


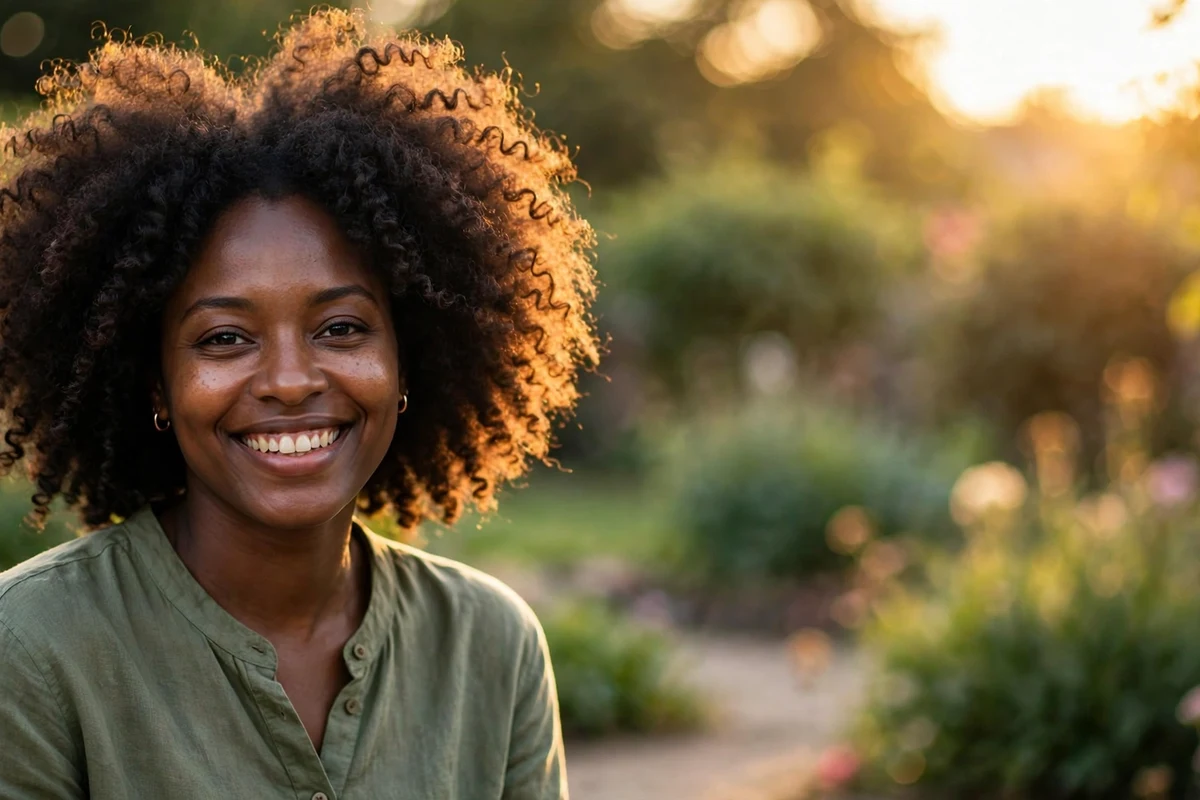
Cute hairstyles for Black women come down to one thing: looks that feel good to wear every day. This list covers 42 ideas across every length and texture, from high puffs and twist-outs to silk press, pixies, and sweet little accessories. Each one is chosen for real life: school runs, office days, weekends, and everything in between.
Most of these take under 30 minutes once you know the steps, and many work on stretched or shrunken natural hair alike. Costs stay low too, since the main tools are a good brush, gel or cream, and a satin scarf at night. For more texture-focused inspiration, browse our natural hairstyles for black women guide.
Quick Takeaways
- High puffs, twist-outs, bantu knots, and wash-and-go curls are the fastest cute everyday styles.
- Stretch your hair with braids, twists, or threading before styling for smoother puffs and updos.
- Always sleep in a satin bonnet or scarf so edges and curls stay neat until morning.
- Use a heat protectant every time a flat iron, blow dryer, or curling wand touches your hair.
- Braided styles appear here only in small numbers, since braids already have their own dedicated guides.
1. High Puff with Laid Edges

The high puff sits at the crown and pulls all your texture into one soft, rounded shape. Brush stretched hair upward with a firm bristle brush, secure it with a long elastic band, then fluff the puff with your fingers until it looks full. Smooth the base with edge control and lay your baby hairs in small swoops. It takes about 15 minutes and works on medium to long natural hair.
Try this: wrap the elastic twice around a satin scrunchie to stop it from snapping on thick hair.
Difficulty: Easy | Cost: $0 to $10 (brush, edge control)
2. Double Puffs

Two puffs, one on each side of a center part, give a playful look that works at any age. Part your hair down the middle, gather each half into its own puff at the same height, and secure with elastics. Keep the puffs even by checking them in a mirror from the front. This style shines on shoulder-length and longer hair, and it keeps everything off your neck on warm days.
Try this: add a small bow clip at the base of each puff for an extra cute finish.
Difficulty: Easy | Cost: $0 to $8 (elastics, brush)
3. Defined Twist-Out

Twist damp hair in small sections with a curl cream, let it dry fully, then unravel each twist for bouncy, defined curls. The trick is separating the twists gently: pull each one apart once or twice instead of raking through them. Pick the roots for volume once the curls are out. A twist-out lasts three to five days with nightly pineappling, and it suits every curl pattern from 3A to 4C.
Try this: unravel with a drop of oil on your fingertips to cut down on frizz.
Difficulty: Easy | Cost: $5 to $15 (curl cream, oil)
4. Bantu Knots

Section your hair into squares, twist each section until it coils into a small knot, and tuck the ends underneath. Bantu knots look adorable worn as-is, and they double as a heatless curl method when you take them down the next day. Keep the sections even so the knots sit at a uniform size. This style works on short to long hair and lasts up to a week with a satin wrap at night.
Try this: use medium sections for a balanced look; tiny sections take much longer to install.
Difficulty: Medium | Cost: $0 to $8 (gel or cream)
5. Voluminous Curly Afro

A full, rounded afro shows off your natural texture at its boldest. Start with moisturized, stretched hair, then pick it out from the roots with a wide-tooth comb or afro pick, shaping as you go. Work in layers, lifting the underneath sections first so the top falls into a balanced silhouette. A light oil seals in moisture without weighing the shape down. This is a wash-day style that photographs well and needs almost no tools.
Try this: shape the afro dry, not wet, so you can see the true volume as you pick.
Difficulty: Easy | Cost: $5 to $12 (leave-in, pick)
6. Mini Afro (TWA)

The teeny weeny afro is a short, cropped celebration of natural texture that takes minutes to style. Rub a curl-defining cream through damp hair, then either finger-coil the front or simply let it air-dry for a soft halo of curls. Keep the sides neat with a light edge brush pass. If you want more cropped ideas, our short afro hairstyles for black women roundup has plenty. A satin-lined cap at night keeps the shape intact, and a weekly deep condition keeps short coils soft.
Try this: a sponge with small holes adds quick definition to very short coils.
Difficulty: Easy | Cost: $5 to $12 (curl cream)
7. Fro with Fringe

Leave the front section of your afro longer so it falls as a curly fringe across the forehead. Ask your stylist to shape the fringe when dry, since shrinkage changes where it lands. Style it by scrunching the front curls forward with a little cream while the rest of the afro gets picked out for volume. The fringe softens the face and gives the classic afro a fresh, youthful update.
Try this: trim the fringe a touch longer than you think; it springs up as it dries.
Difficulty: Easy | Cost: $0 to $10 (cream, pick)
8. Pineapple Updo

Gather all your curls to the very top of your head and secure them loosely so the ends spill forward like a pineapple. It protects your curl pattern overnight and doubles as a cute daytime style. Use a loose scrunchie instead of a tight elastic to avoid dents, and leave the nape and edges smooth. Works best on medium to long curly or coily hair, and takes under five minutes.
Try this: tilt your head upside down before gathering so the curls pile evenly at the crown.
Difficulty: Easy | Cost: $0 to $5 (scrunchie)
9. Wash-and-Go Curls

On freshly washed hair, apply leave-in conditioner and a defining gel in small sections, then let your curls air-dry or diffuse. The goal is clumped, defined curls with a soft hold and no crunch. Scrunch out any stiffness once fully dry. This routine takes 20 to 40 minutes depending on density, and the results last several days if you refresh the edges each morning and sleep in a bonnet. Rake the gel through with your fingers, then shake at the roots for lift before the hair dries.
Try this: style in four sections so no patch of hair gets missed or overworked.
Difficulty: Easy | Cost: $10 to $25 (leave-in, gel)
10. Finger Coils

Twirl small sections of damp, conditioned hair around your finger from root to tip to form springy, uniform coils. Finger coils give short natural hair instant polish and a sweet, doll-like texture. Work with a styling cream that has good slip, and coil in the same direction for consistency. The style lasts one to two weeks, and it unravels into a lovely coil-out afterward. Sit under a hooded dryer for 20 minutes to set the coils faster on thick hair.
Try this: keep sections small, about half an inch, for coils that hold their shape.
Difficulty: Medium | Cost: $5 to $12 (styling cream)
11. Two-Strand Twists

Split damp, moisturized hair into sections and twist two strands around each other from root to tip. Two-strand twists are a protective style that looks cute worn down, pinned up, or pulled into a puff. Medium twists take two to four hours to install and last two to four weeks with light maintenance. Refresh the scalp with a gentle cleanser and keep the twists moisturized with a light spray. Pineapple the twists at night and they will still look fresh on day ten.
Try this: twist on stretched hair for extra length and a smoother finish.
Difficulty: Medium | Cost: $5 to $15 (cream, oil)
12. Braid-Out Curls

Braid damp hair in loose plaits, let them dry completely, then undo each braid for soft, stretched waves. A braid-out gives more length and a looser curl than a twist-out, which makes it lovely on medium to long hair. Use fewer, chunkier braids for bigger waves or many small ones for tighter texture. Fluff at the roots and go; the style holds for three to four days. A light mousse on each braid before drying gives the finished waves extra hold.
Try this: braid on 80 percent dry hair if you want maximum stretch with minimum frizz.
Difficulty: Easy | Cost: $5 to $12 (cream or foam)
13. African Threading

Wrap thread or yarn tightly around sections of hair from root to tip to stretch it without any heat. African threading is an old technique that leaves hair smooth, elongated, and ready for puffs or updos. Colorful thread turns the style itself into a statement you can wear for a week. Take the thread down gently and expect nicely stretched hair underneath. Leave the thread in for three to seven days, then enjoy the stretched hair for another week of styling.
Try this: moisturize each section before wrapping so the hair stays soft under the thread.
Difficulty: Medium | Cost: $2 to $6 (thread or yarn)
14. Blow Out

A blowout stretches natural hair into a big, soft, fluffy shape using a blow dryer and a brush or comb attachment. Always apply a heat protectant first, then dry in small sections on medium heat, pulling each section taut. The result is touchable volume with movement that lasts a week or more if you wrap it at night. It also preps hair perfectly for silk press or braid styles. A vented paddle brush moves through dense hair faster than a round brush.
Try this: use the cool shot at the end of each section to set the smoothness.
Difficulty: Medium | Cost: $10 to $25 (heat protectant, dryer)
15. Curly Bob

A chin-length bob cut into curly hair creates a rounded, bouncy frame around the face. Ask your stylist to cut it dry or stretched so the length lands right where you want it after shrinkage. Define the curls with cream and let them air-dry for a soft finish. This cut flatters round and oval faces, and it grows out gracefully into a curly lob. Refresh the curls on day two with a water and leave-in mix scrunched through the ends.
Try this: a deep side part adds asymmetry and keeps the bob from looking too round.
Difficulty: Easy | Cost: $40 to $80 (salon cut)
16. Sleek Straight Bob

The straight bob is a polished classic: hair cut to jaw or chin length and smoothed flat. Use a heat protectant, flat iron in thin sections, and finish with a light serum for shine. A middle part looks modern, while a side part feels softer. Wrap your hair at night to keep it straight for a week, and touch up only the roots between washes. A dime-sized drop of serum on the ends keeps them from looking dry by day three.
Try this: tuck one side behind the ear to show off earrings and open up the face.
Difficulty: Medium | Cost: $40 to $90 (cut, heat protectant)
17. Lob (Long Bob)

The lob lands between the chin and the shoulders, giving you bob cuteness with ponytail versatility. It works straight, wavy, or curly, so one cut covers many moods. Layers around the face keep it from looking heavy on thick hair. If shoulder-grazing cuts are your thing, our medium-length hairstyles for black women collection has more ideas in this range. Curl the front pieces away from your face with a flat iron for a soft, face-opening wave.
Try this: flip the ends under with a flat iron for a neat, swingy finish.
Difficulty: Easy | Cost: $40 to $80 (salon cut)
18. Classic Pixie Cut

Short on the sides and back with a little length on top, the pixie is low-maintenance and endlessly cute. Style the top with a dab of pomade or curl cream depending on your texture, and keep the edges clean between barber visits. It grows out in stages, so plan a trim every three to four weeks to hold the shape. A pixie shows off your cheekbones and makes earrings pop.
Try this: sweep the top forward for a soft fringe effect on wash day.
Difficulty: Easy | Cost: $25 to $60 (cut every few weeks)
19. Tapered Cut

A tapered cut keeps the back and sides clipped short while the top stays full and curly. The contrast gives natural hair a sculpted, modern silhouette that looks neat for weeks. Define the top with twist sponge or cream, and get the taper cleaned up every two to three weeks. It suits oval, round, and heart face shapes and pairs well with bold lipstick. A curl sponge on the top adds quick texture on mornings when you skip product.
Try this: ask the barber to blend the taper gradually instead of a hard line for a softer grow-out.
Difficulty: Easy | Cost: $25 to $55 (barber visits)
20. Undercut with Shaved Sides

Shave one or both sides close while leaving the top long and curly for a cute-meets-edgy combo. The shaved sections cut drying time in half and make the top look even fuller by contrast. Wear the top loose, in a puff, or swept to one side. Keep the shaved parts lined up every week or two so the style stays sharp. Grow the shaved sections out for a month and the style shifts into a cool asymmetrical cut.
Try this: add a simple shaved line design when you want extra personality.
Difficulty: Easy | Cost: $25 to $60 (cut and line-ups)
21. Pompadour

Sweep the front and top of your hair up and back into a rounded, voluminous pompadour. Backcomb the roots lightly or use a bump insert for height, then smooth the top layer over it. Pin the sides neatly so the focus stays on the lift in front. This retro-inspired style dresses up short to medium hair for parties and photos, and it holds all evening with a firm-hold spray. A small amount of pomade on the fingertips smooths the top layer without flattening the height.
Try this: tease the roots in small sections rather than one big chunk for smoother height.
Difficulty: Medium | Cost: $0 to $12 (pins, spray)
22. Frohawk

Slick both sides flat with gel while leaving a strip of full, picked-out texture down the center. The frohawk gives you mohawk attitude without a single snip of the clippers. Braid or flat-twist the sides for a longer-lasting version. It works on short to medium hair and washes out completely, so you can try the edgy look for a weekend and go back to normal on Monday. Cornrow the sides instead of gelling them when you want the style to last several days.
Try this: use a strong-hold gel on the sides and pick only the center strip for maximum contrast.
Difficulty: Medium | Cost: $0 to $10 (gel, brush)
23. Curly Ponytail

Pull your curls into a ponytail at mid height and let the texture do the talking. Smooth the base with a brush and gel, secure with an elastic, then fluff the ponytail for volume. Wrapping a small section of hair around the elastic hides it for a cleaner look. This is a five-minute style that works for the gym, errands, or a casual night out. Fluff the ponytail with an afro pick once it is secured for maximum fullness.
Try this: position the ponytail at the crown of your head, not the back, for the most flattering lift.
Difficulty: Easy | Cost: $0 to $8 (gel, elastic)
24. Slicked-Back Ponytail

Brush all your hair back into a smooth, low ponytail with not a bump in sight. Work gel through damp hair in sections, brush everything toward the nape, and secure tightly. A toothbrush with edge control tames flyaways around the hairline. Wear it straight, wavy, or with added extensions for length. It reads polished at work and sleek at events. Finish with a light mist of holding spray so the style survives humidity.
Try this: apply gel to damp, not soaking, hair so it grips without flaking.
Difficulty: Easy | Cost: $0 to $10 (gel, brush)
To take this sleek base further with swoops and bolder styling, browse baddie hairstyle ideas.
25. Bubble Ponytail

Secure a ponytail, then add elastics every two inches down its length and gently tug each section wider to form bubbles. The bubble ponytail turns a basic pony into something fun with almost no skill required. It works best on medium to long hair, natural or with extensions. Space the elastics evenly and keep each bubble the same size for the cutest result. Tease each bubble lightly at the roots for extra roundness before moving to the next section.
Try this: use clear mini elastics so the bubbles, not the bands, get the attention.
Difficulty: Easy | Cost: $0 to $6 (mini elastics)
26. Curly High Bun

Pile your curls into a bun at the crown and let the texture spill over naturally instead of tucking it perfectly smooth. Gather hair loosely, twist it once around the base, and pin where needed, leaving the ends free and curly. The slightly undone finish is what makes it cute rather than severe. It takes ten minutes and suits second or third-day curls well. A second elastic wrapped in a figure eight around the base keeps heavy hair secure.
Try this: pull out a few face-framing curls before pinning the bun for softness.
Difficulty: Easy | Cost: $0 to $6 (pins, elastic)
27. Sleek Low Bun

Smooth everything back into a neat bun at the nape for a timeless, office-ready style. Brush hair down with gel, twist it into a bun, and pin it flat against your head. A center or side part keeps it from looking too strict. The low bun works on relaxed, pressed, or stretched natural hair, and it stays put through long days with minimal touch-ups. Tuck the ends under and pin them flat so the bun looks smooth from every angle.
Try this: make a deep side part to give the classic bun a softer, more modern feel.
Difficulty: Easy | Cost: $0 to $8 (gel, pins)
28. Space Buns

Split your hair down the middle and twist each half into a bun on top of your head. Space buns are pure fun: festival-ready, cute for weekends, and easy enough for busy mornings. Keep them the same size and height by checking from the front. They work on short to long hair, and leaving the rest down in a half-up version is just as adorable. Leave two thin front pieces out of the buns for a softer, face-framing effect.
Try this: wrap each bun loosely for a soft, messy finish instead of a tight ballerina look.
Difficulty: Easy | Cost: $0 to $6 (elastics, pins)
29. Flat Twist Updo

Flat-twist sections of hair along the scalp and pin the ends into a low updo at the back. This style keeps every strand tucked away, which makes it protective as well as pretty. Take your time with even parts, since clean partings make the biggest difference in the final look. For dressier pinned styles, see our updo hairstyles for black women collection. Mist the finished style with a light oil sheen spray for a healthy-looking shine.
Try this: twist toward the crown from both sides so the ends meet neatly in the middle.
Difficulty: Medium | Cost: $0 to $10 (cream, pins)
30. Twisted Crown

Twist two sections from the front hairline back along each side and join them at the back to form a crown. The twisted crown frames the face sweetly while keeping hair off the forehead. It works on medium to long hair, natural or stretched, and the rest can hang loose or go into a low bun. Secure the join with pins crossed in an X so it holds all day.
Try this: pancake each twist gently by tugging the edges for a fuller, softer crown.
Difficulty: Medium | Cost: $0 to $8 (cream, pins)
31. Braided Crown

Braid around the entire hairline like a halo and pin the tail underneath where it meets the start. The braided crown looks romantic and keeps every strand off your face, which makes it lovely for weddings and warm weather. Dutch-braid the sections so the braid sits on top of the hair for extra definition. Medium to long hair gives the fullest halo effect. Tuck small fresh flowers or pearl pins along the braid for weddings and special events.
Try this: stretch the braid edges slightly after pinning to make the crown look thicker.
Difficulty: Hard | Cost: $0 to $10 (pins) or $60 to $120 (salon)
32. Finger Waves

Sculpt damp hair into smooth S-shaped waves using gel, a fine comb, and your fingers, then let it set. Finger waves bring vintage glamour to short hair and look adorable with a deep side part. Keep the gel generous while shaping so the waves hold their ridges, and avoid touching the style until it dries completely. The result is sleek, shiny, and full of old-Hollywood charm. Let the waves air-dry fully, then remove the clips and brush lightly with a soft bristle brush.
Try this: clip each wave ridge with a duckbill clip while it sets for sharper definition.
Difficulty: Hard | Cost: $5 to $12 (gel, clips)
33. Silk Press

A silk press uses a blow dryer and flat iron to press natural hair silky straight with bounce and movement. Always apply a heat protectant before any hot tool touches your hair, and work in thin sections for the smoothest finish. The style lasts one to two weeks if you wrap it nightly and avoid moisture. A middle part with a slight bend at the ends keeps it looking soft rather than stiff.
Try this: chase each flat iron pass with a comb for an extra-sleek, frizz-free result.
Difficulty: Medium | Cost: $60 to $150 (salon) or $10 to $25 (DIY products)
34. Side-Swept Bangs

Cut or style the front section to sweep diagonally across the forehead. Side-swept bangs soften the face and add a cute, flirty detail to puffs, buns, and straight styles alike. On natural hair, stretch the front section before trimming so shrinkage does not surprise you. Blow-dry the bangs with a round brush, using heat protectant, for a smooth sweep that stays put. A flat iron pass on low heat each morning keeps the sweep smooth without daily washing.
Try this: keep bangs just below the brow so they can be swept aside or worn forward.
Difficulty: Easy | Cost: $0 to $20 (trim, heat protectant)
35. Headscarf Wrap

Fold a satin or cotton scarf into a band, wrap it around your hairline, and tie it at the top or side in a bow or knot. A headscarf wrap rescues any bad hair day in two minutes and adds a pop of color to simple outfits. It also protects your edges from friction. Choose silky fabrics when you want to preserve a style underneath, and cotton when you need the wrap to grip.
Try this: tuck the scarf ends under the knot for a clean turban-style finish.
Difficulty: Easy | Cost: $5 to $15 (scarf)
36. Claw Clip Updo

Twist your hair up the back of your head and clamp it with a large claw clip, letting the ends spill over the top. The claw clip updo takes under a minute and looks effortlessly cute on medium to long hair. Use a sturdy, large clip so it actually grips thick hair, and twist the hair snugly before clamping. It is the easiest upgrade from a plain ponytail. Twist the hair a little tighter on fine hair so the clip has something firm to grip.
Try this: pick a matte clip in a neutral shade so it blends with any outfit.
Difficulty: Easy | Cost: $5 to $12 (large claw clip)
37. Box Braids

Classic box braids section the hair into squares and braid each one down with added hair for length. They last four to eight weeks and style into buns, ponytails, and half-up looks with zero daily effort. Medium-sized braids balance fullness and comfort best. Keep your scalp clean and moisturized while they are in, and give your hair a rest between installs. Dip the ends in hot water to seal them, or leave them loose for a boho finish.
Try this: ask for a lighter, tension-free hairline install to protect your edges.
Difficulty: Hard | Cost: $120 to $300 (salon, 4 to 8 hours)
38. Knotless Braids

Knotless braids start with your own hair and feed in extensions gradually, so there is no bulky knot at the root. The result lies flatter, feels lighter, and puts less tension on the scalp than traditional box braids. They cost a bit more and take longer to install, but the natural look is worth it. Style them the same versatile ways: up, down, or half-up. The feed-in technique means less tension, so this style suits sensitive hairlines well.
Try this: choose small to medium parts for a fuller look that still feels light.
Difficulty: Hard | Cost: $150 to $350 (salon, 5 to 9 hours)
To wear knotless braids the baddie way, with laid edges and a high ponytail, see baddie hairstyles for black women.
39. Fulani Braids

Fulani braids pair cornrows along the front with loose braids hanging at the back, often finished with beads or cuffs. The patterned front gives the style its signature look, so find a braider who does clean, even parts. The style lasts four to six weeks and the accessories make it easy to personalize. Keep the scalp moisturized and avoid overly tight front rows. Ask for the front pattern to follow your natural hairline so the style grows out gracefully.
Try this: add gold cuffs at the ends for a polished finish that catches the light.
Difficulty: Hard | Cost: $120 to $280 (salon, 4 to 7 hours)
40. Beaded Cornrows

Cornrows braided close to the scalp get a playful upgrade with beads on the ends. Pick a simple pattern, straight back or curved, and slide wooden or colorful beads onto the tips before sealing them. The style lasts two to four weeks and the beads turn a neat protective style into something fun. Sleep in a satin scarf to keep the rows smooth and the beads quiet. Wooden beads are lighter than glass ones and kinder to fine or short hair.
Try this: match bead colors to your outfit palette for a coordinated look.
Difficulty: Medium | Cost: $60 to $150 (salon) or $5 to $12 (DIY beads)
41. High Puff with Side Braids

Braid two or three cornrows up each side of your head and gather everything else into a high puff at the crown. The braids add detail and keep the sides neat for days, while the puff brings the volume. This combo style takes about 30 to 45 minutes and works on medium to long hair. It is a lovely way to dress up the everyday puff without much extra effort.
Try this: keep the side braids small and tight so they stay neat all week.
Difficulty: Medium | Cost: $0 to $10 (gel, elastics)
42. Faux Locs

Faux locs wrap extension hair around your own to mimic real locs without the long-term commitment. They last six to eight weeks and give a boho, textured look that styles into buns and ponytails easily. Shorter, shoulder-length locs feel lighter and read cuter for everyday wear. Keep the scalp clean with diluted shampoo and moisturize the roots lightly. Crochet faux locs take half the install time of individually wrapped ones and look just as neat.
Try this: choose a soft, lightweight wrapping hair so the locs do not pull.
Difficulty: Hard | Cost: $150 to $350 (salon, 5 to 8 hours)
How to Choose the Right Cute Hairstyle
Match the style to your hair length first. Short hair shines with pixies, tapers, finger coils, and frohawks; medium hair suits bobs, lobs, puffs, and twist-outs; long hair opens up braids, locs, and elaborate updos. Thinking of going shorter? Our short hairstyles for black women guide covers every short length in detail.
Next, be honest about your morning routine. Wash-and-go curls and puffs take minutes, while silk press and finger waves need real time and practice. Protective styles like twists, braids, and faux locs cost more upfront but save you weeks of daily styling.
Finally, think about your hair goals. If you are growing your hair out, lean on low-manipulation styles like buns, threading, and twists. If you love switching looks, cuts and heat styles give you the most variety. Whatever you pick, a satin bonnet at night keeps it cute until morning.
Quick Comparison: Pick by Time and Budget
| Style | Best hair length | Styling time | Typical cost |
|---|---|---|---|
| High Puff | Medium to long | 15 minutes | $0 to $10 |
| Twist-Out | Short to long | 1 to 2 hours (drying) | $5 to $15 |
| Bantu Knots | Short to long | 45 minutes | $0 to $8 |
| Sleek Low Bun | Medium to long | 10 minutes | $0 to $8 |
| Silk Press | Medium to long | 1 to 2 hours | $60 to $150 |
| Classic Pixie | Short | 5 minutes daily | $25 to $60 per cut |
| Box Braids | Any (with extensions) | 4 to 8 hours | $120 to $300 |
| Claw Clip Updo | Medium to long | 1 minute | $5 to $12 |
Frequently Asked Questions
What are the easiest cute hairstyles for Black women?
The easiest options are the high puff, pineapple updo, claw clip updo, and curly ponytail. Each takes under 15 minutes and needs only basic tools like a brush, gel, and an elastic. For defined texture with a little more prep, a wash-and-go or twist-out also counts as easy once you learn the routine.
How do I keep a puff or twist-out looking cute all day?
Start with well-moisturized hair, use a product with light hold, and avoid touching the style once it is set. Carry a small edge brush for touch-ups around the hairline. At night, pineapple the hair or tie it down with a satin scarf so the shape survives until morning.
Can I wear cute hairstyles on short natural hair?
Yes. Short hair suits finger coils, mini afros, tapered cuts, pixies, frohawks, and bantu knots. Accessories like headscarves, clips, and headbands also add cute detail without needing length. Many short styles take less time than longer ones.
Which cute styles work on relaxed or silk-pressed hair?
Relaxed or pressed hair suits the sleek straight bob, lob, slicked-back ponytail, sleek low bun, and side-swept bangs. Always use a heat protectant before flat ironing or blow drying, and wrap the hair at night to keep it smooth between washes.
How do I protect cute hairstyles while I sleep?
Sleep in a satin bonnet or wrap your hair in a satin scarf every night. For puffs and pineapples, gather the hair loosely on top of your head first. For straight styles, wrap the hair flat around your head before tying the scarf. Satin reduces friction, which keeps edges smooth and curls defined.
If uneven lengths are your thing, the asymmetric cuts in asymmetrical hairstyle ideas for women include options for curls, coils, and short bobs that work across textures.
Final Thoughts
Cute hair does not need to be complicated. Pick one style from this list that matches your length and your morning energy, learn its steps once, and it becomes yours. Rotate through a few favorites each month so your hair gets both variety and rest. The cutest style is always the one you actually enjoy wearing.
