


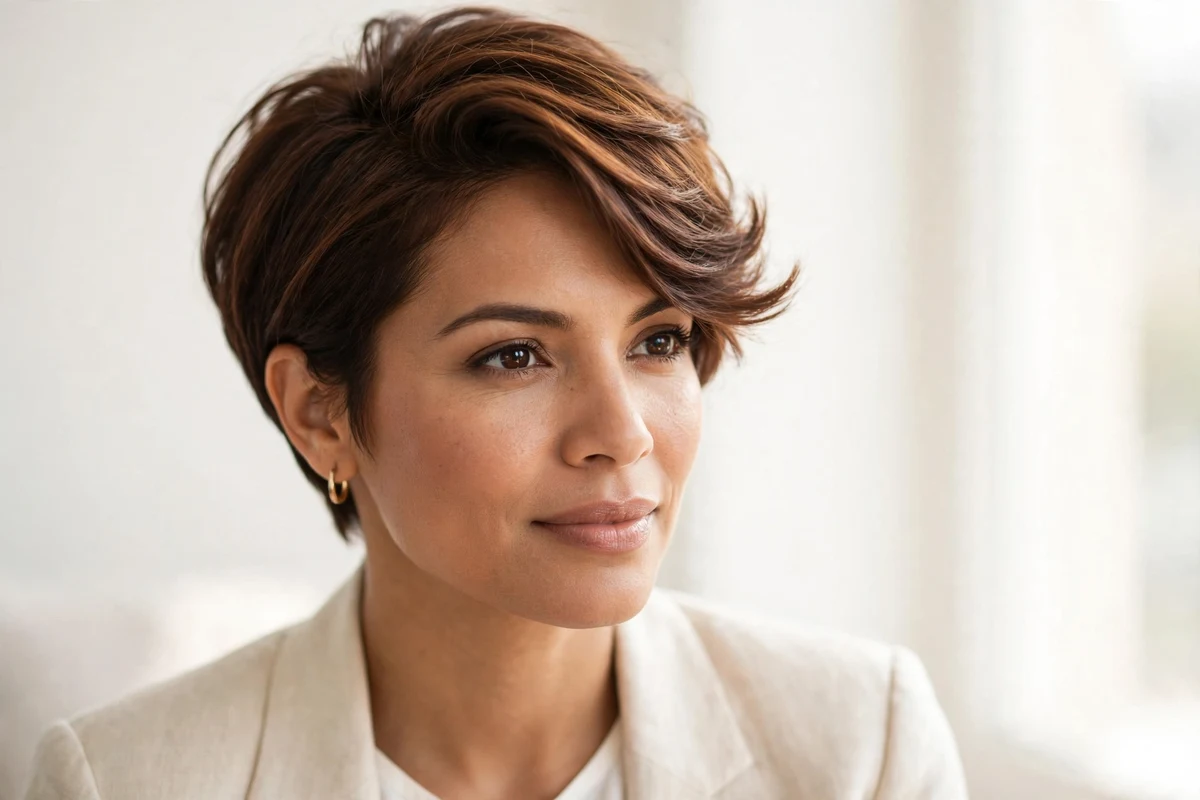
A round face and a pixie cut can be a strong match. The trick is picking the right details: height on top, a deep or off-center part, and sides that stay close instead of wide. Get those right and the cut draws the eye upward and creates the look of length.
Below you will find 30 pixie haircuts for women with round faces, pulled from what stylists are actually cutting and what ranks for this topic. I’ve spent years writing about short hair, and round faces keep rewarding the same handful of smart choices. Each idea includes how to style it and what to ask for in the chair.
Quick answer: The most flattering pixie haircuts for round faces add height at the crown, use a deep side part or side-swept fringe, and keep the sides slim. Side-swept, asymmetrical, undercut, and textured pixies slim the face; wide, rounded, or center-parted pixies widen it.
Quick Takeaways
- Height on top is the single most slimming move for a round face.
- A deep side part creates a diagonal line that breaks up the circle of the face.
- Side-swept and elongated fringes work better than short, straight-across bangs.
- Keep sides close to the head; volume at the cheeks adds width.
- Plan a trim every 4 to 6 weeks so the shape stays sharp.
Why Pixie Cuts Work on Round Faces
Round faces are close to equal in width and length, with full cheeks and a soft jawline. A pixie cut lets you control exactly where the eye lands. Short sides take width away from the cheeks, and length left on top gives you vertical lines that suggest a longer face.
Bangs and parts do the rest. A fringe swept to one side draws a diagonal across the forehead. An asymmetrical outline adds angles where the face has none. Short, blunt sideburns or a tapered nape keep the outline clean. Avoid one thing: a rounded, helmet-like shape with the same length all around. That mirrors the face instead of reshaping it.
1. Sleek Side-Swept Pixie
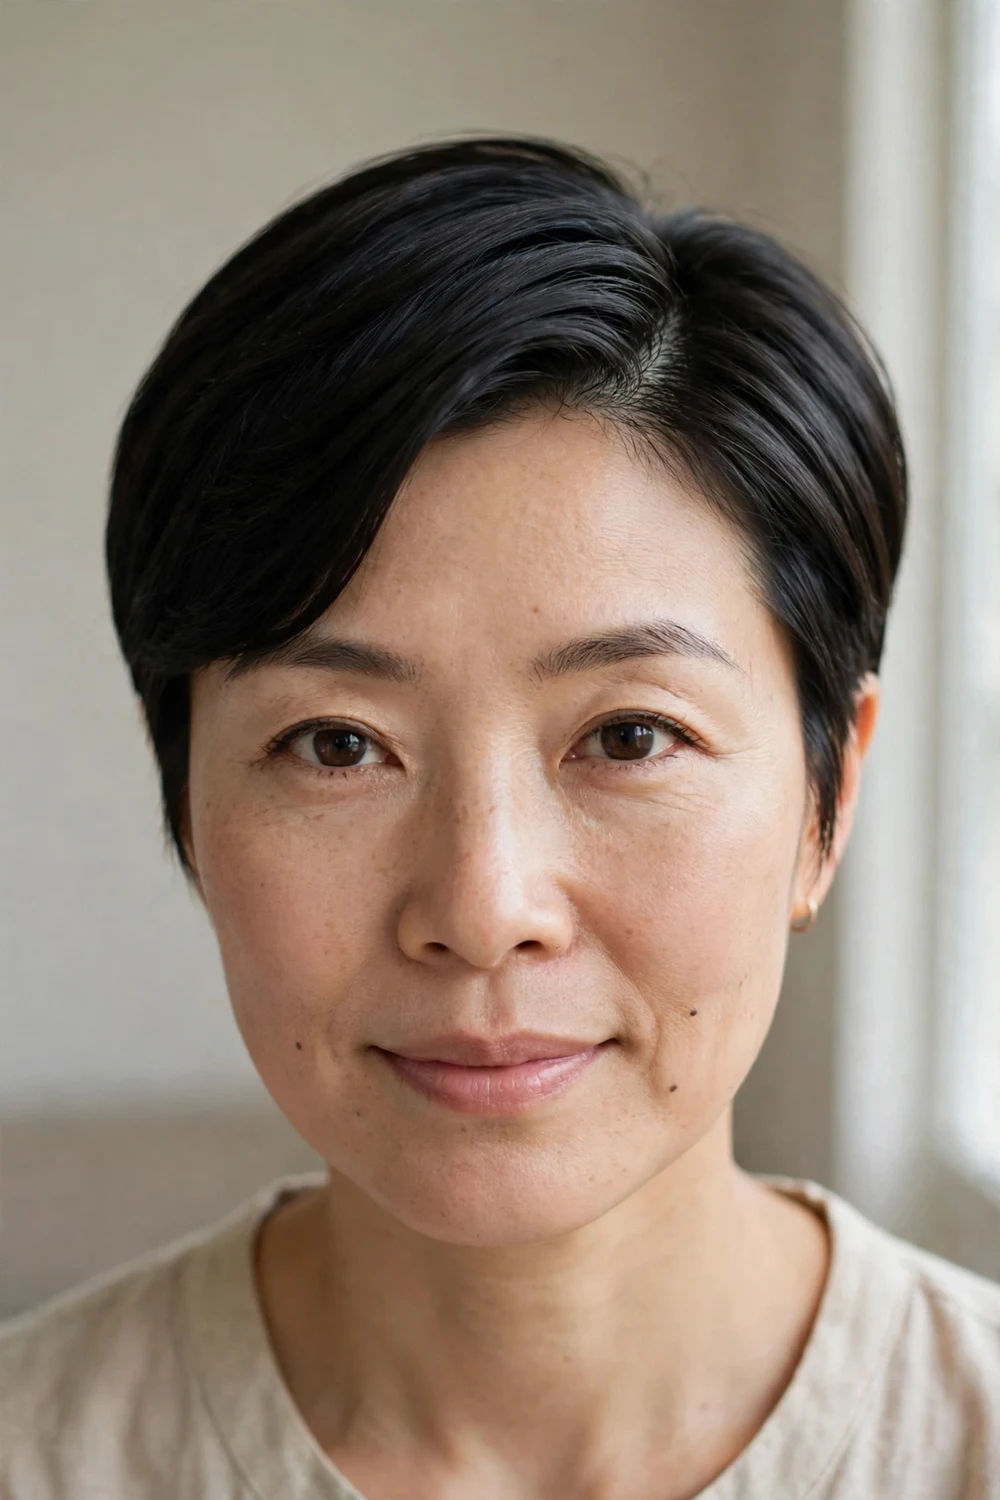
Part the hair deep on one side and smooth everything across the forehead. This is the simplest face-slimming pixie because it changes the geometry of the face with a single line. The deep part pulls attention to the eyes and cheekbones while the sweep covers one side of the forehead, which breaks the symmetry of a round face. Keep the sides trimmed tight so nothing pushes outward at the cheeks. The top needs about two inches of length to lie flat and sweep cleanly.
Try this: blow-dry the front section across the forehead with a flat brush, then press a pea-sized amount of smoothing cream through the ends. Difficulty: Easy. Trim: every 5 weeks.
2. Layered Pixie with a Face-Framing Front
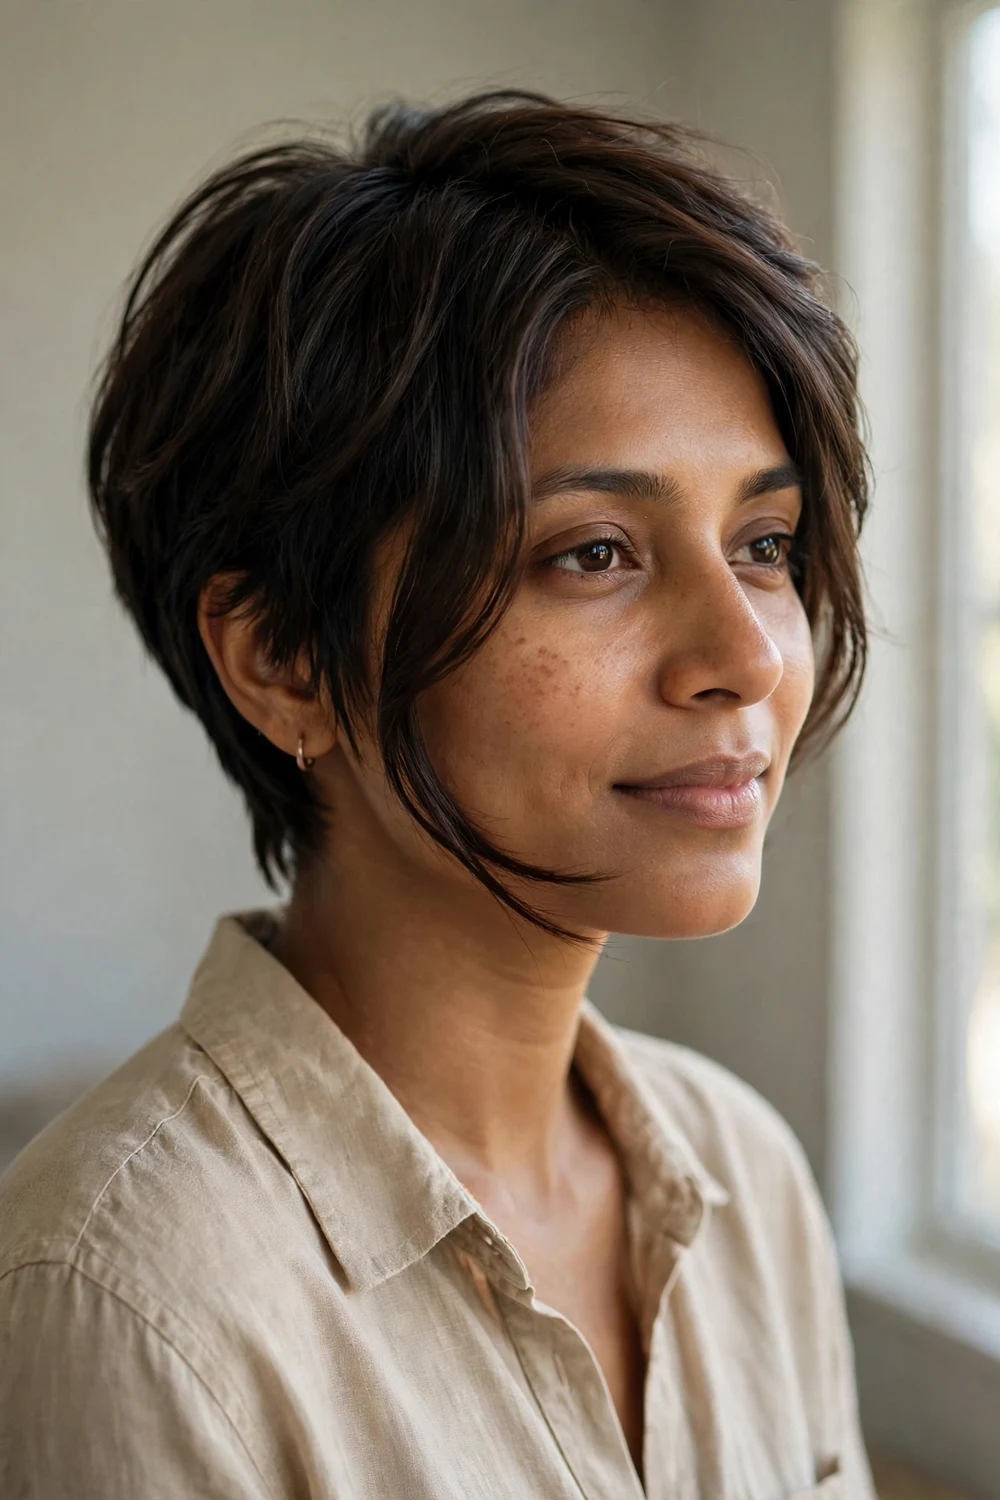
The back of this cut is cropped short and stacked for lift, while the front is left long enough to frame the face in soft pieces. Those longer front strands are the point. They hang past the widest part of the cheeks and create vertical lines right where the face needs them. Ask your stylist to graduate the back layers so the crown has lift and the nape sits close. It suits straight to slightly wavy hair best.
Try this: work a dab of texturizing paste through the front pieces and pull them slightly forward. Difficulty: Easy. Trim: every 5 weeks.
3. Tousled Lengthy Pixie
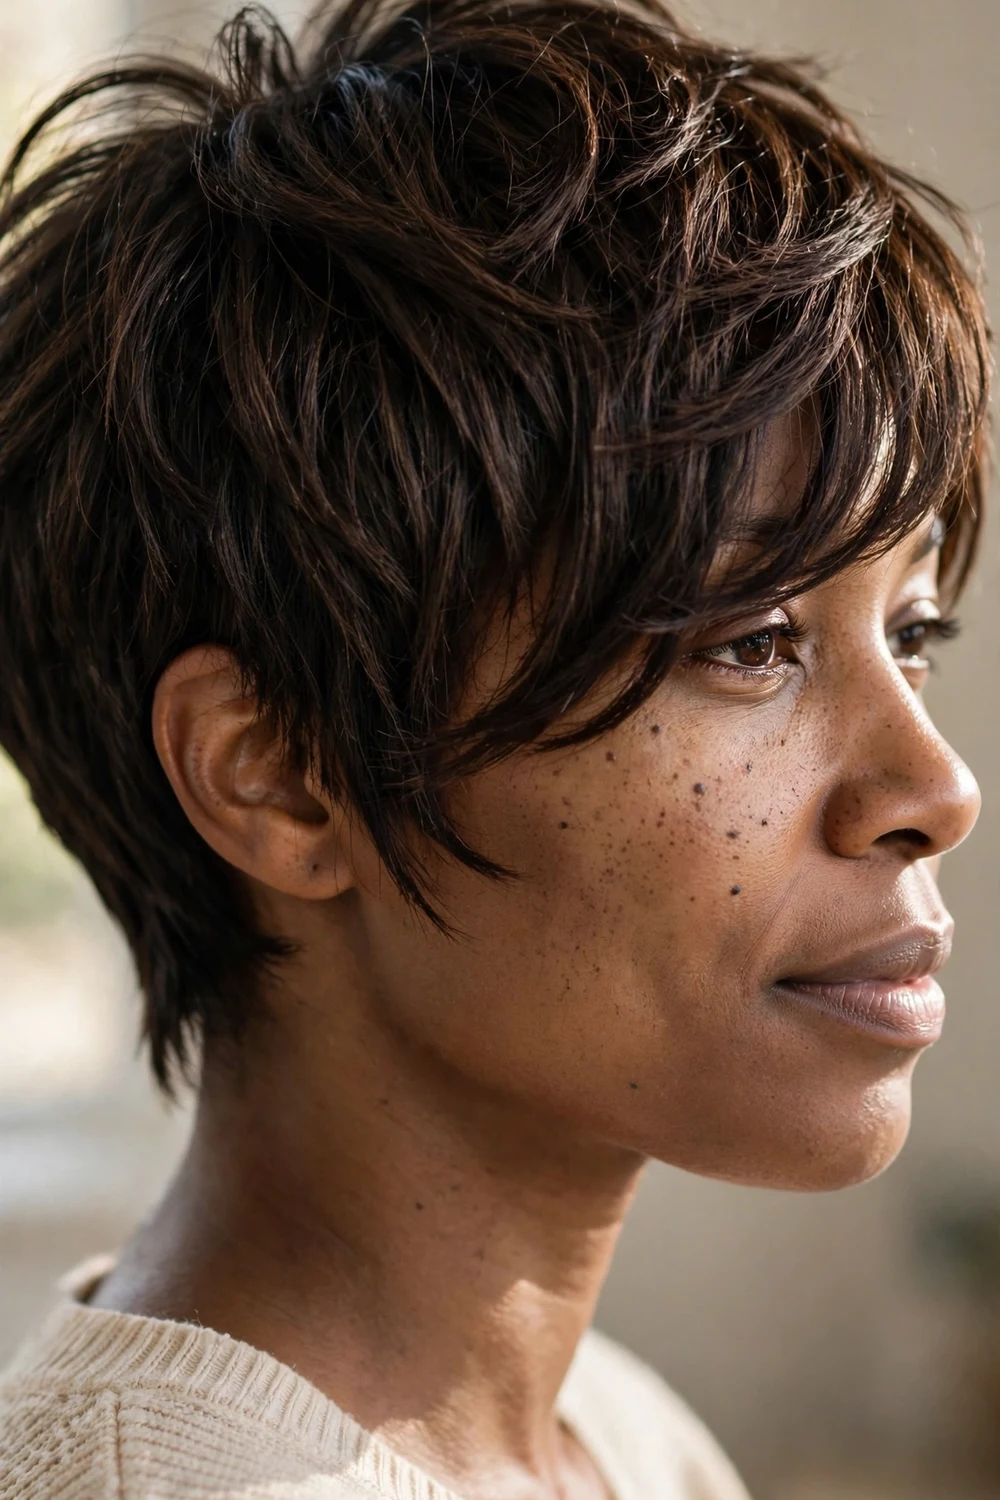
Want the ease of a pixie without giving up styling options? Keep the overall length a little longer than classic and tousle it for texture. The longer pieces across the top give you room to push everything to one side, and that directional styling is what slims the face. Chunky layers keep it from looking flat. Scrunch in some product while the hair is damp and let it air-dry for a relaxed finish.
Try this: spray texturizing spray at the roots before tousling with your fingers. Difficulty: Easy. Trim: every 6 weeks.
4. Long Pixie with Side Bangs
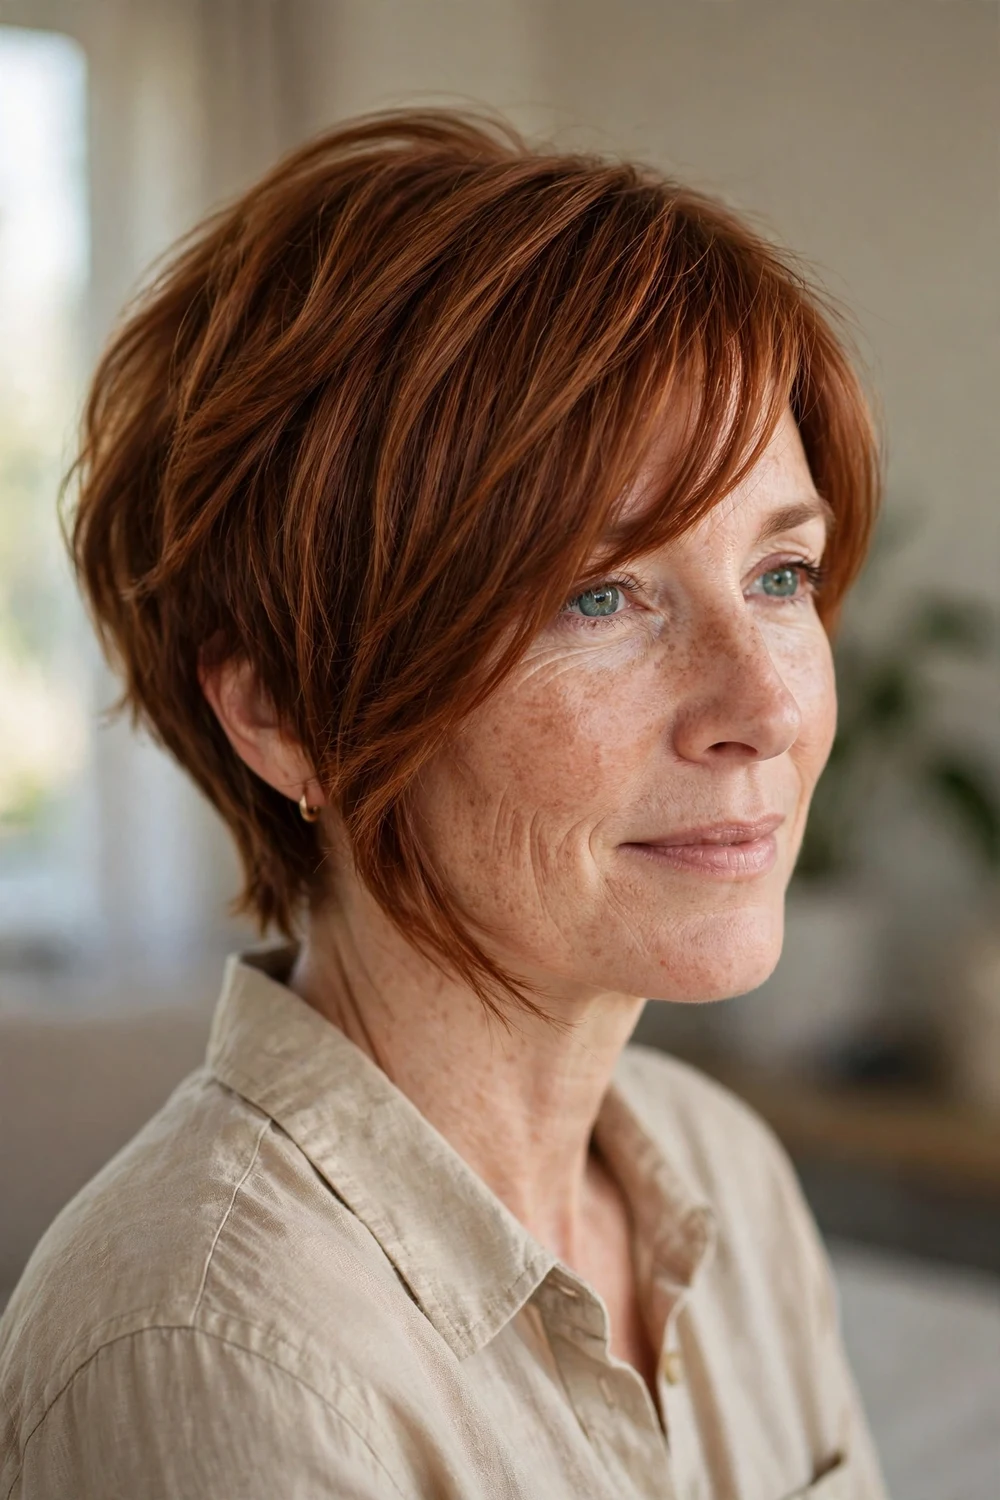
This version sits between a pixie and a bob, which makes it a good first step if you are nervous about going very short. The longer side bangs do the slimming work here. They fall diagonally across the forehead and draw the eye along a line instead of across the widest part of the face. Keep the back and sides trimmed neatly so the longer top stays the star. It works for straight and wavy textures.
Try this: wrap the bangs around a round brush and blow-dry them to the side for a smooth curve. Difficulty: Easy. Trim: every 6 weeks.
If the extra length of this style appeals to you, the guide to long pixie haircuts for round faces covers grown-out and bob-length versions in more detail.
5. Full-Bodied Pixie with Crown Volume

Crown volume is the oldest trick in the book for round faces, and it still works. This cut packs the fullness up top where it adds height, while the sides are kept flat and close to the head. The contrast between the lifted crown and the slim sides is what makes the face look longer. Ask for stacked layers through the crown and a close taper at the sides and nape. A root-lifting mousse and a round brush make the volume last.
Try this: flip your head upside down and blow-dry the roots for two minutes before styling upright. Difficulty: Medium. Trim: every 4 weeks.
6. Undercut Pixie with a Long Textured Top
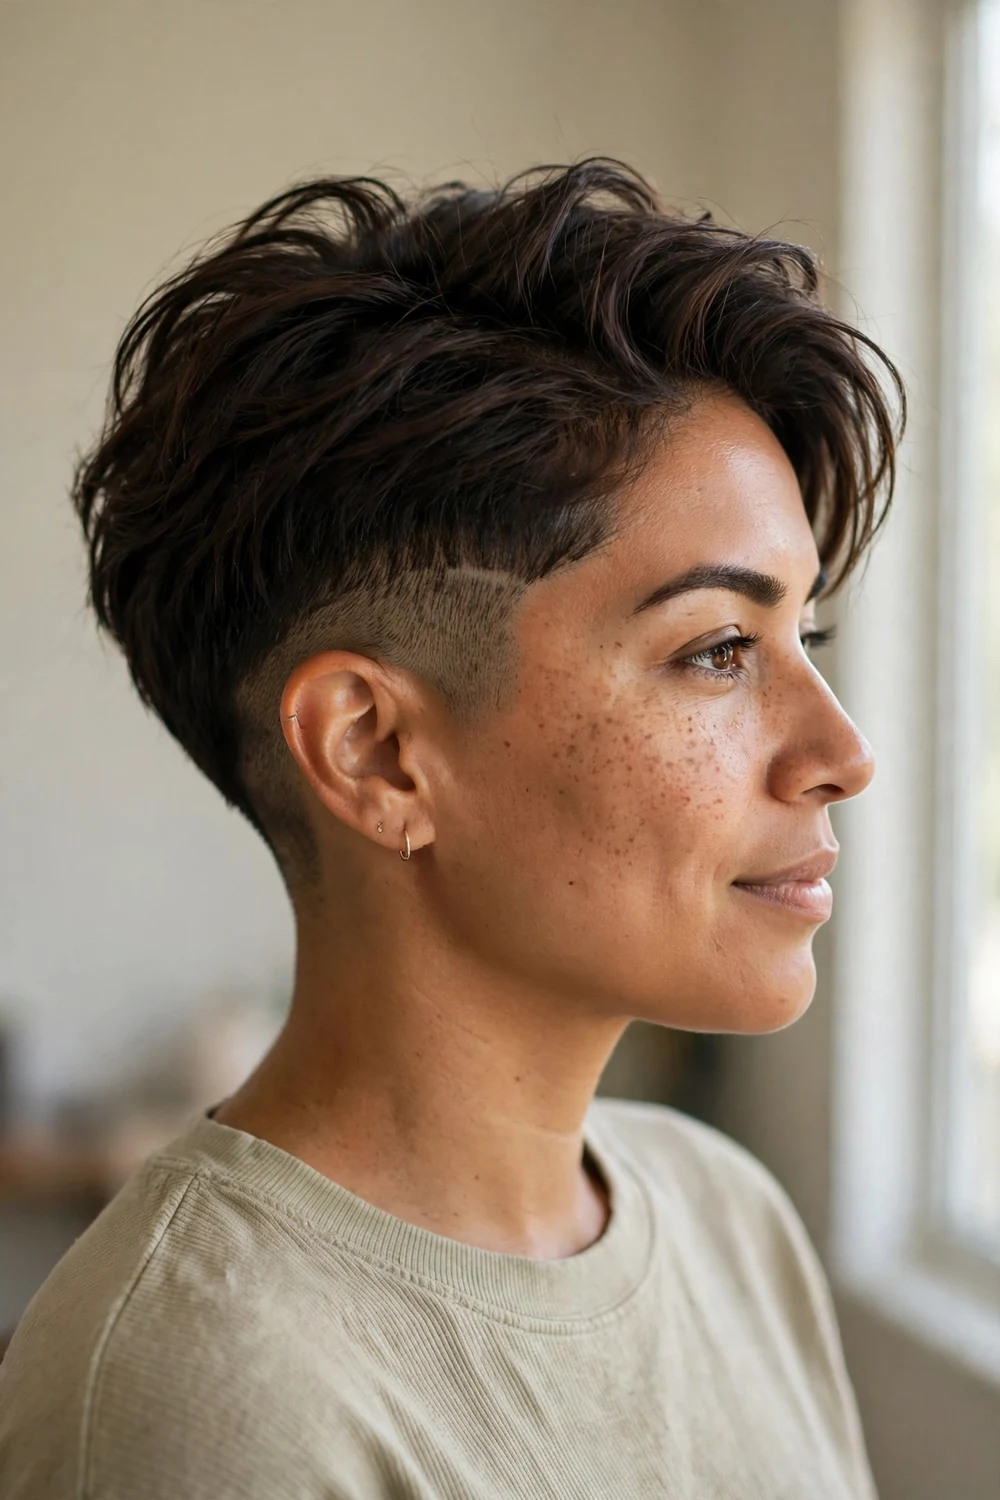
An undercut removes bulk from the sides, which is exactly what a round face needs. The sides are clipped short or faded while the top stays long and textured, and that length difference pulls the eye upward. The style reads modern and confident. Keep the top piece-y rather than sleek so it has movement. You will need regular upkeep on the undercut section to keep the line clean.
Try this: rub a small amount of matte clay between your palms and pinch the top into pieces. Difficulty: Medium. Trim: every 3 to 4 weeks.
7. Shaved Sides with a Swept-Forward Top
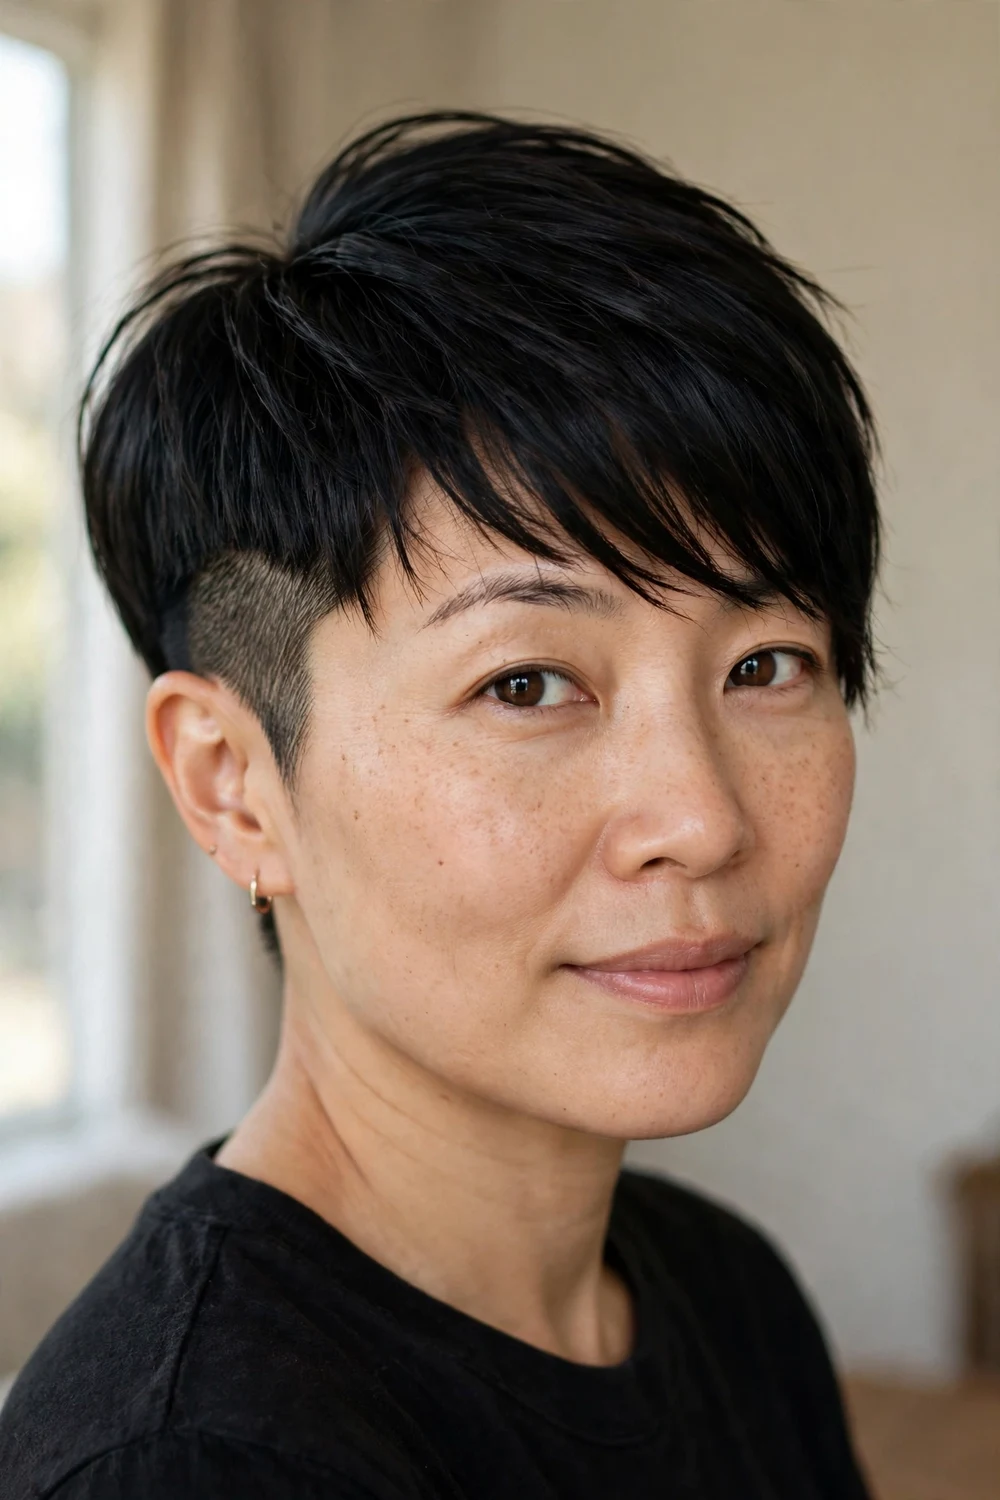
Shaved or very closely cropped sides take width off the cheeks in one move. The longer top is then swept forward, which frames the upper face and draws attention to the eyes. The combination of bare sides and a full top creates strong vertical emphasis. This is a bolder choice, so make sure you like the shaved look before committing. The top needs enough length to sweep and hold.
Try this: use a light pomade on the top and push it forward with your fingers for a soft edge. Difficulty: Medium. Trim: every 3 weeks.
Readers who like the edginess of shaved sections will also want to see pixie cut shaved sides, which walks through the different ways to wear the look.
8. Extra Short Pixie with Teased-Up Bangs
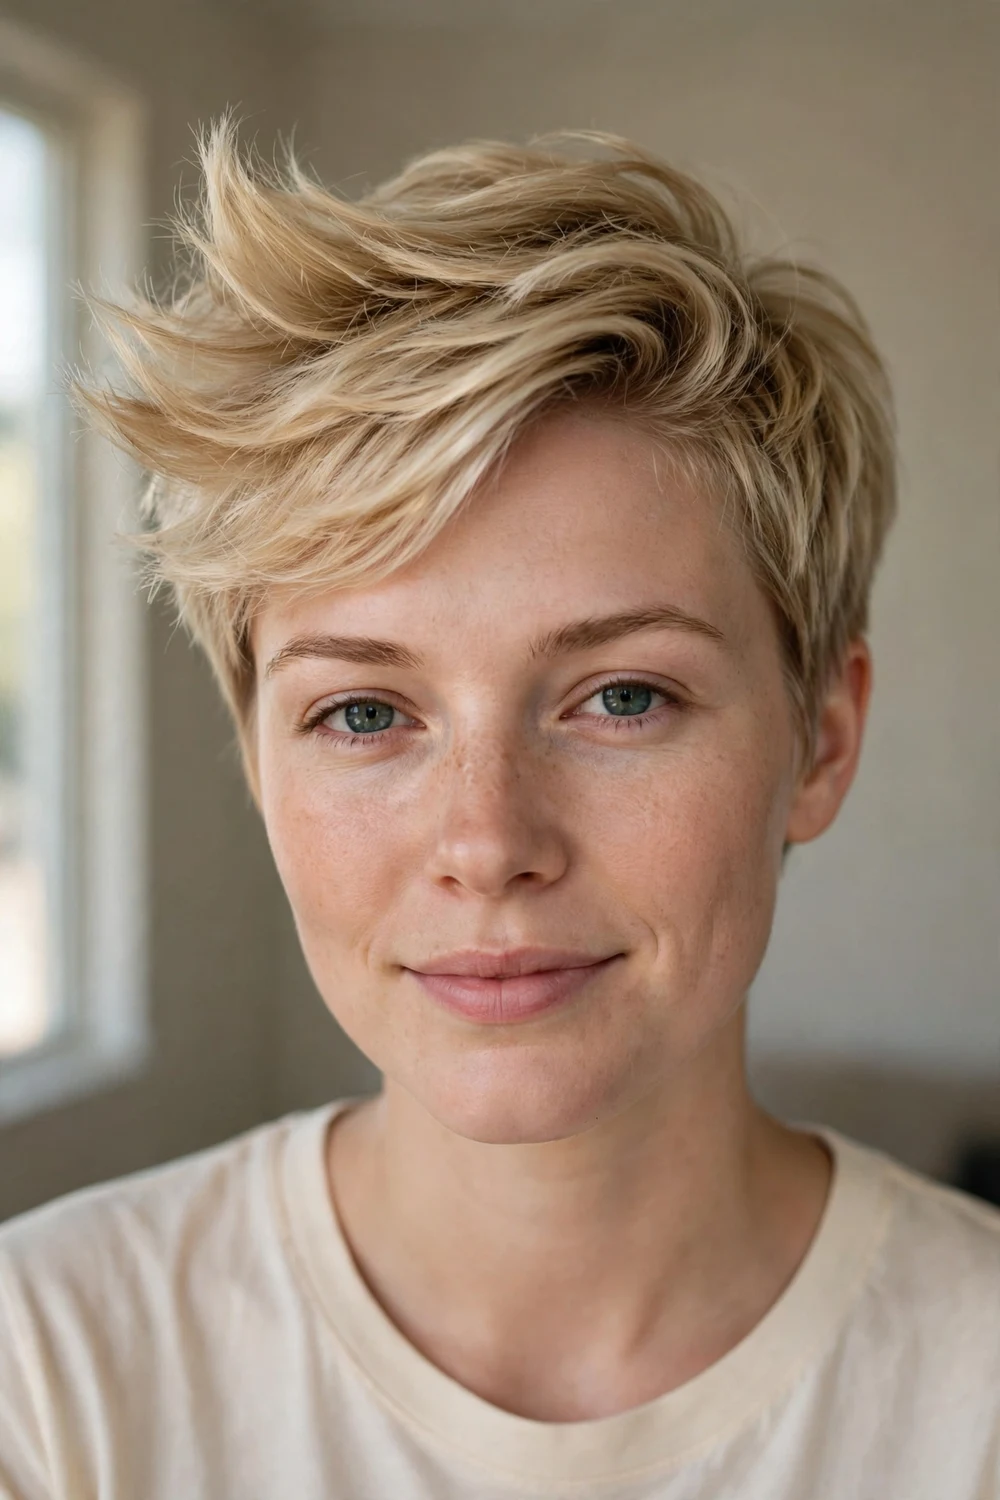
Even a very short pixie can slim a round face if the top has height. Here the bangs are teased up and tossed to the side, which adds lift right where it counts. The rest of the cut stays close and tidy. Backcomb the fringe gently at the roots, smooth the surface, and lock it with a light hairspray. The teased section should look lifted, not stiff.
Try this: tease only the roots of the fringe and leave the ends smooth. Difficulty: Medium. Trim: every 4 weeks.
9. Extra Long Pixie Tossed Forward

This cut borrows length from a bob and attitude from a pixie. The long strands are tossed forward and to the side, and the forward movement creates diagonal lines that break up the roundness of the face. It looks undone on purpose, which means styling is quick. A little texture spray and some finger-combing is usually enough. The longer pieces around the face keep the cheeks from looking wide.
Try this: flip the front section forward while blow-drying for natural direction. Difficulty: Easy. Trim: every 6 weeks.
10. Wild Volume Pixie
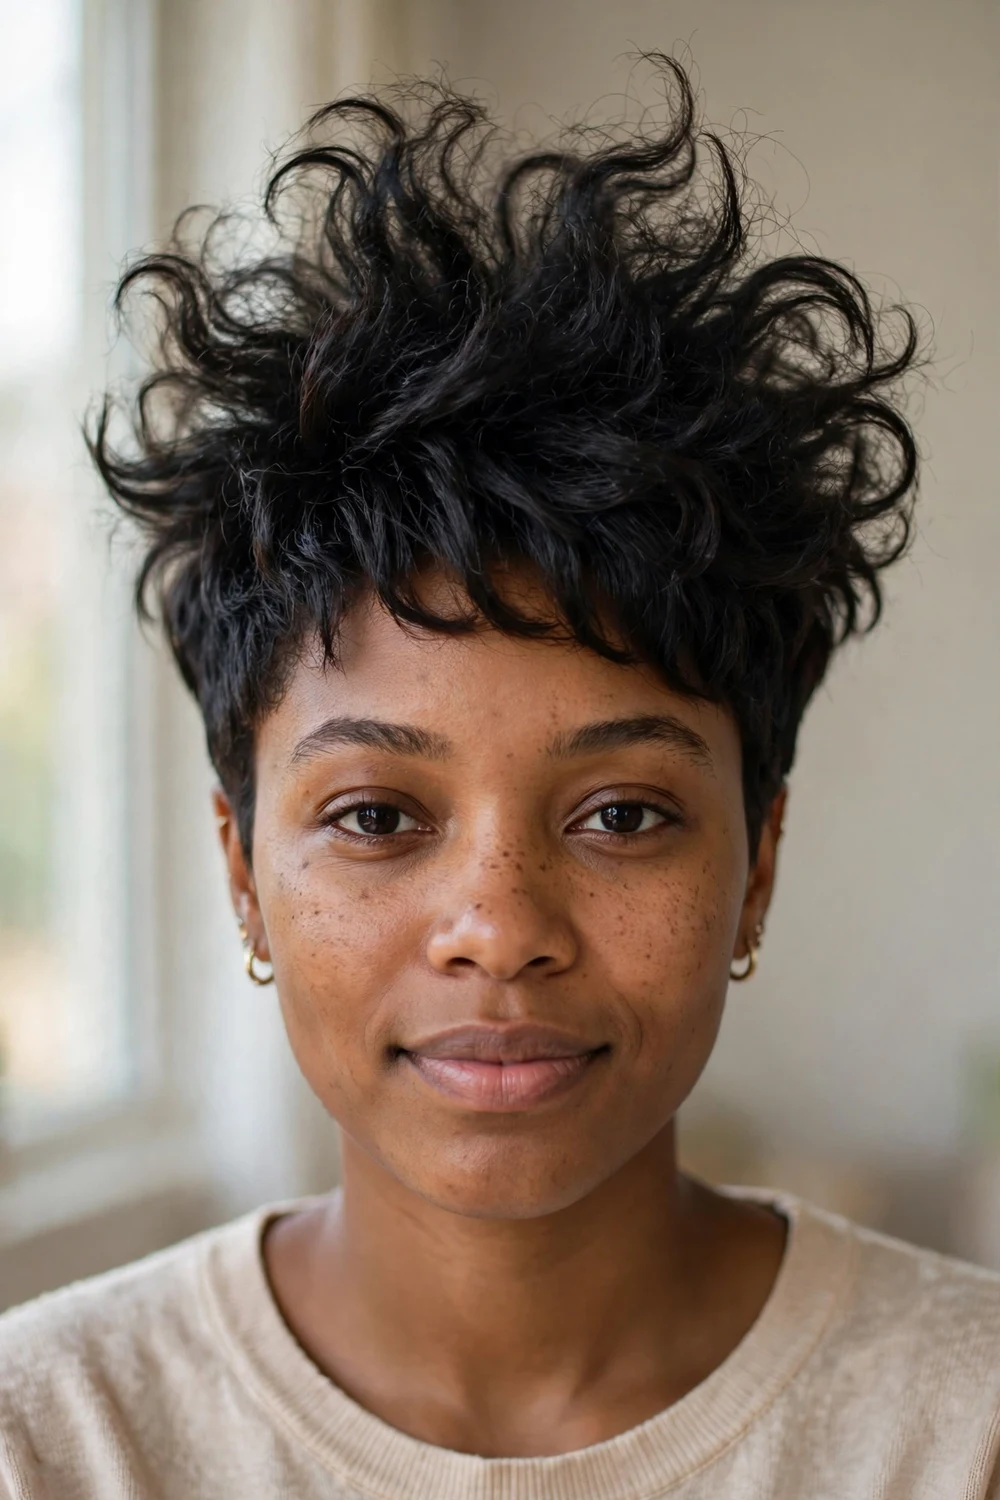
Adding big volume on top is one of the fastest ways to make a round face look longer. This pixie goes for it: height and fullness through the crown with the sides kept tighter. The drama is the point. Work a volumizing mousse through damp hair, then blow-dry with your head tilted forward to build lift at the roots. Finish with a flexible-hold spray so the shape holds without going stiff.
Try this: sprinkle a little volumizing powder at the roots before blow-drying. Difficulty: Medium. Trim: every 5 weeks.
11. Classic Tapered Pixie

A tapered pixie is cut short at the sides and nape with the length gradually increasing toward the top. The clean, graduated shape keeps everything close to the head where width would hurt, and the slightly longer crown adds a touch of height. It is the most low-maintenance option on this list. Ask your stylist to keep the taper neat around the ears and to leave enough on top for a side part.
Try this: smooth a drop of serum over the top for a polished finish. Difficulty: Easy. Trim: every 4 weeks.
12. Textured Pixie
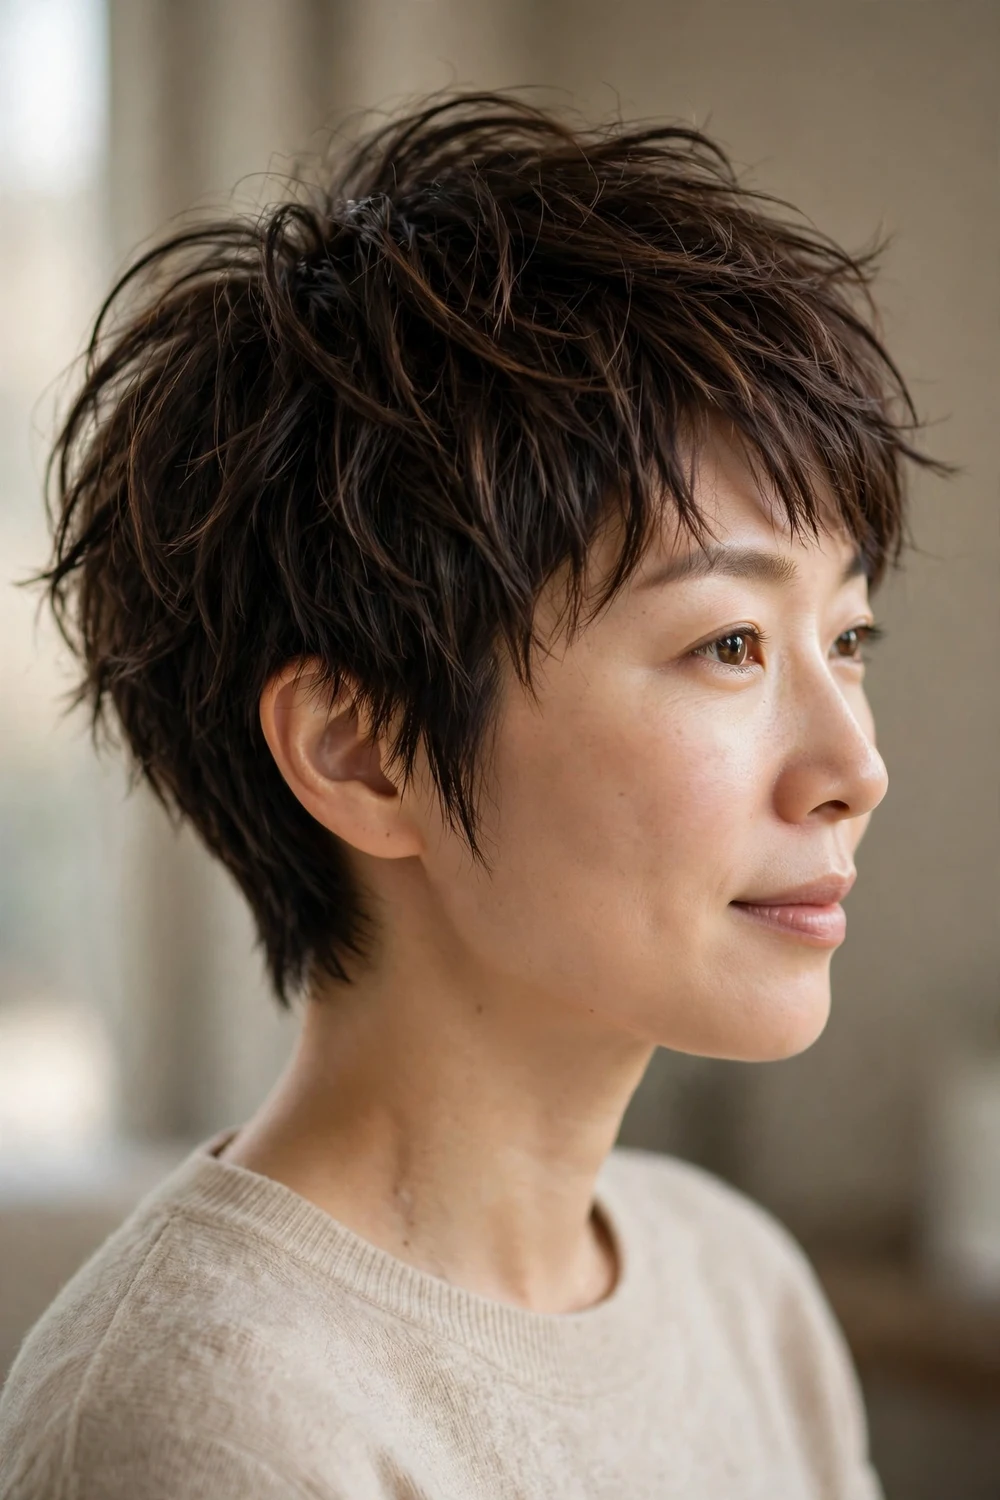
Texture breaks up the smooth, unbroken outline that can make a round face look rounder. This cut uses point-cut layers throughout to create separation and movement. The result is light and airy rather than solid and helmet-like. It suits fine hair well because the layers create the illusion of fullness. Ask for point cutting at the ends instead of blunt ends.
Try this: define the layers with a pea-sized amount of wax, twisting small sections. Difficulty: Easy. Trim: every 5 weeks.
13. Choppy Pixie

Choppy layers cut at different lengths create edges and angles that a round face lacks naturally. This pixie leans into that: the ends are cut unevenly on purpose, which stops the eye from tracing a circle around the face. It looks best with a bit of mess, so do not over-smooth it. Highlights through the top can make the choppy pieces stand out even more.
Try this: scrunch texturizing spray into dry hair and shake it out. Difficulty: Easy. Trim: every 5 weeks.
14. Asymmetrical Pixie

Asymmetry is a round face’s friend. One side of this cut is left longer than the other, and that imbalance keeps the eye moving diagonally instead of settling on the widest part of the face. The longer side usually sweeps across the forehead. It looks intentional and modern. Make sure your stylist understands which side you part on so the longer section falls naturally.
Try this: keep the shorter side tucked behind the ear to show off the contrast. Difficulty: Medium. Trim: every 4 weeks.
15. Pixie with a Quiff
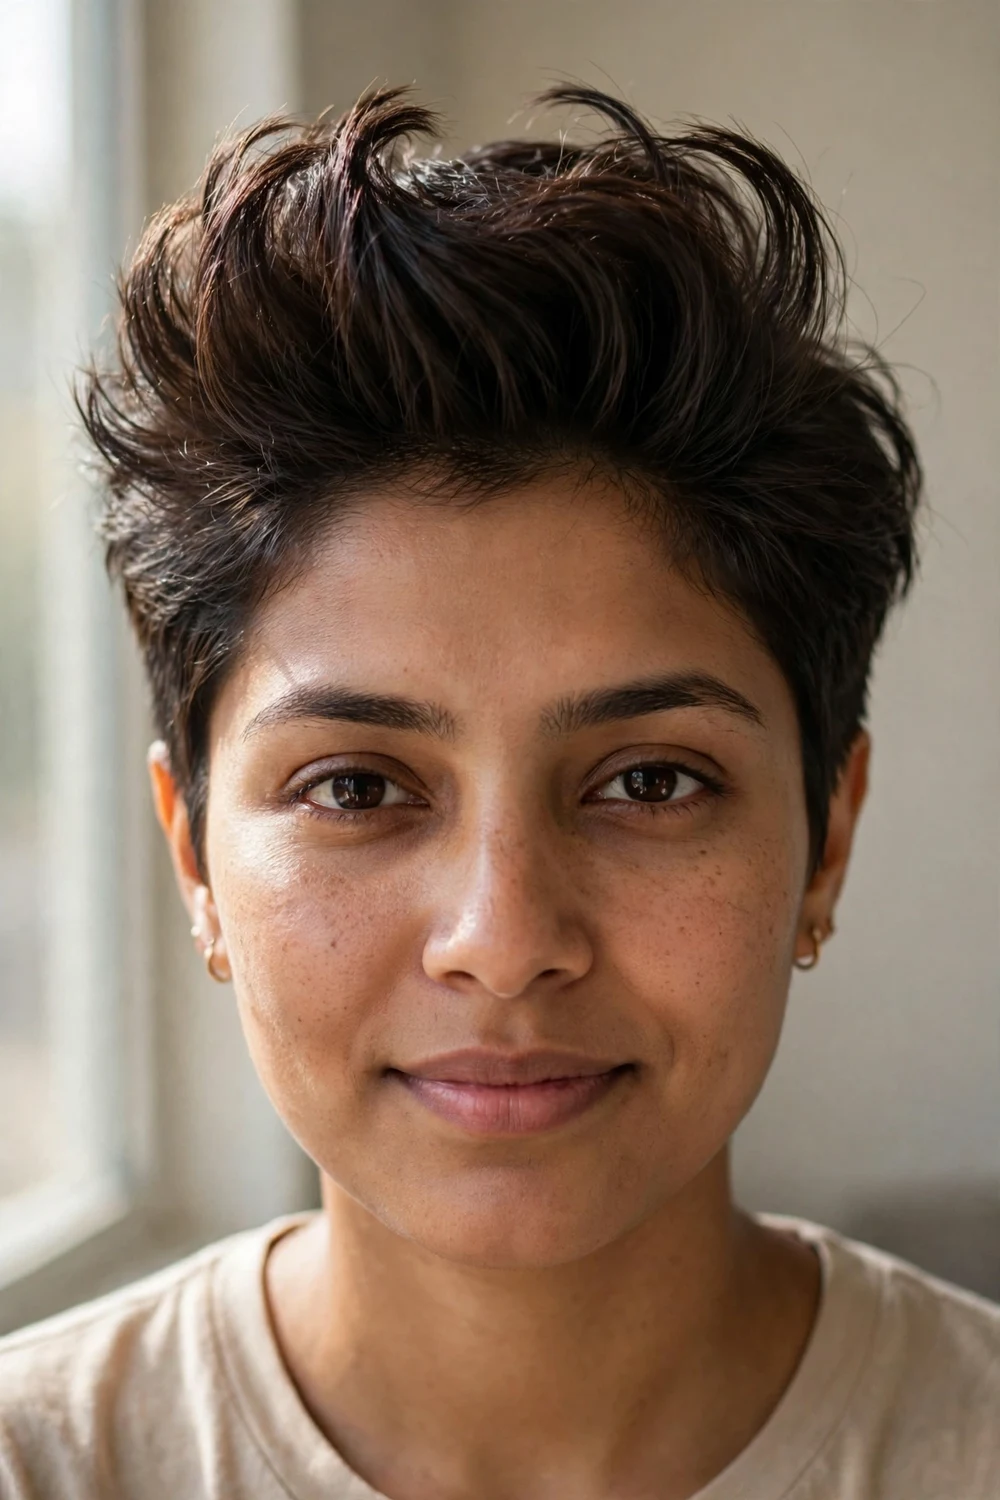
A quiff is a lifted section at the front that stands up and back, and it adds real height above the forehead. For a round face, that vertical lift is pure gold. The sides stay short so all the attention goes upward. Style it by blow-drying the front section up and back over a round brush, then setting it with a medium-hold product. It takes a few minutes in the morning but the payoff is clear.
Try this: use a small round brush at the roots of the front section for lift. Difficulty: Medium. Trim: every 4 weeks.
16. Curly Pixie
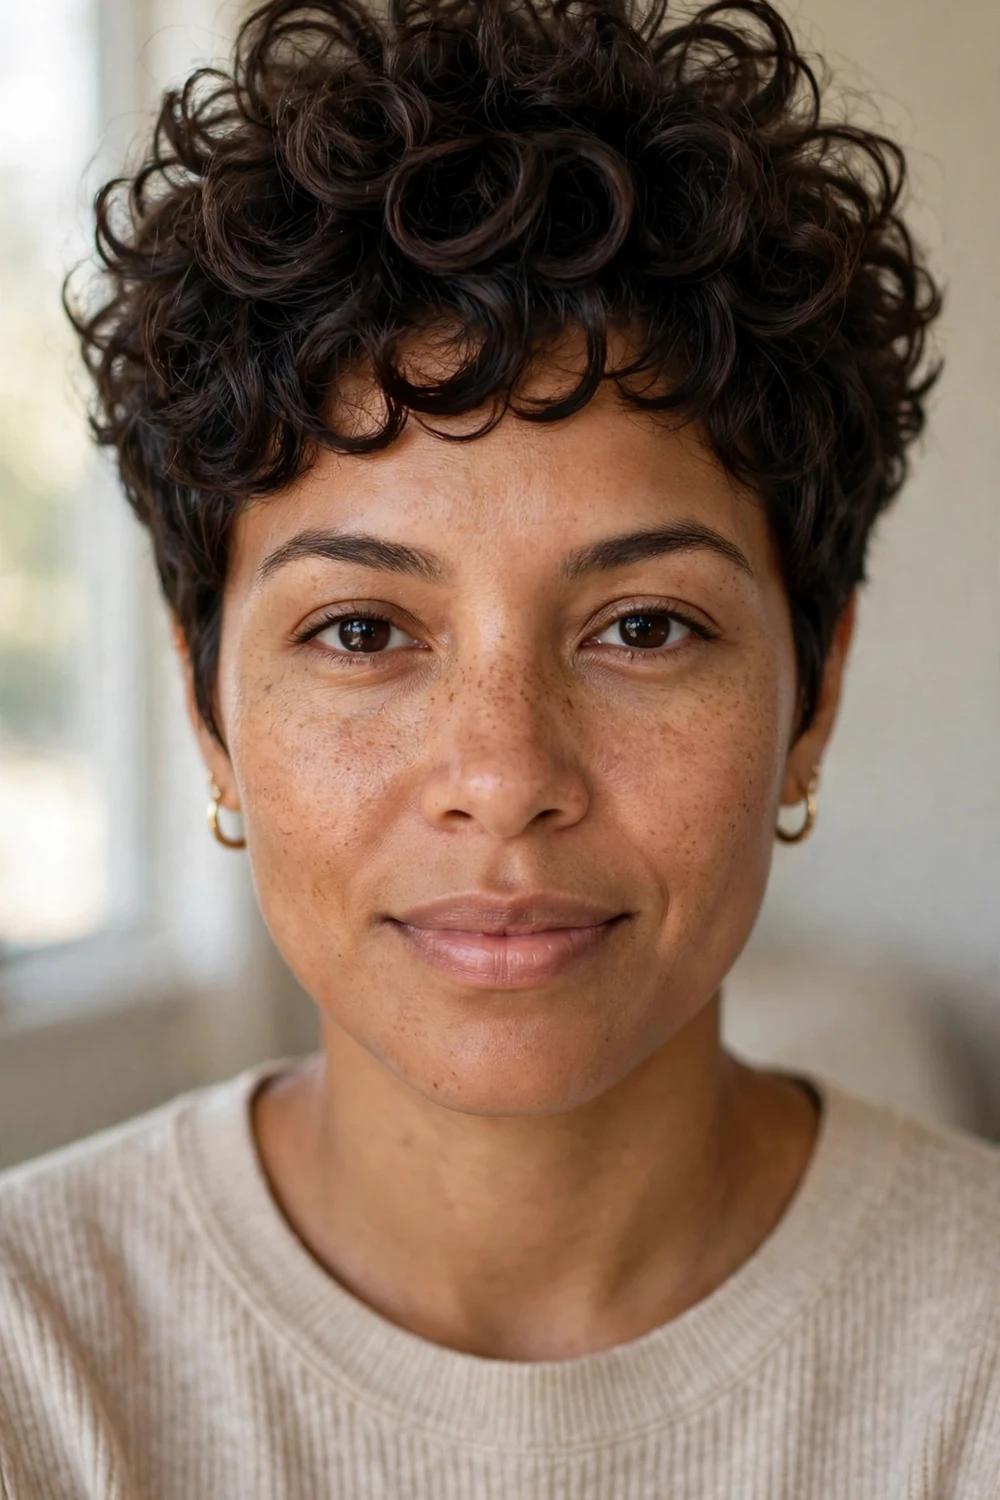
Curly hair and round faces need one rule: keep the volume on top, not at the sides. This pixie does exactly that. The curls are cut to sit higher on the crown with the sides kept shorter, so the shape goes up instead of out. Cut curls dry or on a curl-by-curl basis so the shape stays balanced. A curl cream on damp hair keeps the pattern defined without frizz.
Try this: scrunch curl cream into soaking wet hair and diffuse on low heat. Difficulty: Medium. Trim: every 6 weeks.
Curly texture deserves its own deep dive, and curly pixie haircuts for round faces covers curl-specific cutting and styling techniques.
17. Wavy Pixie
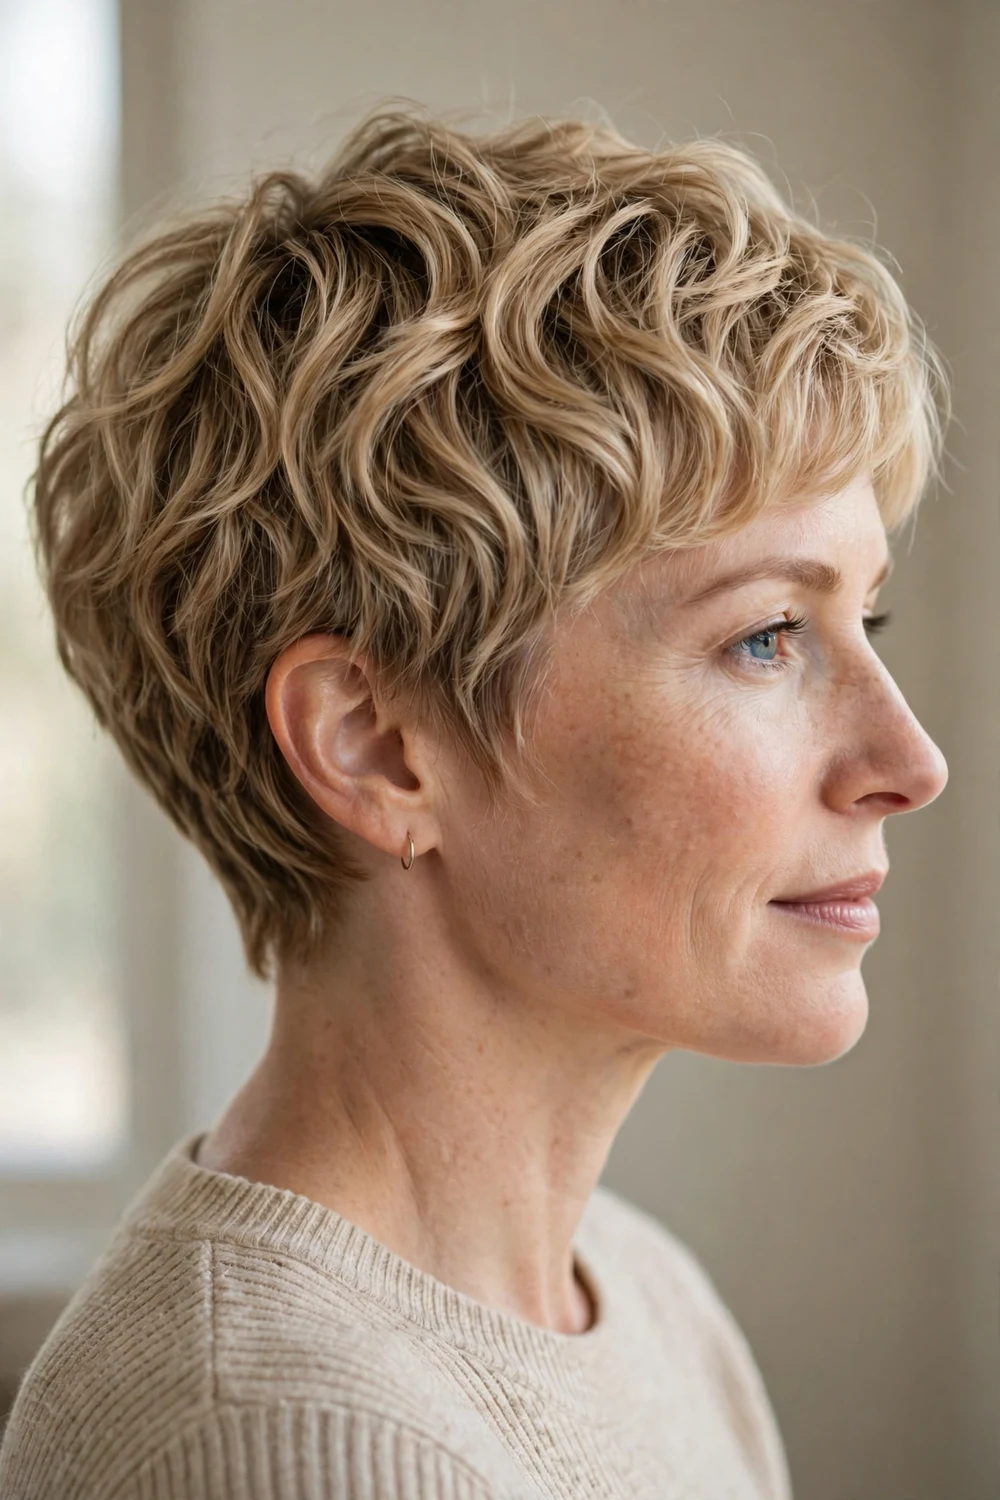
Natural waves give a pixie built-in texture without any product fuss. This cut keeps the waves short enough to stay tidy but long enough to show movement. The wave pattern breaks up the roundness of the face on its own. Ask for layers that follow the wave direction so the shape does not turn triangular. A curl-enhancing cream brings out the wave without weighing it down.
Try this: twist damp sections around your fingers to encourage the wave pattern. Difficulty: Easy. Trim: every 6 weeks.
18. Spiky Pixie
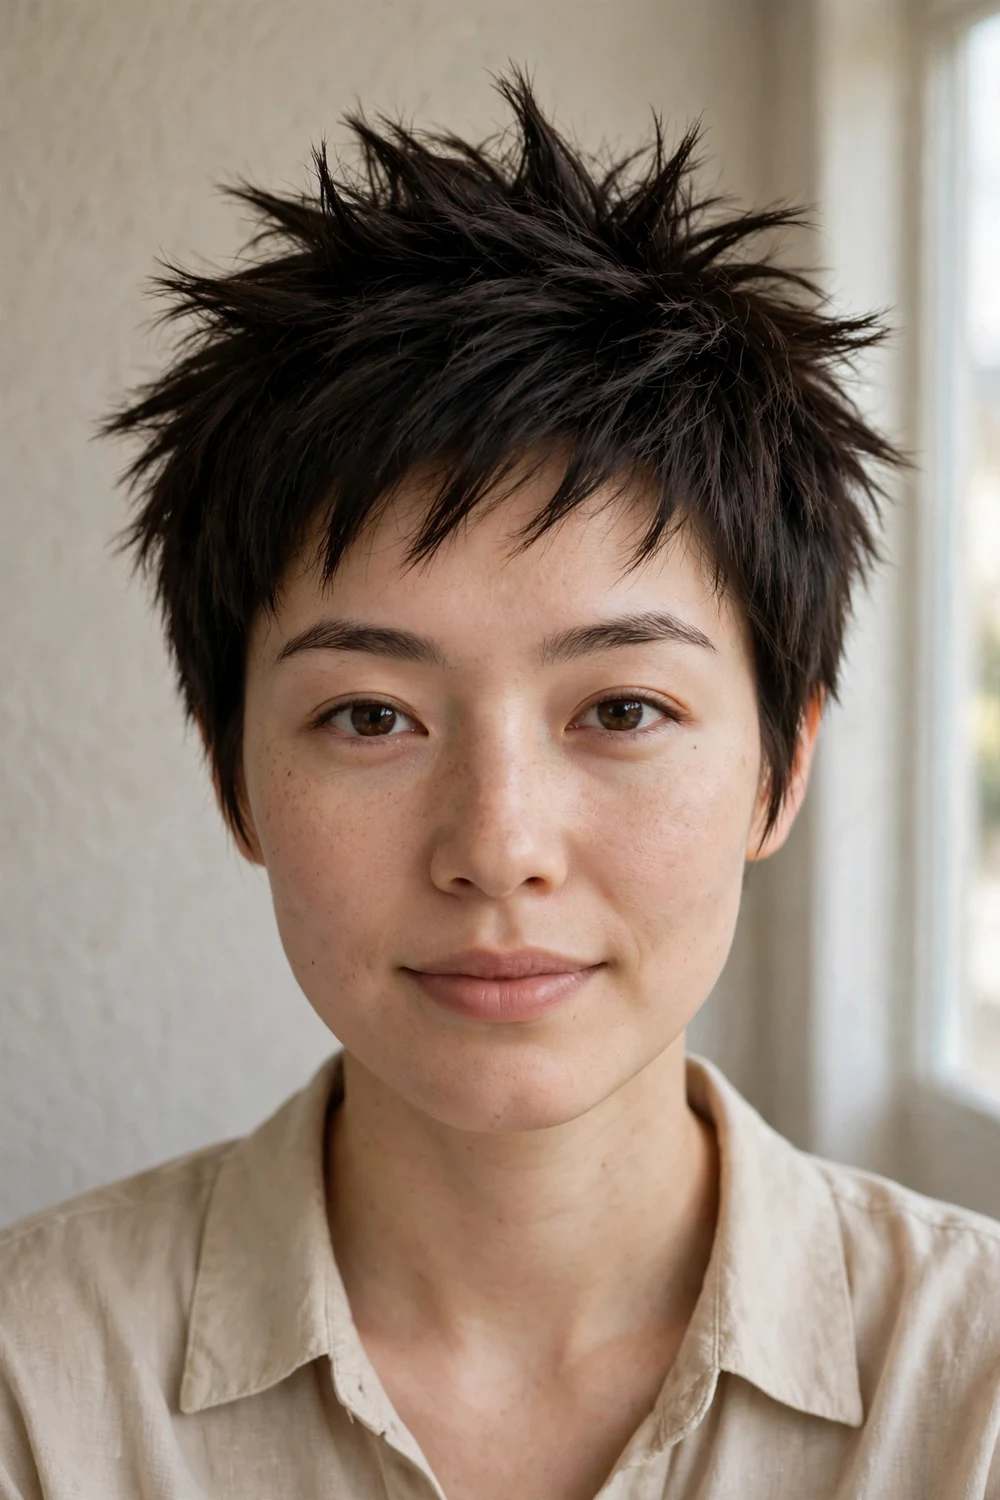
Spikes point upward, and upward is where a round face wants the attention. This bold cut styles short layers up and out for height and edge. It works best on straight, coarse hair that holds a shape. A strong-hold gel or wax applied to dry hair gives the spikes definition. Keep the sides short so the silhouette stays narrow at the cheeks.
Try this: pinch small sections upward with wax, working from the crown forward. Difficulty: Medium. Trim: every 4 weeks.
19. Pixie with Elongated Bangs
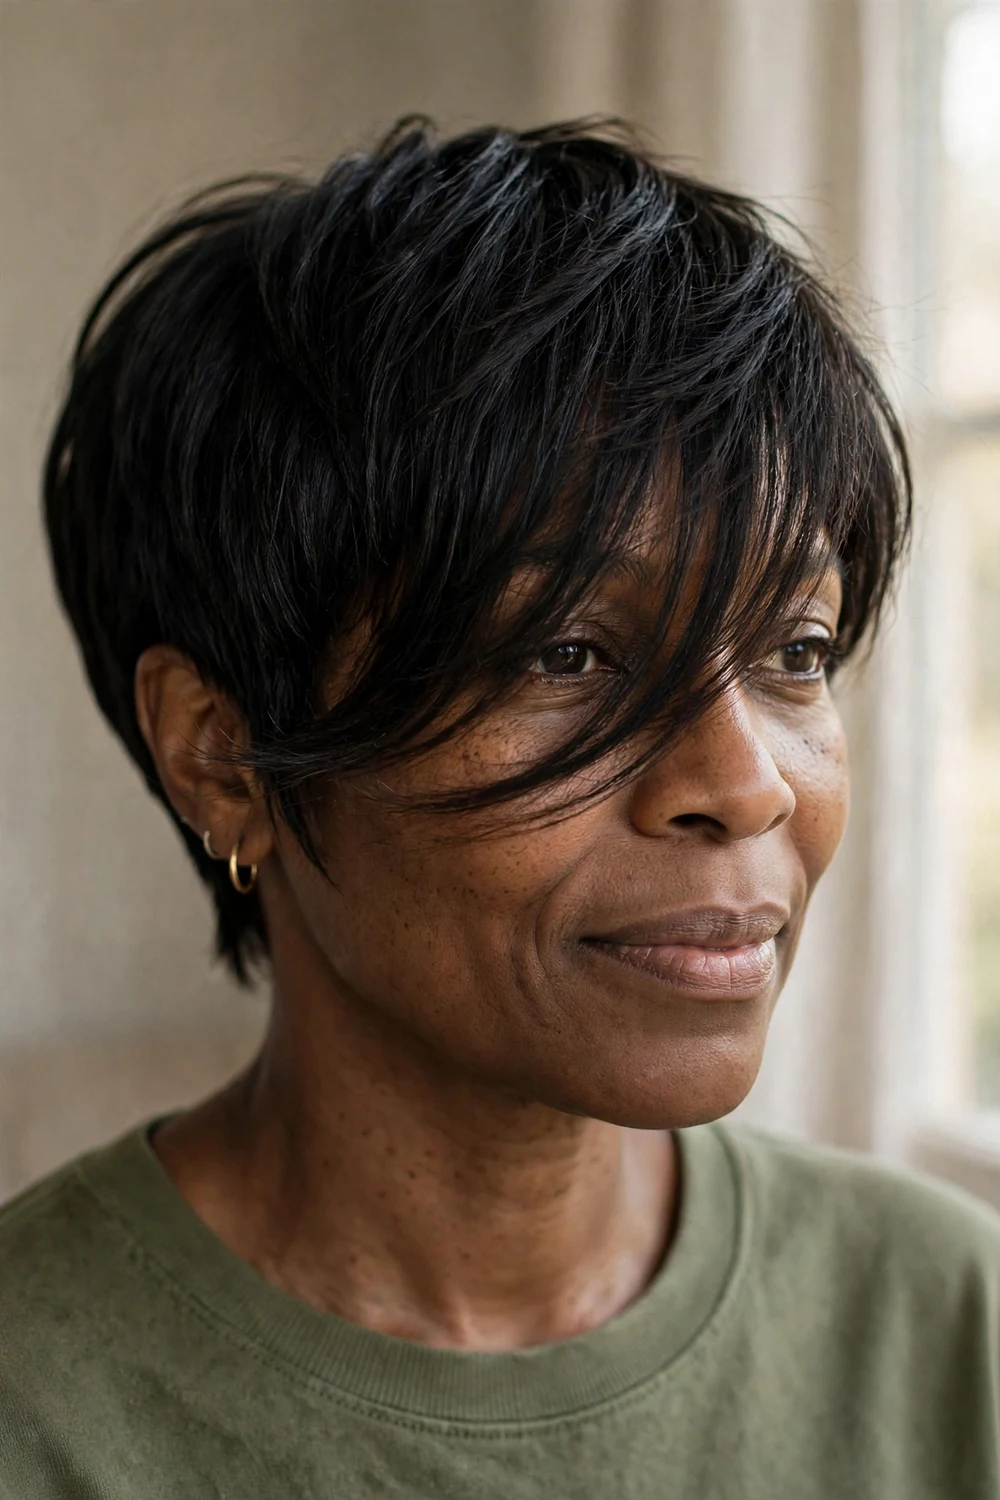
Long, wispy bangs swept across the face do two jobs at once: they cover part of the forehead and they draw a diagonal line across it. Both moves break up the round shape. The rest of the cut stays short and neat so the bangs are the feature. These bangs need regular trims to stay at the right length, or they start falling into the eyes.
Try this: blow-dry the bangs to the side with a paddle brush for a smooth sweep. Difficulty: Easy. Trim: every 3 to 4 weeks.
20. Two-Tone Platinum Pixie with an Undercut

Color can slim a face too. A platinum top with darker sides creates contrast that makes the top of the head look taller and the sides look narrower. The undercut underneath keeps the silhouette close. This is a high-maintenance choice because the platinum needs regular toning and root touch-ups, but the visual payoff is strong. Use purple shampoo between salon visits to keep the blonde clean.
Try this: ask your colorist to keep the platinum focused on the crown and top. Difficulty: Hard. Trim: every 4 weeks, color every 6.
21. Bixie with Side-Swept Bangs
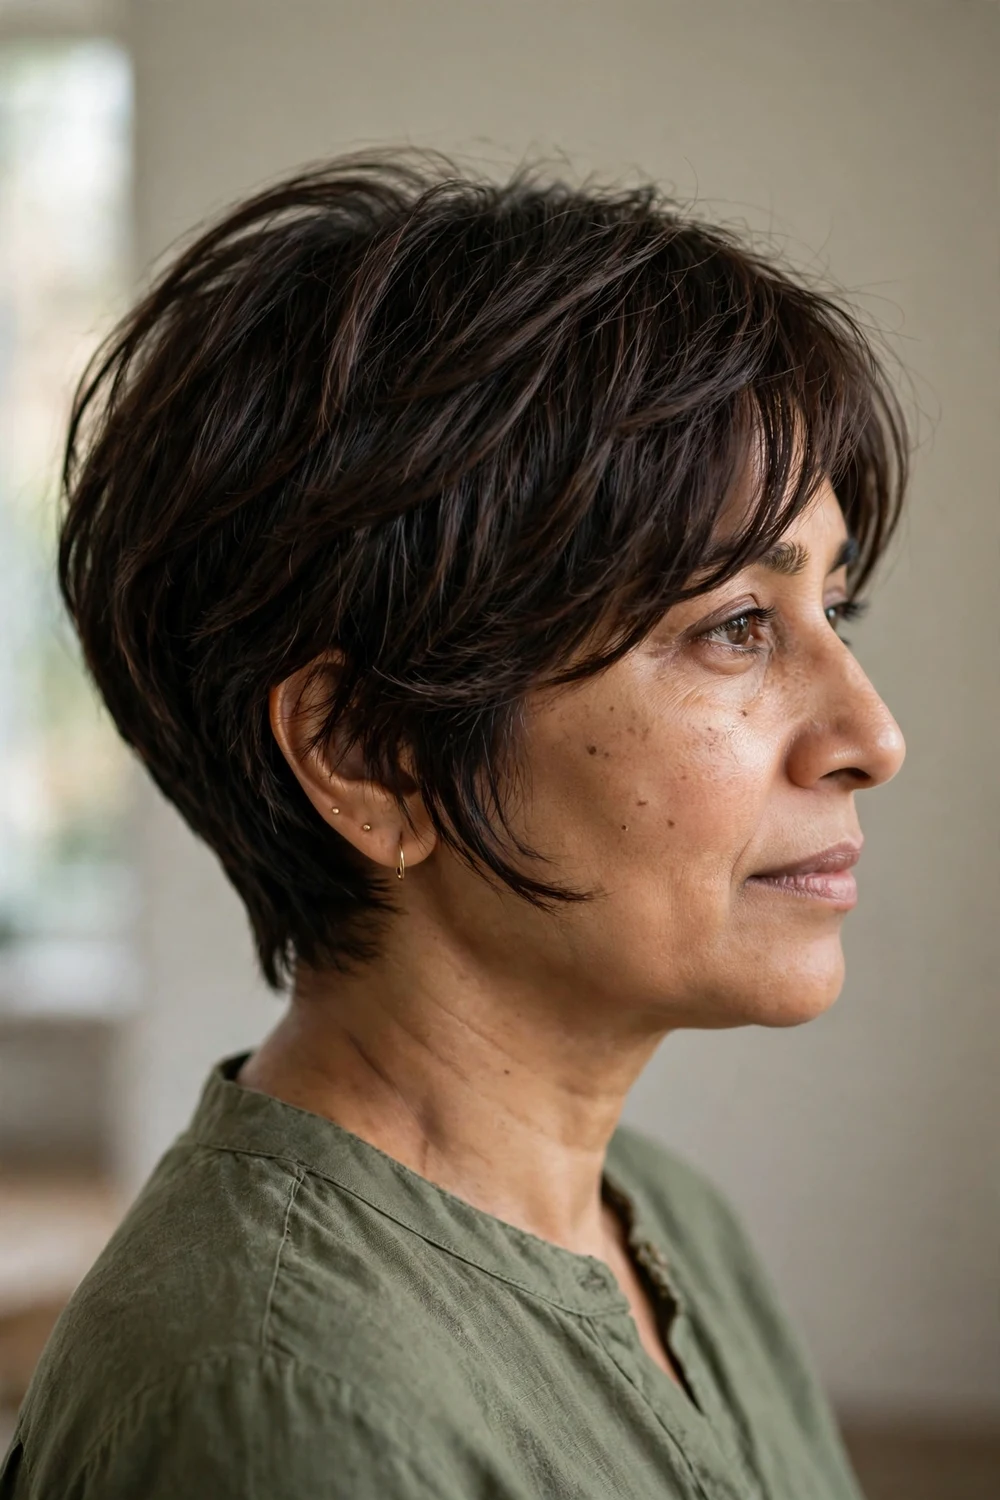
The bixie mixes pixie texture with bob length, and that extra length is useful for round faces. It gives you more hair to sweep, tuck, and angle. The side-swept bangs break up the forehead while the longer back adds a slimming line behind the jaw. It is a good middle ground if a true pixie feels like too big a jump. The shape needs trims to keep the back from growing into a mullet.
Try this: tuck one side behind the ear for an instant asymmetrical line. Difficulty: Easy. Trim: every 5 weeks.
22. Pixie with Short Jagged Bangs
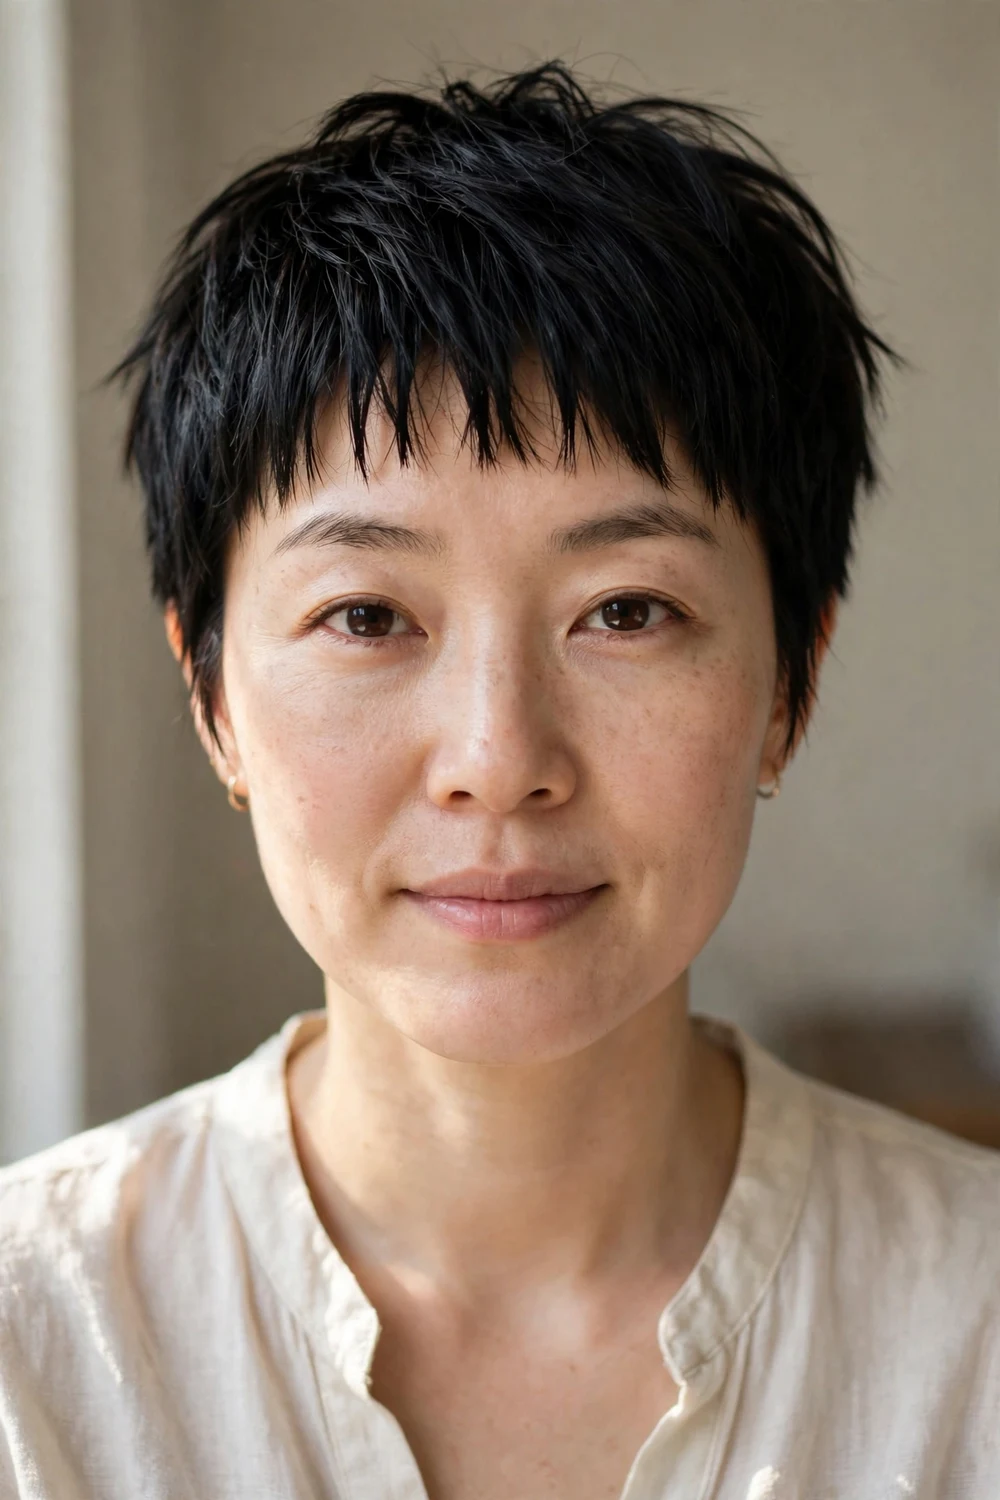
Short, jagged bangs add texture right across the forehead, which keeps the eye busy and breaks up the smooth curve of a round face. The jagged edge is key: a straight-across fringe would widen the face, but an uneven, piece-y one adds angles. Keep the bangs above the brows so they open up the face instead of closing it in. The rest of the cut can stay simple.
Try this: pinch the bangs into points with a tiny amount of wax. Difficulty: Easy. Trim: every 3 weeks.
For more ideas on pairing fringes with short cuts, short pixie haircuts curly hair shows how bangs work with natural texture.
23. Razored Pixie for Fine Hair
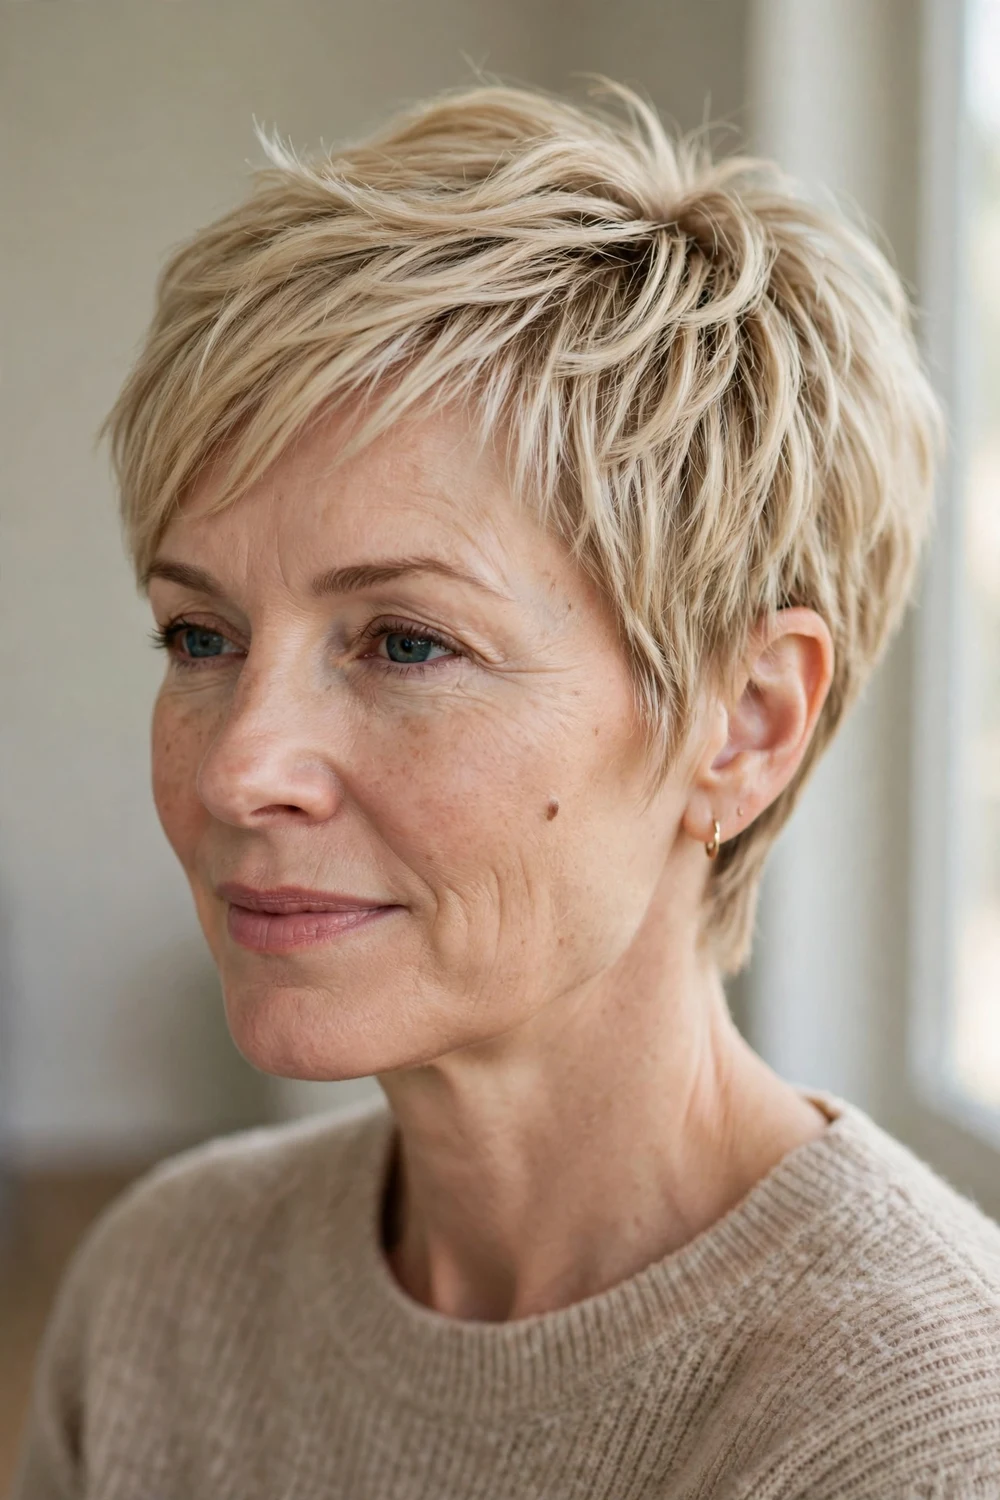
Fine hair can go limp in a pixie, but razored edges fix that. The razor cuts soft, feathered ends that move easily and catch light, which creates the illusion of fullness. For a round face, ask for the razored layers concentrated on top so the fullness sits high. Avoid thinning the sides too much or the cut can look stringy. A volumizing mousse at the roots gives the style its base.
Try this: lift the roots with a blow-dryer and a vent brush, pointing the airflow upward. Difficulty: Easy. Trim: every 5 weeks.
24. Copper Pixie with Cropped Back and Sides
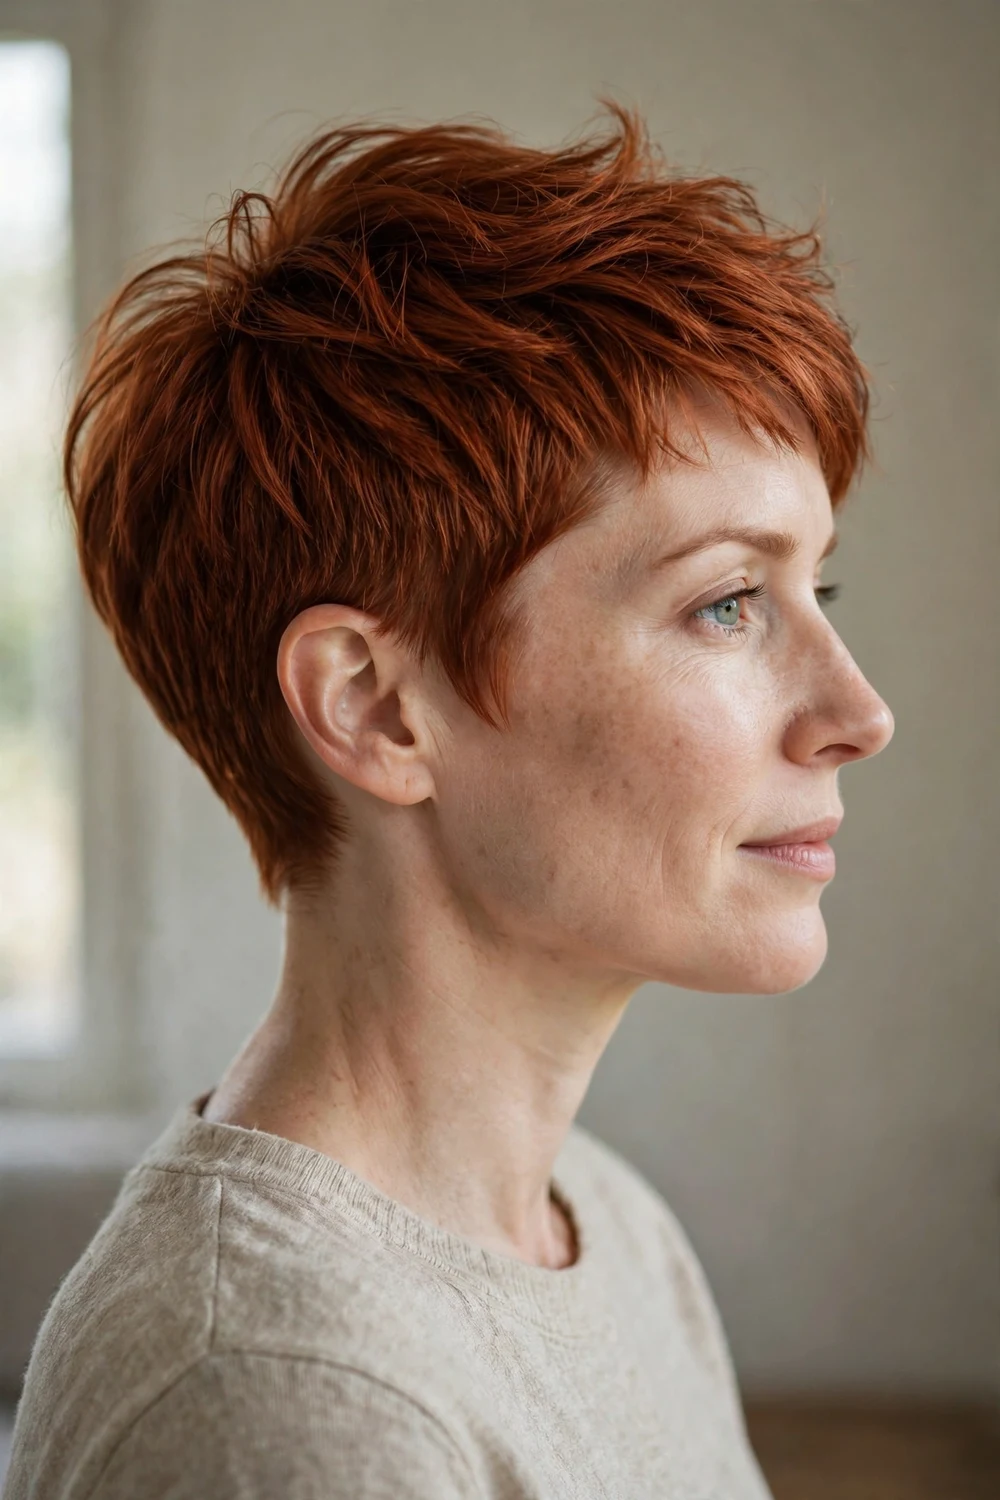
A rich copper shade makes the cut look intentional and polished. The back and sides are cropped close and graduated upward, while the top is tousled for texture and color depth. The warm tone draws light to the upper face. Copper fades faster than most shades, so use a color-safe shampoo and plan gloss refreshes. The geometric outline of the cut suits round faces because the lines are straight, not curved.
Try this: refresh the tone with a copper gloss between salon visits. Difficulty: Medium. Trim: every 4 weeks.
25. Ultra-Short Lengthening Pixie

Do not rule out a very short cut. This pixie keeps everything close except for a short quiff at the front that adds height above the forehead. That small patch of height changes the whole proportion of the face. Short sideburns frame the eyes and keep the outline tidy. It suits women who want the lowest daily effort: wash, add a little product, and go.
Try this: push the front section up with your fingers while it is still damp. Difficulty: Easy. Trim: every 3 to 4 weeks.
26. Auburn Pixie with Blonde Highlights

Highlights placed along the sweep of the cut create diagonal lines of light that make the face look longer. On an auburn base, blonde pieces through the top section add dimension and movement. Ask your colorist to follow the direction of the cut with the highlights so they reinforce the shape instead of fighting it. The cut itself is a classic layered pixie with a deep part.
Try this: ask for the brightest pieces around the crown where the light hits. Difficulty: Medium. Trim: every 5 weeks.
27. Messy Pixie with Straight Texture
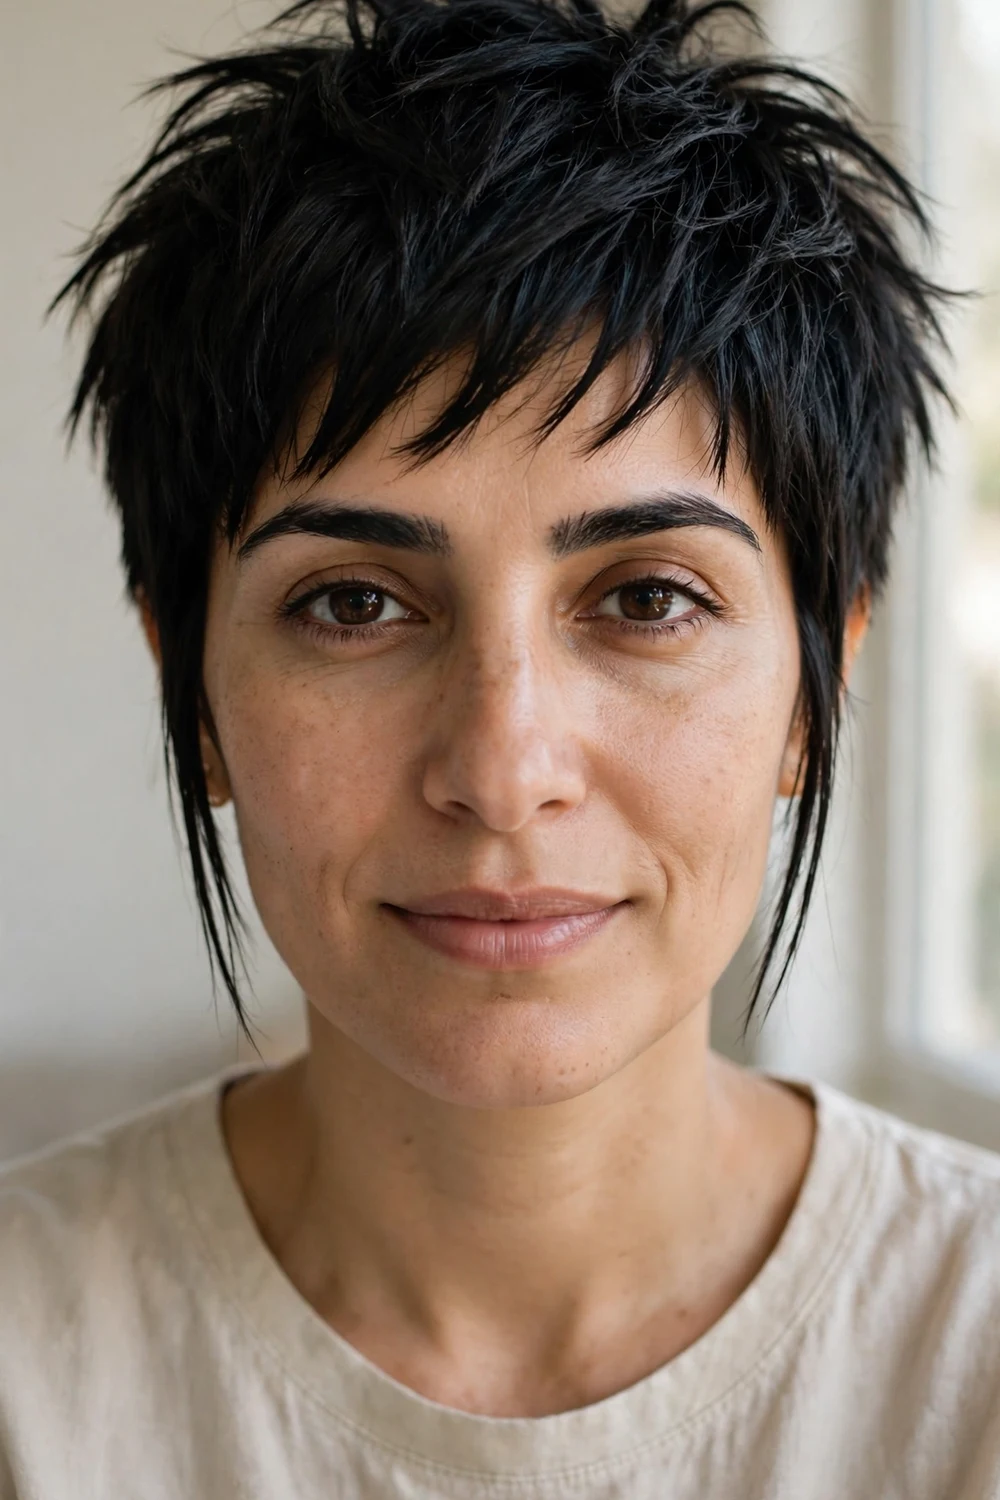
Messy does not mean shapeless. This pixie uses sharply textured layers and straight, piece-y strands at the sides to break up the curve of the cheek. Because the texture is straight rather than curly, the lines stay crisp and directional. It is one of the easiest styles to maintain: the messier it looks, the better it works. Just avoid letting the sides puff out at cheek level.
Try this: work a matte paste through dry hair and pull pieces in different directions. Difficulty: Easy. Trim: every 5 weeks.
28. Party Pixie with a Headband and Extra-Long Fringe
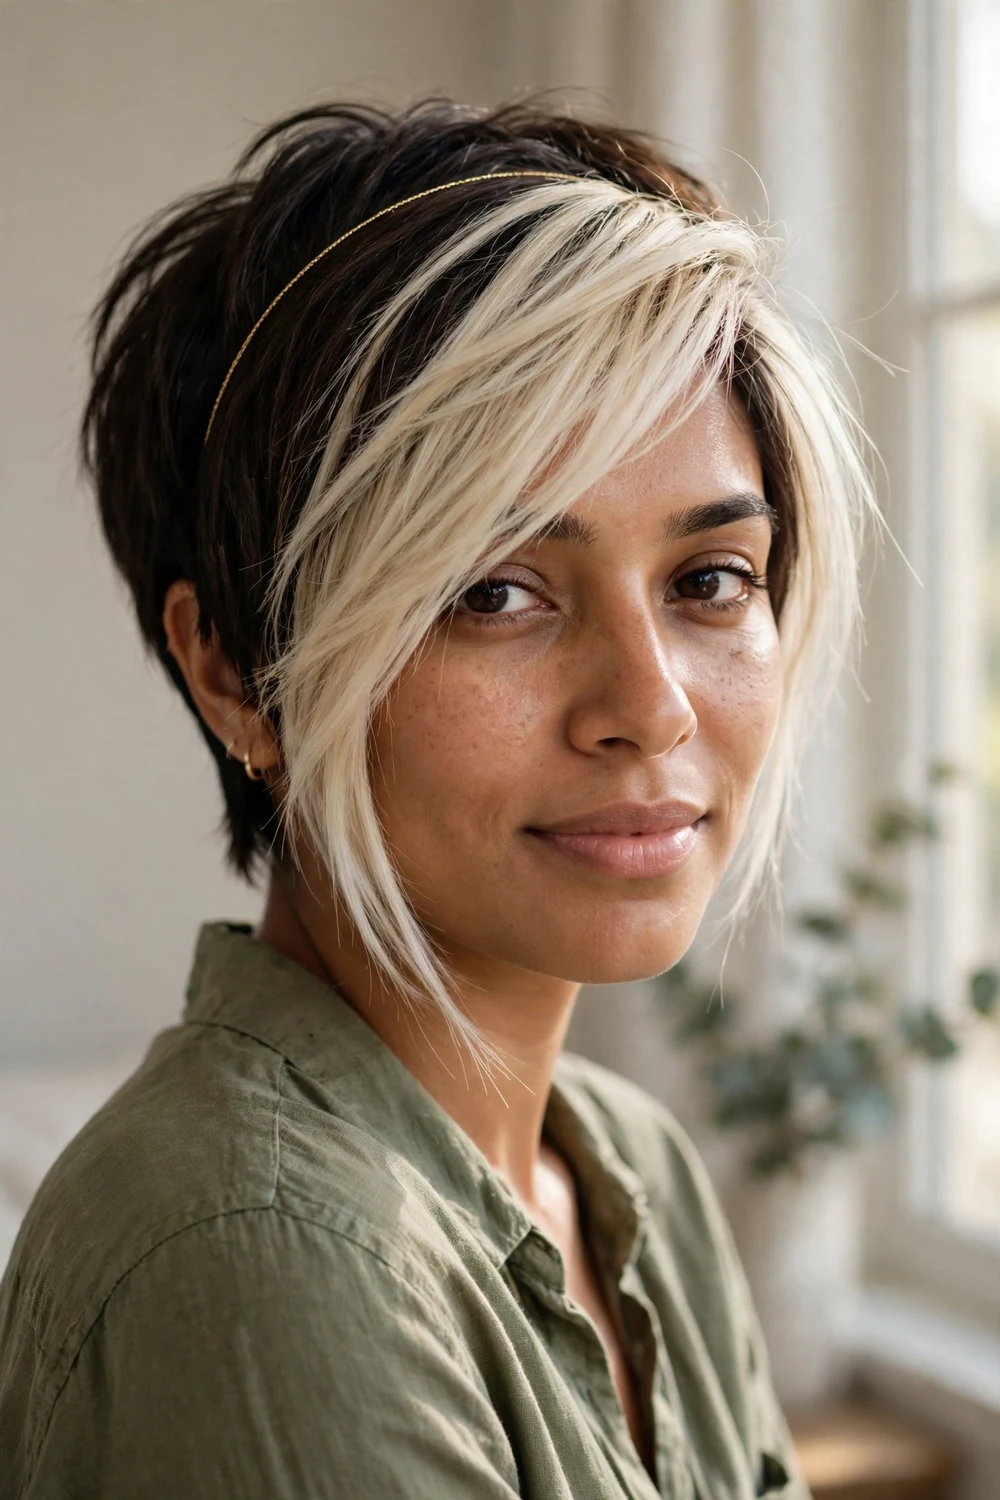
For events, dress up a long pixie with two accessories: a thin headband and an extra-long fringe. The headband adds height and interest at the crown, while the long asymmetrical fringe draws a bold diagonal across the face. Sweep the fringe from a deep part so it tapers toward the mouth and narrows the lower face. It is a simple way to make a pixie feel occasion-ready without heat styling.
Try this: place the headband a couple of inches behind the hairline for the most lift. Difficulty: Easy. Trim: every 5 weeks.
29. Forward-Combed Pixie on Straight Hair
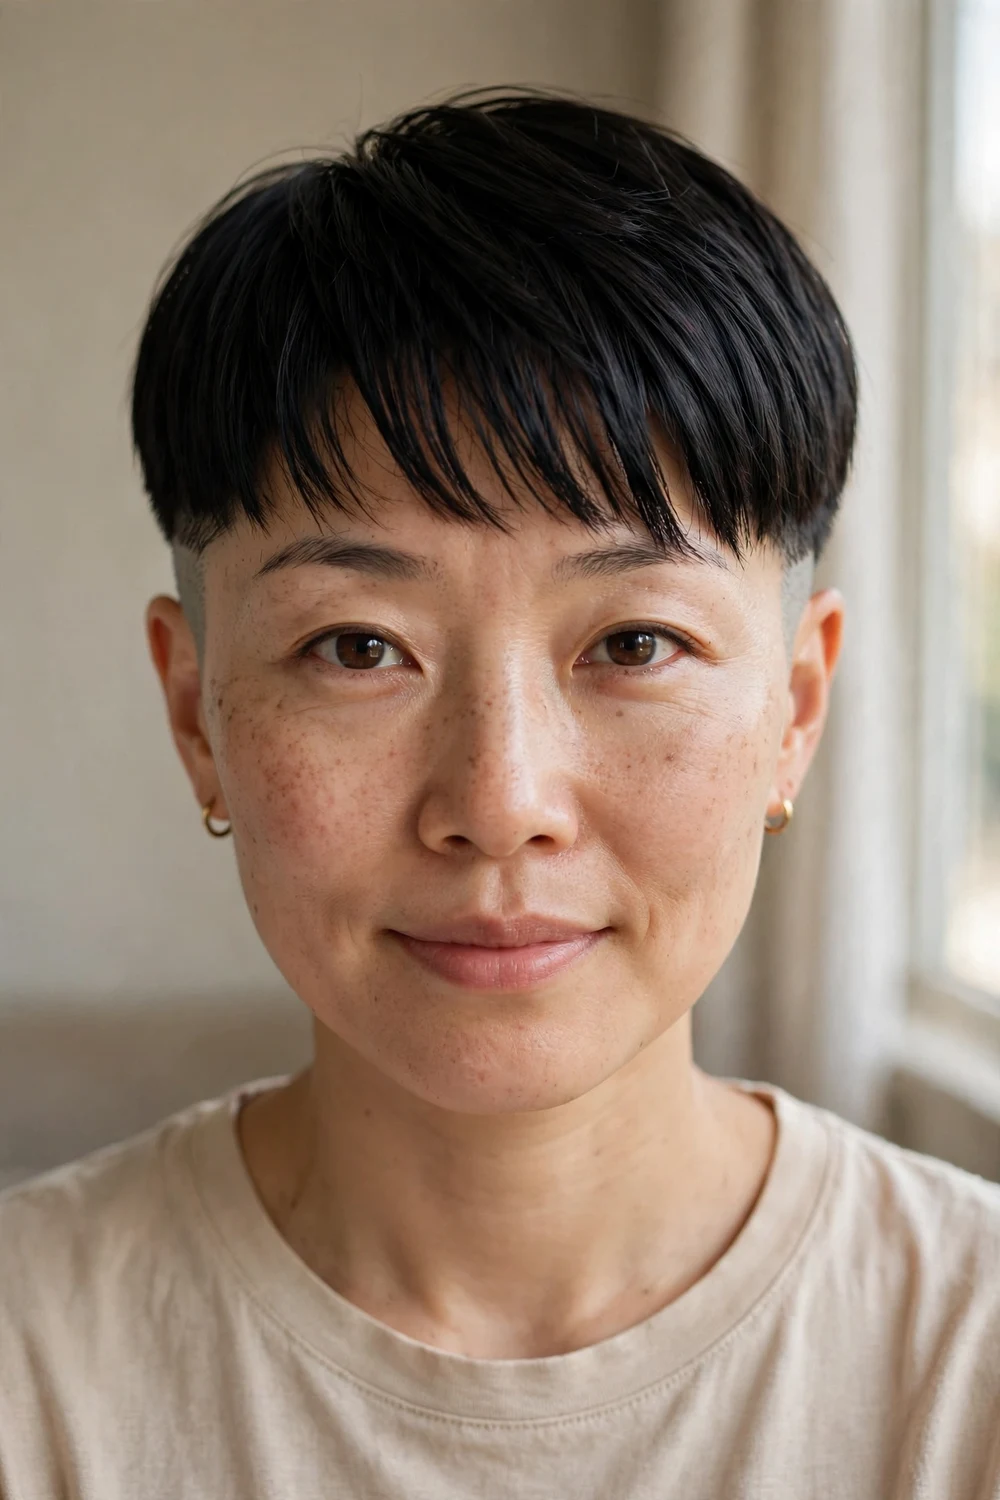
Straight hair shows off precision cutting, and this pixie leans into it. The sides are clipped close around the ears while the top and fringe are combed forward with a sharp line. The forward movement breaks up the round outline and pulls focus to the eyes and upper face. It works best on medium to thick straight hair that can hold the shape. A little styling product keeps the forward pieces in place.
Try this: comb the top forward while blow-drying on low heat for a sleek finish. Difficulty: Medium. Trim: every 4 weeks.
30. Deep Side Part Pixie with Sharp Side Points
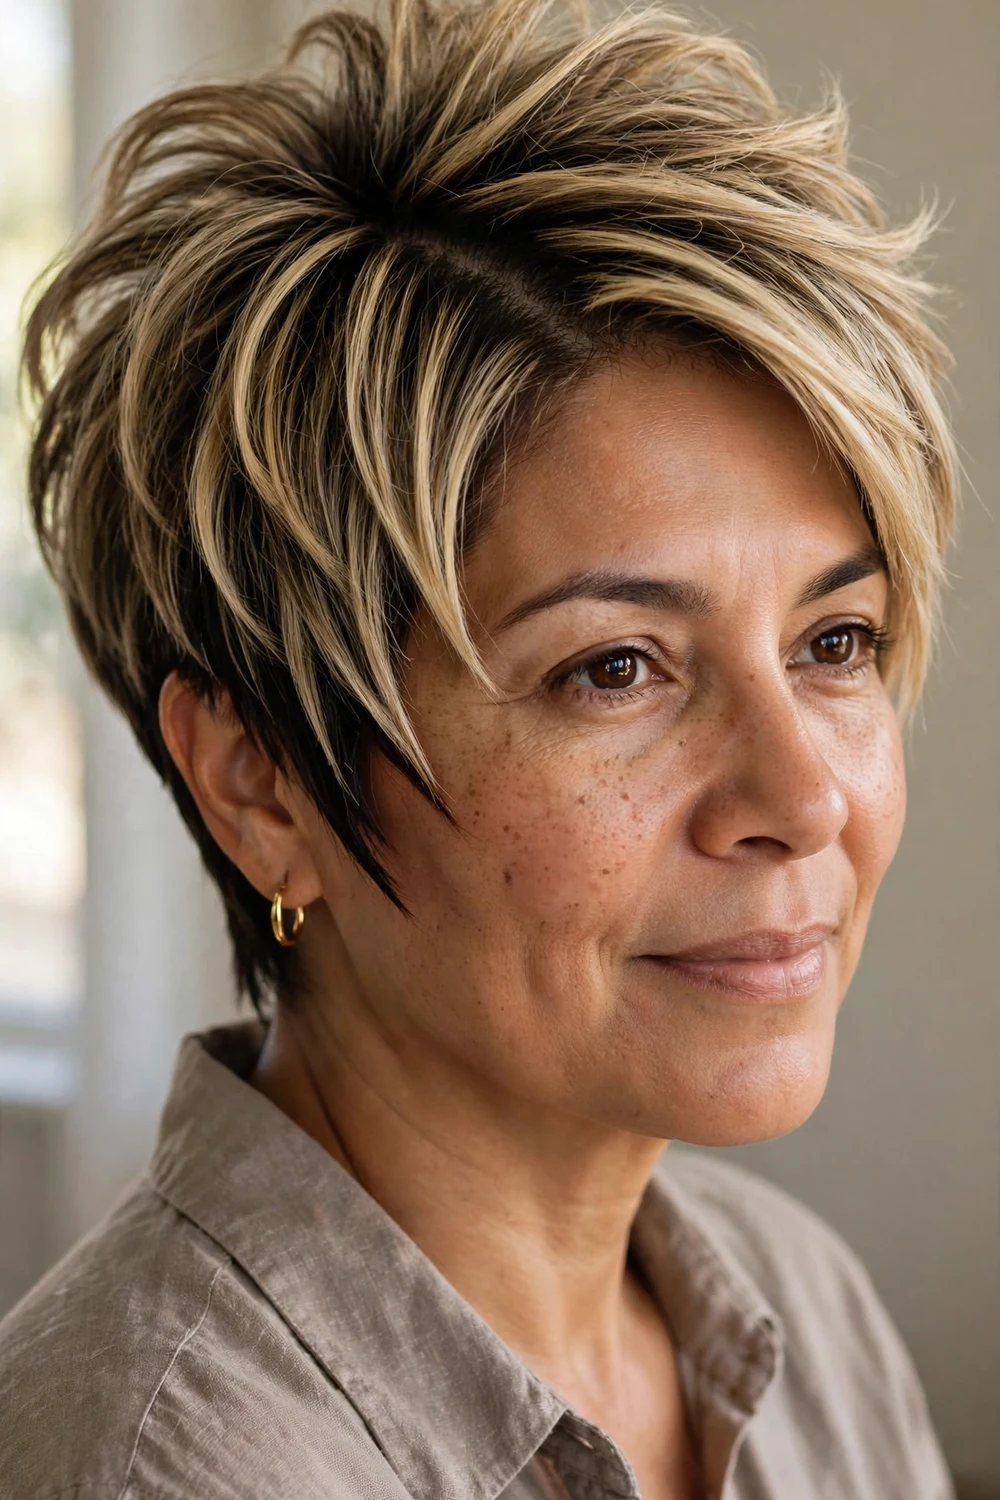
Starting the fringe from a deep part creates two strongly angled lines that cut across the round outline. Add sharp side points, which are the longer pieces that taper in front of the ears, and the face gets a clear vertical frame. The layers on top add height so the whole shape points up and down rather than side to side. It is one of the most reliable slimming cuts on this list.
Try this: flat-iron the side points once so they sit close and sharp. Difficulty: Medium. Trim: every 4 weeks.
Pixie Haircuts for Round Faces Comparison at a Glance
| Style | Best Occasion | Difficulty | Trim Cycle |
|---|---|---|---|
| Sleek Side-Swept Pixie | Office, daily wear | Easy | 5 weeks |
| Layered Pixie with Face-Framing Front | Daily wear, dates | Easy | 5 weeks |
| Tousled Lengthy Pixie | Casual weekends | Easy | 6 weeks |
| Long Pixie with Side Bangs | Formal gatherings | Easy | 6 weeks |
| Full-Bodied Pixie with Crown Volume | Evenings out | Medium | 4 weeks |
| Undercut Pixie with Long Textured Top | Nightlife, creative settings | Medium | 3 to 4 weeks |
| Shaved Sides with Swept-Forward Top | Bold events | Medium | 3 weeks |
| Extra Short Pixie with Teased-Up Bangs | Parties | Medium | 4 weeks |
| Extra Long Pixie Tossed Forward | Daily wear | Easy | 6 weeks |
| Wild Volume Pixie | Nights out | Medium | 5 weeks |
| Classic Tapered Pixie | Office, daily wear | Easy | 4 weeks |
| Textured Pixie | Daily wear | Easy | 5 weeks |
| Choppy Pixie | Casual outings | Easy | 5 weeks |
| Asymmetrical Pixie | Fashion events | Medium | 4 weeks |
| Pixie with a Quiff | Evenings, parties | Medium | 4 weeks |
| Curly Pixie | Daily wear | Medium | 6 weeks |
| Wavy Pixie | Casual days | Easy | 6 weeks |
| Spiky Pixie | Concerts, nights out | Medium | 4 weeks |
| Pixie with Elongated Bangs | Office, dates | Easy | 3 to 4 weeks |
| Two-Tone Platinum Pixie with Undercut | Bold fashion looks | Hard | 4 weeks |
| Bixie with Side-Swept Bangs | Daily wear | Easy | 5 weeks |
| Pixie with Short Jagged Bangs | Casual, creative work | Easy | 3 weeks |
| Razored Pixie for Fine Hair | Daily wear | Easy | 5 weeks |
| Copper Pixie with Cropped Back and Sides | Evenings out | Medium | 4 weeks |
| Ultra-Short Lengthening Pixie | Active lifestyles | Easy | 3 to 4 weeks |
| Auburn Pixie with Blonde Highlights | Dates, events | Medium | 5 weeks |
| Messy Pixie with Straight Texture | Casual weekends | Easy | 5 weeks |
| Party Pixie with Headband and Extra-Long Fringe | Parties, weddings | Easy | 5 weeks |
| Forward-Combed Pixie on Straight Hair | Office, formal settings | Medium | 4 weeks |
| Deep Side Part Pixie with Sharp Side Points | Daily wear, events | Medium | 4 weeks |
How to Choose the Right Pixie for Your Round Face
Start with your hair texture. Fine hair does best with razored or textured layers that fake fullness on top. Thick hair can handle undercuts and longer tops because there is enough density to hold the shape. Curly hair needs a cut that keeps volume high and sides short, and the curls should be cut to sit rather than spread.
Then think about upkeep. Shaved sides and short bangs need the most frequent trims. Longer, tousled pixies are the most forgiving between appointments. Be honest about your mornings: a quiff or a teased fringe takes a few minutes every day, while a textured crop needs almost nothing.
Finally, bring references to your stylist. Photos of the exact cut help more than any description. Point to the part, the fringe, and the sides separately, and ask how each part will be maintained. A good stylist will adjust the plan to your hairline and growth patterns.
Mistakes to Avoid
The biggest mistake is a rounded, even-length pixie with no part and no texture. It copies the shape of the face instead of reshaping it. If your cut looks like a cap, ask for a deep part, some layers, or a fringe to break the outline.
Wide sides are the second mistake. Volume at the cheeks pushes the face outward. Keep the sides slim with a close taper, a fade, or a flat blow-dry. Save the volume for the crown, where it adds the length a round face needs.
The third is skipping trims. A pixie loses its shape fast, and a grown-out pixie widens at exactly the wrong places. Book the next trim when you leave the salon so the cycle stays on track.
Frequently Asked Questions
Can a round face pull off a pixie cut?
Yes. The key is choosing a pixie with height on top, a deep side part or side-swept fringe, and slim sides. Those three details create vertical lines that make the face look longer. A rounded, even-length pixie without texture can widen the face, so avoid that version.
Should I get bangs with a pixie if my face is round?
Side-swept, elongated, or jagged bangs flatter round faces because they draw diagonal lines across the forehead. Short, straight-across bangs usually do the opposite: they cut the face horizontally and emphasize its width. If you want a fringe, ask for one that sweeps to the side or tapers at the ends.
Which pixie adds the most length to a round face?
Styles with the most crown height add the most length: the full-bodied pixie with crown volume, the pixie with a quiff, and the wild volume pixie. Each one stacks fullness above the forehead while keeping the sides close. An ultra-short pixie with a lifted front quiff also works well if you want minimal length overall.
What should I ask my stylist for?
Ask for a deep side part, stacked or point-cut layers through the crown, and a close taper at the sides and nape. Bring photos of the exact style you want and point out the part, the fringe, and the sides separately. Mention that your goal is to add height and keep the sides slim, and ask how the cut will grow out between trims.
How often does a pixie need trimming?
Most pixies need a trim every 4 to 6 weeks. Shaved sides, undercuts, and short bangs need attention every 3 to 4 weeks to keep their lines clean. Longer, tousled pixies are the most forgiving and can stretch to 6 weeks. Booking the next appointment before you leave the salon keeps the shape from slipping.
Final Thoughts
A round face gives you more pixie options than you might expect, as long as the cut respects a few rules: height on top, a strong part, and sides that stay close. Pick the idea that matches your texture and your mornings, then let your stylist fine-tune it. The deep side part stays my top recommendation for the simplest change with the biggest payoff. Whichever style you choose, the right details make all the difference.
