


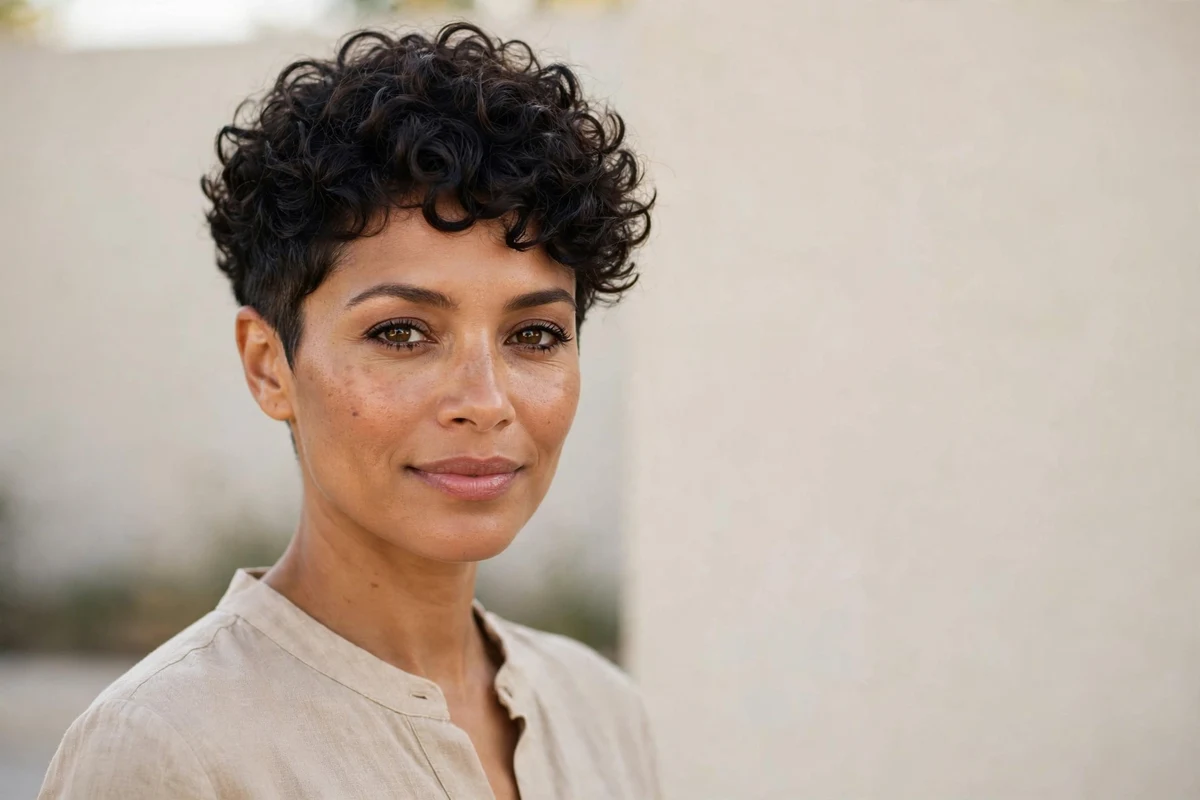
Yes, curly hair and pixie cuts work together, but only when the cut is built around your curl pattern instead of against it. Short pixie haircuts for curly hair need dry cutting, shrinkage planning, and curl-by-curl shaping, because curls spring up as they dry and a wet cut always lands shorter than planned. This guide covers 33 ideas organized by how each cut handles curls: the cutting move, which curl types (3A through 4C) it suits, and how to style it without frizz.
If you wear 3c coils, curly pixie haircuts 3c narrows the field to 29 pixie ideas shaped for that pattern, with cutting and styling notes for tight coils.
Most curly pixies keep 2 to 3 inches on top with shorter, tapered sides. Plan trims every 4 to 8 weeks, since short curls lose their outline fast as they grow. A curl cream on damp hair and a diffuser on low heat handle daily styling for nearly every cut below.
If your face is round, pair this guide with pixie haircuts for women round face.
Use a heat protectant first whenever the diffuser runs on a warm or hot setting.
Quick Takeaways
- Ask for the cut on dry, styled hair (curl by curl) so shrinkage is visible before the scissors move.
- Leave 2 to 3 inches on top for 3A to 3C curls, and plan for up to 50% shrinkage on tight 4C coils.
- Match the technique to your pattern: point-cutting opens up 3A spirals, while carved, separated shaping keeps 4B/4C coils defined.
- Diffuse on low heat with a heat protectant applied first; air-dry when you want the softest curl clumps.
- Book trims every 4 to 8 weeks; faded or undercut sides need a cleanup every 3 to 4 weeks to stay sharp.
1. Wash-and-Go Baseline Curly Pixie
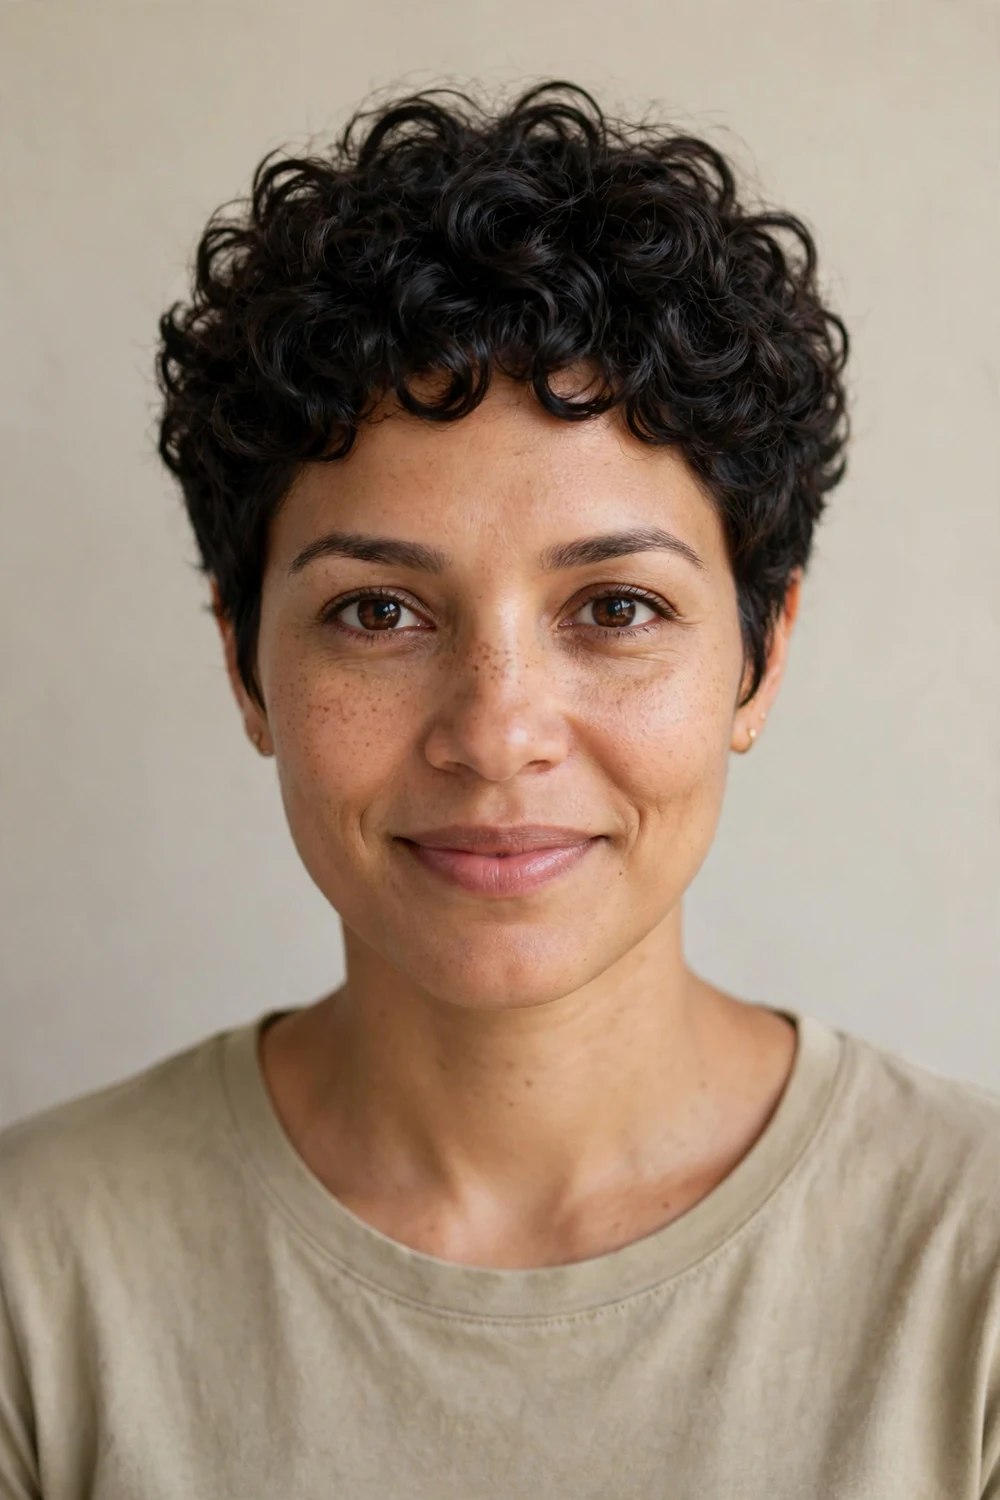
This is the reference cut every other idea builds on: even length through the crown, softly tapered sides, and ends cut curl by curl while dry. Because each curl is shaped in its natural state, the silhouette stays balanced after wash day instead of shrinking into surprises. It suits 3A through 4A patterns and works as the starting point for growing into longer pixie variations later. It also photographs consistently, since the shape does not shift between wash days.
Style on soaking wet hair with curl cream, then scrunch and air-dry or diffuse on low. Apply heat protectant before diffusing on anything above the cool setting. Refresh mornings with a water mist rather than re-wetting fully.
Try this: ask the stylist to cut the perimeter last, checking the neckline curl by curl for an even edge.
Difficulty: Easy · Cost: $45–$85 (cut only)
If you want a straight inspiration gallery without the cutting mechanics, browse these curly pixie haircuts for more shapes at this length.
2. Curl-by-Curl Dry-Cut Pixie
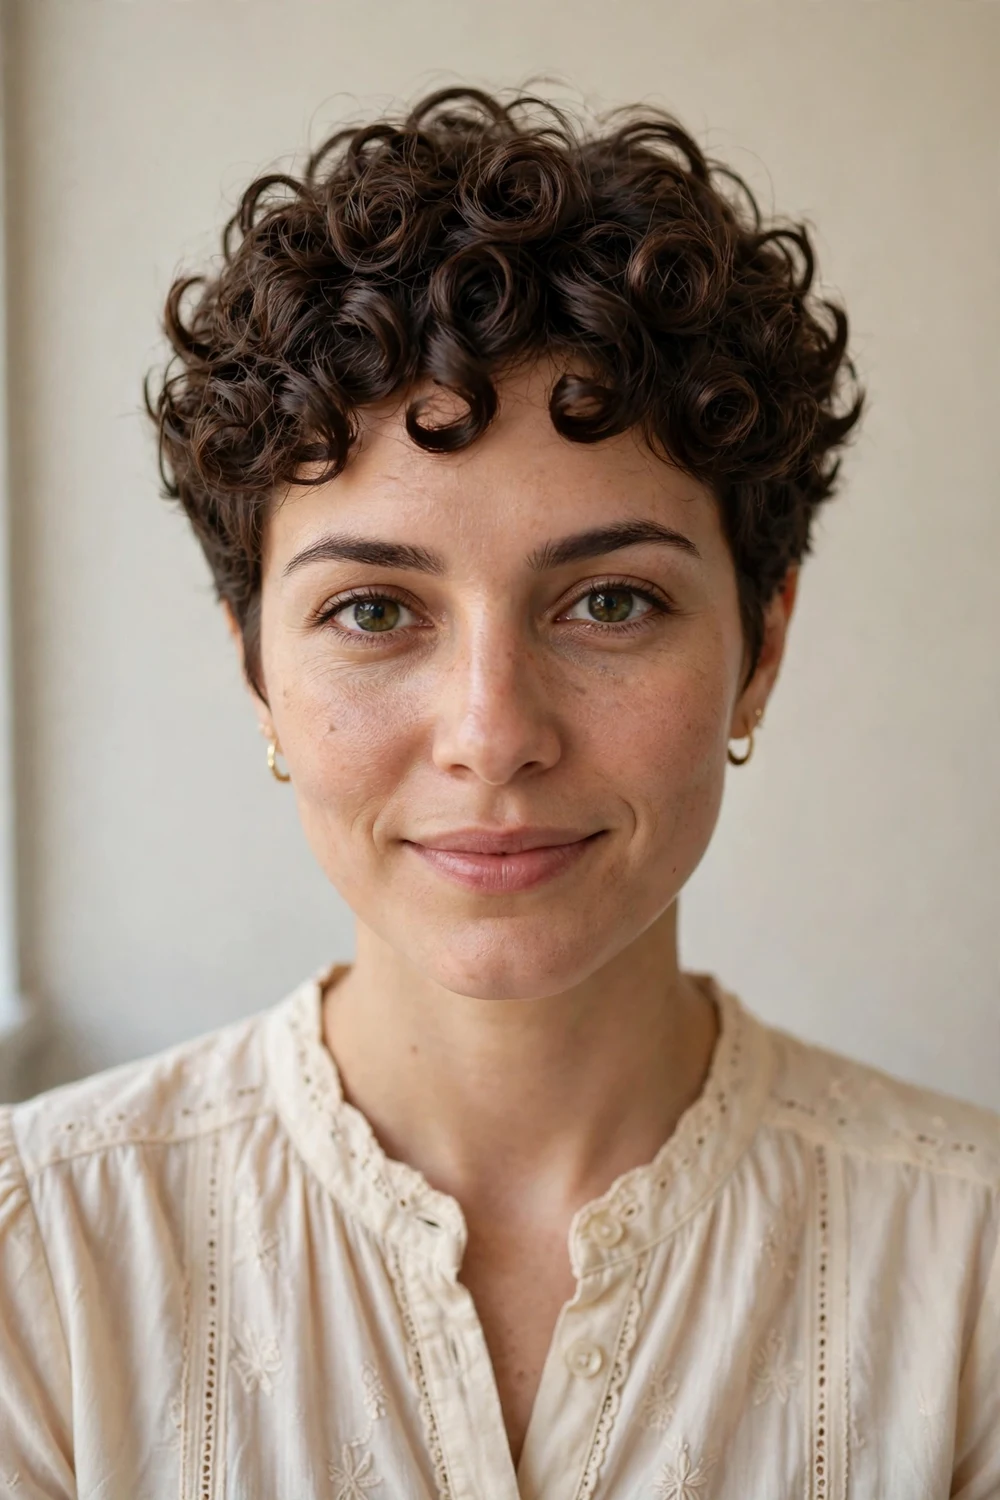
Here the cutting method is the whole idea. The stylist works through dry, defined curls and trims each clump individually, which means every snip accounts for your real shrinkage on the spot. Wet cutting guesses where curls will land; dry curl-by-curl cutting knows. This approach flatters every pattern from 3A to 4C, and it is the safest choice when different sections of your hair shrink at different rates. Book a curl specialist for this, since not every stylist trains in the technique.
Arrive with hair washed, conditioned, and worn in your usual curl pattern, since the cut follows what the stylist sees. Bring photos of your day-three hair too, not just wash day, so the shape works across the week.
Try this: request that no more than a quarter inch comes off any single curl in the first pass, then refine.
Difficulty: Easy · Cost: $60–$110 (curl-specialist cut)
3. Shrinkage-Planned Pixie for Tight Coils
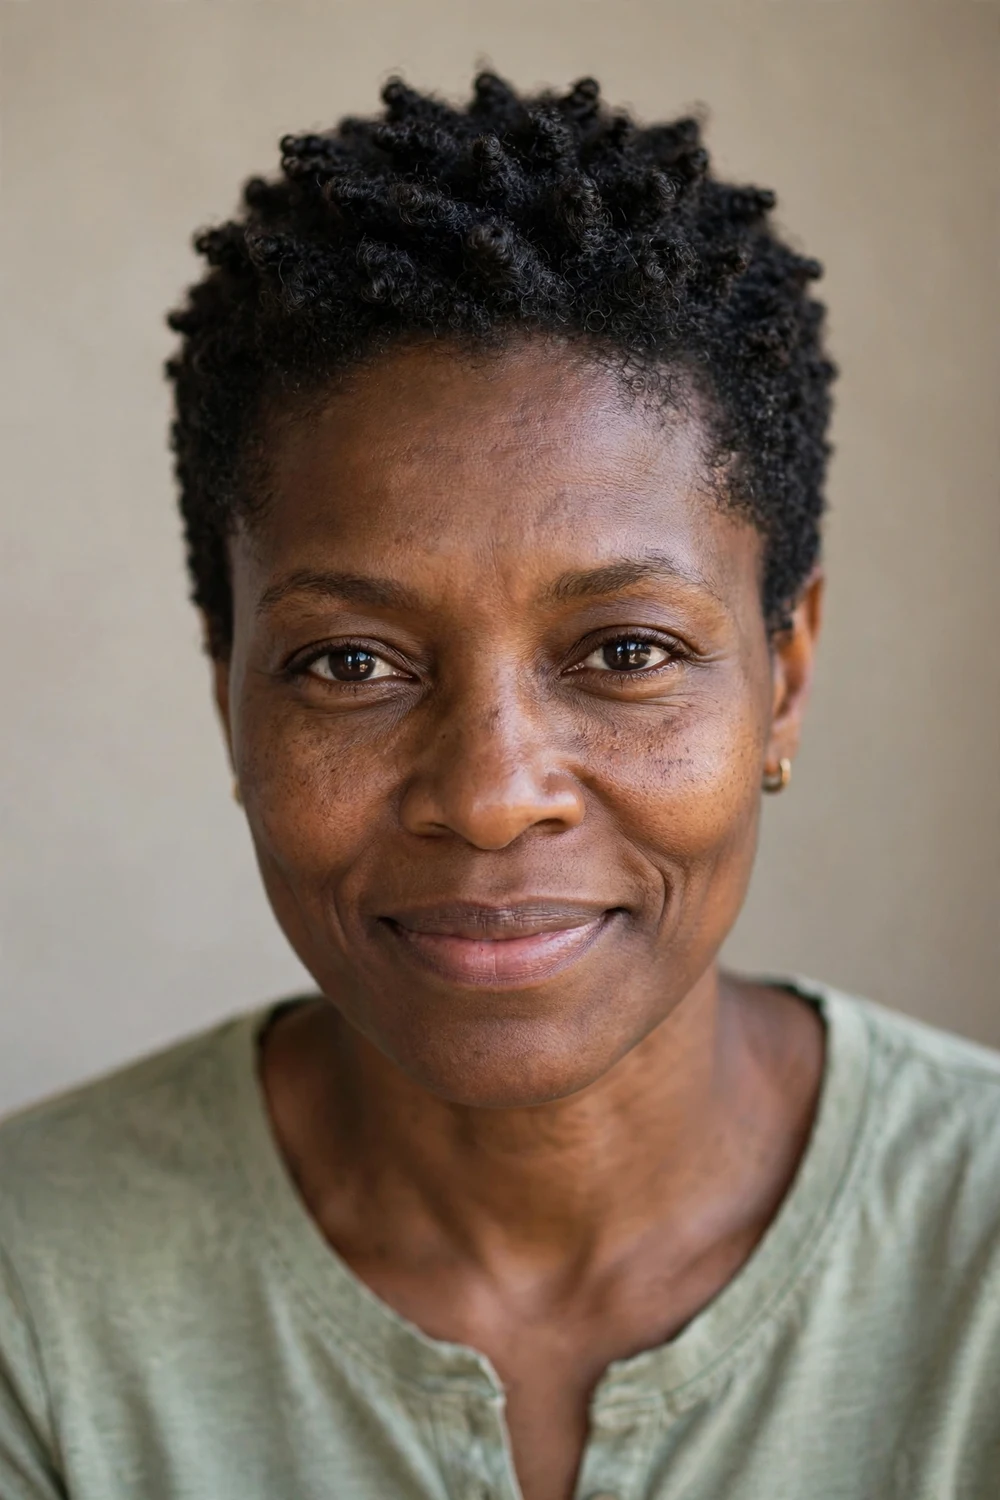
Type 4C coils can shrink to half their stretched length, so this cut is planned backwards from the dry result. The stylist stretches sections to measure, then leaves the top visibly longer than the target while wet, knowing coils will draw up into a rounded cap. Sides stay close and tapered, which keeps the shape from widening into a triangle as it grows. Moisture layering matters here: leave-in under cream under gel, sealed on damp hair.
Pick or finger-fluff the roots once fully dry for height, and sleep in a satin bonnet to keep the coils from matting at this short length. Trim every 4 weeks to hold the rounded outline.
Try this: ask the stylist to show you the stretched-to-dry ratio on one section before cutting the rest.
Difficulty: Moderate · Cost: $55–$100 (cut + products)
4. Long-Top Tapered Pixie
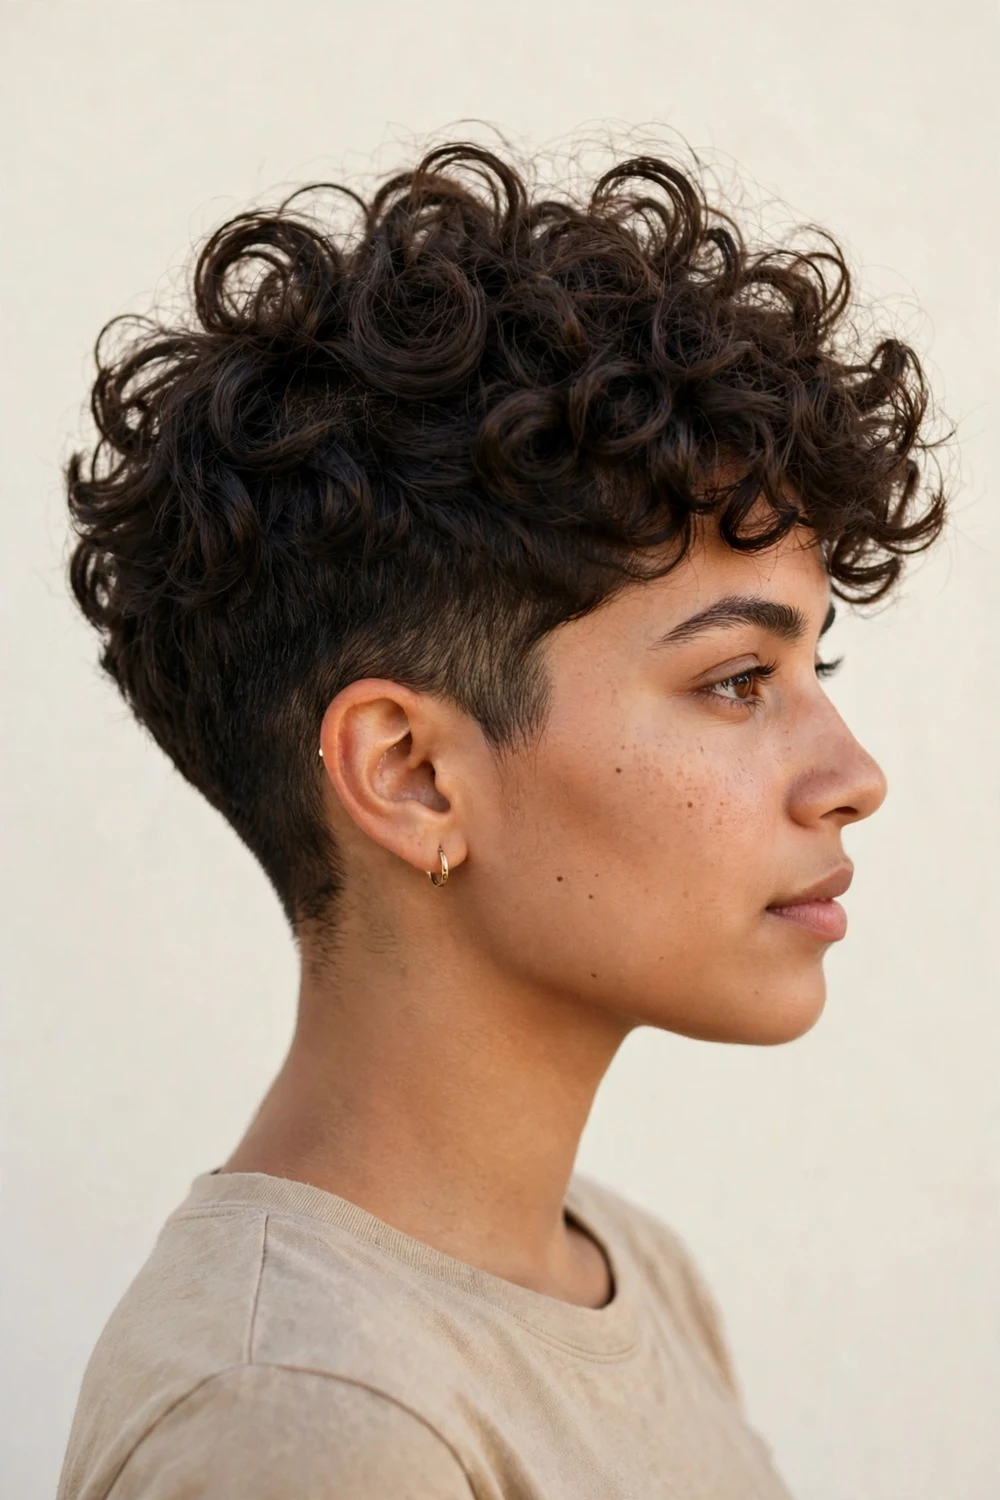
Extra length through the crown (3 inches or more dry) gives curls room to form full spirals while the tapered sides keep the profile slim. The contrast does the styling work for you: volume where curls look best, closeness where bulk causes trouble. This suits 3B through 4A hair and flatters round faces, since the height draws the eye upward. The taper must be cut dry or on stretched hair, or the sides will end up shorter than intended.
Define the crown with gel on damp hair and diffuse with the dryer pointed upward from below. Use heat protectant if you diffuse warm. Clean up the taper every 3 to 4 weeks.
Try this: keep the top long enough to twist two front pieces back for an easy pinned style.
Difficulty: Easy · Cost: $45–$90 (cut only)
5. Undercut and Fade Pixie
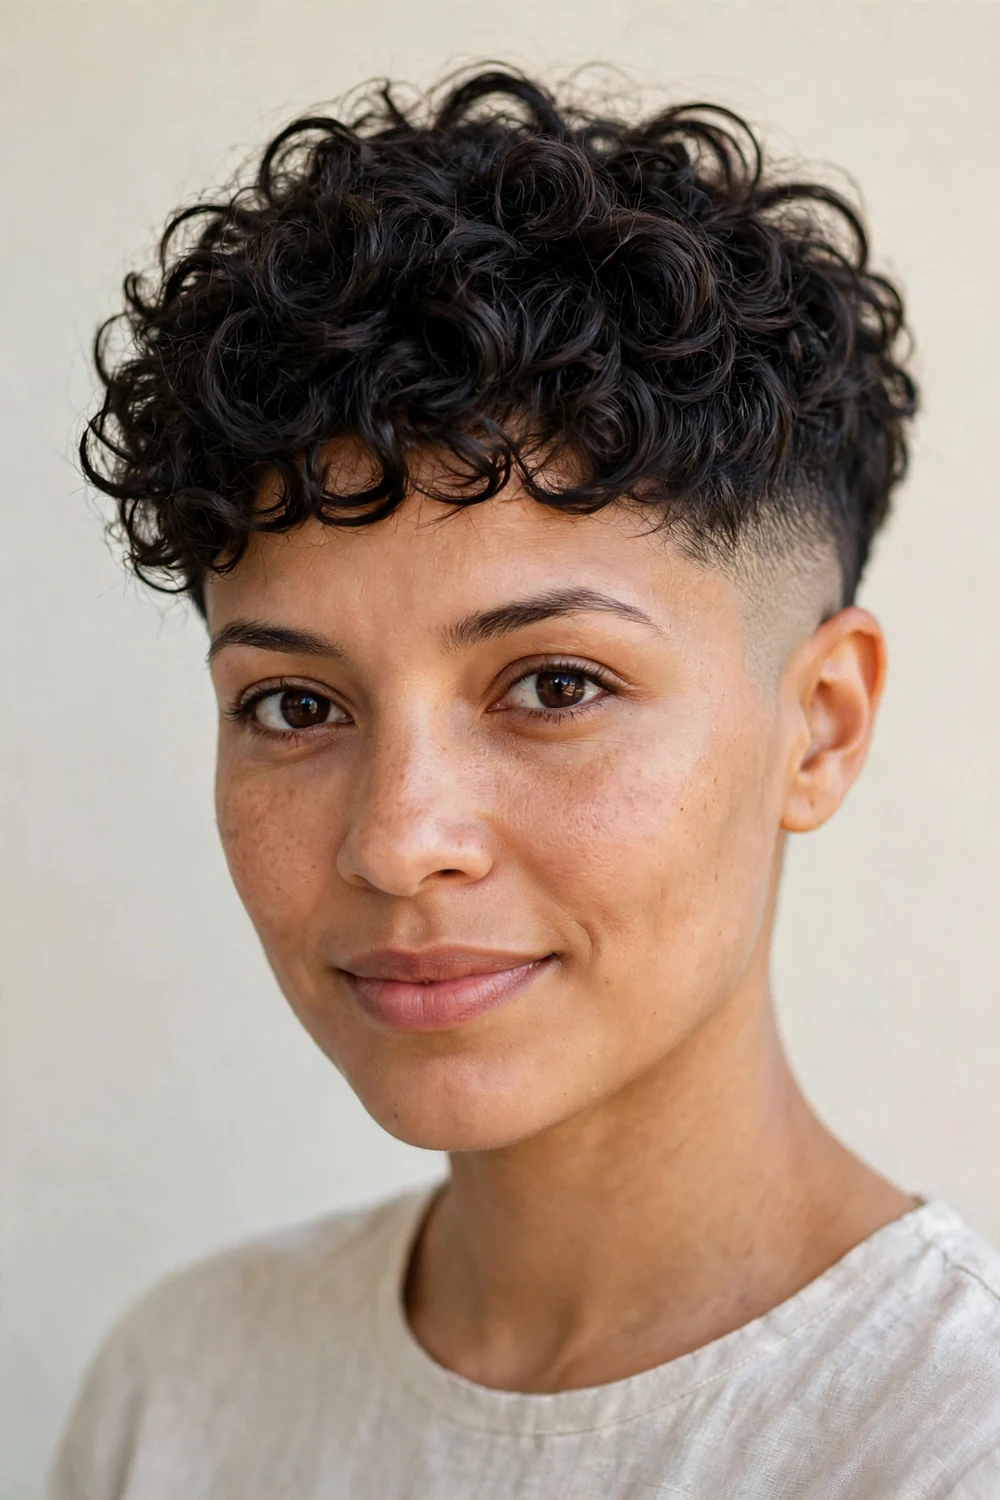
Shearing the sides and nape close while leaving the crown long removes the exact bulk that makes curly pixies puff outward. The fade should graduate softly into the curls rather than stopping at a hard line, which grows out more gracefully and suits curl patterns that expand as they dry. It works across 3A to 4C and cuts drying time noticeably, since there is simply less hair to dry. Fine-haired curls gain the illusion of thickness up top from the contrast.
Moisturize the faded sections lightly to avoid dryness, and define the top with cream or custard. Book a line-up every 3 to 4 weeks to keep the fade crisp.
Try this: ask for a low fade that follows your natural hairline shape instead of a uniform buzz.
Difficulty: Moderate · Cost: $55–$100 (cut + upkeep)
6. Ultra-Short Cropped Pixie
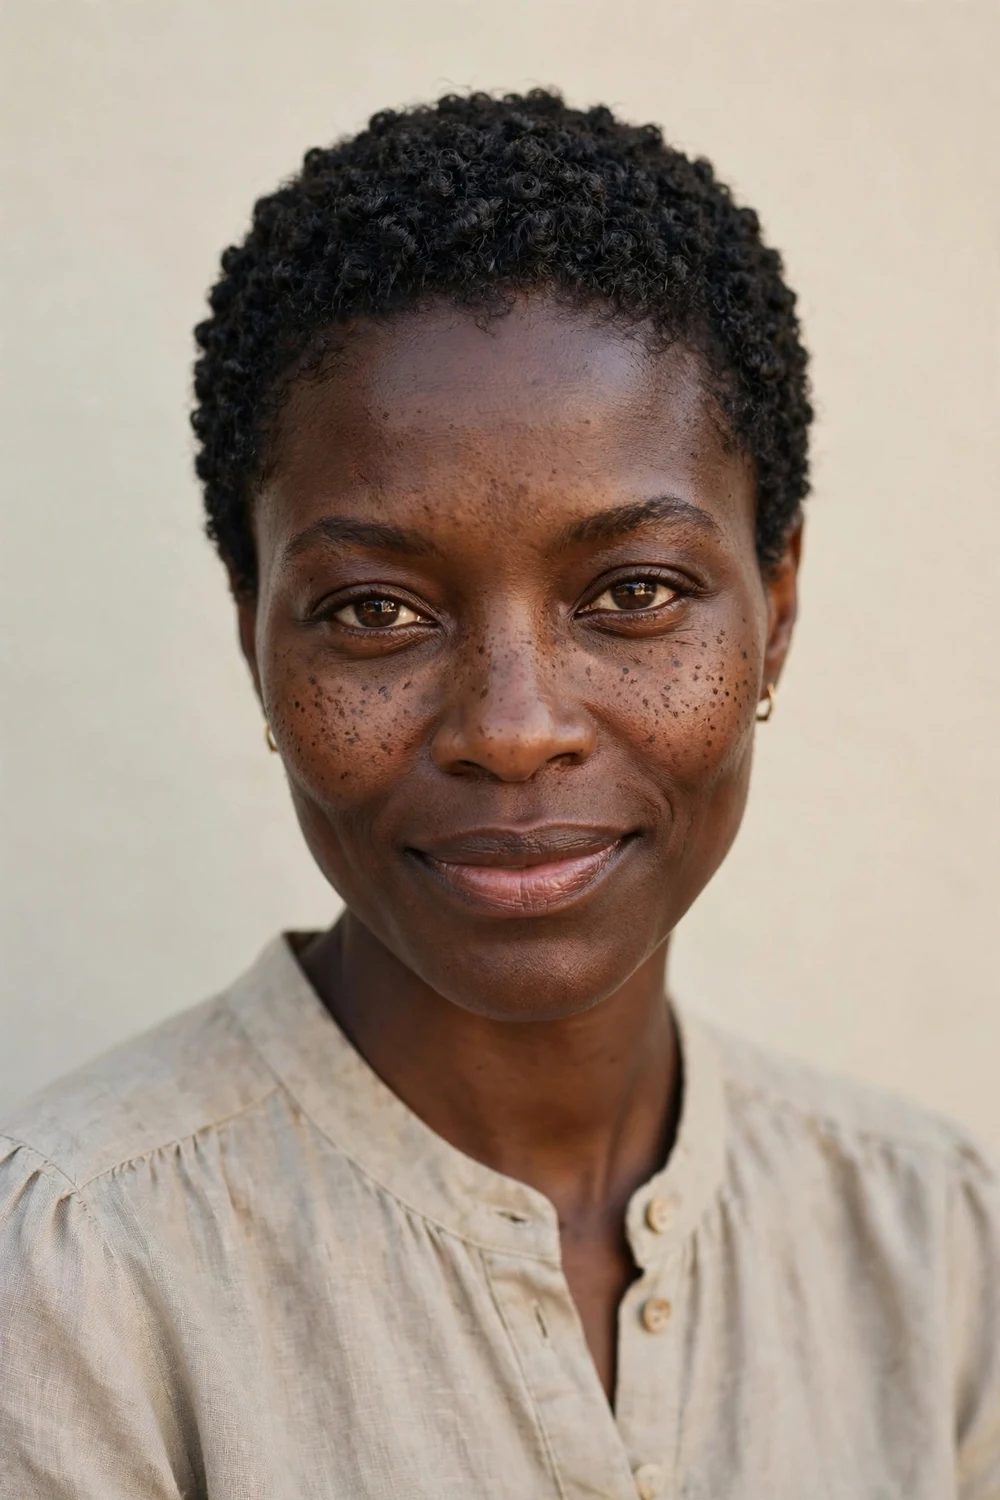
Cropped close all over, this cut lets tight coils and strong 3C curls do all the talking with zero styling required. Because the length is minimal, shrinkage stops being a problem: the curls have nowhere surprising to go. The shape should still be sculpted, not buzzed flat, with slightly more length through the crown so the head keeps a rounded profile. It is the lowest-maintenance option on this list and a strong choice for active routines or humid climates.
Wash, condition, apply a light leave-in, and go. A soft brush or sponge can add coil definition on 4B/4C hair while damp. Trim every 3 to 4 weeks to keep the sculpture intentional.
Try this: have the stylist check the silhouette from the back in a hand mirror before you leave the chair.
Difficulty: Easy · Cost: $40–$75 (cut only)
7. Side-Swept Bang Pixie
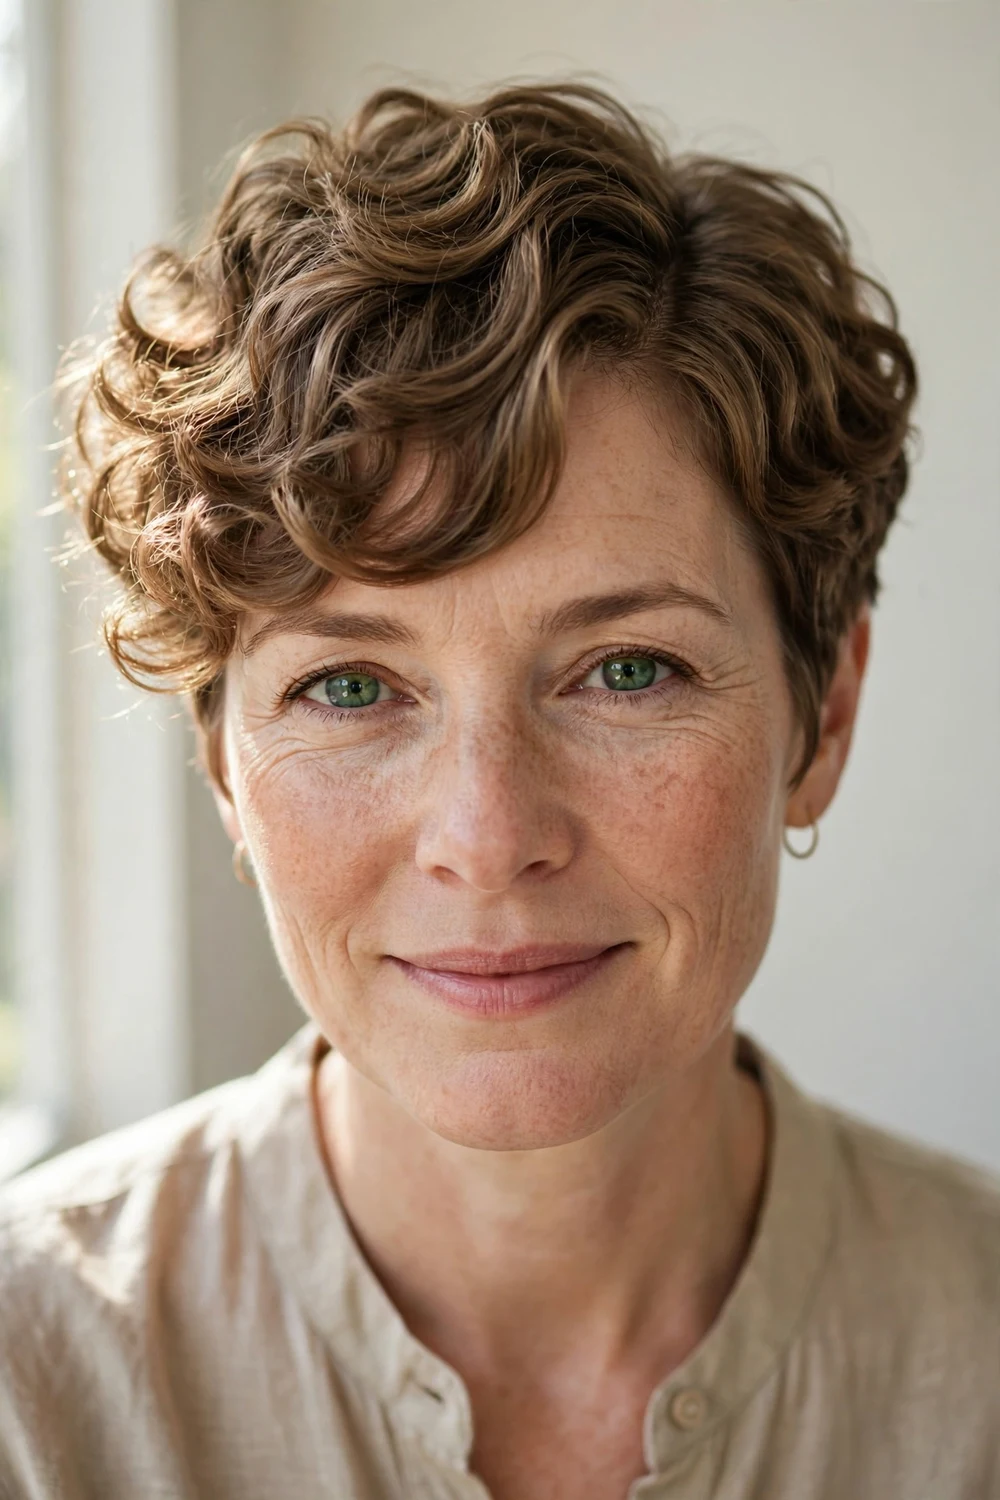
A long, side-swept fringe redirects curl volume diagonally, which slims round faces and softens strong jawlines. The engineering detail: bangs must be cut at least an inch longer than the target while wet, because fringe curls spring up the most dramatically of any section. A deep side part anchors the sweep and gives the cut a built-in styling direction, so mornings take minutes. It suits 2C through 3C patterns best, where the fringe still drapes.
Train the sweep while damp by smoothing the fringe in its direction, then clip it with a duckbill clip until dry. A light cream keeps the bangs defined without stiffness.
Try this: part the hair where it naturally wants to fall instead of forcing a new part line.
Difficulty: Easy · Cost: $45–$85 (cut only)
8. Micro-Bang Sassy Pixie
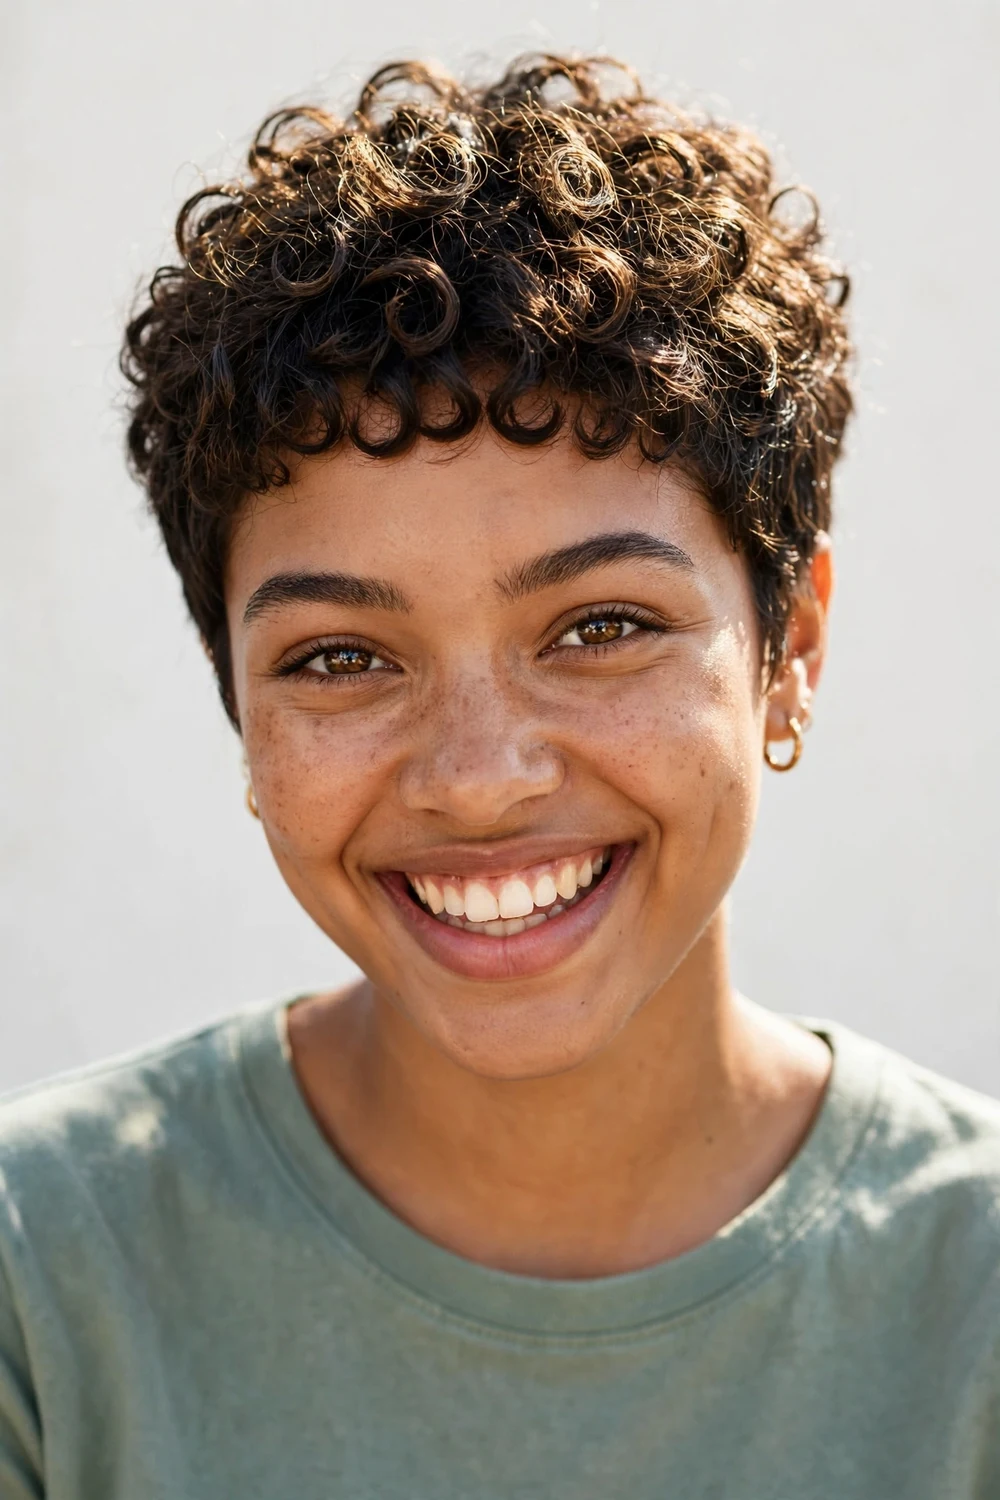
Super-short curly bangs sit above the brow and turn the fringe into the focal point of the whole cut. They work when the curl pattern is consistent across the hairline; mixed textures here will fight the short length. Cut them dry, curl by curl, and leave a margin, since there is no length to hide behind if they spring too high. The payoff is a bold, playful frame that makes eyes and cheekbones stand out. Best for 3A to 3C curls with a uniform pattern.
Define the bangs with a pea-sized amount of gel while damp and let them set untouched. Trim the fringe every 3 weeks, since even a little growth changes the look completely.
Try this: test the idea first by pinning your front curls short for a day before committing.
Difficulty: Moderate · Cost: $45–$85 (cut only)
9. Bold Fringe Pixie

A thick, full fringe gives the pixie a strong horizontal line that balances long faces and adds drama to fine curls. Unlike the side-swept version, this fringe is cut straight across (on dry curls, in sections) so it reads as one deliberate band. Density is the deciding factor: you need enough curls across the forehead to fill the band without gaps. On 3B to 4A hair, finger-coiling the fringe pieces while damp keeps the line tidy.
Keep the fringe off the forehead while it dries to avoid product transfer to skin. A light gel cast, scrunched out once dry, holds the shape through the day.
Try this: trim only the longest fringe curls between appointments to keep the line even.
Difficulty: Moderate · Cost: $45–$90 (cut only)
10. Feathered Tousled Pixie

Feathered ends, created by point-cutting into the curl tips, let each layer separate instead of clumping into a solid mass. The result is an airy, piece-y texture that flatters 2B to 3B patterns and finer densities especially well. Because the ends are thinned rather than blunted, the cut grows out softly without a harsh shelf line. It is one of the more forgiving pixies for second-day hair, since the separation hides uneven curl formation.
Scrunch with a lightweight mousse and let it air-dry for the softest separation. Avoid heavy butters here; they collapse the feathered pieces. Trim every 6 weeks to keep the ends wispy.
Try this: pinch individual dry curls apart with your fingers instead of raking through them.
Difficulty: Easy · Cost: $45–$85 (cut only)
11. Shaggy Textured Pixie
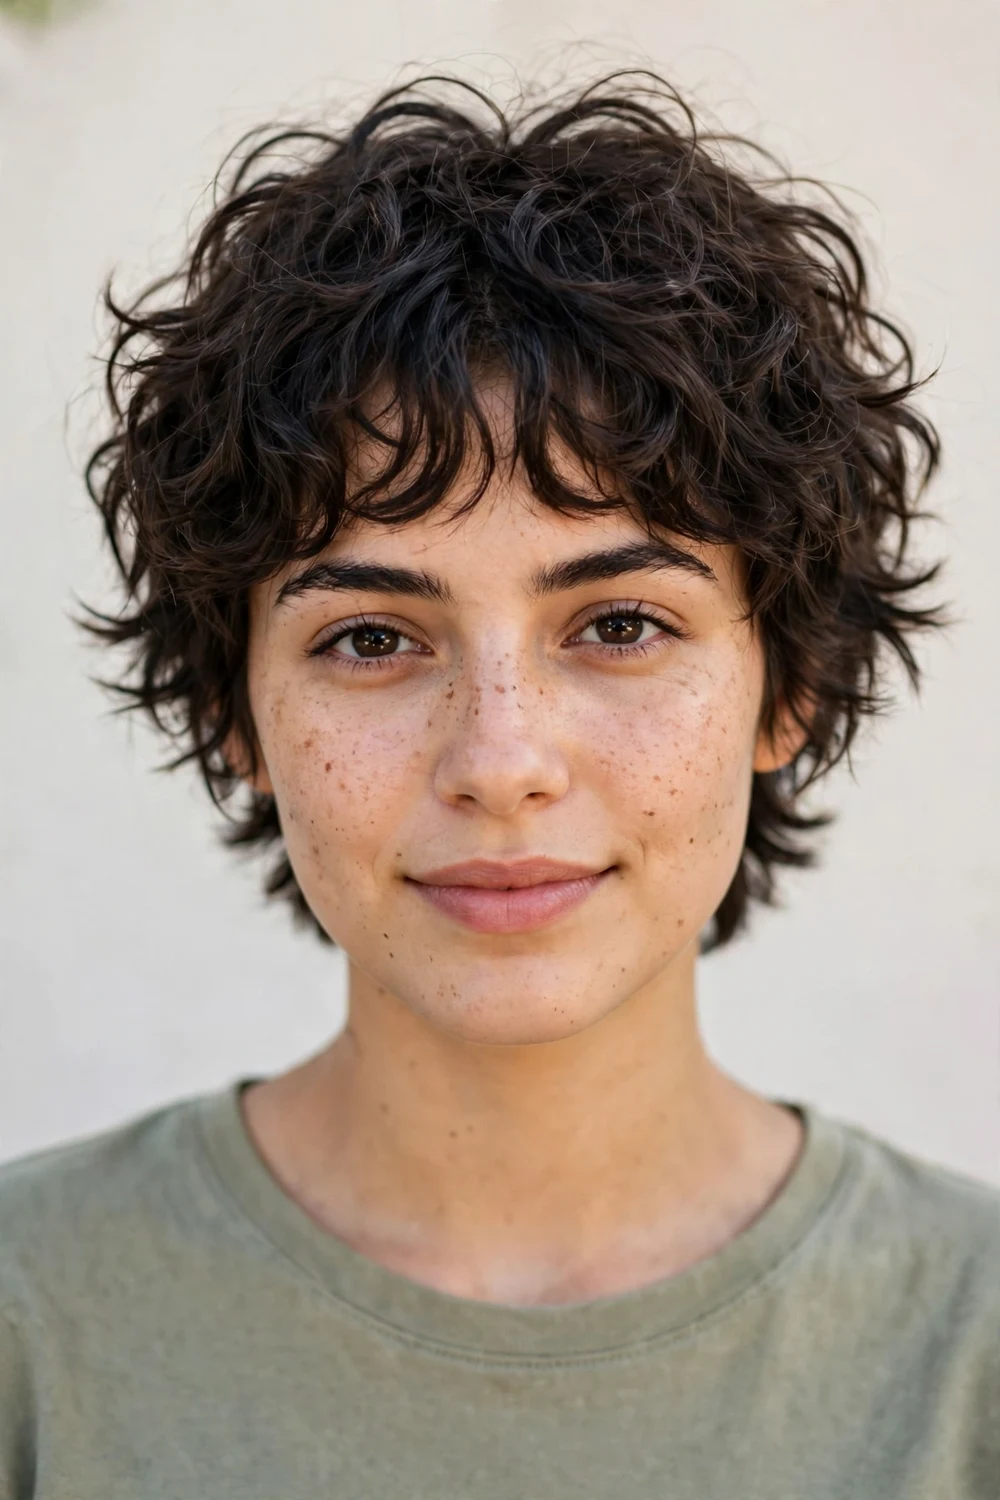
Choppy, uneven layers break the curl pattern into deliberate pieces, which removes weight from thick hair without sacrificing its wild character. The shag cutting move (short crown layers falling into slightly longer nape pieces) works with shrinkage rather than against it, since the unevenness looks intentional at every growth stage. A curtain-style fringe can blend straight into the layers on 3A to 3C hair. Ask for the layers cut dry so the choppiness lands where the curls actually sit.
Use a texturizing cream rather than a heavy gel to keep the pieces separated. Scrunch upside down for extra root lift on flat mornings.
Try this: tell the stylist which sections tend to pouf, so weight comes out exactly there.
Difficulty: Easy · Cost: $45–$90 (cut only)
12. Multidirectional Pixie
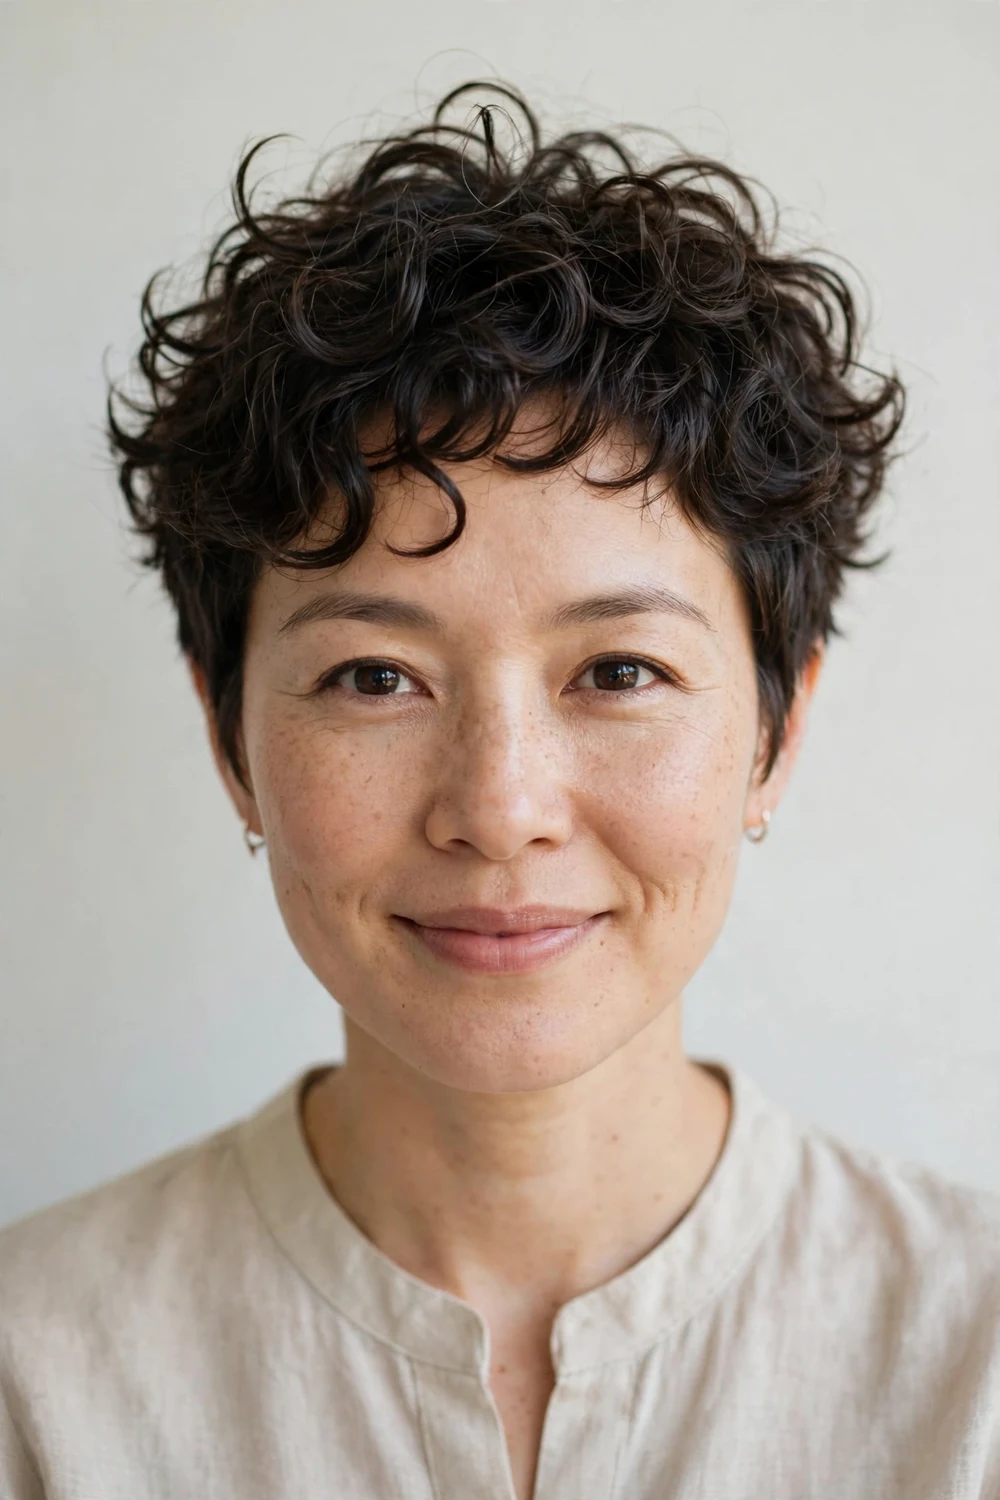
Instead of training curls into one direction, this cut is shaped to look good with pieces falling every which way. It suits 2C to 3B hair with natural cowlicks and growth patterns that refuse to cooperate, because the cut stops fighting them. The stylist maps your growth directions first, then cuts each zone to work with its own flow. The finish reads as creative and lived-in rather than messy, and it hides uneven growth between trims better than any directional cut.
Apply mousse to damp hair and scrunch without directing the pieces. Let it air-dry untouched; over-manipulating ruins the effect.
Try this: point out your stubborn cowlicks at the consultation so they become features, not problems.
Difficulty: Easy · Cost: $45–$85 (cut only)
13. Disconnected Wavy Pixie
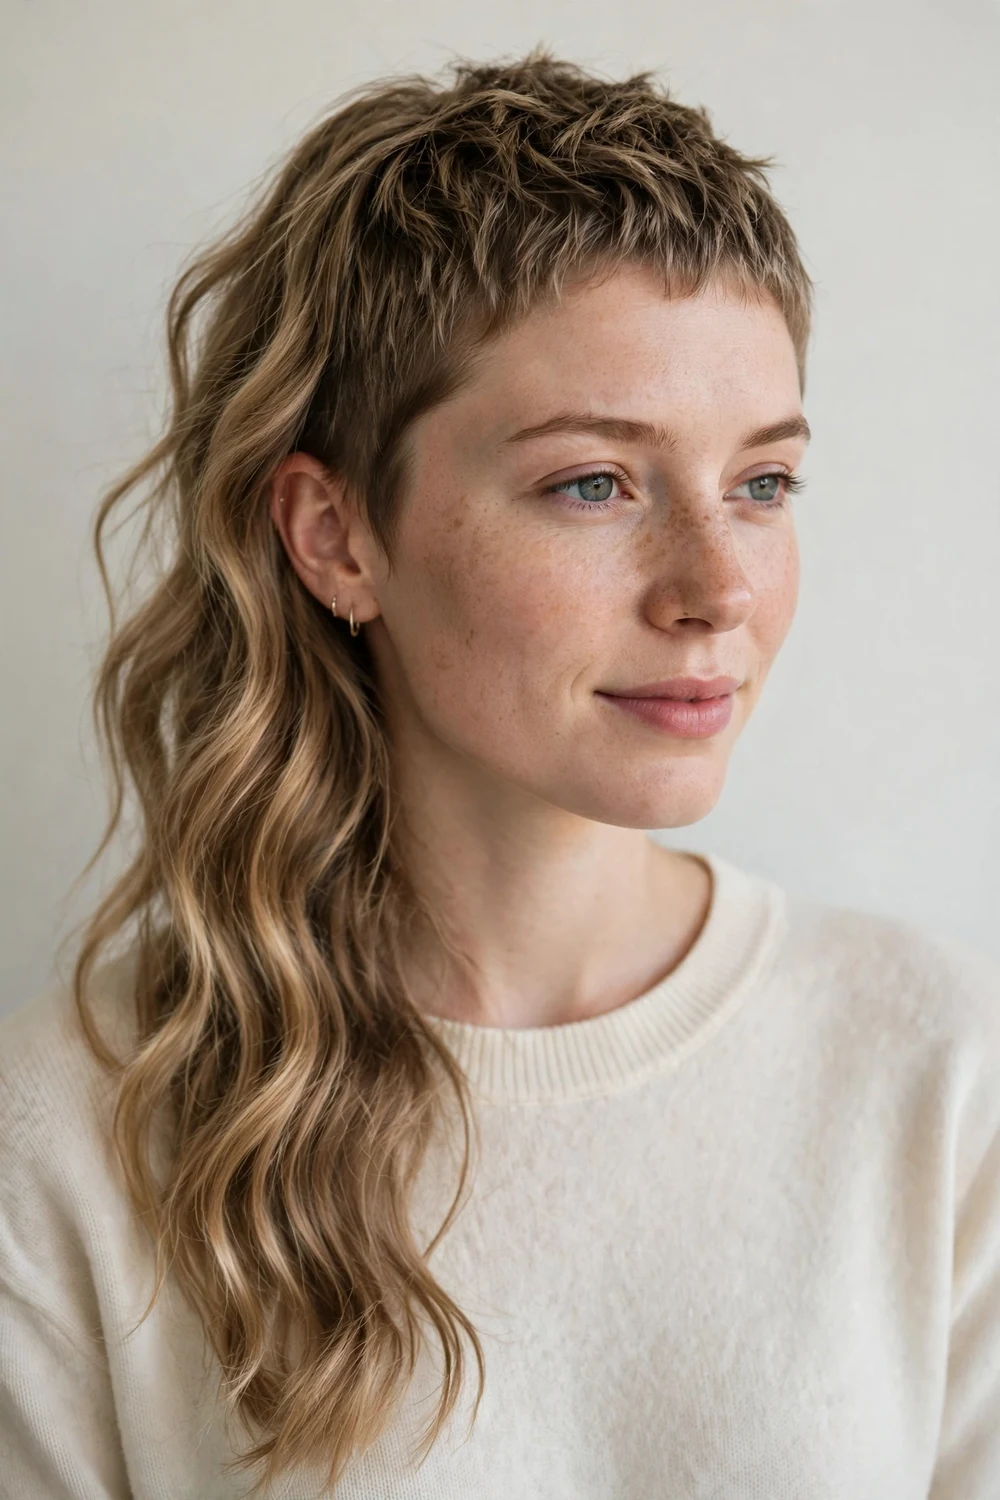
A very short, close-cropped top paired with one long, flowing side section creates deliberate disconnection: two lengths, one haircut. The contrast flatters 2A to 3A waves, where the long piece can drape smoothly while the crop stays textured. The cutting logic matters here: the transition zone is blended with point-cutting so it looks designed, not grown out. It is a confident choice that also functions as a grow-out strategy, since the long section can become the whole cut later.
Smooth the long section with a little cream and let it fall naturally. Keep the cropped top textured with a dab of paste for separation.
Try this: decide which side the long piece lives on based on your natural part, not the photo.
Difficulty: Moderate · Cost: $50–$95 (cut only)
14. Soft Wavy Pixie
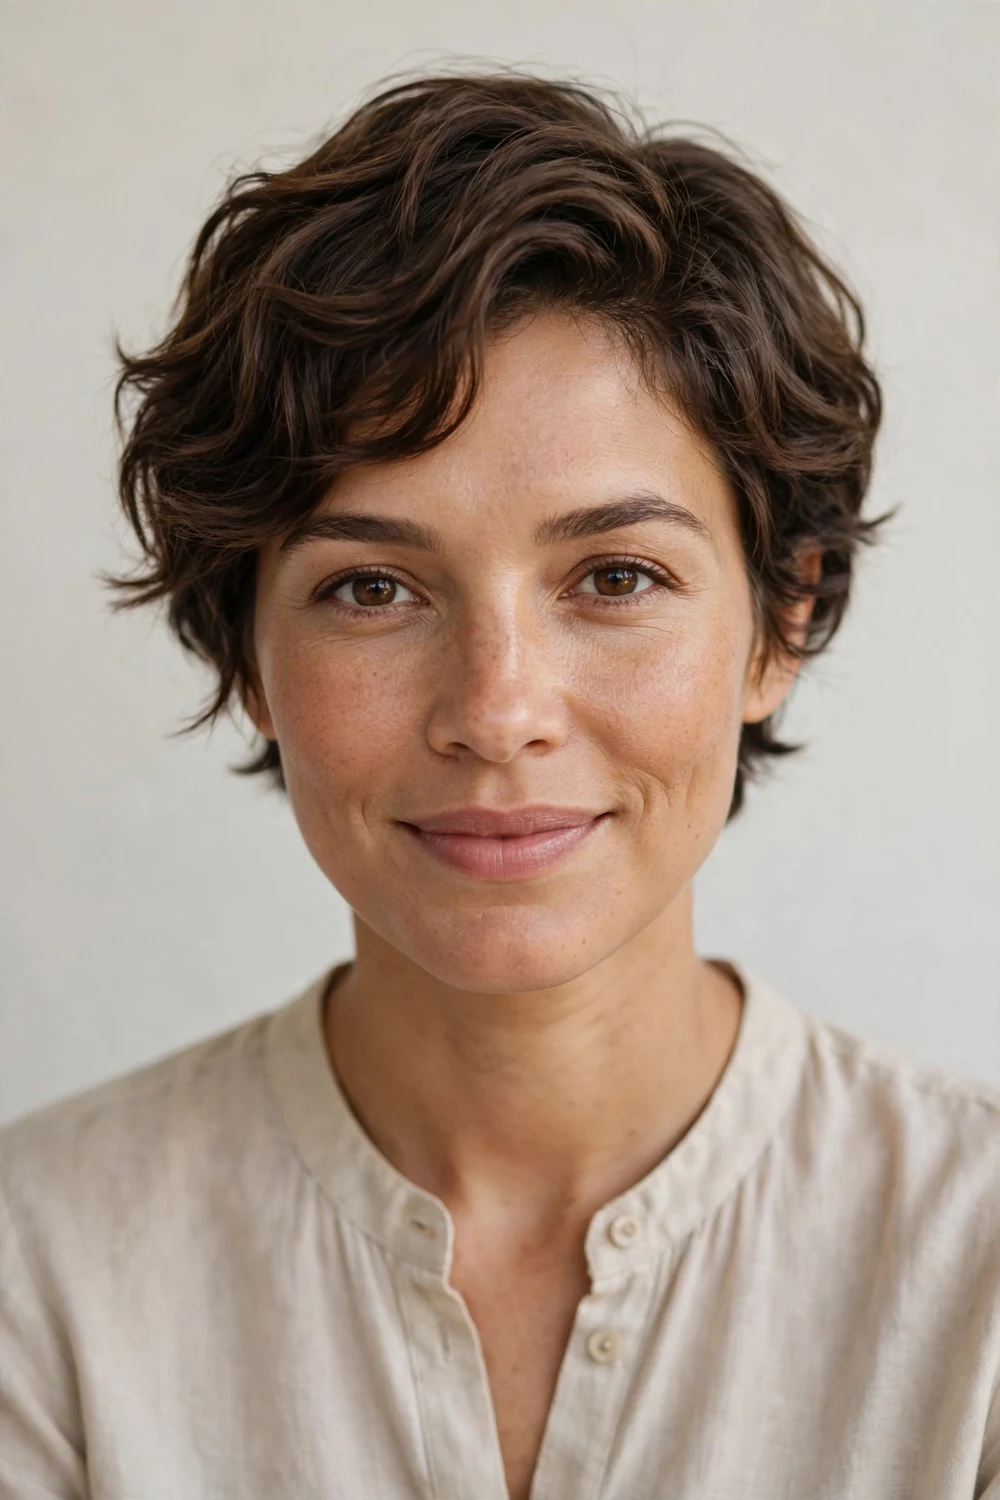
Loose 2A to 2C waves need a different pixie than true curls: less layering, more weight, so the wave pattern stays visible instead of poufing into frizz. This cut keeps the perimeter slightly heavier and the layers long, which lets waves drape rather than spring. It is often the first short cut for women who thought their hair was too straight for texture. Shrinkage is minimal here, so the dry length stays close to the wet length.
Style with a wave-enhancing mousse, scrunch gently, and air-dry or diffuse on low. Use heat protectant before any warm diffusing. Avoid heavy oils that drag waves flat.
Try this: sleep with the waves loosely pinned on top of your head to protect the pattern overnight.
Difficulty: Easy · Cost: $45–$85 (cut only)
Short lengths need their own styling playbook, and this how to style short hair guide walks through wash-day routines that work at pixie length.
15. Finger-Coiled Definition Pixie
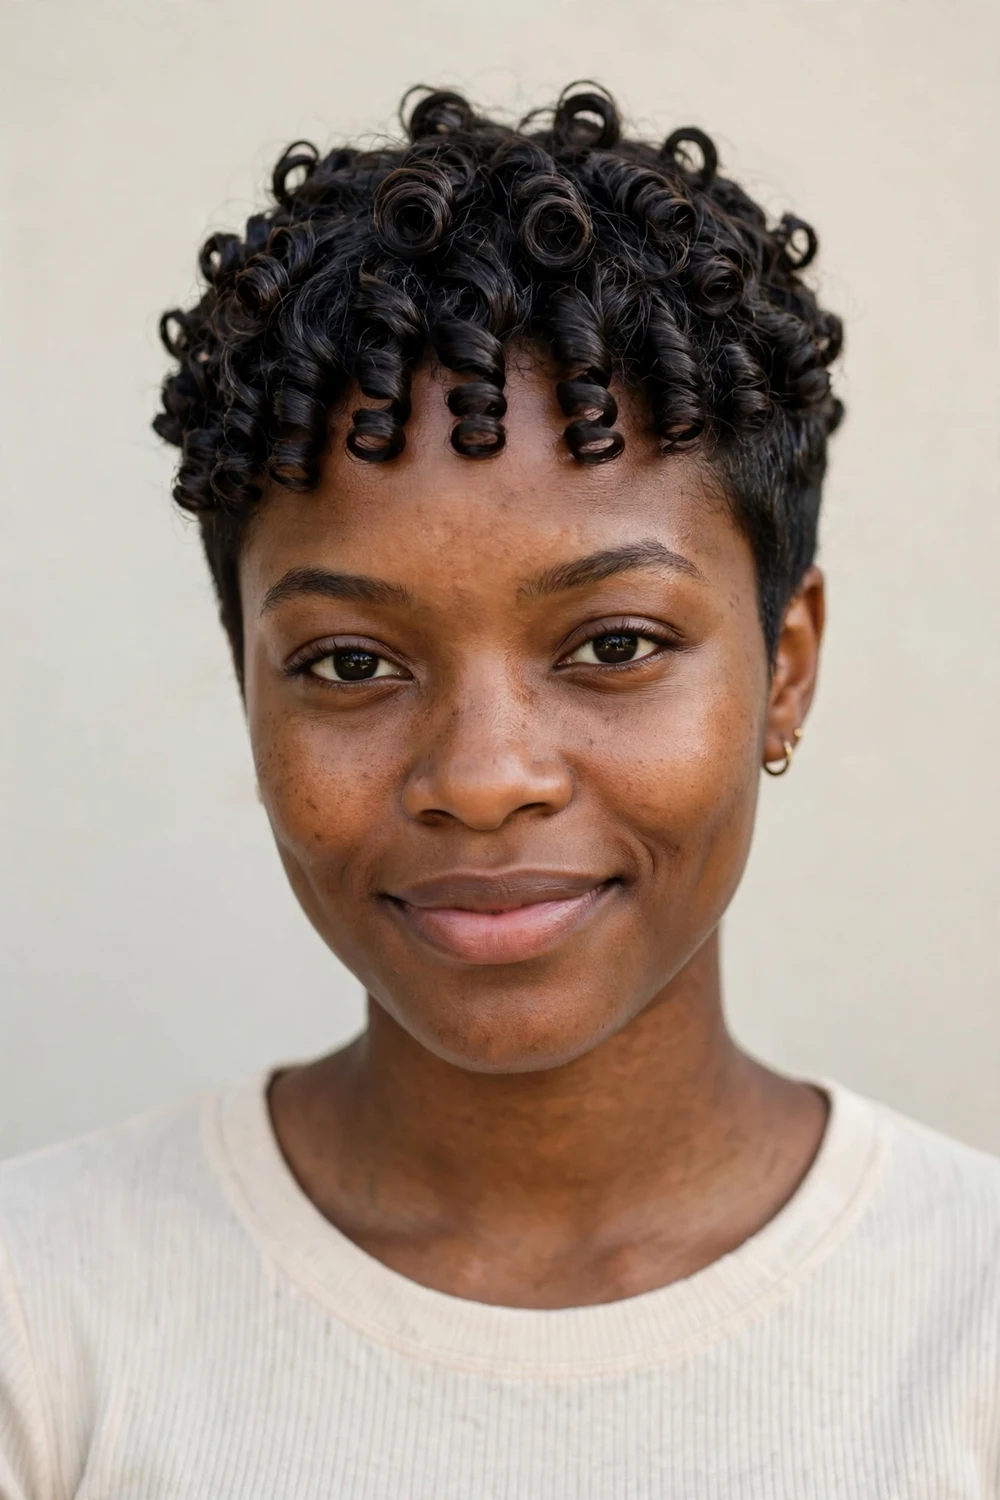
This idea treats definition as the style: after the cut, individual curls are twirled around a finger while damp to form uniform ringlets. It works best on 3B to 4A hair at pixie length, where the short strands coil quickly and the definition lasts for days. The cut itself should leave the crown slightly longer than a standard pixie, because finger-coiling eats a little length as it tightens each curl. Sections that refuse to coil get left alone; forcing them creates frizz.
Work in small sections with gel on soaking-wet hair, coil, and do not touch until fully dry. Pineapple the crown loosely at night to protect the coils.
Try this: coil only the top and front sections and let the sides stay natural for contrast.
Difficulty: Moderate · Cost: $45–$85 (cut only)
16. Spiked Pixie
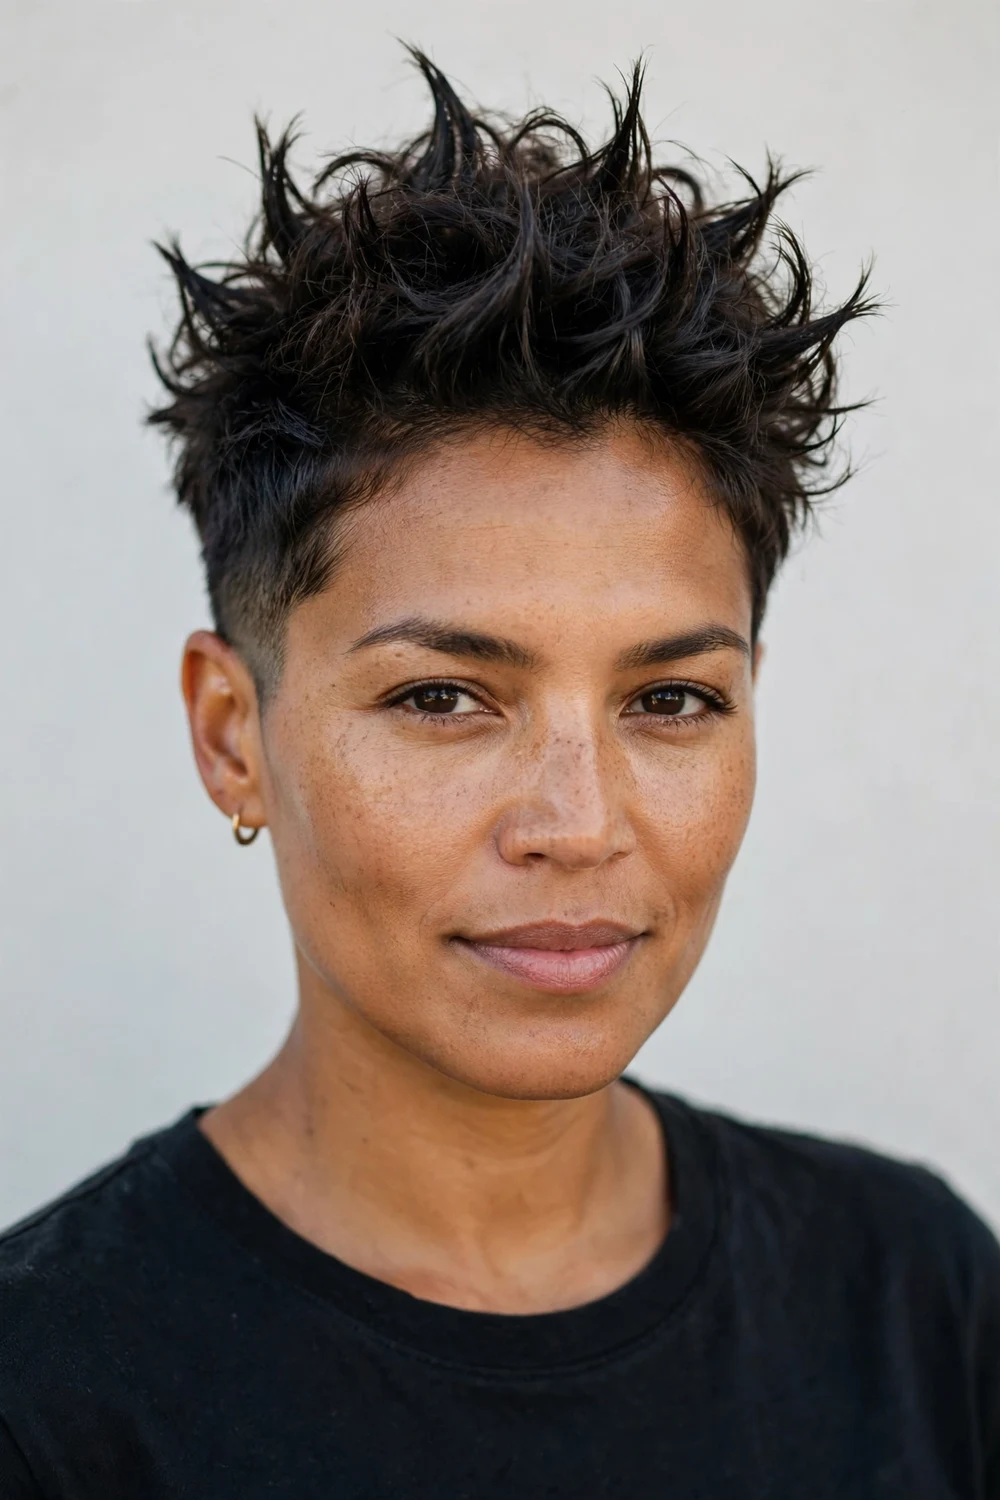
Short, piece-y spikes turn curl texture into architecture. The cut keeps the top just long enough to piece out (about 2 inches dry) while the sides stay tight, so the spikes have a clean base to stand on. It suits 3A to 3C curls best, since the natural bend helps each spike hold its shape. On tighter coils, a strong-hold gel twisted through small sections builds the spikes instead. This is a high-impact, low-time style once the cut is right.
Work a strong-hold gel or wax through damp sections, twist upward, and let set. A light texturizing spray adds grit that helps spikes last all day.
Try this: spike the crown forward and the front upward for a shape that flatters most face shapes.
Difficulty: Moderate · Cost: $45–$85 (cut + products)
17. Edgy Tousled Pixie
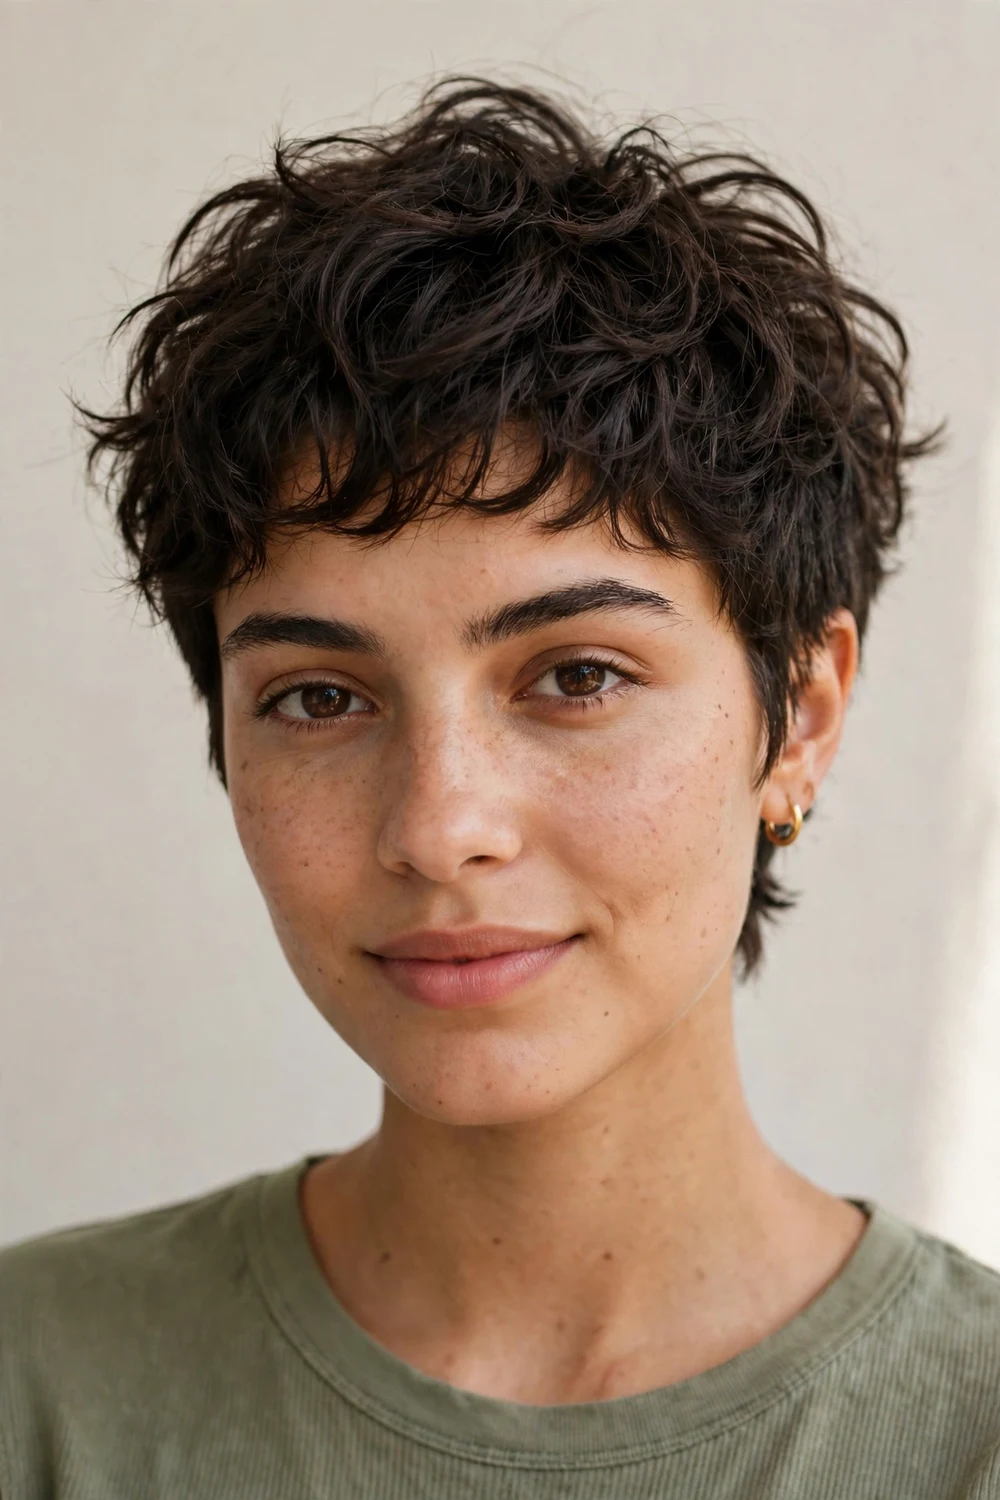
Deliberate messiness is the point here: uneven, piece-y layers are cut to fall where they want, which means less morning wrestling with your texture. The edgy version sharpens the outline with a closer nape and tighter sides, so the tousled top reads as intentional rather than overgrown. It suits 2C to 3C curls and thick densities that need the weight broken up. Because the finish is unstructured, this cut disguises uneven growth better than polished shapes.
Scrunch with texturizing spray on damp hair and let it air-dry. Flip your head upside down and shake the roots once dry for instant volume.
Try this: ask for the nape to be squared slightly; it keeps the messy top looking sharp.
Difficulty: Easy · Cost: $45–$85 (cut only)
18. Asymmetrical Pixie

One side stays noticeably longer than the other, which gives curls two different jobs in a single haircut: texture on the short side, drape on the long side. The asymmetry slims round faces and adds instant drama to 3A to 3C patterns. The cutting challenge is balance: the long side needs internal layering so it does not drag the whole shape sideways as it grows. On tighter coils, keep the length difference moderate, since shrinkage exaggerates asymmetry.
Define the long side with cream and let it fall naturally; keep the short side piece-y with a dab of paste. Trim every 5 weeks to maintain the contrast.
Try this: tuck the short side behind your ear to emphasize the length difference.
Difficulty: Moderate · Cost: $50–$95 (cut only)
19. Forward-Styled Tapered Pixie
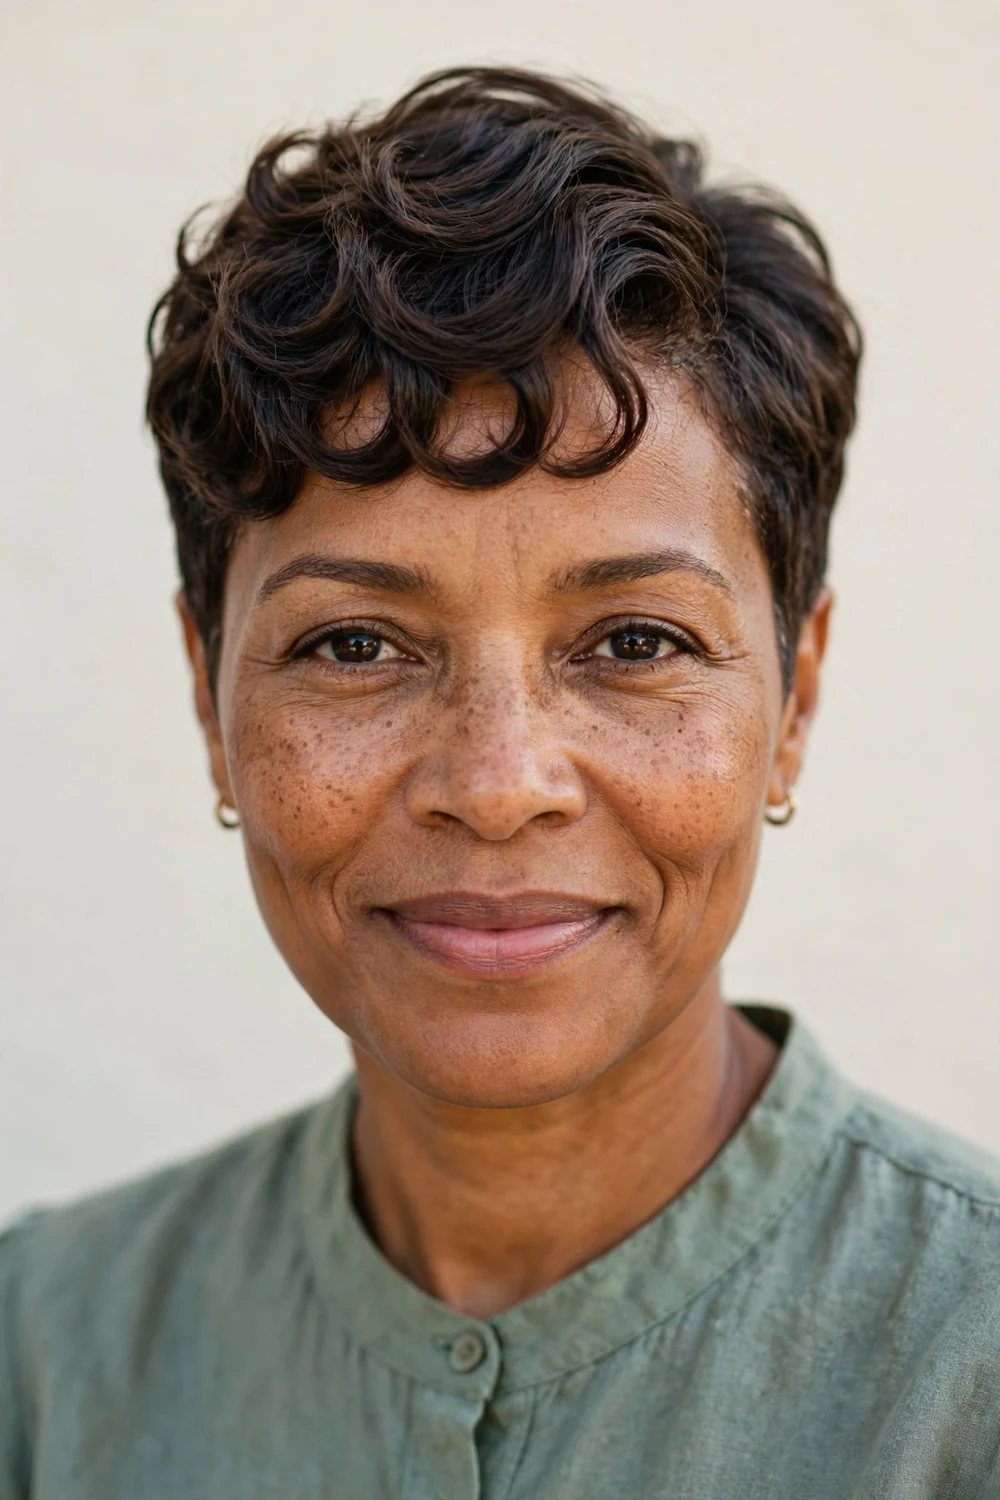
All the length points forward: tapered sides and back with longer curls directed toward the forehead. The forward styling compresses volume at the crown, which suits women who want curls without height on top. It works on 3A to 4A hair and gives a neat, compact outline that reads polished for work settings. Cut the front sections dry and slightly longer than the target, since forward-styled curls spring upward off the forehead.
Smooth curls forward with cream while damp and let them set in that direction. A light gel keeps the forward pieces in place through the day.
Try this: dry the front with the diffuser nozzle pointing down the hair shaft to lock the forward direction.
Difficulty: Easy · Cost: $45–$85 (cut only)
20. Pixie-Bob Hybrid
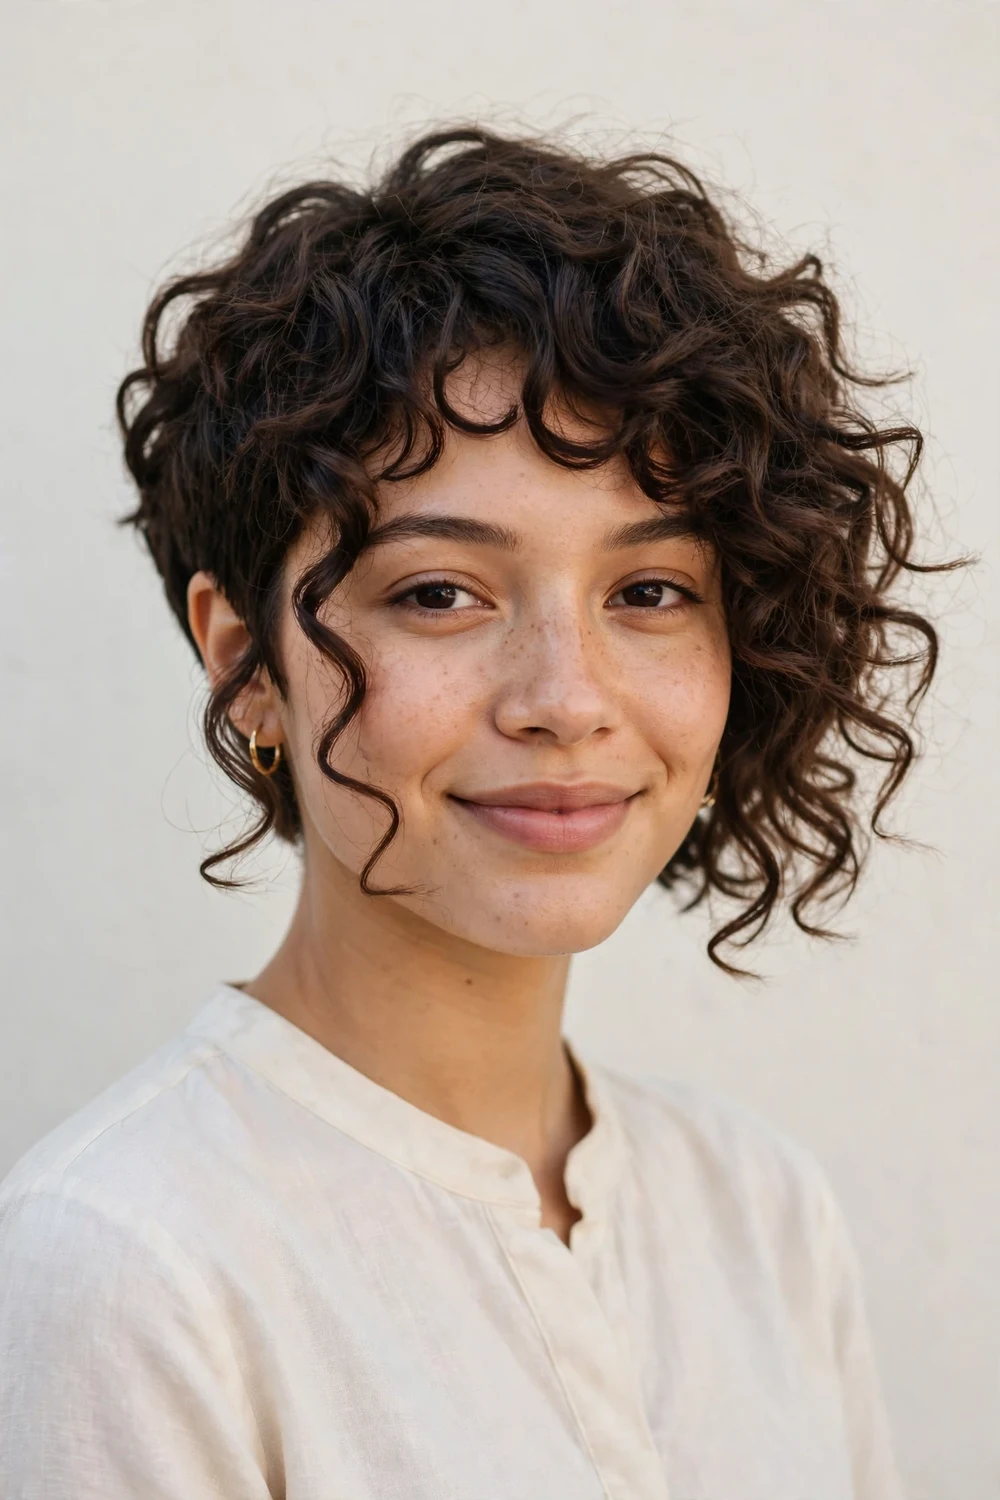
Longer around the face and cropped at the back, the hybrid gives pixie ease with bob softness. The extra length at the front (grazing the cheek or jaw) frames the face and offers styling options the true pixie cannot, like tucking or pinning. It suits 2C to 3C curls best and works as a transition cut for anyone nervous about going fully short. The back must be tapered enough to keep the silhouette from widening into a wedge as curls grow.
Scrunch with curl cream and diffuse for bounce, or air-dry for a softer finish. Apply heat protectant before diffusing warm. Trim the back every 5 weeks to hold the tapered shape.
Try this: wear the front pieces tucked behind one ear to show off the curved outline.
Difficulty: Easy · Cost: $50–$90 (cut only)
If the hybrid length appeals to you but you want to stay firmly in pixie territory, these short pixie cuts show how short the silhouette can go.
21. Sleek Polished Pixie
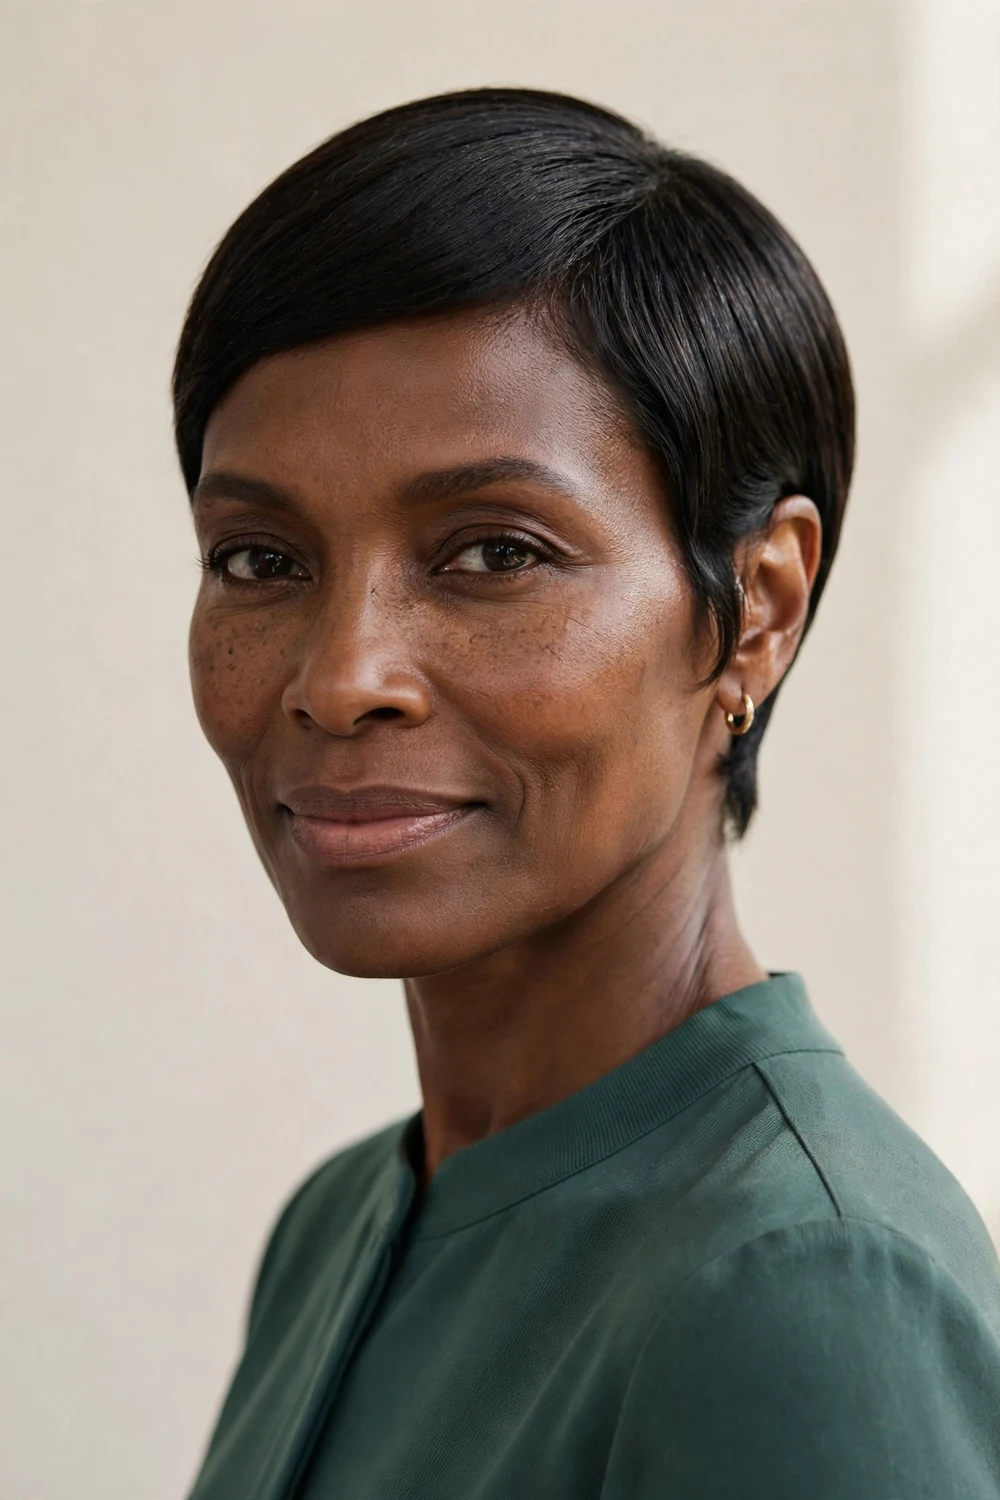
For occasions that call for smoothness, curls can be stretched into a sleek pixie with tension and heat. The cut underneath should be even and precise, since stretching reveals every uneven line that texture normally hides. This works as a temporary style on 3A to 4C hair: blow-dry with a paddle brush using tension, then smooth. Always apply heat protectant before any hot tool touches the hair, and keep the temperature moderate to protect the curl pattern for your next wash day.
Wrap the hair at night or pin it flat to preserve the sleek finish for a few days. Expect the curls to bounce back fully after the next wash.
Try this: tuck one side neatly behind the ear for an elegant, asymmetric finish.
Difficulty: Hard · Cost: $45–$85 (cut only)
22. Classic Retro Pixie
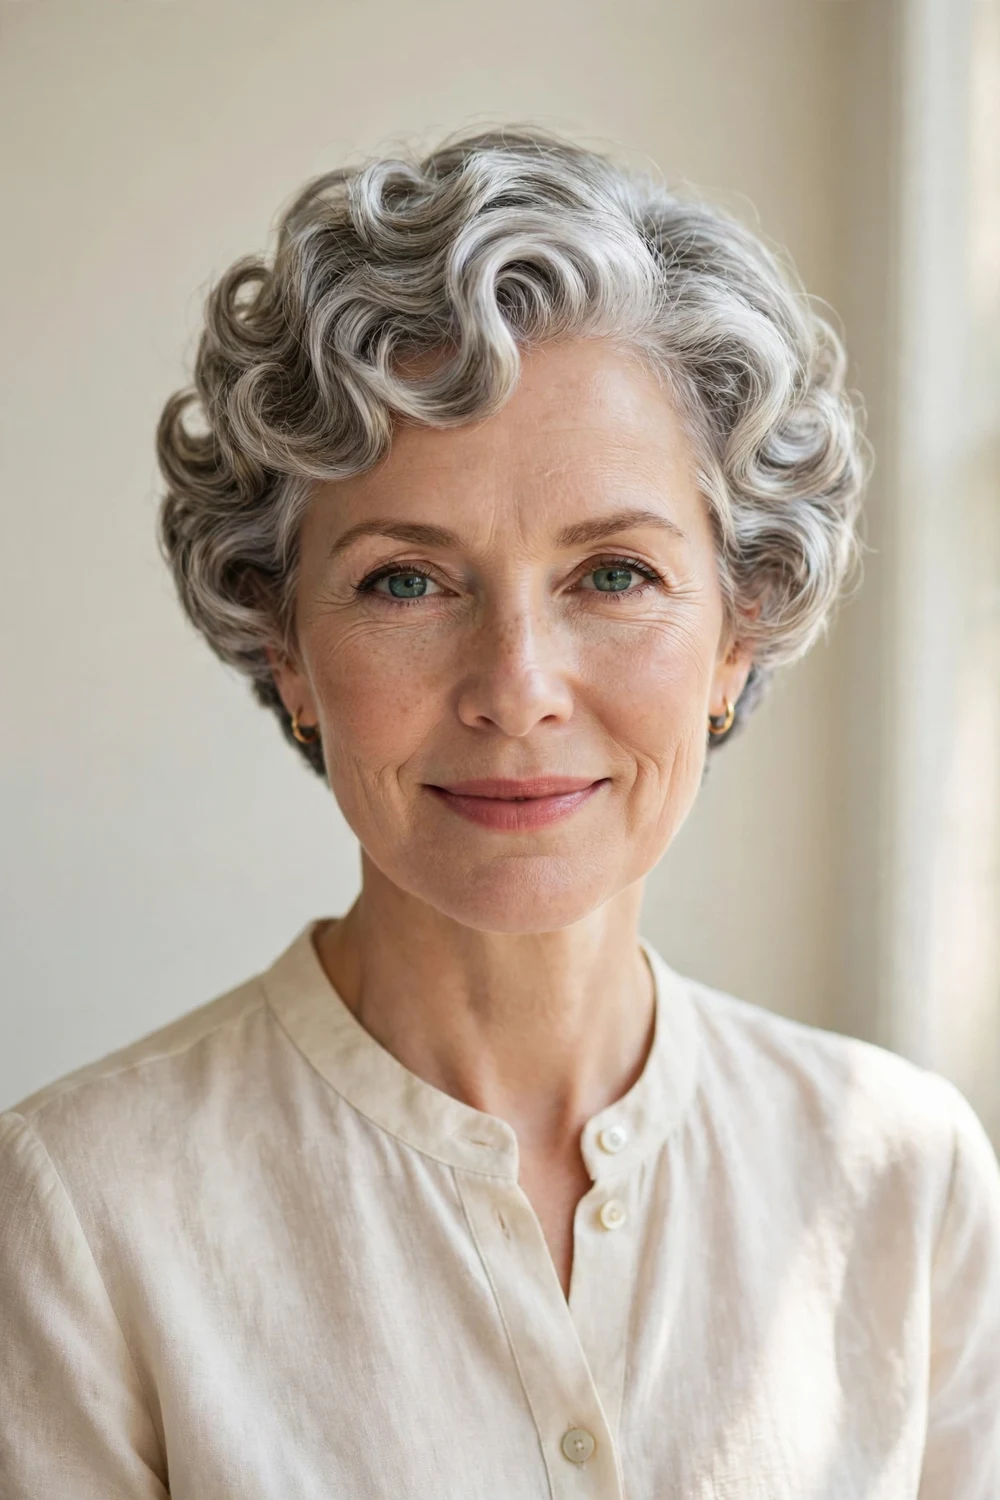
A nod to mid-century crops, this pixie keeps a neat, rounded shape with softly sculpted curls and a tidy hairline. The retro version is cut with the curls in mind rather than against them: light layering through the crown, a clean tapered nape, and enough length up top for the curls to form their natural pattern. It suits 3A to 3C hair and anyone who wants a timeless shape that never looks dated. Silver and gray curls look especially refined in this silhouette.
Set the shape with a light-hold mousse and let it air-dry for a soft finish. A satin pillowcase keeps the sculpted shape intact overnight.
Try this: ask for a softly rounded hairline at the nape rather than a squared one for the vintage feel.
Difficulty: Easy · Cost: $45–$85 (cut only)
23. Braided-Effect Crown Pixie
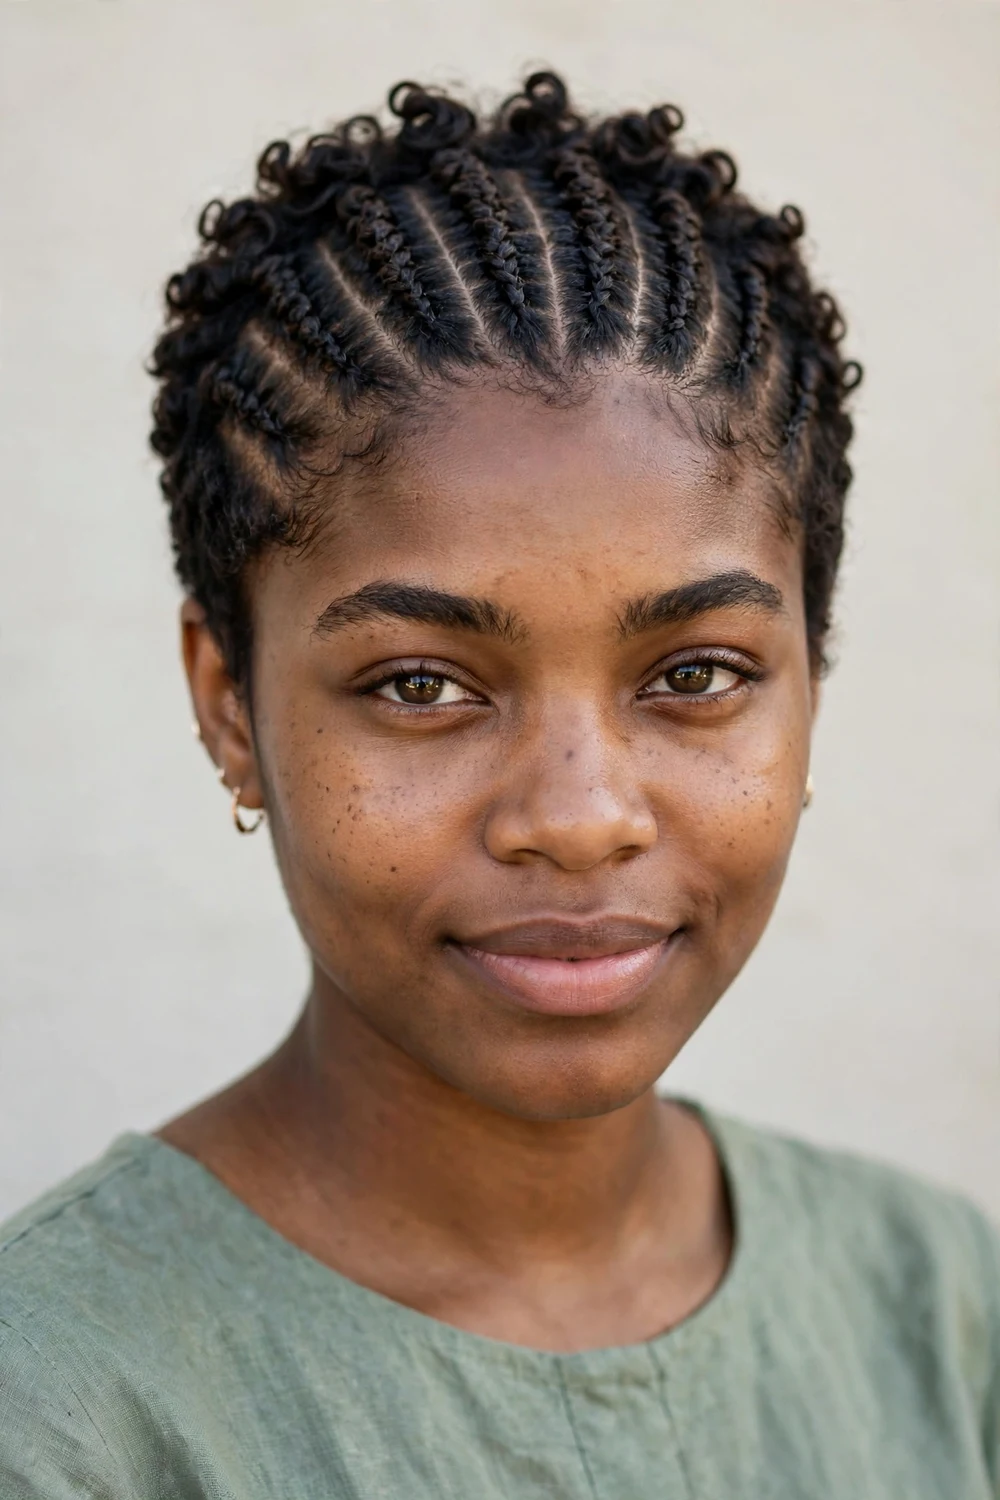
Tightly spaced braids laid in rows across the crown bring a braided pattern to pixie length. The cut needs enough length on top (2 to 3 inches dry) for the rows to read clearly, with shorter sides that keep the focus upward. It works on 3C to 4B hair where the texture holds the rows neatly through the day. This is a special-occasion style for most people, since laying the rows takes patience, but the effect is unforgettable.
Braid small sections with gel into parallel rows while damp. Let the rows dry completely before touching them to keep the pattern crisp.
Try this: use the side of a rattail comb to guide each row straight while the gel is wet.
Difficulty: Hard · Cost: $45–$85 (cut only)
24. Androgynous Close Crop
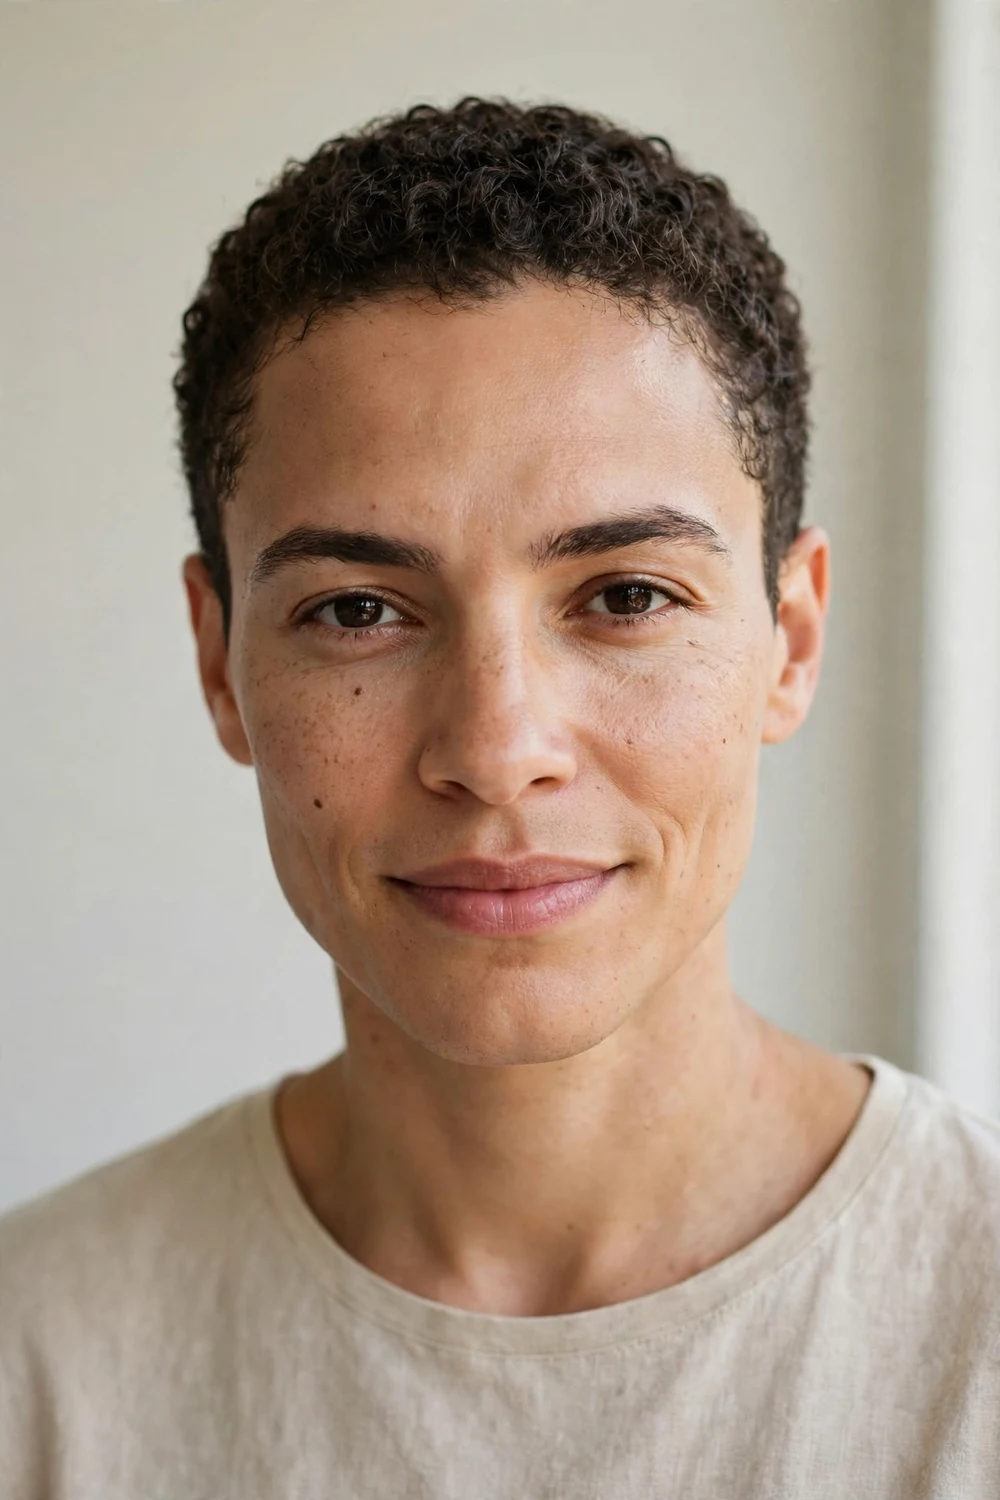
Closely cropped all over with minimal layering, this no-frills cut puts bone structure and curl texture front and center. It differs from the ultra-short curly pixie in intent: the shape is deliberately uniform and architectural rather than sculpted around curl clumps. It suits confident wearers of any curl type and is the fastest wash-to-door routine on this list. A touch of color or a defined hairline can personalize the minimalism without adding maintenance.
Wash, condition, and apply a light moisturizer; that is the whole routine. Keep the hairline and edges tidy with cleanups every 3 weeks.
Try this: experiment with a hard part or design line once, since it grows out in two weeks if you dislike it.
Difficulty: Easy · Cost: $40–$75 (cut only)
25. Round-Face Flattering Pixie
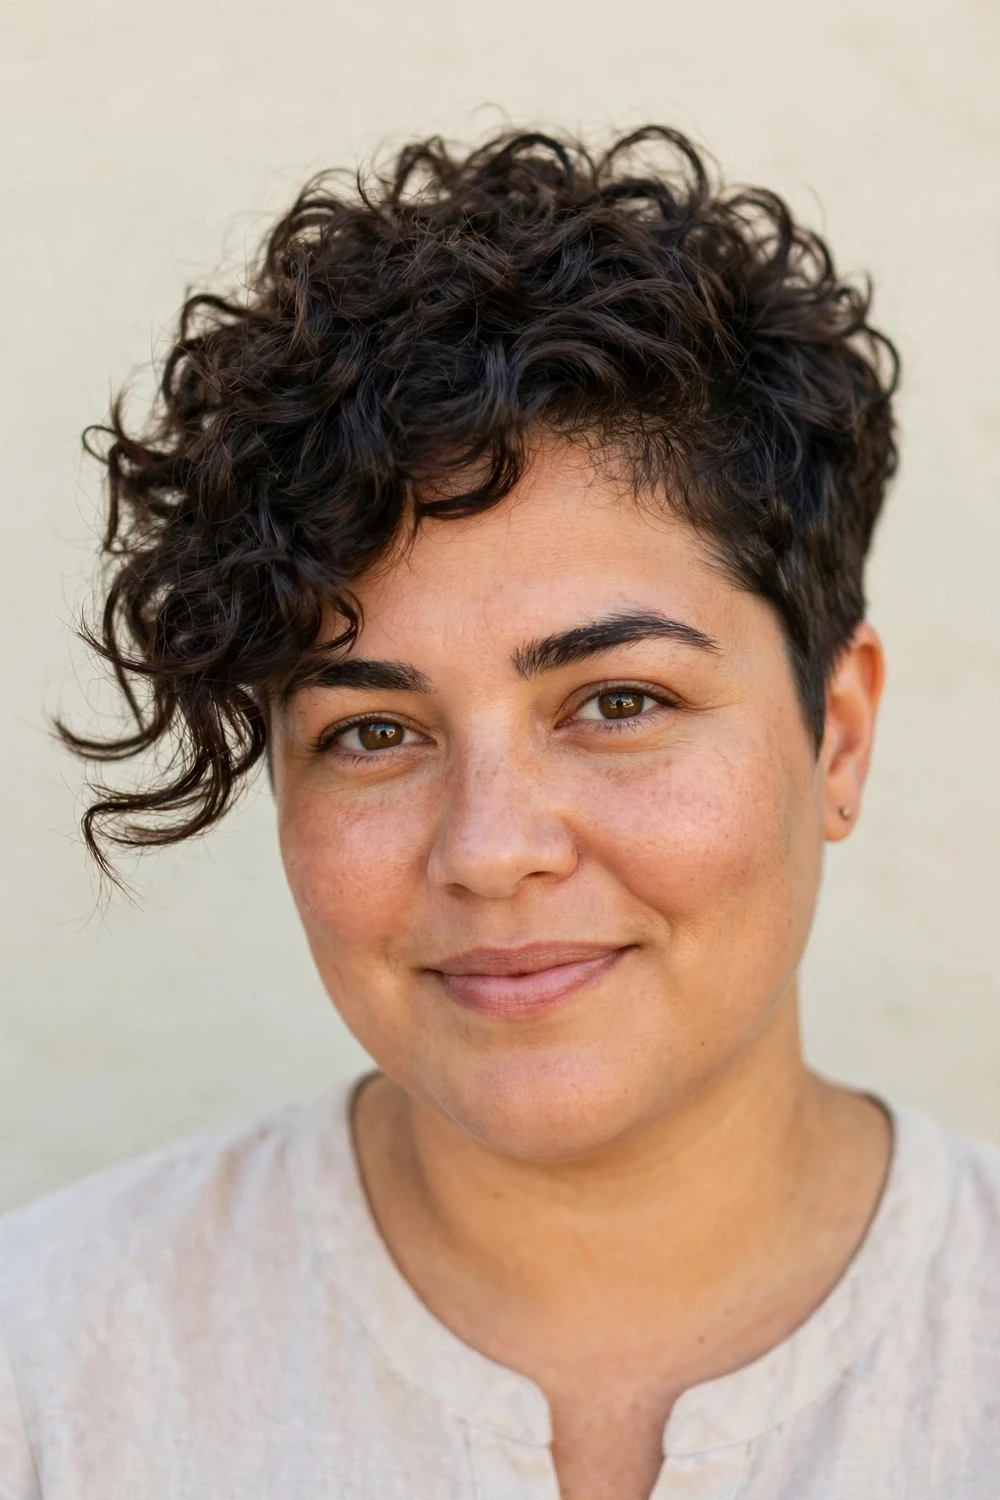
Round faces need height, not width, so this pixie stacks volume at the crown and keeps the sides tight against the head. Asymmetry helps too: a longer sweep on one side breaks the circle visually. The curl-specific rule is to avoid cutting the sides too short while wet, because shrinkage will pull them tighter and widen the cheeks further. On 3A to 4A hair, diffusing the crown upward (with heat protectant on warm settings) builds the elongating height this face shape needs.
Direct styling product to the roots at the crown and lift while drying. Keep side volume controlled with a light smoothing cream.
Try this: check the shape in a hand mirror from the front at eye level, not from above.
Difficulty: Easy · Cost: $45–$85 (cut only)
26. Highlighted Pixie
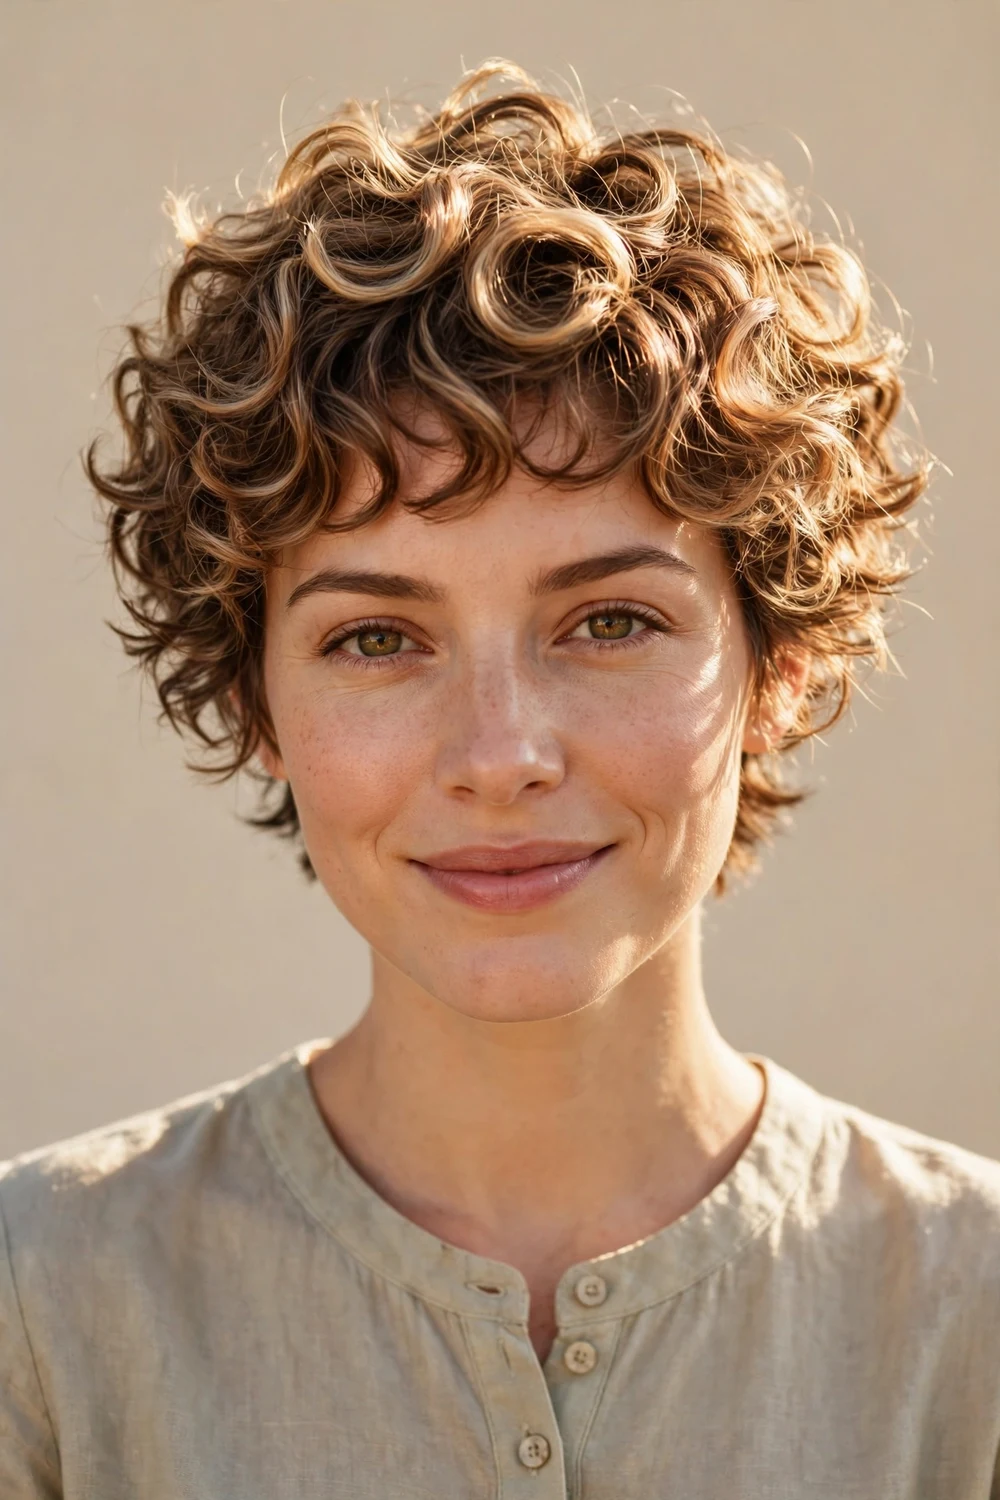
Highlights placed on the outer curls add dimension that makes every spiral easier to see. The technique matters: fine babylights through the crown and slightly bolder pieces around the face, applied after the cut so the colorist can see where the curls actually fall. Bleached curls need extra moisture, so pair this with a committed conditioning routine and purple shampoo if the highlights run cool. Keep the highlighted sections slightly longer, since lightened curls can lose a little spring.
Deep condition weekly and wash with color-safe shampoo. Minimize heat styling to protect the lightened curl pattern, and use heat protectant on the rare days you diffuse warm.
Try this: ask the colorist to concentrate lightness on the canopy where light naturally hits.
Difficulty: Moderate · Cost: $110–$200 (cut + color)
27. Bold Color Pixie
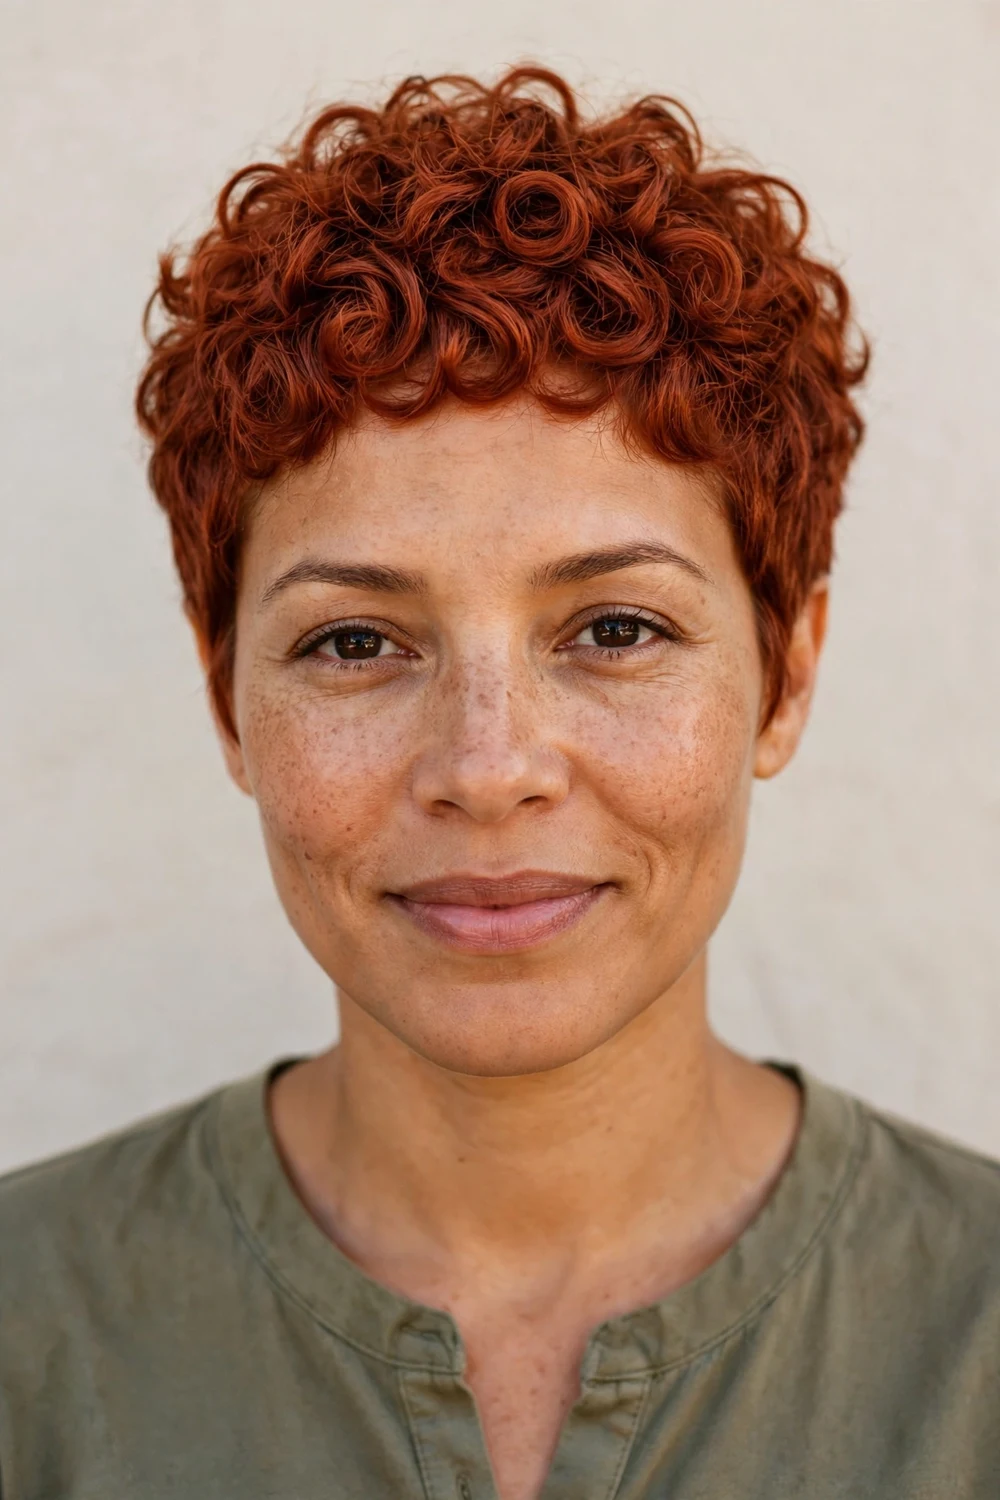
Copper, auburn, platinum, or an outright fashion shade turns curl texture into the star, since color variation highlights every bend and coil. Short length keeps even the loudest shade wearable, and regrowth stays manageable because trims happen often anyway. The curl-care tradeoff is real: vivid and bleached colors raise dryness, so this cut demands weekly deep conditioning and sulfate-free washing. Rich reds and coppers flatter warm skin tones; cool platinums suit cooler undertones.
Wash with cool water to slow fading, and refresh the tone with a gloss every 6 weeks. Keep a hydrating mask in the weekly routine without fail.
Try this: bring photos of the shade in both sunlight and indoor light, since bold color shifts between the two.
Difficulty: Moderate · Cost: $110–$210 (cut + color)
28. Volume-Boosted Pixie for Fine Curls

Fine curly hair needs volume built into the cut, not just the styling. Shorter layers through the crown remove the weight that drags fine curls flat, while a slightly longer perimeter keeps the ends from looking sparse. Point-cutting (never razor work, which frays fine curls) keeps the ends clean. This suits 2C to 3B patterns with low density and works best when the hair is kept healthy, since fine curls show damage faster at short lengths.
Apply a root-lifting mousse to damp roots and diffuse upside down for lift. Use heat protectant before diffusing. Avoid heavy creams that collapse the volume you just built.
Try this: ask the stylist to cut the crown layers dry so the lift matches your real curl pattern.
Difficulty: Easy · Cost: $45–$85 (cut only)
Fine, low-density curls have their own cutting logic beyond pixies; these curly hairstyles for thin fine hair cover more density-friendly shapes.
29. Weight-Removed Pixie for Thick Curls
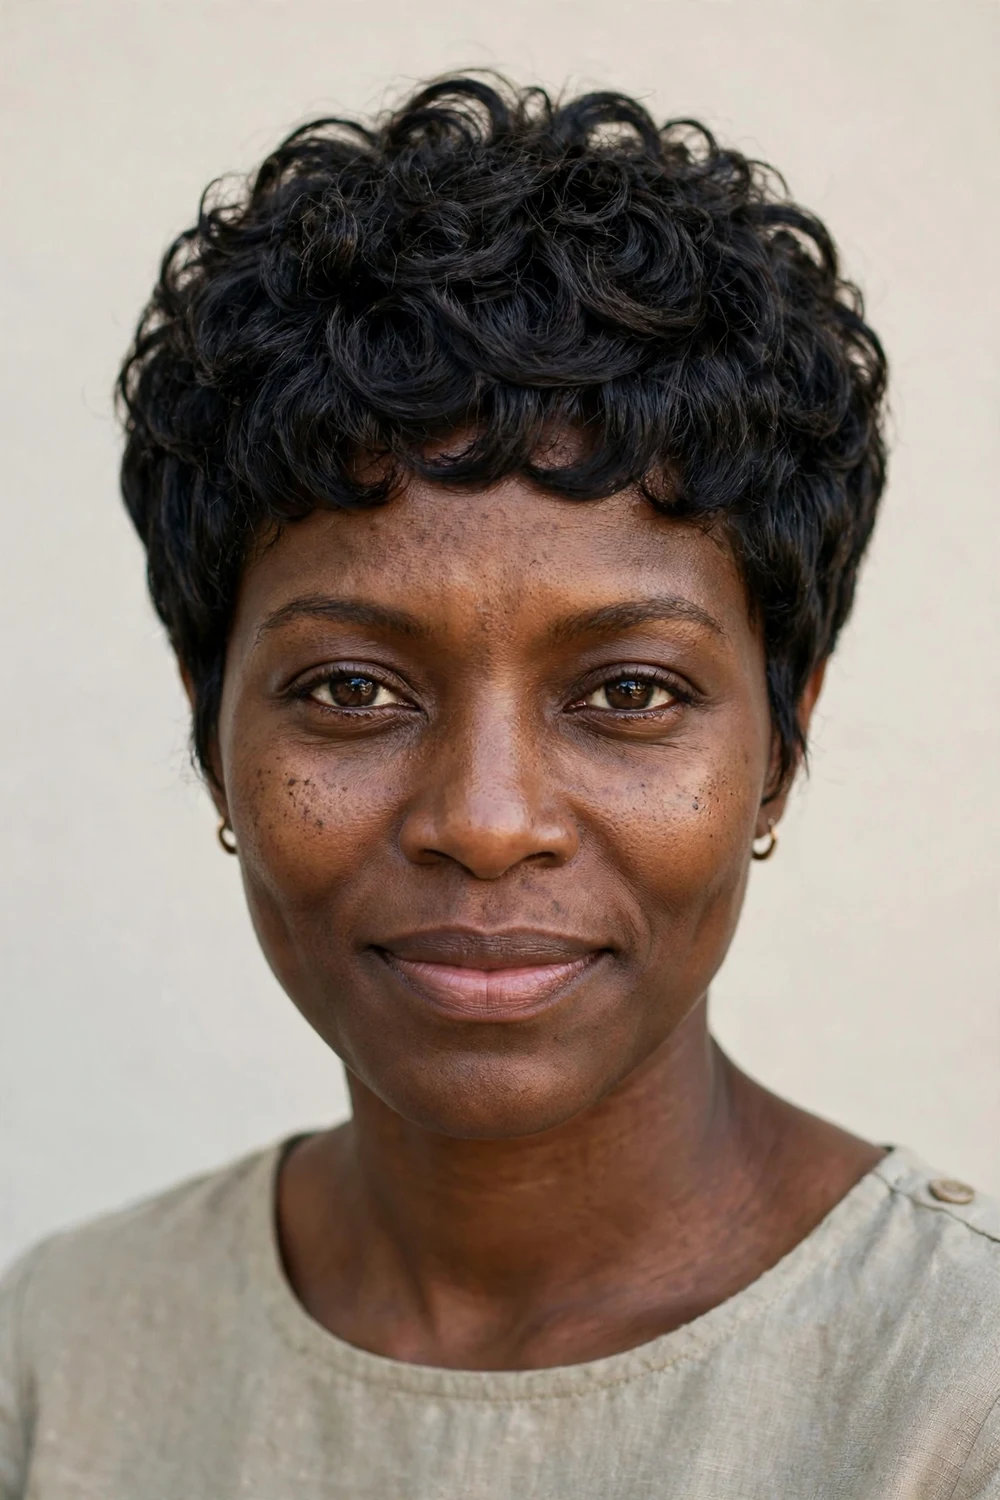
Thick, dense curls can turn a pixie into a triangle without strategic weight removal. The fix is internal layering: shorter pieces underneath that let the canopy sit closer to the head, plus carved-out sections where your hair poufs most. This is a job for a curl specialist, because removing weight from the wrong zone creates holes that only show once the curls dry. It suits 3B to 4C high-density hair and makes the difference between a controlled pixie and an expanding one.
Style with a smoothing cream to keep the canopy settled, and diffuse on low to avoid encouraging extra expansion. Use heat protectant if you diffuse above cool.
Try this: tell the stylist to remove weight in two passes, checking the dry shape between them.
Difficulty: Moderate · Cost: $55–$100 (specialist cut)
30. Short Curly Wolf Cut
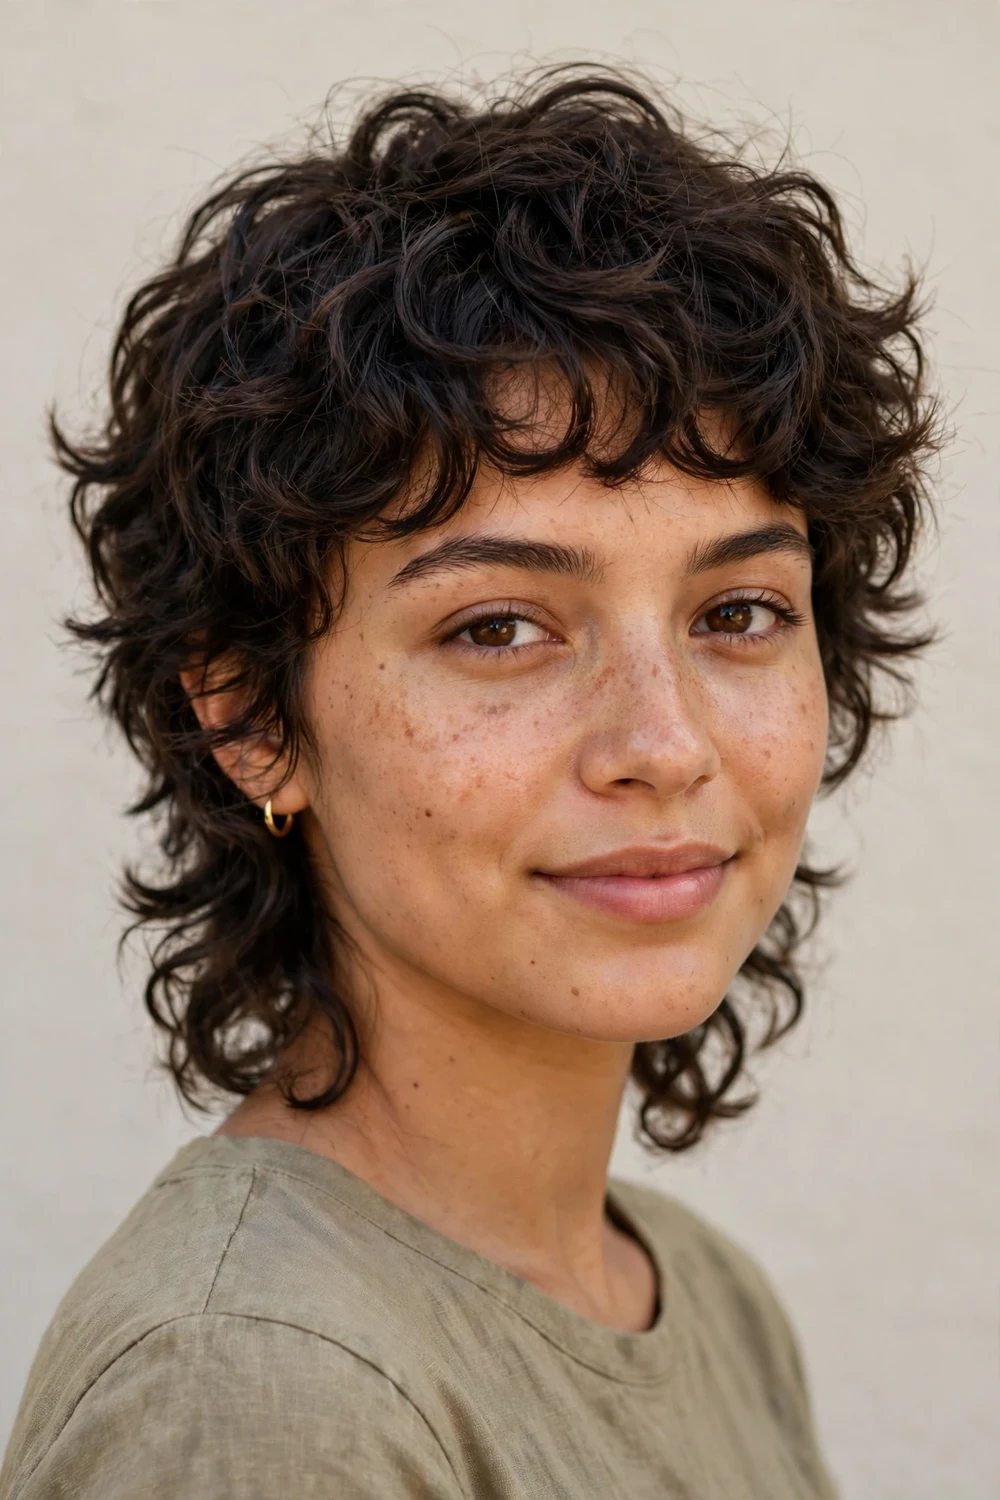
Choppy crown layers that melt into slightly longer curls at the nape give this cut its recognizable wolf silhouette at a short length. It sits between a pixie and a shag: more edge than the shaggy pixie, more length at the back than a true crop. The longer nape pieces need protection from shrinkage planning, or the wolf shape collapses into a regular pixie as the curls dry. It suits 3A to 3C hair with medium to thick density and an appetite for texture.
Scrunch with a lightweight foam to encourage separation between the crown and nape sections. Let it air-dry for the most natural fall.
Try this: keep the nape pieces at least an inch longer than you think while wet.
Difficulty: Moderate · Cost: $50–$95 (cut only)
31. Accessorized Pixie
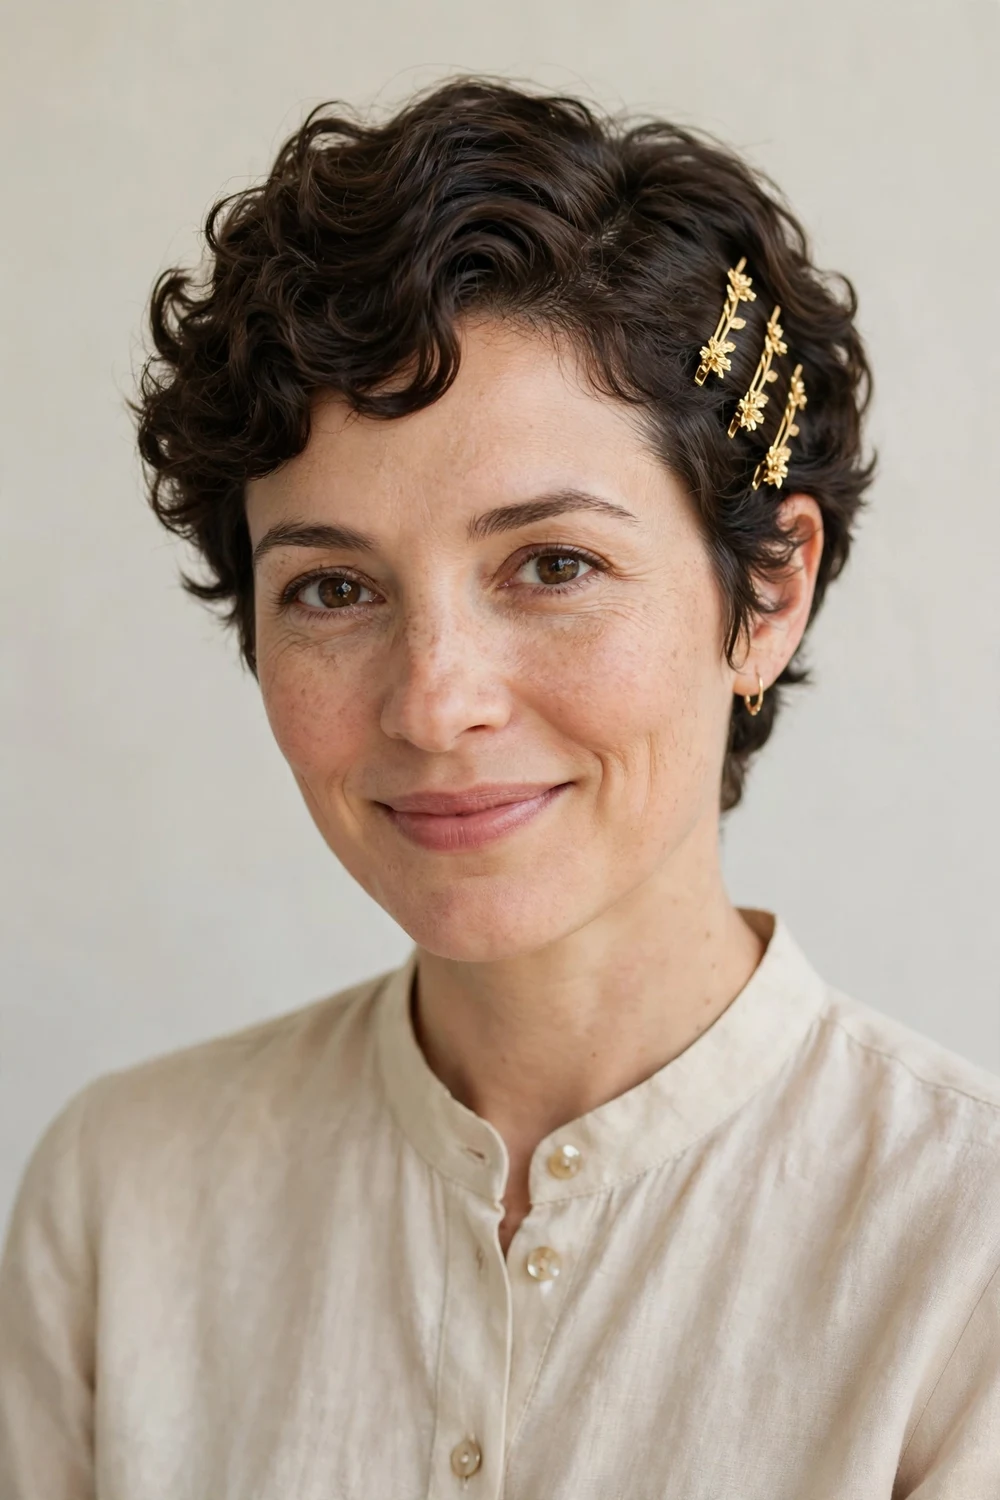
Pins, clips, and headbands do real work at pixie length: they redirect growth, dress up second-day curls, and add personality without a cut change. The base cut should be the simple wash-and-go pixie, since a clean canvas shows accessories best. Decorative pins can also solve the awkward grow-out stage by holding the front pieces where you want them. Choose lightweight, snag-free pieces; heavy accessories pull short curls flat and damage the pattern.
Place pins on dry, styled hair so they grip the curl clumps instead of sliding. A light-hold spray keeps everything in place through the day.
Try this: use two crossed bobby pins to hold a deep side sweep on days the fringe misbehaves.
Difficulty: Easy · Cost: $45–$85 (cut only)
32. Low-Maintenance Pixie for Older Women

The priorities shift with age: easy mornings, a shape that holds between salon visits, and softness around the face. This pixie keeps gentle length through the top with a neat tapered nape, so it looks polished even on non-wash days. Gray and silver curls run drier, so the routine leans heavier on leave-in moisture and a weekly mask. Purple shampoo keeps silver tones bright. It suits all curl types and flatters with minimal daily effort.
For more ideas tuned to the over-60 age group, browse these curly pixie haircuts for women over 60.
Wash, apply leave-in and cream, and air-dry or diffuse on low with heat protectant on warm settings. Trim every 6 weeks to keep the soft outline.
Try this: keep the temples soft rather than tightly faded for the most flattering finish.
Difficulty: Easy · Cost: $45–$85 (cut only)
33. Grow-Out-Proof Pixie
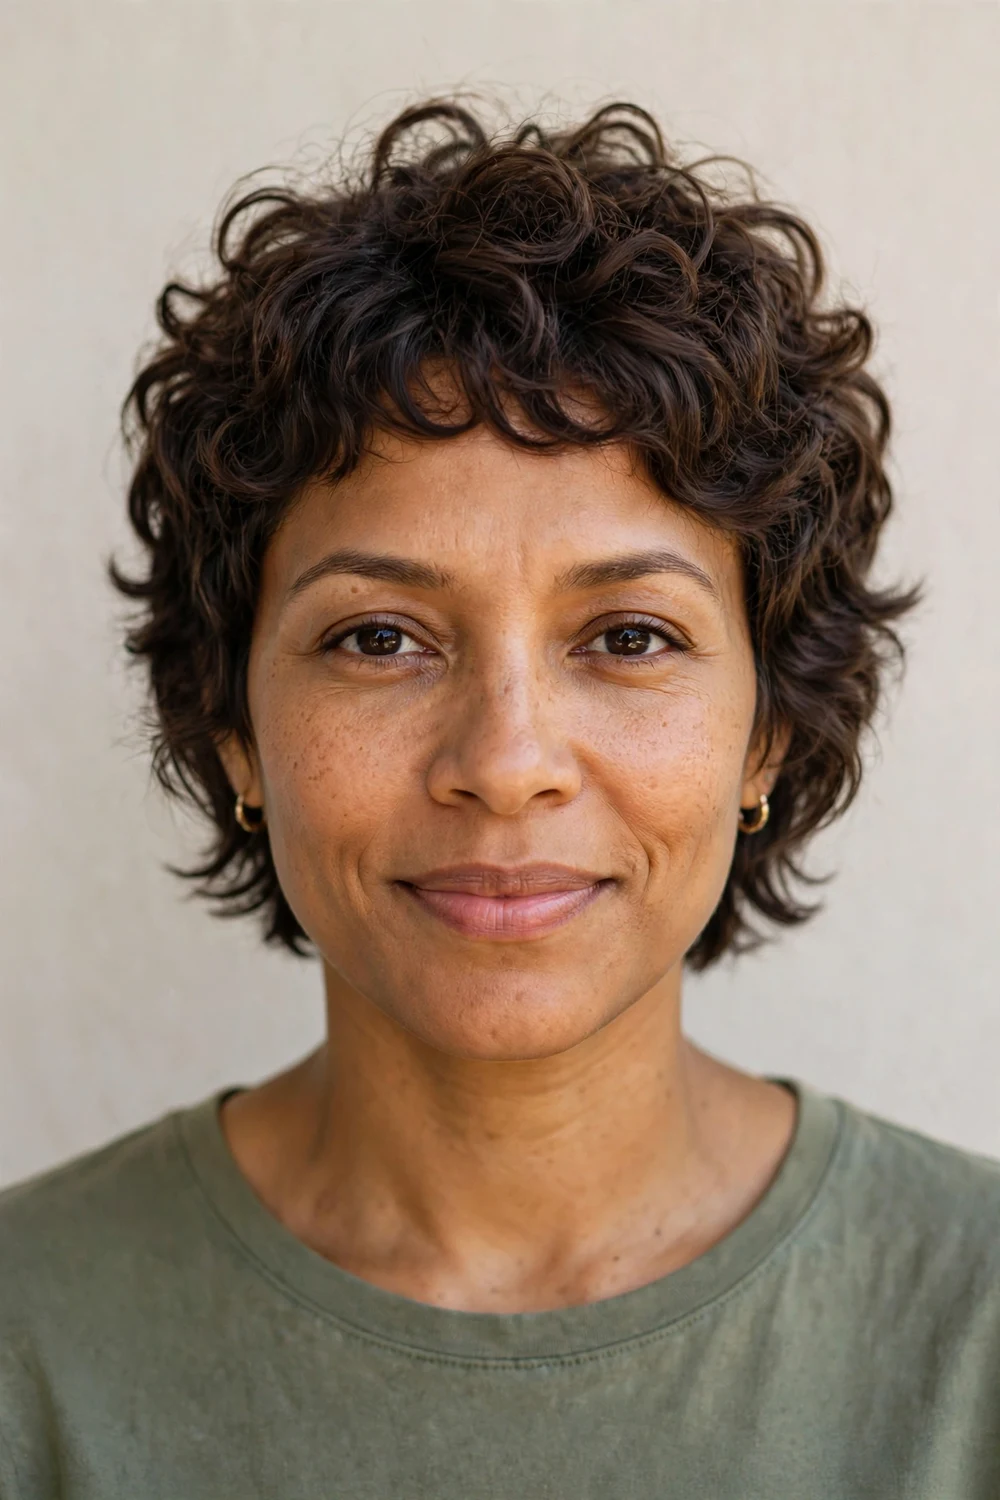
Every pixie grows out, so this idea plans the exit from day one. The trick is a cut with built-in grow-out stages: a slightly longer top that becomes a pixie-bob, sides that grow into the shaggy pixie, and a nape shaped to avoid the mullet phase. Your stylist should map two future shapes before the first cut, not after. Shrinkage helps here, since growing curls draw up and hide uneven lengths. Schedule shaping trims every 6 to 8 weeks that adjust the plan rather than just maintaining it.
Between trims, use accessories and strategic parting to manage awkward stages. Keep moisture high, since growing curls tangle more at the in-between lengths.
Try this: photograph the cut from four angles on day one so future trims can track the plan.
Difficulty: Easy · Cost: $45–$85 (cut only)
How to Choose the Right Curly Pixie
Start with your curl type, not the photo. Type 3A to 3C curls handle bangs, asymmetry, and longer tops well, because the pattern drapes predictably. Type 4A to 4C coils need shrinkage-first planning, closer sides, and a stylist who cuts dry. Fine or low-density curls want volume built into the crown layers; thick, high-density curls need strategic weight removal from the right zones.
Ask your stylist three questions before the scissors move: do you cut curls dry, how do you plan for my shrinkage, and what will this look like at week six? If the answers are vague, find a curl specialist. Avoid razor cutting on curly pixies (it frays the ends and invites frizz), avoid cutting bangs to the target length while wet, and avoid any cut that only works with daily heat styling.
| Haircut | Best curl types | Key cutting move | Daily styling time | Trim cycle |
|---|---|---|---|---|
| Wash-and-Go Baseline | 3A–4A | Dry curl-by-curl shaping | 5–10 min | 6–8 weeks |
| Long-Top Tapered | 3B–4A | Dry-cut taper, 3+ in. crown | 10–15 min | 4–6 weeks |
| Undercut/Fade | 3A–4C | Graduated fade into curls | 5–10 min | 3–4 weeks |
| Ultra-Short Crop | 3C–4C | Sculpted close shaping | Under 5 min | 3–4 weeks |
| Shaggy Textured | 2C–3C | Dry point-cut layers | 5–10 min | 6 weeks |
FAQs
Can you get a pixie cut with curly hair?
Yes. Curly hair works well in a pixie when the cut follows your curl pattern. Ask for dry, curl-by-curl cutting, keep 2 to 3 inches on top with tapered sides, and plan for shrinkage. All curl types from 3A to 4C can wear a pixie with the right technique.
Should curly hair be cut wet or dry for a pixie?
Dry, or on stretched hair. Wet curls stretch longer than they will ever be when dry, so a wet cut almost always lands shorter than planned. Dry curl-by-curl cutting lets the stylist see your real shrinkage and shape each curl where it naturally falls.
How much will my curls shrink in a pixie cut?
It depends on your pattern. Loose 3A curls may shrink 10 to 20 percent, 3B to 3C curls around 25 to 40 percent, and tight 4C coils up to 50 percent or more of their stretched length. Your stylist should measure your stretched-to-dry ratio before deciding how much length to leave.
How often does a curly pixie need a trim?
Every 4 to 8 weeks for the overall shape. Faded sides, undercuts, and micro-bangs need attention every 3 to 4 weeks, while softer shapes like the shaggy or wash-and-go pixie can stretch to 8 weeks. Short curls lose their outline fast, so regular shaping matters more than with longer cuts.
How do you style a curly pixie without frizz?
Style on damp hair with curl cream or light gel, avoid touching curls while they dry, and diffuse on low heat or air-dry. Apply heat protectant before diffusing on warm or hot settings. Sleep on a satin pillowcase or in a bonnet, and refresh with a water mist instead of re-wetting fully.
To see these curl-cutting techniques adapted for rounder features, curly pixie haircuts for round faces reshape each idea with extra crown height.
Final Thoughts
A curly pixie is a precision cut disguised as an easy one. Get the cutting mechanics right (dry, curl by curl, shrinkage planned) and the daily routine nearly runs itself. Pick the idea that matches your curl type and your tolerance for salon visits, then wear it with confidence.
For more short-hair inspiration across every texture, start at the PrimeHairPicks homepage and explore the hairstyle galleries.

