


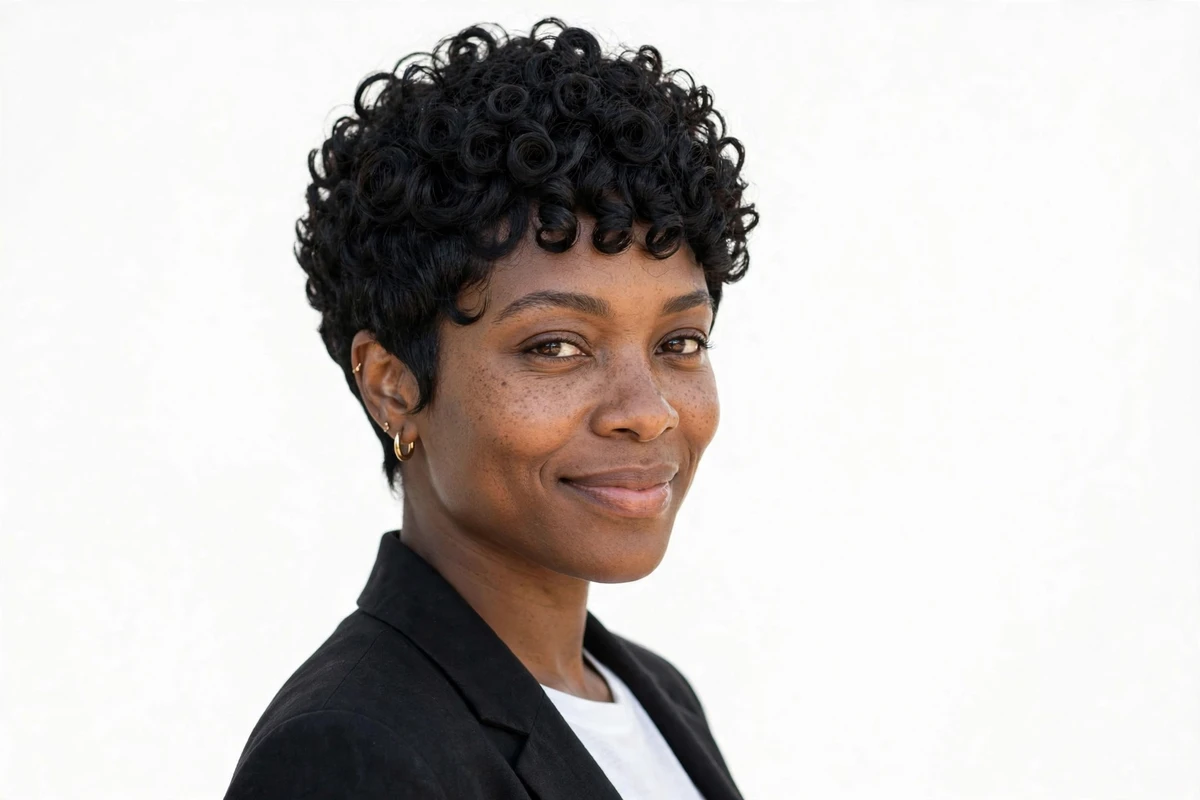
3c hair has a mind of its own: tight corkscrew coils, dense texture, and shrinkage that can take three inches off the length you see in the mirror. That is exactly why a pixie cut suits it so well. At short length, the weight that pulls long curls down is gone, so every coil springs fully free and the cut shows off your natural pattern instead of fighting it.
I’ve spent years testing short cuts for tight curls, and the 3c pixie keeps winning on one point: the daily routine is short. This guide pulls together 29 curly pixie haircut ideas for 3c hair, from the classic rounded shape to tapered cuts, undercuts, bangs, and color. You will also find what to tell your stylist, a simple styling routine, and answers to the questions 3c wearers ask most.
Quick answer: The best curly pixie haircuts for 3c hair keep 2 to 3 inches on top, taper close at the nape, and are cut dry so the stylist can see true shrinkage. Layer in moisture with a leave-in, curl cream, and light gel, then diffuse or air-dry. Trims every 4 to 6 weeks keep the shape sharp.
Quick Takeaways
- 3c coils shrink a lot, so every pixie on this list is designed around the dry length, not the wet length.
- Cut dry, curl by curl, with point-cutting: this is how you avoid frizzy, uneven ends.
- Moisture layering (leave-in, then cream, then gel) keeps short 3c coils defined instead of puffy.
- Tapered sides and undercuts remove bulk while keeping the coils on top full and bouncy.
- Most of these cuts need 5 to 10 minutes of styling and a trim every 4 to 6 weeks.
Why 3c Hair Works So Well in a Pixie
A pixie removes the one thing that works against 3c hair: length weight. Long 3c coils stretch under their own weight and lose their spring. Cut to pixie length, each coil tightens up and the hair looks fuller and more defined than it ever did long. You also use less product, because there is simply less hair to coat.
The catch is shrinkage. Your 3c curls can shrink 40 to 60 percent as they dry, so a stylist who cuts your hair wet will almost always cut it too short. Ask for a dry cut, or a cut after wash-and-diffuse, so the length you agree on is the length you keep. A good curly specialist shapes the cut curl by curl, point-cuts the ends so each coil closes cleanly, and finishes the neckline with a razor for a soft edge.
If you want the full range of curly pixies beyond the 3c-specific versions, the overview of curly pixie haircuts covers every variation in one place.
1. The Tight Coil 3c Pixie
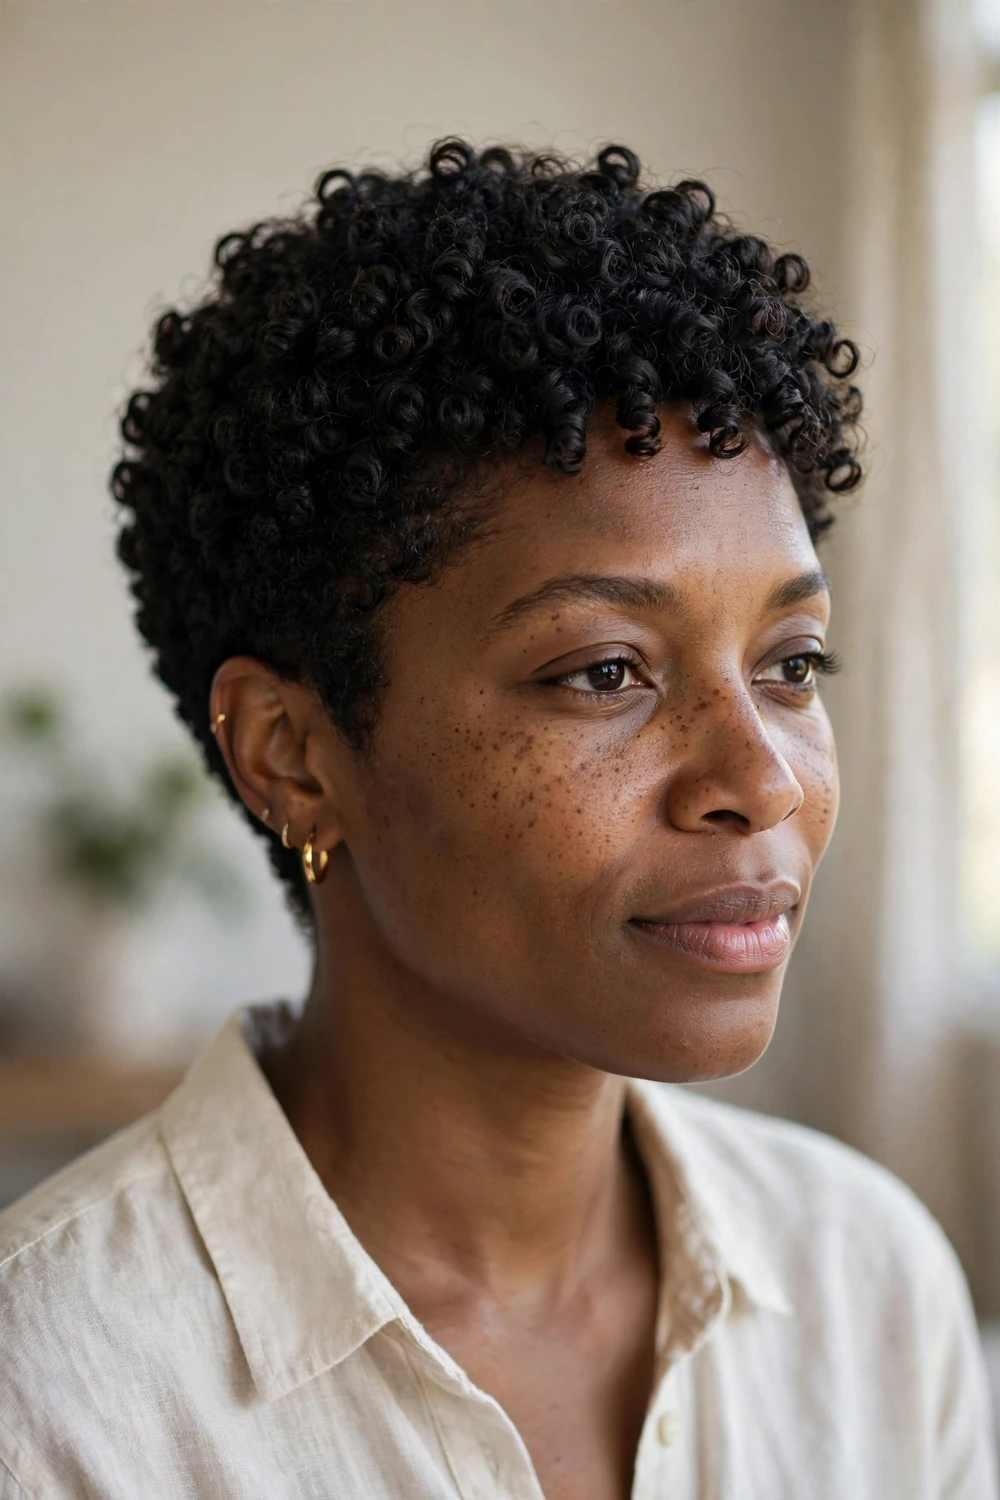
If you only pick one cut from this list, make it this one. The tight coil 3c pixie is built around your natural pattern: dense corkscrew coils left at 2 to 3 inches on top, tapering close through the nape and sides. The result is a striking rounded silhouette with maximum volume, and the coils sit exactly where 3c hair wants to sit. Shrinkage is the main thing to manage, so agree on the dry length with your stylist before cutting. This cut shows off definition at its best when each coil is moisturized from the inside out.
Try this: On wash day, apply a leave-in conditioner first, then a curl cream, then a pea-size amount of light gel on top. Diffuse on low heat for 5 to 8 minutes and let the rest air-dry.
2. Classic Curly Pixie Cut

Start with the original. The classic curly pixie keeps the sides and back short and leaves the top long enough for your 3c coils to form their full spiral. It suits most face shapes because the balance is adjustable: more length on top adds height, closer sides slim the profile. On 3c hair, this cut reads fuller than the same cut on looser curl types, since every coil stacks on the next. Keep the top at 2 inches or longer or the coils will not have room to form.
Try this: Scrunch a golf-ball-size amount of mousse into damp hair at the roots before diffusing. The mousse gives the short coils hold without the crunch of heavy gel.
3. Tapered Curly Pixie
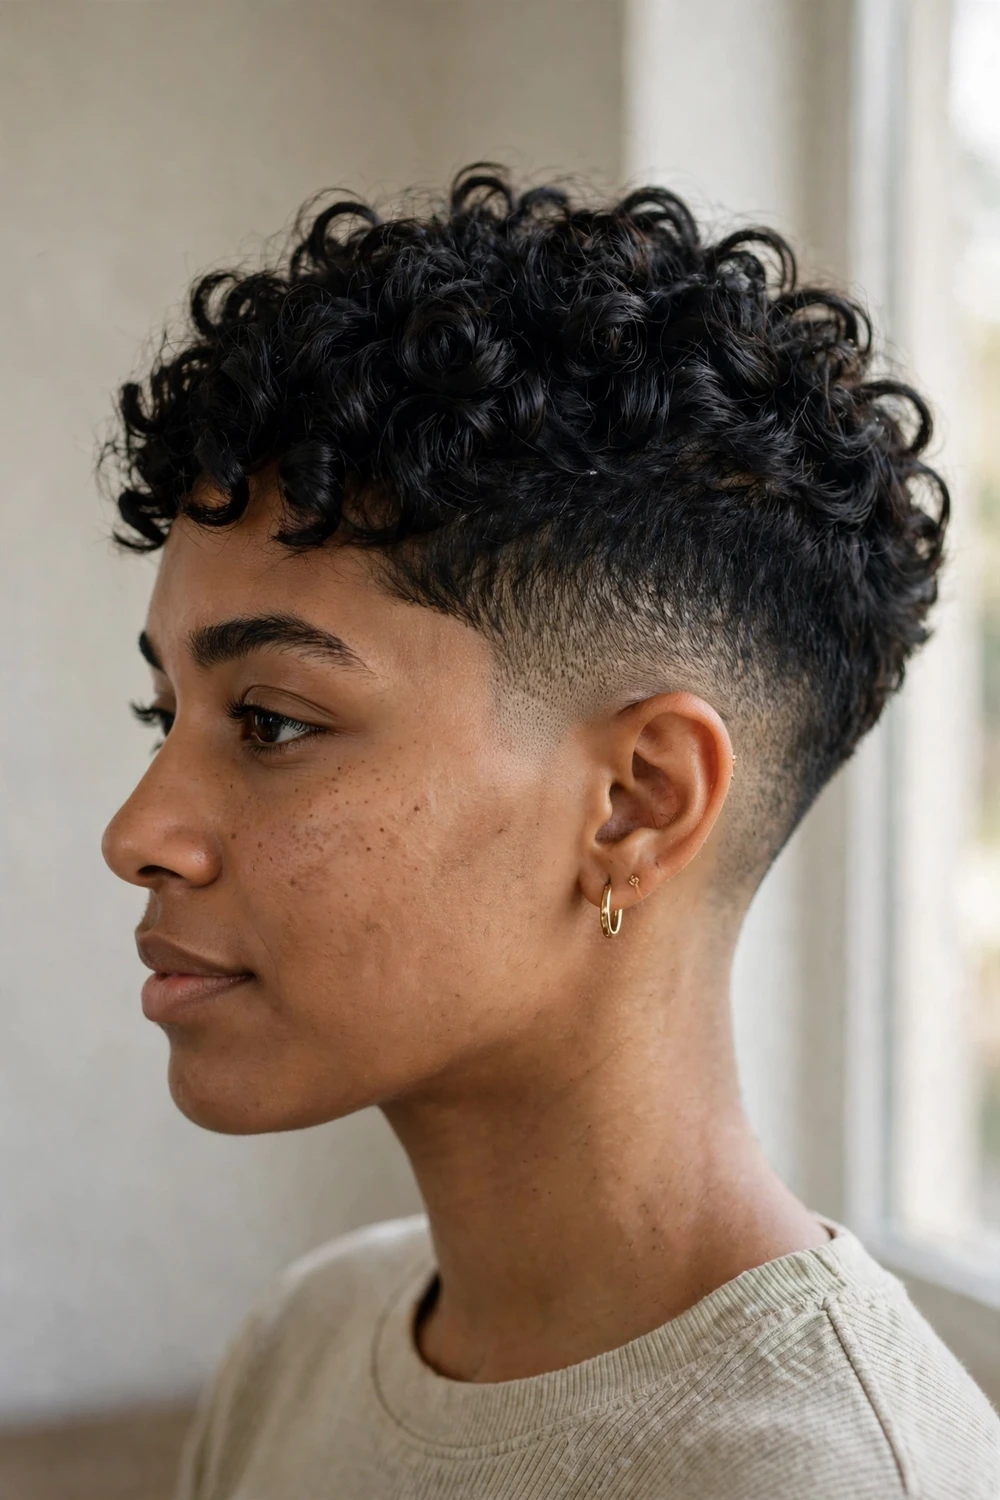
A gradual fade changes the whole attitude of a pixie. The tapered curly pixie moves from longer coils on top down to short, neat sides and back, which gives the cut structure and keeps the outline clean between trims. For 3c hair, the taper also solves the triangle problem: sides that would otherwise flare outward stay close to the head while the crown keeps its fullness. Ask your barber or stylist for a soft taper rather than a hard skin fade if you want the grow-out to stay neat.
Try this: Smooth a light curl cream over the tapered sides after styling the top. It keeps the short hair lying flat and frizz-free for the whole day.
4. Curly Pixie with Undercut
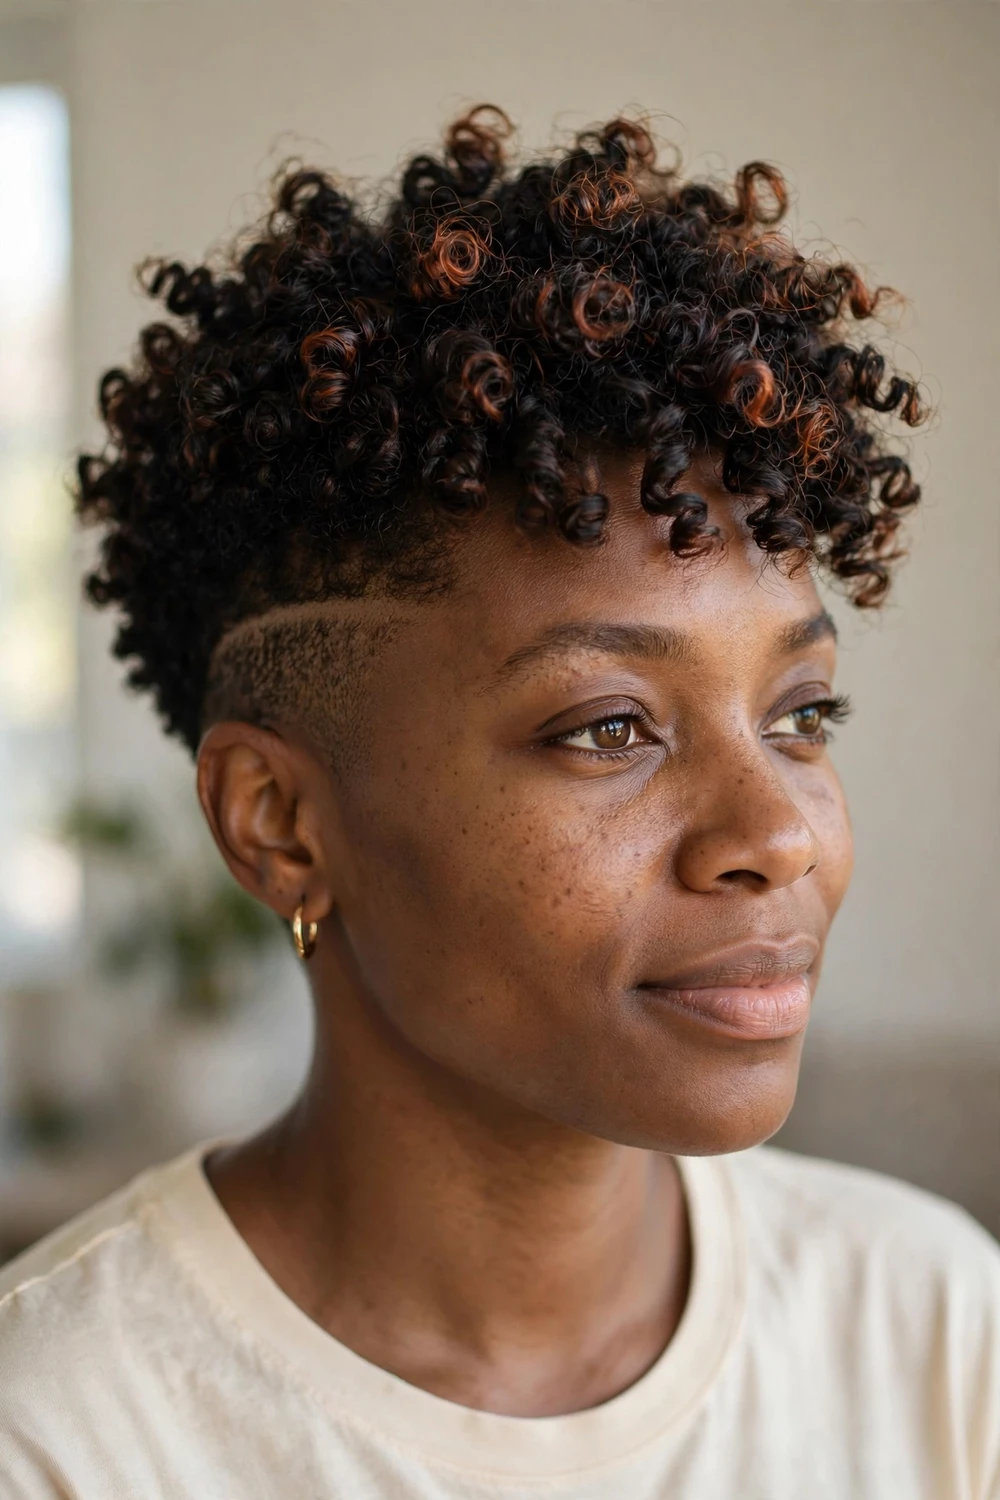
Go bolder with a real contrast. The undercut pixie takes the sides down close or shaved and leaves a full cap of 3c coils on top, so all the volume sits exactly where you want it. This is one of the most practical cuts for dense 3c hair: less hair to wash, less hair to dry, and the top coils dry faster because air reaches them. The undercut needs a clean-up every 2 to 3 weeks to stay sharp, which is a quick barber visit.
Try this: Define the top with a curl-defining cream and pick the roots gently with a wide-tooth pick once dry. The pick lifts the coils at the root for extra height.
5. Asymmetrical Curly Pixie
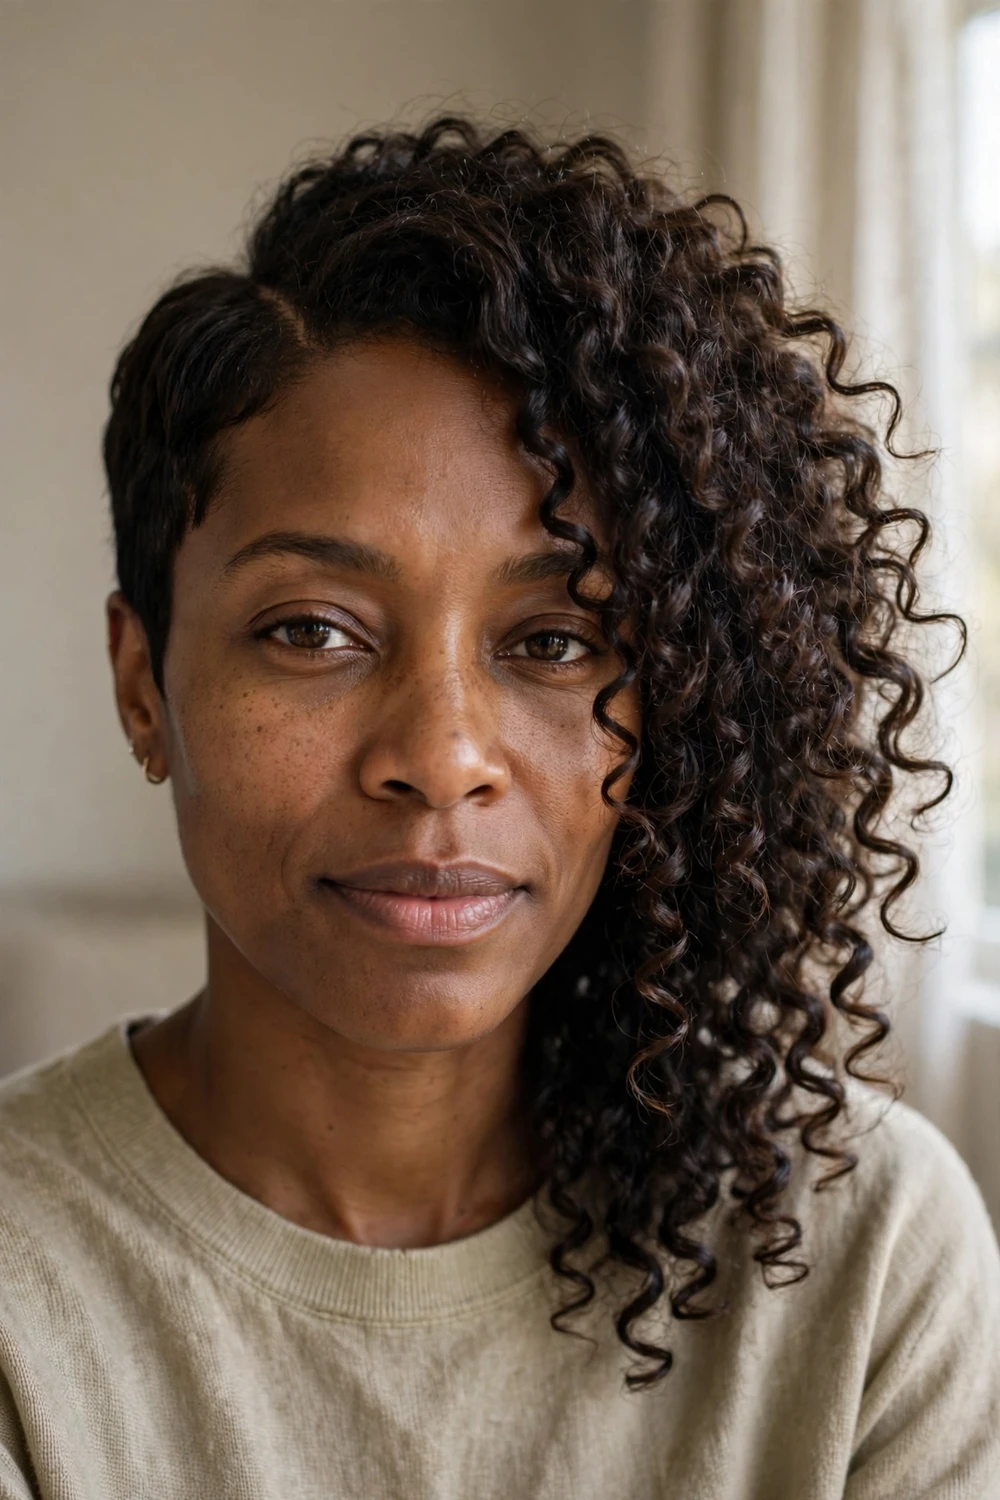
Uneven lengths give a pixie instant character. The asymmetrical curly pixie keeps one side shorter and lets the other side fall longer, with a deep side part directing the 3c coils across the forehead or past the cheekbone. On round faces this cut is especially useful, since the diagonal line breaks up the roundness. The longer side needs about 3 inches of dry length to drape properly, so discuss shrinkage with your stylist before the cut.
Try this: Part your hair while it is still damp and clip the short side flat for 10 minutes while you get ready. Remove the clip and the part will hold all day.
6. Curly Pixie with Bangs
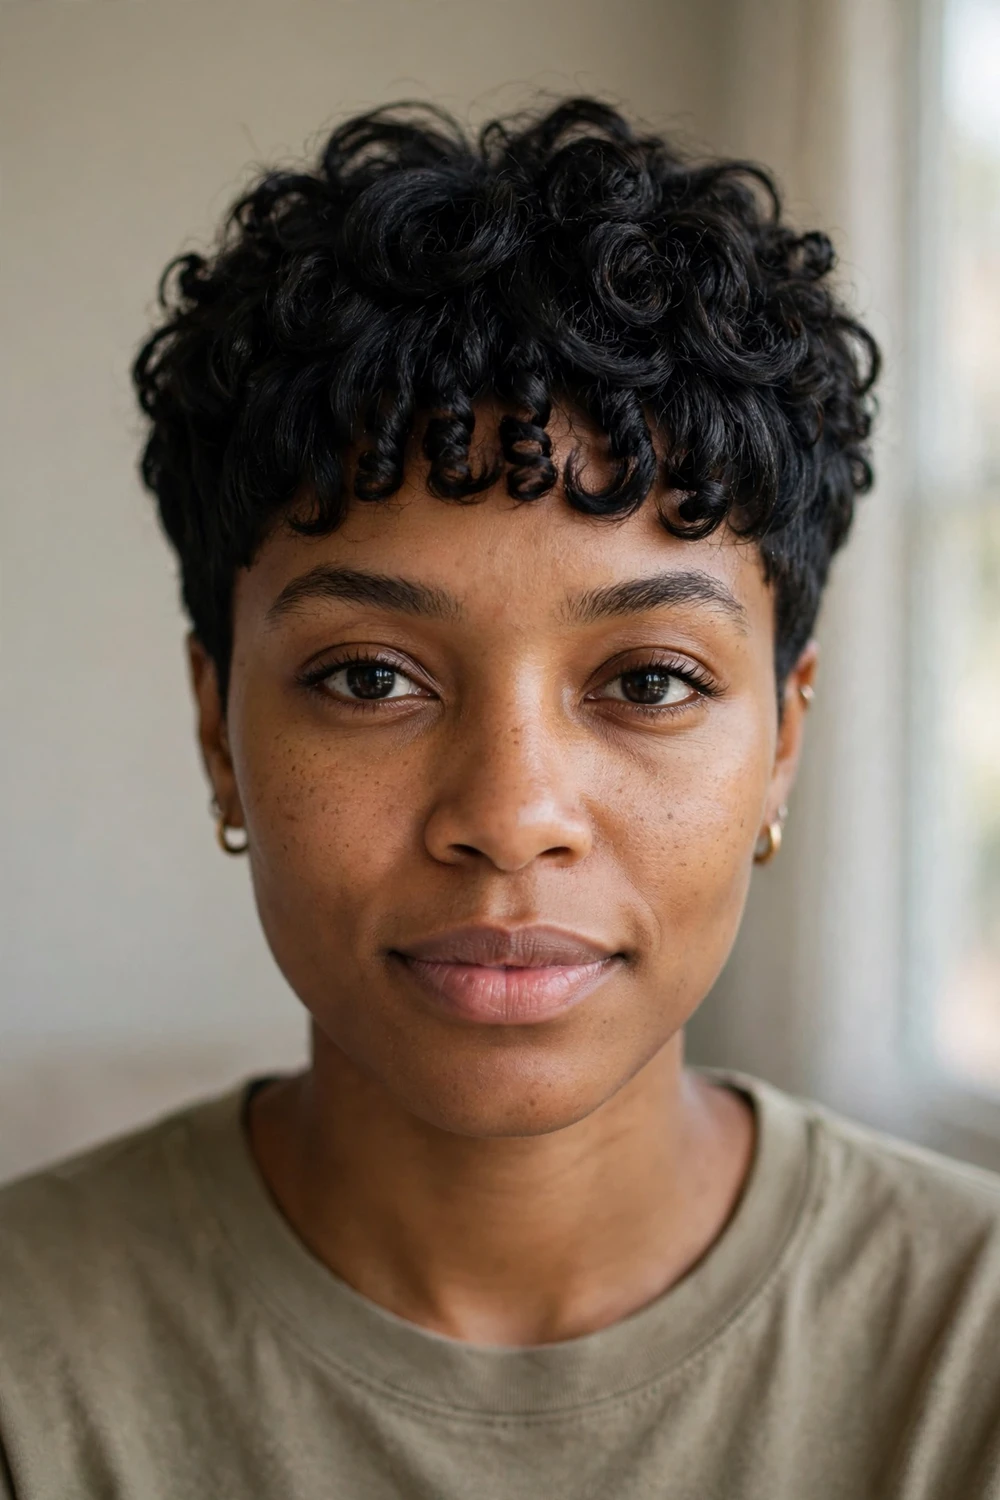
Bangs on 3c hair need one thing: enough length to coil. The curly pixie with bangs keeps a full curly fringe across the forehead at about 2 to 3 inches dry, which lets each coil form instead of springing up into a puff. Cut the fringe dry and leave it slightly longer than you think, because coils always ride up. This version softens a high forehead and draws attention to the eyes, and it pairs well with both tapered and classic sides.
Try this: Style the fringe first while it is wettest, twisting each coil around your finger in the direction you want it to fall. Do the rest of the hair after.
7. Curly Pixie with Side-Swept Bangs
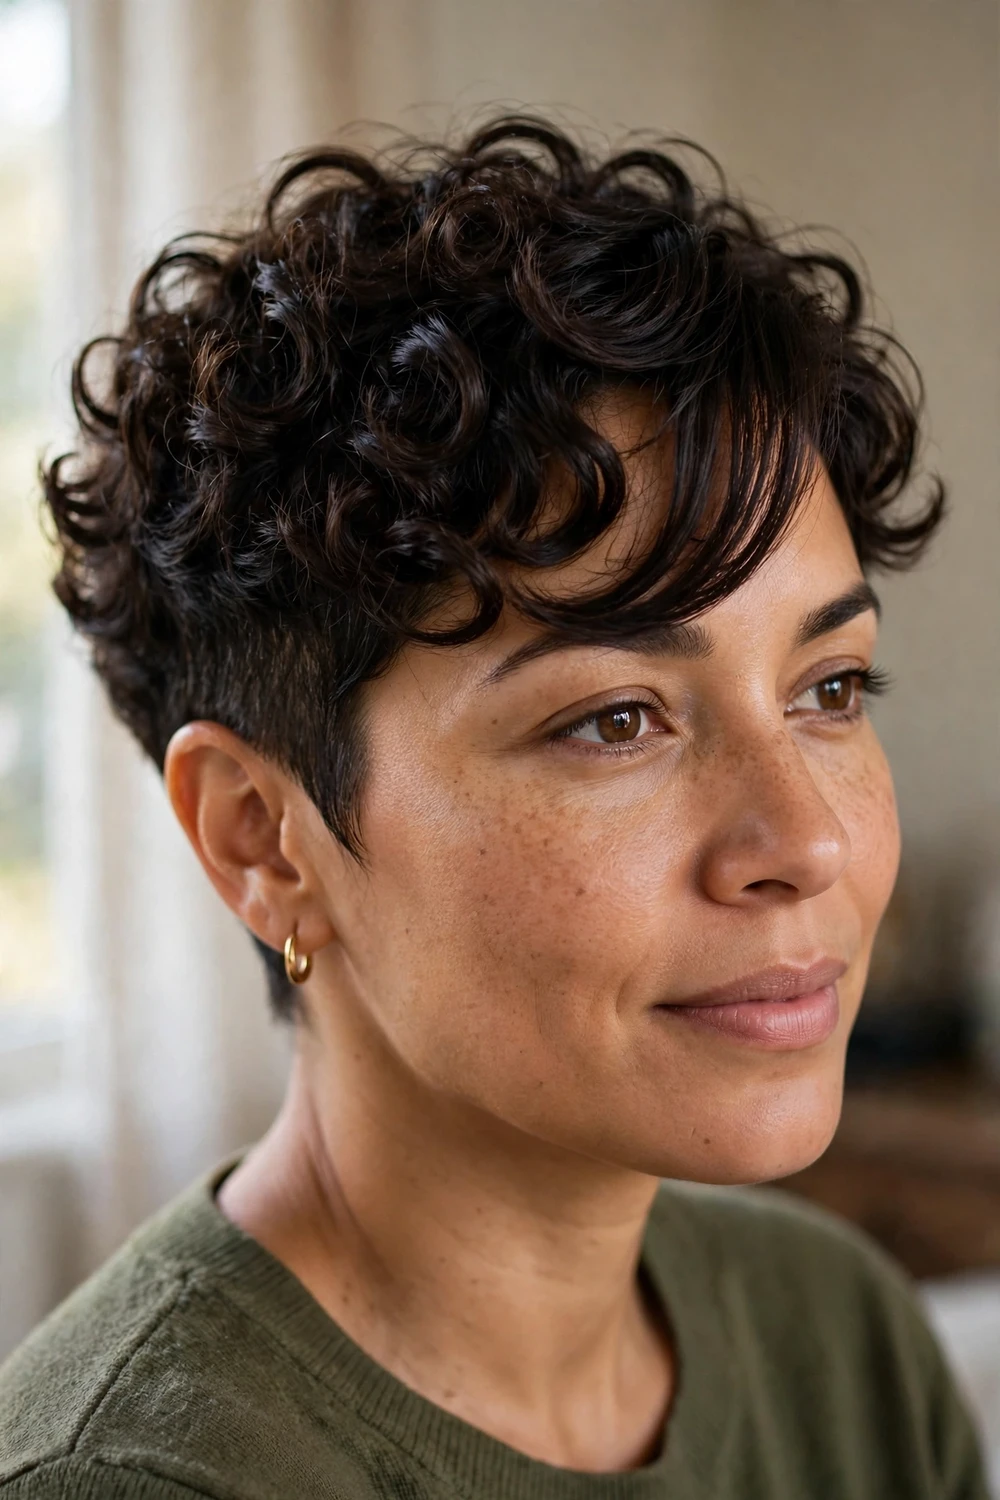
Prefer something less committed than a full fringe? Side-swept bangs give you the softness of a fringe with more flexibility. The curls sweep diagonally across the forehead, which works on shorter 3c pixies where a straight-across fringe would not have enough length. This is a good first step if you are growing out a fringe or want face-framing without a blunt line. Keep the sweep piece at 2 inches dry minimum.
Try this: Apply a dab of edge control along the hairline on the sweep side. It keeps the shorter coils lying in the direction of the sweep.
8. Messy Curly Pixie
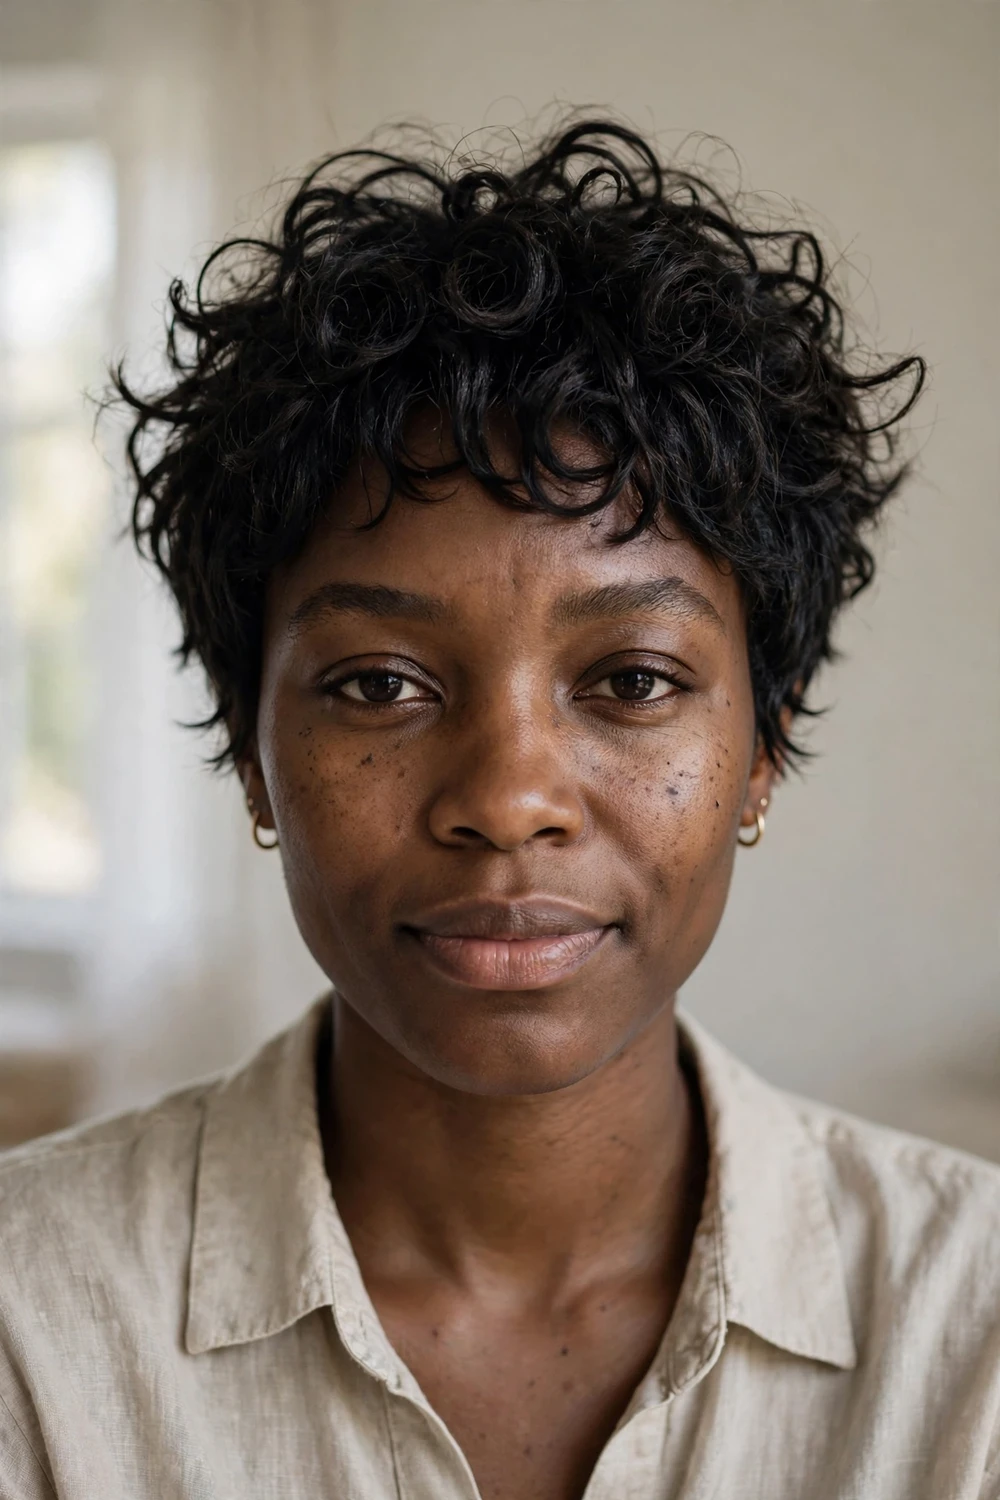
Some mornings call for zero fuss. The messy curly pixie is a wash-and-go cut: tousled, piece-y 3c coils with no strict part and no polished outline. The styling takes about 3 minutes, since the goal is texture, not precision. This cut hides second-day frizz better than sleeker versions, which makes it a strong pick if you stretch wash days. Ask for point-cut layers through the top so the pieces separate naturally.
Try this: On non-wash days, mist the hair with water mixed with a little leave-in, scrunch, and go. The refresh takes under 2 minutes.
9. Long Curly Pixie
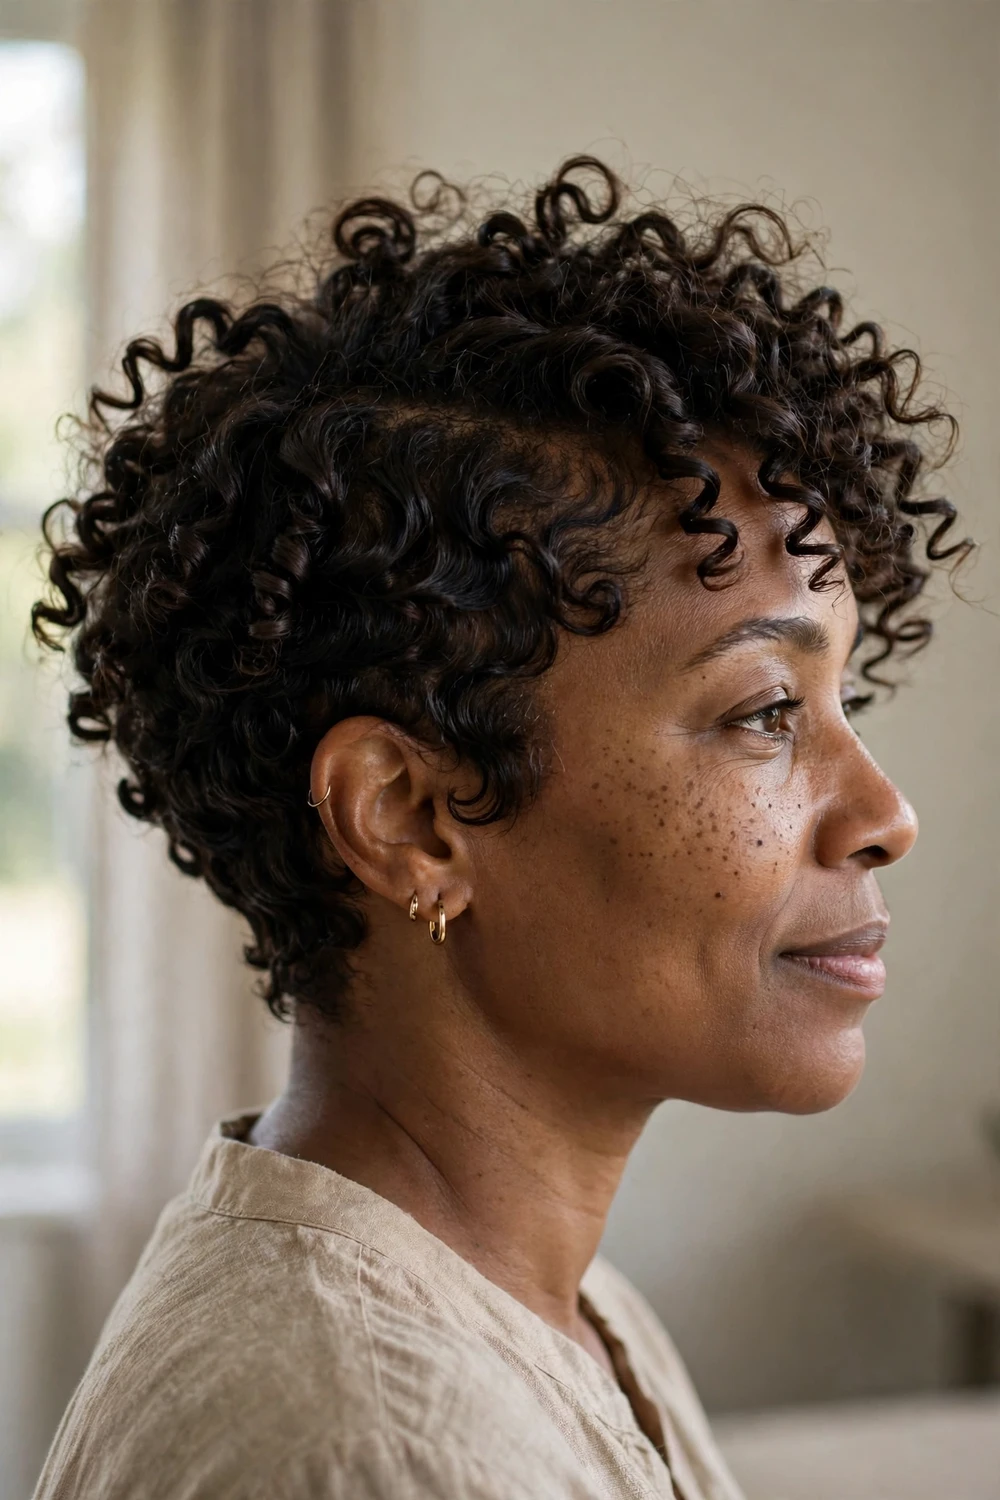
Not ready to go super short? The long curly pixie keeps 3 to 4 inches on top with shorter sides and nape, which gives you styling options a close crop cannot: you can sweep it, spike it, or pull a few coils forward. On 3c hair, the extra length shows off more of the coil pattern, and the cut still dries in under 10 minutes. This is also the easiest pixie to grow out, since each stage keeps a deliberate shape.
Try this: For a sleeker finish, smooth a dime-size amount of styling cream over the top and press the coils down with your palms while diffusing on low.
10. Textured Curly Pixie
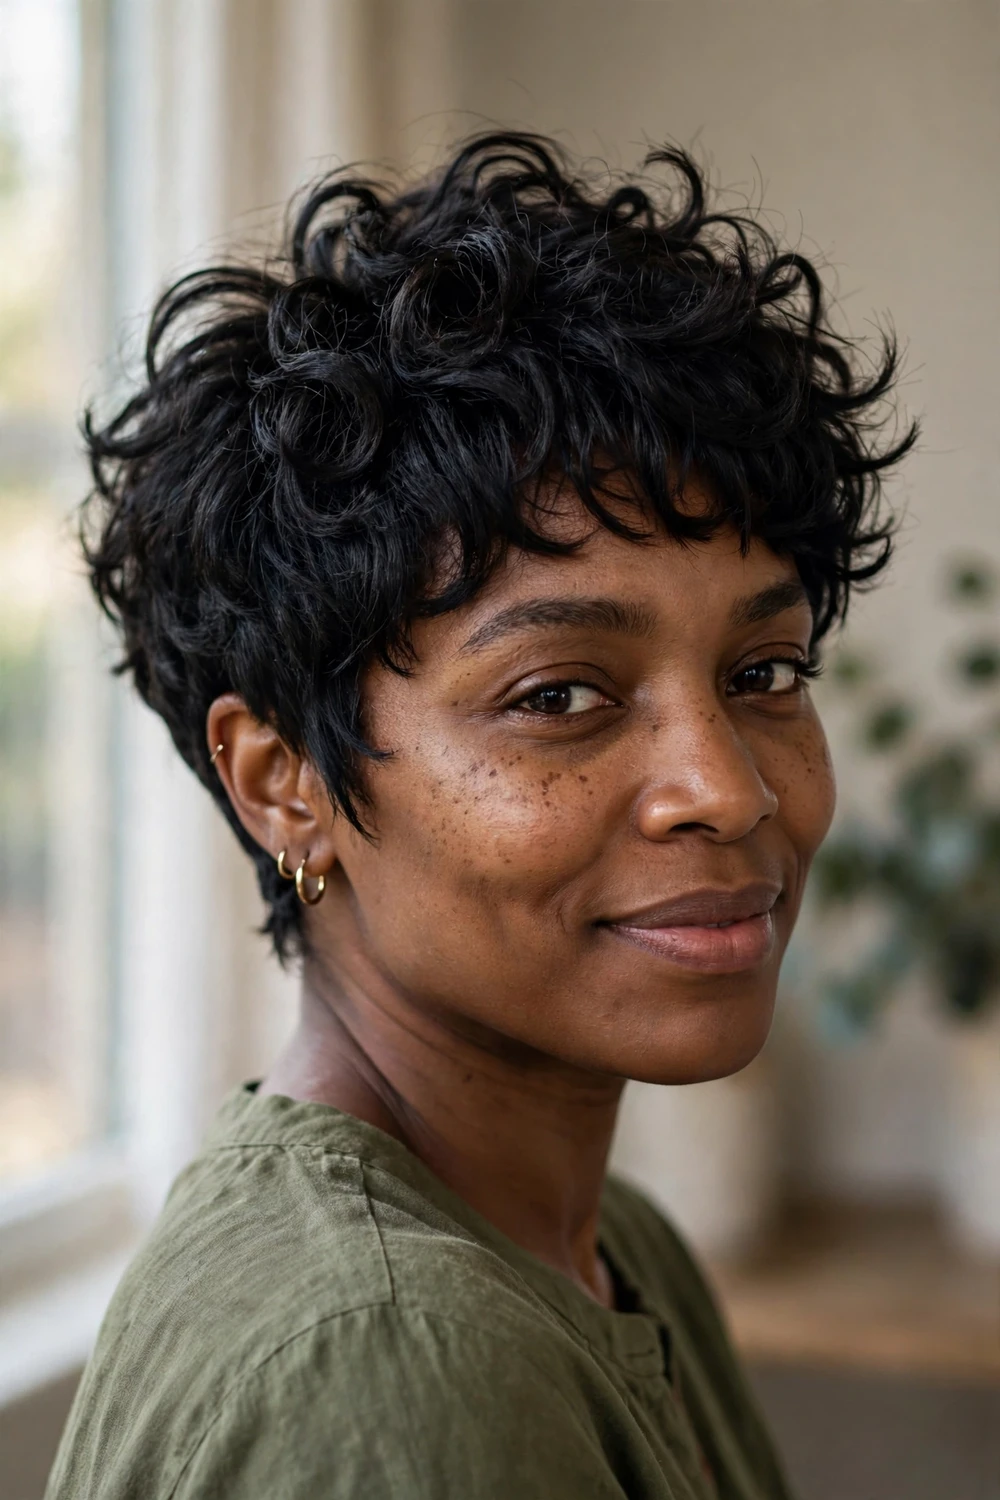
Texture is what separates a flat cut from a lively one. The textured curly pixie uses choppy point-cut layers through the crown so the 3c coils separate into individual, springy pieces instead of forming one solid cap. This is the cut to ask for if your coils tend to clump together and look heavy. The layers remove weight in exactly the right places, which makes the hair move more and dry faster.
Try this: Work a fingertip of matte clay into the crown pieces after diffusing. It adds separation and a slightly piece-y finish without shine or weight.
11. Curly Pixie with Shaved Sides
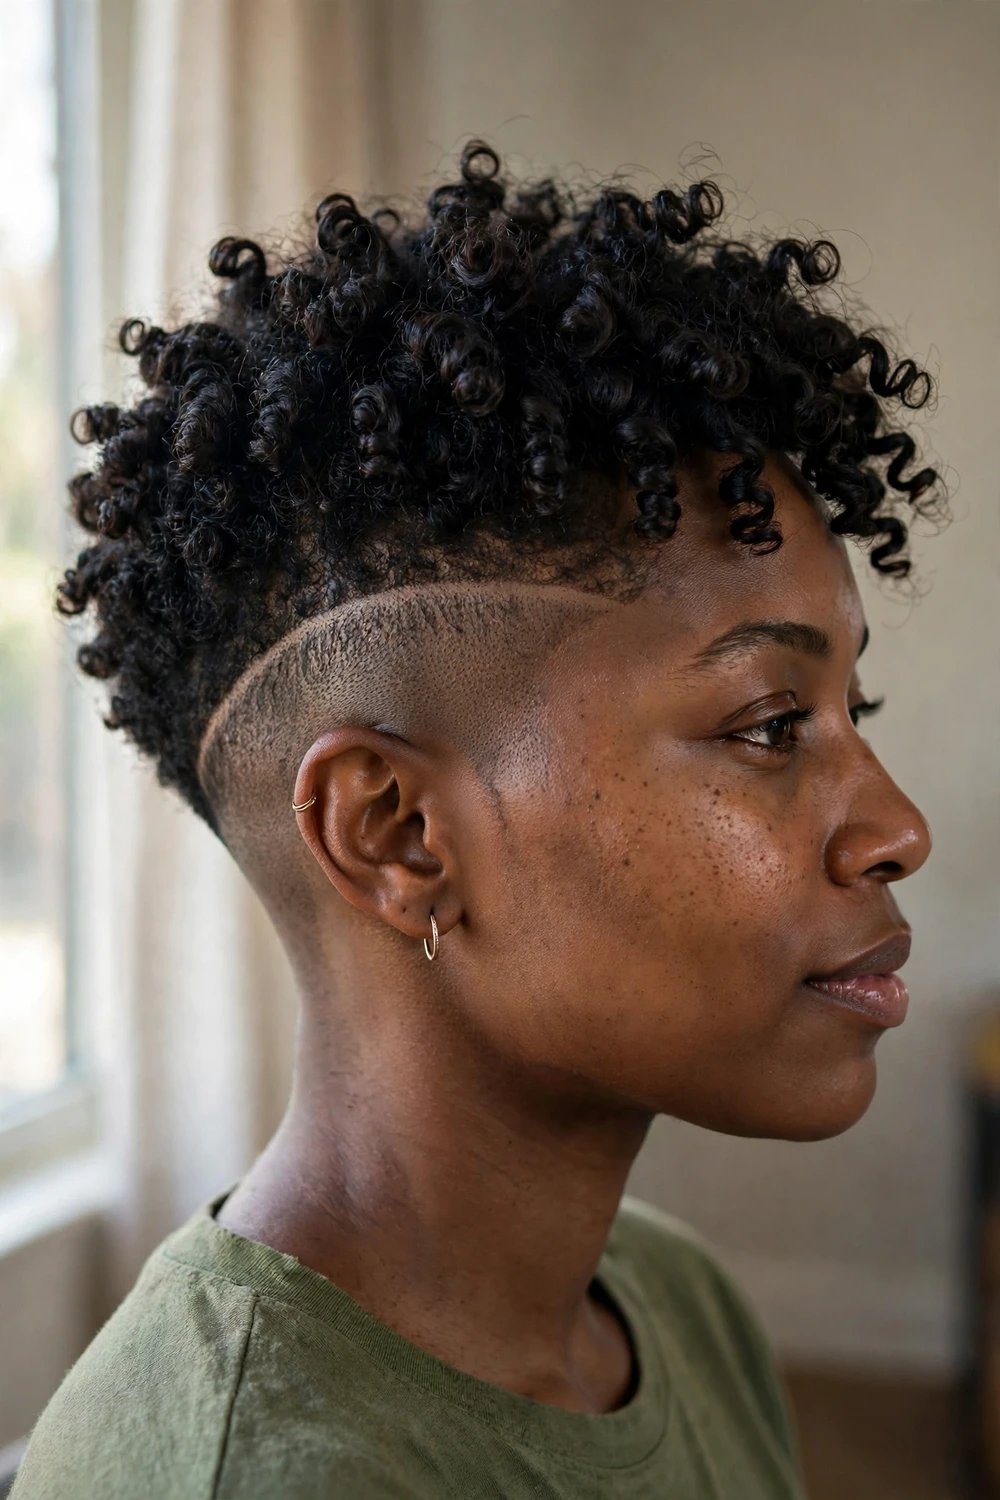
For the most striking contrast on this list, shave the sides. This pixie pairs closely shaved sides with a full crown of defined 3c coils, and the clean sides make the coil pattern on top look even more dramatic. It is also genuinely low maintenance: the shaved sections need nothing but a trimmer touch-up every 2 to 3 weeks. Keep the top at 2 to 3 inches so the coils have room to form their shape.
Try this: Run a trimmer with a short guard over the sides every two weeks at home to keep the line crisp between barber visits.
12. Curly Pixie with Side Part
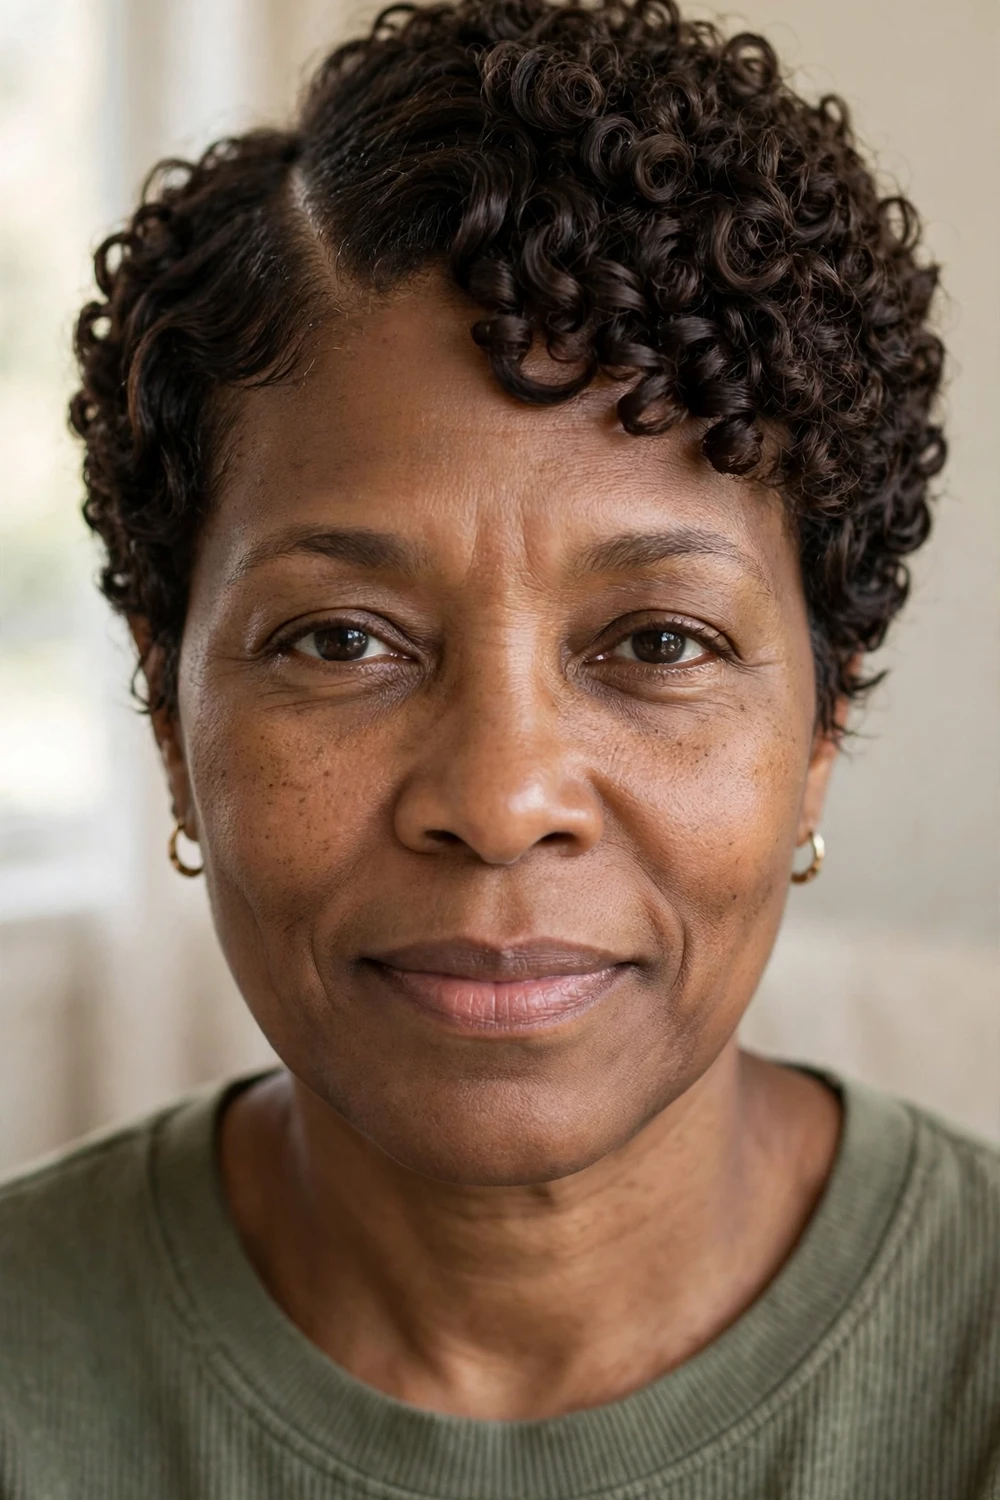
A defined part adds instant polish. This pixie combs the 3c coils into a clean deep side part while damp, which gives the cut structure and a more finished look than a part-free style. It suits work settings and formal events, and the part also helps distribute volume evenly so one side does not puff out. Set the part while the hair is wet and it will dry into place.
Try this: Trace the part with the tail of a rattail comb on soaking-wet hair, then apply your styling products. A wet-set part holds far better than one made on dry hair.
13. Edgy Curly Pixie
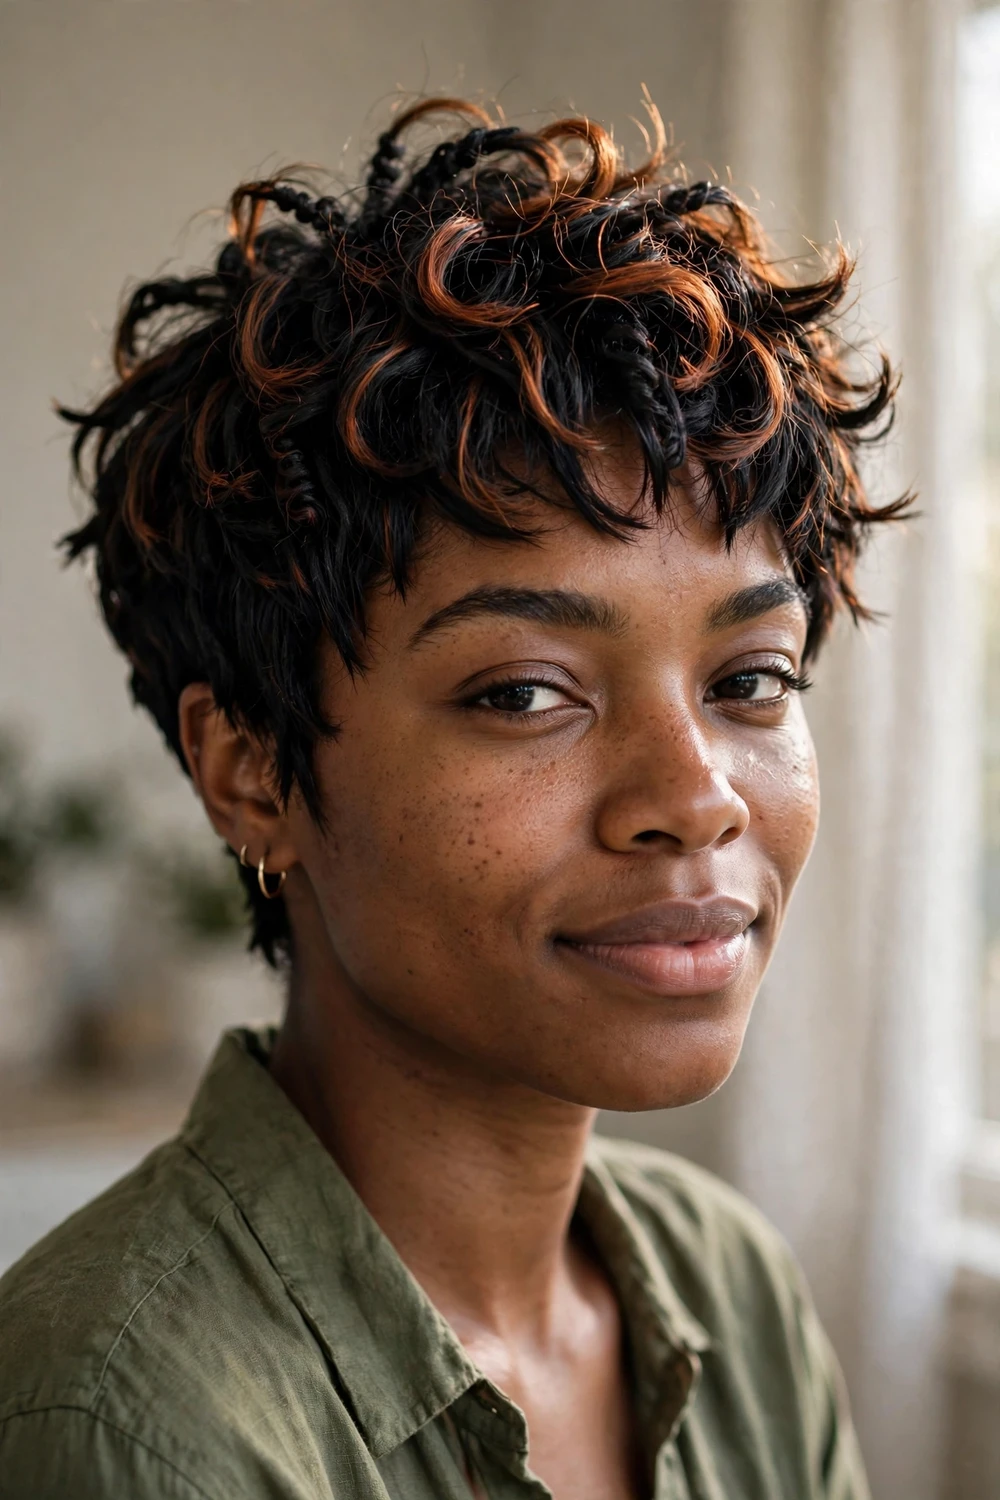
Choppy layers and disconnected pieces give this pixie its edge. The edgy curly pixie breaks the rounded outline on purpose: uneven lengths, piece-y texture, and sometimes a pop of color through the coils. On 3c hair, the natural spring of the coils does half the work, since each coil kicks out in its own direction. This is the cut for anyone who wants their pixie to look intentional rather than neat.
Try this: Twist 5 or 6 random coils with a tiny amount of gel for extra definition, and leave the rest untouched. The contrast between defined and free coils creates the edgy texture.
14. Curly Pixie with Highlights
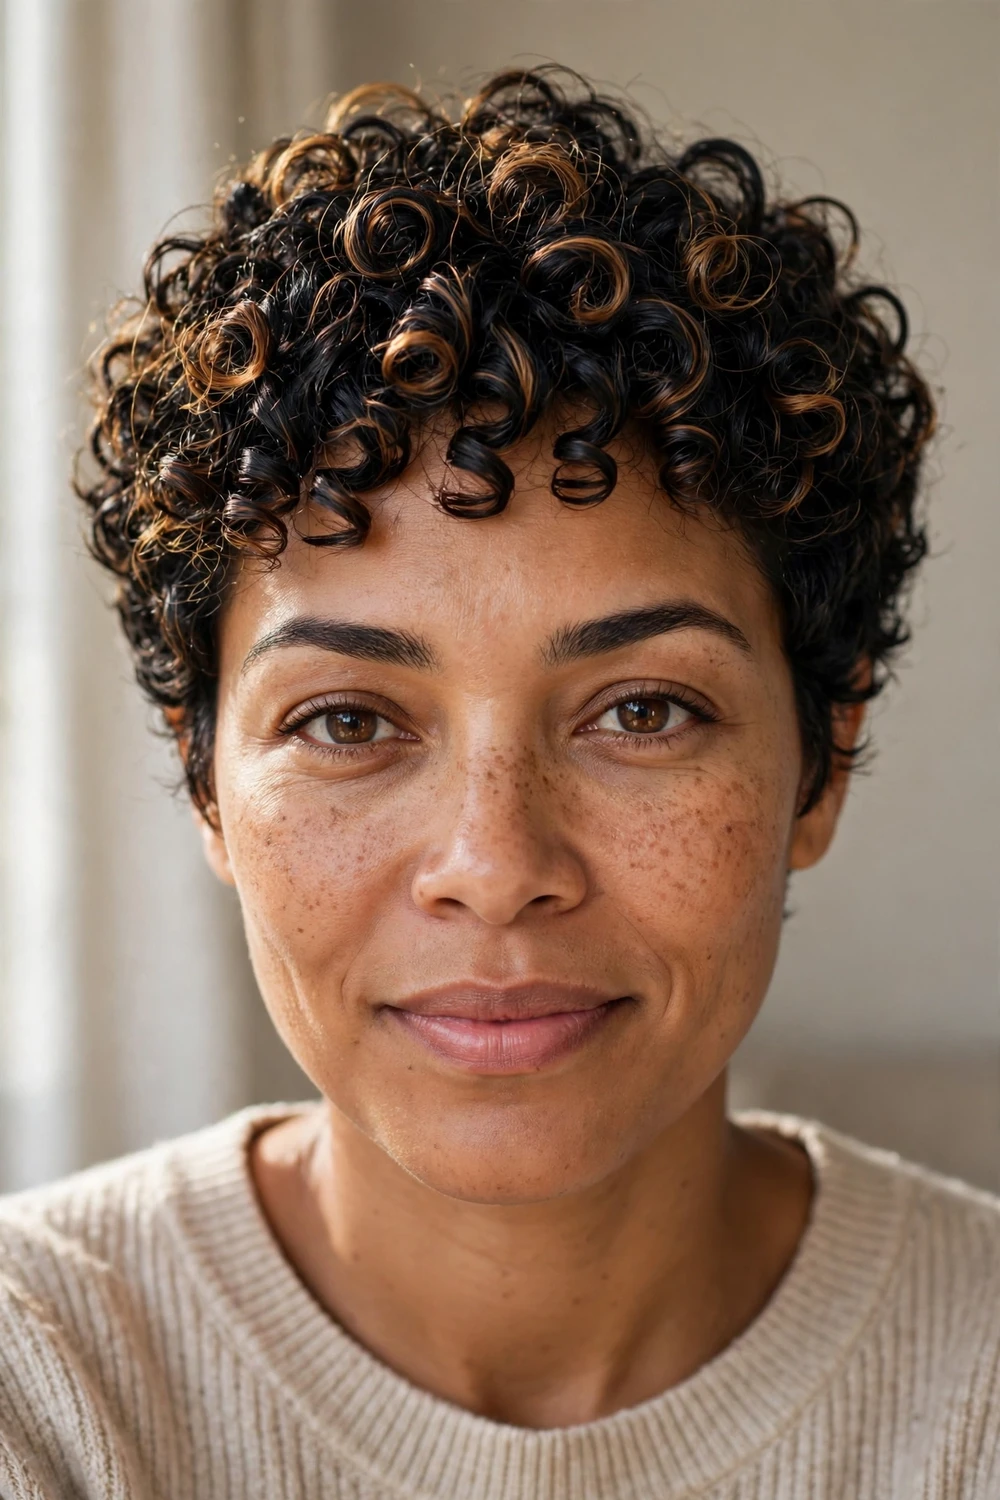
Color changes how a pixie reads. Highlights woven through 3c coils catch the light on every curve, which adds depth and makes the coil pattern more visible from a distance. Caramel, honey, and copper tones work well on dark 3c hair without full bleaching. Keep in mind that lightened curls need extra moisture, so add a weekly deep-conditioning session to your routine after coloring. Ask your colorist to place the highlights through the top and crown, where the coils catch the most light, and keep the nape natural for contrast.
Try this: Switch to a sulfate-free shampoo after highlighting. Sulfates strip both color and the natural oils that 3c hair needs.
15. Voluminous Curly Pixie
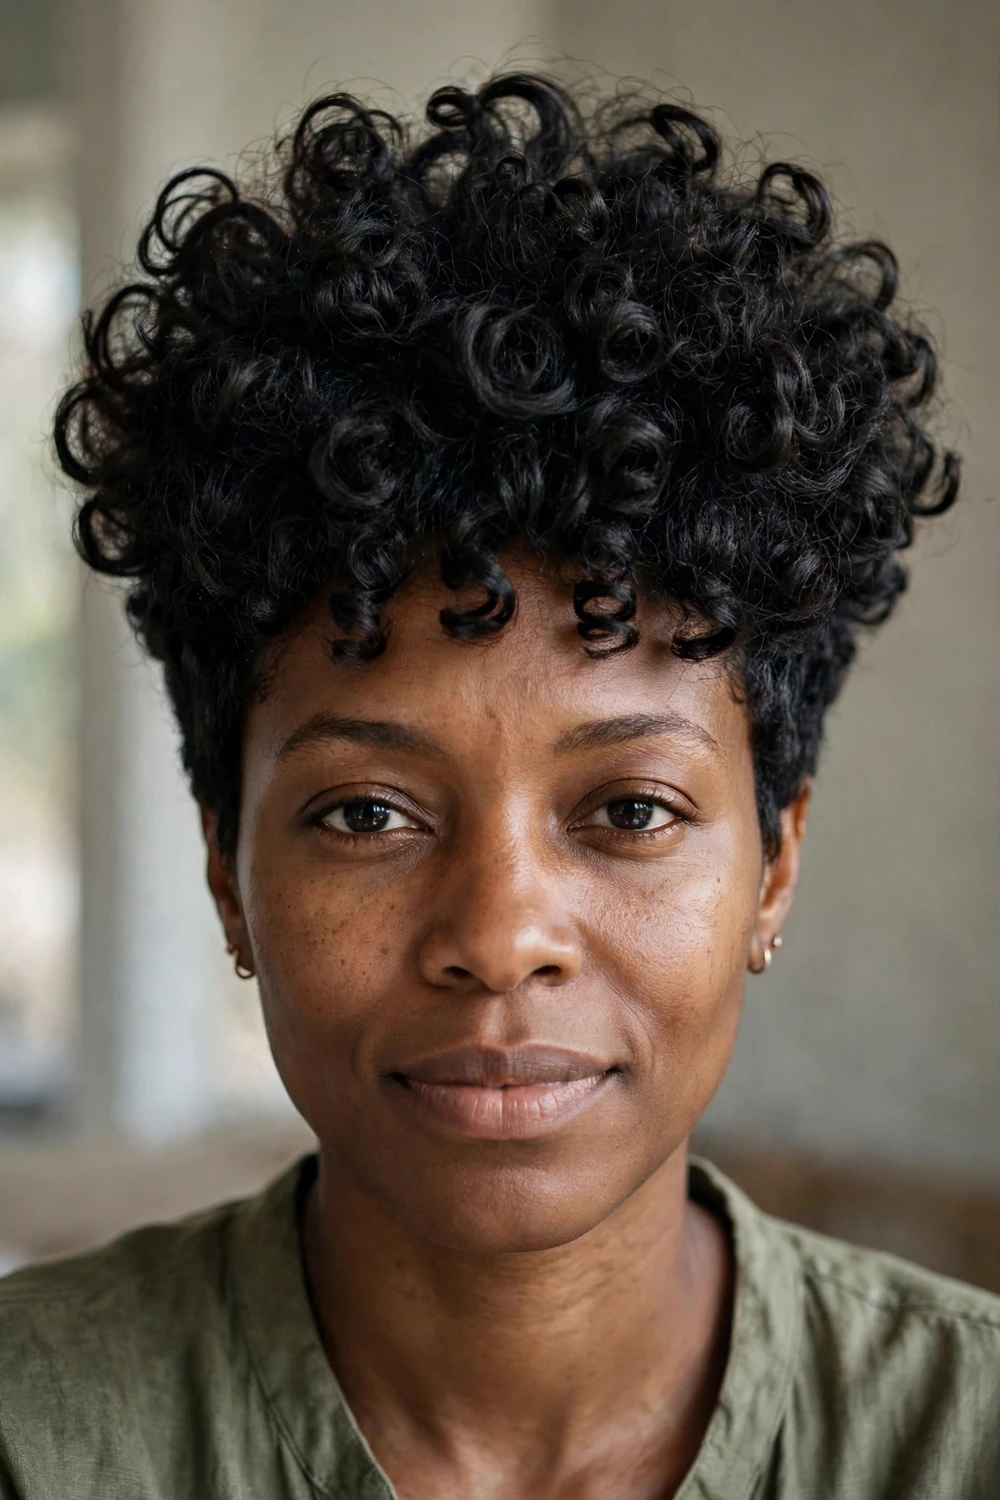
When volume is the whole point, build the crown. The voluminous curly pixie stacks the 3c coils high for maximum height and fullness, with the sides kept close so all the drama sits on top. This cut is a natural fit for 3c hair, which produces volume with almost no effort. Diffusing upside down is the fastest way to get the lift, and a pick at the roots finishes the shape.
Try this: Diffuse with your head flipped upside down until the hair is 80 percent dry, then flip back and arrange the crown with your fingers. The upside-down drying builds root lift that lasts.
16. Curly Pixie with Color Pops
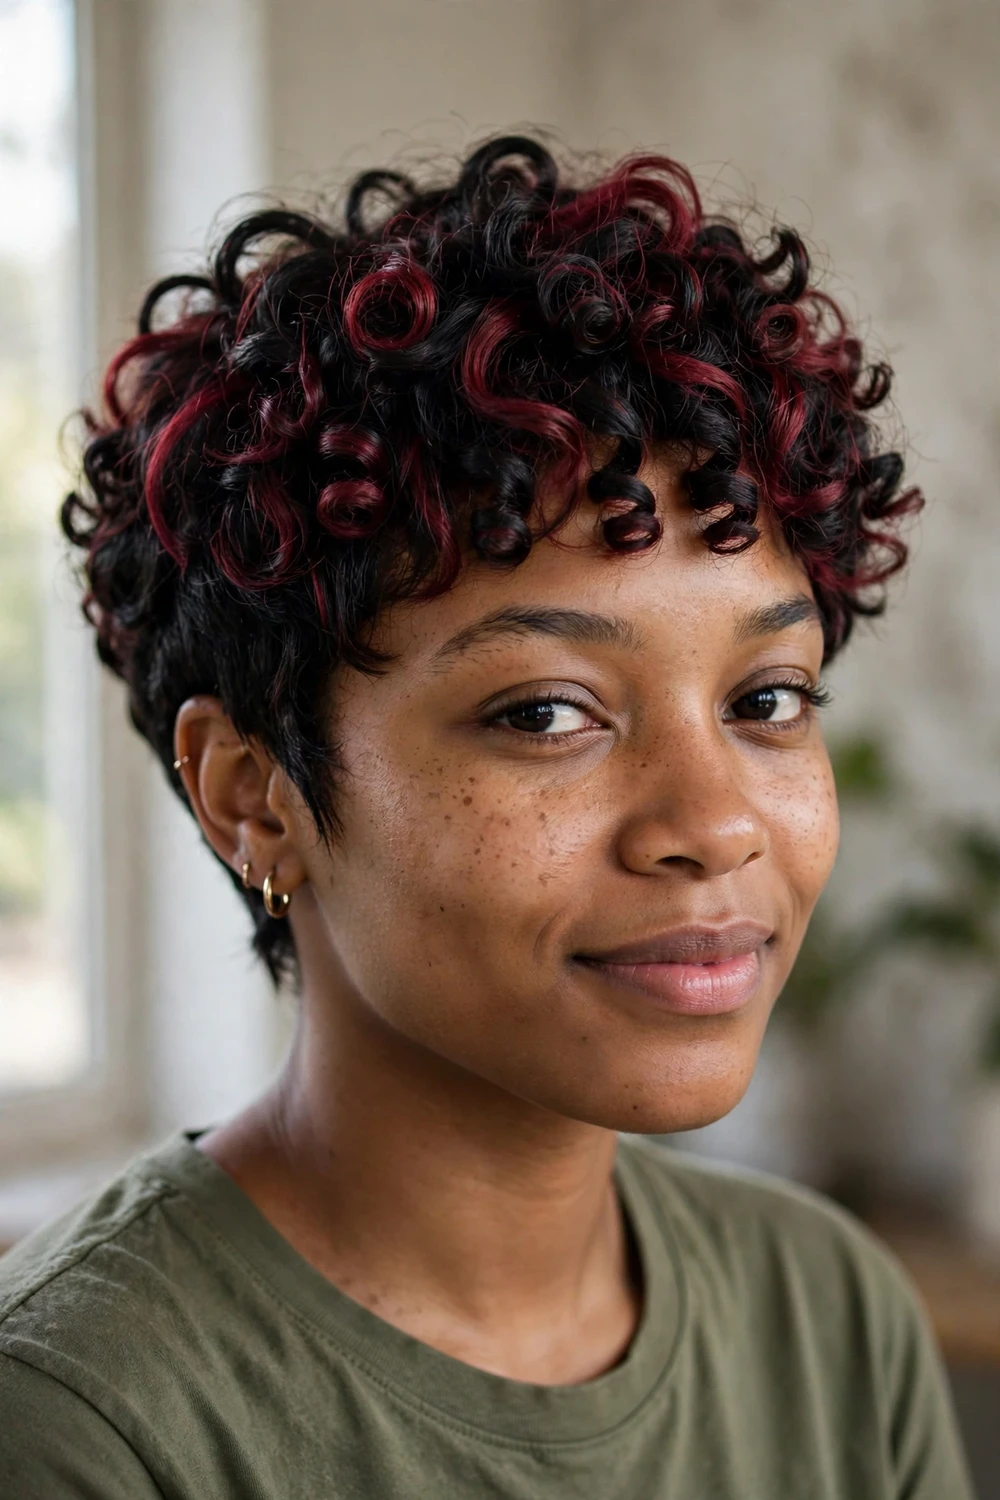
A few streaks of bold color turn a simple pixie into a statement. Color pops, whether burgundy, red, purple, or copper, sit inside the 3c coils and flash as the hair moves. Because the hair is short, the color commitment is small: it grows out fast and costs less than coloring long hair. Place the pops through the top and crown where they show most, and keep the sides natural for contrast.
Try this: Wash color-treated 3c hair in cool water and cut back to twice a week. Cool water and fewer washes keep the color vivid much longer.
17. Natural Curly Pixie

Skip the elaborate routine entirely. The natural curly pixie is a wash-and-go cut that shows your 3c pattern with minimal product and no heat: cleanse, condition, add a leave-in and a light cream, and let the coils do what they do. The shape comes from the cut itself, not the styling, so this only works with a good dry cut underneath. It is the lowest-cost option on this list in both time and products.
Try this: Apply products to soaking-wet hair in the shower and do not towel-dry first. Wet application gives the most even product distribution on 3c coils.
18. Curly Pixie for Thick Hair
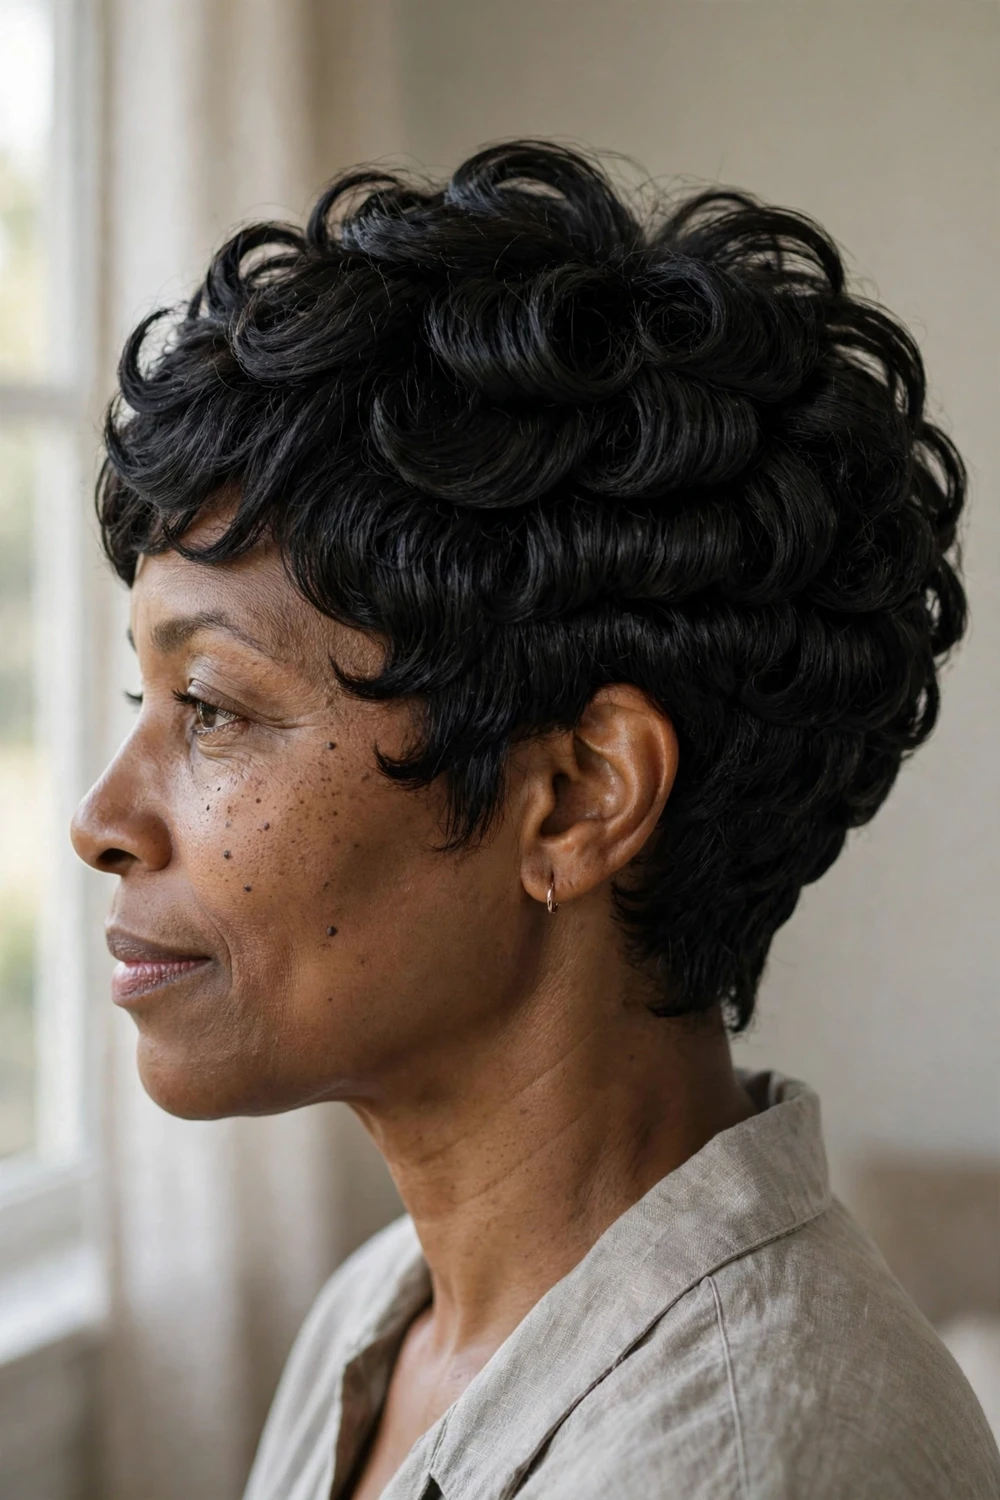
Dense 3c hair needs a cut that removes bulk without removing shape. This pixie uses internal layering to take weight out of the thickest areas while keeping the outline full and rounded. The result looks lighter and dries noticeably faster than an unlayered cut on the same head of hair. Tell your stylist where your hair feels heaviest, since 3c density varies a lot from person to person. Readers dealing with heavy density may also like the dedicated guide to short pixie haircuts for thick hair for more shaping ideas.
Try this: Section the hair into 4 parts when applying products. Thick 3c hair hides dry patches, and sectioning makes sure every coil gets coated.
19. Curly Pixie for Round Faces
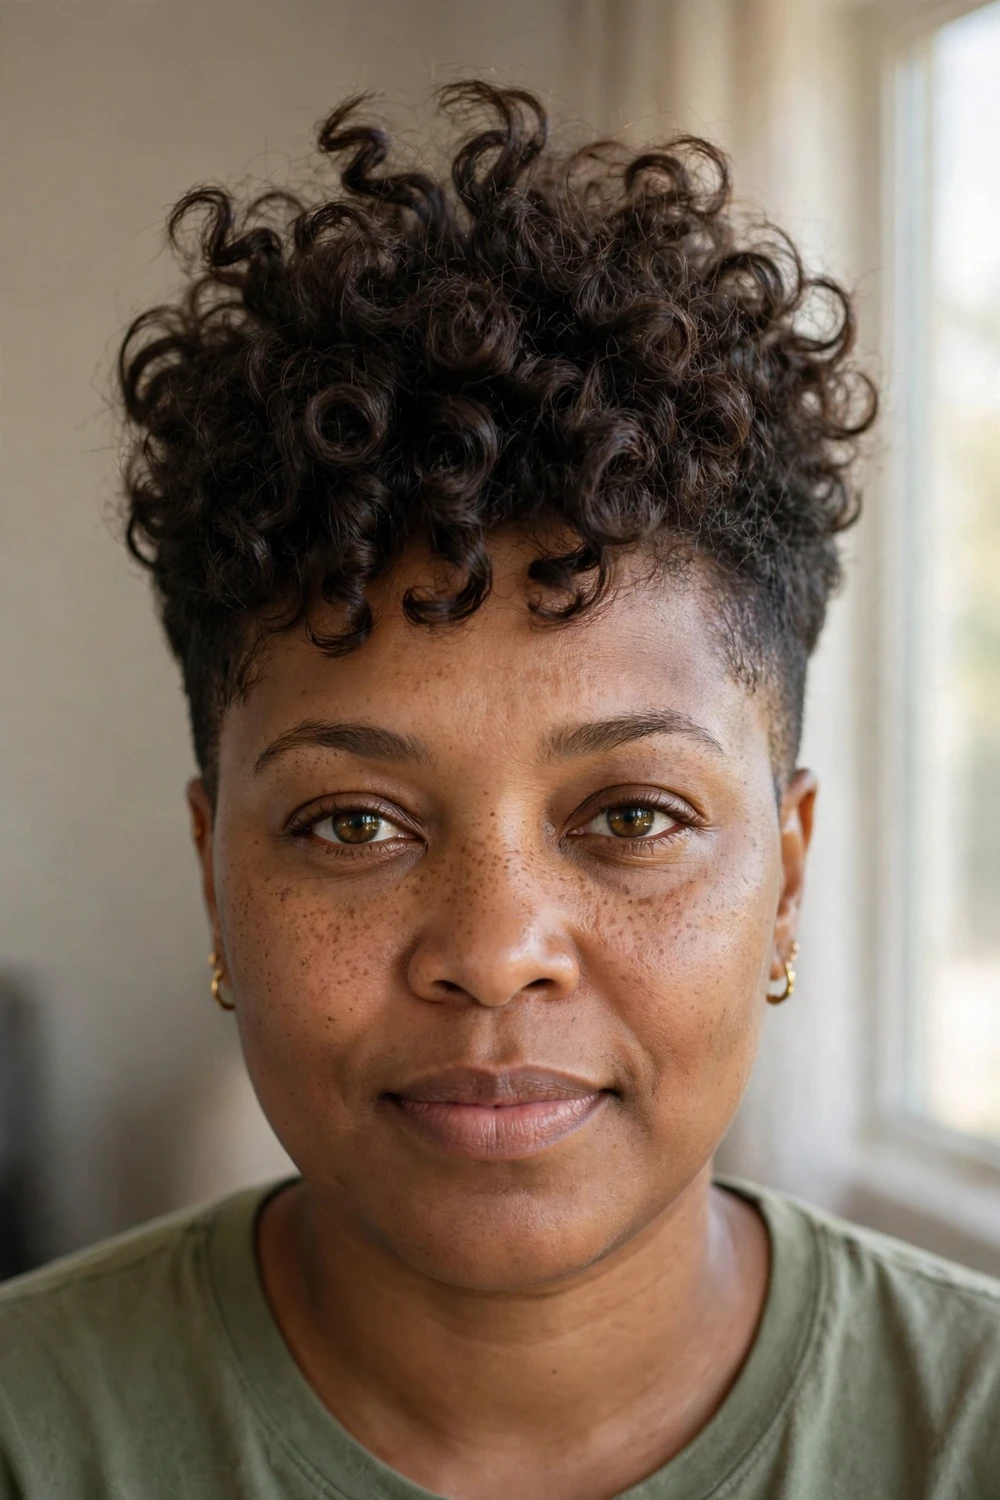
The right proportions flatter a round face. This pixie builds height at the crown and keeps the sides close, which lengthens the face visually instead of widening it. The key measurements: at least 2.5 inches on top for vertical lift, and sides tapered tight. Avoid a fully rounded silhouette with equal volume at the sides, since that mirrors the face shape instead of balancing it. An asymmetrical version with a deep side part works well too, since the diagonal line adds angles that flatter round faces.
Try this: After diffusing, gently lift the crown coils with a pick and press the side coils flat with your palms. The contrast in volume is what slims the face.
20. Layered Curly Pixie Haircut
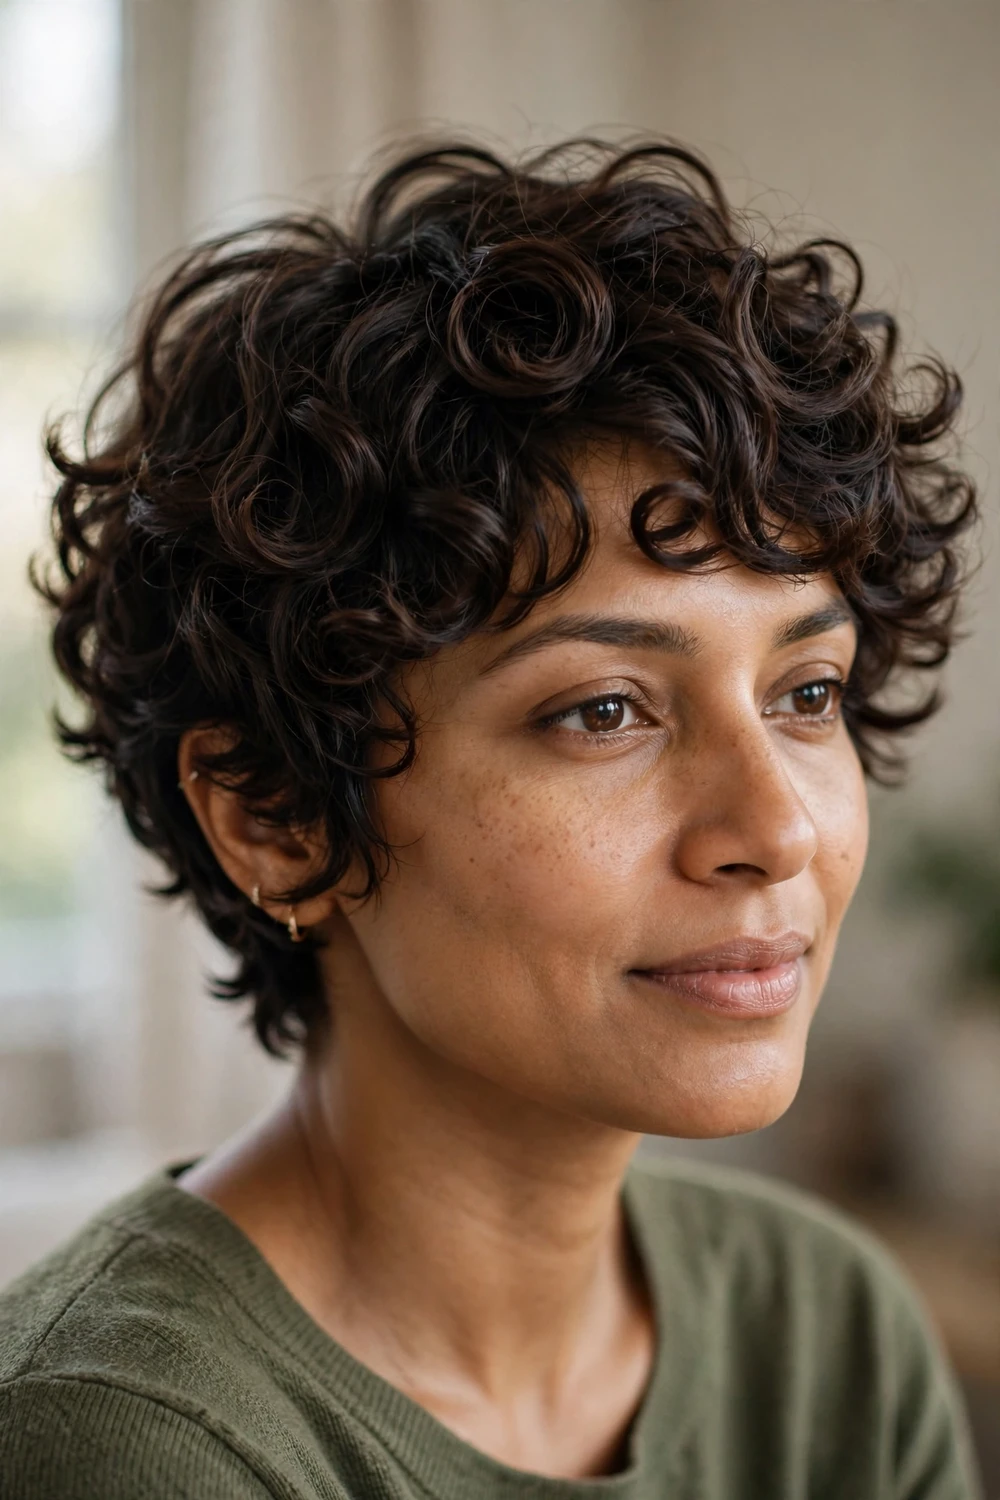
Layers are the quiet engine of a good pixie. This cut varies the curl lengths through the crown so the 3c coils stack in soft tiers instead of one block, which adds movement and keeps the shape from going helmet-like. Layering also helps the cut grow out gracefully, since the tiers blend as the hair gets longer. Ask for long layers rather than short choppy ones if you want a softer, more blended finish.
Try this: Scrunch each layer upward toward the scalp while diffusing. The scrunching motion helps the tiers separate and shows off the layering.
21. Curly Pixie with Long Sideburns
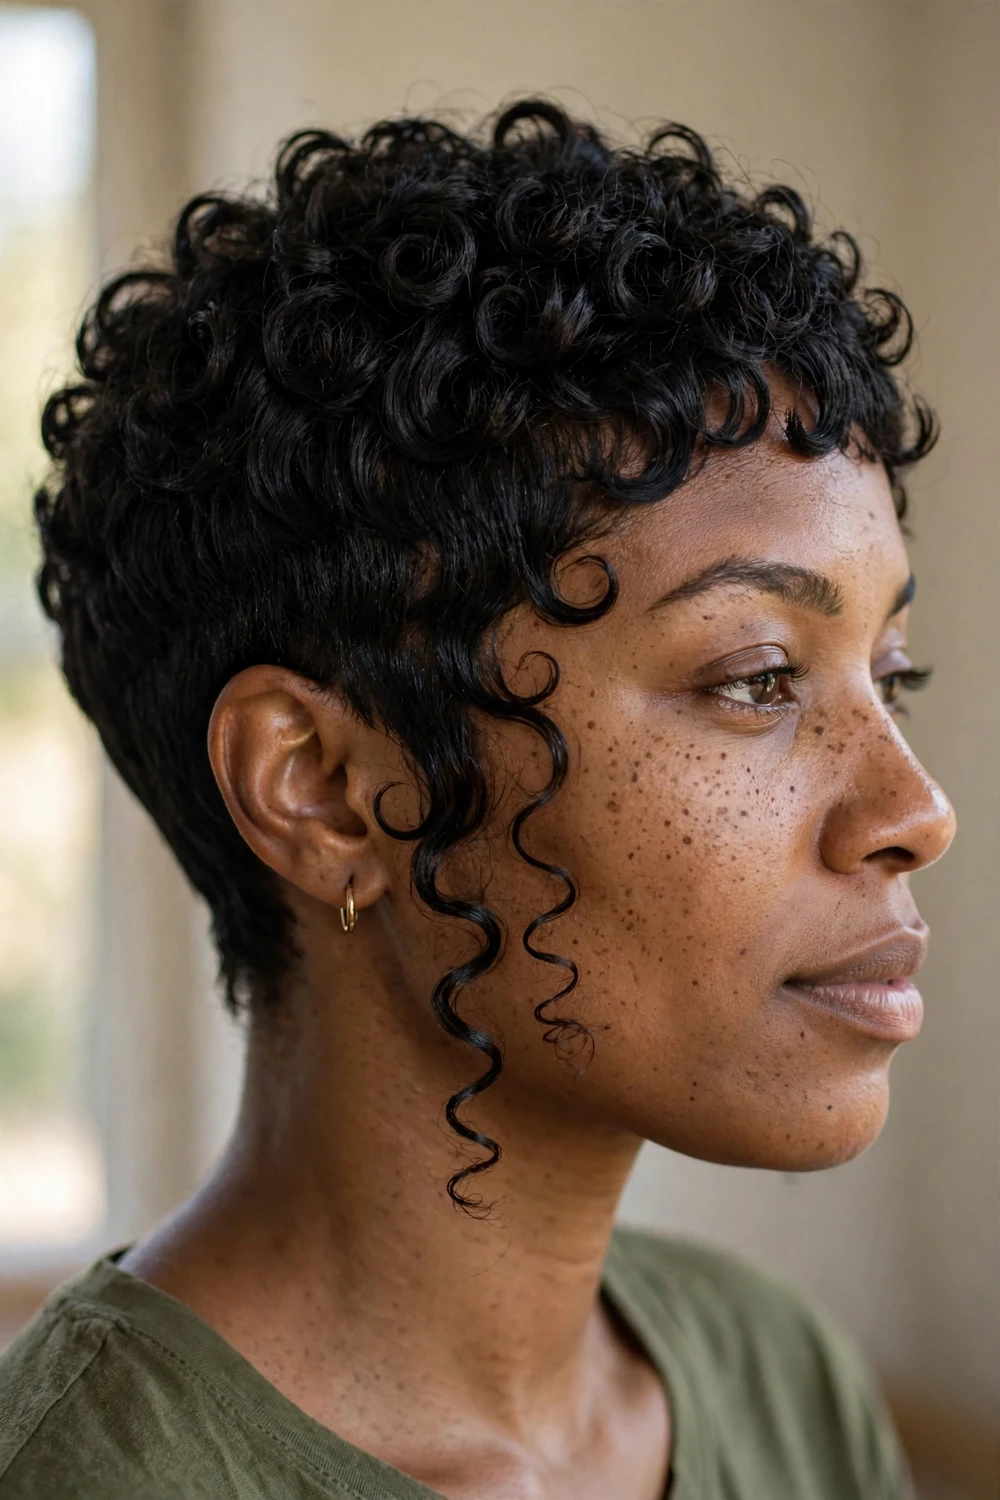
Sideburns add an angular detail most pixies skip. This cut leaves the coils in front of the ears longer so they curl into defined sideburns that frame the cheekbones, while the rest of the pixie stays short. The look is structured and a little retro, and it suits oval and heart-shaped faces well. Keep the sideburn coils moisturized, since the hair in front of the ears is fine and dries out fast.
Try this: Coil each sideburn around your finger with a dab of curl cream after styling the rest. Defined sideburns read as deliberate, not overgrown.
22. Soft Curly Pixie for Mature Women

A softer take suits anyone who wants polish without sharpness. This pixie rounds the 3c coils into a gentle, even shape with no harsh lines and a soft hairline. The styling stays simple: a moisturizing cream and a diffuser, with no heavy gels or stiff finishes. It is a forgiving cut that looks neat even on days you skip styling. The related roundup of curly pixie haircuts over 50 has more age-specific shaping ideas.
Try this: Choose cream-based stylers over gels for this cut. Creams keep the finish soft and touchable, which suits the gentle outline.
23. Curly Pixie with Natural Gray Hair
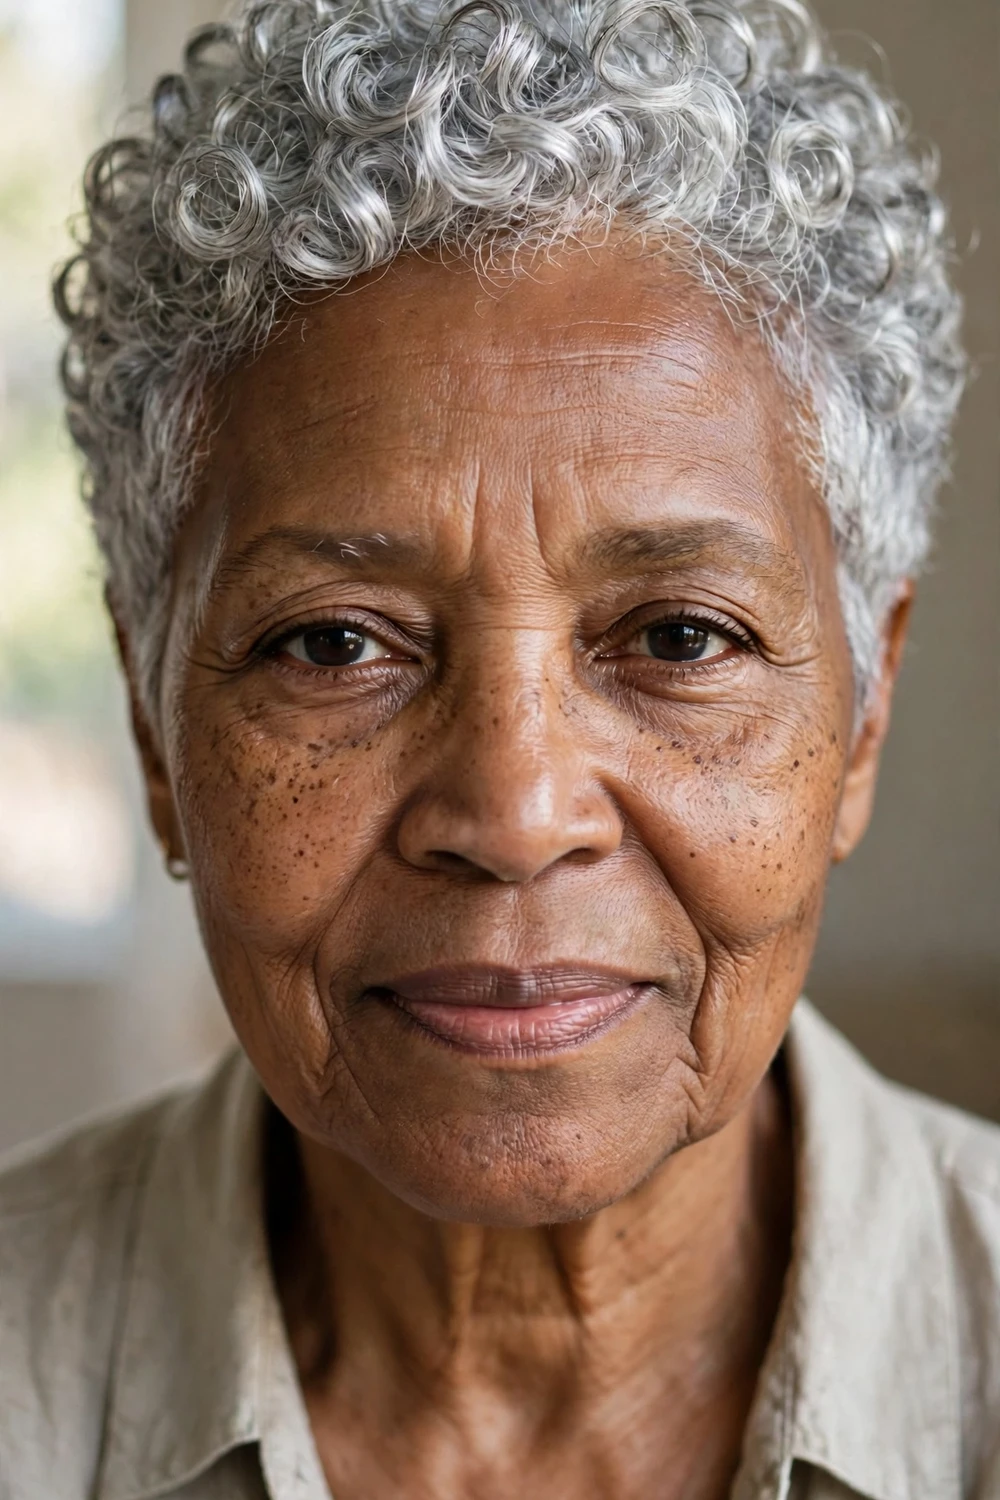
Gray 3c coils in a pixie are hard to beat. The natural mix of silver, white, and darker strands catches the light on every coil, which gives the cut a depth that single-color hair cannot match. Keep the shape close and rounded so the color does the talking. A purple shampoo once a week keeps the silver bright instead of dull or yellow, and gray hair tends to be drier, so do not skip the leave-in.
Try this: Use a purple shampoo once a week and follow every wash with a rich leave-in conditioner. Gray 3c hair drinks up moisture.
24. Curly Pixie with Shaved Design
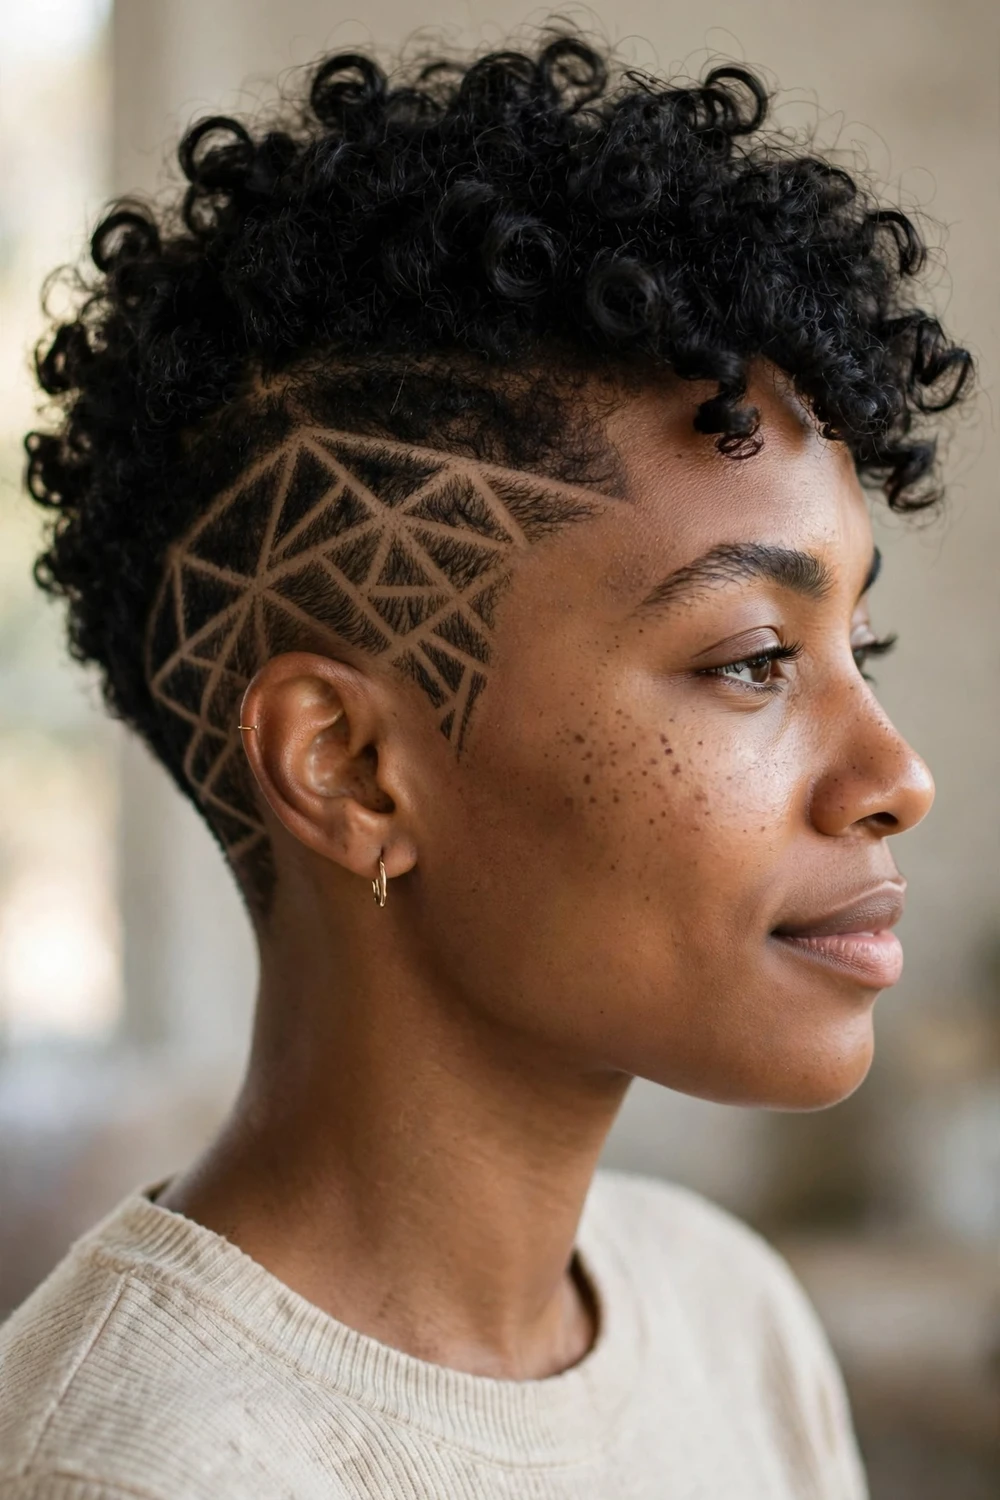
Turn the sides into the main event. This pixie carves a geometric design, lines, or curves into the shaved side section while the 3c coils stay full on top. The design needs a touch-up every 2 to 3 weeks to stay crisp, so factor in regular barber visits. It is the most personal cut on this list: the design can be as subtle as a single line or as detailed as you like.
Try this: Take a photo of the design when it is fresh and show it at each touch-up. The reference keeps the lines consistent visit after visit.
25. Short Rounded Cut
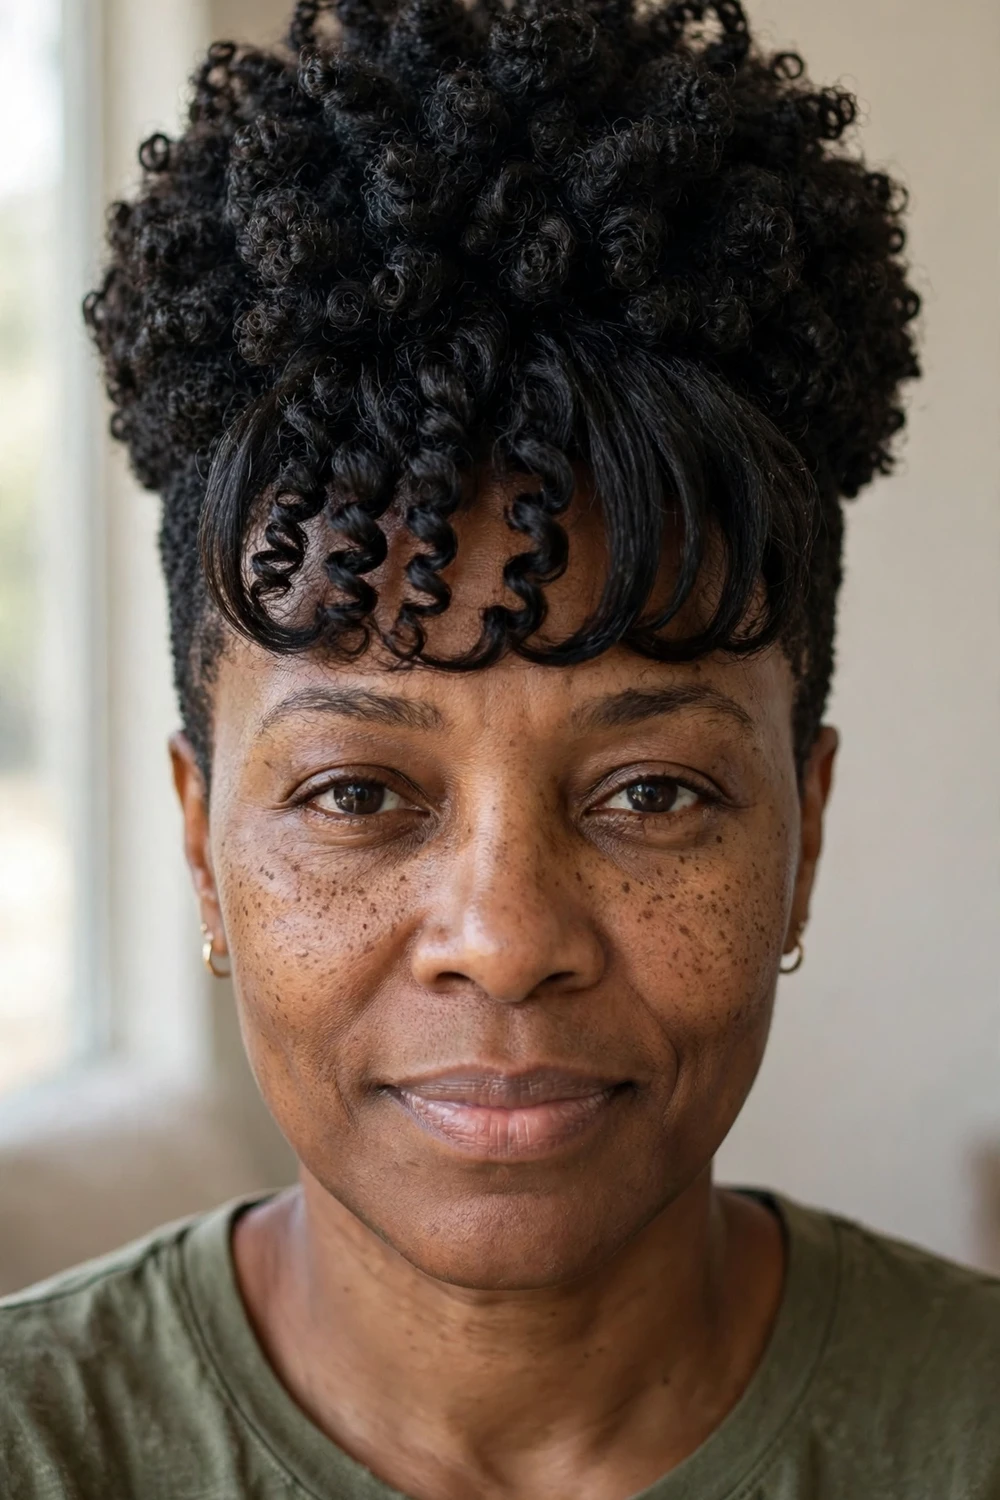
The short rounded cut is all about shaping: it shapes the 3c coils into a near-perfect globe: longer bangs at the front, curls piled evenly on top, trimmed sides, all curving into one smooth outline. It takes a skilled hand to get the symmetry right, so look at a stylist’s portfolio for rounded shapes before booking. The payoff is a head-turning silhouette that photographs well. Between trims, refresh the shape by diffusing the coils upward and smoothing the outline with your palms while the hair is still warm.
Try this: Diffuse in sections, moving the dryer around the head instead of staying in one spot. Even drying keeps the globe shape balanced.
26. High Top
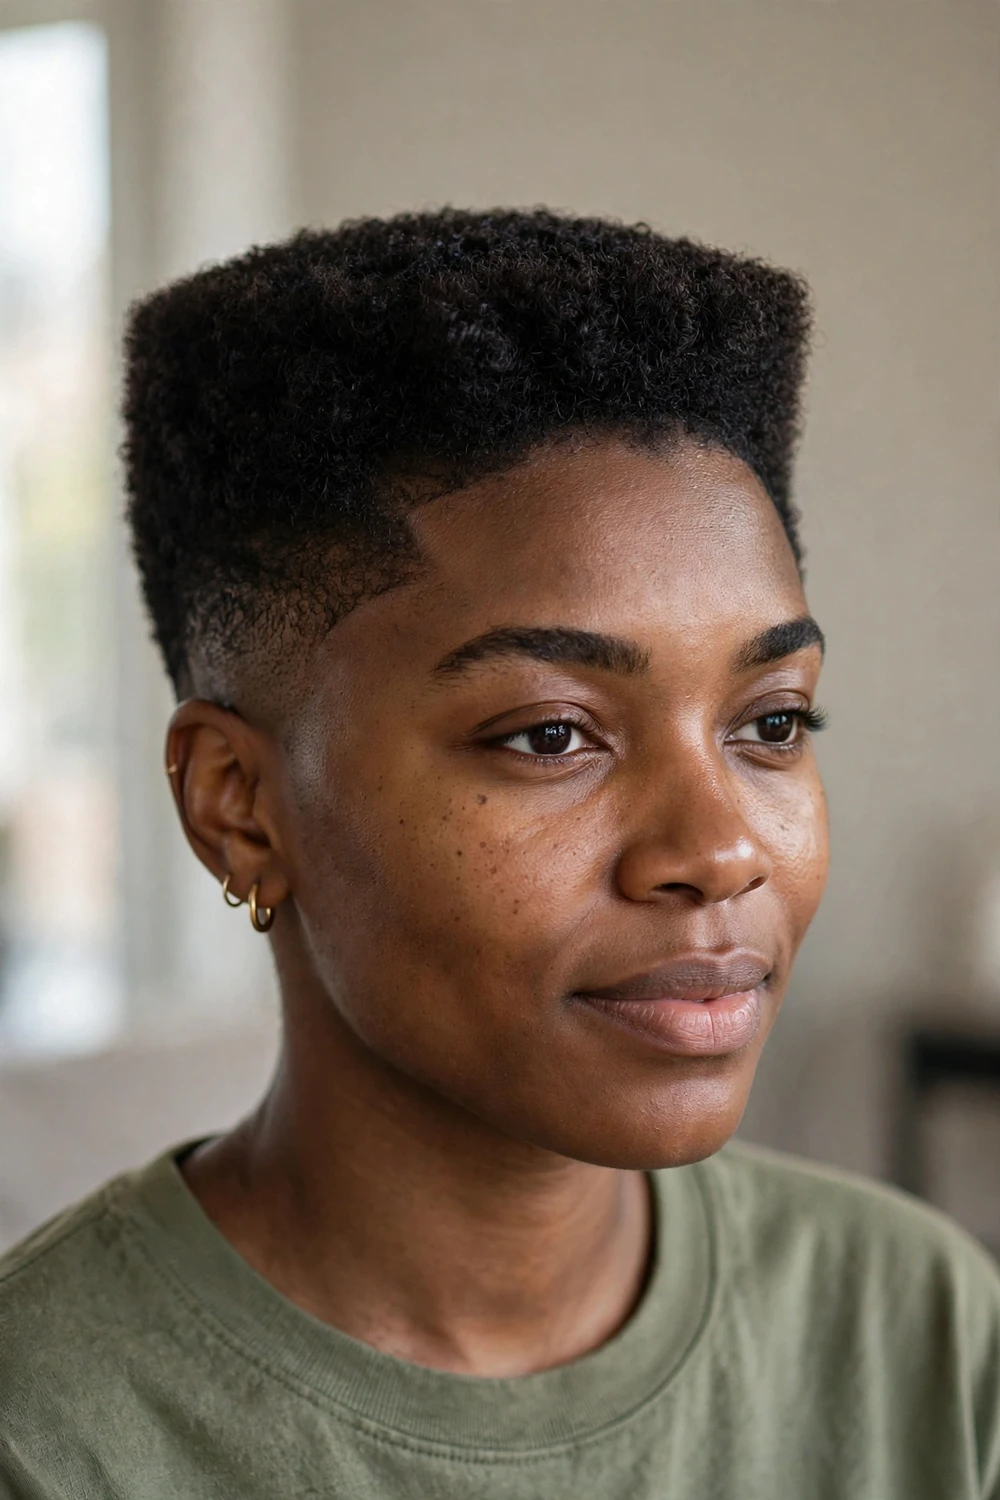
Borrowed from classic barbering, the high top shapes the 3c coils into a level, flat-topped crown with faded sides. It is bold, graphic, and unmistakable, and the flat top shows off coil definition in a way rounded cuts do not. The top needs regular trims to keep the level edge, usually every 3 to 4 weeks. This cut works best on dense 3c hair that can hold the shape. Softer or finer 3c hair may struggle to keep the level edge, so ask your barber for an honest assessment before committing.
Try this: Use a pick to lift the top coils straight up after diffusing, then press a light holding cream over the surface to set the flat shape.
27. Faux Hawk
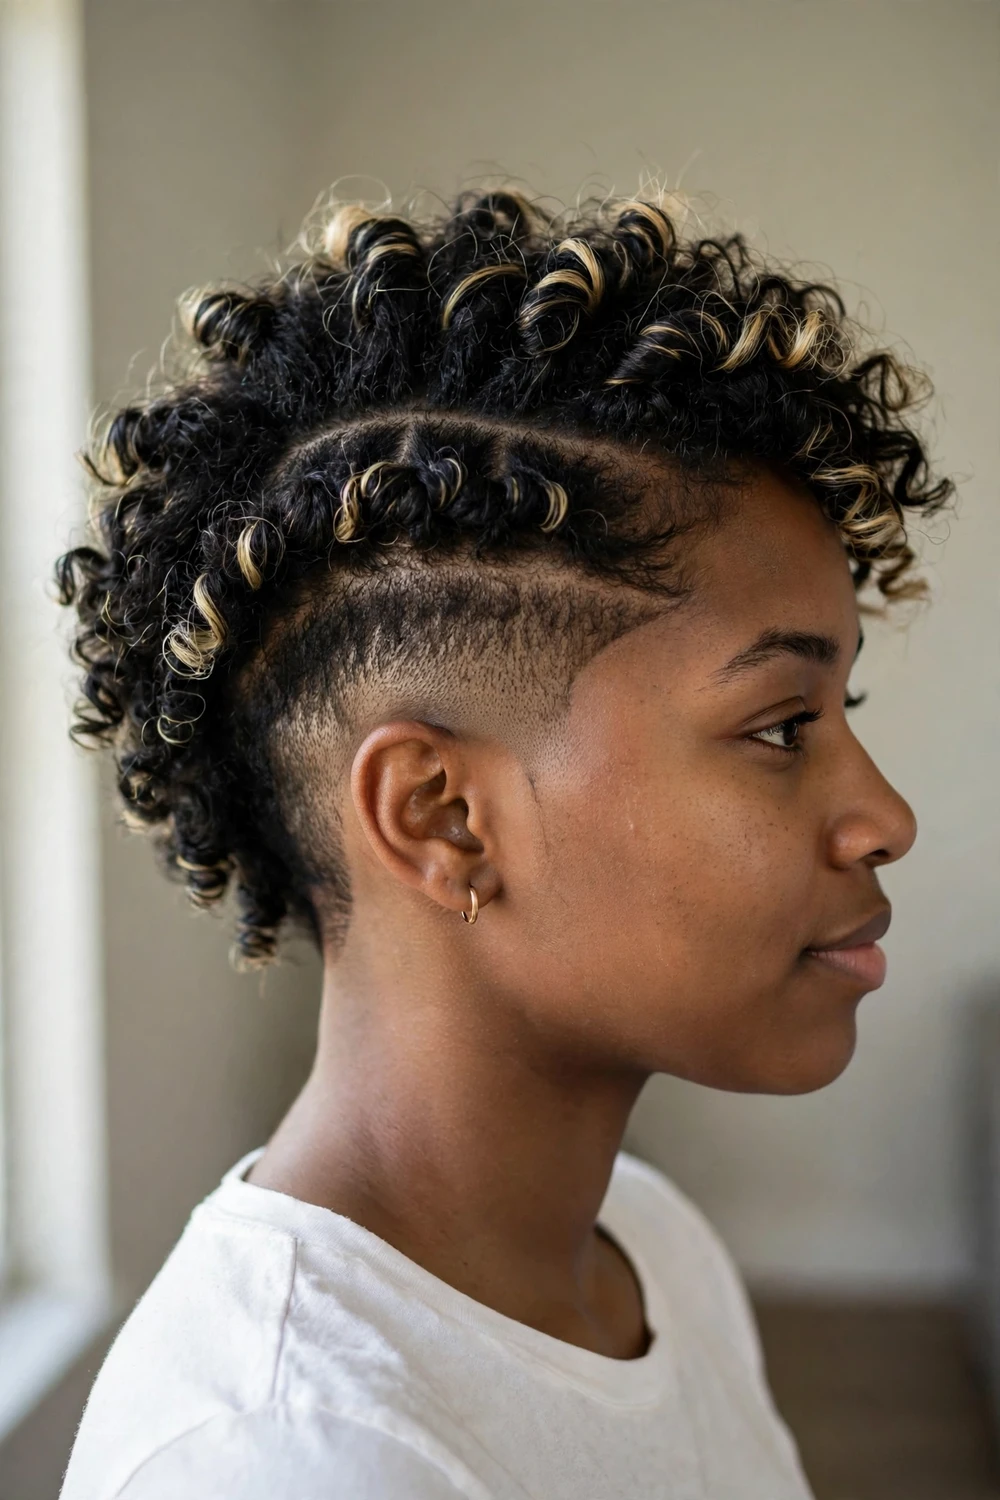
The faux hawk keeps the drama of a mohawk without the full commitment. The sides taper short while a center strip of 3c coils runs from front to back, and the strip can be as wide or narrow as you like. A few colored streaks through the strip add extra attitude, as short hair takes color quickly and cheaply. Style the strip upward and forward for height. At night, protect the strip with a satin scarf so the coils keep their lift for the next day.
Try this: Apply a strong-hold gel to the center strip on damp hair and diffuse with the dryer pointing upward. The upward airflow trains the coils to stand tall.
28. The Big Chop Pixie
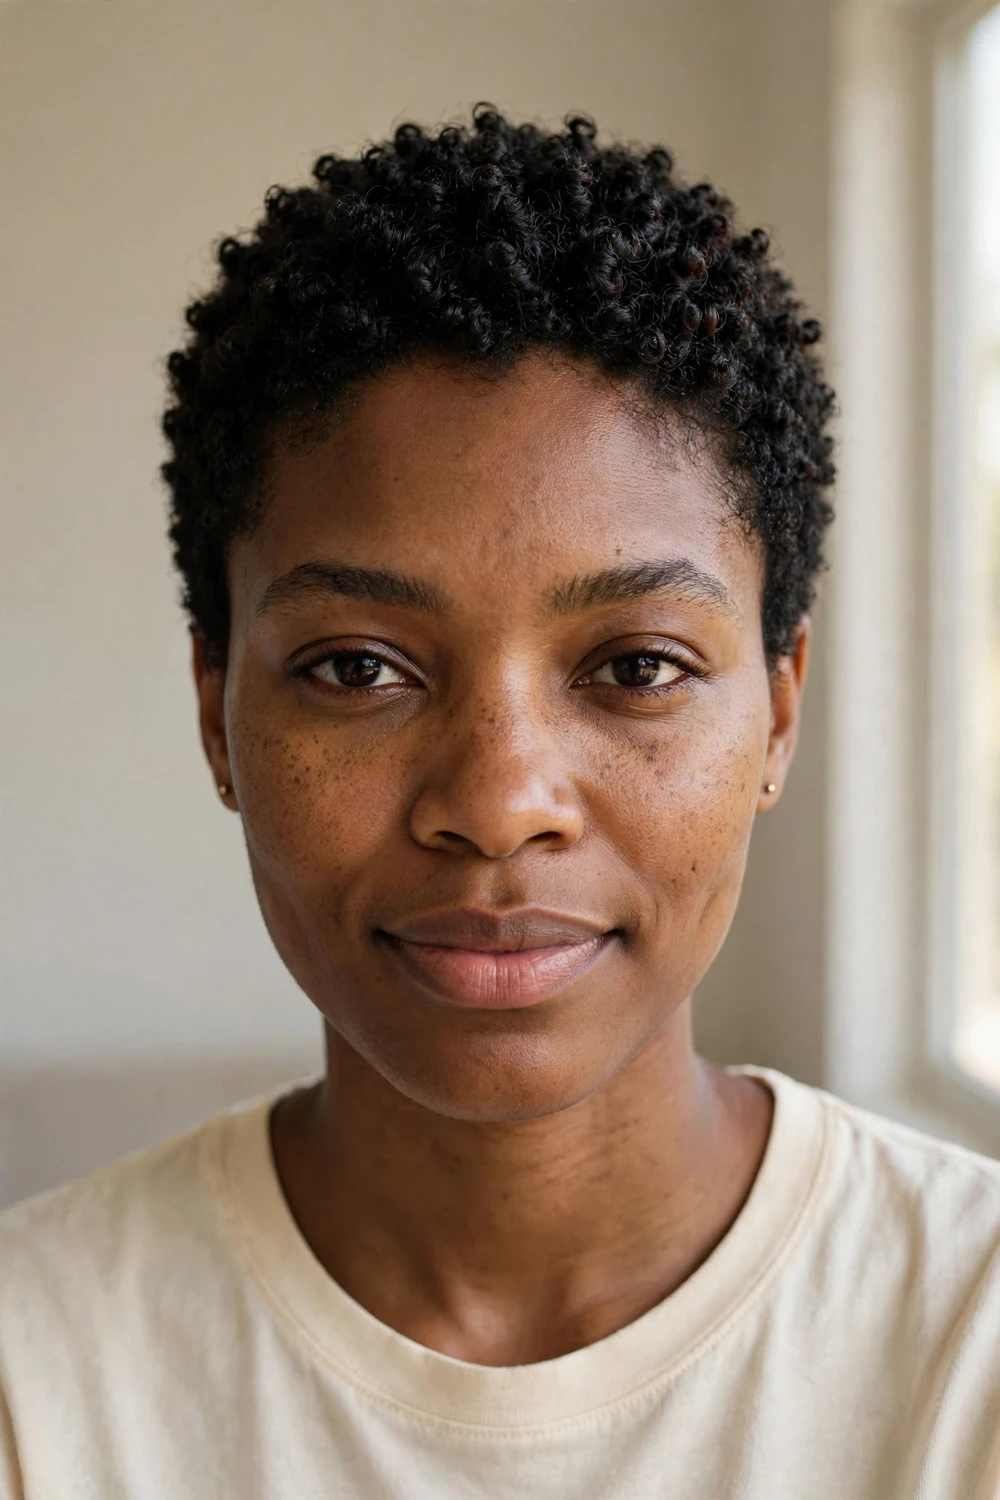
Starting your natural journey? The big chop pixie cuts away relaxed or damaged ends in one go and leaves healthy 3c coils close to the scalp in a shaped, wearable cut. Unlike an unshaped chop, this version has a real silhouette: slightly longer on top, neat at the edges, ready to grow out well. It is the fastest reset for 3c hair, and the short length makes the transition period easy to manage. For more on short natural cuts, see short pixie haircuts curly hair.
Try this: Keep the fresh chop simple for the first month: a gentle cleanser, a rich conditioner, and a leave-in. Let the coils settle before adding stylers.
29. Finger-Coiled 3c Pixie
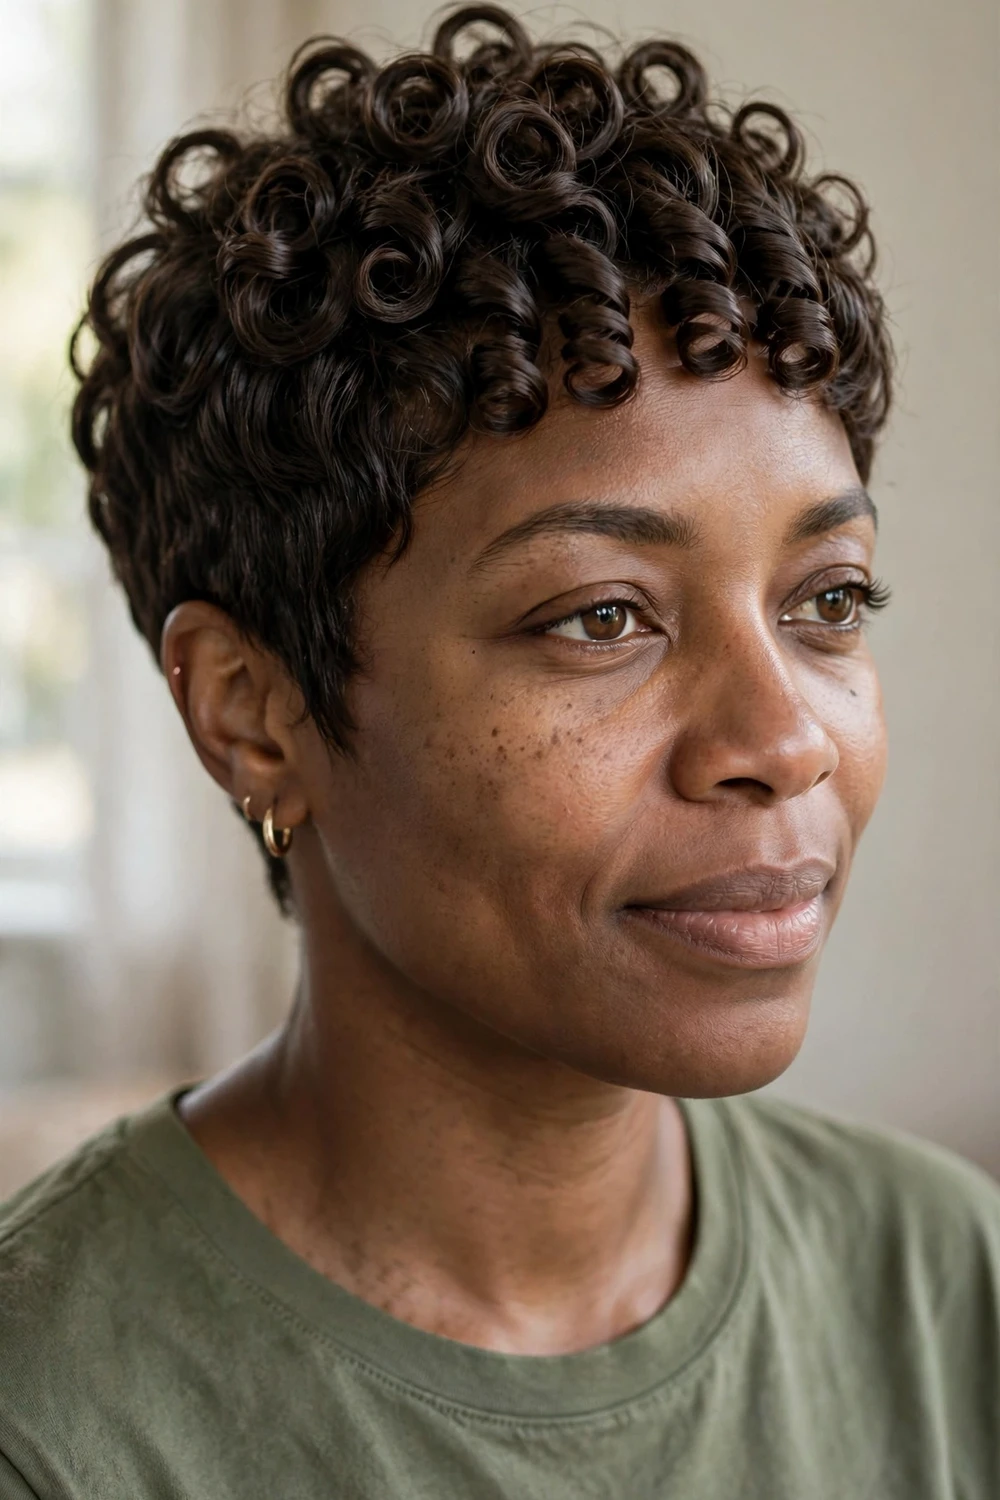
Definition lovers, this one is yours. The finger-coiled pixie takes the shaping further: after cutting, each 3c coil is twisted around a finger with curl cream to form a perfect spiral. It takes 15 to 20 minutes on wash day, but the result is the most defined version of 3c hair a pixie can show. The coils hold their shape for days with nighttime protection, so the effort pays off across the week.
Try this: Work in small sections on soaking-wet hair, coiling each clump in the same direction. Consistent direction gives the most uniform curl pattern.
Curly Pixie Haircuts 3c Comparison at a Glance
| Style | Best For | Difficulty | Upkeep |
|---|---|---|---|
| The Tight Coil 3c Pixie | Showing off natural coil pattern | Easy | Trim every 4 to 6 weeks |
| Classic Curly Pixie Cut | First-time pixie wearers | Easy | Trim every 4 to 6 weeks |
| Tapered Curly Pixie | Clean outline, neat grow-out | Easy | Taper touch-up every 3 weeks |
| Curly Pixie with Undercut | Dense hair, fast drying | Medium | Undercut clean-up every 2 to 3 weeks |
| Asymmetrical Curly Pixie | Round faces, bold style | Medium | Trim every 4 weeks to hold shape |
| Curly Pixie with Bangs | Softening a high forehead | Medium | Fringe trim every 3 to 4 weeks |
| Curly Pixie with Side-Swept Bangs | Flexible face-framing | Easy | Trim every 4 to 6 weeks |
| Messy Curly Pixie | Low-effort wash-and-go | Easy | Trim every 5 to 6 weeks |
| Long Curly Pixie | More styling options | Easy | Trim every 5 to 6 weeks |
| Textured Curly Pixie | Heavy, clumping coils | Medium | Trim every 4 to 5 weeks |
| Curly Pixie with Shaved Sides | Maximum contrast | Easy | Sides trimmed every 2 to 3 weeks |
| Curly Pixie with Side Part | Polished, professional looks | Easy | Trim every 4 to 6 weeks |
| Edgy Curly Pixie | Fashion-forward wearers | Medium | Trim every 4 weeks |
| Curly Pixie with Highlights | Adding depth and dimension | Medium | Color refresh every 8 to 12 weeks |
| Voluminous Curly Pixie | Big, bold volume | Easy | Trim every 4 to 6 weeks |
| Curly Pixie with Color Pops | Creative self-expression | Medium | Color refresh every 6 to 8 weeks |
| Natural Curly Pixie | Minimal routine and cost | Easy | Trim every 5 to 6 weeks |
| Curly Pixie for Thick Hair | Very dense 3c hair | Medium | Trim every 4 to 5 weeks |
| Curly Pixie for Round Faces | Lengthening a round face | Easy | Trim every 4 to 6 weeks |
| Layered Curly Pixie Haircut | Movement and graceful grow-out | Easy | Trim every 5 to 6 weeks |
| Curly Pixie with Long Sideburns | Oval and heart face shapes | Medium | Sideburn trim every 4 weeks |
| Soft Curly Pixie for Mature Women | Gentle, polished shape | Easy | Trim every 4 to 6 weeks |
| Curly Pixie with Natural Gray Hair | Showcasing silver tones | Easy | Purple shampoo weekly, trim every 5 weeks |
| Curly Pixie with Shaved Design | Personal artistic detail | Medium | Design touch-up every 2 to 3 weeks |
| Short Rounded Cut | Sculpted statement shape | Hard | Trim every 3 to 4 weeks |
| High Top | Bold graphic silhouette | Hard | Top trim every 3 to 4 weeks |
| Faux Hawk | Edgy nights-out style | Medium | Sides trimmed every 2 to 3 weeks |
| The Big Chop Pixie | Starting natural hair fresh | Easy | Shape-up trim every 6 to 8 weeks |
| Finger-Coiled 3c Pixie | Maximum coil definition | Hard | Re-coil wash day weekly |
How to Choose the Right Curly Pixie for Your 3c Hair
Match the cut to your face shape first. Round faces do best with height on top and close sides, which lengthens the face. Oval faces can wear almost anything on this list. Square jawlines soften with coils at the temples, while long faces look better with width at the sides rather than extra crown height.
Next, be honest about your density and your routine. Very dense 3c hair needs internal layering or an undercut to stay manageable; finer 3c hair does better with a classic or layered pixie that preserves fullness. If your mornings allow 5 minutes, pick a wash-and-go cut like the messy or natural pixie. If you enjoy styling, the finger-coiled or edgy versions reward the extra time.
Finally, vet your stylist. Ask whether they cut curly hair dry and whether they point-cut the ends. Look at their portfolio for tight curl patterns specifically, not just wavy hair. Bring 2 or 3 reference photos of the exact cut you want, and agree on the dry length in inches before the scissors come out.
Mistakes to Avoid
The biggest mistake is cutting 3c hair soaking wet. Wet coils stretch far past their dry length, so a wet cut almost always ends up shorter than planned once the hair dries. Always cut dry or after diffusing, and confirm the length with your stylist in the mirror before each section is cut.
Blunt-cut ends are the second trap. Scissors cut straight across a coil leave a flat edge that frays instead of coiling, which reads as frizz. Every cut in a 3c pixie should be point-cut, with the scissors angled into the ends. Heavy butters and oils are the third issue: on short 3c hair they coat the coils and pull them down instead of defining them. Use light leave-ins and creams, and save the heavy sealants for the ends only.
Skipping trims undoes a good pixie fast. The shape grows out in 4 to 6 weeks, and shaved or tapered sections lose their edge in 2 to 3. Book the next trim before you leave the salon so the shape never gets away from you.
Frequently Asked Questions
Can I get a pixie cut with 3c hair?
Yes, 3c hair is one of the best textures for a pixie. At short length, tight coils spring free and form a full, defined shape with real volume. The keys are cutting the hair dry so shrinkage is accounted for, keeping 2 to 3 inches on top for the coils to form, and point-cutting the ends so each coil closes cleanly.
How do I style a 3c curly pixie every day?
Keep it simple: dampen the hair, apply a leave-in conditioner, then a curl cream, then a small amount of light gel. Scrunch the coils upward and diffuse on low heat for 5 to 8 minutes, or let the hair air-dry. On non-wash days, mist with water mixed with a little leave-in and scrunch to refresh the coils.
How often should I trim a 3c pixie?
Get a full shape trim every 4 to 6 weeks to keep the outline sharp. If your cut has shaved sides, an undercut, or a tapered nape, those sections need a clean-up every 2 to 3 weeks. Bangs and fringes usually need a trim every 3 to 4 weeks so the coils do not ride up too far.
How do I keep my 3c coils defined in a short pixie?
Definition comes from moisture layering and technique. Apply products to soaking-wet hair in this order: leave-in, curl cream, then gel. Finger-coiling individual clumps gives the sharpest definition, and diffusing sets the shape faster than air-drying. At night, wear a satin bonnet or scarf to protect the coils, and refresh in the morning with a water and leave-in mist.
Will a curly pixie suit my face shape?
There is a 3c pixie for every face shape. Round faces look best with height on top and close sides. Oval faces can wear most versions as-is. Square faces soften with longer coils at the temples, heart-shaped faces balance with side-swept bangs, and long faces do better with width at the sides instead of tall crowns. Show your stylist your face shape concerns at the consultation.
Final Thoughts
A 3c pixie is one of those cuts that gives back more than it asks: less wash time, less product, more definition, and a shape that grows out gracefully. Pick the version that fits your face shape and your mornings, find a stylist who cuts curls dry, and let the coils do the rest. After years of testing short cuts for tight curls, I keep coming back to this length for a reason: it simply works.

