


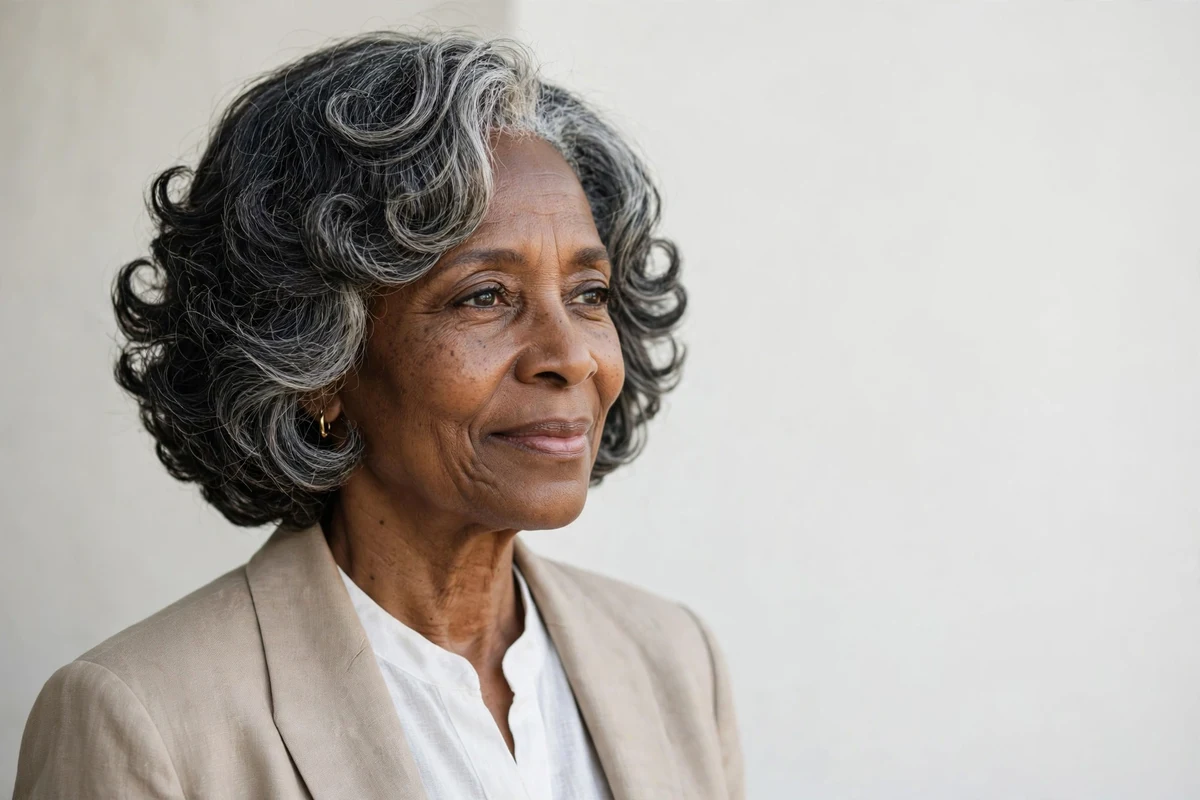
Curls change the whole equation after 50. The right shape gives you volume where you want it, a clean outline where you don’t, and wash days that take minutes instead of an hour.
These 30 curly hairstyles for older Black women cover every length and curl pattern, from close-cut TWAs to collarbone curls. I’ve spent years studying how curl shape and placement change a look, and every idea below builds on that. Each one comes with a concrete styling tip so you know exactly how to wear it.
Quick answer: The most flattering curly styles for older Black women add lift at the crown and keep the outline clean: shaped TWAs, tapered afros, layered bobs, twist-outs, and defined wash-and-go curls. Ask for a dry cut when shrinkage is strong, and build your routine around leave-in, curl cream, and a satin bonnet at night.
Quick Takeaways
- Volume belongs at the crown; taper the sides to avoid a wide, bottom-heavy triangle.
- Shaped cuts like the TWA, tapered afro, and layered bob need the least daily styling.
- Definition comes from product on soaking-wet hair in the right order, not from using more product.
- Gray curls need extra moisture: leave-in first, then cream, then a light gel.
- Most of these styles last 3 to 7 days with a satin bonnet or scarf at night.
Why Curls Work So Well After 50
Curls create natural fullness, which matters because hair often gets finer with age. A strong curl pattern fills in sparse areas and frames the face without any heat styling.
The other advantage is the routine. Short curly cuts like TWAs and tapered afros take under ten minutes in the morning. Longer styles like twist-outs and rod sets hold for several days with nightly protection.
Ask for a cut that builds lift at the crown. If your stylist cuts wet and your shrinkage is strong, request a dry cut so the finished length is exactly what you see in the chair.
1. Shaped TWA
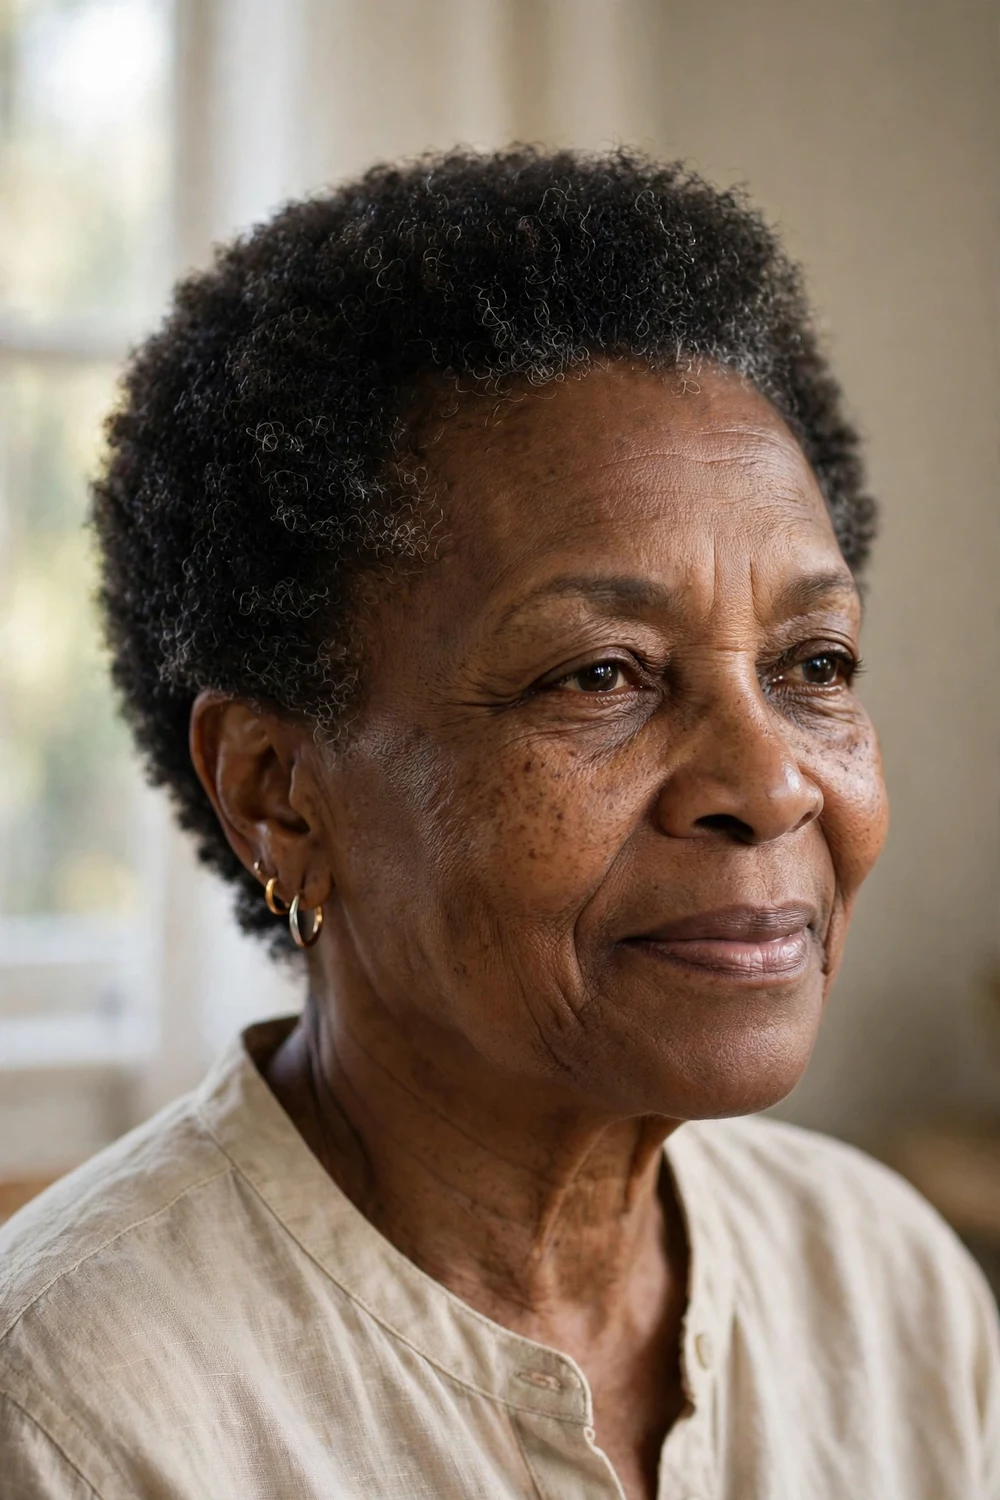
Ask for a rounded TWA with softly tapered edges instead of a boxy outline. That small change in shape is what makes this cut flattering at any age: the curve follows your head, opens up your face, and shows off your features. Styling takes about five minutes with a light leave-in and a pick. It also gives relaxed or heat-damaged ends the cleanest possible fresh start.
Try this: Wrap a satin scarf around the edges for ten minutes after applying gel. The edges dry flat and neat while the crown keeps its lift.
Effort: Low · Cost: Salon cut every 6 to 8 weeks
2. Finger-Coil TWA
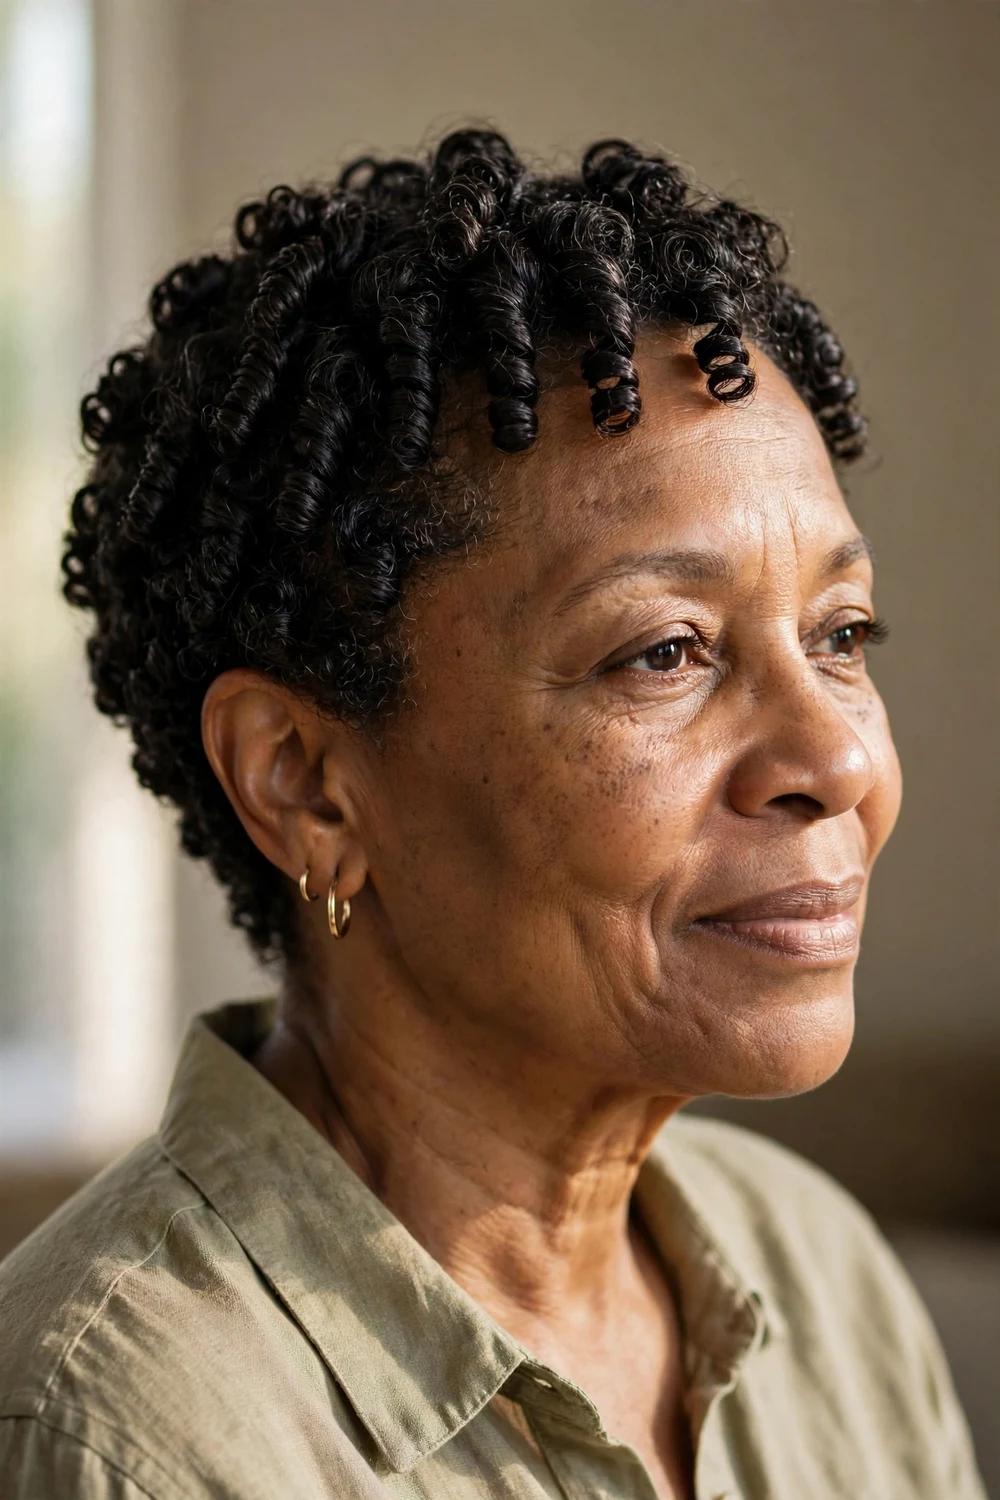
Want definition without picking up a comb every day? Finger coils on TWA-length hair give you glossy, uniform curls that hold their shape for days with nighttime protection. Coil small sections with cream and a little gel, let them dry fully before separating, and you get a neat, polished look that reads intentional from every angle. Refresh with a water spritz and a dab of foam on day three.
Try this: Coil on soaking-wet hair and do not touch the coils until they are 100 percent dry. Taking them down damp is what causes frizz.
Effort: Medium (one-time setup) · Cost: DIY, products only
3. Tapered Afro
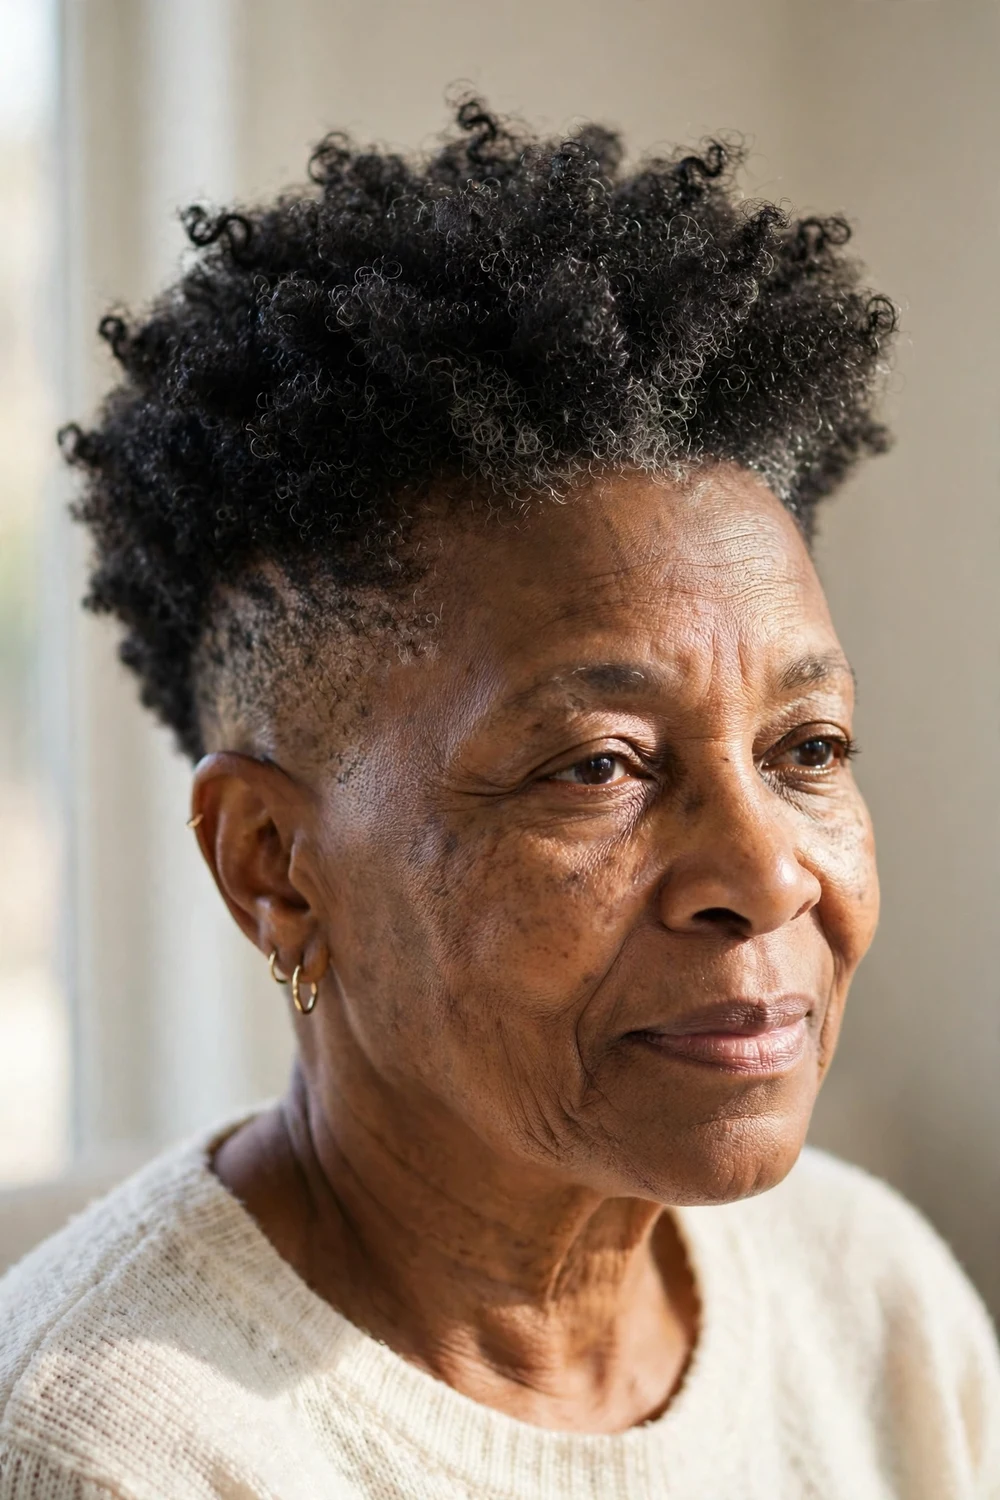
Fullness on top, clean around the sides. The tapered afro keeps all the height where it flatters your face and trims the sides and nape close, so the shape rises instead of spreading. It elongates your features and gives earrings room to shine. Maintenance is simple: fluff the crown with a pick, smooth the sides with gel, and tie them down with a satin scarf at night.
Try this: Define the crown curls with a cream and pick them out at the root. The pick creates lift that a comb flattens.
Effort: Low · Cost: Salon cut every 6 to 8 weeks
4. Rounded Curly Afro
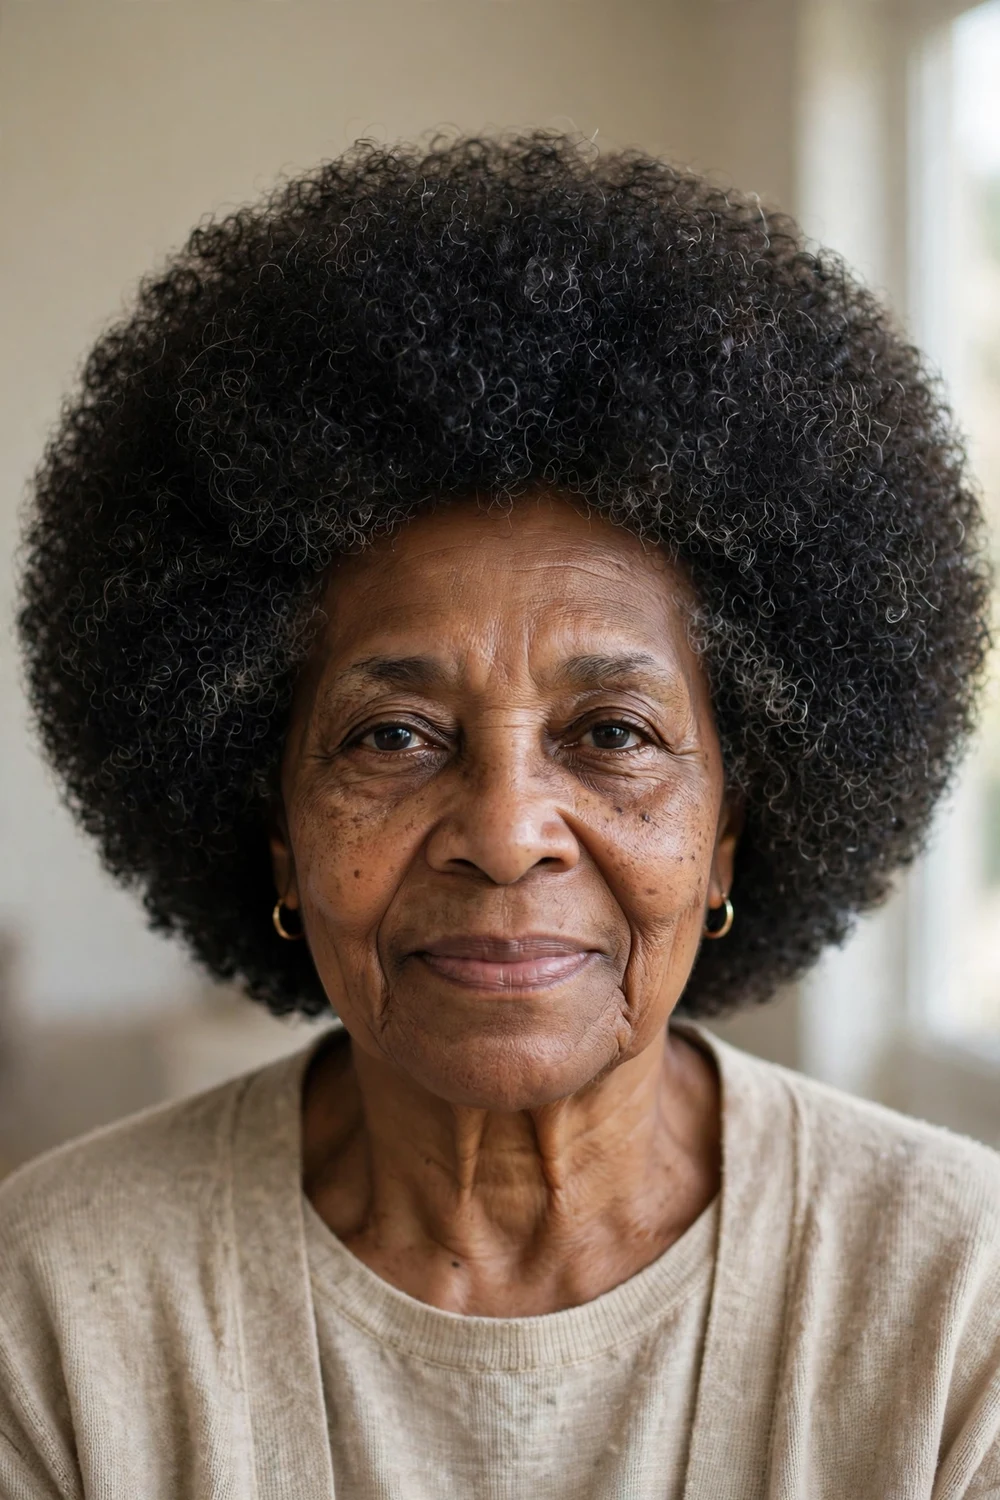
For maximum volume with minimum effort, the rounded afro is hard to beat. Keep the silhouette even and spherical, and let every curl show. A light leave-in under a curl cream keeps the coils bouncy and hydrated through the day. Ask your stylist to shape it on dry hair so the roundness is even all the way around.
Try this: Sleep with the afro in a loose pineapple on top of your head. It protects the shape and stretches the roots overnight.
Effort: Low · Cost: DIY, products only
5. Layered Curly Bob
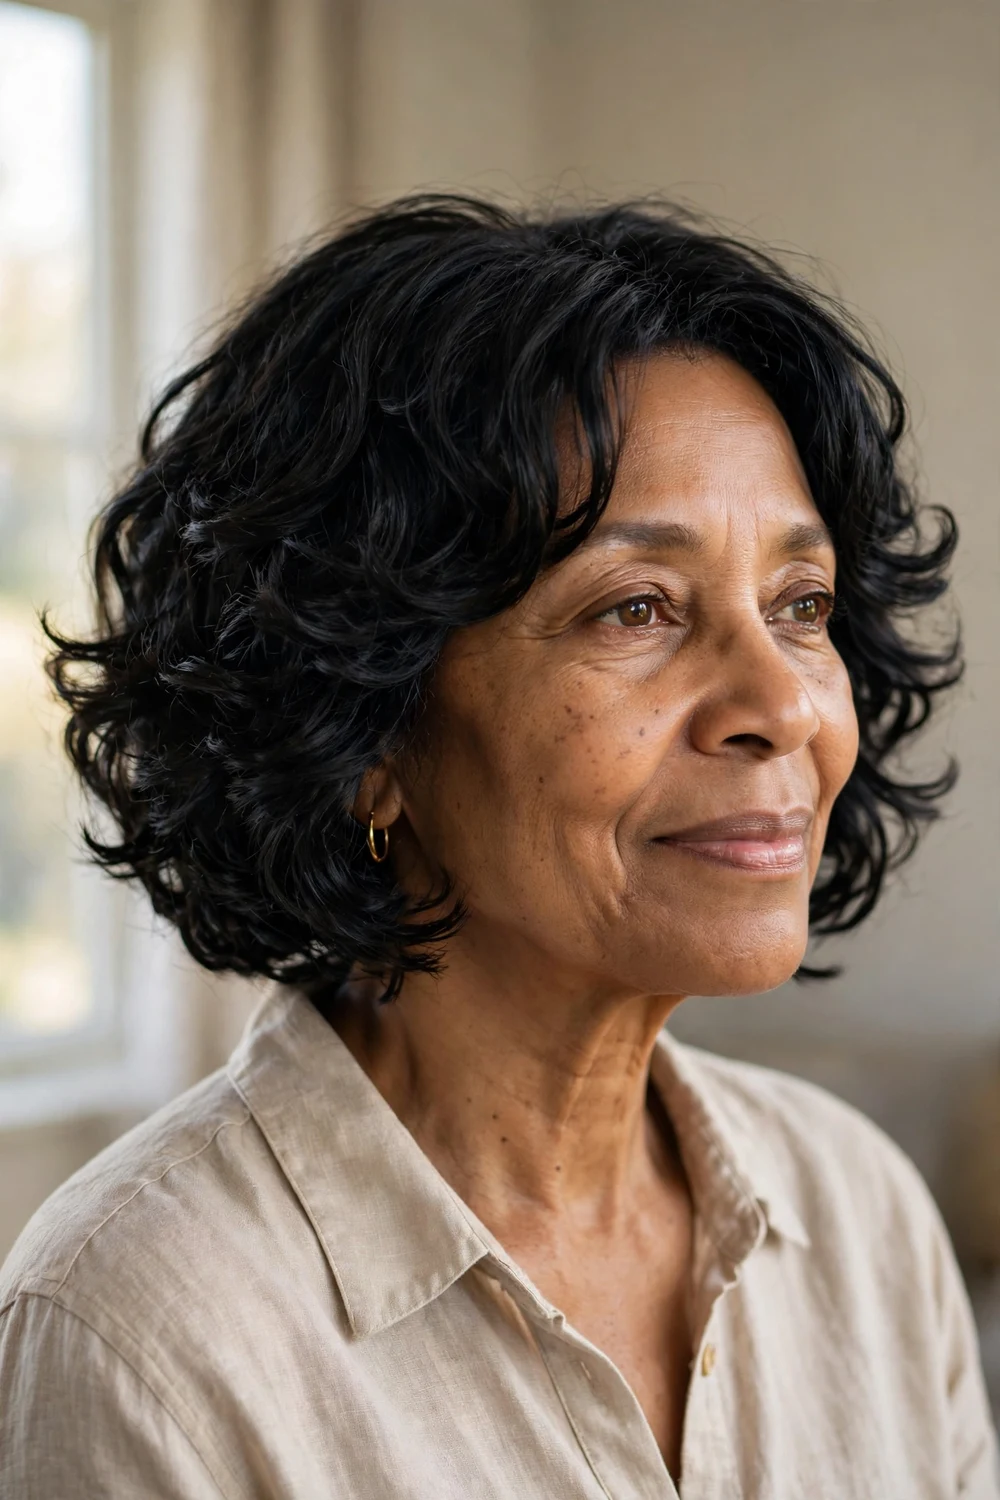
Layers are what keep a curly bob from turning into a triangle. Start them around the cheekbones so the shape stays rounded and the curls bounce instead of stacking at the bottom. This length is a sweet spot: short enough for fast wash days, long enough for clips and headbands. Define with curl cream on wet hair and diffuse on low heat so the ends stay springy.
Try this: For fine hair, ask for long light layers. For thick hair, ask for weight removal through the interior so the bob keeps its bounce.
Effort: Low · Cost: Salon cut every 8 to 10 weeks
6. Side-Part Curly Bob
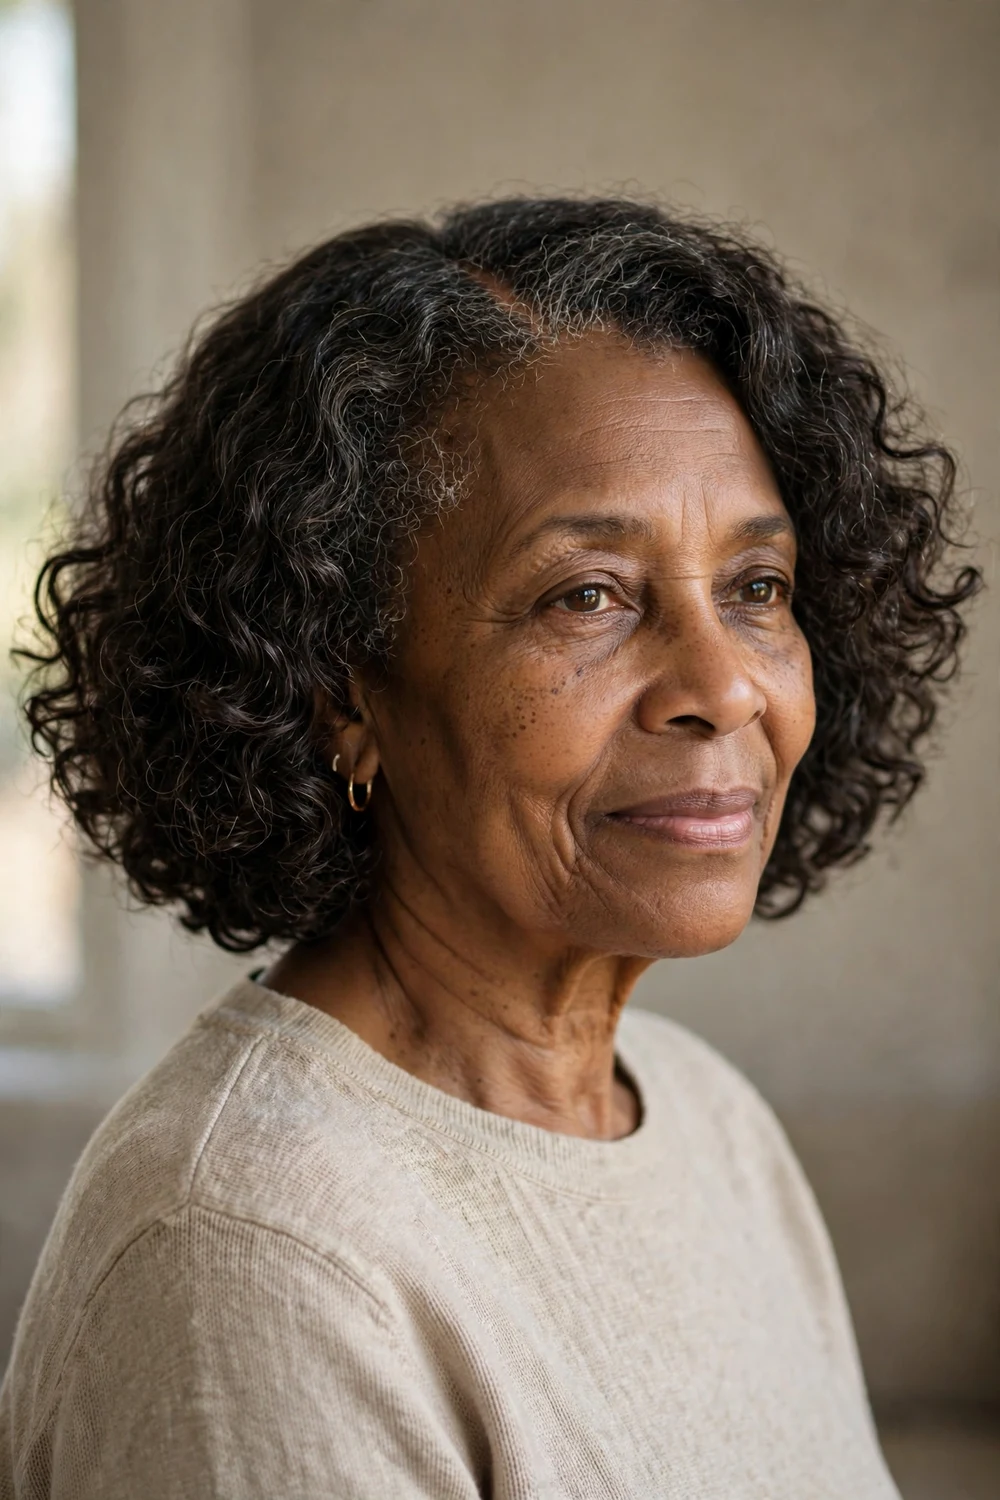
Change the part and you change the whole style. A deep side part on a curly bob adds instant asymmetry and volume, and it lets the curls frame your face from a longer angle. This works on loose or tight curls and suits most face shapes. Set the part on wet hair so it holds through the dry cycle.
Try this: Flip the part to the other side every few weeks. It refreshes the root volume and keeps the style from going flat on one side.
Effort: Low · Cost: DIY, products only
7. Finger-Coil Bob

Coil cream, patience, and a chin-length cut. Finger coils on a bob give you uniform, glossy definition that lasts for days under a satin bonnet. The bob length keeps everything light while the coils keep frizz in check. Coil with cream and a touch of gel, let the hair air-dry fully before separating, and refresh on day two or three with a water spritz and a little foam.
Try this: Work in sections no wider than an inch. Larger sections coil unevenly and take twice as long to dry.
Effort: Medium (one-time setup) · Cost: DIY, products only
8. Crochet Curly Bob
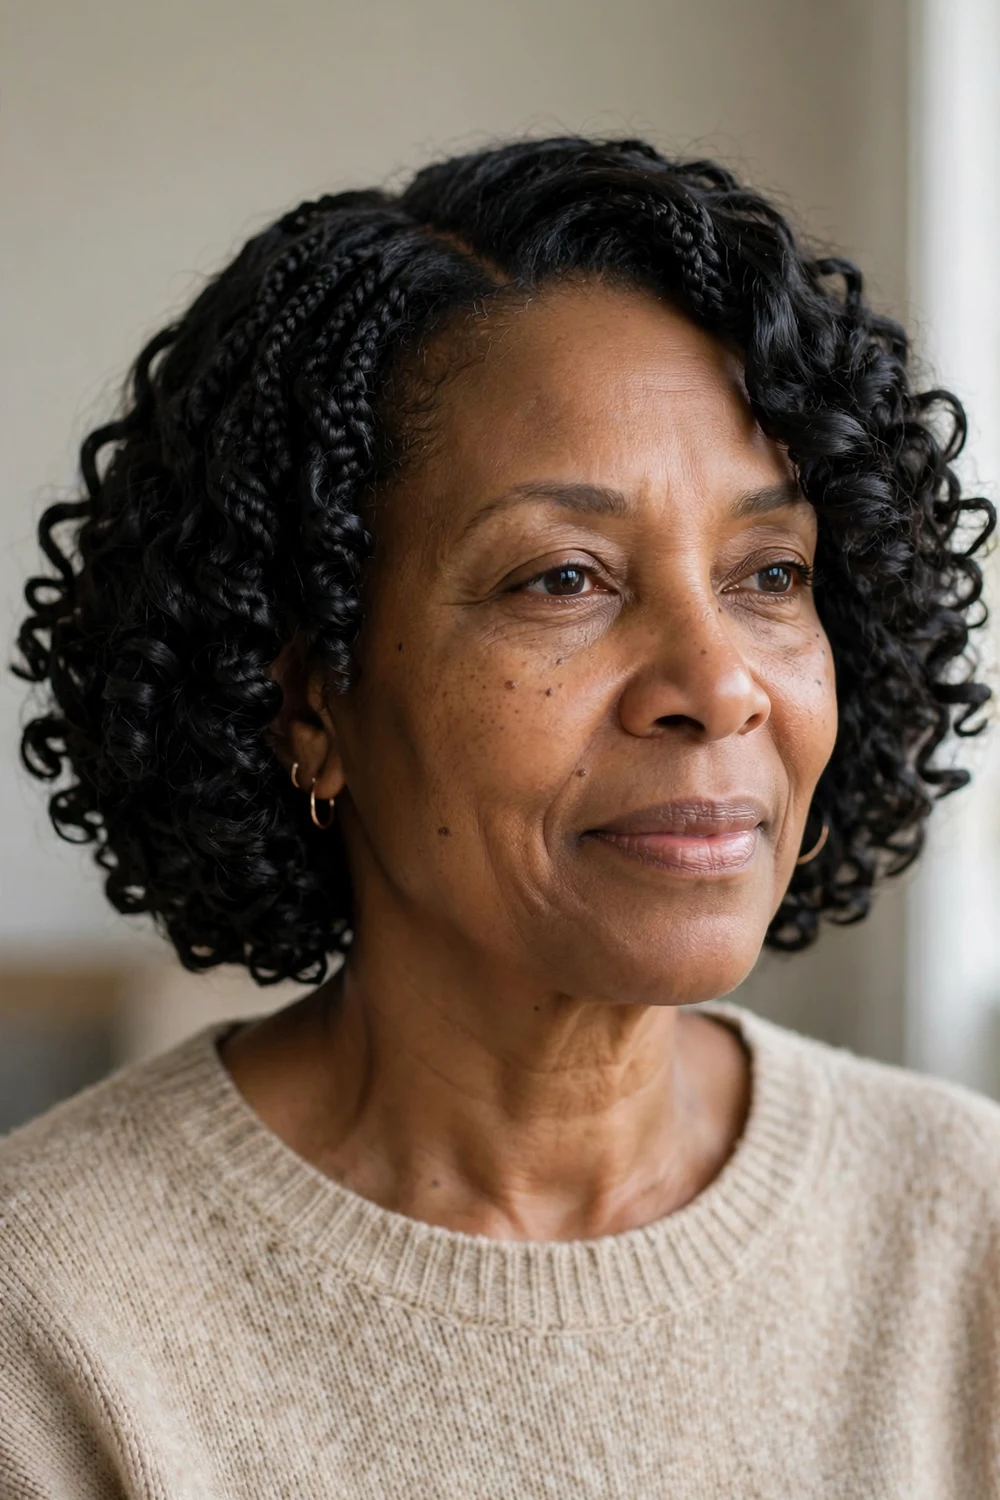
Want the look without touching your own curls for weeks? Crochet curls are the low-manipulation answer. Once installed, you get a consistent curl pattern and fullness with almost no daily styling. The bob length keeps it looking intentional and polished rather than heavy. Choose a curl pattern close to your natural texture for the most seamless blend.
Try this: Keep your own hair moisturized underneath with a light oil on the scalp twice a week, and add a slight side part so the finished style looks custom.
Effort: Low (after install) · Cost: Salon install
9. Highlighted Curly Bob
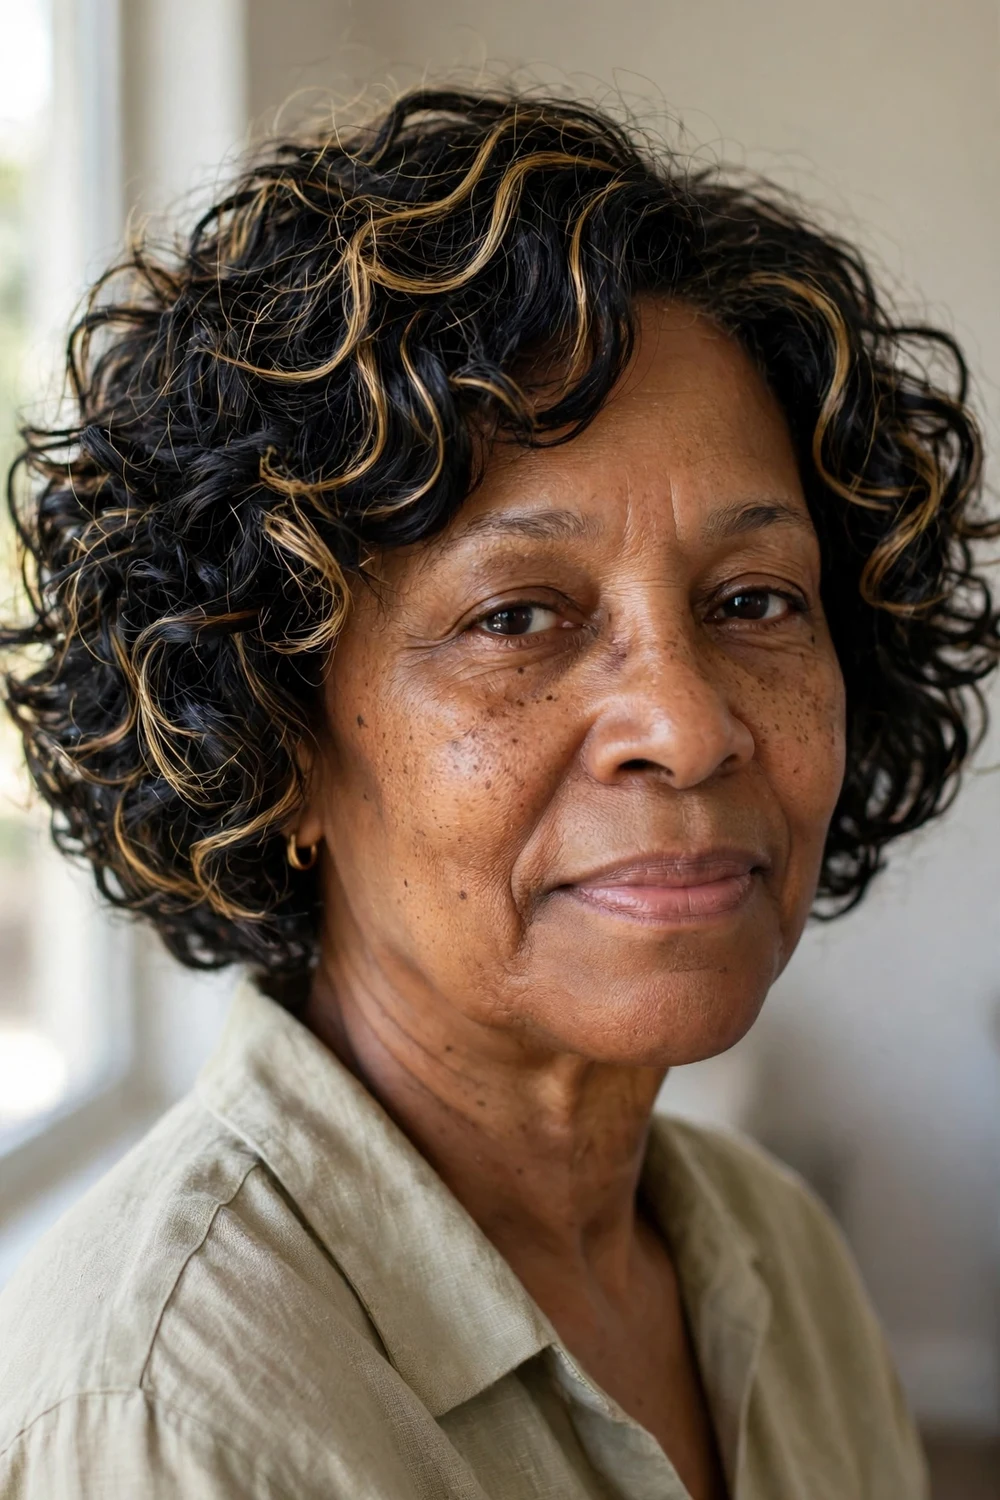
A few ribbons of honey, caramel, or warm brown through a curly bob add dimension that flat color never gives. Highlights catch the light on every curl, which makes the cut look fuller and the texture more defined. Ask your colorist for hand-painted pieces rather than foils, since curls show harsh lines easily. A sulfate-free shampoo keeps the color bright.
Try this: Start with just a few face-framing pieces. You can always add more at your next appointment once you see how you like it.
Effort: Low · Cost: Salon color plus cut
10. Wash-and-Go Curls
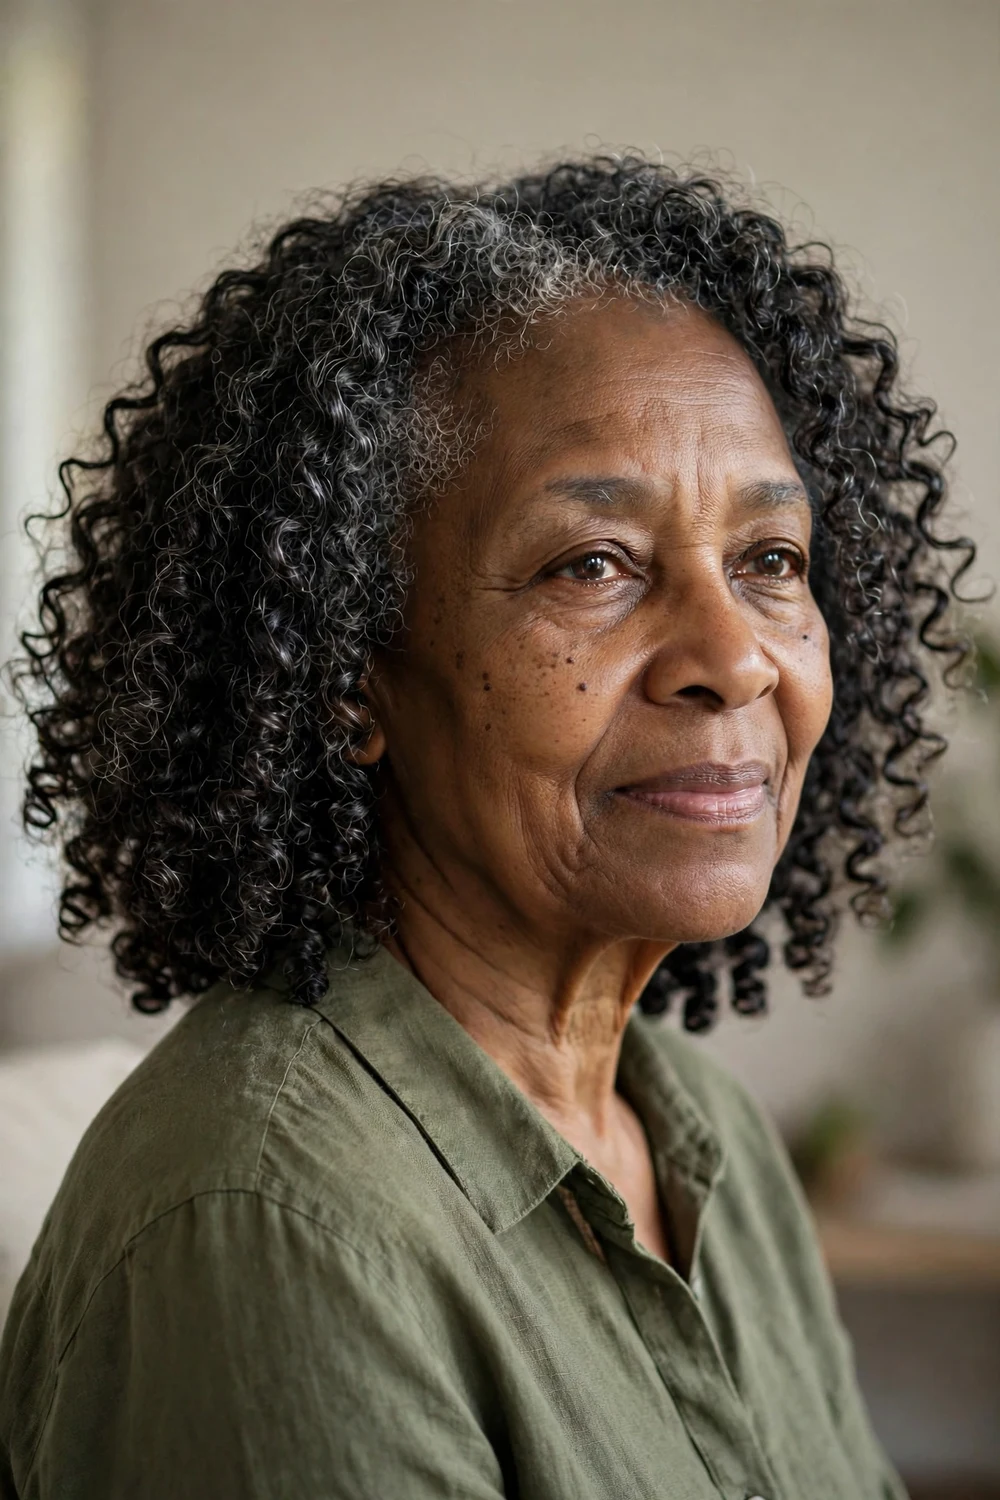
The wash-and-go gets a bad name from rushed routines. Done right, it gives you definition that still looks like your hair, not a helmet of product. The secret is product on soaking-wet hair in sections: leave-in, then cream, then a light gel glazed over the top. Diffuse until fully dry, then separate gently. Touching curls while damp is the number one frizz trigger.
Try this: Build the cut with lift at the crown rather than width at the jaw. That shape frames the face instead of widening it.
Effort: Low · Cost: DIY, products only
11. Twist-Out Curls
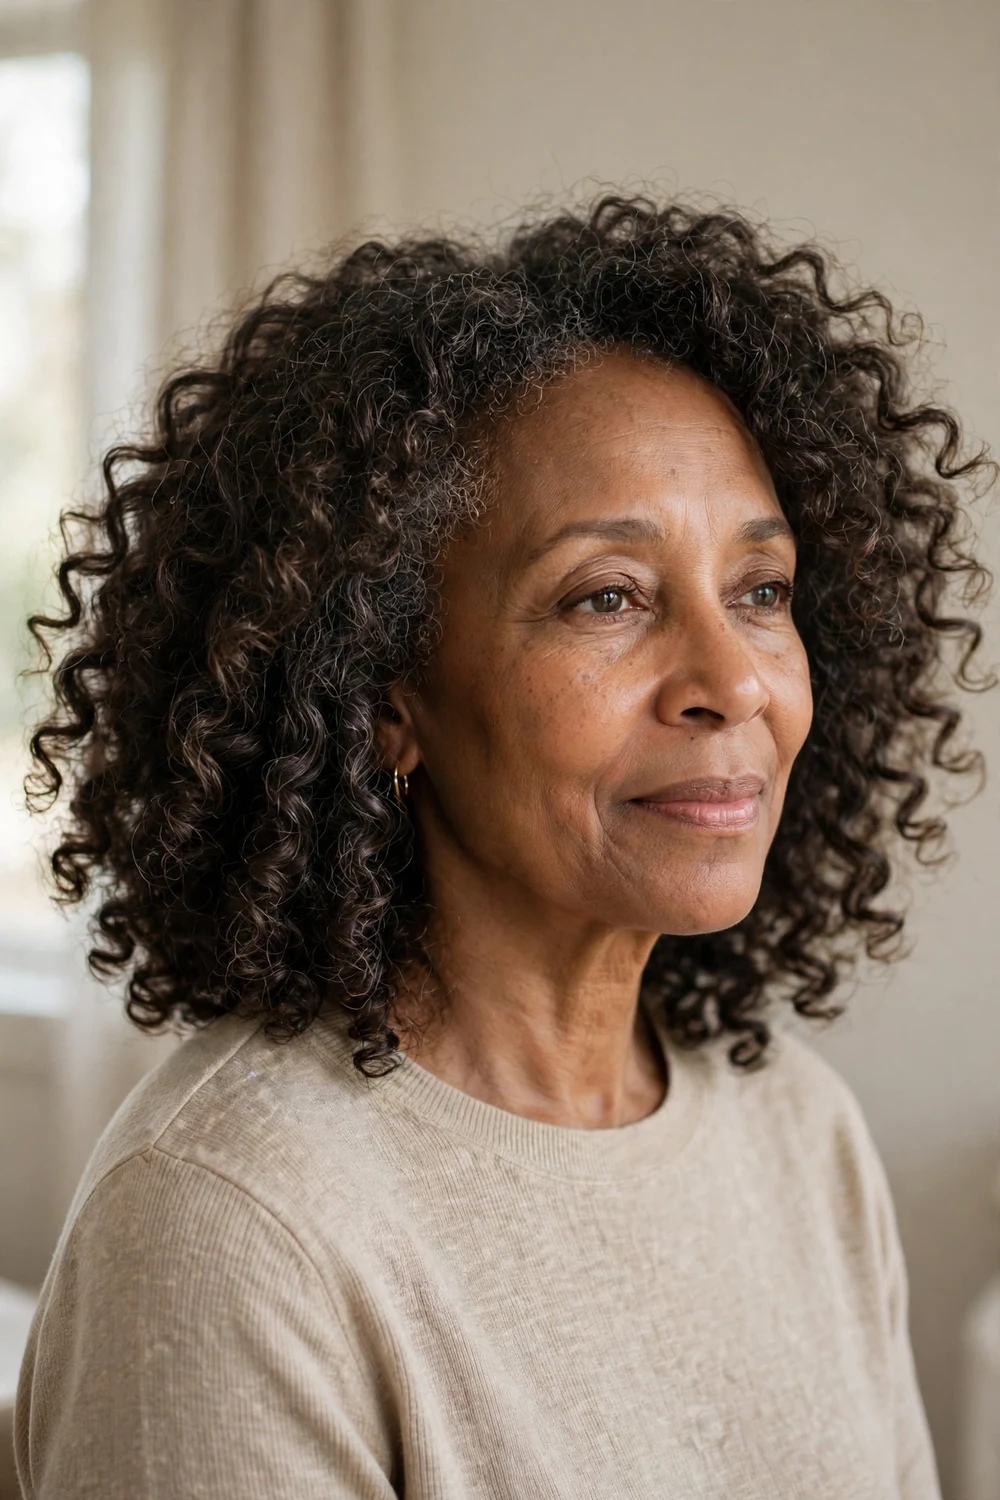
Two-strand twists are the most reliable curl recipe in natural hair. Twist damp, conditioned hair, let it dry completely, then unravel for soft, stretched curls with less shrinkage than a wash-and-go. On medium-length hair, twist-outs give you movement and fullness that hold up for days. The key is twisting on well-moisturized hair and never rushing the dry time.
Try this: The twists double as a protective style while they are in. Wear them for two days, then the twist-out for four more.
Effort: Medium (one-time setup) · Cost: DIY, products only
12. Bantu Knot-Out Curls

Set them at night, release them in the morning. Bantu knot-outs deliver some of the most defined, springy curls you can get without heat, since each unraveled knot leaves a perfect coil. Set them on moisturized hair with a little cream, sleep in a satin scarf, and separate gently for fullness in the morning. The result has real volume at the roots, which flatters a mature face.
Try this: Use smaller knots at the front for tighter definition around the face and larger knots at the back for looser volume.
Effort: Medium (one-time setup) · Cost: DIY, products only
13. Coiled Bantu Knots
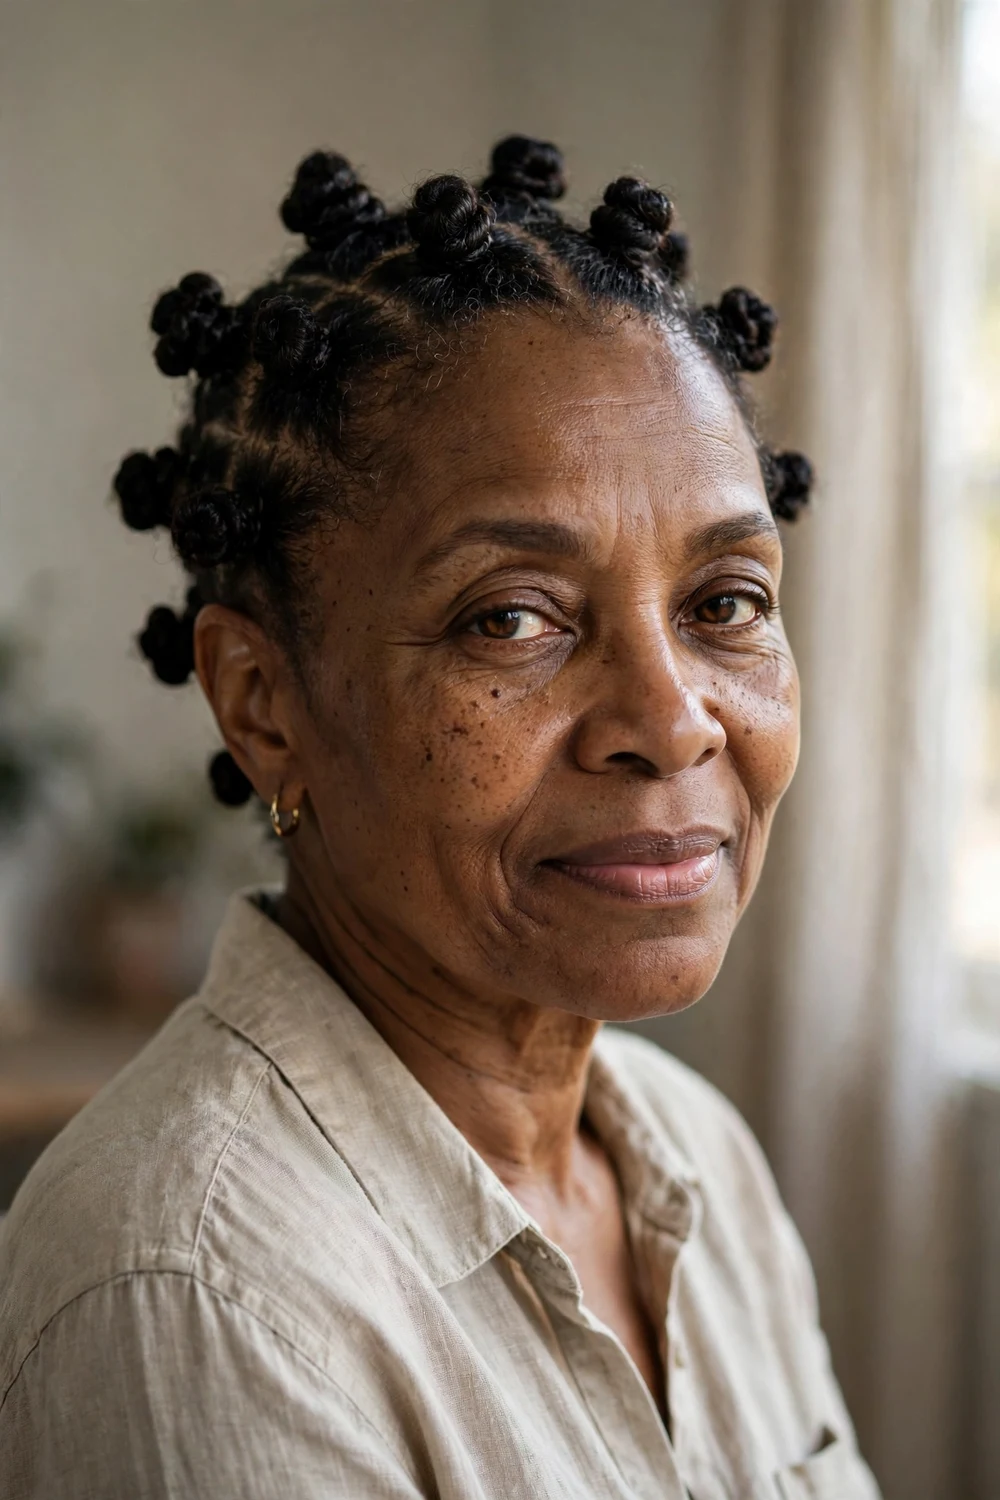
Bantu knots worn as a finished style are bold, regal, and completely protective. Twist small sections of hair into neat mini knots across the head and you get a sculptural look that holds for a week or more. They also give you a two-for-one: wear the knots for days, then take them down for the knot-out curls in idea 12.
Try this: Smooth a little edge control along each part line. Clean parts are what make this style look polished instead of messy.
Effort: Medium (one-time setup) · Cost: DIY, products only
14. Salt-and-Pepper Silver Curls
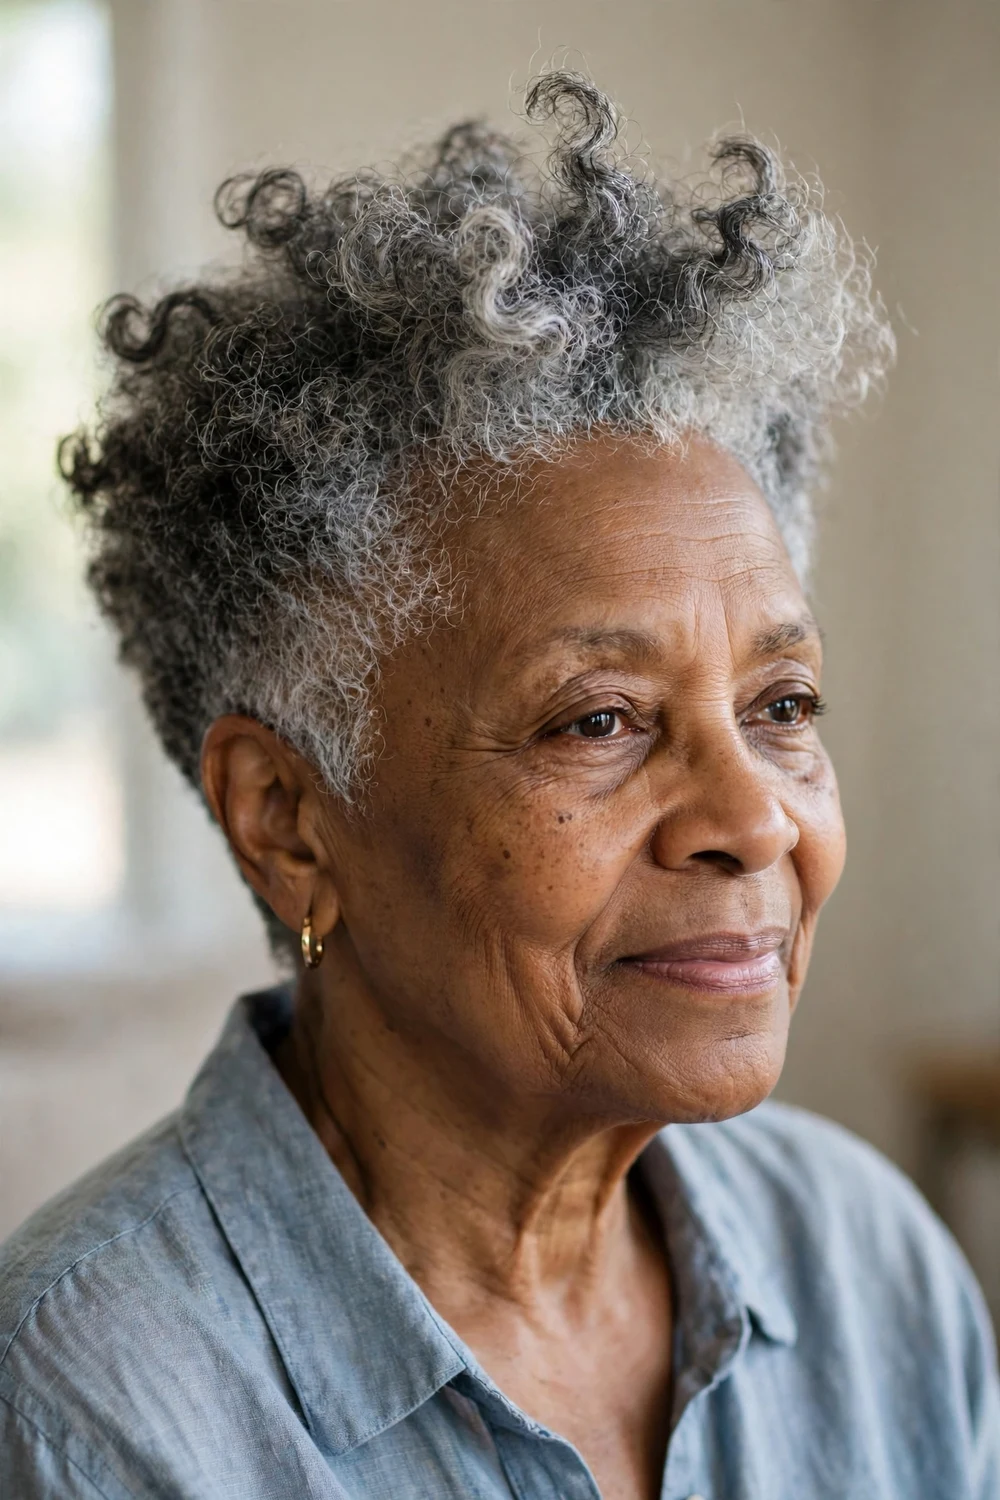
Gray hair and curls are a strong pair. Silver coils catch the light in a way that makes every curl look more defined, and a shape with height through the top and clean tapered sides lets the texture be the star. Gray hair runs drier by nature, so build the routine around moisture: leave-in first, then a light gel for hold without stiffness. A purple-toned conditioner once in a while keeps silver bright instead of dull.
Try this: If you are growing out color, ask your stylist to blend the line of demarcation with lowlights. The grow-out looks intentional instead of awkward.
Effort: Low · Cost: DIY, products only
15. Curly Pixie
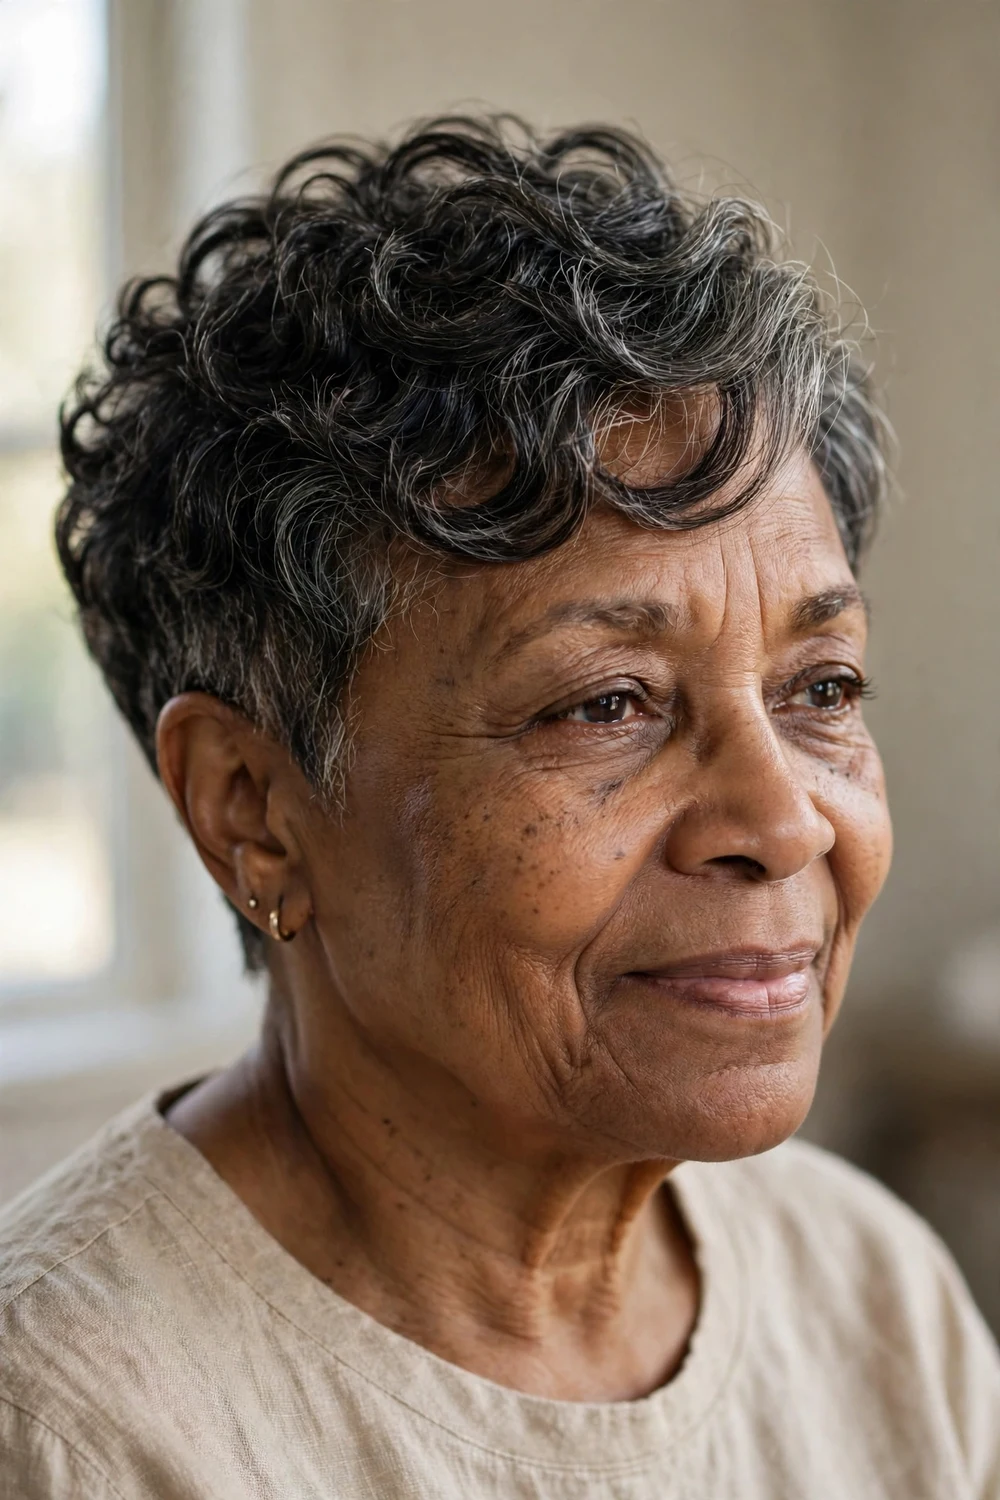
Short on the sides, soft length on top. The curly pixie keeps the perimeter tidy and close while the crown stays long enough to show real curl personality. The rounded top keeps it soft, never severe. Tell your stylist whether you want it to stay a pixie or grow out into a tapered afro, because the cut plan differs. A small amount of mousse keeps curls lifted without weighing down fine hair.
Try this: Add a side-swept bang section at the front. It softens the forehead and gives the pixie a finished frame.
Effort: Low · Cost: Salon cut every 6 to 8 weeks
16. Tight Coils
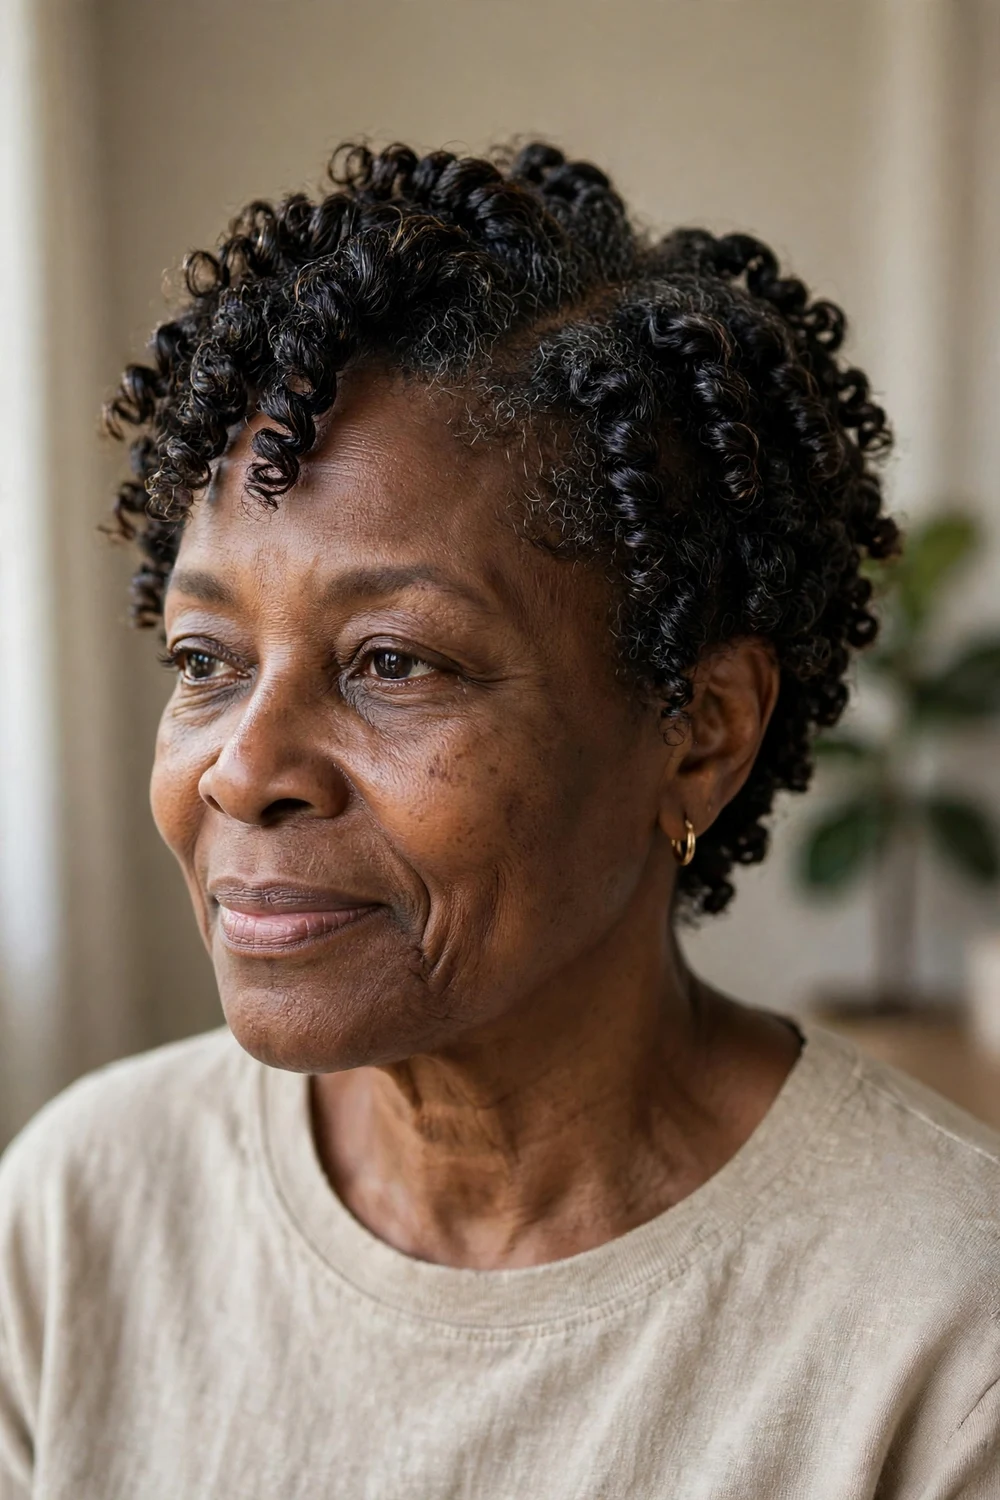
When your coils are naturally tight, the best style is the one that shows them off. Keep the cut shaped with a little length on top and let each coil do its own thing. A curl-defining cream on damp hair encourages the pattern to clump and shine. Let a few tendrils fall at the forehead and ears to frame the face, and cut light layers in if you want more movement.
Try this: Shingle the cream through in small sections instead of raking. Shingling smooths the cuticle and cuts frizz in half.
Effort: Low · Cost: DIY, products only
17. Sponge-Defined Curls
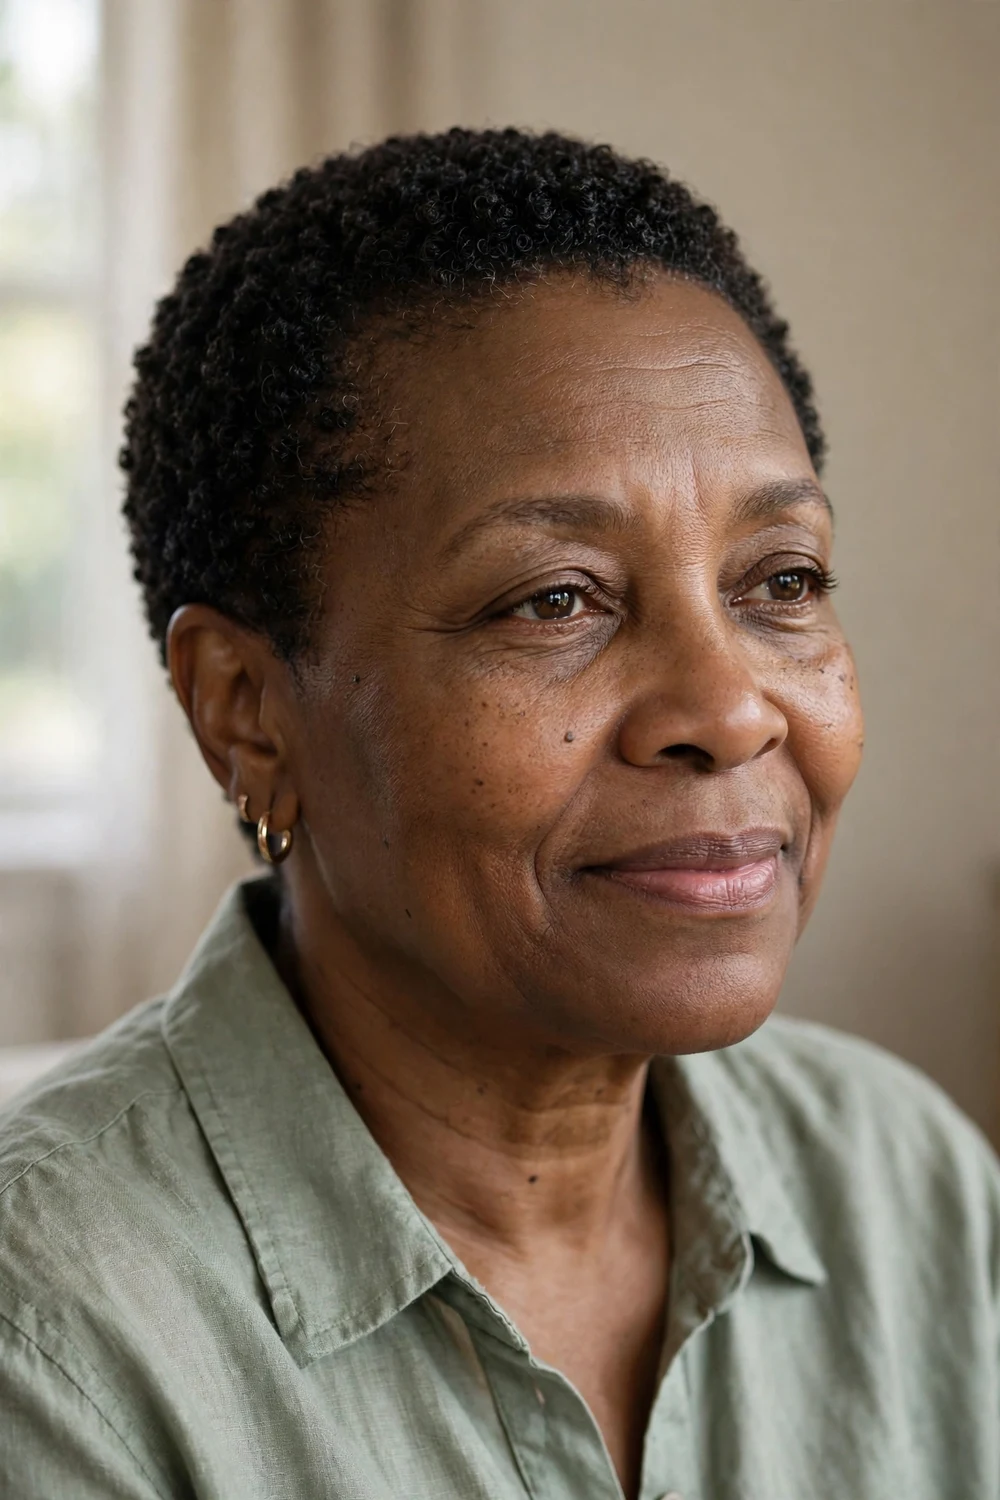
A curl sponge does in ten minutes what finger coiling does in an hour. On short hair, working the sponge in small circles on slightly damp hair with a little cream creates tight, uniform coils with a clean outline. Finish with a light oil for shine. This pairs naturally with a tapered or faded perimeter and keeps the whole routine under ten minutes.
Try this: Use the sponge on one side of the head, then mirror the direction on the other side. Matching coil direction keeps the pattern even.
Effort: Low · Cost: DIY, sponge plus products
18. Curly Frohawk

Bold down the middle, neat on the sides. The frohawk packs height and coils along the center while tapered or faded sides keep the look sharp and wearable. It reads confident and modern at any age. Soften it by letting a few curls fall forward over the forehead, and smooth the sides with gel and a satin scarf for a crisp finish. Bold earrings get the spotlight they deserve with this cut.
Try this: Define the center strip with a curl sponge or small coils. Uniform texture on top is what sells this style.
Effort: Medium · Cost: Salon cut plus DIY styling
19. Curly Lob
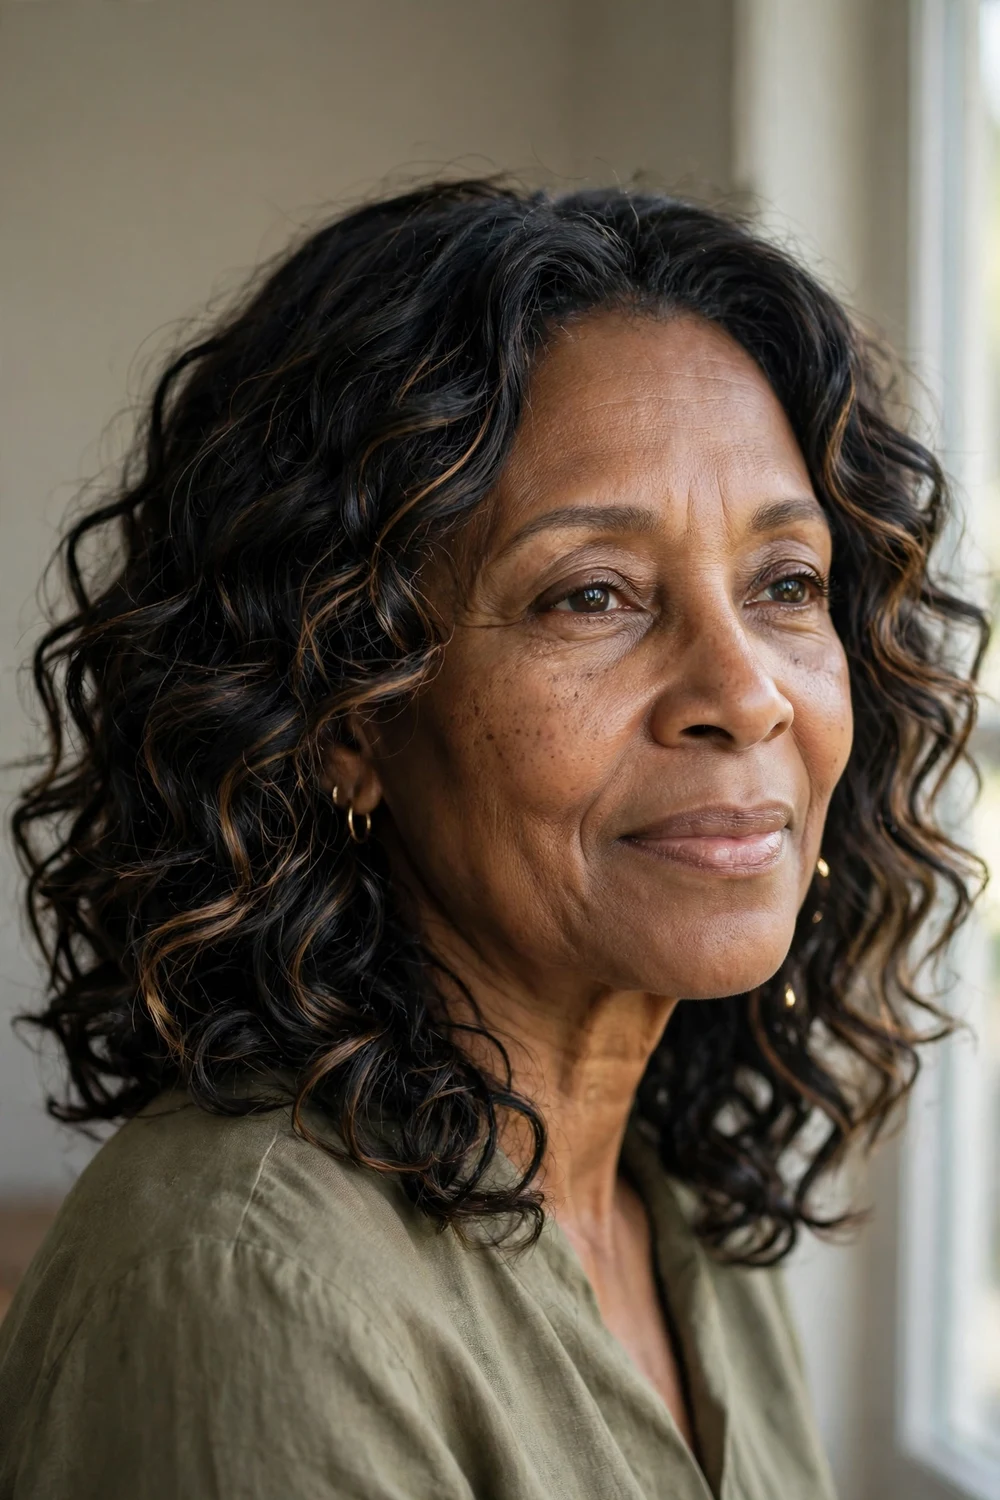
Collarbone length hits the sweet spot between short and long. You get enough hair for low buns and half-up styles, but the cut stays light enough to keep its shape. Long layers do the heavy lifting here; without them, the ends stack into a triangle. If your shrinkage is strong, have it cut dry so the final length lands where you want it.
Try this: This is a good grow-out target if you currently wear a bob and want more versatility without committing to long hair.
Effort: Low · Cost: Salon cut every 10 to 12 weeks
20. Layered Curly Hair with Bangs
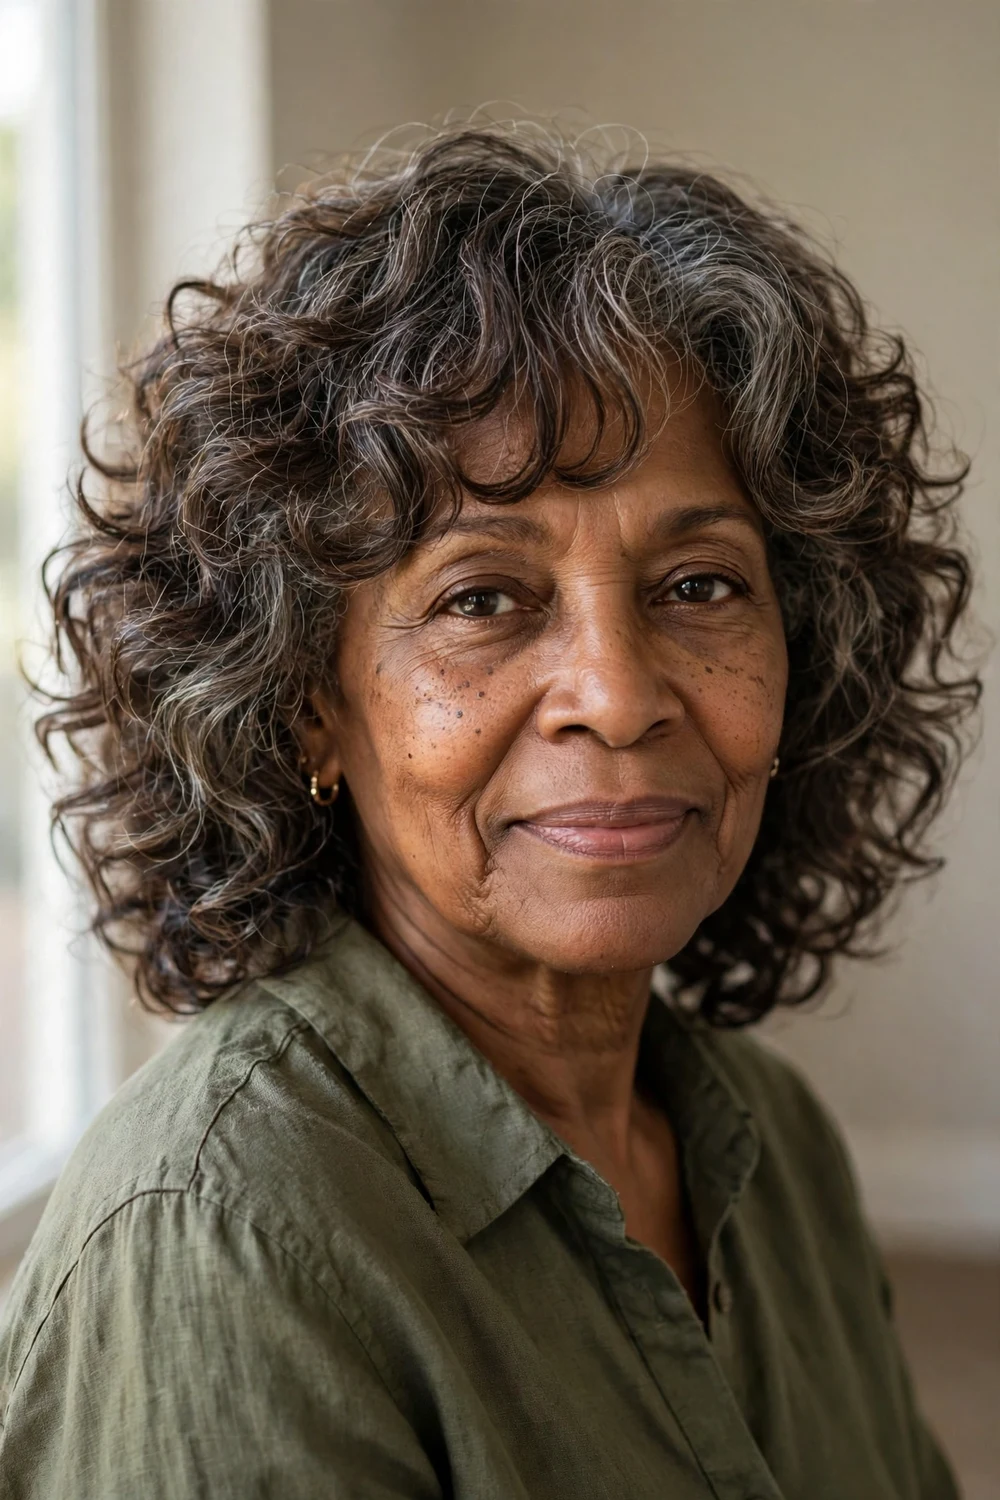
Bangs soften everything. On layered curly hair, a curly fringe brings depth and fullness while the layers keep the shape moving instead of sitting flat. The bangs and layers together flatter the face at any curl pattern. Style the fringe separately with a little cream and let it air-dry undisturbed so it keeps its curl instead of frizzing out.
Try this: Cut curly bangs longer than you think. They spring up two inches shorter than they look when wet.
Effort: Low · Cost: Salon cut every 8 to 10 weeks
21. Afro Curls with Bangs
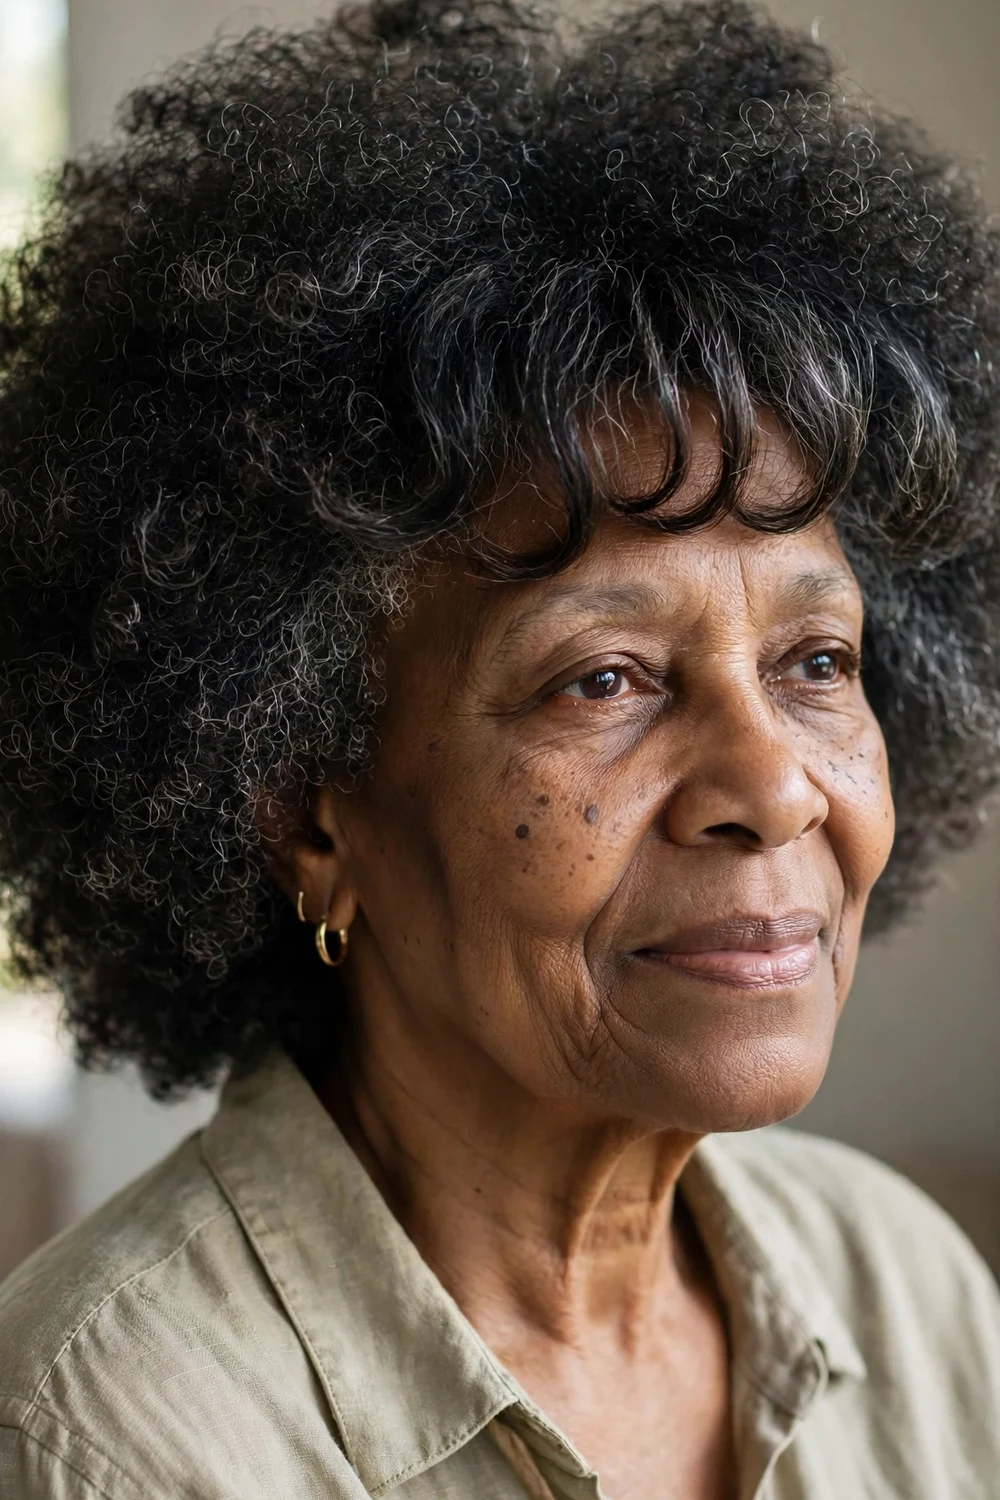
An afro with a fringe reads fresh and modern. The bangs frame the eyes while the full volume around them keeps the look bold and low-effort. Keep the fringe section moisturized separately, since it takes more daily handling than the rest. This style suits strong, dense curl patterns that hold their shape.
Try this: Trim the fringe only when it is dry and in its natural curl. Wet trimming always takes off more than you planned.
Effort: Low · Cost: DIY, products only
22. Finger Coils with Bangs
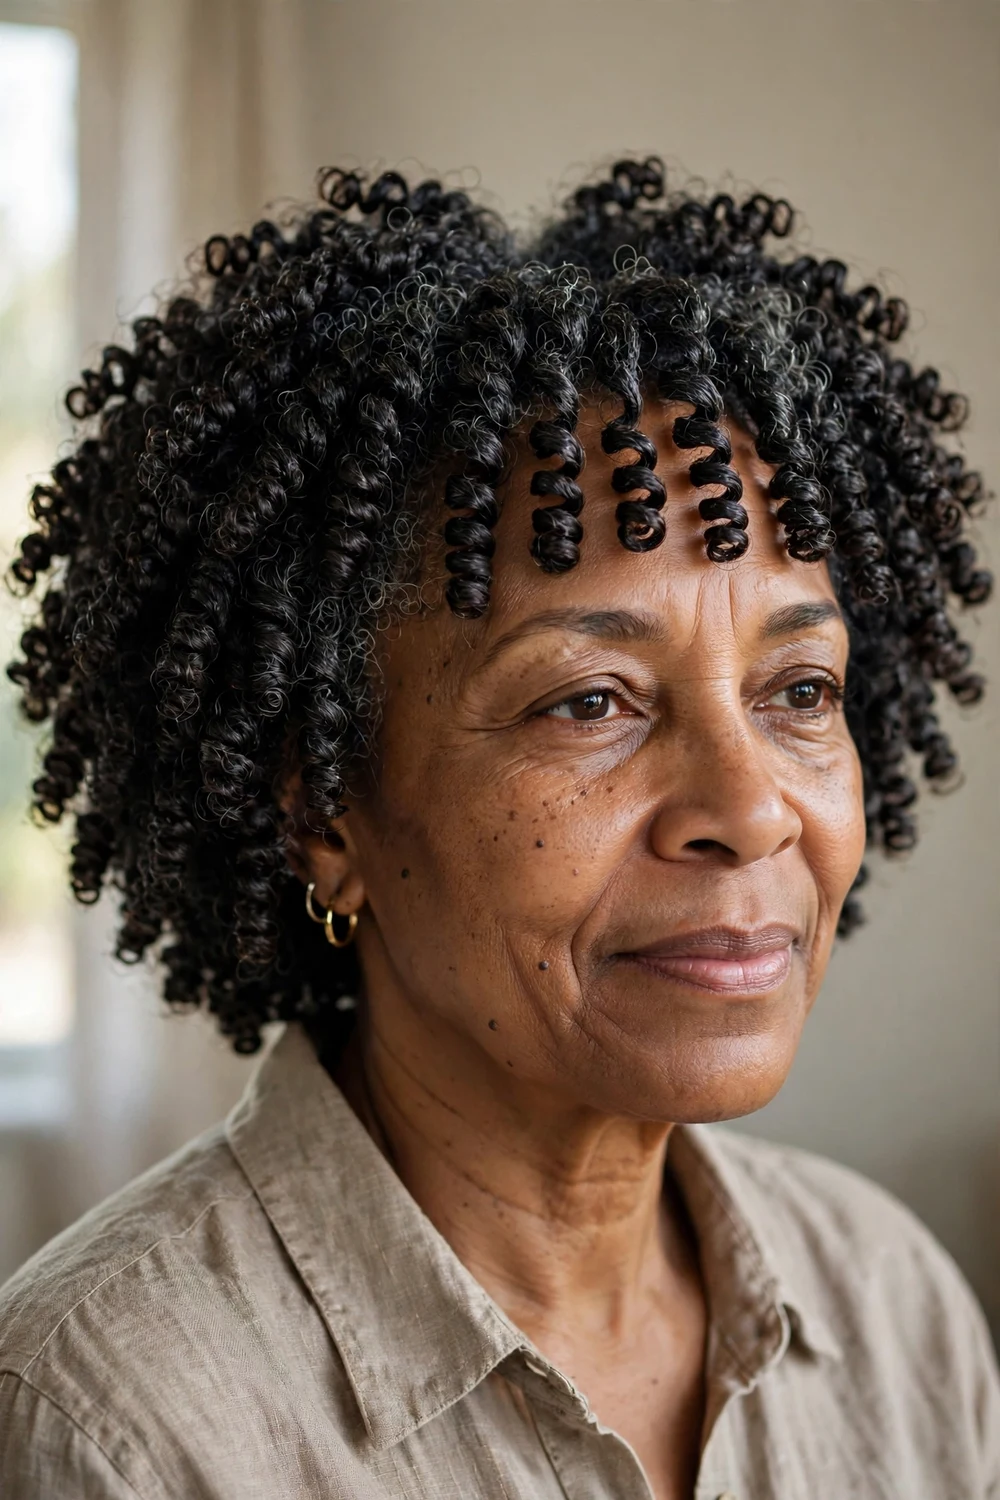
Coils plus a bang section give you the definition of finger coiling with a softer front. The tight coils create full volume and texture, while the bangs open up the look and add movement around the face. Coil the fringe in the same direction as the rest so the whole head reads as one style instead of two.
Try this: Do the bang section last. It dries fastest, and coiling it last means it sets while you finish the rest of your head.
Effort: Medium (one-time setup) · Cost: DIY, products only
23. Half-Up Puff
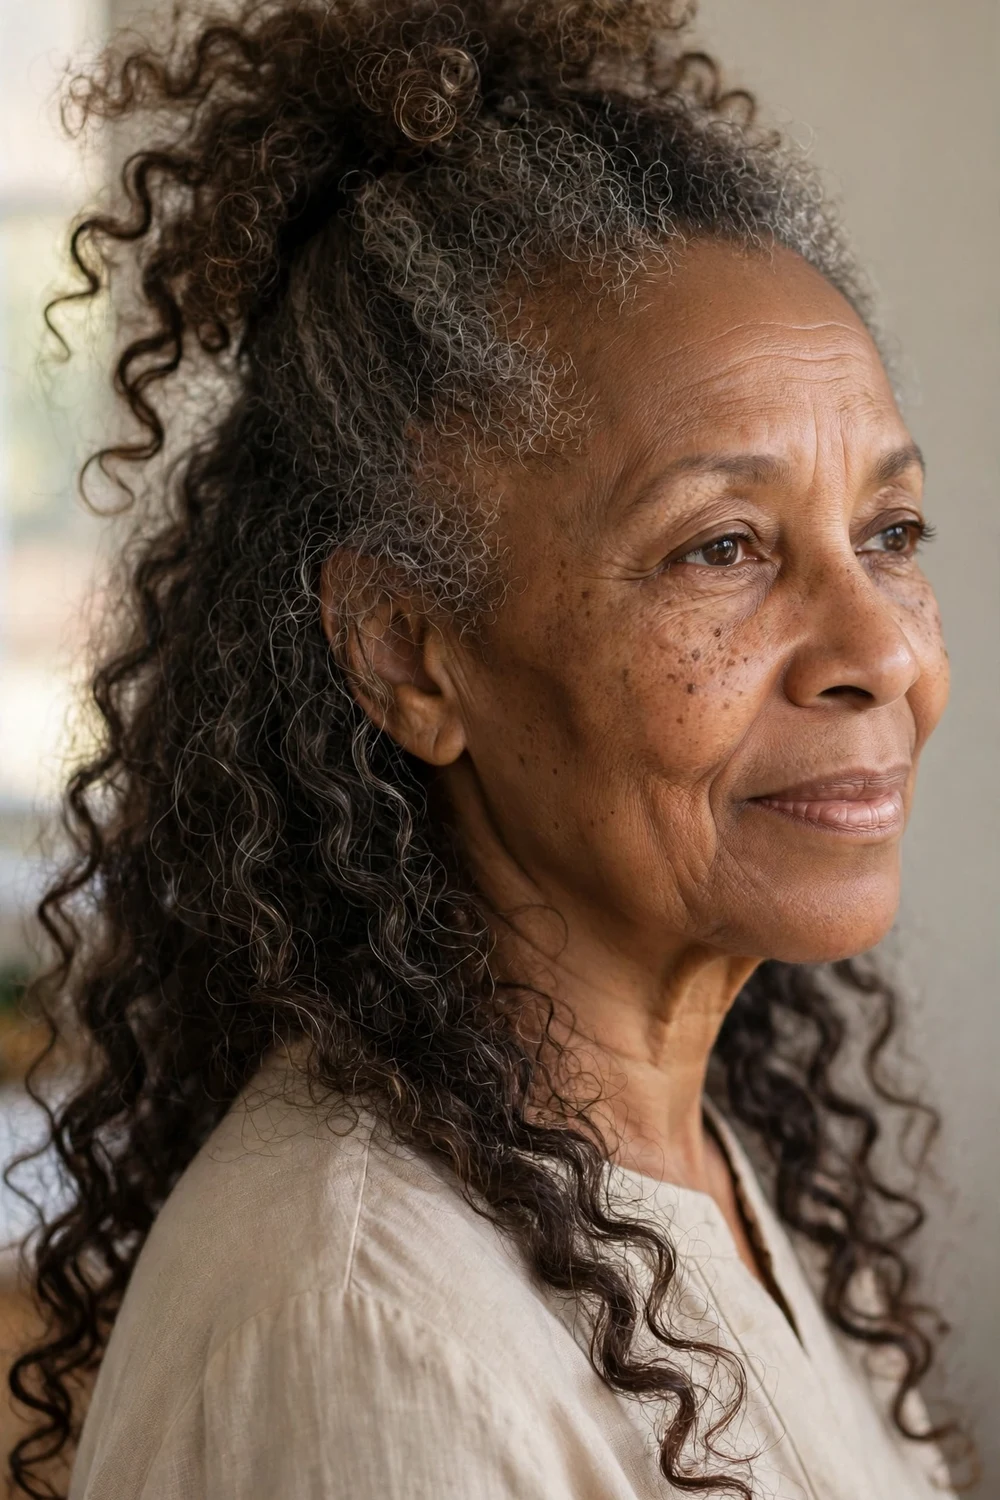
Five minutes, one scrunchie. The half-up puff gives you crown lift while the rest of your curls stay free, and it actually looks better on second- or third-day hair. Gather the top section loosely (never tight, for your edges’ sake), secure with a satin scrunchie, and let the back fall naturally. A few soft tendrils at the front keep it relaxed.
Try this: This style stretches your wash day. Wear it on day two or three when the curls have loosened a little.
Effort: Low · Cost: DIY, scrunchie only
24. High Afro Puff
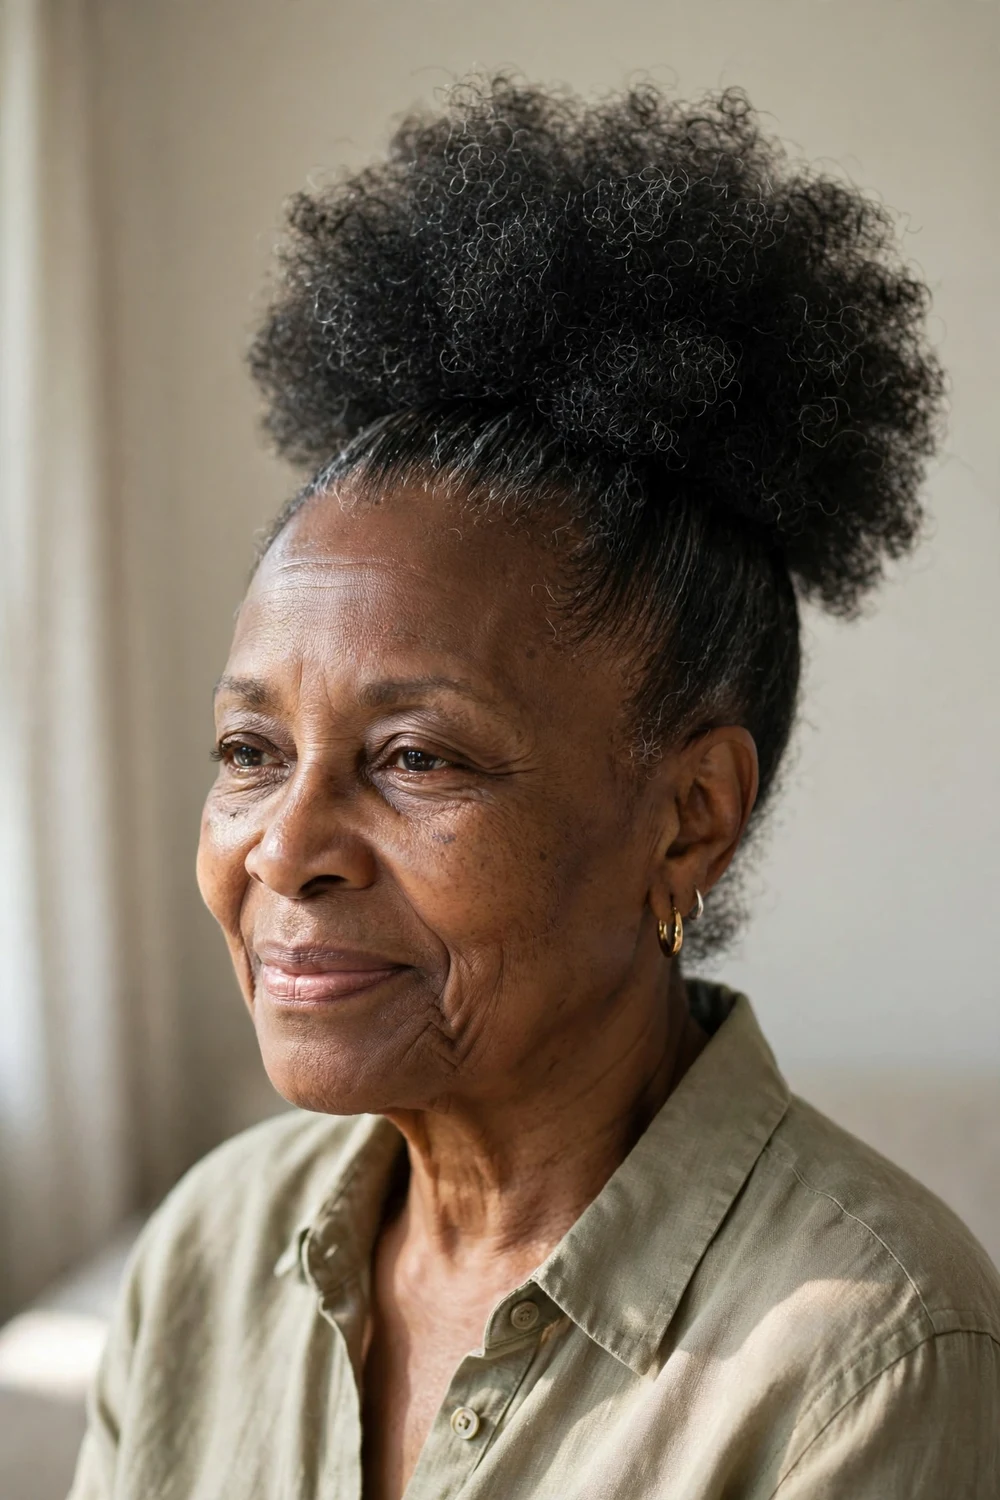
Pull everything up and let the texture do the talking. The high afro puff gathers all your curls toward the crown into one rounded shape that shows off your coil pattern from every angle. Smooth the base with a little gel and a soft brush, secure with a wide band, and fluff the puff with a pick. It is a no-fuss style for daily wear.
Try this: Place the puff slightly forward on the crown rather than dead center. The forward placement lifts the face.
Effort: Low · Cost: DIY, products only
25. Half-Up Half-Down Curls
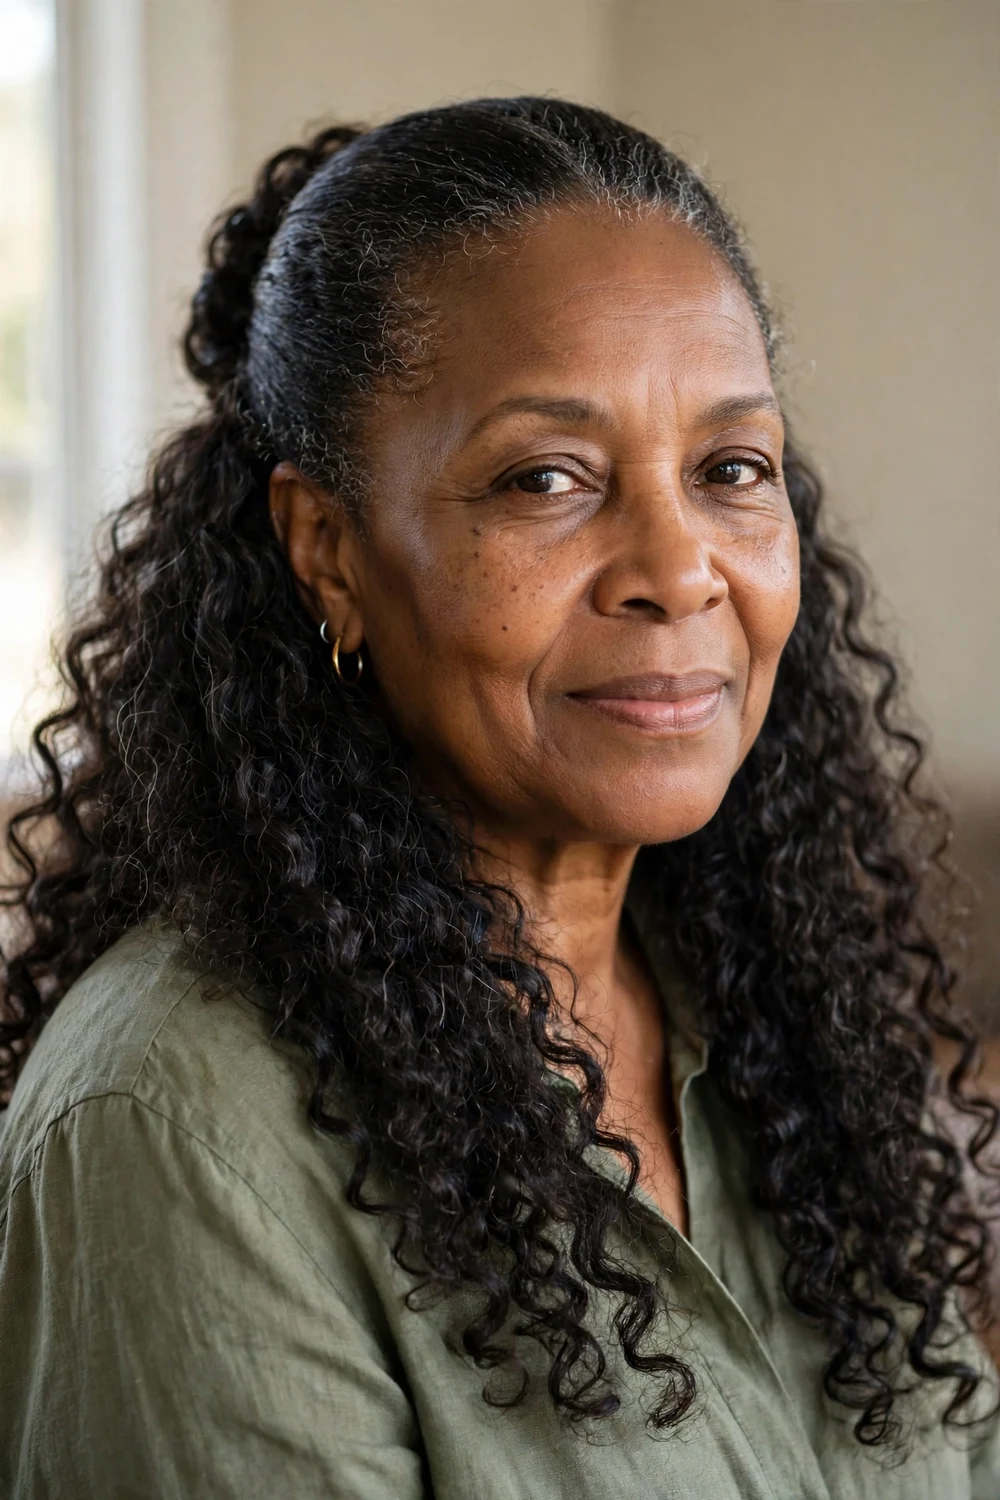
Keep hair out of your face without giving up length. Pull the top section back and let the rest of your curls fall free with all their bounce and texture. It works on medium to long curls and suits casual days as well as evenings out. For a polished version, smooth the front with gel and leave the back big.
Try this: Secure the top section with two crossed bobby pins instead of an elastic. It holds better on thick curls and hides easily.
Effort: Low · Cost: DIY, pins only
26. Messy Curly Bun
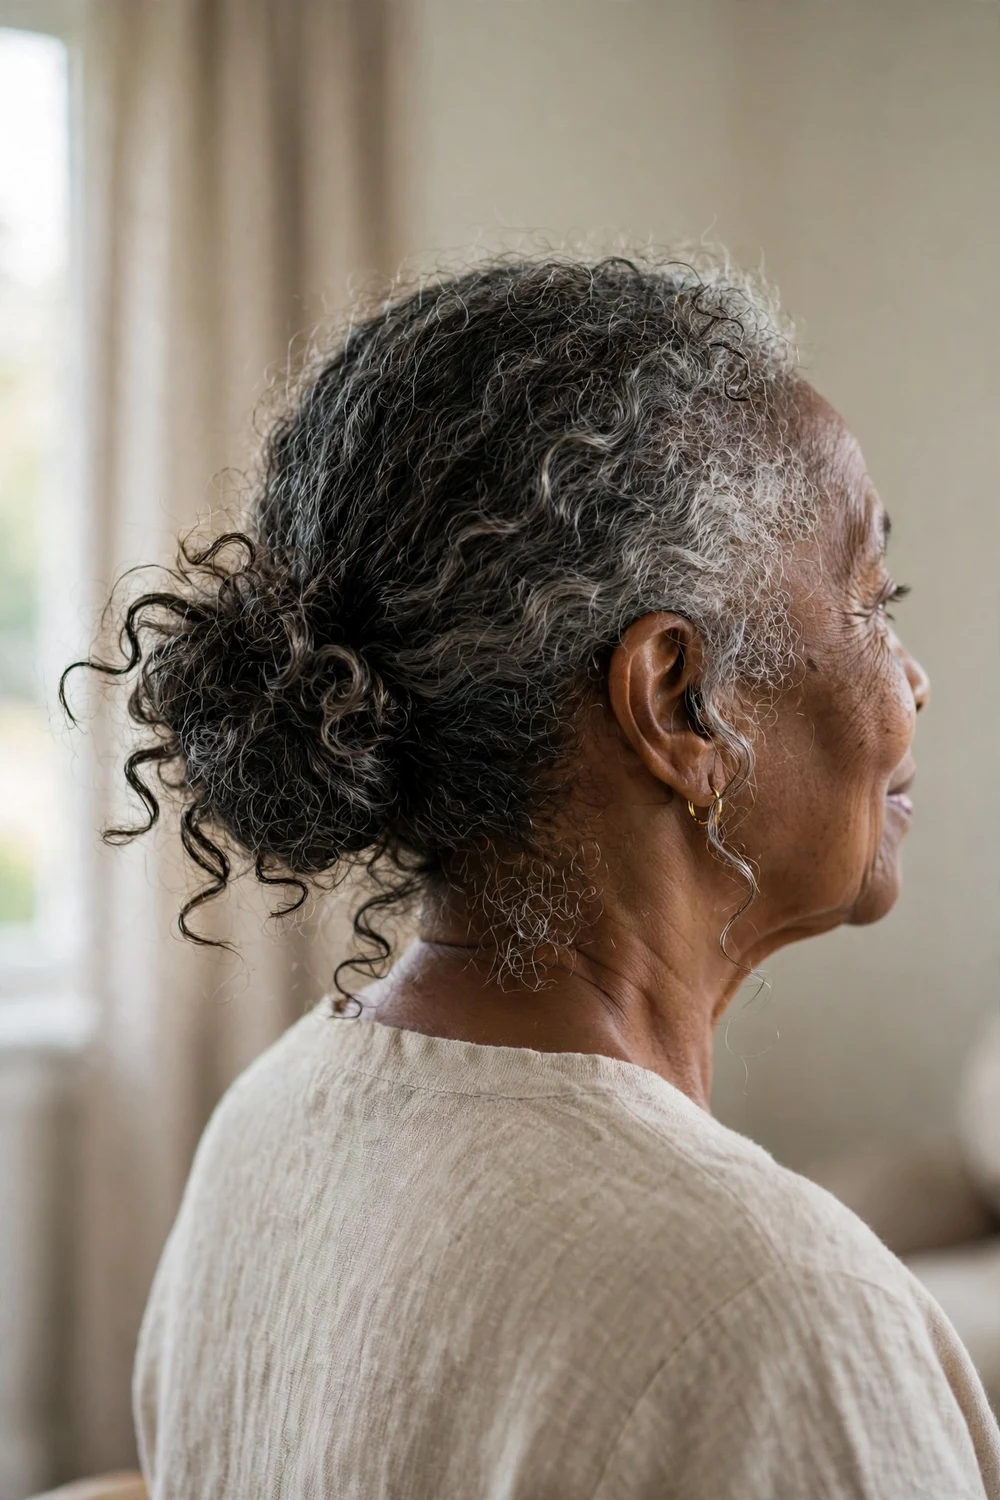
A low bun with texture beats a sleek one on curly hair every time. Gather your curls at the nape, twist loosely, and pin without pulling everything smooth. The loose curls around the bun give it softness and movement. Add a side-swept front section for a little polish, and this works for weddings, church, and dinner dates.
Try this: Leave the ends slightly undone instead of tucking them all in. The loose ends are what make it look effortless.
Effort: Low · Cost: DIY, pins only
27. Voluminous Curly Ponytail
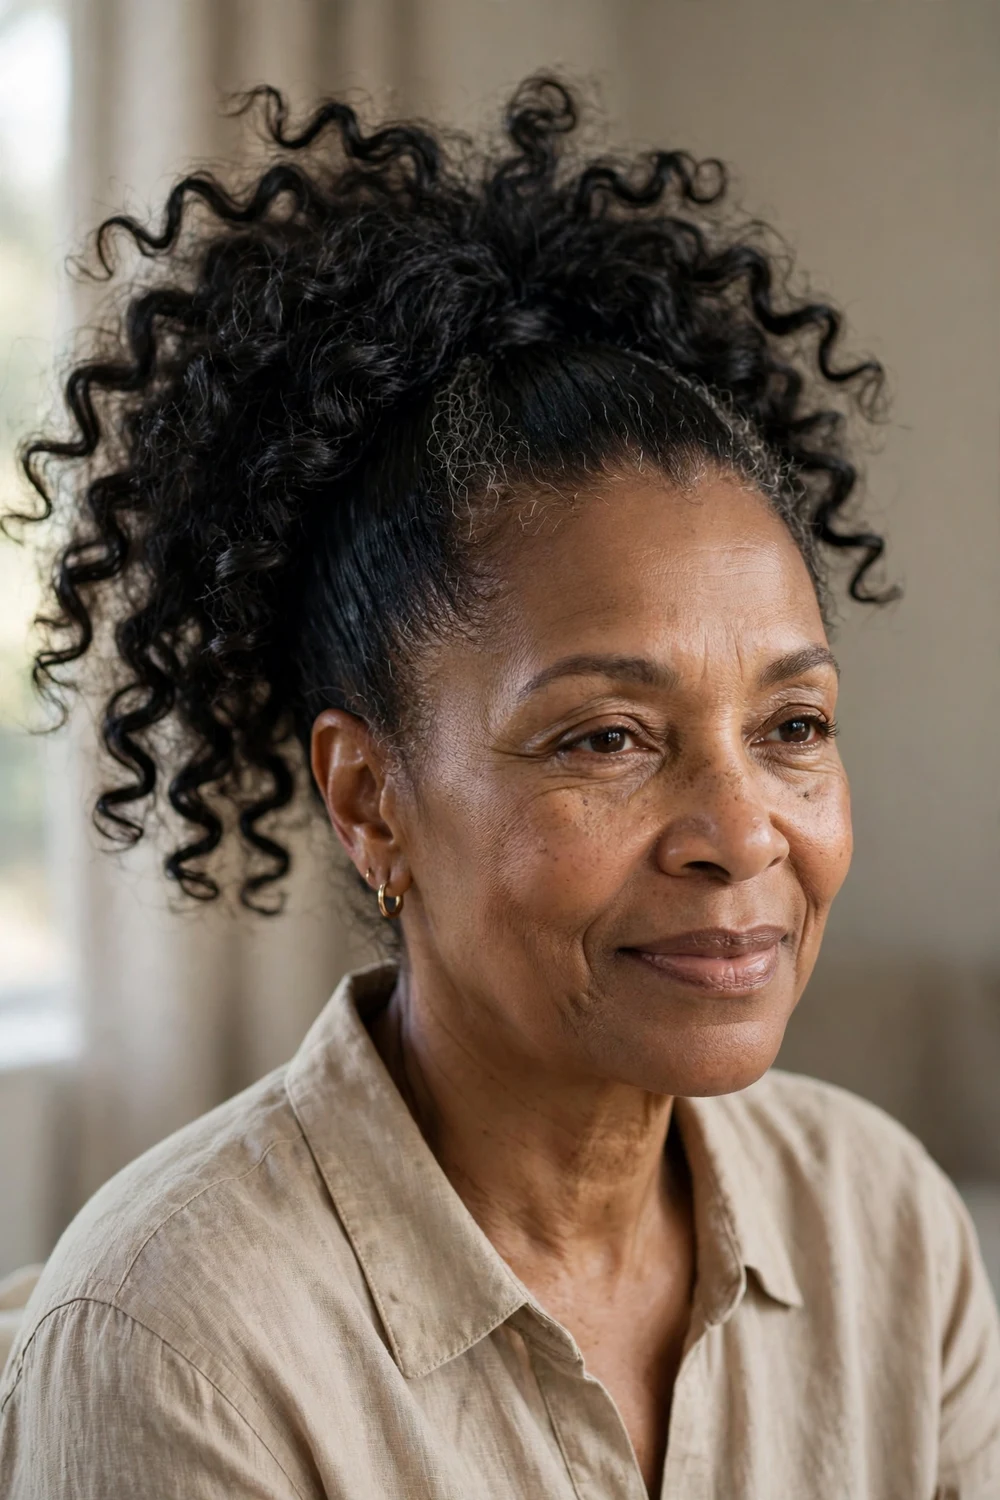
A high ponytail with serious volume takes five minutes and turns heads. Smooth the base, gather the curls high, and let them fall big. Play with the height: higher reads playful, mid-height reads polished. Wrap a small section of hair around the elastic to hide it, and secure with a pin underneath.
Try this: Use two elastics stacked for thick hair. One elastic alone slides down by midday under the weight.
Effort: Low · Cost: DIY, elastics only
28. Slick-Back Curly Updo with Tendrils
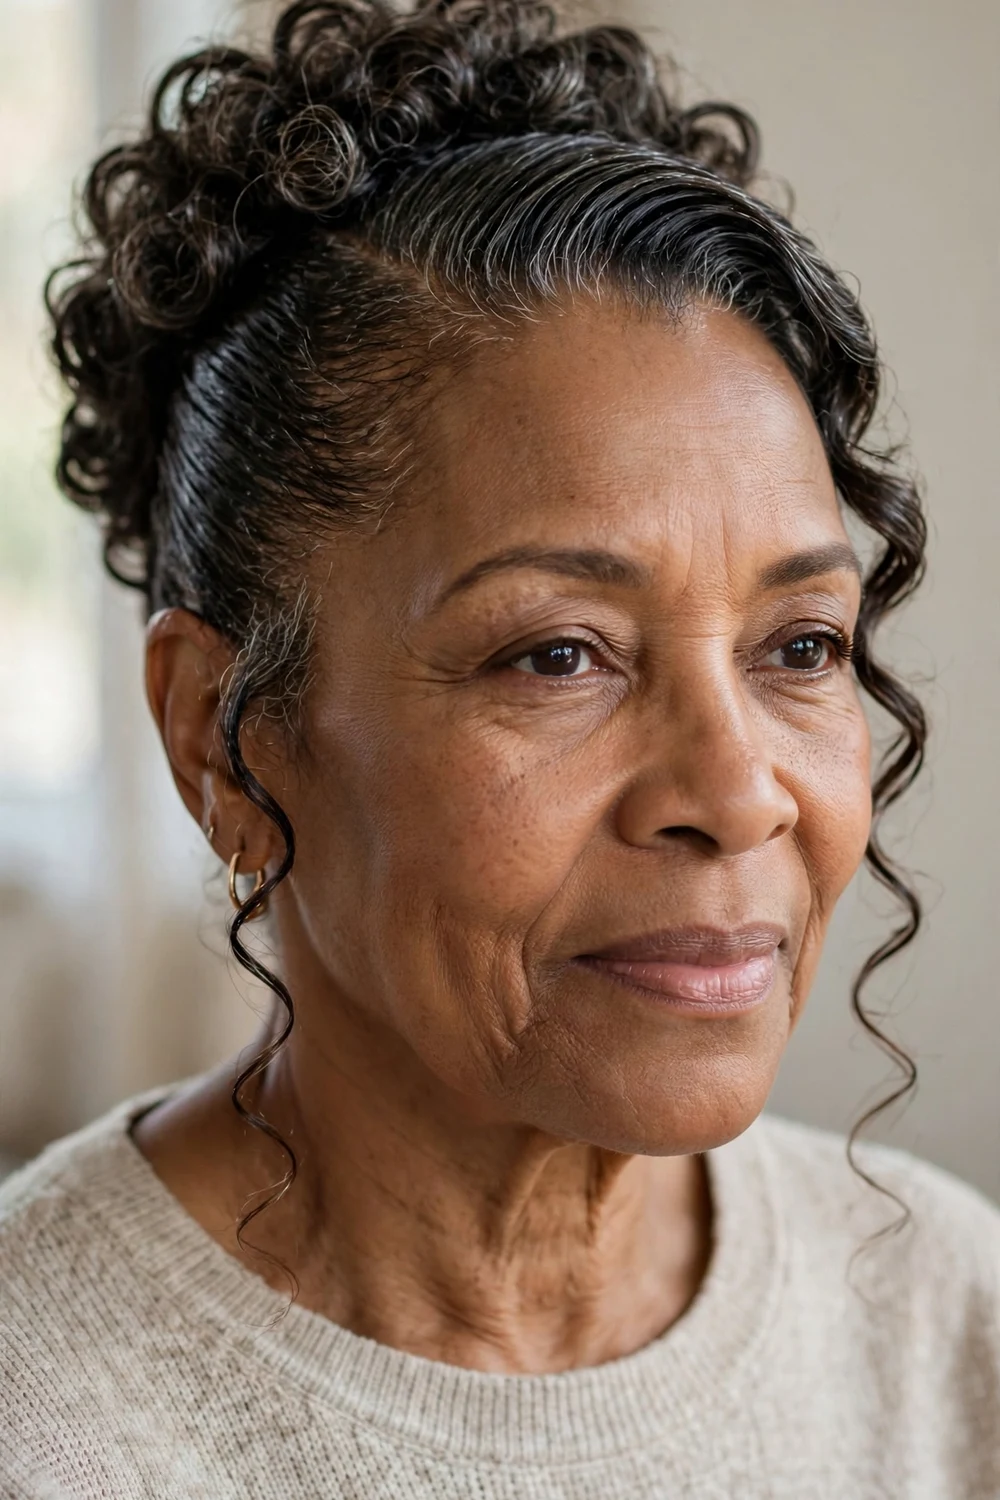
Smooth roots, curly top. This updo pulls everything back into a polished shape while leaving two soft tendrils at the front for a delicate frame. It suits formal events and date nights, and it keeps the front neat without tension on your edges. Set it with a firm-hold gel under a hooded dryer so it stays put for hours.
Try this: Curl the tendrils around your finger with a dab of cream after the updo sets. Defined tendrils look intentional; frizzy ones do not.
Effort: Medium · Cost: DIY or salon
29. Flat-Twist Updo
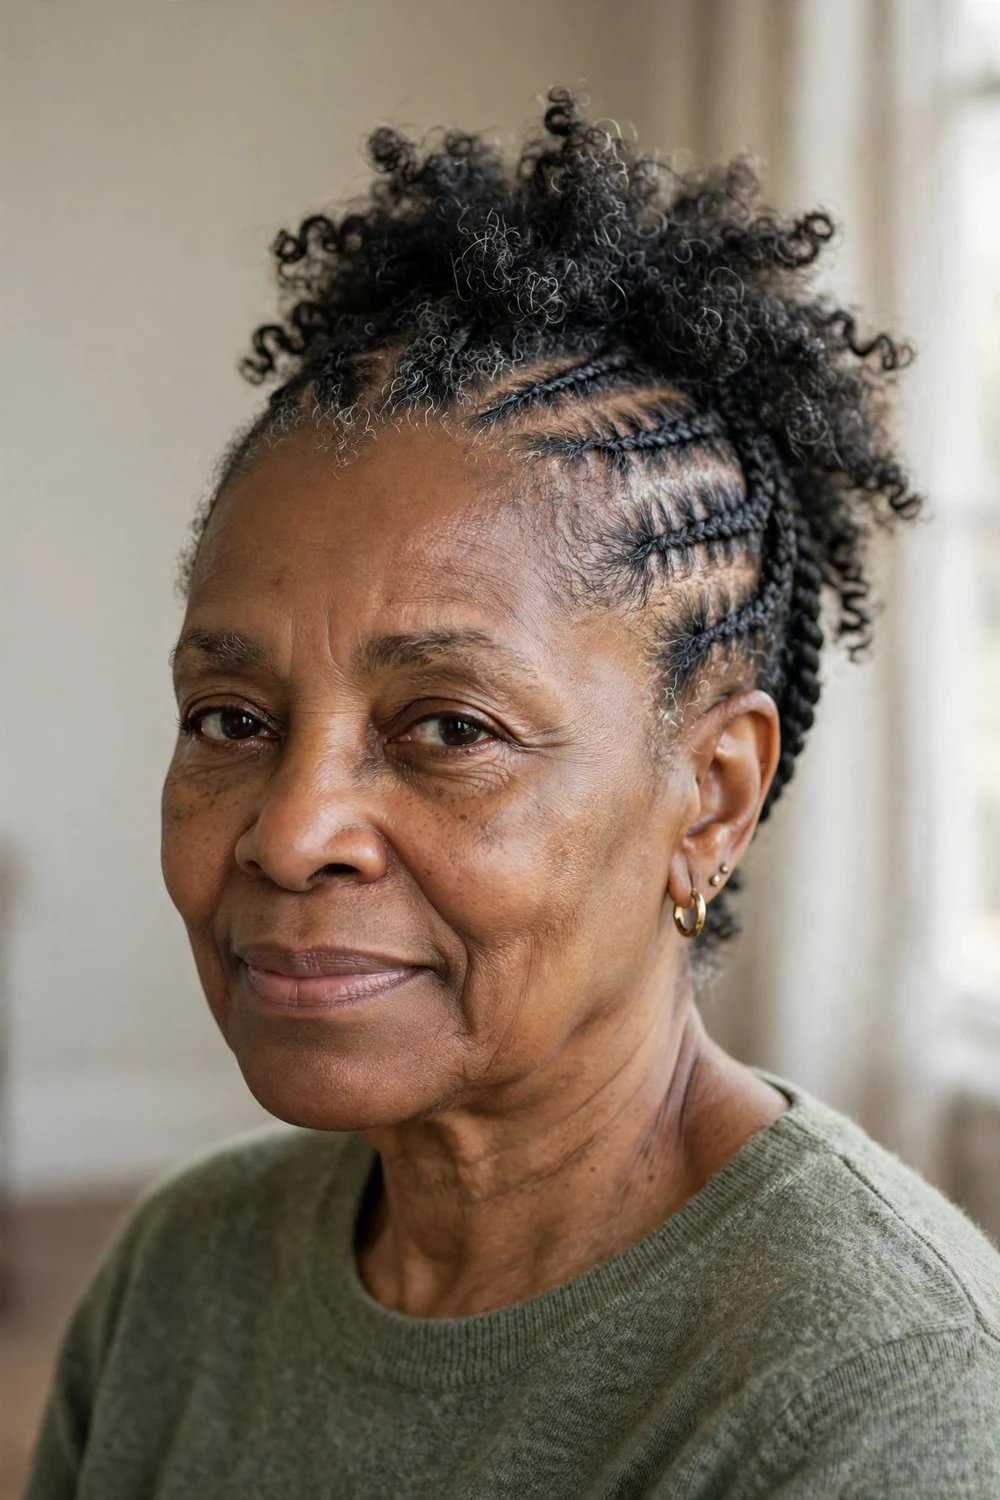
Flat twists along the sides leading into a curly top give you the polish of an updo with the softness of free curls. It is elegant enough for events and easy enough for a regular week, and it keeps the front neat without pulling your edges. Ask your stylist to keep the twists loose at the hairline if your scalp is sensitive.
Try this: Wear the updo for a few days, then take the twists down. You get a twist-out with extra root volume as a second style.
Effort: Medium · Cost: Salon or DIY
30. Auburn Rod-Set Curls

A salon rod set gives you uniform, bouncy curls that last for days. The auburn color adds warmth that flatters deeper skin tones and gives the style a rich, dimensional finish. Setting foam under a hooded dryer sets each curl perfectly, so you get all the fun of a longer curly style with none of the daily work. This is a classic for a reason.
Try this: Ask for medium rods rather than small ones. Medium rods give you movement and body; small rods read tighter and more formal.
Effort: Low (after appointment) · Cost: Salon rod set
Curly Hairstyles for Older Black Women: Comparison at a Glance
| Style | Best Occasion | Difficulty | Hold Time |
|---|---|---|---|
| Shaped TWA | Everyday | Easy | 6 to 8 weeks |
| Finger-Coil TWA | Everyday, work | Medium | 5 to 7 days |
| Tapered Afro | Everyday, evenings | Easy | 6 to 8 weeks |
| Rounded Curly Afro | Everyday | Easy | 3 to 5 days |
| Layered Curly Bob | Work, events | Easy | 8 to 10 weeks |
| Side-Part Curly Bob | Work, evenings | Easy | 3 to 5 days |
| Finger-Coil Bob | Events, work | Medium | 5 to 7 days |
| Crochet Curly Bob | Everyday, travel | Easy | 4 to 6 weeks |
| Highlighted Curly Bob | Events, evenings | Easy | 8 to 10 weeks |
| Wash-and-Go Curls | Everyday | Easy | 3 to 5 days |
| Twist-Out Curls | Everyday, weekends | Medium | 4 to 6 days |
| Bantu Knot-Out Curls | Events, weekends | Medium | 4 to 6 days |
| Coiled Bantu Knots | Events, cultural occasions | Medium | 7 to 10 days |
| Salt-and-Pepper Silver Curls | Everyday, events | Easy | 3 to 5 days |
| Curly Pixie | Everyday, work | Easy | 6 to 8 weeks |
| Tight Coils | Everyday | Easy | 3 to 5 days |
| Sponge-Defined Curls | Everyday | Easy | 2 to 4 days |
| Curly Frohawk | Evenings, events | Medium | 3 to 5 days |
| Curly Lob | Work, events | Easy | 10 to 12 weeks |
| Layered Curly Hair with Bangs | Everyday, work | Easy | 3 to 5 days |
| Afro Curls with Bangs | Everyday | Easy | 3 to 5 days |
| Finger Coils with Bangs | Events, work | Medium | 5 to 7 days |
| Half-Up Puff | Everyday, casual | Easy | 1 to 2 days |
| High Afro Puff | Everyday, casual | Easy | 1 to 3 days |
| Half-Up Half-Down Curls | Everyday, evenings | Easy | 2 to 3 days |
| Messy Curly Bun | Events, church | Easy | 1 day |
| Voluminous Curly Ponytail | Everyday, evenings | Easy | 1 to 2 days |
| Slick-Back Curly Updo | Formal events | Medium | 1 day |
| Flat-Twist Updo | Events, weddings | Medium | 5 to 7 days |
| Auburn Rod-Set Curls | Events, church | Easy | 5 to 7 days |
How to Choose the Right Curly Style for You
Start with your styling time. If you want under ten minutes in the morning, pick a shaped cut: TWA, tapered afro, sponge curls, or a curly pixie. These need a little product and nothing else.
If you enjoy a weekly styling session, twist-outs, knot-outs, and rod sets reward the effort with curls that last four to seven days. The setup takes an hour, but the rest of the week is nearly hands-off.
Match the cut to your curl pattern. Tight coils hold short shapes well. Looser curls need length or layers to keep their definition. And whatever you choose, tell your stylist how much shrinkage you get, because that decides whether the cut happens wet or dry.
Mistakes to Avoid
The biggest mistake is skipping the shape. Curls without a cut grow into a wide triangle that drags the face down. A shaped perimeter or tapered sides fix this in one appointment.
The second is touching curls while they dry. Every touch breaks the curl cast and invites frizz. Apply product, set the style, and leave it alone until it is fully dry.
The third is piling on product. Definition comes from the right order on wet hair (leave-in, cream, gel), not from more layers. Heavy buildup dulls curls and weighs them down.
If you are deciding between gray and color, curly gray hairstyles for women over 50 shows how silver curls look in different shapes and lengths.
For a broader look at curls at this stage of life, curly hairstyles for women over 50 covers 30 more ideas across every curl pattern.
If your curls are on the finer side, curly hairstyles for thin fine hair focuses on cuts that build fullness where hair is sparse.
And to match your curls to your face shape, oval face hairstyles curly hair shows which silhouettes flatter oval faces best.
Frequently Asked Questions
How do I keep my curls from turning into a triangle shape?
Ask for shaping and weight removal through the mid-lengths, not just shorter layers on top. The goal is a rounded silhouette with a clean nape or gentle taper. Cutting on dry hair helps your stylist place the shape exactly where it should sit, especially if your shrinkage is strong.
What is the best way to get curl definition without crunch?
Layer fewer products in the right order: leave-in on soaking-wet hair, then curl cream, then a light gel or foam. Let the hair dry completely, then scrunch gently with oiled hands to break the cast. The scrunching step is what turns a crunchy set into soft, defined curls.
How often should older women trim curly hair?
Every 8 to 12 weeks for most curly cuts, or sooner if the ends feel rough and single-strand knots appear. Tapered cuts and pixies need touch-ups closer to every 6 to 8 weeks to keep the outline crisp. Regular trims also keep the shape from going wide at the bottom.
Can I wear these styles with gray or transitioning hair?
Yes. Crochet styles, flat-twist updos, and bantu knot-outs all work well on transitioning hair. A stylist experienced with natural texture can also shape relaxed hair into bobs and pixies that mimic these silhouettes. Gray curls just need extra moisture, since gray hair runs drier by nature.
What products do older Black women need for curly hair?
Four basics cover almost everything: a sulfate-free cleanser, a rich conditioner, a leave-in, and a curl cream. Add a light gel or foam for hold and a satin bonnet for the night. Avoid heavy butters if your hair is fine, since buildup dulls curls and weighs them down.
Final Thoughts
The best curly hairstyle is the one that gives you volume where you want it, a clean outline everywhere else, and a routine you can live with. Start with one style that matches your current length and one that feels like a stretch, then take both photos to your stylist. Hydrated curls in the right shape need very little else.

