


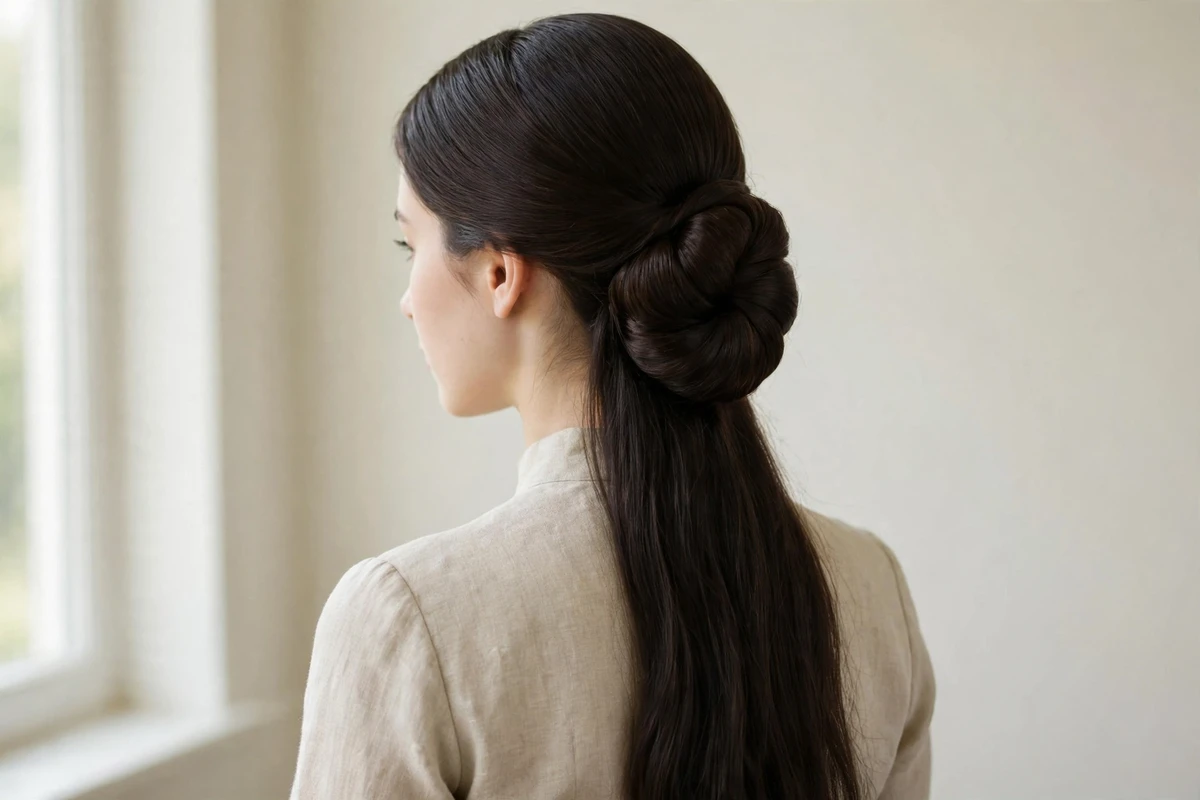
Yes, long hair is the best starting point for an updo. Extra length means more wraps around a bun, longer braids to coil, and twists that hold their own shape. Shorter hair often needs padding or extensions to fill out the same styles. These 35 updos for long hair are built around that advantage, from five-minute knots to detailed braided work.
Every style below includes a difficulty rating, an honest cost estimate, and one practical tip. Most need nothing more than bobby pins, elastics, and a brush.
Quick Takeaways
- Second-day hair holds updos better than freshly washed hair, so plan wash day around the event.
- Anchor pins against the scalp, not just into the style, to carry the weight of long hair without headaches.
- Long hair wraps two to three loops around a bun base, which fills out styles that look thin on shorter hair.
- Braiding or twisting the hair first gives the updo internal structure and helps it last all day.
- Keep a small kit in your bag: six bobby pins, two elastics, and a travel hairspray for touch-ups.
1. Classic High Bun

Gather all the hair into a high ponytail at the crown and secure it firmly. Twist the ponytail until it coils on its own, then wrap it around the base two or three times. The extra length makes enough loops to build real height without padding. Pin the coil at four points: top, bottom, left, and right. Tuck the ends under the wrap so nothing sticks out. For extra hold on slippery hair, tease the ponytail lightly at the base before wrapping.
Try this: wrap the first loop a little loosely, then tighten each later loop, so the bun sits smooth instead of lumpy.
Difficulty: Easy | Cost: $0 (pins and elastics at home)
2. French Twist

Brush the hair smooth and sweep it all to one side. Hold it flat against the back of the head and twist the whole length upward into a vertical roll. Long hair creates a tall, full twist with the ends tucked inside the top. Secure the roll with six to eight U-shaped pins pushed in along the seam. Smooth the surface with light hairspray for a clean finish. If the twist feels loose at the top, add two pins crossed in an X through the tucked ends.
Try this: slide the first pin horizontally through the base of the twist and into the scalp hair before pinning the roll itself, so the weight anchors properly.
Difficulty: Medium | Cost: $0-5
3. Low Chignon

Pull the hair into a low ponytail at the nape and fasten it with an elastic. Twist the ponytail into a rope, then coil it flat against the head in a neat circle. That length wraps around twice, which fills out the chignon without any filler. Pin the coil in place and wrap a thin strand from the ponytail around the elastic to hide it. This is a dependable pick for weddings, interviews, and formal dinners, and a longer list of timeless picks sits in the updo hairstyles older women article.
Try this: coil the twist clockwise on one side of the nape for a slightly off-center shape that photographs well.
Difficulty: Easy | Cost: $0 (pins and elastic at home)
4. Ballerina Bun

This is the strictest bun on the list: high, round, and completely smooth. Brush the hair straight up into a ponytail at the very top of the head. Apply a small amount of gel through the lengths for a glassy finish. Wrap the hair tightly around the base and pin every loop. Extra length builds a large, even bun that holds its shape through rehearsals, performances, and long event days.
Try this: do a final smoothing pass over the hairline with a clean toothbrush misted with hairspray to catch flyaways.
Difficulty: Medium | Cost: $0-5
5. Braided Crown

Part the hair down the middle and make two Dutch braids starting at the temples. Braid each one down past the ear, then cross them over the top of the head like a headband. Long hair gives enough length for the braids to overlap slightly, which hides the join. Pin along both braids and tuck the tail ends underneath. More braid-led updo ideas appear in the updo hairstyles for Black women guide.
Try this: gently pull the braid edges wider (pancaking) before pinning, so the crown looks fuller.
Difficulty: Medium | Cost: $0 (pins and small elastics at home)
6. Dutch-Braid Bun

Start a Dutch braid at the front hairline and braid back toward the crown, feeding in hair as you go. When you reach the back, gather everything into a ponytail and twist the remaining length into a bun. The braid acts as a built-in anchor, so the bun stays put even on heavy hair. Keep the braid close to the scalp for the first few stitches so it lies flat. This structure is what makes it a favorite for proms and outdoor weddings.
Try this: mist the hair with dry texture spray before braiding so the sections grip instead of sliding.
Difficulty: Medium | Cost: $0-5
7. Fishtail-Braid Updo

Braid all the hair into one fishtail braid, working from the nape down to the ends. Long hair produces a fishtail long enough to coil into a full low bun with one clean wrap. Tie the end with a small elastic, coil the braid around its own base, and pin through the thick parts of the braid. The woven texture shows clearly even after coiling, which is the whole point of this style.
Try this: pancake the fishtail along its full length before coiling, so the finished bun looks wide rather than ropey.
Difficulty: Advanced | Cost: $0 (pins and elastic at home)
8. Gibson Tuck

Place a thin elastic headband over the hair, sitting low near the nape. Take sections of hair, roll each one upward, and tuck it over and into the band. Long lengths get tucked in two or three passes, building a soft roll across the back. Pin any loose sections into the roll. It reads polished from the front and takes about ten minutes. For office-friendly styling beyond updos, the easy work hairstyles for medium hair guide is a useful companion.
Try this: tuck the side sections first and the back hair last, so the roll stays even on both sides.
Difficulty: Easy | Cost: $0-5 (thin headband)
9. Twisted Chignon

Split the hair into two sections at the back. Twist each section into a rope, twisting away from the face on both sides. Cross the two ropes at the nape and coil them together into a low chignon. The opposing twists lock against each other, which gives this style more hold than a plain coiled bun. Let the ropes overlap slightly at the center so no scalp shows through. Pin through the crossover point for the strongest anchor.
Try this: apply a pea-sized amount of smoothing cream to each section before twisting to keep the ropes clean.
Difficulty: Easy | Cost: $0 (pins at home)
10. Waterfall-Braid Updo

Braid a waterfall braid from one temple across the back of the head to the other side, dropping a strand with each stitch. Pin the braid tail behind the opposite ear. Gather all the remaining hair, including the dropped strands, into a low bun at the nape. The braid frames the bun with a woven band, and the dropped strands blend into the coil. The length keeps the braid long enough to reach all the way across.
Try this: keep every dropped strand roughly the same thickness so the braid pattern looks even.
Difficulty: Advanced | Cost: $0 (pins and elastic at home)
11. Low Twisted Knot

Make a low ponytail and split it into two equal sections. Twist each section tightly, then wrap the two twists around the base in opposite directions. The opposing wraps form a knot shape that sits flat at the nape. Pin where the twists cross. A light mist of flexible-hold hairspray over the finished knot stops the twists from loosening. It looks more detailed than the effort it takes, which makes it a strong pick for last-minute formal plans.
Try this: spritz texturizing spray through the ponytail before splitting it, so the twists grip instead of unwinding.
Difficulty: Easy | Cost: $0 (pins and elastic at home)
12. Milkmaid Braids

Braid the hair into two low braids, one behind each ear. Lift the left braid up and across the crown, pinning it above the right ear. Do the same with the right braid in the opposite direction. Long hair lets the braids overlap at the top, covering the part line completely. For a softer look, pull the braids a little wider after braiding and before pinning them up. Tuck both tail ends under the opposite braid and pin them flat.
Try this: fasten the braid ends with clear mini elastics so no tails poke out from under the pinned braids.
Difficulty: Easy | Cost: $0-5
13. Wrapped Low Ponytail

Technically a ponytail, but finished like an updo. Secure a low ponytail at the nape with an elastic. Take a half-inch strand from underneath the ponytail and wrap it around the elastic twice. Long hair wraps cleanly with length to spare. Pin the strand end underneath the ponytail where it will not show. A dab of styling cream on the strand keeps it smooth while you wrap. The hidden elastic makes the whole style look more deliberate and neat.
Try this: backcomb the wrapping strand lightly first so it covers the elastic with no gaps.
Difficulty: Easy | Cost: $0 (pins and elastic at home)
14. Sleek High Ponytail Updo

Brush the hair up into a ponytail at the crown and lock it in with two stacked elastics, which stops the weight of long hair from dragging the style down. Smooth the top with gel and a boar bristle brush until the surface reflects light. Wrap a strand around the base and pin it underneath. Finish with a shine spray on the lengths for a reflective, healthy look. It sits high and tight, and the wrapped base keeps it in updo territory.
Try this: tilt your head back while securing the elastics so the front hairline pulls smooth with no bumps.
Difficulty: Easy | Cost: $0-5
15. Donut Bun

Pull the hair into a ponytail and slide a foam donut over it to the base. Spread the hair evenly over the donut, then wrap the remaining length around the base and pin it. There is usually enough length left for a full second wrap, which hides the donut completely. Pick a large donut and a shade close to your hair color so nothing shows through thin spots. Smooth the outer layer with a soft brush once the bun is pinned for a clean surface.
Try this: spread the hair over the donut before wrapping, not during, so coverage stays even all the way around.
Difficulty: Easy | Cost: $5-8 (foam donut)
16. Messy Side Bun

Sweep all the hair over one shoulder and make a low ponytail behind the ear. Twist the ponytail loosely and coil it into a bun, pinning as you go but leaving the loops soft. Pull out a few short pieces around the face and at the nape. Long hair gives this bun real volume even when the loops are loose. It works for dinners, dates, and any evening that is not strictly formal.
Try this: after pinning, tug gently at the crown for lift, then leave it alone; over-adjusting flattens the shape.
Difficulty: Easy | Cost: $0 (pins and elastic at home)
17. Twisted Crown

This is the faster cousin of the braided crown. Take a two-inch section at each temple and twist it into a rope, working back toward the crown. Cross the two twists over the top of the head and pin them in place. Gather the rest of the hair into a low bun or leave the twists as the feature with the remaining hair in a ponytail. Rope twists take minutes and still read as an intentional style.
Try this: angle each twist slightly upward as you work back, so the crown sits above the ears instead of sliding down.
Difficulty: Easy | Cost: $0 (pins at home)
18. Victory Rolls

Section the front hair into two or three parts. Backcomb the underside of each section, roll it toward the scalp, and pin the roll in place. The remaining hair goes into a low bun or chignon at the back. Long hair rolls into large, defined victory rolls with real presence. If hot rollers are used to set the rolls, apply heat protectant to each section first and let the hair cool fully before pinning.
Try this: backcomb only the underside of each section and keep the top layer smooth, so the roll looks polished, not frizzy.
Difficulty: Advanced | Cost: $0-5
19. Beehive Updo

Backcomb the crown section in layers to build height, then smooth the top layer over the teased hair with a soft brush. Gather the lengths at the back and pin the ends under at the nape. The natural bulk of long hair holds the beehive shape without inserts. Work in a well-lit mirror and check the profile often, since height reads differently from the side. Set the whole style with firm-hold hairspray, applied in two light passes rather than one heavy blast.
Try this: tease in horizontal layers from the crown forward, smoothing each outer layer before moving to the next.
Difficulty: Advanced | Cost: $0-5
20. Low Bun with Side Braid

Braid a single Dutch or French braid along one side of the hairline, starting at the temple and working back. Feed the braid into a low ponytail with the rest of the hair, then twist everything into a bun at the nape. The braid adds detail to an otherwise plain bun and keeps the front hair off the face. One braid is enough; the asymmetry is the design. Add a small decorative pin where the braid meets the bun for a finished detail.
Try this: braid the first few stitches tightly at the hairline, then loosen your grip as you move back toward the bun.
Difficulty: Medium | Cost: $0 (pins and elastic at home)
21. Romantic Side-Braid Updo

Make a loose three-strand braid starting behind one ear and draping over the shoulder. Coil the braid into a soft bun just behind that ear and pin it. Leave the front pieces out until the very end, then pin them loosely around the face. Long hair makes a braid thick enough to form a full bun on its own. The loose tension keeps the whole style soft rather than severe.
Try this: stretch the braid wider after tying it off but before coiling, so the bun has visible texture.
Difficulty: Medium | Cost: $0 (pins and elastic at home)
22. Floral Low Bun

Build a simple low bun or chignon first, then dress it with flowers. Fresh blooms, dried flowers, or floral hair pins all work. Push each stem in between the bobby pins rather than into the hair alone, so the flowers stay anchored through the event. Match the flower size to the bun: small blooms for neat buns, larger ones for full, textured buns. Cluster three to five blooms on one side instead of scattering them evenly. This is a standard choice for spring weddings and garden parties.
Try this: choose wired floral pins over loose stems if the event involves dancing or wind.
Difficulty: Easy | Cost: $5-10 (floral pins or fresh blooms)
23. Casual Boho Updo

Work with the hair’s natural texture instead of fighting it. Twist a few random sections, braid one or two thin pieces, and pin everything loosely into a low bun at the nape. Leave the ends slightly undone and let shorter layers fall where they want. Long hair gives enough material to layer twists over braids without the style going flat. A few loose strands around the face are part of the look, so there is no need to pin everything down. There is no fixed pattern, which is the appeal.
Try this: put one rope twist and one thin braid on each side before pinning, so the texture mix looks intentional.
Difficulty: Easy | Cost: $0 (pins at home)
24. Hair Bow Updo

Pull the hair into a high ponytail and loop it through the elastic one last time only halfway, leaving the ends hanging. Split the loop into two halves and pin each half flat against the head to form the bow. Bring the hanging ends up between the halves and pin them underneath to form the center knot. Plenty of length builds a large, clearly readable bow. Set the loops with light-hold hairspray so the bow keeps its shape through the evening.
Try this: shape both bow loops and pin them before bringing the ends up, so the knot lands exactly in the middle.
Difficulty: Medium | Cost: $0 (pins and elastic at home)
25. Fan-Out Sock Bun

This is a sock bun worn wide and flat instead of round. Pull the hair through a rolled sock, spread it over the sock, and fan the lengths outward into a disc shape before pinning the ends under. Long hair fans far enough to make a dramatic wide bun. Use a sock close to your hair color so the base never shows through. The flat shape suits oval and long face shapes in particular.
Try this: fan the hair outward first and check the shape in a hand mirror before pinning anything down.
Difficulty: Medium | Cost: $0 (a clean sock and pins)
26. Mini Twist Updo

Divide the hair into eight to ten sections and twist each one into a small rope. Pin the twists one by one into a low cluster at the nape, overlapping them slightly. Long hair makes each twist long enough to wrap and tuck, so the cluster looks full. Keep the twists a similar thickness so the finished cluster looks balanced. The many anchor points spread the weight evenly, which makes this one of the most comfortable updos for heavy hair.
Try this: pin the twists in horizontal rows from the nape upward, tucking each new row over the last.
Difficulty: Medium | Cost: $0 (pins at home)
27. Messy Casual Updo

Gather the hair into a high ponytail, twist it loosely, and wrap it around the base without worrying about neatness. Pin in three or four places and let the ends stick out wherever they land. Long hair gives the wrap enough bulk to look like a style rather than an accident. Five minutes is genuinely enough. This is the everyday answer when a bun feels too formal and loose hair feels like too much.
Try this: place three pins in a triangle around the base for a quick hold that survives a full day.
Difficulty: Easy | Cost: $0 (pins and elastic at home)
28. Low Bohemian Braid-Bun

Braid the hair into a low ponytail first, then coil the braid into a bun at the nape. The braid keeps the bun textured and stops long hair from slipping out of the coil. For extra detail, split the ponytail into two braids, one regular and one fishtail, and coil them together. Tuck a couple of tiny pearl pins into the coil for a boho finish. Pull the braid edges slightly loose before coiling for a relaxed finish.
Try this: tie the braid end with a clear elastic and tuck it fully under the coil so no elastic shows.
Difficulty: Medium | Cost: $0 (pins and elastic at home)
29. Messy Top Knot

Flip the head forward, gather the hair into a ponytail at the top of the head, and secure it. Wrap the ponytail loosely around the base, pin it, and pull at the loops for volume. Plenty of length builds a large knot with real presence. Stop the final wrap before pulling the ends all the way through and let them fan out over the knot for the classic messy finish. Day-old hair works best here, since a little natural texture helps the knot hold.
Try this: wrap the first loop snugly for hold, then make every later loop loose for the messy texture.
Difficulty: Easy | Cost: $0 (pins and elastic at home)
30. Bubble Ponytail Updo

Make a high ponytail and add elastics every two inches down its length, puffing each section outward into a bubble. Long lengths make four to six bubbles easily. Coil the bubbled ponytail around its base into a high bun and pin through the elastic points. Use clear elastics on light hair or dark elastics on dark hair so they blend in. The bubbles turn into visible texture rings in the finished bun, which looks far more detailed than the effort involved.
Try this: puff each bubble out fully before adding the next elastic, since tightening later flattens them.
Difficulty: Easy | Cost: $0-5 (several small elastics)
31. Space Buns

Part the hair straight down the middle into two sections. Twist each section into a bun on its side of the head, sitting high near the crown. Long hair makes full-sized buns with plenty of wrap. Keep them symmetrical by checking in the mirror after pinning the first one. Leave two thin strands out at the front and curl them with a small iron, applying heat protectant first. They suit festivals, concerts, and casual weekends, and they keep all the hair off the neck in hot weather.
Try this: use a tail comb for the center part, since a crooked part throws off the symmetry.
Difficulty: Easy | Cost: $0 (pins and elastics at home)
32. Half-Up Top Knot

Take the top half of the hair, from above the ears up, and gather it into a ponytail at the crown. Twist it into a small knot and pin it, leaving the bottom half of the hair down. Long hair keeps both sections substantial: the knot has enough wrap and the loose half still shows length. If the whole wedding party wants a theme, short-haired bridesmaids can browse the formal hairstyles for short hair ideas.
Try this: take the section from just above the ears, not higher, so the knot and the loose hair stay balanced.
Difficulty: Easy | Cost: $0 (pins and elastic at home)
33. Claw-Clip Twist Updo

Gather the hair at the nape as if making a low ponytail, twist the whole length upward, and fold it flat against the back of the head. Clamp a large claw clip over the twist to hold it. Long hair needs an extra-large clip with strong teeth; standard clips will not close over the full twist. Twist first and clip second, never try to clip loose hair and twist after.
Try this: push the twist slightly upward before clamping so the clip sits against the scalp and carries the weight.
Difficulty: Easy | Cost: $5-10 (extra-large claw clip)
34. Scarf-Wrapped Low Bun

Make a simple low bun or chignon and pin it securely. Fold a silk scarf into a three-inch band, wrap it around the base of the bun, and tie it at the nape with the ends tucked in. The scarf adds color and pattern while also covering pins and elastics. Long hair fills the bun out enough that the scarf sits on hair rather than on scalp. Pick a scarf that picks up a color in the outfit.
Try this: tie the scarf snugly on the first wrap and looser on the second, so it stays put without sliding.
Difficulty: Easy | Cost: $8-12 (silk scarf)
35. Braided Halo with Face-Framing Tendrils

Braid a Dutch braid around the full hairline like a halo, feeding in hair as you circle the head, and pin the tail under the start of the braid. Pull out two thin strands at the temples before you finish. Curl each tendril away from the face with a one-inch curling iron. Apply heat protectant to the tendrils first and let them cool before touching them. Long hair circles the whole head with length to spare, so the halo closes neatly.
Try this: curl the tendrils last, after the halo is fully pinned, so they do not get caught in the braid.
Difficulty: Medium | Cost: $0-5
Updo Comparison Table
| Updo | Best For | Difficulty | Time Needed |
|---|---|---|---|
| Classic High Bun | Everyday wear, workouts | Easy | 5 min |
| French Twist | Work, formal events | Medium | 10 min |
| Low Chignon | Weddings, interviews | Easy | 10 min |
| Ballerina Bun | Dance, performances | Medium | 15 min |
| Braided Crown | Festivals, weddings | Medium | 20 min |
| Dutch-Braid Bun | Prom, outdoor events | Medium | 20 min |
| Fishtail-Braid Updo | Formal occasions | Advanced | 25 min |
| Gibson Tuck | Office, vintage looks | Easy | 10 min |
| Twisted Chignon | Dinners, events | Easy | 10 min |
| Waterfall-Braid Updo | Weddings, parties | Advanced | 25 min |
| Low Twisted Knot | Last-minute formal plans | Easy | 5 min |
| Milkmaid Braids | Casual days, festivals | Easy | 15 min |
| Wrapped Low Ponytail | Work, polished days | Easy | 5 min |
| Sleek High Ponytail Updo | Evenings out | Easy | 10 min |
| Donut Bun | Formal events, dance | Easy | 10 min |
| Messy Side Bun | Dinners, dates | Easy | 10 min |
| Twisted Crown | Quick dressed-up days | Easy | 10 min |
| Victory Rolls | Retro parties | Advanced | 30 min |
| Beehive Updo | Themed events | Advanced | 30 min |
| Low Bun with Side Braid | Everyday polish | Medium | 15 min |
| Romantic Side-Braid Updo | Dates, weddings | Medium | 20 min |
| Floral Low Bun | Spring weddings | Easy | 15 min |
| Casual Boho Updo | Weekends, casual outings | Easy | 10 min |
| Hair Bow Updo | Parties, fun events | Medium | 15 min |
| Fan-Out Sock Bun | Statement looks | Medium | 15 min |
| Mini Twist Updo | Heavy hair days | Medium | 20 min |
| Messy Casual Updo | Everyday, errands | Easy | 5 min |
| Low Bohemian Braid-Bun | Outdoor weddings | Medium | 15 min |
| Messy Top Knot | Casual days, lounging | Easy | 5 min |
| Bubble Ponytail Updo | Parties, concerts | Easy | 15 min |
| Space Buns | Festivals, hot weather | Easy | 10 min |
| Half-Up Top Knot | Casual outings | Easy | 5 min |
| Claw-Clip Twist Updo | Quick errands, work | Easy | 5 min |
| Scarf-Wrapped Low Bun | Brunch, vacations | Easy | 10 min |
| Braided Halo with Face-Framing Tendrils | Weddings, photoshoots | Medium | 25 min |
How to Choose the Right Updo for Long Hair
Start with the occasion. Formal events call for structure: chignons, French twists, and braided buns hold their shape for hours. Casual days allow looser work like messy knots, claw-clip twists, and boho pinned styles.
Factor in hair weight. Very long or thick hair pulls on pins, so pick styles with built-in anchors: Dutch-braid buns, mini twist clusters, and Gibson tucks spread the load. If an updo gives you a headache within an hour, the pins are holding the style instead of the scalp; redo it with pins pushed into the hair at the scalp.
Match the style to your time. Under five minutes means a messy top knot, claw-clip twist, or low twisted knot. Twenty minutes or more opens up fishtail coils, waterfall braids, and halo braids. Practice a new style once on a normal day before wearing it to an event.
Check the weather. Wind and humidity loosen smooth styles fast, so pick braided or twisted updos for outdoor events and save sleek buns for indoors. A travel-size hairspray in your bag covers the rest.
Frequently Asked Questions
What is the easiest updo for long hair?
The messy top knot and the claw-clip twist are the easiest. Both take about five minutes, need only pins or one clip, and work with the hair’s natural texture instead of against it. Long hair gives both styles enough bulk to look finished.
How do you keep a long-hair updo from slipping out?
Start with second-day hair or add dry texture spray for grip. Push bobby pins into the hair at the scalp, not just into the style, so the scalp carries the weight. Braiding or twisting the hair before coiling it adds internal structure that resists slipping for hours.
What products do you need for updos on long hair?
A basic kit covers almost everything: bobby pins, small elastics, a brush, dry texture spray, and a light to firm-hold hairspray. Add a foam donut for round buns, an extra-large claw clip for twist styles, and heat protectant if you curl tendrils or set rolls with hot tools.
Do updos work on very thick or heavy long hair?
Yes, but the style needs to distribute the weight. Mini twist updos, Dutch-braid buns, and Gibson tucks anchor at many points instead of one, which prevents pulling and headaches. Avoid styles that hang all the weight from a single ponytail point.
How long does an updo on long hair usually last?
A well-pinned updo lasts eight to twelve hours, easily covering a full event day. Braided and twisted styles last the longest because the structure supports itself. Smooth buns on freshly washed hair loosen fastest, so plan wash day accordingly or add texture spray.
Final Thoughts
Long hair turns updos from a challenge into an advantage. Pick one style from the easy group, wear it on a normal day first, and keep the pins handy. Once the anchoring habit is set, the advanced braided styles stop feeling advanced.
If your hair has not quite reached long lengths yet, these medium hair updo ideas are designed specifically for medium hair.

