



Updos suit older women well because they lift the face, show the neckline, and keep hair off the collar on warm days. The best updo hairstyles for older women share three traits: they sit low or at mid-head instead of pulled tight on top, they leave some softness around the face, and they hold with pins rather than a straining elastic. Every style below works on shoulder-length to long hair and includes notes for thin or fine hair, which is the most common hair type after 50.
Start every updo on second-day hair or hair with dry shampoo in it. Freshly washed hair is slippery, and pins slide out of it within hours. A light dusting of texture spray at the roots gives even fine hair enough grip to hold a style from morning to evening.
Quick Takeaways
- Low and mid-head updos flatter more than styles pulled tight on top.
- Second-day hair or dry shampoo gives pins the grip they need.
- Tease the crown lightly before pinning to add volume to thin hair.
- Match bobby pin color to your hair so the pins disappear.
- Flexible-hold hairspray keeps an updo comfortable all day; strong-hold can feel stiff.
1. Classic Low Chignon
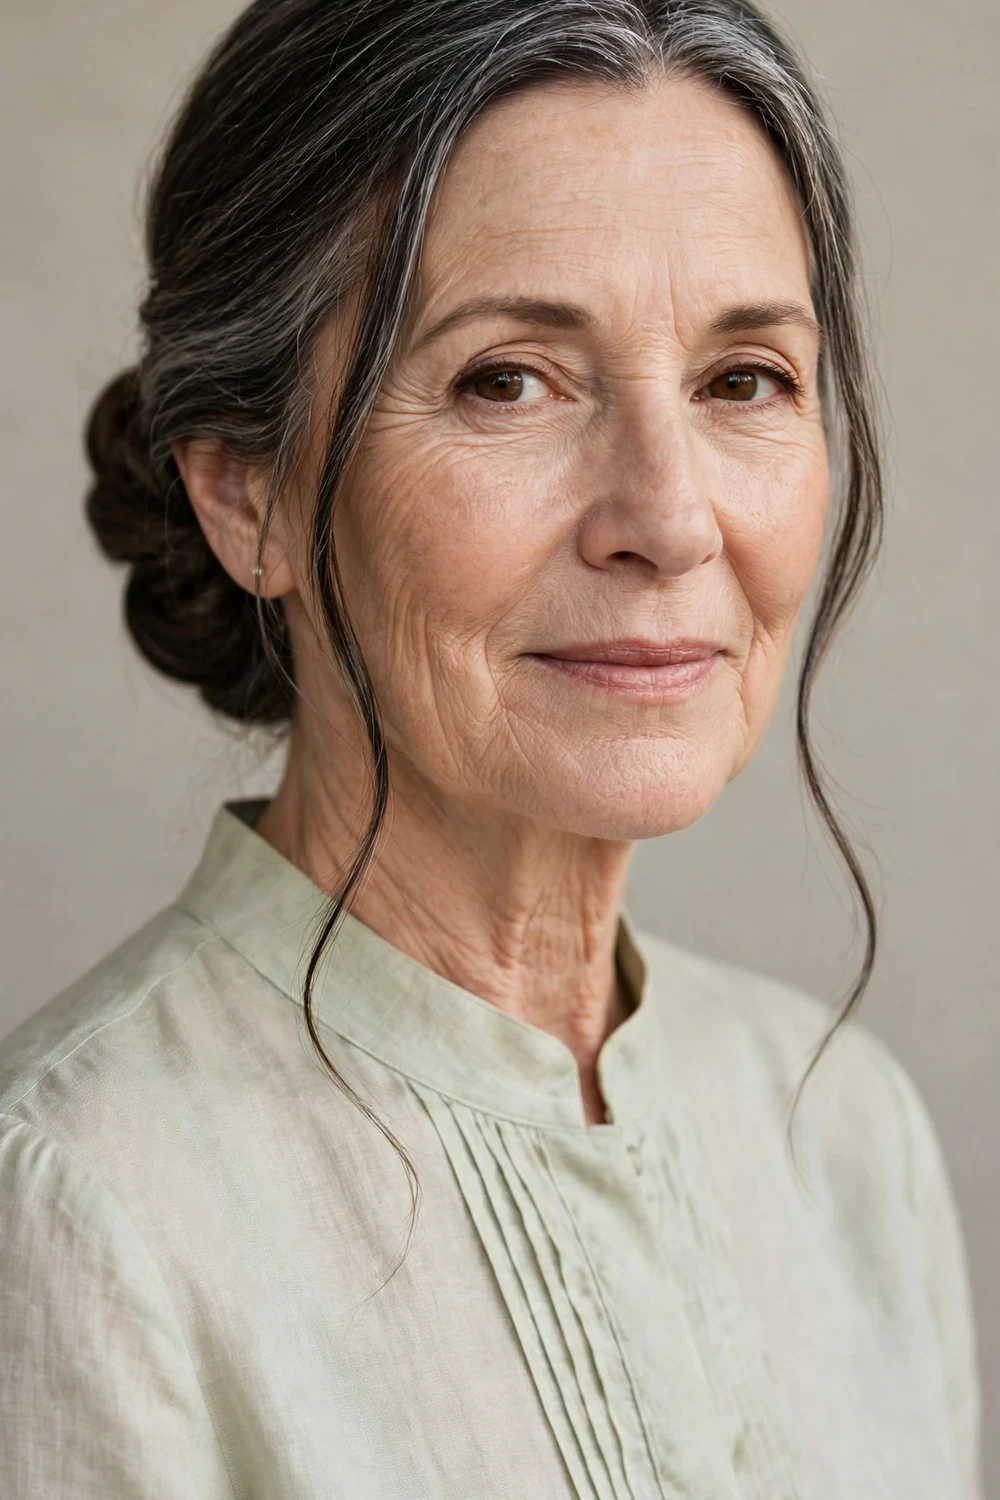
Gather your hair at the nape of your neck and twist it into a low bun, then secure it with four to six bobby pins. Leave out two thin pieces at the front and let them fall naturally around your face. The whole style takes about eight minutes once you have the motion down.
Don’t pull the bun tight against your head. A chignon that sits slightly loose looks softer and puts less tension on thinning hair. This is the style to choose for weddings and formal dinners because it reads polished from every angle.
Try this: cross two bobby pins in an X over the bun’s base instead of pushing them in parallel. The X grips far better on fine hair.
Difficulty: Easy · Cost: $0–$4 (bobby pins)
2. French Twist

Sweep all your hair to one side and hold it flat against your head. Roll it upward in one smooth motion toward the opposite side, tucking the ends inside the roll. Pin along the seam with five or six bobby pins, pushing them upward so they anchor into the roll. Ten minutes, no elastic needed.
Fine hair needs texture spray before you start, or the roll loosens by lunch. Work on hair with some grit in it and the twist holds for hours. Keep the top slightly soft rather than shellacked for a modern finish.
Try this: tease the crown section lightly before sweeping it back. The extra volume keeps the twist from looking flat against thin hair.
Difficulty: Medium · Cost: $0–$8 (pins, texture spray)
3. Messy Low Bun
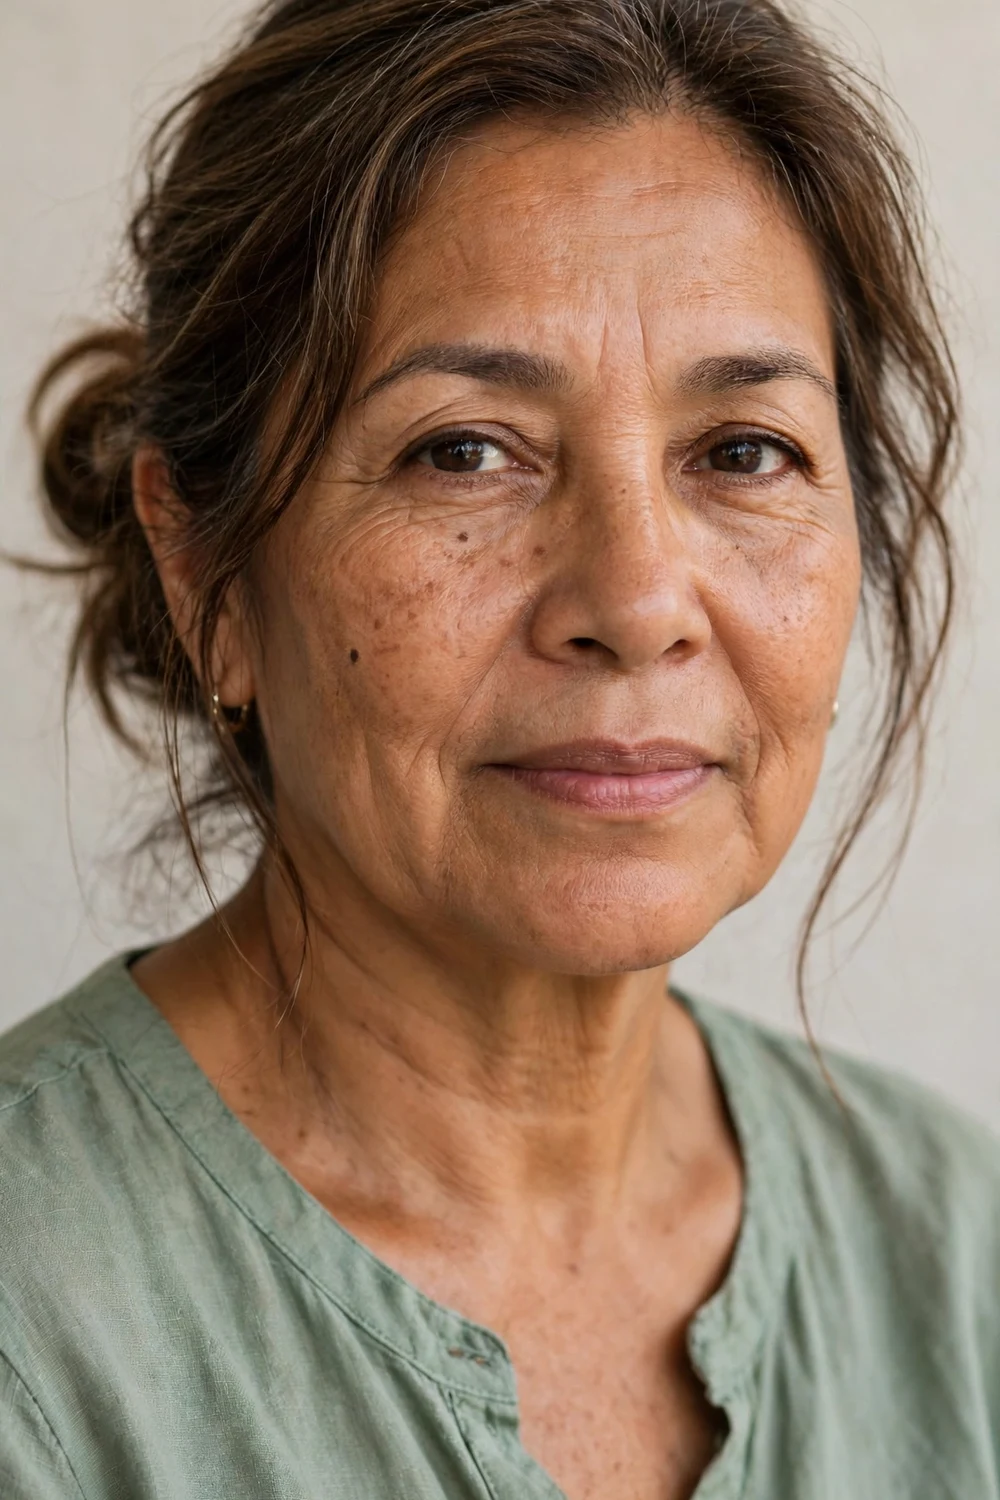
Pull your hair into a loose low ponytail at the nape, twist the length, and wrap it around the base. Pin it loosely so the bun has some air in it, then pull out a few strands around your face with your fingers. Five minutes, and it works on hair as short as chin length.
The mistake here is over-pinning. Every extra pin makes it look more done, which defeats the relaxed feel. Four pins are usually enough, plus a light mist of flexible-hold spray.
Try this: wrap a thin strand from the ponytail around the elastic before pinning the bun. It hides the elastic completely and looks more finished.
Difficulty: Very easy · Cost: $0–$4 (elastic, pins)
If your hair is on the shorter side, our short hair updos guide covers pinned styles that work when you don’t have much length to gather.
4. Twisted Side Bun
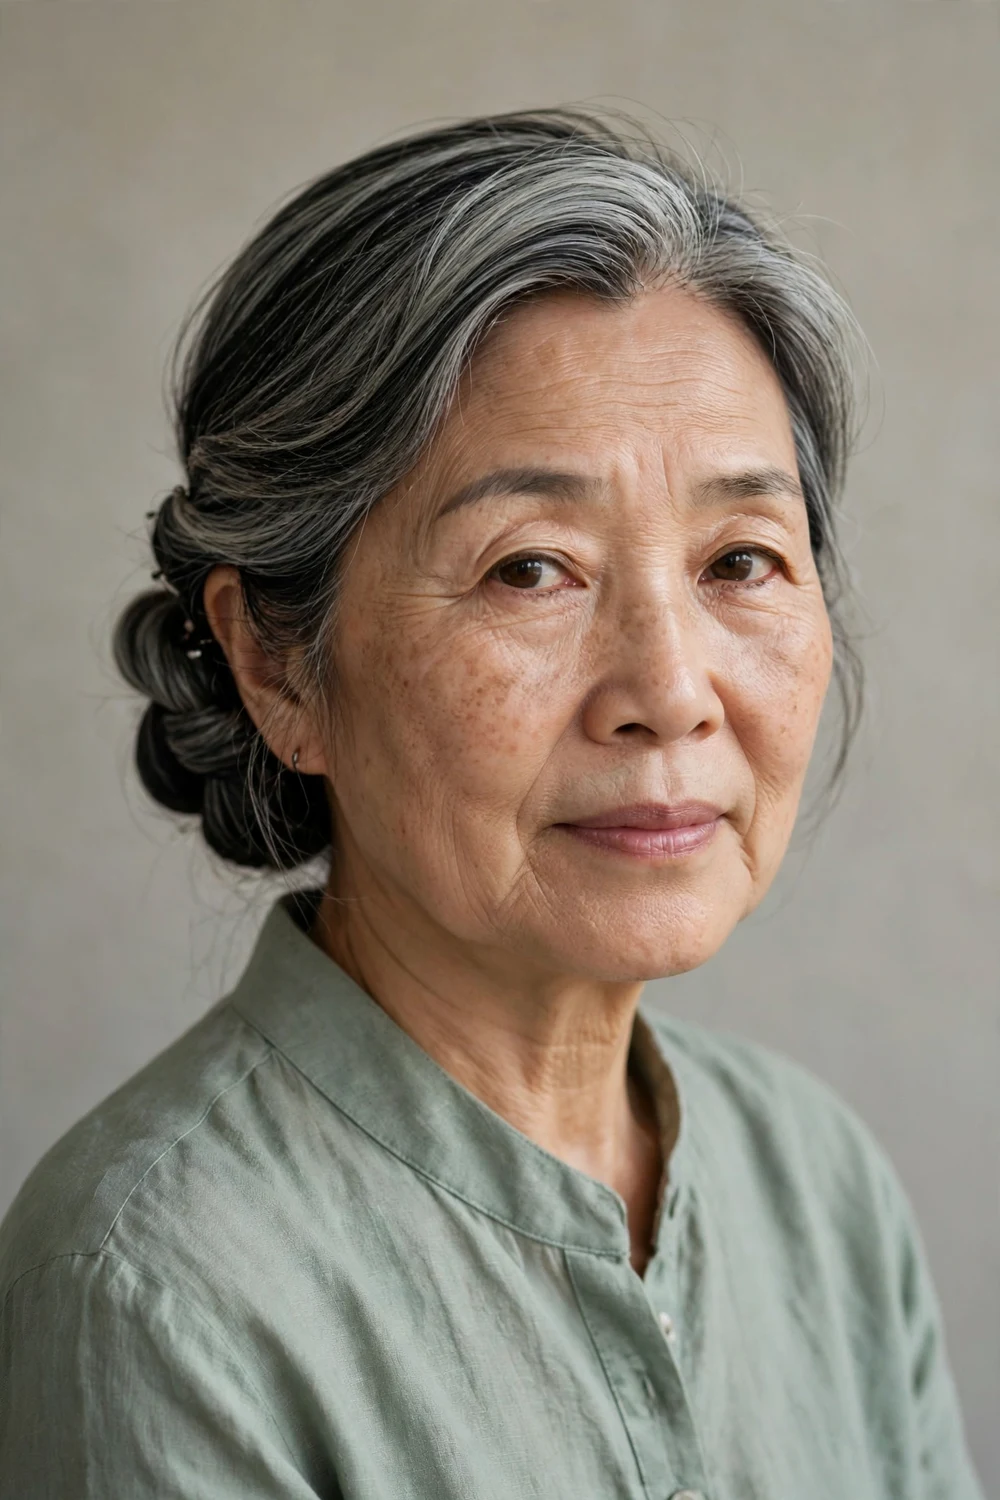
Make a deep side part and gather your hair low behind the opposite ear. Twist the gathered hair in one direction and coil it into a bun, pinning as you go. Eight minutes. The off-center placement adds interest that a centered bun doesn’t have.
Twist away from your face so the coil lies flat against your head instead of buckling outward. This style suits round faces well because the side placement draws the eye diagonally.
Try this: add a decorative pin or small clip just above the bun. One accessory is enough; two starts to look busy.
Difficulty: Easy · Cost: $0–$6 (pins, one decorative clip)
5. Braided Low Bun
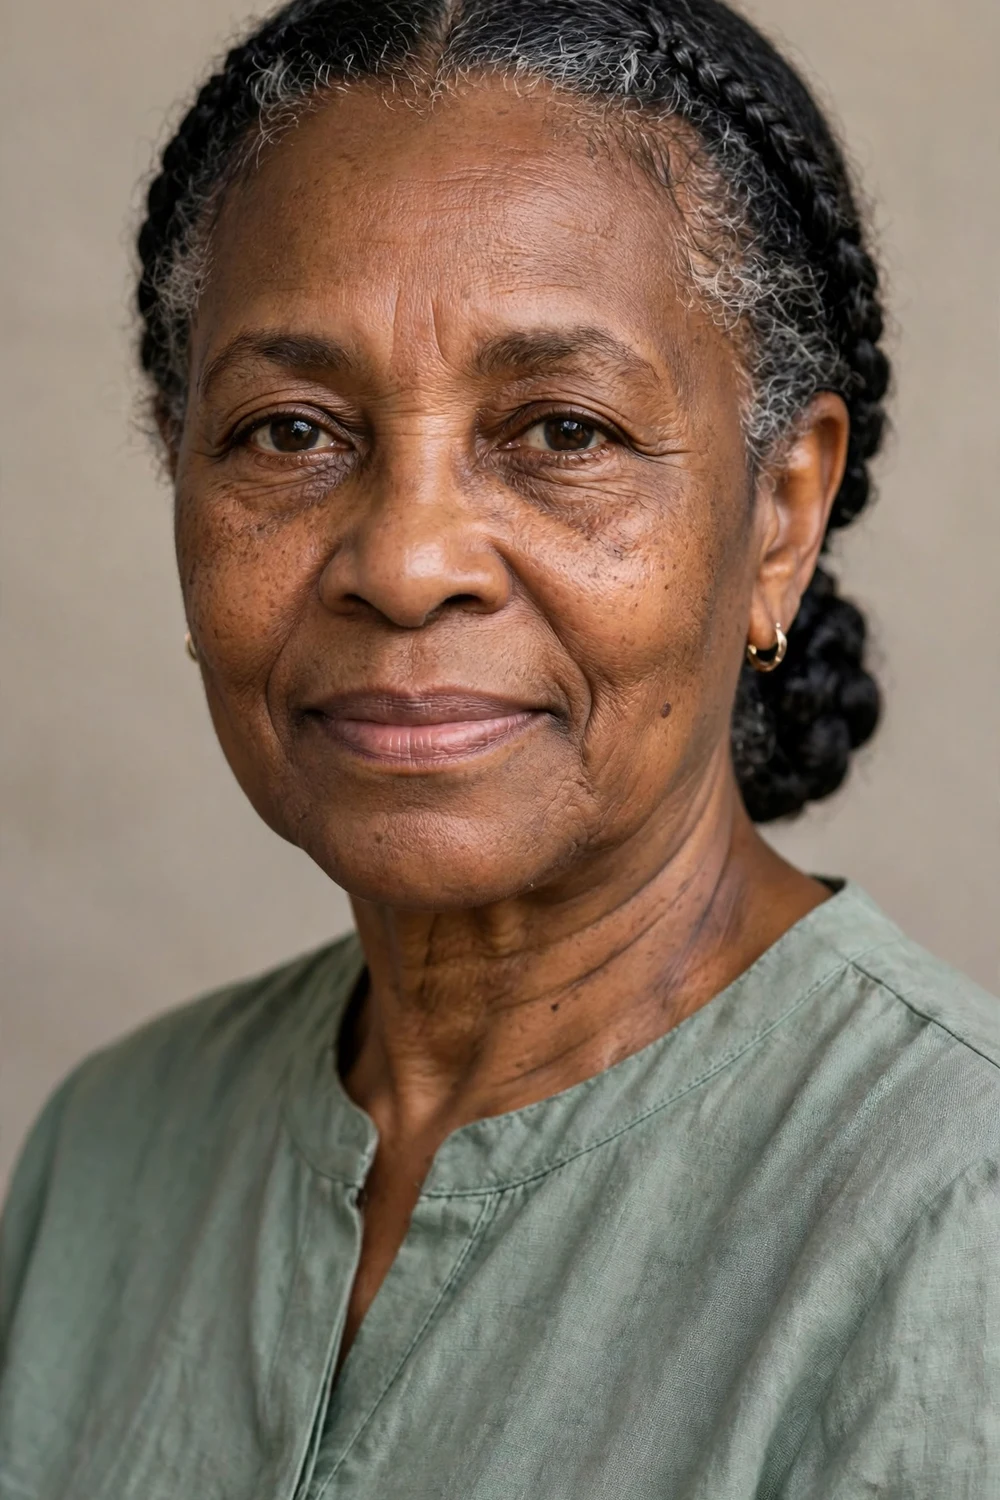
Braid a one-inch section from each temple back toward your crown, then gather both braids plus the rest of your hair into a low bun at the nape. Pin the bun and tuck the braid ends underneath. Twelve minutes. The braids add texture that makes thin hair look fuller.
Keep the braids snug at the scalp but don’t pull them tight. Tight braids on mature scalps cause soreness by evening. Loose braids still show the pattern clearly.
Try this: pancake each braid by gently tugging the loops wider before gathering. The braids look twice as thick with ten seconds of extra work.
Difficulty: Medium · Cost: $0–$5 (elastics, pins)
6. Gibson Tuck
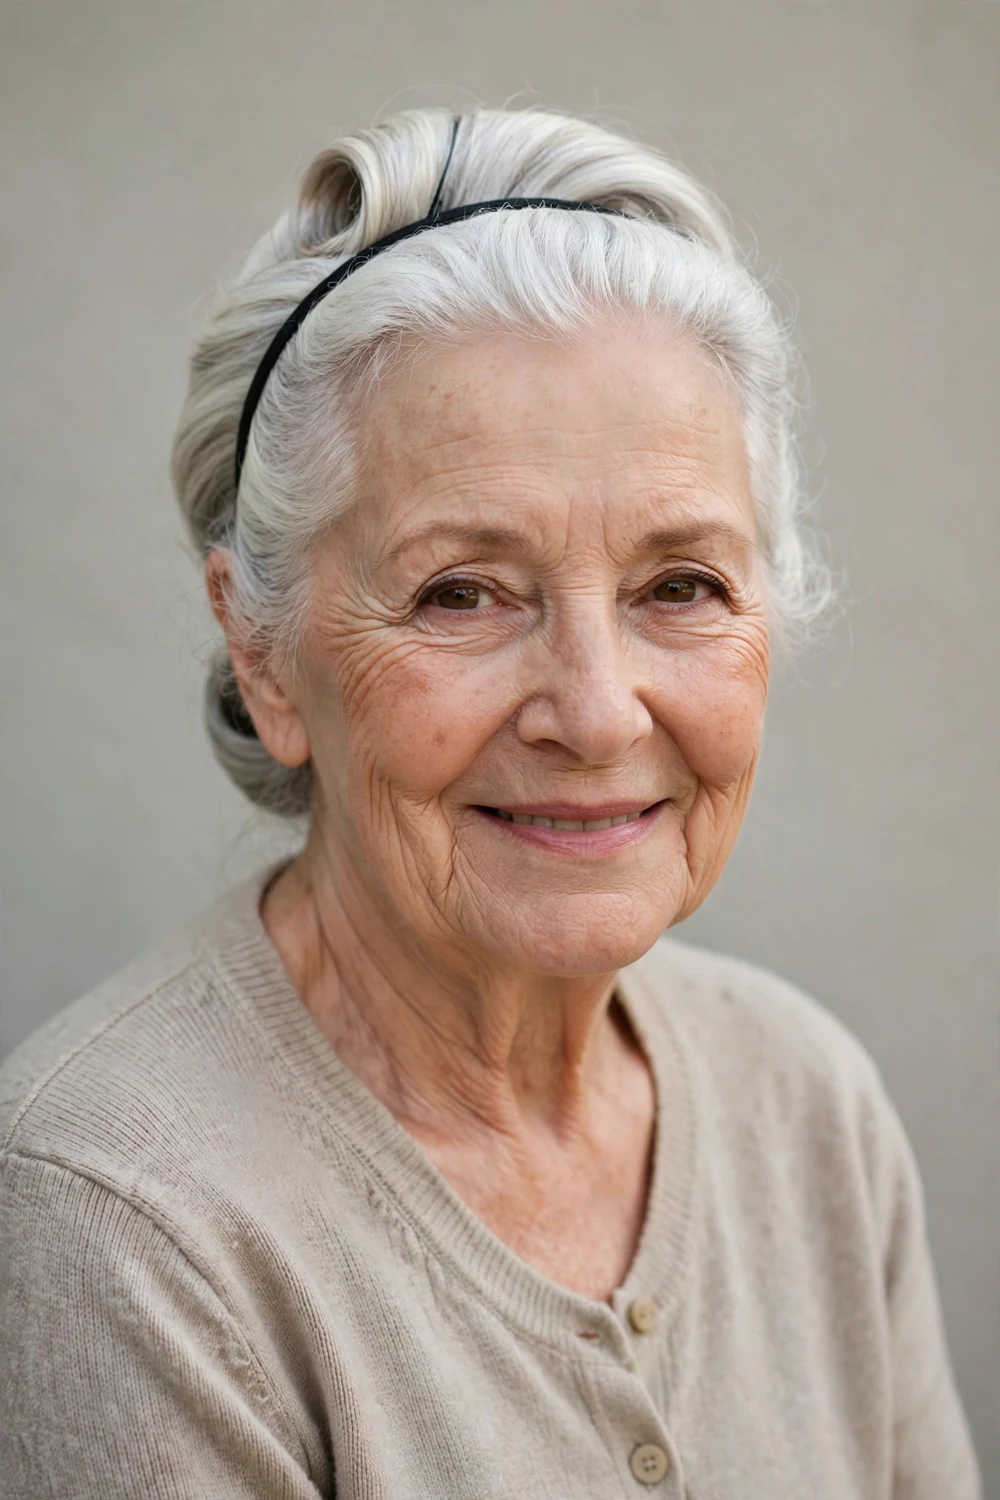
Place a thin elastic headband over your hair, about two inches back from your hairline. Working in two-inch sections, tuck the hair up and over the band all the way around your head. Seven minutes, zero bobby pins needed. It holds surprisingly well on fine hair because the band does the gripping.
Choose a band with a velvet or fabric lining, not bare elastic, or it slides. This is one of the kindest styles for thinning hair since nothing pulls at the roots.
Try this: mist the tucked sections with light-hold hairspray before your final mirror check. It locks the roll without stiffness.
Difficulty: Very easy · Cost: $4–$8 (elastic headband)
7. Low Knotted Bun
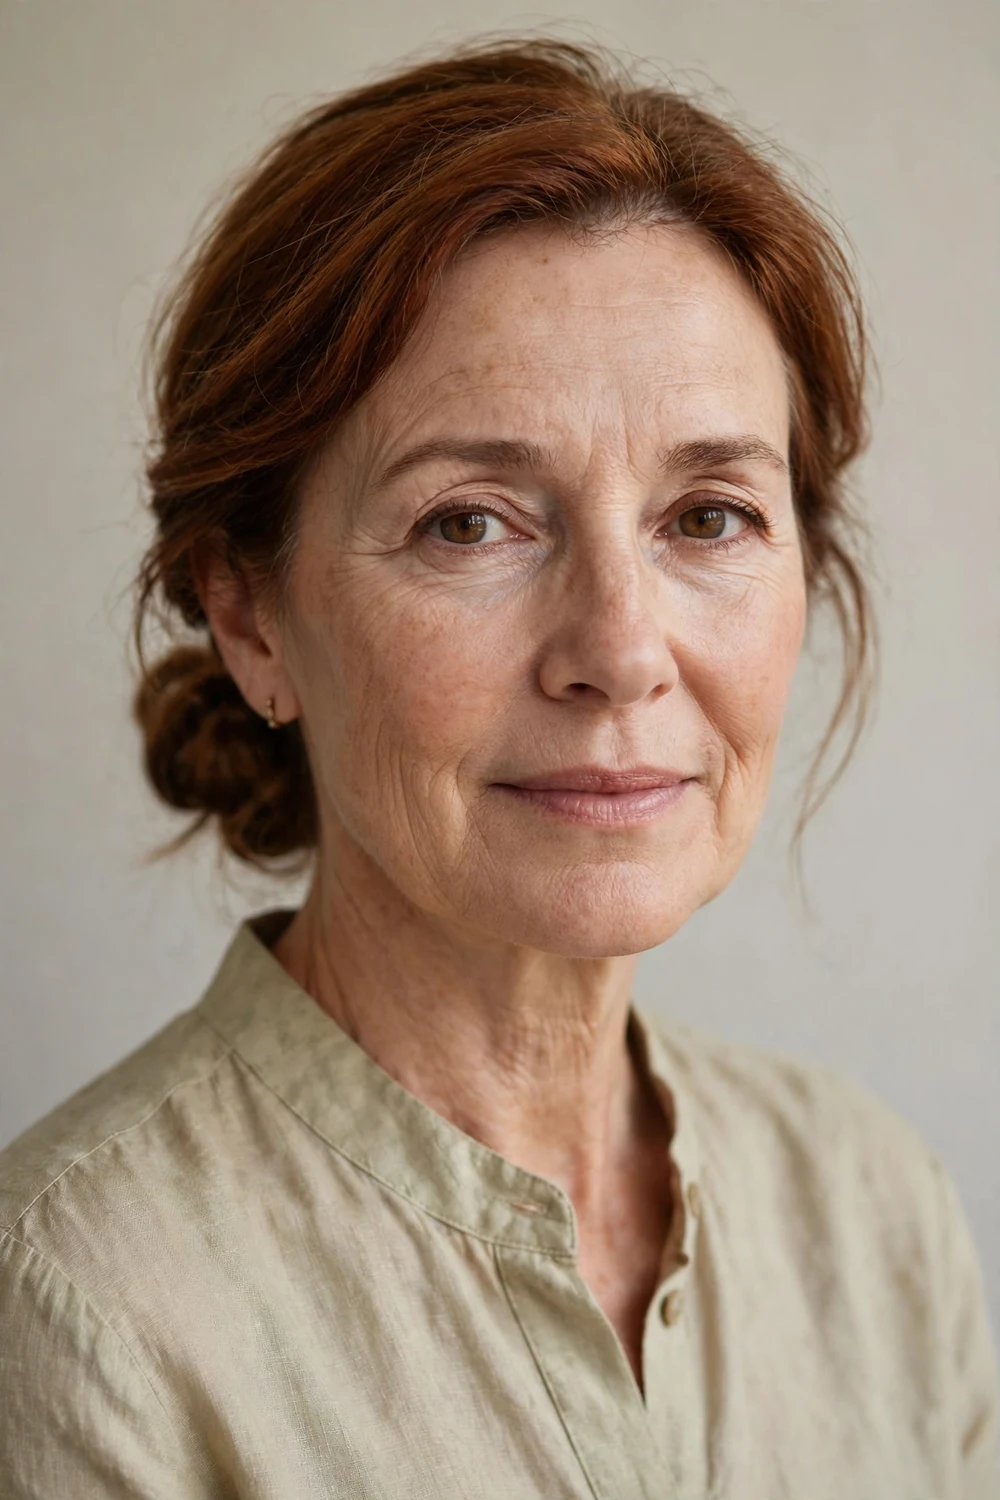
Gather your hair into a low ponytail and tie the length in a loose single knot, then wrap the remaining ends around the knot and pin them. Six minutes. The knot creates natural volume at the back, which helps when hair is fine.
Don’t yank the knot tight. A loose knot looks fuller and is easier to pin. If your hair is layered, pin the shorter escaping pieces flat against your head instead of forcing them into the knot.
Try this: backcomb the ponytail lightly before tying the knot. The added texture keeps the knot from slipping apart.
Difficulty: Easy · Cost: $0–$4 (elastic, pins)
Medium-length hair ties the easiest knots with the least pinning. Our medium hairstyles for women over 60 guide covers cuts that gather into knots and buns with minimal effort.
8. Half-Up Twist
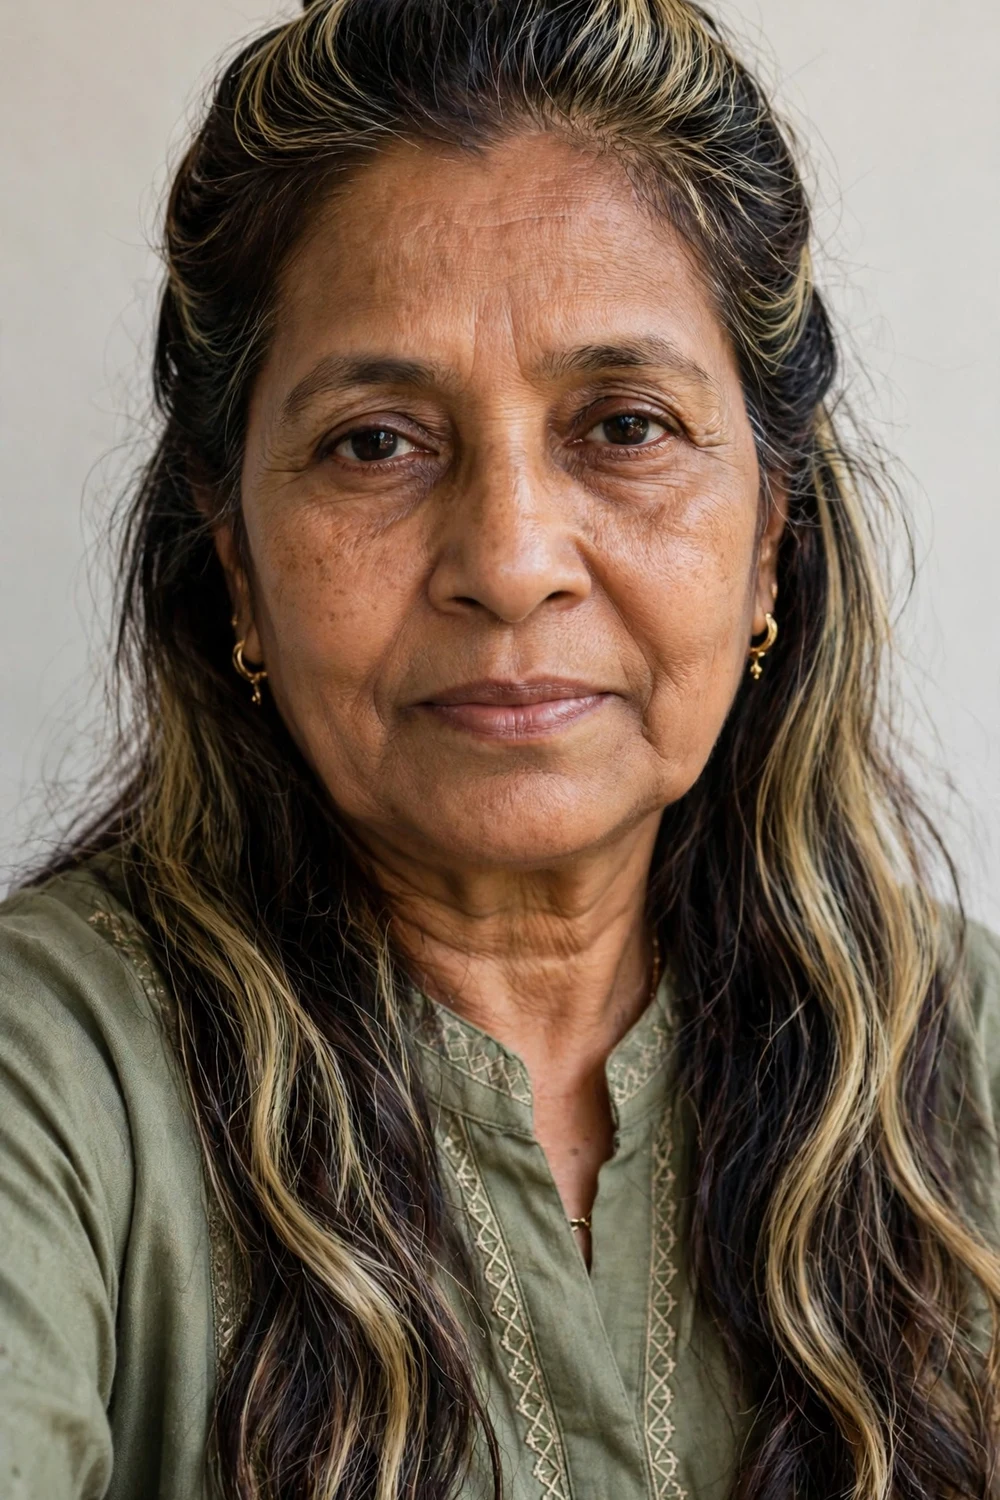
Take the top half of your hair from temple to temple and twist it back toward your crown. Pin the twist with two crossed bobby pins and let the rest of your hair fall loose. Four minutes. It keeps hair off your face while showing off your length.
Twist both sides toward the center rather than twisting one big section, or the twist buckles. This works on straight, wavy, and curly hair without any changes.
Try this: add a light mist of flexible-hold spray to each section before twisting. It keeps flyaways down without crunch.
Difficulty: Very easy · Cost: $0–$3 (bobby pins)
9. Side-Swept Chignon

Comb a deep side part and sweep all your hair to the fuller side at the nape. Twist it into a low chignon and pin it behind one ear. Nine minutes. The asymmetry flatters square and round faces because it breaks up the symmetry.
Smooth the top with a boar-bristle brush before pinning for a clean finish. If you prefer a softer look, pull out two thin pieces at the front after pinning.
Try this: place the chignon slightly off-center toward the back rather than directly behind the ear. It photographs better from the front.
Difficulty: Easy · Cost: $0–$4 (pins)
10. Soft Low Topknot
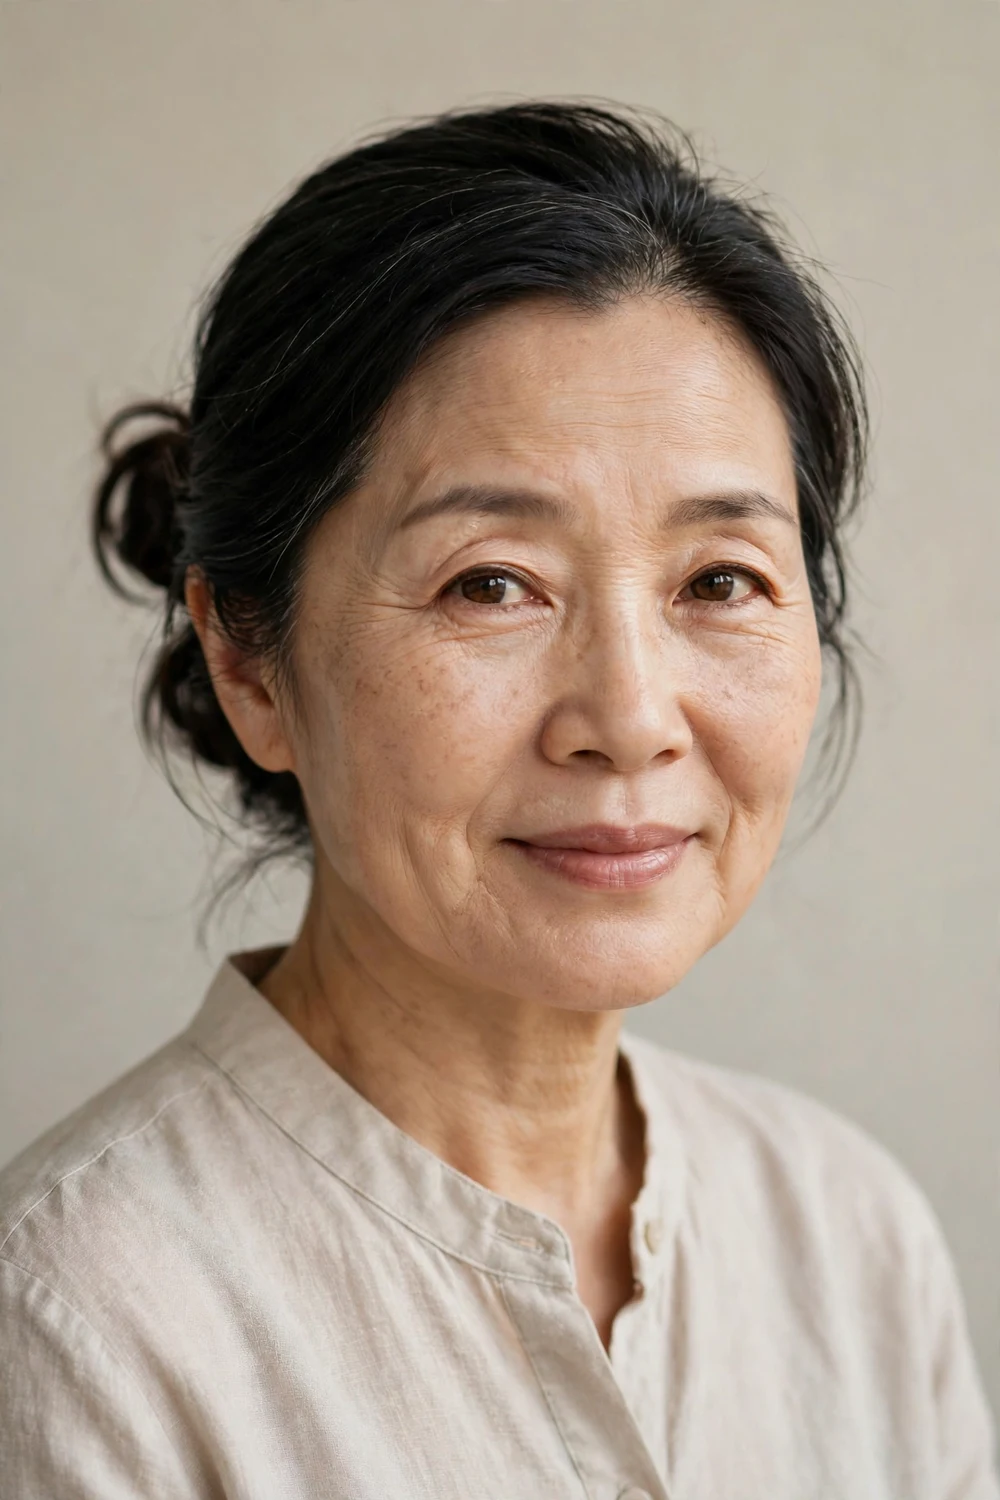
Gather your hair at the back of your crown, not on top of your head, and twist it into a loose knot. Pin it and pull the knot gently wider with your fingers for softness. Six minutes. Sitting lower than a classic topknot, it stays flattering after 50.
Keep the front smooth and the knot loose. A high, tight knot can pull the face harshly, while this lower, softer version does the opposite.
Try this: tease the gathered section at the roots before twisting. The knot looks fuller and holds its shape longer.
Difficulty: Easy · Cost: $0–$4 (elastic, pins)
11. Pinned Curls Updo
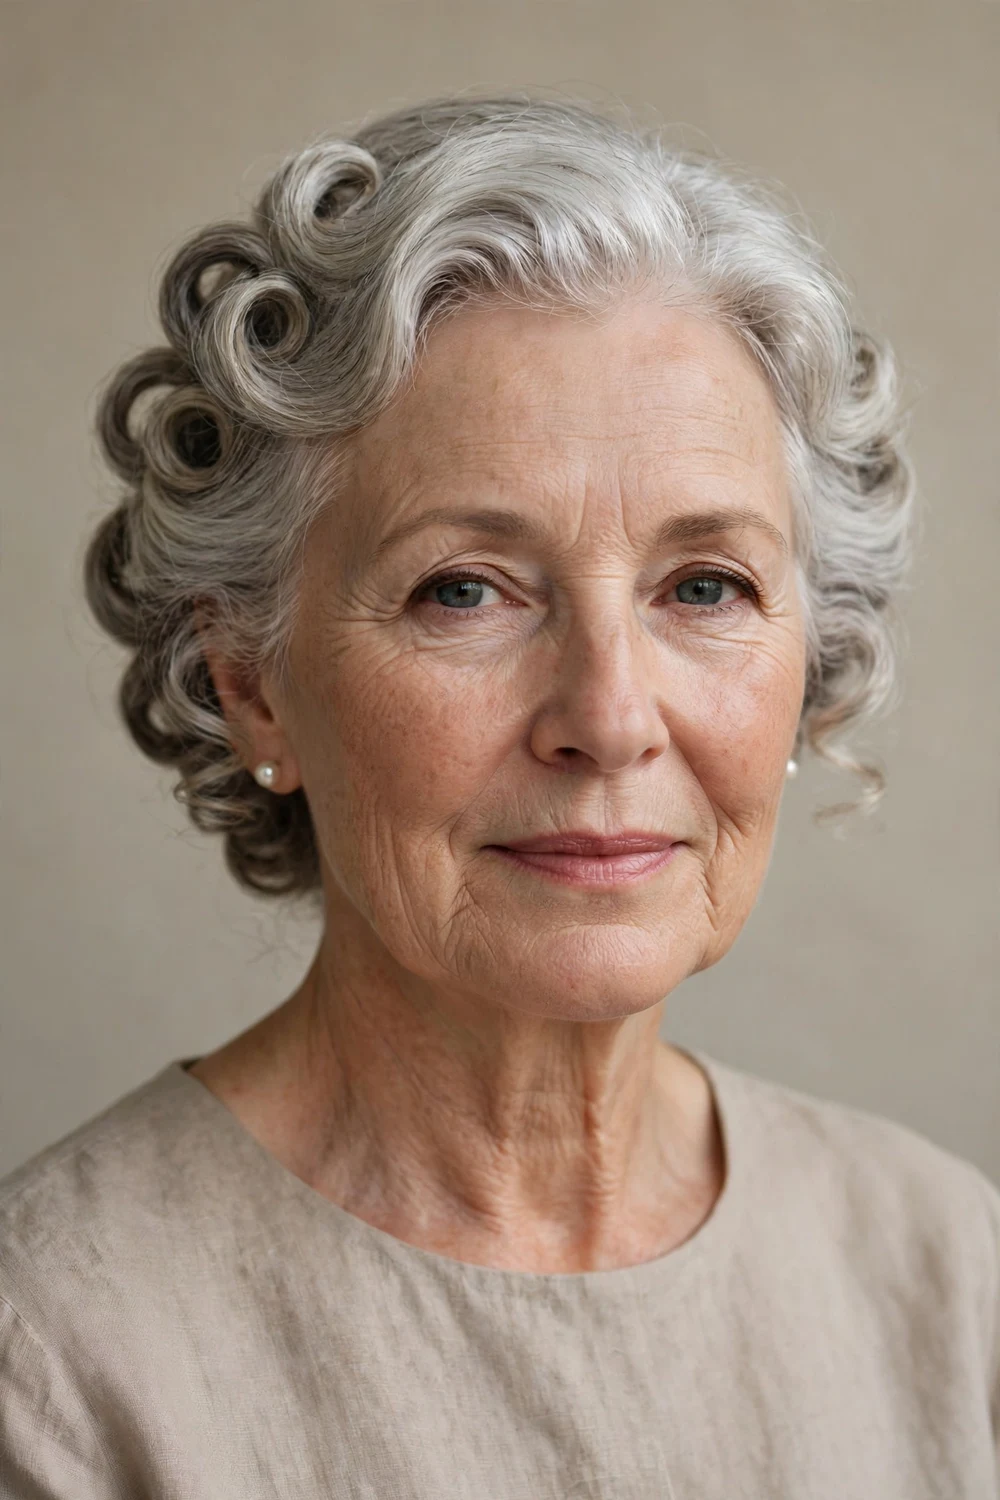
Set your hair in pin curls the night before or use a curling iron on one-inch sections in the morning. Pin the curls up in clusters at the back of your head, working from the nape upward. Fifteen minutes of pinning for a style that looks salon-done.
Use a heat protectant on every section before the iron touches it. Let each curl cool in your palm for five seconds before pinning; cooled curls hold their shape far longer than warm ones.
Try this: pin the curls in a loose honeycomb pattern rather than rows. Staggered placement looks more natural and covers thin spots better.
Difficulty: Medium · Cost: $0–$10 (pins, heat protectant)
12. Dutch Braid Crown into Bun
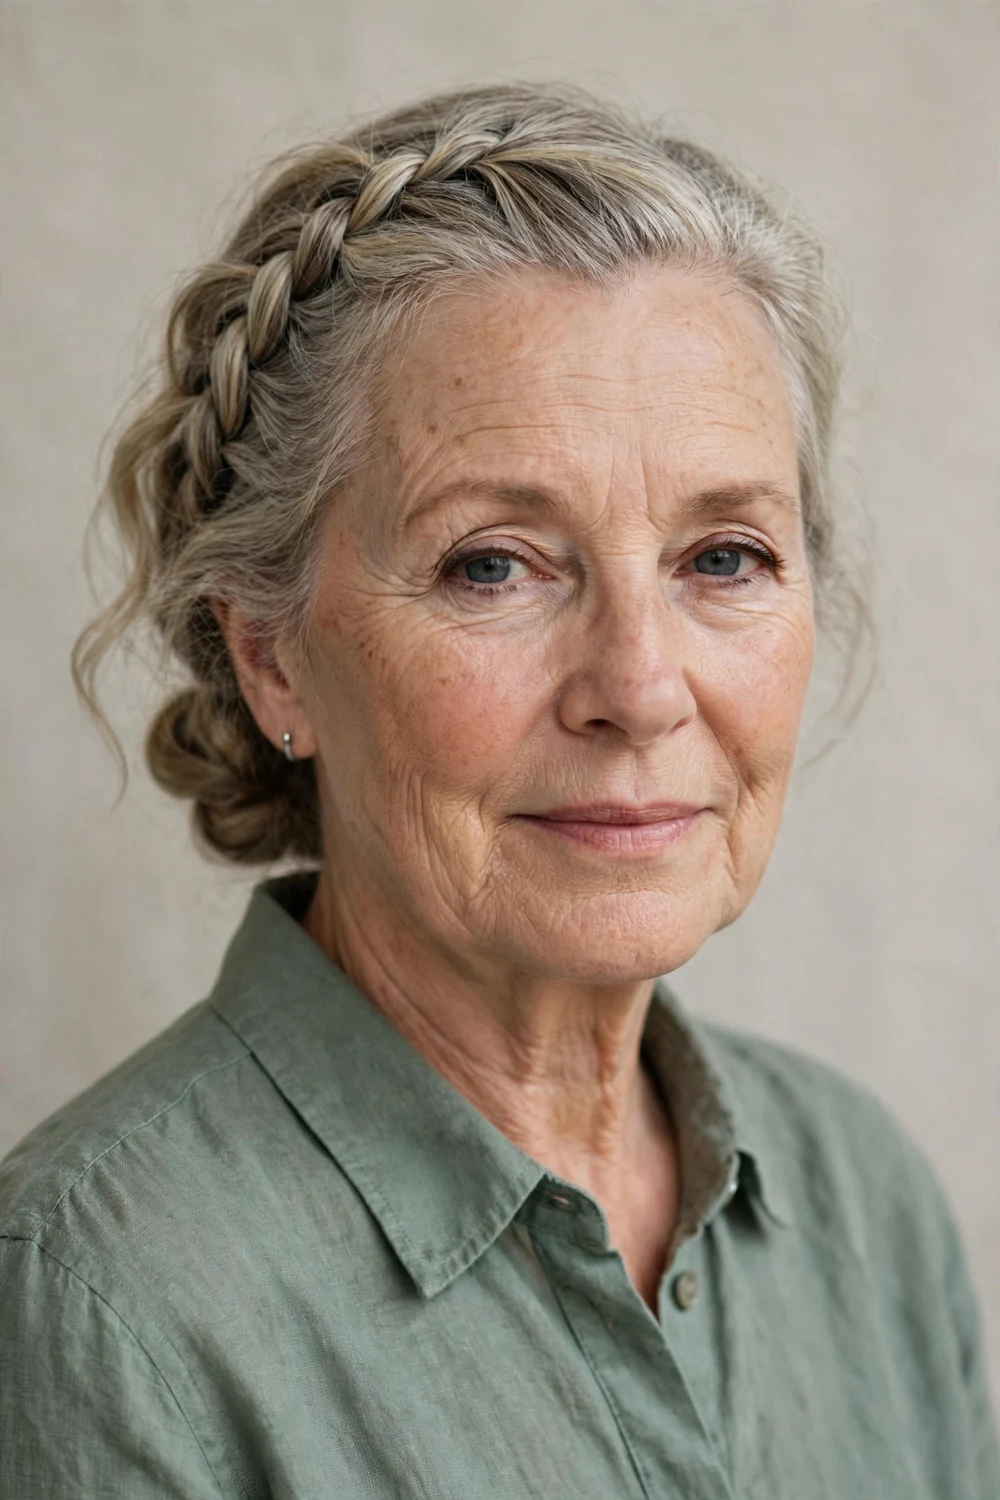
Dutch braid along your hairline from one temple, working across the front and down the other side. Gather the braid end plus the remaining hair into a low bun at the nape. Fourteen minutes. The braid adds a headband effect that keeps shorter front layers in place.
Dutch braids sit on top of the hair, so they show up well even on fine hair. Braid on day-old hair with dry shampoo in it so short layers don’t slip out of the braid.
Try this: pancake the braid loops gently after finishing. The braid looks fuller and the style reads more deliberate.
Difficulty: Medium · Cost: $0–$5 (elastics, pins, texture spray)
13. Rolled Ponytail Updo
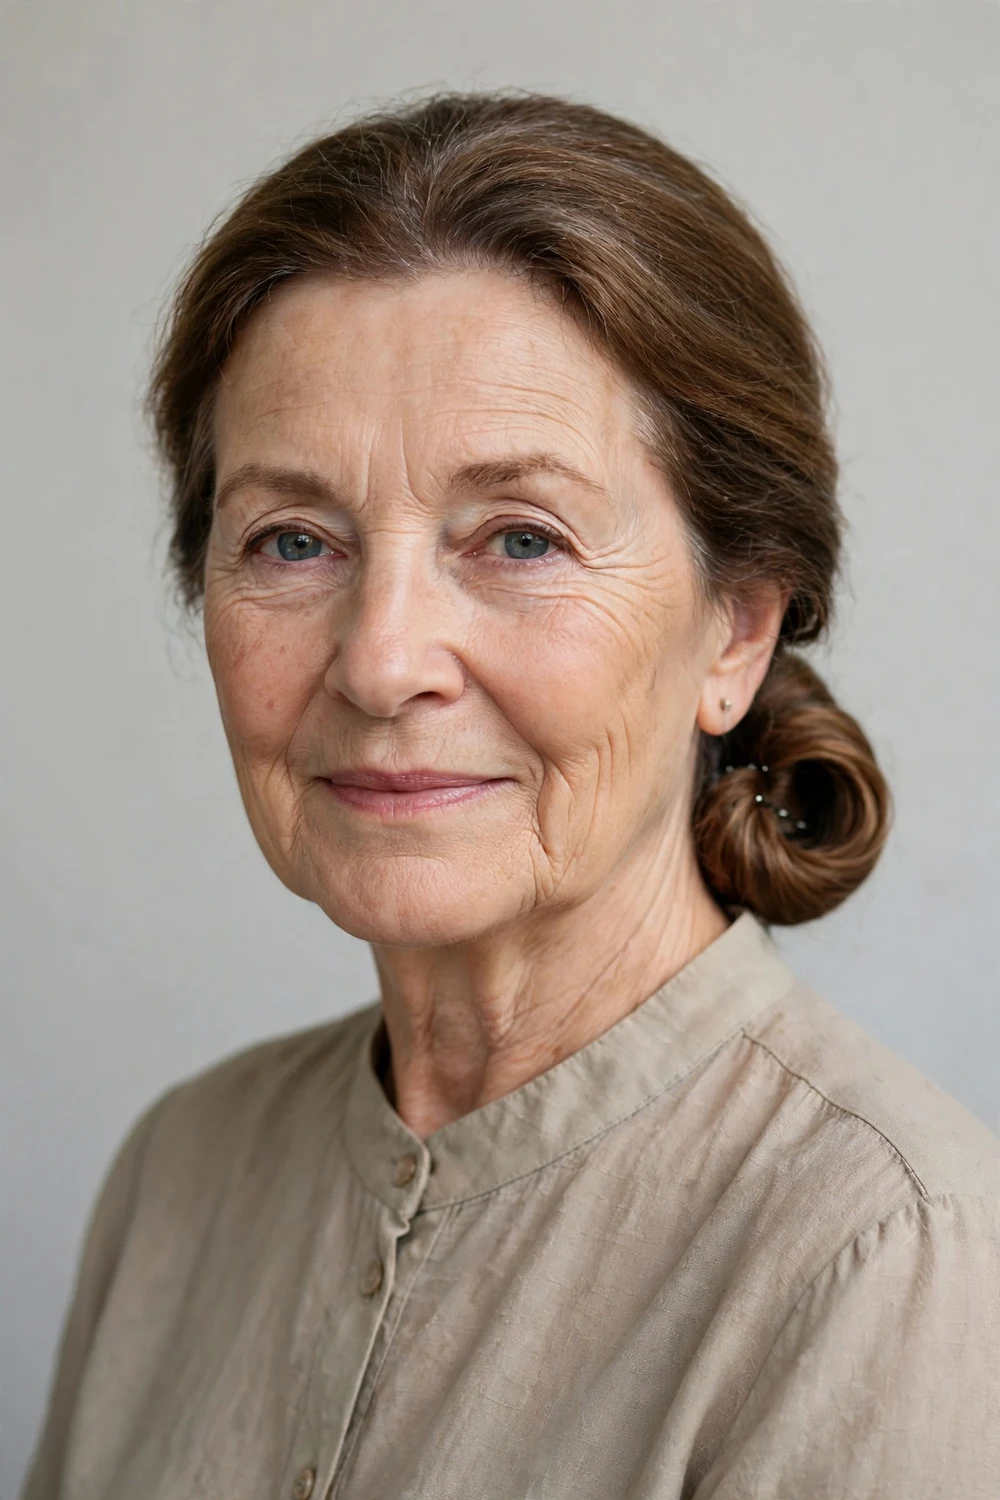
Make a low ponytail and roll it upward and under toward your head, tucking the ends into the roll. Pin along the roll to secure it. Seven minutes. From the front it looks like a chic bob-length style, which makes it a good option for growing-out cuts.
Roll tightly at the start and let it loosen slightly as you pin, or the roll slides down by afternoon. Pin the roll at both ends first, then fill in the middle.
Try this: use a foam hair donut inside the roll for extra fullness. It gives thin hair the body of much thicker hair.
Difficulty: Easy · Cost: $0–$8 (pins, optional hair donut)
14. Soft Beehive
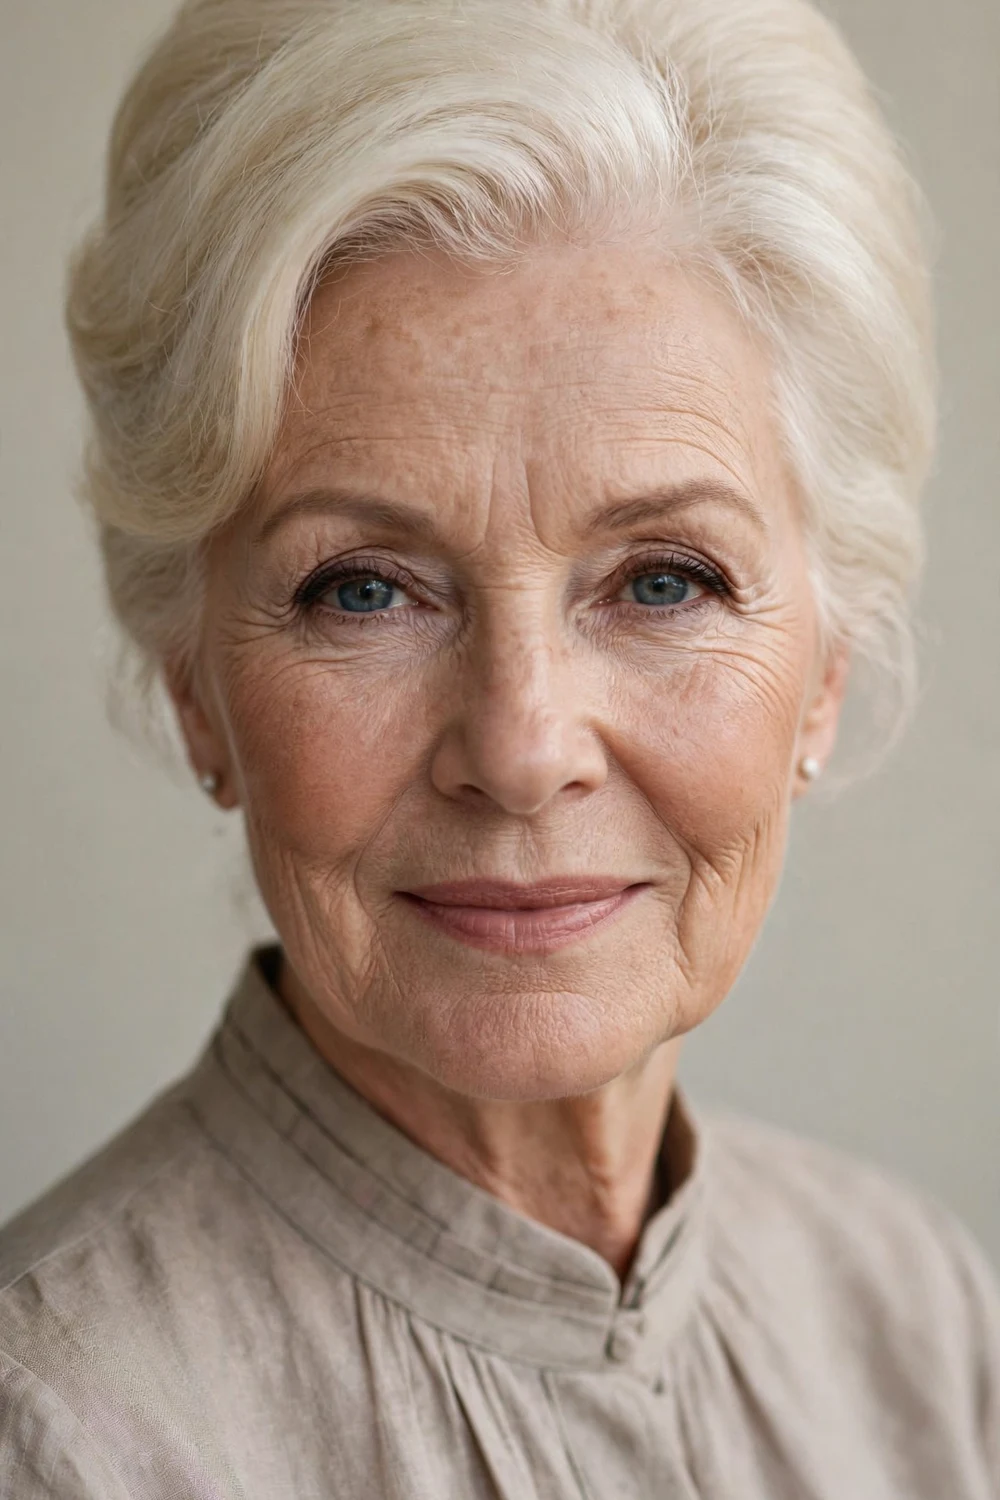
Tease the crown section in three layers, then smooth the top layer over the teasing with a soft brush. Gather the sides back and pin them under the volume at the back of your head. Twelve minutes. The height at the crown is flattering because it lengthens the face.
Tease near the roots in short strokes, two or three per section, and never tease down the full length. Too much backcombing turns into a tangled mess that’s hard to brush out. Finish with flexible-hold spray.
Try this: insert a small hair pad or bumpit under the crown before smoothing. It builds height without extra teasing.
Difficulty: Medium · Cost: $5–$12 (teasing comb, pins, optional volume pad)
Vintage-inspired volume pairs well with retro cuts. If you like this era’s shapes, our short hairstyles for older women guide includes several classic cuts that style up fast.
15. Headband Tuck Updo

Place a wide fabric headband over your hair and tuck two-inch sections up and over it all the way around, working from one side to the other. Eight minutes. The band holds everything, so even very fine hair stays put.
Pick a band at least two inches wide with some grip to it. Narrow or silky bands slip, and then the tucks fall out. This style needs at least chin-length hair to tuck properly.
Try this: choose a headband in a color close to your hair. It blends in and the style looks like a pure updo rather than an accessory look.
Difficulty: Easy · Cost: $0–$4 (pins, one decorative clip)
16. Double-Twist Back
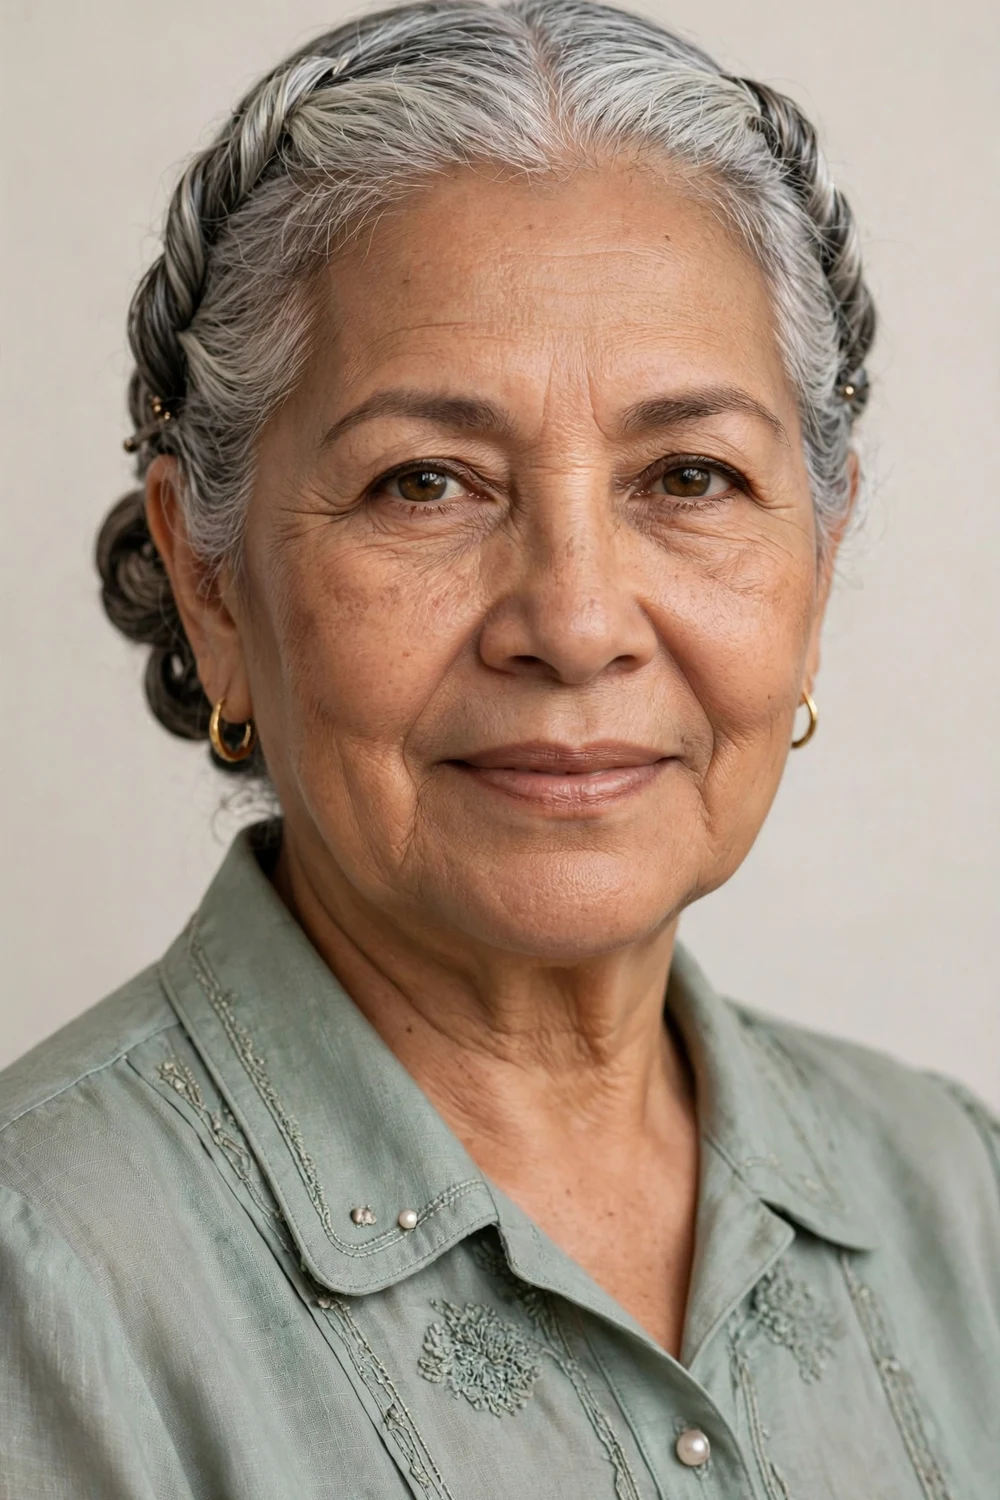
Twist a two-inch section back from each temple and pin both twists where they meet at the back of your head. Gather the remaining hair into a low bun below the twists. Ten minutes. The double twist adds detail that a plain bun lacks.
Twist both sections in the same direction so they mirror each other when pinned. If one twist is thicker than the other, the style looks lopsided, so take matching sections.
Try this: secure the meeting point with a small clear elastic before pinning the bun. The elastic holds the twists while you work on the rest.
Difficulty: Easy · Cost: $0–$4 (pins, small elastic)
17. Vintage Roll Updo

Part your hair down the middle and roll each front section inward toward your head, pinning the rolls at the sides. Gather the back into a low bun. Fourteen minutes. The rolls frame the face in a way that flatters glasses wearers especially well.
Roll the sections over your fingers to keep the rolls even in size. Uneven rolls are the most common mistake with this style. Pin each roll at both ends before moving on.
Try this: set the rolls with a light mist of spray before pinning the back. The hold lasts much longer on set hair.
Difficulty: Medium · Cost: $0–$5 (pins, hairspray)
18. Side French Braid into Bun
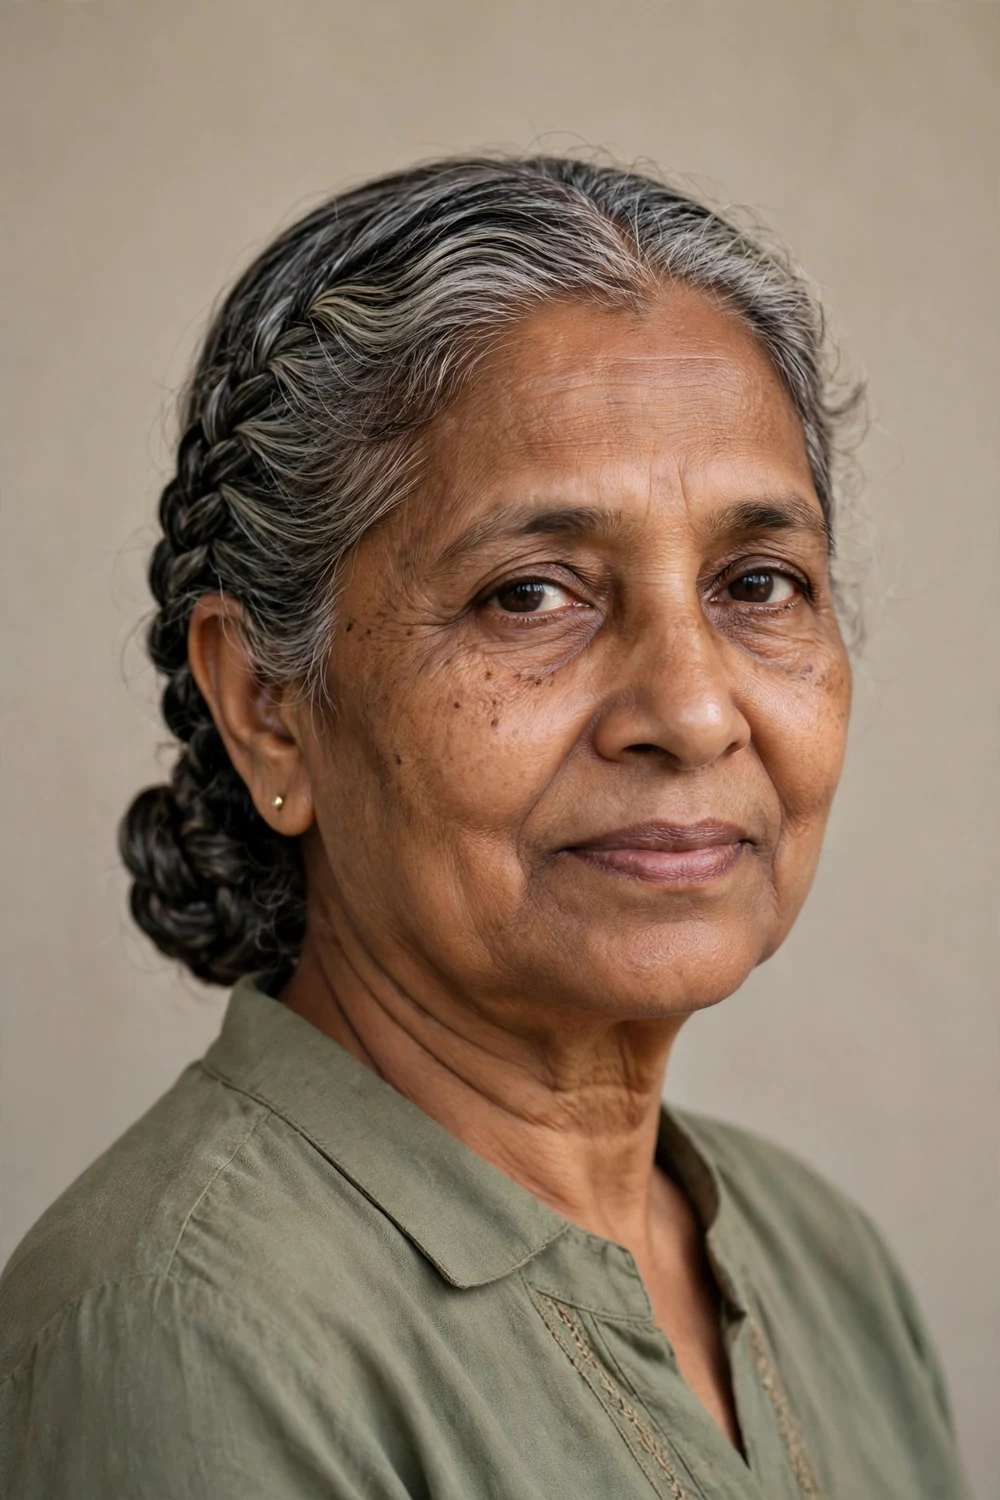
French braid from one temple down along the side of your head toward the nape. Coil the braid end plus the remaining hair into a low bun and pin it. Thirteen minutes. The braid keeps side layers controlled all day, which is useful for layered cuts.
Keep your fingers close to the scalp as you braid so the braid hugs the head. A braid that drifts outward loosens within hours. Finish the bun with crossed pins for extra hold.
Try this: braid on hair with texture spray in it. The grit keeps layered ends from poking out of the braid.
Difficulty: Medium · Cost: $0–$5 (elastics, pins)
Braid-based updos also dress up shorter cuts for events. For wedding-ready ideas on shorter lengths, see our bridal hairstyles for short hair guide.
19. Romantic Loose Updo

Curl the ends of your hair loosely, then gather everything into a soft low bun, leaving the curls’ texture visible. Pull out several face-framing pieces and let them curl naturally. Twelve minutes. The looseness is what makes it look current rather than dated.
Use a heat protectant before curling and keep the iron at or below 350 degrees for fine hair. Don’t brush the curls out; finger-comb them so they keep their shape in the bun.
Try this: leave the nape pieces slightly longer than the front pieces. The variation looks more natural than evenly pulled strands.
Difficulty: Easy · Cost: $0–$10 (pins, heat protectant)
20. High Chignon for Events
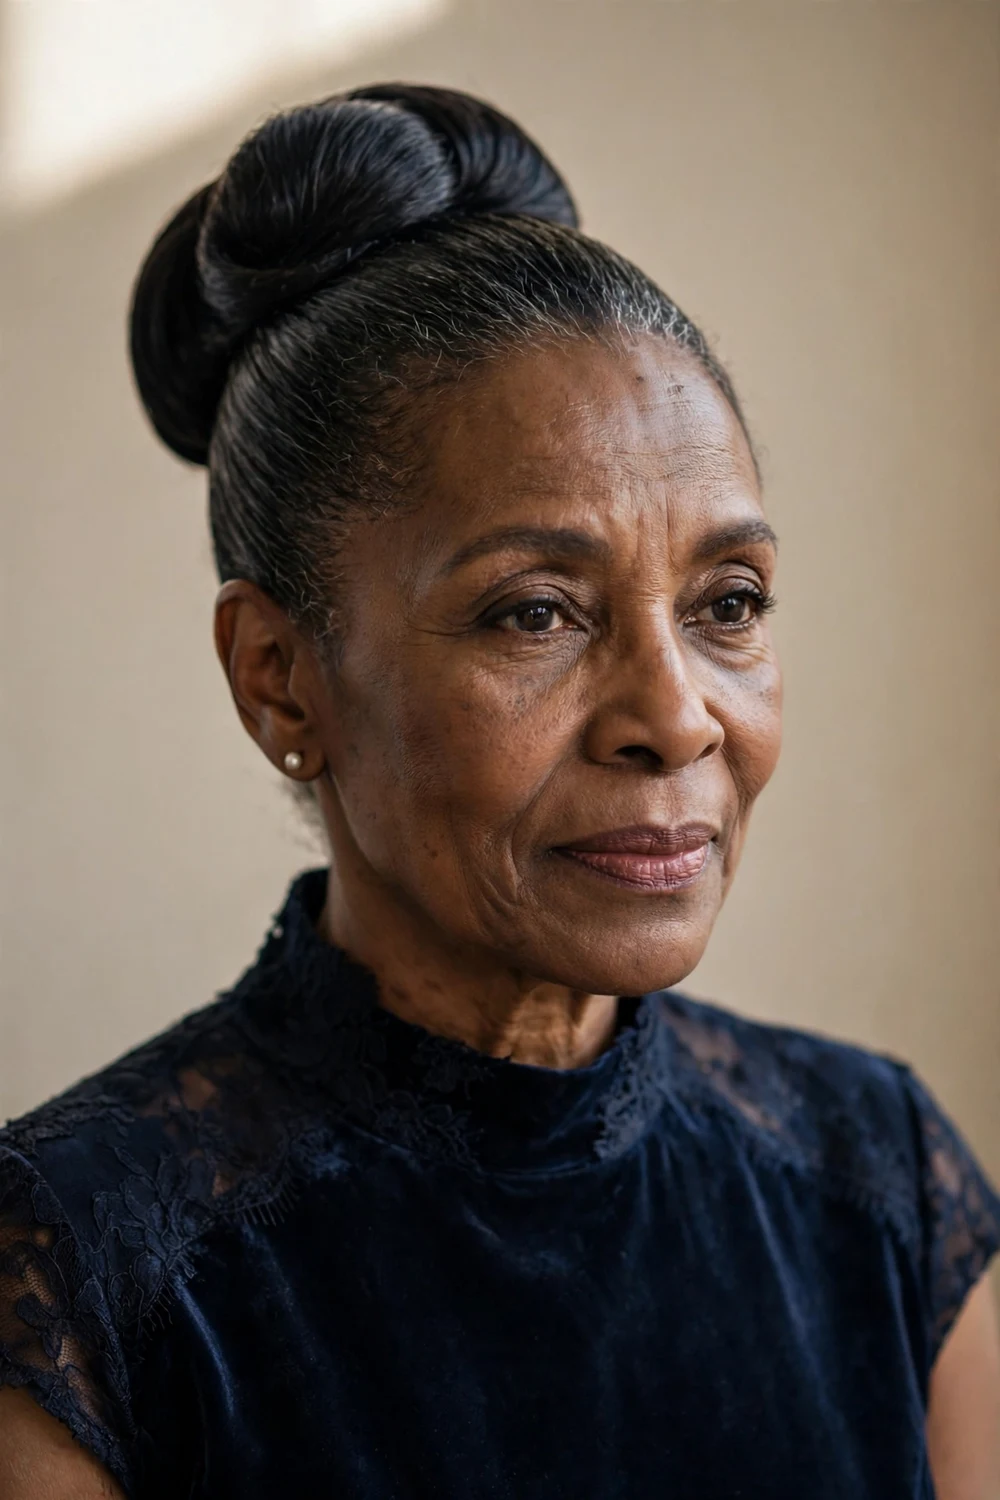
Gather your hair into a high ponytail at the crown, twist the length, and wrap it around the base into a smooth chignon. Pin it firmly and smooth the top with a brush and light serum. Fifteen minutes. Reserve this for formal events since the height and polish read dressy.
Smooth each section before wrapping so the finished chignon has no bumps. A few crossed pins at the base hold better than a ring of parallel pins. Finish with a shine spray for photographs.
Try this: tease the ponytail base lightly before wrapping. The chignon sits higher and looks fuller.
Difficulty: Medium · Cost: $0–$8 (pins, smoothing serum)
For more polished event styles at shorter lengths, see our prom hairstyle ideas collection for formal looks that photograph well.
Quick Comparison
| Style | Works best on | Time needed | What you need |
|---|---|---|---|
| Messy Low Bun | All lengths, thin hair | 5 minutes | Elastic, 4 bobby pins |
| Classic Low Chignon | Shoulder-length and longer | 8 minutes | 4-6 bobby pins |
| Gibson Tuck | Chin-length and longer, fine hair | 7 minutes | Elastic headband |
| French Twist | Shoulder-length and longer | 10 minutes | 5-6 bobby pins, texture spray |
| Half-Up Twist | All lengths | 4 minutes | 2 bobby pins |
| Rolled Ponytail Updo | Shoulder-length hair | 7 minutes | Pins, optional hair donut |
| Braided Low Bun | Medium to long hair | 12 minutes | Elastics, pins |
| High Chignon for Events | Medium to long hair | 15 minutes | Pins, smoothing serum |
How to Choose the Right Updo
Start with your hair’s thickness, not the occasion. Fine or thinning hair does best with styles that build in volume: the French twist, the soft beehive, and the rolled ponytail with a donut all add fullness without much hair. Thick hair holds structured styles like the braided low bun and the Dutch braid crown with less pinning.
Then consider comfort. Updos that pull tightly at the hairline cause headaches by evening on sensitive scalps, so favor styles that distribute the weight, like the Gibson tuck and the headband tuck, which spread the hold across the whole head. If an updo hurts within the first hour, take it down and repin it looser rather than pushing through.
A few things to avoid: metal elastics with grippers, which snag fine hair and cause breakage. Scraping everything back without any face-framing softness, which can look severe. And skipping the dry shampoo step on clean hair, since pins slide out of slippery hair no matter how well you place them.
Thinning hair needs cuts that support updos rather than fight them. Our short hairstyles for thin hair guide covers cuts that give fine hair more grip for pinned styles.
Frequently Asked Questions
What is the easiest updo for older women with thin hair?
The Gibson tuck or the messy low bun. The Gibson tuck needs no pins at all because the headband does the holding, and the messy low bun needs only four pins. Both work on thin hair because they don’t require much volume to look complete.
How do I make an updo stay in place all day?
Start with second-day hair or add dry shampoo for grip. Tease the roots lightly where pins will anchor, cross bobby pins in X shapes, and finish with flexible-hold hairspray. Avoid touching the style once it’s set, since every adjustment loosens the pins.
Can I wear an updo if my hair is fine and slippery?
Yes. Texture spray or dry shampoo is the key step for slippery hair. The Gibson tuck, headband tuck, and rolled ponytail with a hair donut all work well on fine hair because the hold comes from the band or the donut rather than pin grip alone.
Are high updos flattering for women over 60?
High updos can work for formal events, but low and mid-head updos generally flatter more after 60. A high style pulled tight can look severe, while a soft low chignon or side bun keeps the overall effect gentle. If you choose height, keep the front soft with face-framing pieces.
What basic tools do I need for updos at home?
A starter kit covers nearly everything here: bobby pins matched to your hair color, small clear elastics, a wide fabric headband, dry shampoo or texture spray, a teasing comb, and flexible-hold hairspray. Total cost runs about $20 to $35, and the kit lasts for months.
Final Thoughts
A good updo doesn’t need a salon appointment. With pins that match your hair, some texture at the roots, and a style that suits your thickness, you can put your hair up in under fifteen minutes and have it last all day. Pick two or three styles from this list, practice each once on a quiet evening, and you’ll have them ready whenever you need them.
Many of these updos work beautifully for church, and church hairstyles for thin fine hair collects 23 modest styles made for thin, fine hair that hold through a whole service.
Longer hair gives you the most updo options. Our long hairstyles for women over 50 guide covers cuts and care that keep longer hair healthy enough to style up regularly.

