


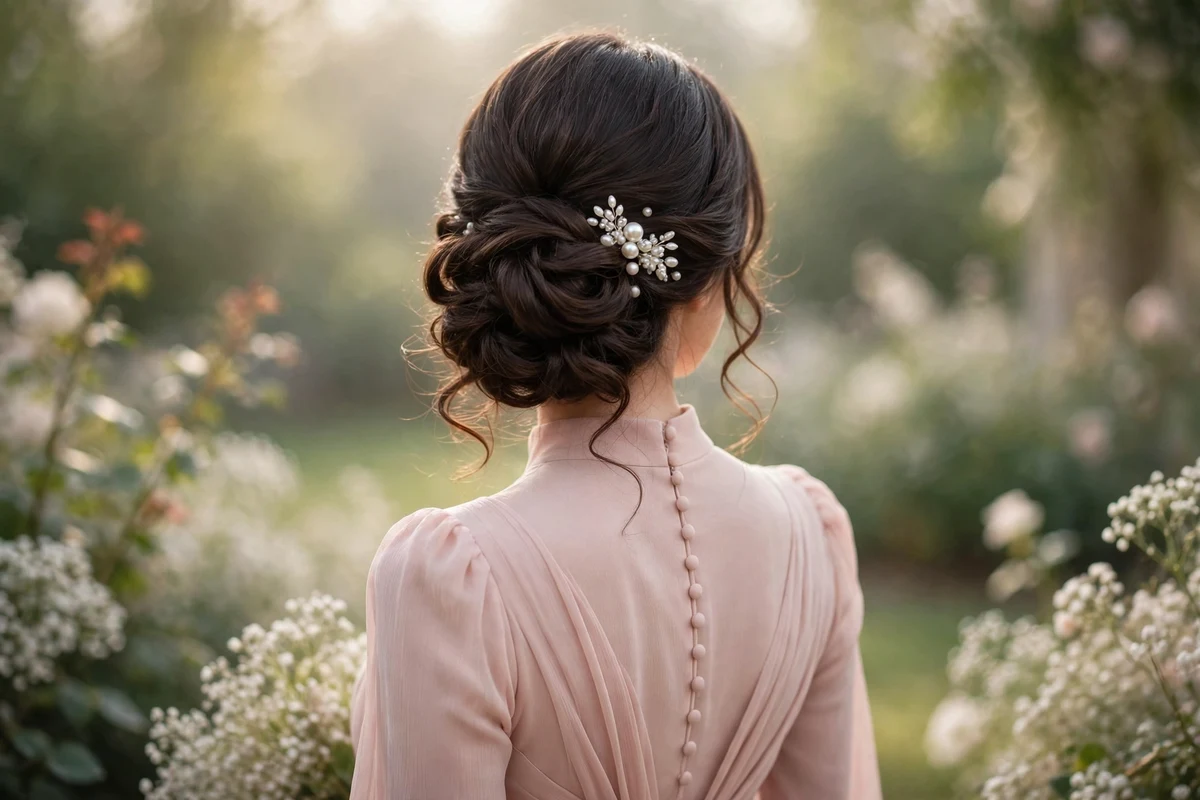
Being a bridesmaid means looking polished in hundreds of photos while celebrating from morning prep to the last dance. The best bridesmaid hairstyles strike a careful balance: elegant enough for the occasion, comfortable enough for a very long day, and complementary to the bride, never competing with her.
After reviewing current wedding trends and real bridal-party photos, these 27 bridesmaid hairstyles stood out for versatility across dress styles and hair types. Each includes a difficulty rating and time estimate for planning trials. One golden rule: always check with the bride first, since her vision leads.
Quick Takeaways
- Always confirm your hairstyle with the bride, since her vision leads the bridal party look.
- Choose a style family that flatters different hair types rather than forcing identical styles.
- Match formality to the wedding: sleek updos for black-tie, soft waves and braids for outdoor ceremonies.
- Trial every style before the wedding day and plan for 10+ hours of comfortable wear.
- One accessory per bridesmaid keeps group photos cohesive and elegant.
1. Polished Low Bun with Face-Framing Strands
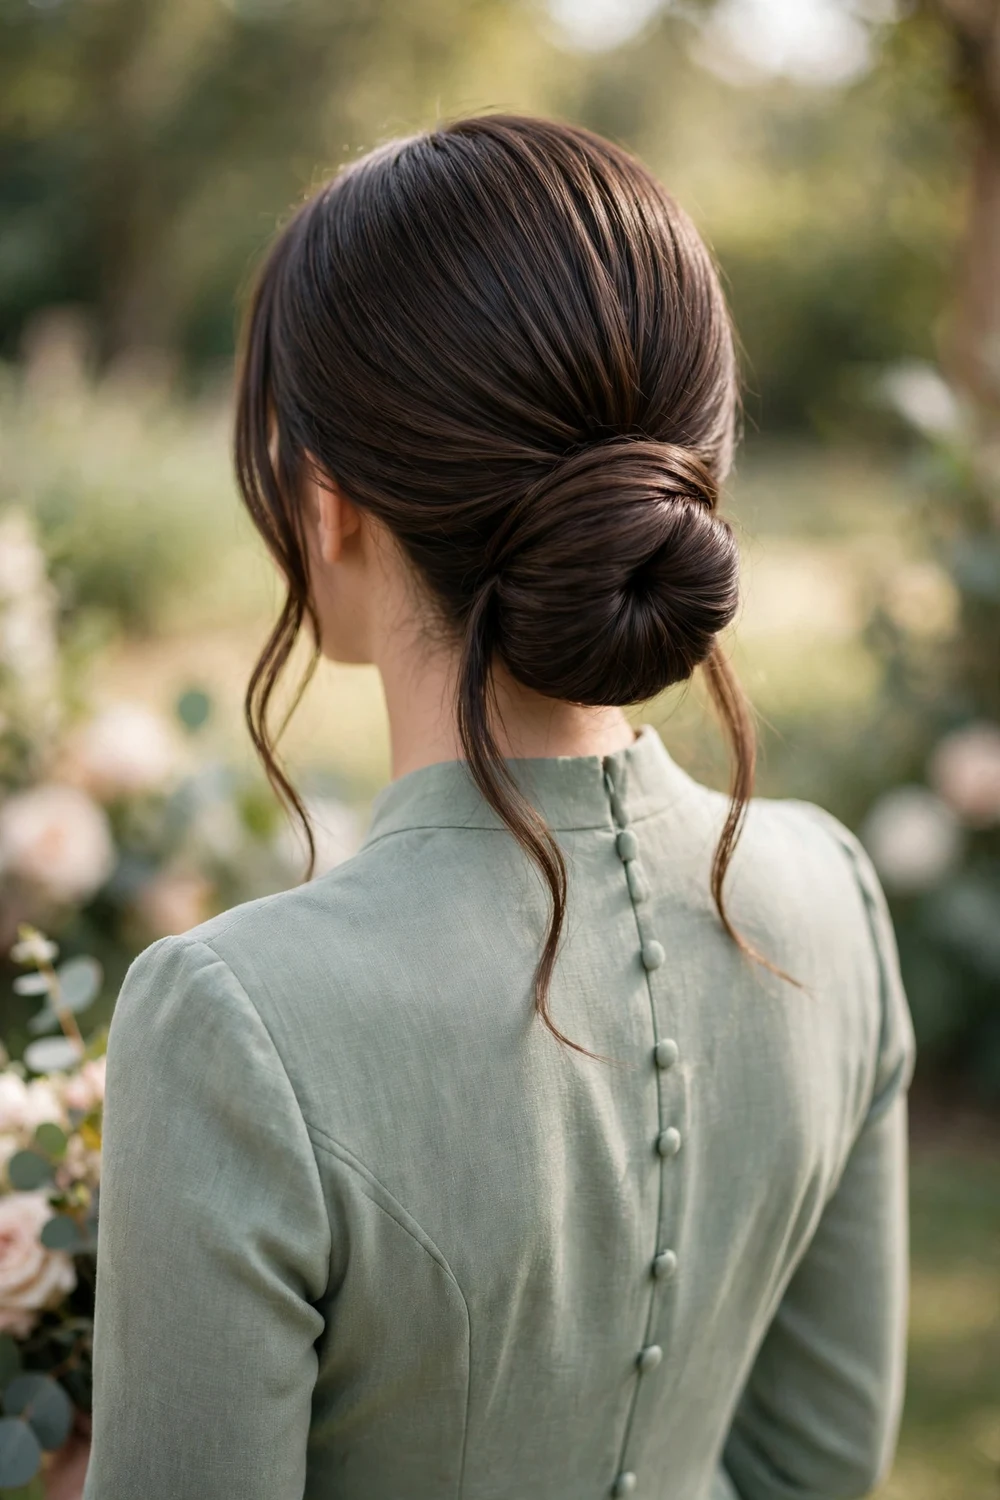
Smooth your hair into a neat low bun at the nape, then release two soft strands to frame your face. The polished base reads formal and photo-ready while the loose pieces add warmth, which suits minimalist gowns and structured silhouettes. Use a boar-bristle brush and a pea-sized amount of smoothing serum before pinning so flyaways stay flat through the ceremony. Cross two bobby pins in an X at each anchor point for a hold that lasts past the last dance.
Try this: curl the face-framing strands once with a 1-inch iron for a gentle bend that keeps its shape. Apply heat protectant first.
Difficulty: Easy to moderate · Time: 20 minutes · Cost: DIY with pins and smoothing serum (stylist version typically $60–$100)
2. Garden Chignon with Fresh Blooms
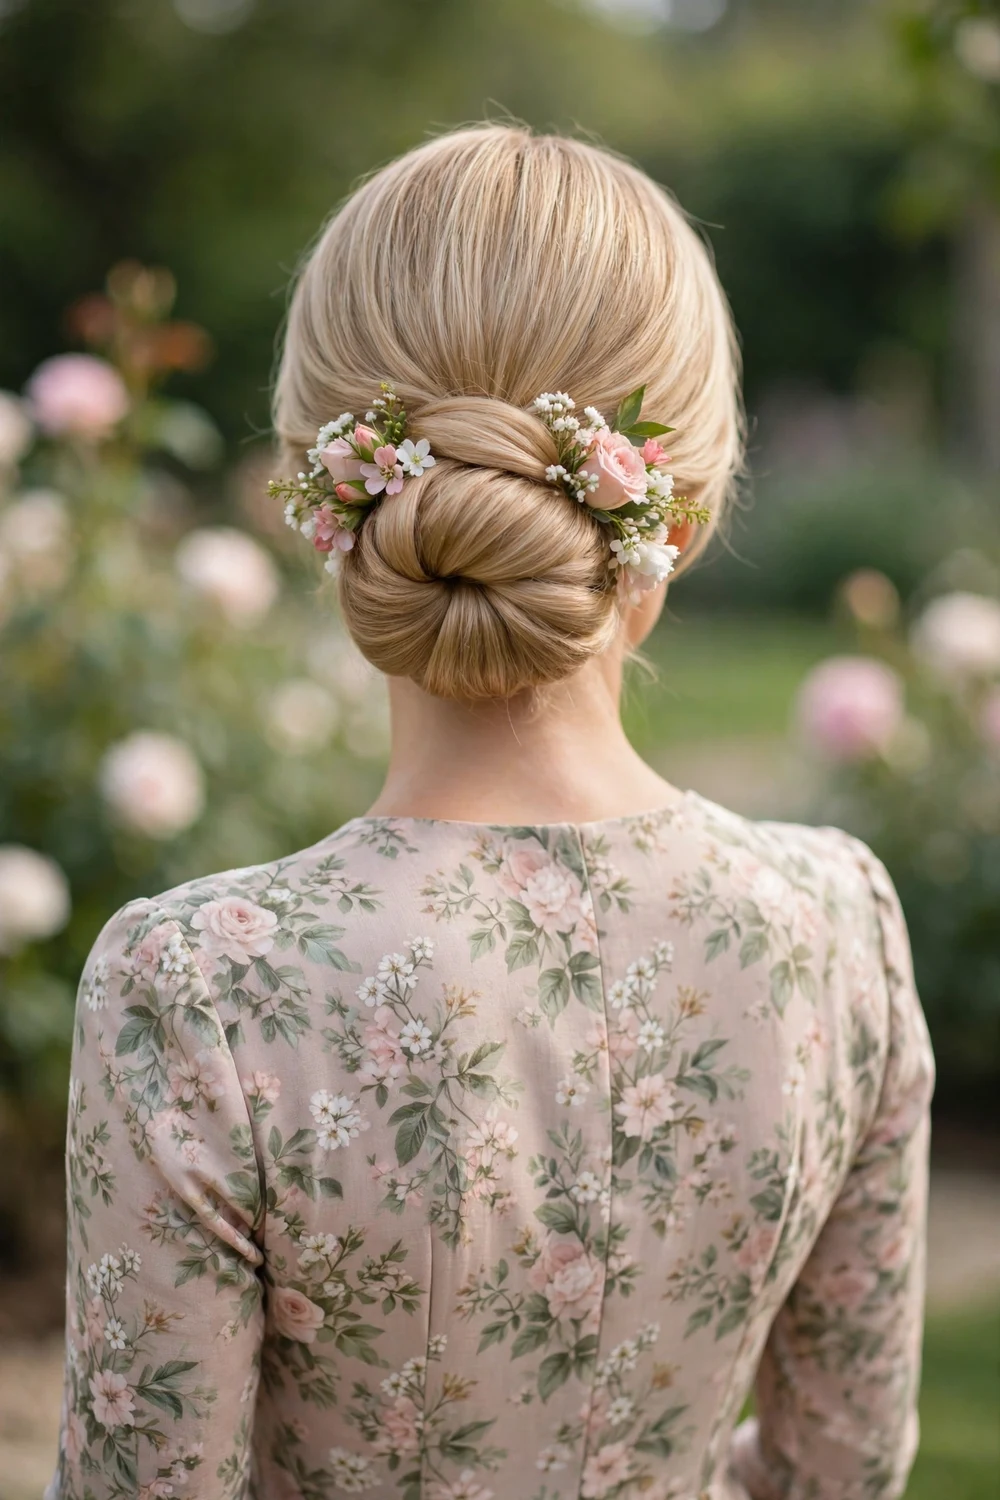
A classic low chignon, which is hair swept back and rolled into a neat bun at the nape, becomes memorable with a few fresh blooms tucked in. Choose small, sturdy flowers like baby’s breath or spray roses, and pin them in last so they sit exactly where you want them. This suits garden, spring, and outdoor ceremonies especially well. Small faux blooms work just as well on a budget, and they will not wilt during a long photo session.
Try this: ask the wedding florist for spare sprigs that match the bouquets so your hair coordinates with the arrangements.
Difficulty: Moderate · Time: 30 minutes · Cost: Stylist recommended ($70–$120); blooms from the wedding florist
3. Woven Braid Low Bun
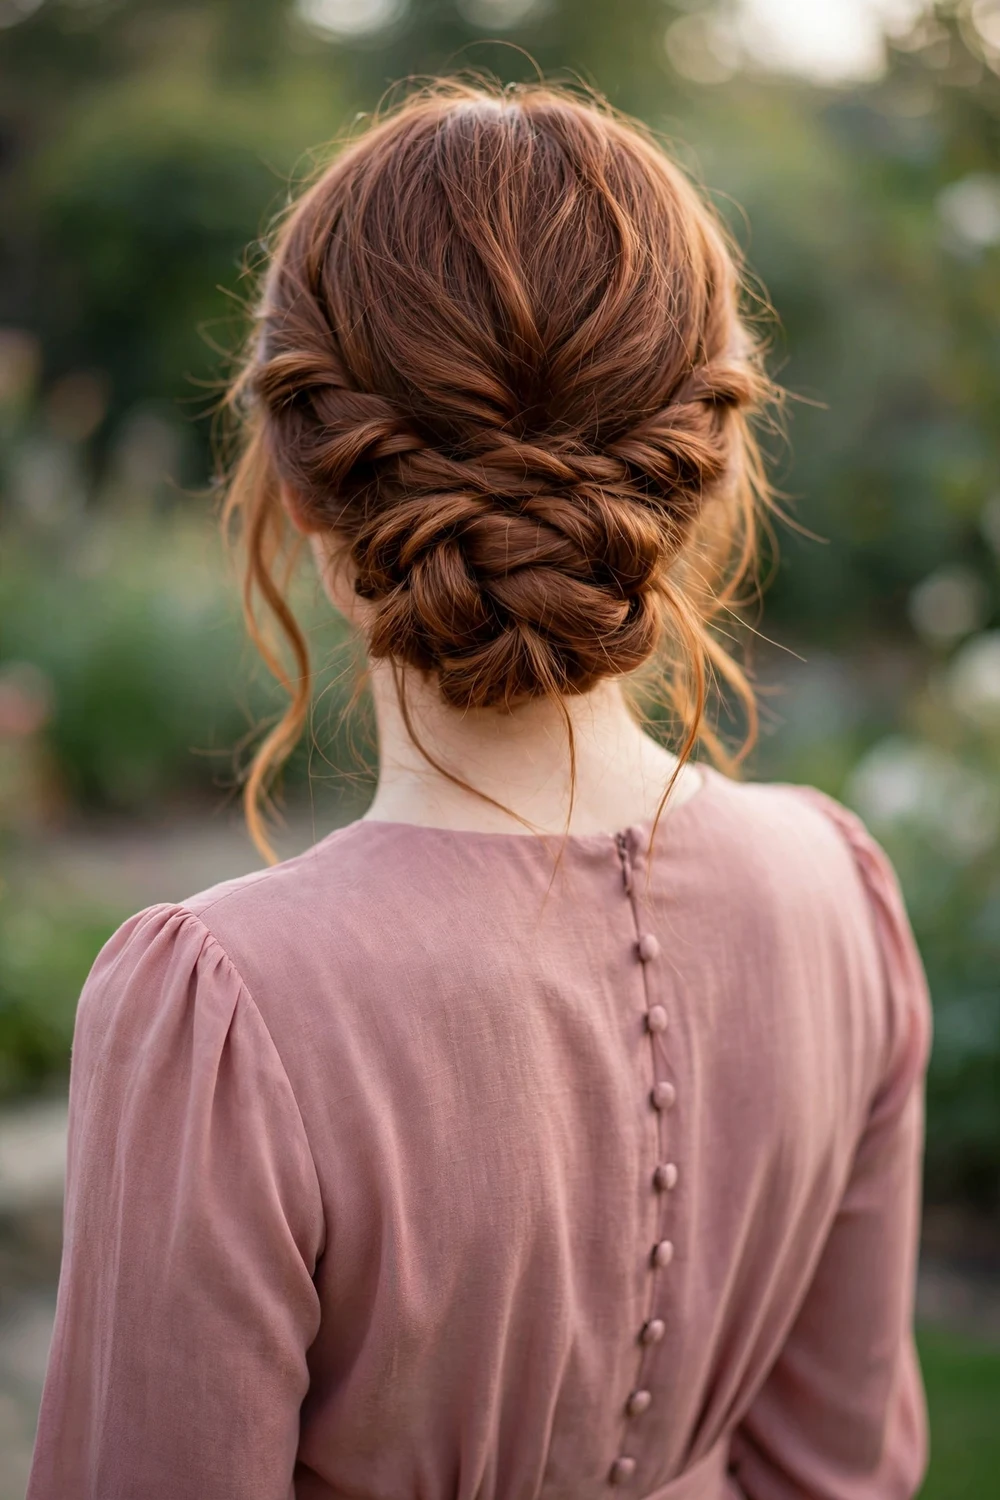
Weave two or three loose braids first, then coil them together at the nape. The woven texture catches light in photos and gives the updo far more interest than a smooth bun. Finish with light-hold spray so the braids stay defined but touchable. This style works especially well on thick or long hair, since the extra length feeds the braids. If your hair is fine, a light tease at the crown before braiding adds the fullness the woven finish needs.
Try this: pancake each braid slightly before coiling it so the bun looks fuller without needing extensions.
Difficulty: Moderate · Time: 30 minutes · Cost: DIY with braiding practice (stylist typically $70–$110)
4. Half-Up Curls with a Pearl Clip
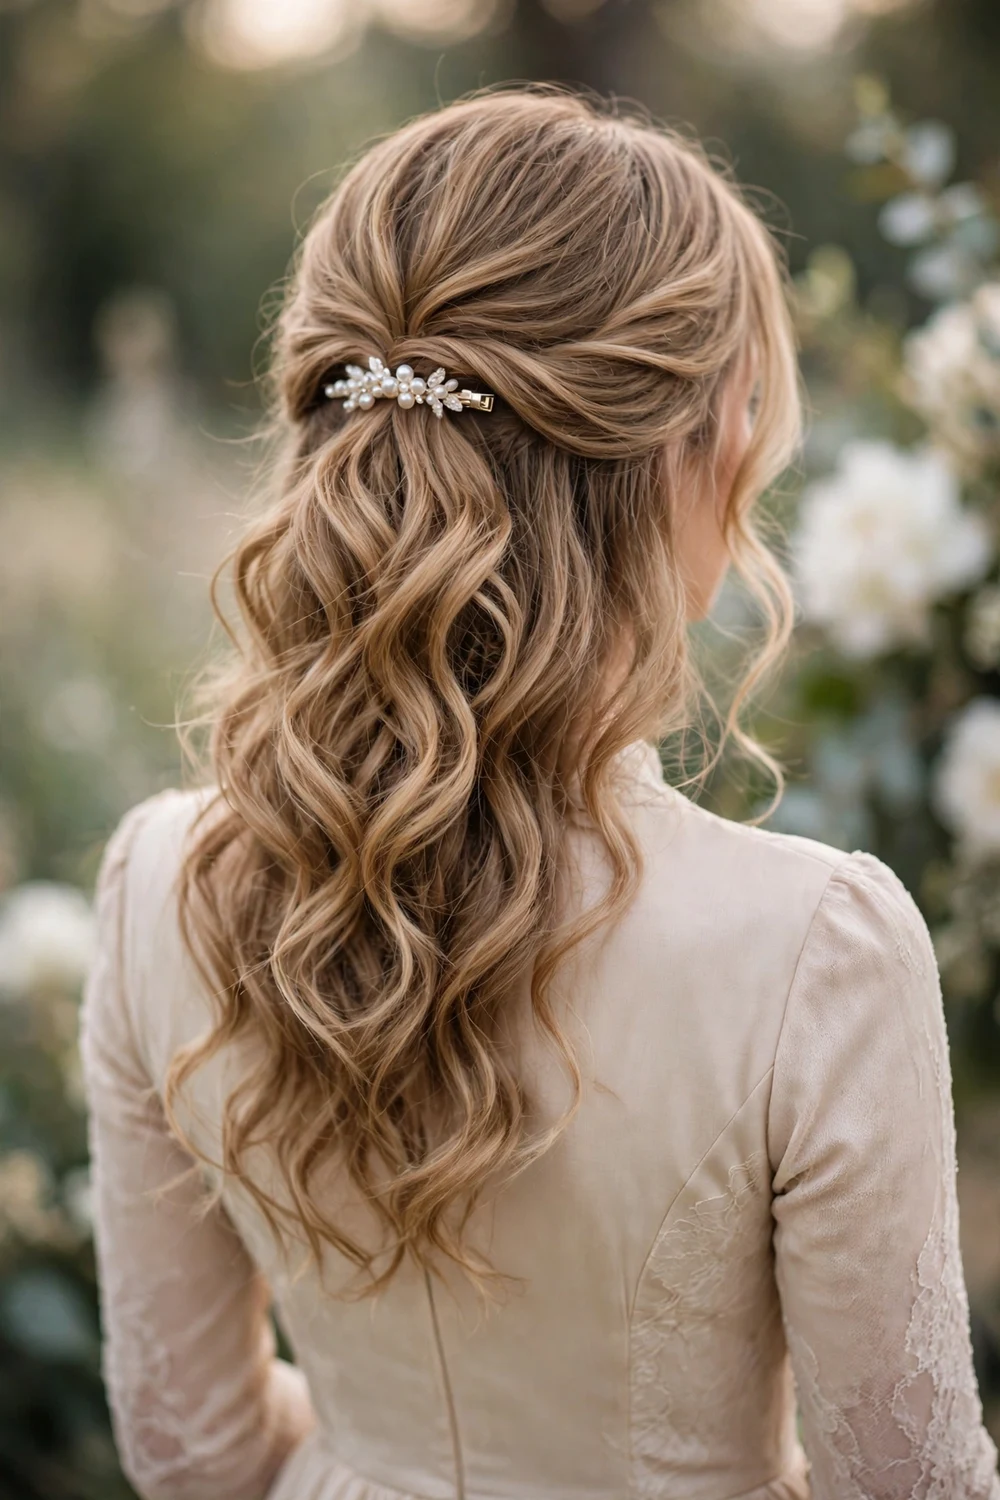
Curl your hair into soft, bouncy curls, sweep the top half back, and secure it with a pearl clip or comb for instant bridal-party polish. This style flatters nearly every dress neckline, from strapless to high neck, because it keeps hair off the face while showing off length. Curl the hair before securing the top section so the clip sits on smooth, controlled hair.
Try this: place the clip slightly off-center for a modern feel that still photographs symmetrically from the front.
Difficulty: Easy · Time: 20 minutes · Cost: DIY with a curling iron and a pearl clip
For more half-up inspiration beyond the wedding day, browse these half up half down hairstyles that work for parties, dates, and everyday occasions too.
5. Airy Textured Low Bun
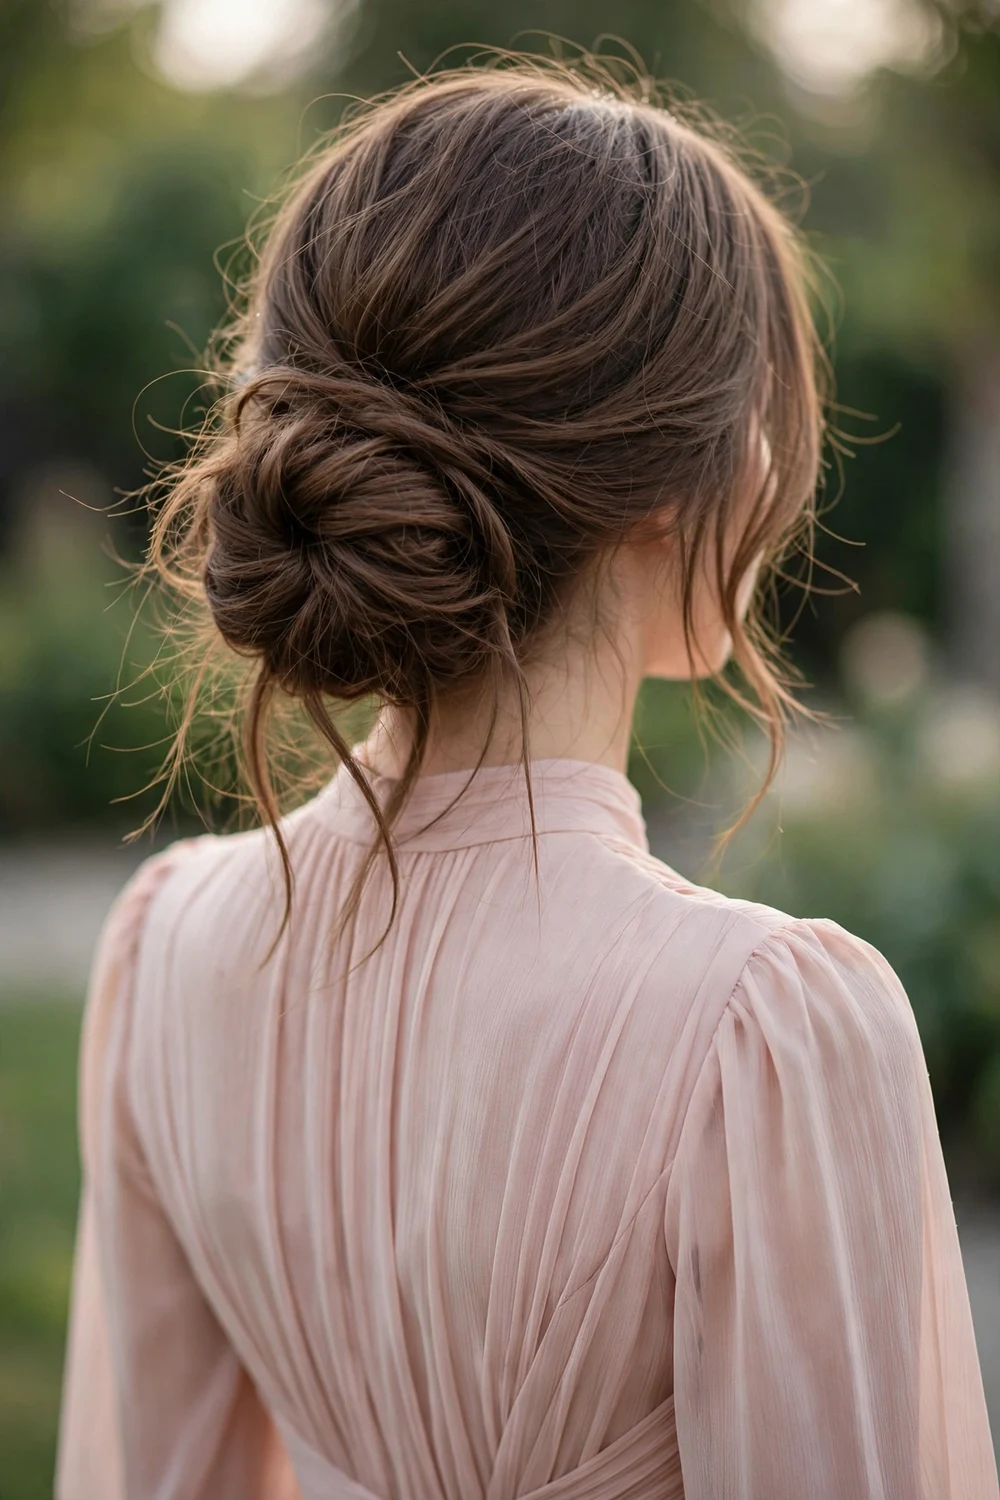
Prep with texture spray, then pin your hair into a deliberately loose, airy bun at the nape, pulling sections gently outward for a full, cloud-like effect. The texture keeps it modern and romantic, and the looseness makes it forgiving to create and comfortable for a full day of celebrating. Work in small sections and pin as you go rather than trying to place the whole bun at once. A few face-framing wisps pulled free at the end soften the whole look.
Try this: mist texture spray onto second-day hair, since the natural grip holds loose pinning far better than freshly washed hair.
Difficulty: Easy · Time: 20 minutes · Cost: DIY with texture spray and pins
6. Sculpted High Twist Bun
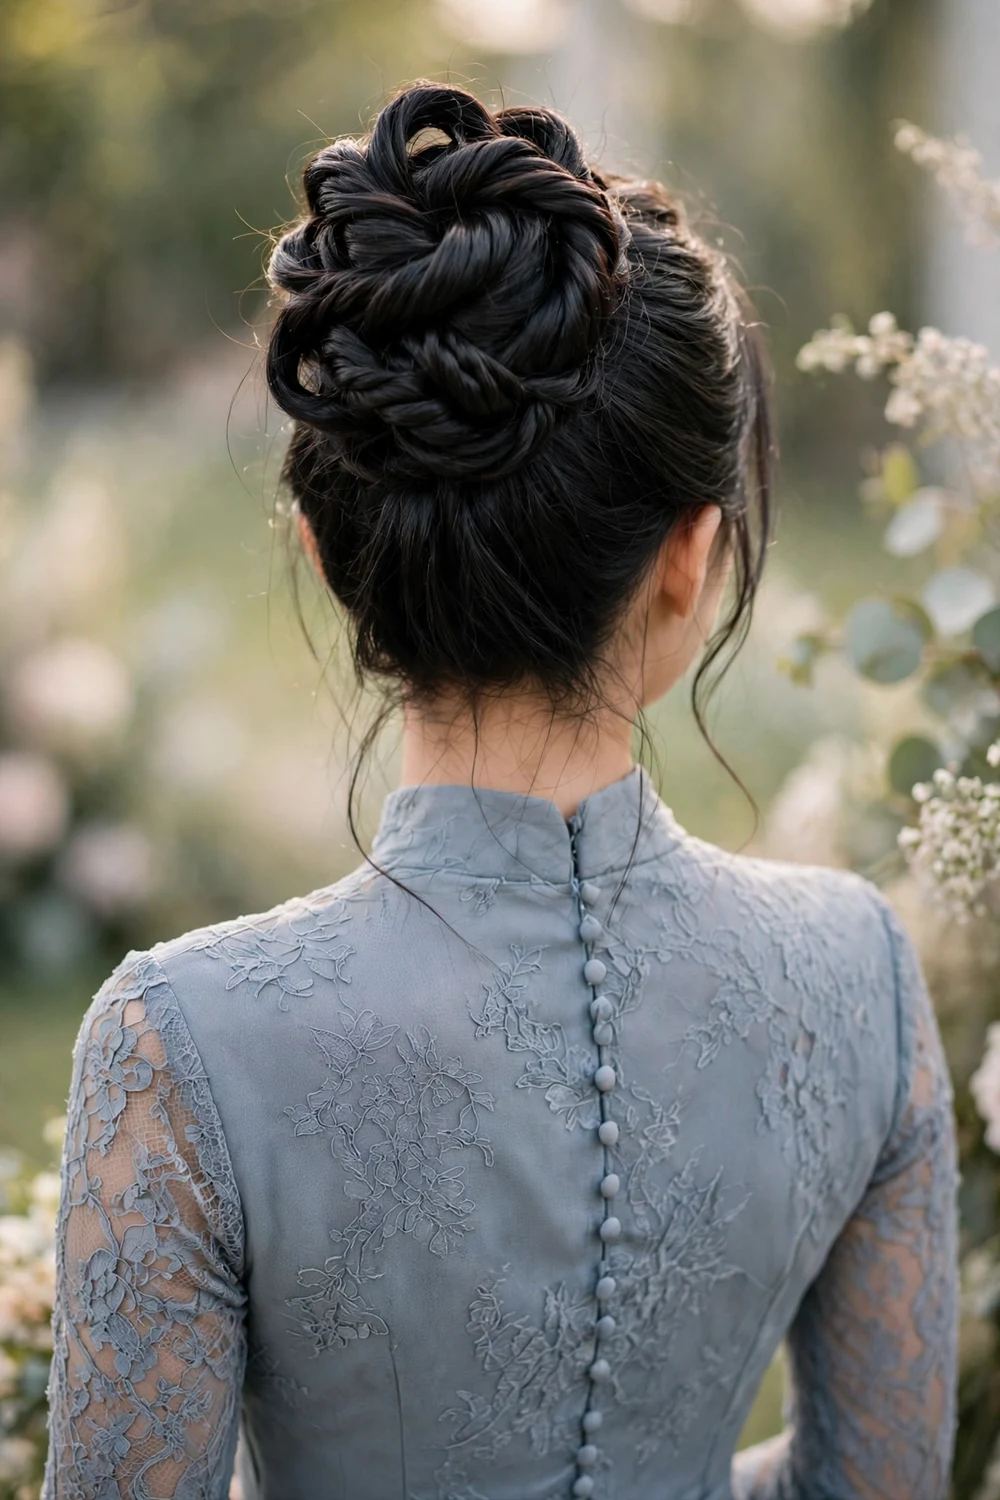
Twist sections of hair and wrap them into a high bun for a sculptural, dimensional finish. The twists catch light from every angle for a rich, detailed look that pairs well with open-back or high-neck dresses. A stylist gives the cleanest finish, but it is very doable at home with one trial run. Work with damp, detangled hair so the twists wrap smoothly, and secure each section before moving on. A strong-hold finishing spray keeps the sculpted shape intact through hugs and dancing.
Try this: do a full trial with photos from the back so you can see how the twists read from the angles guests will actually see.
Difficulty: Moderate to advanced · Time: 30 minutes · Cost: Stylist recommended for the cleanest finish ($70–$120)
7. Twisted Low Ponytail with Soft Waves
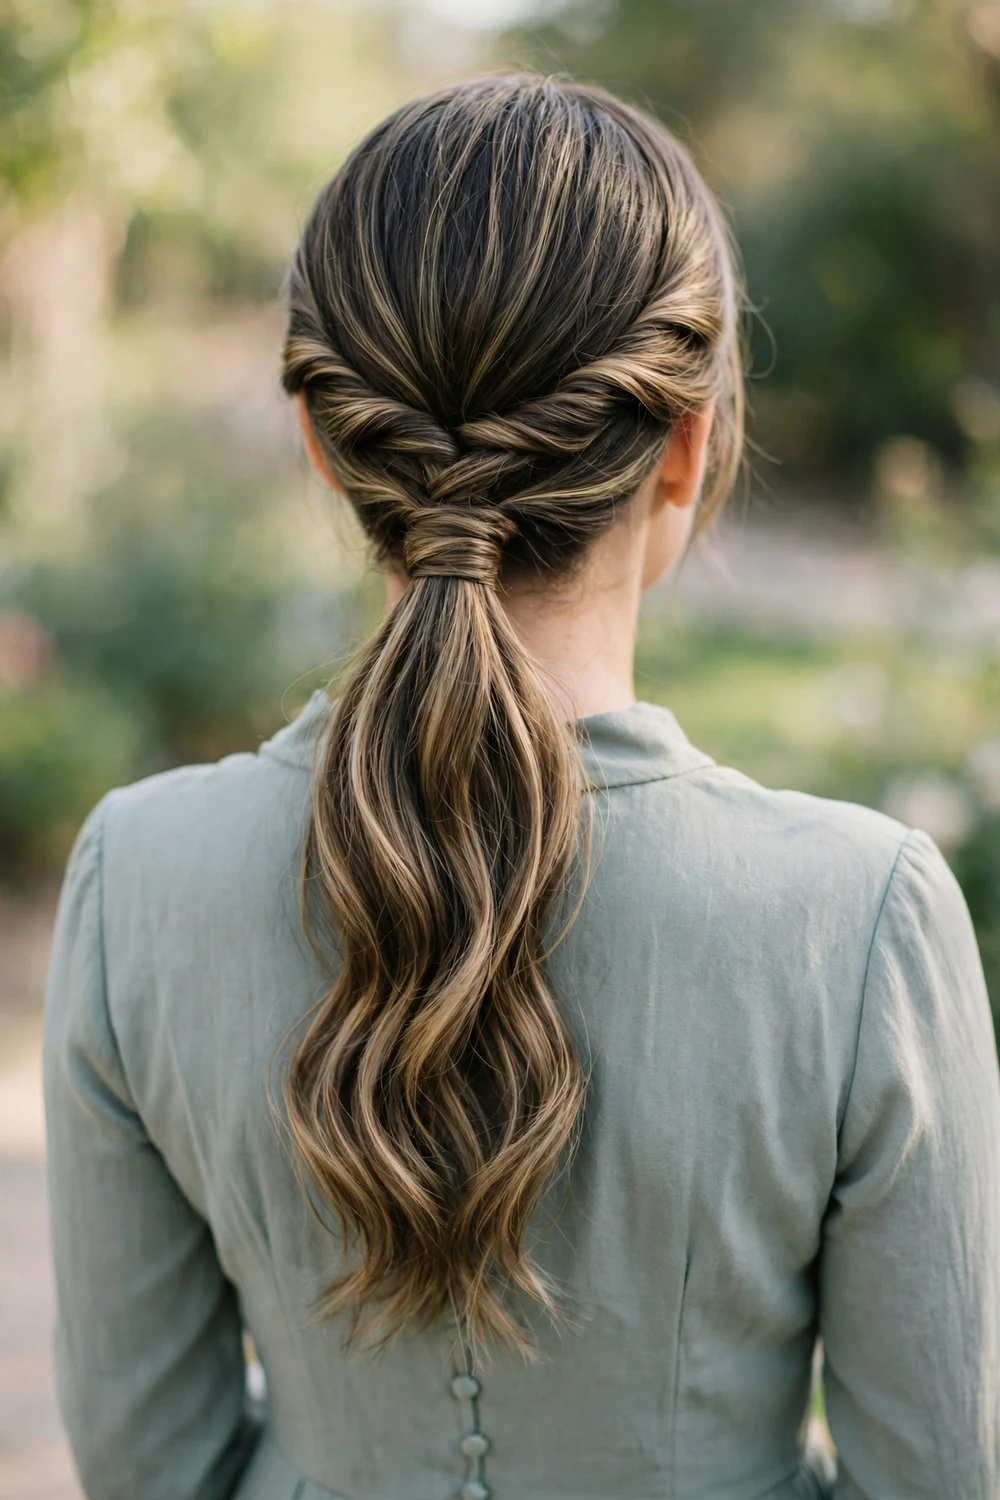
Twist two front sections back from your temples, join them into a low ponytail, and style the lengths into soft waves. The twists add elegant crown detail while the ponytail keeps everything comfortable, a lovely middle ground between up and down. Secure the twists with small clear elastics hidden under the top layer, then wrap a strand of hair around the main elastic for a finished look. Apply heat protectant before waving the lengths so they stay smooth all evening.
Try this: tease the crown lightly before twisting to add lift that shows up in side photos.
Difficulty: Easy to moderate · Time: 20 minutes · Cost: DIY with an elastic and pins
8. Asymmetric Side Bun
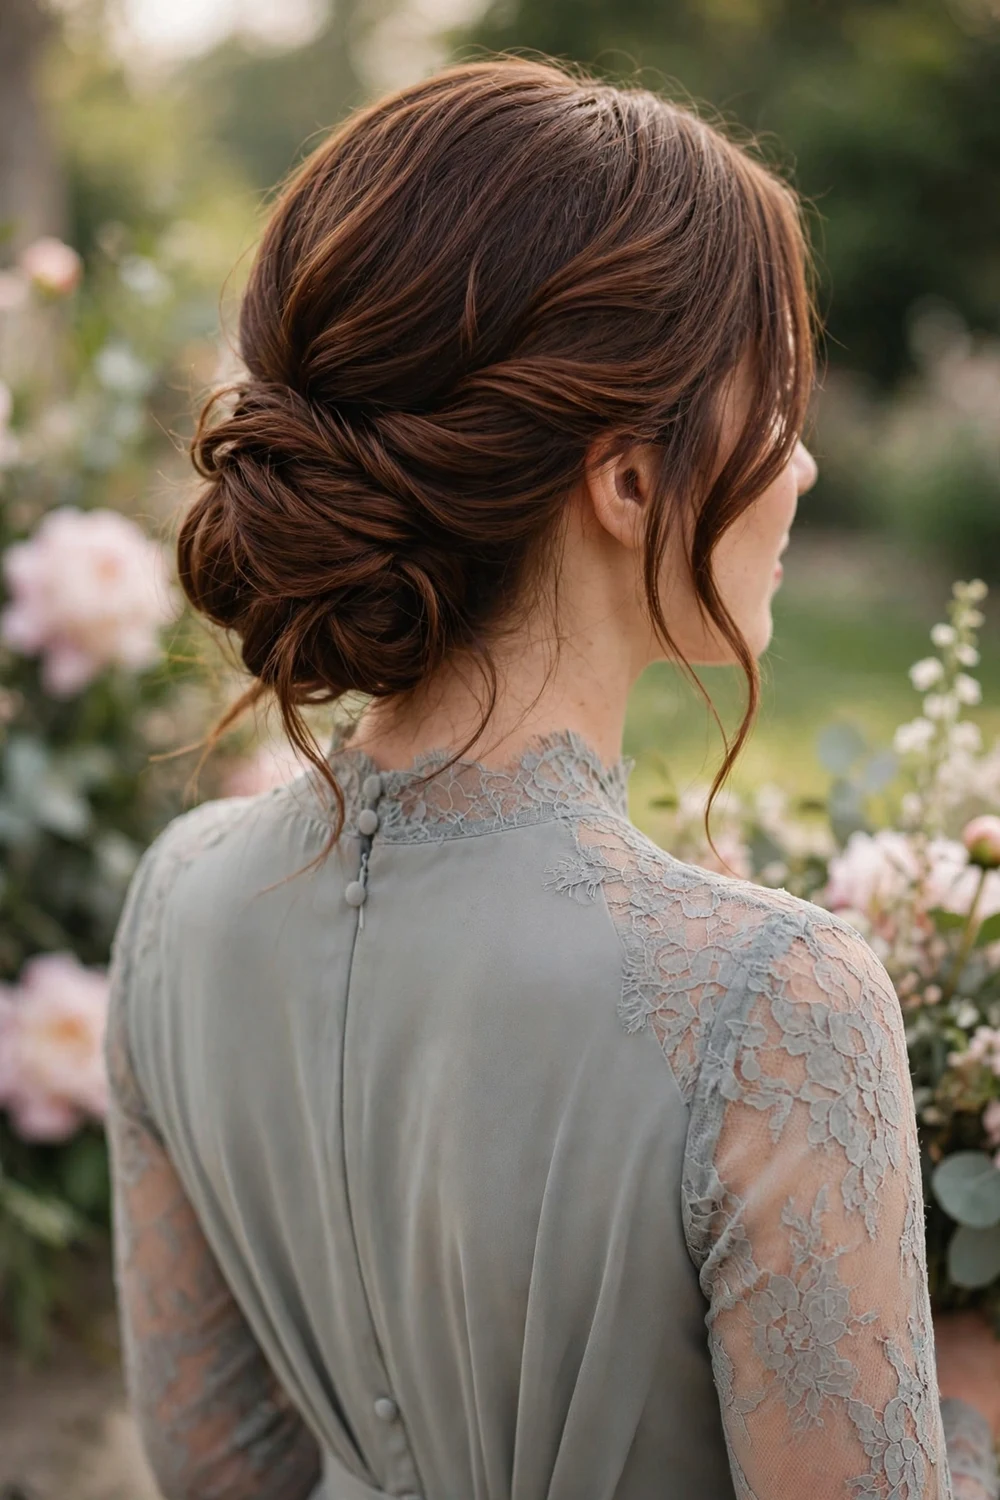
Sweep all your hair to one side and pin it into a low bun just behind one ear. The asymmetry feels fresh yet wedding-appropriate, photographs well from the front, and complements one-shoulder and asymmetric necklines. Deep-part your hair on the fuller side first so the sweep has a natural direction. Tuck the bun slightly toward the back rather than directly over the ear so it does not interfere with earrings. A light mist of flexible hairspray keeps the swept side smooth.
Try this: add a single decorative pin where the bun meets the sweep to mark the focal point.
Difficulty: Moderate · Time: 25 minutes · Cost: DIY-friendly with pins and light hairspray
9. Voluminous Half-Up Waves
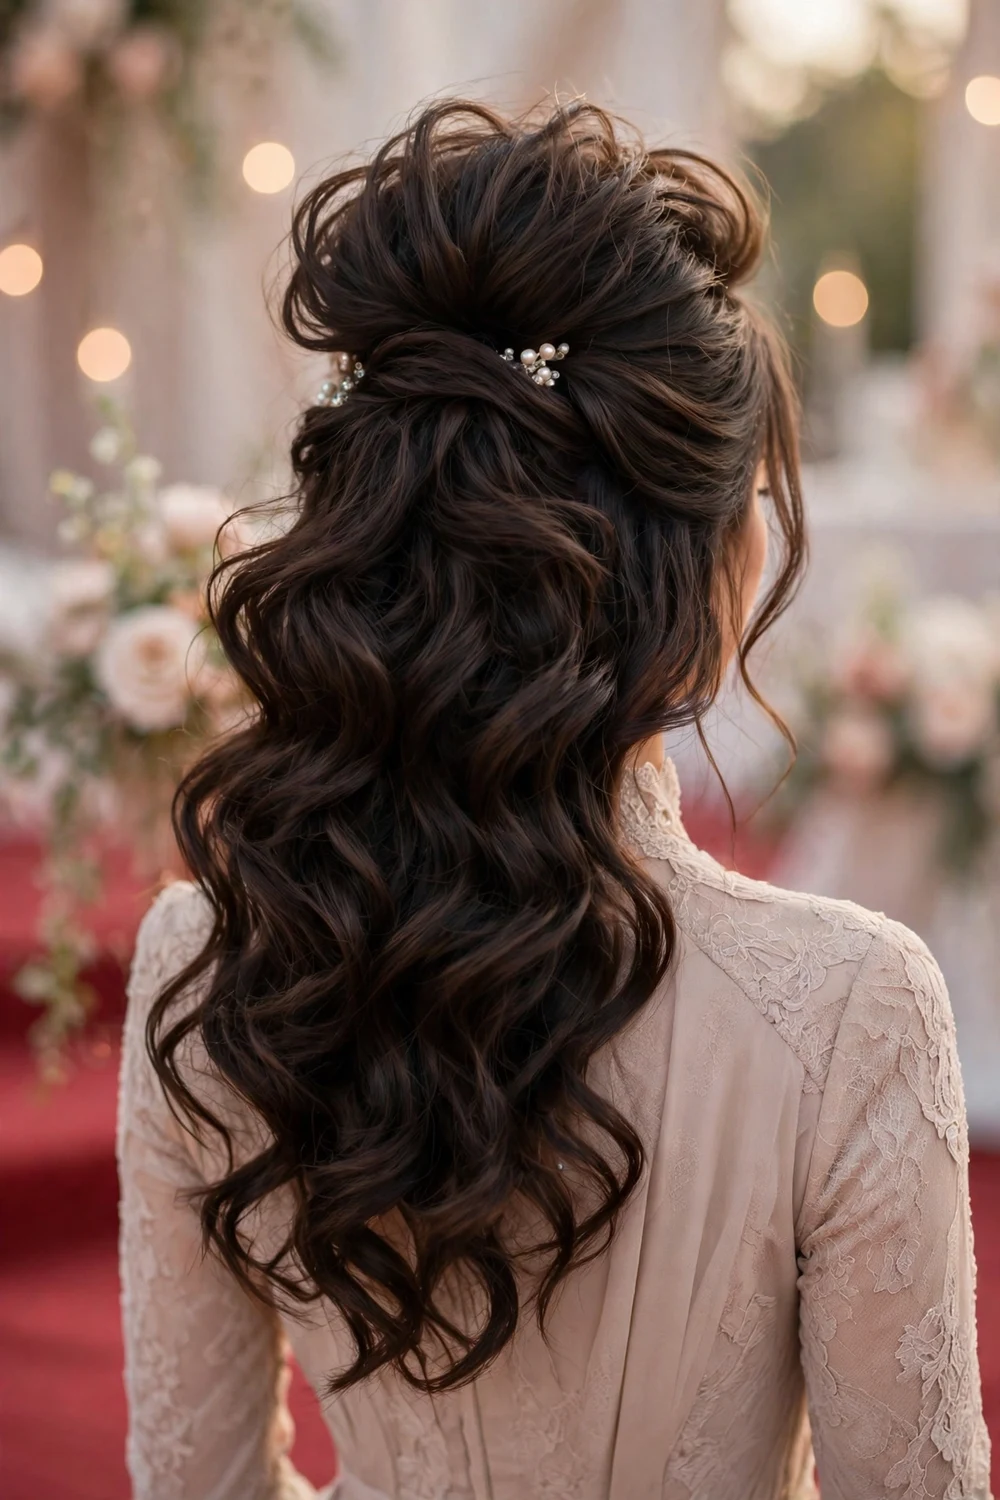
Tease the crown lightly for lift, smooth the top layer over it, and secure the upper half while full waves cascade down. The crown volume elongates the face for a glamorous, red-carpet feel, so set it with a strong but flexible hairspray. Curl the lengths before securing the top half so the waves fall naturally around the pinned section. Apply heat protectant before curling. This style needs medium to long hair to show off the contrast between the lifted crown and flowing waves.
Try this: backcomb in thin layers rather than one big section so the volume looks smooth instead of lumpy.
Difficulty: Moderate · Time: 25 minutes · Cost: DIY with a teasing comb and curling iron
10. Pinned Curls Updo
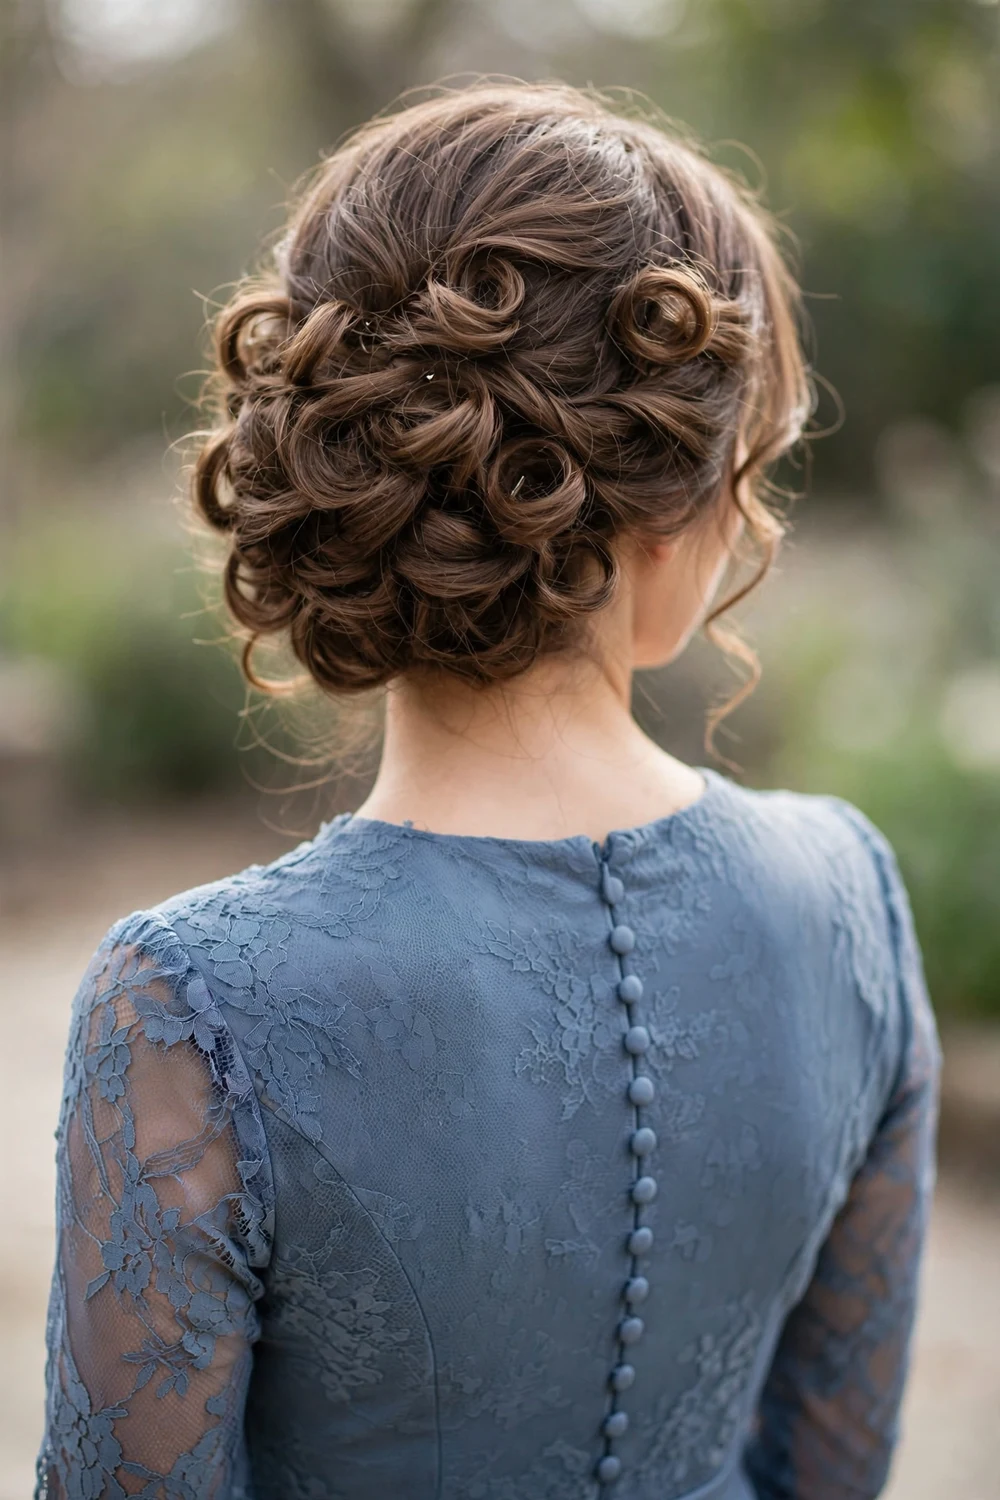
Curl your whole head, then pin each curl individually at the nape and crown instead of gathering everything into one bun. The result is dimensional and romantic from every angle, and it works wonderfully on naturally curly hair too. Vary the pinning direction slightly so the curls interlock like tiles rather than sitting in a flat row. Keep a handful of extra pins in your clutch, since individually pinned styles benefit from a quick check before evening photos.
Try this: spray each section lightly before pinning so the curls keep their shape without needing a heavy final coat.
Difficulty: Moderate · Time: 30 minutes · Cost: DIY with many bobby pins (stylist typically $70–$110)
11. Crystal-Pinned Braided Chignon
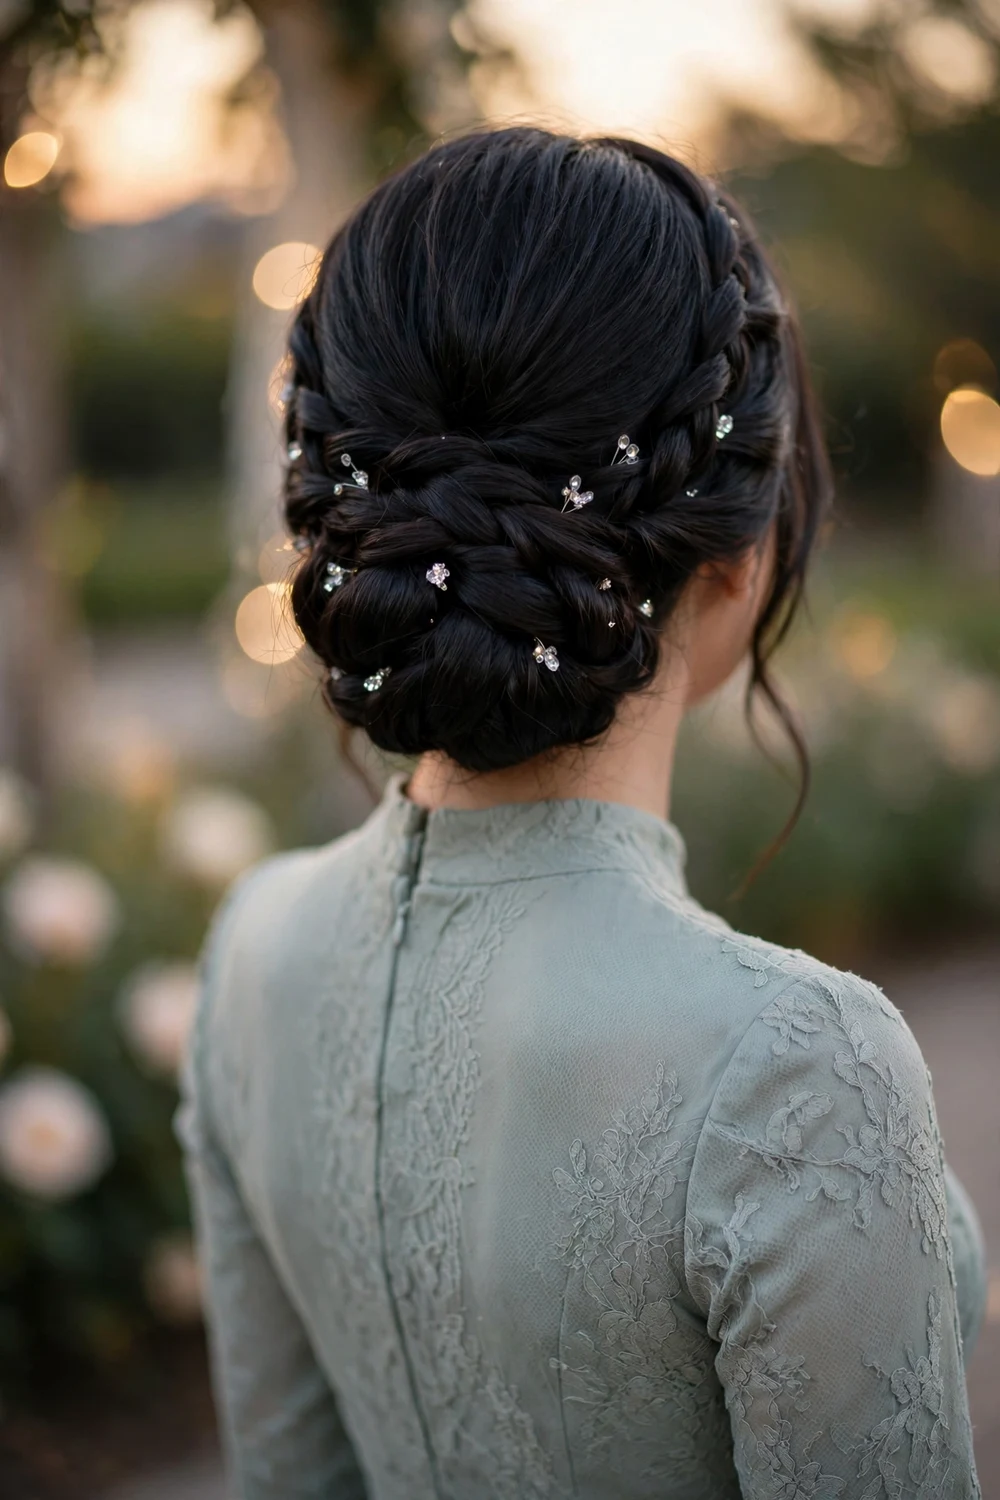
Weave soft braids into a structured chignon at the nape, then scatter small crystal pins throughout for subtle sparkle that catches candlelight in evening photos. Keep it delicate, since a few well-placed pins read elegant while too many overwhelm. Practice the braids at home first and you can skip the salon entirely. Place the crystal pins after the chignon is fully secured so you can step back and judge the balance before committing.
Try this: cluster three pins together near one side instead of spreading them evenly for a more editorial look.
Difficulty: Moderate to advanced · Time: 35 minutes · Cost: Stylist recommended ($80–$130); crystal pins a few dollars
12. Bohemian Crown Braid Half-Up
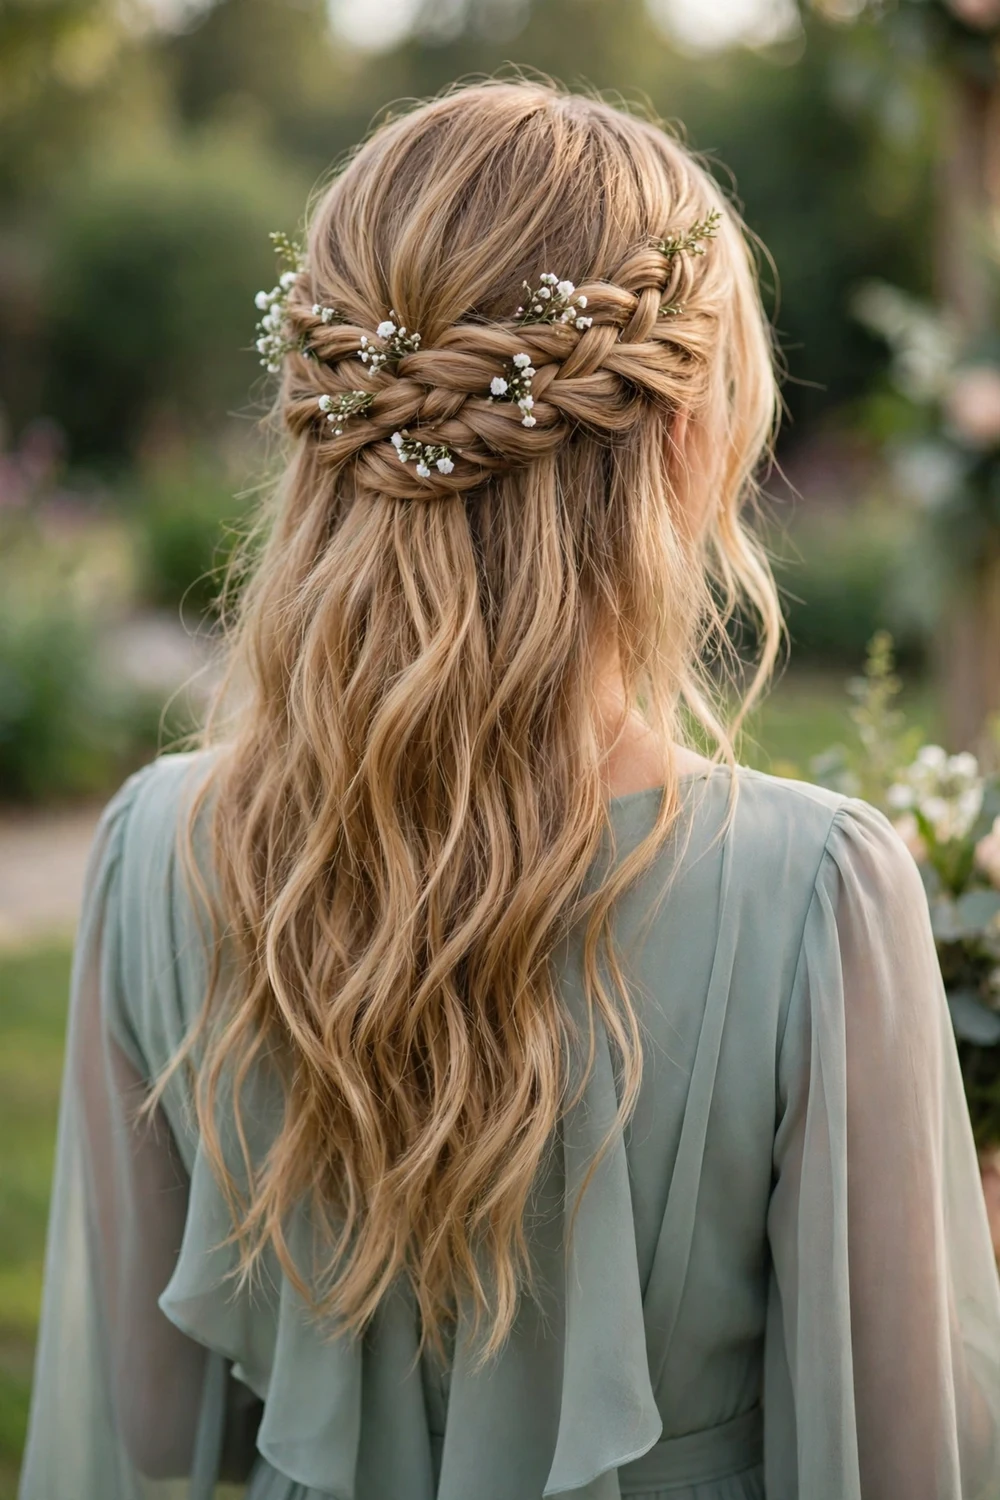
Braid from each temple and join the plaits at the back like a crown, letting the rest fall in loose waves. Tuck tiny sprigs of baby’s breath into the braid for a boho garden feel, which suits outdoor and rustic weddings. Gently pancake the braid edges to make them look fuller, and secure the join with crossed pins hidden under the waves.
Try this: mist the braid with flexible hairspray after pancaking so the pulled edges keep their fullness.
Difficulty: Moderate · Time: 25 minutes · Cost: DIY with braiding practice
13. Sleek Half-Up Ponytail
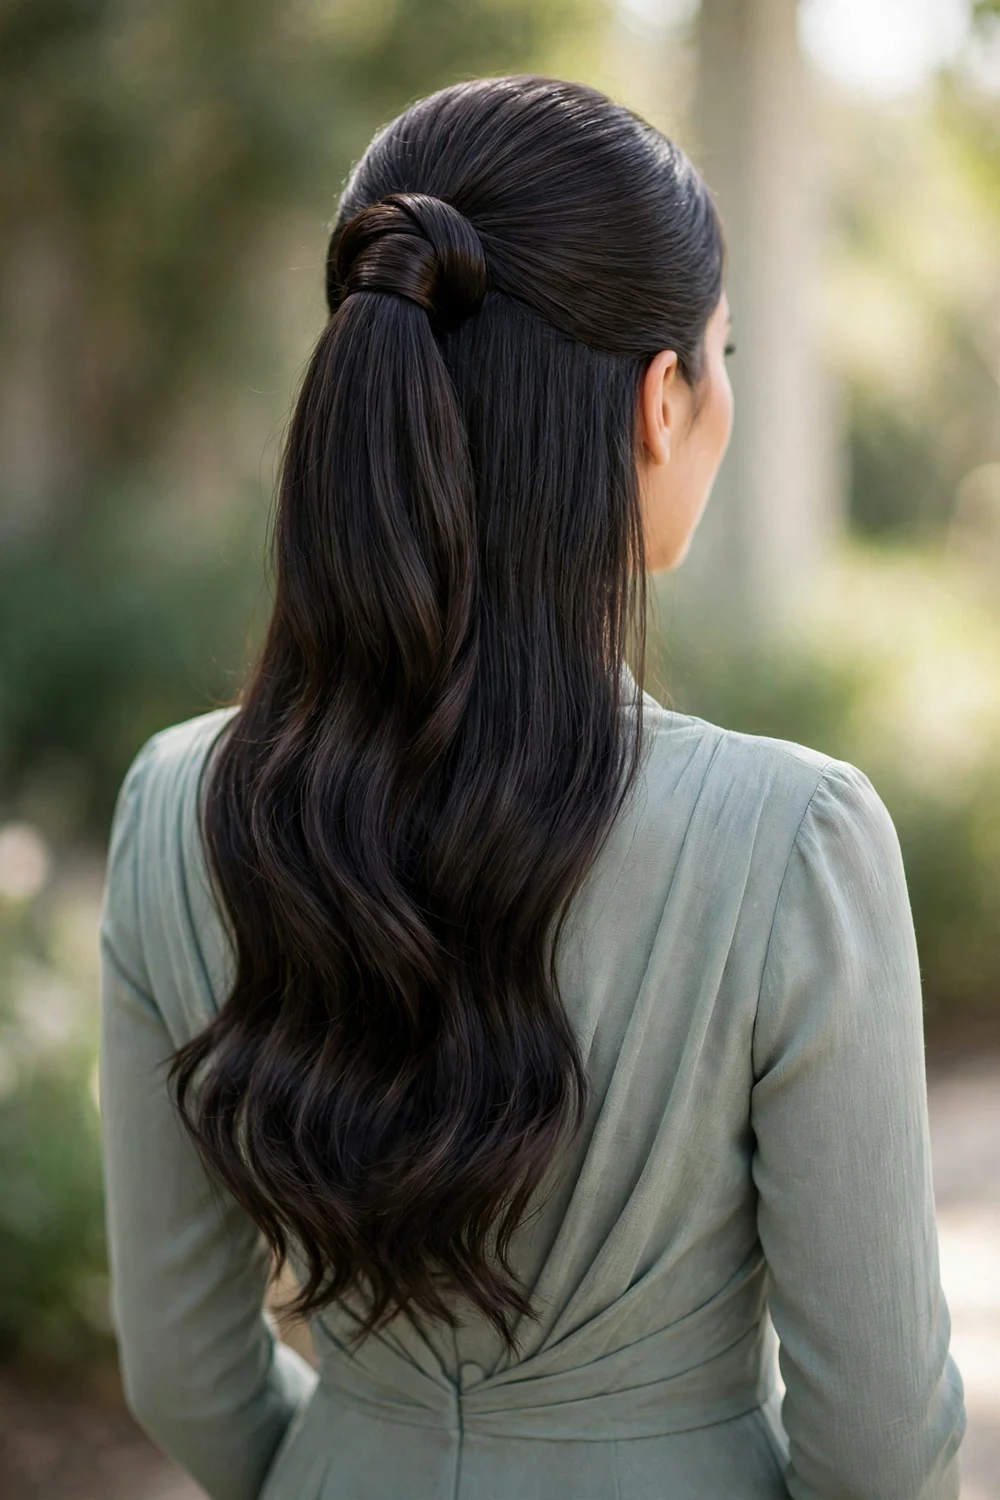
Brush the top half back smoothly and secure it into a clean ponytail at the crown, wrapping a strand around the base to hide the elastic. The sleek crown contrasts nicely with soft waves below for a modern, polished, all-day-neat result. Use a smoothing serum on the top section before brushing so the surface stays glassy. This suits straight or slightly wavy hair best, since very curly hair needs extra smoothing work to get the clean finish.
Try this: anchor the wrapped strand with a pin underneath the ponytail so it never slips loose during the reception.
Difficulty: Easy · Time: 15 minutes · Cost: DIY with a brush, elastic, and smoothing serum
14. Fishtail Accent Half-Up
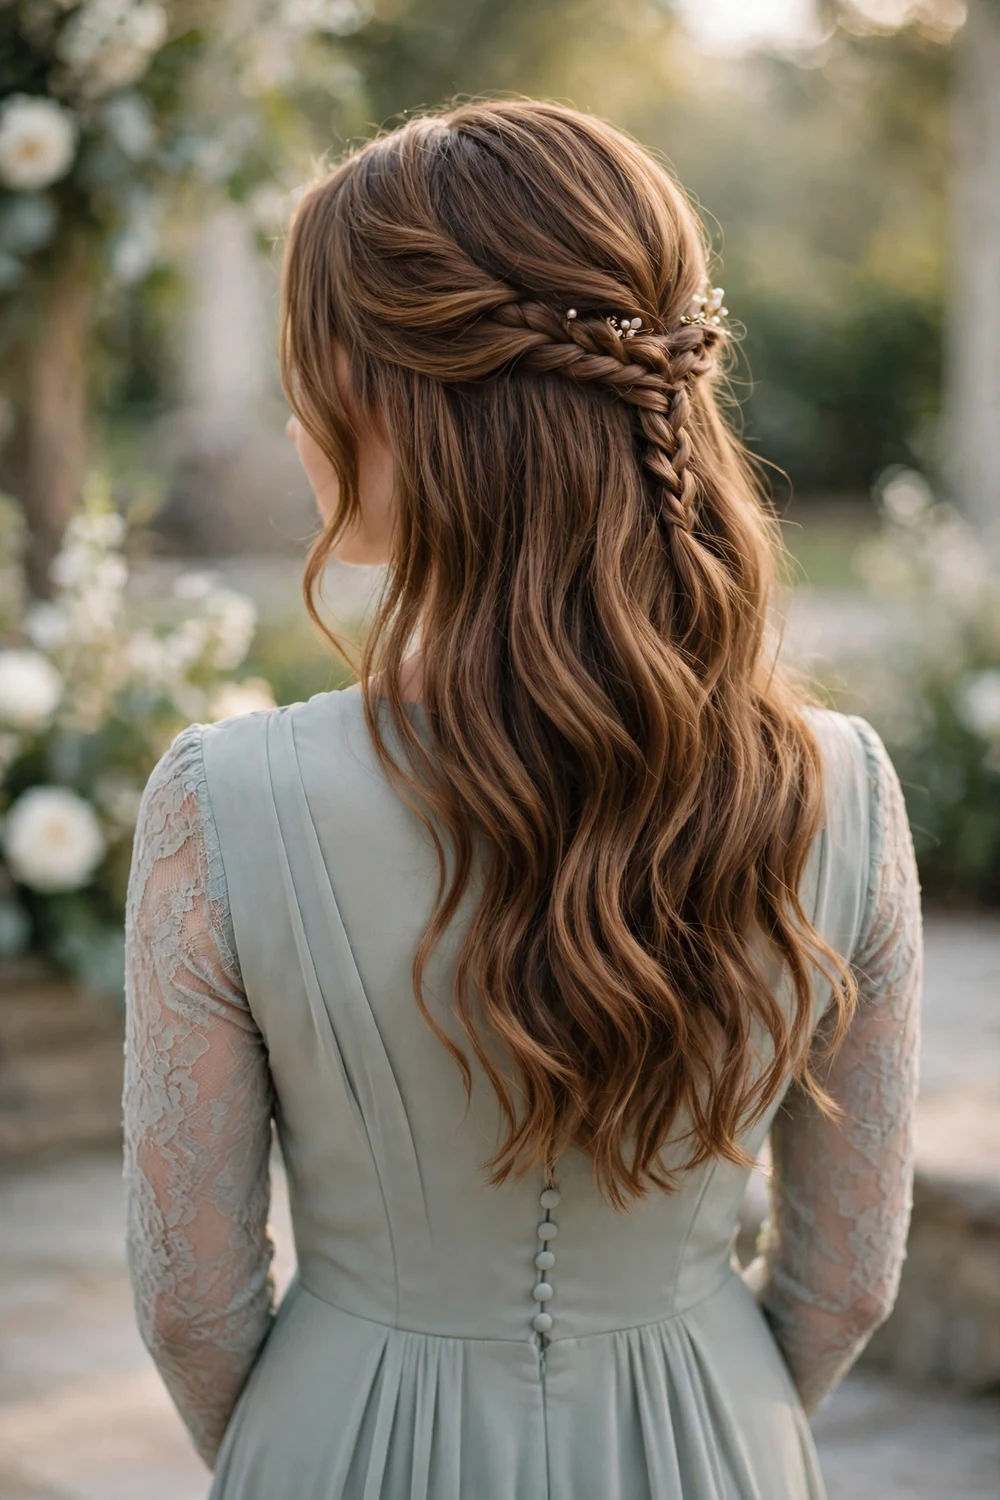
A fishtail braid, woven from just two sections for a herringbone effect, makes a lovely small accent. Braid a slim fishtail on one side and pin it into a half-up style over soft waves; the detail turns a simple half-up into something special. Keep the accent braid thin, no wider than two fingers, so it reads as jewelry for the hair rather than competing with the waves. Practice the fishtail motion once on a practice section, since the two-strand rhythm feels odd until your fingers learn it.
Try this: pancake only the outer edges of the fishtail so the herringbone pattern stays crisp in the middle.
Difficulty: Moderate · Time: 20 minutes · Cost: DIY (practice the fishtail technique first)
15. High Braided Bun
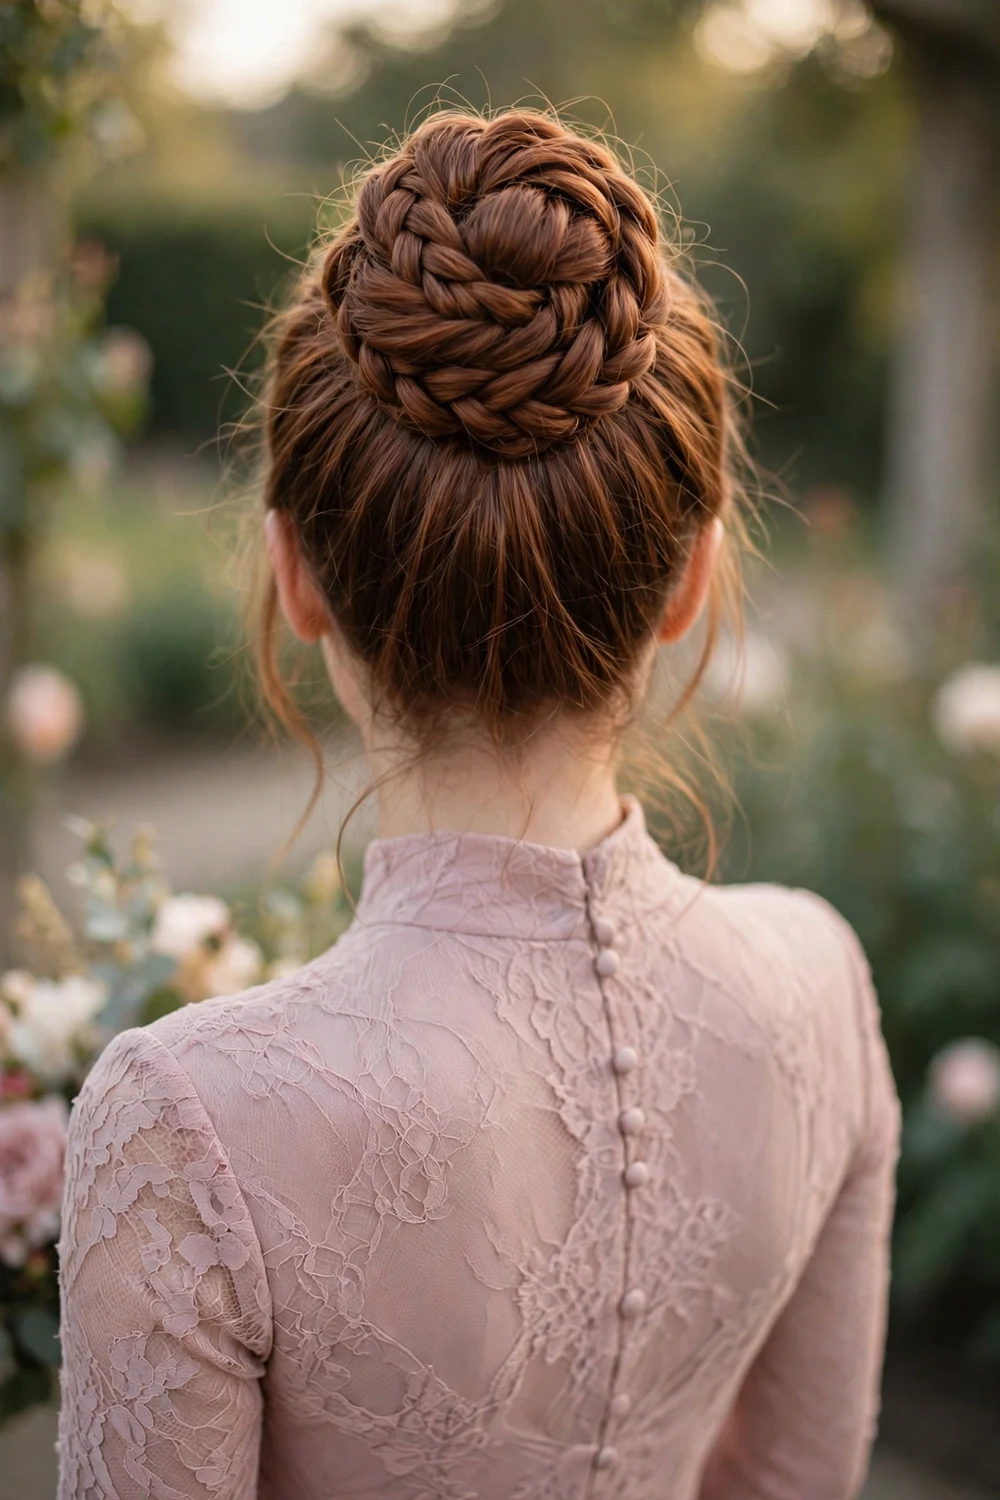
Braid your ponytail first, then coil the braid into a high bun and pin it in place. The braided texture adds character, and the style is exceptionally secure, which makes it ideal for windy outdoor ceremonies. A few pulled-loose edges keep it soft. Start the ponytail higher than you think, since braiding and coiling always drops the final bun slightly. Tuck the braid end under the coil and pin from underneath so no tail peeks out.
Try this: wrap a thin silk scarf around the base for color, a trick that also hides any uneven pinning.
Difficulty: Moderate · Time: 25 minutes · Cost: DIY with an elastic and pins
16. Wrapped Low Ponytail with Sculpted Waves
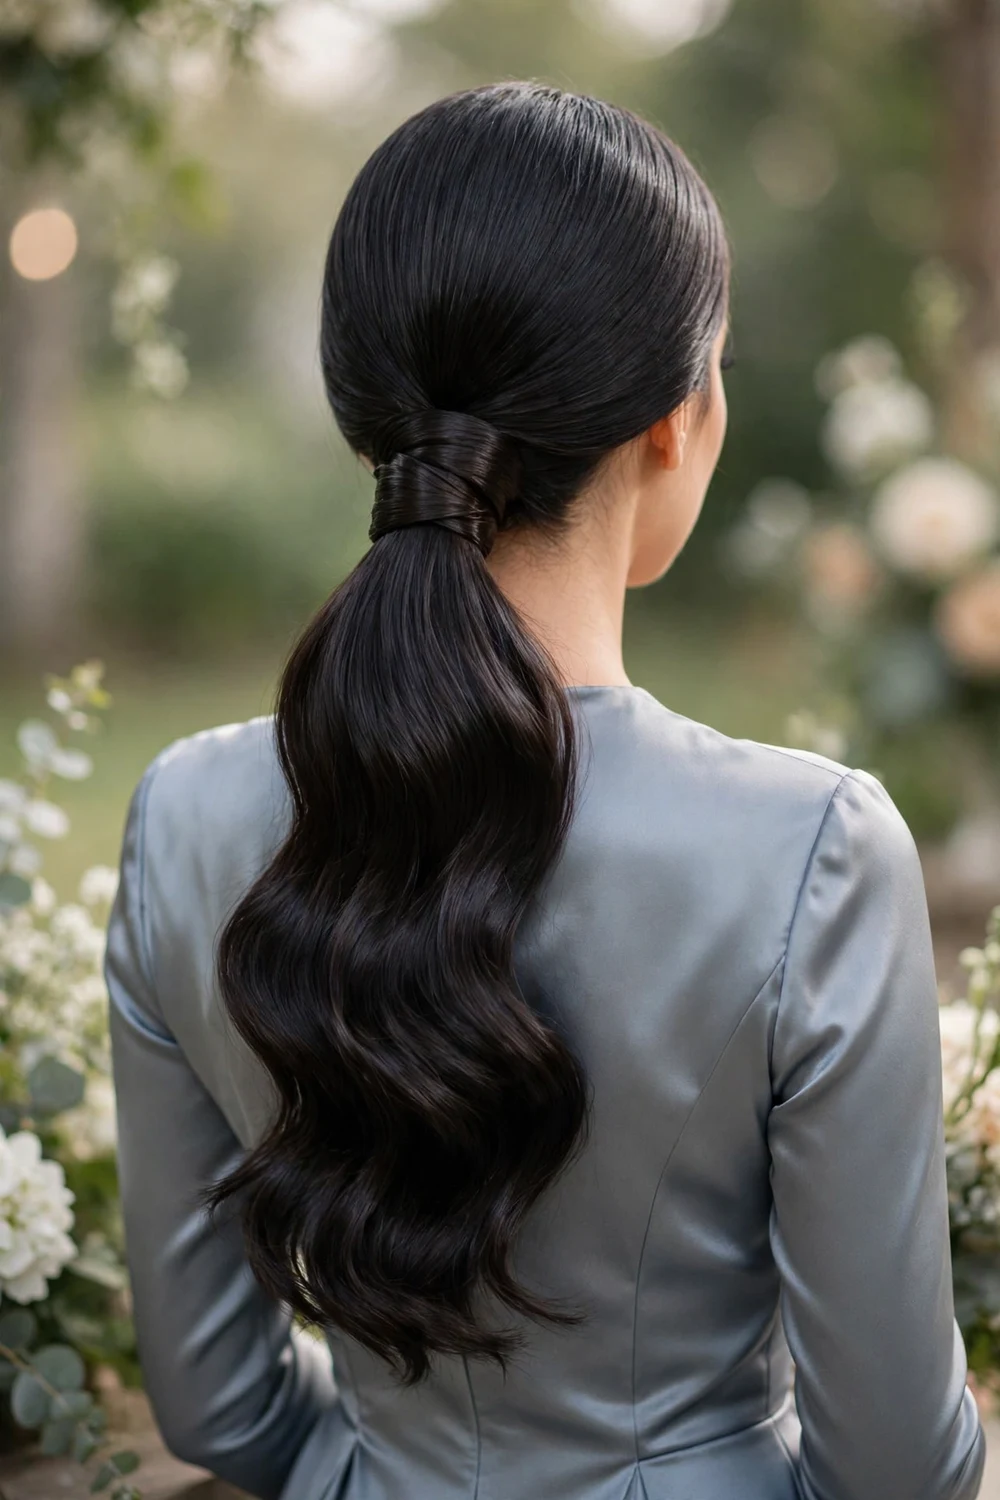
Smooth your hair into a low ponytail, wrap a strand around the base, and style the lengths into sculpted, glossy waves. The wrapped base takes it from everyday to event-ready and pairs well with satin gowns and sparkling earrings. Apply heat protectant before curling, and brush the curls through once for waves instead of ringlets. The wrap hides the elastic completely, so from every angle the ponytail looks like it starts from the hair itself.
Try this: set each wave with a clip while it cools for extra definition that lasts through the evening.
Difficulty: Easy to moderate · Time: 20 minutes · Cost: DIY with a curling iron
17. Timeless Sleek Chignon
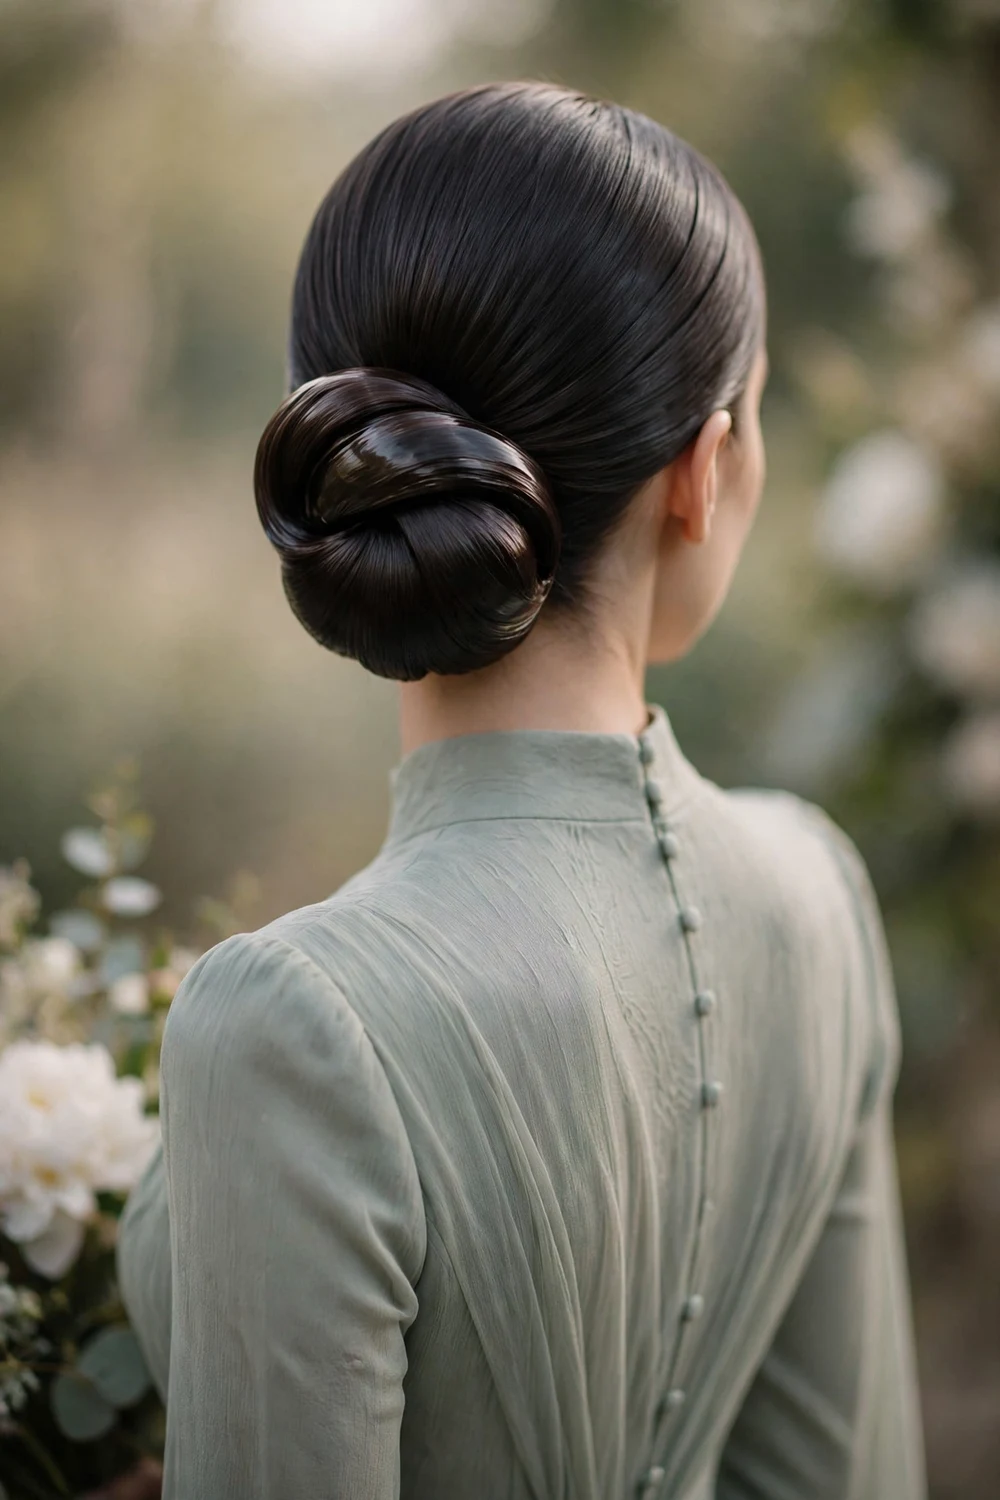
The sleek chignon, which is hair smoothed back and rolled into a sculpted bun at the nape, is the most timeless choice here. Its clean lines suit formal weddings and let statement earrings or a detailed neckline take center stage. Finish with shine serum. Divide the hair into a smooth ponytail first, then roll and tuck, pinning in stages so the roll stays even. A fine-tooth comb and a light hand with gel keep the surface mirror-smooth without stiffness.
Try this: run a flat iron over the ponytail before rolling for the smoothest possible surface. Use heat protectant first.
Difficulty: Moderate · Time: 25 minutes · Cost: DIY with practice (stylist typically $60–$100)
18. Soft Rope-Twist Low Bun
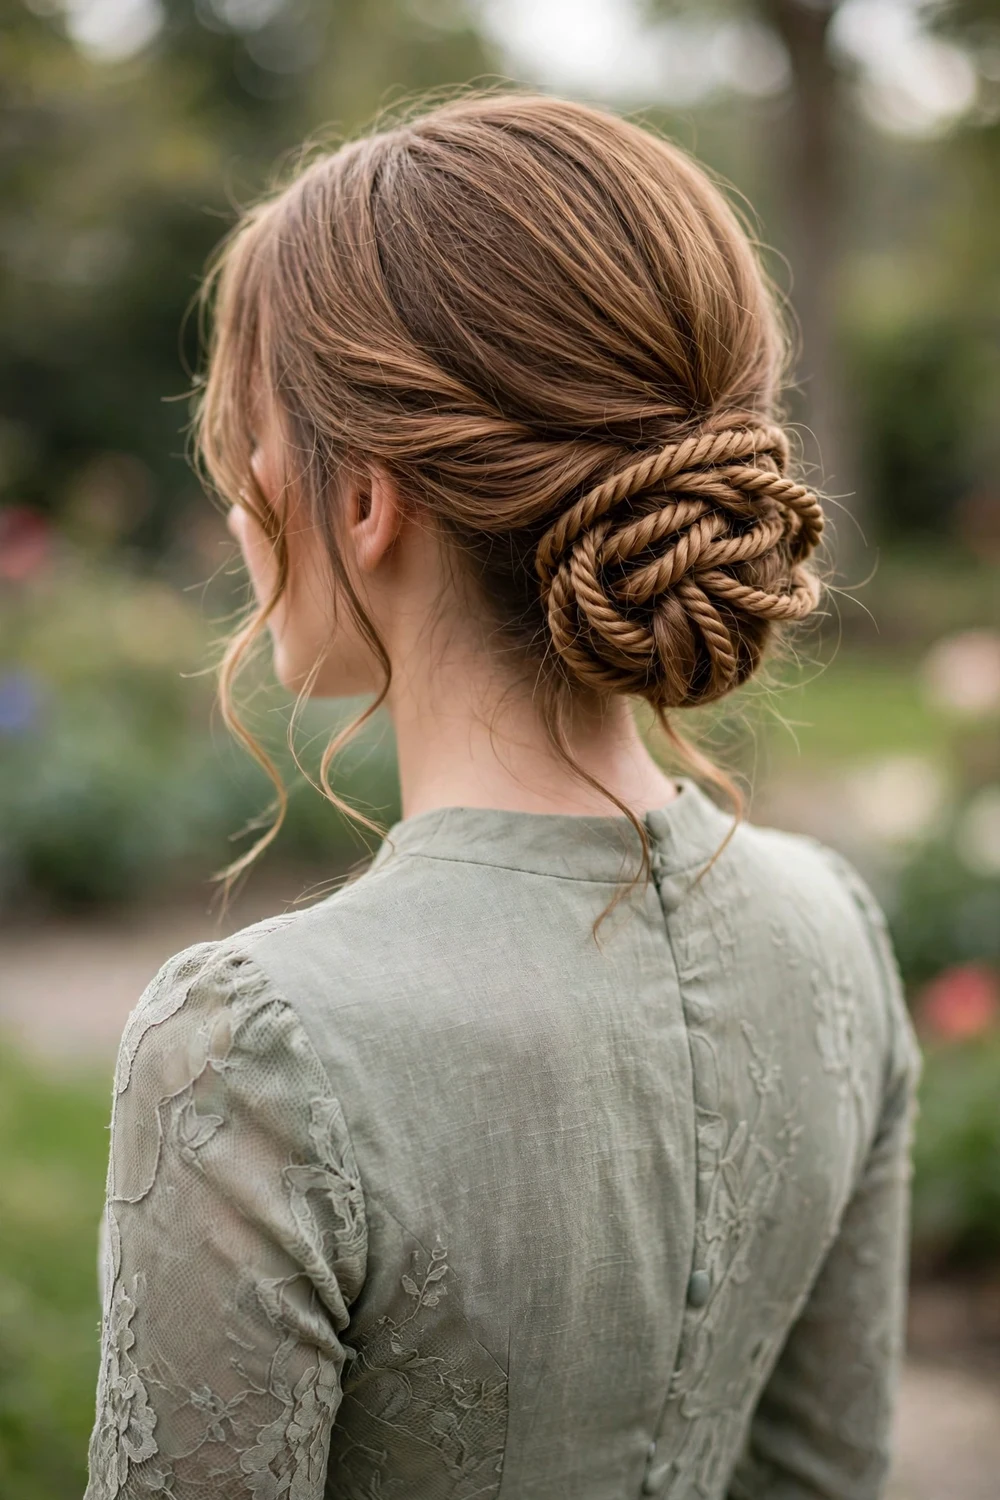
A rope twist, made from two strands coiled around each other, creates lovely spiral texture with minimal skill. Coil several rope twists into a soft low bun, leaving gentle tendrils around your face. It looks intricate yet ranks among the easiest textured updos to master. Twist each section in the same direction so the ropes coil together neatly, and pin them at slightly different heights for a full, dimensional bun. The tendrils soften the look for round or square face shapes.
Try this: rub a drop of serum between your palms before twisting to keep the ropes smooth and frizz-free.
Difficulty: Easy to moderate · Time: 20 minutes · Cost: DIY with pins and light hairspray
19. Pearl Vine Low Twist

Gather your hair into a smooth low twist at the nape, then wind a flexible pearl vine through it. The pearls add luminous elegance without the fuss of fresh flowers, understated from the front and quietly lovely from behind. Secure the twist firmly first, since the vine adds weight that can pull a loose base. Wrap the vine in a loose S-curve rather than a straight line so it looks woven in rather than laid on top.
Try this: pin the vine at three points, start, middle, and end, so it cannot shift while you dance.
Difficulty: Easy to moderate · Time: 20 minutes · Cost: DIY plus a pearl hair vine (roughly $8–$20)
20. Pearl-Scattered High Bun
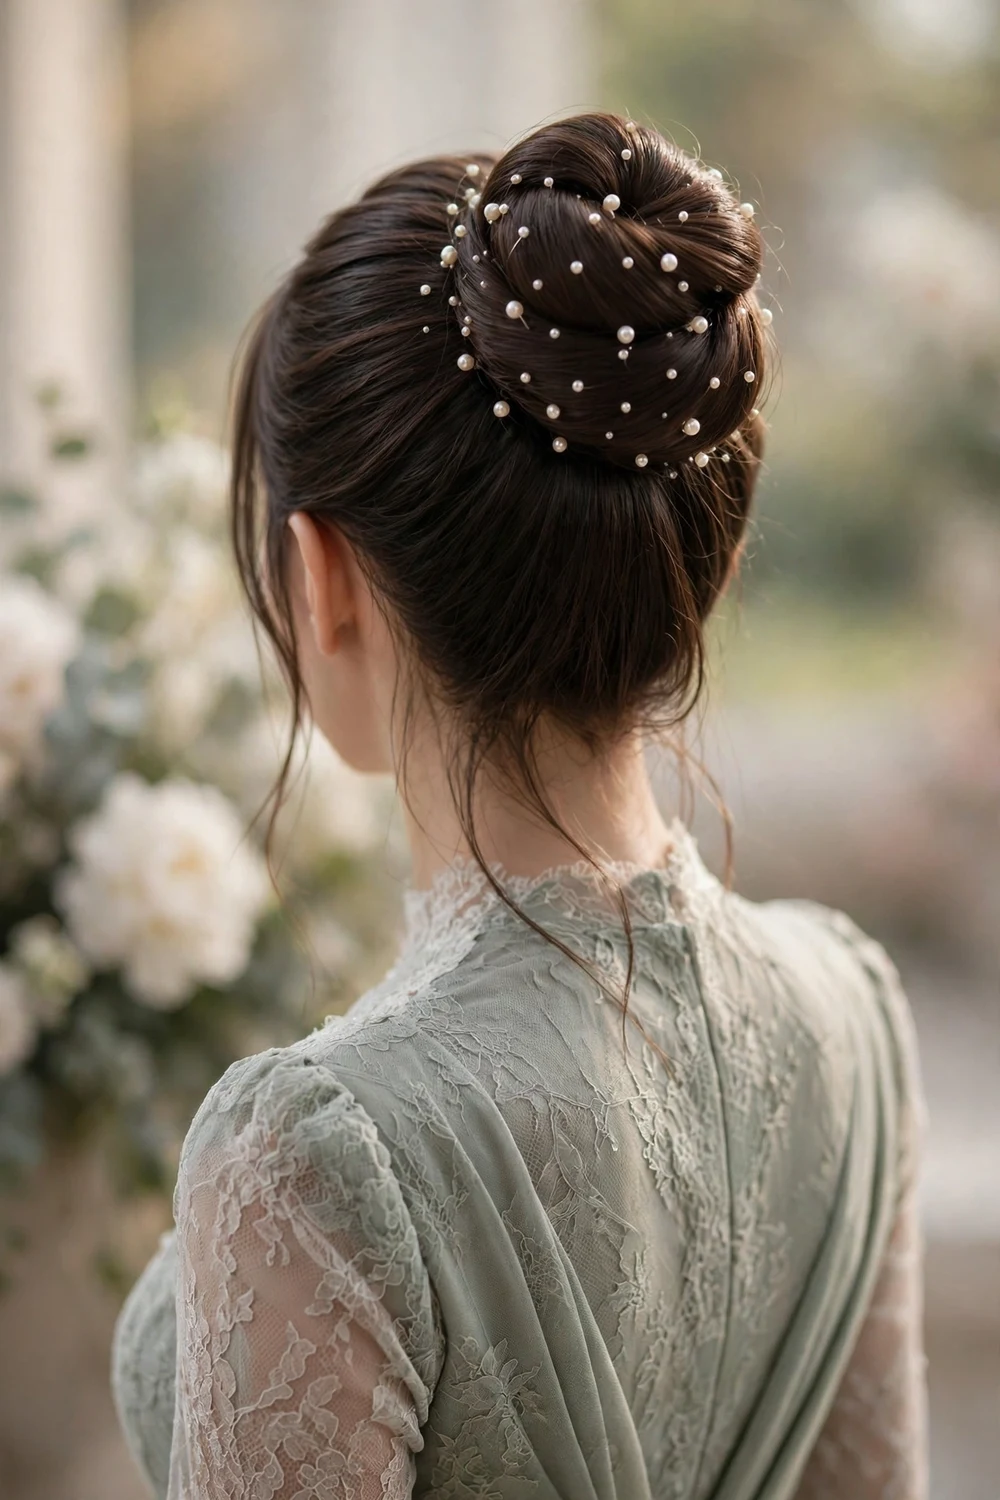
Style a smooth, clean high bun, then scatter small pearl pins across it like dewdrops. The sleek-pearl contrast is effortlessly chic, showcases your makeup and earrings, and stays put from ceremony to dance floor. Build the bun on a small donut or with backcombed hair for a perfectly round shape, then push the pearl pins in at varied angles so they catch light differently. Keep the hairline smooth with edge control for a truly polished finish.
Try this: use five to seven pins in odd numbers, since odd groupings look more natural than even rows.
Difficulty: Easy · Time: 15 minutes · Cost: DIY with pins and a set of pearl pins
21. Gilded Low Bun with Gold Pins
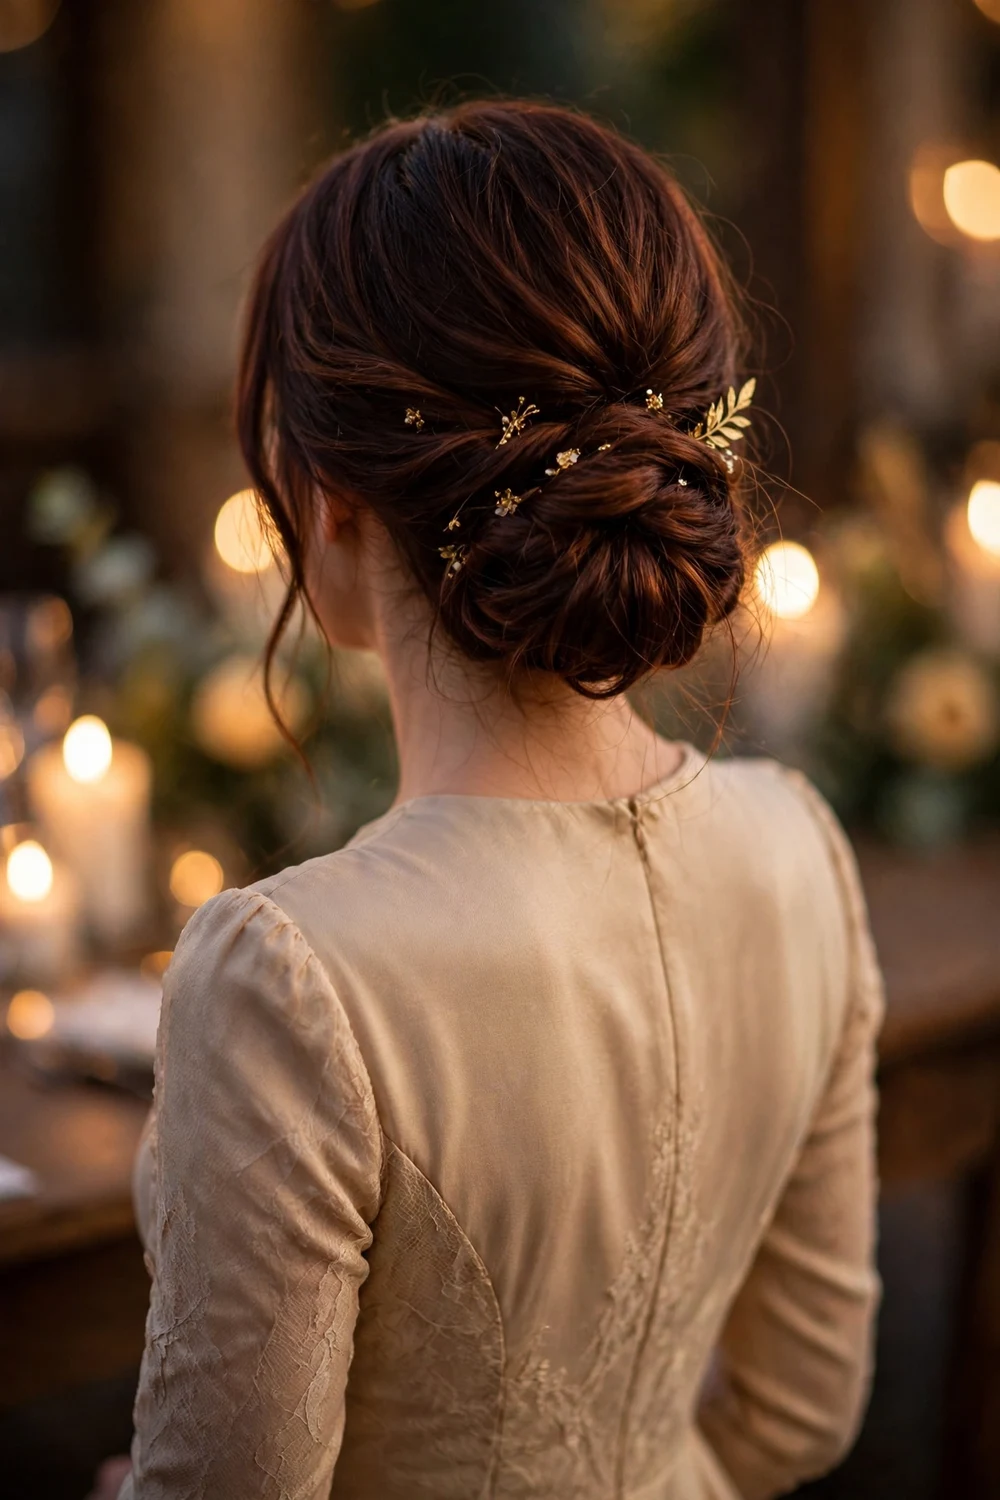
Pin your hair into a soft low bun, then accent it with gold-toned pins, a cuff, or delicate gold leaves. The warm metallic touch feels luxurious, suits fall weddings and candlelit receptions, and flatters most hair colors. Match the gold tone to your jewelry, yellow gold with yellow gold, so the whole look feels intentional. Place the accents on one side only for an asymmetric detail that photographs like a focal point.
Try this: spray gold pins with a light coat of hairspray before inserting so they grip better and stay put.
Difficulty: Easy · Time: 15 minutes · Cost: DIY plus gold hair accessories (a few dollars)
22. Effortless Loose Waves
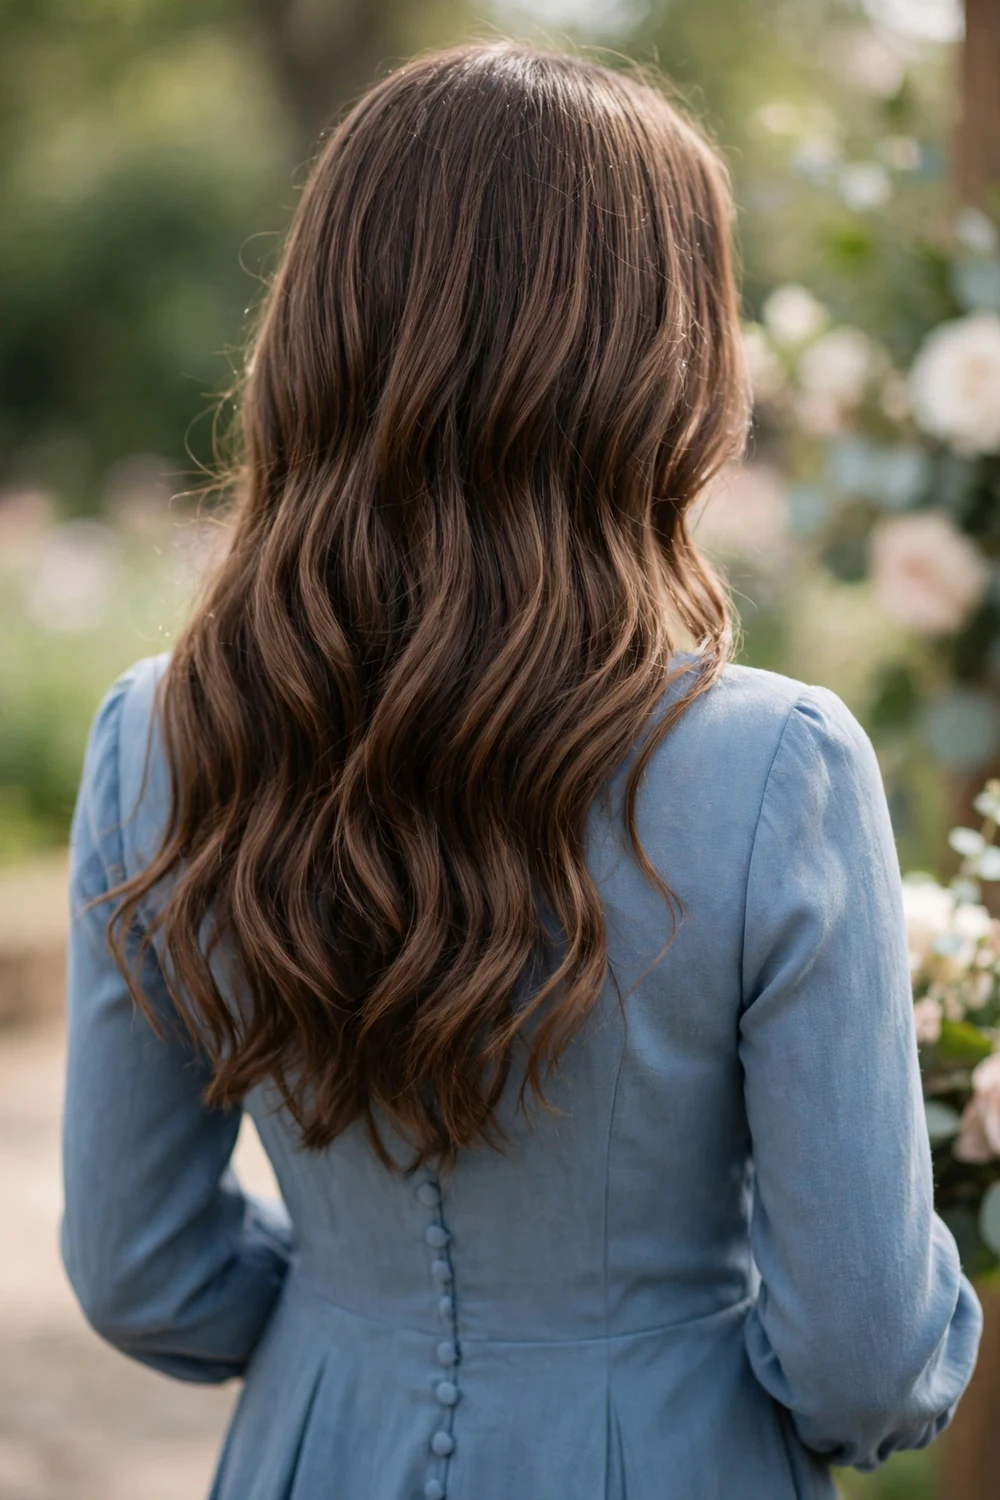
Sometimes the simplest choice works best: healthy, glossy waves worn down. Create loose bends with a large-barrel iron, always over heat protectant, brush through for softness, and finish with shine spray. The key is intention: the waves should look styled, not slept-in, so take care with the ends and keep the parting clean.
Try this: curl away from the face on both sides for an open, face-brightening effect in photos.
Difficulty: Easy · Time: 20 minutes · Cost: DIY with a curling iron and shine spray
For more polished down-styles that work at formal events, explore our prom hairstyle ideas for extra wave and curl inspiration.
23. Satin Ribbon Low Ponytail
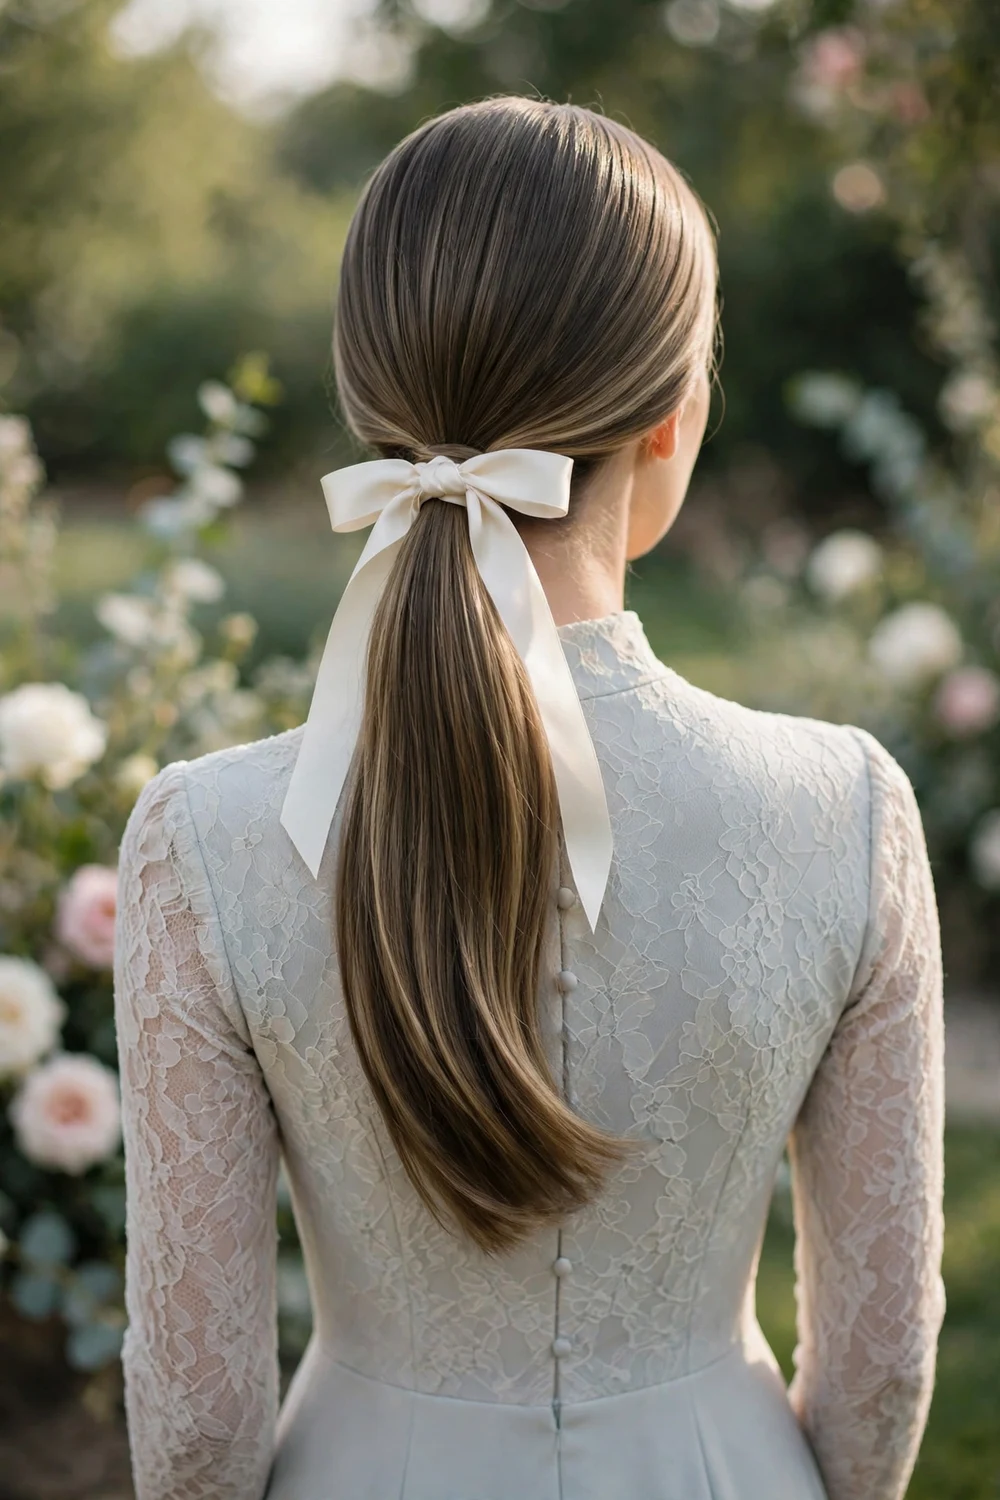
A sleek low ponytail tied with a satin ribbon bow is quietly romantic and very current. Choose ribbon in the wedding’s accent color for a coordinated look, or classic ivory for timelessness. It is quick, and it photographs well in getting-ready shots. Cut the ribbon ends on a diagonal so they do not fray, and tie the bow over the elastic rather than replacing it, since ribbon alone rarely holds all day. Double-sided tape under the bow keeps it from sliding down the ponytail.
Try this: curl the ponytail ends softly so the ribbon bow sits against a finished, wavy tail.
Difficulty: Easy · Time: 10 minutes · Cost: DIY (satin ribbon costs just a few dollars)
24. Retro-Inspired Low Roll
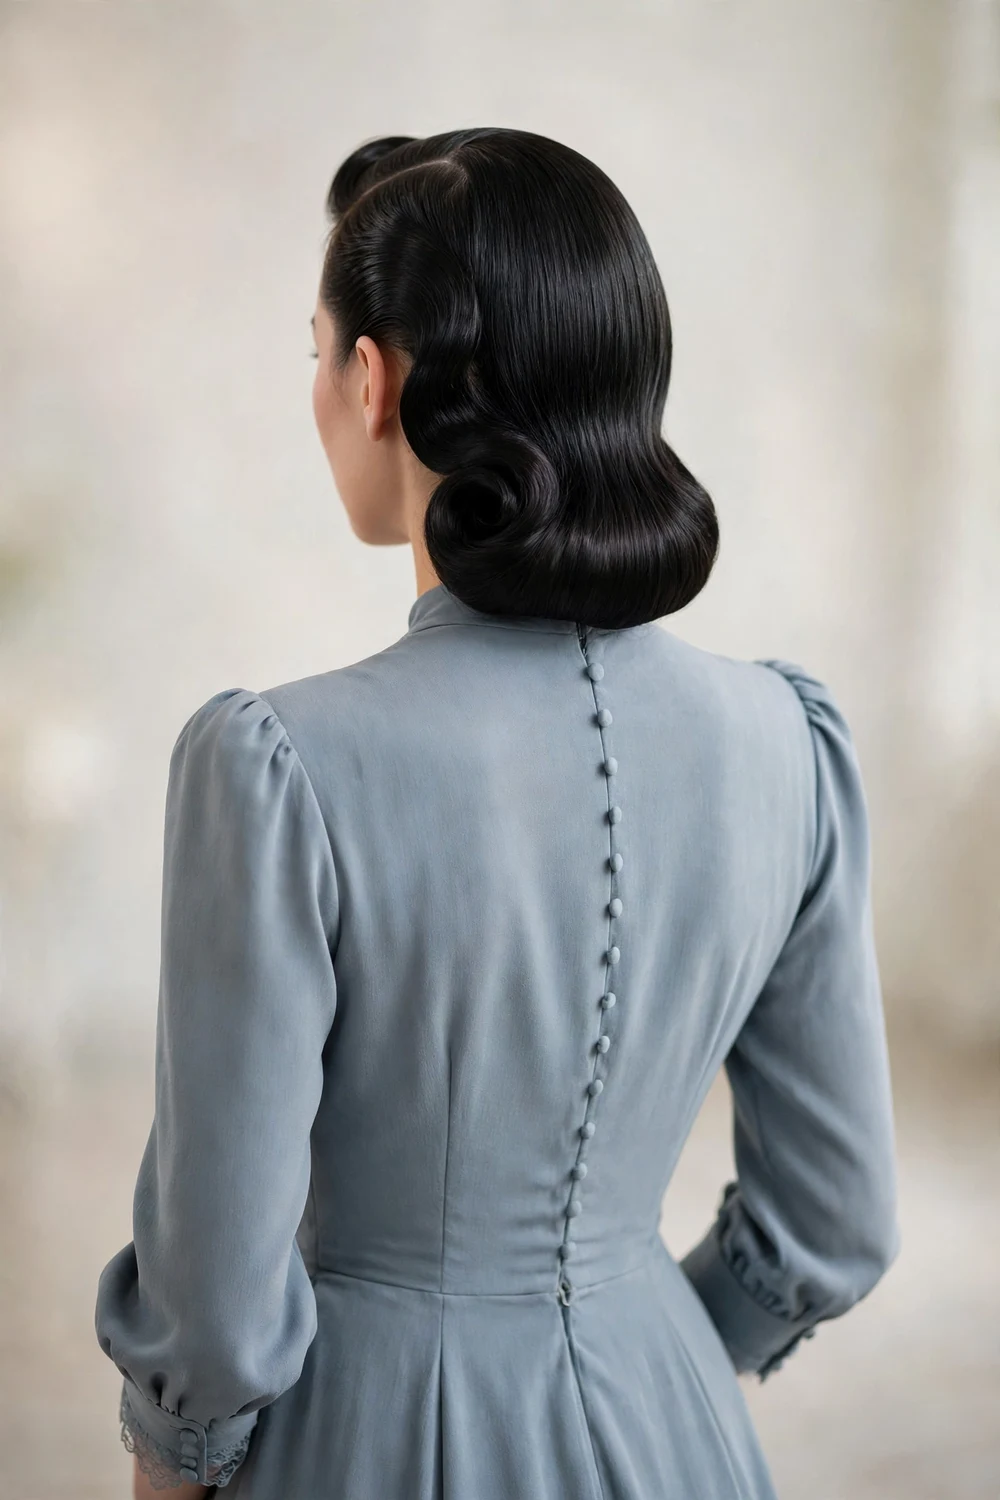
Inspired by 1940s glamour, this style rolls the hair under into a smooth, sculpted shape at the nape, a vintage Gibson roll. It is polished, unusual, and incredibly photogenic; pair with a deep side part and bold lip, or keep makeup soft. On a budget, a simpler low roll with a deep side part captures the same mood with basic pinning skills. Smooth each section with a brush before rolling so the final shape has no bumps, and pin from underneath in a crisscross pattern.
Try this: backcomb the section lightly before rolling for extra fullness in the finished roll.
Difficulty: Moderate to advanced · Time: 30 minutes · Cost: Stylist recommended for the smoothest roll ($70–$120)
25. Vintage Hollywood Waves
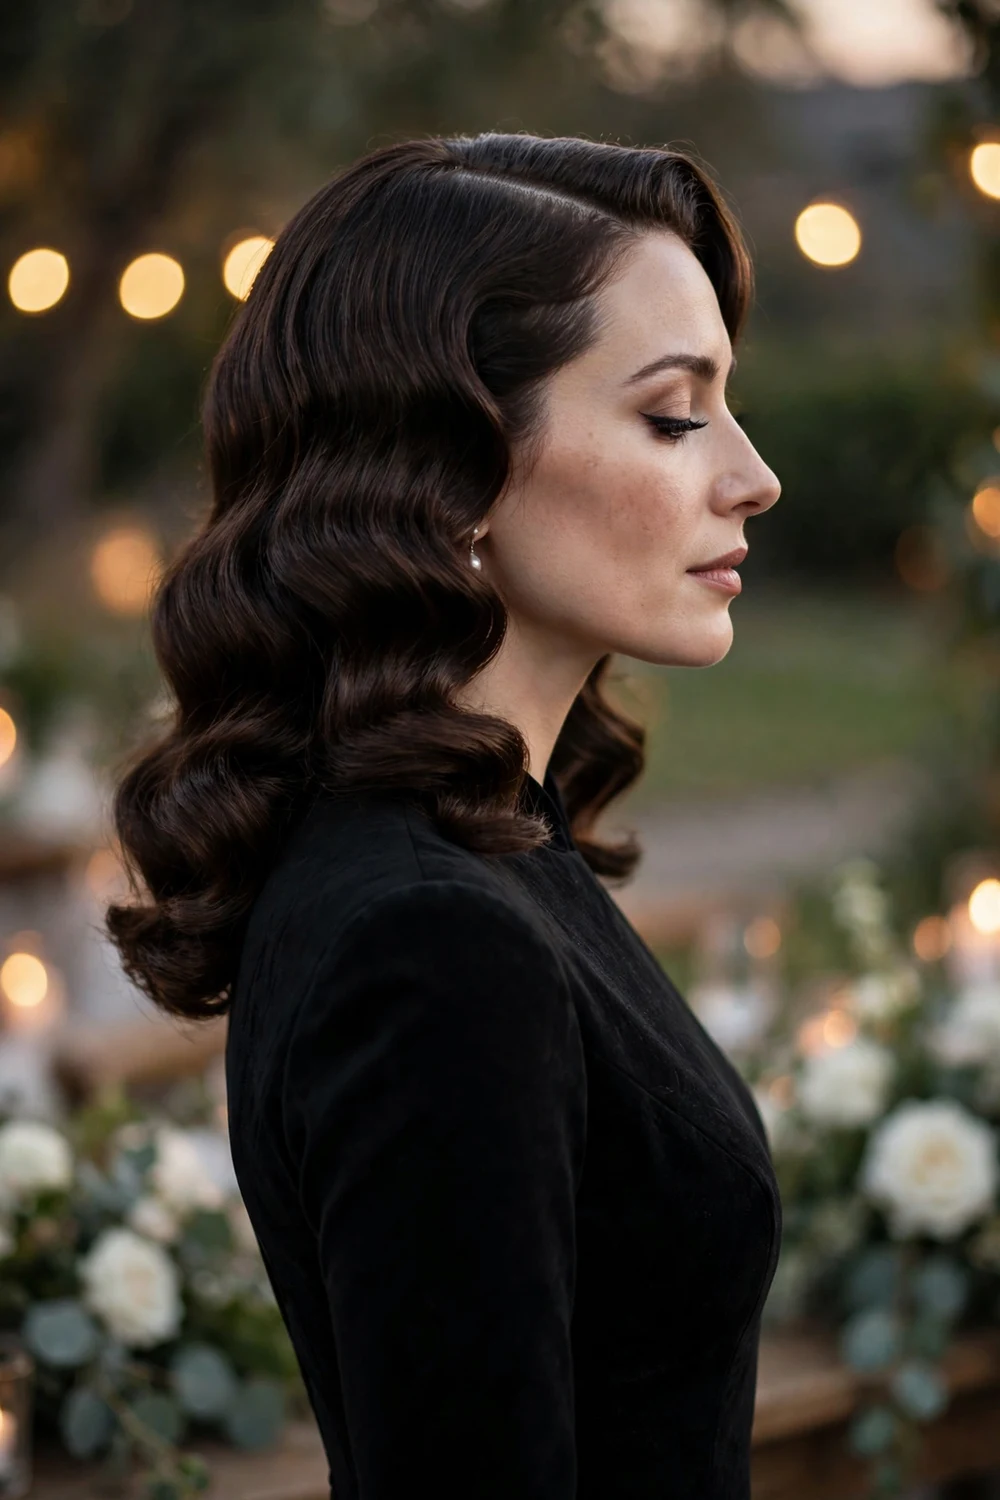
Deep side part, sculpted glossy waves, old-Hollywood drama. Set the waves with clips while they cool for maximum definition, then brush through gently. This suits black-tie weddings, especially with a dramatic neckline. Apply heat protectant before curling every section, and curl all sections in the same direction so the waves merge into one continuous pattern. Shine spray at the end gives the glossy finish that makes this style read as formal rather than everyday.
Try this: use a 1.25-inch iron for the most classic wave size, which suits most face shapes.
Difficulty: Moderate · Time: 35 minutes · Cost: DIY with a curling iron and heat protectant (stylist typically $60–$100)
26. Low Knotted Bun
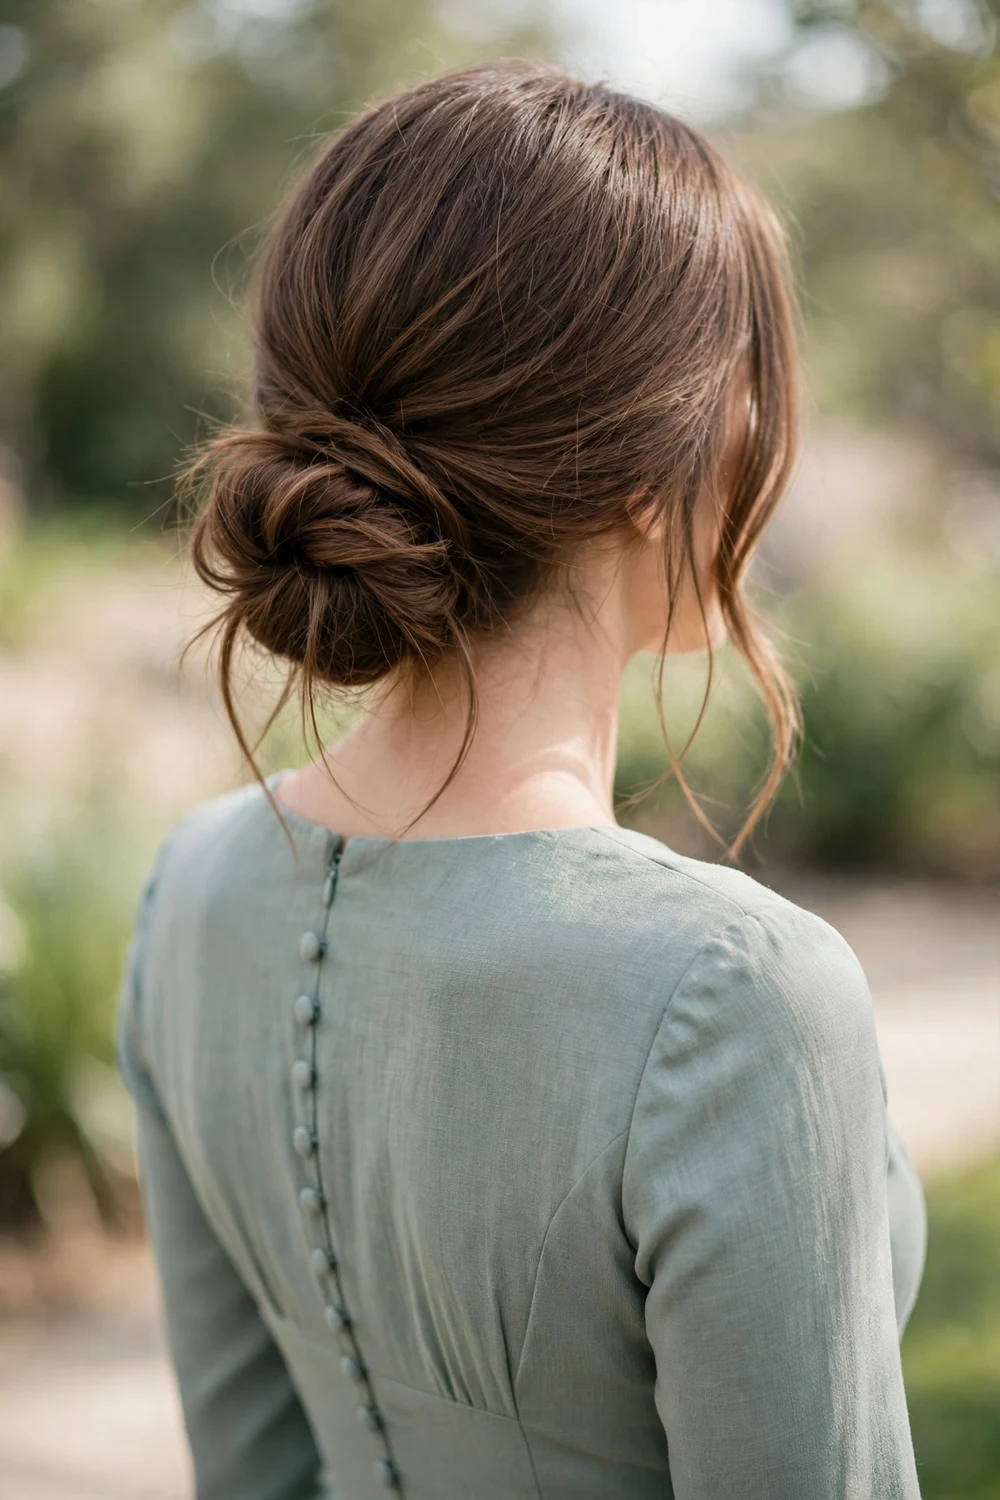
Tie your hair into a loose knot at the nape and pin the ends underneath. The knotted technique creates lovely natural folds with almost no skill required. Modern and editorial yet effortless; texturizing spray beforehand adds grip. This works best on medium to long hair with some texture, since very silky hair can slip out of the knot. Loop the hair through twice for a fuller knot, and pull the edges gently outward after pinning for a soft, lived-in finish.
Try this: leave the very ends out of the second loop for a chic, undone tail peeking from the knot.
Difficulty: Easy · Time: 15 minutes · Cost: DIY with pins and texture spray
27. Double Dutch Braids into a Low Ponytail
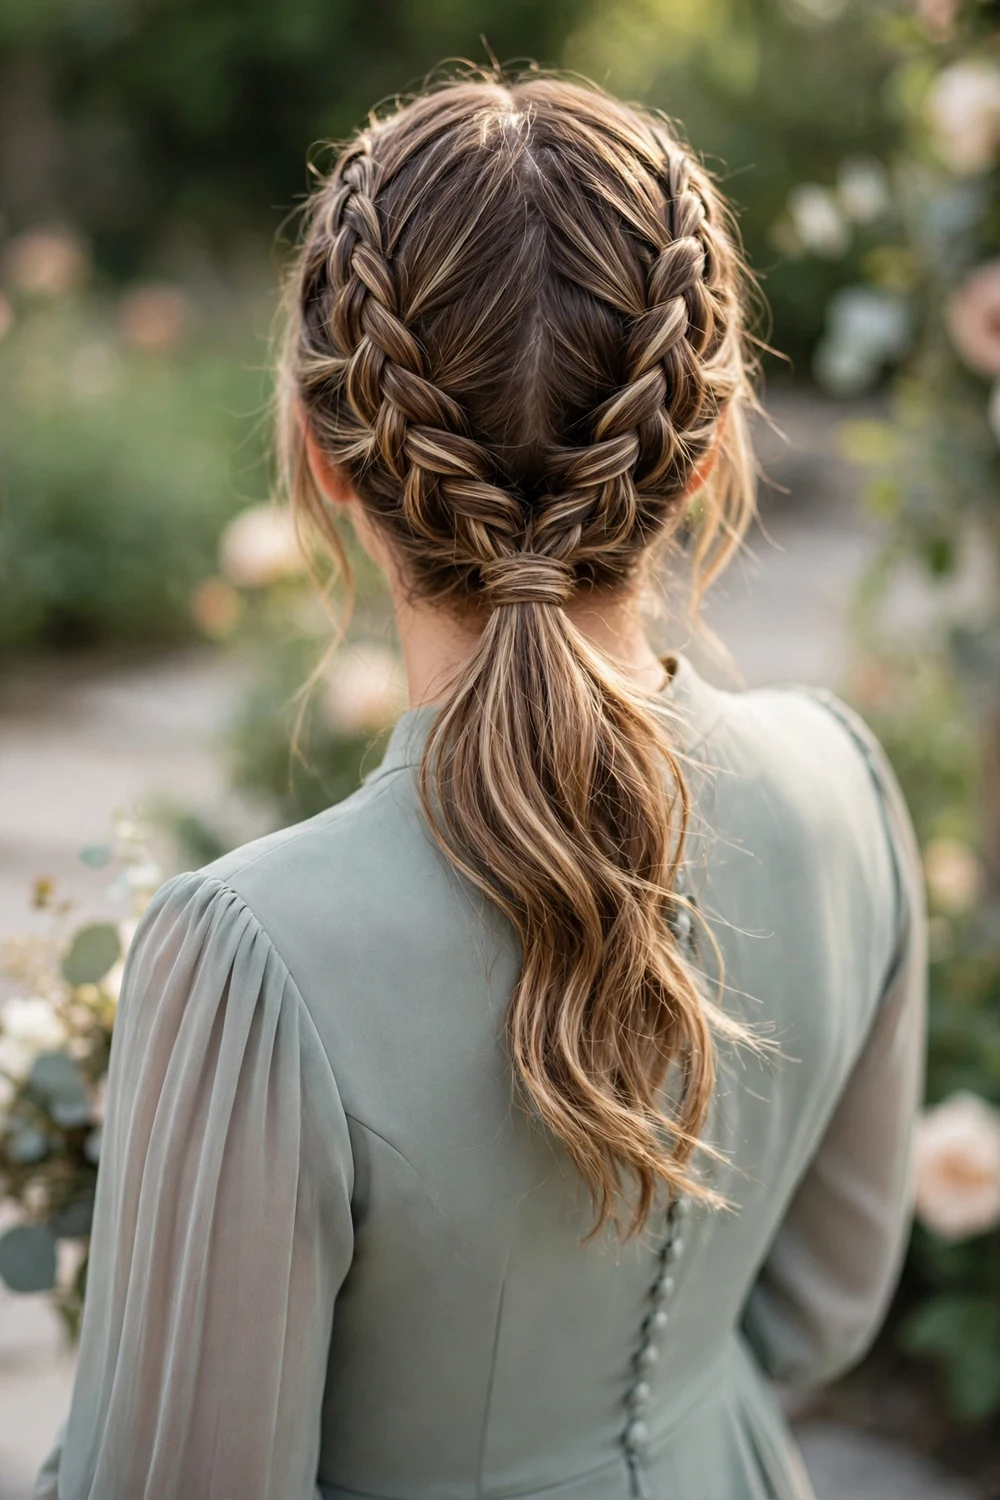
Braid two underhand Dutch braids from your hairline to the nape, since they sit raised for lovely crown texture, then join them into a soft low ponytail. Comfortable, secure, and full; pancake the braids gently for extra volume. Keep the braids snug at the hairline but looser toward the nape so the style stays comfortable for hours. Curl the ponytail ends over heat protectant for a finished look that matches the polished braids above.
Try this: weave a thin ribbon into one braid for a subtle pop of the wedding color.
Difficulty: Moderate · Time: 25 minutes · Cost: DIY with elastics and pins
Comparison Table: All 27 Bridesmaid Hairstyles
| Style | Best for | Difficulty | Time |
|---|---|---|---|
| Polished Low Bun | Minimalist gowns | Easy to moderate | 20 min |
| Garden Chignon with Blooms | Garden and spring weddings | Moderate | 30 min |
| Woven Braid Low Bun | Thick, long hair | Moderate | 30 min |
| Half-Up Curls with Pearl Clip | Any neckline | Easy | 20 min |
| Airy Textured Low Bun | Romantic, relaxed weddings | Easy | 20 min |
| Sculpted High Twist Bun | Open-back dresses | Moderate to advanced | 30 min |
| Twisted Low Ponytail | Comfort all day | Easy to moderate | 20 min |
| Asymmetric Side Bun | One-shoulder necklines | Moderate | 25 min |
| Voluminous Half-Up Waves | Glamorous feel | Moderate | 25 min |
| Pinned Curls Updo | Natural curls | Moderate | 30 min |
| Crystal-Pinned Braided Chignon | Evening receptions | Moderate to advanced | 35 min |
| Bohemian Crown Braid | Outdoor, rustic weddings | Moderate | 25 min |
| Sleek Half-Up Ponytail | Modern, clean looks | Easy | 15 min |
| Fishtail Accent Half-Up | Delicate detail lovers | Moderate | 20 min |
| High Braided Bun | Windy outdoor ceremonies | Moderate | 25 min |
| Wrapped Low Ponytail | Satin gowns | Easy to moderate | 20 min |
| Timeless Sleek Chignon | Formal, black-tie weddings | Moderate | 25 min |
| Soft Rope-Twist Low Bun | Beginners wanting texture | Easy to moderate | 20 min |
| Pearl Vine Low Twist | Understated elegance | Easy to moderate | 20 min |
| Pearl-Scattered High Bun | Showcasing earrings | Easy | 15 min |
| Gilded Low Bun | Fall and candlelit weddings | Easy | 15 min |
| Effortless Loose Waves | Mixed hair types in one party | Easy | 20 min |
| Satin Ribbon Low Ponytail | Coordinated color themes | Easy | 10 min |
| Retro-Inspired Low Roll | Vintage themes | Moderate to advanced | 30 min |
| Vintage Hollywood Waves | Black-tie glamour | Moderate | 35 min |
| Low Knotted Bun | Modern, editorial feel | Easy | 15 min |
| Double Dutch Braids Ponytail | Secure all-day hold | Moderate | 25 min |
How to Choose a Bridesmaid Hairstyle That Works for Everyone
A bridal party rarely shares one hair type, so the smartest approach is a style family, not identical clones. Use this guide:
| Wedding vibe | Hairstyles that fit |
|---|---|
| Formal / black-tie | Sleek chignons, sculpted waves, crystal-pinned updos |
| Garden / outdoor | Loose waves, floral chignons, boho braids |
| Rustic / boho | Crown braids, textured buns, fishtail accents |
| Modern / minimalist | Sleek ponytails, polished buns, clean center parts |
Consider dress necklines too: updos flatter high necks, while hair down or half-up softens strapless gowns. For shorter cuts, these bridal hairstyles for short hair work wonderfully for pixies and bobs.
For pinning techniques at shorter lengths, see these short hair updos designed for proms and weddings.
Bridesmaid Hair Mistakes to Avoid
- Skipping the trial. Every bridesmaid should trial her style before the wedding. Morning-of surprises cause delays for the whole party.
- Ignoring the bride’s vision. Check accessories, formality, and overall vibe with the bride first. Your style should harmonize, not compete.
- Choosing something you cannot wear for 10+ hours. If it pulls, slips, or needs constant fixing at home, it will not survive the wedding day.
- Forgetting weather. Outdoor summer weddings demand extra hold. Humidity melts curls fast, so lean toward updos and braids.
- Over-accessorizing. One accessory (pearls, a vine, a ribbon) is plenty. Competing accessories across the bridal party look chaotic in photos.
Frequently Asked Questions
Should all bridesmaids have the same hairstyle?
Not necessarily. Many parties choose a style family, everyone in a low updo, say, or everyone with soft waves, so each bridesmaid is flattered while the group still looks cohesive in photos.
Who pays for bridesmaid hair?
It varies. Traditionally, bridesmaids cover their own hair and makeup, but if the bride requires professional styling, she often covers the cost. Discuss it openly with the bride early so everyone can budget comfortably.
How do I choose a bridesmaid hairstyle for an outdoor wedding?
Prioritize security: updos, braids, and twists withstand wind and humidity far better than loose curls. Use strong-hold products, extra pins, and trial the style on a similarly warm day.
Should bridesmaids wear updos or wear their hair down?
Both work well. Updos photograph elegantly, stay secure for hours, and suit formal weddings; hair down feels romantic and suits relaxed or outdoor celebrations. Match the choice to the wedding’s formality and your dress neckline.
How early should bridesmaids book hair trials?
Book trials two to three months before the wedding, leaving time to adjust the style, coordinate accessories, and plan a calm wedding-morning timeline.
Final Thoughts
The right bridesmaid hairstyle makes you feel confident, photographs well, and lets the bride shine. Whether you choose a timeless chignon, romantic braids, or effortless waves, pick the style that suits your hair, your dress, and the celebration ahead, then enjoy every moment of the day.
For everyday hair inspiration beyond wedding season, start at our homepage and browse the full collection of hairstyle guides.

