


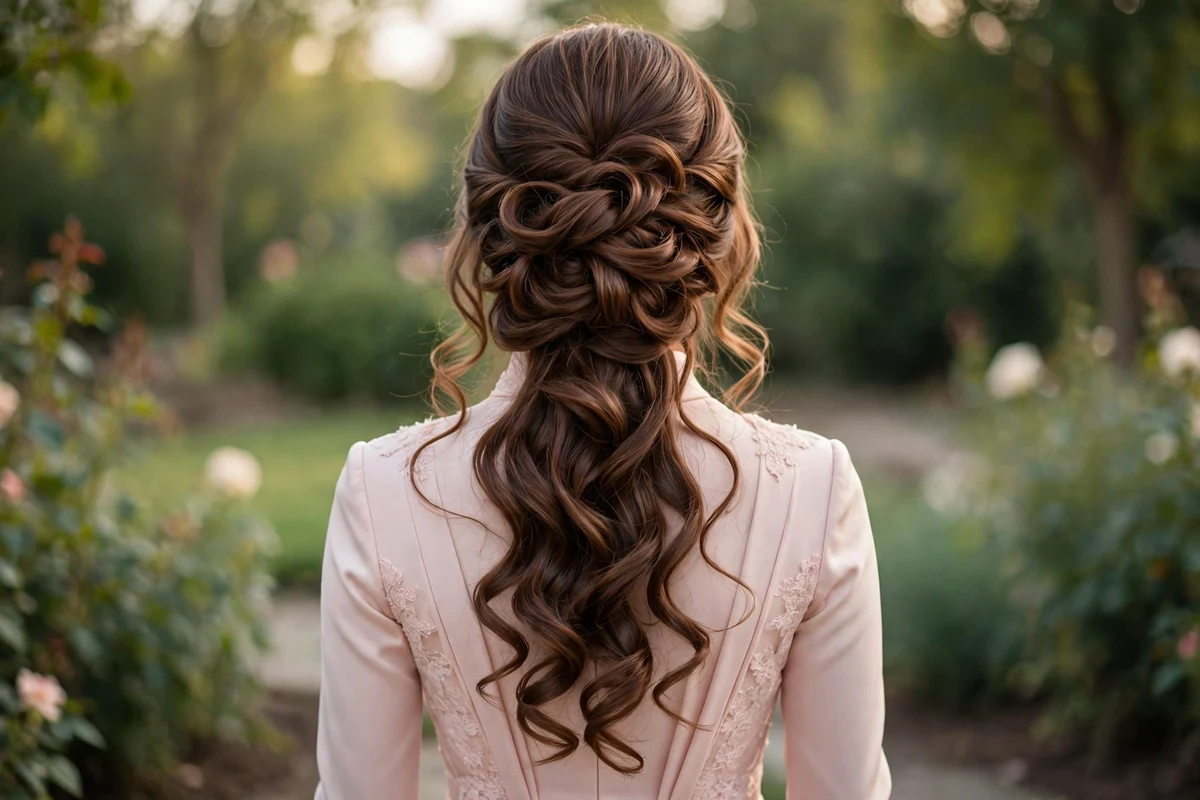
Prom night is one of those evenings you will remember for years, the dress, the photos, the dance floor, and your hairstyle ties the whole look together. The right prom hairstyle complements your dress, survives hours of dancing, and still feels like you.
After reviewing this year’s most-saved prom looks and salon trends, one thing is clear: the best prom hairstyles are not necessarily the most complicated. The 23 ideas below cover every hair length and skill level, each with a difficulty rating and time estimate so you can decide whether to DIY or book a stylist. Do a trial run at least a week before prom to sort out timing and products without big-day pressure.
Quick Takeaways
- Match your hairstyle to your dress neckline: updos for high necks, flowing styles for strapless gowns.
- Do a full trial run at least one week before prom, using the products you plan to wear.
- Always use heat protectant before curling irons, flat irons, or blow dryers.
- Second-day hair, or texture spray, holds pins, braids, and updos far better than freshly washed hair.
- Pick a style you can dance and take photos in for hours without constant fixing.
1. Polished High Bun with Curtain Tendrils
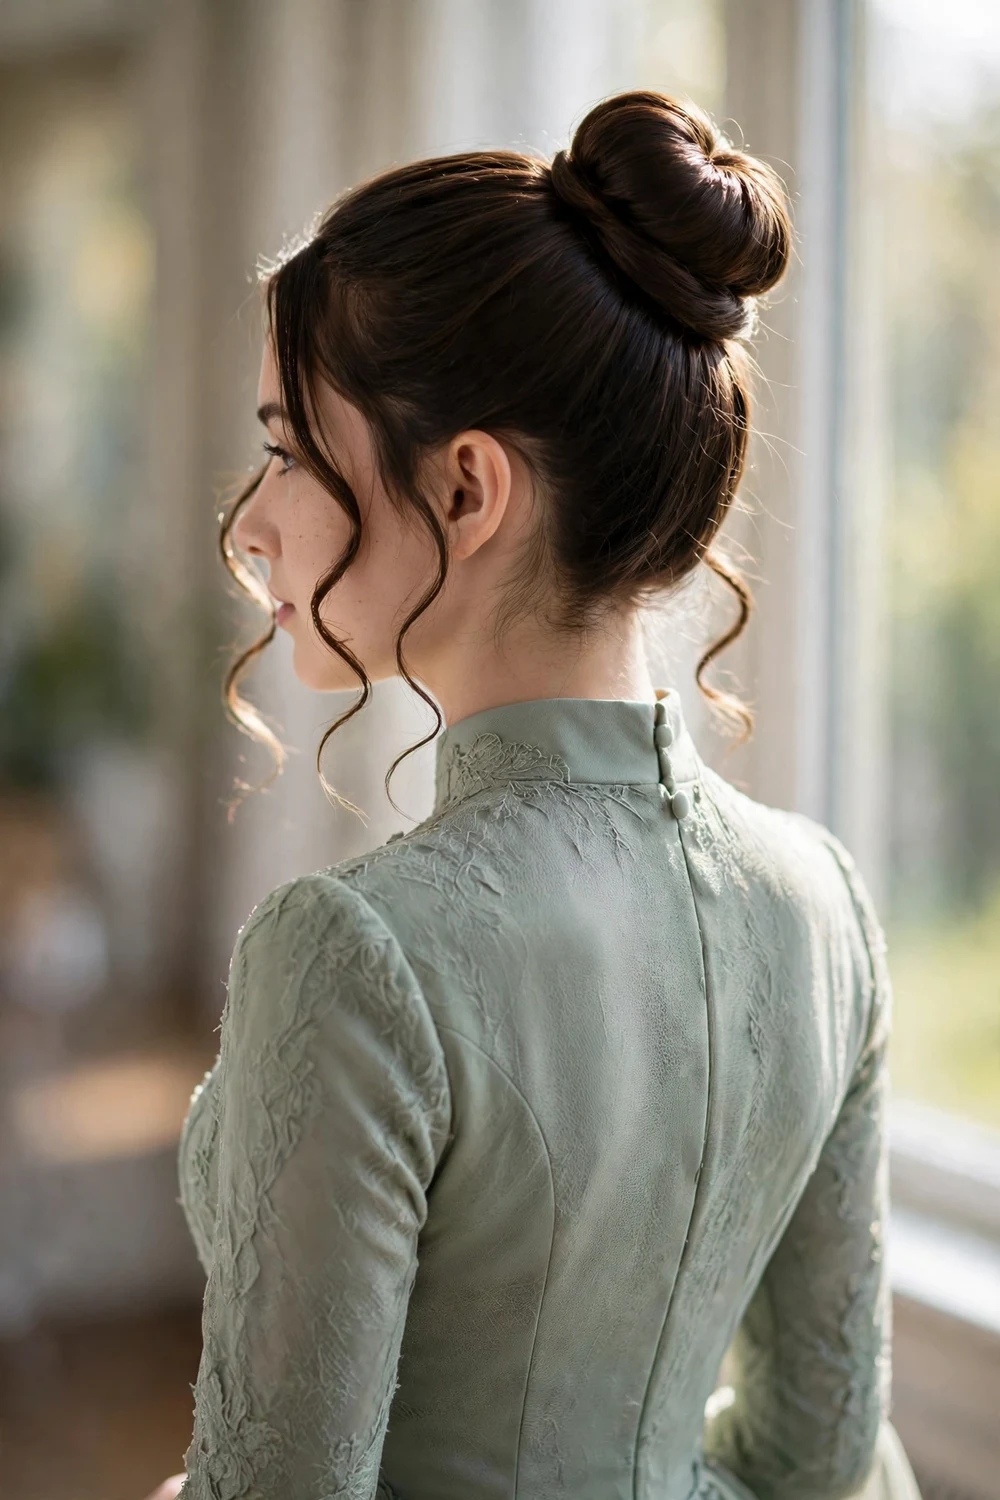
Smooth your hair into a high bun at the crown and pin it securely, leaving two soft tendrils loose at the front and curling them gently away from your face. The tendrils keep the look romantic rather than severe, and the lifted bun shows off statement earrings. A mist of flexible-hold hairspray tames flyaways without stiffness. Apply heat protectant before curling the tendrils, and place the bun slightly back from the hairline so it does not pull all evening.
Try this: wrap a small section of hair around the bun base to hide the pins for a seamless finish.
Difficulty: Easy to moderate · Time: 20 minutes · Cost: DIY with bobby pins and hairspray (salon version typically $50–$90)
2. Romantic Low Chignon
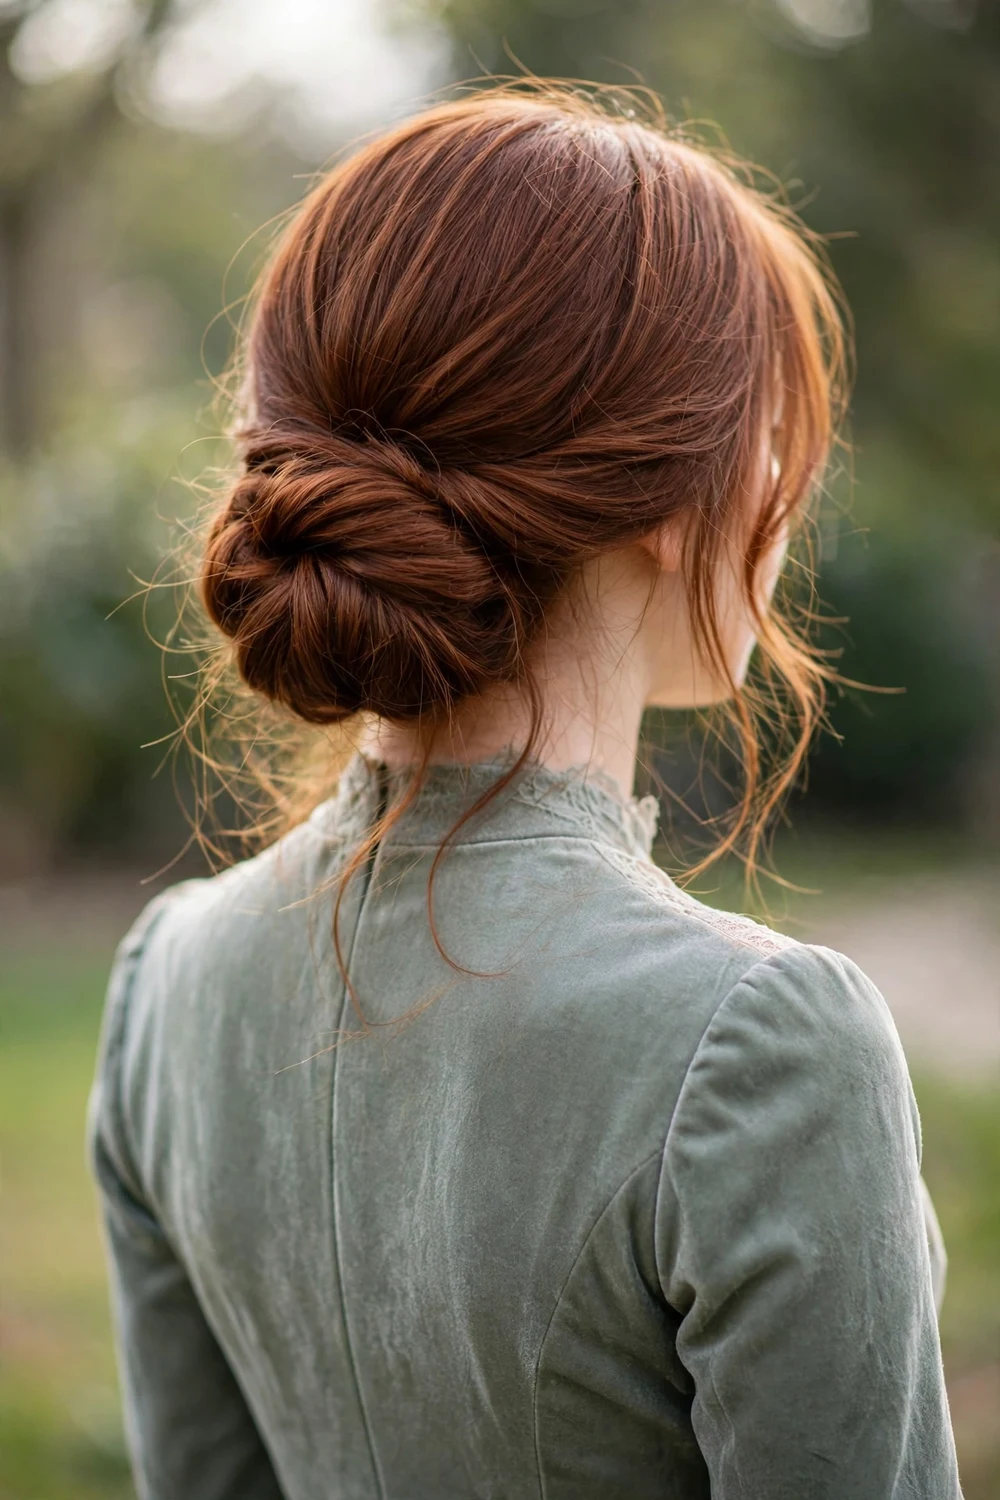
A chignon is a neat bun pinned low at the nape of the neck. Kept slightly loose, it feels modern rather than stuffy. Twist your hair into a soft low roll, pin it in place, and let a few wisps escape around your face. It keeps hair off your shoulders, making it ideal for gowns with detailed backs or necklines. Roll the hair in sections rather than all at once so the chignon stays even, and anchor each section with crossed pins for a hold that lasts through the last dance.
Try this: leave the wisps slightly longer in front so they soften, not hide, your cheekbones in photos.
Difficulty: Moderate · Time: 25 minutes · Cost: DIY-friendly with pins and light hairspray (salon styling typically $60–$100)
3. Classic Hollywood Waves
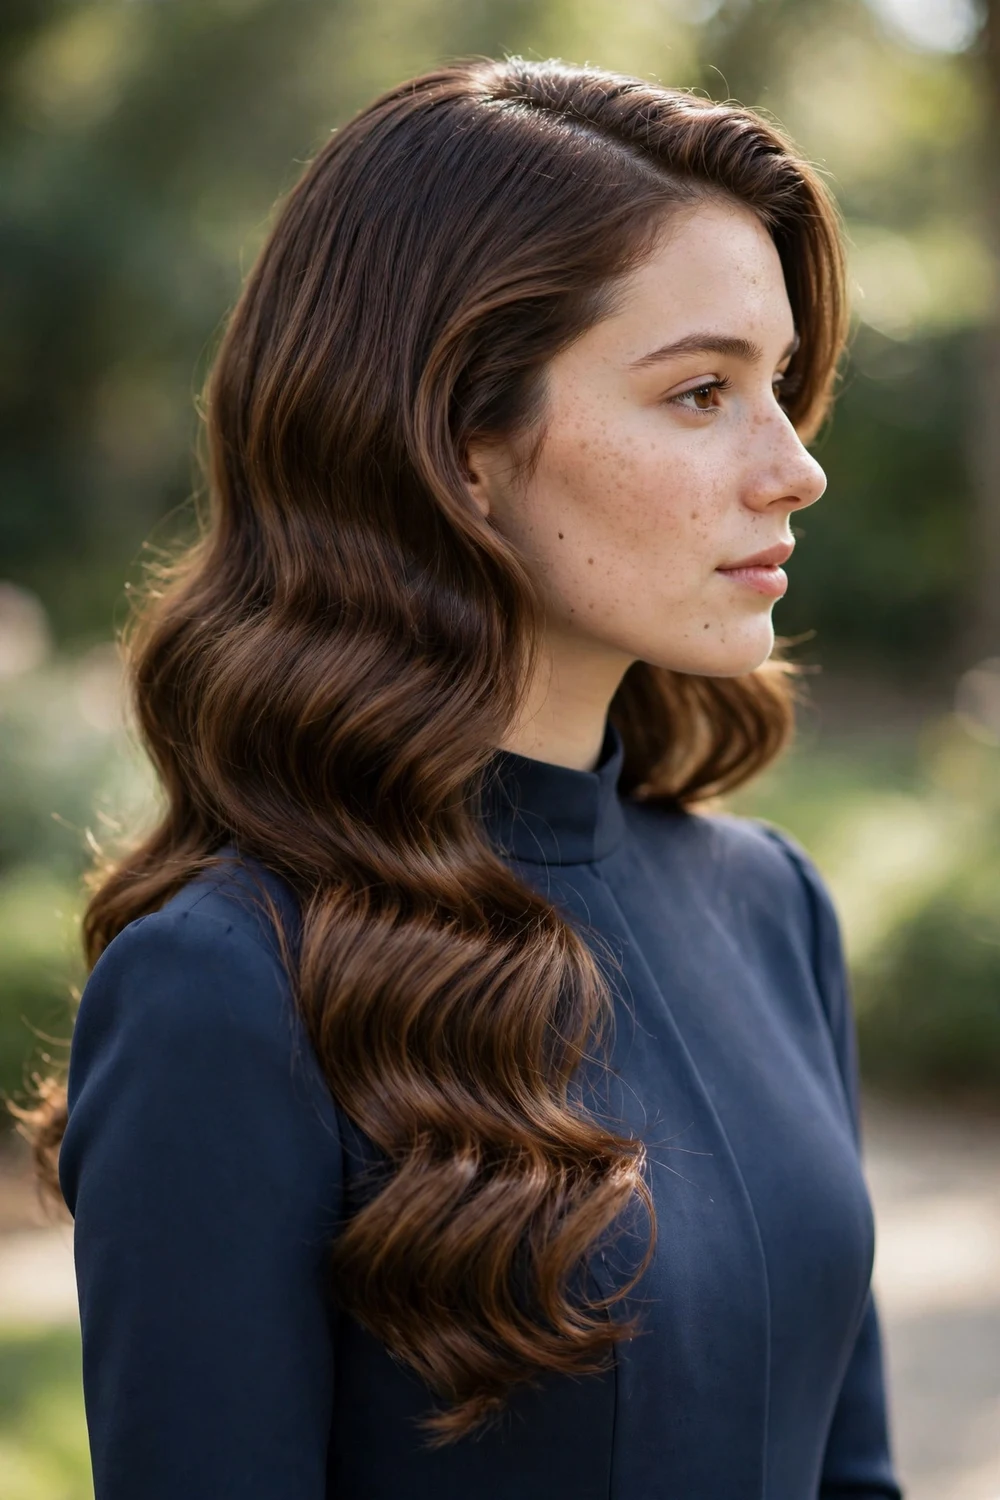
Curl uniform sections in the same direction with a medium-barrel iron, let each curl cool fully, then brush through gently to form smooth, sculpted waves. Always apply heat protectant first, since it prevents damage and helps the style hold. A deep side part adds extra old-Hollywood drama. Clip each wave in place while it cools for the most defined finish, then remove the clips and brush through with a soft-bristle brush for that continuous, glossy pattern.
Try this: finish with a shine spray rather than hairspray for the reflective, camera-ready gloss.
Difficulty: Moderate · Time: 35 minutes · Cost: DIY with a curling iron and heat protectant (salon styling typically $50–$90)
4. Soft Half-Up, Half-Down Waves
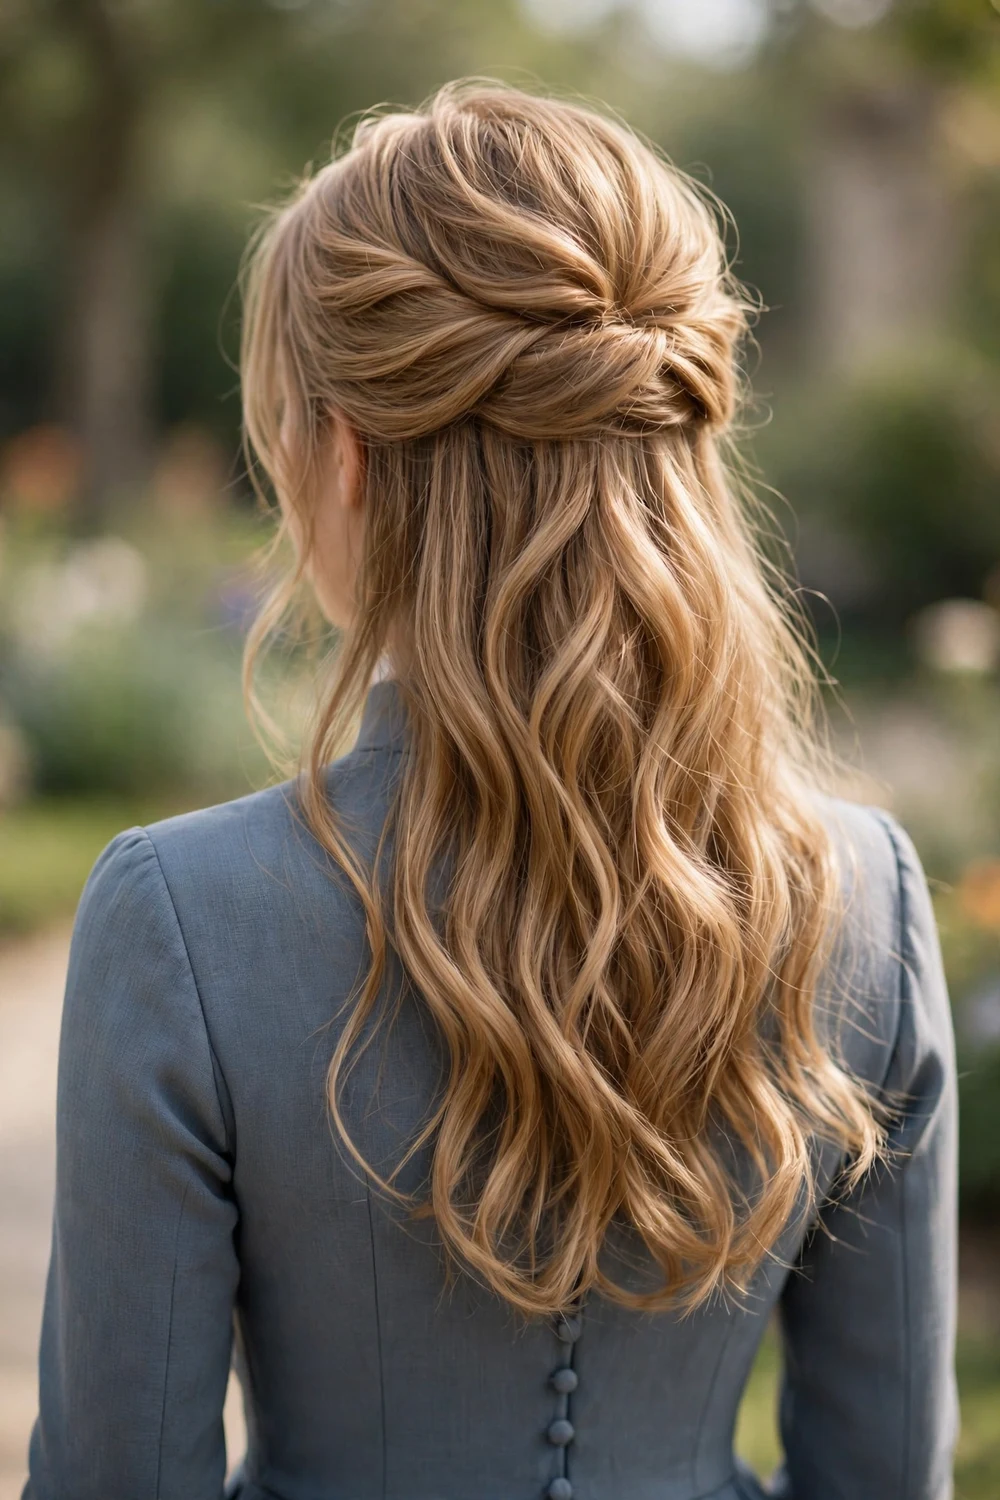
Pull the top section back with a little lift at the crown and secure it, letting soft waves fall over your shoulders. It keeps hair out of your face for photos and dancing while showing off your length. Finish with flexible-hold hairspray for bounce. Backcomb the crown lightly before securing the top half so the style has shape from the side.
Try this: secure the top section with a small clear elastic, then hide it with a decorative clip.
Difficulty: Easy · Time: 15 minutes · Cost: DIY with one elastic or a pretty clip
For more half-up inspiration beyond prom night, browse these half up half down hairstyles for parties, dates, and everyday wear.
5. Sleek High Ponytail
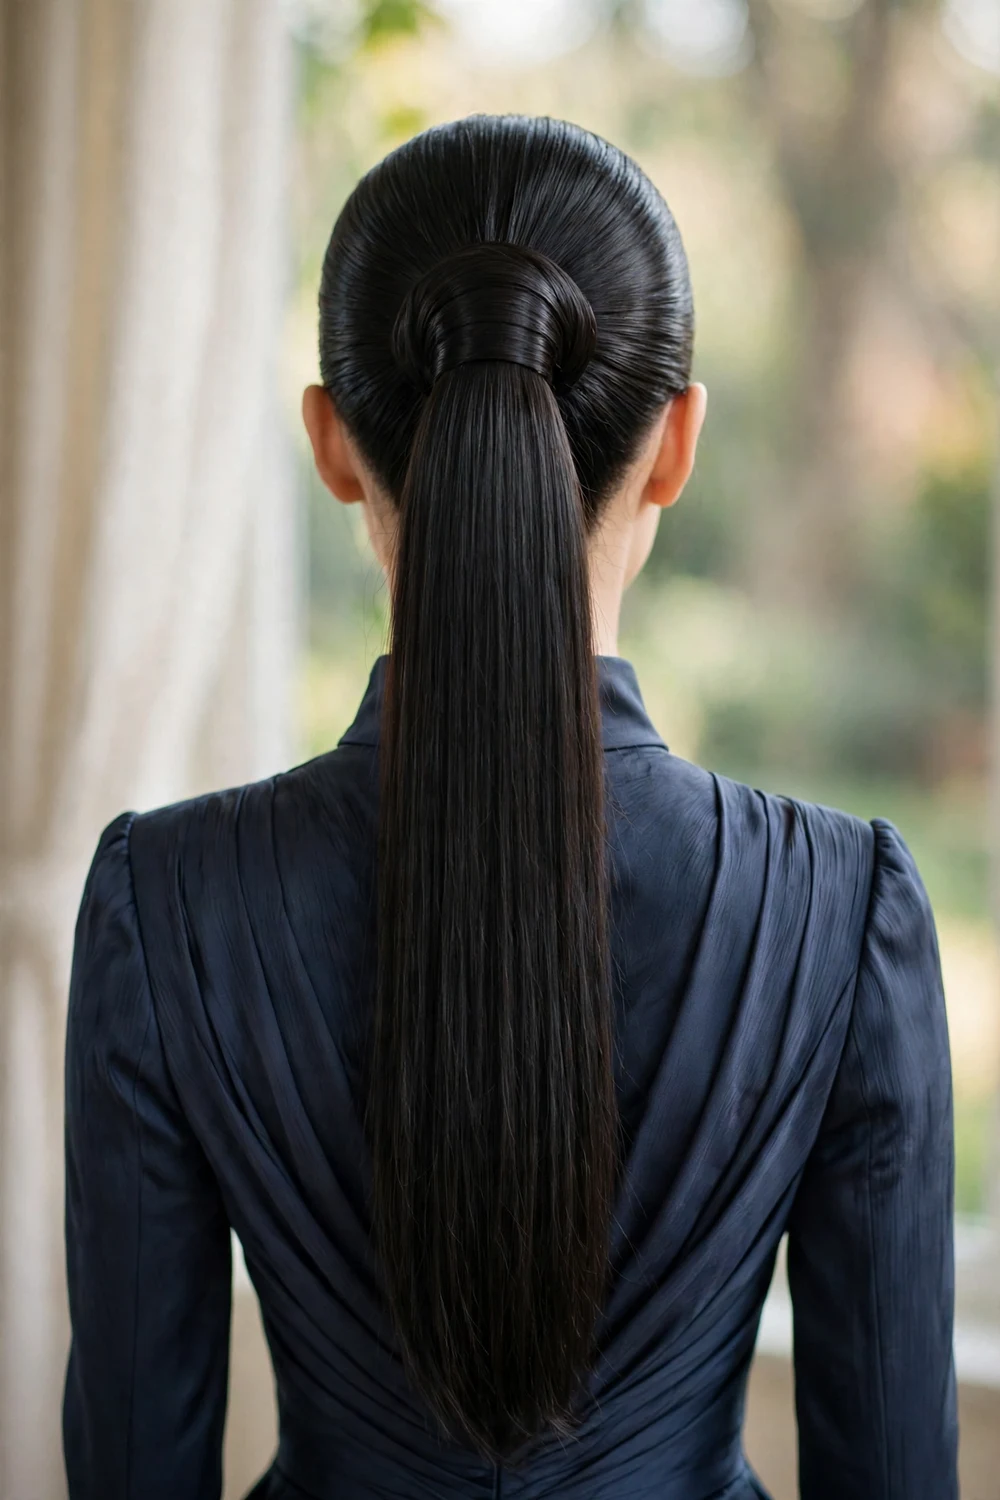
Brush your hair smooth into a high ponytail, secure it firmly, then wrap a small strand around the elastic to hide it. The result looks clean and expensive, and stays comfortable through hours of dancing. A smoothing serum on the lengths adds mirror-like shine for photos. Tilt your head back slightly while brushing the sides up so the ponytail sits high and centered, and use two elastics stacked for extra security on thick hair.
Try this: flat-iron the ponytail lengths after securing for the sleekest possible finish. Use heat protectant first.
Difficulty: Easy · Time: 10 minutes · Cost: DIY with a brush, elastic, and serum
6. Curled Low Ponytail with a Wrapped Base
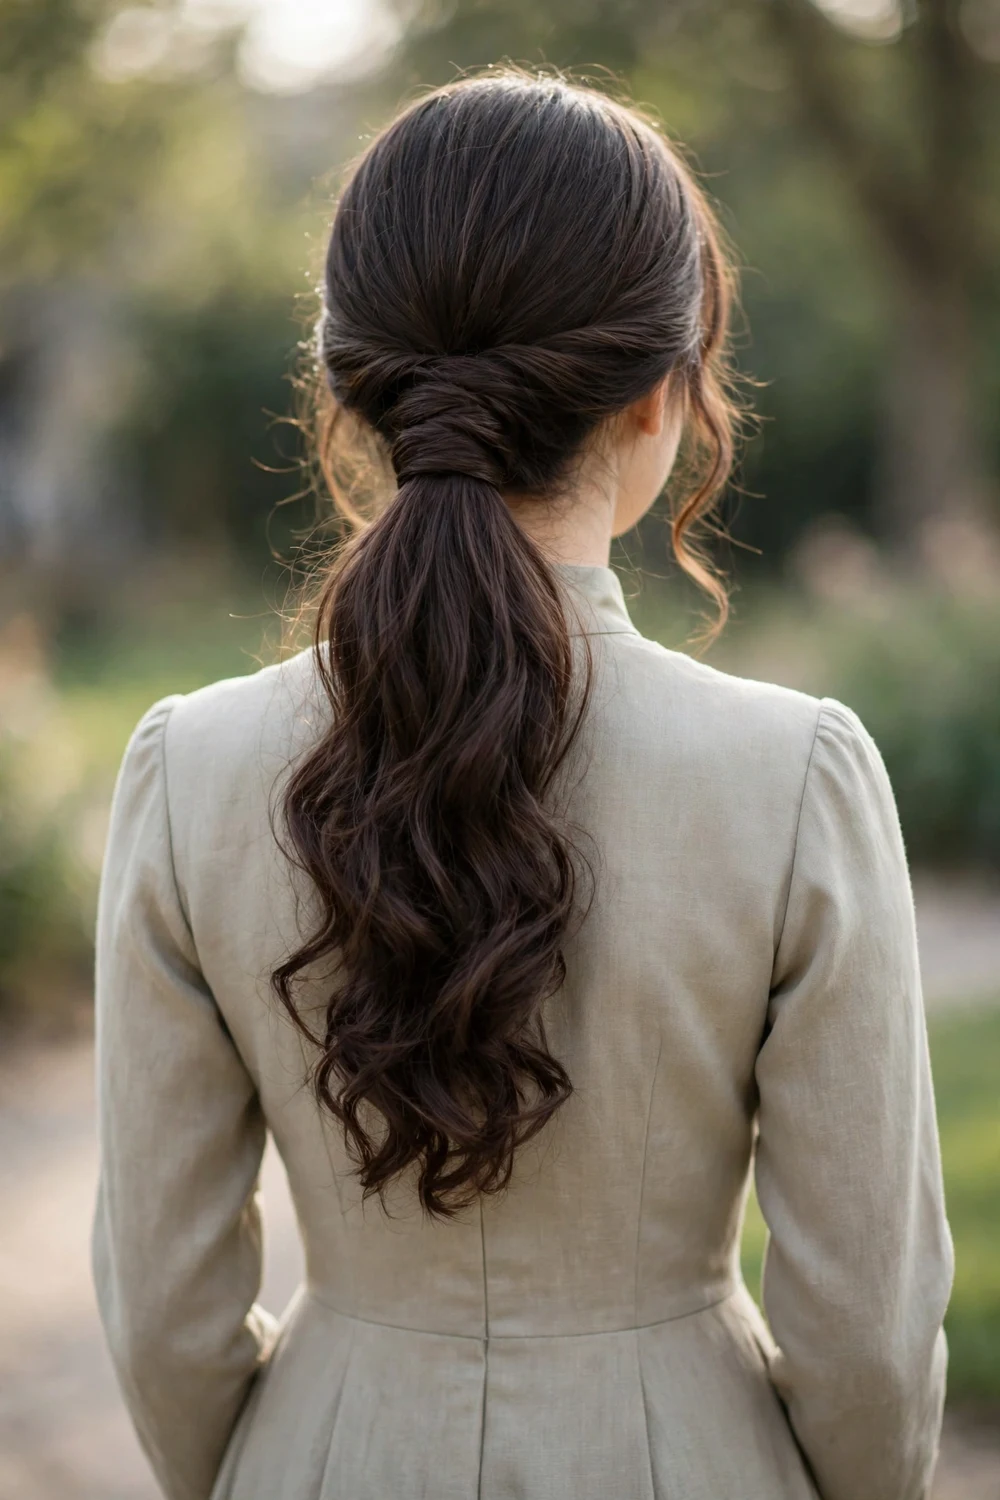
Tie your ponytail low at the nape, curl the ends loosely over heat protectant, then wind a section of hair around the elastic and pin it underneath. These two small upgrades make a basic pony feel intentional and polished. It pairs well with off-the-shoulder necklines. Keep the curls loose rather than tight ringlets so the style reads relaxed, and pin the wrapped strand from underneath so no pins show from the front or sides.
Try this: tease the crown lightly before tying the ponytail for a little lift at the back.
Difficulty: Easy · Time: 15 minutes · Cost: DIY with a curling iron and bobby pins
7. Side-Swept Loose Curls
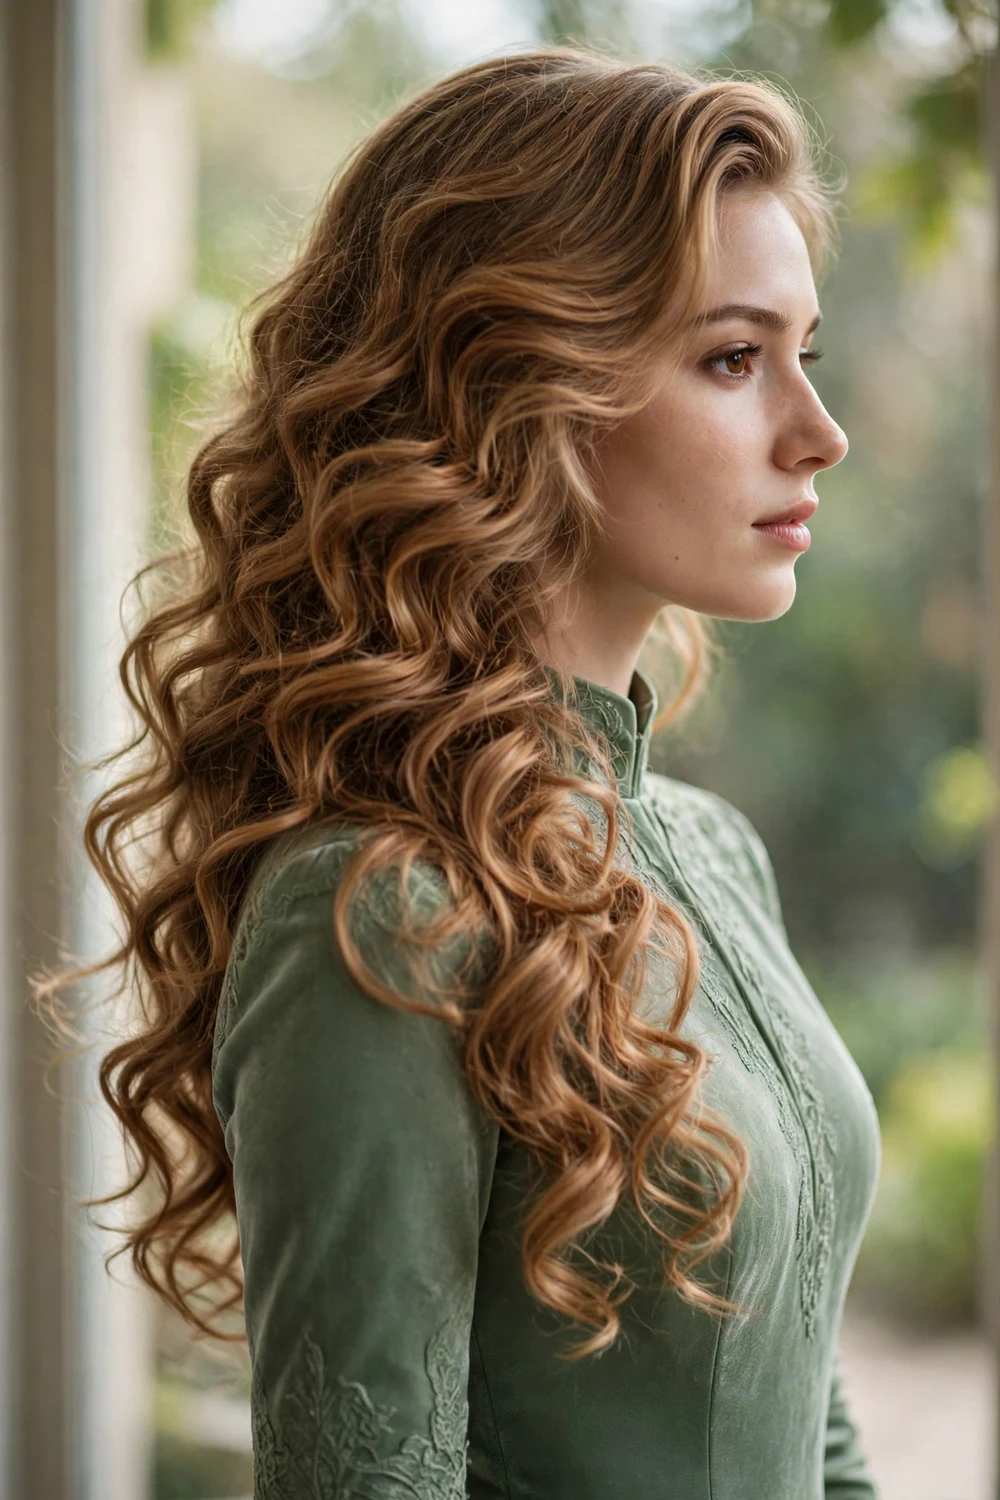
Curl your hair loosely, sweep everything over one shoulder, and pin discreetly at the nape so it survives the dance floor. The asymmetry photographs gorgeously and shows off a statement earring on the exposed side. Use heat protectant before curling and hide several pins underneath for real staying power. Place the pins in a fan pattern rather than a straight line so the swept hair cannot pivot loose, and choose pins that match your hair color so they disappear.
Try this: add a decorative comb above the pinned section for a jeweled detail on the bare side.
Difficulty: Easy to moderate · Time: 20 minutes · Cost: DIY with a curling iron and pins
8. Waterfall Braid with Loose Waves
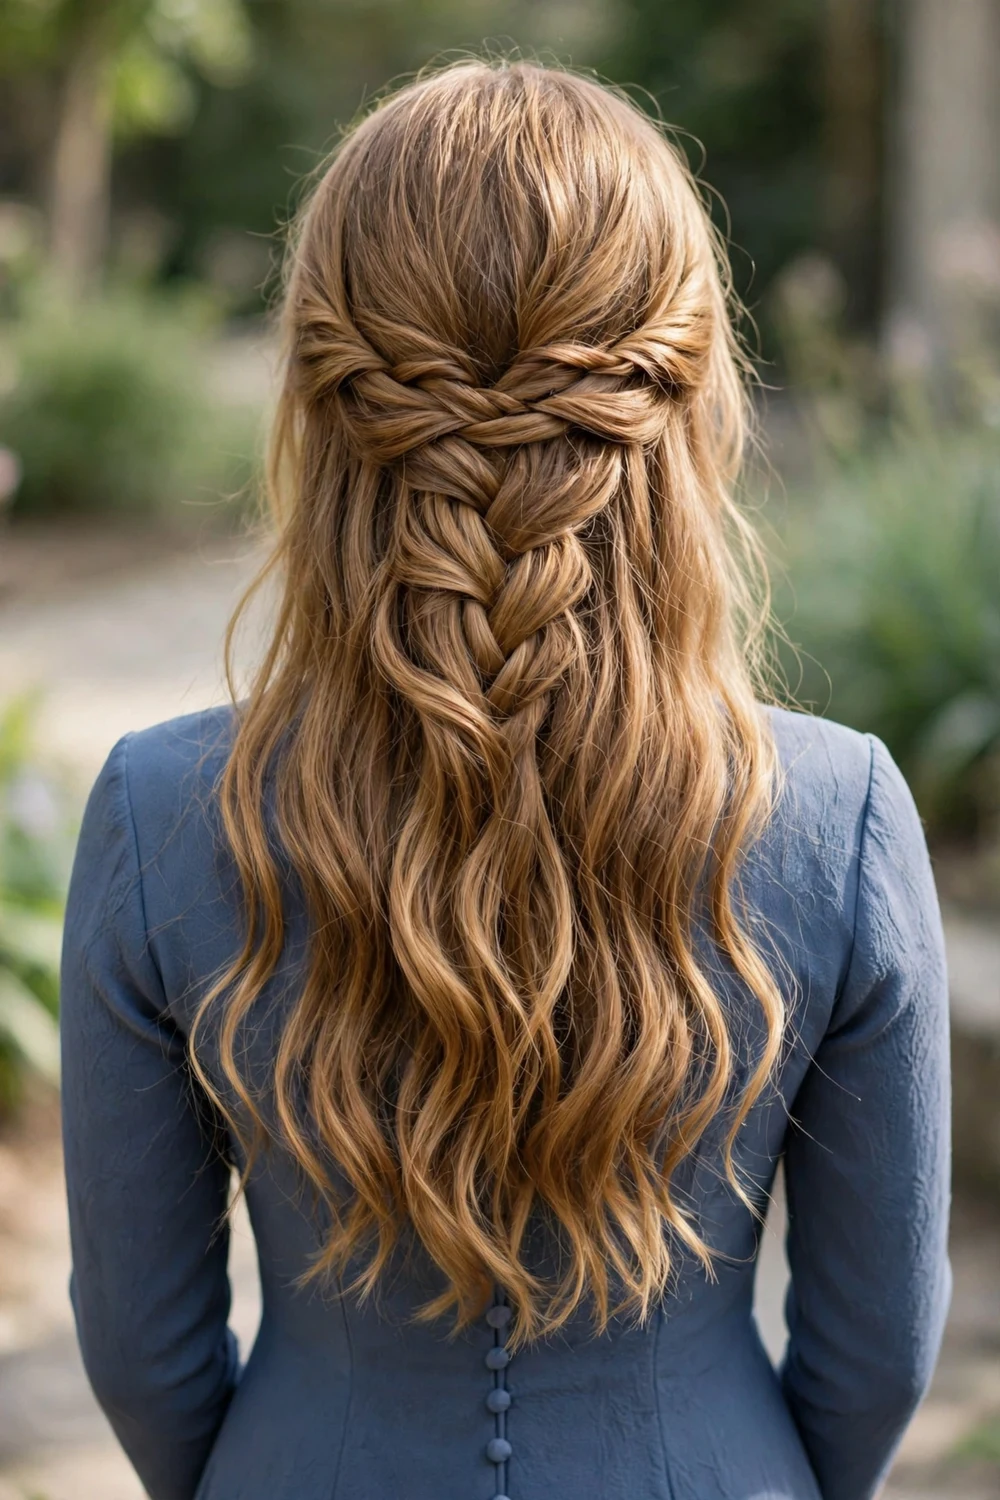
A waterfall braid drops strands as you go so sections cascade through the plait. Braid from one temple across the back into loose waves below. It looks intricate but uses a basic three-strand technique, so practice once beforehand, then gently tug the braid edges for fullness. The dropped strands are the whole effect, so do not pull them tight. Keep the braid itself snug against the head while letting the cascading pieces fall free for the prettiest contrast.
Try this: curl the cascading strands with a wand for waves that match the hair below the braid.
Difficulty: Moderate · Time: 25 minutes · Cost: DIY (practice once or twice beforehand)
9. Loose Fishtail Braid

A fishtail weaves just two sections of hair into a detailed plait that looks far fancier than it is. Keep it loose and slightly undone, then pancake it, gently pulling the braid apart with your fingertips, to make it look twice as thick. Drape it over one shoulder or down your back. Start the braid a little looser than feels natural, since fishtails tighten as you work down, and secure the end with a clear elastic that disappears into the hair.
Try this: weave a thin gold cord into the fishtail for a subtle sparkle that shows up in flash photos.
Difficulty: Moderate · Time: 20 minutes · Cost: DIY with a clear elastic
10. Bubble Ponytail with Crystal Pins
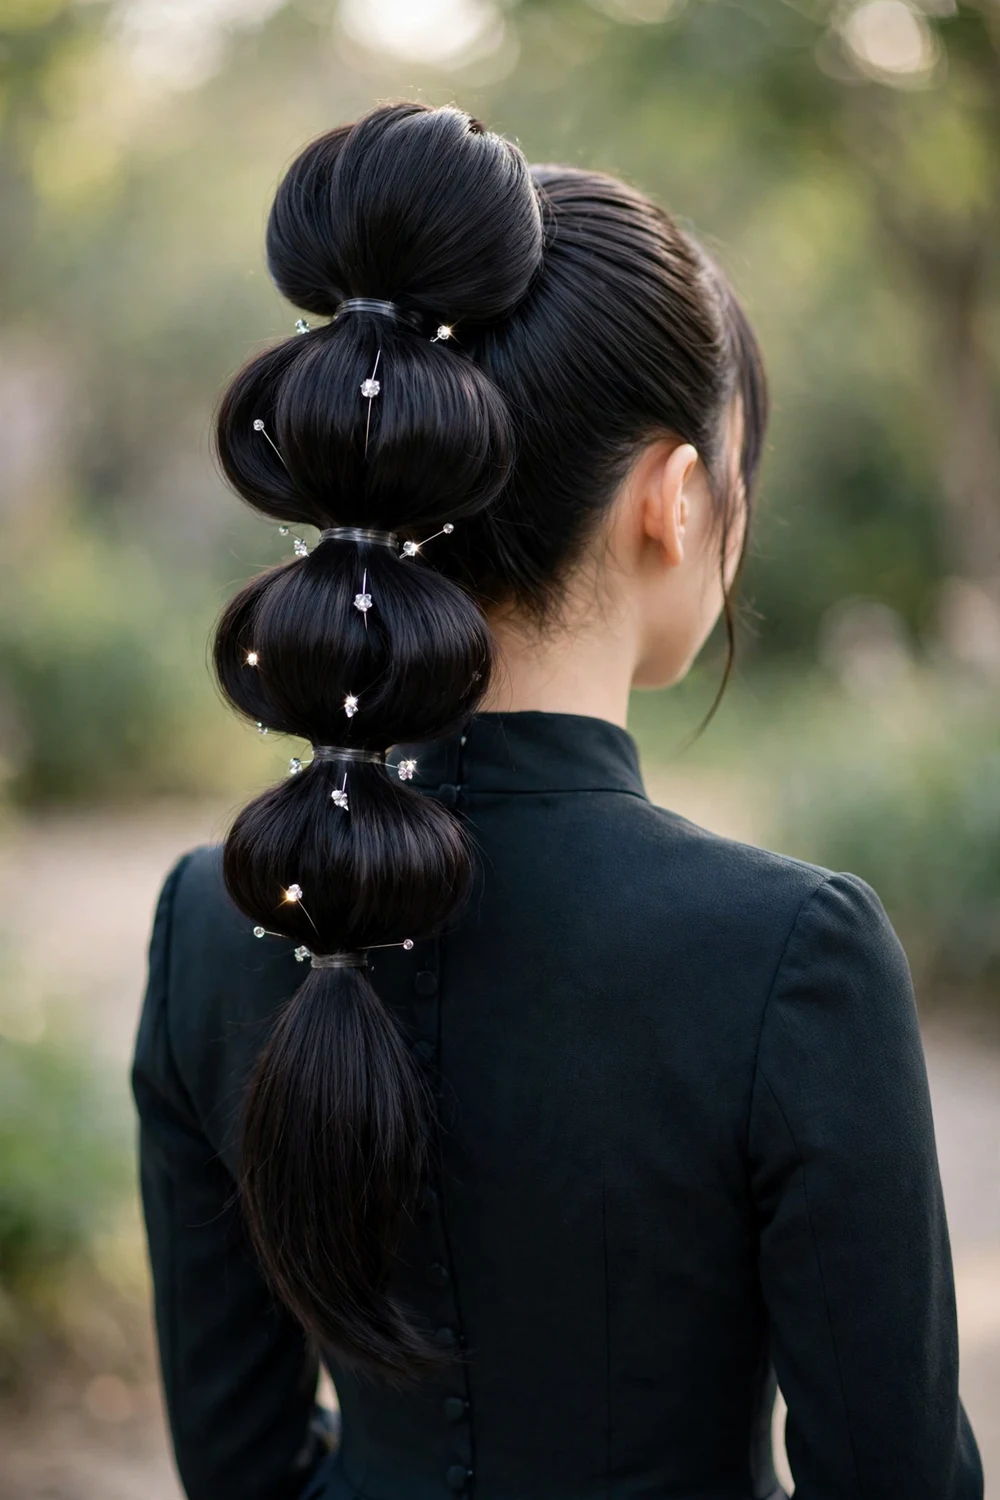
Tie a high ponytail, add mini elastics at even intervals down its length, and pull each section outward into rounded bubbles. Tuck tiny crystal pins between the bubbles for sparkle. It holds its shape all night with almost no touch-ups and adds volume to finer hair. Space the elastics evenly by measuring with your fingers, two finger-widths apart, so the bubbles come out uniform. Push each crystal pin in at an angle so it anchors into the elastic rather than sliding down the hair.
Try this: tease each section lightly before pulling it into a bubble for maximum fullness.
Difficulty: Easy · Time: 15 minutes · Cost: DIY with mini elastics and crystal pins (a few dollars for the pins)
11. Braided Crown Updo
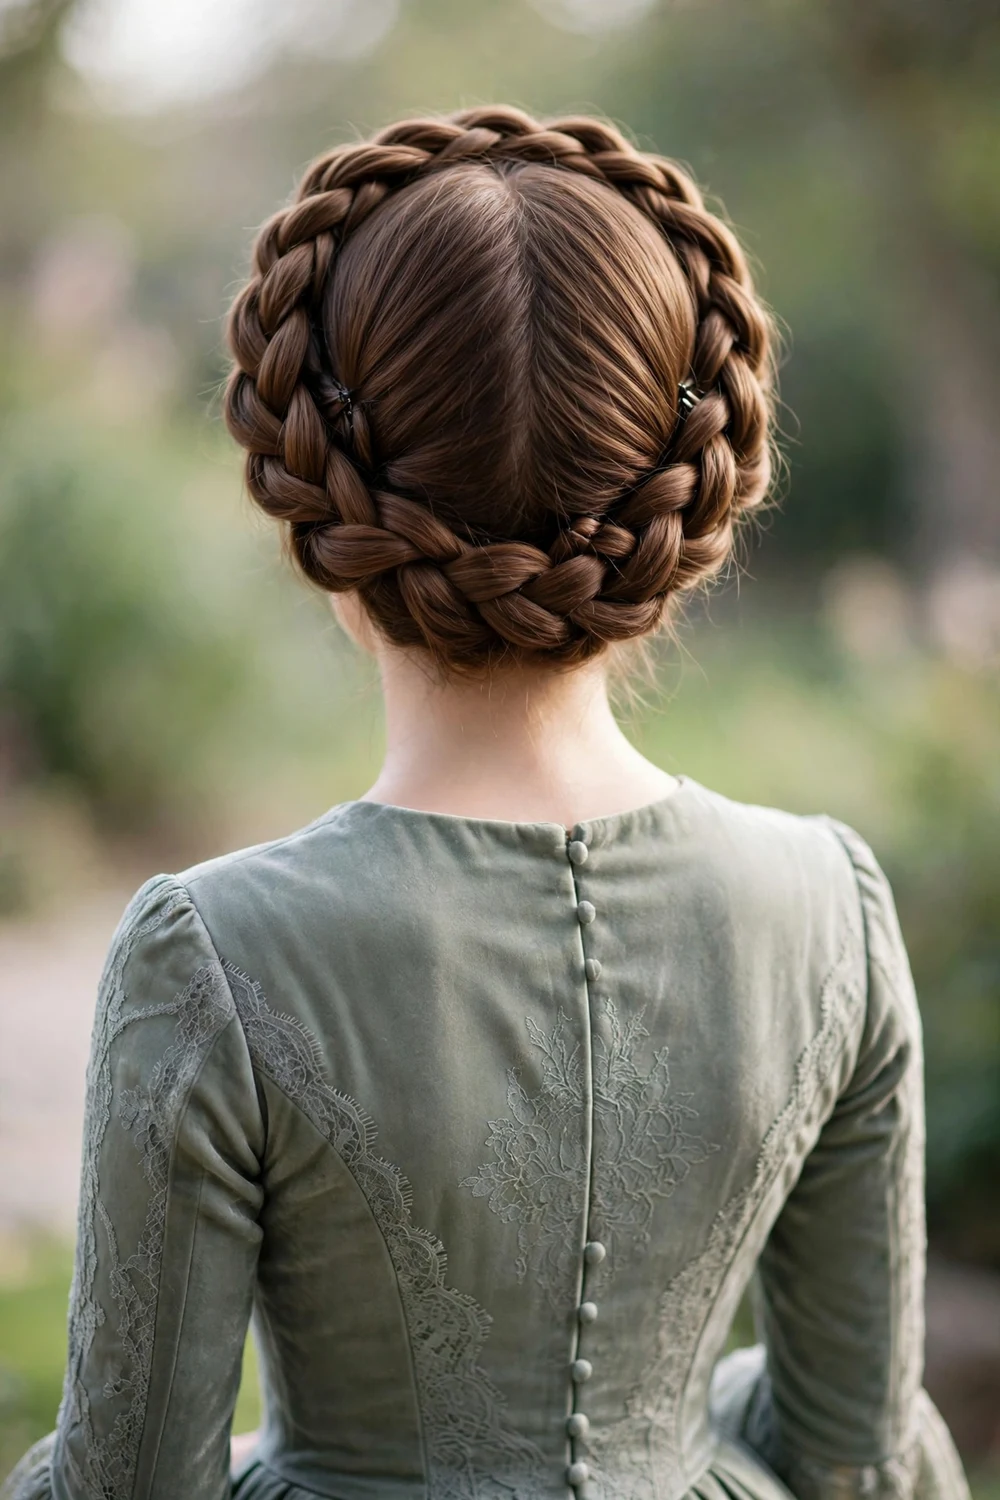
Braid along your hairline from one side to the other and pin the tail underneath for a seamless halo that keeps everything up and away. It is one of the trickier styles here, so consider a stylist if braiding is not your strength. On a budget, two simple braids pinned across the crown give a similar feel and are far easier to DIY. Braid with the hair slightly damp for better grip, and pancake the braid gently so the crown looks full rather than skinny.
Try this: tuck small fresh flowers into the crown for a romantic finish that suits garden venues.
Difficulty: Advanced · Time: 35 to 45 minutes · Cost: Salon recommended; simpler DIY version possible
12. Half-Up Twisted Bun
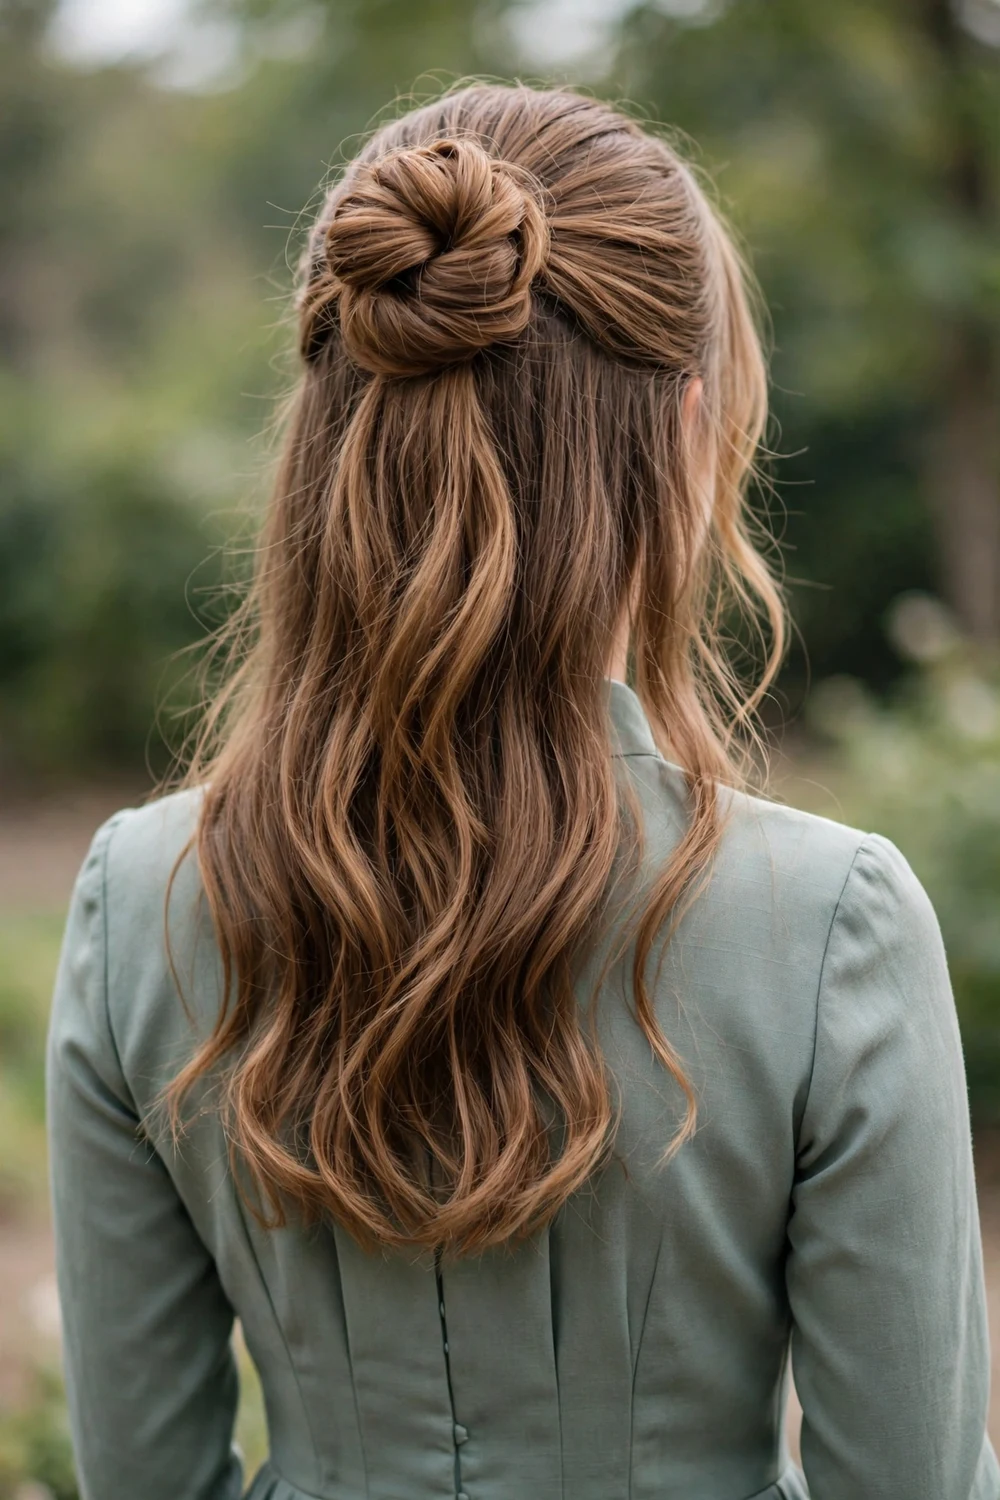
Gather the top half of your hair, twist it into a small bun at the crown, and let the rest flow freely. Keep the bun slightly loose and pull out a few face-framing strands for softness. A jeweled clip at the base dresses it up in seconds. Twist the section in one smooth motion rather than wrapping haphazardly, since a clean twist reads more polished. Pin the bun from four sides, top, bottom, left, and right, so it cannot rotate during the evening.
Try this: curl the flowing lengths before twisting the top so the whole style has one consistent texture.
Difficulty: Easy · Time: 10 minutes · Cost: DIY with an elastic and pins
13. Vintage Finger Waves
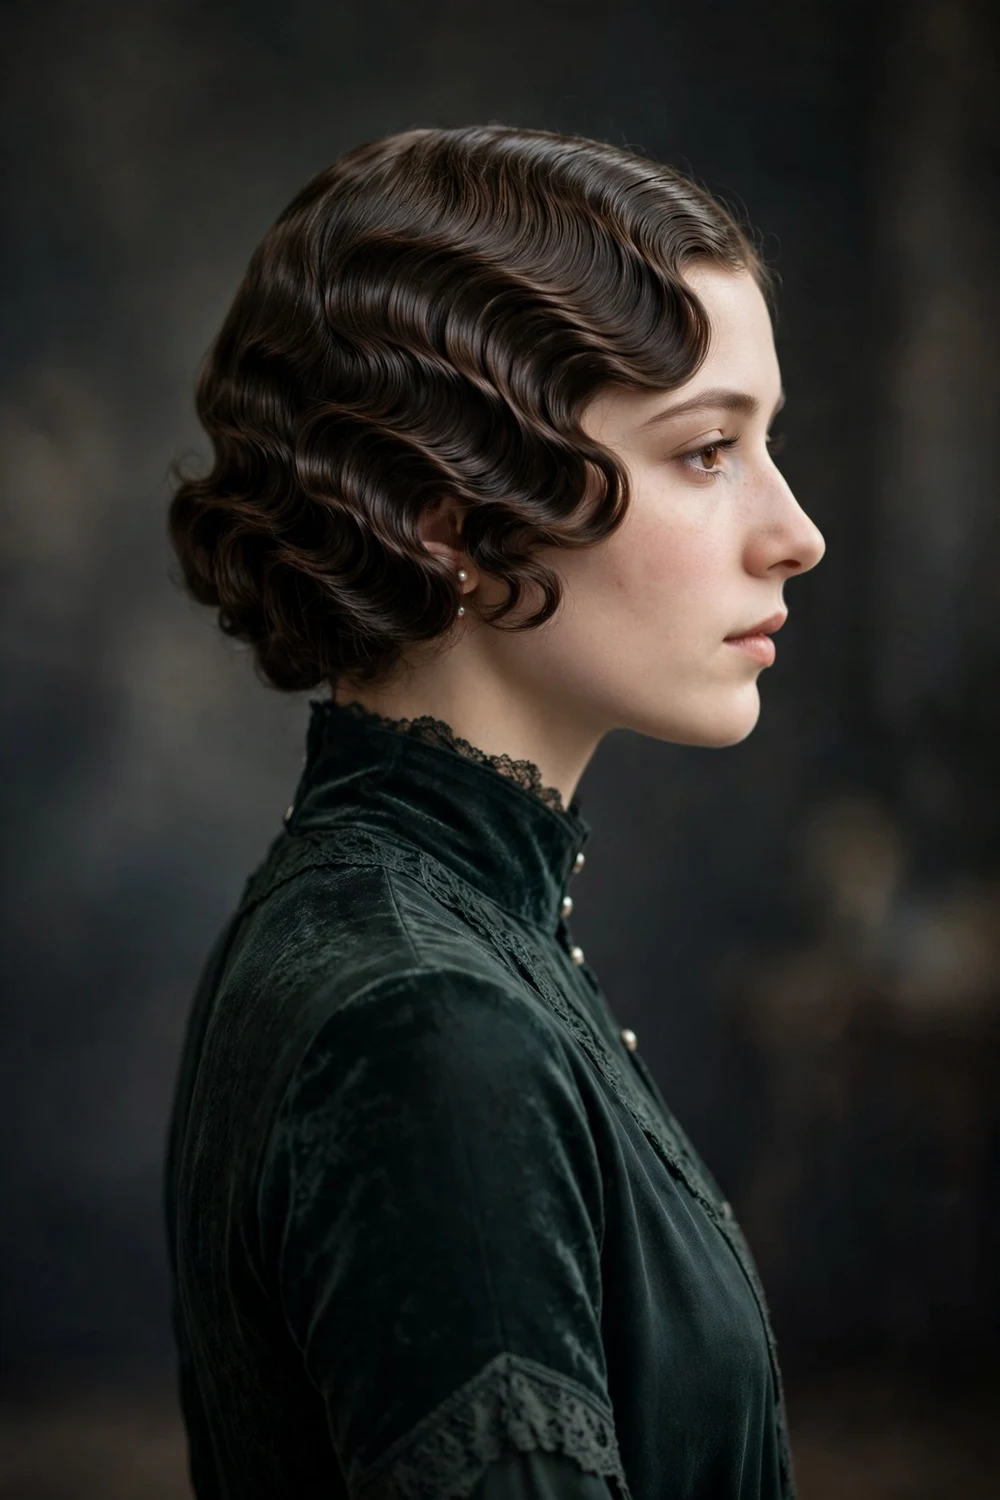
Finger waves are sculpted, S-shaped ridges set with gel and clips while the hair is damp, pure 1920s glamour. The technique is genuinely advanced, so a stylist gives the smoothest result. If that is out of budget, deep side-parted waves shaped with a flat iron echo the same vintage mood. Work with a strong-hold gel and duckbill clips, shaping each wave with a fine-tooth comb before the gel sets. The style needs patience but photographs like nothing else.
Try this: book a stylist who lists vintage styling in their portfolio, since not every salon does true finger waves.
Difficulty: Advanced · Time: 45+ minutes · Cost: Salon recommended for authentic results
14. Messy Textured Low Bun
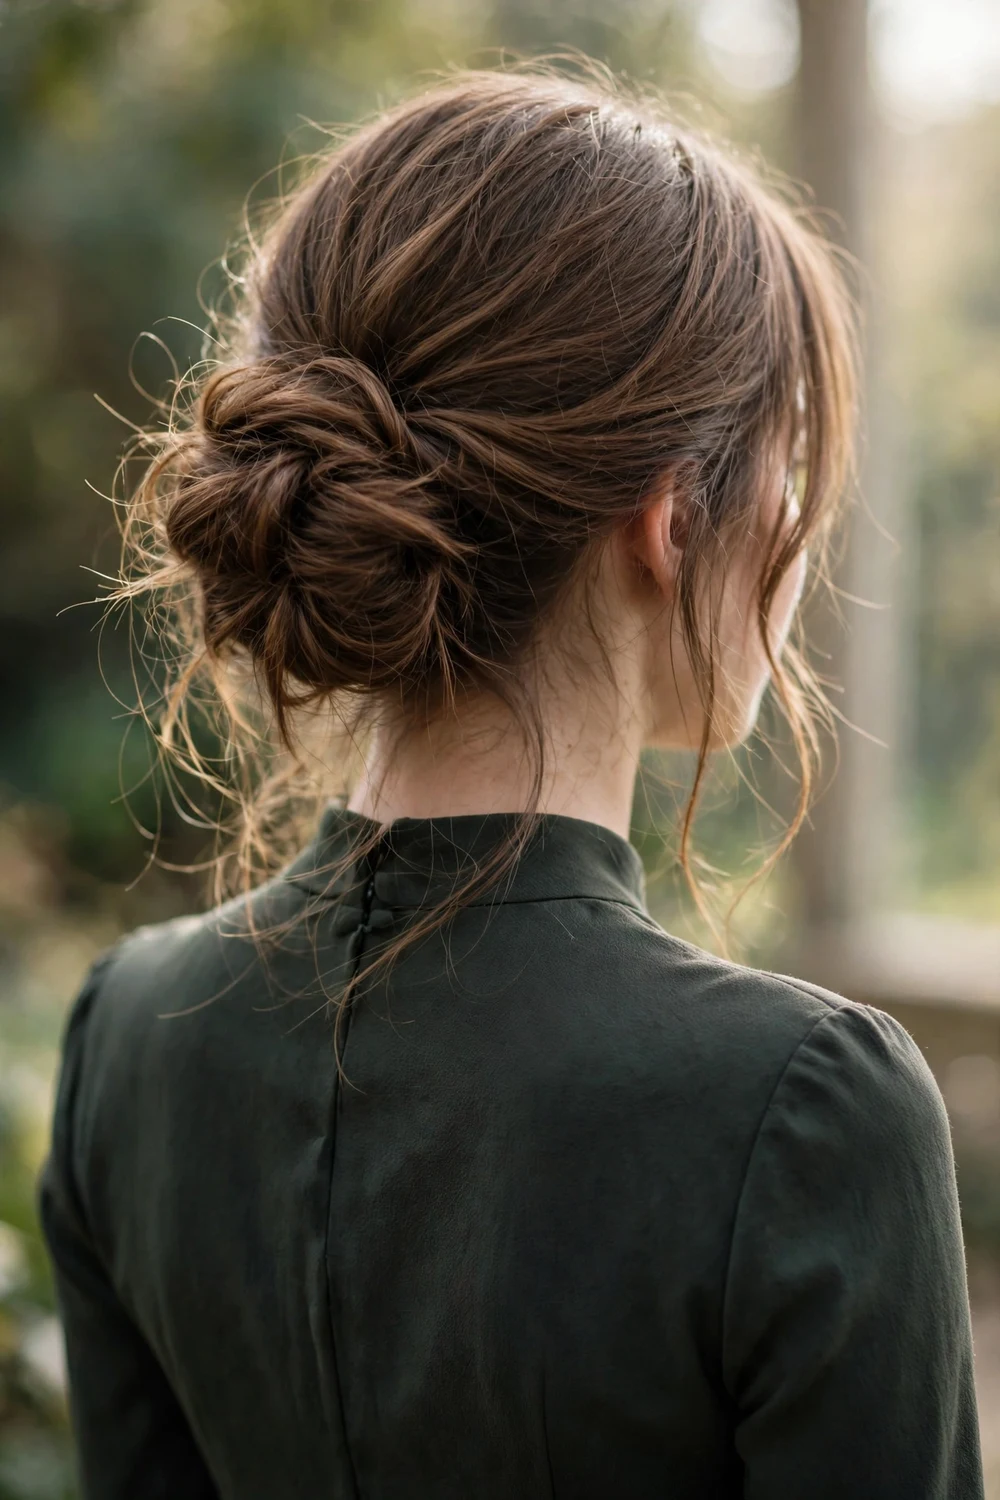
Work texture spray through your hair first, gather it loosely at the nape, and pin it into a bun, deliberately leaving ends and wisps out. Imperfection is the point, so this style is wonderfully forgiving for DIY styling and comfortable from pre-prom photos to the after-party. Twist and pin in small sections rather than one big gather so the mess looks intentional. Pull a few pieces loose around the ears last, since those frame the face in front-facing photos.
Try this: backcomb the ponytail lightly before pinning for a bun with real volume instead of a flat knot.
Difficulty: Easy · Time: 15 minutes · Cost: DIY with texture spray and pins
15. Modern French Twist
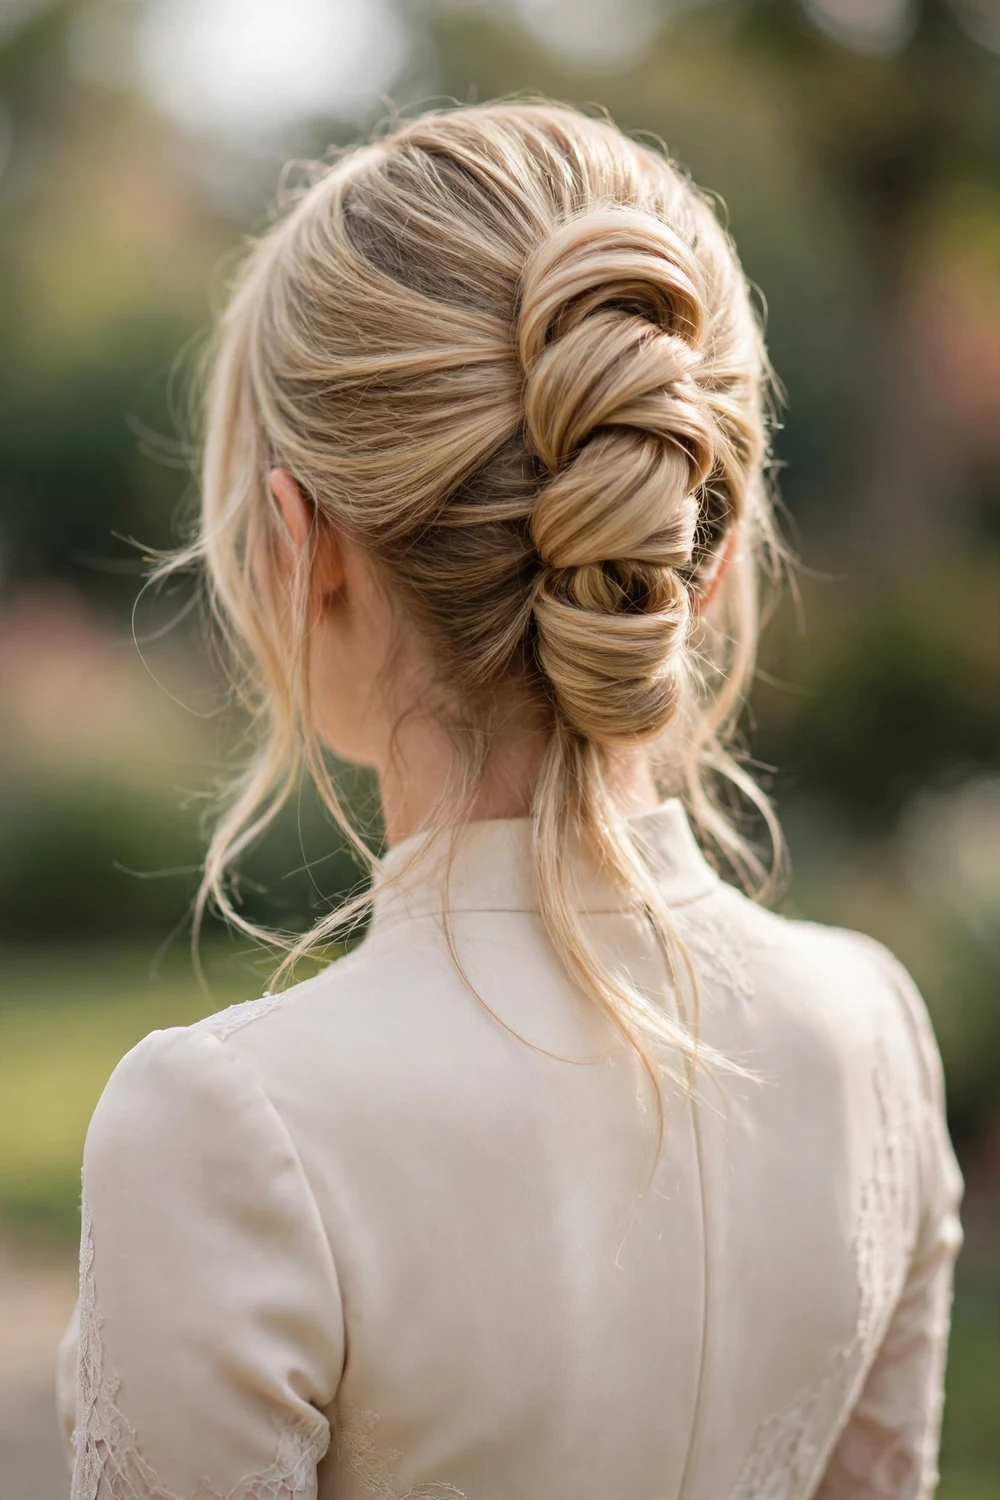
Roll your hair vertically up the back of your head and pin along the seam with pins that match your hair color so they disappear. Keep it slightly soft with loose face-framing pieces for a modern feel. Do a trial run first, since the rolling technique takes a try or two to master. Smooth the hair to one side and start the roll low at the nape, tucking as you go, then fan the top slightly for the soft, current silhouette rather than a severe vintage line.
Try this: place a decorative comb along the seam to turn the pinned edge into a feature.
Difficulty: Moderate to advanced · Time: 25 minutes · Cost: DIY with practice (salon version typically $60–$110)
16. Dutch Braid into a Low Bun
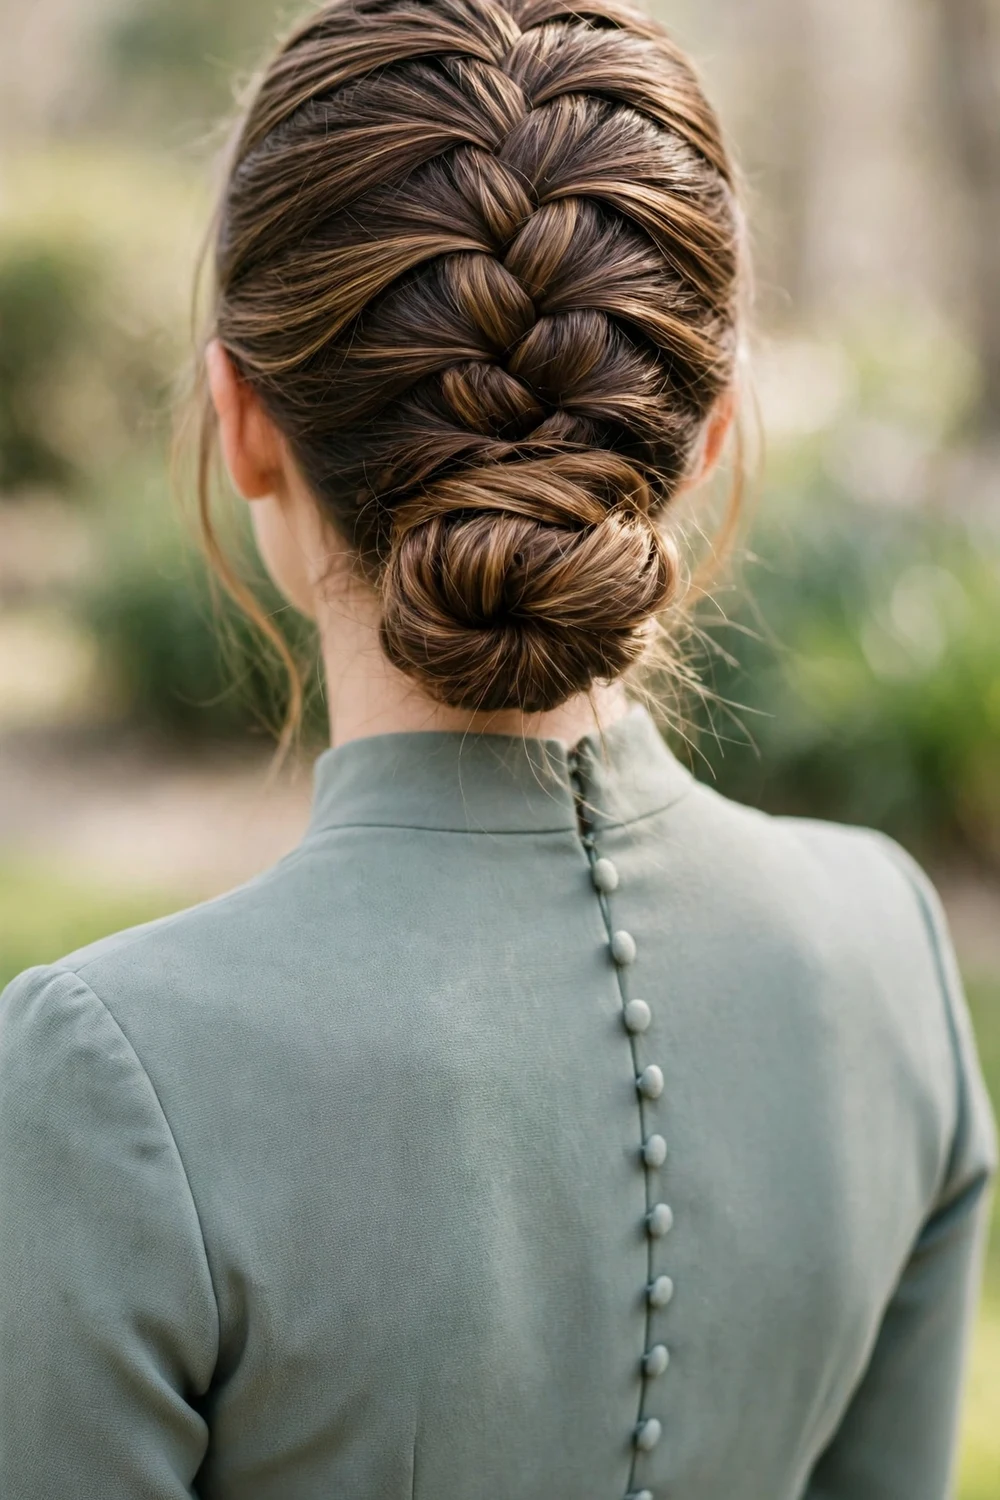
A Dutch braid is woven underhand so it sits raised on the hair, adding striking dimension. Braid from the crown to the nape, then coil the rest into a low bun and pin. The braid anchors everything securely for dancing, and the raised plait shows off highlighted hair well. Keep the braid centered by checking in a hand mirror as you work down, and pancake the braid before coiling so the bun has presence rather than disappearing into the back of the head.
Try this: run the Dutch braid slightly off-center for an asymmetric detail that stands out in group photos.
Difficulty: Moderate · Time: 25 minutes · Cost: DIY with an elastic and pins
17. Vintage Curled Bob
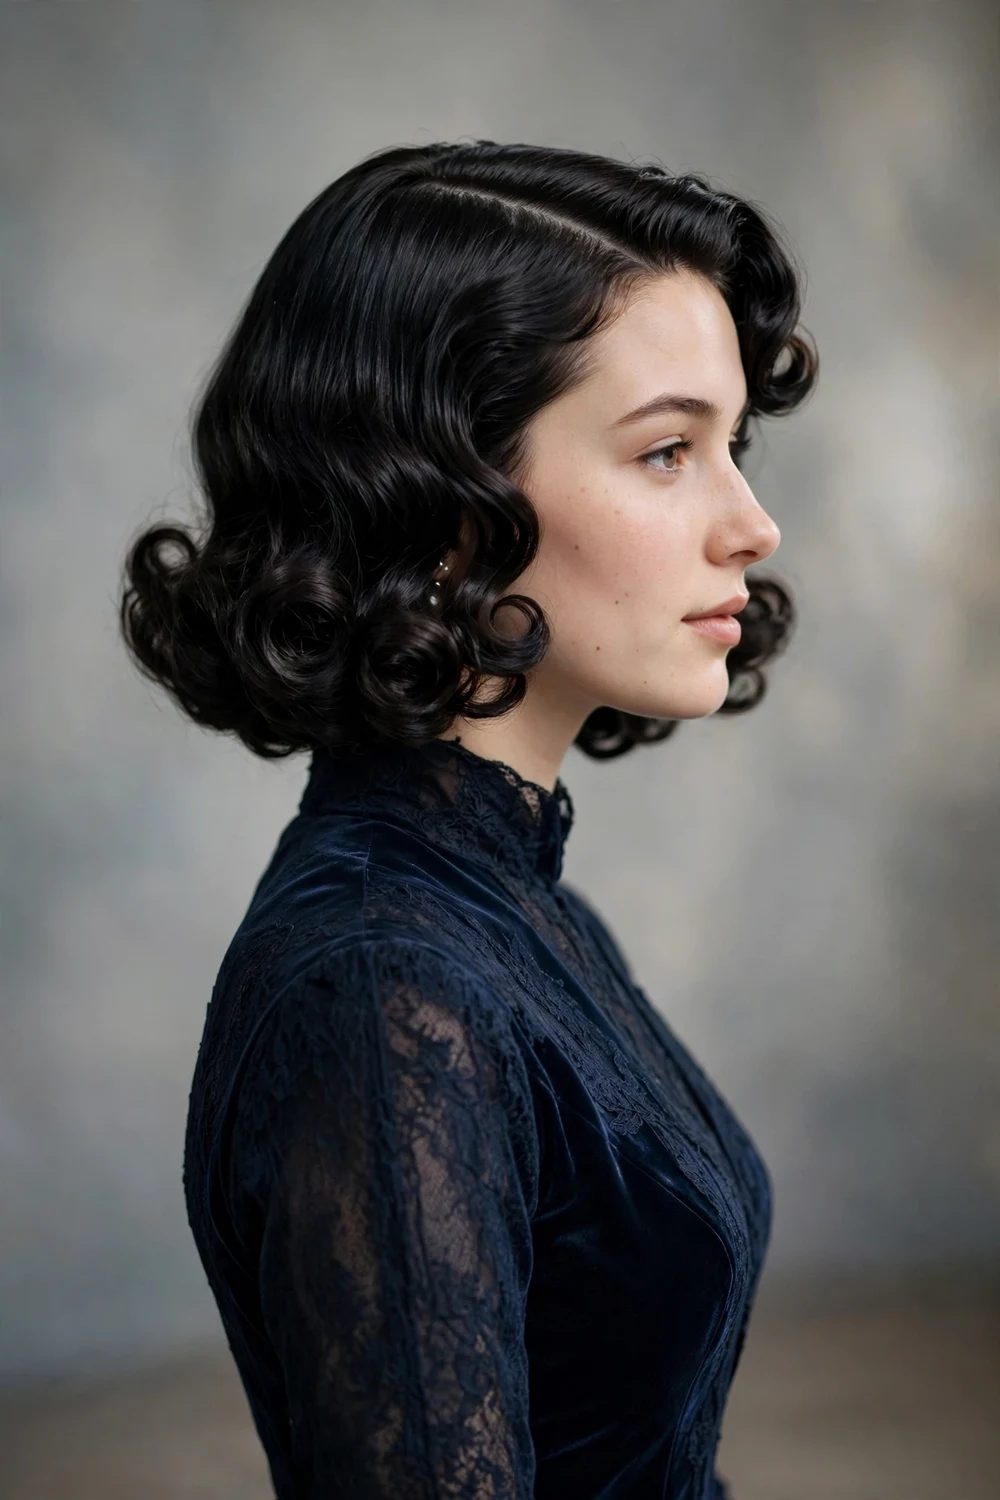
Short hair gets prom glamour too: curl small sections of a bob with a medium iron, always over heat protectant, and set a deep side part for bouncy retro drama. Shine spray and a bold lip complete the look. Curl every section in the same direction so the curls merge into a unified wave pattern, and pin each curl to cool for maximum hold. A decorative headband or crystal clips add formal polish without needing length.
Try this: tuck one side behind the ear and add a crystal clip for an asymmetric vintage detail.
Difficulty: Moderate · Time: 25 minutes · Cost: DIY with a curling iron and heat protectant
For more short-hair formal inspiration, see these short hair updos made for proms and weddings.
18. Voluminous Blowout with Flipped Ends
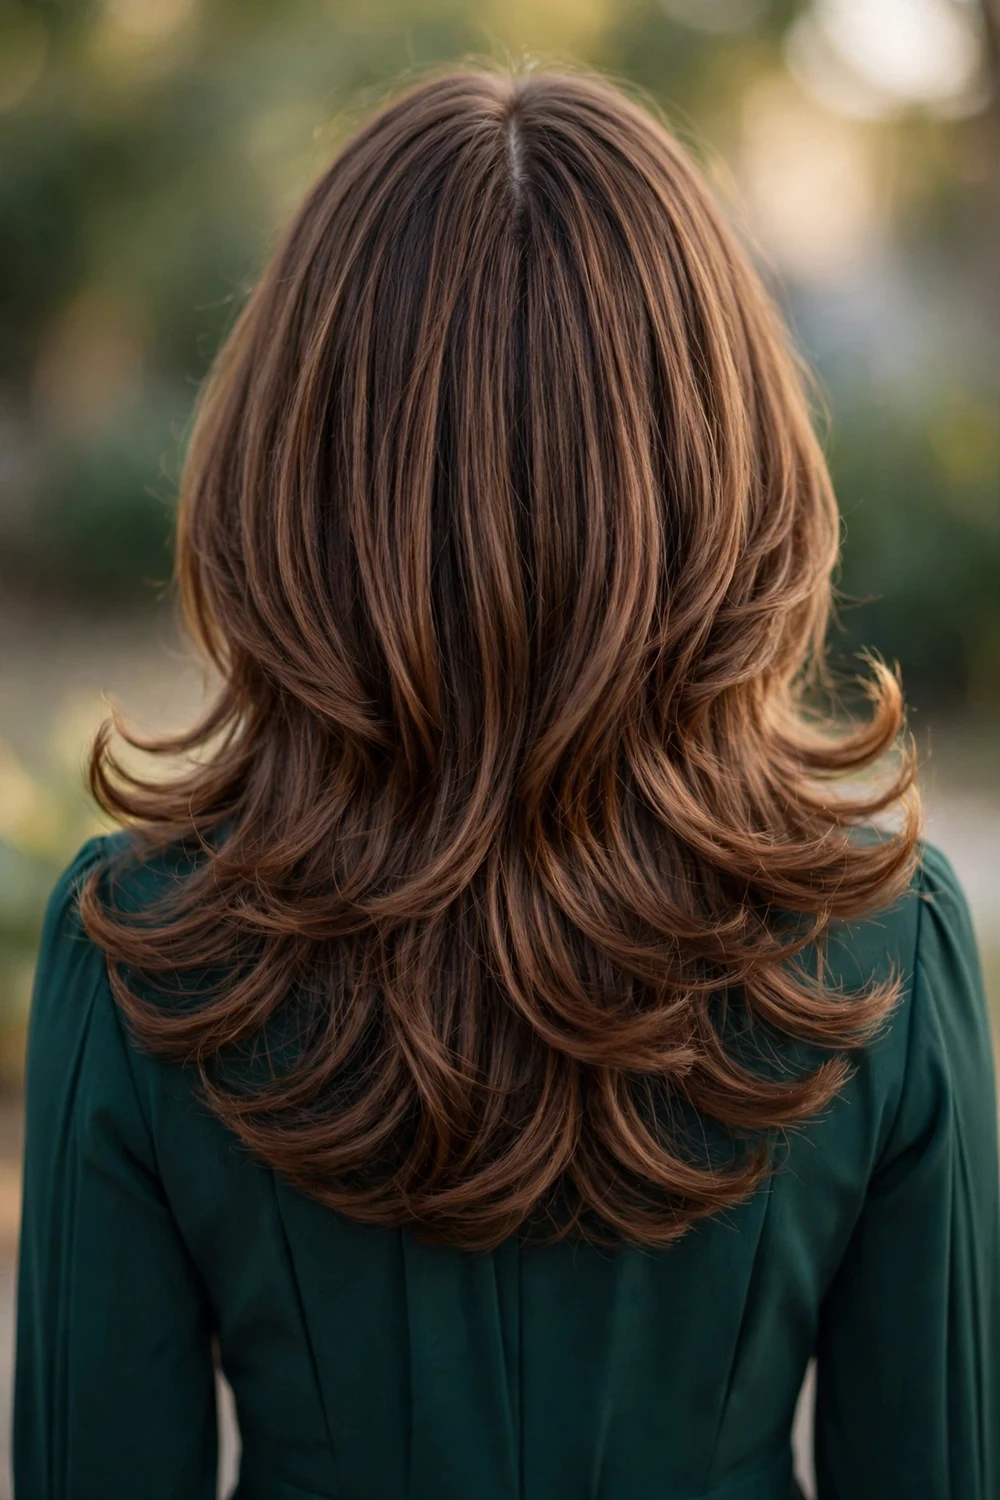
Blow-dry with a large round brush, lifting at the roots, and flick the brush outward at the ends for a flipped, supermodel finish, no curling iron needed. Use heat protectant and work in sections. Rough-dry to 80 percent first, then switch to the round brush for the smoothing pass so you are not fighting sopping hair.
Try this: blast the roots with cool air at the end to lock in the lift.
Difficulty: Easy to moderate · Time: 30 minutes · Cost: DIY with a blow dryer and round brush (salon blowouts typically $40–$80)
For more polished hair-down looks for formal evenings, browse our bridesmaid hairstyles roundup, which has plenty of elegant down-styles.
19. Twisted Side Chignon
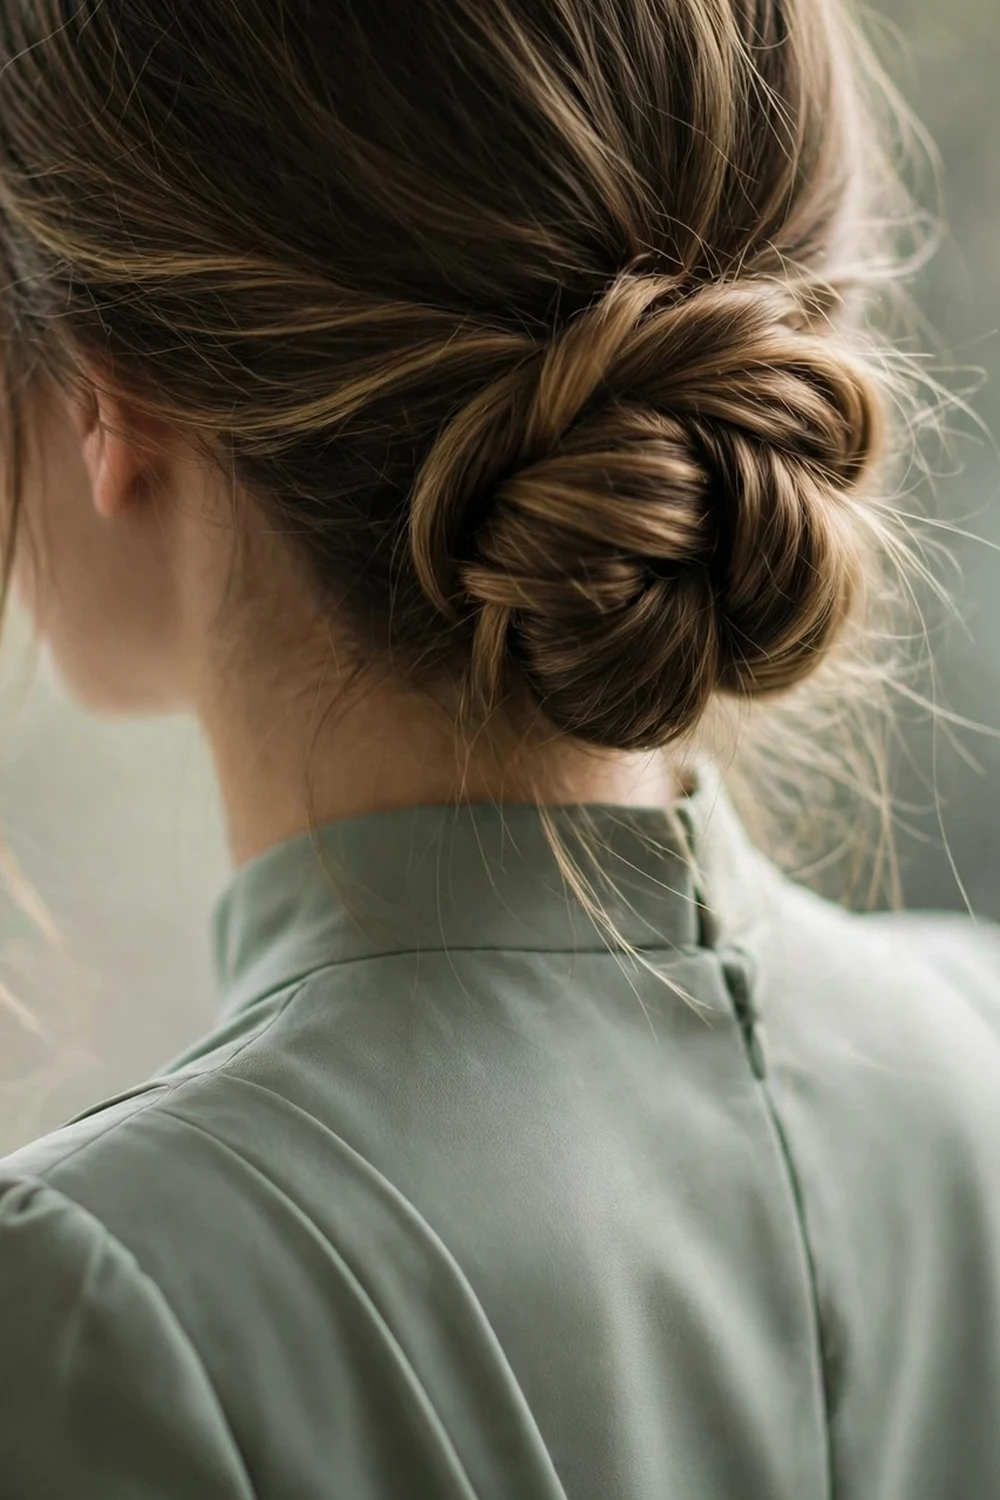
Sweep your hair to one side, twist it into a low bun just behind one ear, and pin securely. The asymmetric placement flatters front-facing photos and echoes the lines of one-shoulder or asymmetric dresses. Part deeply on the fuller side first so the sweep has a natural direction, and pin the twist at three points, top, middle, and base, so the asymmetry cannot rotate loose. Leave a few soft tendrils on the bare side to balance the composition.
Try this: add a small crystal comb where the twist meets the sweep for a focal point.
Difficulty: Moderate · Time: 25 minutes · Cost: DIY-friendly with pins and light hairspray
20. Half-Up Waves with a Satin Ribbon
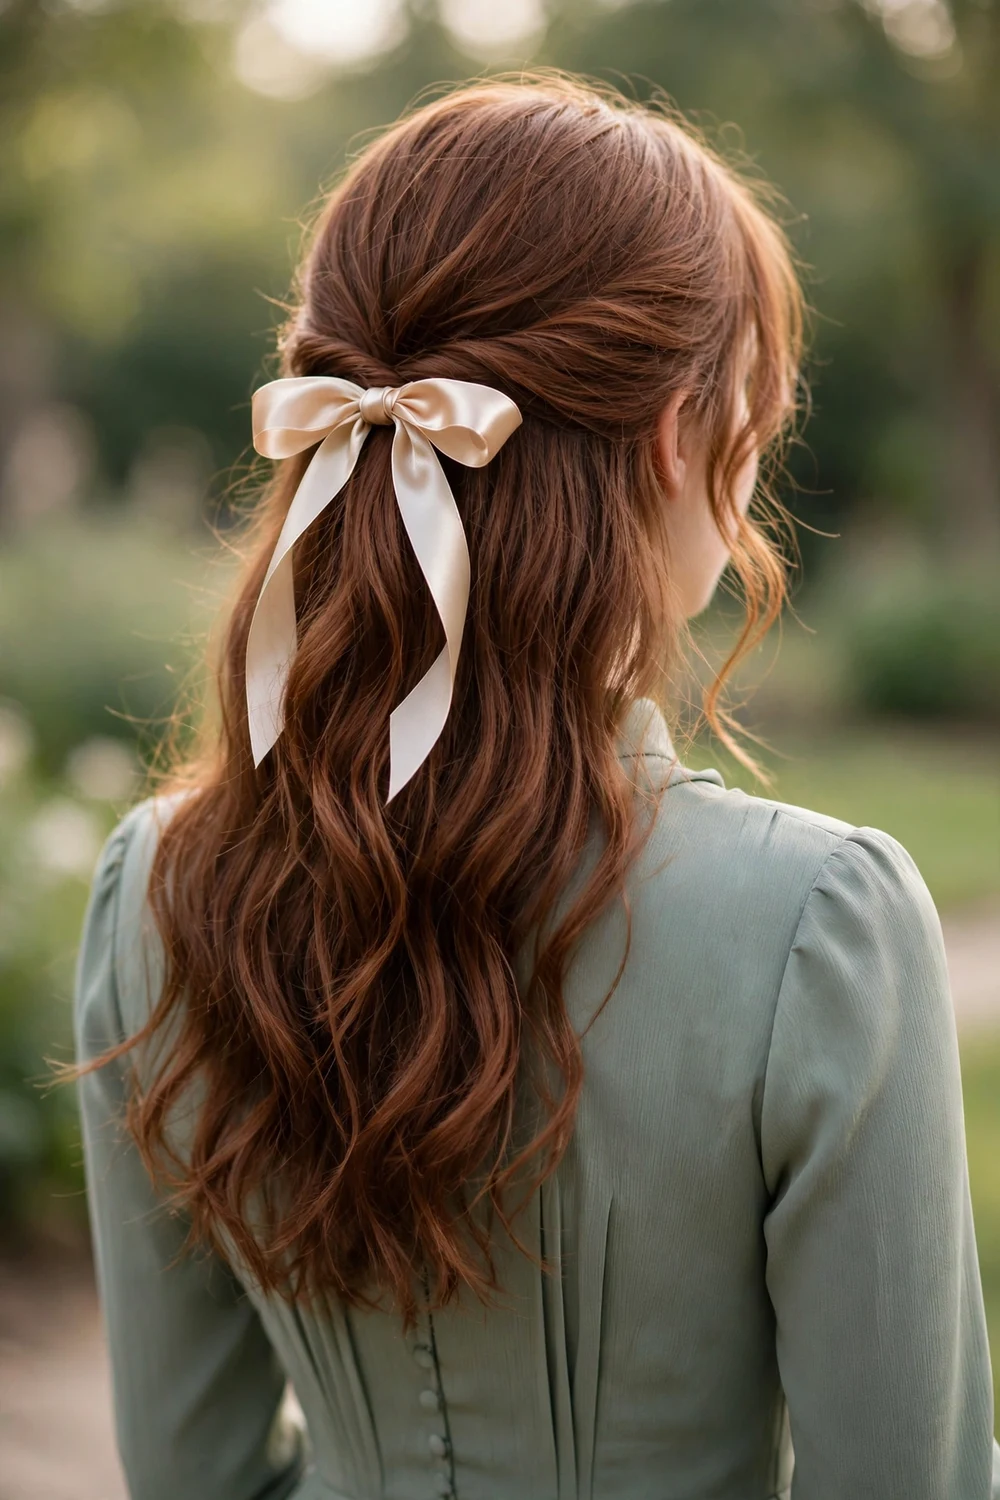
Style simple half-up waves, then tie a satin ribbon in a bow where the top section is secured. One accessory, instant romance. Match the ribbon to your dress or go classic with black or champagne, and expect it to star in your candid photos. Tie the bow over a small elastic rather than relying on the ribbon alone, since ribbon slips under the weight of hair. Cut the ribbon ends on a diagonal to prevent fraying through the night.
Try this: curl the ribbon with scissors like gift wrap for playful spirals at the ends.
Difficulty: Easy · Time: 15 minutes · Cost: DIY (a spool of satin ribbon costs just a few dollars)
21. Side Braid into a Loose Ponytail
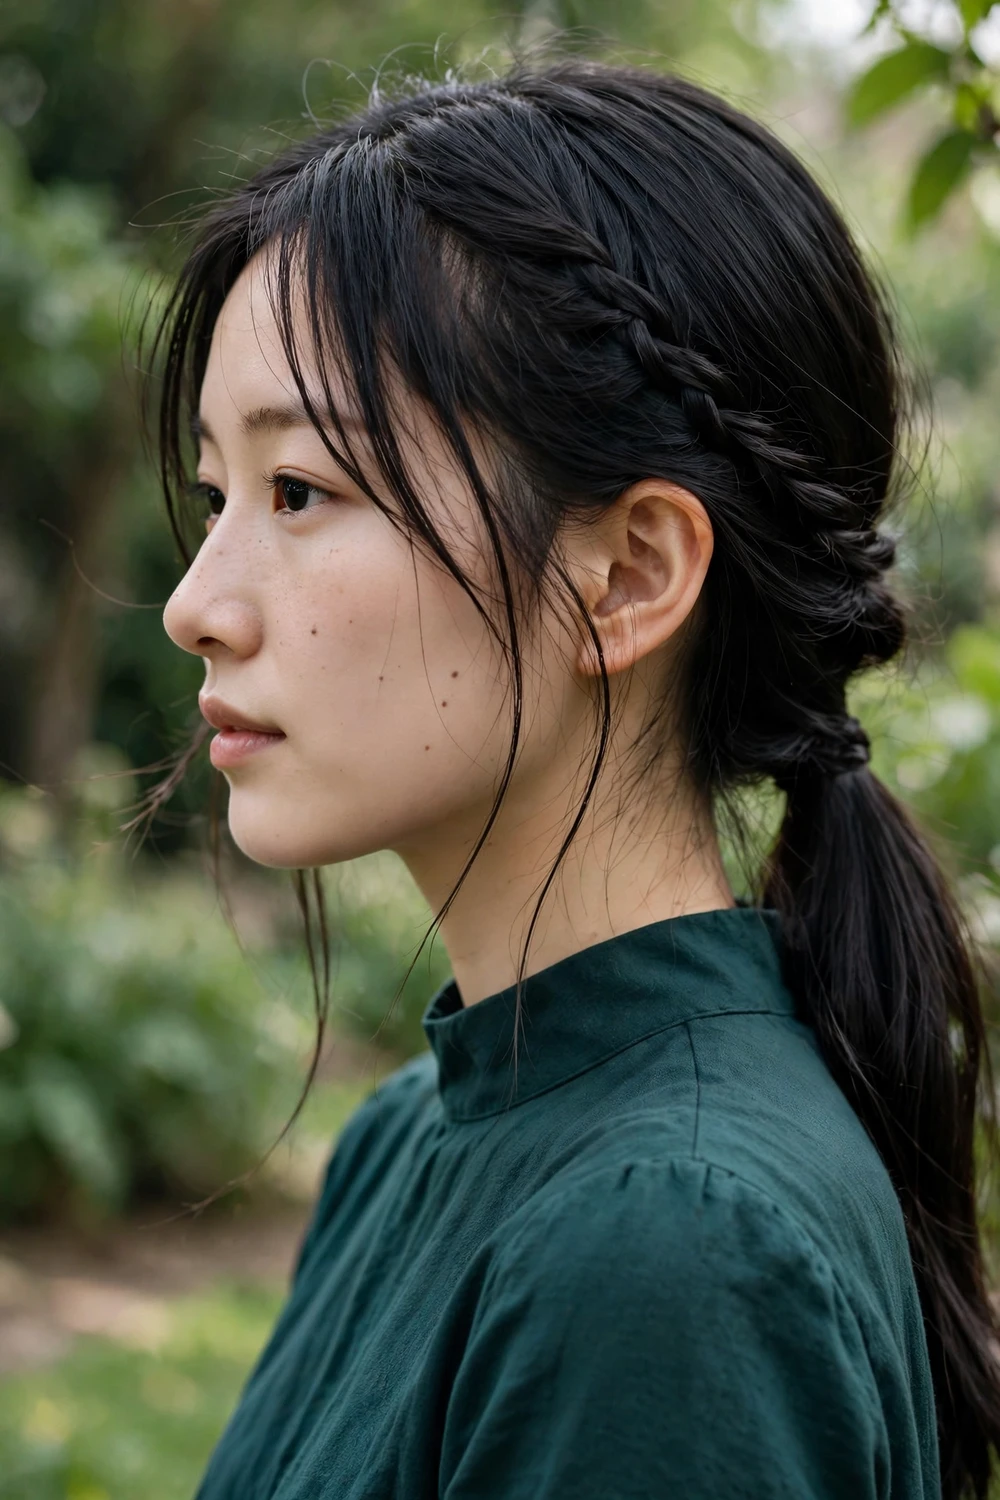
Braid a loose three-strand plait along one side of your head, then gather it with the rest of your hair into a relaxed low ponytail. You get braided detail up front with ponytail comfort for dancing. Loosen the braid with your fingers and curl the pony ends for polish. Braid with the hair slightly textured from day-old hair or dry shampoo so the plait grips, and keep the braid loose enough that it does not pull at the hairline all evening.
Try this: wrap a strand around the ponytail elastic to hide it for a finished look.
Difficulty: Easy to moderate · Time: 20 minutes · Cost: DIY with an elastic and pins
22. Retro Bouffant Updo
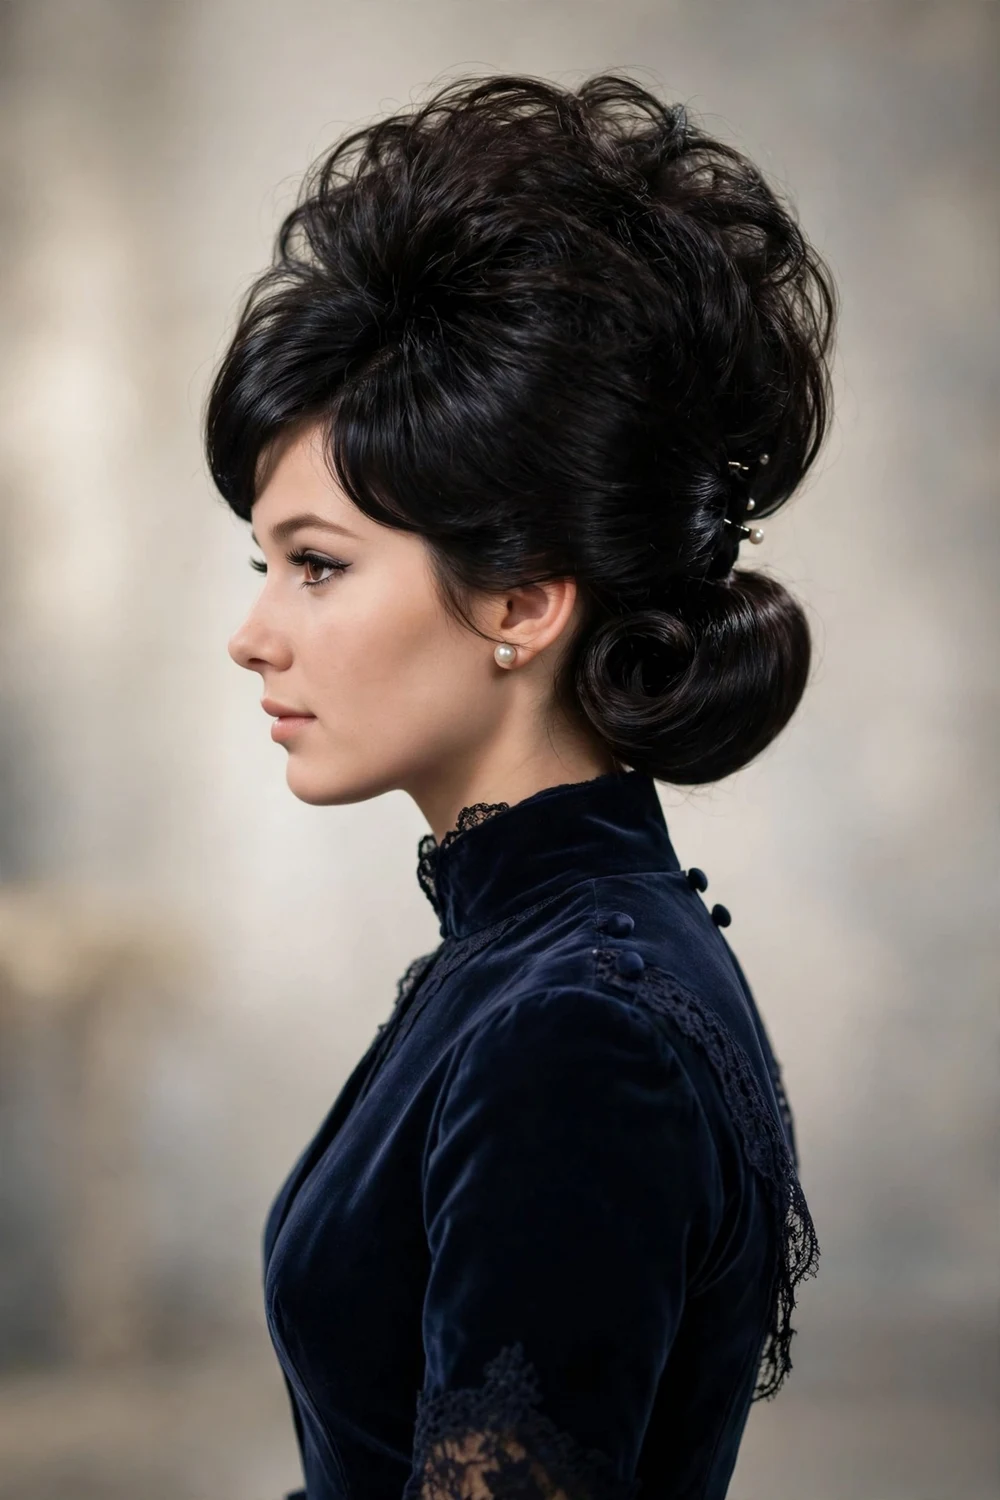
Tease the crown for 1960s height, smooth the top layer over it, and pin the lengths into an updo behind. The technique is fiddly, so a stylist gives the smoothest finish. On a budget, concentrate the volume at the crown in a half-up style instead. Backcomb in thin layers for smooth volume rather than one tangled mass, and smooth the top layer gently with a soft brush so the teasing stays hidden. Strong-hold spray keeps the height from sinking as the night goes on.
Try this: do a trial with photos from the side to check the height looks balanced, not top-heavy.
Difficulty: Advanced · Time: 40 minutes · Cost: Salon recommended; simplified DIY version possible
23. Loose Romantic Updo with a Crystal Hair Vine
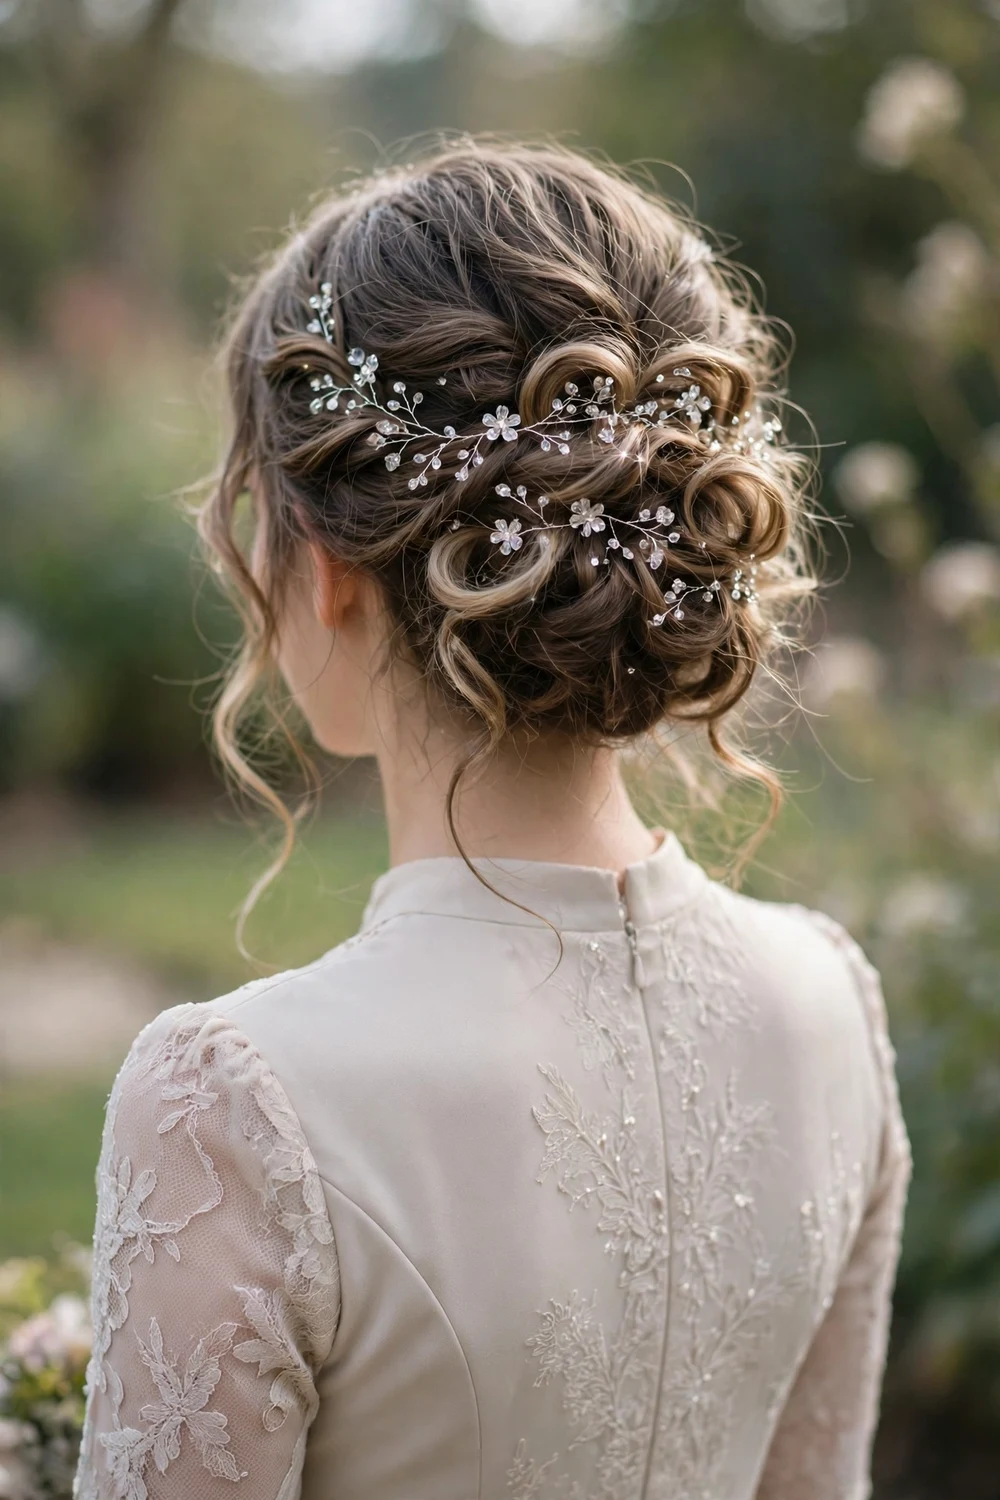
Pin curls and twists loosely into a soft updo, then weave a flexible crystal hair vine through it for light-catching sparkle. Vines cost roughly $8 to $20 and can be reworn. Arc it across the back for classic romance or place it asymmetrically for a modern feel. Secure the updo firmly first, since the vine adds weight, then weave the vine in a loose S-curve and pin it at three points so it cannot shift while you dance.
Try this: match the vine’s metal tone to your jewelry for a coordinated finish.
Difficulty: Moderate · Time: 25 minutes · Cost: DIY plus a crystal hair vine accessory
Comparison Table: All 23 Prom Hairstyle Ideas
| Style | Best for | Difficulty | Time |
|---|---|---|---|
| High Bun with Curtain Tendrils | Statement earrings | Easy to moderate | 20 min |
| Romantic Low Chignon | Detailed-back gowns | Moderate | 25 min |
| Classic Hollywood Waves | Black-tie glamour | Moderate | 35 min |
| Soft Half-Up Waves | Showing off length | Easy | 15 min |
| Sleek High Ponytail | All-night dancing | Easy | 10 min |
| Curled Low Ponytail | Off-shoulder necklines | Easy | 15 min |
| Side-Swept Loose Curls | Asymmetric photos | Easy to moderate | 20 min |
| Waterfall Braid | Intricate detail | Moderate | 25 min |
| Loose Fishtail Braid | Boho feel | Moderate | 20 min |
| Bubble Ponytail | Fine hair volume | Easy | 15 min |
| Braided Crown Updo | Secure all-night hold | Advanced | 35 to 45 min |
| Half-Up Twisted Bun | Quick styling | Easy | 10 min |
| Vintage Finger Waves | Vintage gowns | Advanced | 45+ min |
| Messy Textured Low Bun | Forgiving DIY | Easy | 15 min |
| Modern French Twist | Timeless elegance | Moderate to advanced | 25 min |
| Dutch Braid into Low Bun | Highlighted hair | Moderate | 25 min |
| Vintage Curled Bob | Short hair | Moderate | 25 min |
| Voluminous Blowout | Movement and shine | Easy to moderate | 30 min |
| Twisted Side Chignon | One-shoulder dresses | Moderate | 25 min |
| Half-Up Waves with Ribbon | Romantic detail | Easy | 15 min |
| Side Braid into Ponytail | Braid plus comfort | Easy to moderate | 20 min |
| Retro Bouffant Updo | Dramatic height | Advanced | 40 min |
| Crystal Hair Vine Updo | Sparkle detail | Moderate | 25 min |
How to Choose the Right Prom Hairstyle for You
The most flattering prom hairstyle works with your dress, your hair, and the evening ahead, not just the prettiest picture you saved. Use this quick guide:
| If your dress has… | Consider… |
|---|---|
| A strapless or sweetheart neckline | Hair down or half-up to frame your shoulders softly |
| A high neck or halter | An updo or high ponytail to show off the neckline |
| An open or detailed back | A low chignon or side-swept style that keeps the back visible |
| Long sleeves or full coverage | Voluminous waves or a statement updo for balance |
Think practically too: for humid or outdoor evenings, an updo or braid outlasts loose curls, and fine hair gains fullness from teasing or texture spray. For shorter cuts, see these bridal hairstyles for short hair, proof that bobs and pixies shine at black-tie occasions.
Prom Hair Mistakes to Avoid
- Skipping the trial run. Never debut a new style on prom day. Practice at least once to learn the real timing.
- Styling freshly washed, slippery hair. Second-day hair, or dry shampoo and texture spray, gives pins and braids far better grip.
- Forgetting heat protectant. Every hot tool should be preceded by heat protectant spray to prevent breakage and frizz.
- Overloading on product. Too much hairspray or serum looks stiff and dull. Build hold in light layers instead.
- Choosing a style that hurts. If an updo pulls at home, it will feel worse after five hours. Comfort is non-negotiable.
Frequently Asked Questions
Should I do my prom hair myself or go to a salon?
Sleek ponytails, half-up waves, and bubble ponytails are very achievable at home, while braided crowns, finger waves, and bouffants usually look better from a professional. Try the style yourself first. If the trial frustrates you, book a stylist.
How far in advance should I try my prom hairstyle?
Do at least one full trial run one to two weeks before prom, leaving time to adjust the technique, buy missing products, or book a salon appointment as backup.
What prom hairstyle works best with a strapless dress?
Hair down or half-up flatters strapless necklines best, since soft hair around the shoulders balances the bare neckline. Hollywood waves, side-swept curls, and half-up waves are all great choices.
How do I make my prom hairstyle last all night?
Start with texture. Second-day hair or dry shampoo gives grip. Cross bobby pins in an X pattern and choose flexible-hold hairspray. Bring extra pins and a travel hairspray for touch-ups.
Can I wear my hair down for prom?
Absolutely. Polished blowouts, Hollywood waves, and sleek straight styles look completely prom-appropriate when the finish is glossy and intentional: smooth, shiny, and styled rather than everyday.
Final Thoughts
Your prom hairstyle should make you feel like the best version of yourself. Whether you choose a sculpted updo, romantic braids, or glossy waves, there is an option here for every hair length, budget, and skill level. Practice your favorite and enjoy every minute of the night.
For more formal-event hair inspiration, start at our homepage and browse the full collection of hairstyle guides.

