


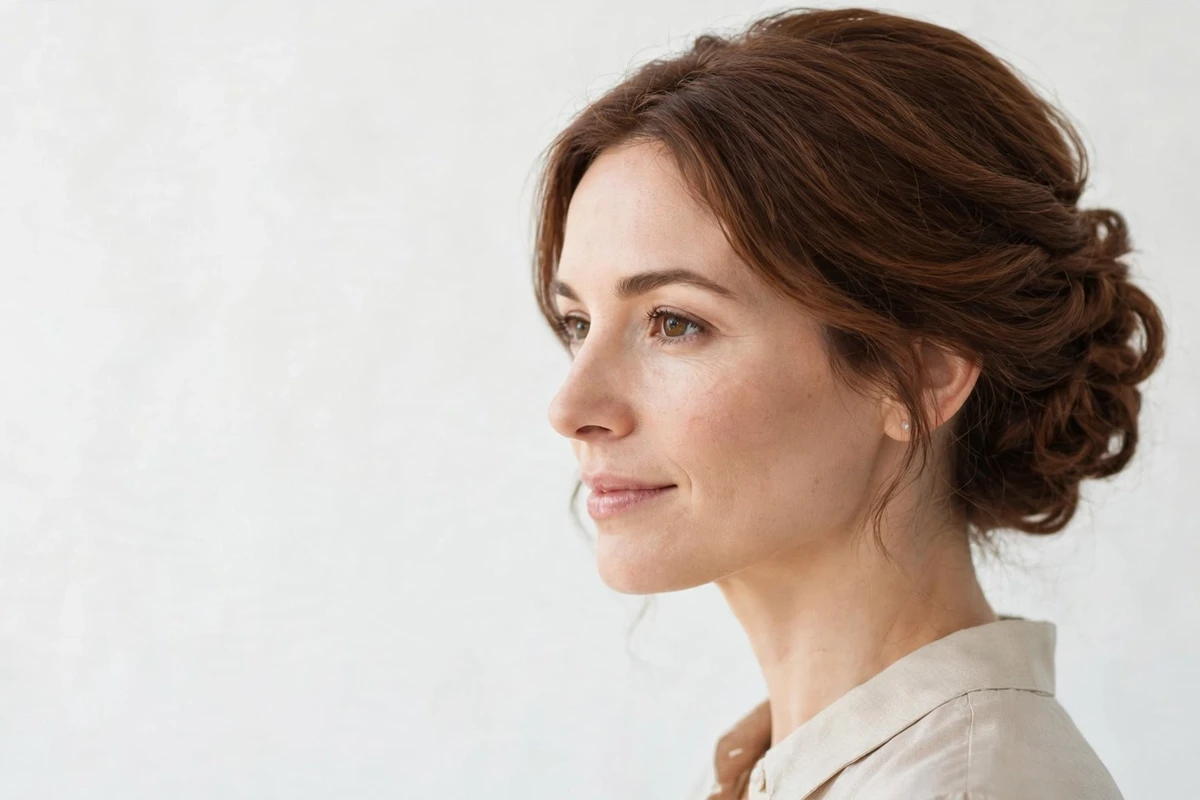
Medium hair sits in the sweet spot for updos. It’s long enough to twist, pin, and braid, but short enough that styles hold without sliding out by noon. I’ve spent years trying different updos for medium hair, and the styles below are the ones that actually work in real life.
You’ll find 22 ideas here, from five-minute fixes to red-carpet styles. Each one includes a practical tip so you can get it right on the first try.
Quick answer: This guide covers the best styles, who they suit, and how to get them right.
Quick Takeaways
- Second-day hair holds updos better than freshly washed hair, dry shampoo adds the grip you need.
- Bobby pins work best in a crossed X-pattern, not slid in flat.
- Texturizing spray before styling gives medium hair the volume to fill out buns and twists.
- Face-framing tendrils soften every updo on this list.
- Flexible-hold hairspray keeps styles touchable; strong-hold freezes them stiff.
Why Updos Work So Well for Medium Hair
Shoulder-length to collarbone hair has a natural advantage. There’s enough length to create twists, rolls, and braids, but not so much weight that gravity pulls everything down within the hour. That’s why updos on medium hair tend to outlast the same styles on very long hair.
Medium hair also takes texture well. A quick pass with texturizing spray or a light tease at the crown gives you the fullness that makes buns look deliberate instead of skimpy. If your hair is fine, that prep step matters even more.
The Updo Formula: Prepping for a Lasting Style
Start with hair that isn’t freshly washed. Clean hair is slippery, and pins slide right out. If you did wash this morning, work dry shampoo into the roots and wait two minutes before styling.
Next, add texture where you’ll need grip. A light mist of texturizing spray through the mid-lengths, or volumizing mousse scrunched into damp hair before blow-drying, gives pins and elastics something to hold. Tease the crown lightly with a rattail comb if you want height.
Gather your tools before you start: snag-free elastics, bobby pins that match your hair color, a flexible-hold hairspray, and any accessories (claw clip, scarf, decorative pins) the style calls for. Styling goes faster when you’re not hunting for pins mid-twist.
1. Low Twisted Bun
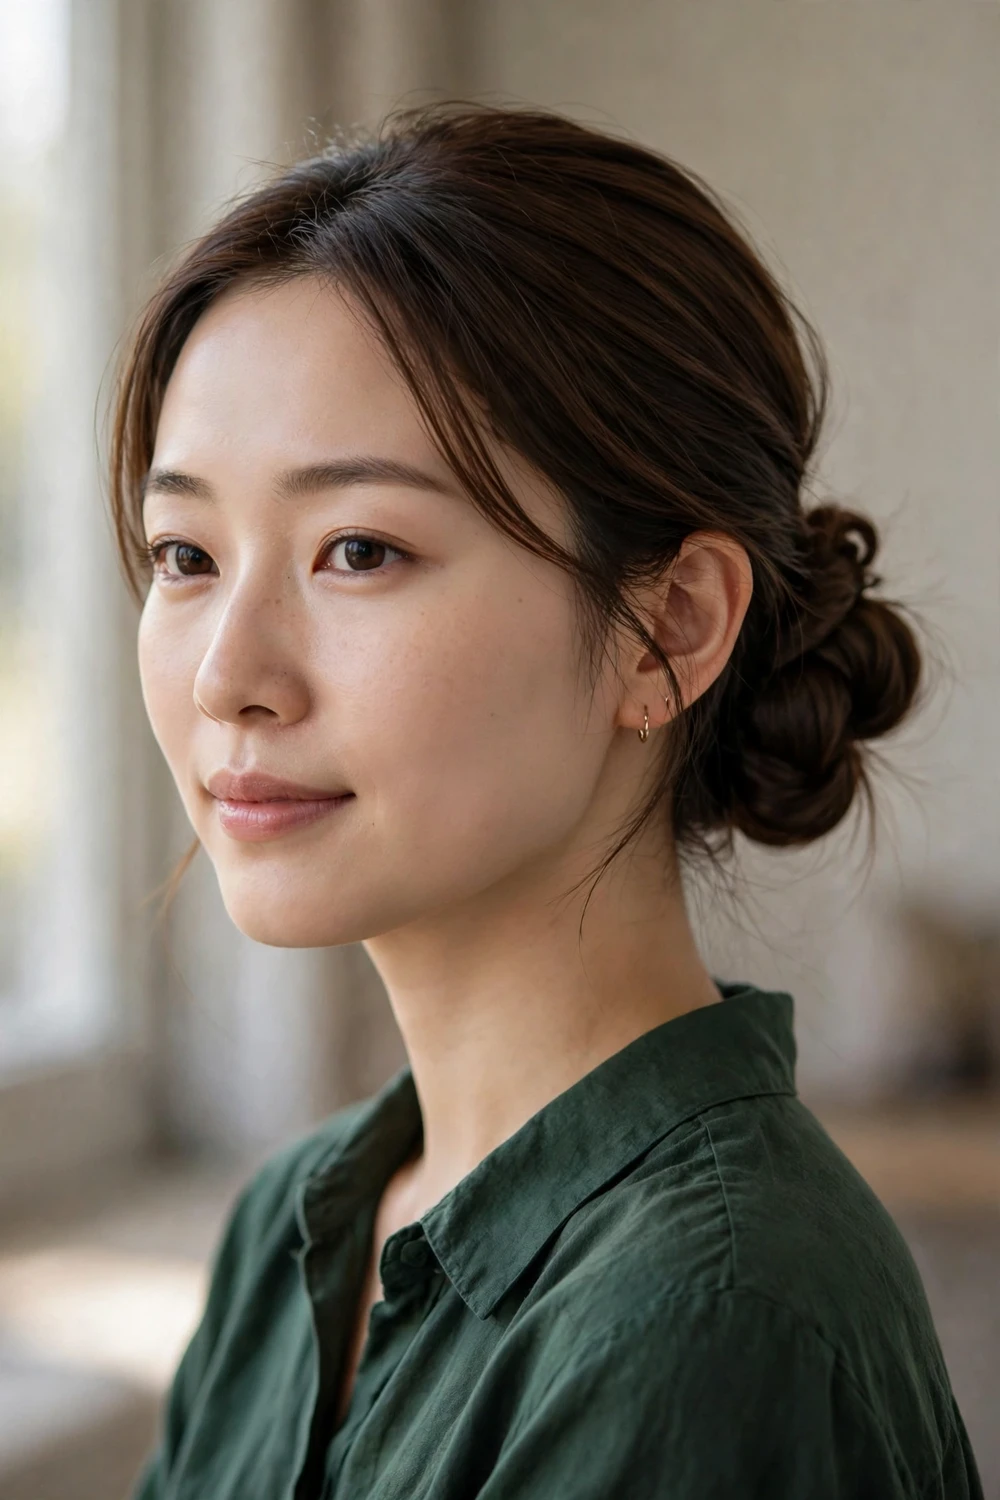
When you need a polished look in under ten minutes, the low twisted bun delivers. Divide damp or dry hair into two sections, twist each one away from your face, then coil both twists together at the nape of your neck. Pin as you go, tucking the ends underneath so nothing sticks out. The twist texture hides the fact that you didn’t spend long on it, and the low placement keeps it comfortable for all-day wear.
Try this: Mist texturizing spray on each section before twisting. It stops layers from poking out and gives the bun a fuller shape.
2. Messy Low Chignon
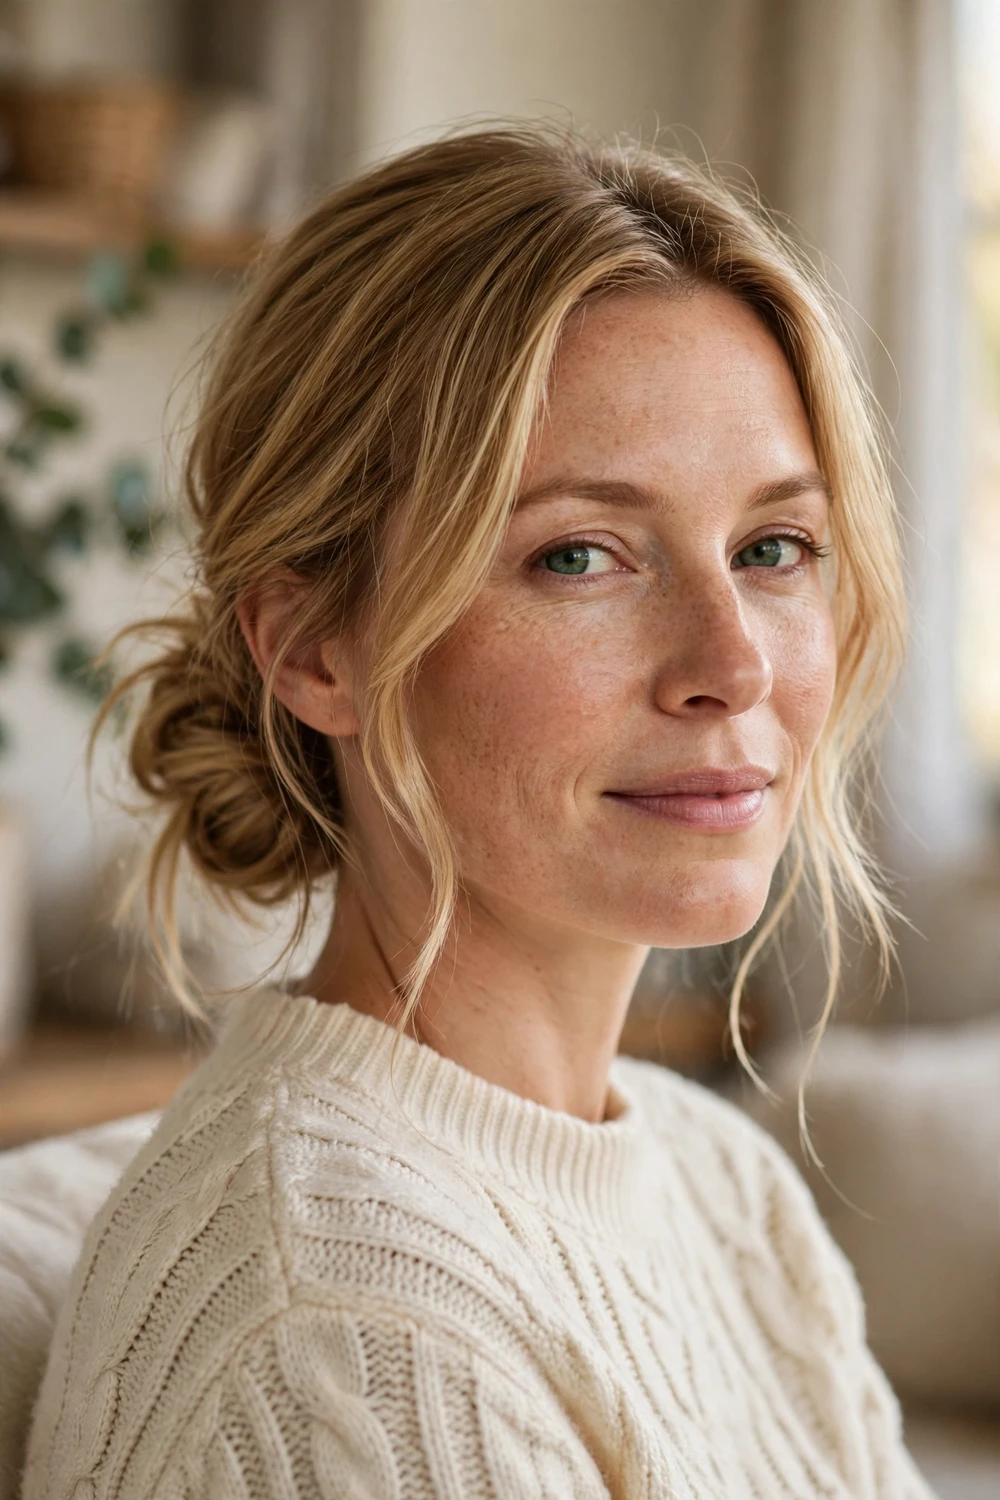
Want that undone-but-pretty finish you see everywhere? Gather hair into a loose low ponytail, twist it gently, and wrap it around the base without pulling tight. Pin loosely so soft pieces fall out on their own. Pull two thin tendrils free at the front to frame your face. The whole point is imperfection, so don’t smooth anything down or re-pin flyaways. This works best on second-day hair when there’s already some natural texture to work with.
Try this: Skip the brush and use your fingers to gather the hair. It keeps the texture rough in the right way.
3. Braided Half-Updo
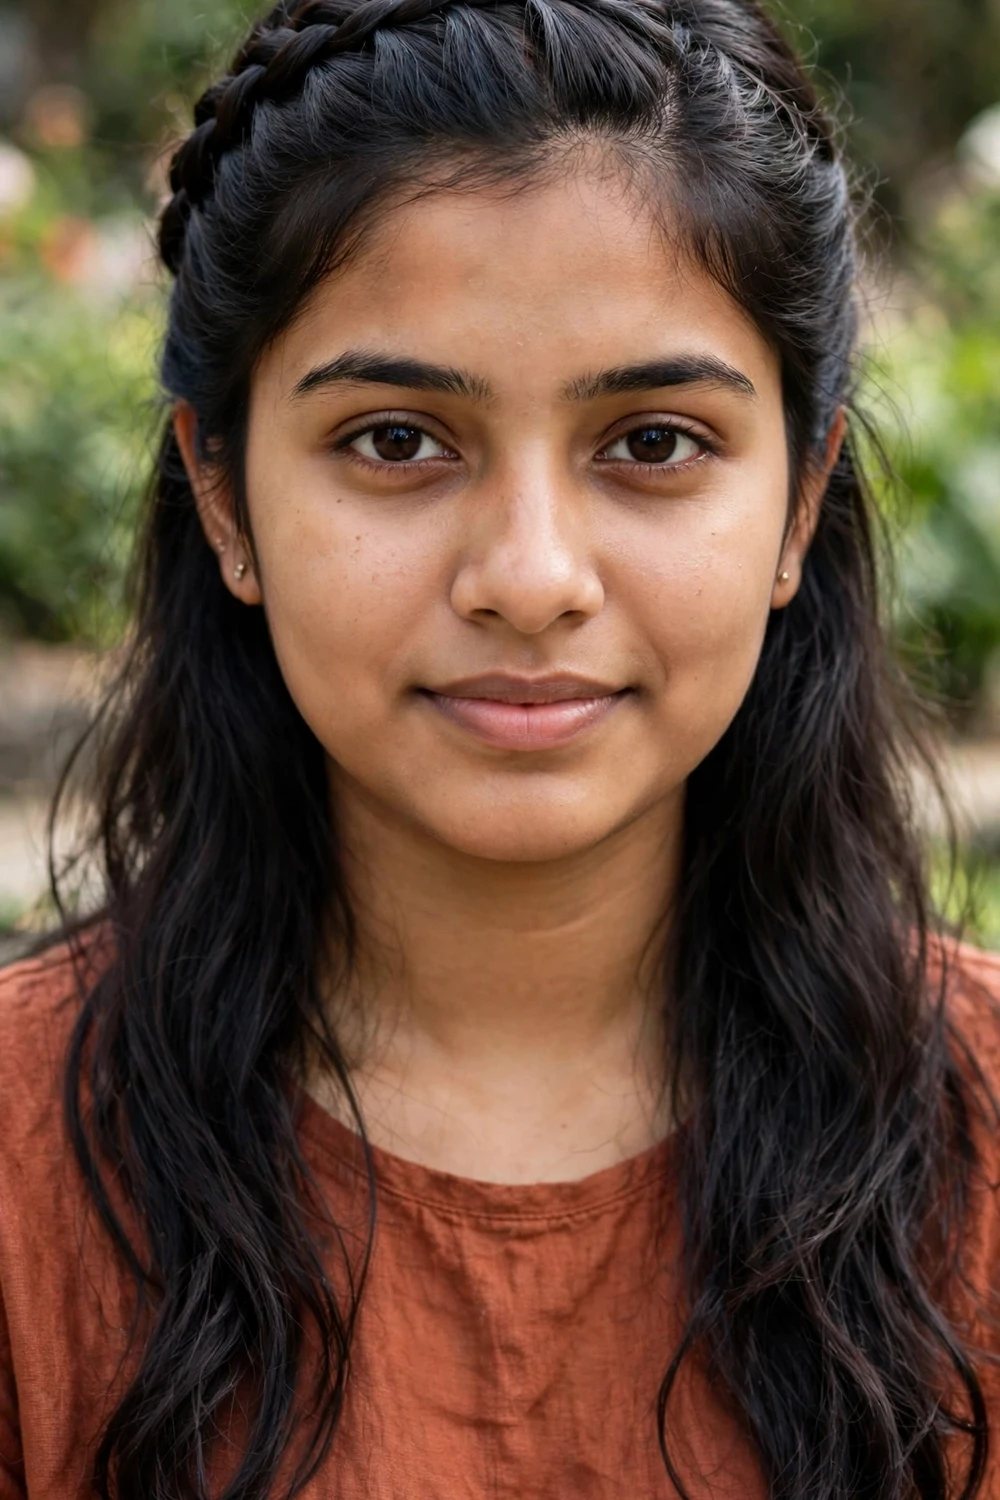
Braid two small sections from each temple, pulling them back to meet at the crown. Secure with a clear elastic, then let the rest of your hair fall loose. A Dutch braid (where strands cross under instead of over) sits raised off the head and photographs better than a flat three-strand braid. This style keeps hair out of your face while showing off your length, which makes it a strong pick for outdoor events where wind is a factor.
Try this: Pancake each braid by gently tugging the edges outward. It doubles the braid’s width in seconds.
4. French Twist
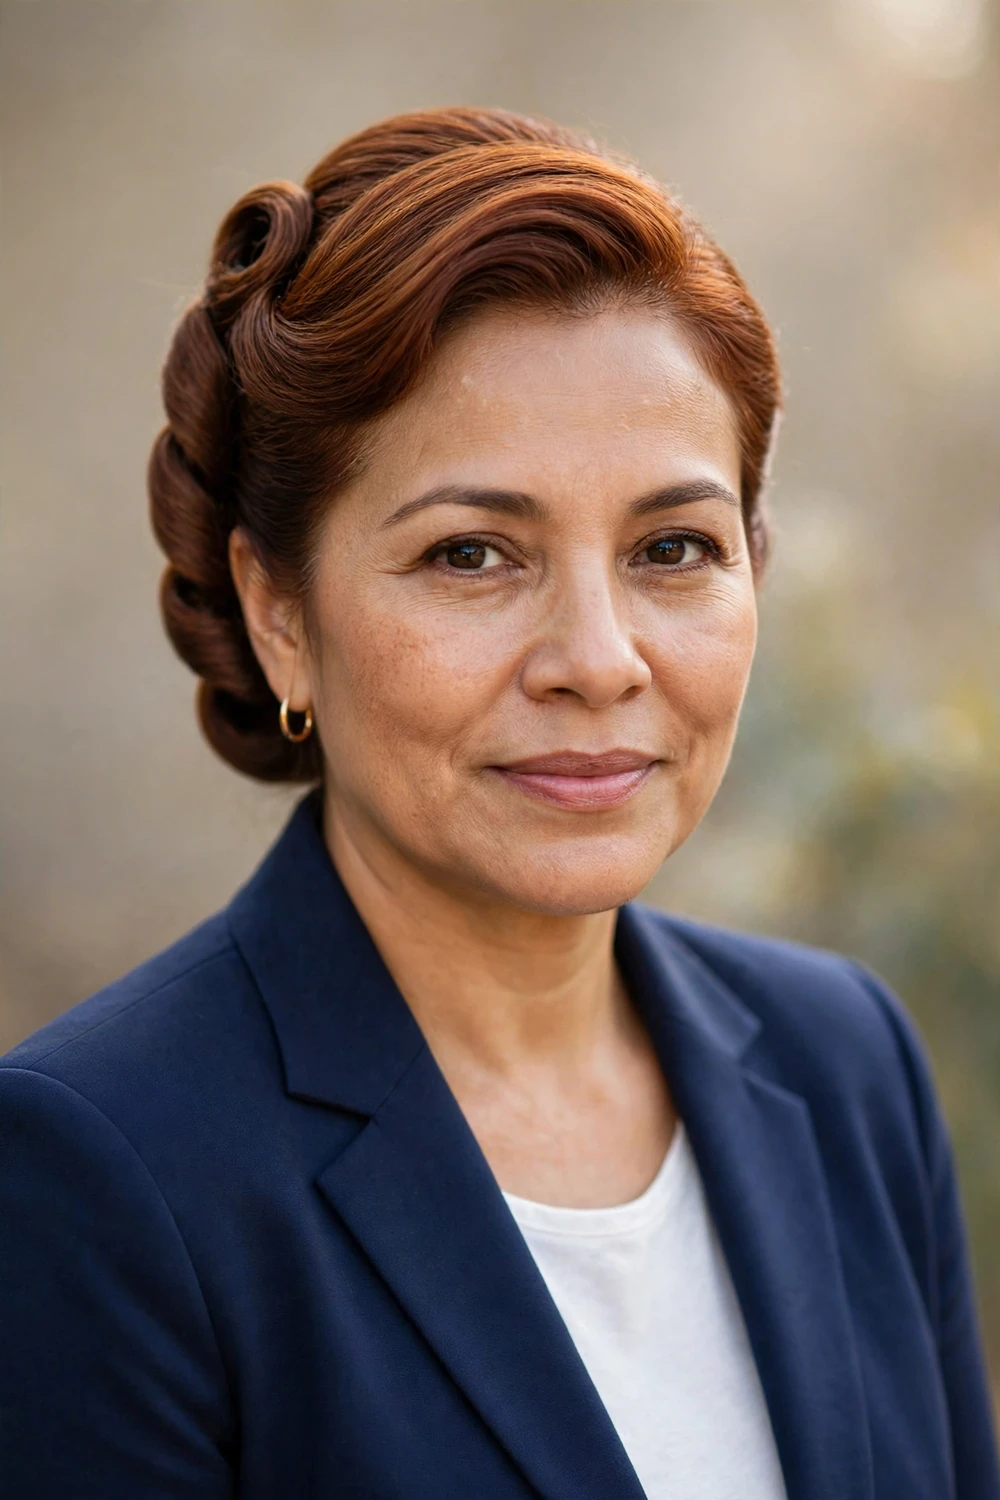
Few styles read as instantly elegant as a french twist. Sweep all your hair to one side, pin it flat along the back of your head to anchor it, then roll the length upward and tuck the ends inside the roll. Slide bobby pins vertically along the seam in a crossed pattern to lock it. Medium hair is actually ideal here because there’s less bulk to roll, so the twist sits flatter and sleeker than it does on long hair.
Try this: Smooth a pea-sized amount of shine serum over the surface before rolling. It kills frizz without making the style slippery.
5. Curly Low Pony Updo
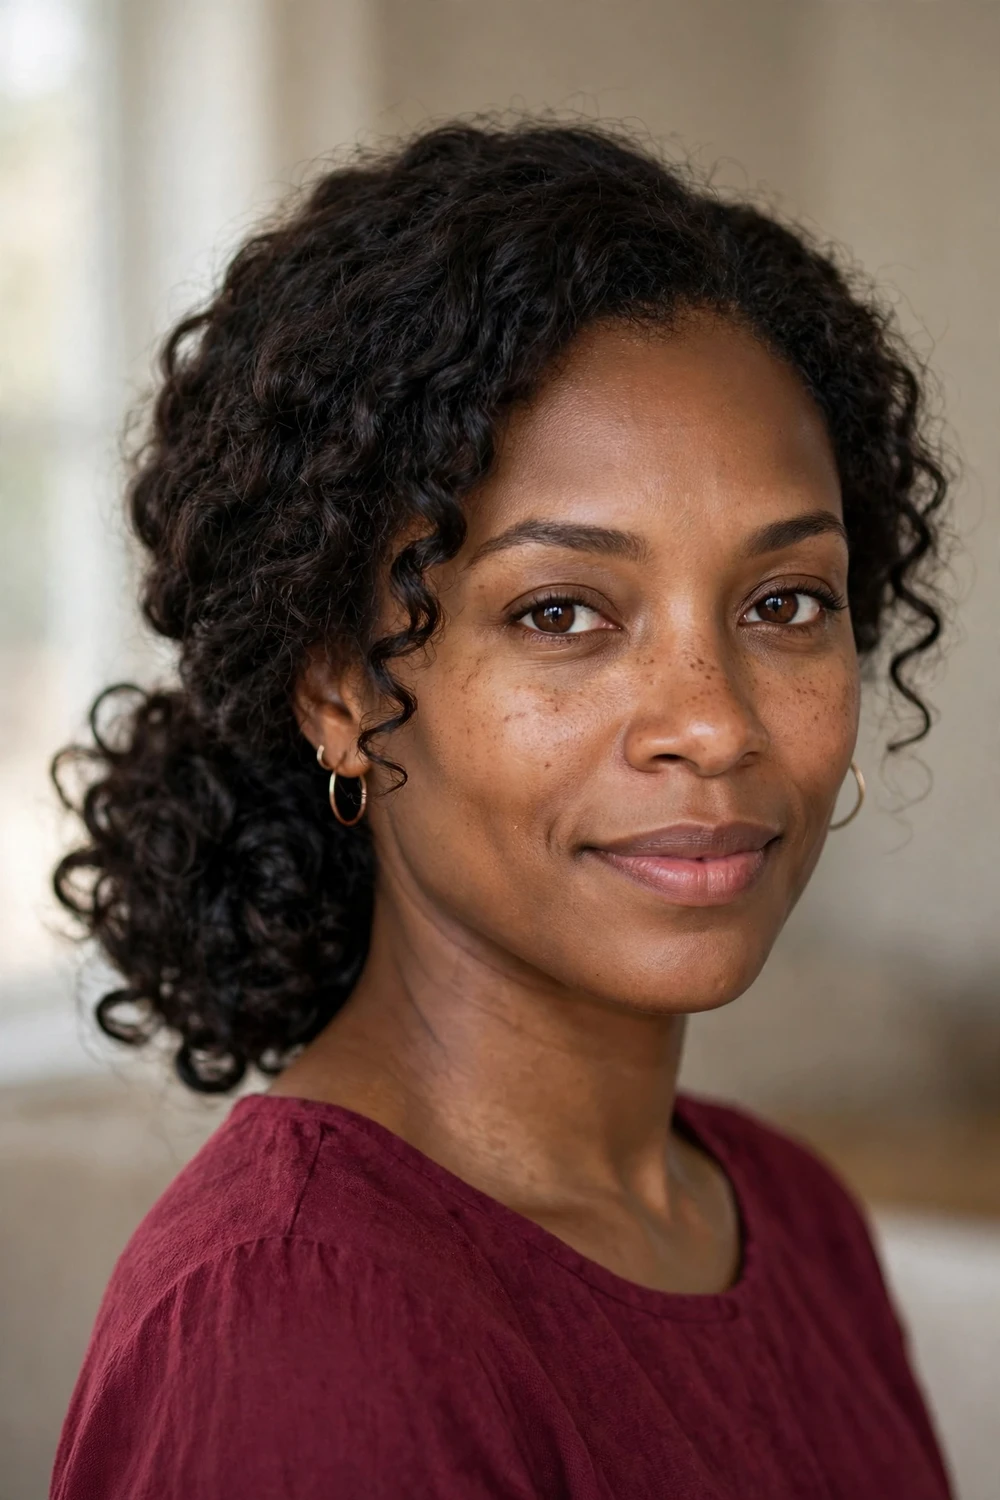
Curly girls, this one is yours. Gather curls into a low ponytail at the nape, but on the last pull of the elastic, stop halfway so the ends loop into a loose bun shape. Fan the looped curls out with your fingers and pin any heavy sections that droop. Your natural volume does all the work here, so you don’t need teasing or padding. Leave the curl pattern intact rather than smoothing it, since the texture is what makes this style interesting.
Try this: Use a silk scrunchie instead of a regular elastic. It won’t snag curls when you take the style down.
6. Classic Bun
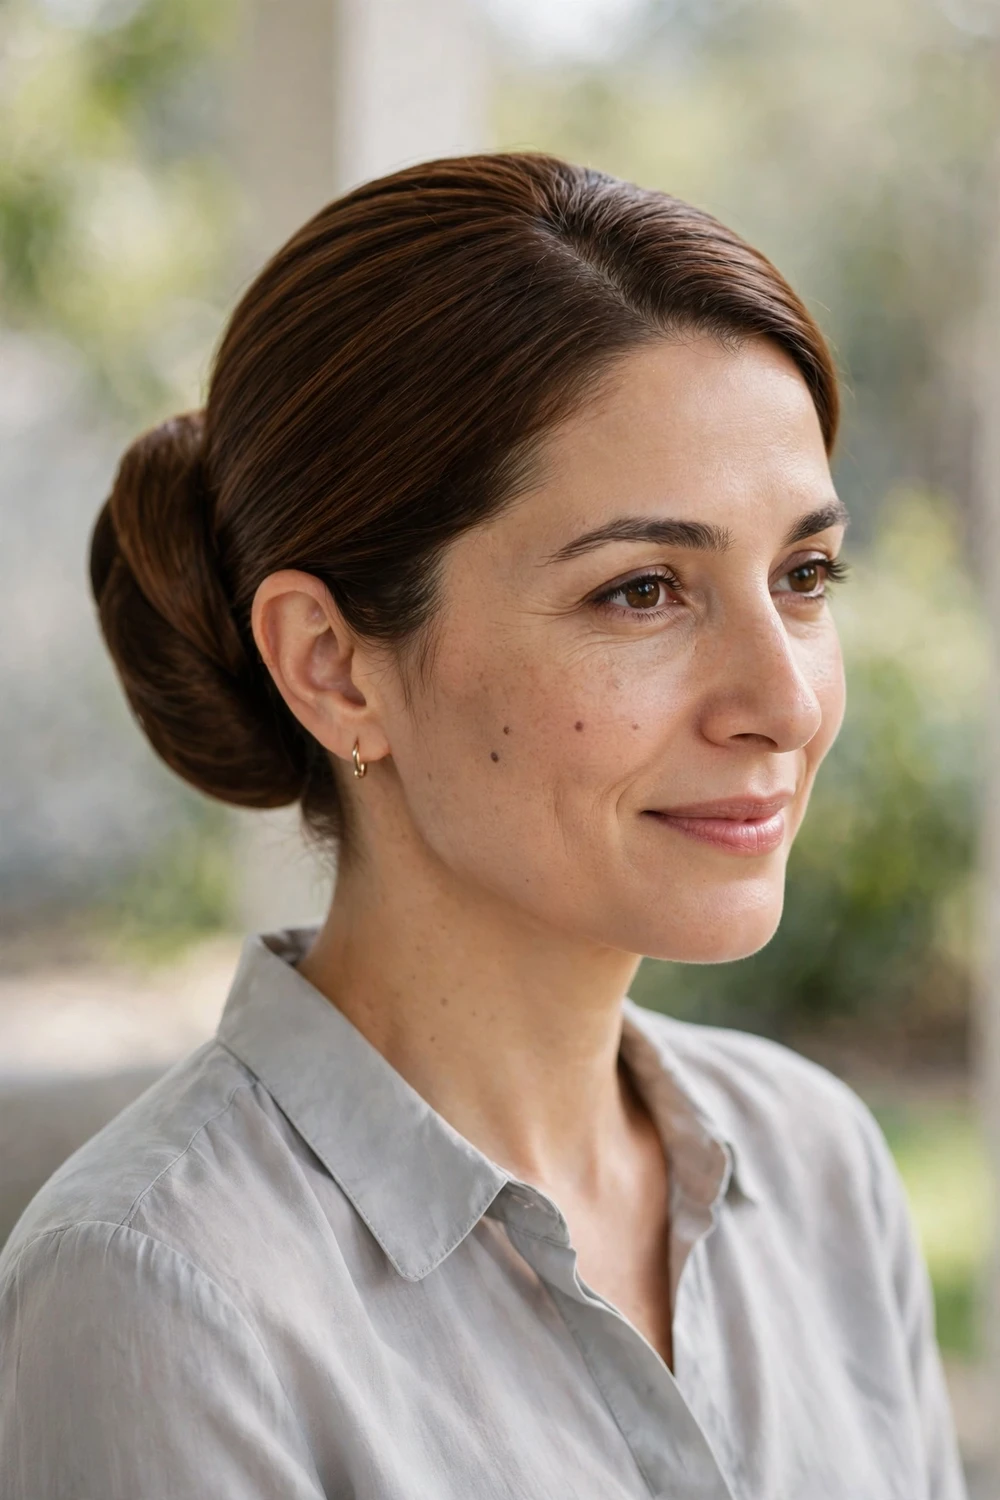
The classic bun never leaves the rotation because it suits literally every setting. Pull hair into a ponytail at your preferred height, twist the length, and coil it around the base. Pin every inch or so, hiding each pin under the coil above it. For a sleek finish, smooth the surface with a boar bristle brush before you start twisting. For a softer version, leave the crown slightly loose and pull out face-framing pieces after pinning.
Try this: Wrap a thin strand of hair around the elastic before coiling. It hides the band completely.
7. Messy Top Knot
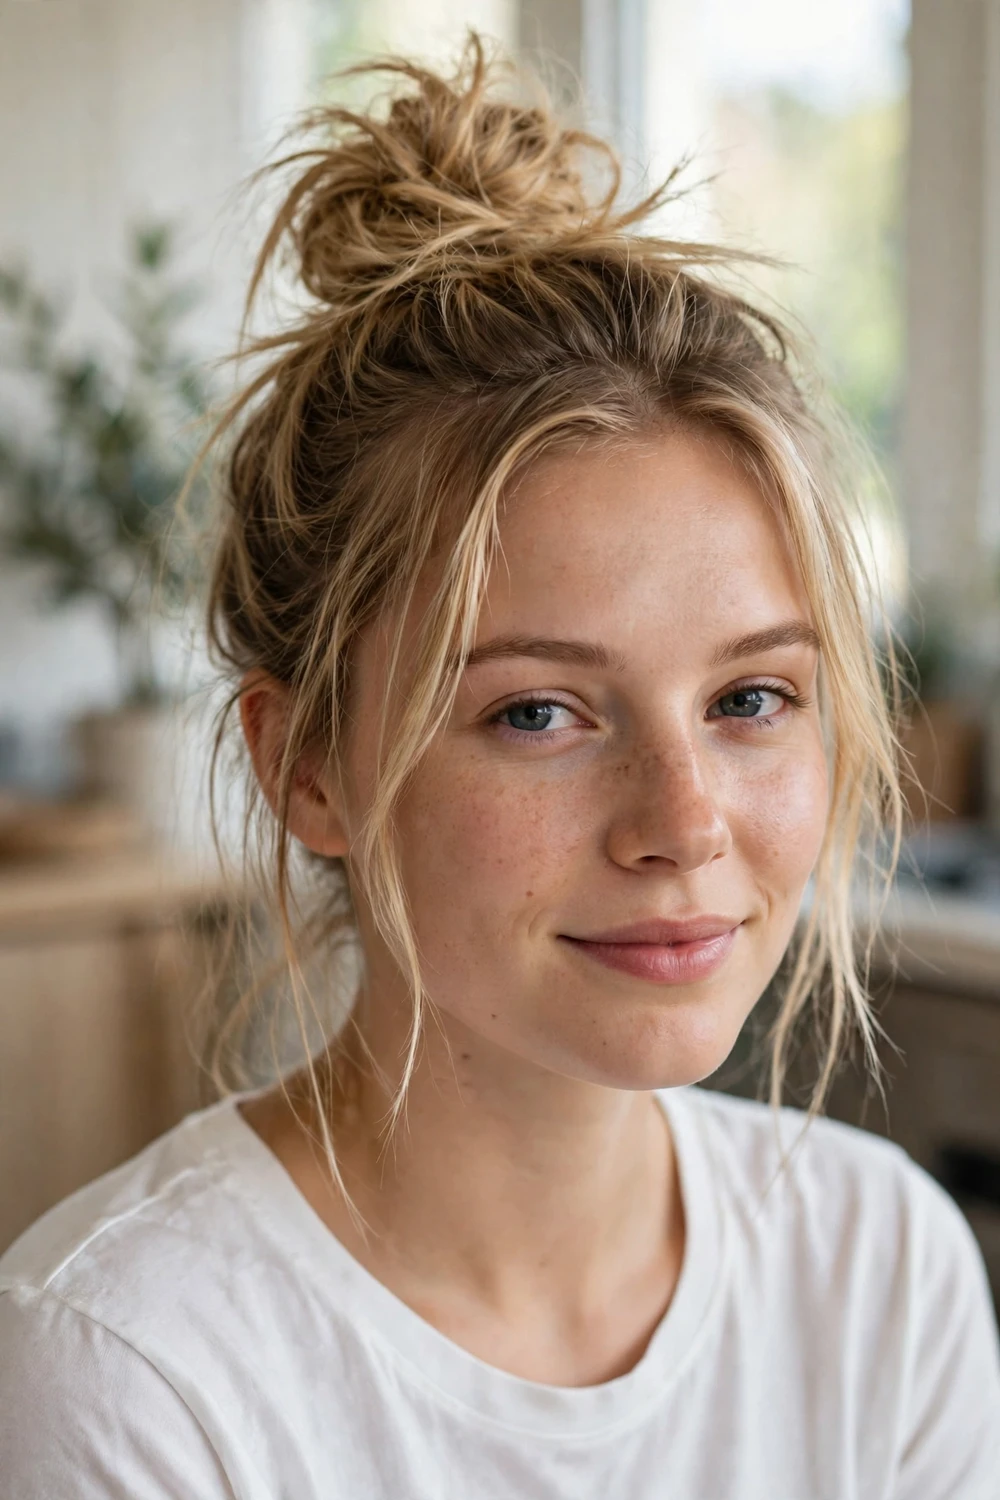
Second-day hair and no time? Flip your head forward, gather everything into a high ponytail, and twist it loosely around the base. Don’t aim for neatness. Pin the coil in three or four spots and let the ends stick out wherever they land. The height elongates your neck and keeps hair completely off your face, which is why this stays the default for workouts, errands, and work-from-home days. It takes about ninety seconds once you’ve done it twice.
Try this: Tease the ponytail lightly before twisting. It gives the knot twice the volume with zero extra effort.
8. Braided Low Chignon
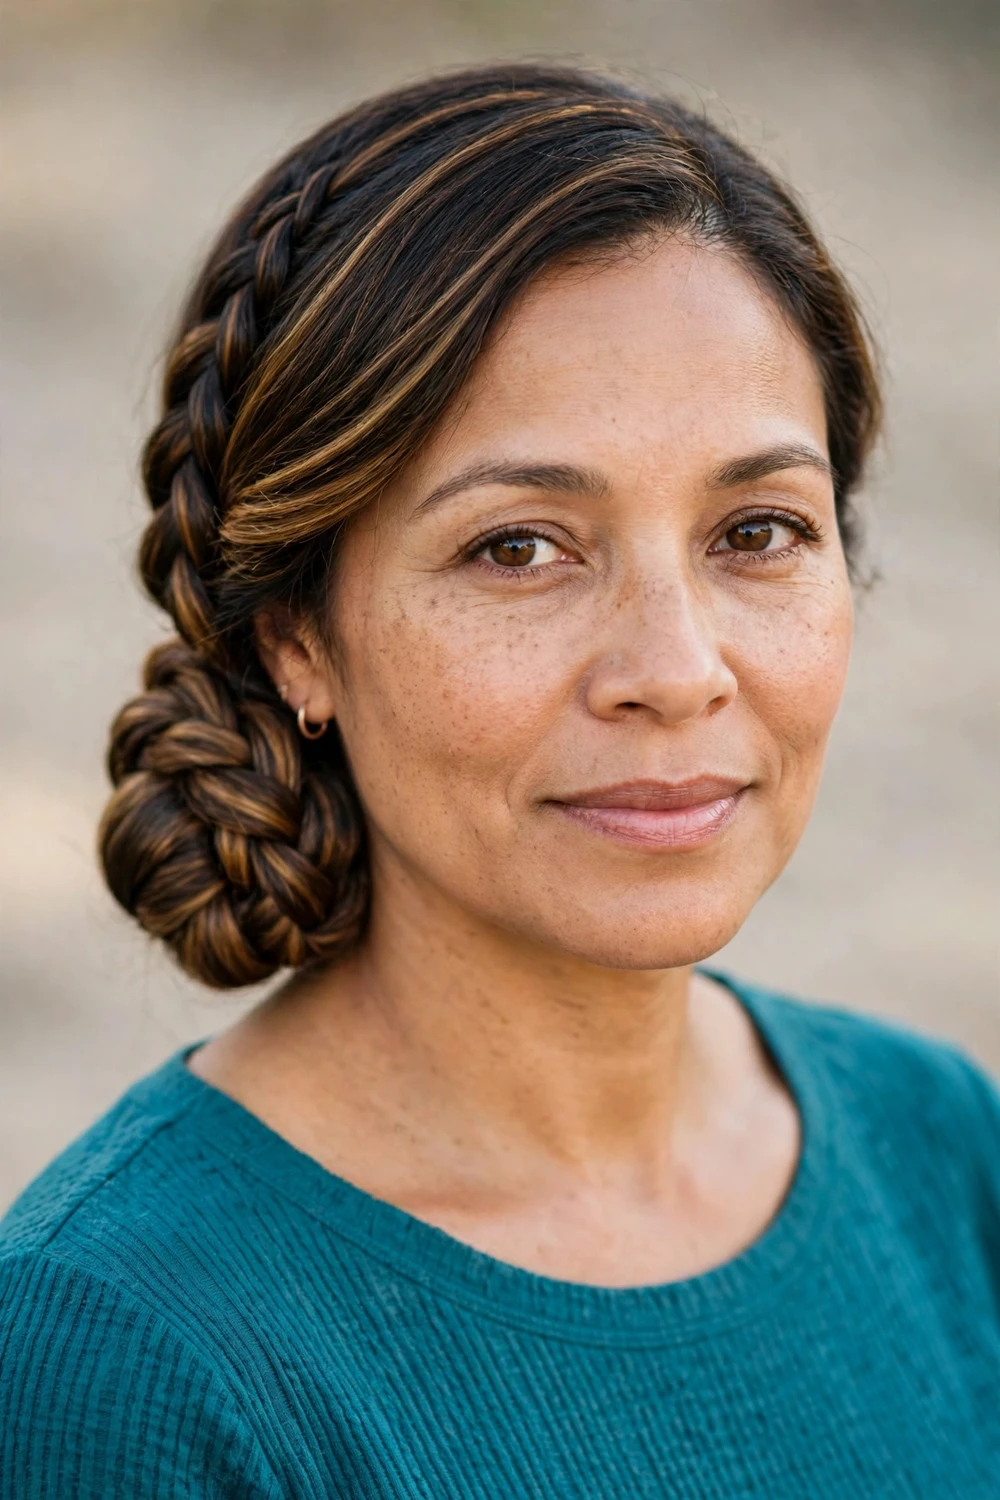
A slim braid wraps around the base of this chignon and turns a simple bun into something people ask about. Braid a one-inch section from behind one ear, then gather the rest of your hair into a low bun. Wrap the braid around the bun’s base and pin the end underneath. The contrast between the smooth bun and the textured braid gives the style dimension without any complicated technique. It reads formal enough for weddings but takes under fifteen minutes.
Try this: Braid the accent section first and clip it aside. It’s easier than braiding after the bun is already pinned.
9. Half-Up Twist
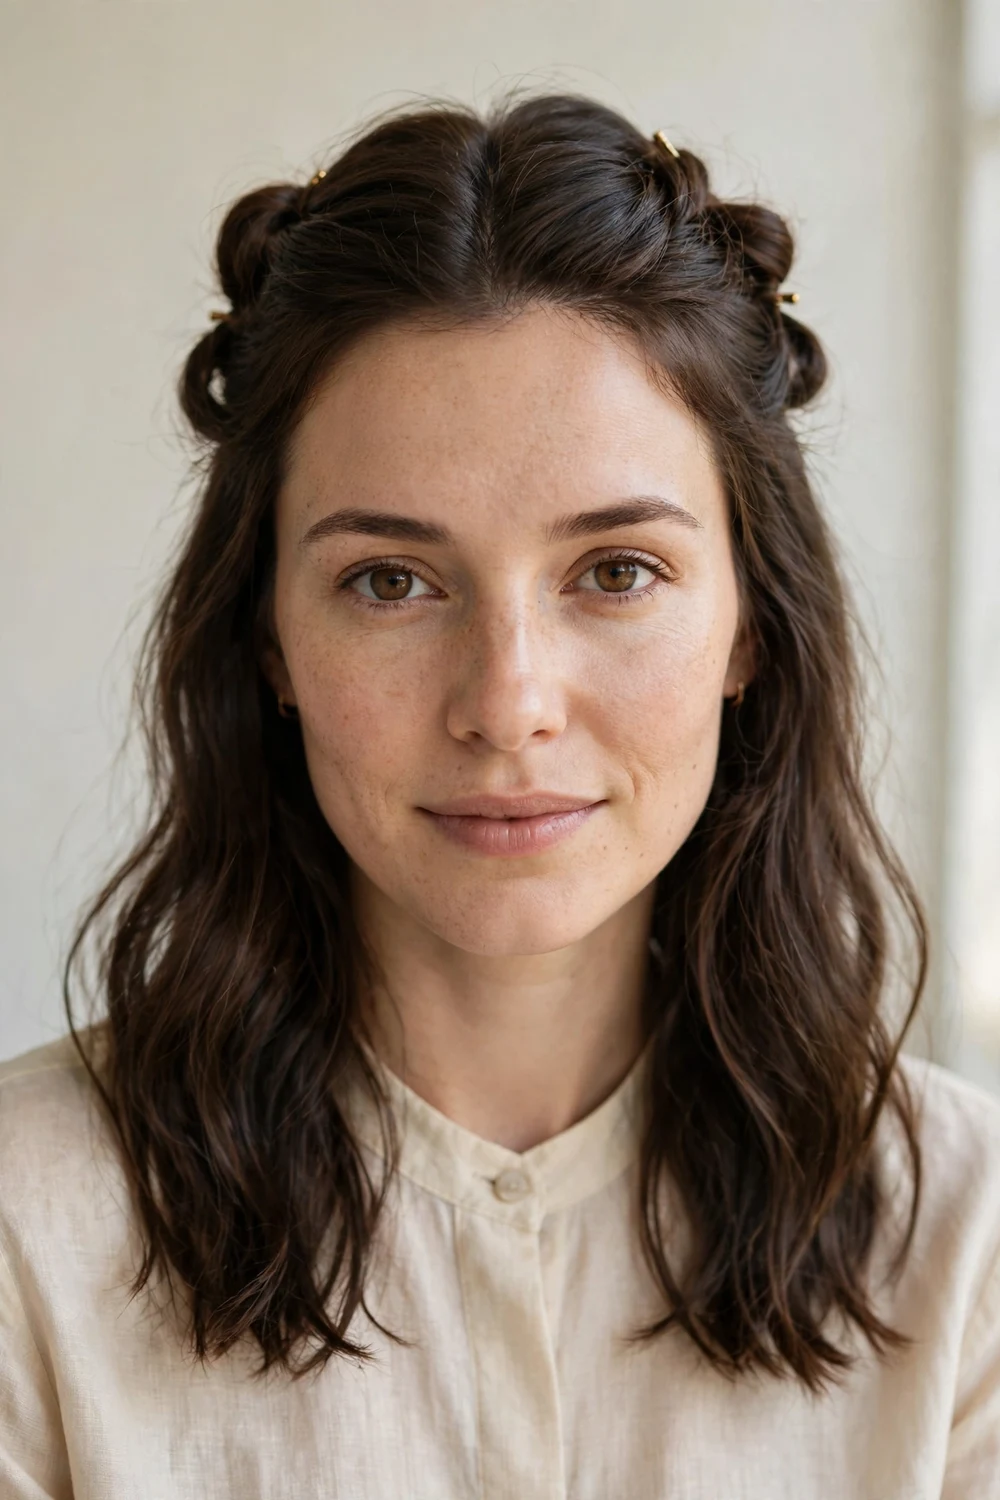
Unlike a full updo, the half-up twist lets you keep your length on display. Take a two-inch section from each side of your part, twist both toward the back of your head, and cross them over each other at the crown. Pin the crossover point with two bobby pins in an X. The twists add just enough polish to make loose hair look intentional, and the style survives wind better than a plain half-ponytail because the twists grip each other.
Try this: Use decorative pins instead of plain bobby pins at the crossover. They turn a simple style into an accessory moment.
10. Sleek Ponytail
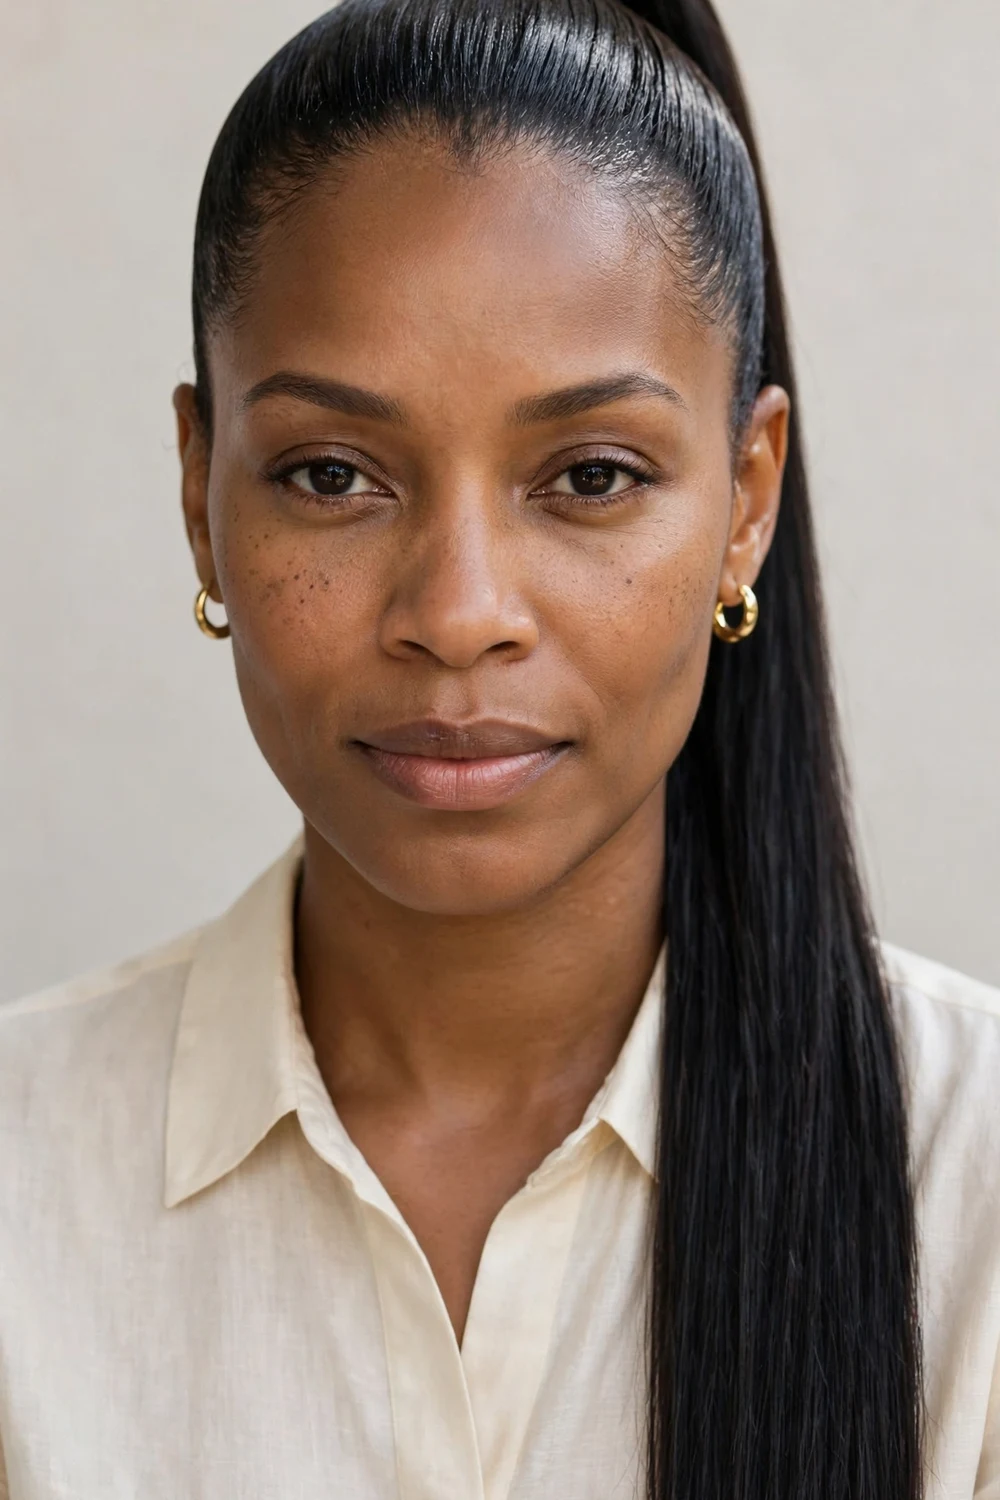
Job interviews, client dinners, formal events, the sleek ponytail handles them all. Apply heat protectant first, then flat iron your hair straight in sections. Brush everything back tightly and secure with a snag-free elastic at the crown or nape. Smooth flyaways with a toothbrush sprayed with hairspray, not your fingers. Wrap a strand around the elastic to finish. Keep this style occasional rather than daily, since tight ponytails worn constantly can cause traction alopecia along the hairline.
Try this: Flat iron the ponytail itself after securing it. The length hangs straighter and looks twice as polished.
11. Ballet Bun
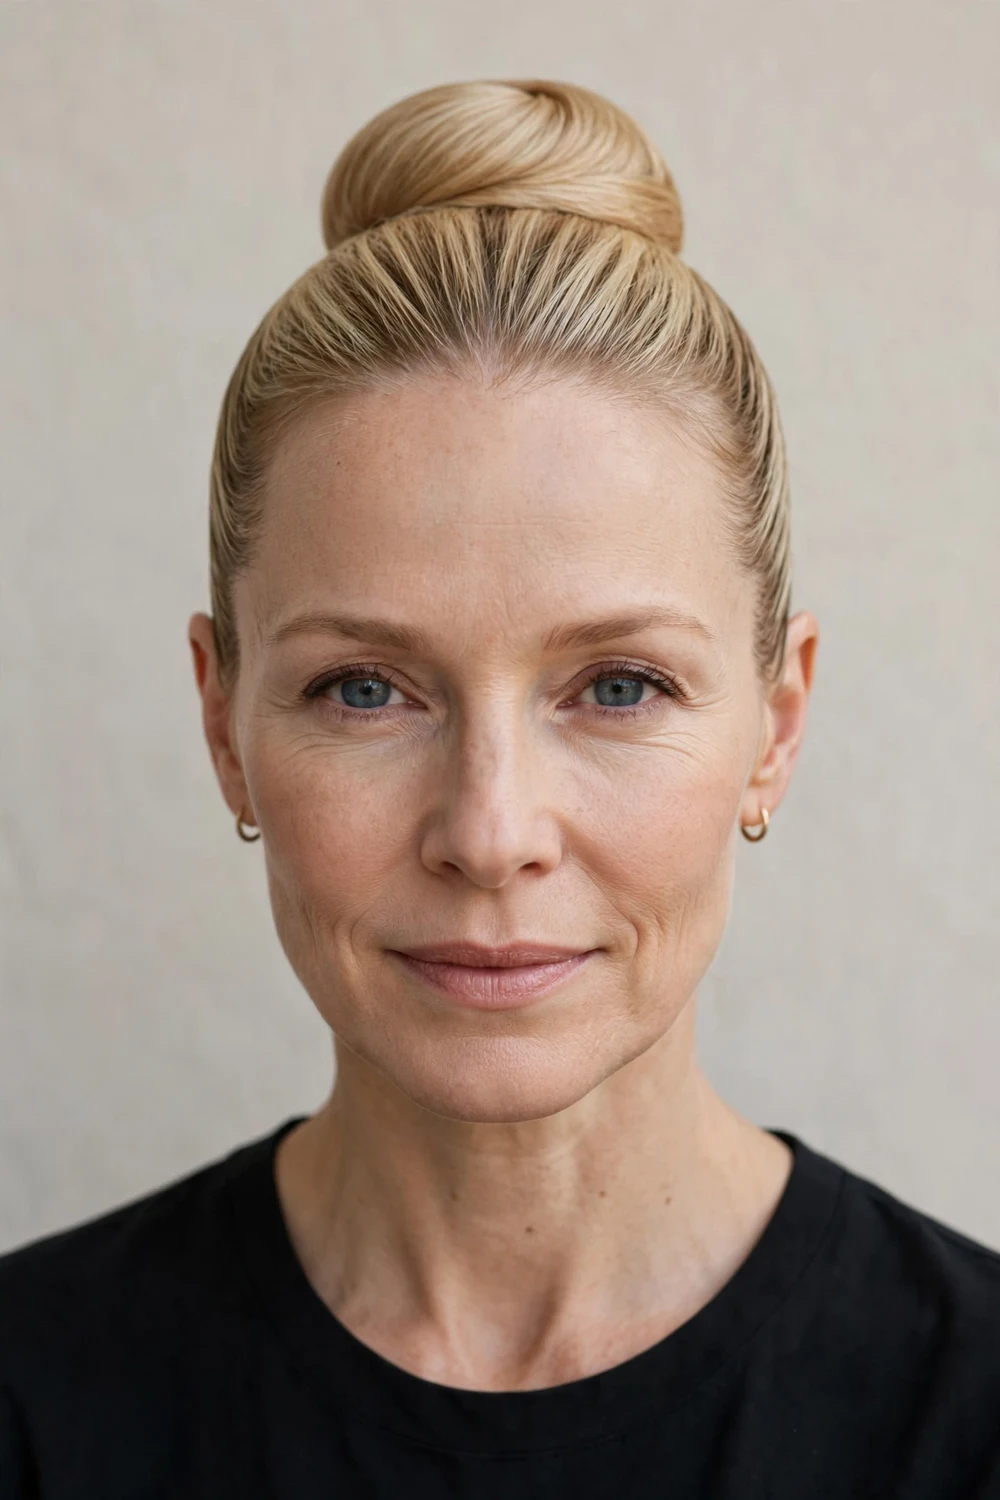
Pull everything high and smooth for the neatest bun on this list. Brush hair straight up to the crown, secure with an elastic, then twist and coil tightly. Pin thoroughly, a ballet bun shouldn’t shift when you turn your head quickly. Gel the hairline before brushing up to eliminate bumps. This is the tightest style here, so give your scalp rest days between wears. Constant tension at the crown can thin the hairline over time, so rotate it with looser styles.
Try this: Use a bun donut if your hair is fine. It creates a full round shape that medium hair can’t always achieve alone.
12. Braided Halo
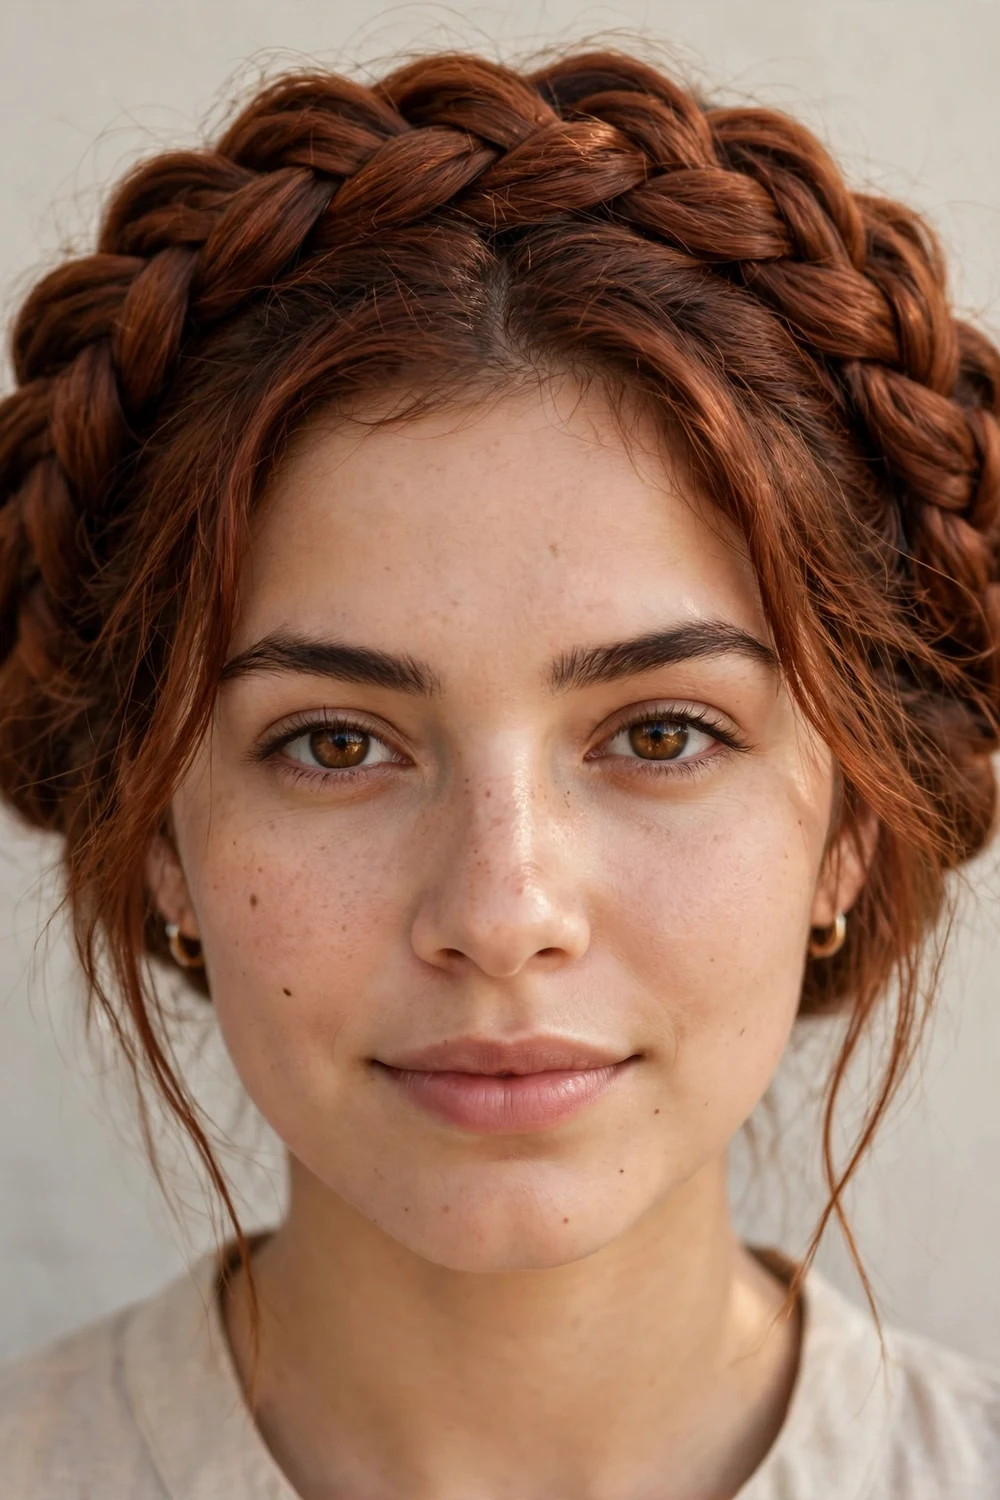
A crown braid circles your entire head like a halo, and it stays put for hours because the braid’s own tension holds it. Start a Dutch braid behind one ear and work it around your hairline, adding hair as you go, until you meet the starting point. Tuck the tail under and pin it flat. Medium hair is long enough to complete the circle without extensions. This style keeps every strand contained, which makes it practical for dancing, wind, and long outdoor ceremonies.
Try this: Braid slightly damp hair. It grips better and the finished halo looks smoother once dry.
13. Fishtail Crown
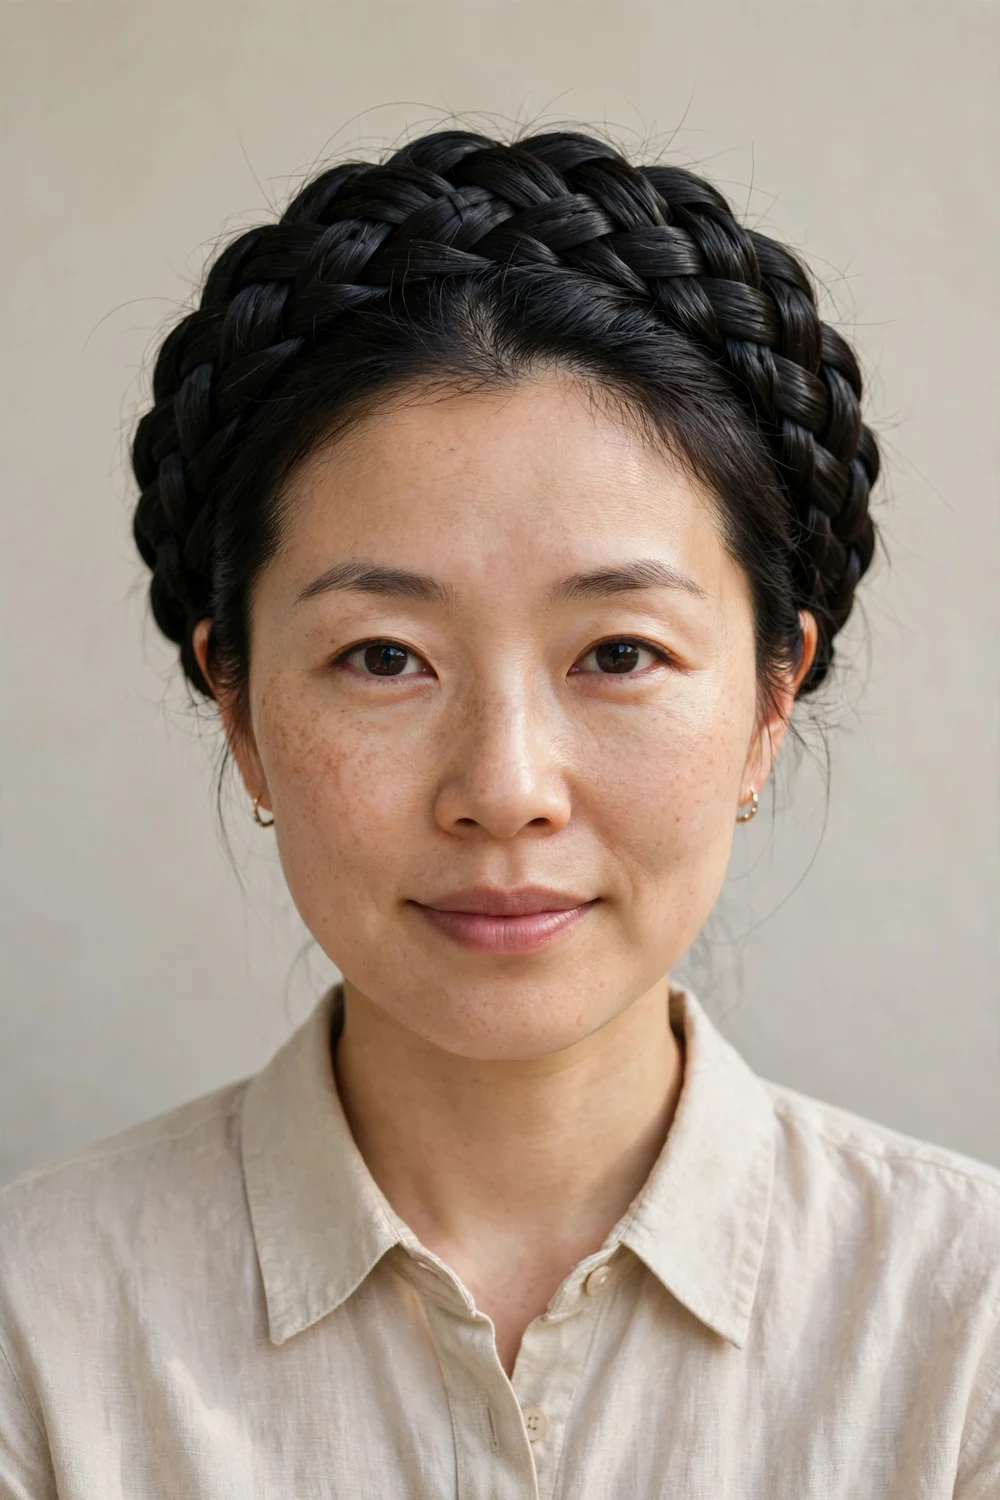
If you can fishtail, you can make this crown. The fishtail weave looks intricate but uses only two sections instead of three, so many people find it easier than a Dutch braid once they learn the rhythm. Braid from one temple around to the other, following the hairline, and pin the end behind the opposite ear. The fine woven texture catches light in a way regular braids don’t, which is why this photographs so well at golden hour.
Try this: Work with small sections. Chunky fishtails lose the delicate woven effect that makes this style special.
14. Low Chignon
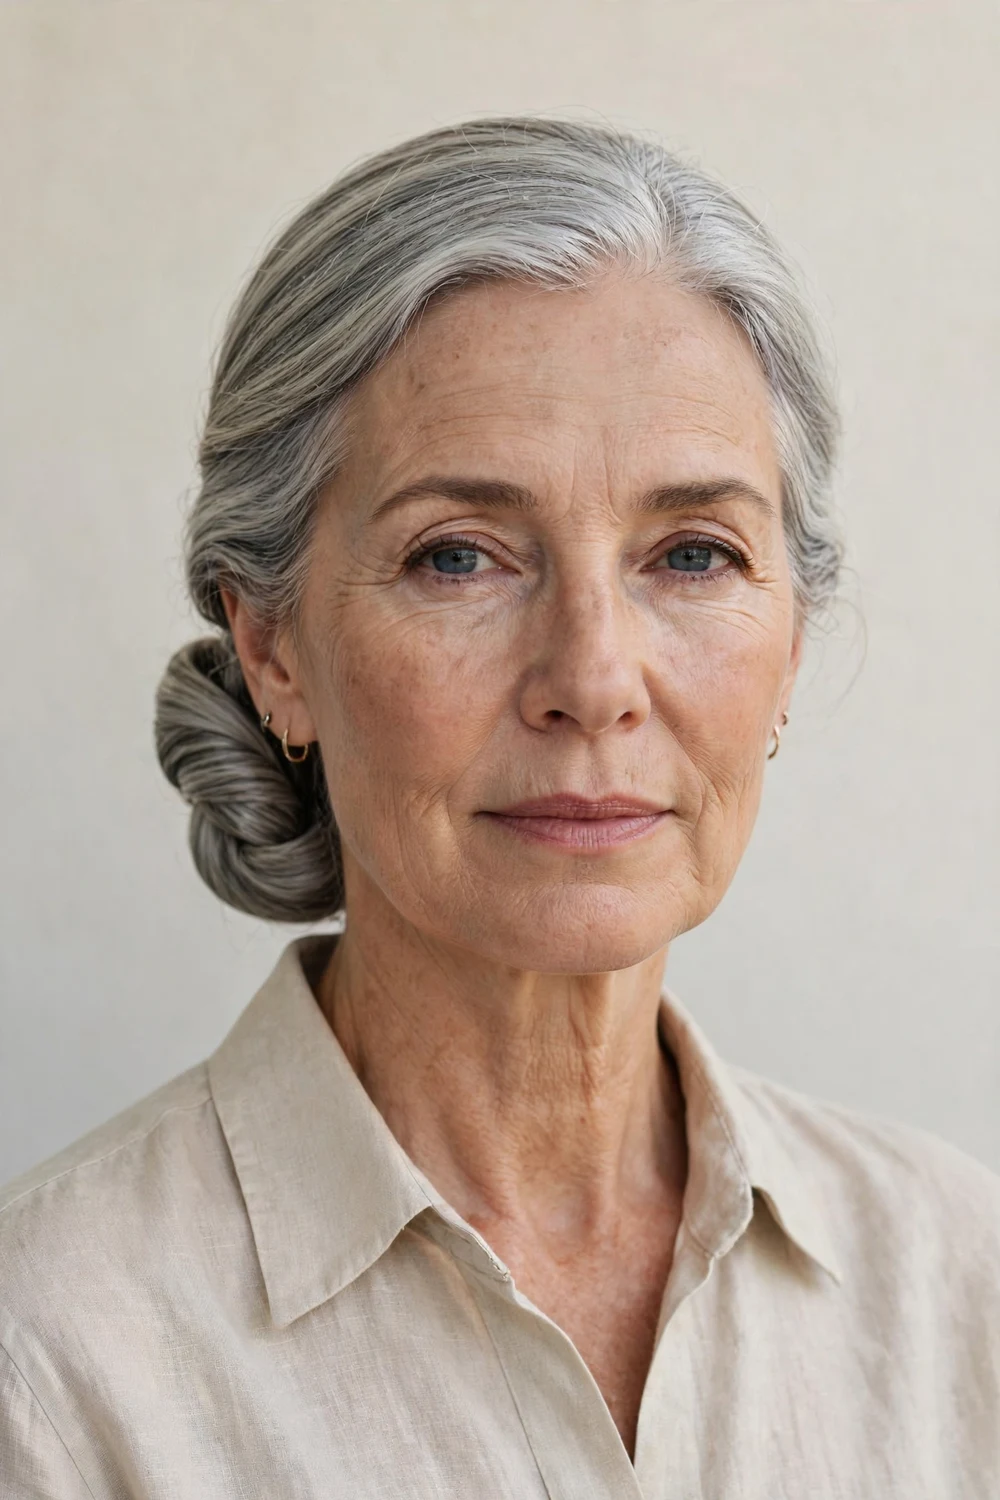
Some styles don’t need updating, and the low chignon is one of them. Gather hair at the nape, twist the length into a coil, and pin it flat against your head. Keep the surface smooth and the shape compact. There’s no texture trick or accessory doing the work here, it’s pure technique, which is why it suits formal settings where restraint reads as confidence. Silver and gray hair looks particularly striking in this style because the smooth surface shows off the color’s dimension.
Try this: Pin in a clock pattern, 12, 3, 6, 9, to distribute the hold evenly around the coil.
15. Twisted Waterfall Braid
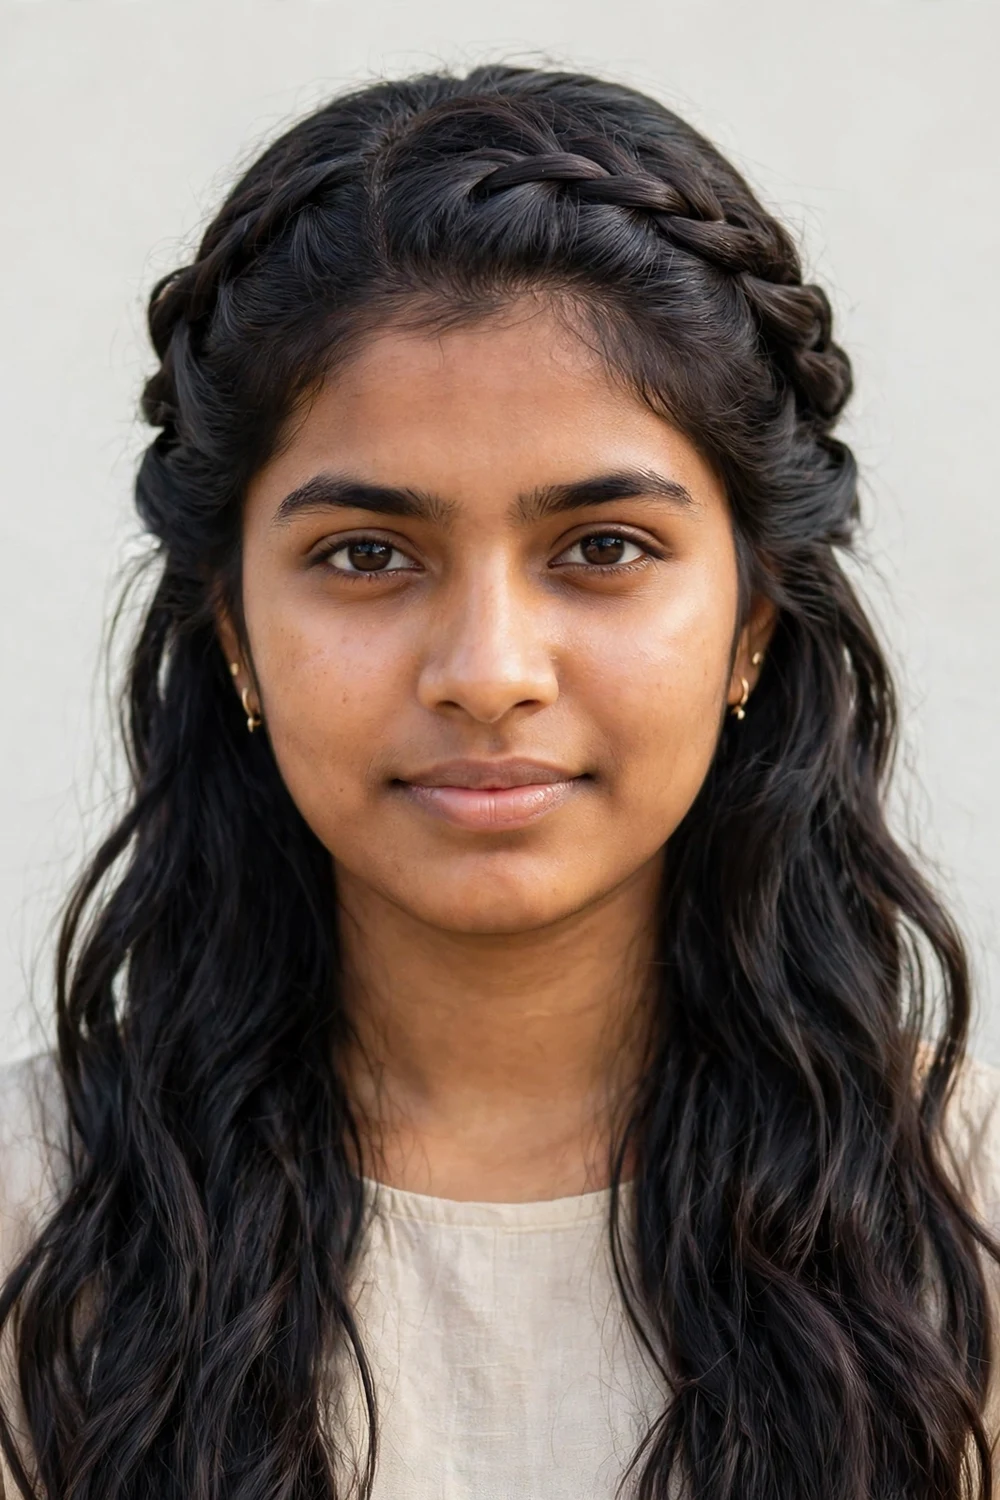
Strands cascade through this braid like water over a ledge, which is where the name comes from. Instead of adding every dropped section back in (as in a classic waterfall braid), this twisted version lets pieces fall free as you work across the crown. The result is softer and less structured, with loose strands framing the braid itself. It works as a half-updo on medium hair because you don’t need much length for the cascading effect to read clearly.
Try this: Curl the falling strands with a curling iron (heat protectant first). Defined waves make the waterfall effect pop.
16. Delicately Twisted Bouffant
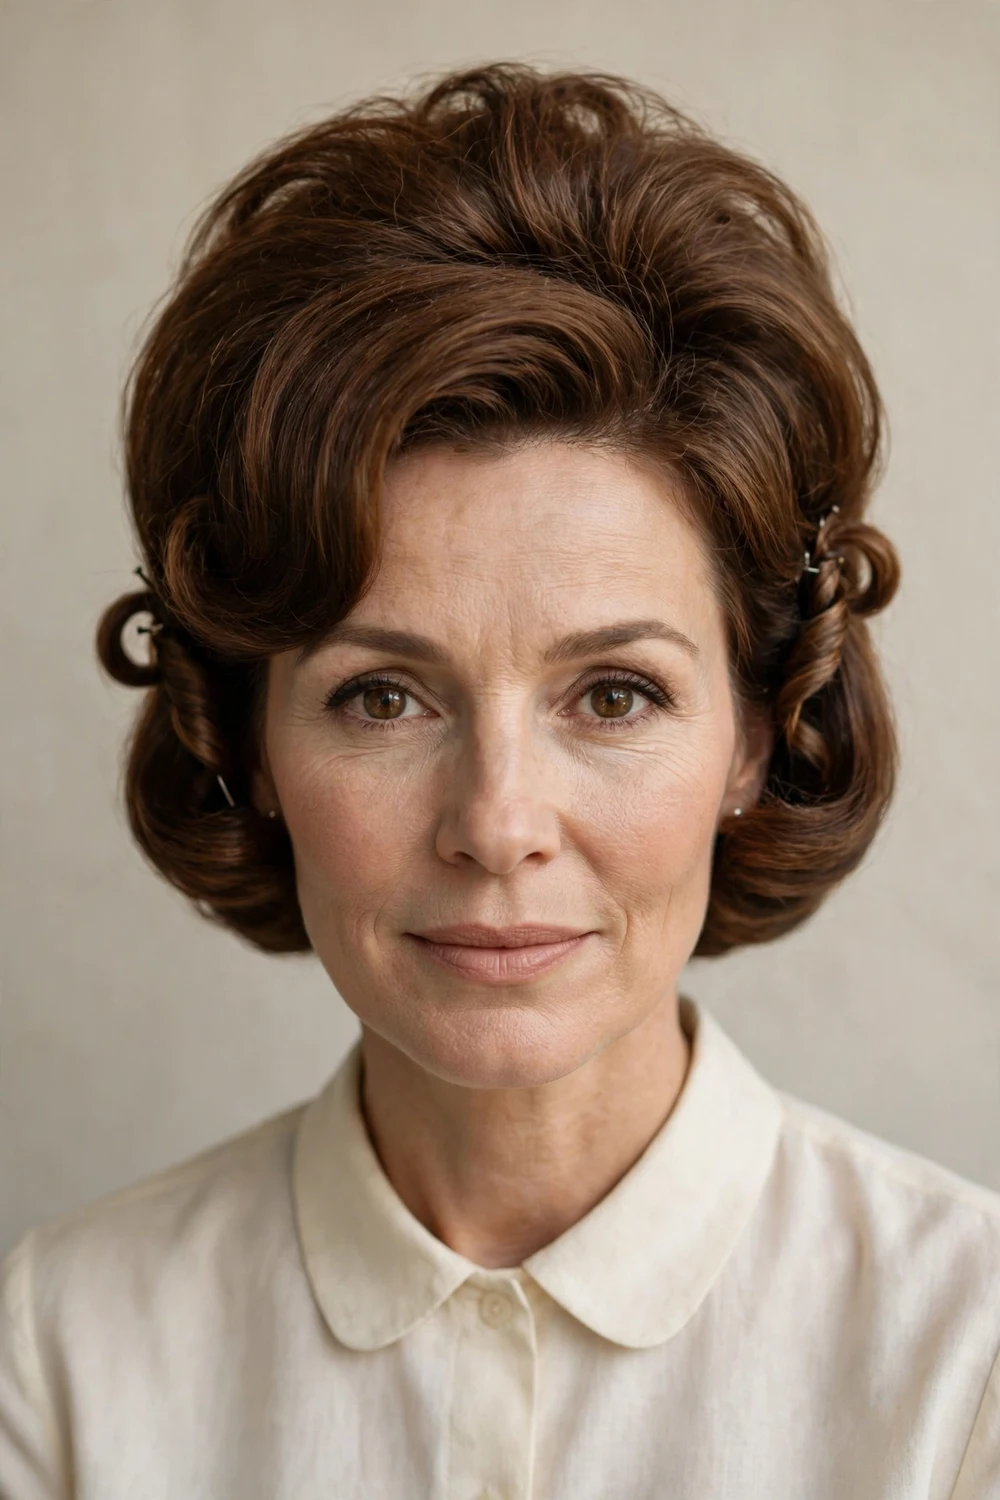
Fine hair gets a lift from this vintage-inspired shape. Tease the crown section thoroughly with a rattail comb, this is the foundation everything else sits on. Smooth the top layer over the teasing, then twist two side sections back and pin them over the base of the bouffant to hide the pins. The twists add a delicate detail that keeps the volume from looking dated. Finish with flexible-hold hairspray so the height stays soft instead of helmet-like.
Try this: Tease in three layers (bottom, middle, top) rather than one big section. Layered teasing holds height twice as long.
17. Modern Gibson Roll
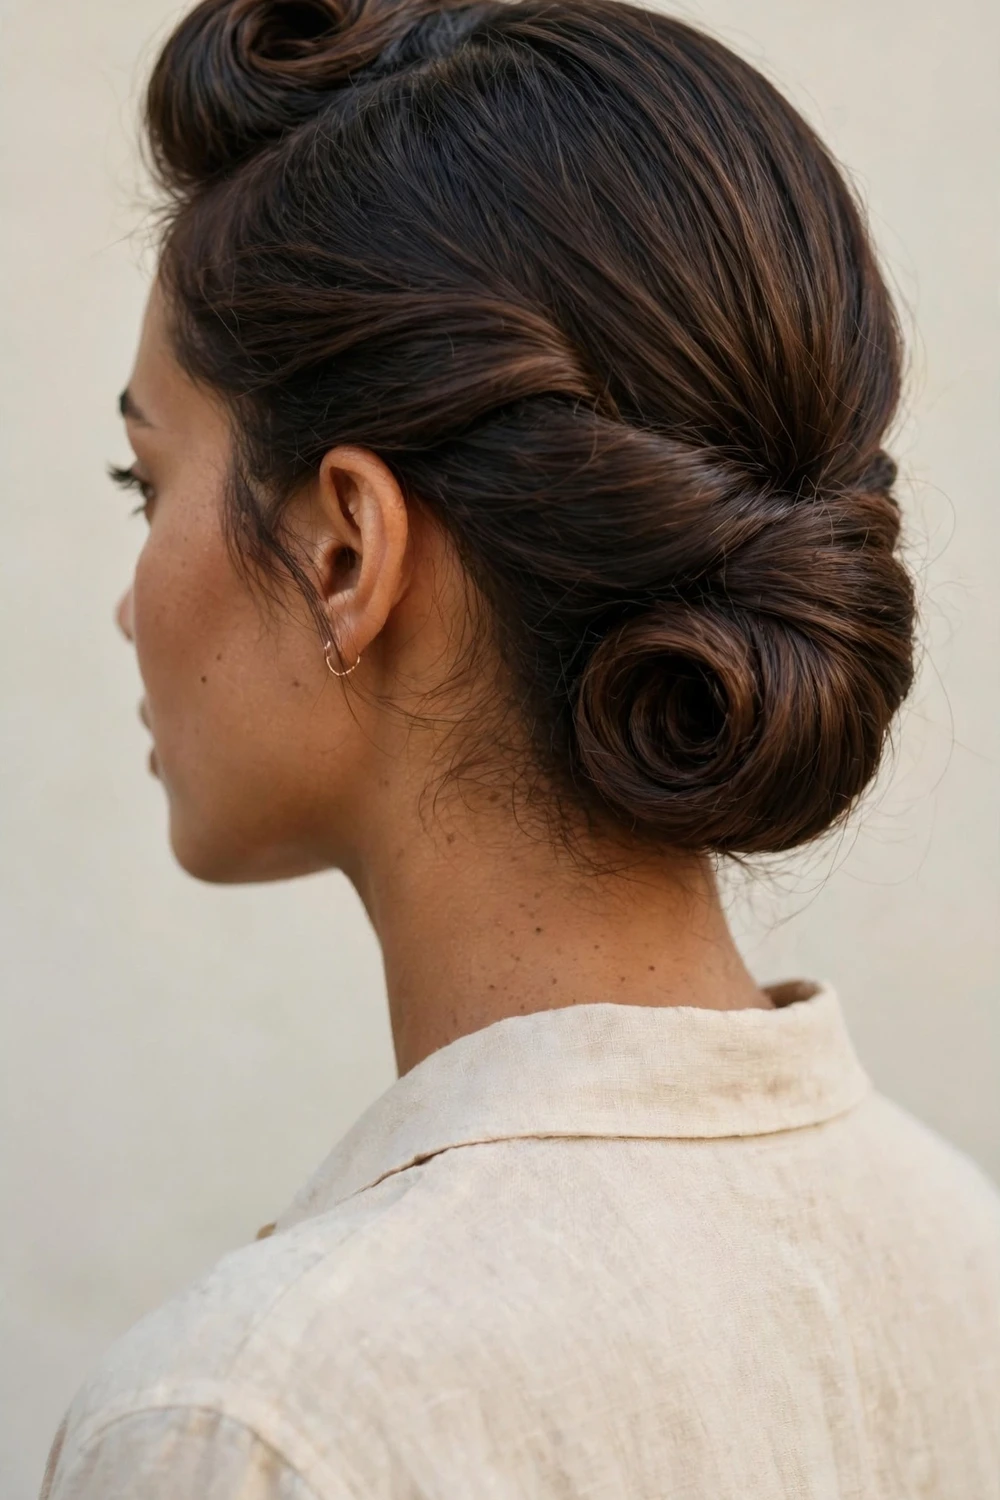
A century-old technique still earns compliments today. Put your hair in a low ponytail, then create a pocket above the elastic by splitting the hair in two. Flip the ponytail up and tuck it down through the pocket, then roll the remaining length under and pin. The modern version stays looser than the original Edwardian style, leave the crown soft and pull out a few tendrils. Medium hair tucks cleanly because there’s less bulk to hide inside the roll.
Try this: Use a thin elastic for the base ponytail. Thick bands create a visible bump under the roll.
18. Spiral Textured Bun
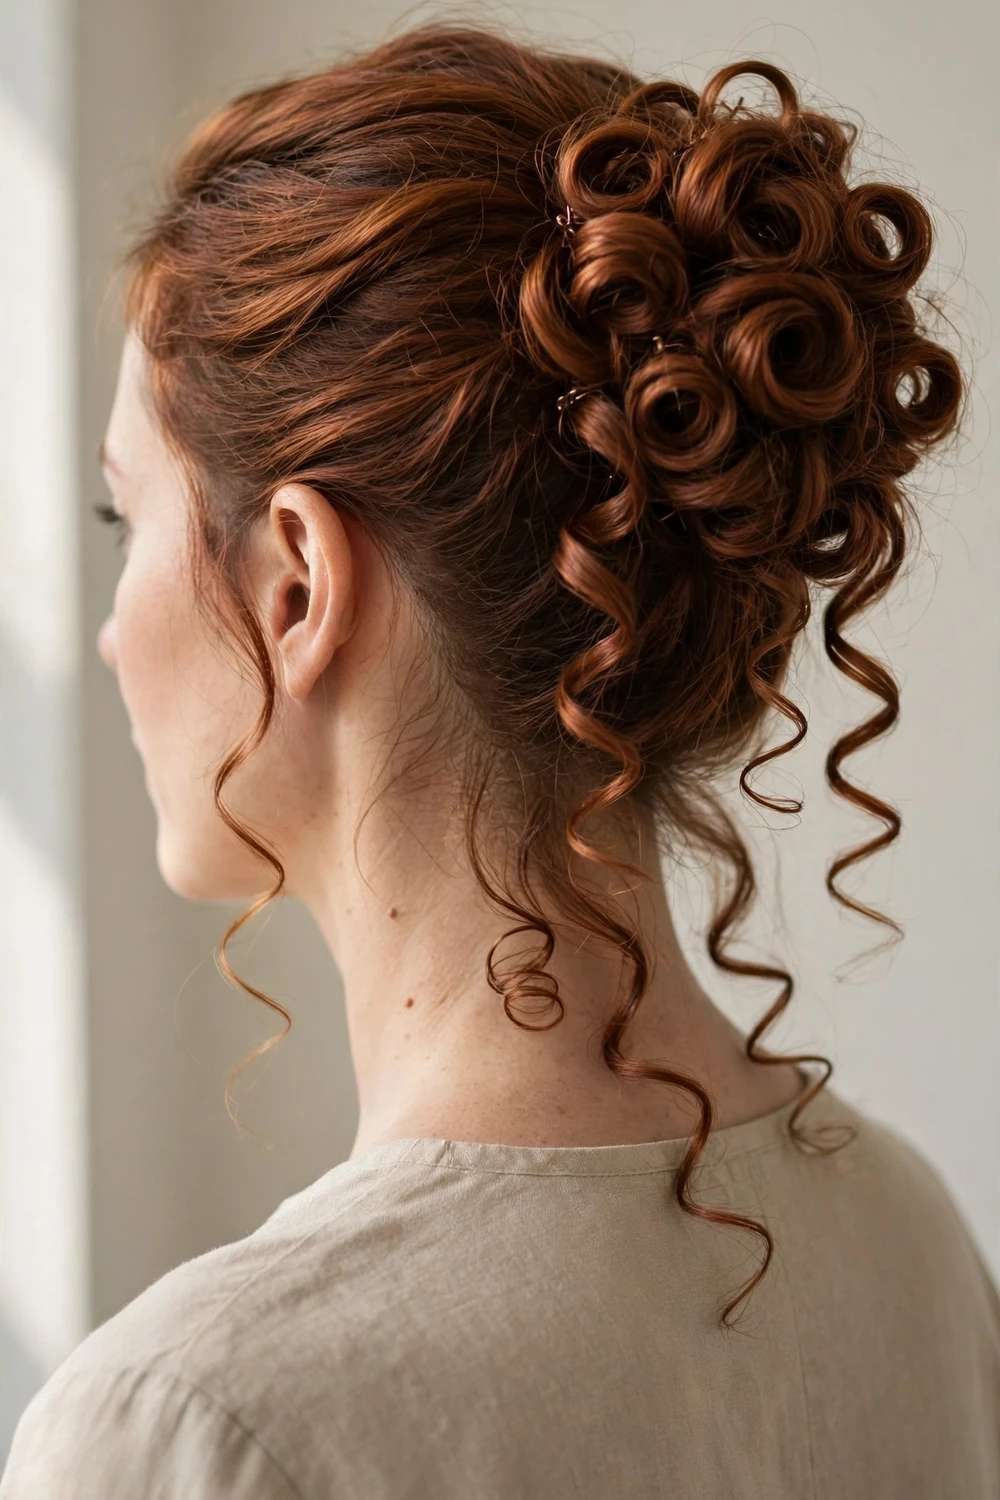
Curls and coils do the heavy lifting in this bun. Curl medium hair in one-inch sections with a curling iron (heat protectant on first), then gather everything loosely at the back. Instead of smoothing, pin curls individually around the base so the spiral shapes stay visible. The finished bun looks full and dimensional because every curl keeps its form. Straight hair can fake this with a curling iron, but naturally curly or wavy hair gets there with half the effort.
Try this: Pin curls in the direction they naturally fall. Fighting the curl pattern makes the bun look forced.
19. Claw Clip Twist Updo
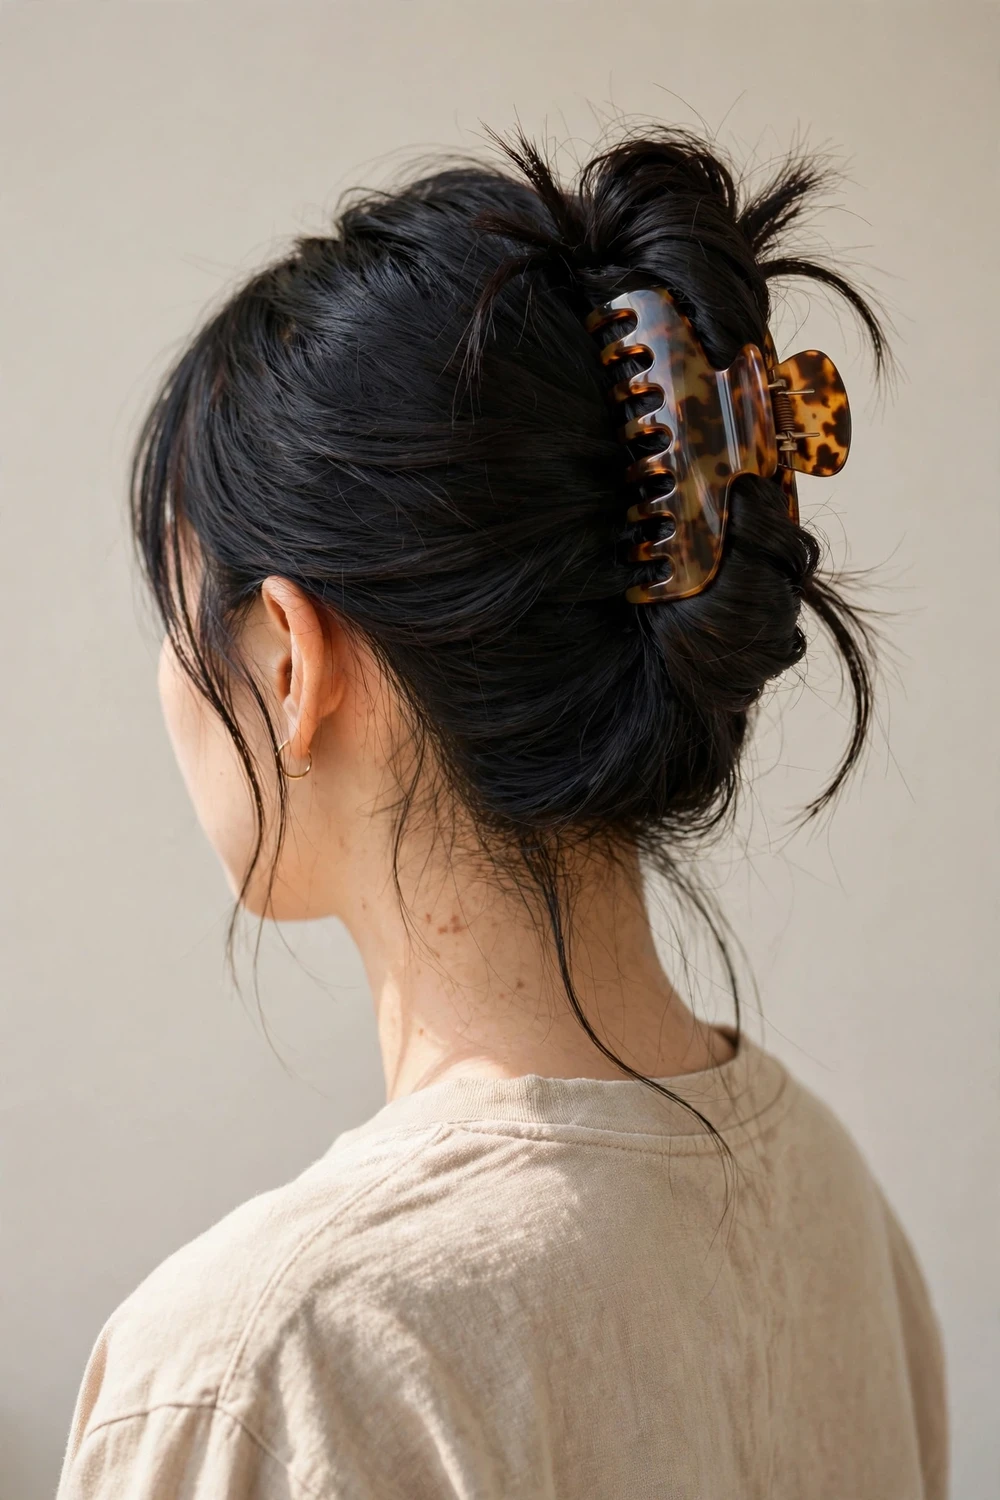
The claw clip comeback is the fastest trend on this list to actually wear. Gather hair as if making a low ponytail, twist the length upward against your head, and clamp a large claw clip over the twist to hold it. Let the ends fan out over the top of the clip. The whole thing takes under a minute and holds surprisingly well because the clip’s teeth grip the twisted hair. Choose a matte clip for daytime and tortoiseshell or gold for evenings.
Try this: Twist tighter than you think you need to. The clip holds the twist, but a loose twist slides out within the hour.
20. Vintage Victory Rolls Updo
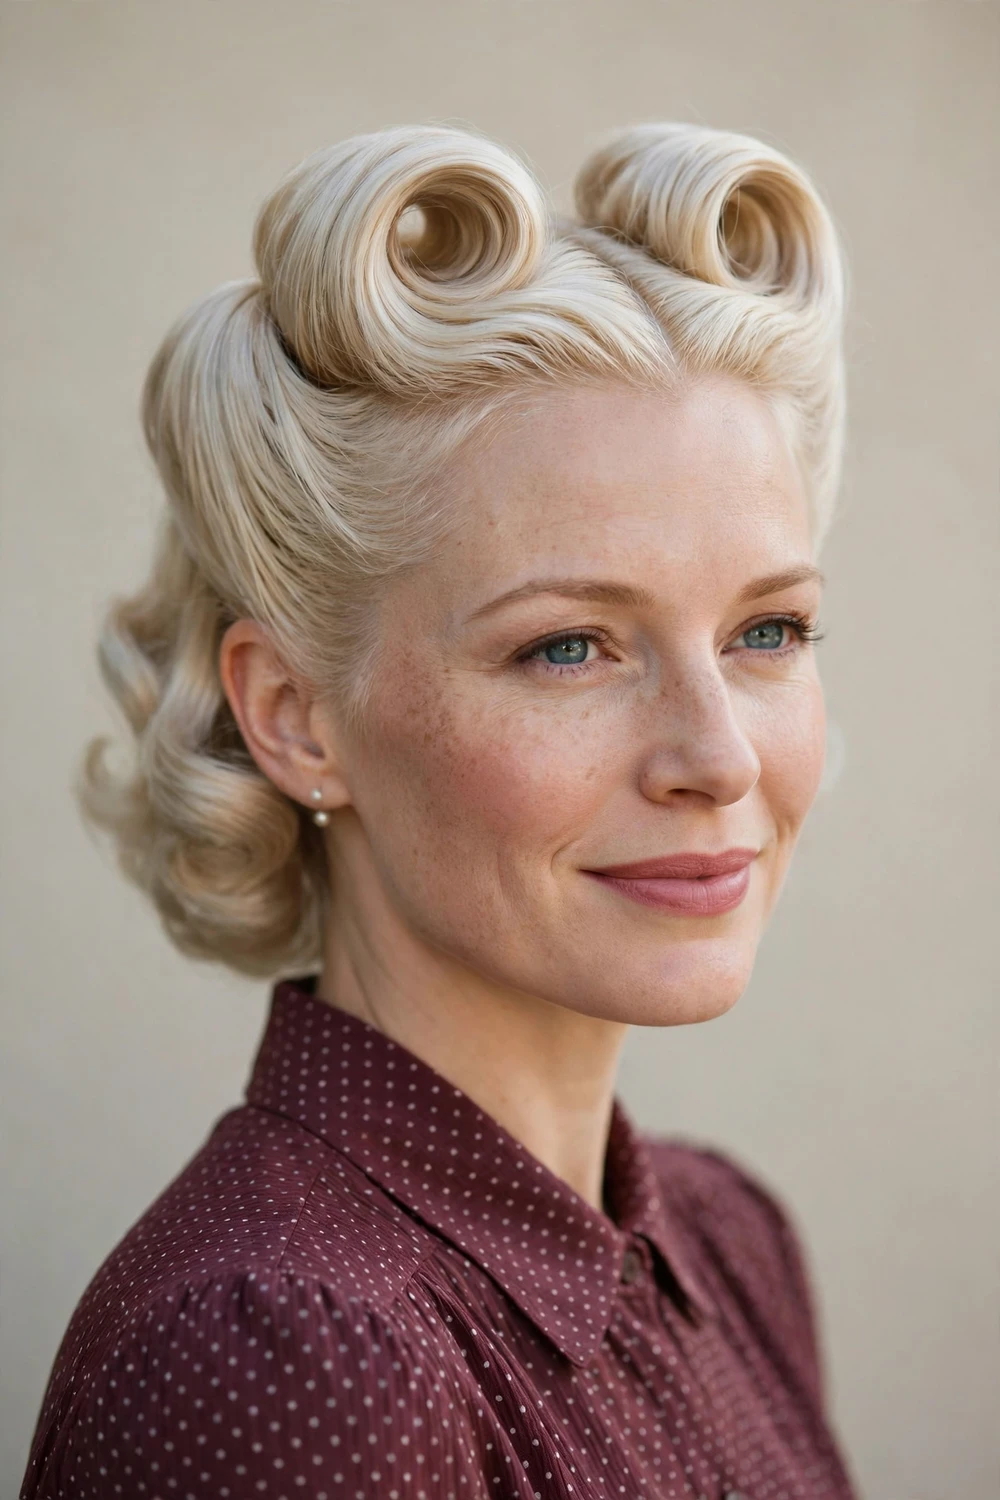
The 1940s gave us victory rolls, and they still turn heads. Section the front hair on each side of your part, backcomb each section at the roots, then roll each one inward toward your head and pin the roll’s seam flat. The back hair goes into a simple low bun so all attention stays on the rolls. Hot rollers set the shape best (heat protectant first), but backcombing plus hairspray works if you’re skipping heat. Symmetry matters here, step back and check both rolls in the mirror before you leave.
Try this: Roll around two fingers to get matching sizes. Uneven rolls are the most common mistake with this style.
21. Double Space Buns
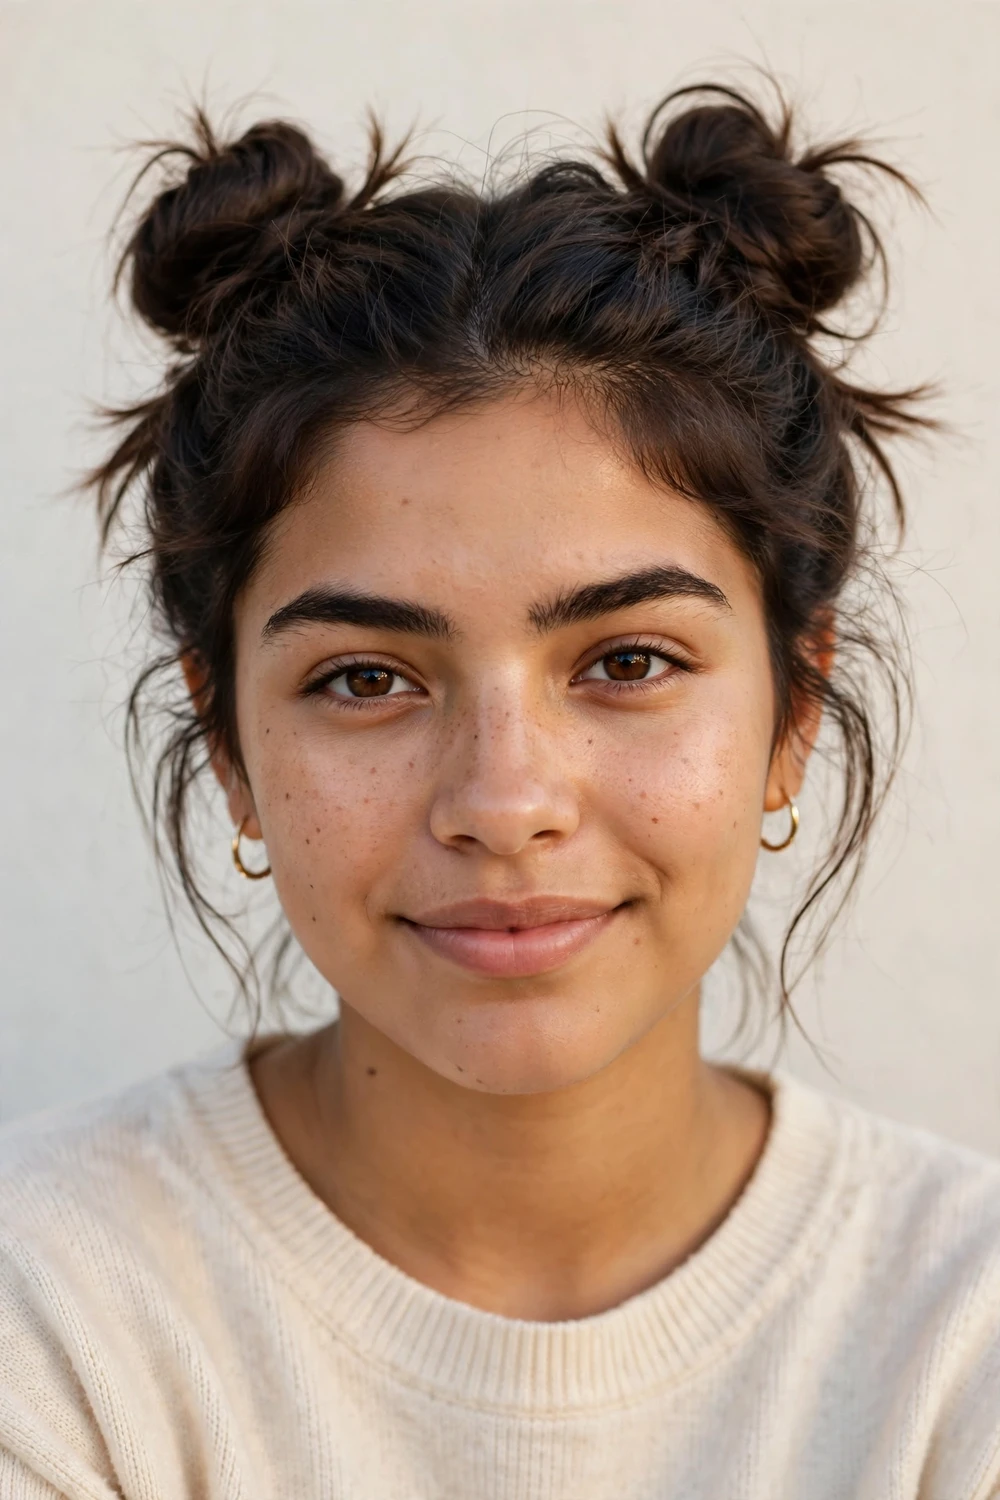
Two buns beat one when you want something playful. Part hair down the middle, make a high ponytail on each side, then twist and coil each into a bun. Keep them symmetrical and positioned toward the top of your head rather than the sides, that’s what separates space buns from mouse ears. This style suits festivals, casual parties, and anywhere a single bun would feel too serious. It also distributes weight evenly, so it stays comfortable longer than one heavy top knot.
Try this: Braid each ponytail before coiling for braided space buns. It adds texture with one extra step.
22. Scarf-Wrapped Low Bun
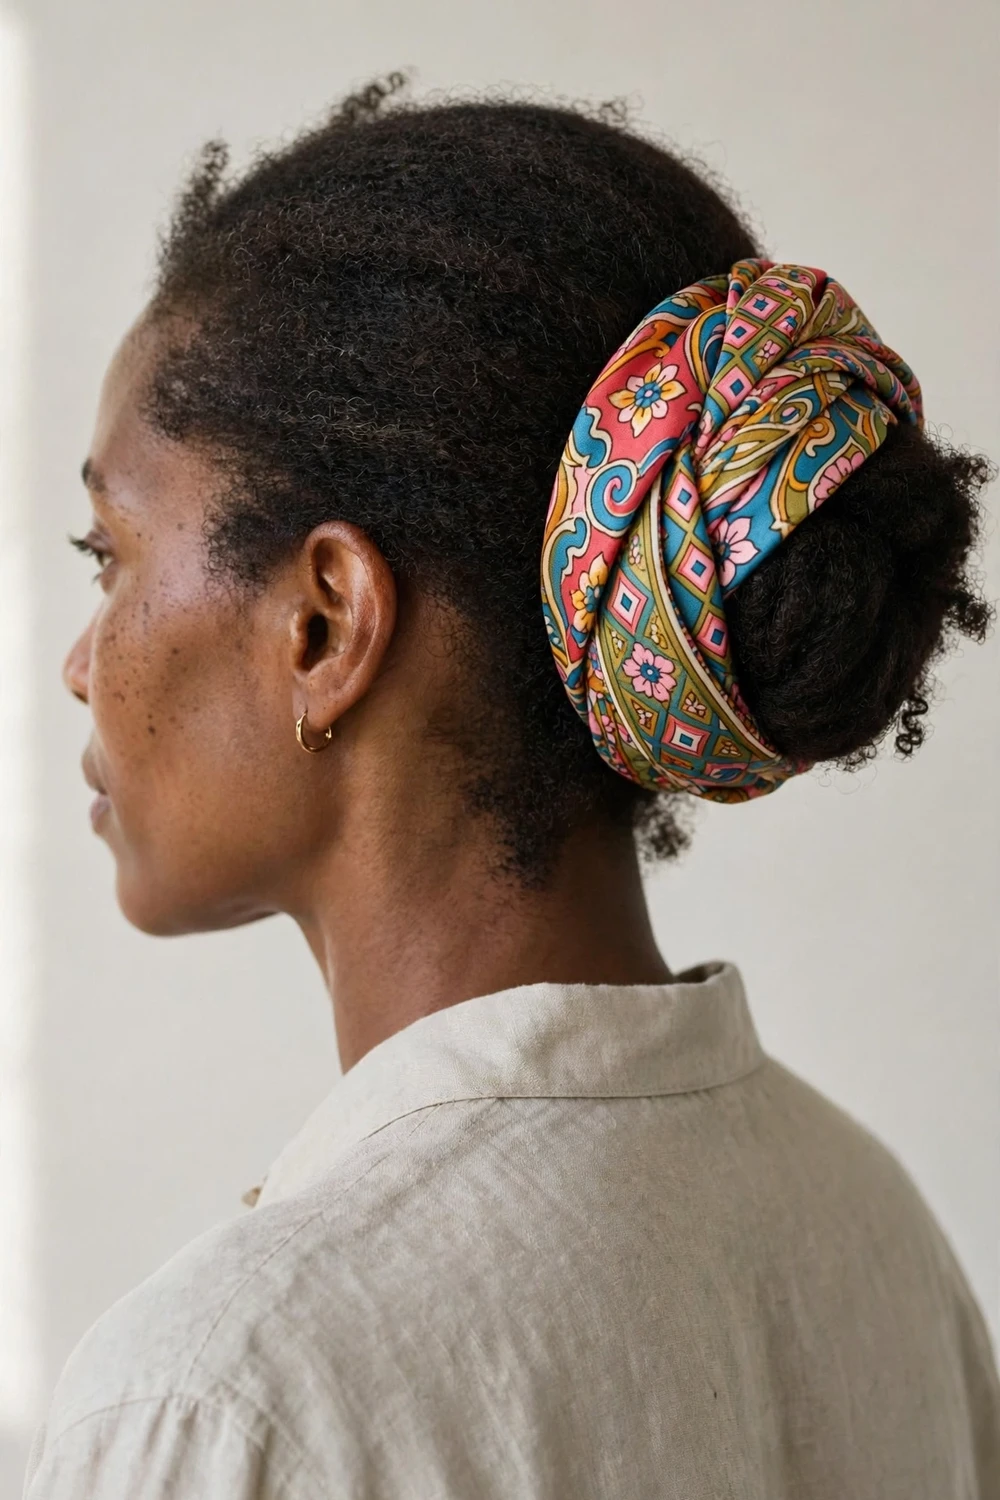
A silk scarf turns the simplest bun into a styled look. Make a low bun first and pin it securely, the scarf is decoration, not structure. Fold a square scarf into a long band, wrap it around the bun’s base twice, and tie it in a bow or knot at the side. Tuck the ends under the wrap so nothing dangles into your food. The scarf adds color and pattern, which means this works even on days when your hair itself isn’t cooperating.
Try this: Match the scarf to one color in your outfit. It looks intentional instead of random.
Medium Hair Updo Comparison at a Glance
| Style | Best Occasion | Difficulty | Hold Time |
|---|---|---|---|
| Low Twisted Bun | Work, dinners | Easy | 6-8 hours |
| Messy Low Chignon | Dates, parties | Easy | 4-6 hours |
| Braided Half-Updo | Outdoor events | Medium | 6-8 hours |
| French Twist | Formal, weddings | Hard | 8+ hours |
| Curly Low Pony Updo | Casual, brunch | Easy | 5-7 hours |
| Classic Bun | Anything | Easy | 8+ hours |
| Messy Top Knot | Workouts, errands | Easy | 3-5 hours |
| Braided Low Chignon | Weddings, events | Medium | 6-8 hours |
| Half-Up Twist | Daily wear | Easy | 4-6 hours |
| Sleek Ponytail | Professional, formal | Medium | 8+ hours |
| Ballet Bun | Performances, formal | Medium | 8+ hours |
| Braided Halo | Weddings, festivals | Hard | 8+ hours |
| Fishtail Crown | Parties, photos | Hard | 6-8 hours |
| Low Chignon | Formal, office | Medium | 8+ hours |
| Twisted Waterfall Braid | Dates, showers | Medium | 4-6 hours |
| Delicately Twisted Bouffant | Evenings out | Medium | 5-7 hours |
| Modern Gibson Roll | Vintage events | Medium | 6-8 hours |
| Spiral Textured Bun | Parties | Medium | 5-7 hours |
| Claw Clip Twist Updo | Daily, quick fix | Easy | 3-5 hours |
| Vintage Victory Rolls Updo | Themed parties | Hard | 6-8 hours |
| Double Space Buns | Festivals, casual | Easy | 4-6 hours |
| Scarf-Wrapped Low Bun | Travel, brunch | Easy | 6-8 hours |
How to Choose the Right Updo for Your Hair Type and Occasion
Match the style to your hair’s texture first, occasion second. Fine hair needs styles with built-in volume (bouffant, teased top knot, Gibson roll) because sleek styles can look sparse. Thick hair suits contained styles (french twist, braided halo) that manage the bulk. Curly hair shines in styles that use the texture (spiral bun, curly pony updo) rather than fighting it.
For the occasion, consider how long you need the style to last and how much you’ll move. A wedding means eight hours and dancing, pick a pinned style like the french twist or braided halo. A workday means comfort at a desk, the low twisted bun or classic bun won’t give you a headache. Outdoor events mean wind, anything braided or fully pinned beats loose styles.
Mistakes to Avoid
The biggest mistake is starting with freshly washed, product-free hair. Pins slide out, twists unravel, and you’ll re-pin all day. Always add grip first with dry shampoo or texturizing spray.
Second: using too few pins. One bobby pin per section isn’t enough. Cross pins in X-patterns and use more than you think you need, you can always remove extras, but a collapsing bun mid-event has no fix.
Third: pulling everything too tight. A headache by noon means the style was too tense at the hairline. Tight styles worn daily can also cause traction alopecia, so rotate them with looser options. Comfort matters as much as appearance.
How to Make Your Updo Last All Day
Humidity is the main enemy. If the forecast is damp, prep with an anti-humidity spray before styling and finish with a humidity-proof hairspray. Braided and twisted styles resist moisture better than smooth ones because the texture hides frizz as it forms.
For all-day hold, layer your products: dry shampoo at the roots for grip, texturizing spray through the lengths for body, then flexible-hold hairspray to finish. Strong-hold spray seems logical but makes hair brittle, when it cracks, the style collapses faster than with flexible hold.
Carry four extra bobby pins in your bag. Even the best updo loosens slightly by evening, and a quick re-pin in the bathroom takes thirty seconds. Check the back with your phone camera before photos, the back is what everyone else sees.
If you want more polished options beyond updos, these formal hairstyles for medium length hair cover elegant looks for every dress code.
Growing your hair out? These updos for long hair use the extra length for fuller, more dramatic styles.
For a big night out, browse these prom hairstyle ideas for red-carpet-worthy inspiration.
Standing in a wedding party? These bridesmaid hairstyles are designed to photograph well and last through the reception.
Frequently Asked Questions
Can I do an updo on medium hair that is layered?
Yes, but prep matters more. Layers slip out of smooth styles, so use texturizing spray on each section before pinning and choose textured styles (messy chignon, twisted bun) over sleek ones. Pin shorter layers individually with small bobby pins rather than trying to catch them in the main twist. A light mist of flexible-hold hairspray on each layer before gathering helps everything stay put.
How do I keep my updo from falling out by afternoon?
Three things make the difference: grip, pins, and product layering. Start with second-day hair or dry shampoo for grip. Use more bobby pins than you think you need, crossed in X-patterns. Layer dry shampoo, texturizing spray, and flexible-hold hairspray rather than relying on one product. Braided and twisted styles also outlast smooth ones because the texture itself provides hold.
What is the easiest updo for medium hair beginners?
The messy top knot and the claw clip twist updo are the two fastest to learn. Both take under two minutes, need no special skill, and look intentional even when imperfect. Start with one of these to build confidence, then try the low twisted bun once you’re comfortable with pinning. Save the french twist and braided halo for after you’ve practiced the basics.
Will updos damage my medium-length hair?
Occasional updos are fine, but daily tight styles can cause traction alopecia, thinning along the hairline from constant pulling. Rotate tight styles (ballet bun, sleek ponytail) with looser ones (messy chignon, claw clip twist). Use snag-free elastics, never rubber bands, and take styles down gently rather than yanking pins out. If your scalp aches, the style was too tight.
How do I make a medium hair updo look fuller?
Tease the crown before styling, use texturizing spray through the lengths, and choose styles with built-in volume like the bouffant or Gibson roll. A bun donut under the coil creates fullness that fine hair can’t achieve alone. Pulling the finished style gently outward (pancaking) also adds width. Avoid flattening everything smooth, texture reads as fullness.
Final Thoughts
Medium hair gives you the best of both worlds for updos: enough length for real styling, not so much that everything falls apart. Start with the prep formula, pick a style that matches your texture and your day, and don’t skip the pins. Once you’ve worn a few of these, you’ll know your go-to styles by heart.
For Sundays, church hairstyles for thin fine hair adapts these ideas into 23 modest, fine-hair-friendly styles that stay neat through a whole service.

