


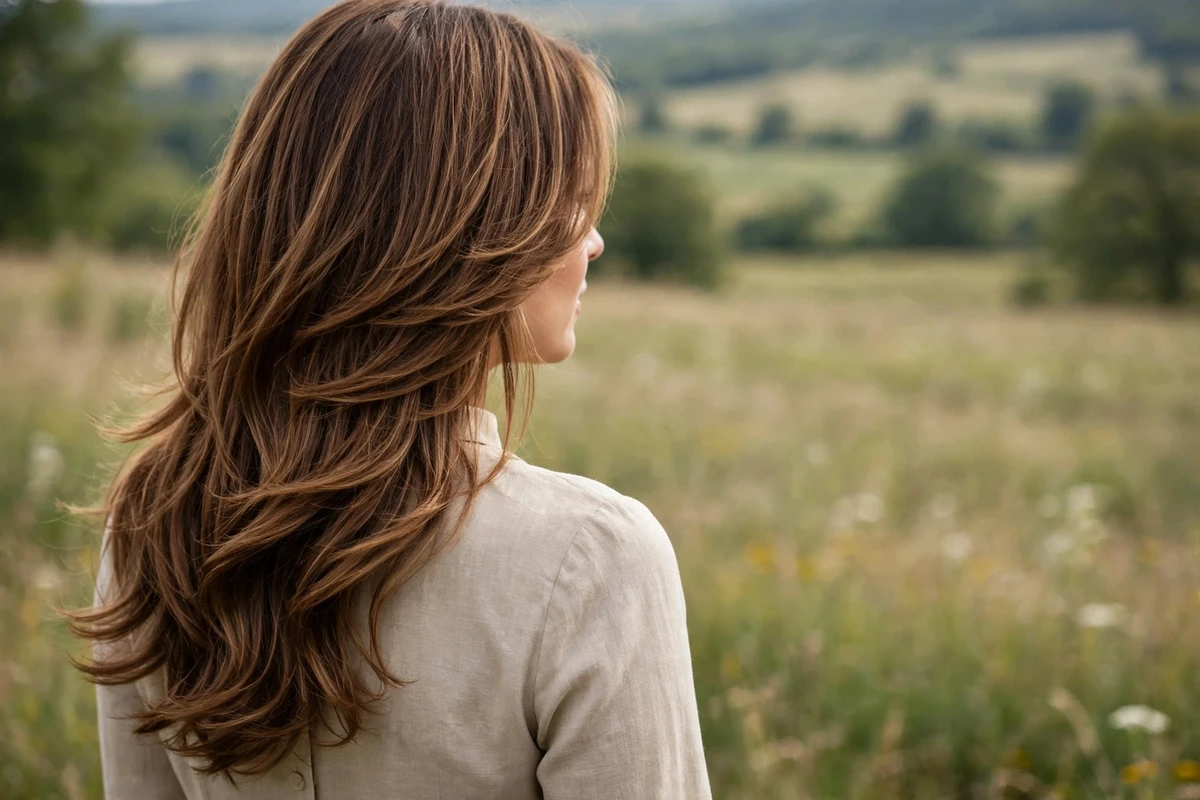
Long hair without layers can sit flat, tangle easily, and take forever to style. The right layers change all of that. They remove weight where you don’t need it, add movement where you do, and give your hair a shape that works even on days you barely touch it.
This guide covers 24 layered hairstyles for long hair, from sharp V-cuts to barely-there ghost layers. You’ll get a plain explanation of each style, who it suits, and one practical styling tip per look so you can recreate it at home.
Quick answer: This guide covers the best styles, who they suit, and how to get them right.
Quick Takeaways
- Layers remove bulk and add movement, which makes long hair easier to style and less prone to tangling.
- V-cuts sharpen the back outline while U-cuts keep it soft and rounded. Pick based on how bold you want the silhouette.
- Ghost layers and subtle long layers suit fine hair. Razor-cut and thinned-out layers suit thick, heavy hair.
- Face-framing layers and curtain bangs soften the front without cutting overall length.
- Trim every 8 to 12 weeks to keep layers blended and ends healthy.
Why Layers Transform Long Hair
One-length long hair pulls straight down. Gravity does all the work, and the result is often a flat curtain with thin-looking ends. Layers break up that weight. Shorter pieces on top create lift at the crown, while the longer lengths underneath keep the drama of long hair intact.
Layers also make styling faster. Curled or waved long hair holds its shape better when the ends aren’t all competing at the same length. Blowouts look fuller, braids look thicker, and ponytails swing instead of hanging.
The catch is that bad layers show more on long hair than on short hair. Uneven blending, layers cut too short, or the wrong technique for your density can take months to grow out. That’s why it helps to know the main layer types before you sit in the chair.
Layer Types Explained
A V-cut tapers the back outline into a pointed V, with the shortest layers near the shoulders. A U-cut rounds the same idea into a soft curve, which reads fuller from behind. Both keep serious length while giving the ends a deliberate shape.
Graduated layers stack shorter pieces over longer ones in visible steps, building volume through the mid-lengths. Razor-cut layers use a razor instead of scissors for feathered, wispy ends that blend softly. Texturizing thins out the interior of thick hair without changing the outline, while ghost layers hide barely-there layers inside the hair so fine hair keeps its fullness.
Face-framing layers sit around the front, starting anywhere from the chin to the collarbone, and they work with almost every back shape. Curtain bangs are their shorter cousin, parted in the middle and swept to each side. If you’re weighing how much length to keep, short layered haircuts show how the same techniques play out on shorter hair.
1. V-Cut Layers
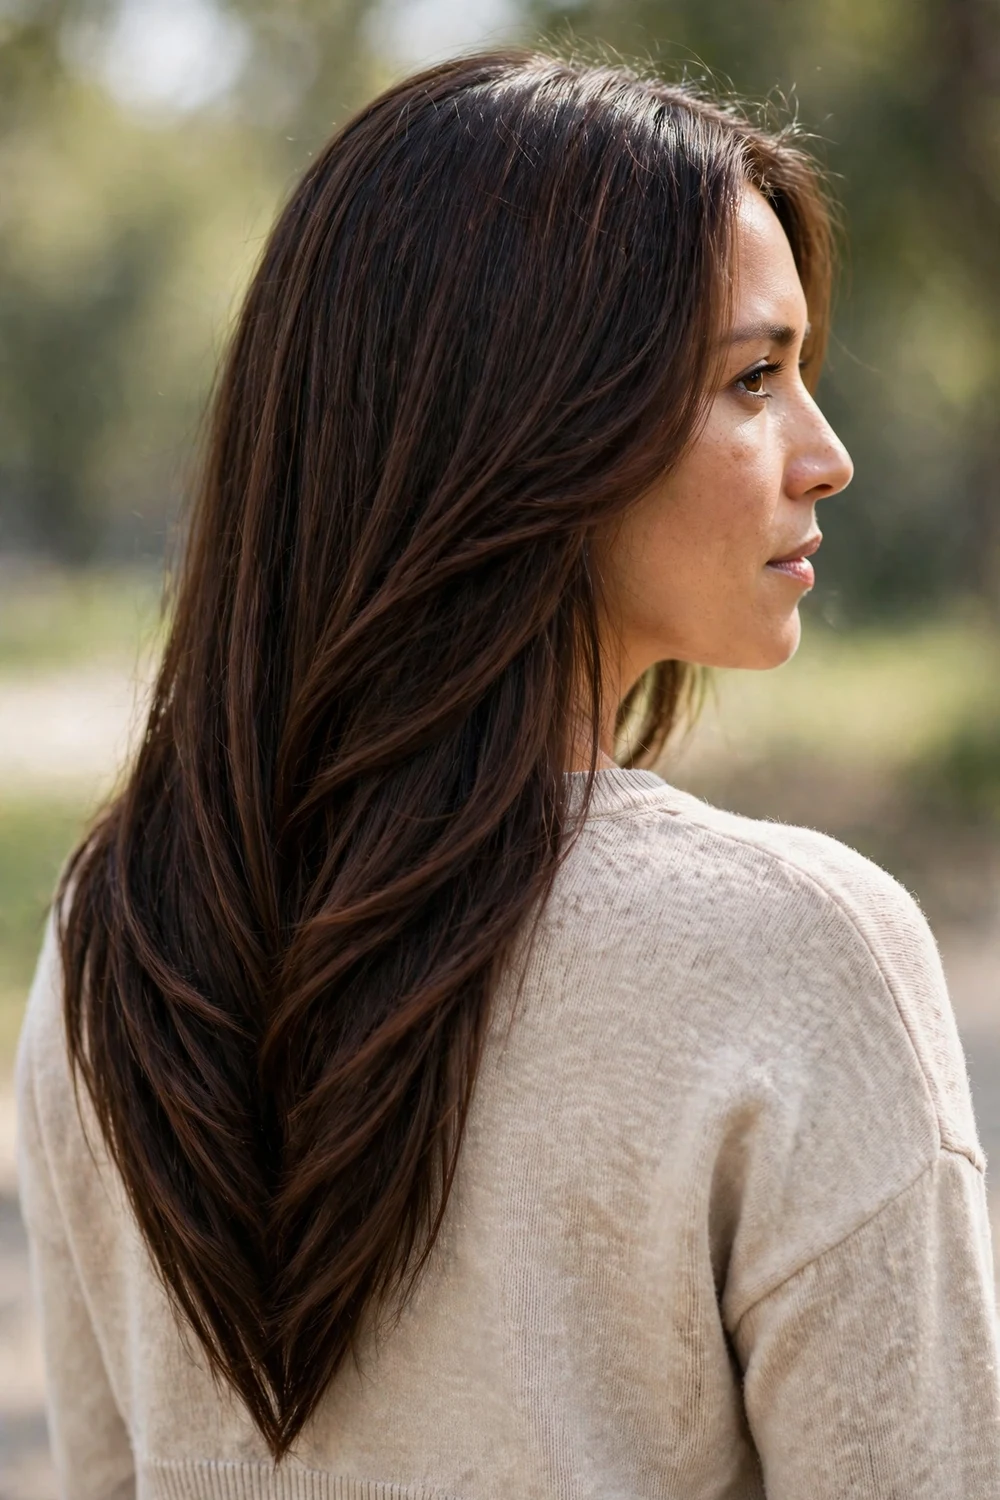
The V-cut keeps the back outline in a sharp V, with the shortest layers starting near the shoulders and the longest points reaching the middle of the back. It pulls bulk away from the sides while keeping dramatic length at the center, which suits thick hair that feels heavy in one-length cuts. Ask for the point to start no higher than bra-strap length so the shape stays wearable day to day. It grows out cleanly because the taper is built into the outline itself. Straight and wavy textures show the V most clearly.
Try this: Blow-dry with a large round brush, directing the ends inward, then run a pea-sized drop of shine serum over the V point so it catches the light.
2. U-Cut with Swoopy Layers
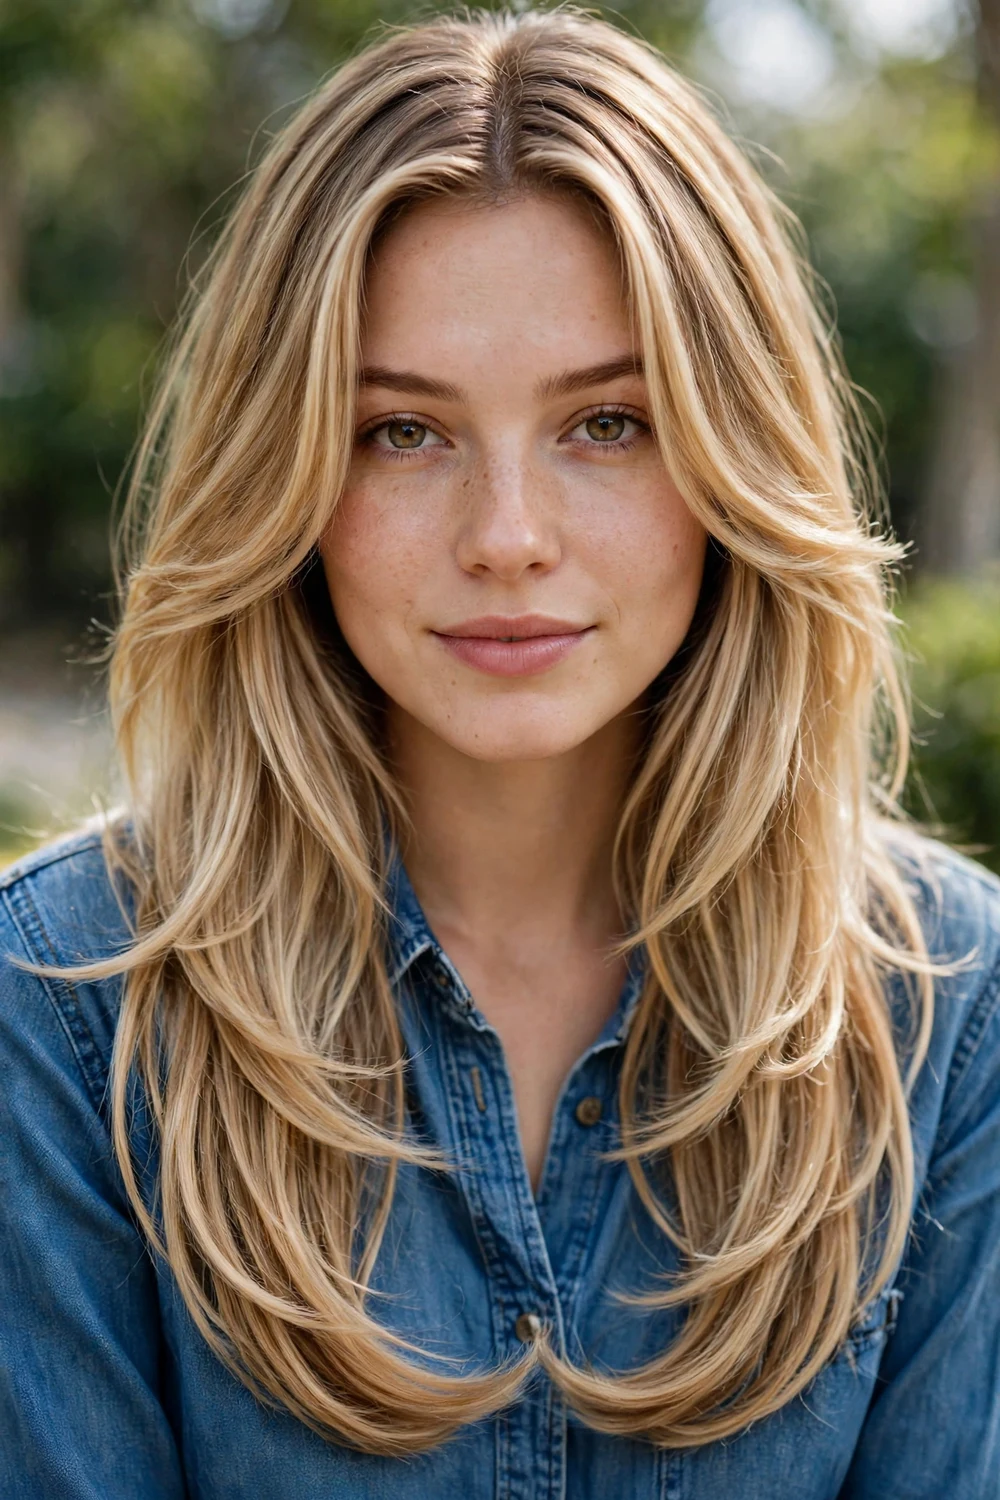
Want the V-cut’s length without its sharp point? The U-cut rounds the back outline into a soft curve while swoopy layers flip through the mid-lengths. The rounded perimeter looks fuller from behind, so it suits fine to medium hair that needs the look of density. Layers usually begin around the collarbone and sweep outward at the ends. It styles fast with a blow dryer and a large round brush. Keep the U shallow if you wear your hair up often, since a deep curve can poke out of ponytails.
Try this: After blow-drying, flick the ends outward with a flat iron on low heat. Apply heat protectant first, and work in 2-inch sections for an even swoop.
3. Center-Parted Loose Waves
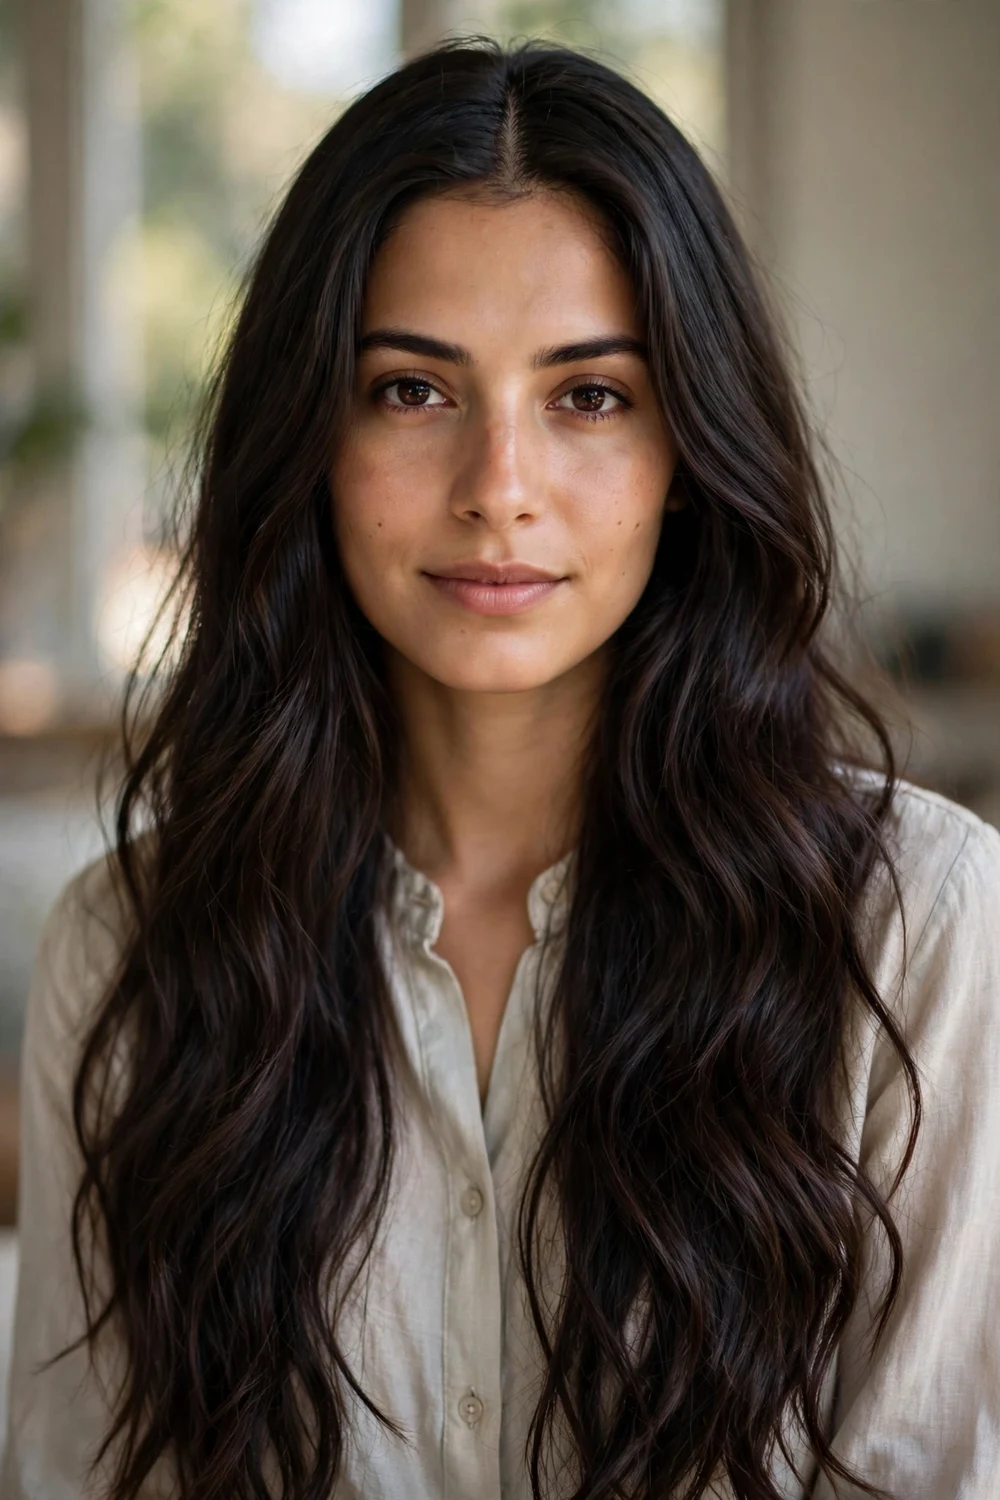
If your hair holds a bend, long layers plus a center part give you waves that start at eye level and roll all the way down. The center part keeps the front symmetrical, and layers cut from the chin down stop the waves from stacking into a triangle. This works best on naturally wavy or wavy-permed hair, but straight hair can fake it with a 1.25-inch curling iron. Keep the top layers long so the crown stays smooth while the ends move. A middle part also grows out gracefully if you later switch to a side part.
Try this: Curl away from your face in vertical sections, leave the last inch uncurled, then shake the waves out with your fingers and a light-hold spray.
A center part also frames the face nicely with a fringe; browse these curtain bangs with layers ideas for long hair that keeps its full length.
4. Flippy Layers
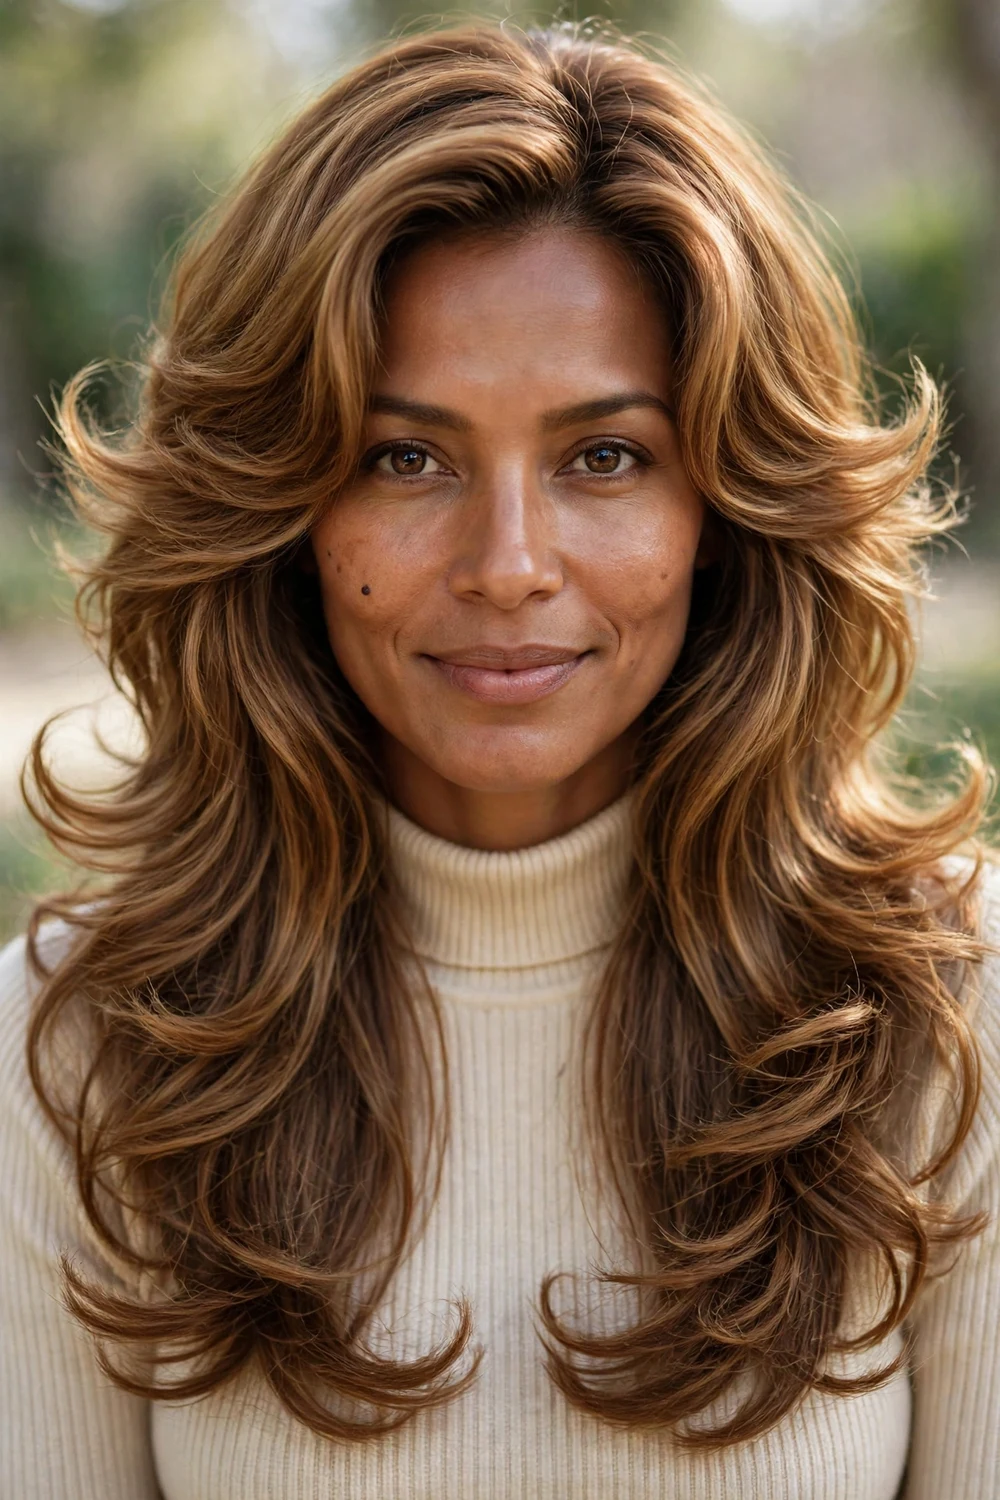
Second-day hair is where flippy layers earn their keep. The ends are cut to turn outward instead of lying flat, so the style looks intentional even when you skip washing. Layers start around the shoulders and angle out through the ends, which adds width at the bottom and balances narrow faces. It suits straight to slightly wavy hair best, since tight curls won’t hold the flip. The cut does most of the work, so your morning routine can be as simple as a quick brush and a smoothing cream on the ends.
Try this: On dry hair, run a flat iron over just the bottom 3 inches, bending your wrist outward at the end. Finish with a flexible-hold hairspray.
5. Octopus Haircut
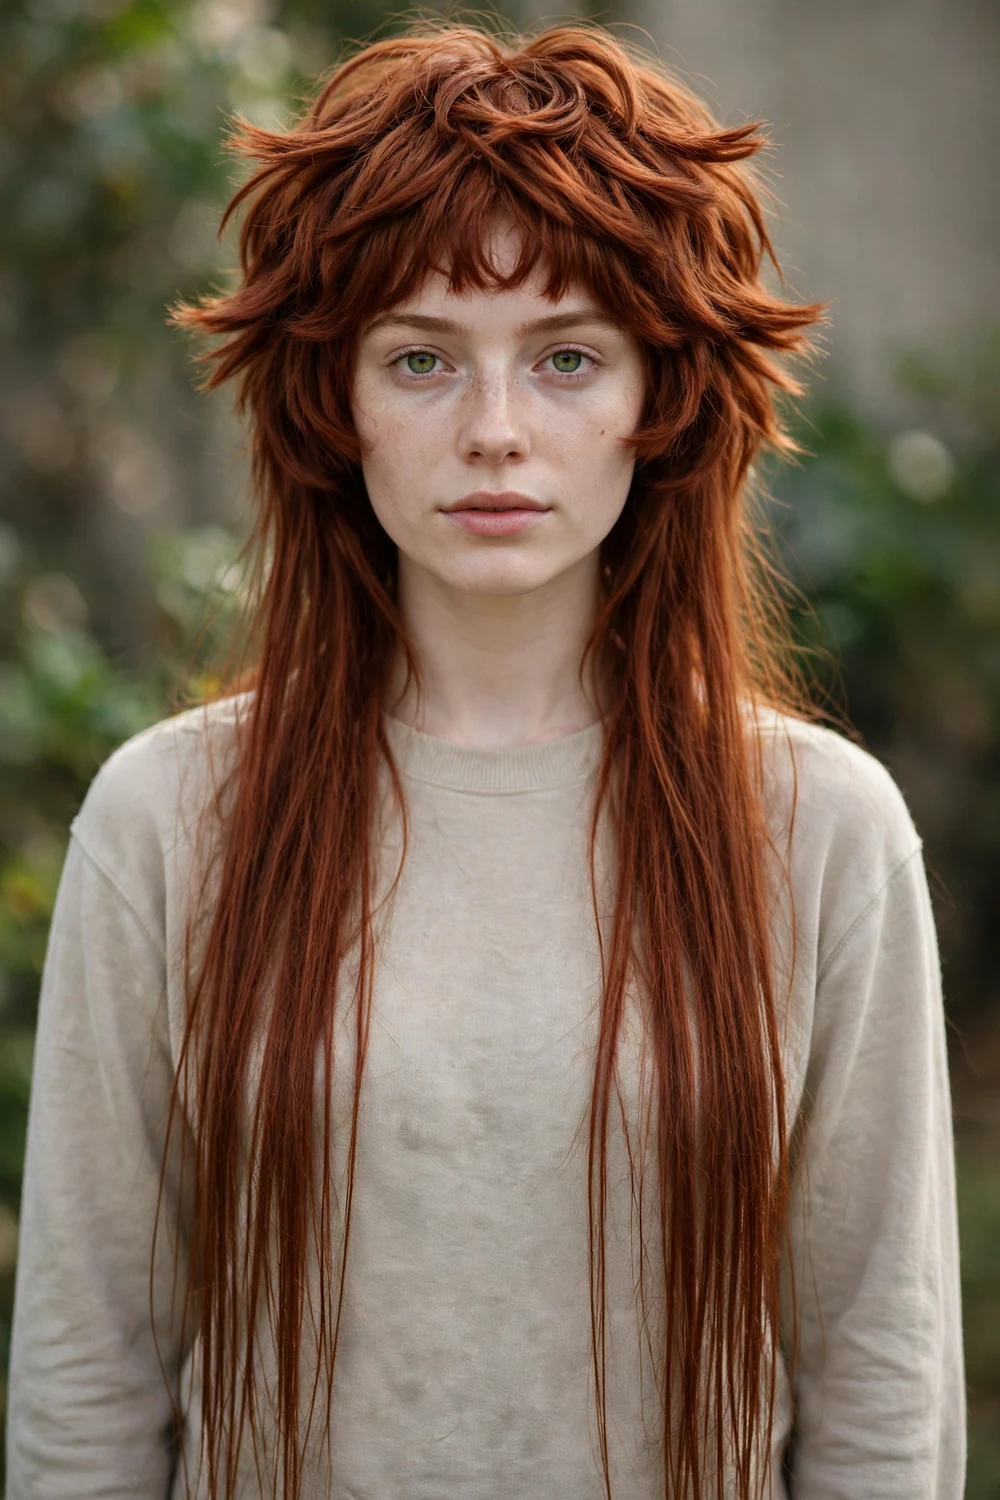
The octopus cut piles short, choppy layers through the crown and lets the remaining length hang thin underneath, which creates a top-heavy silhouette with wispy ends. It borrows from the shag and the mullet but keeps enough length to read as long hair from the front. Thick hair handles it best because the interior needs density to support all that layering. Ask your stylist to connect the crown layers into the lengths gradually, or the top can look disconnected from the bottom. It’s a high-contrast look, so commit to the shape before you book.
Try this: Scrunch a golf-ball-sized amount of mousse into damp hair and diffuse upside down to build volume at the crown.
6. Butterfly Layers
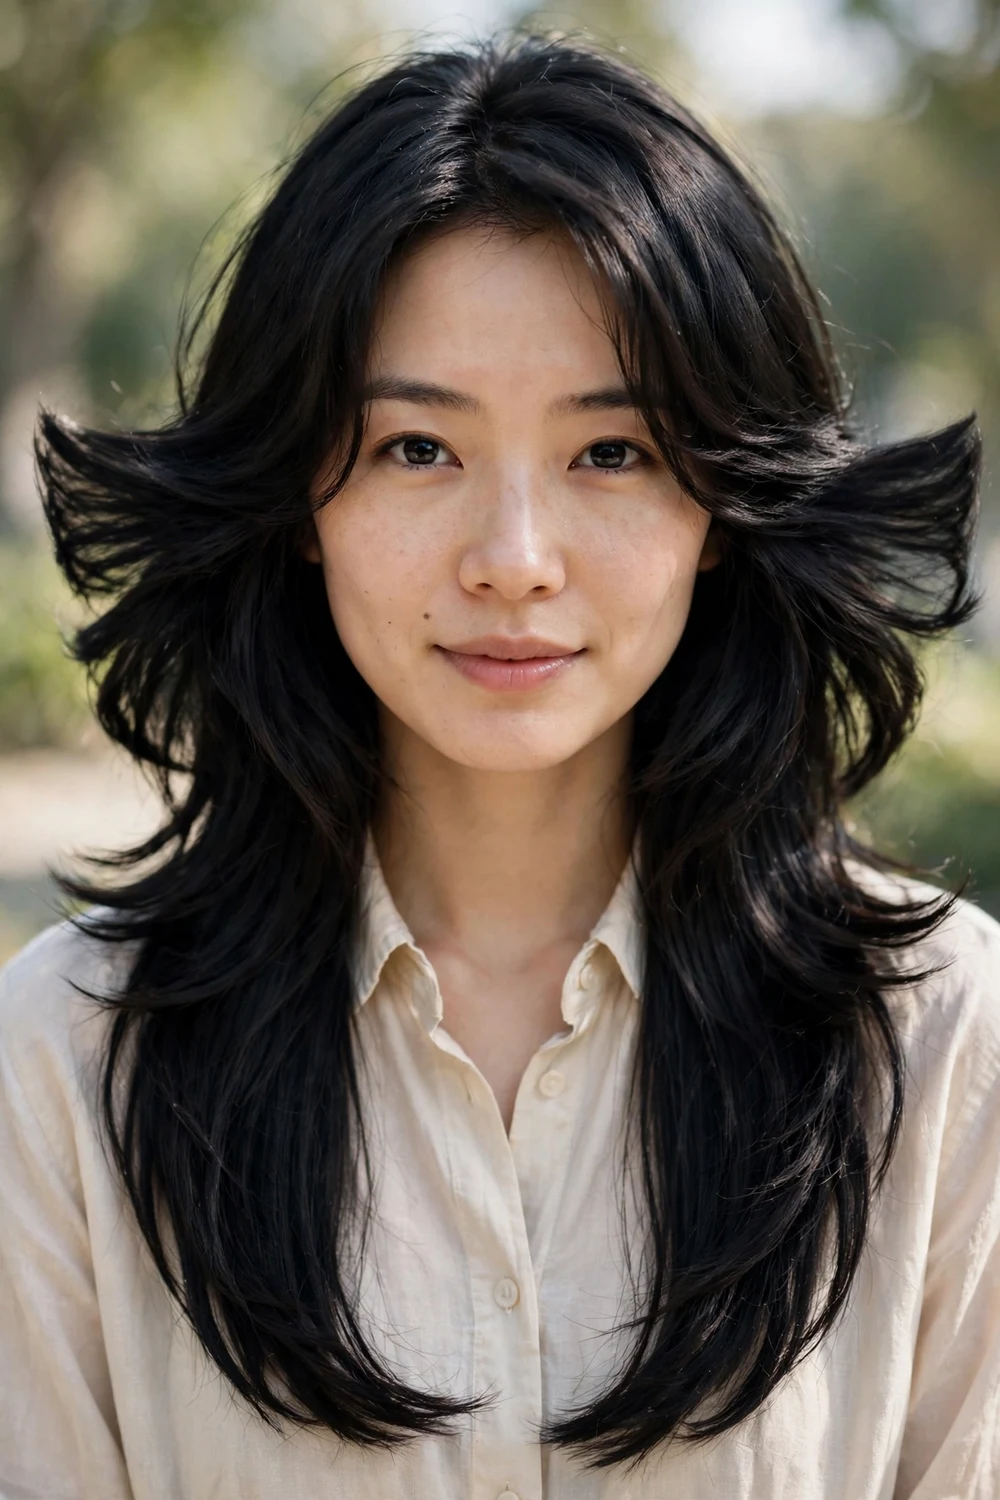
Butterfly layers split the hair into two zones: shorter, bouncy pieces around the face that flick outward like wings, and long lengths through the back. The front layers usually start at the chin and the back layers stay near one length, so you keep your length while the front gets all the movement. It flatters round and square faces because the outward flick widens the cheek area. Blow-drying the front pieces away from the face with a round brush sets the signature shape. It needs a bit of daily styling to look its best.
Try this: Wrap the front layers around a large round brush, blast with heat for 10 seconds per section, then pin each curl to cool for lasting bounce.
7. Ghost Layers
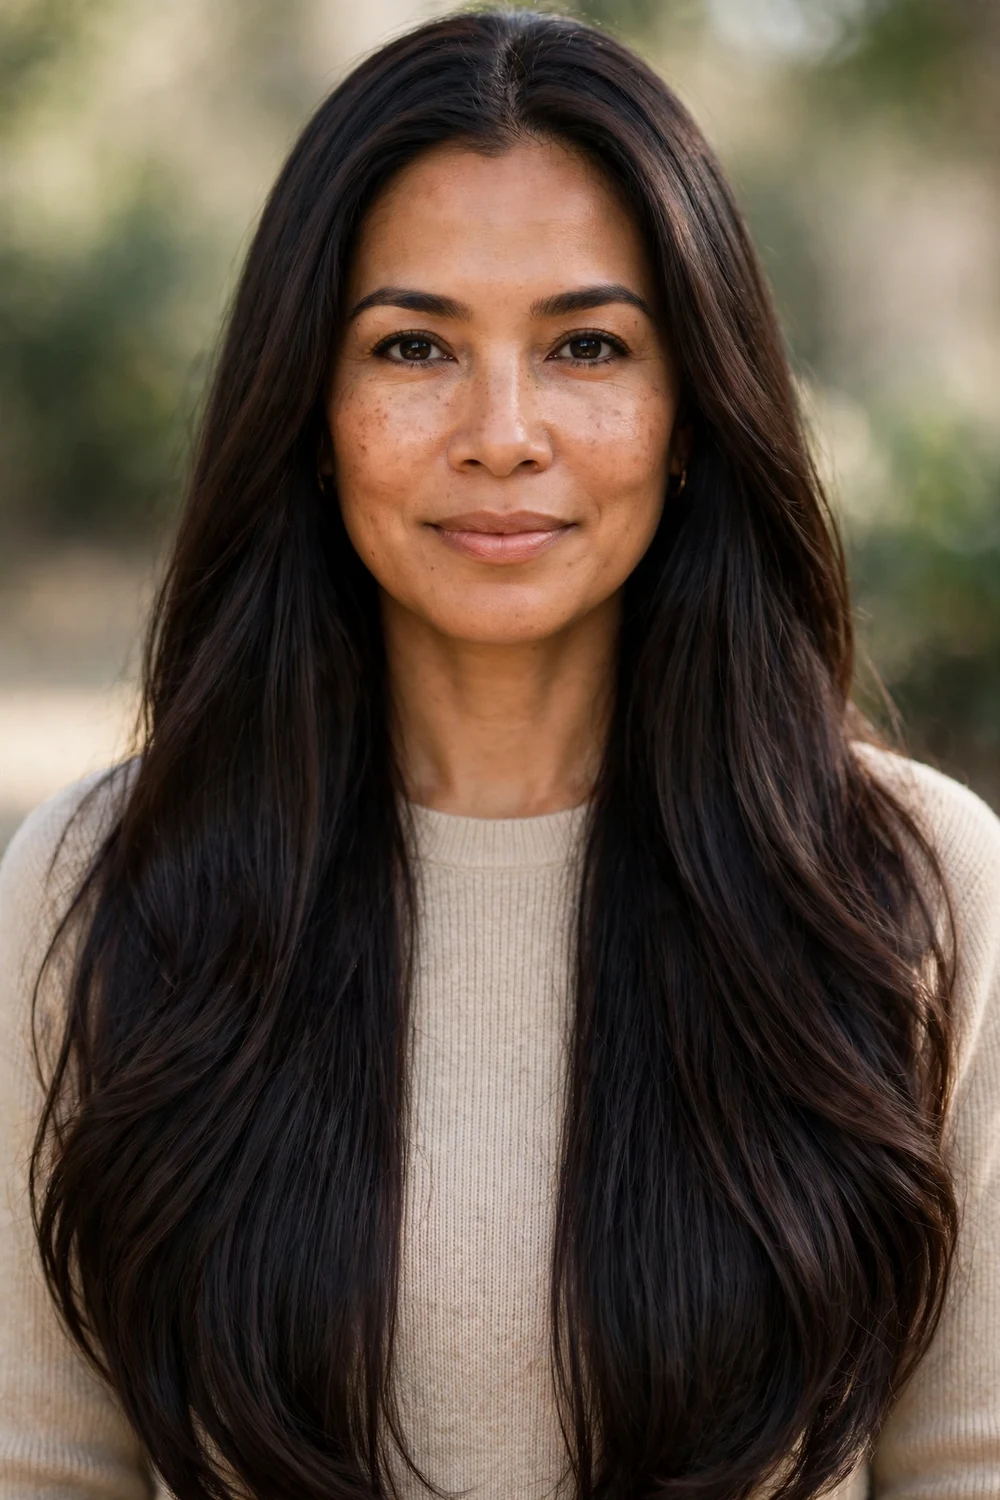
Ask for ghost layers if you want the benefits of layering without anyone seeing a layer. The stylist cuts ultra-subtle, long layers hidden inside the hair, so the outline stays blunt and full while the interior moves freely. Fine hair is the ideal candidate because visible layers can make thin ends look stringy. The difference shows in how the hair swings and how easily it styles, not in the silhouette. Grow-out is painless since there’s no harsh line to maintain. Tell your stylist you want internal movement with a solid perimeter.
Try this: Blow-dry upside down for 2 minutes to lift the roots, then flip back up. The hidden layers will separate on their own.
8. Long Wolf Cut
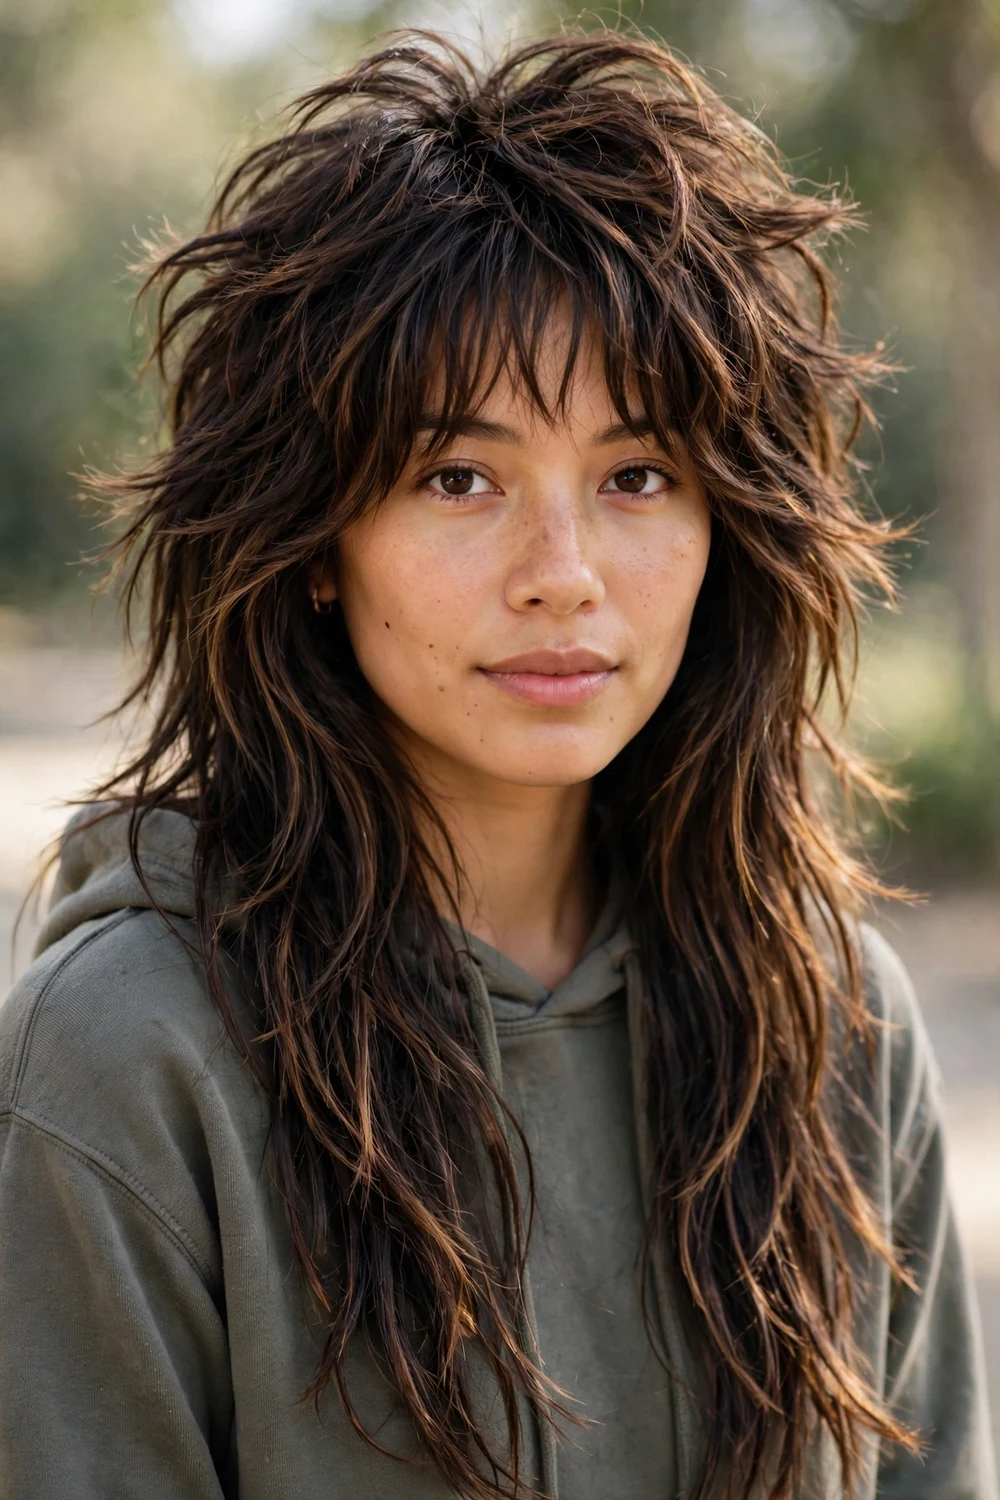
The short wolf cut gets all the attention, but the long version keeps the shaggy, rock-inspired layering while holding on to serious length. Heavy layers through the crown create volume up top, and the lengths taper into textured, piece-y ends. It suits thick, wavy hair that can support the interior weight removal without going flat. The cut looks best a little messy, so it’s a good match if you don’t like polished styling. Ask for the shortest crown layer to sit around the cheekbones for the classic wolf shape.
Try this: Work a dime-sized amount of texturizing cream through dry ends, twisting random sections to define the piece-y texture.
9. Curtain Bangs with Layers
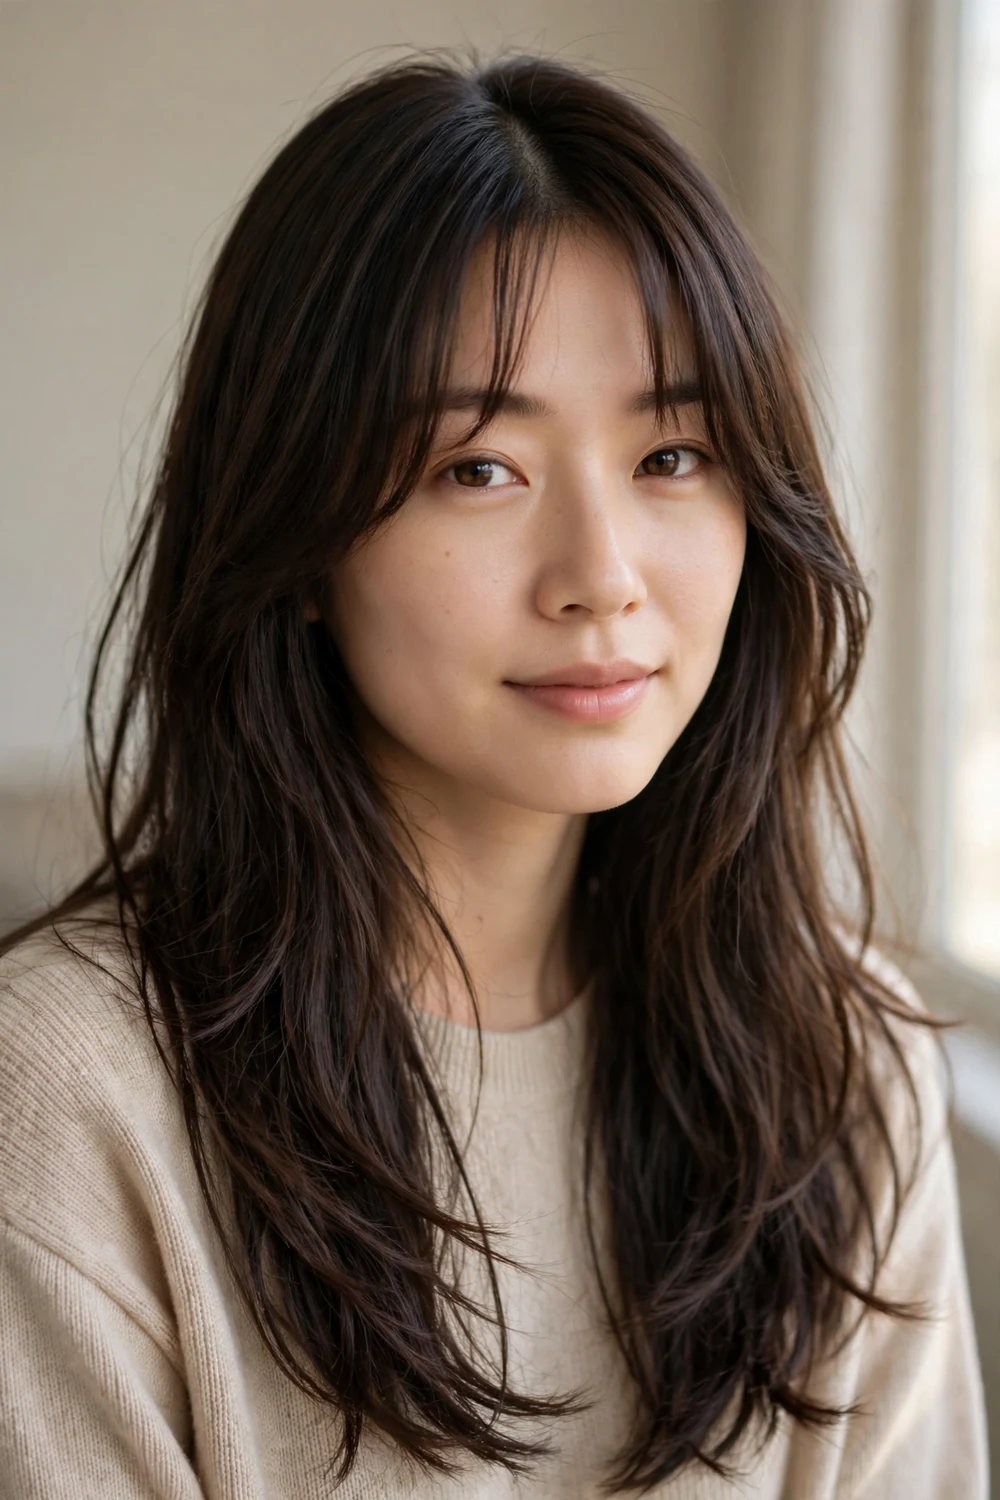
Part them down the middle and sweep each side back, and curtain bangs melt into long layers without a visible stopping point. The bangs usually start at the cheekbones and blend into face-framing layers that continue down the front. This pairing suits almost every face shape because the middle part and the curved sweep soften foreheads and jawlines alike. Growing them out is simple since they just become shorter front layers. Ask for the bangs to be cut dry so your stylist can see exactly where they fall.
Try this: Blow-dry bangs forward with a round brush, then split them down the middle while warm. They’ll set into the curtain shape as they cool.
If you prefer your fringe swept to one side instead of parted down the middle, side swept bangs ideas has 30 variations worth browsing before your appointment.
10. Face-Framing Layers
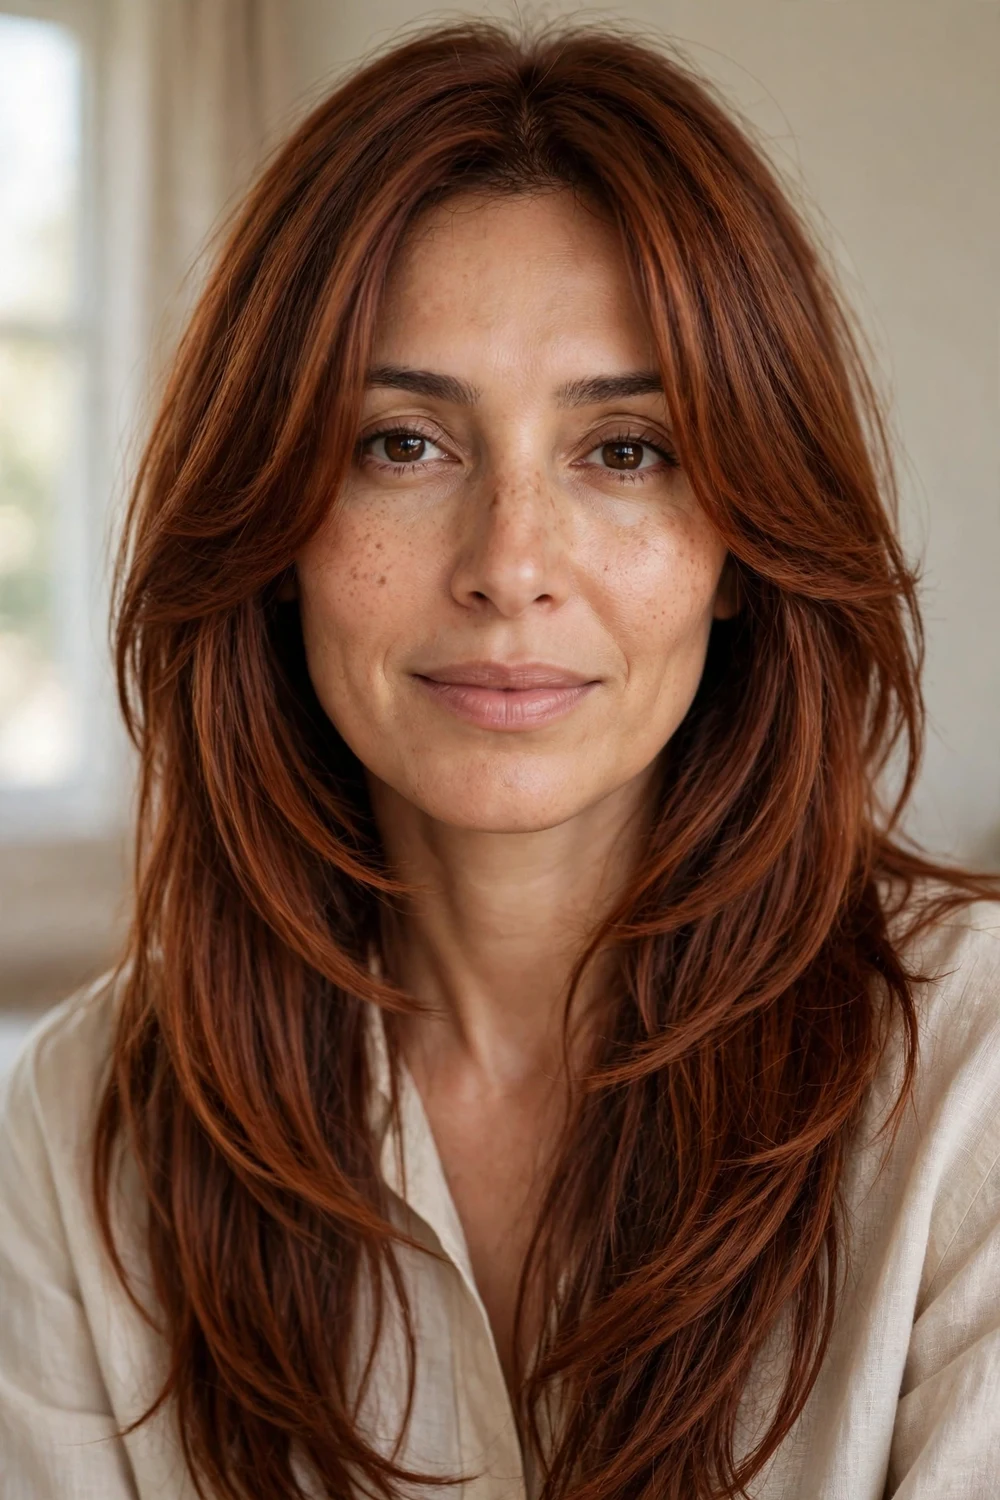
When the front of your hair needs interest but you won’t sacrifice length, face-framing layers are the answer. They start anywhere from the chin to the collarbone and angle down into the rest of the hair, drawing attention toward your features. Long, oval, and heart-shaped faces benefit most because the shorter front pieces break up vertical length. The back can stay any shape you like, from blunt to V-cut. They’re also the easiest layers to maintain since a quick trim of the front refreshes the whole cut.
Try this: Curl only the two front sections away from your face with a 1-inch iron for 8 seconds each. Leave the back straight for contrast.
11. Razor-Cut Layers
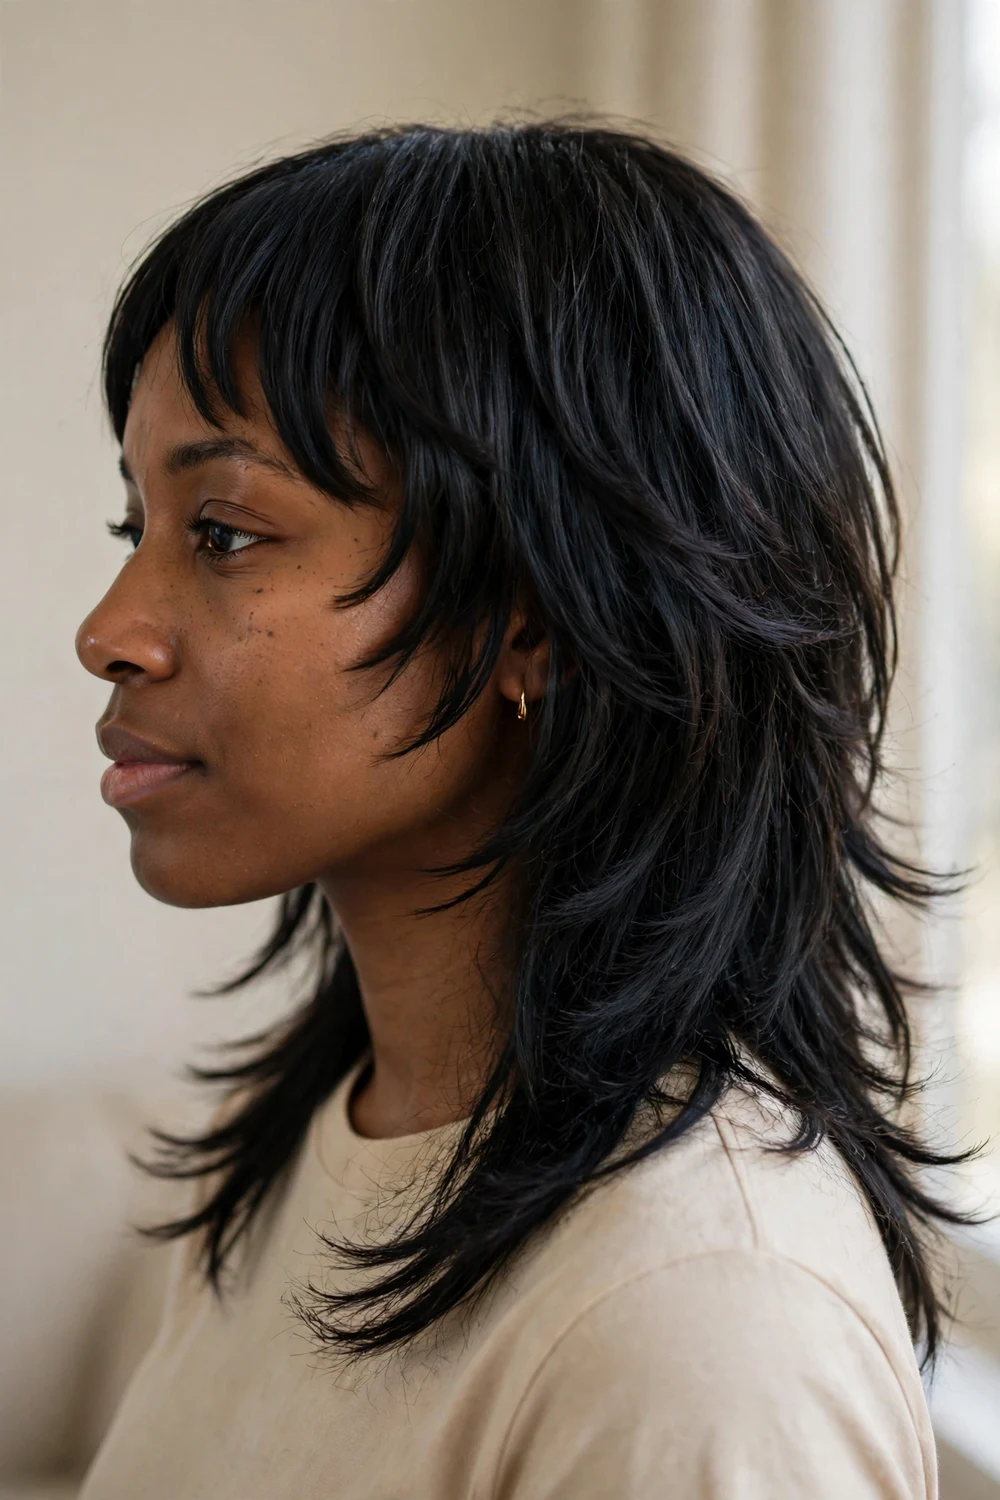
A razor replaces scissors for this technique, slicing the ends at an angle so they taper into soft, feathered points instead of blunt lines. Razor-cut layers suit thick, coarse hair because the razor removes bulk while creating wispy separation that scissors can’t match. The result moves more and tangles less than scissor-cut layers on the same density. Skip this technique on very fine or damaged hair, since the razor can fray fragile ends. Ask for it on dry hair so your stylist can control exactly how much weight comes off.
Try this: Smooth a lightweight oil over the ends only, avoiding the roots, to keep the feathered tips defined without weighing them down.
12. Graduated Layers
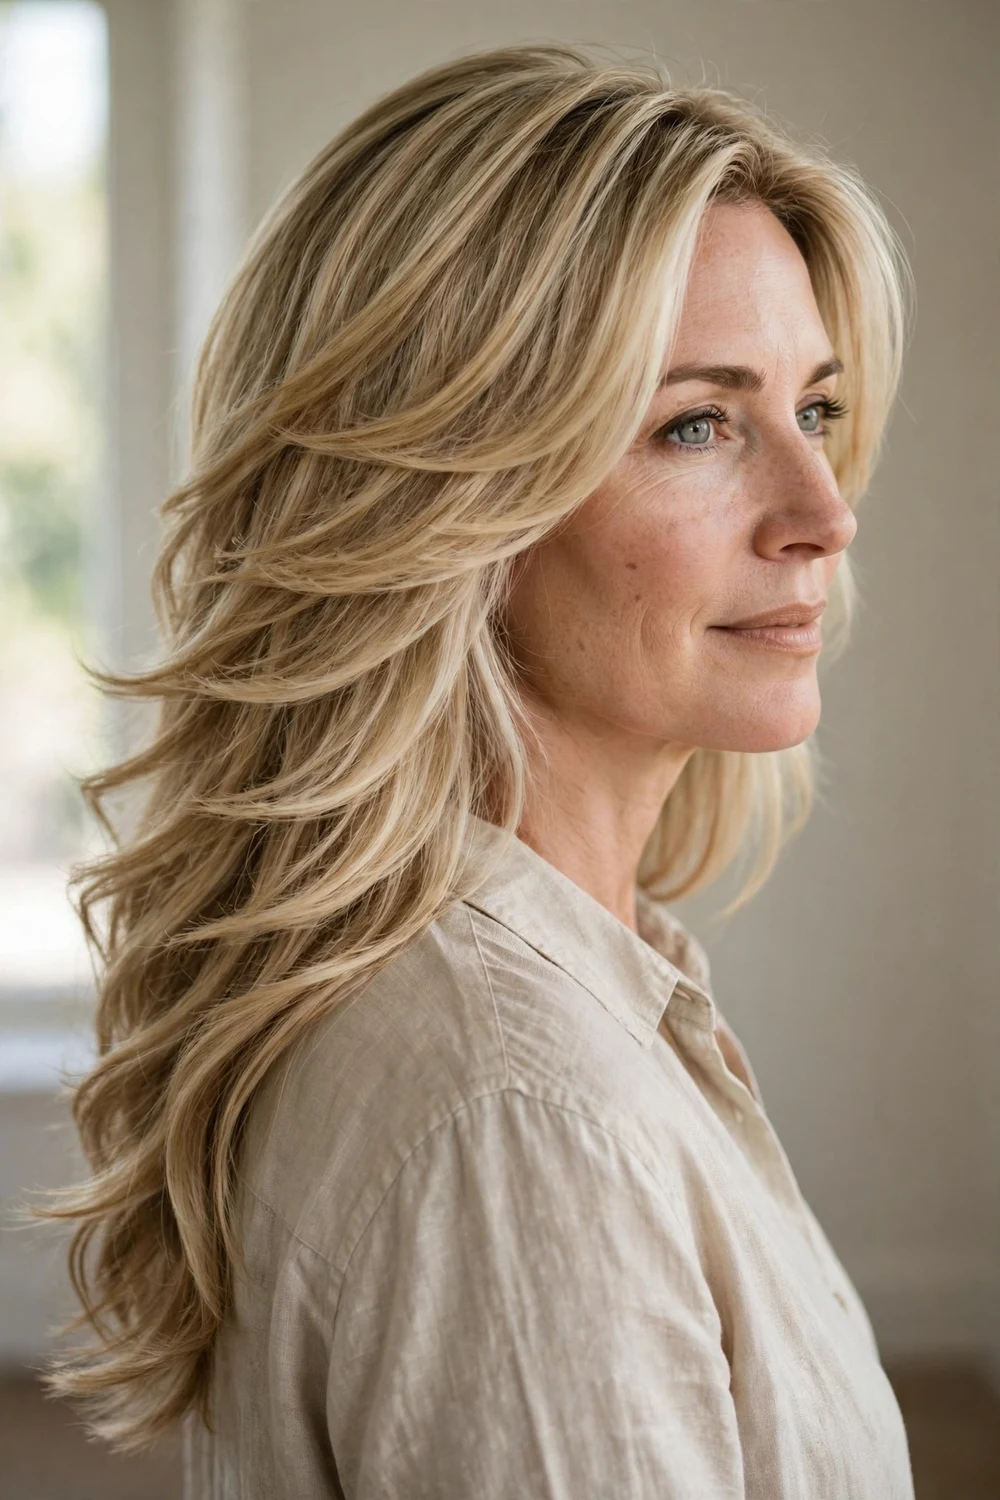
Graduated layers stack in visible steps, each one shorter than the last, building a rounded shape with real volume through the mid-lengths. The technique works from the crown down, so the top gets lift while the bottom keeps its length. Medium to thick hair shows the graduation best, and the shape photographs with clear dimension from every angle. It needs trims on schedule because grown-out steps start to look chunky instead of smooth. Ask your stylist how many graduation levels they plan so you know what upkeep to expect.
Try this: Blow-dry each section over a round brush, rolling under at the ends, to emphasize the stepped shape. Apply heat protectant before you start.
13. Long Layers with Curls
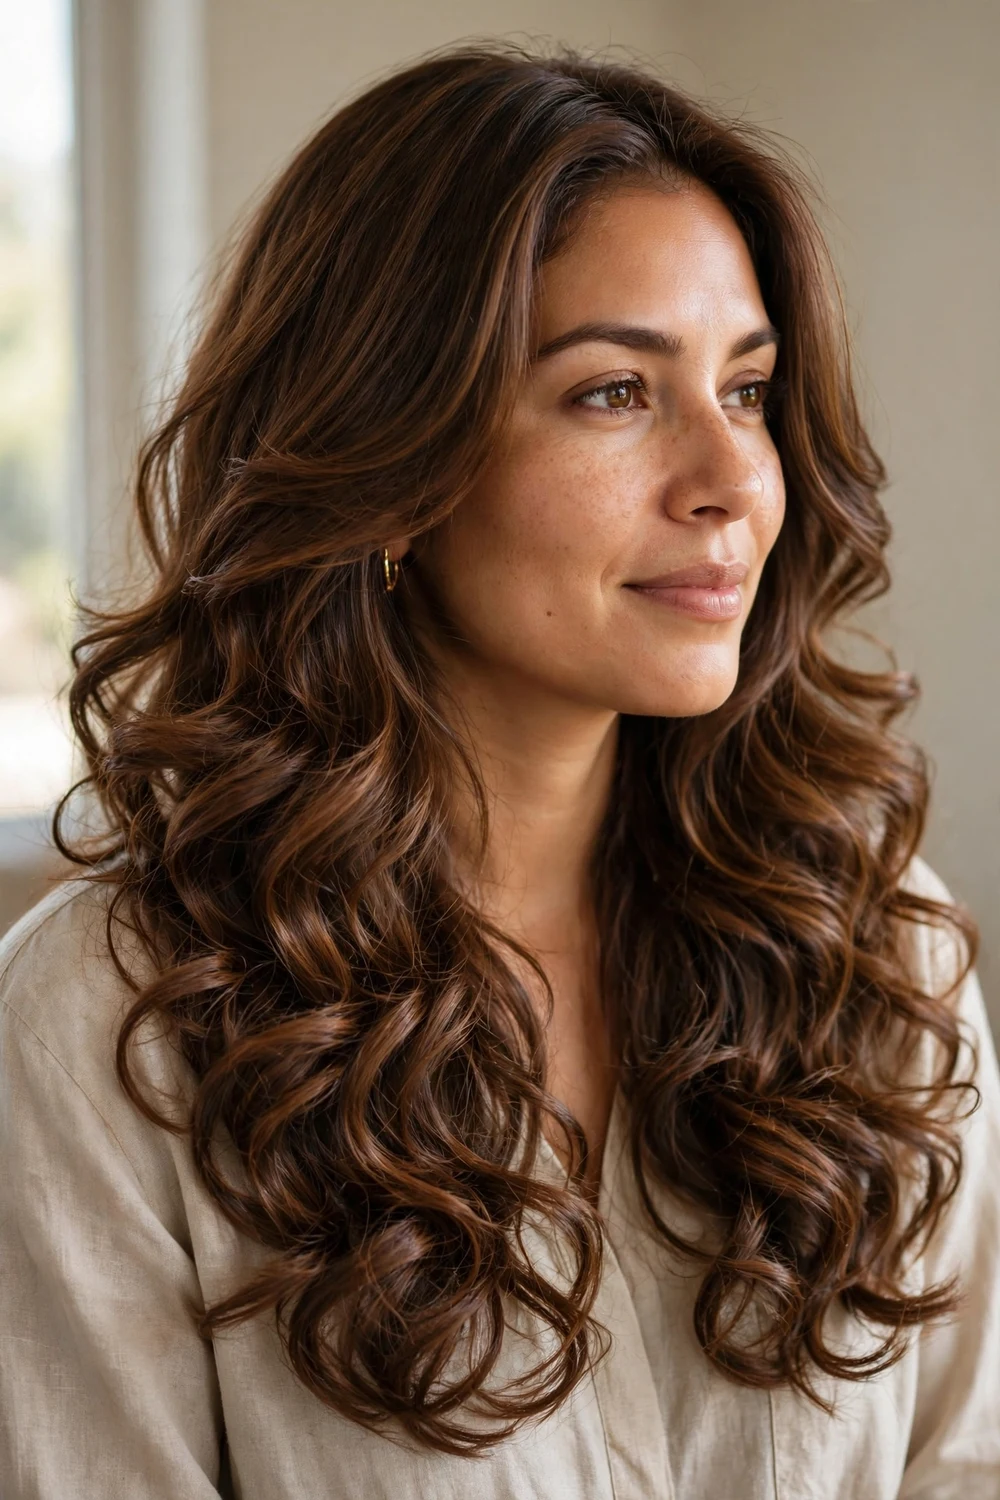
Natural curls and long layers were made for each other. Cutting curls at staggered lengths stops them from stacking into a pyramid and lets each curl spring to its own level. The layers should be cut on dry, styled curls so your stylist can see the true spring of each section. Ask for the shortest layer to sit no higher than the shoulders if you want to keep real length. This cut also makes wash days easier because product distributes more evenly through separated curls. A curly-hair specialist is worth seeking out for this one.
Try this: Apply curl cream to soaking-wet sections, then scrunch upward and diffuse on medium heat until 90 percent dry.
14. Layered Ombre
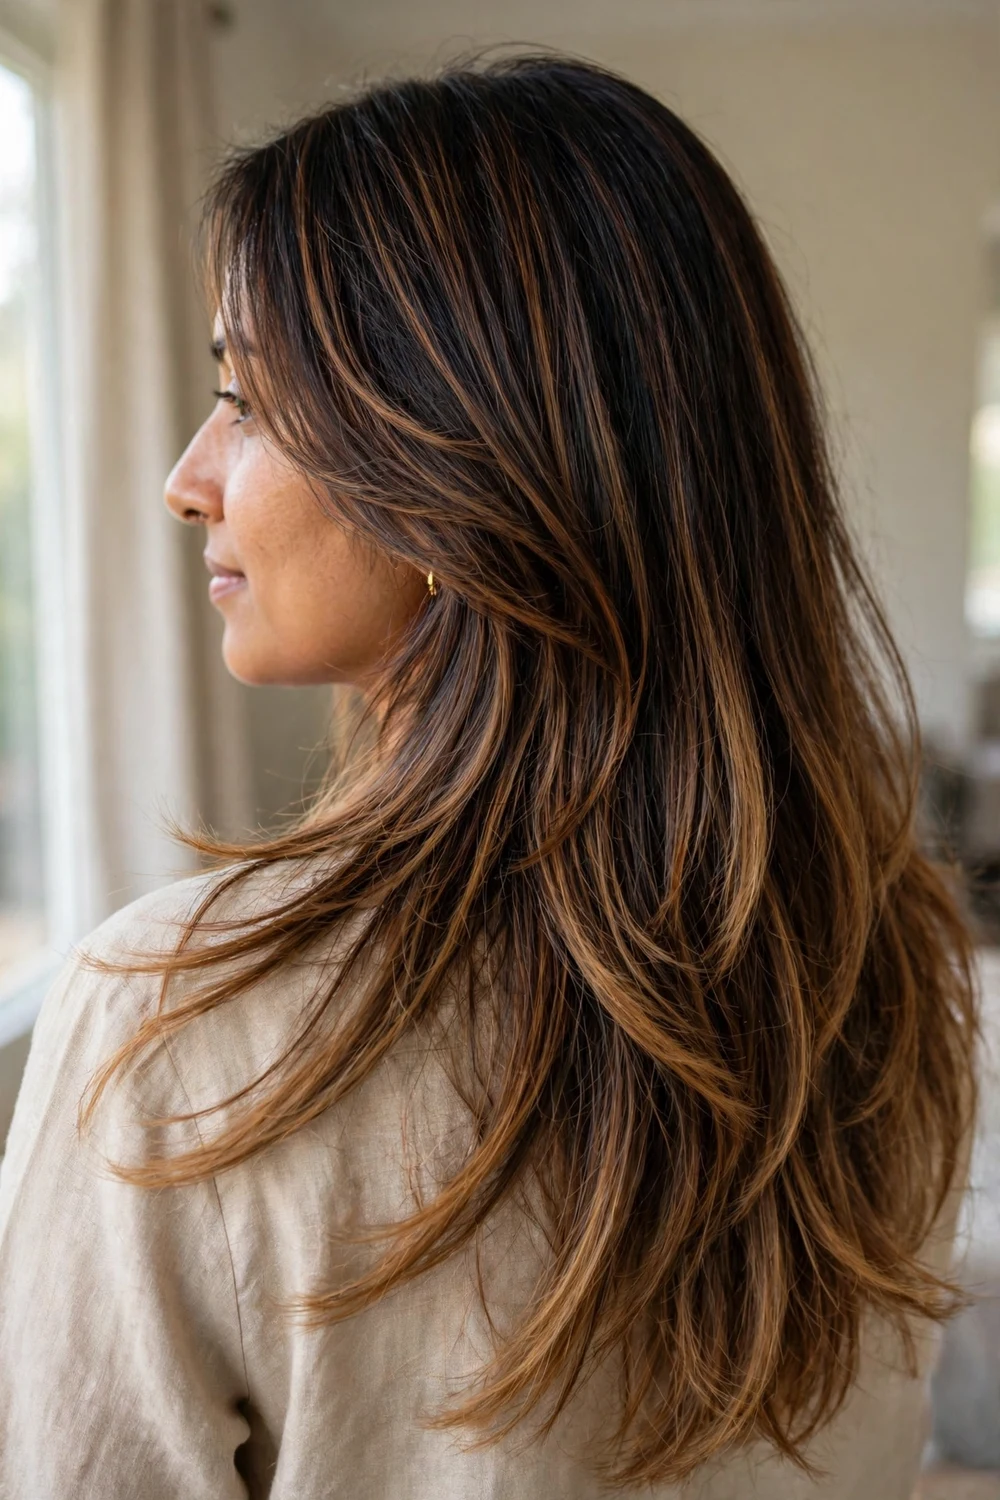
Pairing ombre color with layers makes both look better. The color melts from dark roots to light ends, and the layers give each tone its own level to sit on, which adds depth the color alone can’t create. Long layers work best here because short, choppy pieces can chop the gradient into visible bands. Keep the lightest pieces toward the ends where the layers are longest, since lightened ends need the most moisture. Plan on a gloss or toner every 8 weeks to keep the fade smooth.
Try this: Use a purple-tinted mask once a week on the lightened ends to stop brassiness, and always use heat protectant before styling tools.
15. Long Shaggy Layers
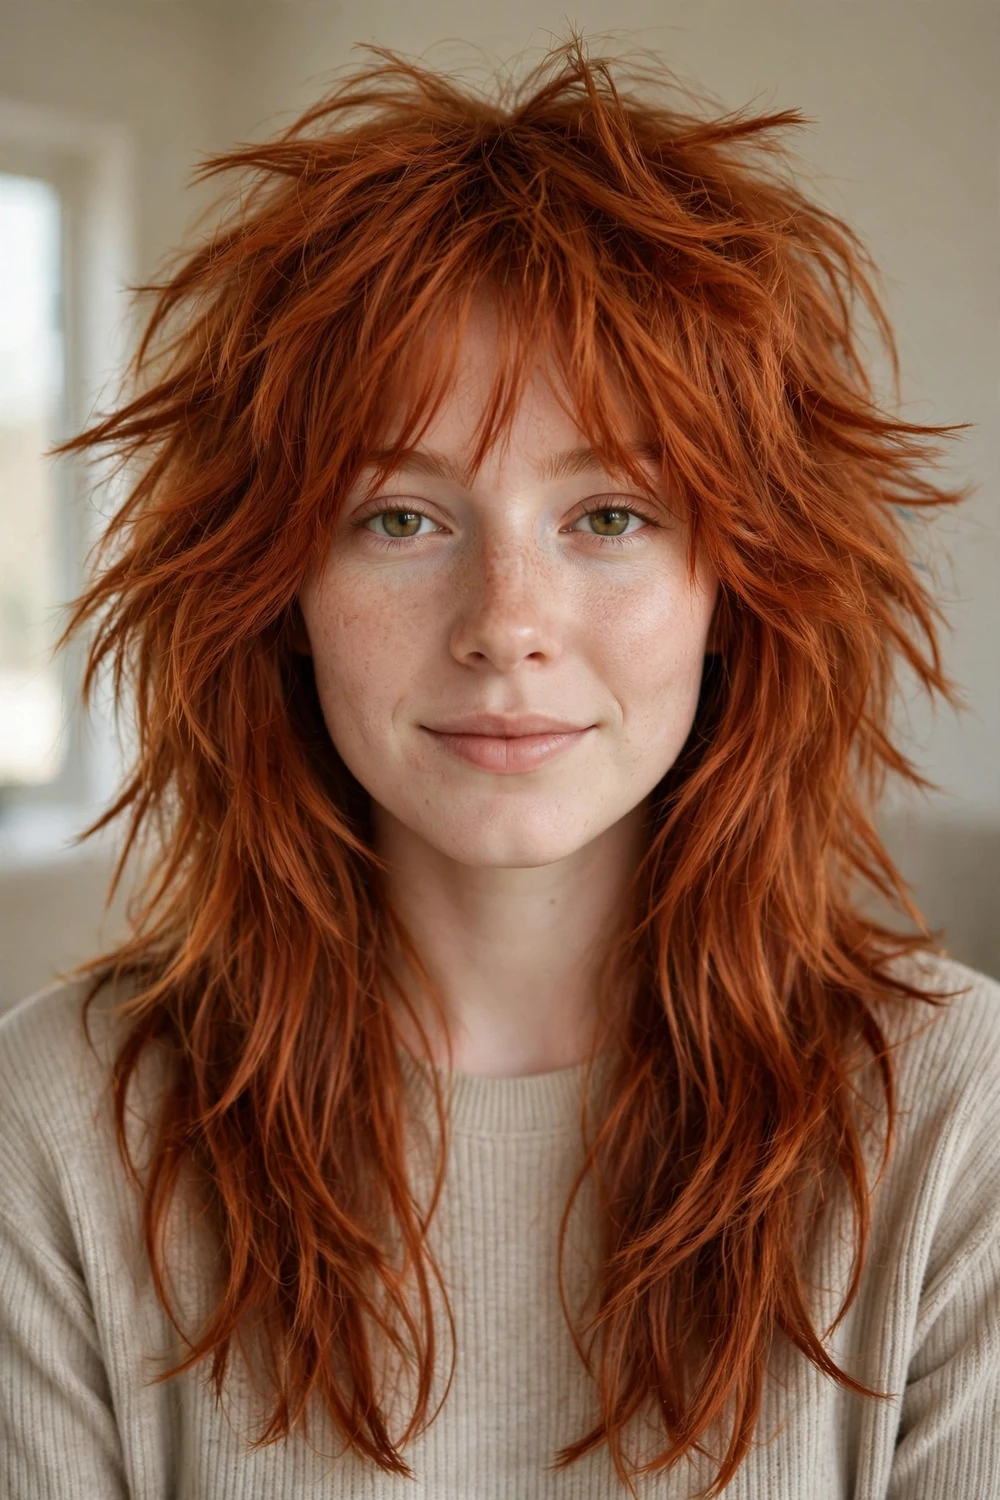
If low maintenance is your priority, long shaggy layers deliver texture that looks good slightly undone. The layers are cut with lots of internal separation, so the hair falls into piece-y sections on its own. It suits wavy and thick straight hair that has enough body to hold the texture. Wash-and-go wearers love it because air-drying still produces shape. The trade-off is that it can look messy rather than effortless if the layers grow past 12 weeks, so book trims before the texture collapses into bulk.
Try this: Mist damp hair with sea salt spray, twist 4 to 5 random sections, and let it air-dry for natural separation.
16. Blunt Cut with Subtle Layers
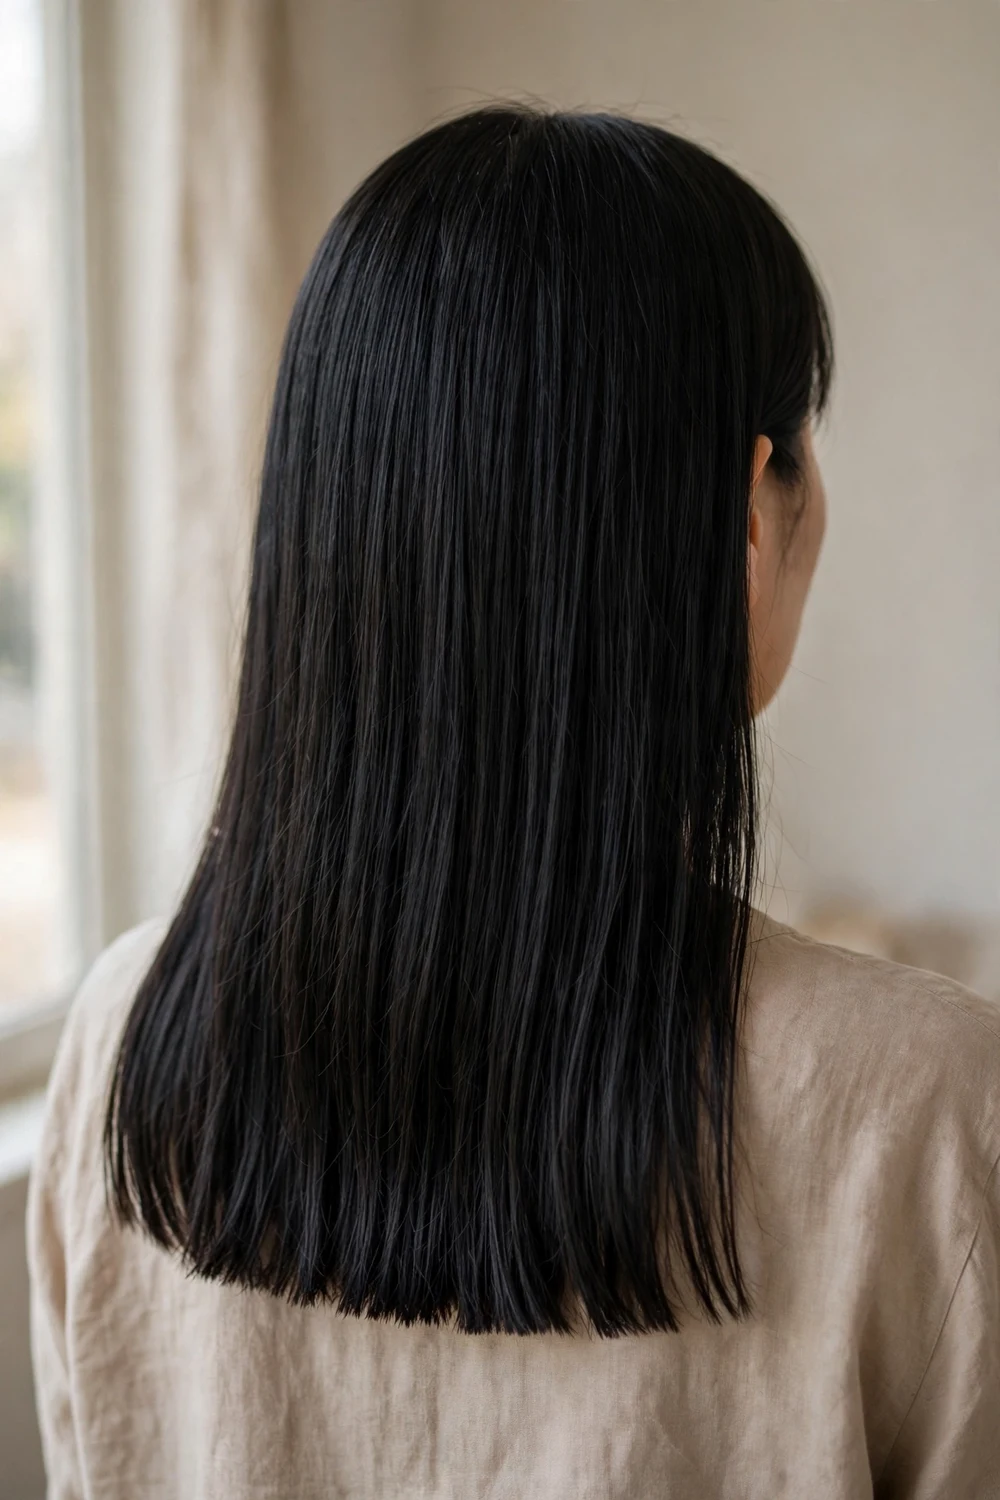
Blunt on the outside, layered on the inside. This cut keeps a thick, straight-across perimeter while hiding one or two long layers underneath to remove weight. It’s the right call if you love the look of blunt ends but your hair feels heavy or takes too long to dry. Fine hair benefits most because the solid outline preserves the appearance of density. From the outside nobody can tell the layers exist, which makes grow-out invisible. Ask for the interior layer to sit at least 4 inches above the perimeter.
Try this: Flat-iron in thin sections with heat protectant applied first, then tap the very ends under slightly for a polished finish.
17. U-Shaped Wispy Layers
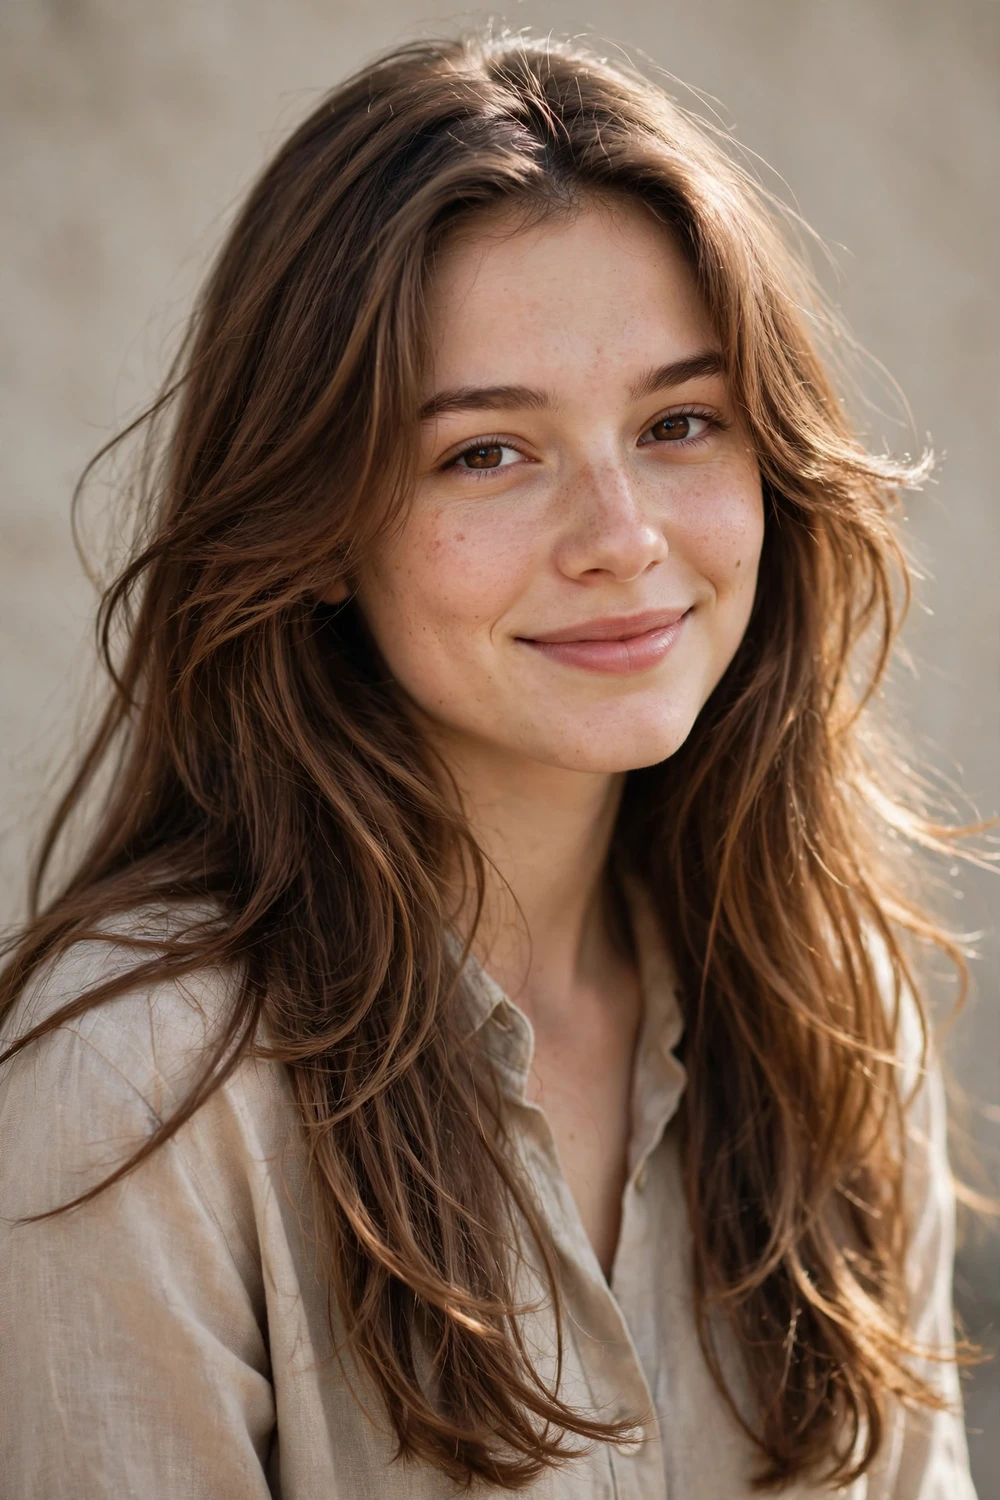
Softness is the whole point of U-shaped wispy layers. The back outline curves gently like a standard U-cut, but the ends are thinned and feathered so they taper instead of sitting heavy. Fine to medium hair wears this best because the wispy finish removes just enough weight to create movement without sacrificing coverage. It air-dries nicely since the tapered ends don’t clump together when wet. Ask your stylist to point-cut the last 2 inches rather than cutting straight across for the wispiest result.
Try this: Rub a pea-sized amount of smoothing cream between your palms and press it into the ends only, which keeps the wispy tips separated.
18. Voluminous Step Cut

The step cut doesn’t hide its layers. It builds bold, visible steps from the crown to the ends, and each step flips outward to create serious volume. Thick, straight hair carries it best because the steps need density to hold their shape. It’s a high-maintenance style that looks flat without blow-drying, so only choose it if you’ll style it regularly. Ask for the steps to start below the ears rather than at the crown if you want the volume concentrated through the mid-lengths instead of the top.
Try this: Blow-dry upside down with a paddle brush for root lift, then flip each step outward with a round brush. Use heat protectant throughout.
19. Inward Layers
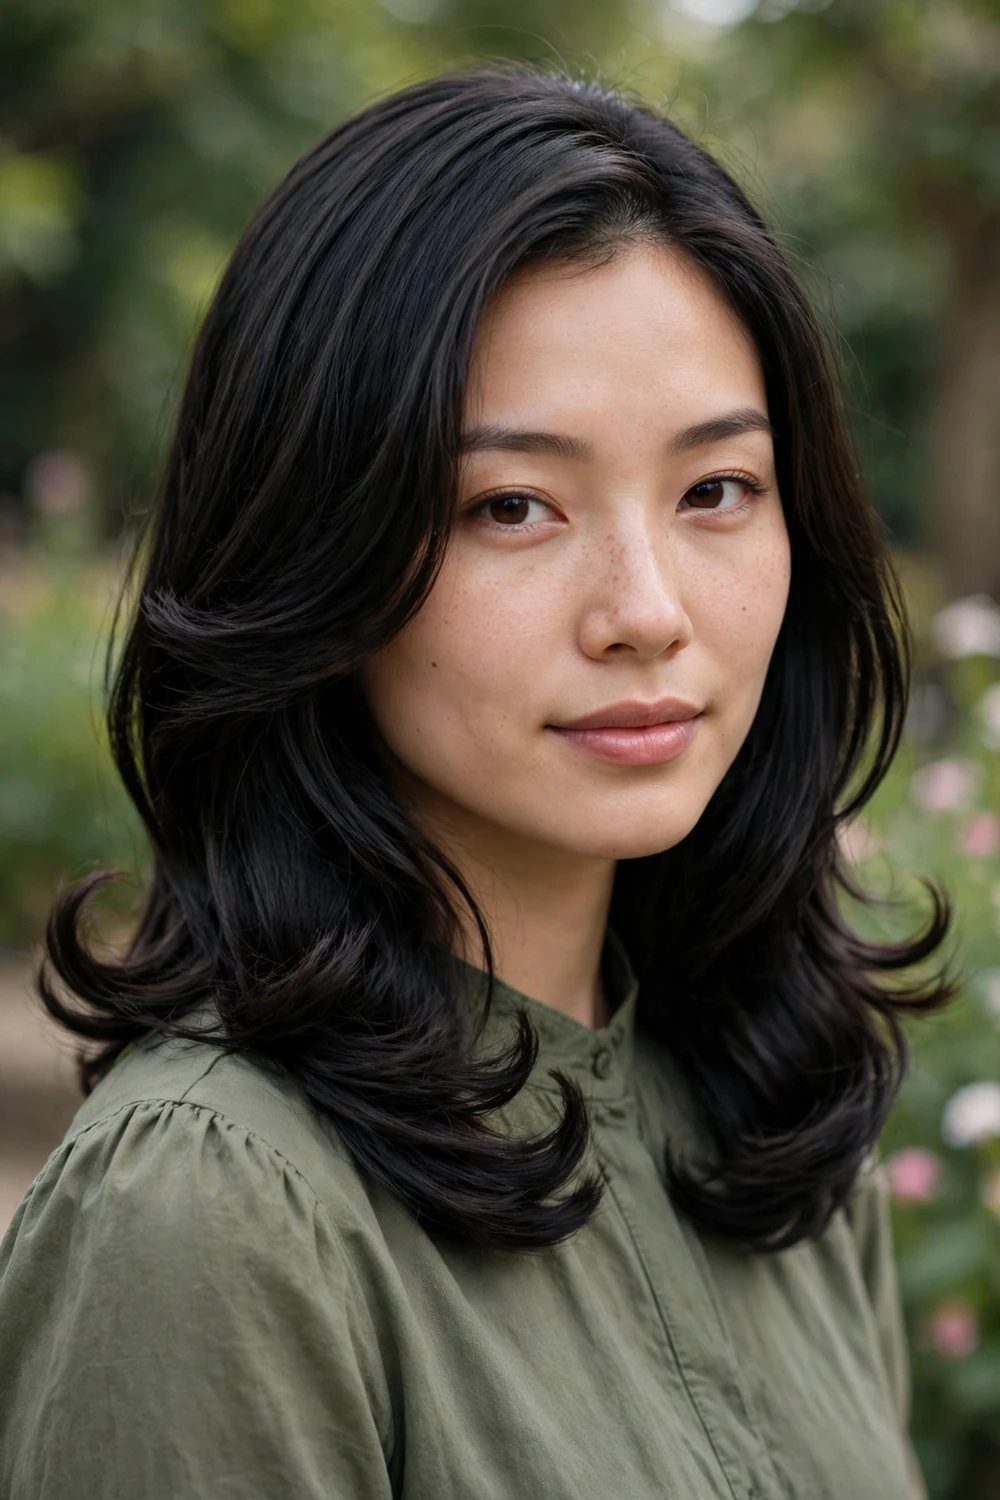
Direction matters as much as length. Inward layers are cut and styled so every layer tucks under toward the neck instead of flipping out. The result is a smooth, contained silhouette that suits professional settings and formal events. Straight to slightly wavy hair holds the inward curve best, and the style works on fine through thick densities. It needs a round brush and a blow dryer to set the direction, since air-drying lets the ends do whatever they want. Ask for the layers to graduate slightly so each one tucks neatly under the one above it.
Try this: Blow-dry each section over a medium round brush, rolling the brush under at the ends, and cool each section on the brush for 5 seconds.
20. Thinned-Out Tousled Layers

Density is the enemy of movement in very thick hair, and thinned-out tousled layers solve it directly. Your stylist removes interior bulk with thinning shears or texturizing cuts, then layers the lengths so the hair falls in separated, touchable pieces. The tousled finish hides the thinning completely. This is built for coarse, dense hair that poufs or takes an hour to dry. Don’t choose it for fine hair, since removing interior weight there just makes the ends look sparse. Expect your drying time to drop noticeably after this cut.
Try this: Apply a lightweight mousse to damp hair and rough-dry with your fingers, lifting at the roots, for an undone tousled finish.
21. Descending Face-Framing Layers
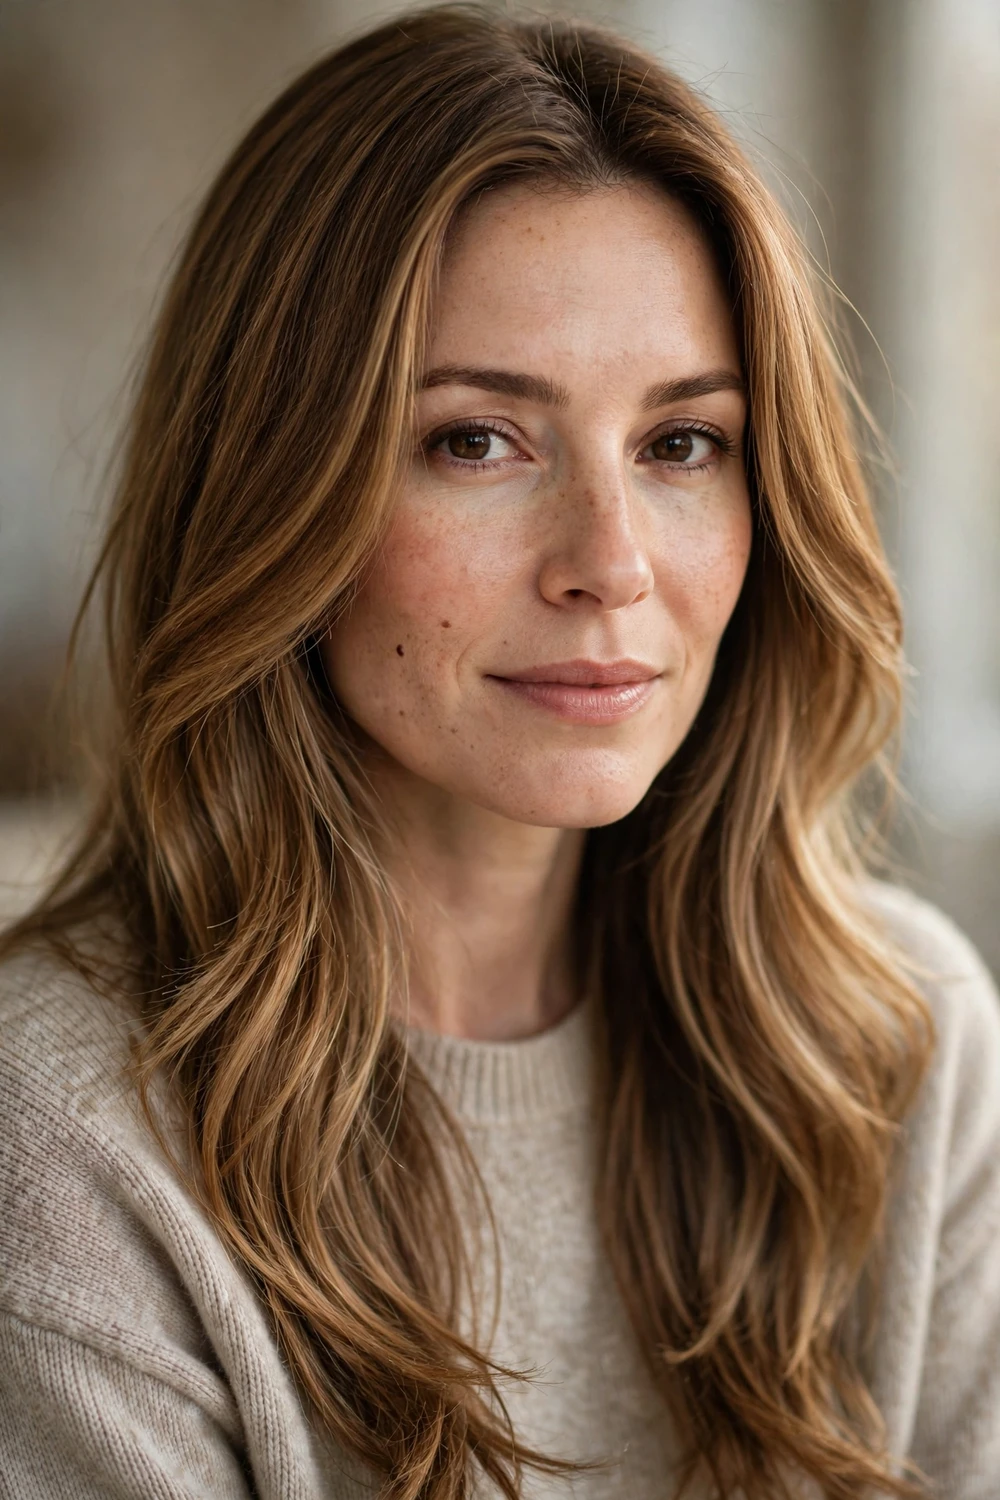
Think of these as face-framing layers with a longer runway. They start high at the cheekbones and descend in a smooth diagonal all the way to the chest, getting longer as they travel down. The diagonal line slims wider faces and adds structure to very long hair that otherwise hangs in one sheet. Each layer should blend into the next without visible steps, so ask your stylist to slide-cut the transitions. The style frames the face in photos and keeps the front interesting even in a ponytail, since the shorter pieces fall out softly.
Try this: Flat-iron the front layers with a slight inward bend at the bottom, using heat protectant, so the diagonal line stays crisp.
22. Long Layered Waves with Bangs

Bangs change the whole equation for long layered hair. They shorten the visual length of the face, which lets the waves behind them fall as long as you like without overwhelming your features. The bangs can be full, wispy, or curtain-style, and the layers should start below the chin so the front doesn’t get crowded. This combination suits oval, long, and heart-shaped faces especially well. Bangs need trimming every 3 to 4 weeks, so factor that upkeep into your decision before you commit.
Try this: Style bangs first while they’re damp, directing them side to side with a small round brush, then wave the lengths with a 1.25-inch iron.
23. V-Cut with Curled Ends
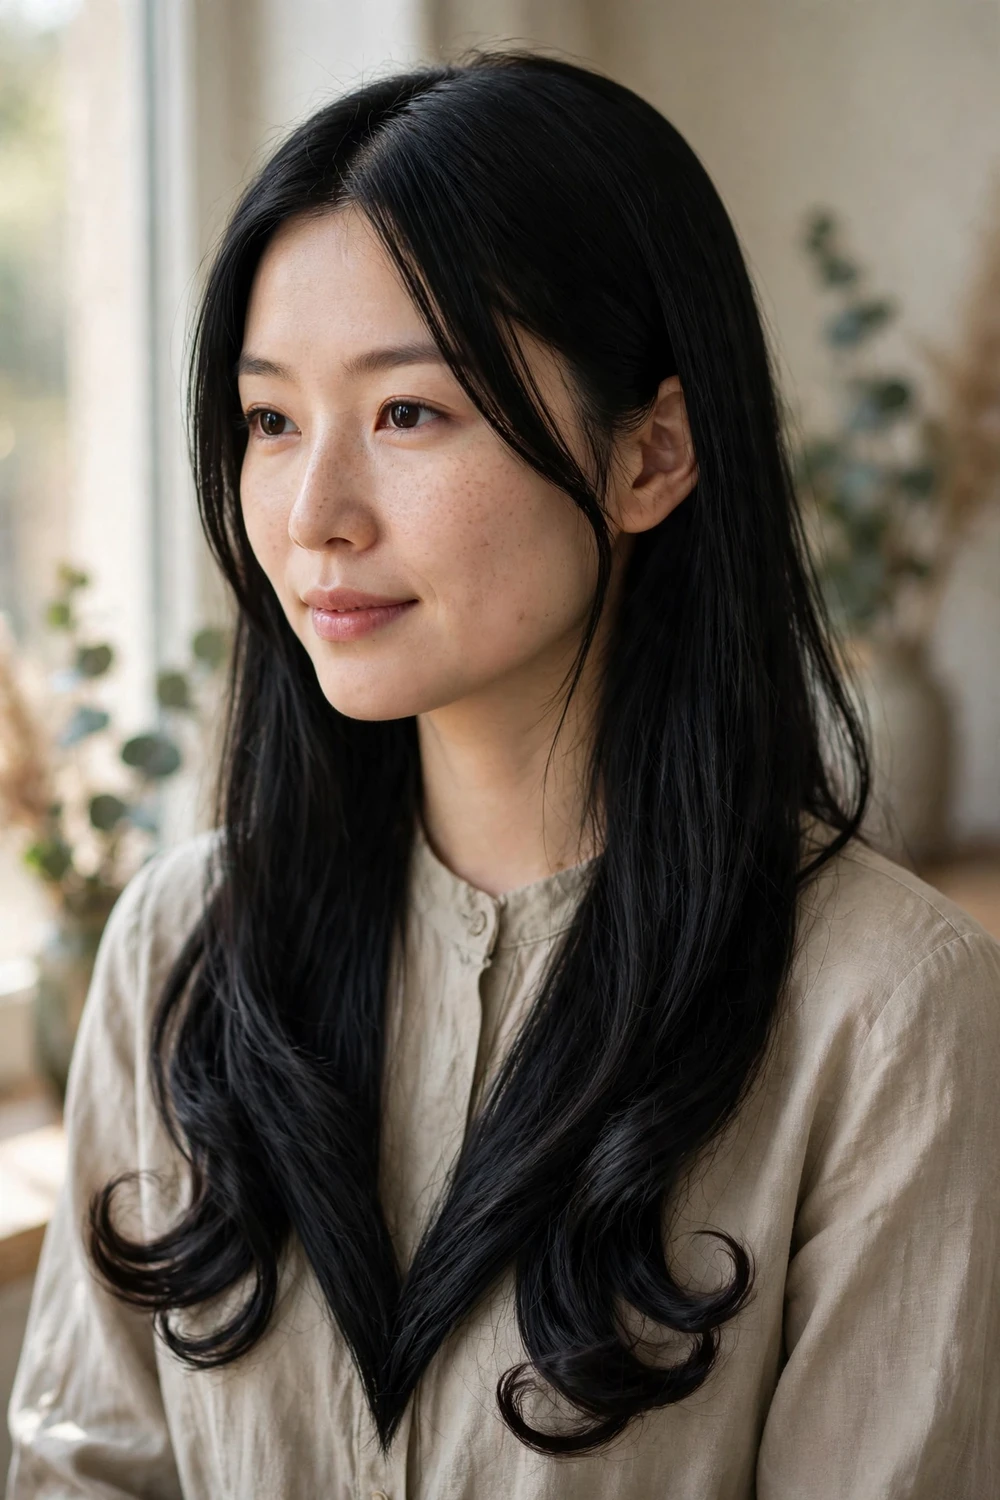
Take the sharp V-cut outline and finish the ends with curls, and you get a red-carpet look from an everyday cut. The V shape gives the curls a point to cascade toward, which makes the style look deliberate from behind instead of randomly curled. It works on medium to thick hair that can hold a curl through the evening. Set the curls with a light-hold spray rather than a strong one so they stay soft and touchable. The cut underneath means you can also wear it straight on casual days without losing the shape.
Try this: Curl 2-inch sections away from your face, let each cool in your palm for 5 seconds, then brush through once with a wide-tooth comb.
24. Jagged U-Cut
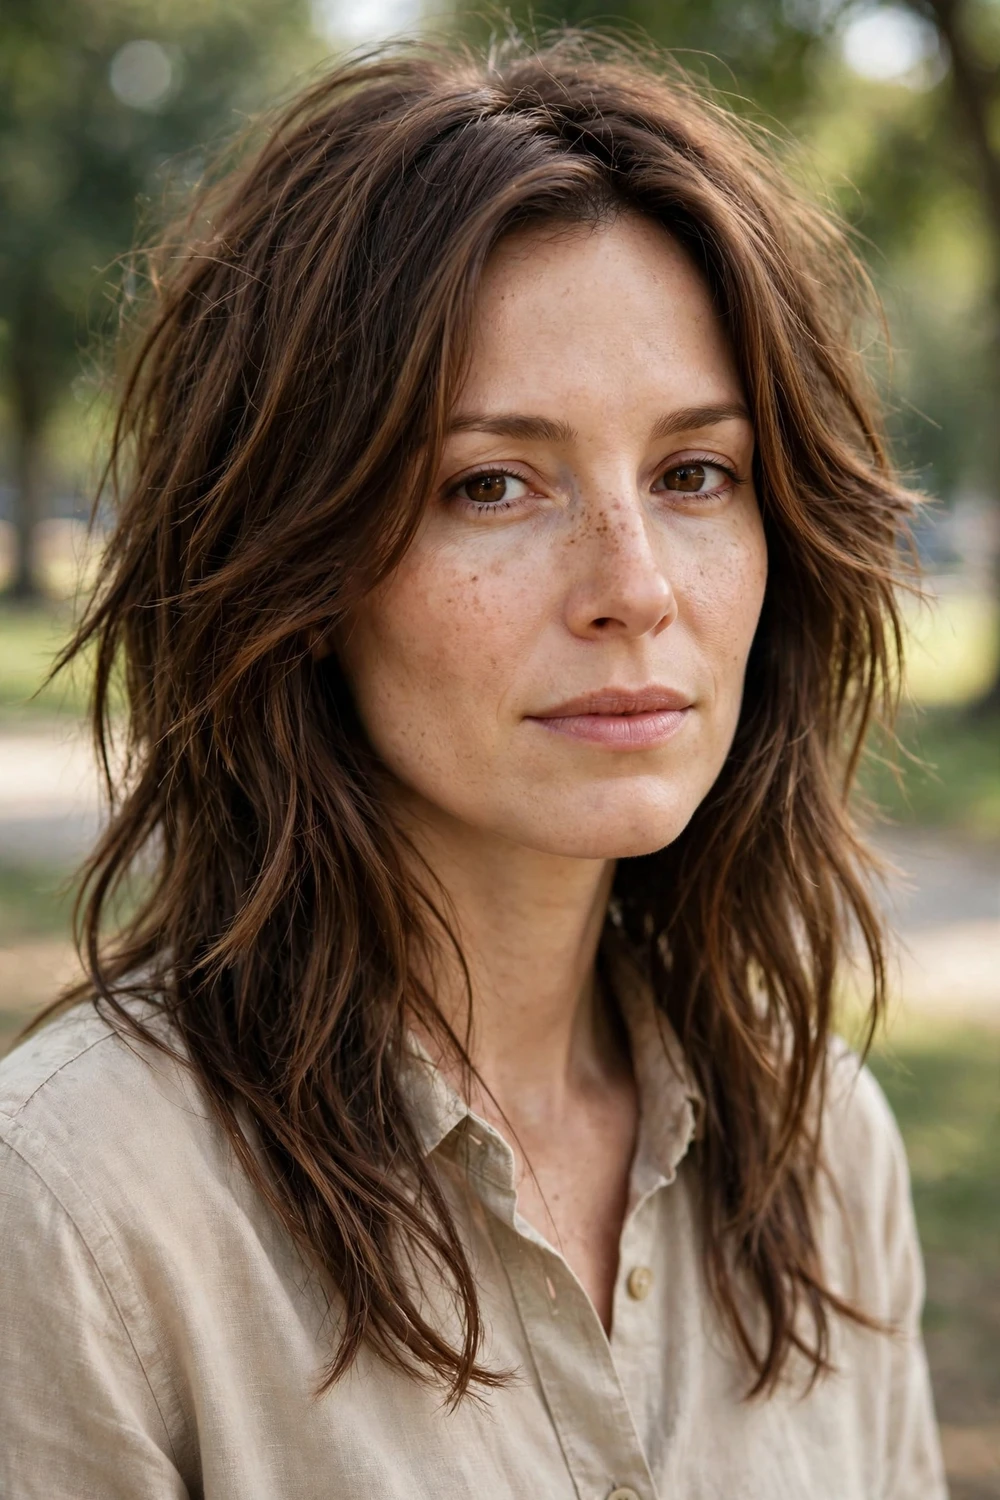
The jagged U-cut keeps the rounded U outline but finishes the ends with uneven, point-cut texture instead of a smooth line. It reads edgy and modern without the severity of a V, and the jagged tips hide split ends between trims better than blunt perimeters do. Medium to thick straight hair shows the texture best. It’s a forgiving grow-out too, since the uneven ends just get softer with time rather than developing an obvious line. Ask for point-cutting through the last 3 inches to get the jagged effect without actual damage.
Try this: Work a small amount of texturizing paste through the dry ends, pinching random tips between your fingers to emphasize the jagged texture.
Layered Hairstyles Comparison at a Glance
| Style | Best Hair Type | Styling Effort |
|---|---|---|
| V-Cut Layers | Thick, straight or wavy | Low |
| U-Cut with Swoopy Layers | Fine to medium | Low-Medium |
| Center-Parted Loose Waves | Wavy or heat-styled | Medium |
| Flippy Layers | Straight to slightly wavy | Low |
| Octopus Haircut | Thick | Medium |
| Butterfly Layers | Medium to thick | Medium |
| Ghost Layers | Fine | Low |
| Long Wolf Cut | Thick, wavy | Low-Medium |
| Curtain Bangs with Layers | All types | Medium |
| Face-Framing Layers | All types | Low |
| Razor-Cut Layers | Thick, coarse | Low-Medium |
| Graduated Layers | Medium to thick | Medium |
| Long Layers with Curls | Curly, coily | Medium |
| Layered Ombre | Medium to thick | Medium |
| Long Shaggy Layers | Wavy or thick straight | Low |
| Blunt Cut with Subtle Layers | Fine to medium | Low-Medium |
| U-Shaped Wispy Layers | Fine to medium | Low |
| Voluminous Step Cut | Thick, straight | High |
| Inward Layers | Straight to slightly wavy | Medium |
| Thinned-Out Tousled Layers | Very thick, coarse | Low-Medium |
| Descending Face-Framing Layers | All types | Low-Medium |
| Long Layered Waves with Bangs | All types | Medium-High |
| V-Cut with Curled Ends | Medium to thick | Medium |
| Jagged U-Cut | Medium to thick, straight | Low |
How to Choose the Right Layers for You
Start with your density. Fine hair needs ghost layers, subtle long layers, or a blunt cut with hidden layers, since visible layering can expose thin ends. Thick hair can handle razor-cut layers, thinned-out tousled layers, and the octopus cut, which all remove the bulk that makes dense hair hard to manage.
Next, be honest about your styling routine. If you air-dry and go, pick flippy layers, long shaggy layers, or ghost layers, which all look good with minimal effort. If you enjoy blow-drying, butterfly layers, graduated layers, and the step cut reward the extra time. There’s no wrong answer here, only a mismatch between the cut and your habits.
Age doesn’t rule out long layers, but the approach shifts. Softer, longer layers around the face tend to flatter mature features more than choppy, disconnected pieces. For inspiration aimed at this stage of life, browse layered hairstyles for women over 50 to see which techniques translate best.
Face shape is your tiebreaker when two styles both suit your hair. Round faces gain from butterfly layers and descending face-framing layers that add width at the cheeks. Long faces do better with curtain bangs or bangs paired with waves, which shorten the visual length. Oval faces can wear nearly anything on this list.
Thin hair needs special attention regardless of age, because the wrong layers can make sparse ends look sparser. Longer, fewer layers with a solid perimeter protect density while still adding shape. See layered hairstyles for women over 50 with thin hair for cuts built around keeping fine hair looking full.
Think about upkeep honestly. Bangs and graduated layers need frequent trims, while ghost layers and U-cuts are forgiving. A cut that fits your salon-visit habits will look good far longer than one that fights them.
Finally, consider your growth plan. If you’re growing your hair out, choose V-cuts, U-cuts, or ghost layers, which all grow gracefully. If you might cut it shorter within the year, short layered hairstyles for women over 60 shows how layered techniques work when length comes off.
Maintaining Long Layers
Book a trim every 8 to 12 weeks. Layers lose their blend as they grow, and long hair shows the unevenness fast. A maintenance trim reshapes the layers and removes split ends before they travel up the hair shaft.
Heat protectant is non-negotiable if you use hot tools. Spray or cream it through damp or dry hair before every blow dryer, flat iron, or curling wand session. Long layered ends are the oldest, driest part of your hair, and unprotected heat turns them brittle within weeks.
Wash with a sulfate-free shampoo and condition from the mid-lengths down, where layered ends need the most moisture. A weekly deep-conditioning mask keeps the layers soft and stops the ends from frizzing apart. Sleep on a satin pillowcase or in a loose braid to cut down on the tangling that long layers invite.
Mistakes to Avoid
Don’t let layers start too high. Short layers near the crown on long hair create a shelf that won’t blend, and growing it out takes months. Keep the shortest layer at or below the chin unless you’re going for a wolf cut or shag on purpose.
Don’t thin fine hair. Texturizing and razor work are built for density, and using them on fine hair leaves the ends wispy and see-through. If your ponytail is slim, stick with ghost layers or subtle long layers.
Don’t skip the consultation. Bring photos of the exact style you want, and tell your stylist how you actually style your hair day to day. A cut that needs daily blow-drying will disappoint you if you air-dry, no matter how good it looks in the salon chair.
Don’t ignore your part. Layers are cut to fall a certain way, and flipping your part to the opposite side can expose choppy transitions. If you switch parts often, ask for layers that work with both.
Frequently Asked Questions
What is the difference between V-cut and U-cut layers?
A V-cut tapers the back outline into a pointed V, with the longest hair at the center point. A U-cut rounds the same outline into a soft curve with no point. V-cuts look sharper and more dramatic, while U-cuts look fuller and softer from behind. Both keep long length while giving the ends a deliberate shape.
Do layers make long hair look thinner or thicker?
It depends on the technique. Ghost layers and subtle long layers keep the outline full while adding interior movement, so hair looks thicker. Razor-cut and thinned-out layers remove bulk, which can make fine hair look thinner but makes thick hair look lighter and more manageable. Tell your stylist whether your goal is fullness or weight removal before they pick up the scissors.
How often should I trim long layered hair?
Every 8 to 12 weeks is the standard window for most layered cuts. Graduated layers and step cuts need the shorter end of that range because their visible steps grow out unevenly. Ghost layers and U-cuts can stretch toward 12 weeks since their grow-out is subtle. Bangs are the exception and need trimming every 3 to 4 weeks.
Are layers good for fine long hair?
Yes, if you choose the right type. Ghost layers, blunt cuts with hidden layers, and U-shaped wispy layers add movement without sacrificing density. Avoid razor-cut layers and heavy texturizing, which remove the interior weight that fine hair needs to look full. Keep the layers long and the perimeter solid for the best result.
What should I ask my stylist for long layers?
Bring reference photos of the exact style you want, since layer names mean different things to different stylists. Specify where you want the shortest layer to start, whether you want a V or U outline, and how you style your hair daily. Mention your density concerns directly, such as wanting to keep ends looking thick or needing bulk removed. A good consultation takes 5 minutes and prevents most bad cuts.
Final Thoughts
Long hair gives layers the most room to work, and the 24 styles above cover every density, face shape, and styling habit. Pick the one that matches your real routine, bring clear photos to your appointment, and keep up with trims. Good layers should make your mornings easier, not harder.
If you want to keep all your length while the front acts like a shorter cut, these butterfly cuts pair short face-framing layers with long lengths underneath.

