


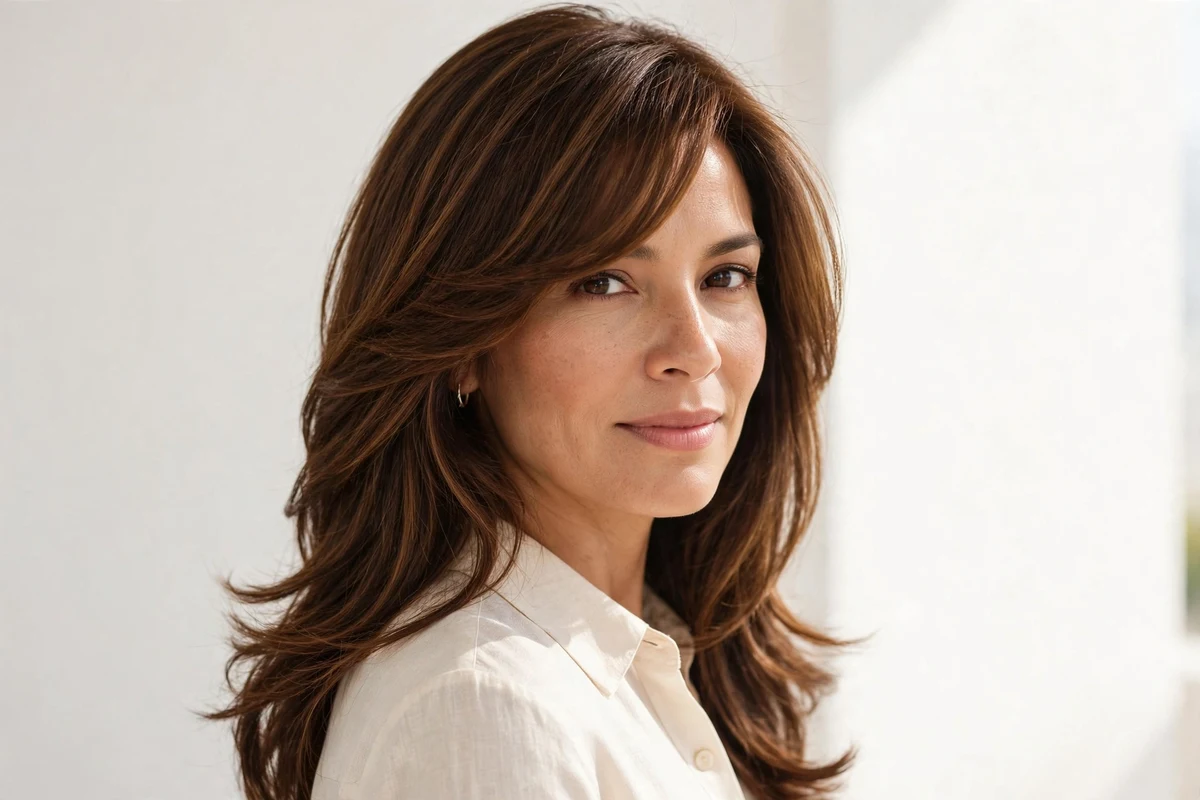
Side-swept bangs are the most forgiving fringe you can get. They soften foreheads, slim wide faces, and grow out without an awkward stage. I’ve had side-swept bangs in some form for most of the last decade, and no other fringe is this easy to live with.
This roundup covers 30 side-swept bangs ideas across every length, texture, and styling mood. You’ll find classic diagonal cuts, choppy pixie fringes, glossy evening looks, and low-effort options for growing them out.
Quick answer: Side-swept bangs suit nearly every face shape because the diagonal line draws the eye sideways instead of straight across. Pick a length that matches your hair density and how much styling time you have. Wispy, longer fringes are the easiest starting point.
Quick Takeaways
- Side-swept bangs flatter oval, round, square, and heart faces by creating a diagonal line across the forehead.
- Fine hair works best with wispy or feathered fringes that don’t steal density from the rest of the cut.
- Thick hair can handle dramatic, heavier fringes that skim the cheekbones.
- Most side-swept styles need a trim every 3 to 4 weeks to stay out of the eyes.
- A round brush and 2 minutes of blow-drying in the morning keep the sweep in place all day.
Why Side-Swept Bangs Work for Almost Everyone
The diagonal line is the whole trick. Straight-across bangs draw attention horizontally, which can make a wide face look wider. A fringe swept to one side breaks that horizontal line and pulls the eye diagonally, which reads as length.
They are also the lowest-commitment fringe. When you grow them out, they simply become face-framing layers. You never hit the blunt-bang grow-out stage where everything needs pinning back for two months.
How to Ask Your Stylist for Side-Swept Bangs
Bring one reference photo and point at the exact parting line in it. Tell your stylist where you want the fringe to end: brow level, cheekbone, or chin. Shorter fringes read classic, longer ones read softer.
Mention your dominant hand and which side you part on. Most people sweep away from their stronger hand so the fringe doesn’t get disturbed while eating or writing. A stylist who knows this will cut the angle correctly the first time.
1. Classic Side-Swept Bangs
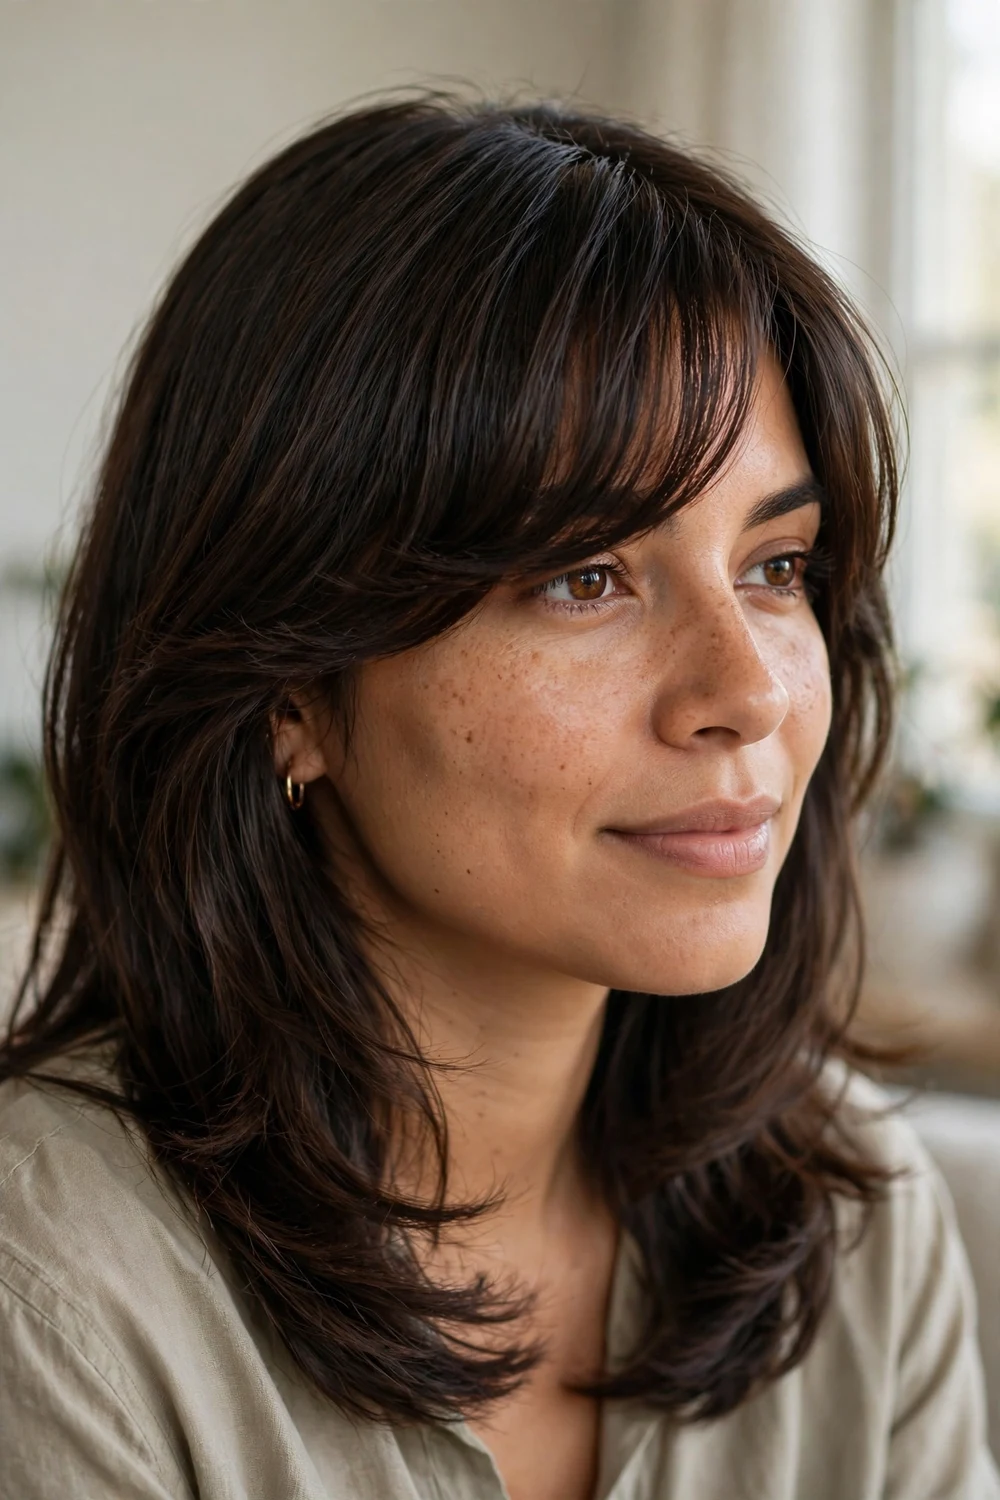
This is the textbook version: a clean diagonal fringe parted deep on one side, grazing the brows and tapering to end above the opposite eye. It pairs naturally with a layered bob or medium cut because the angles line up with the rest of the hair.
Ask for the shortest point at brow level and the longest point at the cheekbone. Blow-dry the fringe across the forehead with a flat brush, then push it into place. A pea-sized amount of smoothing cream keeps flyaways down.
Try this: train a new fringe by blow-drying it flat against the forehead for 3 nights in a row before styling it sideways. It learns the new direction fast.
2. Smooth Swoopy Bangs
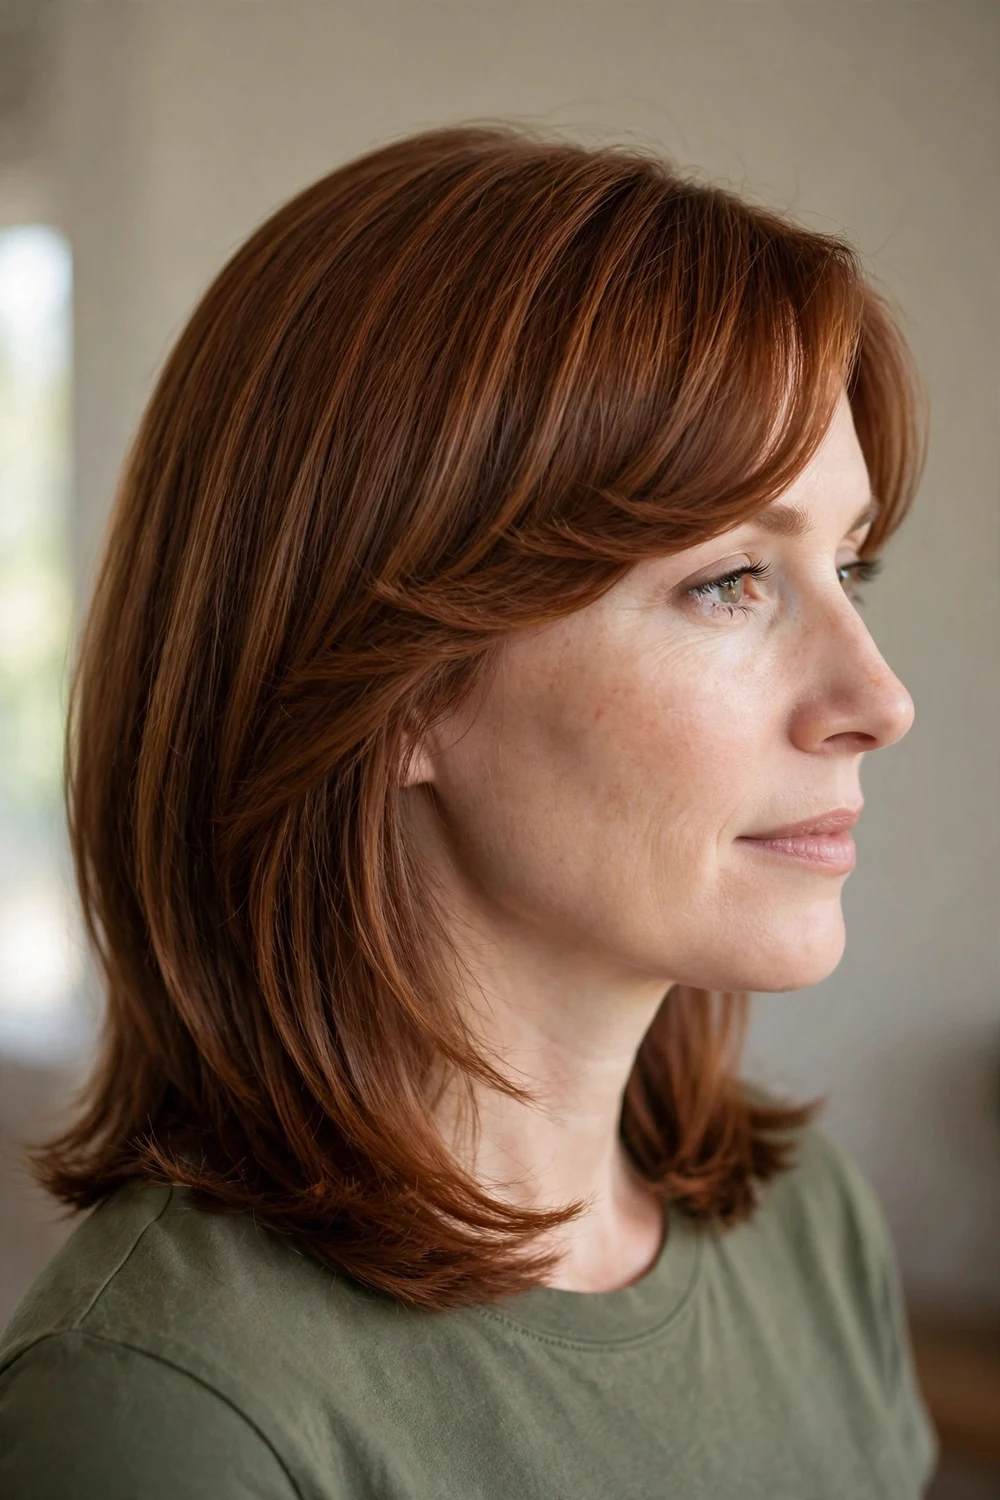
Polished and curved, swoopy bangs look like they were set with a round brush and meant to be seen. The fringe follows one smooth arc from the side part across the forehead, with no texture breaking it up.
This finish suits shoulder-length and medium hair best, where the sleek fringe contrasts with softly teased lengths. Use a large round brush and roll the ends under slightly so the arc holds its shape.
Try this: mist the finished fringe with a flexible-hold hairspray from 10 inches away. Close-range spraying is what makes swoopy bangs go stiff.
3. Dramatic Side-Swept Bangs
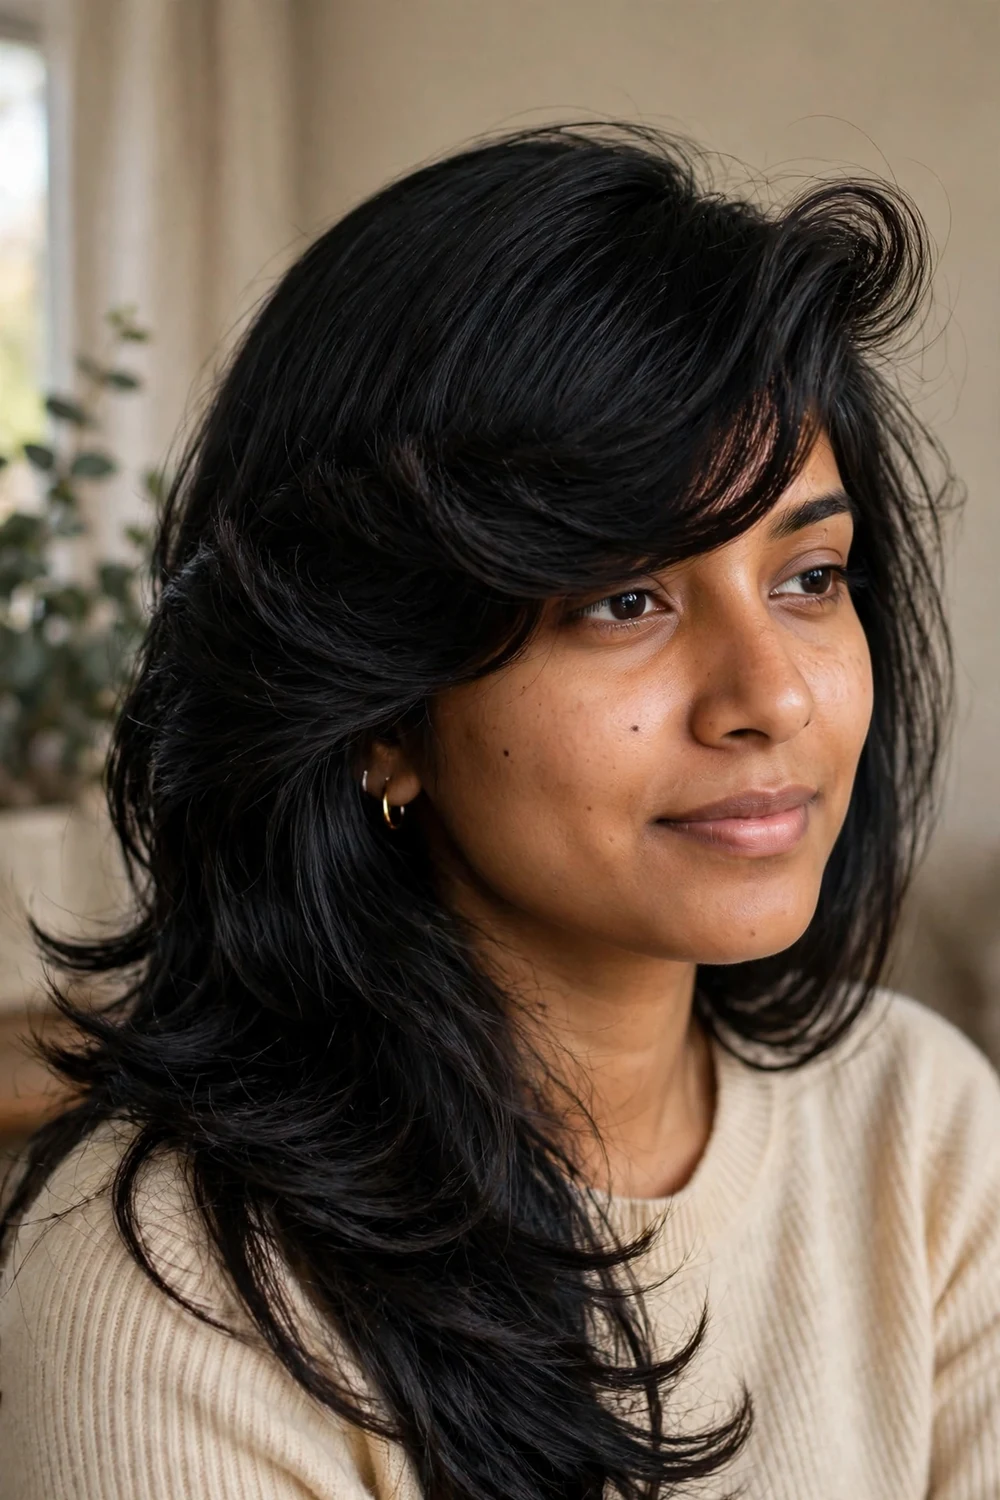
Here the fringe is the whole hairstyle. A big, bouncy side bang carries the look, with long layered lengths playing backup. It works best on thick hair that can support real weight in the front without going limp.
Wrap the fringe around a medium velcro roller while you do the rest of your makeup. Ten minutes of heat-free setting gives more lift than a round brush ever will. A boar bristle brush smooths the fringe after the roller comes out, and a cool shot from the dryer locks the lift in place.
Try this: backcomb the roots of the fringe just at the part line before sweeping it over. That hidden cushion is what keeps dramatic bangs from collapsing by noon.
4. Bouncy Blowout with Side Bangs
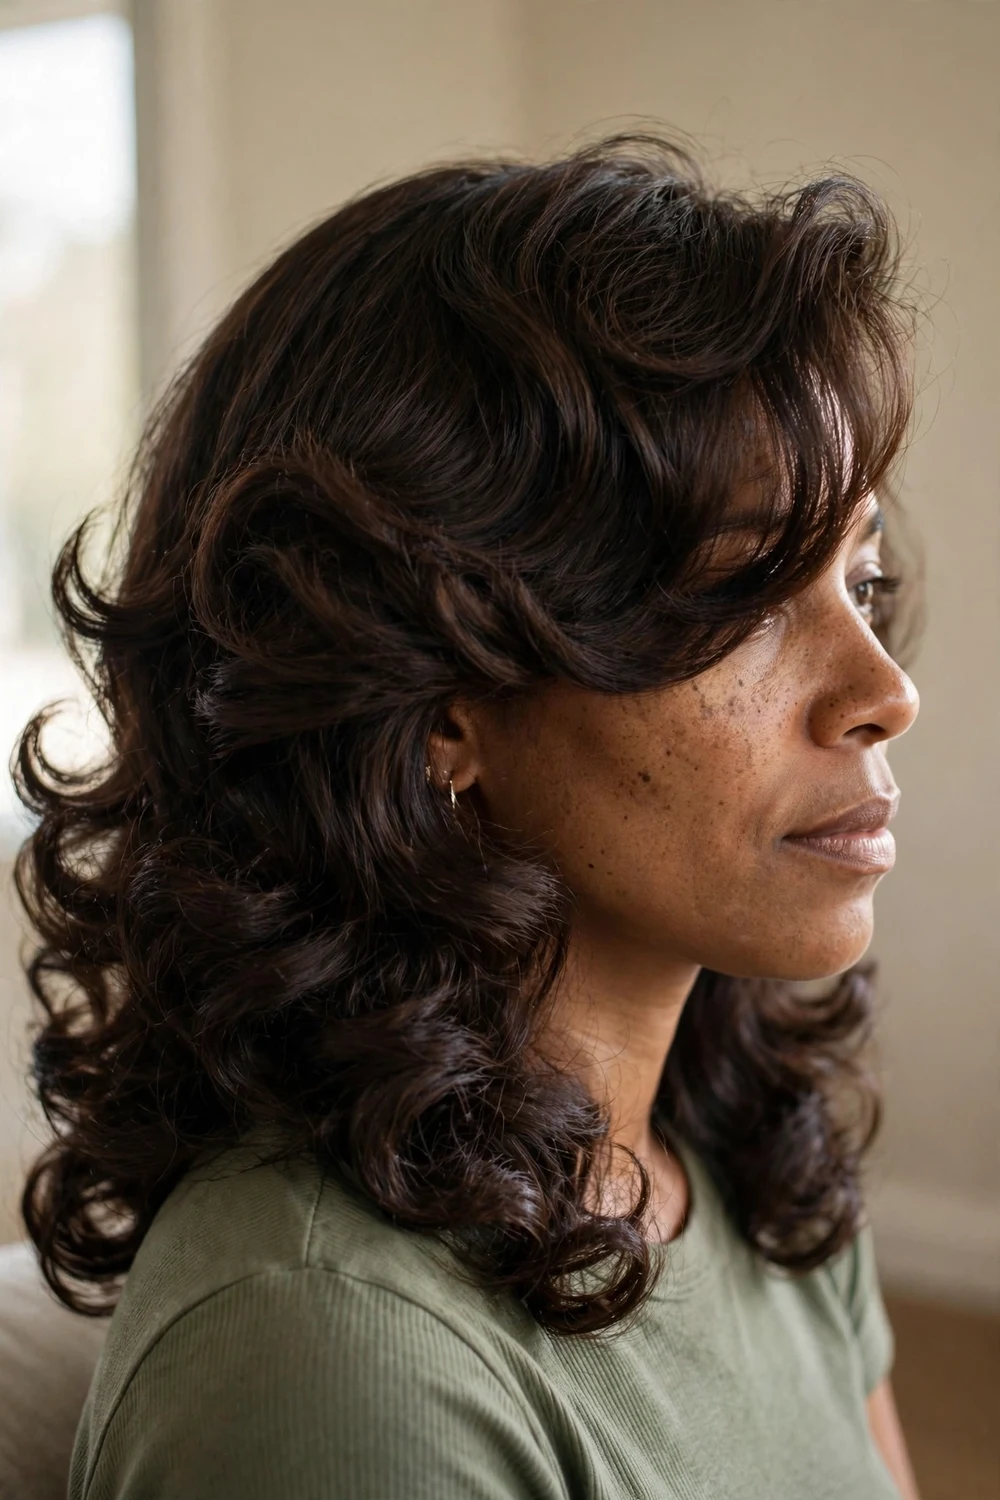
Pair early-2000s eye-skimming bangs with 90s bouncy curls and you get the ultimate throwback blowout. The fringe sits long over one eye while the lengths curl under with serious volume.
Hot rollers or a large-barrel curling iron both work. Curl everything away from the face, then brush through once cooled so the curls turn into waves instead of ringlets. Let each section cool for at least 30 seconds before brushing through, since the shape sets while the hair cools, not while it heats.
Try this: if your hair doesn’t hold a curl, blow-dry with a volumizing mousse first. Product at the root matters more than the tool you curl with.
5. Wispy Side-Swept Bangs for Fine Hair
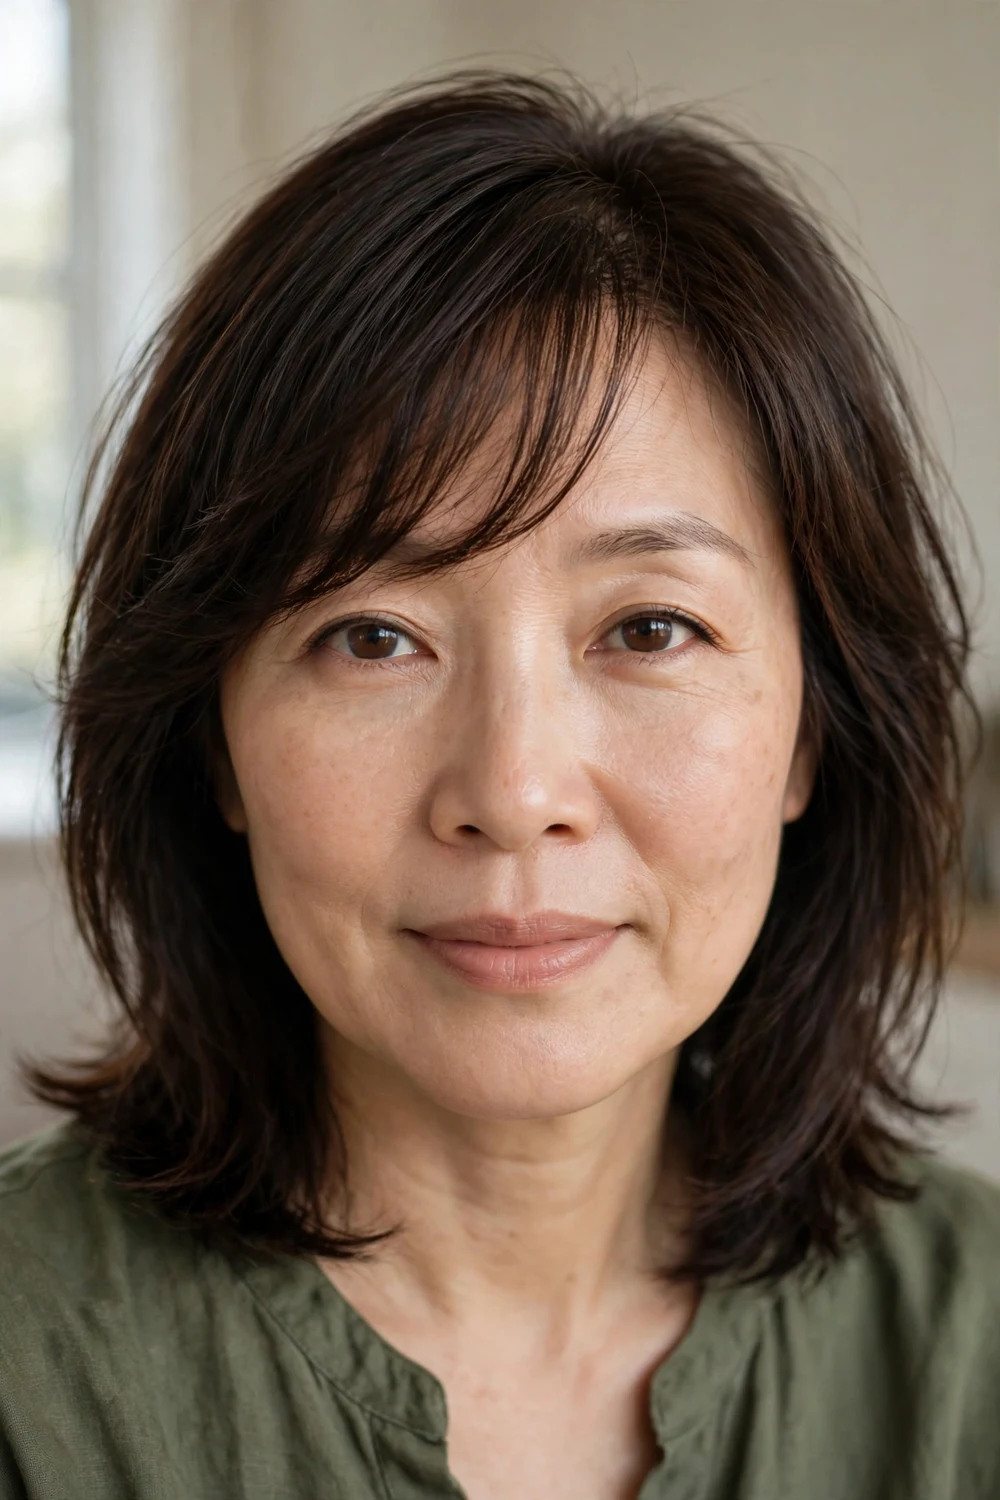
Don’t skip bangs just because your hair is fine. A wispy fringe takes so little hair from the crown that the rest of your cut keeps all its density. Longer, textured pieces swept to one side are the safest version.
Ask your stylist to point-cut the ends instead of cutting straight across. Those irregular edges are what make thin hair look like more hair instead of less. Blow-dry the fringe forward over the forehead first, then sweep it sideways; that two-step direction keeps fine bangs from splitting at the part.
Try this: dust dry shampoo at the roots of the fringe on day two. Oil at the forehead is what flattens fine bangs first.
If this light fringe appeals to you, these wispy bangs hairstyles show 30 ways to wear it across every length.
6. Choppy Side Bangs
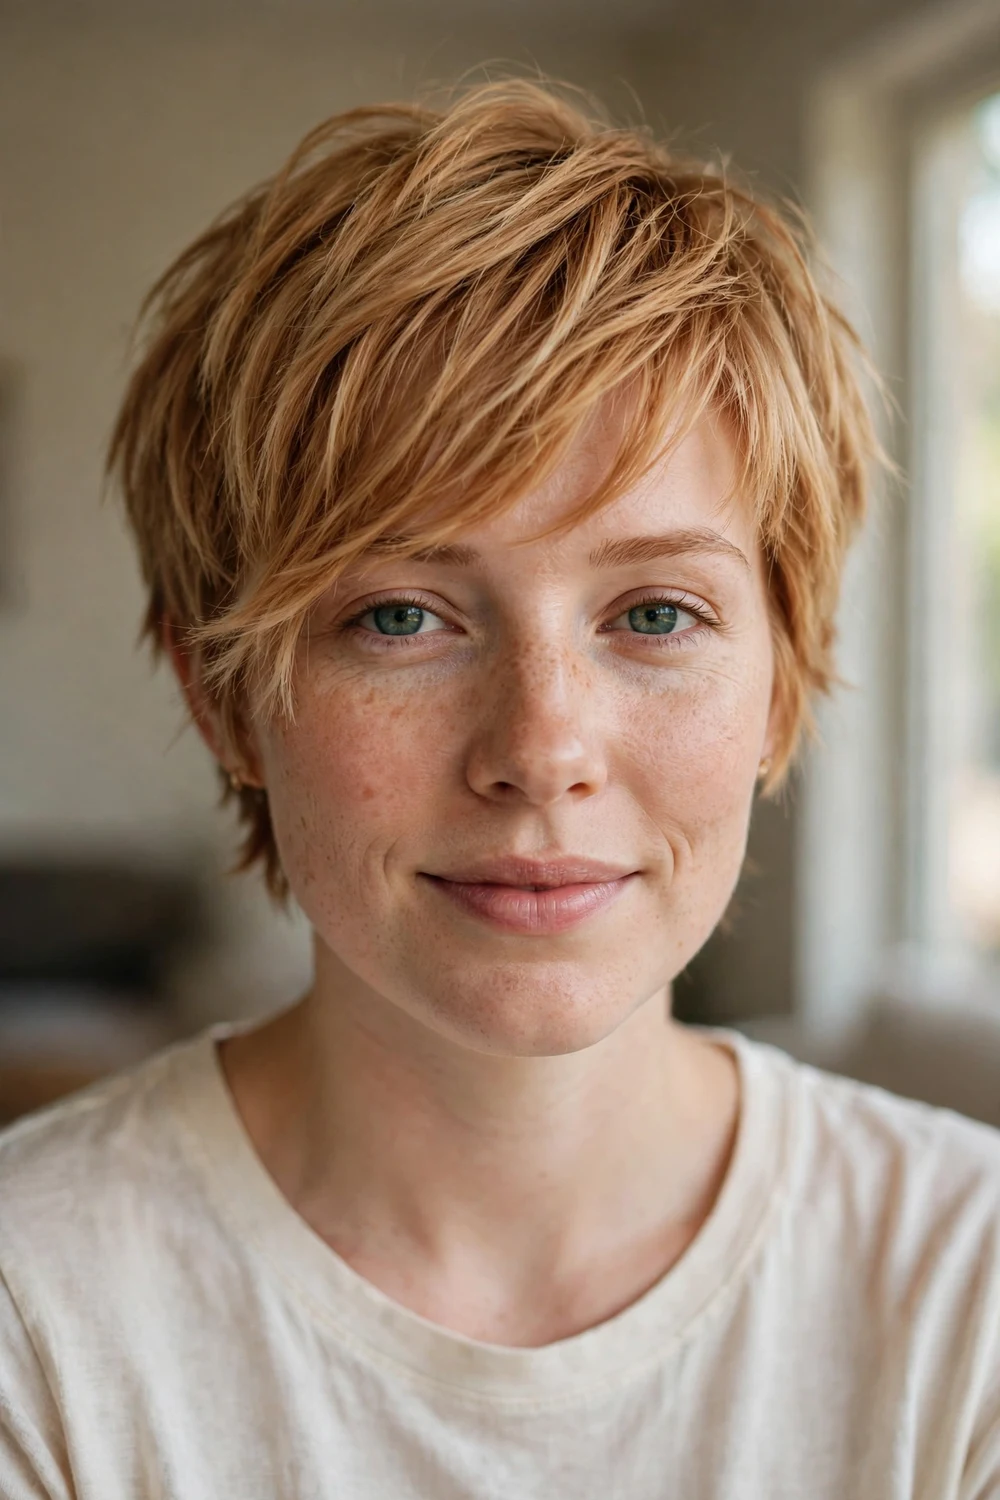
Uneven, piece-y ends give this fringe an edge that blunt bangs can’t touch. The choppy texture runs from the eyebrow to the cheekbone, and each piece sits at a slightly different length.
This is the fringe to choose when a short cut feels too safe. A flat iron run over the ends in alternating directions separates the pieces without making them look messy on purpose. A razored finish on the ends is what creates the piece-y separation, so ask your stylist to razor-cut rather than blunt-cut the fringe.
Try this: rub a tiny amount of matte paste between your palms and pinch the ends of the fringe. Choppy bangs need definition, not smoothness.
7. Pixie with Side Bangs
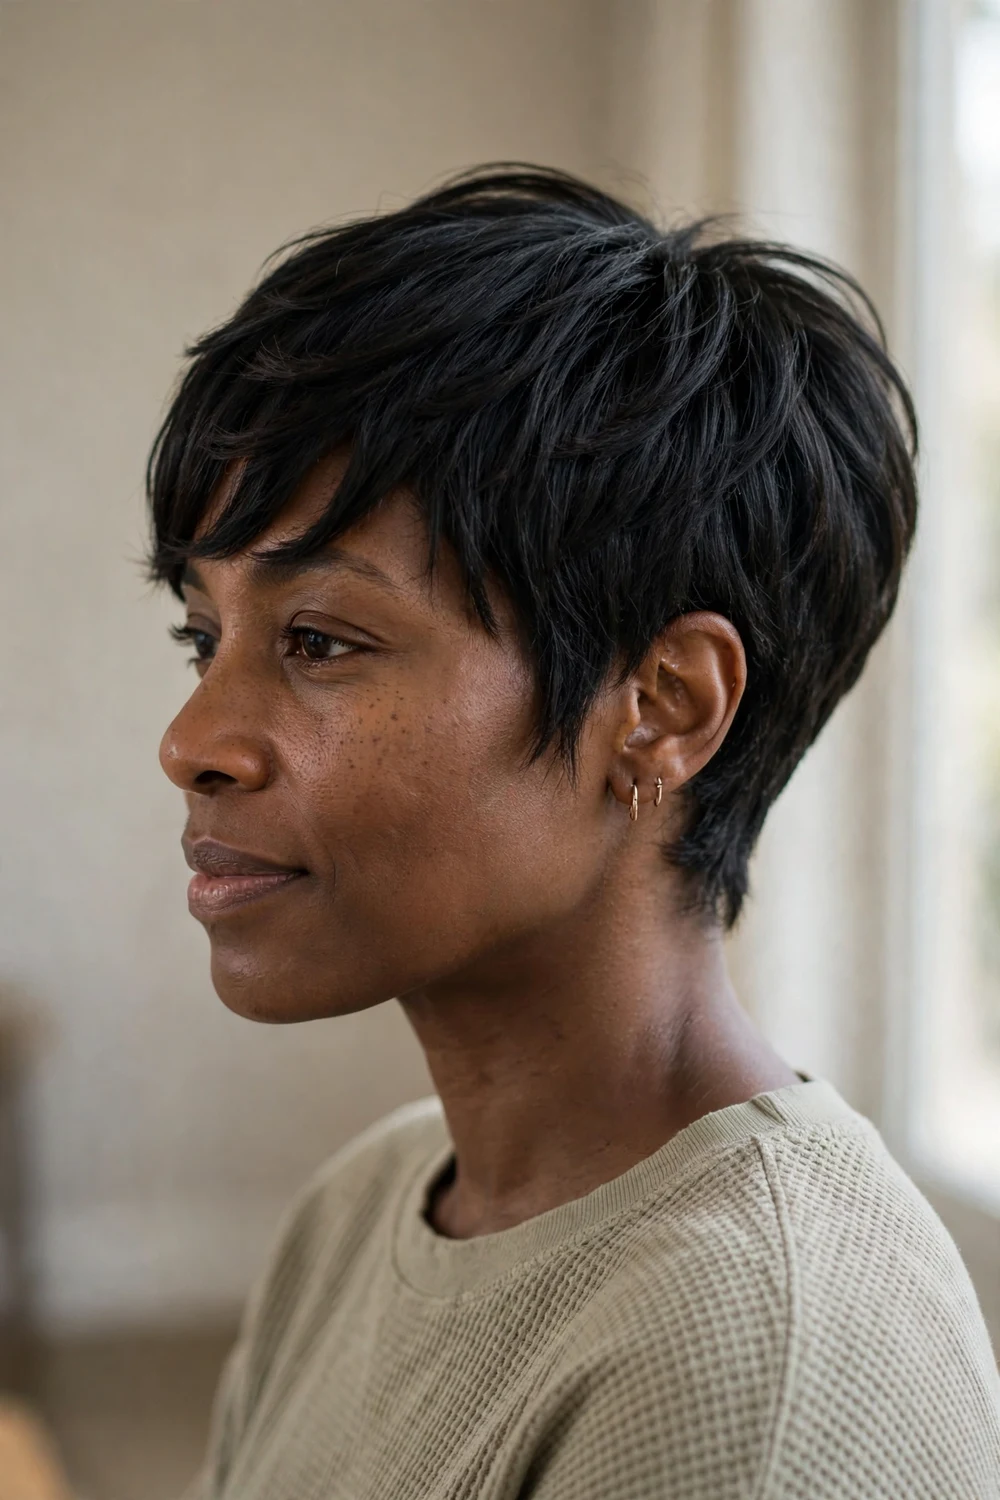
A pixie doesn’t have to mean giving up on bangs. Short pieces swept across the forehead soften a pixie and give you styling options on days you don’t want the full piece-y look.
The key is length: keep the fringe long enough to sweep but short enough that it never hangs in the eyes. About two inches of sweepable length at the front is the sweet spot. A dab of fiber cream worked through dry hair separates the pieces and keeps the fringe from reading as one solid panel.
Try this: flat-iron just the fringe straight down, then push it sideways. That keeps the pieces sleek while the rest of the pixie stays textured.
8. Tousled Choppy Bangs
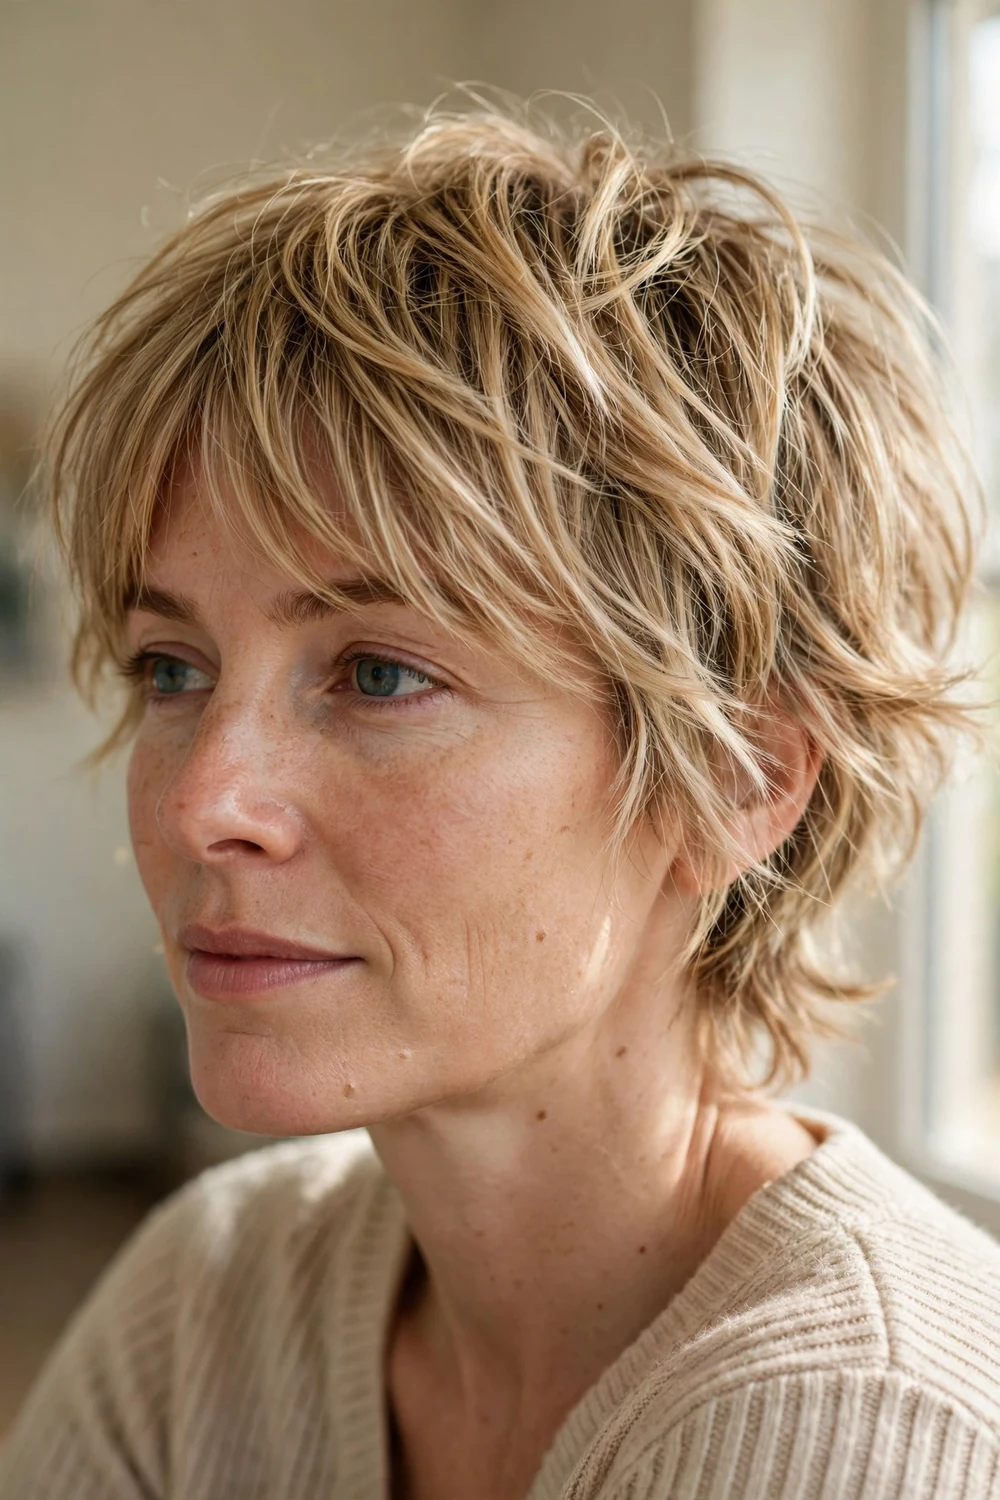
Built for shag cuts and other lived-in styles, tousled choppy bangs look good when they are slightly imperfect. The disheveled texture matches the rest of the cut instead of fighting it.
Air-dry with a dab of salt spray and shake the fringe out with your fingers. The less you fuss with it, the better it looks, which makes this the easiest fringe on the list to maintain. A light spritz of texturizing spray at the roots gives second-day grit, which is what helps tousled bangs hold their shape.
Try this: if one piece sticks out wrong, wet just that piece and twist it while it dries. Spot-fixing beats restyling the whole fringe.
9. Long Flowy Bangs
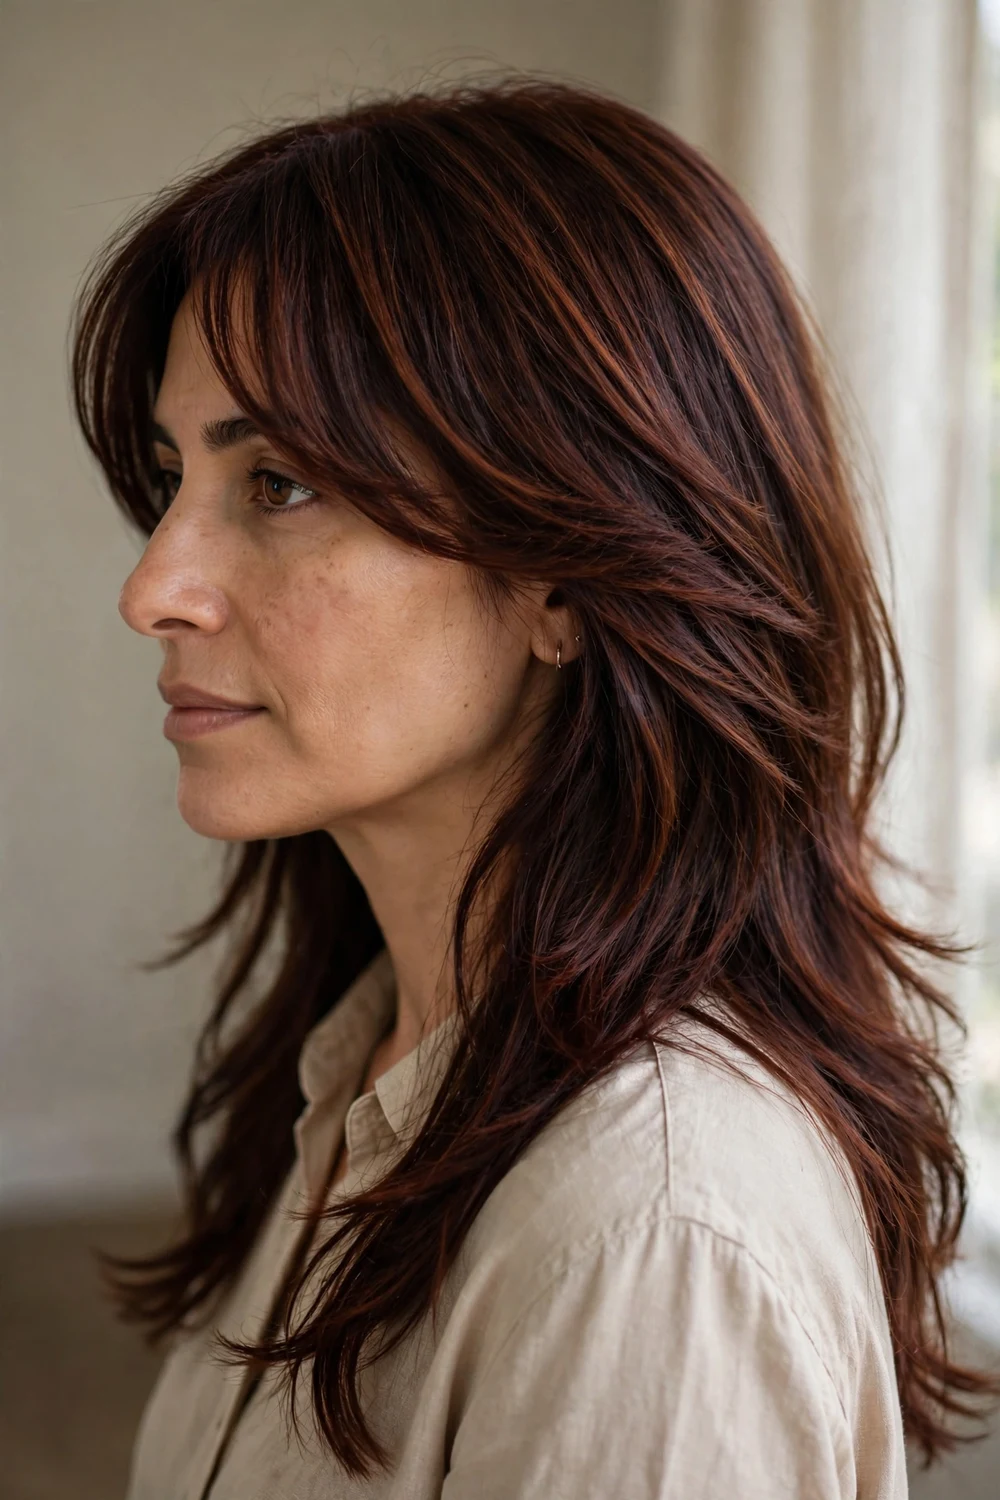
No separate fringe needed here. Shorter face-framing layers within the cut get swept to one side and act as bangs, blending right into the longer lengths behind them.
This is the lowest-risk way to try the look. If you hate it, there is nothing to grow out, because the “bangs” are just layers. Round-brush the face-framing pieces away from the face for a soft winged effect. Because the pieces are longer, you can also tuck them behind the ears for a clean look on days you want your face fully open.
Try this: clip the front pieces to one side while you finish your makeup, then release. The set direction holds for hours with zero product.
10. Lengthy Feathery Bangs
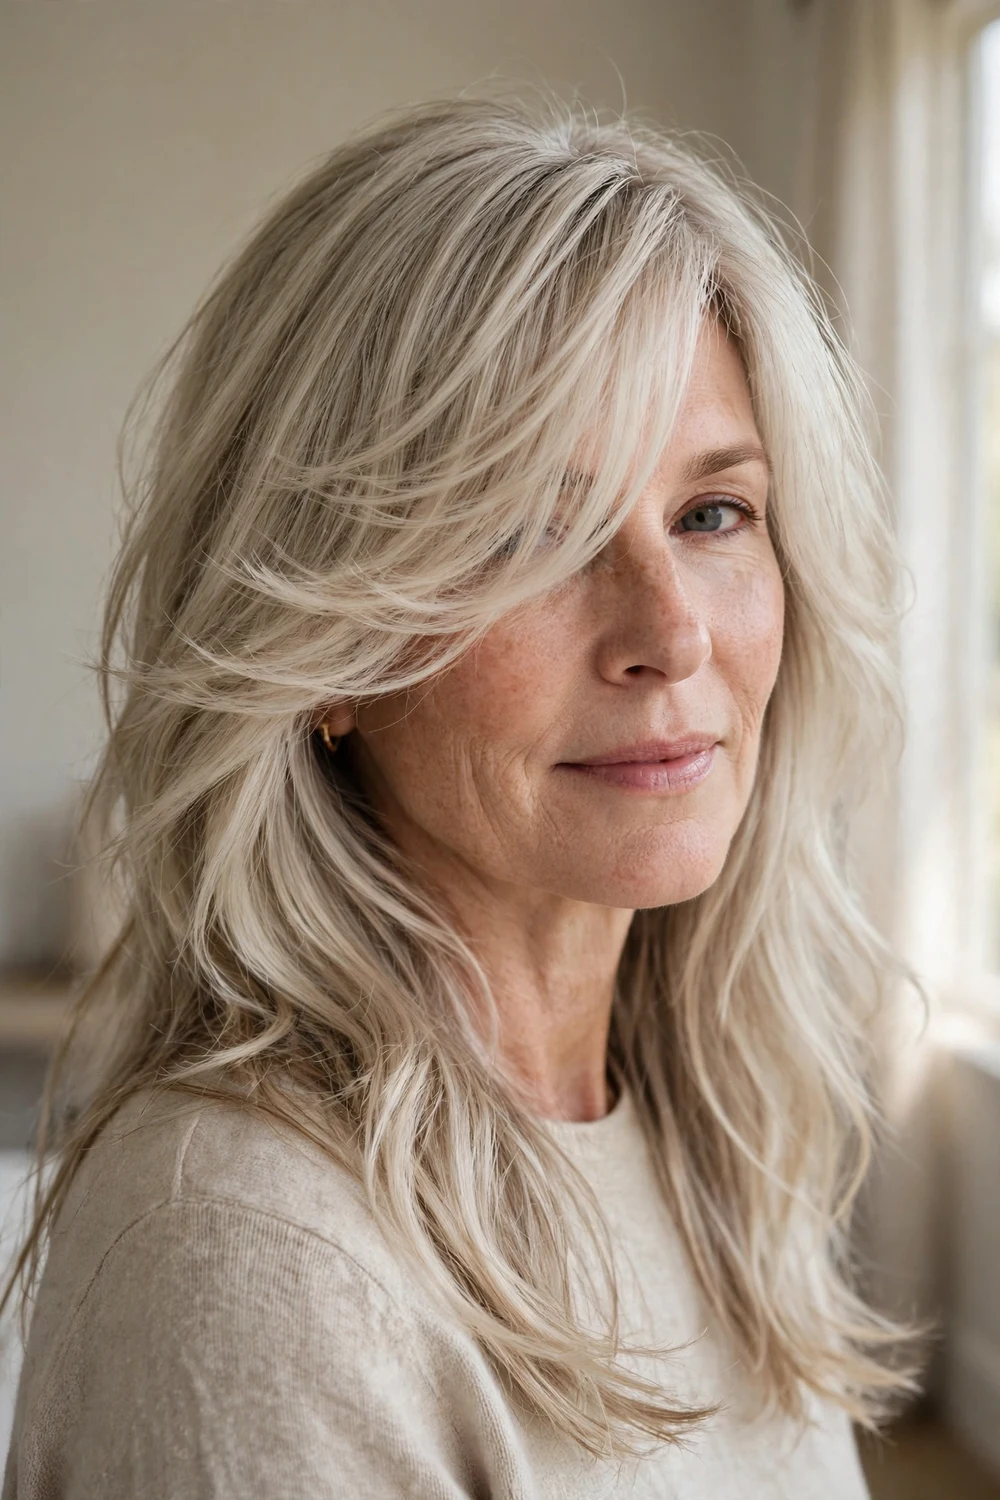
A soft veil of feathered hair falls over one side of the face, giving you coverage without a hard edge anywhere. The fringe reads romantic rather than sharp.
Feathered layers catch light at every angle, which makes the hair look fuller. This is a strong choice if your hair is long and one-length, since the feathering adds movement the cut lacks. A large round brush rolled outward at the ends encourages the feathered pieces to flick away from the face instead of collapsing inward.
Try this: ask for the feathering to start at the cheekbone, not the brow. Higher feathering can read dated; cheekbone-level keeps it current.
11. Chin-Grazing Side Fringe
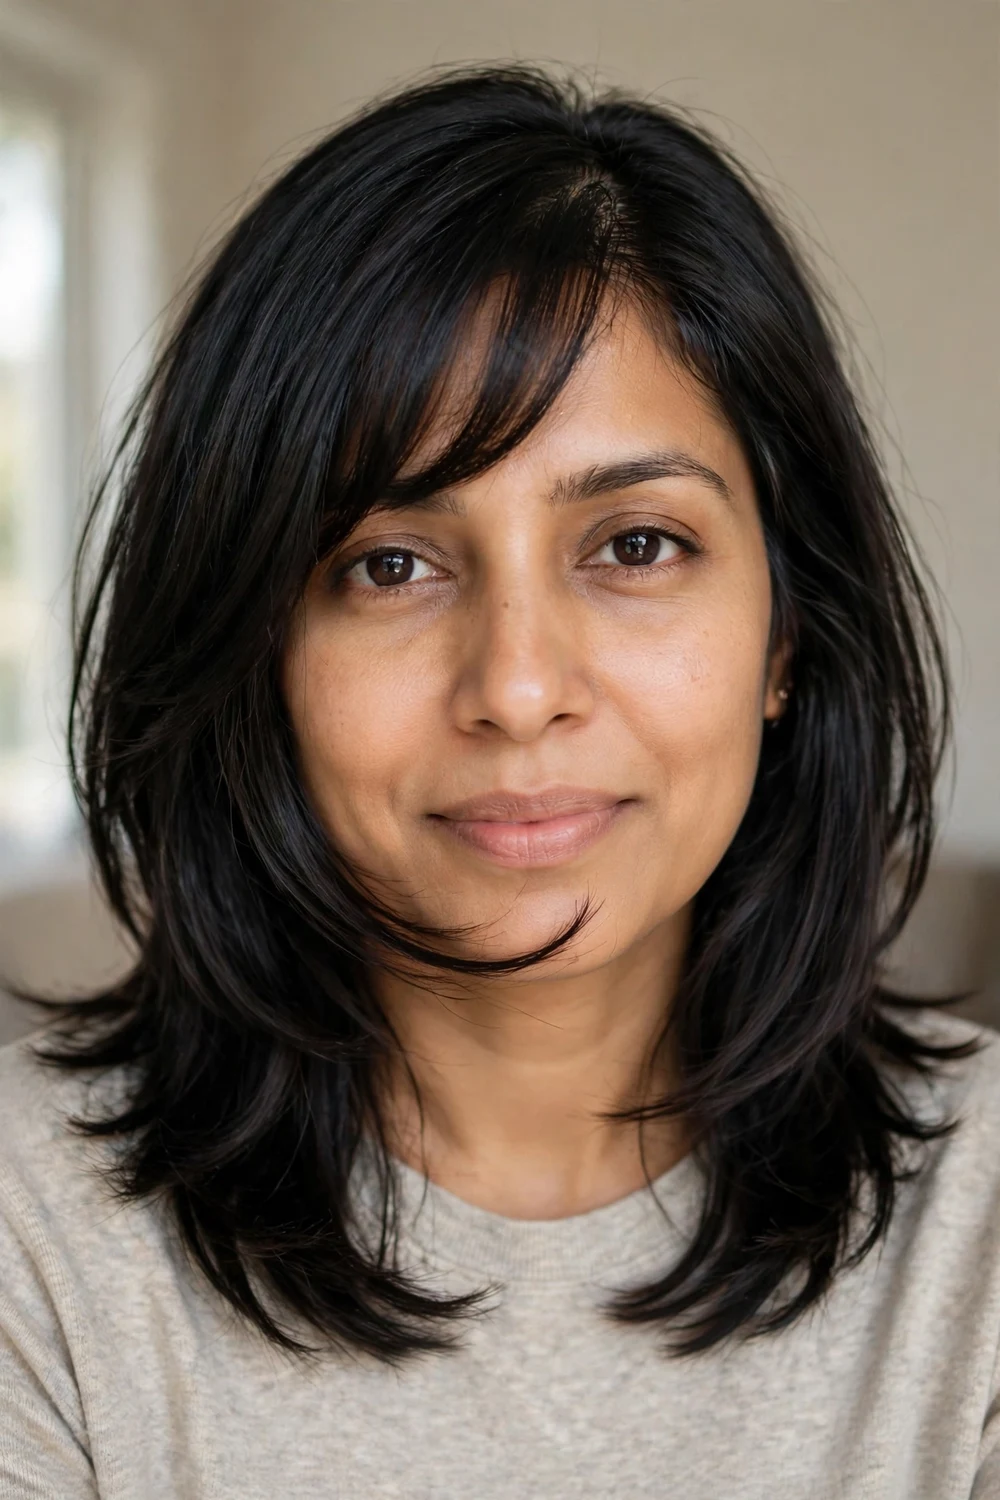
Extra-long bangs are having a moment, and this chin-grazing version proves why. Finely chopped or layered so it feels light, the fringe sweeps from a deep side part all the way down to the chin.
Longer fringes tuck behind the ear or pin back easily on no-bang days. They also suit medium and long cuts better than short ones, since the proportions stay balanced. Keep the ends texturized so the long fringe moves when you do; blunt long bangs can hang like a curtain pulled too far.
Try this: on days you want the fringe off your face, feed it into a small braid along the hairline. It looks intentional, not like you gave up.
12. Long Subtle Side Bangs
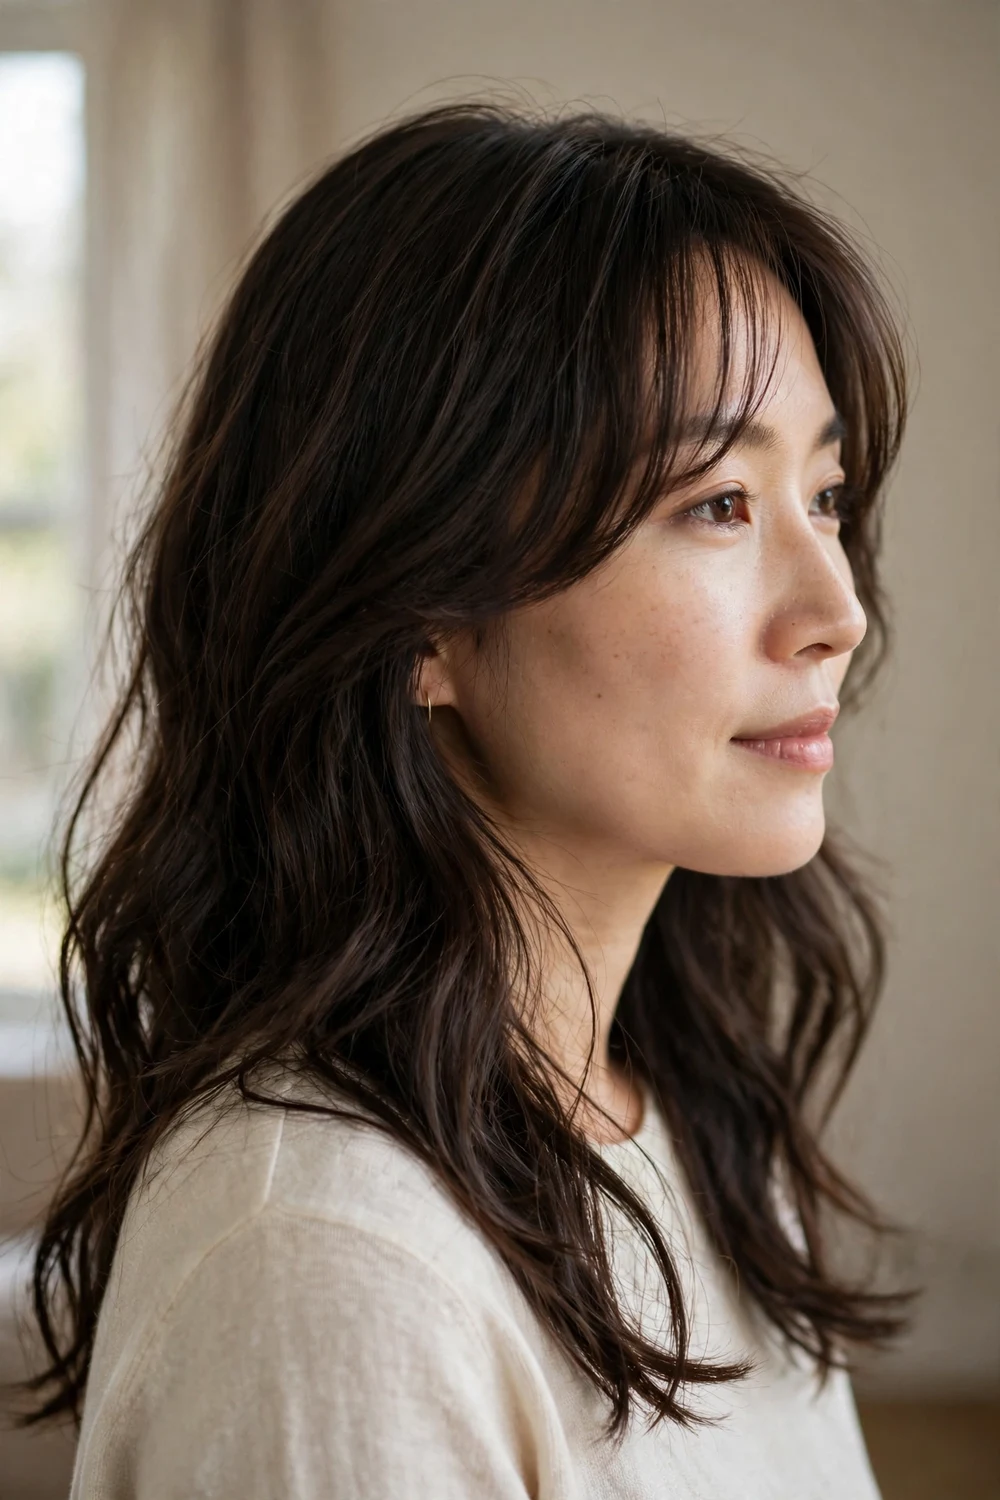
Want bangs without the commitment of looking like you have bangs? Long subtle pieces meld into soft waves and long layers so completely that nobody can tell where the fringe ends.
This works as a trial run. Wear it for a month, and if you want more impact, your stylist just shortens the same pieces. Nothing is wasted and nothing needs regrowing. Because these pieces are subtle, a gloss treatment or shine spray makes them catch the light and read as an intentional detail.
Try this: part your hair on the opposite side once a week. Flipping the part trains the longer pieces to fall either way, which doubles your styling options.
13. Off-Centered Straight Bangs
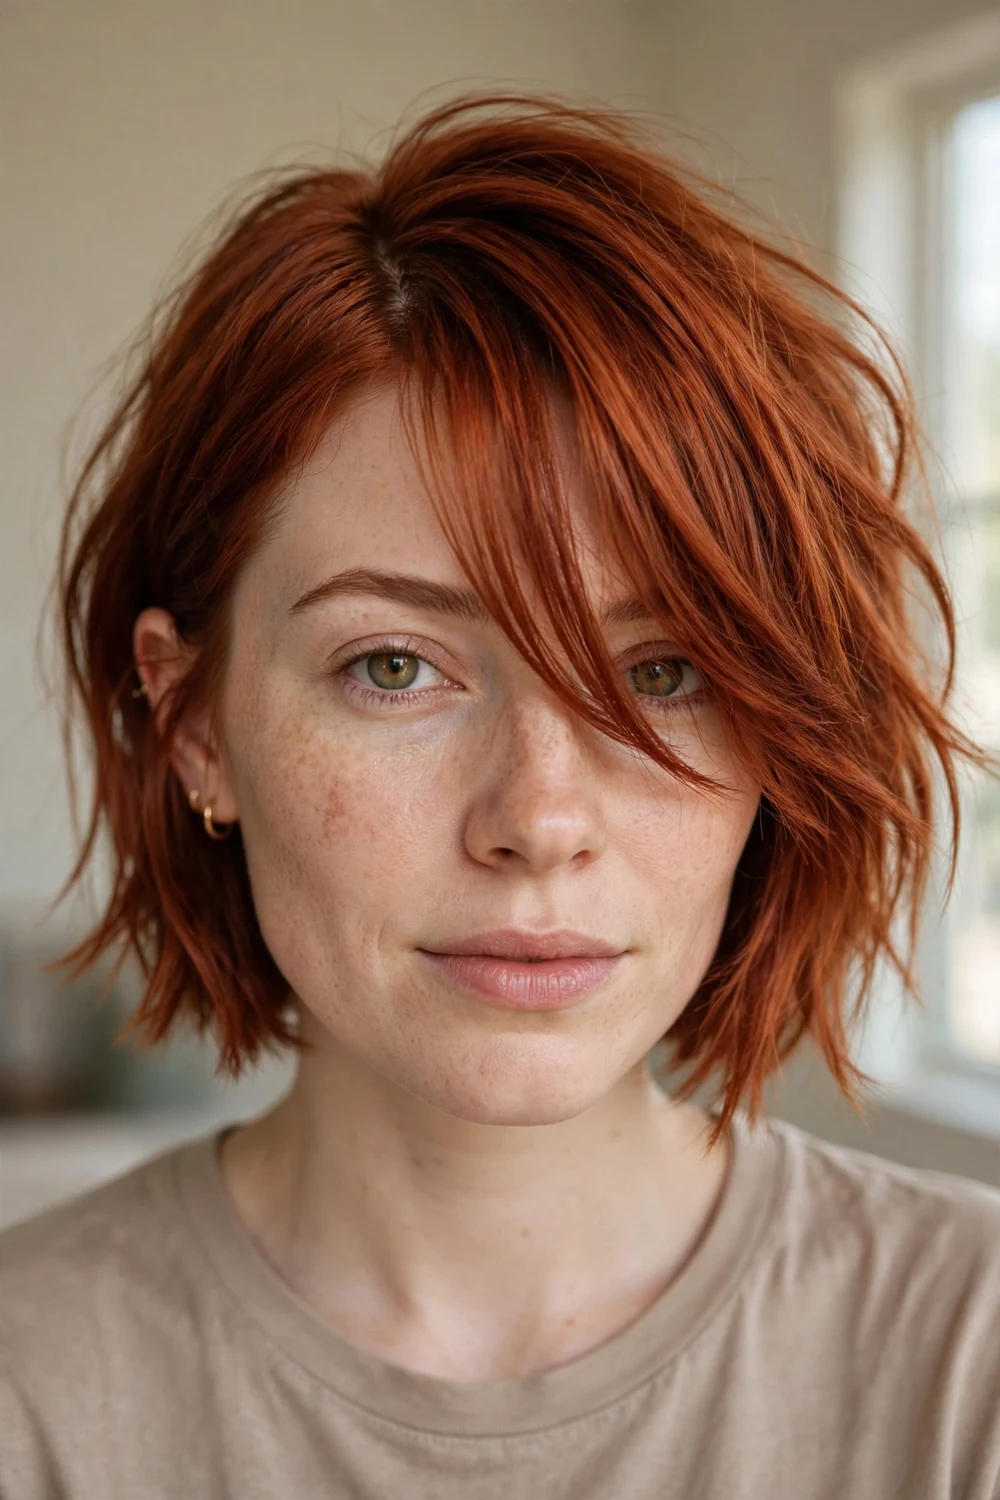
A deep side part plus elongated straight bangs swept across one eye gives a bob real attitude. The off-center line makes the whole cut feel deliberate instead of default.
Keep the fringe sleek with a flat iron and tuck the thinner side behind the ear. That contrast between the covered side and the tucked side is what makes it look styled rather than grown-out. A deep side part needs training, so part wet hair exactly where you want it and let it dry in place for the first few days.
Try this: run a smoothing serum through the fringe before flat-ironing. Straight bangs show every bit of frizz, so the serum does more work here than anywhere else.
14. Ear-Skimming Angled Bangs
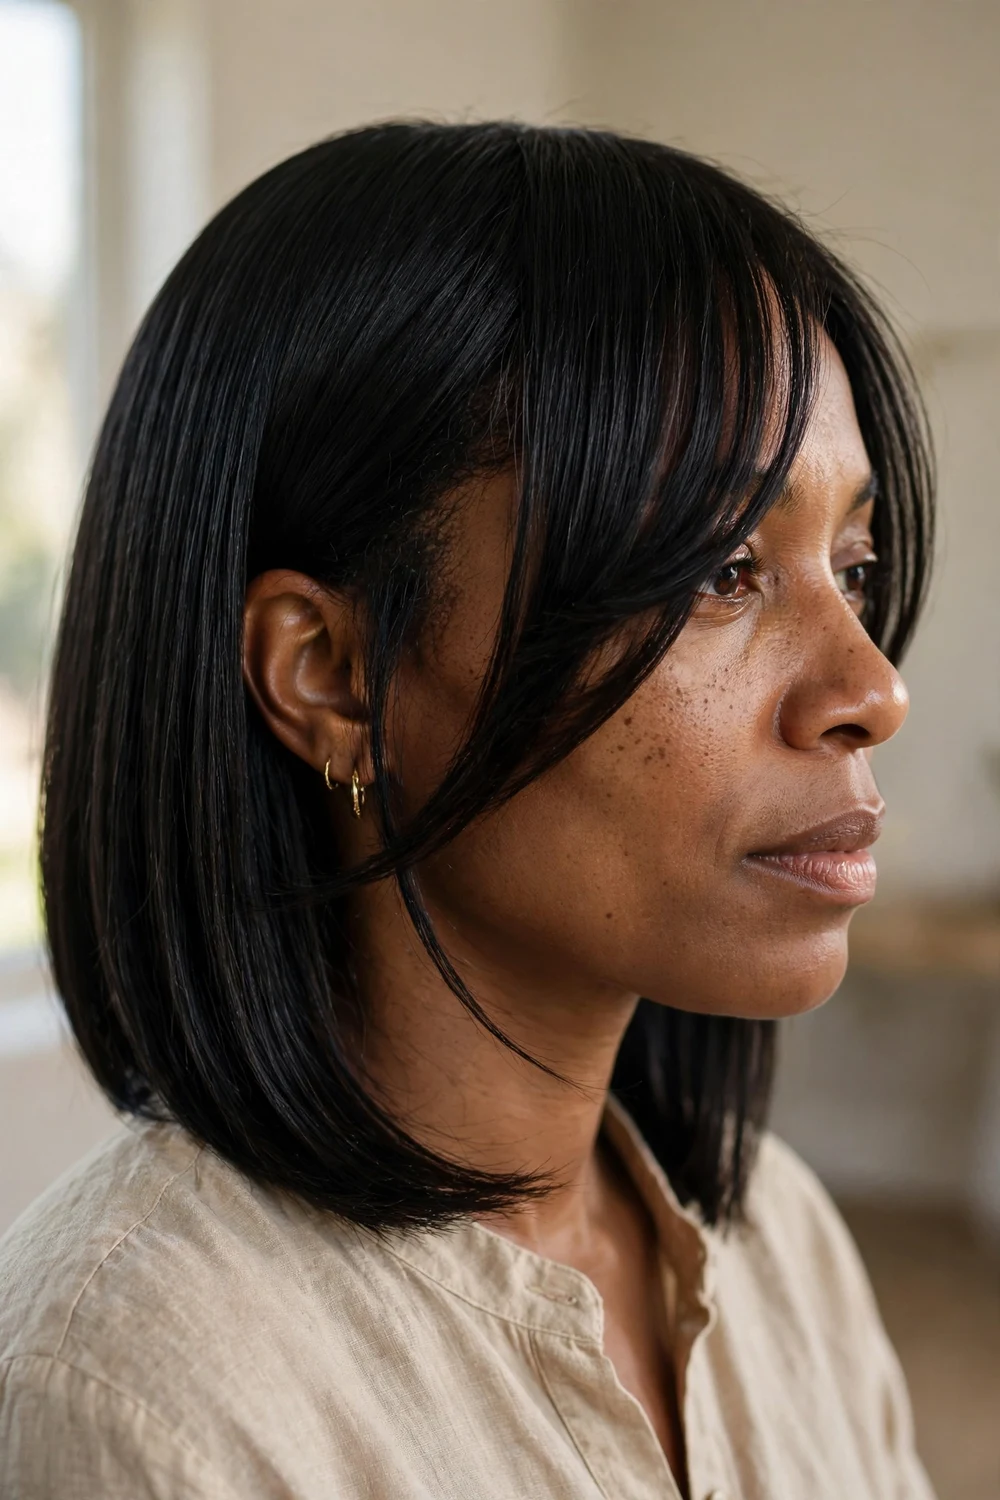
A straight lob gets an instant upgrade when the bangs angle down past the cheekbones toward the ears. The diagonal line visually lengthens the face, which flatters round and square shapes especially well.
This cut is easy to style and maintain. Blow-dry the fringe forward first, then sweep it to the side; drying forward first stops it from splitting at the part. This angled cut grows out into a face-framing layer, so the awkward grow-out stage that plagues short bangs never really arrives.
Try this: trim the angle yourself between appointments with hair shears, never kitchen scissors. One careful snip every two weeks keeps the line sharp.
15. Rounded Side Bangs
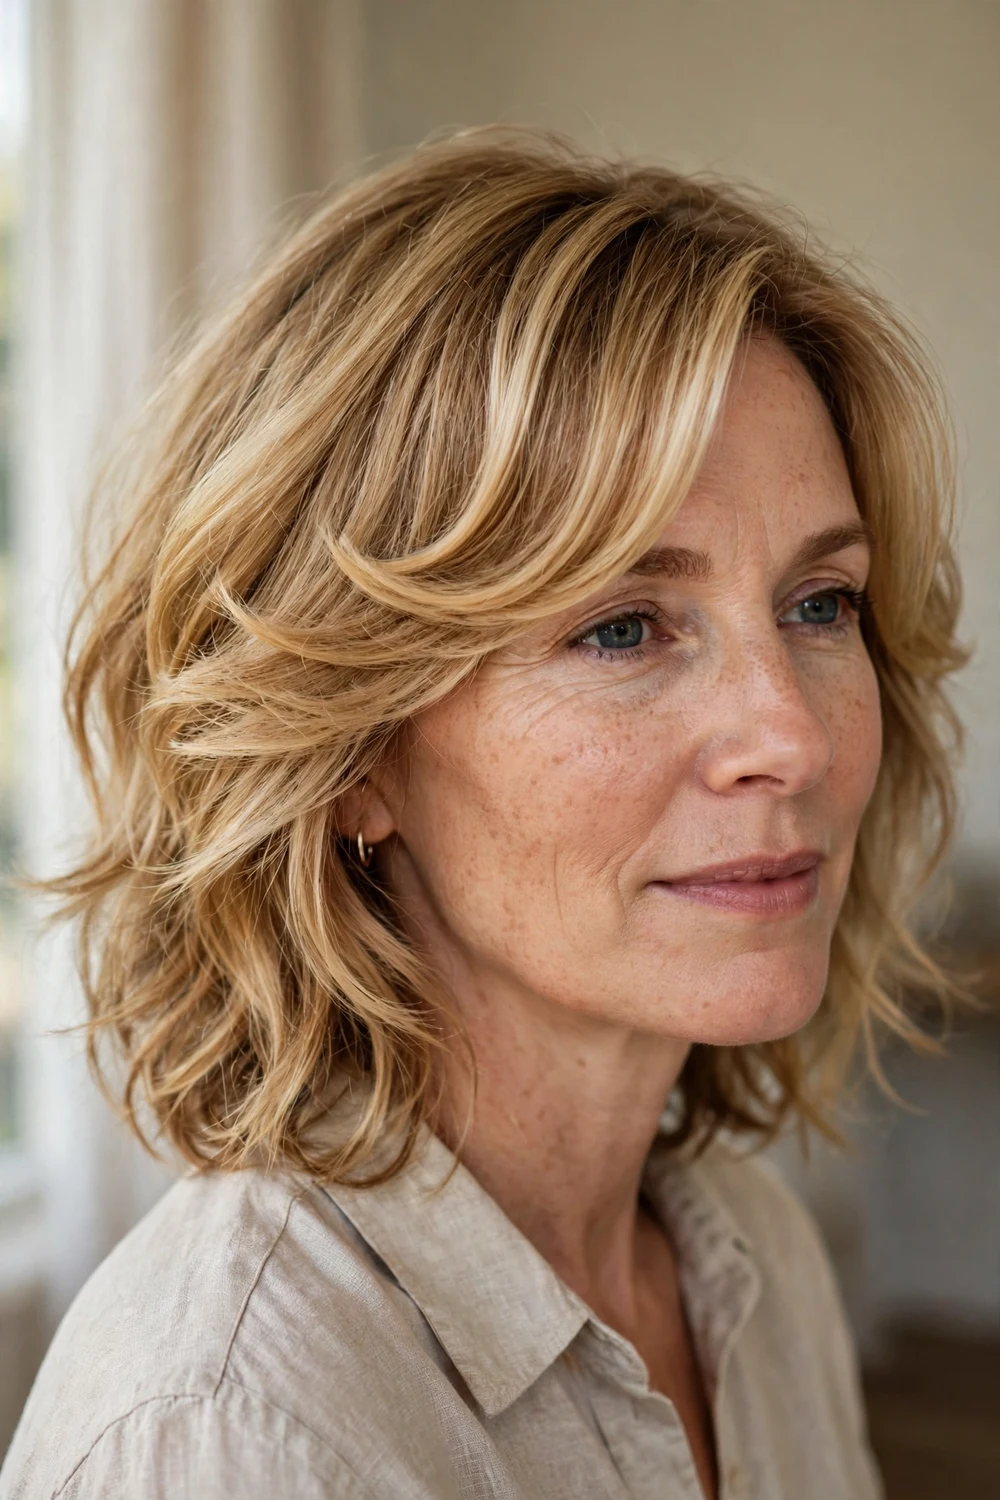
Sleek, swoopy bangs with a soft rounded curve blend into tousled mid-length layers without a harsh line anywhere. The mix of textures sounds like it shouldn’t work, but the rounded shape ties it together.
Your stylist should blend the ends of the fringe into the front layers so there is no visible disconnect. A medium round brush creates the rounded curve in about a minute. The rounded shape needs the ends curved under, so finish by rolling the brush inward along the bottom edge of the fringe.
Try this: cool the fringe on the brush for 10 seconds before releasing. The set lasts noticeably longer when the hair cools in shape.
16. Multicolored Angled Fringe
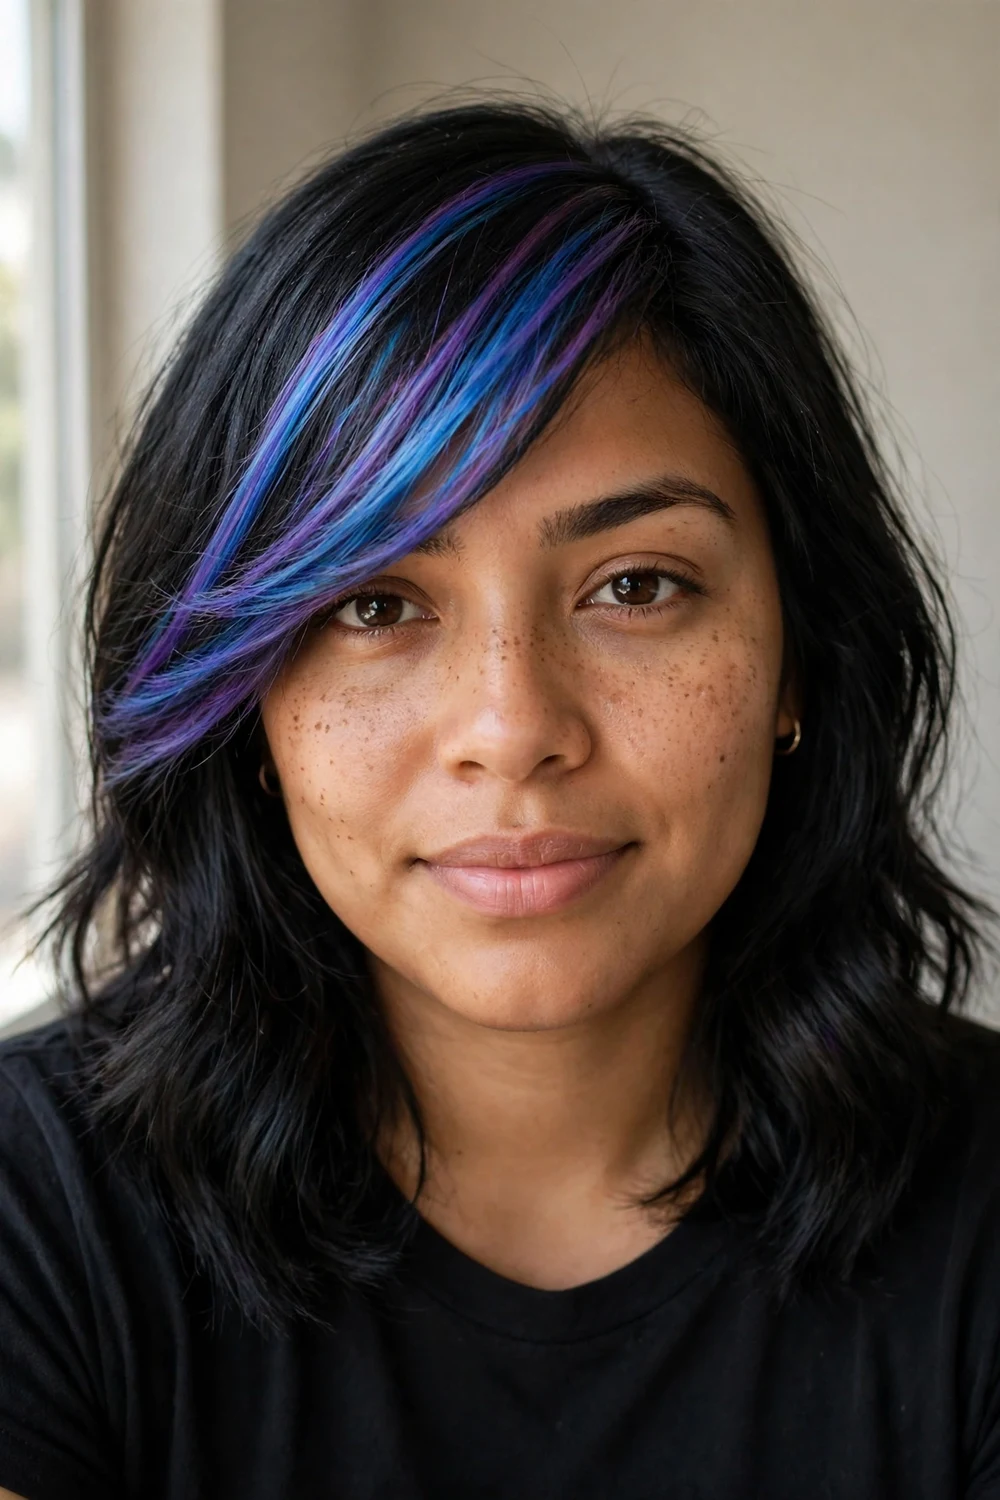
A cropped diagonal bang plus vivid color is not subtle, and that is the point. Blue and purple streaks through the fringe draw the eye straight to the eyes.
Keep the rest of the cut simple so the color stays the star. The fringe itself is short and angled, which means the color does the talking and the shape stays easy. Bleached fringe needs a bond-building treatment every couple of weeks to stay soft, since vivid color over lightened hair dries out fast.
Try this: wash the fringe separately with cold water and color-safe shampoo. Vivid colors fade fastest where hair gets the most washing, and that is the fringe.
17. Graduated Two-Color Bangs
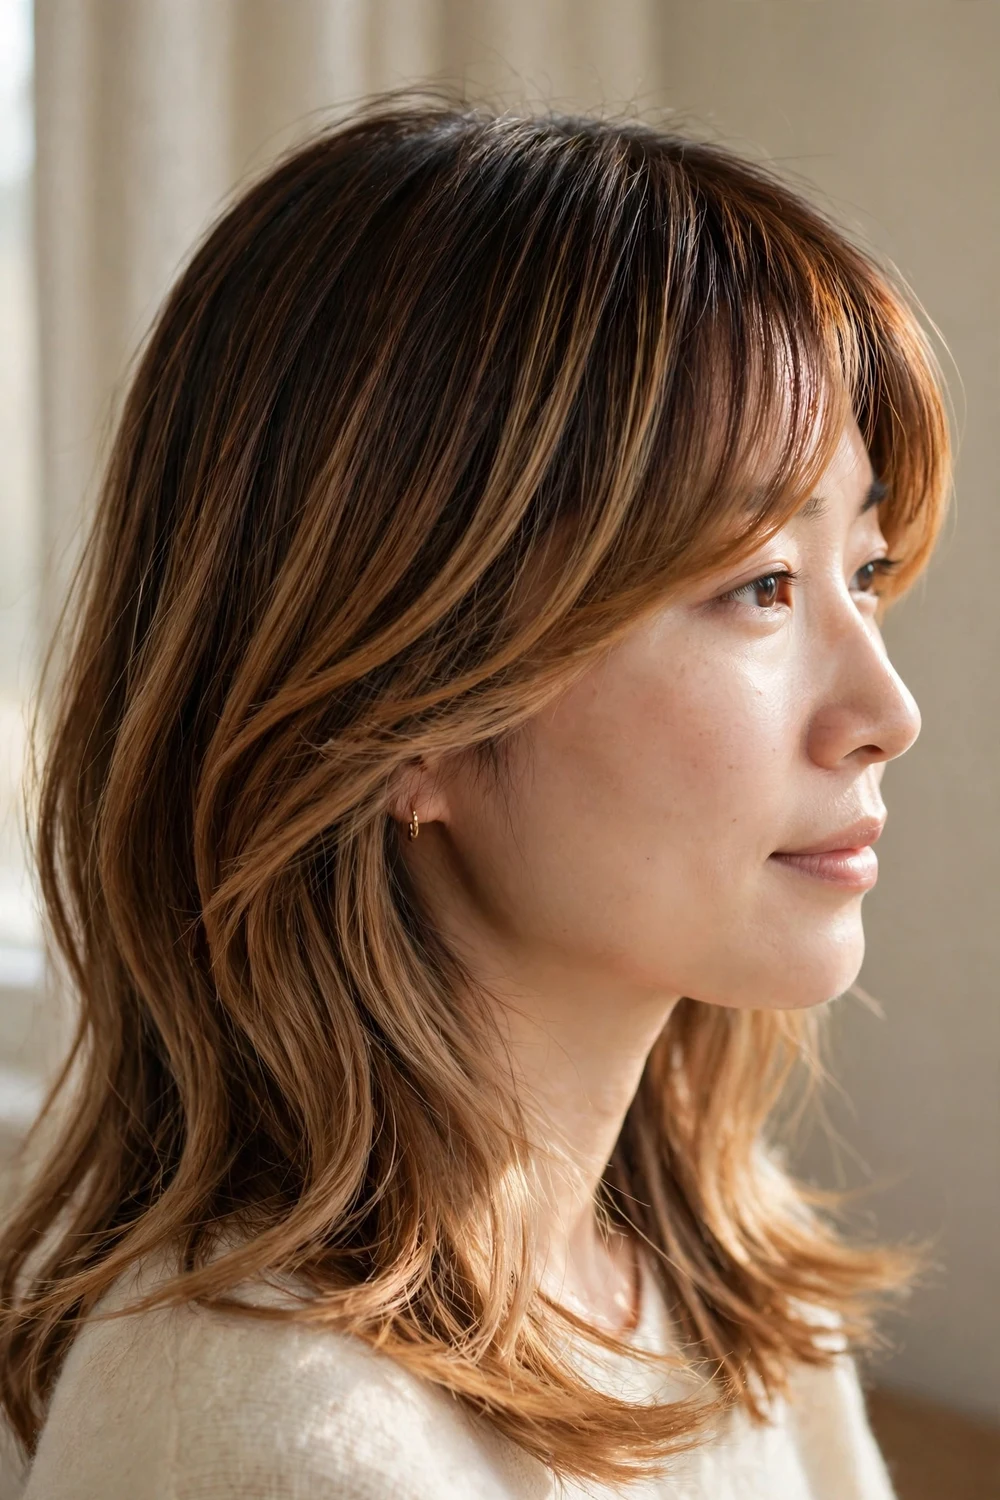
Shorter lengths on the outside, longer toward the face: graduation keeps the fringe light at the edges while the angled front slims the face. On two-tone hair, the color shift emphasizes the cut lines.
This is a smart pick for fine hair. Graduation adds movement without thinning anything out, and the angled front gives structure that fine hair usually lacks. Graduation looks sharpest when the hair is blown smooth, so a paddle brush with the nozzle aimed downward is worth the extra minute.
Try this: point the blow-dryer nozzle down the hair shaft while sweeping the fringe over. That direction seals the cuticle and makes the graduation look glassy.
18. Side-Flipped Bangs with Money Pieces
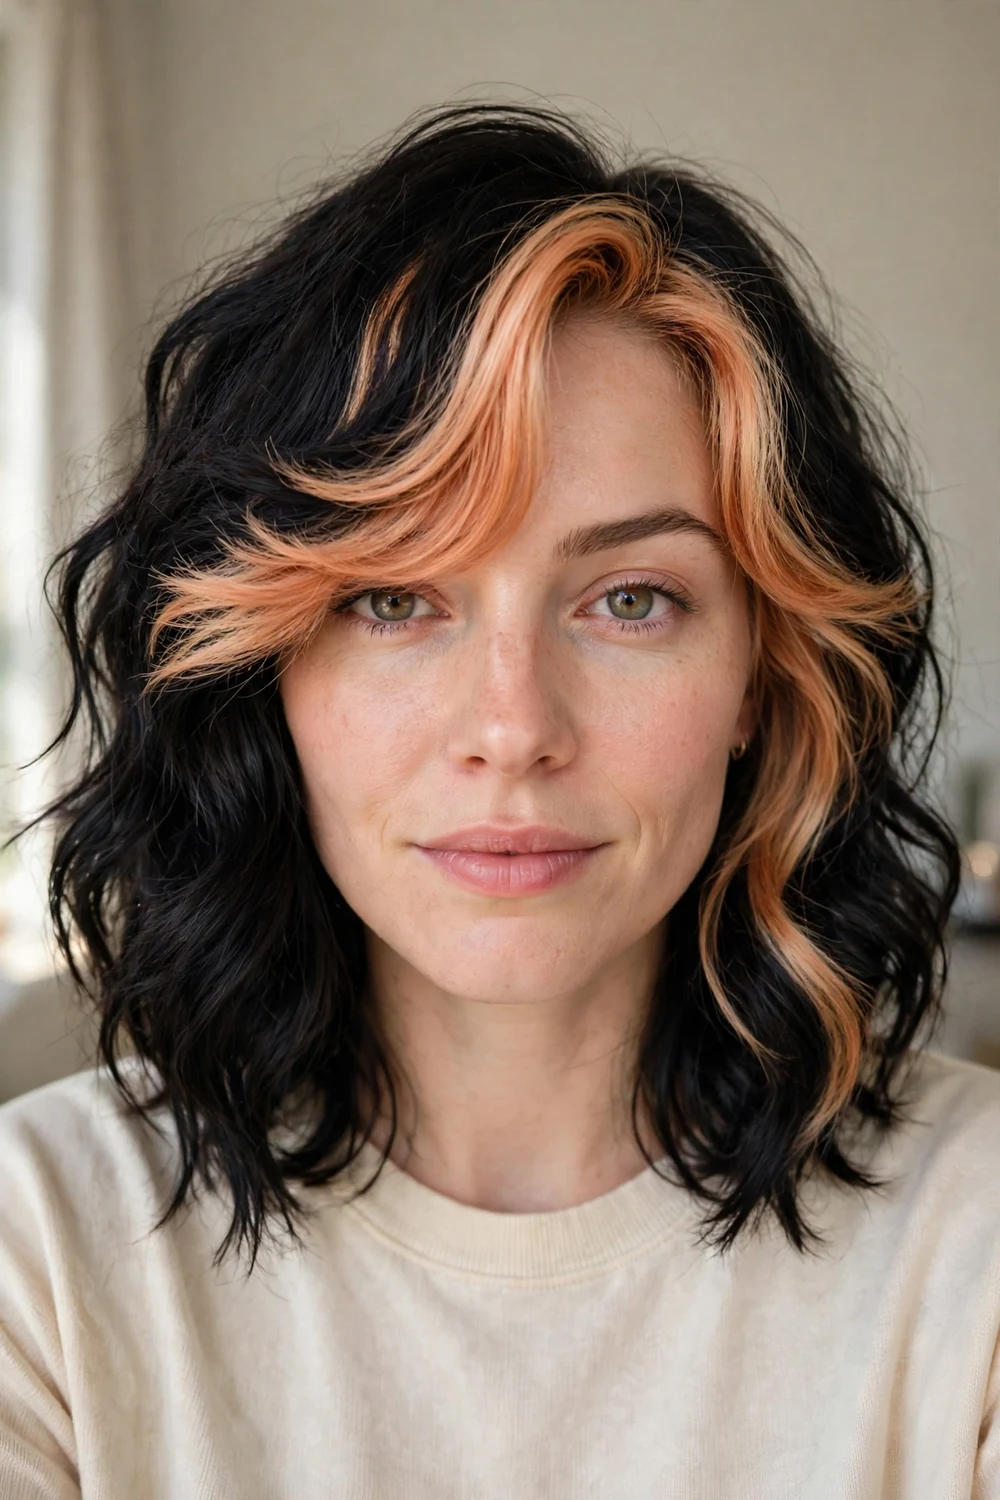
Thick wavy hair can look heavy in front, but bright face-framing highlights change that. Strawberry blonde money pieces through a side-flipped fringe make the whole front section look lighter and more open.
Ask for the highlights to start right at the hairline so the brightness frames the face from every angle. The flipped styling keeps the color visible instead of buried. The highlights need a toner refresh every 6 to 8 weeks, since face-framing pieces show brassiness before the rest of the hair does.
Try this: use a purple-toning gloss once a month if the blonde pieces go brassy. Coppery regrowth kills the lightening effect fast.
19. Long Highlighted Curtain Bangs
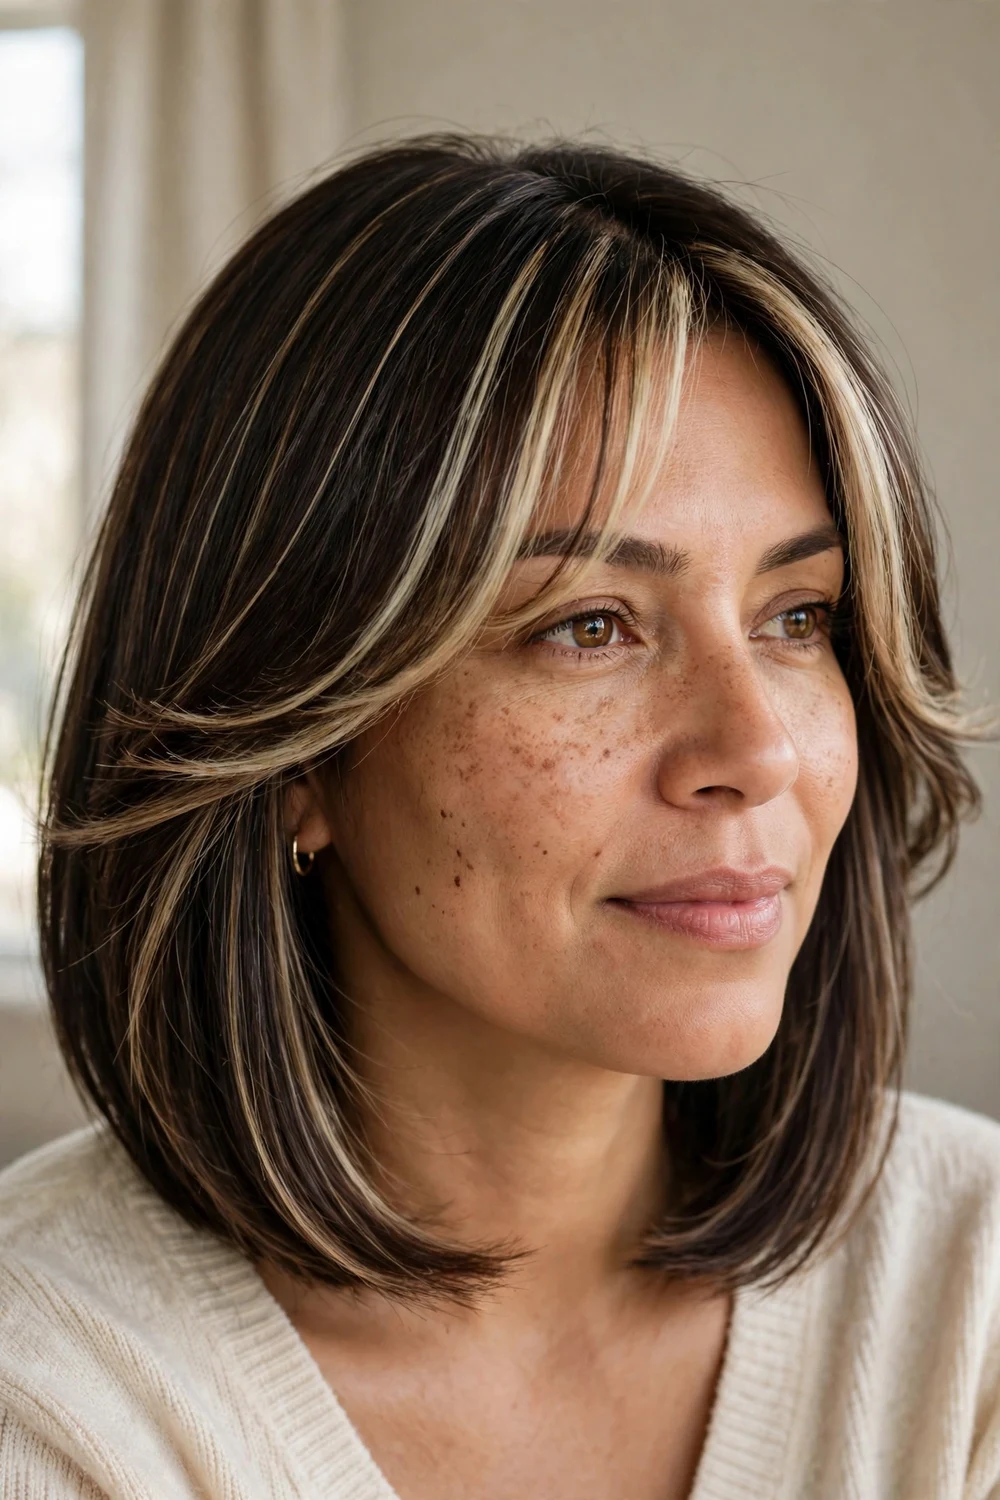
Longer curtain bangs swept to the sides frame the face like, well, curtains. Paired with money-piece highlights on a straight bob, they also make fine hair look visibly thicker around the face.
Blow-dry with a large round brush, rolling the left side left and the right side right. The two directions meet at the part and create that open, face-framing sweep. Curtain bangs part best when the hair is damp, so set the center part before blow-drying and never try to force it after.
Try this: if one side keeps collapsing inward, clip it back with a no-crease clip for 5 minutes after blow-drying. It trains the direction without heat damage.
20. Curly Side-Swept Bangs
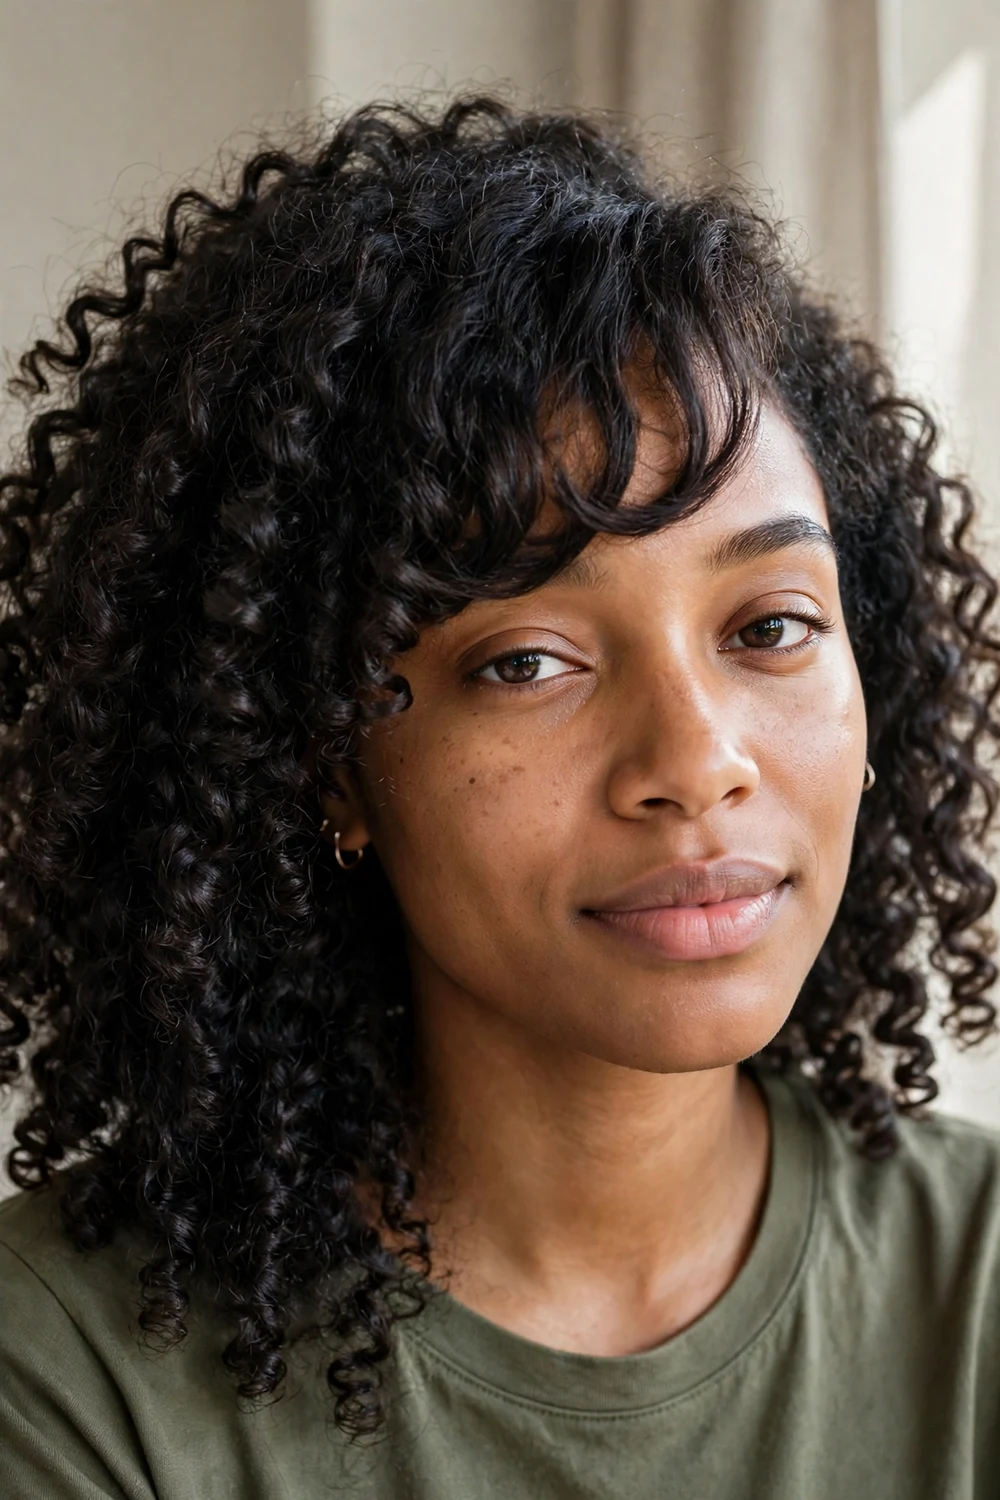
Curly hair and bangs go together just fine when the fringe works with the texture instead of against it. Curls swept to one side give a lively, dimensional look that straight bangs can’t copy.
Cut curly fringes dry and longer than you think you want; curls shrink up once they dry. A diffuser keeps the curl pattern intact while you set the sweep direction. Pineapple your hair at night to protect the fringe curls, and refresh them in the morning with water and a pea-sized amount of curl cream.
Try this: apply curl cream to the fringe while it is soaking wet, then scrunch it to the side. Styling wet locks in the direction; styling damp fights it.
21. Straight Bangs and Curls
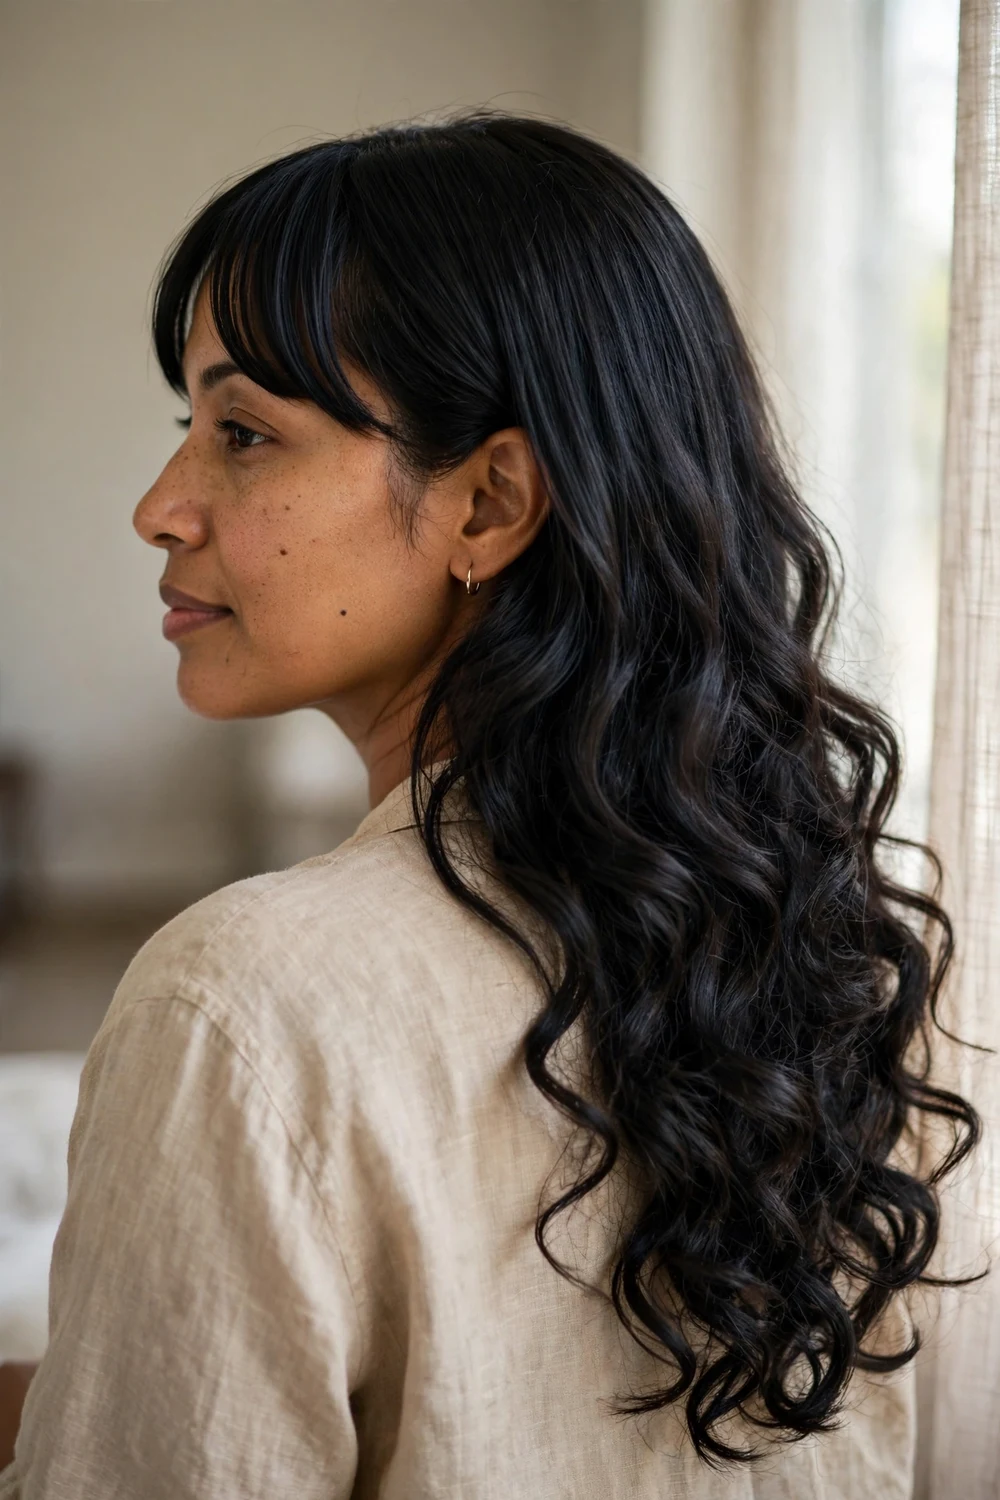
Straight bangs in front, curls in back: the contrast is the look. The sleek fringe frames the face cleanly while the curled lengths add all the movement.
Flat-iron the fringe smooth, then curl the rest with a medium barrel in alternating directions. The two textures meet at the cheekbones, so blend that transition zone with your fingers. Use a heat protectant on both textures, since flat-ironing the fringe and curling the lengths means the hair takes double the heat.
Try this: keep the fringe dry on humid days and let the curls do what they want. The contrast actually looks better when the lengths are a little wild.
22. Frizzy Swoop Bangs
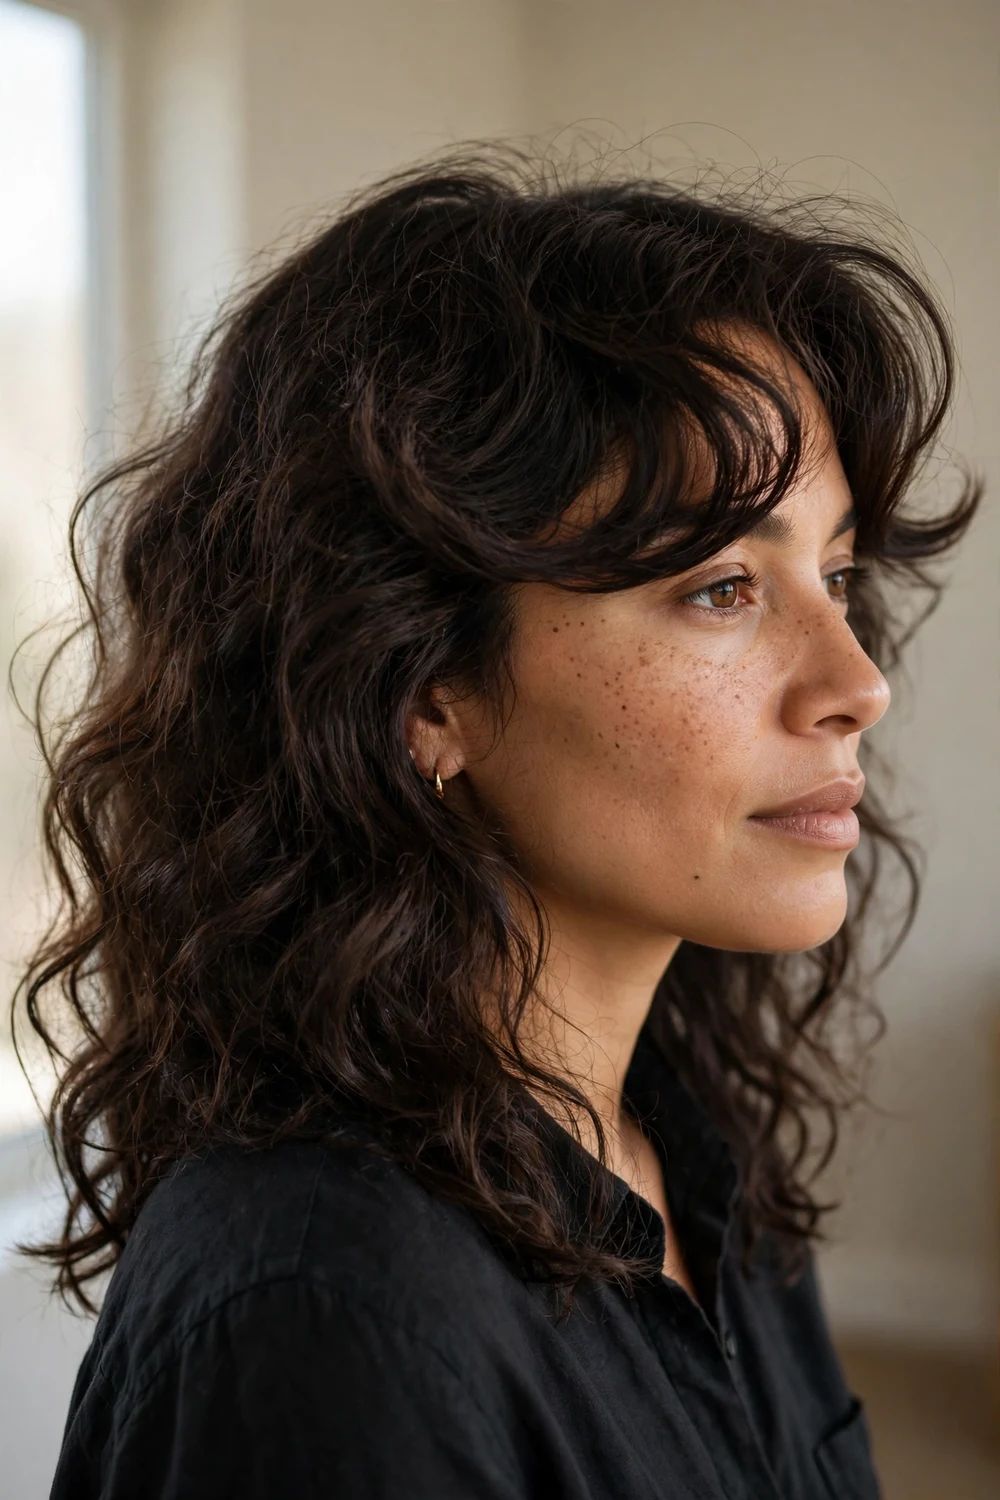
A big romantic swoop of textured bangs over wavy shoulder-length hair delivers serious evening energy. The volume up front balances out the waves behind it.
Don’t fight the texture here; enhance it. A diffuser and a little mousse give the swoop body without turning it into a helmet. The messier the swoop, the more current it looks. A dime-sized amount of anti-frizz serum smoothed over the finished swoop tames flyaways without flattening the volume you built.
Try this: flip your head upside down and diffuse the fringe first, then flip back and arrange it. Roots dried upside down lift for hours.
23. Beachy Side Bangs
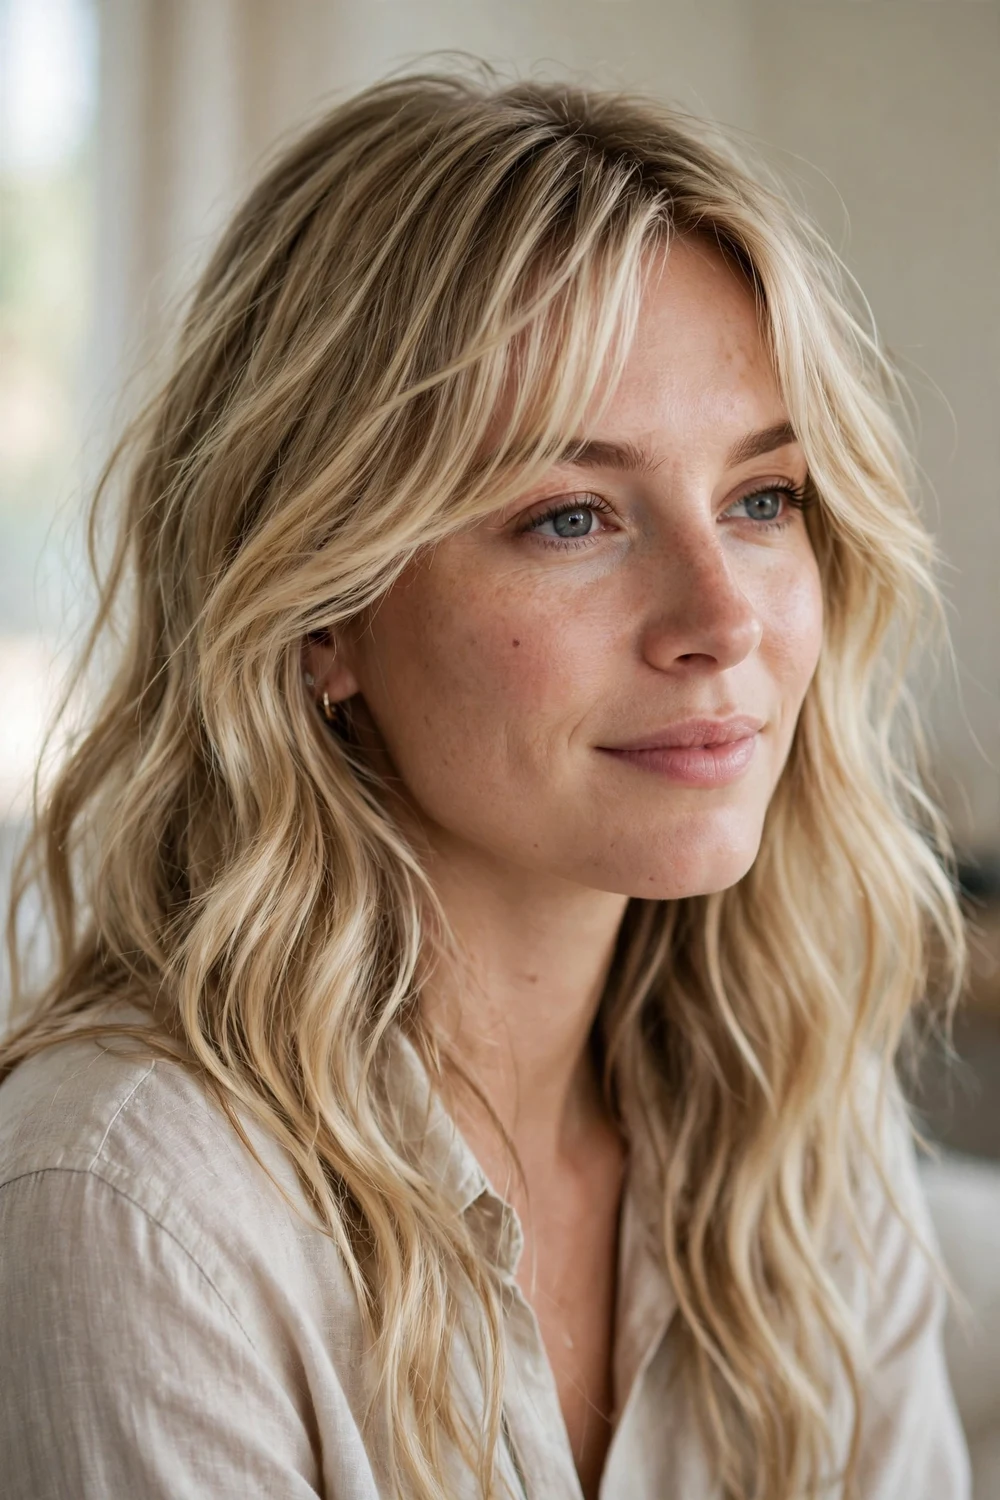
Beach waves plus a wispy side fringe is the low-effort summer uniform. The fringe looks best when it is slightly undone, like it dried that way on its own.
Get the texture heat-free with overnight braids, or use a wand and finish with texture spray. Either way, the bangs should look spontaneous, not set. Salt spray works best on damp hair, so mist it on after towel-drying and scrunch the fringe to the side before it air-dries.
Try this: skip washing the fringe the morning you style it. Second-day hair grips beachy texture better than freshly washed hair.
24. Slicked Side Bangs
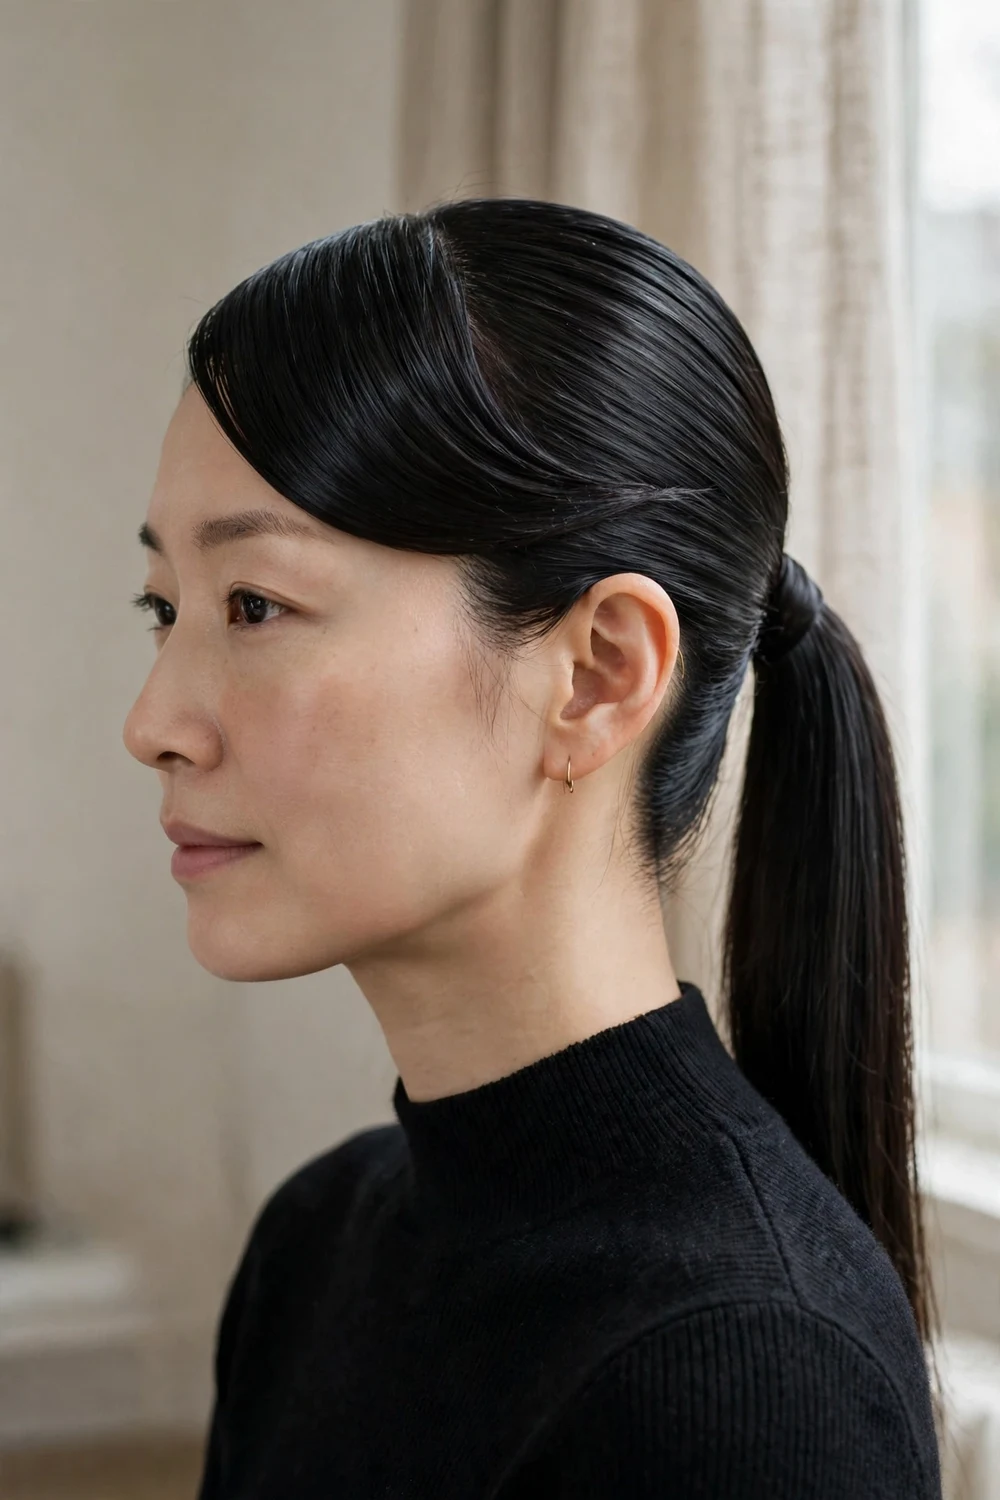
Glossy and flat, slicked bangs are the editorial option. Paired with a straight ponytail and blunt ends, they read sharp and intentional rather than severe.
Work a strong-hold gel through damp fringe and comb it flat to the side. Let it air-dry for the glossiest finish; heat can dull the shine gel gives you. Gel applied to damp hair gives a smoother finish than gel on dry hair, which can flake once it sets.
Try this: slick the fringe slightly upward at the root before laying it sideways. That tiny lift at the hairline stops the whole thing from looking pasted down.
25. Wet-Look Bangs
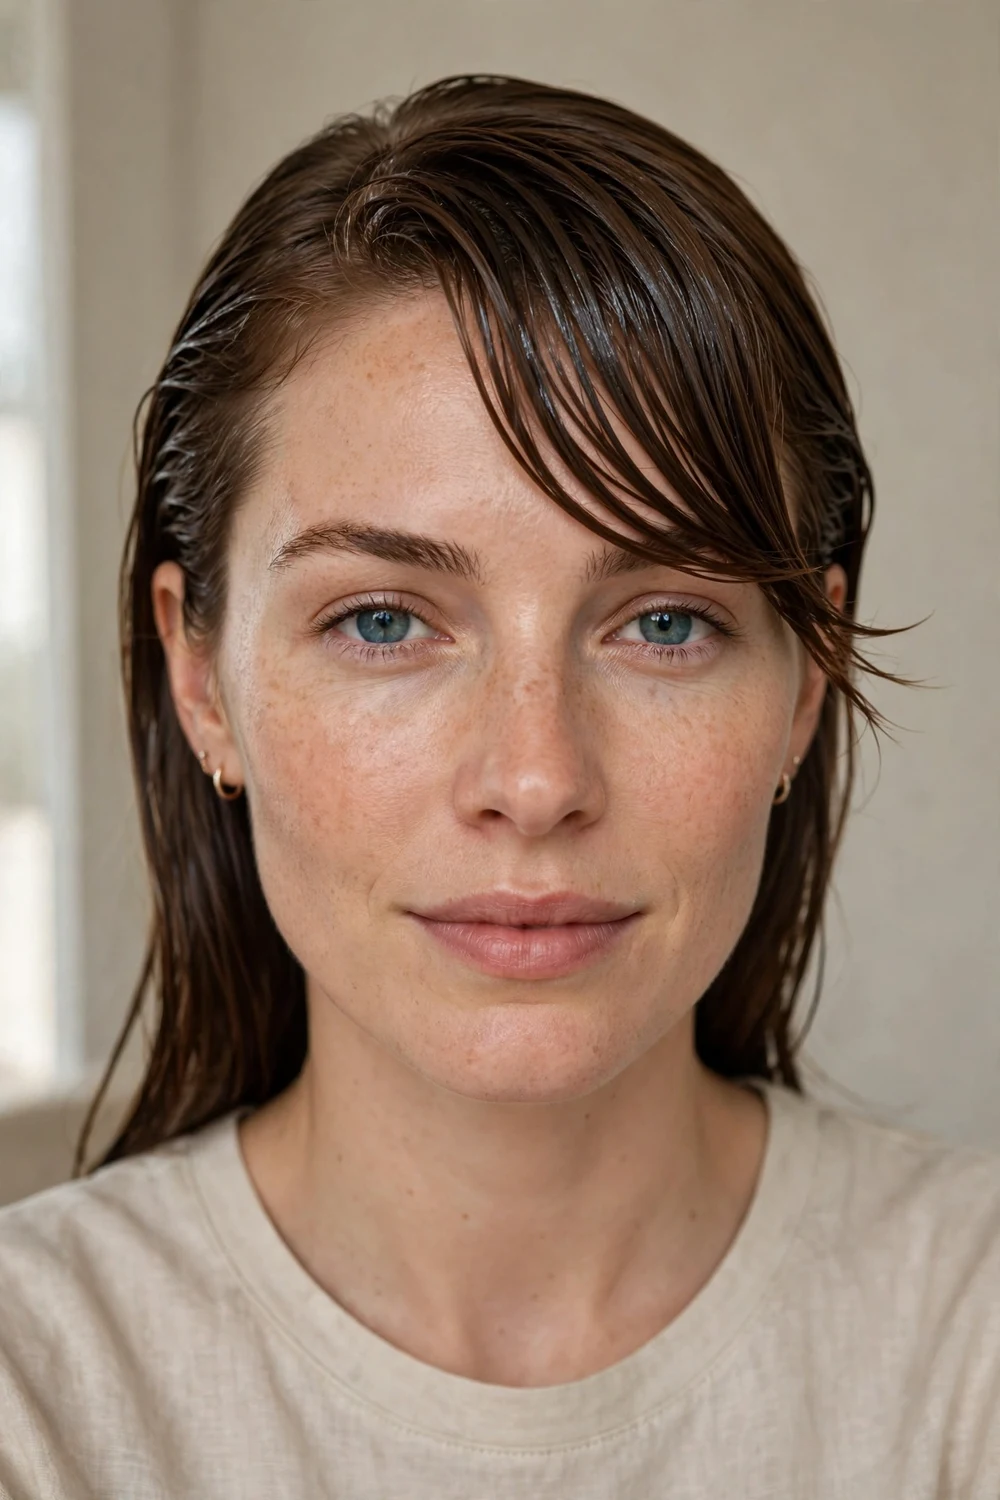
Bangs get greasy fast, so why not make it the point? A deliberate wet finish on a side-swept fringe looks modern and takes almost no effort.
Smooth hair oil through the fringe from roots to ends and comb it to the side. The key is even distribution; patchy oil just looks unwashed. A glossing oil rather than a heavy pomade gives the wet sheen without the crunchy texture that cheaper products leave behind.
Try this: keep the rest of the hair matte. Wet-look works because of the contrast between the glossy fringe and dry lengths.
26. Glam Wave Side Bangs
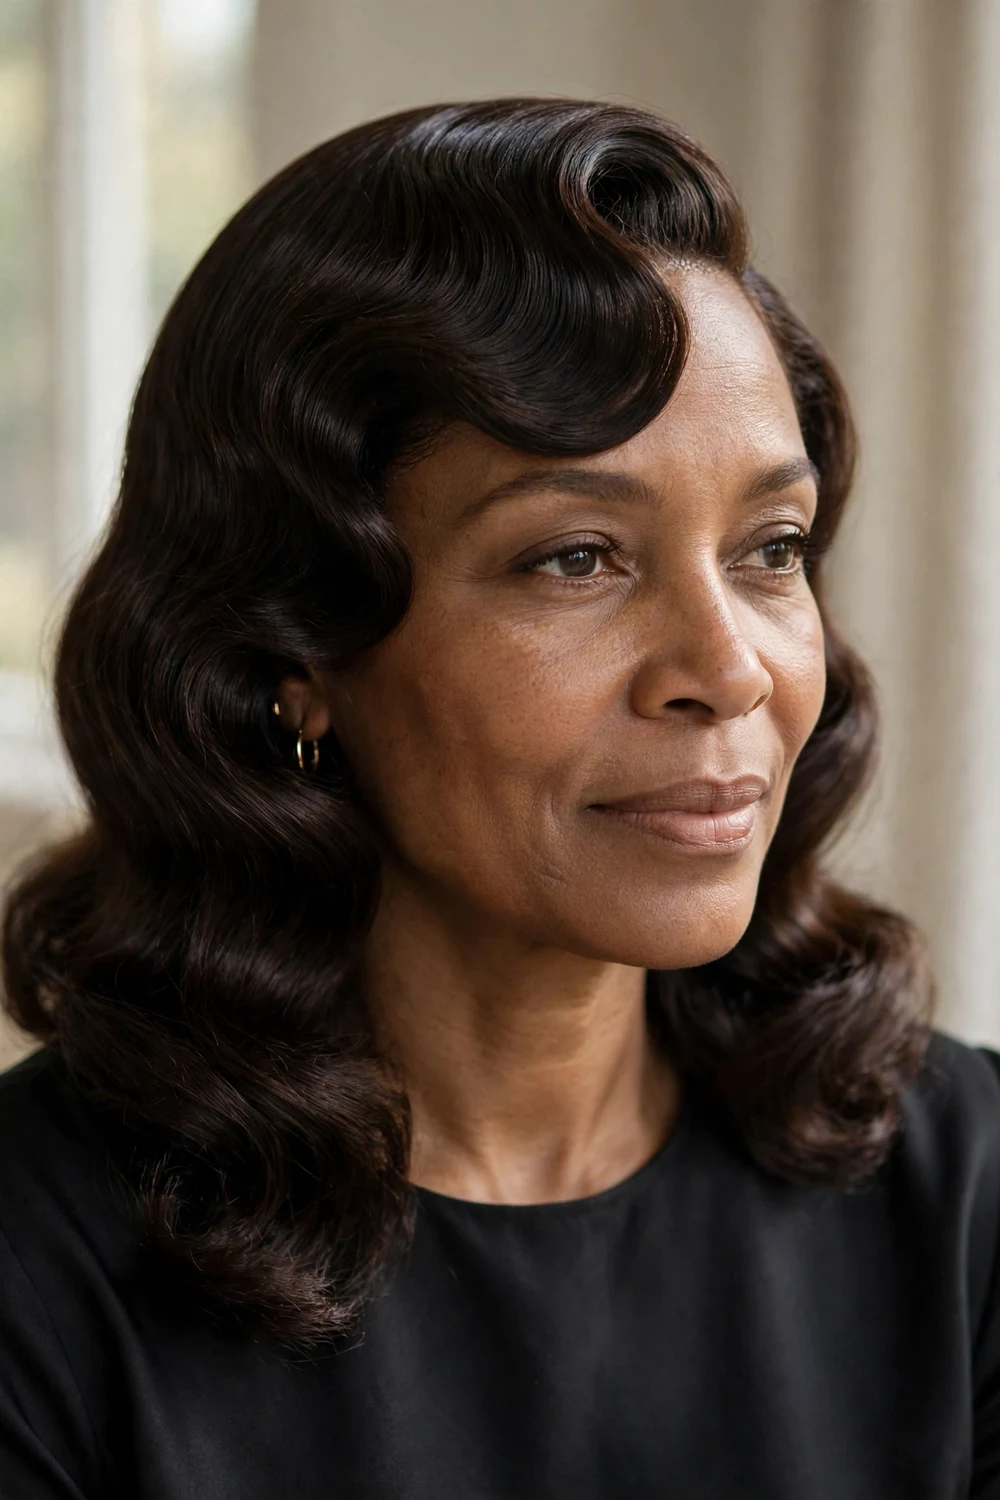
Old Hollywood waves demand a side part, and a deep swooped fringe completes the picture. The sculpted S-wave across the forehead is pure red-carpet polish.
Curl everything in one direction with a medium wand, let the curls cool completely, then brush through to merge them into waves. A light mist of strong-hold spray keeps the sculpt in place. Pin-curl the fringe while the rest cools, then release it last so the wave sets with the sharpest definition.
Try this: set the fringe wave with a duckbill clip while it cools. Removing the clip last gives the cleanest wave line.
27. Lip-Length Razored Bangs
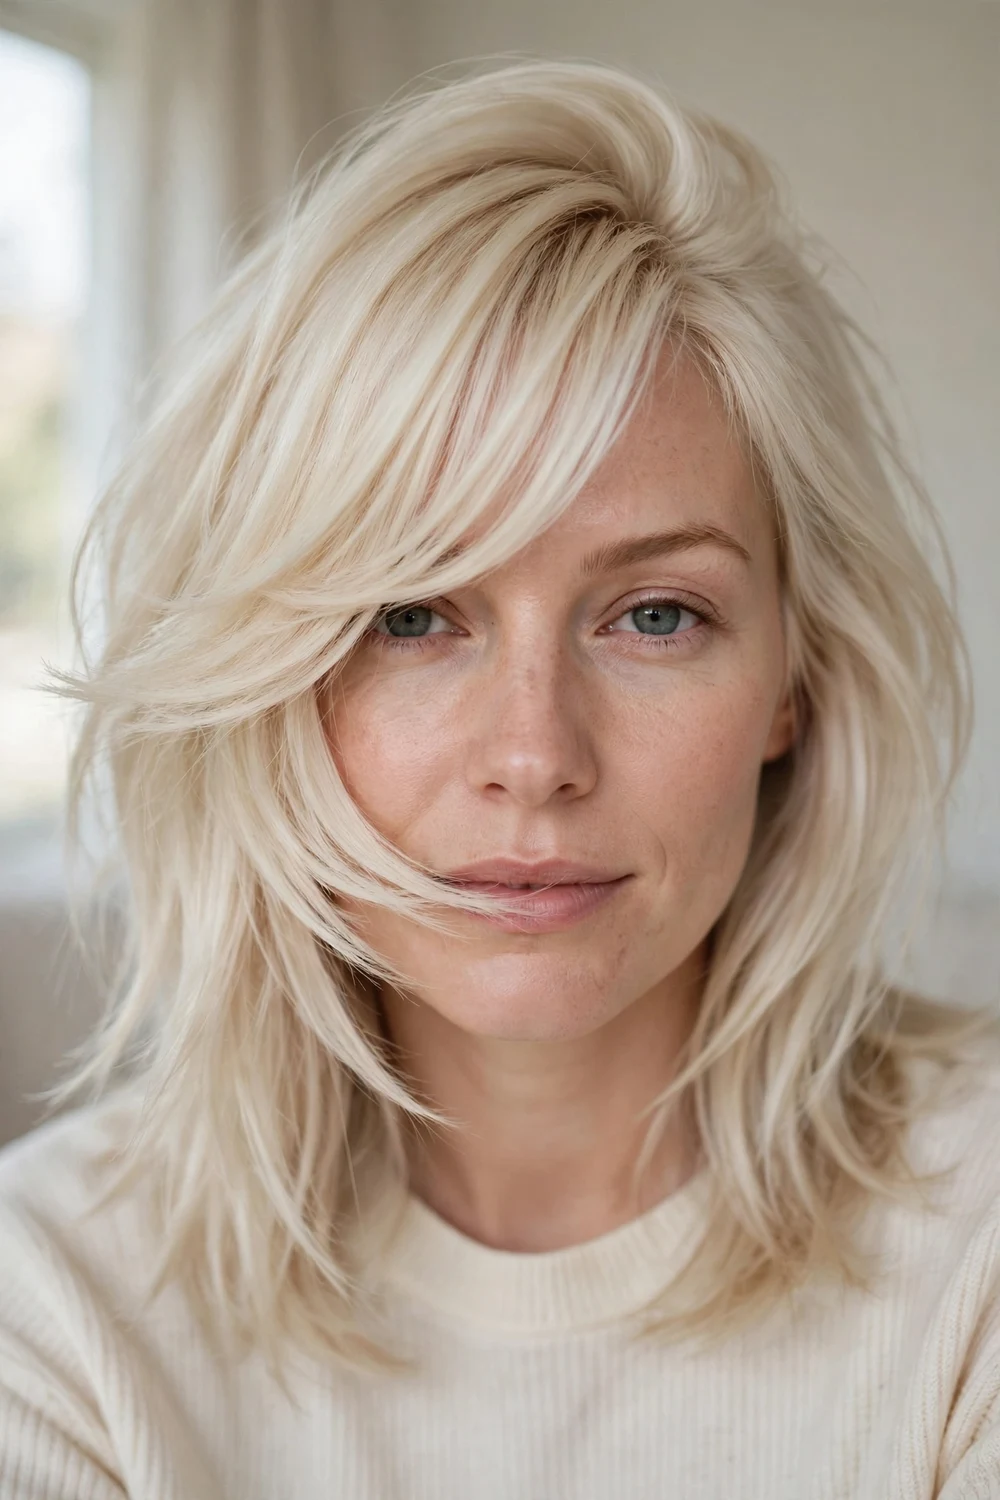
Long and razored, this fringe reaches lip level and adds noticeable volume on top. The razor-cut ends stay light even at longer lengths, so the fringe moves instead of hanging.
Tired of it falling in your face? The length pins back into a sleek no-bang style in seconds, which makes this one of the most versatile fringes here. Because the fringe is long, you can twist it to one side and pin it for an evening look that needs no heat at all.
Try this: ask your stylist to razor-cut rather than scissor-cut the ends. Scissored long bangs can look blunt and heavy; razored ones stay airy.
28. Cheek-Length Jagged Bangs
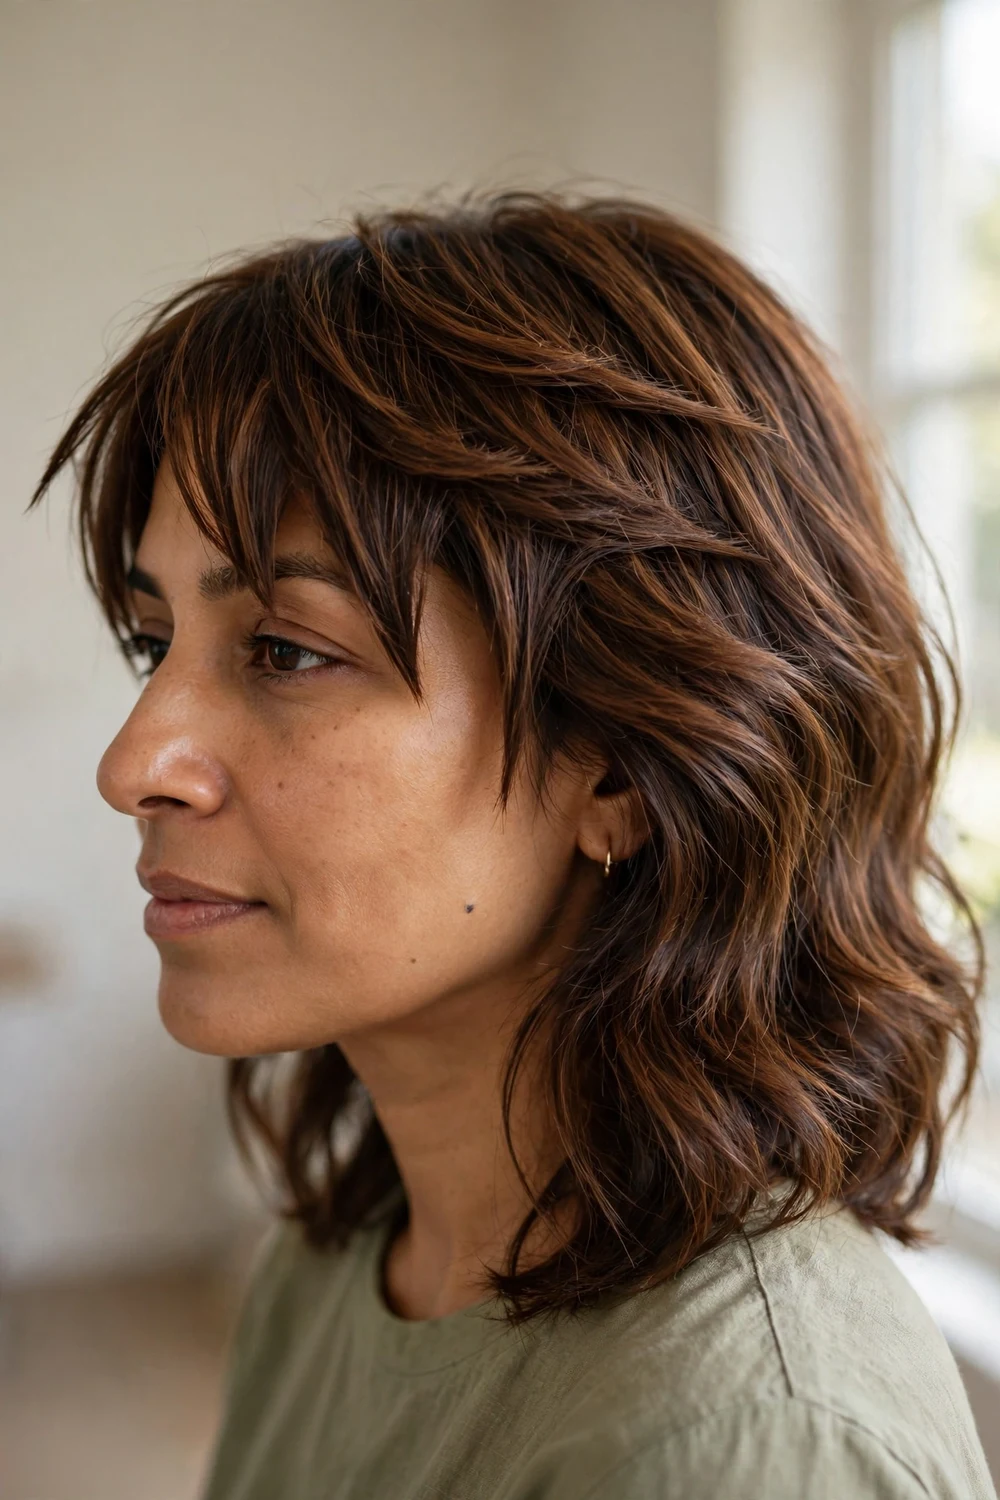
Jagged ends at cheek length add dimension to any cut that feels too safe. These front layers hit just above the nose, which makes them versatile: wear them swept, or clip them off the face entirely.
Point-cutting creates the jagged edge. If your stylist only offers blunt cuts, the fringe will read severe instead of edgy, so ask specifically. Jagged edges stay sharpest with dry-cut touch-ups, so ask your stylist to trim the fringe dry at your next appointment.
Try this: on windy days, pin one side back with two crossed bobby pins. The asymmetry looks styled, not defeated.
29. Flipped Bangs with Soft Layers
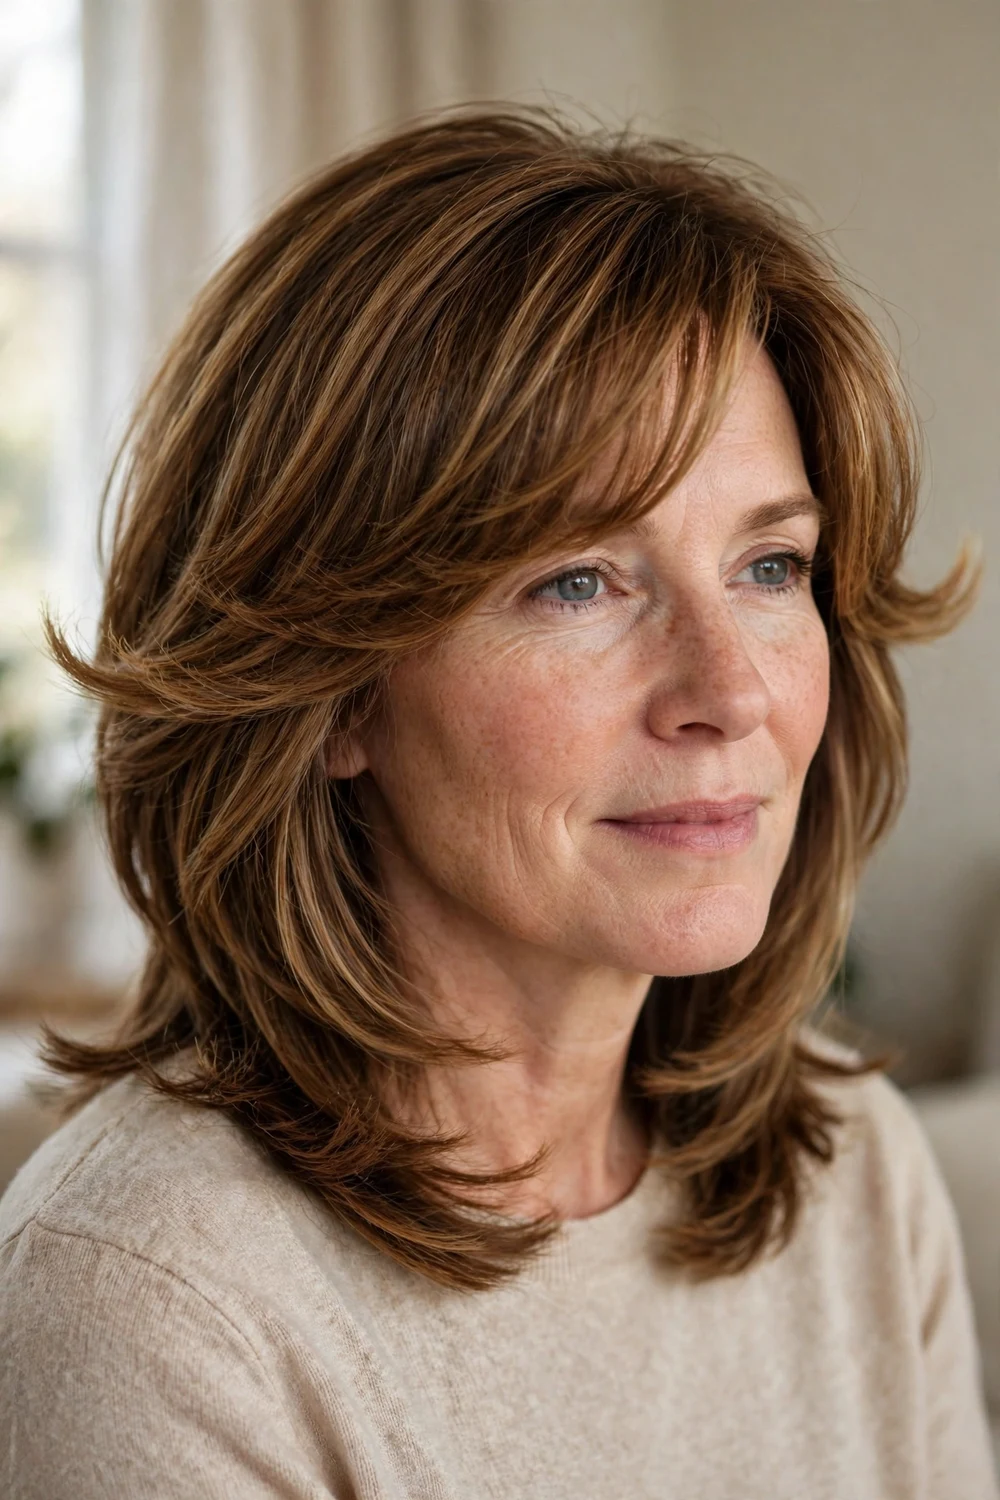
When bangs blend into layers with flicked ends, the result is a flowing shape with no visible fringe line. Keeping the shortest lengths around the jawline instead of the brow keeps it soft.
A round brush creates the flipped ends. Roll the brush outward at the ends of the fringe and the front layers together so they move as one piece. A medium round brush is the whole tool kit here; the flicked ends come from rolling the brush outward as you dry each section.
Try this: this style grows out the most gracefully of all 30. Book trims every 5 to 6 weeks instead of every 3 to 4.
30. Soft Accented Fringe
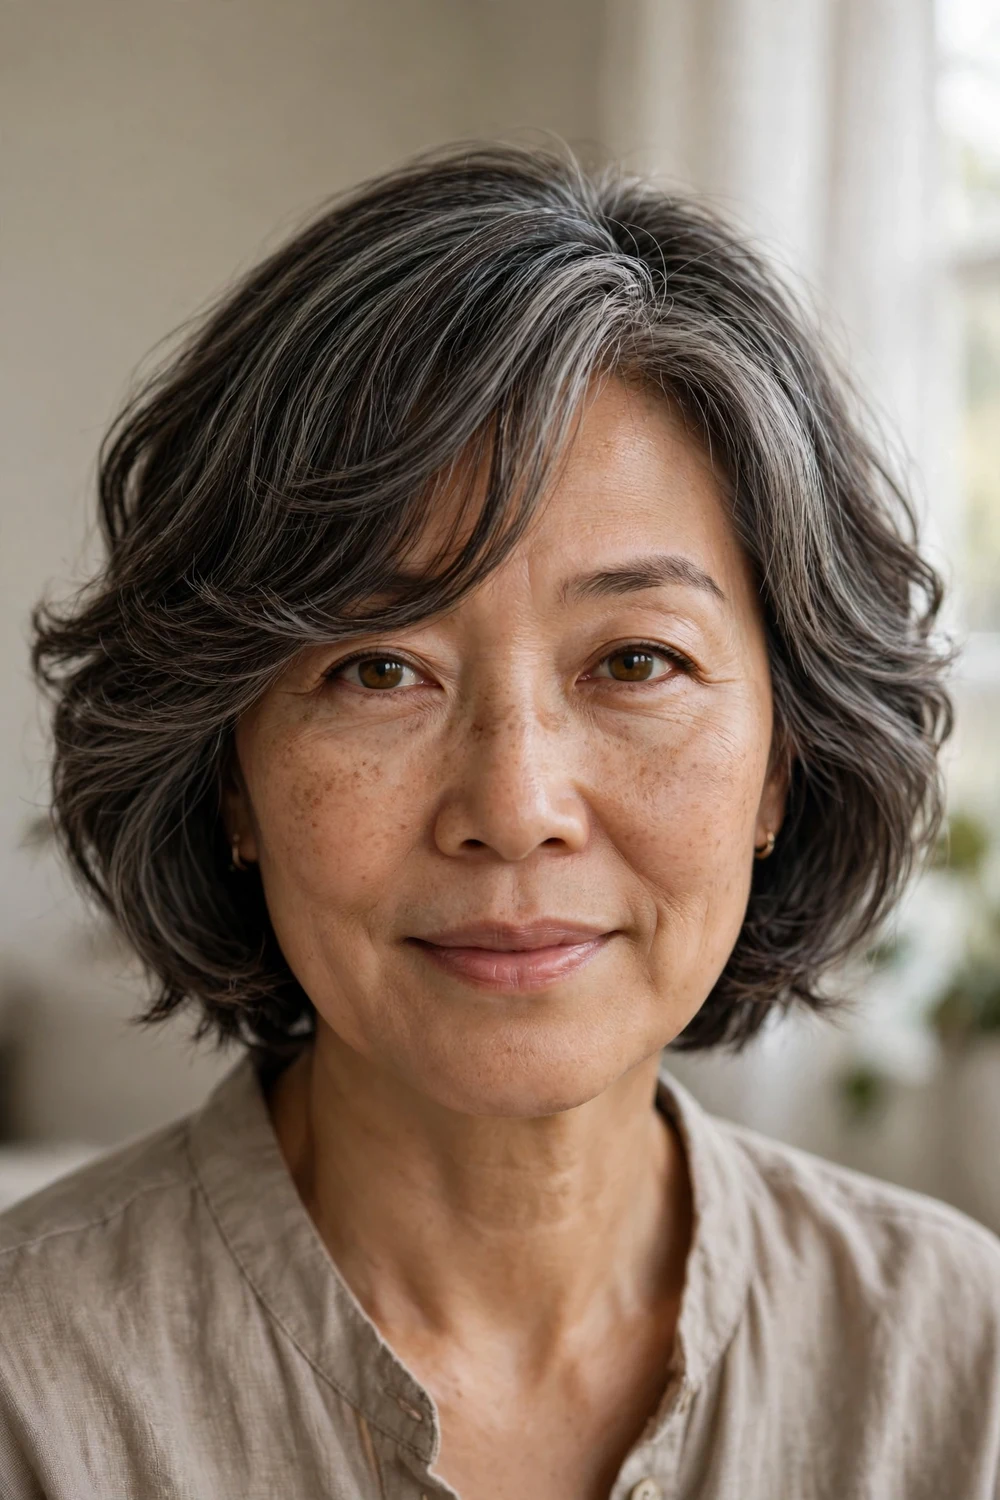
A gentle body wave through the fringe softens facial features without any sharp lines. On short hair, this swoopy finish keeps the cut from reading harsh.
Wrap the fringe around a large round brush and roll it under while blow-drying. The wave should be loose, more of a bend than a curl. Gray and salt-and-pepper hair takes a wave well, and a purple shampoo once a week keeps the tone bright instead of yellow.
Try this: finish with a shine spray instead of hairspray. The goal here is softness, and spray can freeze the wave into place.
Side-Swept Bangs Comparison at a Glance
| Style | Best Occasion | Difficulty | Hold Time |
|---|---|---|---|
| Classic Side-Swept Bangs | Everyday, office | Easy | 6-8 hours |
| Smooth Swoopy Bangs | Work events, dinners | Easy | 6-8 hours |
| Dramatic Side-Swept Bangs | Nights out | Medium | 4-6 hours |
| Bouncy Blowout with Side Bangs | Parties, dates | Medium | 4-6 hours |
| Wispy Side-Swept Bangs for Fine Hair | Everyday | Easy | 6-8 hours |
| Choppy Side Bangs | Concerts, casual | Easy | All day |
| Pixie with Side Bangs | Everyday | Easy | All day |
| Tousled Choppy Bangs | Casual weekends | Easy | All day |
| Long Flowy Bangs | Everyday | Easy | 6-8 hours |
| Lengthy Feathery Bangs | Dates, evenings | Easy | 6-8 hours |
| Chin-Grazing Side Fringe | Everyday, versatile | Easy | All day |
| Long Subtle Side Bangs | Everyday | Easy | 6-8 hours |
| Off-Centered Straight Bangs | Nights out | Medium | 4-6 hours |
| Ear-Skimming Angled Bangs | Office, events | Easy | 6-8 hours |
| Rounded Side Bangs | Dinners, dates | Medium | 6-8 hours |
| Multicolored Angled Fringe | Festivals, creative | Medium | All day |
| Graduated Two-Color Bangs | Everyday, office | Easy | 6-8 hours |
| Side-Flipped Bangs with Money Pieces | Nights out | Medium | 4-6 hours |
| Long Highlighted Curtain Bangs | Everyday, versatile | Easy | 6-8 hours |
| Curly Side-Swept Bangs | Everyday | Medium | All day |
| Straight Bangs and Curls | Weddings, events | Hard | 4-6 hours |
| Frizzy Swoop Bangs | Dates, evenings | Medium | 4-6 hours |
| Beachy Side Bangs | Summer, casual | Easy | 4-6 hours |
| Slicked Side Bangs | Evenings, editorial | Medium | All day |
| Wet-Look Bangs | Nights out | Easy | All day |
| Glam Wave Side Bangs | Formal events | Hard | 6-8 hours |
| Lip-Length Razored Bangs | Everyday, versatile | Easy | All day |
| Cheek-Length Jagged Bangs | Casual, creative | Easy | All day |
| Flipped Bangs with Soft Layers | Office, everyday | Easy | 6-8 hours |
| Soft Accented Fringe | Everyday | Easy | 6-8 hours |
How to Choose the Right Side-Swept Bangs for You
Match the fringe to your hair density first. Fine hair needs wispy, feathered, or graduated fringes that take minimal hair from the crown. Thick hair can carry dramatic, heavy fringes that would flatten fine hair by lunch.
Then match it to your routine. If you spend 5 minutes on hair, pick tousled, long flowy, or jagged fringes that look good messy. If you enjoy styling, swoopy, glam wave, and dramatic fringes reward the effort.
Face shape matters less than people think, because the diagonal sweep flatters all of them. The one rule: rounder faces do better with longer fringes that end at or below the cheekbone, since short fringes can emphasize width.
Mistakes to Avoid
Cutting the fringe too short is the classic error. You can always take more off at a second appointment, but you can’t put it back. Start longer than you think you want.
Blow-drying the fringe straight down and then wondering why it won’t sweep is the other one. Dry it in the direction you plan to wear it, or at least dry it forward and push it over while it is still warm.
Skipping trims turns every side-swept style into an eye-poking problem. Most fringes need a tidy-up every 3 to 4 weeks. Ask your stylist for a fringe trim price; many salons charge very little for a 10-minute bang trim between full cuts.
Side-swept bangs blend so well into layers that longer styles carry them naturally. If you wear your hair long, layered hairstyles for long hair pair with almost every fringe in this list.
Short cuts get the most contrast from a strong fringe. A pixie or cropped cut with swept pieces sits well alongside short layered haircuts if you want more short-length inspiration.
Medium lengths are the sweet spot for dramatic and swoopy fringes. For cuts that hit between the chin and shoulders, layered hairstyles for medium hair give the fringe plenty of company.
Fine or thinning hair needs a fringe that doesn’t steal density. If that is your hair type, layered hairstyles for women over 50 with thin hair covers cuts built around the same light-touch principle.
Prefer your fringe parted in the middle instead of swept to the side? These curtain bangs for fine hair over 40 show the center-part version on the same bob and lob shapes.
Frequently Asked Questions
What face shape suits side-swept bangs best?
Side-swept bangs flatter oval, round, square, and heart faces because the diagonal line breaks up the horizontal width of the forehead. Round faces benefit most from longer fringes that end at or below the cheekbone. Oval faces can wear any length. There is no face shape that side-swept bangs actively work against.
Do side-swept bangs work with thin hair?
Yes, and they are one of the safest fringes for thin hair. A wispy or feathered side-swept fringe uses very little hair, so the rest of your cut keeps its density. Ask your stylist to point-cut the ends and keep the fringe on the longer side. Avoid heavy, blunt side fringes, which can make thin hair look thinner.
How do I style side-swept bangs at home?
Blow-dry the fringe in the direction you want it to sweep, using a round brush or flat brush and aiming the nozzle down the hair shaft. For extra hold, wrap the fringe around a velcro roller for 10 minutes while you finish your makeup. A light mist of flexible-hold hairspray keeps it in place without stiffness.
How often do side-swept bangs need a trim?
Most side-swept fringes need a trim every 3 to 4 weeks to stay out of the eyes and keep their shape. Longer, chin-grazing fringes can stretch to 5 or 6 weeks since they grow out gracefully. Many salons offer quick fringe trims at a low price between full haircuts.
Can side-swept bangs work with curly hair?
Absolutely. The key is cutting the fringe dry and longer than the target length, since curls shrink as they dry. Style the fringe while soaking wet with curl cream, scrunch it to the side, and dry with a diffuser. The result is a lively, dimensional fringe that works with your texture instead of against it.
Still deciding which fringe suits you after 50? Compare every soft option in our guide to best bangs for women over 50 soft flattering styles and bring your favorite to the salon.
Final Thoughts
Side-swept bangs earn their reputation as the easiest fringe. They suit every face shape, grow out gracefully, and only ask for a round brush and a few minutes in the morning. Pick the version that matches your hair density and your styling patience, and you’ll wonder why you waited.
A deep side part also changes how layered cuts fall across the face. Browse these butterfly cuts if you like the swept-front look with the layers doing the work.

