


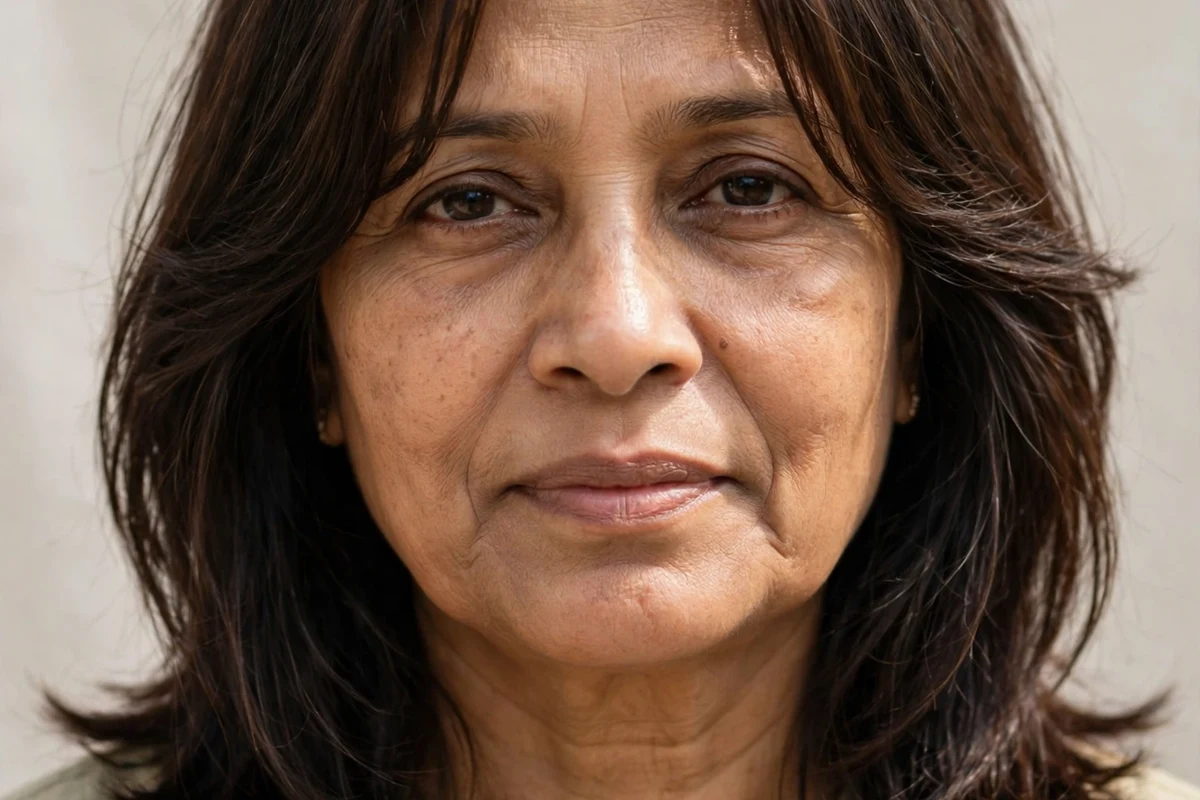
Can layers really help thin hair after 50? Yes, when the layering is done with volume in mind. The trick is keeping a strong perimeter so the ends look full, while adding interior layers that lift the crown and create movement. The wrong kind of layering, long wispy pieces that remove weight from already thin ends, will make hair look thinner. The 20 layered hairstyles below are built for thin hair on women over 50, each with what to ask your stylist and honest upkeep notes.
Quick Takeaways
- Keep the perimeter strong. A blunt or softly blunt baseline keeps thin ends looking dense. Put the layers inside, not at the ends.
- Crown layers do the heavy lifting. Shorter pieces around the crown create the most visible volume on thin hair.
- Stacking pushes hair up. Graduated layers at the nape build a shelf of volume that lifts everything above it.
- Ask for interior or ghost layers if you are afraid of losing density. They add movement without touching the outline.
- Plan trims every 6 to 8 weeks. Layered cuts on thin hair lose their shape fast once the layers grow out.
1. Stacked Bob with Graduated Layers
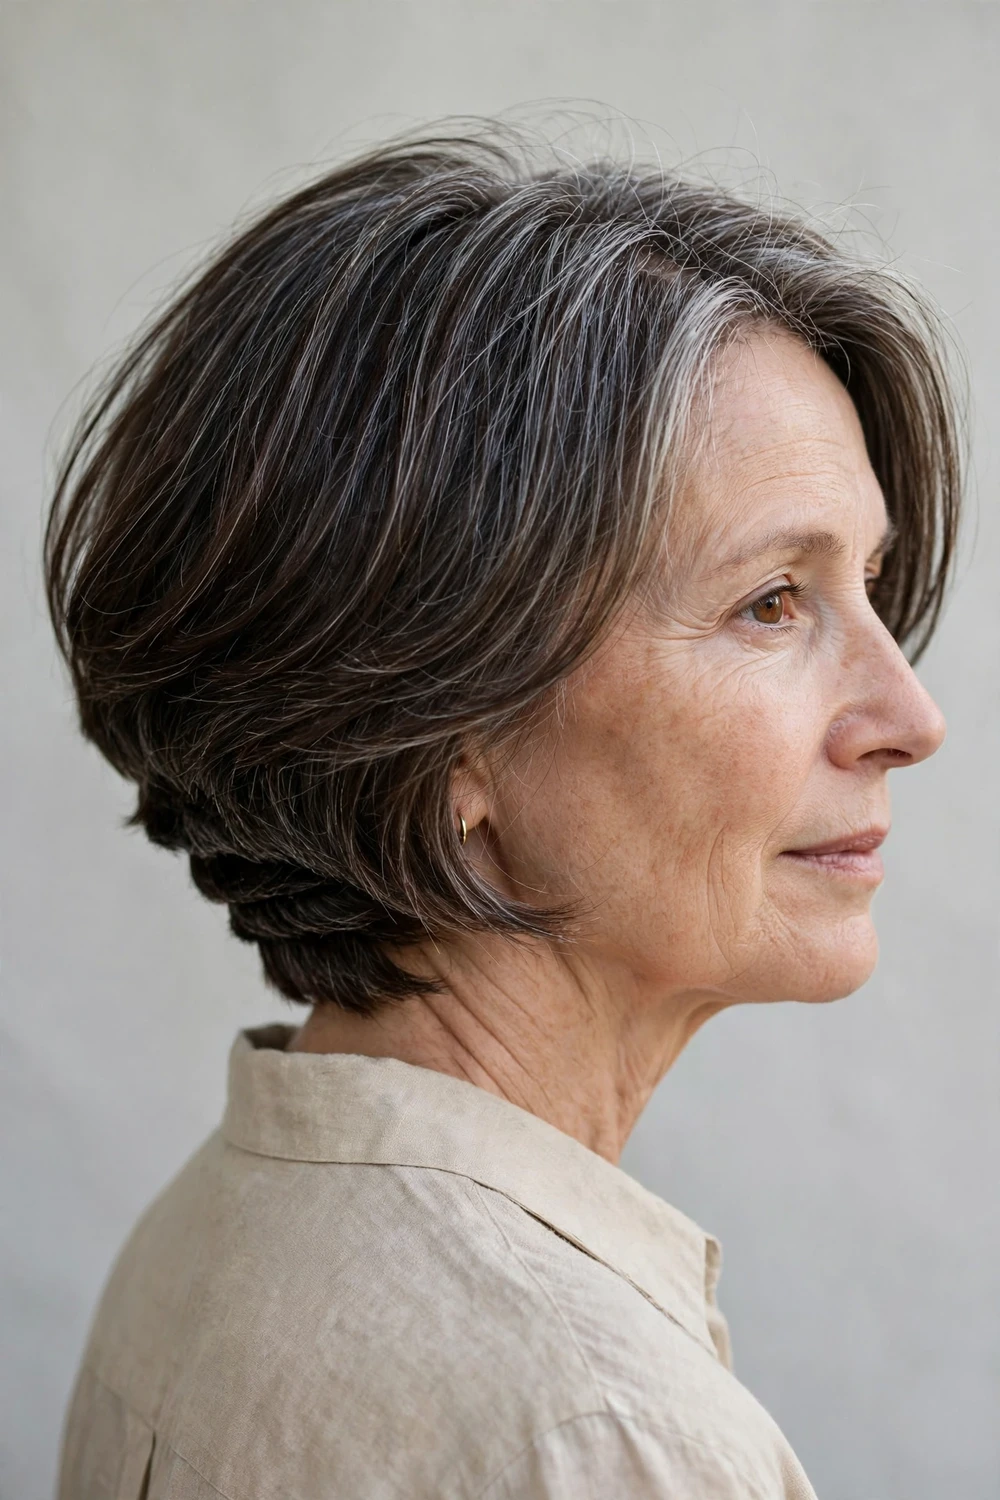
The stacked bob is the classic volume builder for thin hair. Short graduated layers at the nape stack on top of each other, pushing the hair above upward and outward. The front stays longer, usually chin to jaw length, which keeps the silhouette balanced. Ask your stylist for strong graduation in the back with a clean perimeter in front. A round brush and a 2-minute blow dry give it that rounded, full shape. Without styling it still holds more body than a one-length bob.
Try this: Blow dry the nape upward with a small round brush, then smooth the front pieces under for a polished finish.
Difficulty: Easy · Cost: $55–$85 for the cut
2. Feathered Pixie with Long Crown Layers
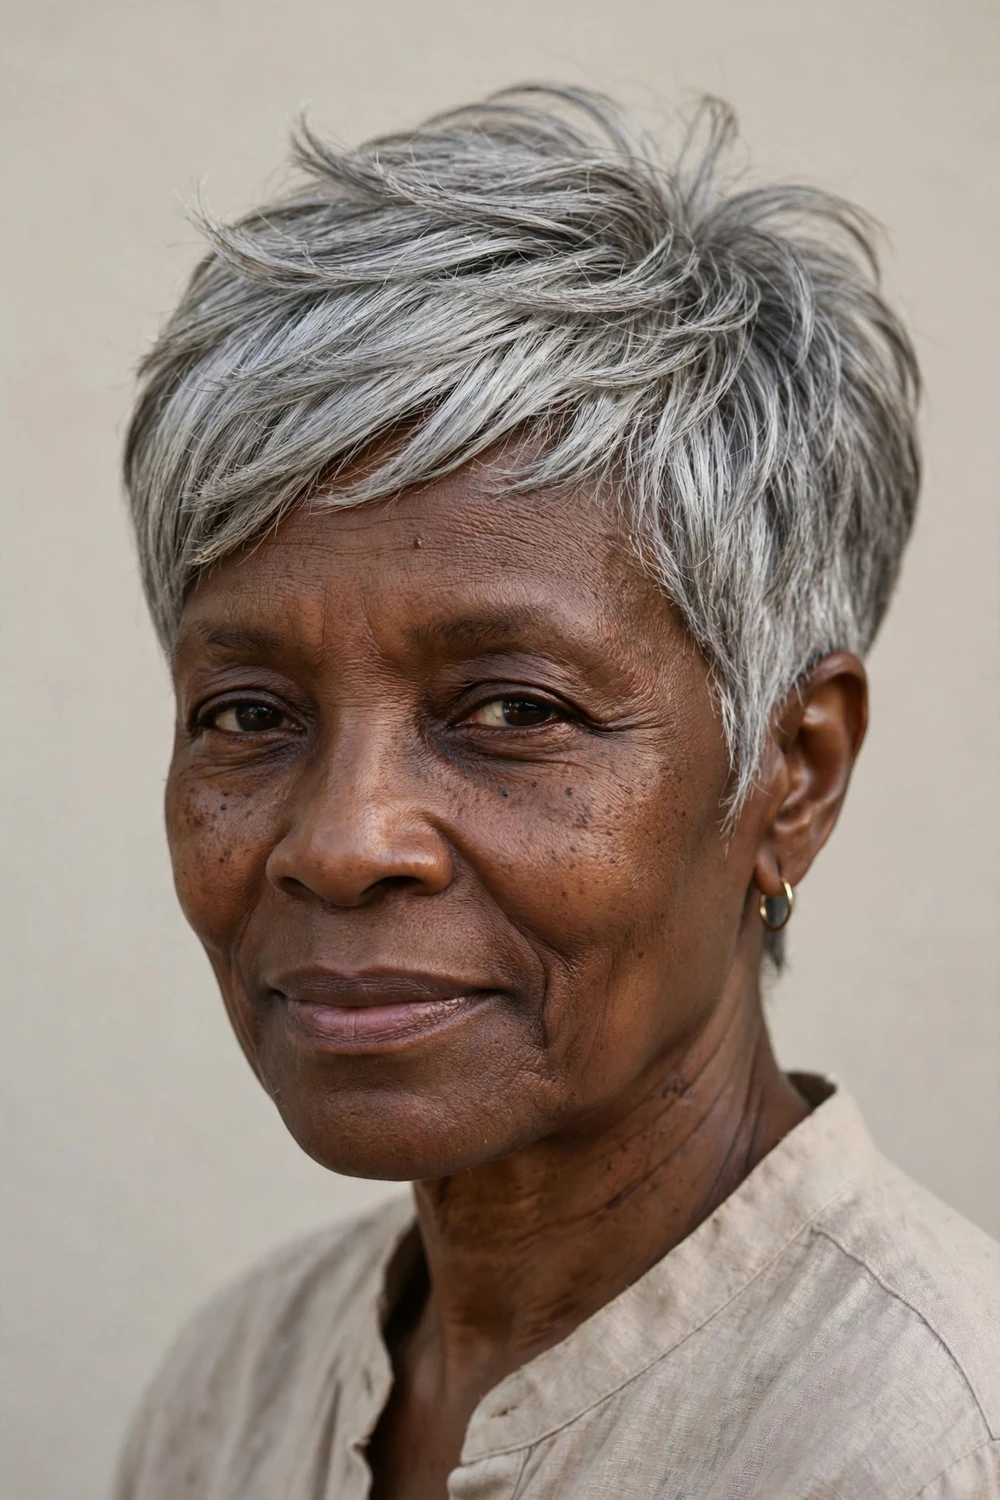
A pixie with length left on top is one of the smartest choices for thin hair after 50. The sides and back stay neat and tapered, while the crown keeps 2 to 3 inches of layered length that can be lifted and textured. Feathering the ends with thinning shears (used lightly) removes bulk without removing density. This cut dries in minutes and needs only a pea-sized amount of volumizing mousse. It grows out gracefully too, since the top layers blend into the sides.
Try this: Work mousse into damp roots, then blow dry the crown forward and up with your fingers for instant lift.
Difficulty: Easy · Cost: $45–$75 for the cut
3. Soft Layered Lob with Blunt Perimeter
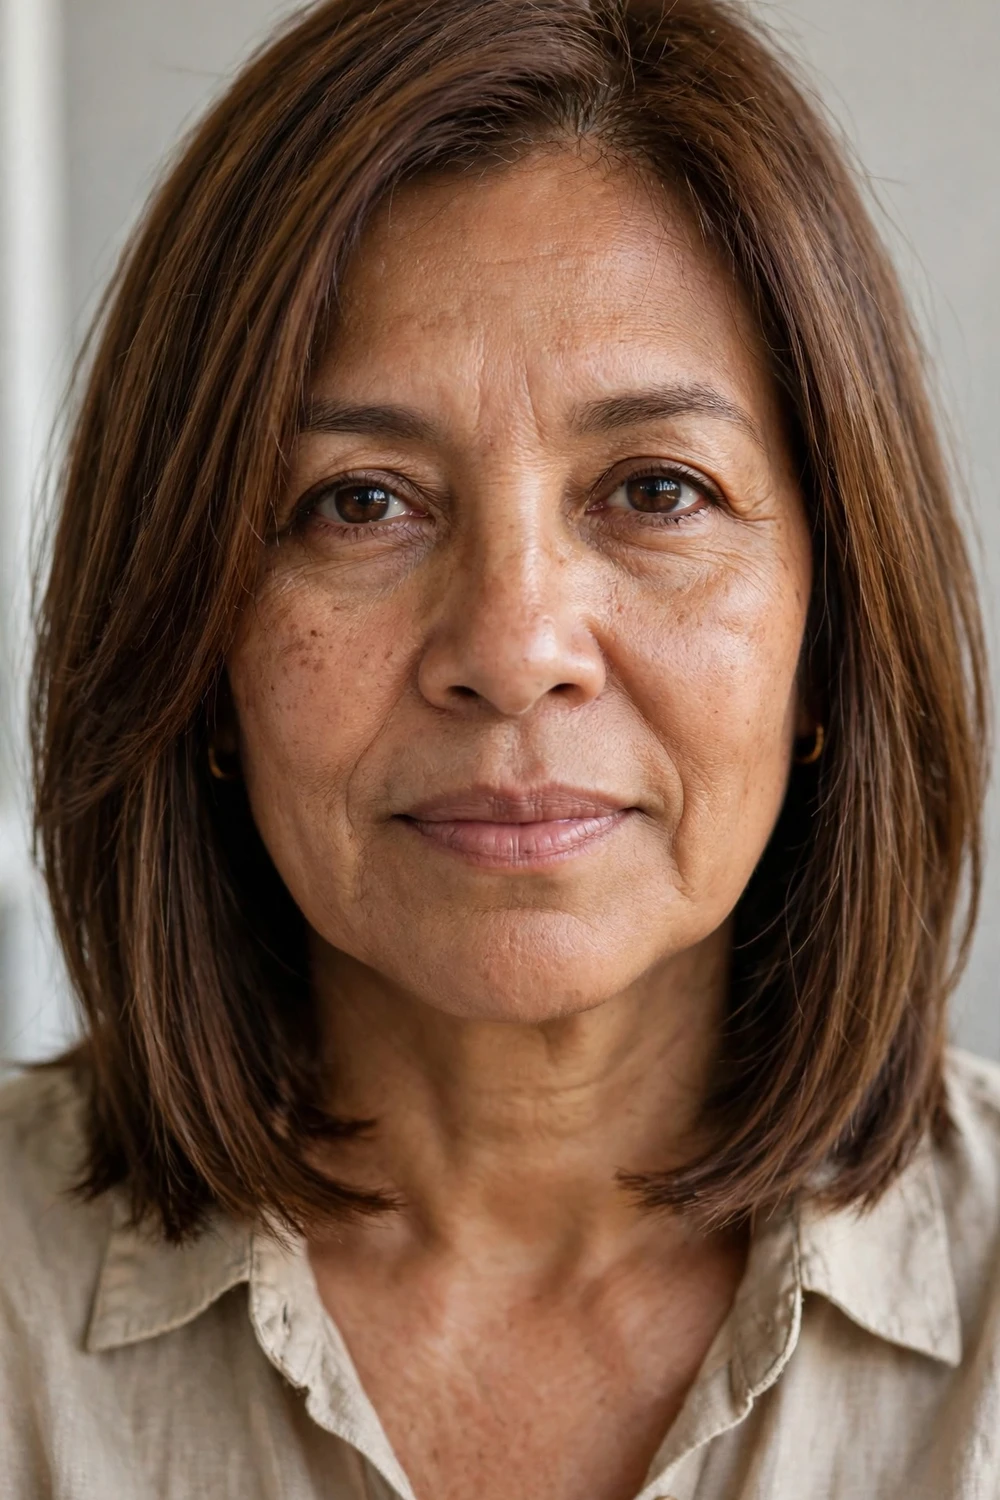
This is the layering paradox solved: a blunt baseline with layers hidden inside. The ends are cut straight across at collarbone length so they read as thick, while interior layers through the mid-lengths and crown create movement and lift. Nothing is thinned at the bottom, which is where thin hair needs density most. Ask for “interior layers with a blunt perimeter” and stress that you want the ends left heavy. It works straight, wavy, or air dried.
Try this: Curl just the mid-lengths with a 1.25-inch iron, leaving the ends straight, for bend without losing the blunt edge.
Difficulty: Easy · Cost: $55–$85 for the cut
4. Textured Shag with Choppy Crown Layers
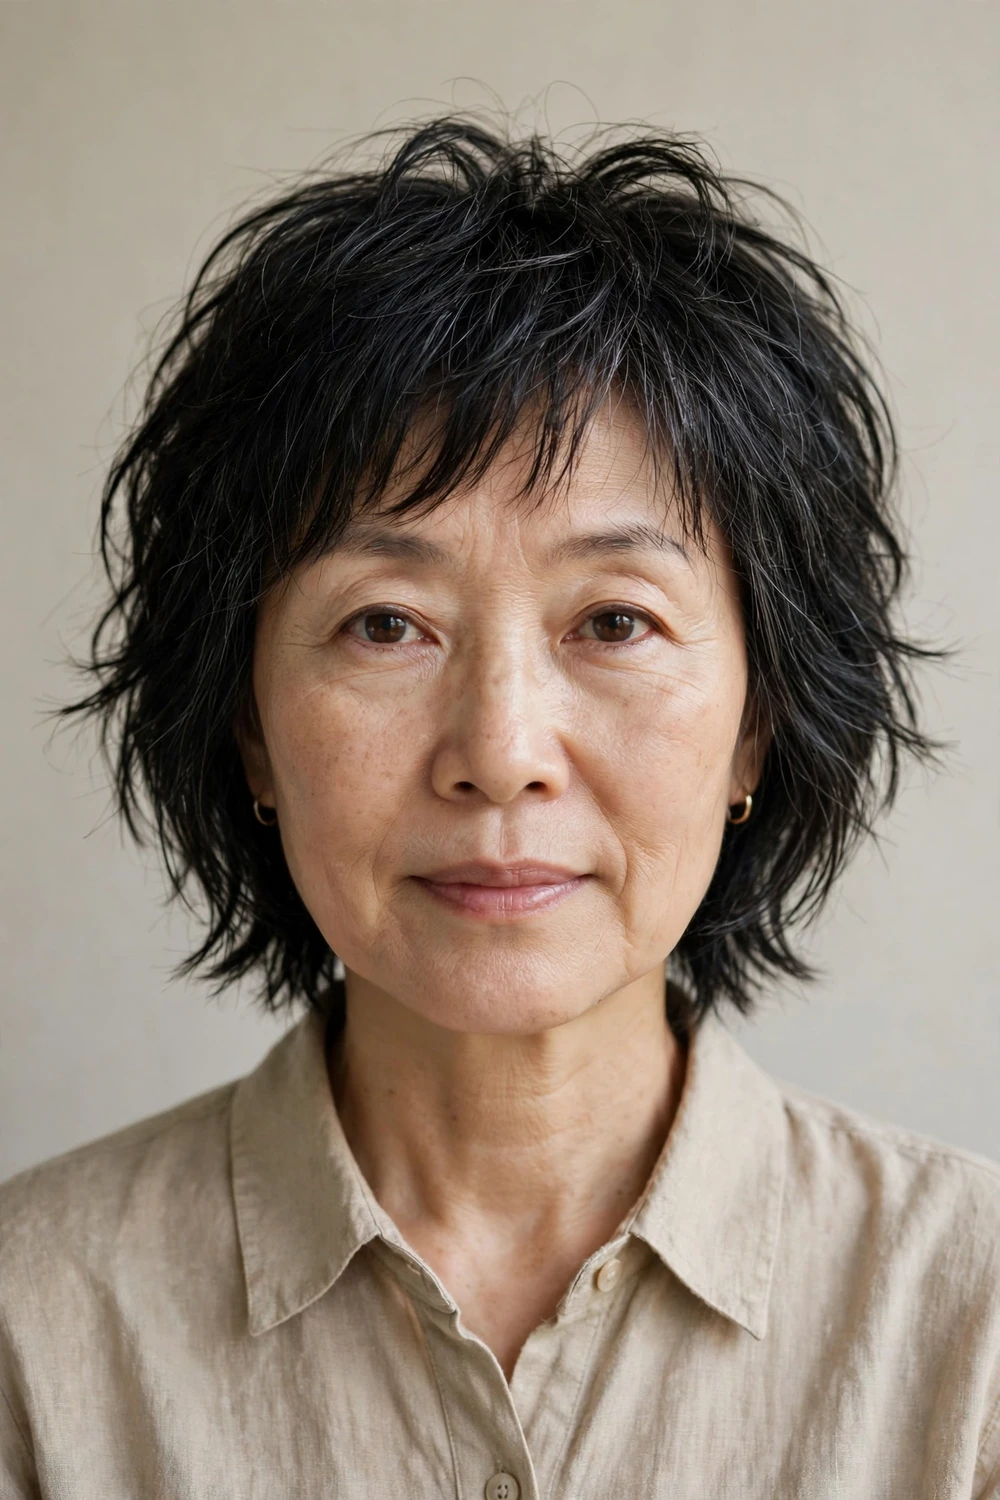
A shorter shag, hitting between the chin and shoulders, gives thin hair separation that reads as fullness. The choppy layers are concentrated at the crown, where they create piecey texture, while the perimeter stays fairly solid. Keep the overall length above the shoulders so the layers have room to spring up instead of dragging down. A dime-sized amount of texture cream scrunched into dry hair is all the styling it needs. Skip heavy oils, which flatten thin strands fast.
Try this: Flip your head upside down, scrunch in texture cream, then flip back up for maximum root lift.
Difficulty: Easy · Cost: $55–$85 for the cut
5. Face-Framing Layers with Curtain Bangs
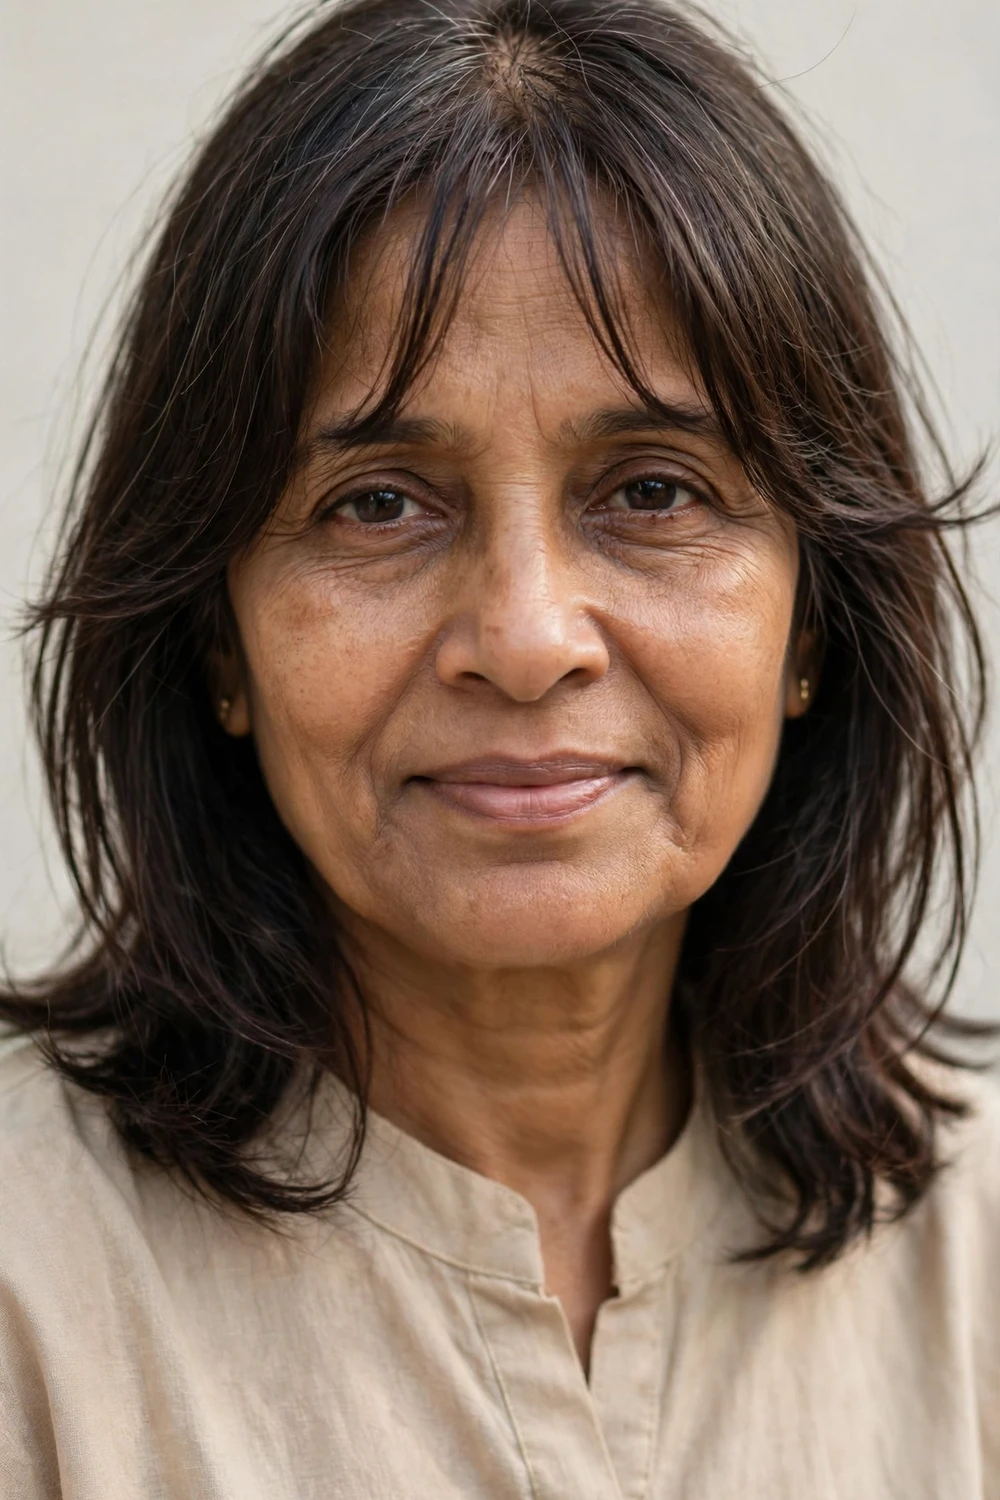
Curtain bangs paired with face-framing layers break up a thin hairline and add instant fullness around the face. The bangs are cut to part in the middle and sweep outward, while the framing pieces start at cheekbone level and blend down. Because the fullness sits right where people look, the whole head of hair reads thicker. Keep the bangs piecey rather than thick, since a heavy fringe can expose thinness at the temples. Trim the bangs every 3 to 4 weeks to hold the shape.
Try this: Blow dry curtain bangs with a round brush pulling outward on each side, then let them fall naturally into the part.
Difficulty: Medium · Cost: $55–$85 for the cut, $10–$15 for bang trims
6. The Layered Bixie
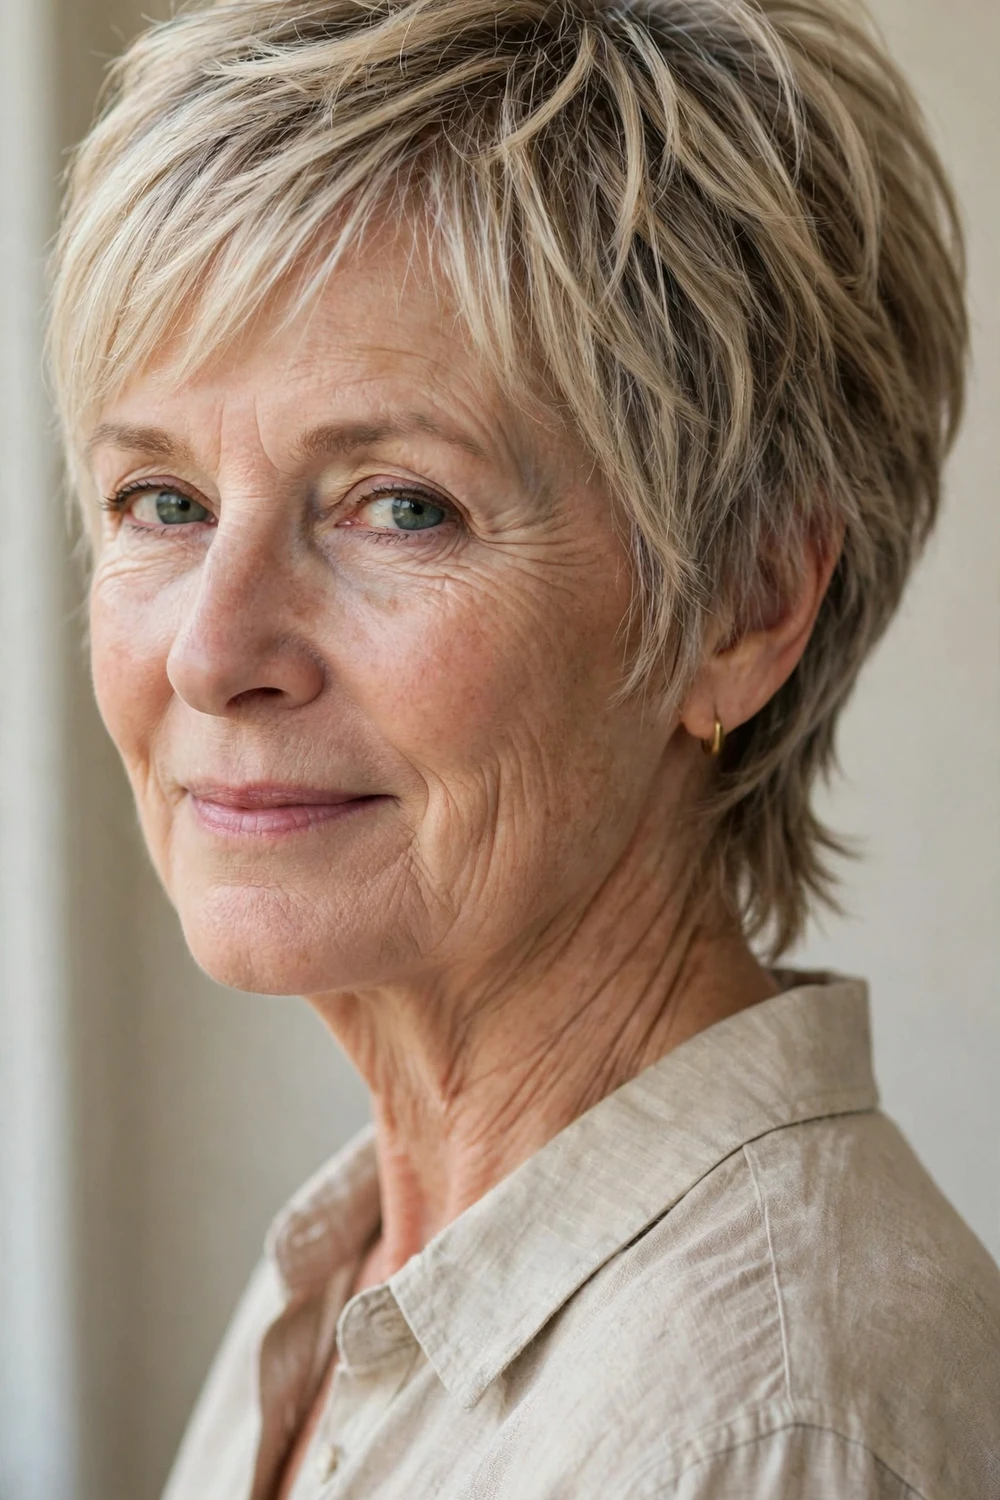
The bixie sits between a bob and a pixie, and that in-between length is ideal for thin hair. Layers through the crown give it pixie-like lift, while the slightly longer nape and sides keep enough hair to look full. It is shorter than a bob but softer than a pixie, which suits women who find pixies too severe. Ask your stylist to keep weight at the perimeter and layer mainly through the top. A little pomade on the ends defines the pieces without weighing them down.
Try this: Rub a pea-sized amount of pomade between palms and pinch the crown pieces for separated, piecey texture.
Difficulty: Easy · Cost: $50–$80 for the cut
7. Invisible Interior Layers (Ghost Layers)
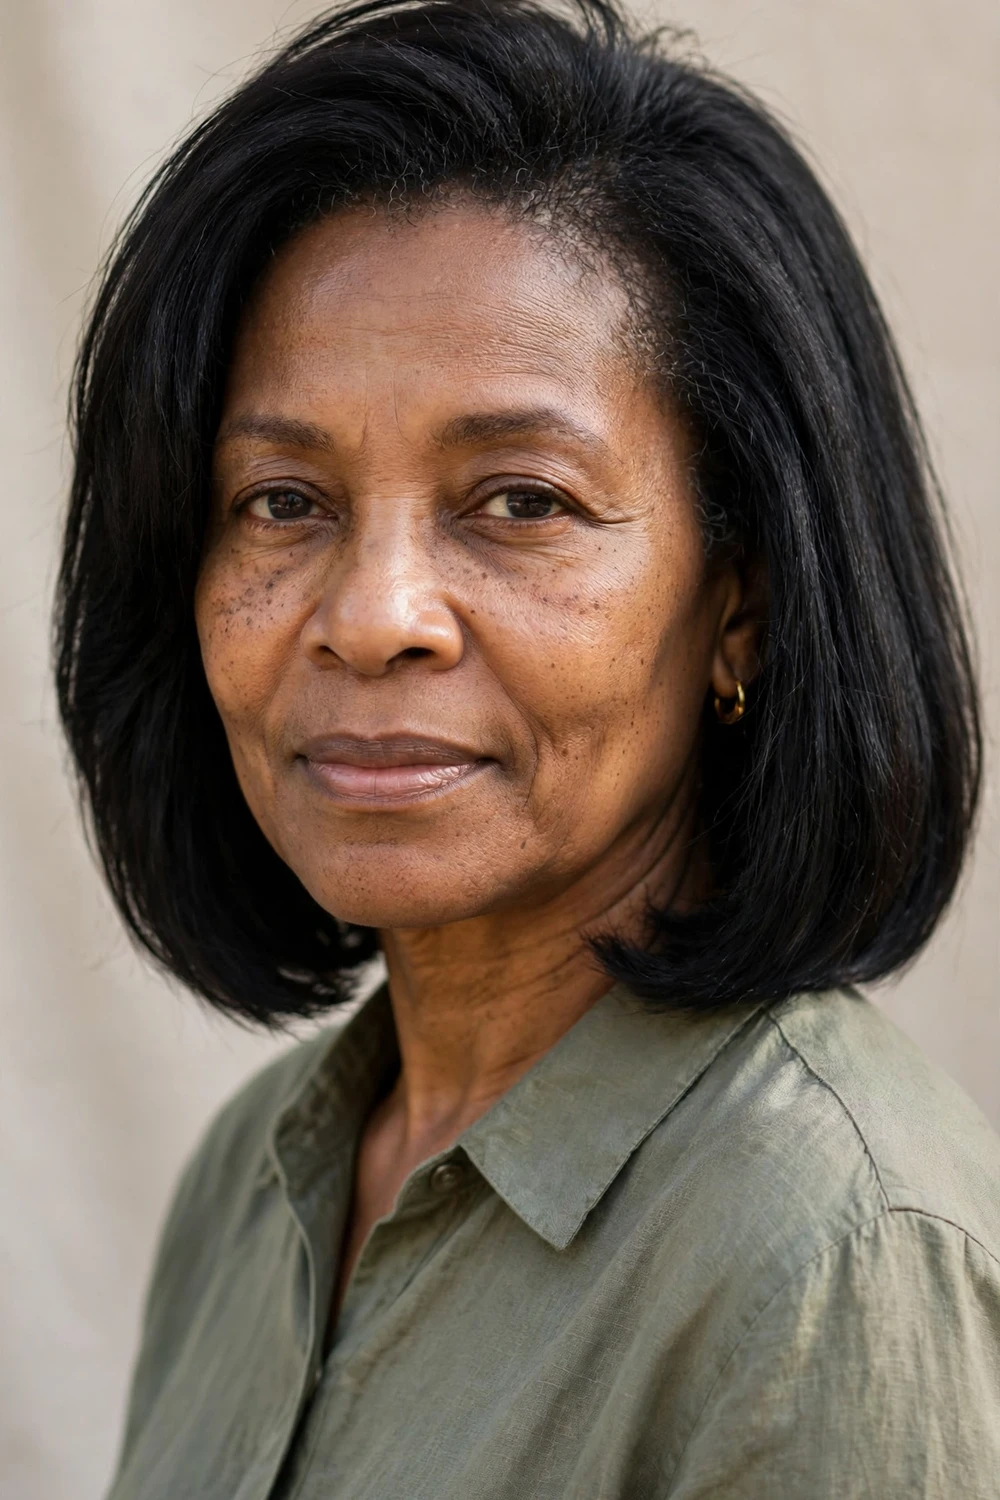
Ghost layers are cut underneath the top section of hair, so the surface looks one length while the interior has hidden lift. For thin hair, this is the safest way to add volume: nothing is removed from the visible outline, but the shorter pieces underneath push the top layer up. It works at almost any length from chin to shoulders. Tell your stylist you want “interior layering with no visible layers on the surface.” The effect shows most after a round-brush blow dry, when the hidden layers spring up.
Try this: After blow drying, flip the top layer back and mist the interior with light hairspray for hidden support.
Difficulty: Easy · Cost: $55–$90 for the cut
8. Deep Side-Part Layered Pixie
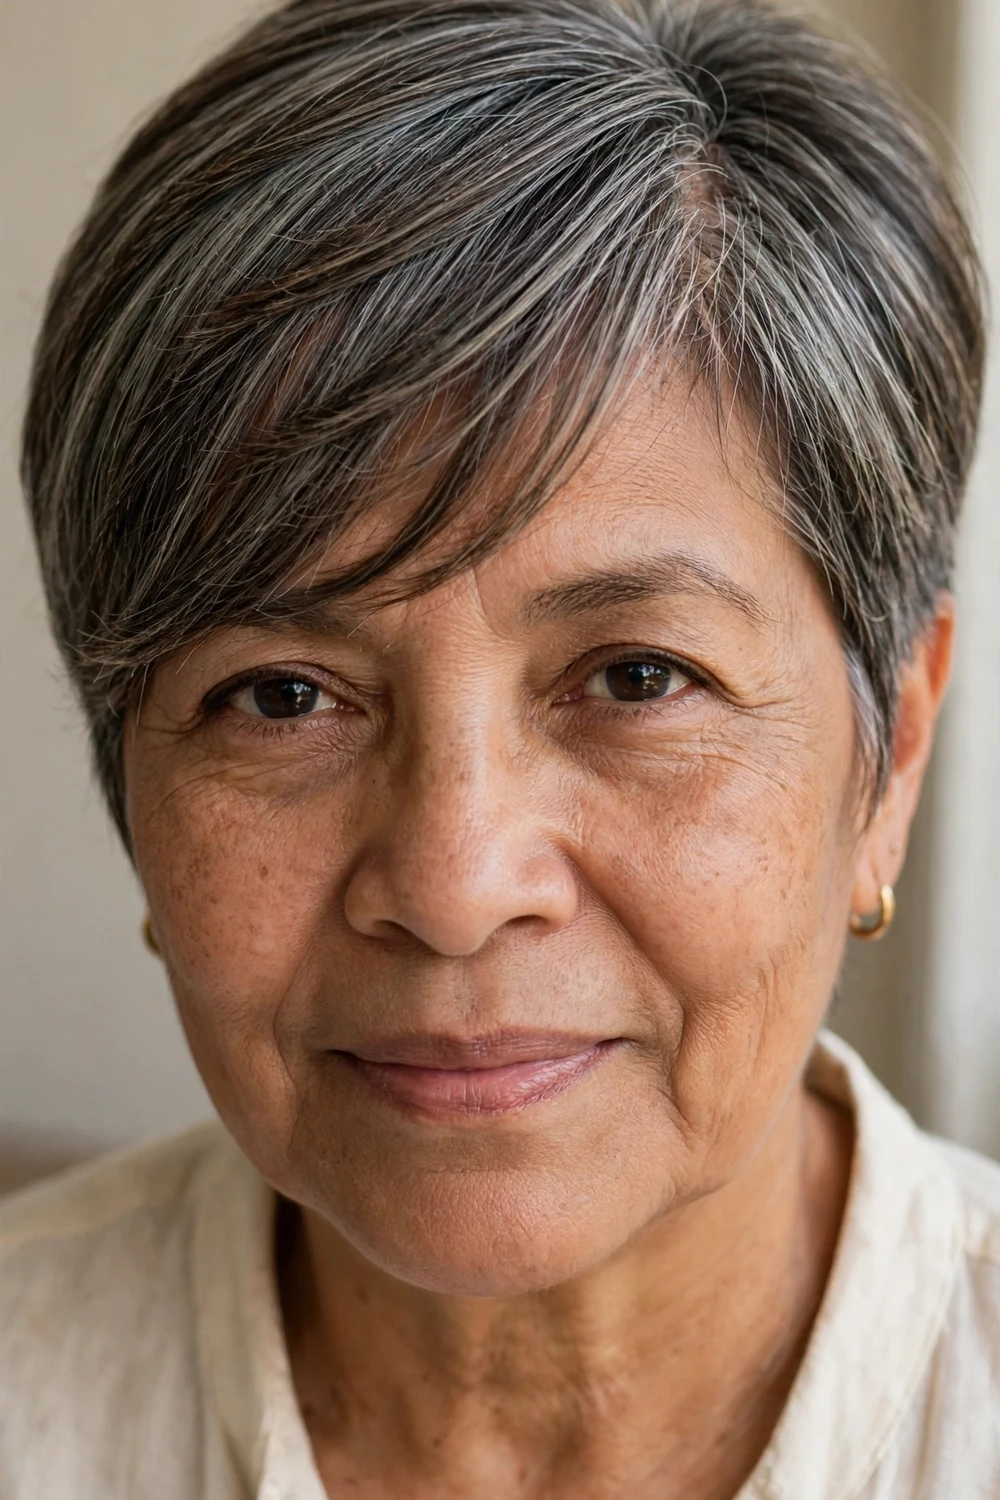
Moving the part deep to one side is the fastest volume trick for thin hair, and a layered pixie makes it permanent. The heavy side gets long, sweeping layers that fall across the forehead, while the short side stays tapered close. That contrast creates the illusion of much more hair. Layers through the top keep the long side from lying flat. This cut suits straight and slightly wavy hair best. Grow-out is simple: the long side just gets reshaped at each trim.
Try this: While hair is damp, set the deep part with a comb, then blow dry the long side up and over for a lasting sweep.
Difficulty: Easy · Cost: $45–$75 for the cut
9. The Classic Layered Wedge
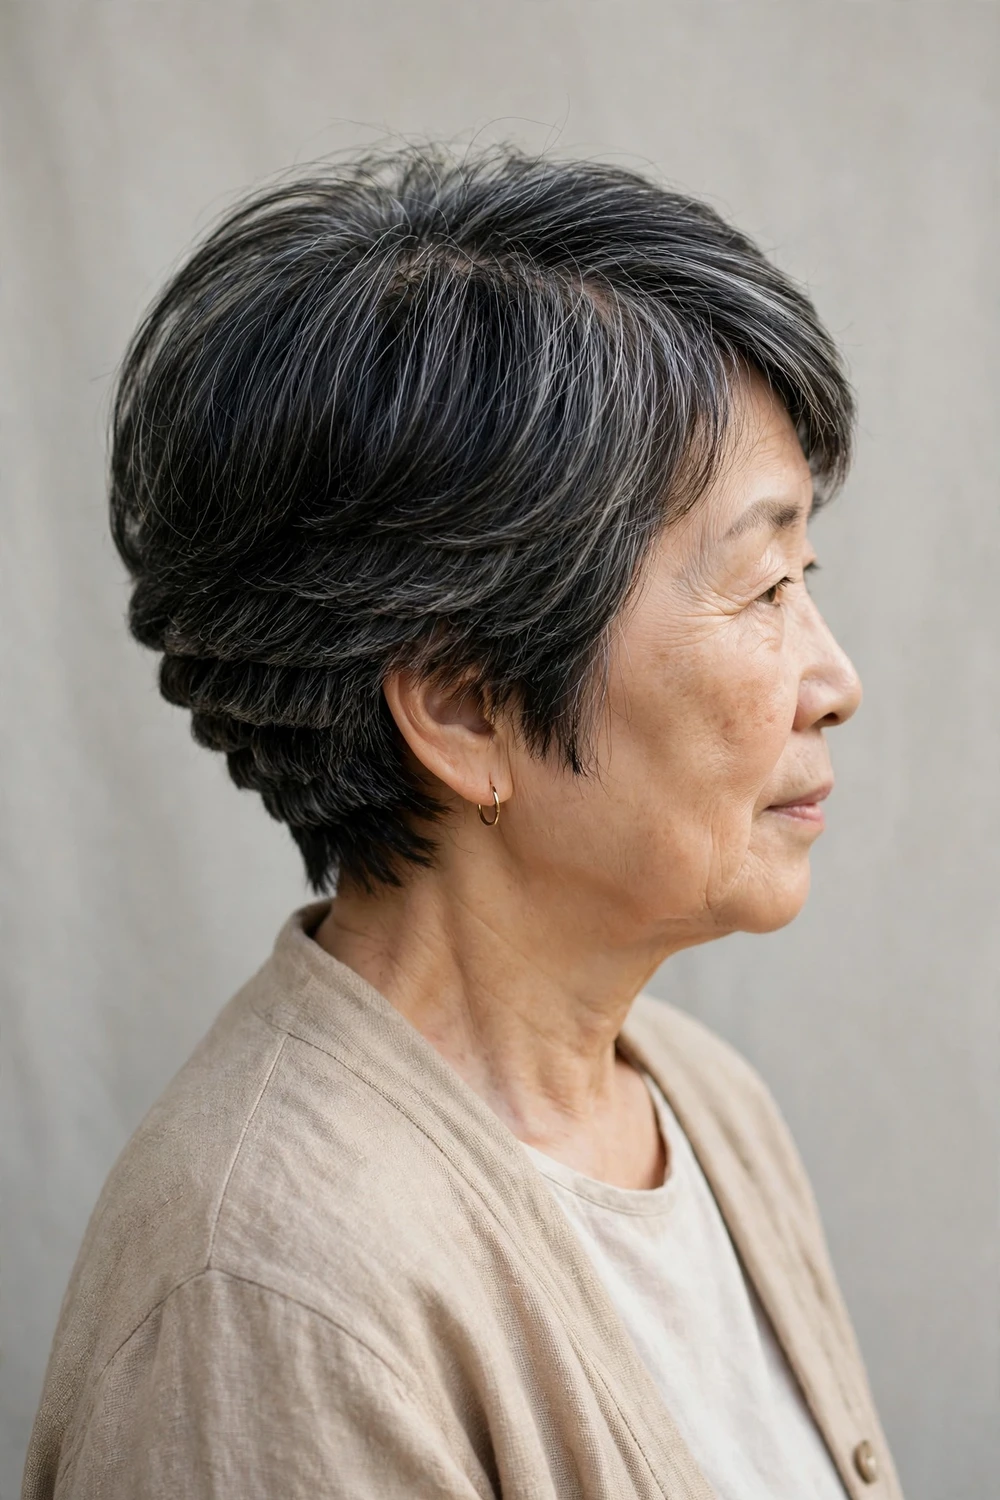
The wedge never really left, and for thin hair over 50 it still delivers. Tight graduated layers through the back stack the hair into a rounded shape that looks dense from every angle. The front can be worn at cheek or chin length with light layering to soften it. Because the shape is built into the cut, it needs almost no daily styling, just a quick blow dry to set the graduation. Ask for a “soft wedge with graduation, not a severe angle” so it reads current rather than dated.
Try this: Blow dry with a paddle brush following the rounded shape of the cut, directing the back sections upward.
Difficulty: Easy · Cost: $50–$80 for the cut
10. Wispy Layered Bob with Light Bangs

Light, wispy bangs plus soft layers make a bob feel airy instead of heavy on thin hair. The bangs are cut thin enough to see through slightly, which avoids the solid curtain that can highlight a thin hairline. Layers start below the cheekbones so the top keeps its fullness. This combination flatters most face shapes because the bangs shorten a long forehead while the layers add width at the cheeks. Keep the bangs trimmed every 3 weeks, since wispy fringe grows out fastest.
Try this: Dry bangs first, before the rest of the hair, using a small round brush and low heat for a soft, piecey finish.
Difficulty: Medium · Cost: $55–$85 for the cut
11. Tousled Layered Crop
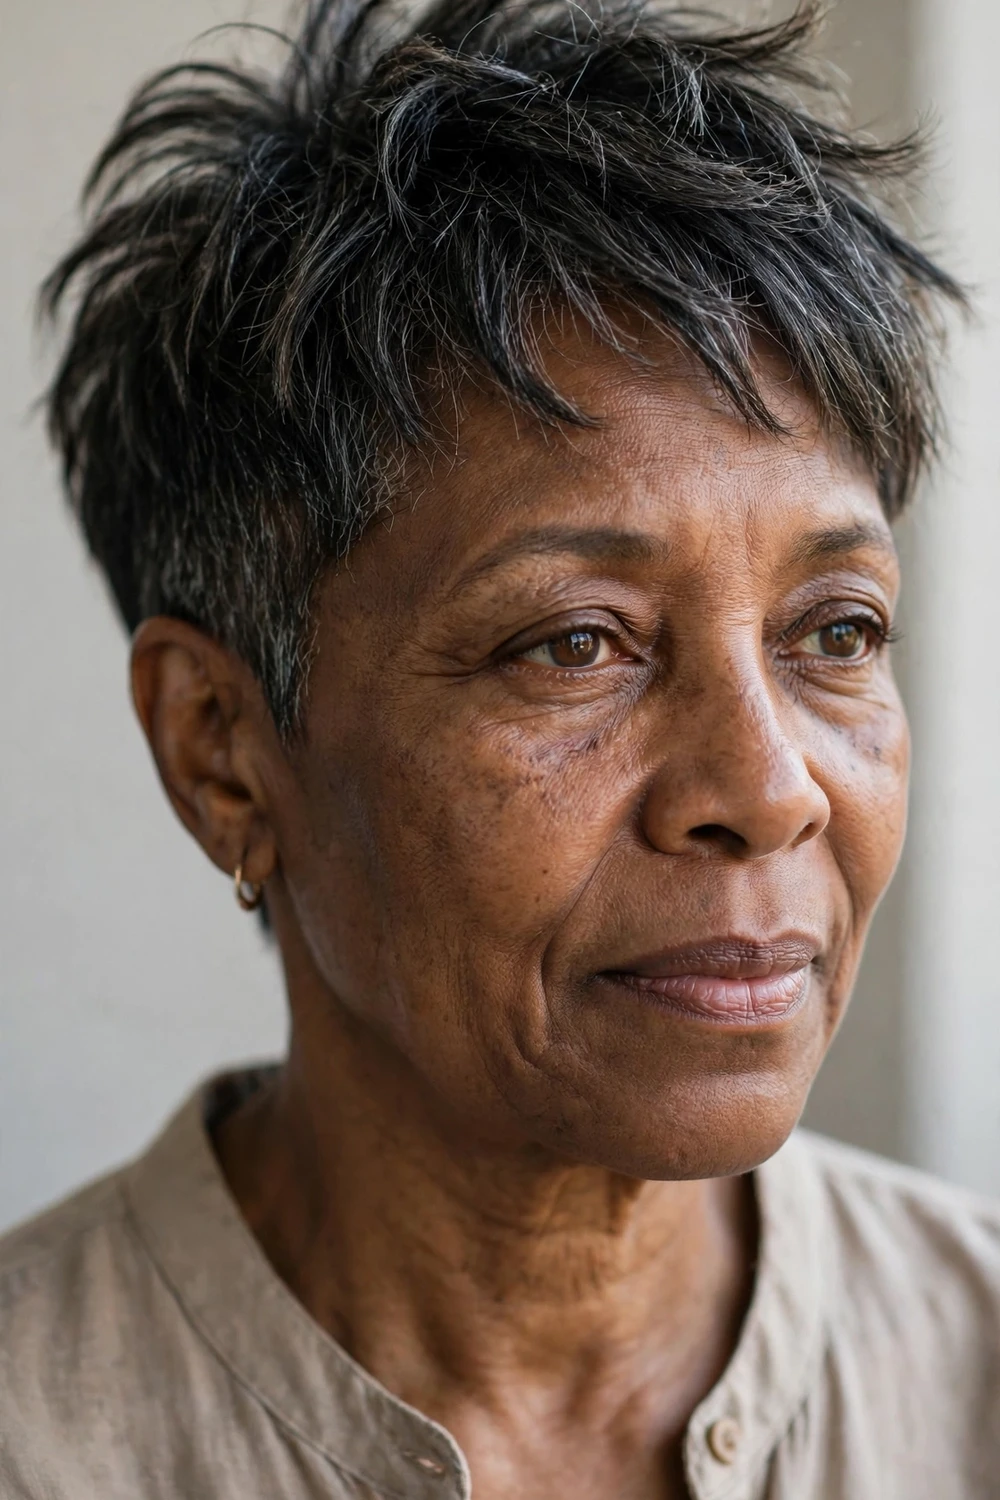
A short crop with deliberately tousled layers turns thin hair’s lightness into an advantage. The layers are cut with texture so the pieces separate and create the look of density through separation. Keep the top around 2 inches and the sides tapered but not skin tight. This is a wash-and-go cut: towel dry, add a little styling cream, and let it air dry. It suits active women who want a cut that looks styled with zero morning effort. Trims every 5 to 6 weeks keep the tousle from turning shaggy.
Try this: Apply styling cream to damp hair, then pinch and twist small sections in different directions as it air dries.
Difficulty: Easy · Cost: $45–$70 for the cut
12. Shoulder-Length Layers with Flipped Ends
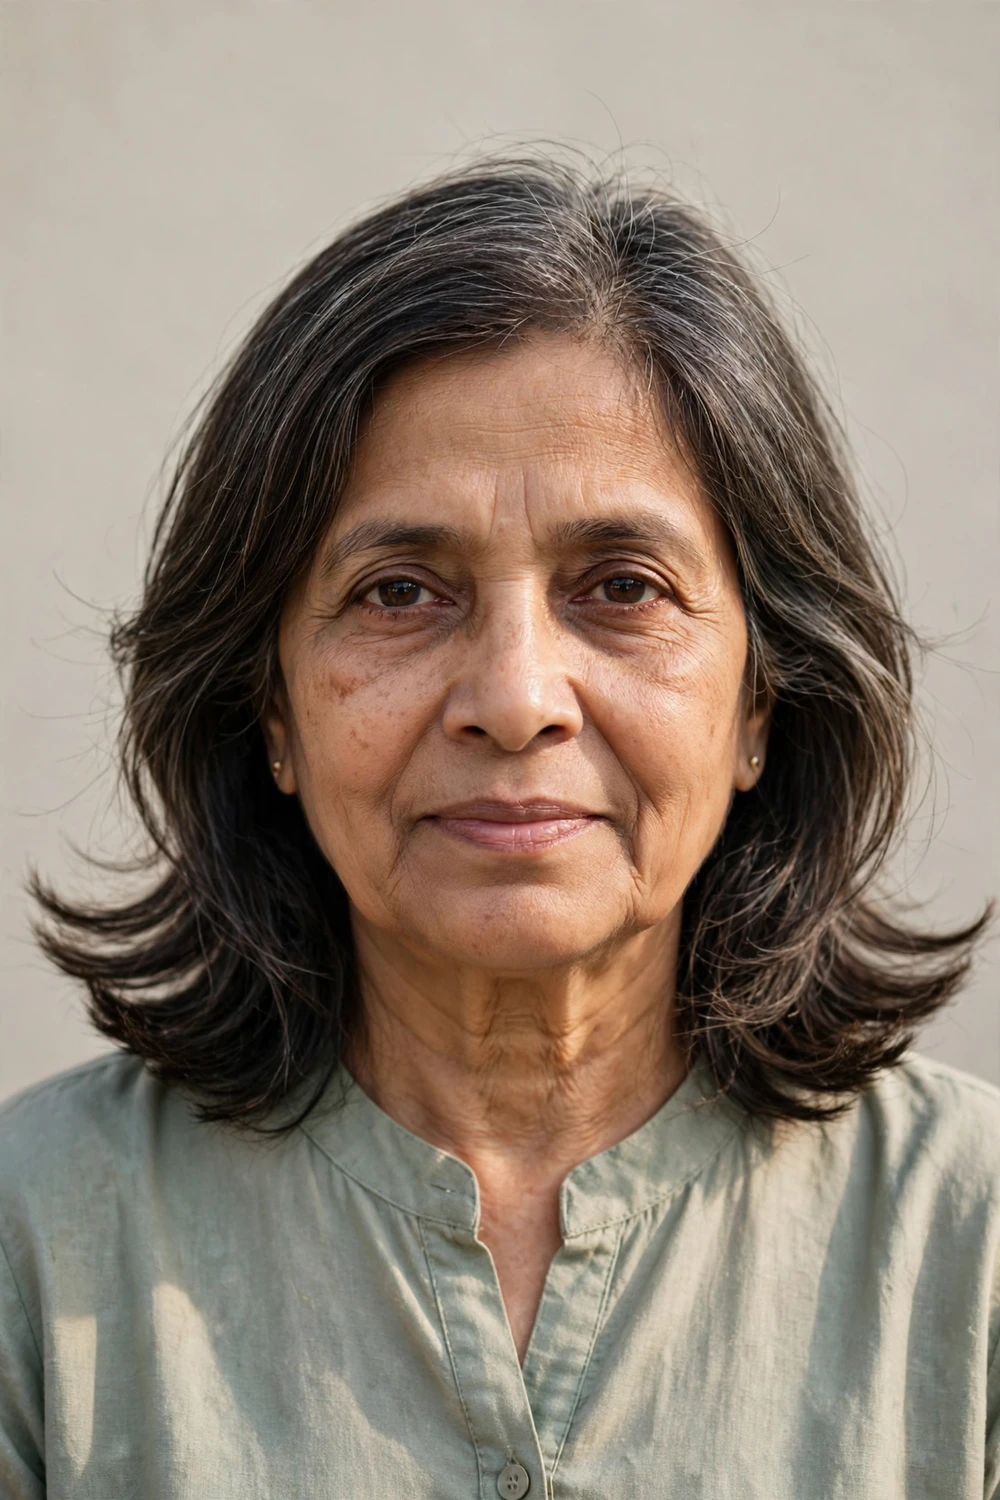
Flipping the ends outward adds horizontal width, which makes thin hair look wider and fuller at the bottom. The layers start at shoulder level so the top stays smooth, and only the last 2 to 3 inches flip out. A large round brush or a flat iron turned outward creates the flip in minutes. Use a heat protectant first, since thin hair shows heat damage quickly. This style works best on straight to slightly wavy hair and holds all day with a light mist of flexible hairspray.
Try this: Apply heat protectant, then run a flat iron through the ends while turning your wrist outward for a smooth flip.
Difficulty: Medium · Cost: $55–$85 for the cut
13. Choppy Layered Lob
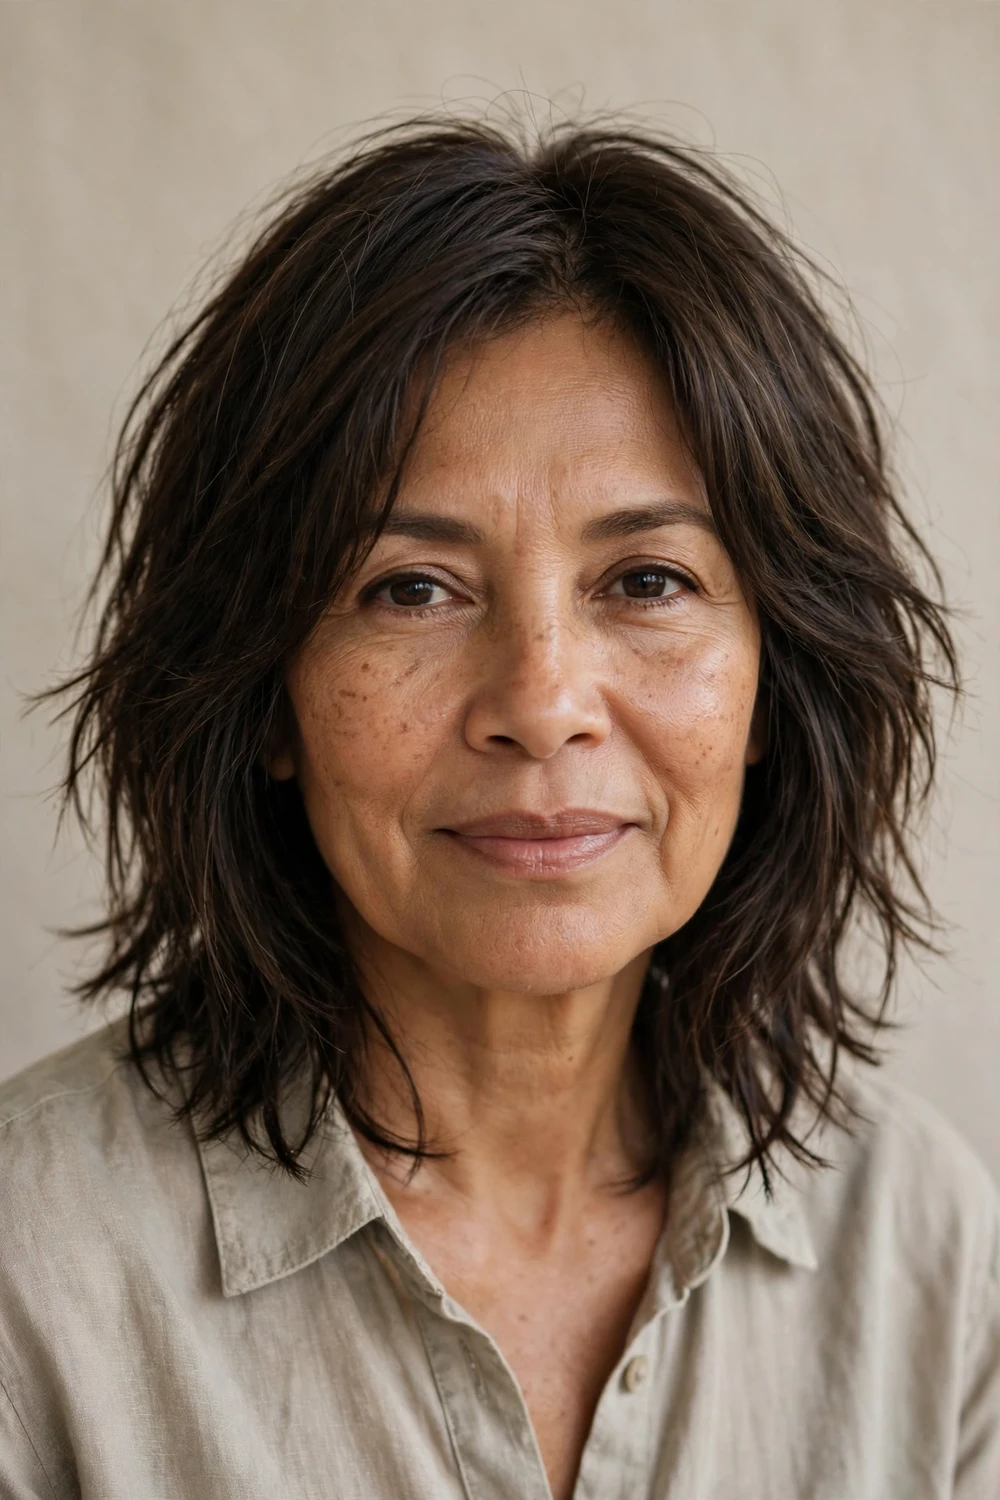
Choppy ends on a lob give thin hair an edgy texture that reads as thicker than blunt ends in the right hands. The trick is keeping the choppiness to the last inch of hair, so the interior keeps its density. Point cutting (snipping into the ends vertically) creates the piecey finish without removing real weight. This cut looks best slightly messy, so it suits women who like a relaxed style. A salt spray or texture spray adds grit that helps thin strands hold separation. If you prefer going shorter, see our short hairstyles for thin hair roundup for cropped options with the same approach.
Try this: Mist dry hair with texture spray, then scrunch the ends upward to set the choppy pieces.
Difficulty: Easy · Cost: $55–$85 for the cut
14. Graduated Bob with Stacked Nape
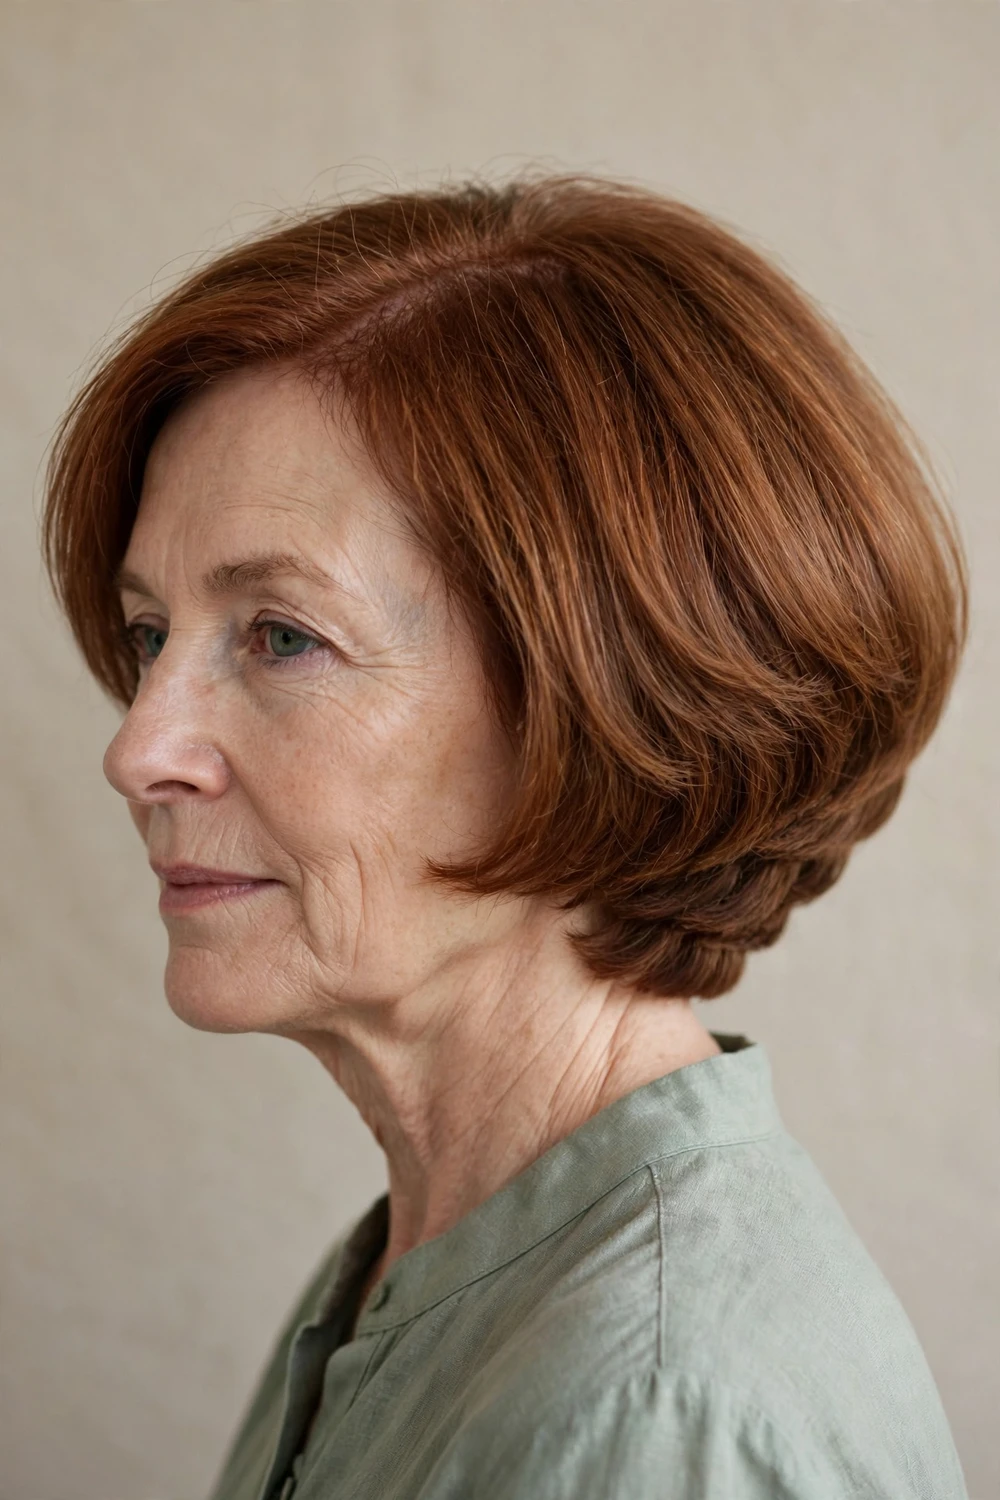
Graduation is the technical term for layers that get progressively shorter toward the nape, and on thin hair it builds a rounded shape that looks dense. The stacked nape acts as a foundation, pushing the longer top layers up and out. The front can fall anywhere from the jaw to the shoulders. This cut photographs well because the rounded silhouette reads as full hair from the back, where thinness often shows most. It needs a trim every 6 weeks to keep the graduation crisp, since grown-out graduation collapses flat.
Try this: Dry the nape first with a round brush, rolling each section under to lock in the stacked shape.
Difficulty: Easy · Cost: $55–$85 for the cut
15. Layers with Dimensional Highlights
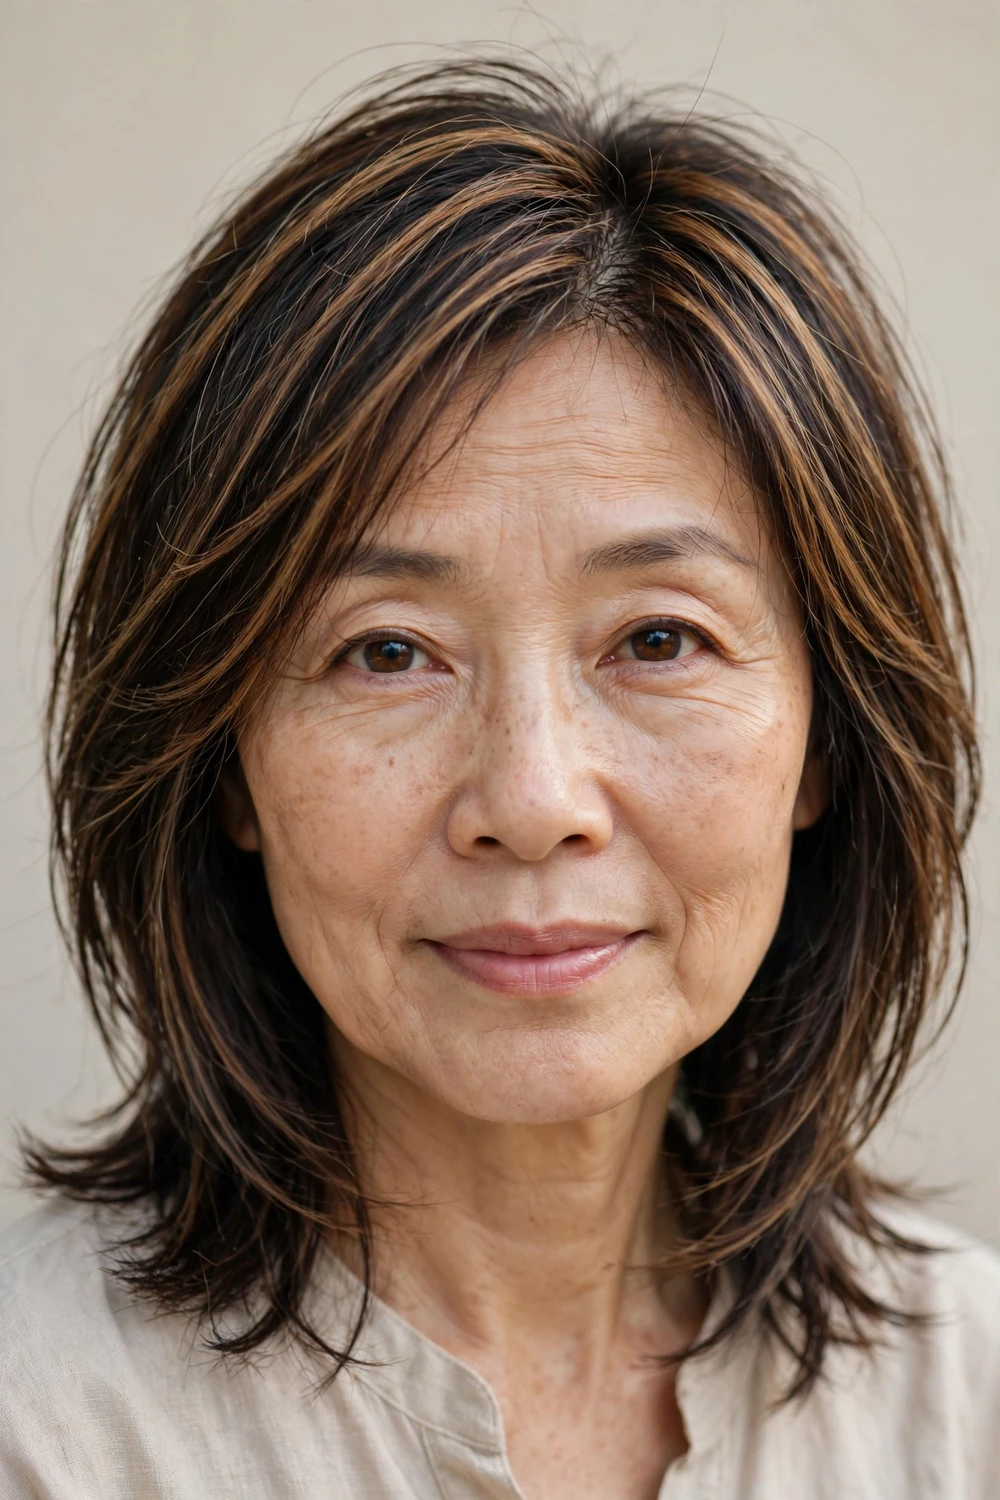
Color and cut work as a team on thin hair. Fine highlights woven through the layered sections create shadows and light that make strands look thicker than they are. Ask for babylights or subtle balayage one to two shades lighter than your base, focused on the crown and face-framing pieces where volume matters most. The layers give the color dimension somewhere to live, and the color gives the layers visible separation. This is the most expensive option here, but the grow-out is soft and root touch-ups stretch to 10 or 12 weeks.
Try this: Ask your colorist for “dimension through the crown, not all-over lightness” to keep the effect natural and low maintenance.
Difficulty: Medium · Cost: $55–$85 for the cut, $90–$160 for partial highlights
16. Curly Layered Cut for Natural Texture
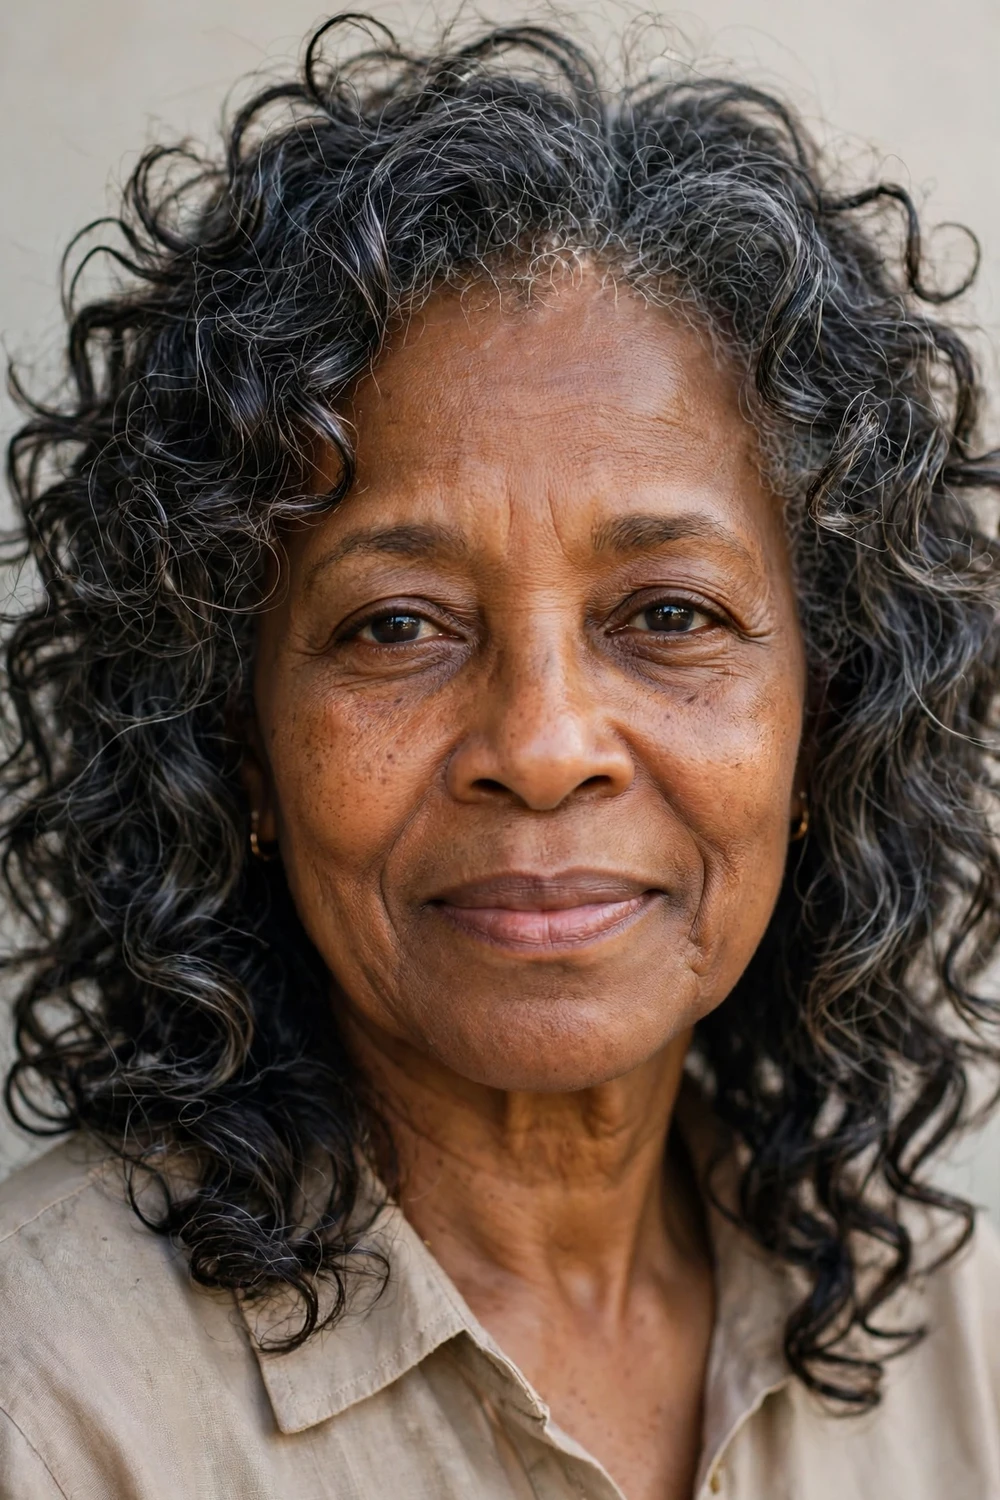
Thin curly hair needs layers more than any other texture, because one-length curls stack into a triangle that looks sparse at the top. Shattered layers, cut into dry curls one by one, let each curl spring up to its natural height. The result is even volume from roots to ends instead of flat roots and wide ends. Find a stylist who cuts curls dry, since wet curls shrink unpredictably. A curl cream scrunched into soaking wet hair, then air dried or diffused, defines the layers without frizz.
Try this: Scrunch curl cream into wet hair in sections, then diffuse on low heat with your head tilted for root lift.
Difficulty: Medium · Cost: $65–$100 for a dry curl cut
17. A-Line Layered Bob
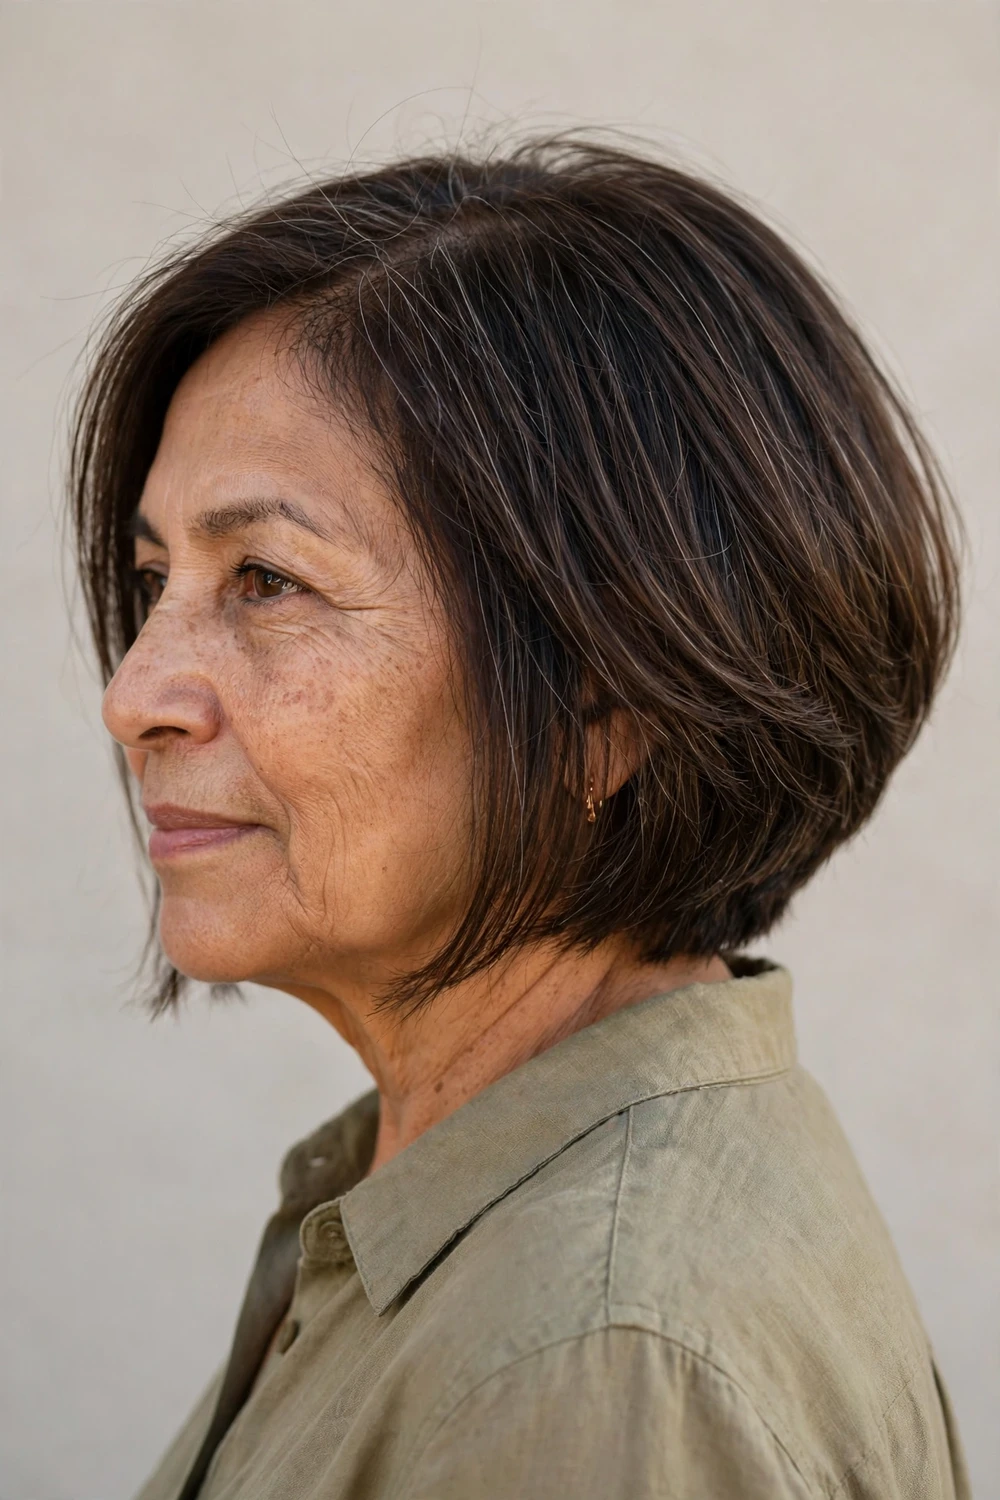
The A-line shape, shorter in back and longer in front, gives thin hair a strong geometric outline that looks intentional and full. Layers through the back keep the short section from lying flat against the head, while the longer front pieces draw the eye forward. Keep the angle moderate, about an inch or two of difference, so it stays wearable for everyday life. For more bob variations built on layering, our layered bob hairstyles guide breaks down each version in detail.
Try this: Flat iron the front pieces straight down to show off the angle, and round-brush the back for lift.
Difficulty: Easy · Cost: $55–$85 for the cut
18. Long Pixie with Layered Side-Swept Fringe
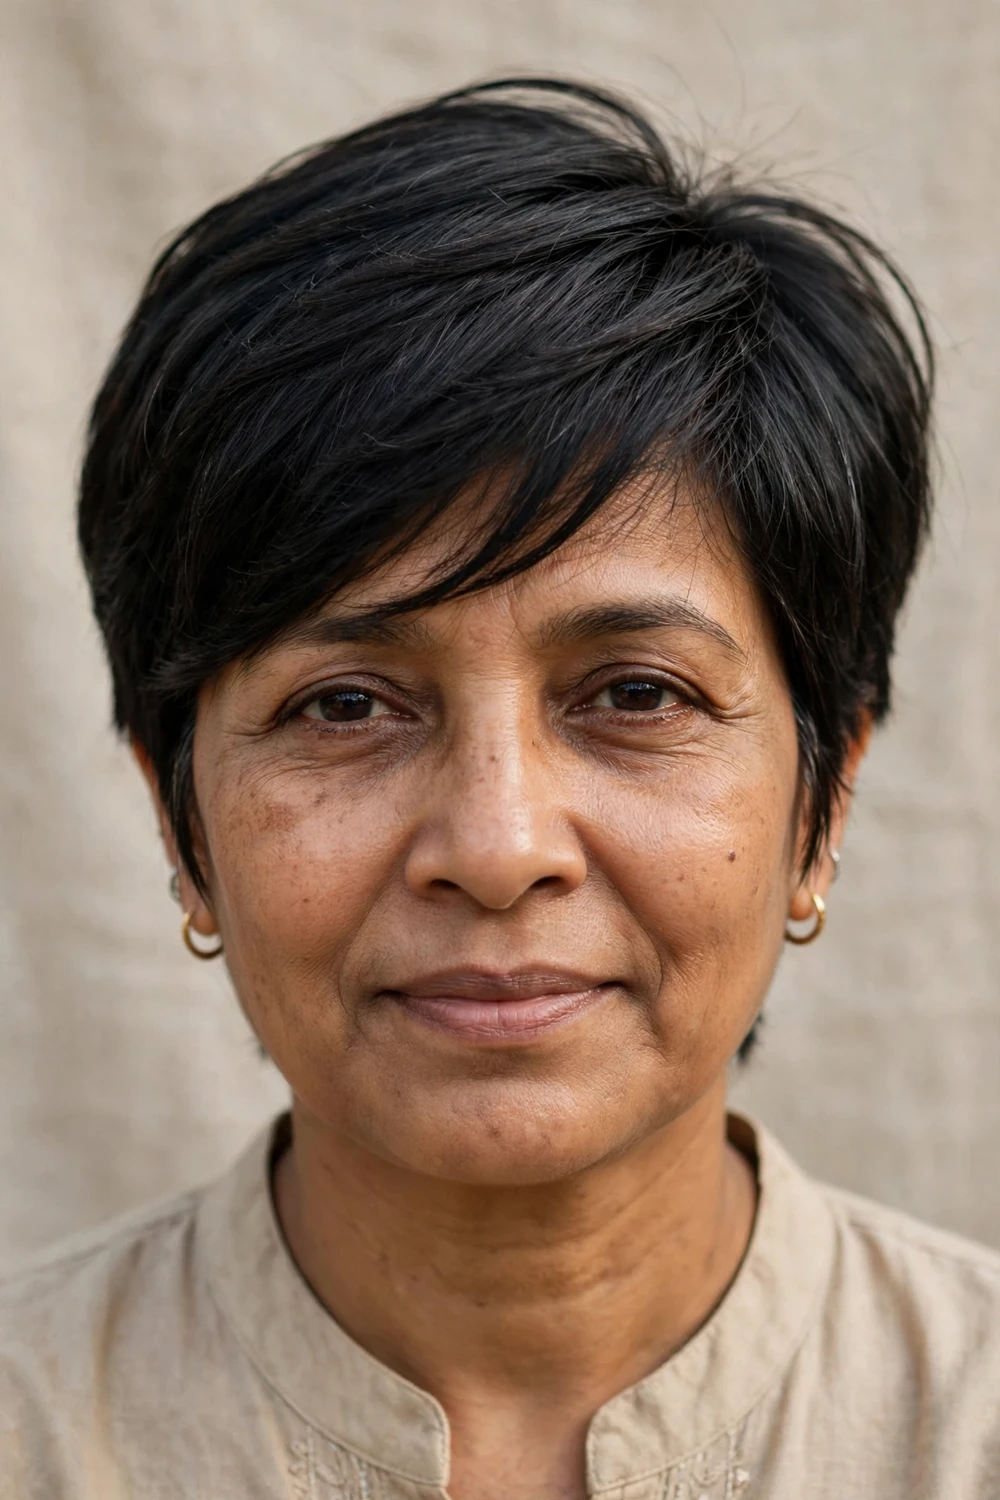
A grown-out pixie length with a layered fringe gives you pixie convenience with more styling options. The top keeps 3 to 4 inches of layered length that sweeps to the side, covering a thinning hairline while adding height. The back and sides stay tapered so the shape stays neat between trims. Layers through the fringe keep it from falling in a flat sheet. This is a good grow-out plan too: if you are growing a pixie into a bob, this stage looks deliberate rather than awkward.
Try this: Blow dry the fringe to the opposite side first for root lift, then sweep it into place.
Difficulty: Easy · Cost: $45–$75 for the cut
19. Feathered Shoulder-Length Cut
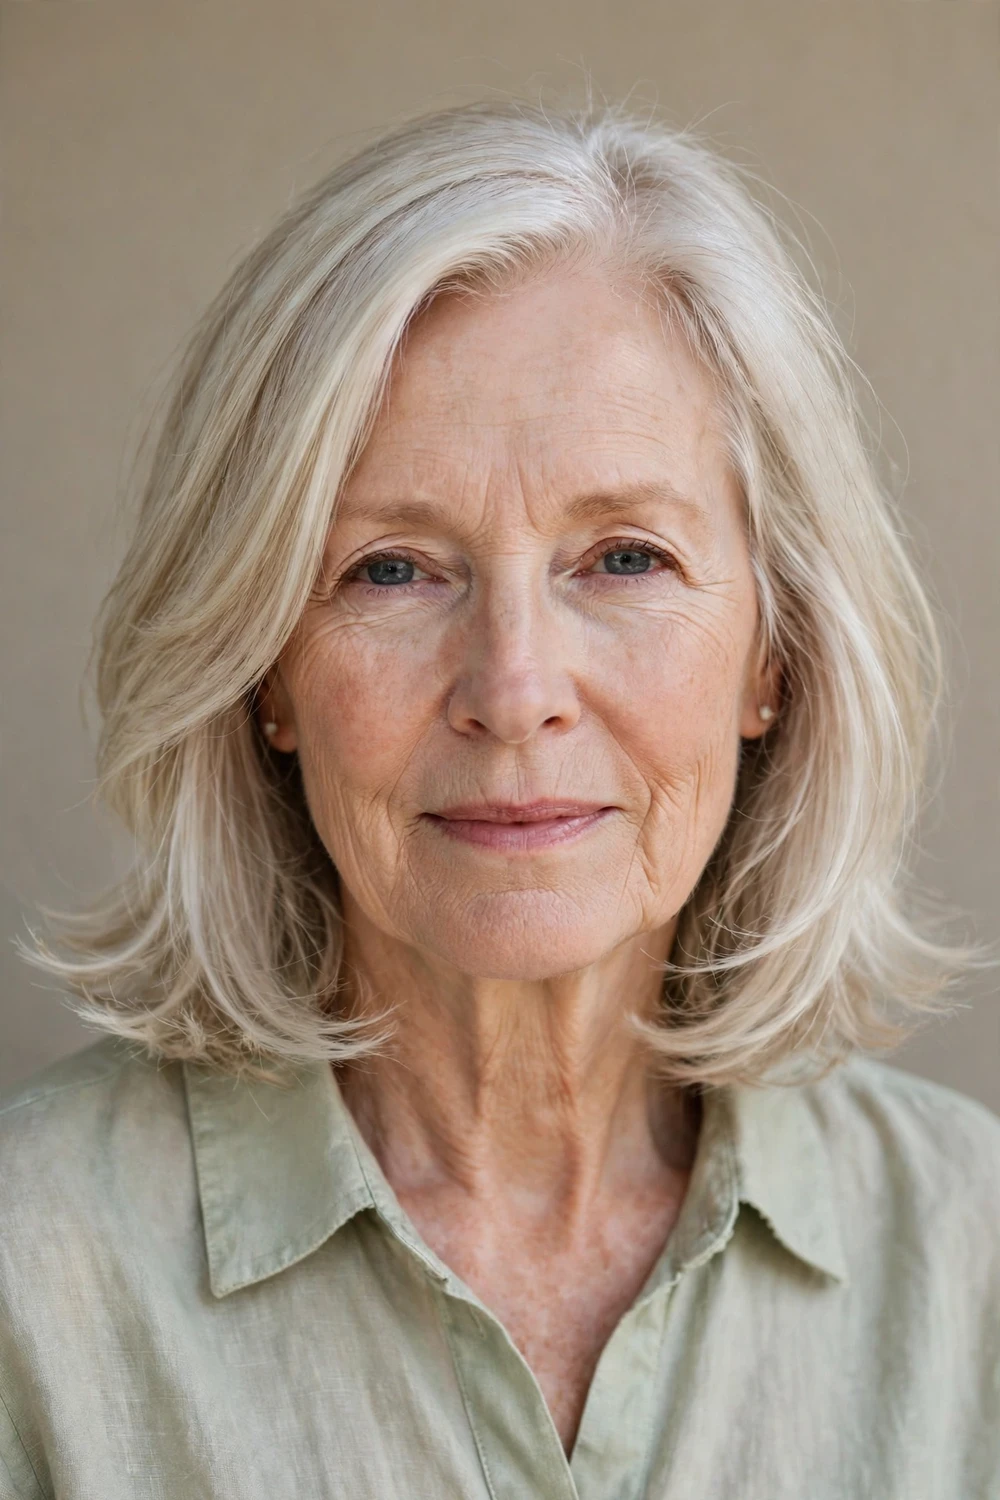
Feathering is a razor or shear technique that thins the very ends of each layer so they flick outward softly. On thin shoulder-length hair, light feathering through the bottom third creates airy movement without sacrificing the density above. The key word is light: heavy feathering will string out thin ends. Ask your stylist to feather only the last 2 inches and keep everything above solid. A round brush flicked outward at the ends sets the feathered shape in under 5 minutes.
Try this: After blow drying, run a large round brush through the ends turning outward, holding each section for 5 seconds as it cools.
Difficulty: Easy · Cost: $55–$85 for the cut
20. Round-Brush Layered Blowout Cut
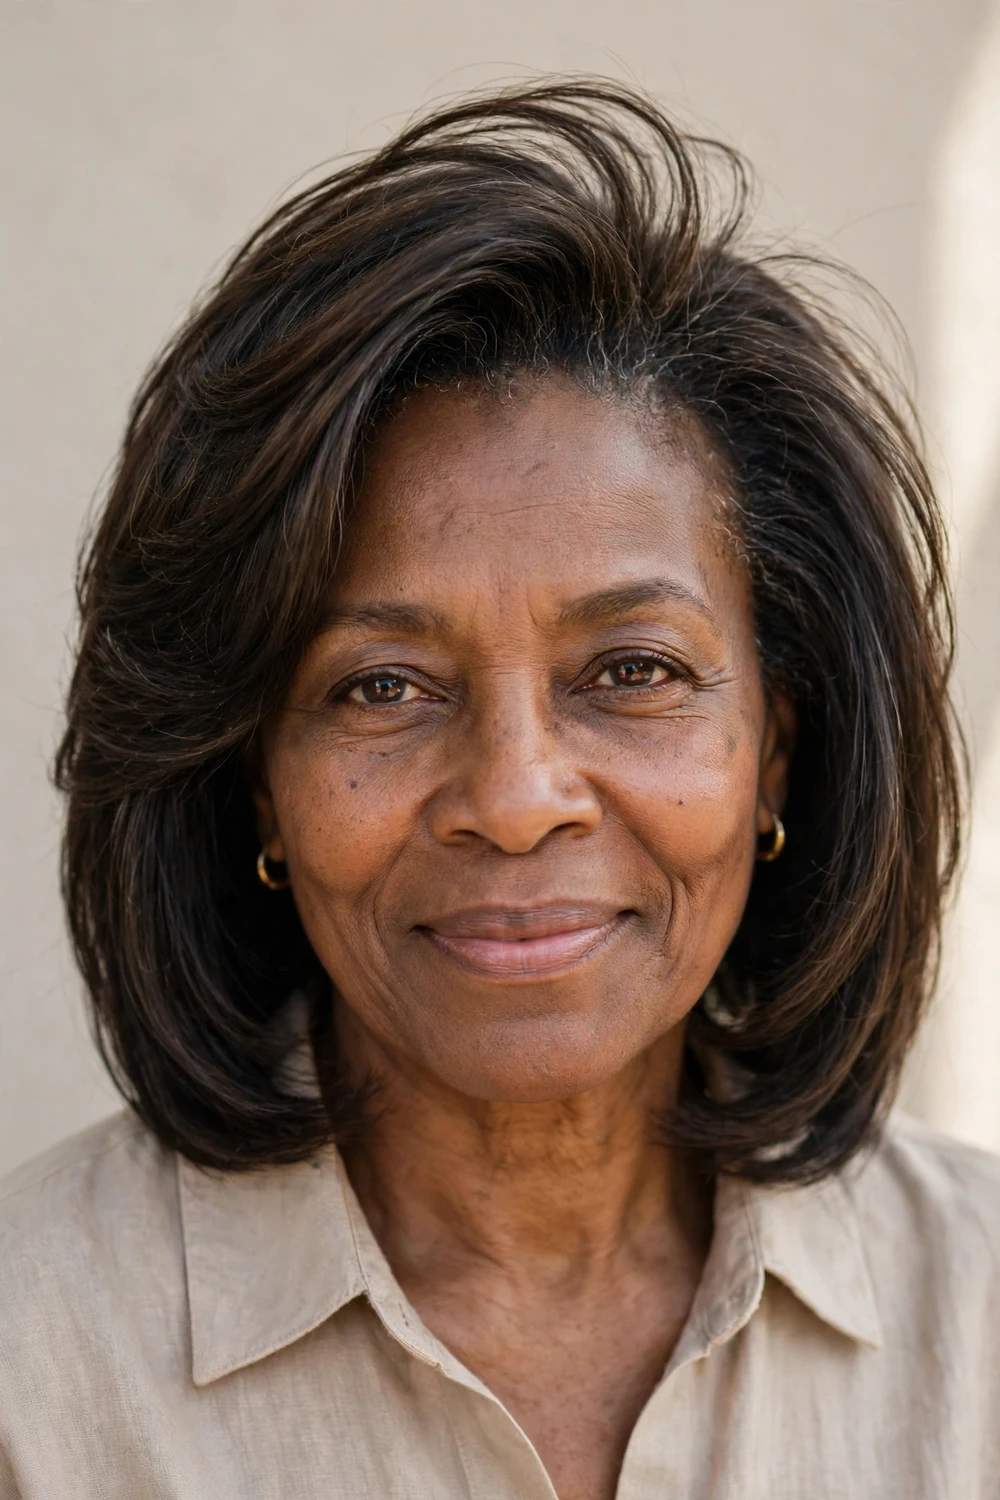
Some cuts are designed around the blowout, with layers placed exactly where a round brush will lift them. This cut puts short layers at the crown, medium layers through the sides, and a solid baseline at the ends, so a 10-minute blow dry produces salon-level volume. Tell your stylist you blow dry regularly and want the layers “cut for round-brush styling.” Use a heat protectant every time, since frequent blow drying is the main risk for thin hair. On non-wash days, a blowout holds its shape with just a refresh at the roots.
Try this: Always use heat protectant, then blow dry in sections with a medium round brush, rolling each section up and away from the face.
Difficulty: Medium · Cost: $55–$90 for the cut
What to Ask Your Stylist
Bring these exact phrases to your appointment so the cut comes out right the first time. For shorter layered options beyond this list, browse our short layered haircuts collection for cropped ideas that use the same volumizing logic.
- “Keep the perimeter strong.” This tells the stylist not to thin your ends, which is where thin hair loses density.
- “Interior layers, not surface layers.” Layers hidden under the top section add lift without visible choppiness.
- “Graduation at the nape.” Ask for this if you want a stacked or wedge shape with built-in volume at the back.
- “Point cut the ends, don’t razor everything.” Point cutting textures the last inch; over-razoring removes too much weight from thin hair.
- “How short can the crown layers go?” Shorter crown layers mean more lift, but going too short can expose the scalp on very thin hair. Let the stylist judge your density.
Also mention your styling routine honestly. If you air dry most days, say so, since some layered cuts need heat to show their shape. A good stylist will adjust the layering to match real life, not the salon chair.
Layered Cuts Compared
| Cut | Best for | Daily styling time | Trim cycle |
|---|---|---|---|
| Stacked bob | Flat nape, straight hair | 5 minutes | 6 weeks |
| Feathered pixie | Low-maintenance routines | 3 minutes | 5 weeks |
| Layered lob, blunt ends | Keeping some length | 10 minutes | 8 weeks |
| Textured shag | Natural wave, casual style | 3 minutes | 10 minutes |
| Ghost layers | Fear of losing density | 10 minutes | 8 weeks |
| Layered wedge | Hands-off styling | 5 minutes | 6 weeks |
| Curly layered cut | Natural curls or waves | 10 minutes | 12 weeks |
| Layers + highlights | Maximum fullness illusion | 10 minutes | 8 weeks (cut); 12 weeks (color) |
For a fringe that adds fullness without stealing density, these curtain bangs for fine hair over 40 were designed around the same thin-hair concerns.
Frequently Asked Questions
Do layers make thin hair look thinner?
They can, if they are the wrong kind. Long, wispy layers that remove weight from the ends will make thin hair look thinner. Layers that add volume keep the perimeter strong and place the shortest pieces at the crown or nape, where lift matters most. Tell your stylist you want volume, not just movement, and the layering will work in your favor.
What is the best layered haircut for thin hair over 50?
The stacked bob is the most reliable choice because its graduated nape builds volume into the cut itself. If you prefer short hair, a feathered pixie with long crown layers gives lift with almost no styling. For more length, a lob with a blunt perimeter and interior layers keeps ends looking full. The right pick depends on your styling routine and how short you are willing to go.
Should thin hair be razor cut?
Usually not. Razoring removes weight along the whole strand, which is the opposite of what thin hair needs. Point cutting with shears gives texture at the ends without hollowing out the interior. If your stylist reaches for the razor, ask them to use it only on the last inch of hair and keep the work minimal.
How often should layered thin hair be trimmed?
Every 6 to 8 weeks for most layered cuts. Thin hair shows grown-out layers faster than thick hair because there is less hair to hide the uneven lengths. Short pixies and crops need trims every 5 to 6 weeks, while longer layered cuts can stretch to 8. Bangs need their own trim every 3 to 4 weeks.
Can I have layers if my hair is both thin and fine?
Yes, with the right technique. Thin means low density and fine means thin strands, and the combination needs careful layering: blunt perimeter, interior layers, no aggressive thinning. Our bob hairstyles for fine hair article covers density tricks that pair well with the layered cuts above.
Want even more options? Our full collection of layered hairstyles for women over 50 covers 40 ideas for every texture and face shape.
Final Thoughts
Layers are not the enemy of thin hair. Badly placed layers are. Keep the outline strong, put the shortest pieces where lift matters, and find a stylist who understands the difference. Start with one of the safer options like the stacked bob or ghost layers if you are nervous, then go shorter or choppier once you see how your hair responds. If you want shorter age-specific options too, our short hairstyles for women over 50 roundup is a good next read.

