


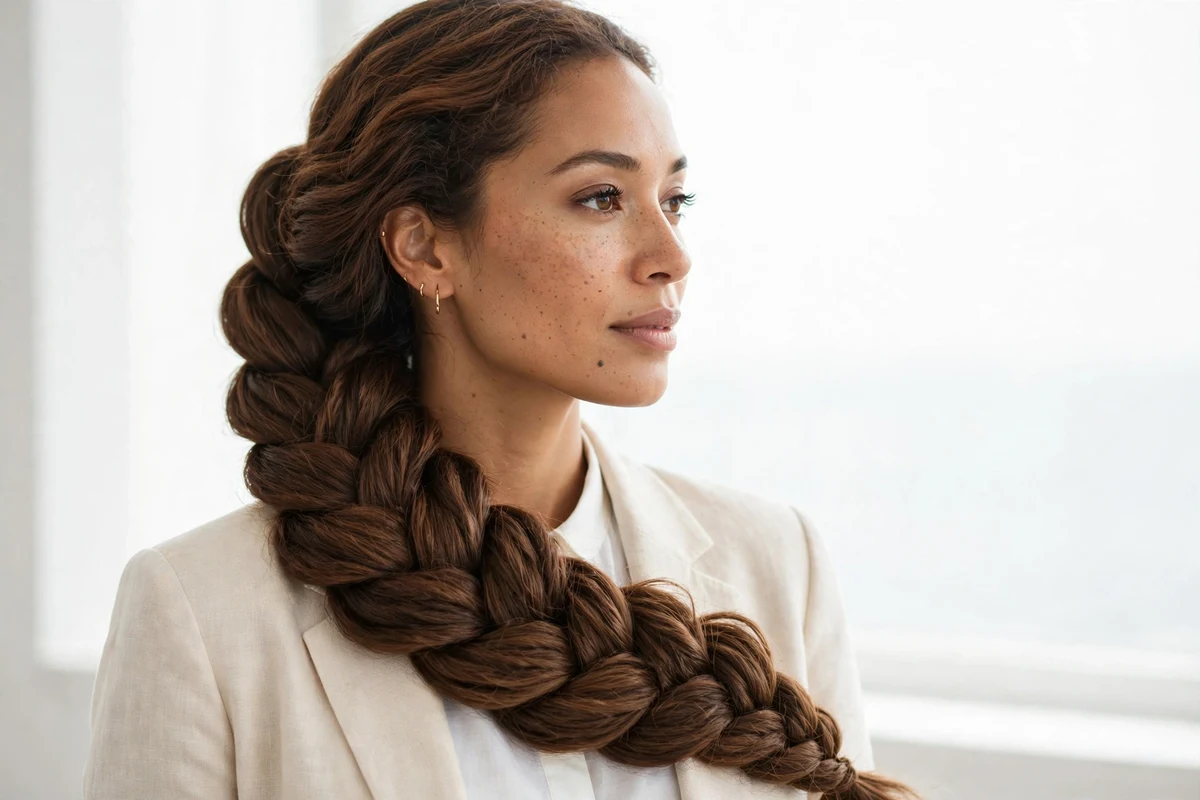
Thin hair and braids get along far better than most people think. The right technique turns fine strands into plaits that look thick, textured, and full of life.
This guide covers 25 braid hairstyles for thin hair, each chosen because it adds visible fullness rather than exposing thin spots. I have written dozens of braid guides, and thin hair is the texture I get asked about most. Below you will find the exact techniques, from pancaking to texture prep, that make the difference.
Quick answer: The best braid hairstyles for thin hair are pancaked French and Dutch braids, pull-through braids, loose fishtails, and two-strand rope twists. Prep with dry shampoo or texturizing spray, keep tension gentle, and widen each loop after braiding for instant fullness.
Quick Takeaways
- Pancaking (gently tugging each loop outward) is the fastest way to make a braid look twice as thick.
- Dry shampoo or texturizing spray gives slippery fine hair the grip braids need to hold.
- Dutch braids and pull-through braids build raised, dimensional plaits that flatter thin hair.
- Keep tension loose: tight braids compress hair, expose the scalp, and stress delicate roots.
- Knotless and low-tension styles protect fragile strands while still looking full.
Why Braids Work on Thin Hair
Braids add texture and dimension, which is exactly what fine hair lacks on its own. A plait breaks up flat, straight lengths into interlaced sections that catch light and shadow. That contrast is what the eye reads as fullness.
The technique matters more than the hair you have. A loose, widened braid on fine hair can look thicker than a tight braid on medium hair. Small choices, like where you part and how wide you pull each loop, decide how dense the finished style looks.
Braid-Day Prep for Fine Hair
Start with day-old hair when you can, since it grips better than freshly washed strands. If your hair is clean, work a texturizing spray or dry shampoo through the roots and mid-lengths before you begin.
Add light waves or bends with a curling wand if time allows. Texture is bulk, and pin-straight hair shows every gap. Blow-drying upside down with volumizing mousse at the roots gives the braid a fuller base to sit on.
Keep a small clear elastic, a few bobby pins, and a flexible-hold mist within reach. You will pancake each loop after braiding, starting from the bottom and working upward, then mist lightly to hold the fullness.
1. Pancaked French Braid
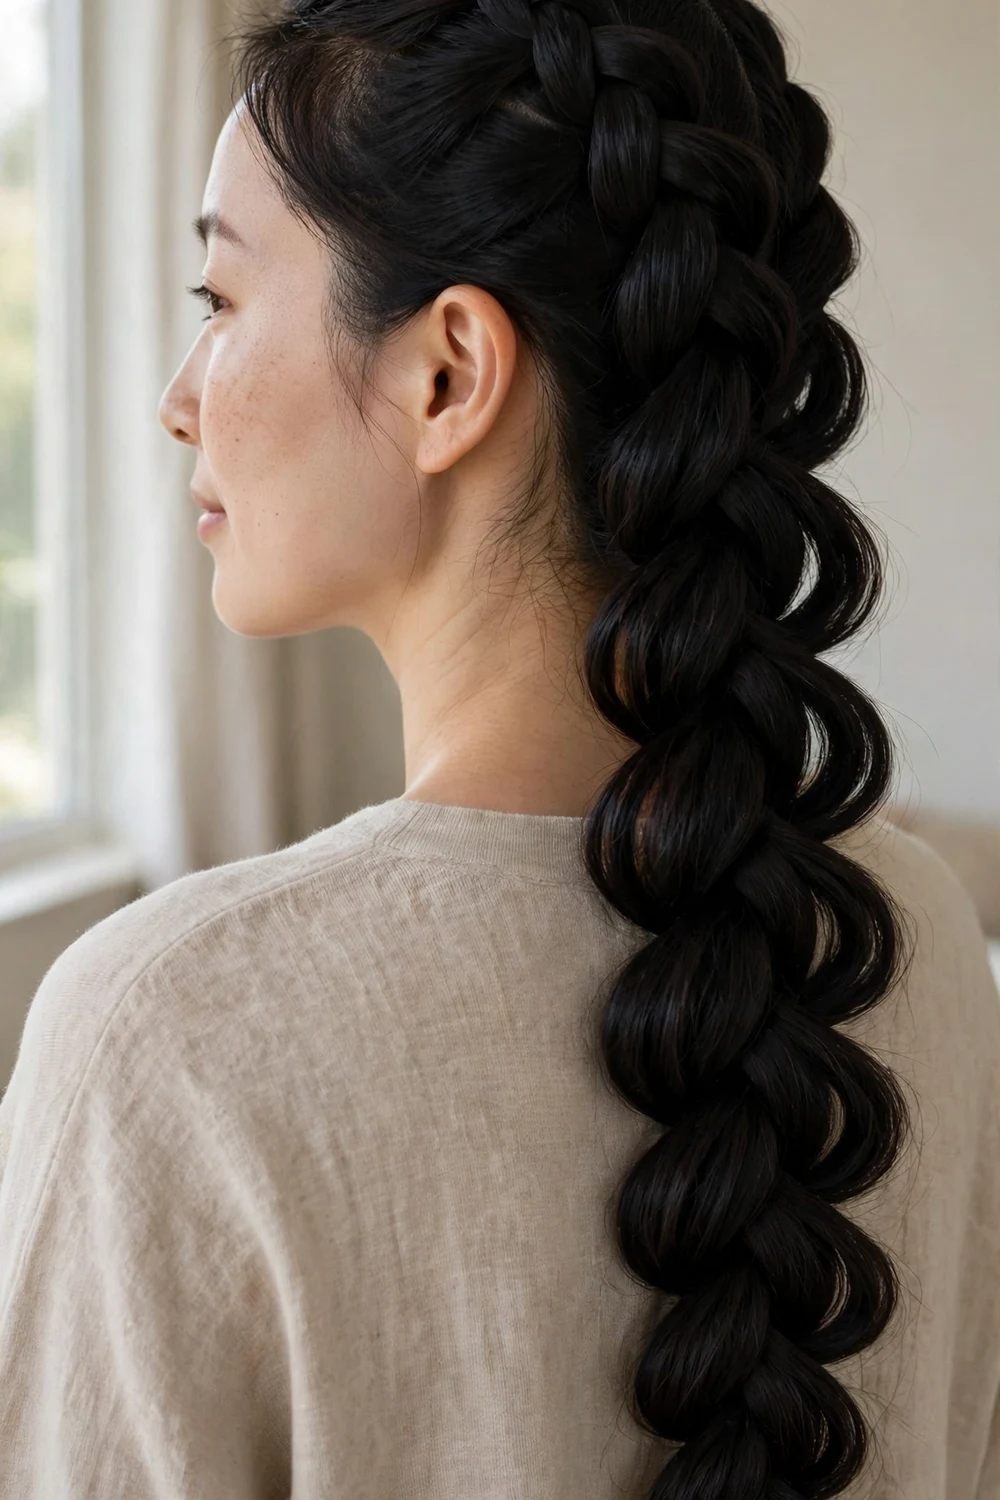
Start with the single most useful trick in this whole guide. Braid a classic French braid with light, even tension, then gently tug each loop outward from the bottom up. The plait widens dramatically and looks nearly twice as thick as it really is, with no added hair and no extra weight. Fine hair is ideal for this because the loops stretch easily. Secure with a clear elastic so the tie stays invisible.
Try this: Mist texturizing spray on the lengths before braiding, then pancake wider than feels natural. Thin hair can take more widening than you expect.
Difficulty: Easy. Cost: Free.
2. Pancaked Dutch Braid
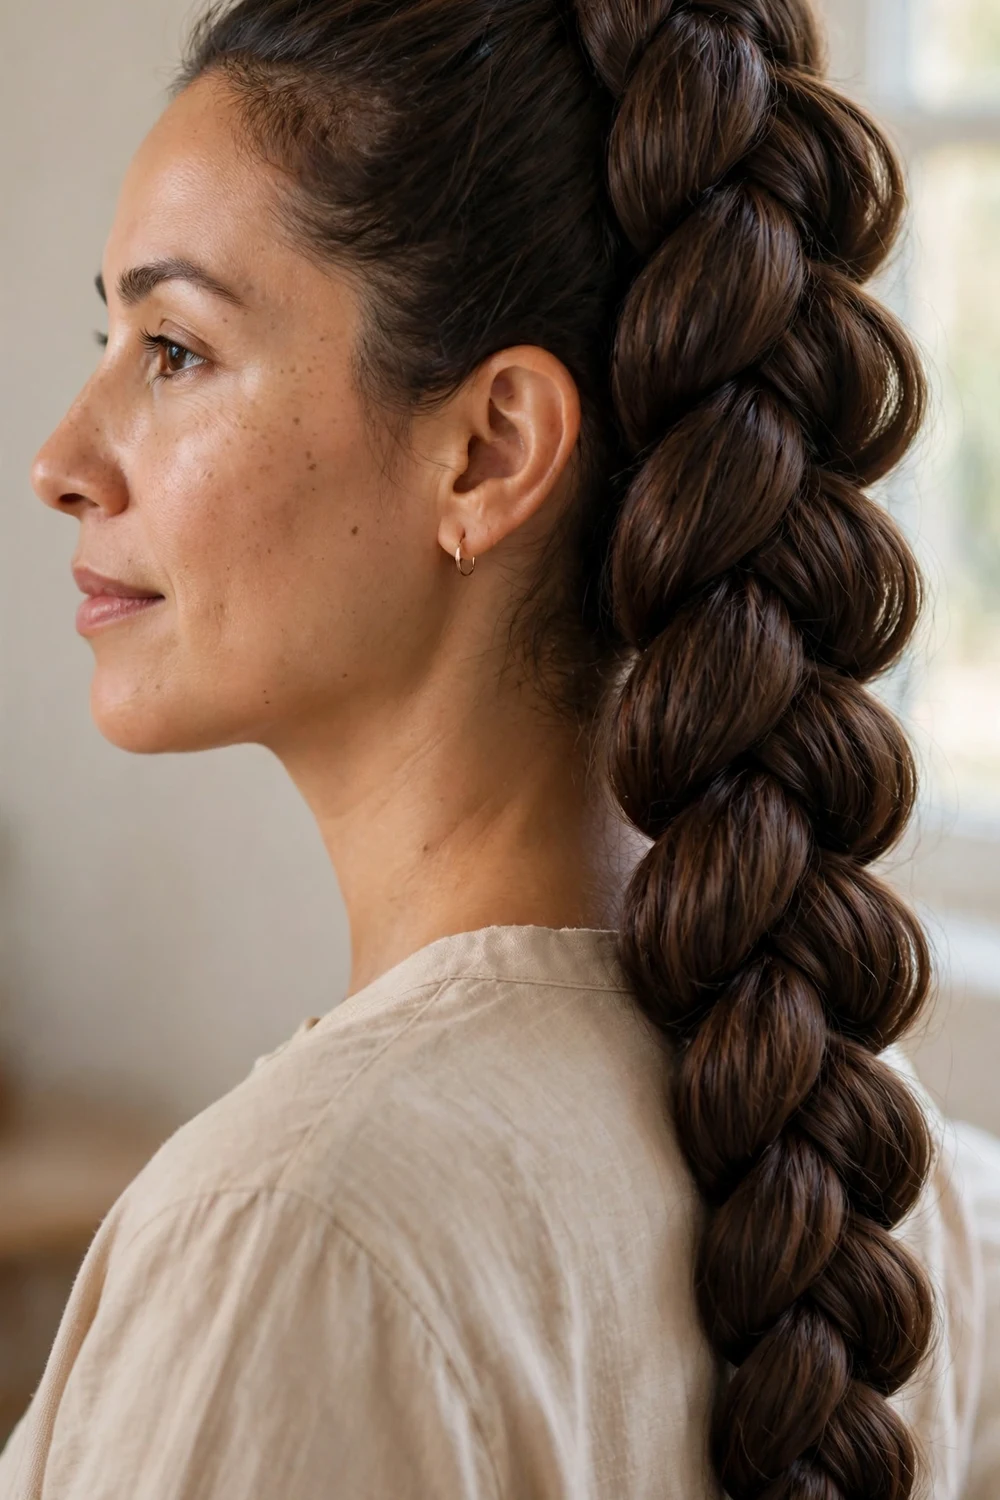
A Dutch braid weaves each section under instead of over, so the plait sits raised off the head with real height. That raised architecture reads as density even before you pancake. Keep the added sections small and consistent, since neat, even loops look thicker than chunky, uneven ones. Once finished, widen every loop with your fingertips. This is the thickest-looking single plait in this guide and the one to learn if you only learn one.
Try this: Braid with gentle but firm tension. Too loose at the start and the Dutch weave loses its raised shape.
Difficulty: Medium. Cost: Free.
3. Dutch Braid Ponytail
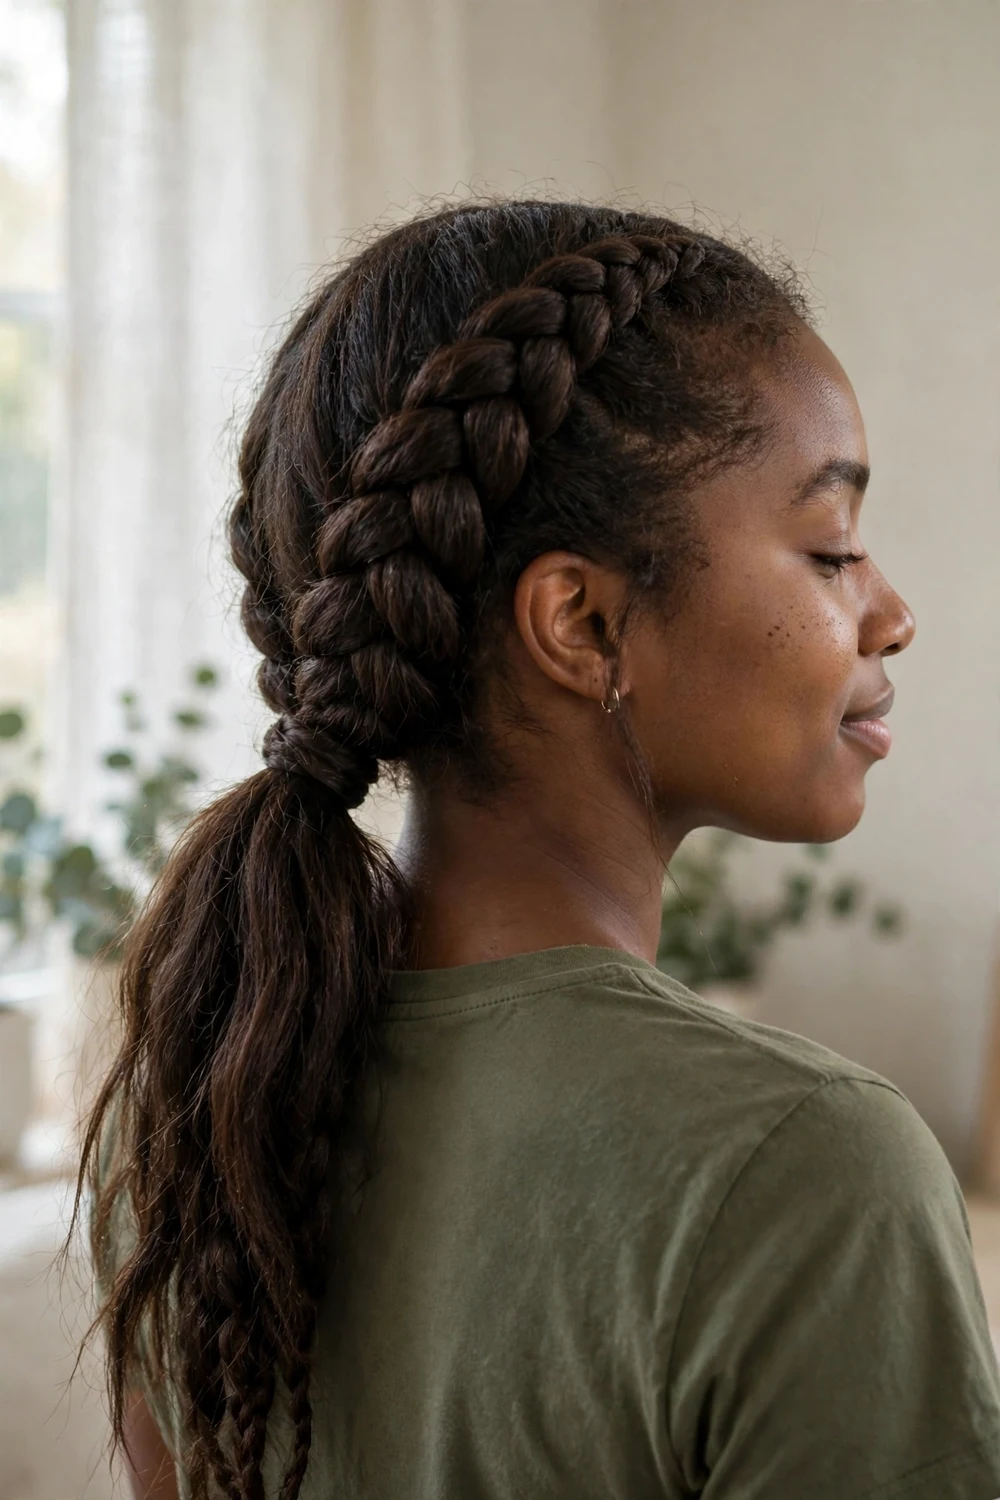
When you want the braid to do the visual work and the ponytail to stay simple, this is the style. Braid a Dutch plait from the hairline back along the crown, then gather everything into a ponytail where the braid ends. The raised weave up top adds height and texture while the pony stays sleek and swingy. Wrap a thin strand of hair around the elastic to hide it, which makes the ponytail itself look denser and more finished.
Try this: Tease the crown lightly before braiding. The extra lift at the base stops the style from looking flat.
Difficulty: Medium. Cost: Free.
4. Double Dutch Braids
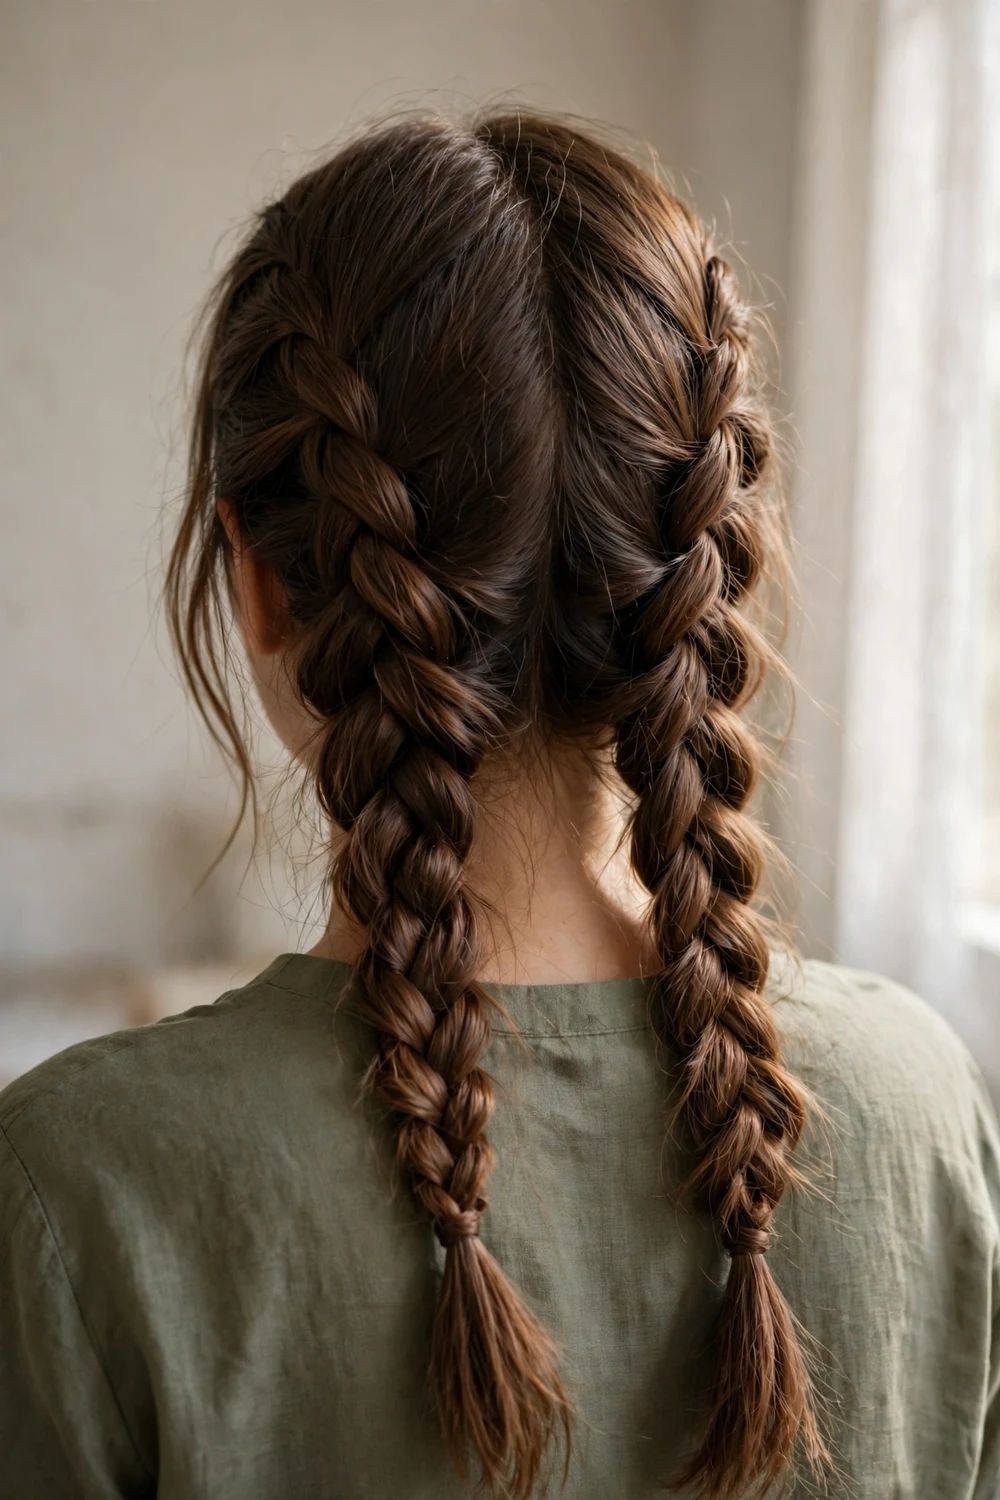
Splitting thin hair into two Dutch braids solves the sparse-tail problem. Each plait carries half the hair, so no single braid looks thin or lonely. The raised inside-out weave gives both braids built-in dimension that flat three-strand plaits cannot match. Wear them sleek and tight for workouts, or pancake each loop wide for a soft weekend look. A center part keeps the style balanced on both sides of the head.
Try this: Start braiding high on each side so the plaits hug the scalp. Loose, low starts tend to slip on fine hair.
Difficulty: Medium. Cost: Free.
5. Pull-Through Braid
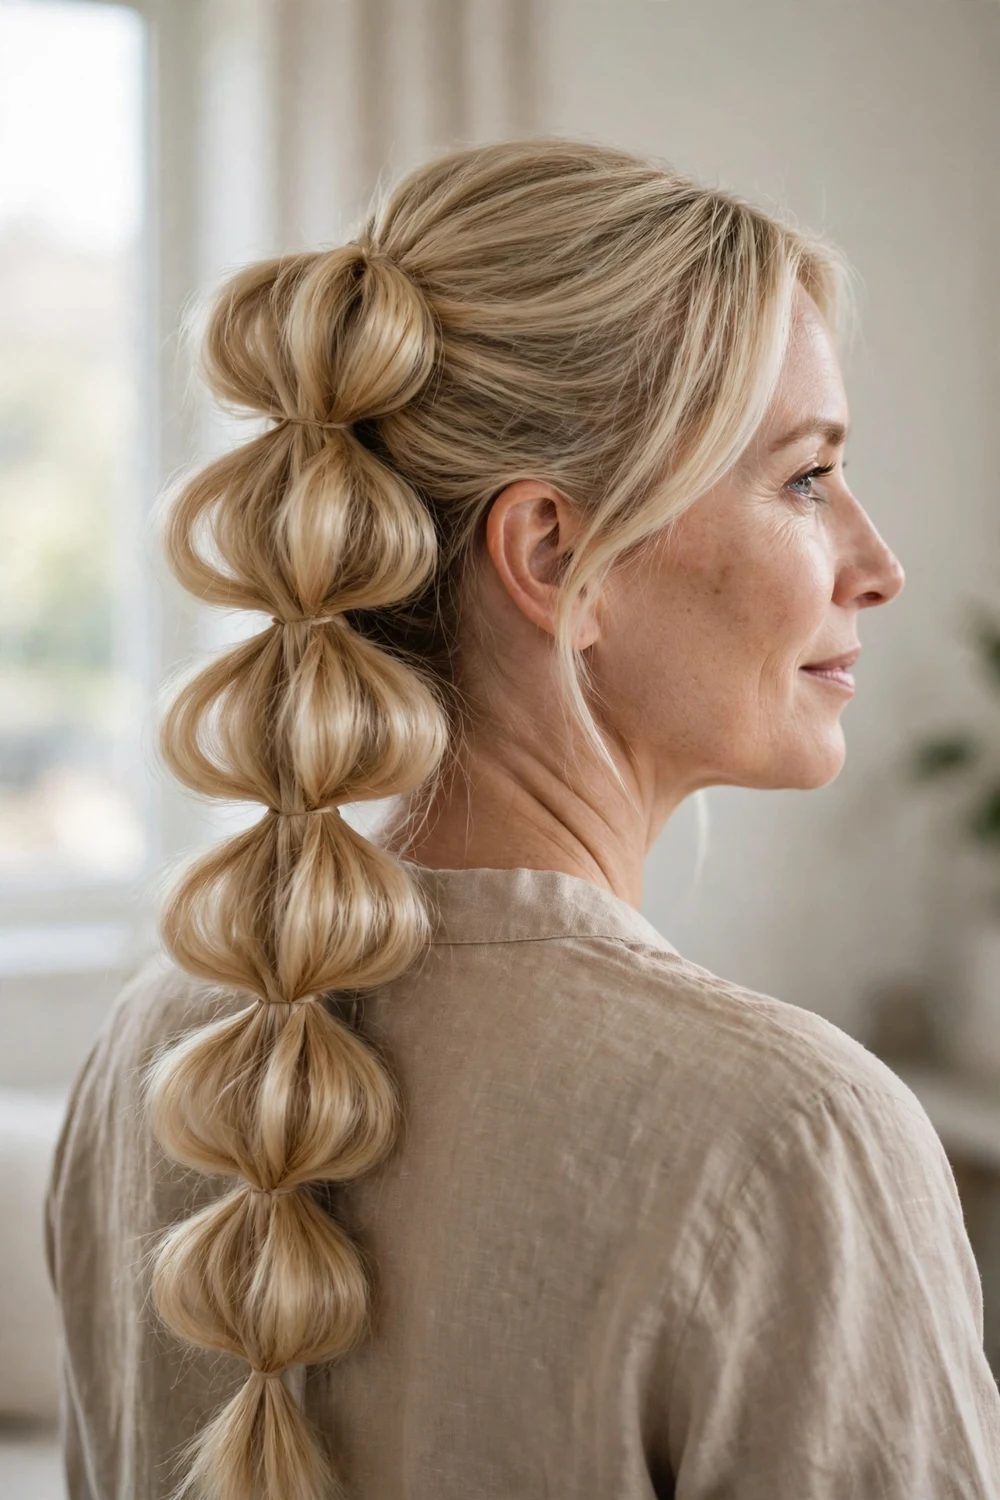
Here is the optical illusion of the braid world. A pull-through braid is built from a series of looped ponytails stacked down the back, with each ponytail split and pulled around the next. Every loop puffs outward, so the finished plait looks dramatically thicker than your actual density. If you can make a ponytail, you can make this braid. No real braiding skill is needed, and thin hair is no obstacle at all.
Try this: Use small clear elastics and puff each loop before adding the next one. The volume builds as you go.
Difficulty: Easy. Cost: A few dollars for clear elastics.
6. Loose Fishtail Braid
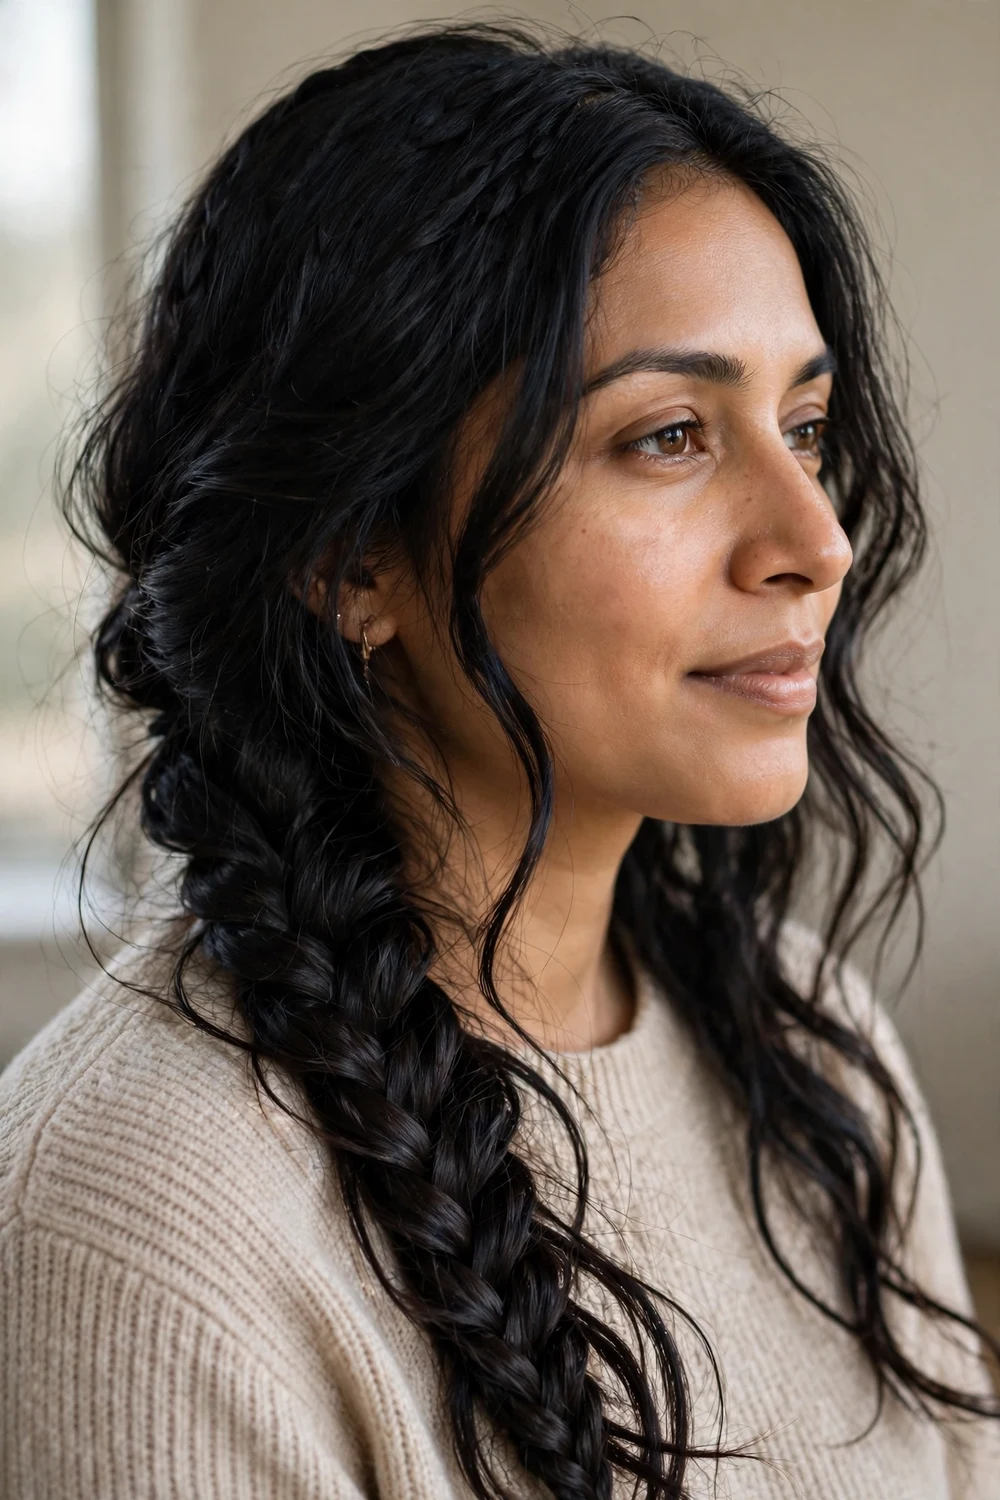
The fishtail’s fine, interlaced two-strand pattern creates dense surface texture that disguises how little hair is actually there. Worn loose over lightly waved hair, the weave looks intricate and deliberately undone rather than sparse. Keep it soft and slightly messy: neat, tight fishtails can look thin, while a relaxed plait reads as full. This braid takes a few minutes to learn but repays the practice every time. A light mist of flexible-hold spray keeps the tiny sections from slipping apart.
Try this: Take small, even sections and pull them apart generously at the end. Small sections make a denser pattern.
Difficulty: Medium. Cost: Free.
7. Side-Swept Fishtail Braid
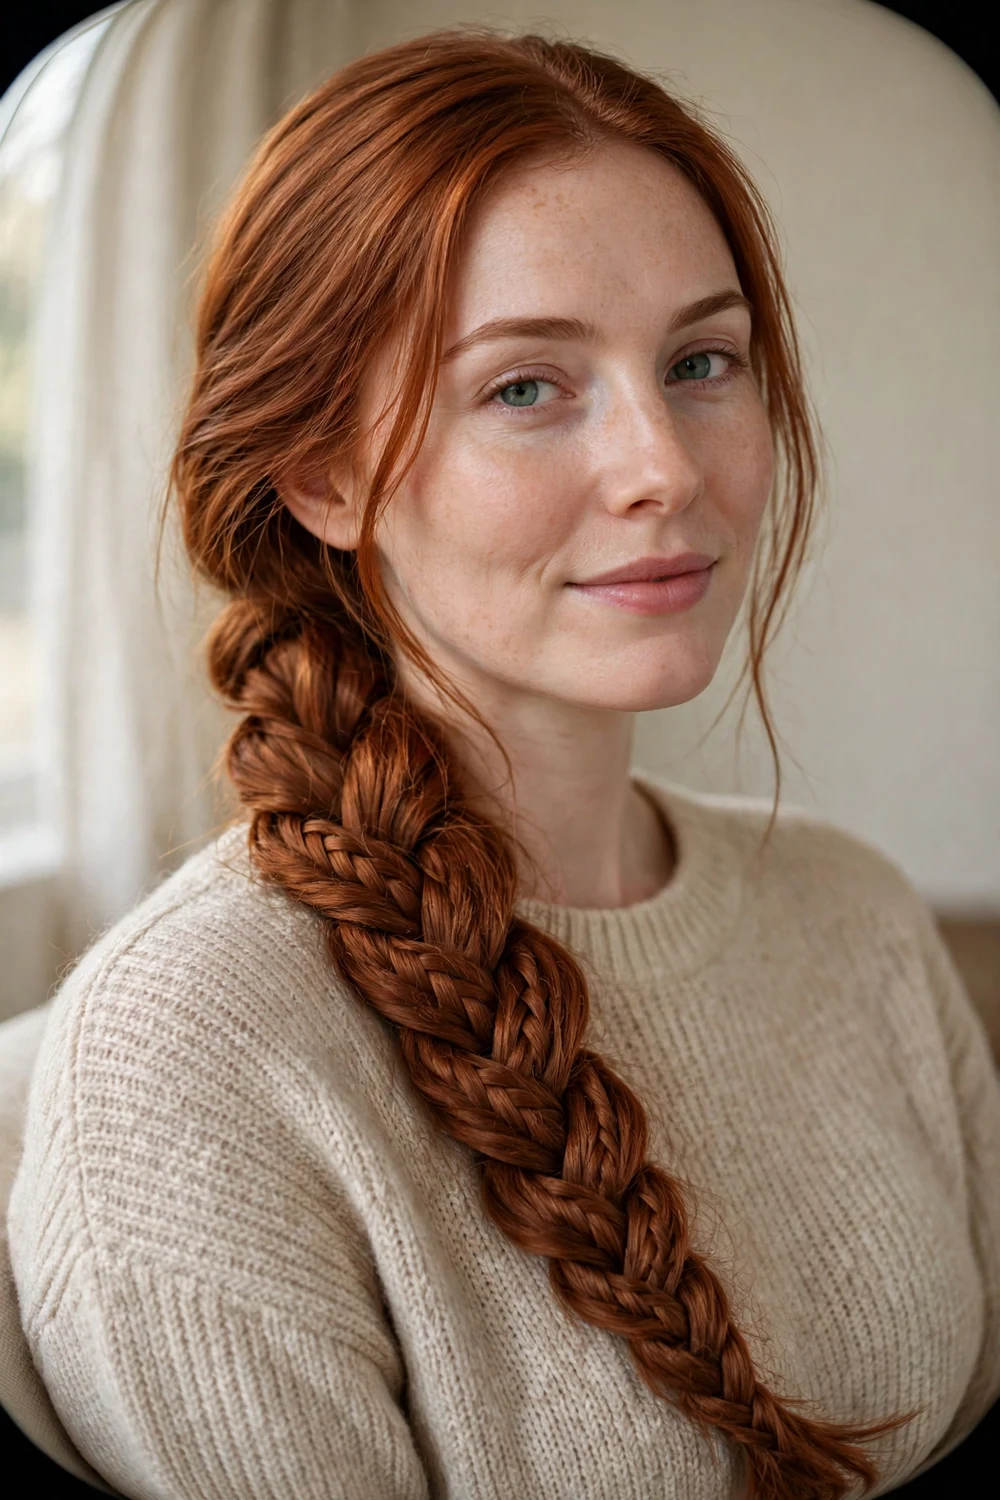
Sweeping a fishtail over one shoulder gathers all your hair’s visual weight into one textured rope. The diagonal line draws the eye across rather than down, which makes the braid look wider and more substantial than the same plait worn down the back. It reads as polished enough for evenings out but takes the same simple two-strand technique as any fishtail. A deep side part sets the direction before you start.
Try this: Braid with your head tilted slightly to the side. The plait settles over the shoulder instead of sliding back.
Difficulty: Medium. Cost: Free.
8. Messy Side Braid
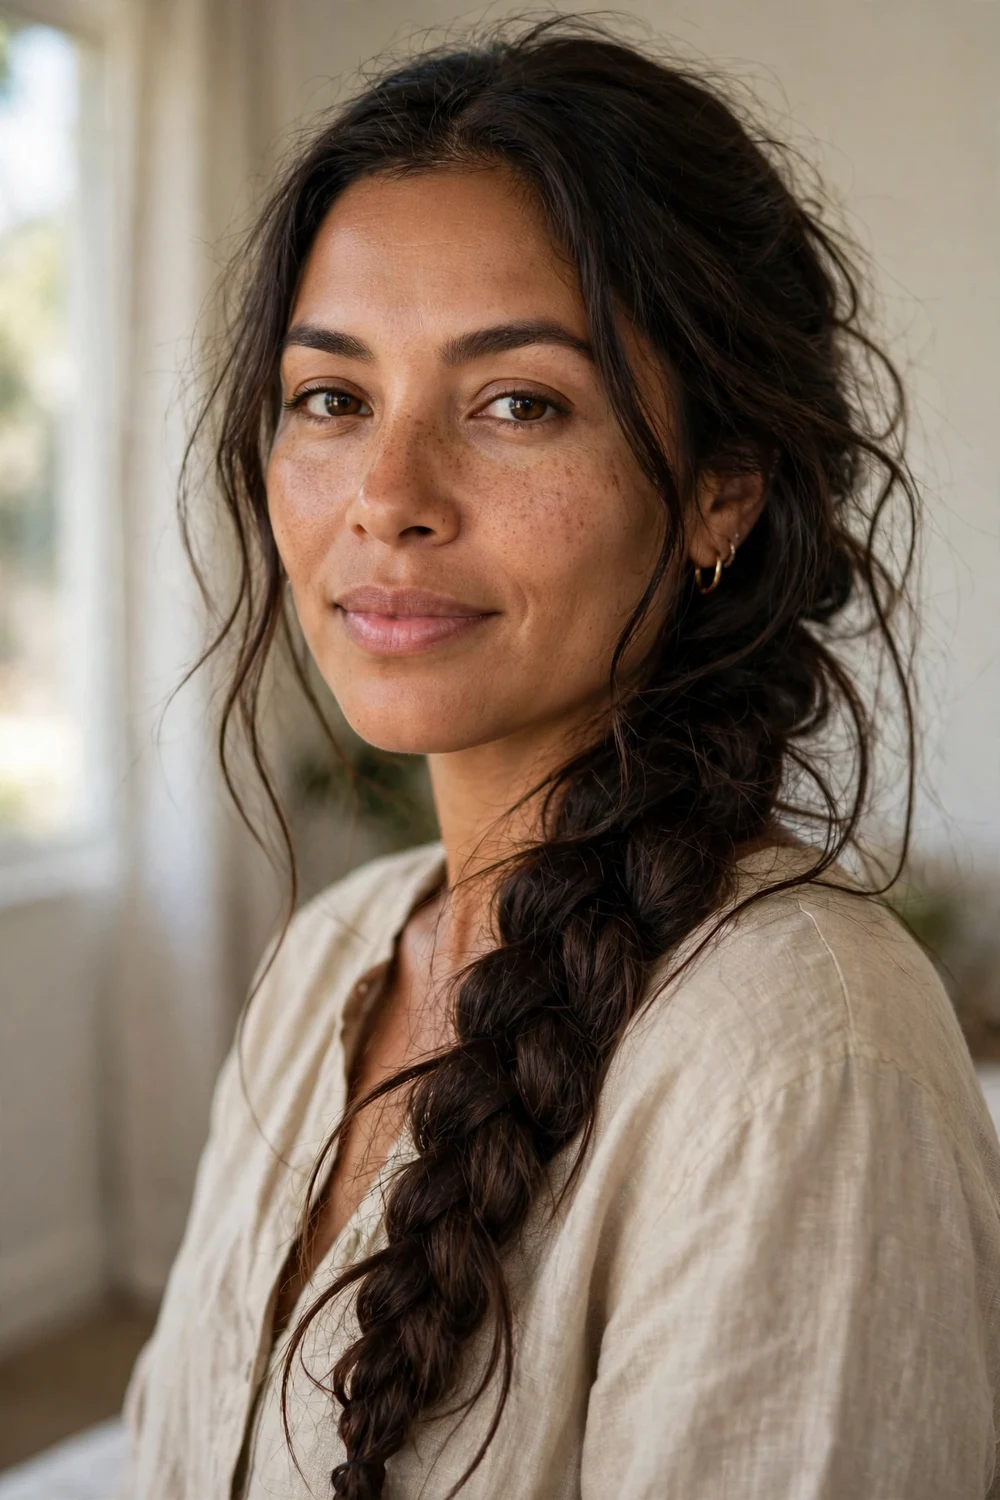
Fine hair’s natural softness becomes an asset here, because looseness is the entire point. Braid loosely over one shoulder, tug sections outward generously, and let a few pieces fall where they will for an artful, undone finish. The airy dimension makes thin strands look naturally abundant instead of sparse. A little texturizing spray before you start gives slippery hair the grip it needs to hold the shape through the day.
Try this: Massage the braid lightly from the bottom up to encourage a soft, lived-in fullness.
Difficulty: Easy. Cost: Free.
9. French Braid into a Low Ponytail
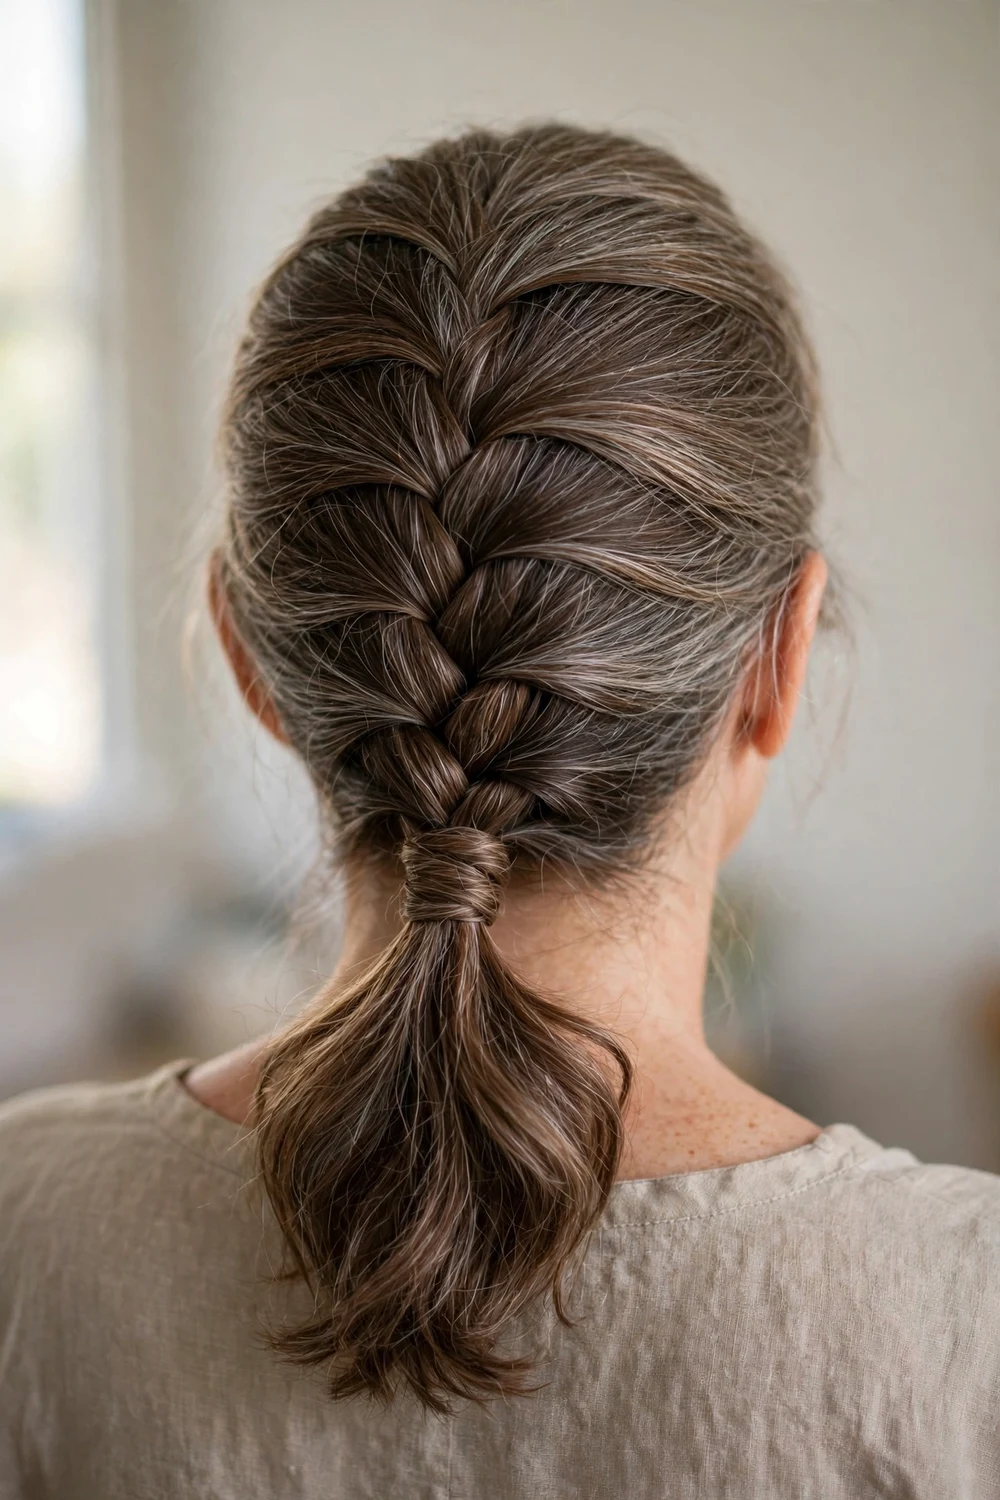
A French braid that melts into a low ponytail suits workdays and errands alike. The braid adds structure and interest up top, where thin hair needs it most, while the ponytail keeps the ends simple and swingy. Wrap a thin strand of hair around the elastic at the base of the pony to hide the tie. That one detail makes the ponytail look thicker and far more finished than a bare elastic ever could.
Try this: Pancake the braid portion before gathering the ponytail. The widened plait carries the whole style.
Difficulty: Easy. Cost: Free.
10. Half-Up Braid Crown
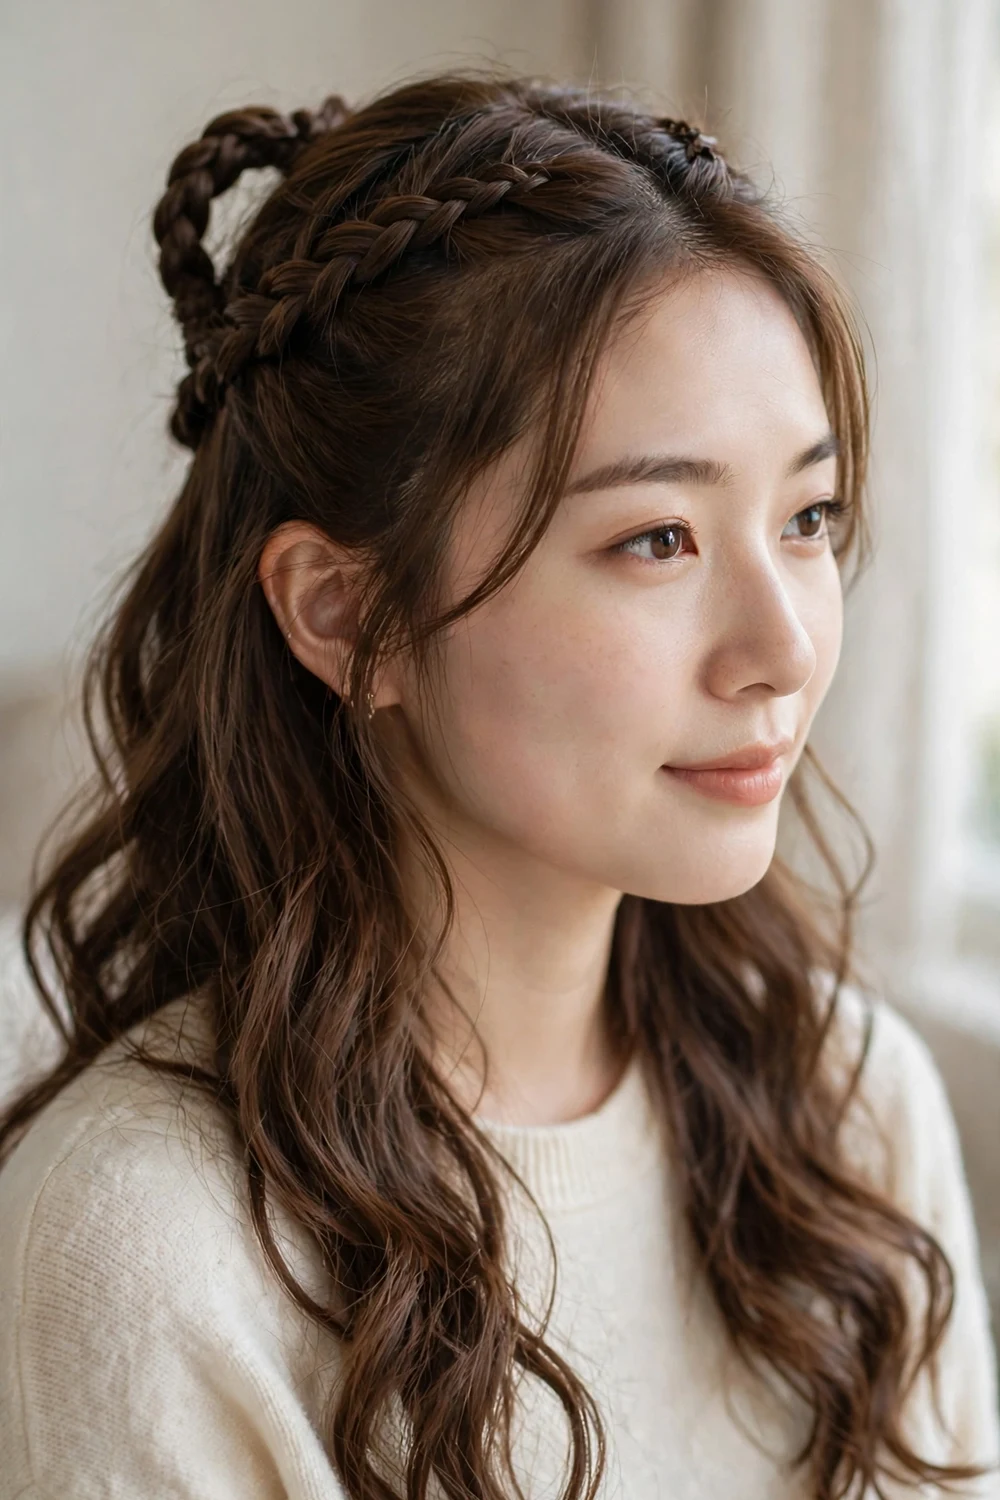
Using only the top half of your hair keeps the crown compact and refined, which suits fine hair far better than a full-head plait. Braid two small plaits from each side and pin them where they meet at the back, letting the rest of the hair flow freely underneath. The contrast between the structured crown and the soft, flowing lengths makes the whole head of hair look fuller. Face-framing wisps pulled free at the temples soften the style.
Try this: Curl the loose lengths lightly. The waves underneath add bulk that supports the crown.
Difficulty: Easy. Cost: Free.
11. Goddess Braid Crown
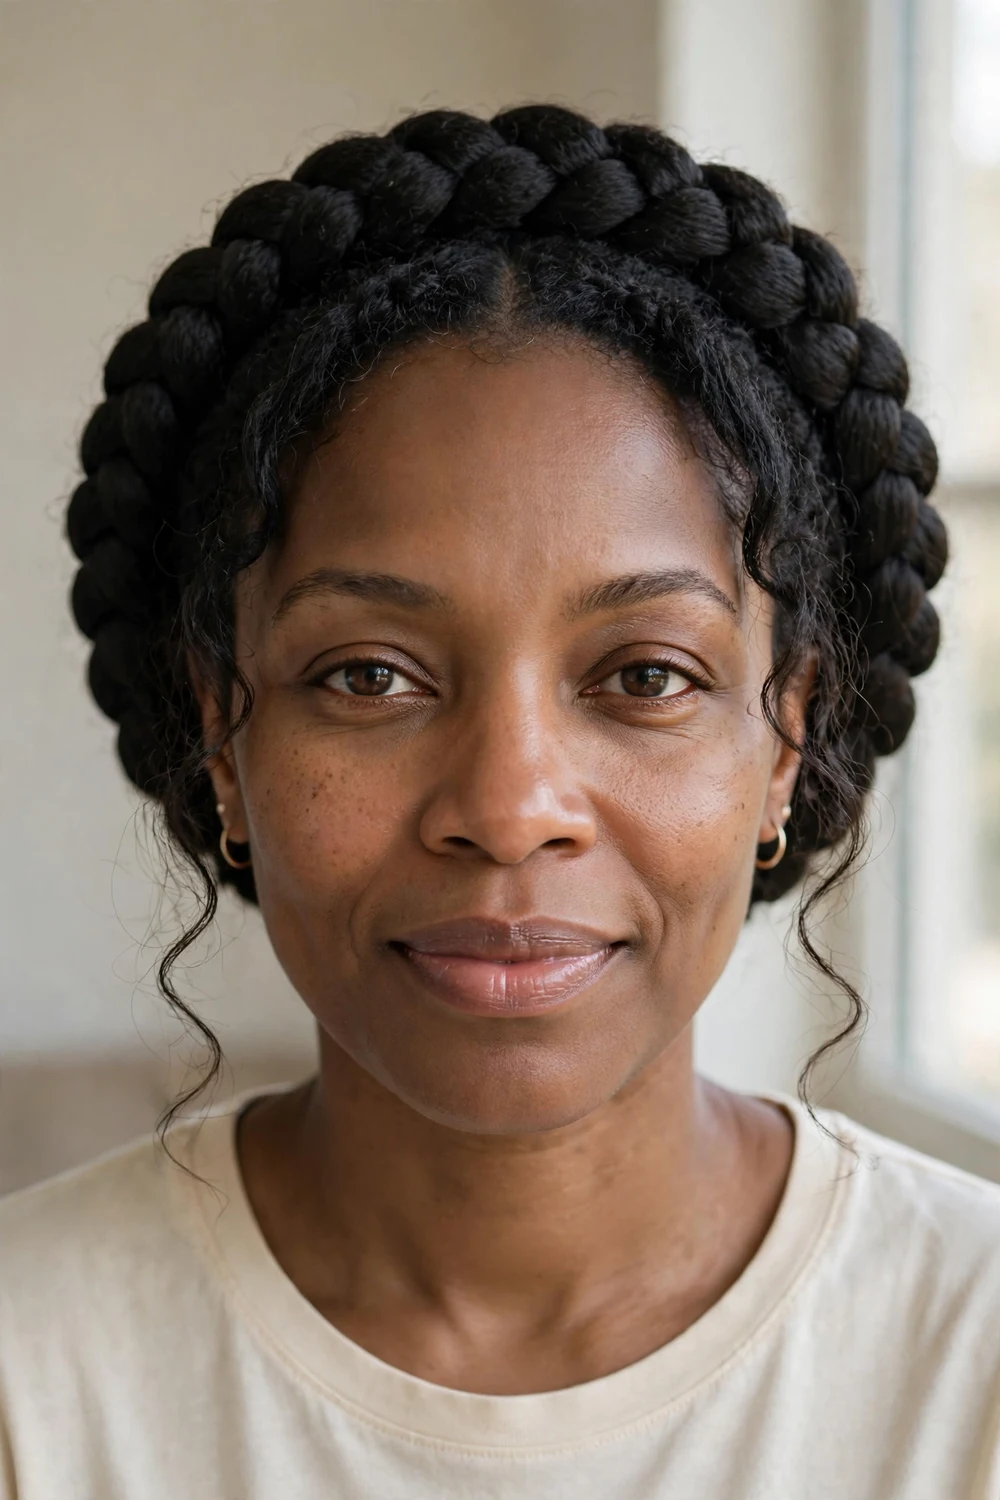
Thick braids wrapped around the full perimeter of the head form a halo crown that hides thinning at the temples, a spot where fine hair often parts through to the scalp. Make two pigtail braids starting at the nape, cross them once in the back, then wrap and pin them around the hairline. Pull out a few soft wisps at the front and sides. The wrapped braid reads as one continuous, substantial plait.
Try this: Pin with bobby pins in a crossed pattern so the crown stays put without pulling the hairline.
Difficulty: Medium. Cost: Free.
12. Two-Strand Rope Twist
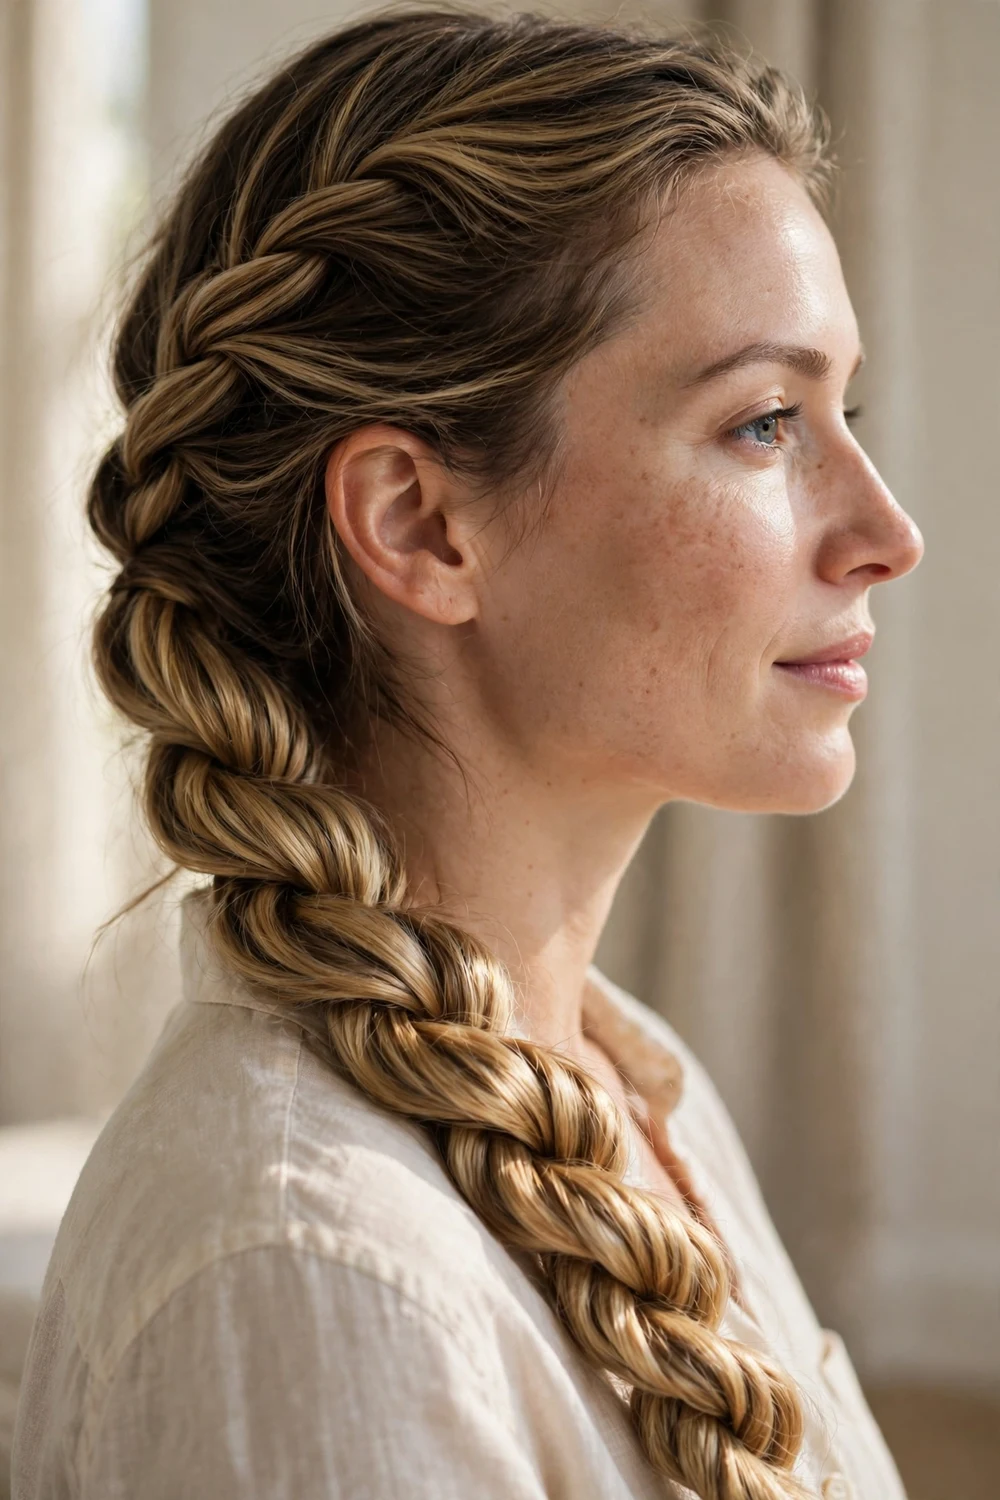
The two-strand rope twist is one of the gentlest braids for fragile fine hair. Twist two sections in one direction, then wind them around each other in the opposite direction so the rope locks in place. The twisted ridges catch light along their length, adding dimension that flat, straight hair cannot match. It looks intricate, takes only minutes, and never pulls delicate roots the way tight three-strand braids sometimes do.
Try this: Twist all the way to the very ends before securing. Loose tails unravel quickly on slippery hair.
Difficulty: Easy. Cost: Free.
13. Frohawk Braid
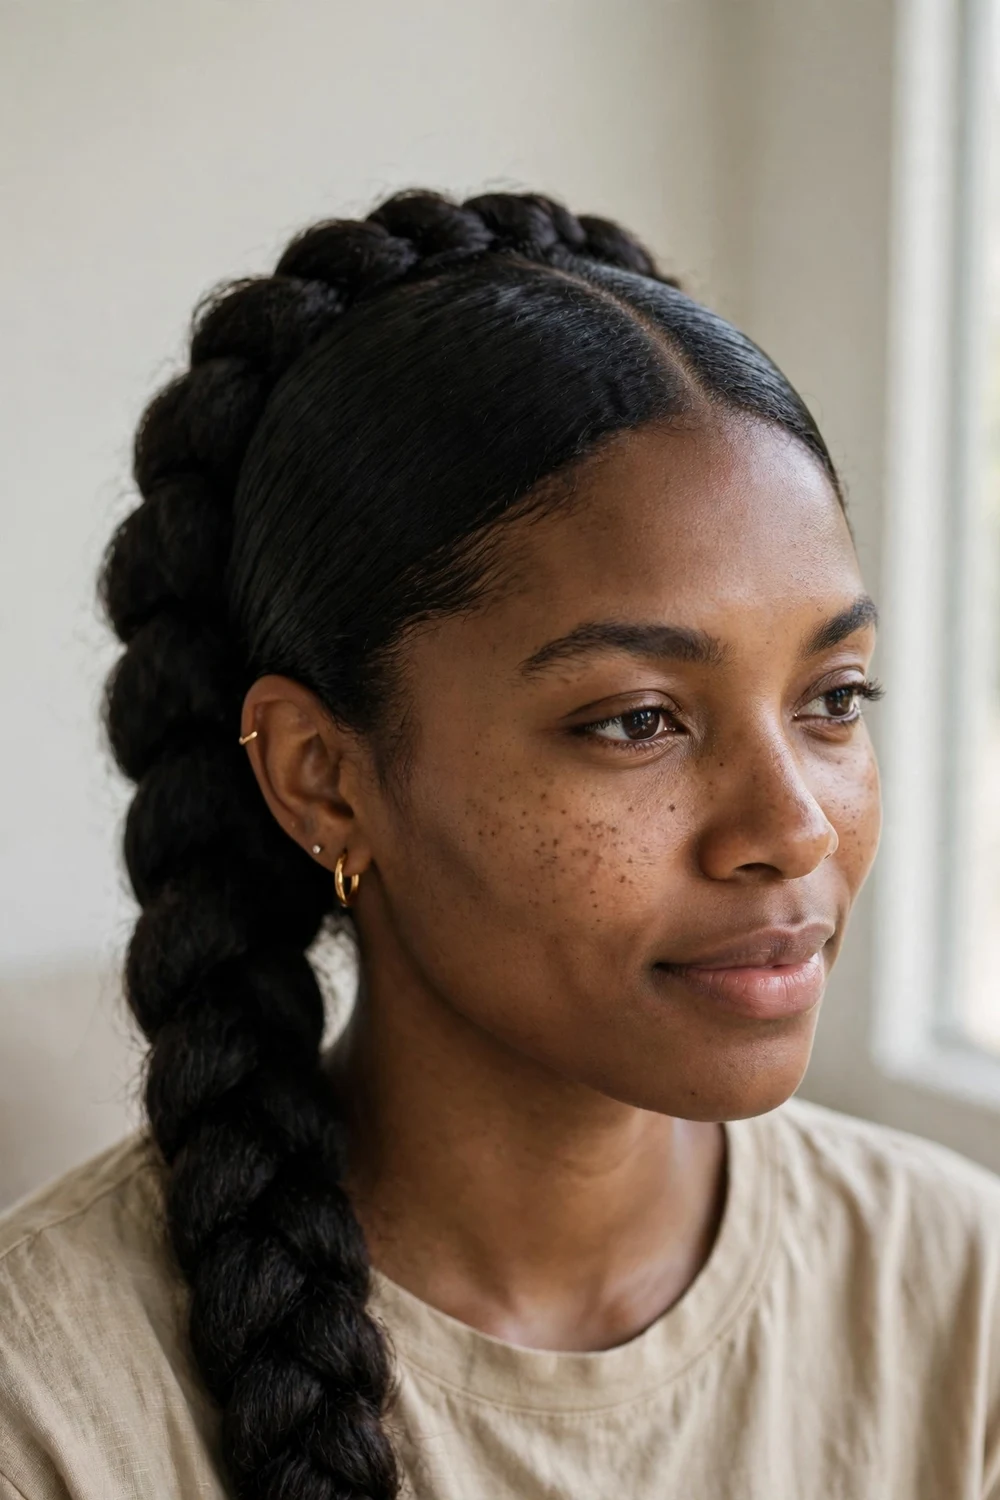
A single wide braid running front to back along the center of the head creates the frohawk shape. Smooth the sides flat and keep the center plait loose and wide, loosening the sections with a rattail comb after braiding. That contrast is flattering on fine hair: the sleek sides make the full center strip look even thicker by comparison. It also covers thinning at the crown, since the whole top section is gathered upward.
Try this: Part from ear to ear first, then gather only the top section. Clean partings keep the shape sharp.
Difficulty: Medium. Cost: Free.
14. Pinned Braided Updo
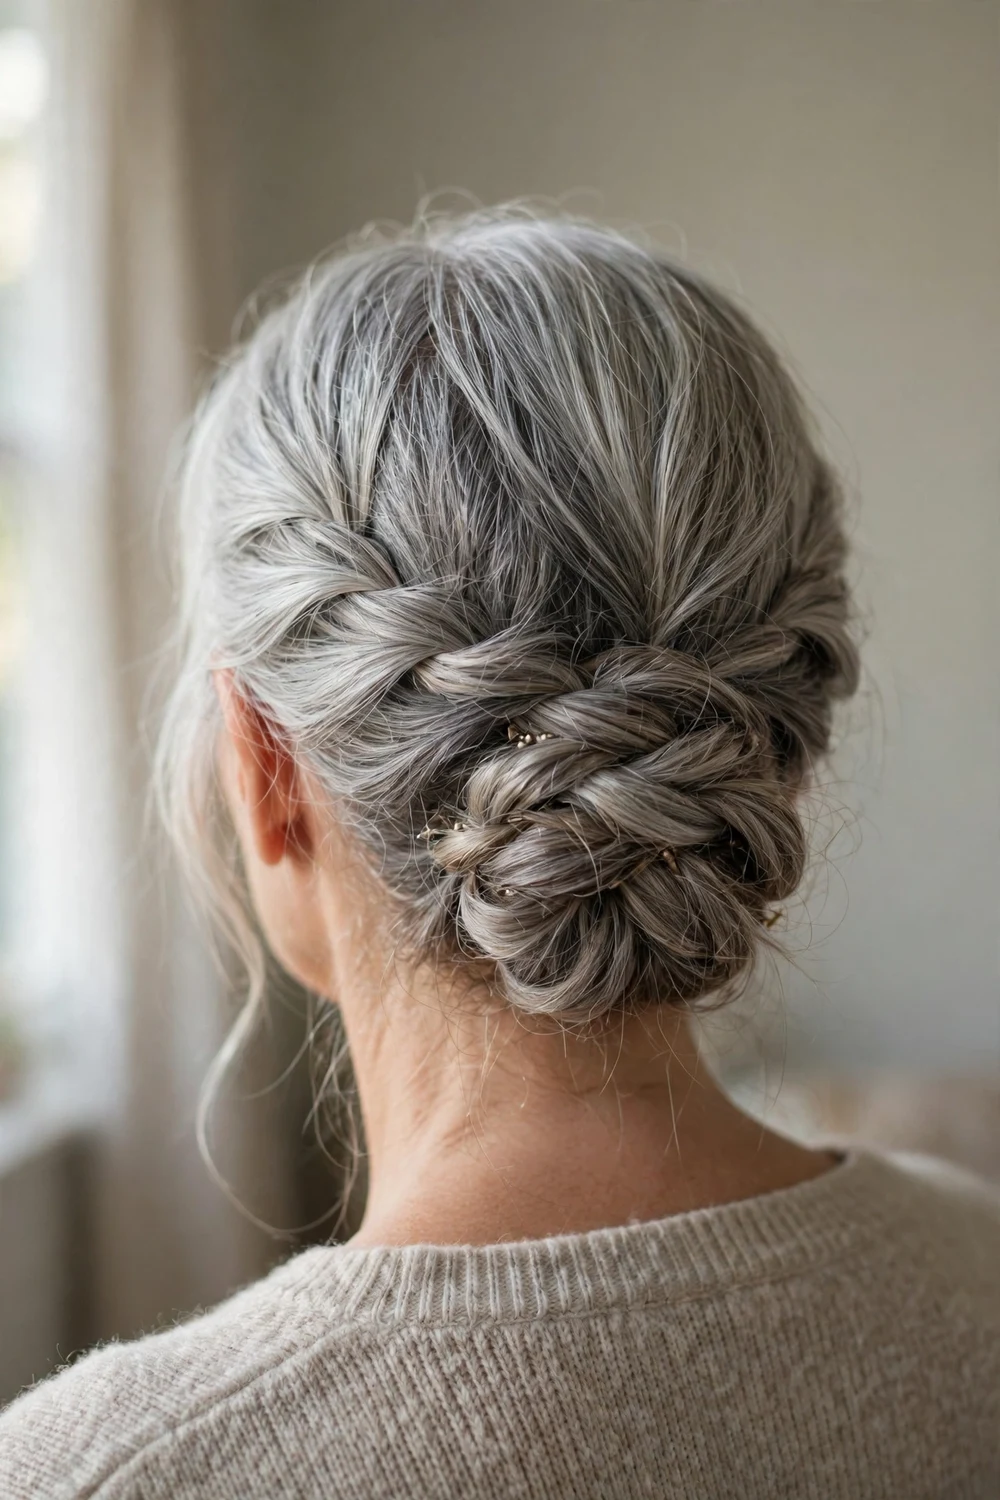
Two loose pigtail braids, wrapped and pinned into a low bun, make an updo that works with thin hair instead of against it. Wrap and design the braids as you pin, building the shape gradually until it looks like a full braided bun. The wrapped texture reads as one substantial updo rather than a small knot. It suits weddings and events, and the low placement keeps the style comfortable for hours.
Try this: Tease each braid gently before wrapping. The air inside each loop is what fakes the volume.
Difficulty: Medium. Cost: Free.
15. Braided Top Bun
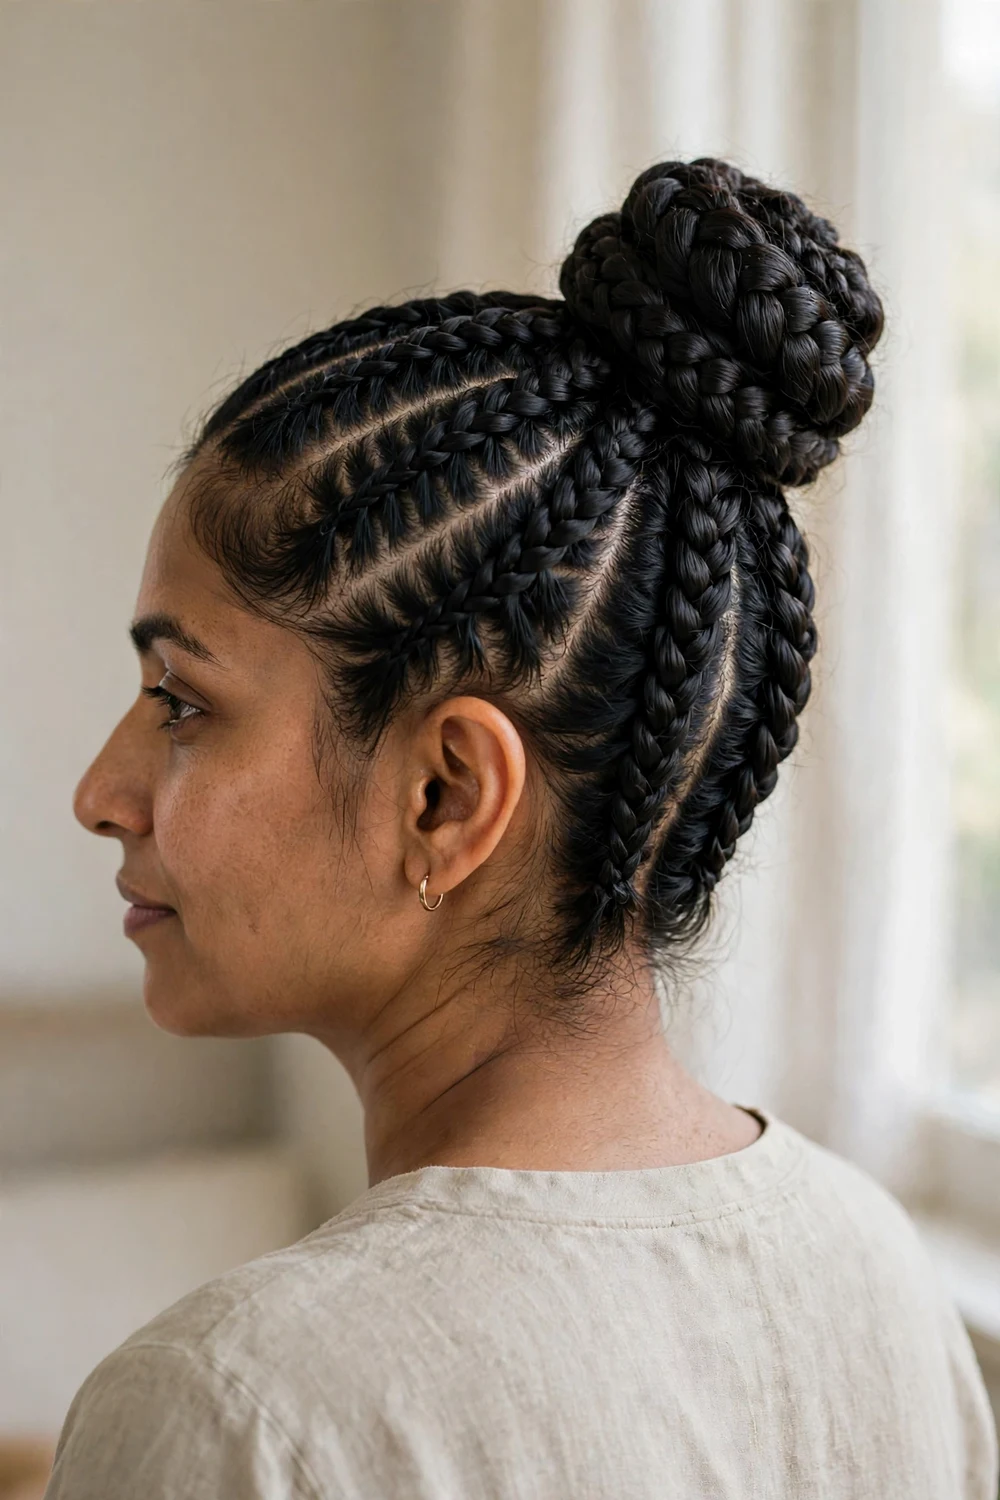
Several Dutch braids worked upward from the back of the scalp into a high top bun give thin hair a bouncy, lifted finish. The braids themselves add texture across the head, and gathering them into a bun stacks all that volume in one place. The result looks far thicker than the hair really is. Cornrow-style braids fed into a low bun work the same way for a quieter version of the idea.
Try this: Coil a hair donut inside the bun if you want extra size. The braids hide it completely.
Difficulty: Medium. Cost: A few dollars for a hair donut if used.
16. Knotless Box Braids
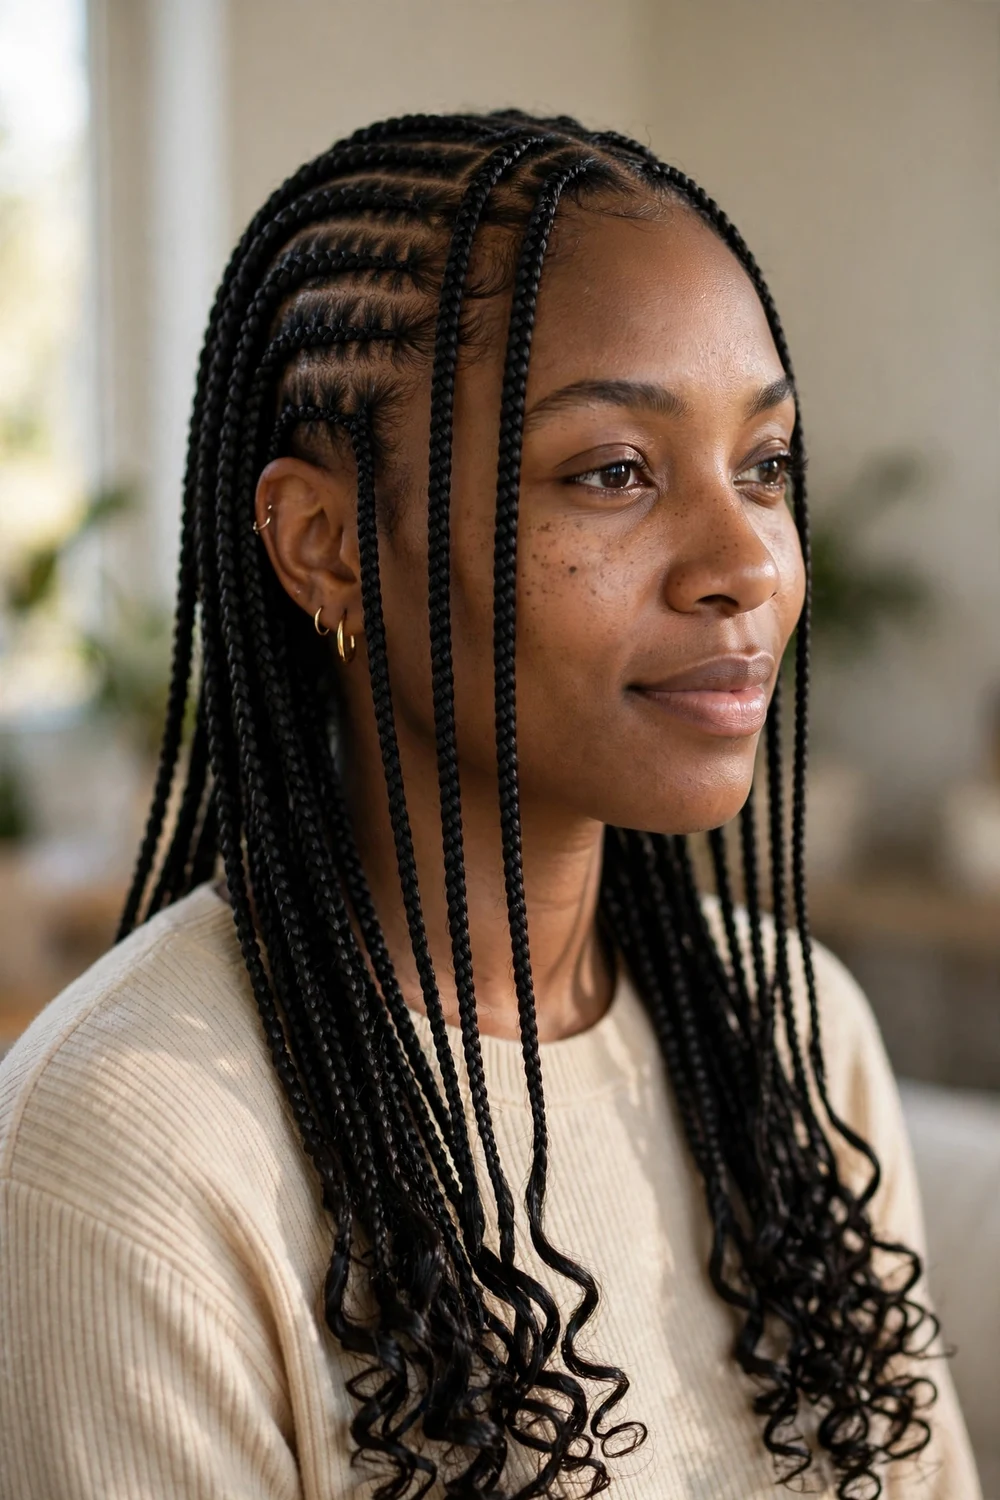
Knotless braids start with a smooth feed-in at the scalp, so they sit flat and light instead of tugging at delicate roots. Multiple thin braids worn open, with the ends curled for extra bounce, give thin hair a full protective style without heavy tension. They tie up into ponytails or buns just as easily. Small accessories woven in along the braids add visual interest and cover any sparse spots along the hairline.
Try this: Ask your braider for lightweight braiding hair in a thin width. Less weight means less stress on fine strands.
Difficulty: Hard (salon style). Cost: Salon pricing, varies by length.
17. Colored Braids
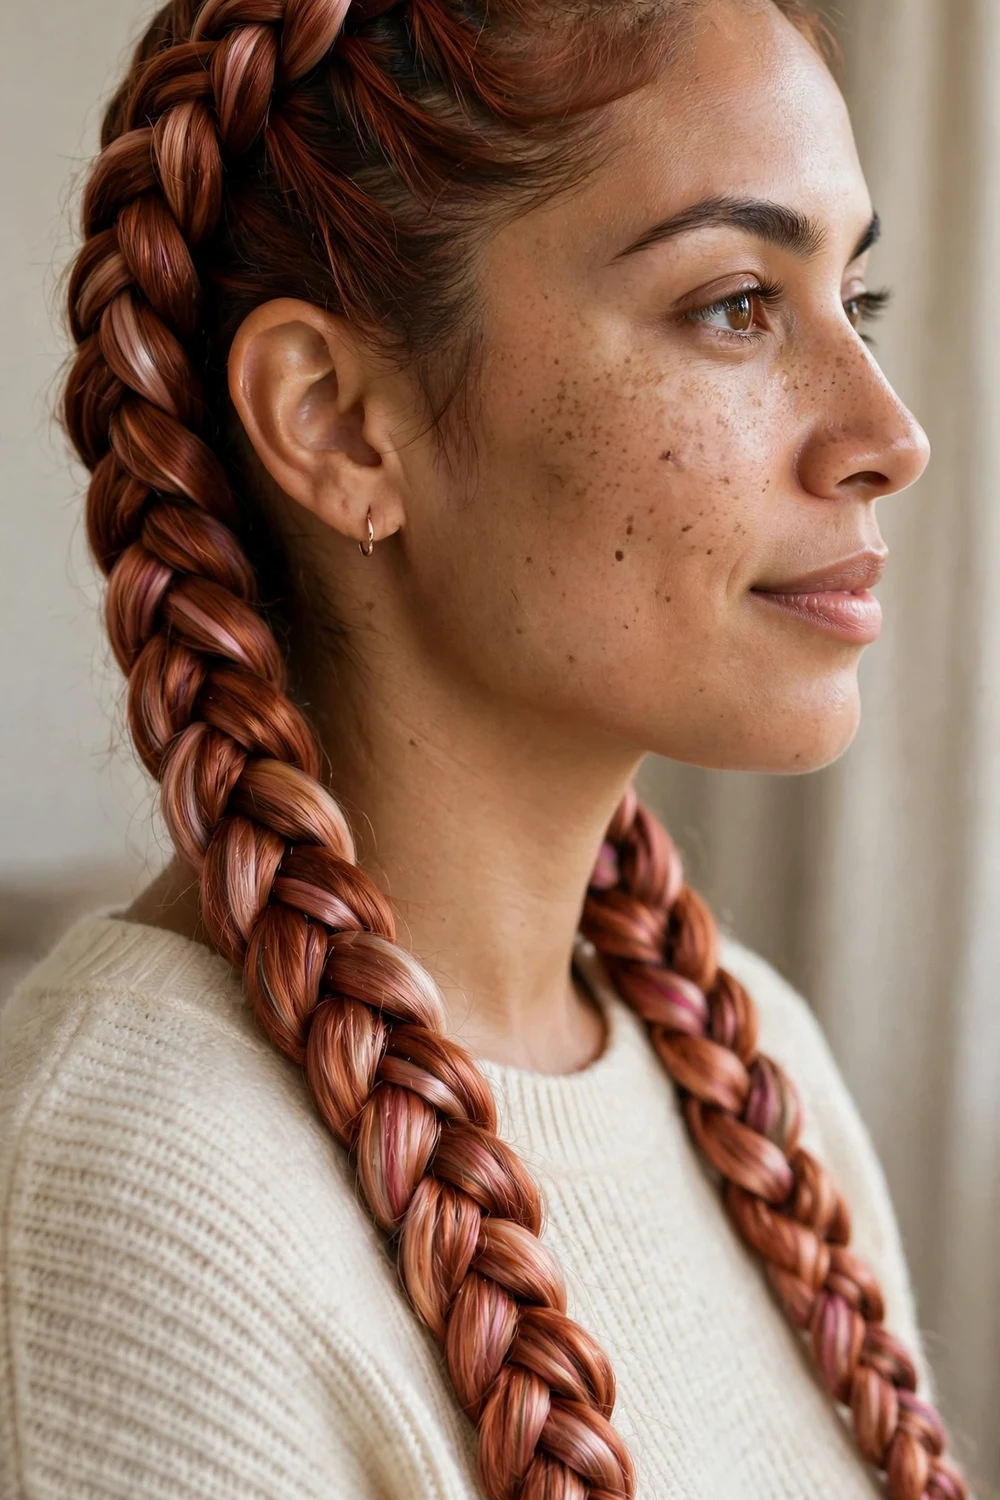
Color is a quiet fullness trick. Dimensional shades like auburn or copper add visible depth to each loop, and depth reads as thickness. Colored plaits swept to one side show off the shade variation across every twist of the braid. Keep the braids knotless and light so the style stays comfortable, and let the color do the visual heavy lifting. This works especially well on braids worn long and open.
Try this: Blend two close shades instead of one flat color. The variation between strands looks denser.
Difficulty: Medium. Cost: Salon color or temporary color products.
18. Boho Accent Braids
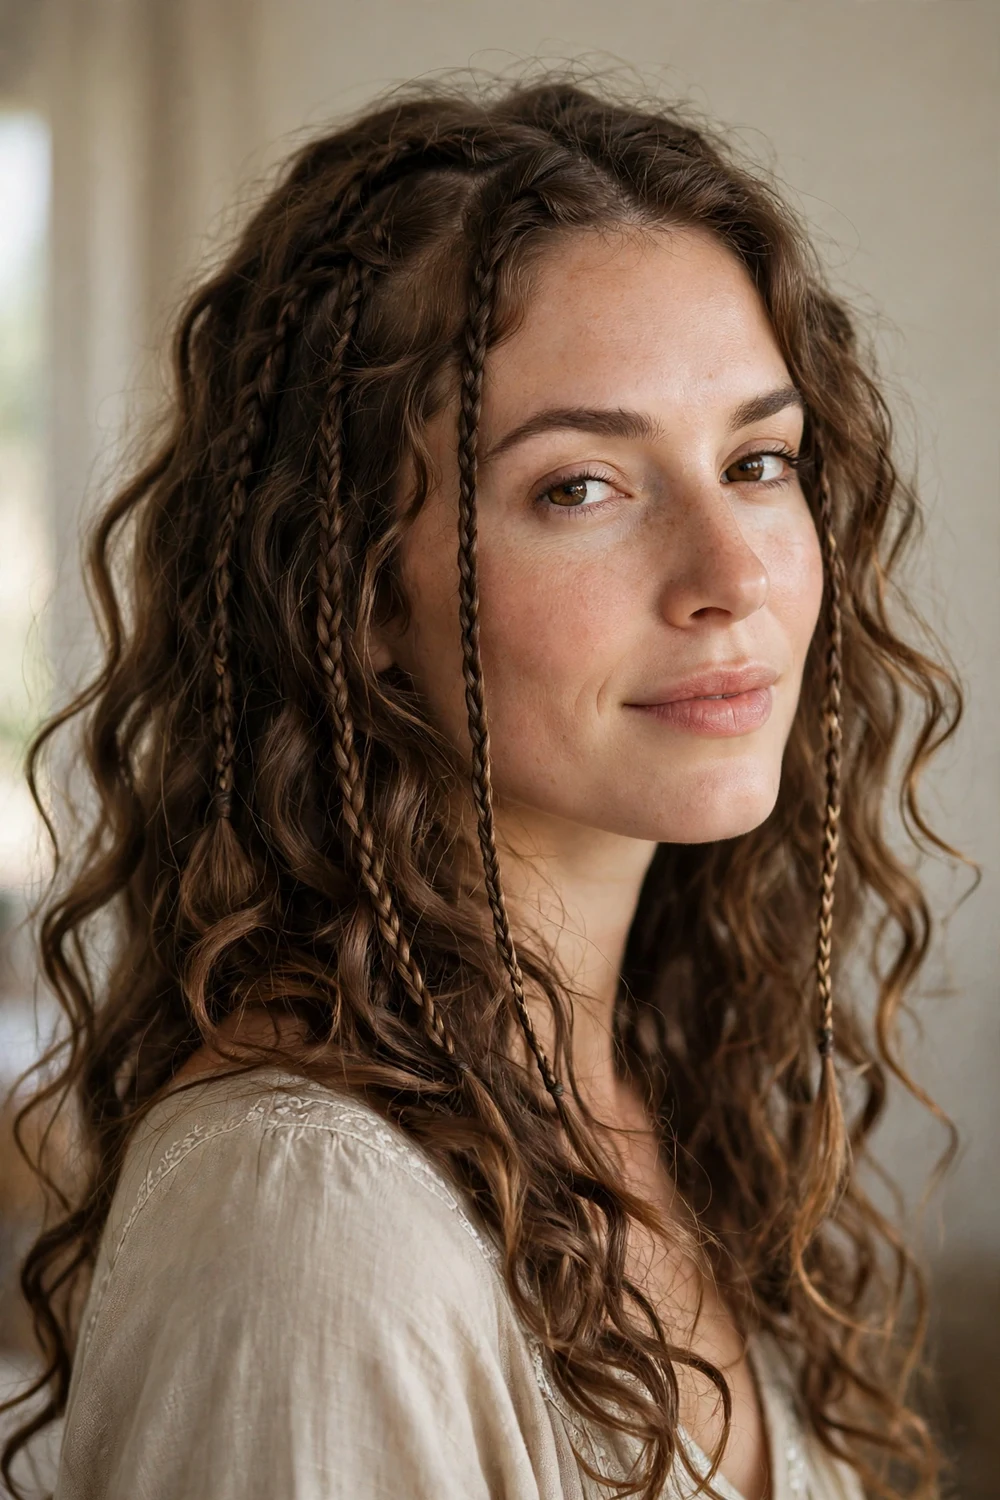
A few thin accent braids scattered through loosely curled, open hair give thin hair a relaxed bohemian feel. The curled pattern adds bounce and movement around the braids, so the overall style looks abundant even though only a few sections are actually braided. Leave the rest of the hair down and let the curls do the volumizing. It is a low-effort style that suits weekends and casual days, and it refreshes nicely on day two.
Try this: Curl with a wand before braiding the accents. Second-day curls hold the braids better than fresh ones.
Difficulty: Easy. Cost: Free.
19. Laced Braid
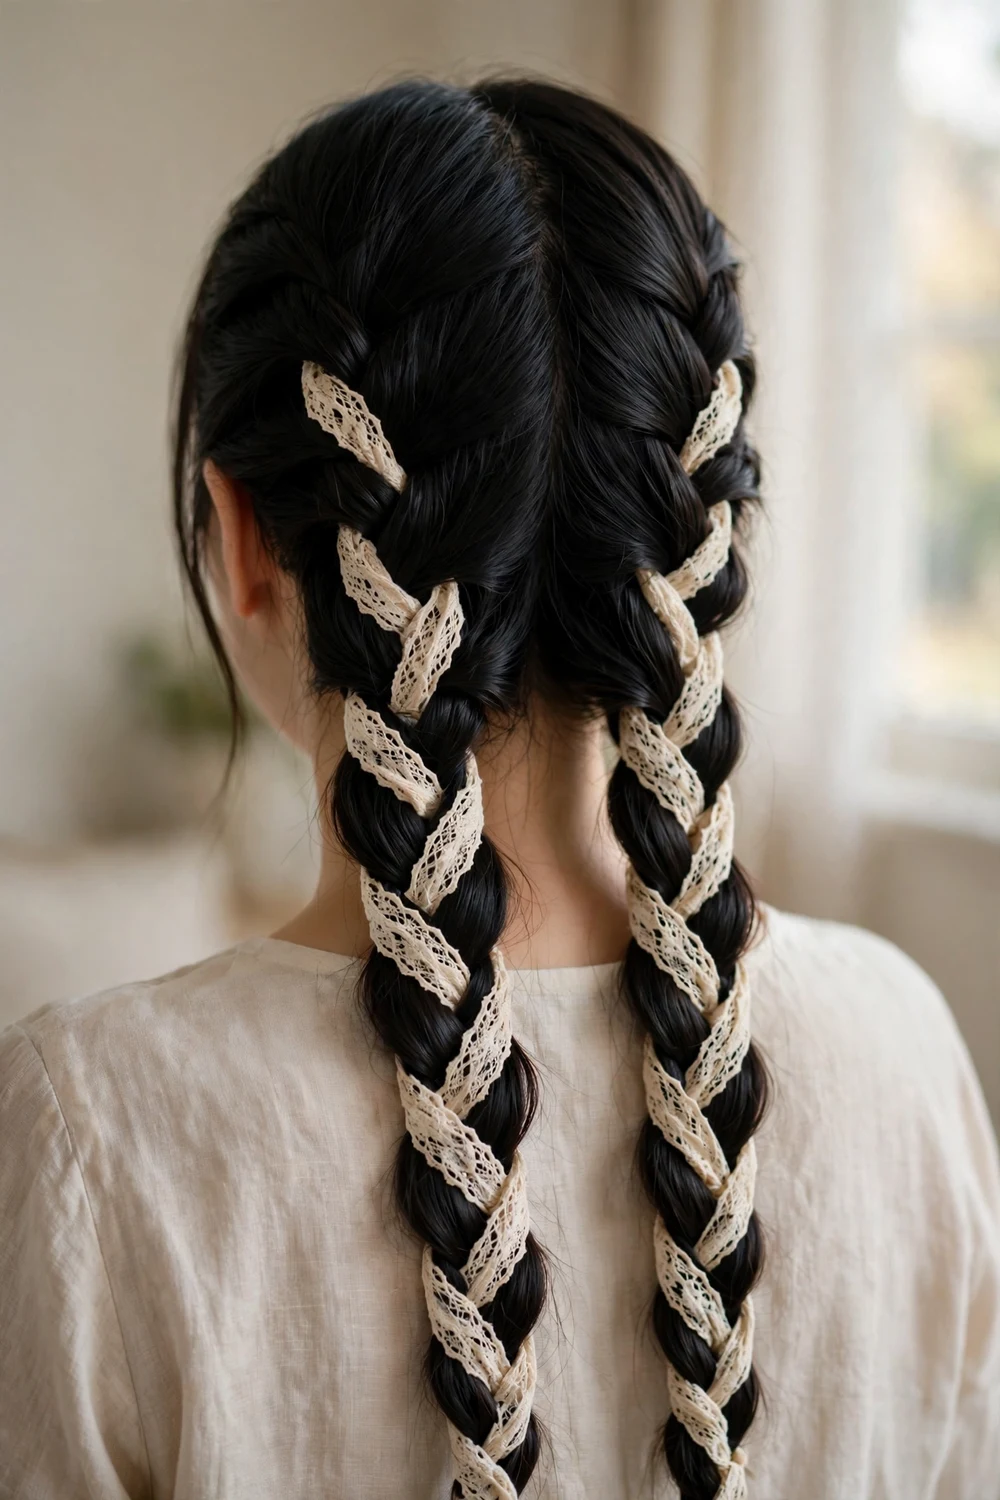
Weaving a lace ribbon or thin fabric strip between the sections of a French braid adds instant visual width. The ribbon fills the gaps that thin hair leaves exposed and turns a simple plait into something decorative. Braid two French plaits from a center part, feeding the lace in as a fourth strand. The contrast between dark hair and cream lace makes every loop stand out, which is what makes the braid look fuller.
Try this: Tie the ribbon at the crown before you start braiding. Anchoring it early keeps the weave even.
Difficulty: Medium. Cost: A few dollars for ribbon or lace trim.
20. Twisted Marley Braids
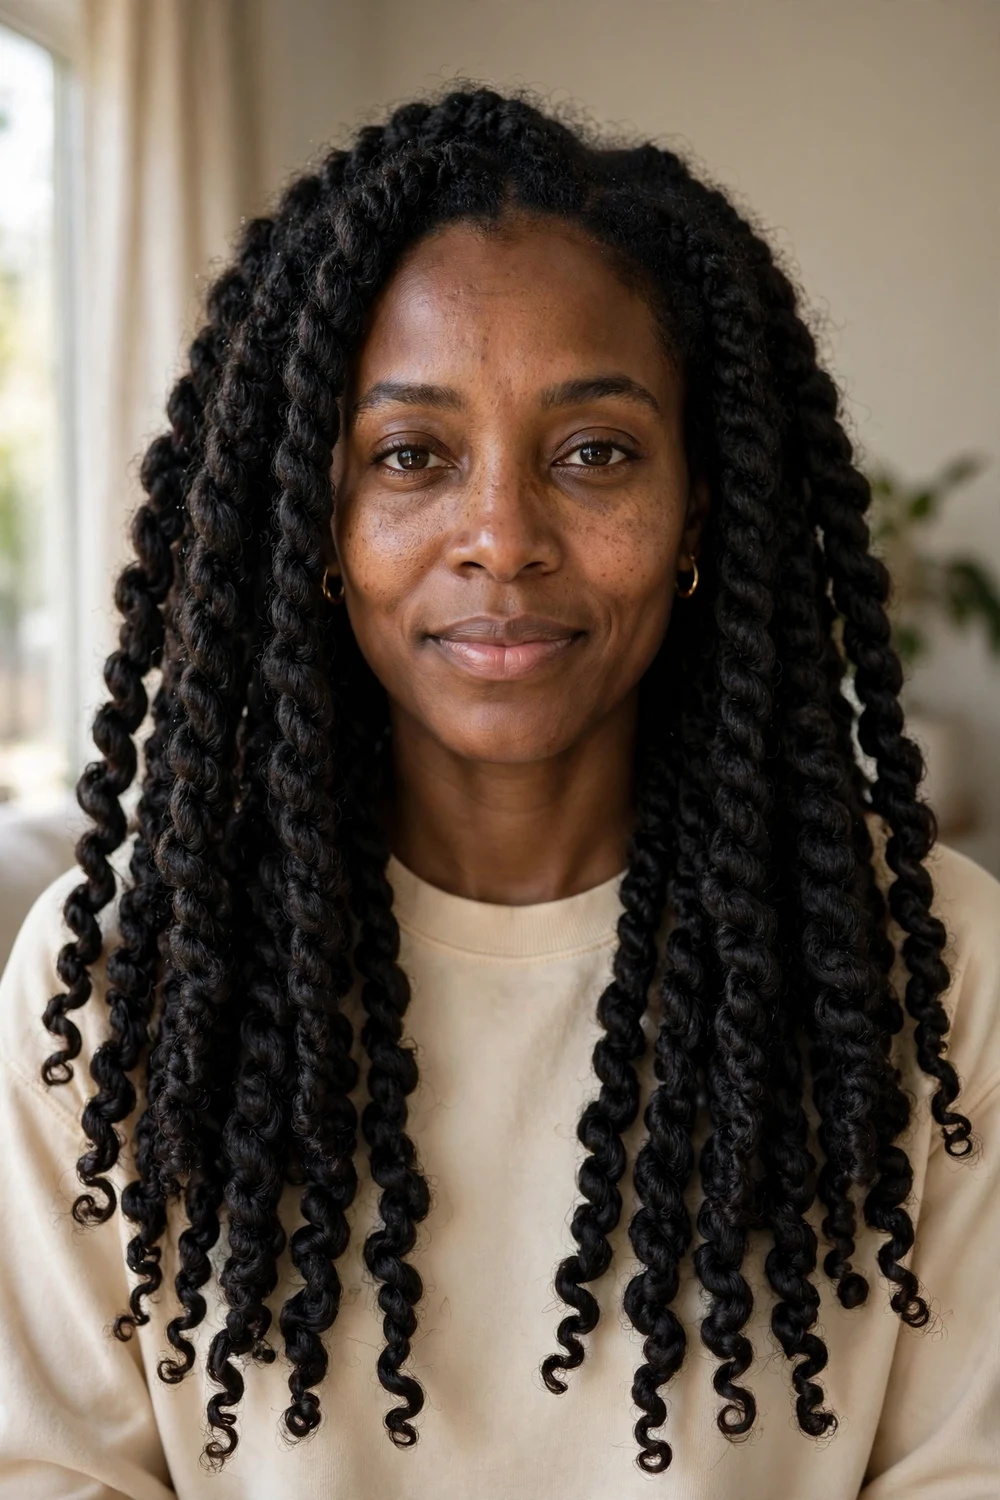
Marley twists use textured hair to create springy, bouncy two-strand twists with real volume. Each twist has a soft, matte texture that looks far thicker than silky braiding hair would. Worn open past the shoulders, the twists give thin hair a full protective style with movement. The twist pattern also hides sparse spots better than smooth braids, since the texture breaks up the eye’s view of the scalp. A satin bonnet at night keeps the twists fresh for weeks.
Try this: Keep twists medium-sized. Very small twists take longer and very large ones can pull on fine roots.
Difficulty: Hard (salon style). Cost: Salon pricing, varies by length.
21. Side-Swept Cornrows
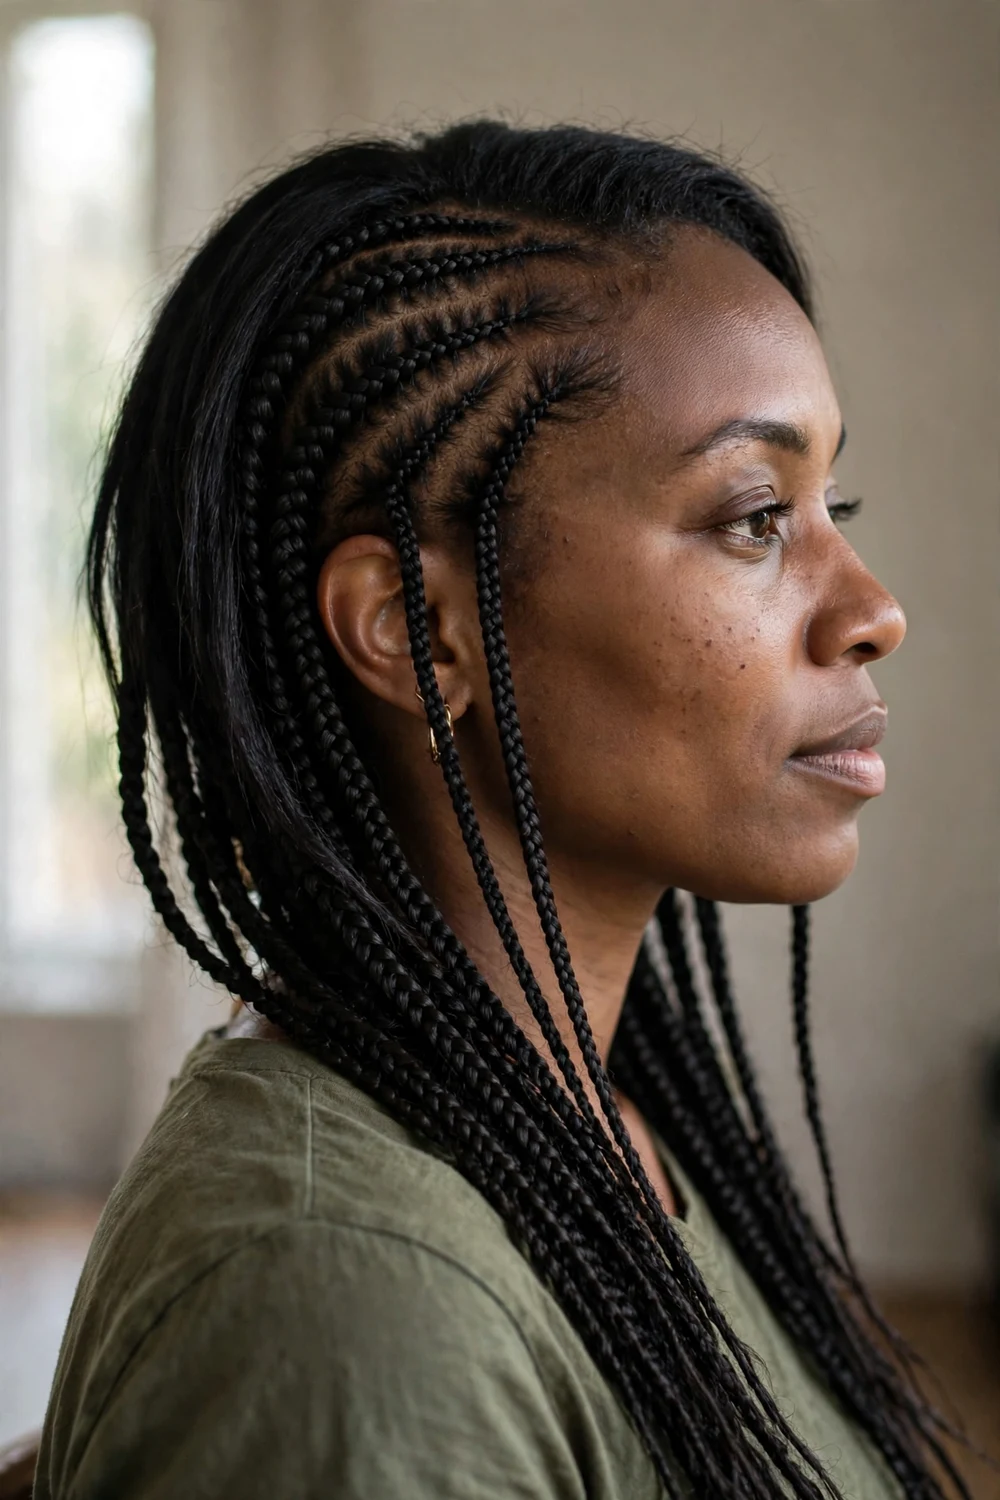
Several thin cornrows braided along one side of the scalp, just above the ear, then swept across to the opposite side, make an edgy asymmetrical style. The braids stay light with little tension on the hairline, and wearing them long and open down the back keeps the look soft. Decorate with beads or small cuffs for extra coverage. This style suits anyone who wants braids with an edge rather than a romantic finish.
Try this: Keep the cornrows lightweight and short enough to manage. Heavy, long cornrows strain thin hairlines.
Difficulty: Hard (salon style). Cost: Salon pricing.
22. Waterfall Bridal Braid
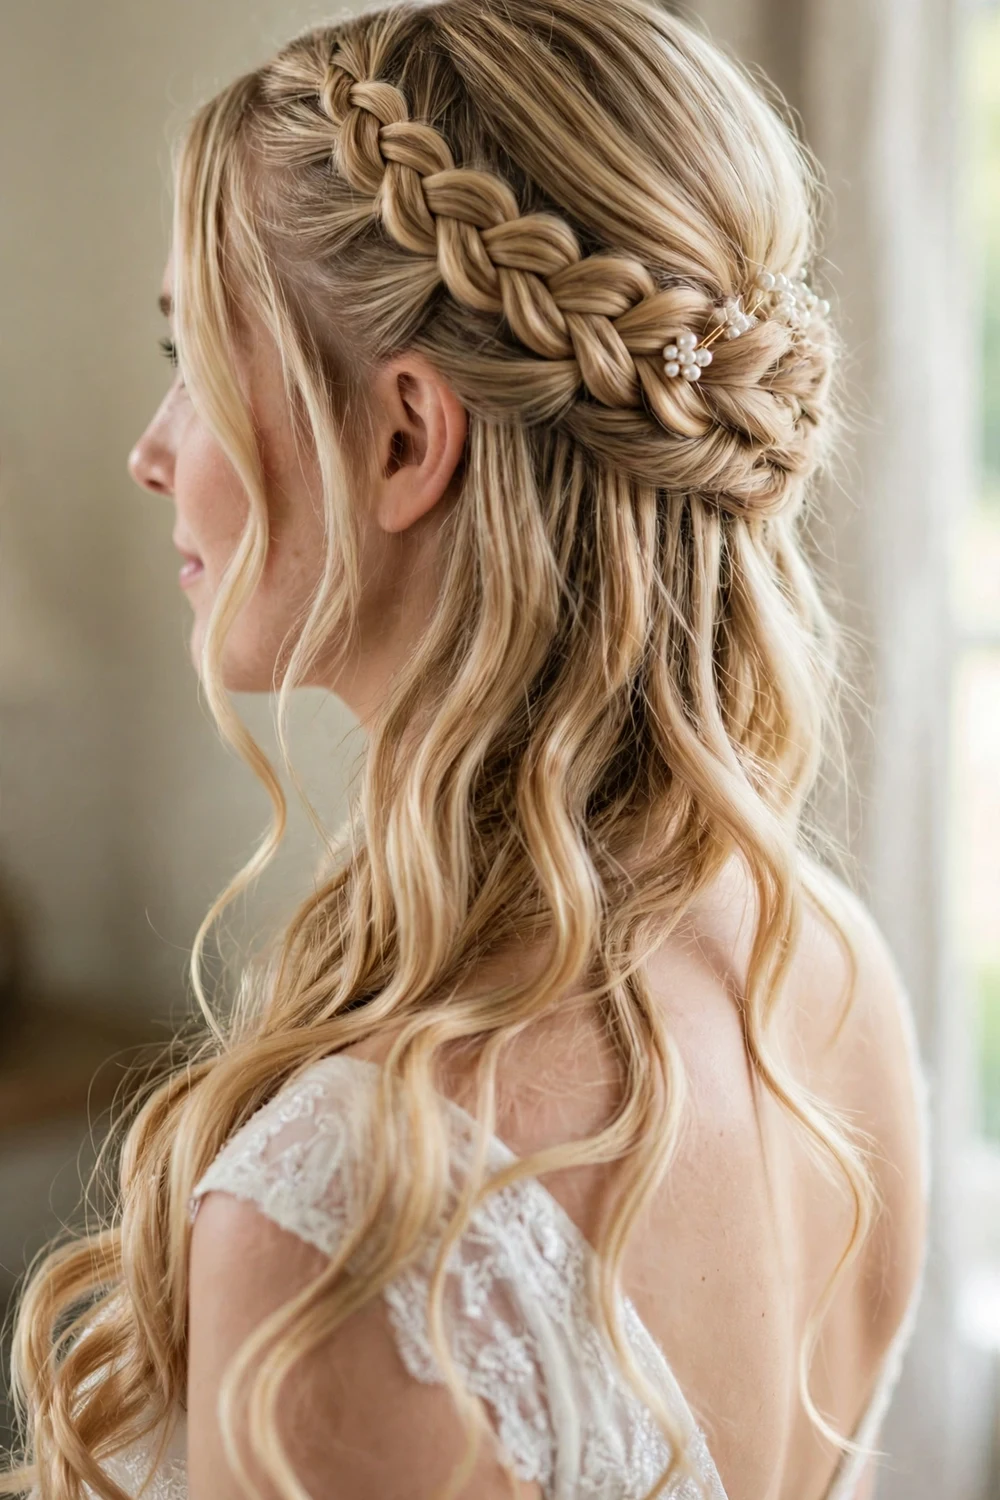
A waterfall braid lets strands drop through the plait like a cascade, which means the braid itself never looks thin: the falling hair fills the space around it. Styled across the back of the head with soft curls and a small pearl accessory, it becomes a wedding-ready look. The technique flatters fine hair because it works with flowing lengths instead of fighting them. Curls on one side of the ear add a final soft touch.
Try this: Pin the accessory where the braid ends. It anchors the style and hides the tucked tail.
Difficulty: Medium. Cost: A few dollars for a hair accessory.
23. Swoop Side Braid
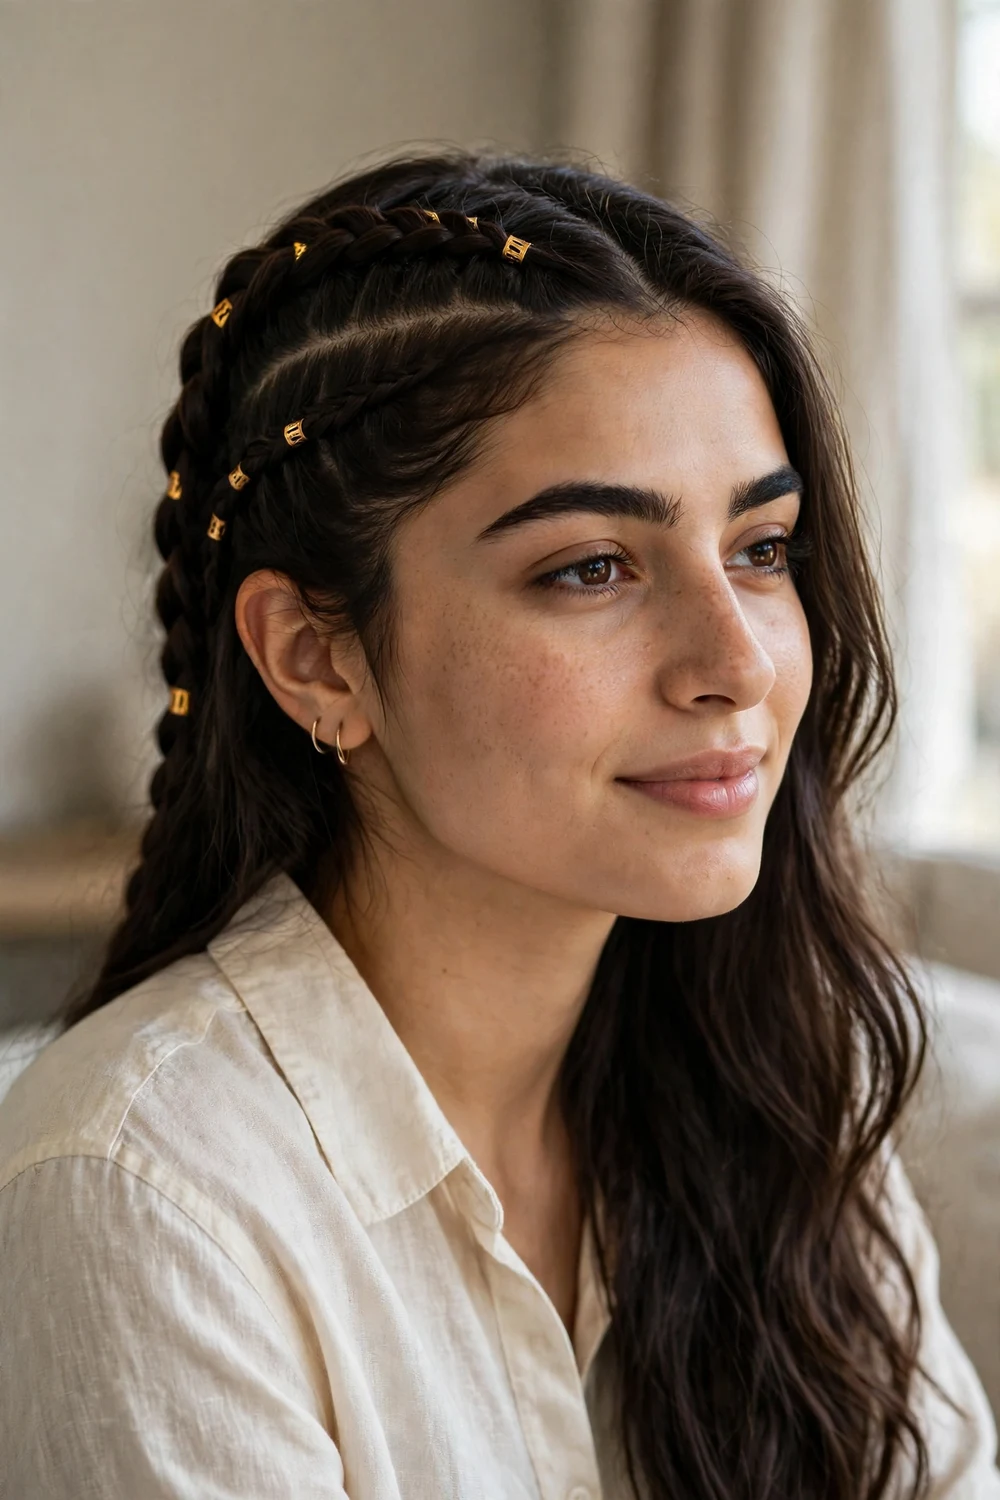
A swoop braid starts at the upper scalp on one side and curves across to the other side at the back. The sweeping diagonal line flatters thin hair the same way side-swept fishtails do, gathering visual weight along one curve. Small gold cuffs clipped along the plait add shine and cover any spots where the braid runs slim. It is a youthful style that works for school, outings, and casual events.
Try this: Add cuffs after pancaking so they sit on the widest loops. They read as intentional, not as cover-ups.
Difficulty: Easy. Cost: A few dollars for braid cuffs.
24. Bubble Braid Ponytail
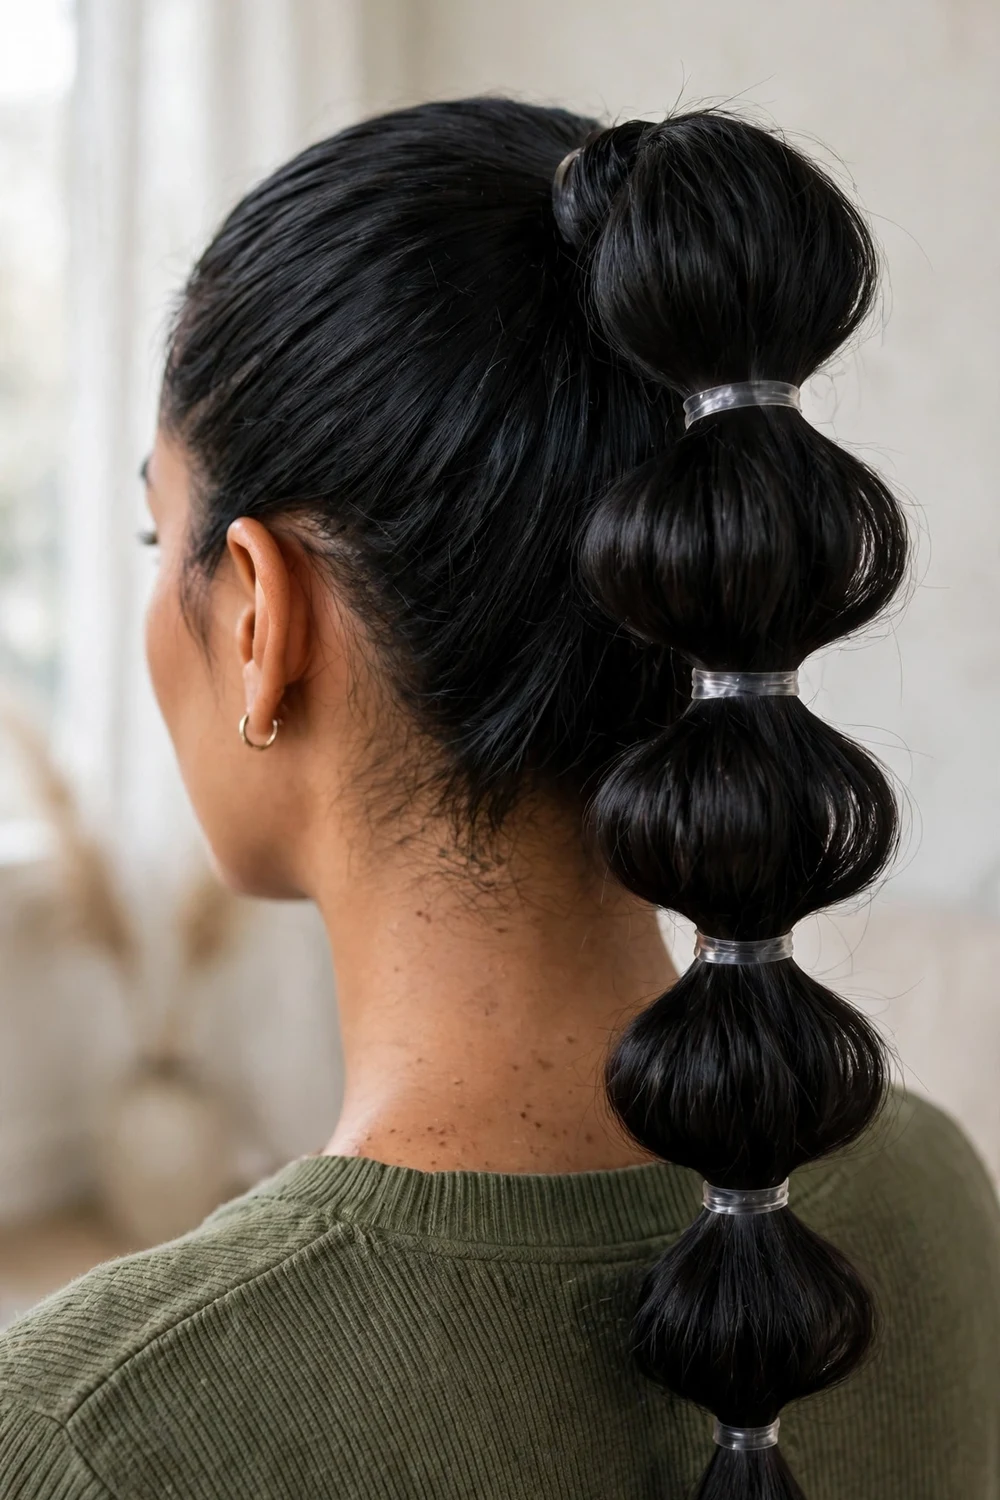
The bubble braid is a close cousin of the pull-through, and it is just as kind to thin hair. Tie a high ponytail, add clear elastics every few inches, and gently pull each section wide to form plump rounded bubbles. Every segment adds width that fine hair lacks on its own. The style reads as playful and modern, takes minutes, and needs nothing but elastics and fingers. It also works on a low ponytail for a quieter take.
Try this: Fan each bubble wider than you think you should. Thin hair puffs up with very little pulling.
Difficulty: Easy. Cost: A few dollars for clear elastics.
25. Everyday Waterfall Braid
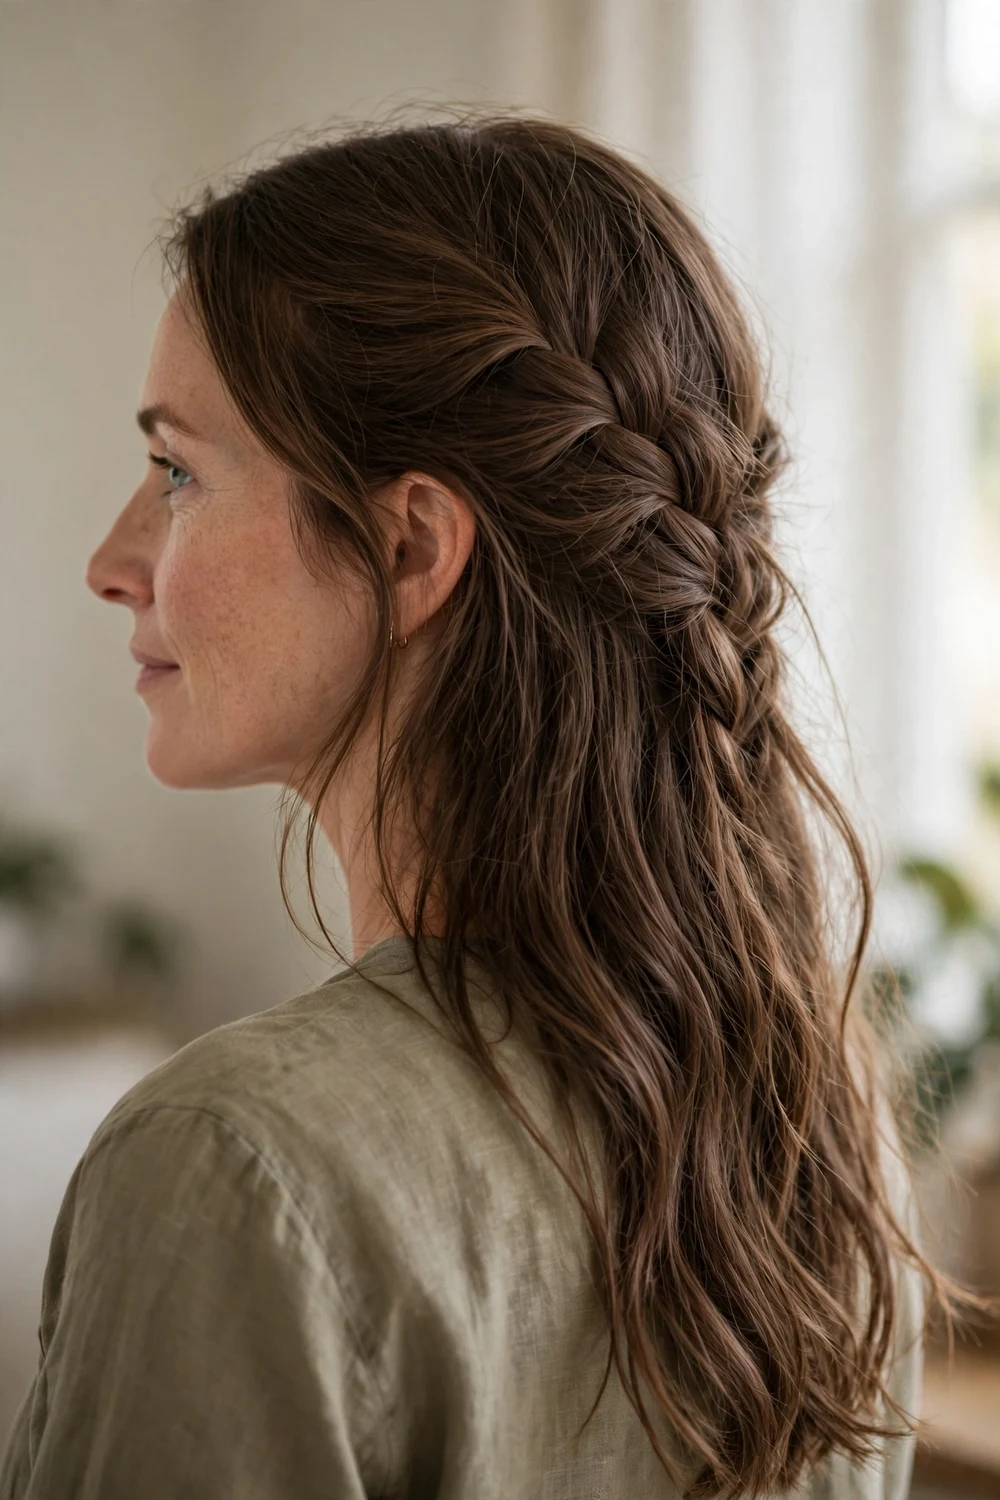
Strip the bridal dressing away and the waterfall braid becomes a simple daily style. Braid loosely across one side of the head, letting strands fall through as you go, and wear the rest of the hair down. The braid adds a pretty detail without demanding much hair, and the loose lengths around it keep everything looking soft. It takes about ten minutes once you know the rhythm, and it holds fine on second-day hair.
Try this: Braid on the fuller side of your part. The extra hair there gives the braid a stronger start.
Difficulty: Easy. Cost: Free.
Braid Styles for Thin Hair at a Glance
| Style | Best Occasion | Difficulty | Hold Time |
|---|---|---|---|
| Pancaked French Braid | Everyday wear | Easy | All day |
| Pancaked Dutch Braid | Work or school | Medium | All day |
| Dutch Braid Ponytail | Office days | Medium | 8 to 10 hours |
| Double Dutch Braids | Workouts, weekends | Medium | All day |
| Pull-Through Braid | Events, photos | Easy | 6 to 8 hours |
| Loose Fishtail Braid | Casual outings | Medium | 6 to 8 hours |
| Side-Swept Fishtail Braid | Date nights, parties | Medium | Evening |
| Messy Side Braid | Relaxed days | Easy | 6 to 8 hours |
| French Braid into a Low Ponytail | Work, errands | Easy | All day |
| Half-Up Braid Crown | Daytime events | Easy | 6 to 8 hours |
| Goddess Braid Crown | Parties, photos | Medium | Evening |
| Two-Strand Rope Twist | Everyday wear | Easy | All day |
| Frohawk Braid | Nights out | Medium | Evening |
| Pinned Braided Updo | Weddings, events | Medium | Evening |
| Braided Top Bun | Work, events | Medium | All day |
| Knotless Box Braids | Long-term protective style | Hard | 4 to 6 weeks |
| Colored Braids | Style refresh | Medium | 2 to 4 weeks |
| Boho Accent Braids | Weekends, festivals | Easy | 1 to 2 days |
| Laced Braid | Parties, photos | Medium | Evening |
| Twisted Marley Braids | Long-term protective style | Hard | 4 to 6 weeks |
| Side-Swept Cornrows | Nights out | Hard | 2 to 3 weeks |
| Waterfall Bridal Braid | Weddings | Medium | Evening |
| Swoop Side Braid | School, outings | Easy | All day |
| Bubble Braid Ponytail | Casual days | Easy | 6 to 8 hours |
| Everyday Waterfall Braid | Daily wear | Easy | All day |
How to Choose the Right Braid for Your Thin Hair
Match the braid to the day you are having. Loose, widened plaits like the pancaked French or Dutch braid suit everyday wear because they take minutes and hold all day. Salon styles like knotless box braids or Marley twists make more sense when you want weeks of low-effort wear.
Think about where your hair looks thinnest. Braids that gather the crown upward, like the frohawk or goddess crown, cover the top of the head. Styles that sweep across, like the side-swept fishtail or swoop braid, hide thin temples. The braid you choose can quietly solve the exact problem you see in the mirror.
Be honest about your skill level. A pull-through or bubble braid gives a dramatic result with almost no technique, while Dutch braids reward a little practice. Start simple, and move to harder styles once the easy ones feel natural.
Mistakes to Avoid
Braiding too tightly is the most common mistake with thin hair. Tight plaits compress the hair, expose the scalp between loops, and stress delicate roots. Keep tension gentle and even, and let pancaking create the width instead of pulling.
Skipping texture prep is the second mistake. Clean, slippery hair slides apart and goes flat within hours. Dry shampoo, texturizing spray, or light waves give the braid something to grip, and the style lasts far longer.
Do not pin or pull tightly around areas where hair is thinning. Constant tension on fragile spots can worsen shedding over time. If a style feels like it is pulling, loosen it or choose a gentler option like the rope twist.
If you like protective styles with a light feel, see our guide on knotless braids hairstyles for more low-tension options that suit delicate hair.
For readers who wear their braids shorter, our post on short braided hairstyles shows how plaited styles work on cropped and chin-length hair.
Box braid fans can find styling variations in our article on box braids hairstyles styling ideas, which covers buns, ponytails, and updos.
If the relaxed, carefree finish appeals to you, our roundup of boho braids hairstyles 2026 has more undone braided looks to try.
Frequently Asked Questions
Are braids good for thin hair?
Yes, when done with the right technique. Braids add texture and dimension, which is exactly what fine hair needs to look fuller. Pancaking, Dutch weaving, and pull-through methods create the illusion of thickness. Keep tension loose to protect delicate roots, and thin hair braids just as well as thick hair.
How do I make my braids look fuller with thin hair?
Pancake the braid by gently pulling each loop outward after braiding. This one move can double the visual width of the plait. Prep with texturizing spray or dry shampoo for grip, braid over light waves instead of pin-straight hair, and keep the plait loose rather than tight. Each of these steps adds visible fullness.
What is the best braid style for very fine hair?
The pull-through braid and a loosened, pancaked French braid are strong choices for very fine hair because they rely on technique rather than density. Bubble braids and two-strand rope twists also work well, since they add texture without needing thick sections. All three styles are beginner-friendly.
Can braids damage thin hair?
Braids can stress thin hair if they are too tight, too heavy, or left in too long. Avoid pulling hard around the hairline and crown, choose lightweight options like knotless braids, and take protective styles down on schedule. Gentle daily braids with loose tension carry very little risk.
What products help braids last longer on thin hair?
Texturizing sprays, volumizing mousse, and dry shampoo give fine hair the grip braids need to hold all day. A light flexible-hold mist locks the style without adding weight. A drop of shine serum on the lengths tames frizz without collapsing the volume you built.
Final Thoughts
Thin hair is never a limitation when it comes to braids. From the widened loops of a pancaked French plait to the puffed segments of a bubble braid, these 25 styles prove that fine strands can look full and textured with the right technique. Pick one that matches your day, prep with grip, braid loosely, and pancake with confidence.

