


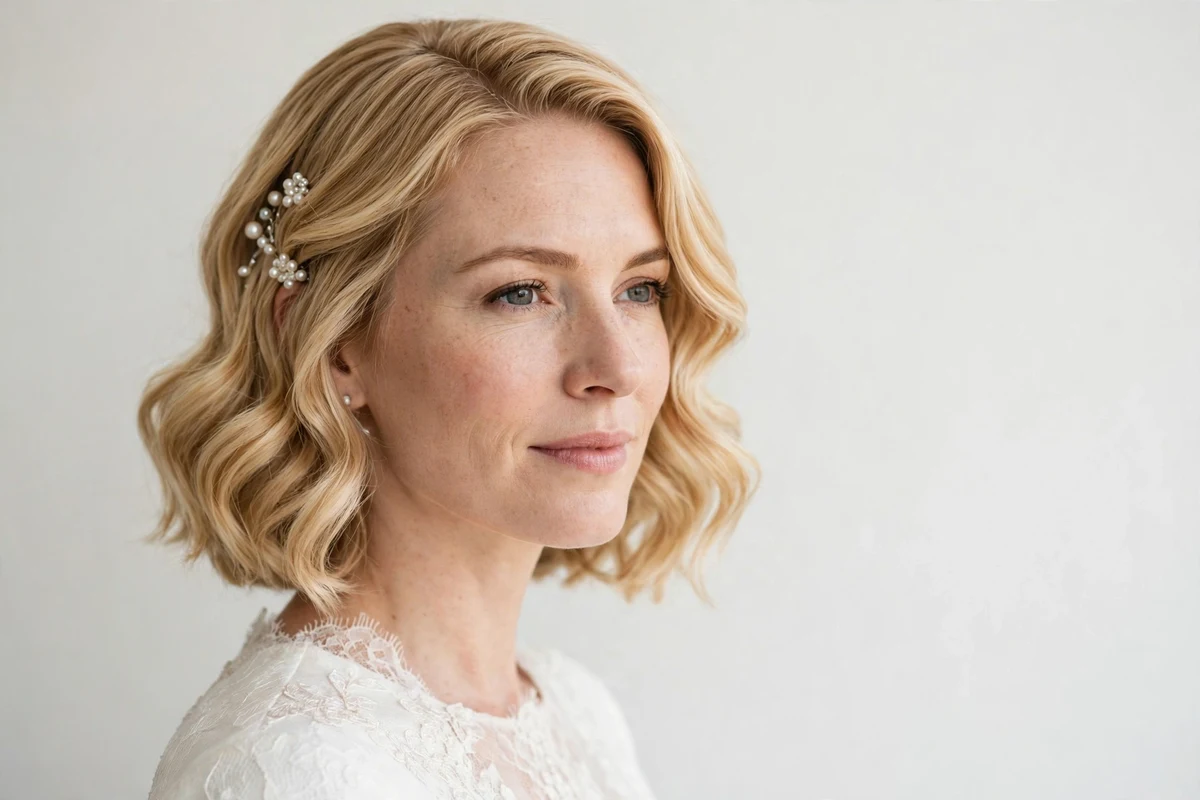
A chin-length bob might look too short for a wedding, but brides, bridesmaids, and guests wear it down the aisle every season. The cut frames the face, shows off the neckline of the dress, and photographs cleanly from every angle.
This guide rounds up 22 chin length bob hairstyles wedding looks that actually work on the day, from sleek straight finishes to pearl-pinned waves. Each idea includes a styling tip, a difficulty rating, and what it costs to pull off. I’ve watched enough wedding mornings to know the best style is the one that still looks right at the last dance.
Quick answer: A chin-length bob suits weddings when you dress it up: sleek and straight for minimalist ceremonies, soft waves or curls for romantic themes, and pearls, veils, or floral pins for a bridal finish. Most styles take 15 to 30 minutes and hold all day with the right prep.
Quick Takeaways
- A chin-length bob works for brides, bridesmaids, and wedding guests with the right styling.
- Veils pair best in short or birdcage lengths, or as a side veil pinned near the temple.
- Accessories do the heavy lifting: pearls, jeweled clips, and floral pins turn a daily bob into a wedding look.
- Most styles take 15 to 30 minutes; book a trial if your hair is fine or slips out of pins.
- Prep with texture spray and flexible-hold hairspray so the style survives dancing and humidity.
Why a Chin-Length Bob Works for Weddings
Short hair gets unfairly dismissed as un-bridal. In practice, a chin-length cut has real advantages on a wedding day. It dries and styles in half the time of long hair, it doesn’t wilt in heat the way longer styles do, and it keeps the focus on your face, makeup, and neckline.
The cut also flatters most dress necklines. Strapless, off-shoulder, and high-neck gowns all sit well against a bob that ends at the jaw, because nothing competes with the collar or straps. And because the hair is short, it holds curl and texture longer than the same curl would on heavy long hair.
What a bob can’t do is an elaborate updo. That’s the trade-off, and it’s why accessories matter more here than on longer hair. A plain bob reads everyday; the same bob with pearl pins, a birdcage veil, or a braided crown reads wedding. Plan the accessory as part of the look, not an afterthought.
1. Sleek Straight Bob
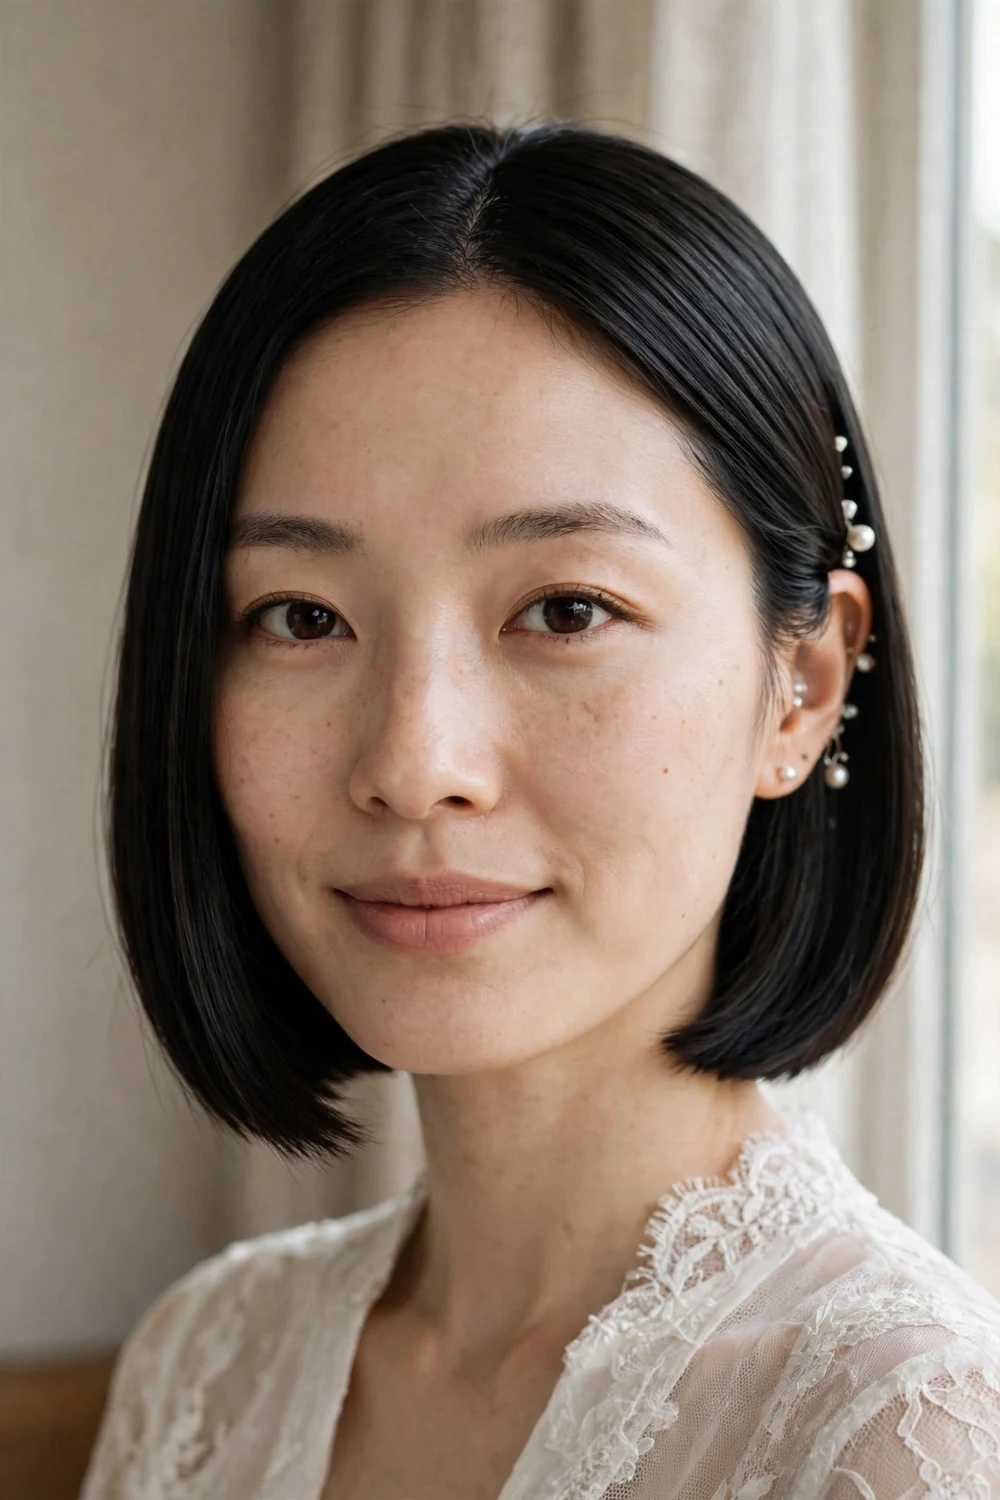
Straighten the bob with a flat iron until it shines, and let the clean edge do the talking. This is the minimalist bride’s answer: no curls, no fuss, just sharp lines that match a satin gown or a tailored suit. A shine serum on the mid-lengths and ends gives the mirror finish that photographs so well. Work in one-inch sections, pulling each pass from root to tip in one smooth motion so the cuticle lies flat. Start at the nape and move upward; the full head takes about 20 minutes at this length. Finish with a light mist of anti-humidity spray so the style survives an outdoor ceremony.
Try this: Finish with a pea-sized drop of gloss serum pressed through the ends, and carry a mini flat iron for touch-ups before photos. Difficulty: easy. Cost: under $15 in serum and heat protectant.
2. Soft Romantic Waves
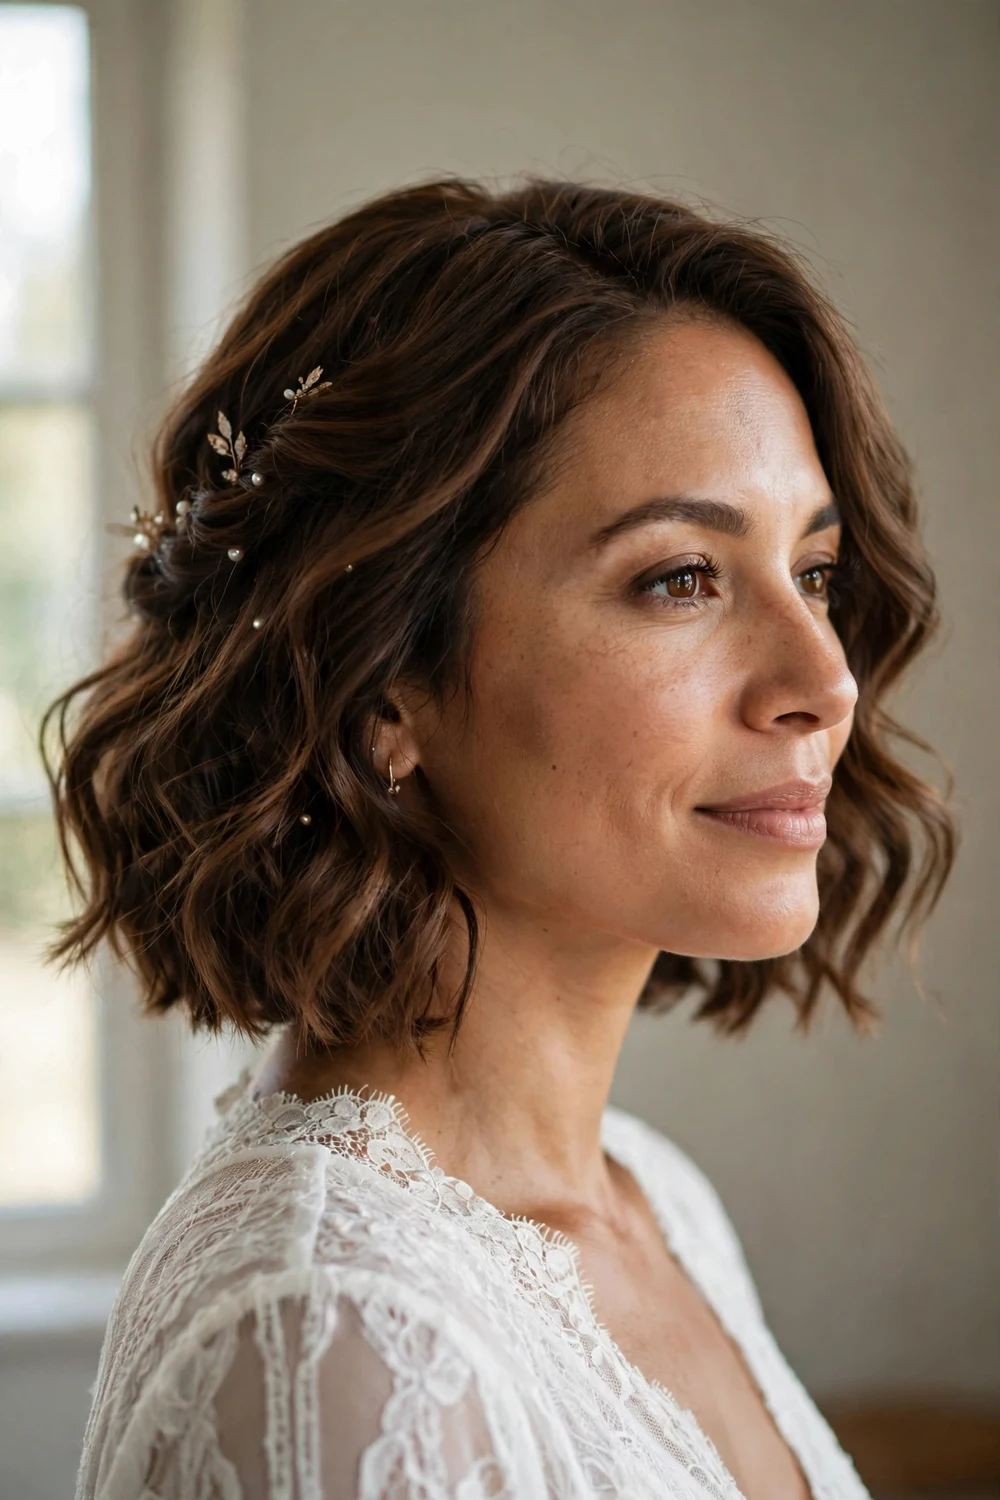
If you want movement without tight curls, loose waves are the middle ground. Wrap one-inch sections around a curling wand, hold each for five seconds, and brush through with a paddle brush once they cool. The result looks relaxed but deliberate, which suits garden ceremonies and outdoor receptions where wind is part of the day. Alternate the curl direction every other section so the waves don’t clump into one pattern. A pea-sized amount of smoothing cream on the ends keeps them from frizzing by the time the reception starts.
Try this: Mist each section with light heat protectant before curling, and skip hairspray until the very end so the waves stay soft. Difficulty: easy. Cost: under $20 in spray and a wand you may already own.
3. Defined Bridal Curls
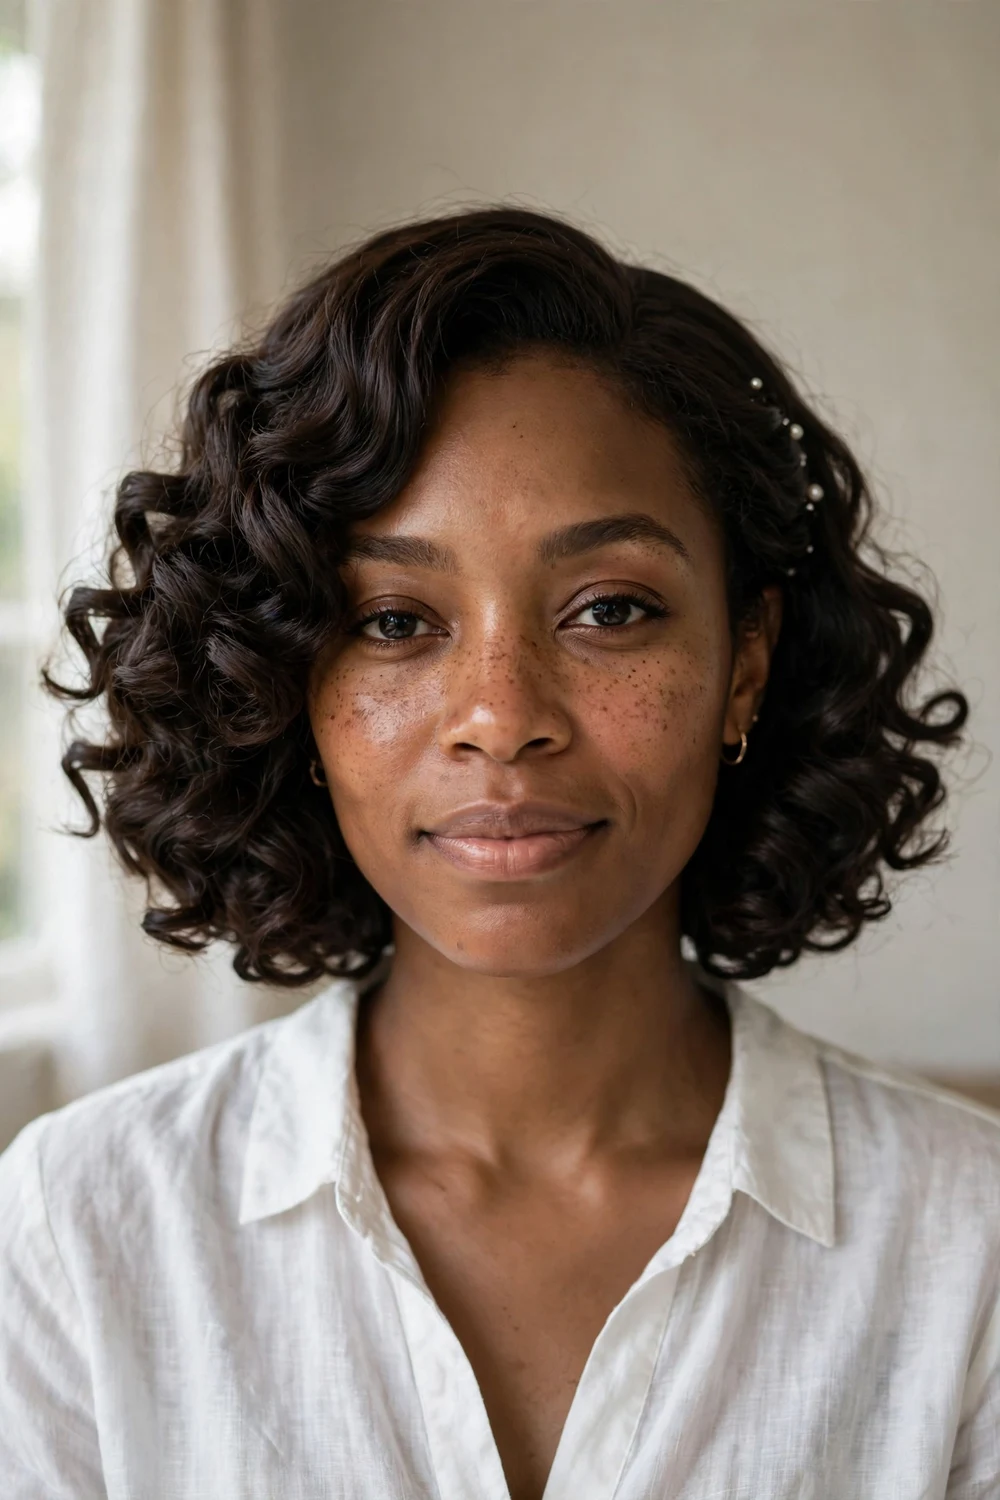
Defined curls read dressier than waves. Use a three-quarter-inch iron, curl every section in the same direction, and let each curl cool pinned in place before you release it. On a chin-length bob this creates a ringlet frame around the face that holds its shape for hours, which is why curls are a go-to for formal evening weddings. Work from the bottom layer up so finished curls rest neatly on top of each other. A light pass of medium-hold spray on each cooled curl locks the definition without stiffness.
Try this: Curl each section slightly tighter than your target, since curls relax during the first hour. Pin-curl them to cool for maximum hold. Difficulty: medium. Cost: $15 to $25 in pins, clips, and spray.
4. Vintage Hollywood Waves
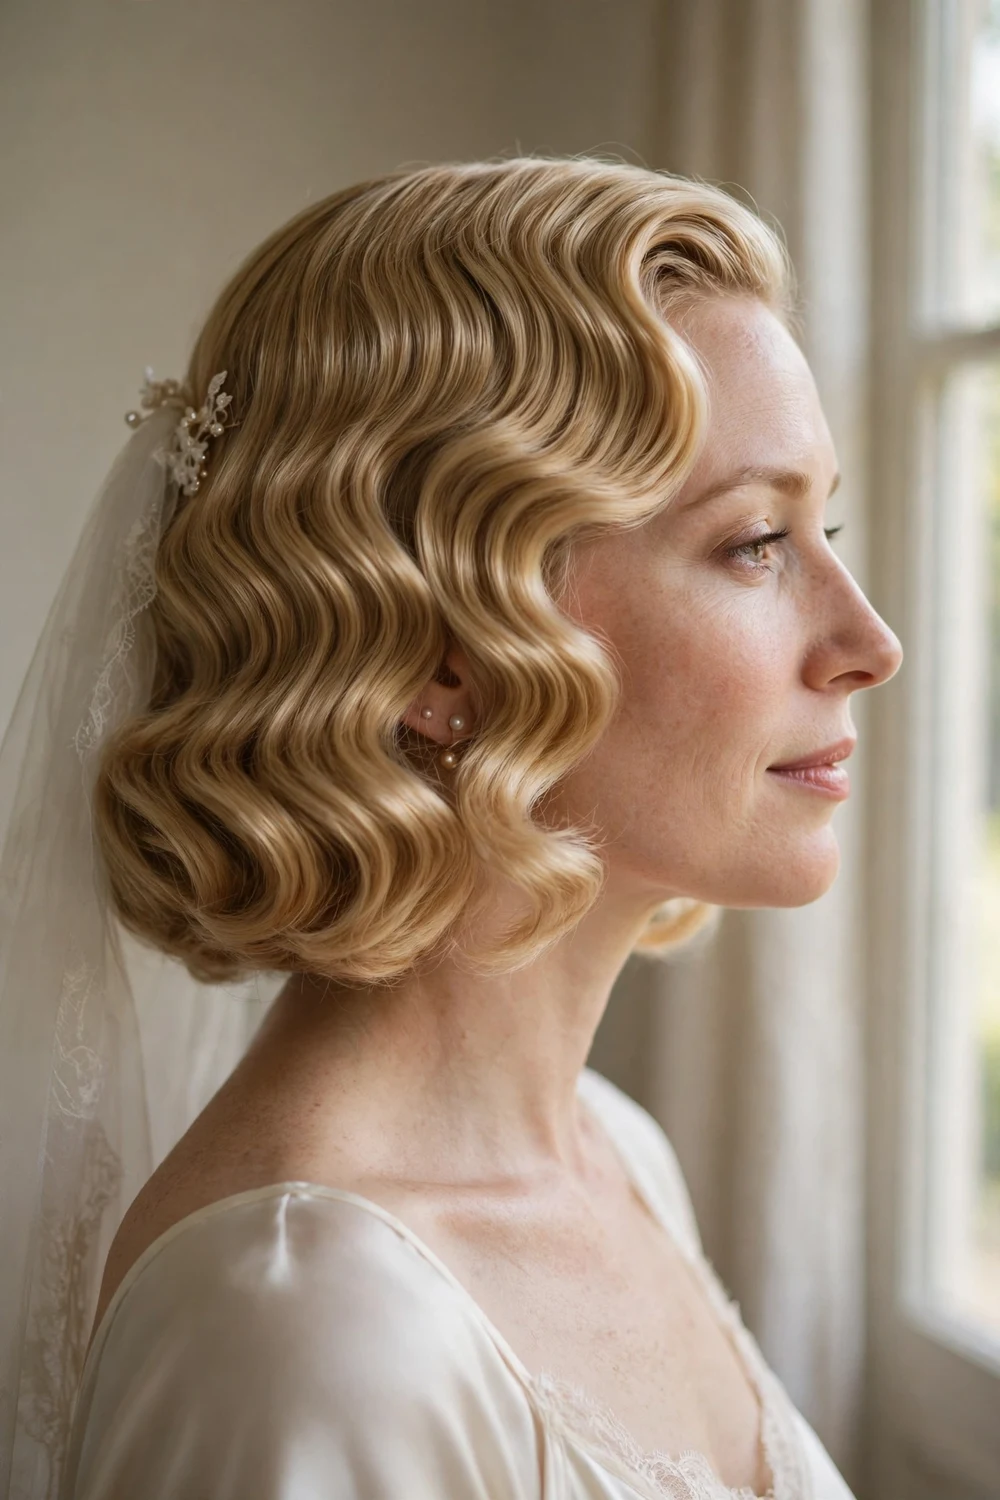
Old Hollywood glamour was practically invented for this length. Deep side part, sculpted S-waves laid flat against the head, ends tucked under. Finger waves or a deep-wave iron both get you there. This look pairs naturally with a lace gown and a classic red lip, and it is one of the few styles that looks better in black-and-white photos than in color. Set each wave with a duckbill clip while it cools so the ridge stays crisp. This is a trial-and-stylist style; don’t attempt it for the first time on the wedding morning.
Try this: Set the waves with a strong-hold gel while damp, then smooth the surface with a shine spray once dry. Difficulty: hard. Cost: $30 to $60, or a stylist’s trial fee.
5. Twisted Half-Up Half-Down
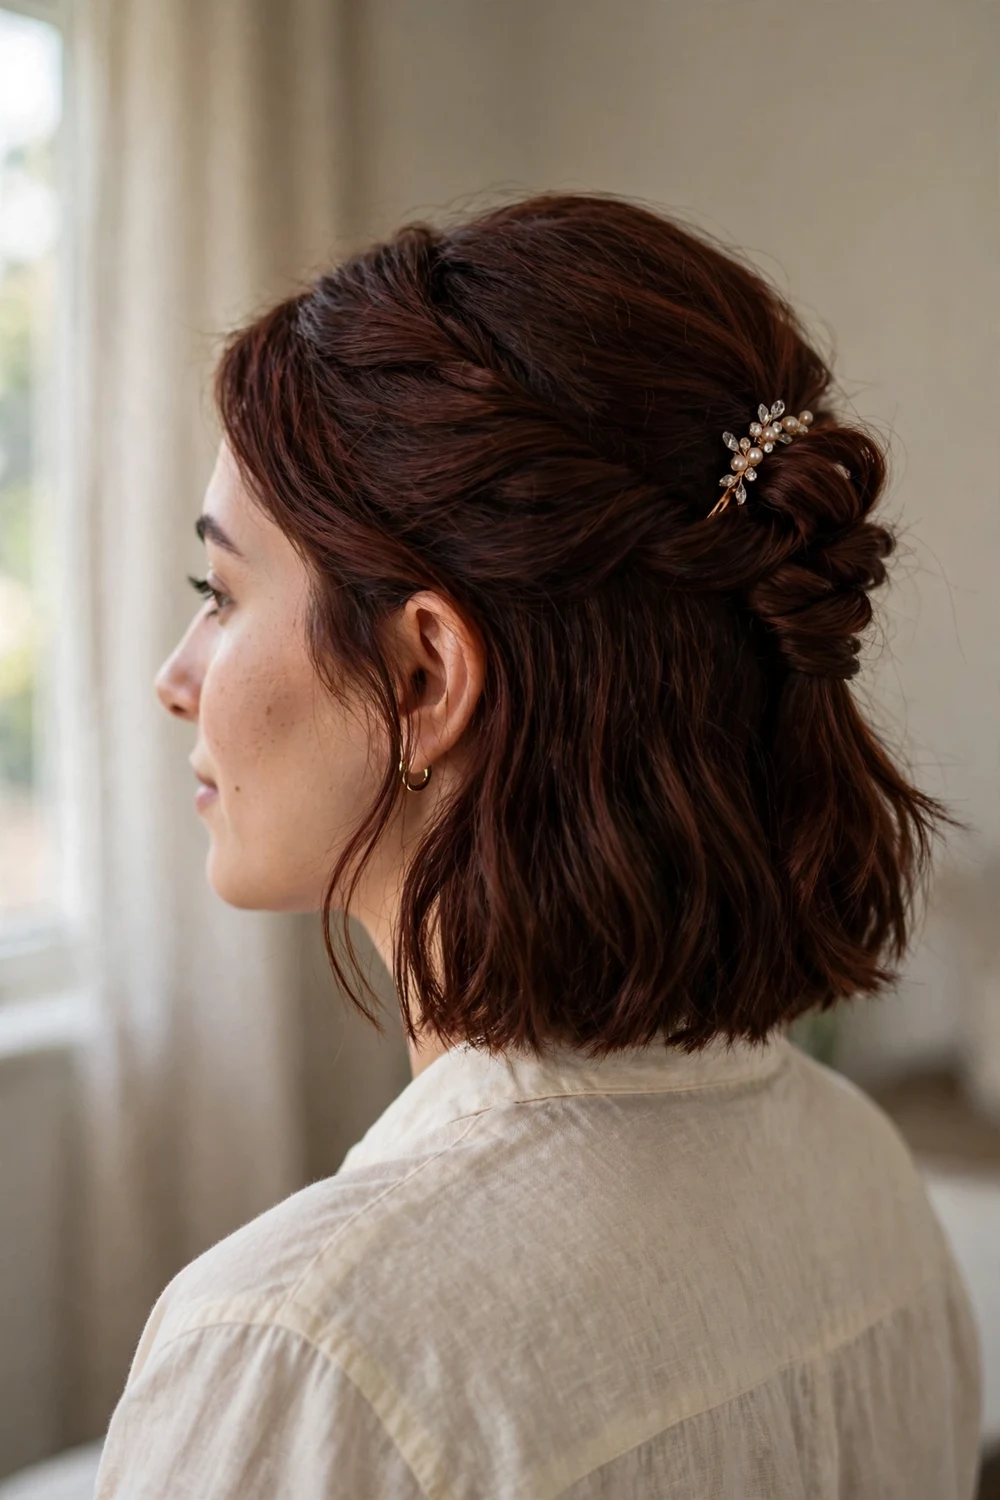
Gather the top section from each temple, twist both toward the back, and join them with a jeweled barrette. The rest of the bob falls loose. This keeps hair out of your face during the ceremony while leaving length to frame the jaw. On chin-length hair the twist only needs two to three inches of hair per side, so it works even on fine hair. Secure each twist with a bobby pin before adding the barrette, so the barrette is decorative rather than load-bearing. Backcomb the crown lightly first to give the pins something to grip.
Try this: Backcomb the crown lightly before twisting to give the barrette something to grip. Difficulty: easy. Cost: $10 to $25 for the barrette and pins.
If you like the half-up direction but want the hair fully off your neck, our guide to chin length bob hairstyles updo covers tucked and pinned options that work at this length.
6. Side Accent Braid
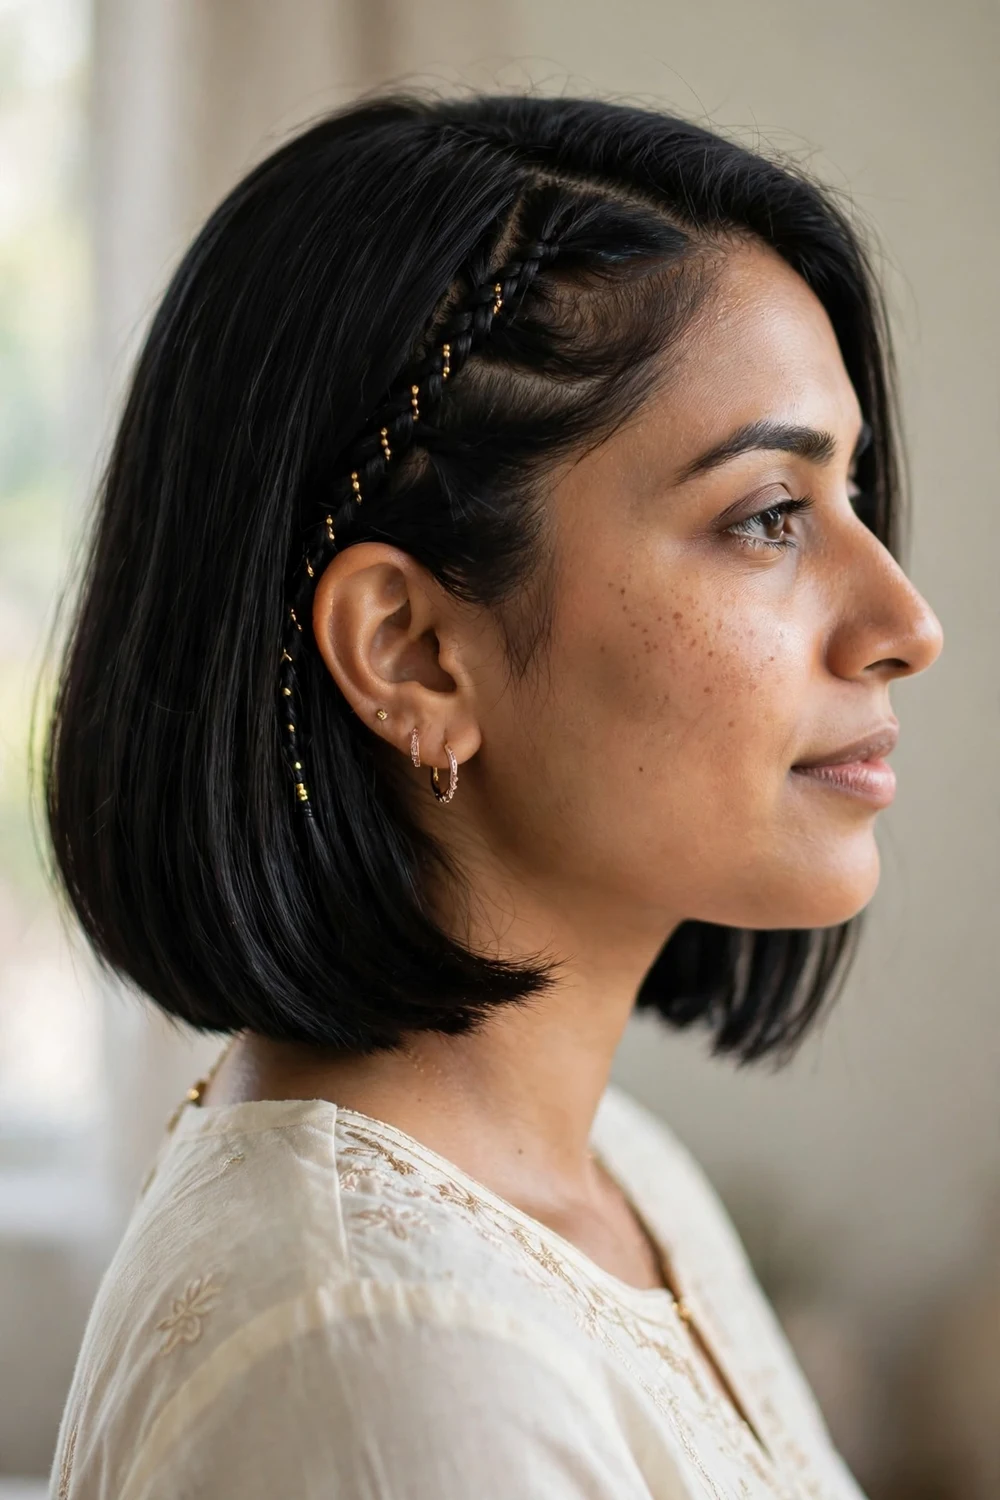
Braid a thin section from one temple back along the hairline and pin it behind the ear. A three-strand, fishtail, or twisted braid all work at this length because the braid is short and decorative, not structural. It adds a hand-crafted detail that shows up well in close-up shots of the ceremony. Weave in a few tiny pearl pins along the braid for a bridal touch. Keep the braid snug against the scalp so it reads as a design element rather than a stray piece.
Try this: Tug the braid edges gently to widen it, then anchor the end with a small clear elastic and a bobby pin crossed underneath. Difficulty: easy. Cost: under $5.
7. Braided Crown with Floral Clips
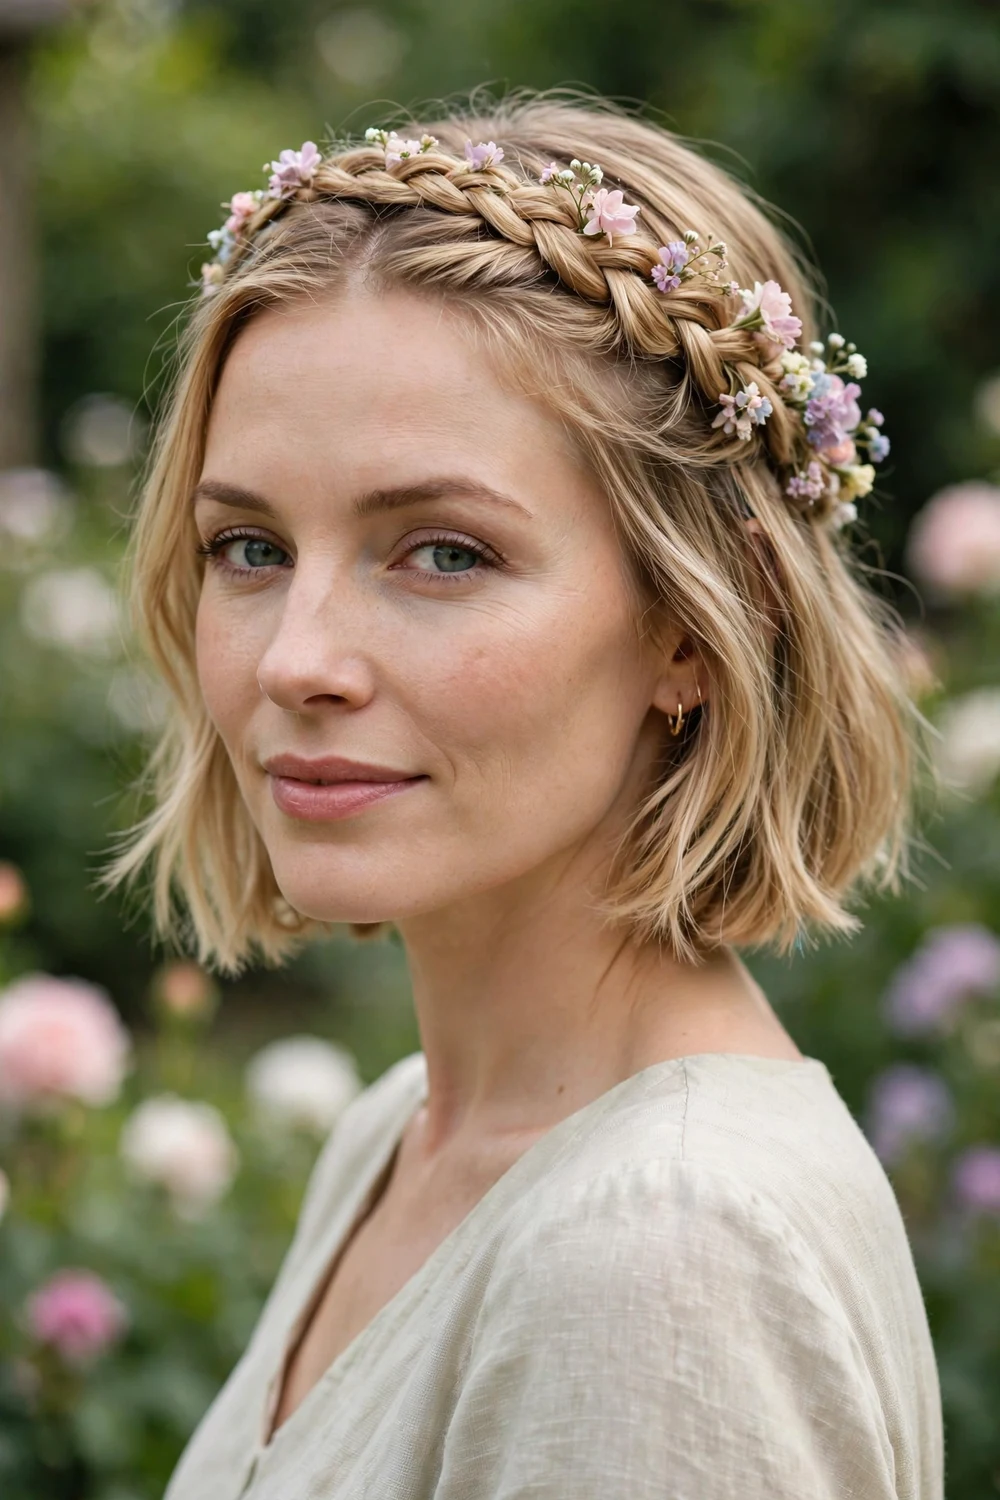
Weave a soft braid from each temple and join them across the crown like a headband, then tuck in tiny fresh or silk blossoms. The rest of the bob stays loose underneath. This is the garden-wedding look: romantic without feeling overdone, and it keeps the front hair secure if there is a breeze during an outdoor ceremony. Add light waves to the loose hair first so the braid blends in instead of sitting on top of flat hair. Choose blossoms in your bouquet’s palette so the hair ties into the overall florals.
Try this: Add light waves to the loose hair first so the braid blends instead of sitting on top of flat hair. Difficulty: medium. Cost: $15 to $40 for fresh florals or good silk clips.
8. Pearl Accents with Loose Waves
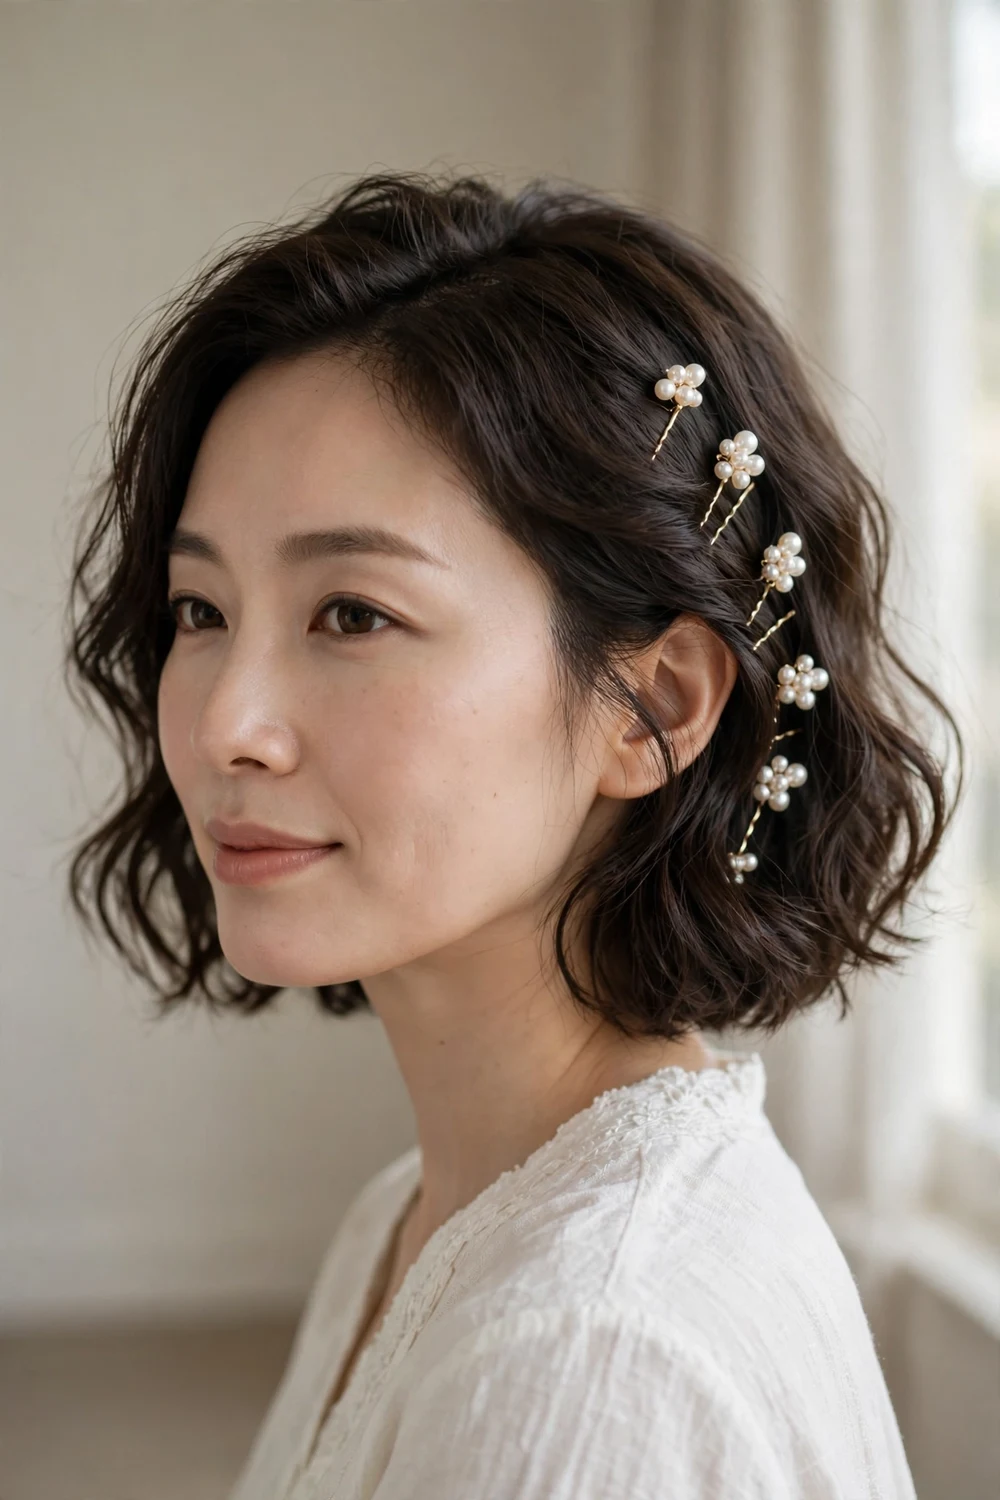
Start with loose waves, then place three to five pearl hairpins along one side, following the part line. Pearls catch light in photos and instantly signal bridal without a veil. Keep the pins on one side only; symmetry makes it look like a costume, while asymmetry looks modern. Slide each pin against the direction of hair growth so it locks in place. Space the pins unevenly, cluster two close together and leave a gap before the next, for an editorial feel.
Try this: Slide each pin against the direction of the hair growth so it locks, and finish with a light mist of flexible-hold spray. Difficulty: easy. Cost: $10 to $20 for a set of pearl pins.
9. Sleek Gloss Finish with Side Veil
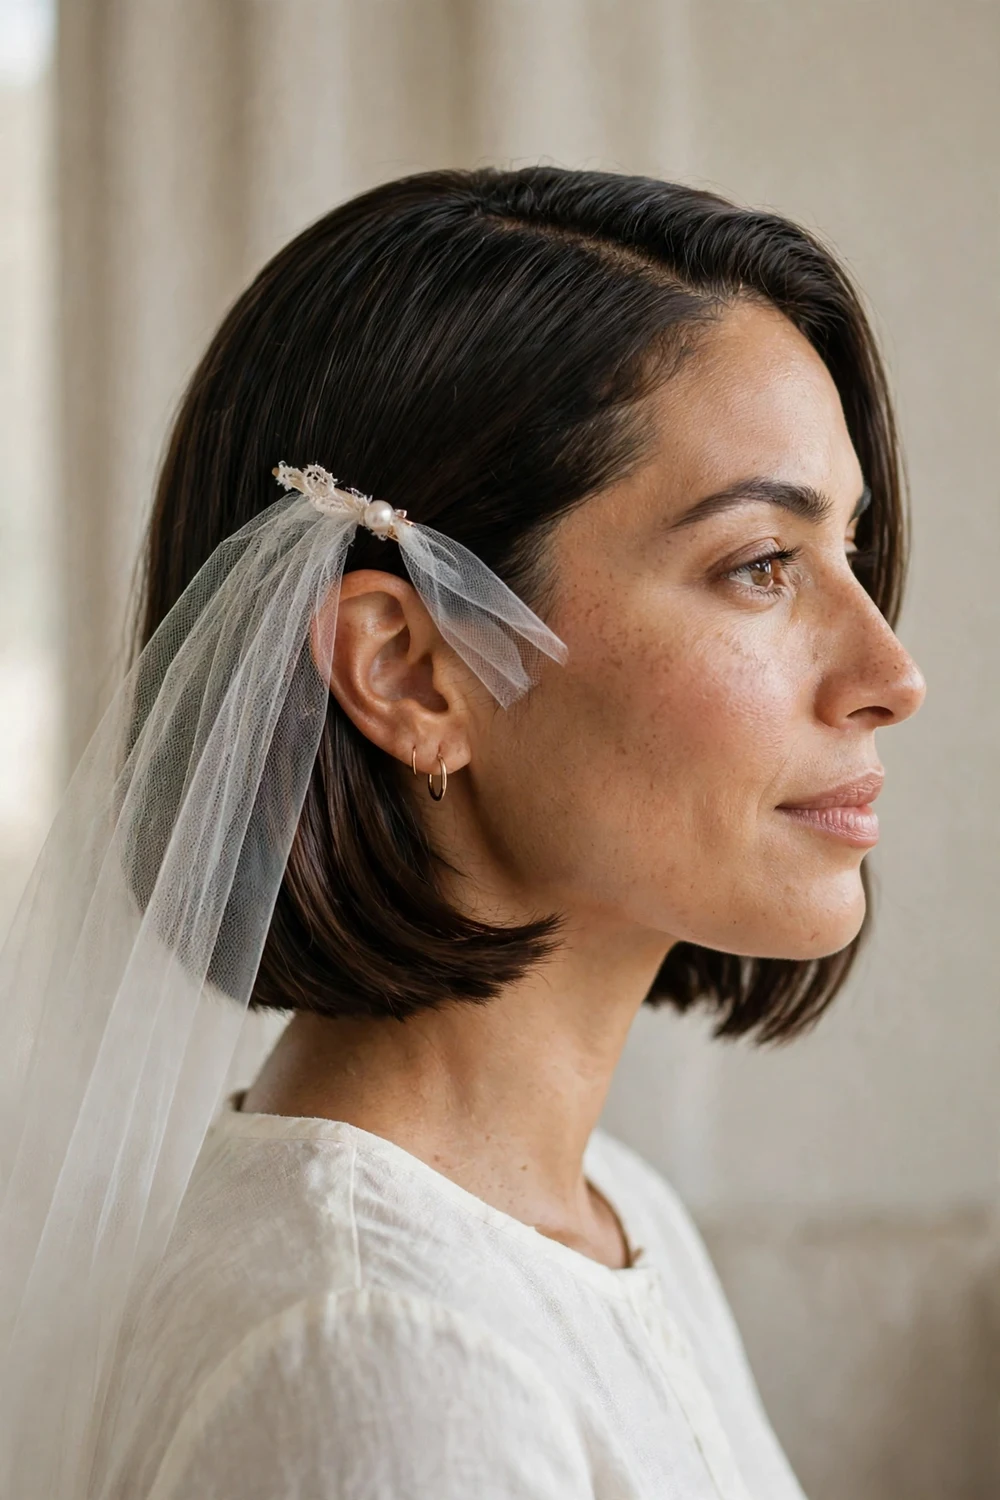
Flat-iron the bob to a high-shine finish with a deep side part, then attach a short veil at the temple on the heavier side. The veil drapes down one side and lifts away easily for the reception. This suits city and rooftop weddings where the clean lines of the hair echo the architecture. Use a smoothing serum before ironing and a gloss spray after; the shine is what makes this look expensive. Anchor the veil comb with two crossed bobby pins so it stays put in wind.
Try this: Use a smoothing serum before ironing and a gloss spray after; the shine is what makes this look expensive. Difficulty: medium. Cost: $20 to $50 including the veil comb.
10. Blunt Bob with Birdcage Veil
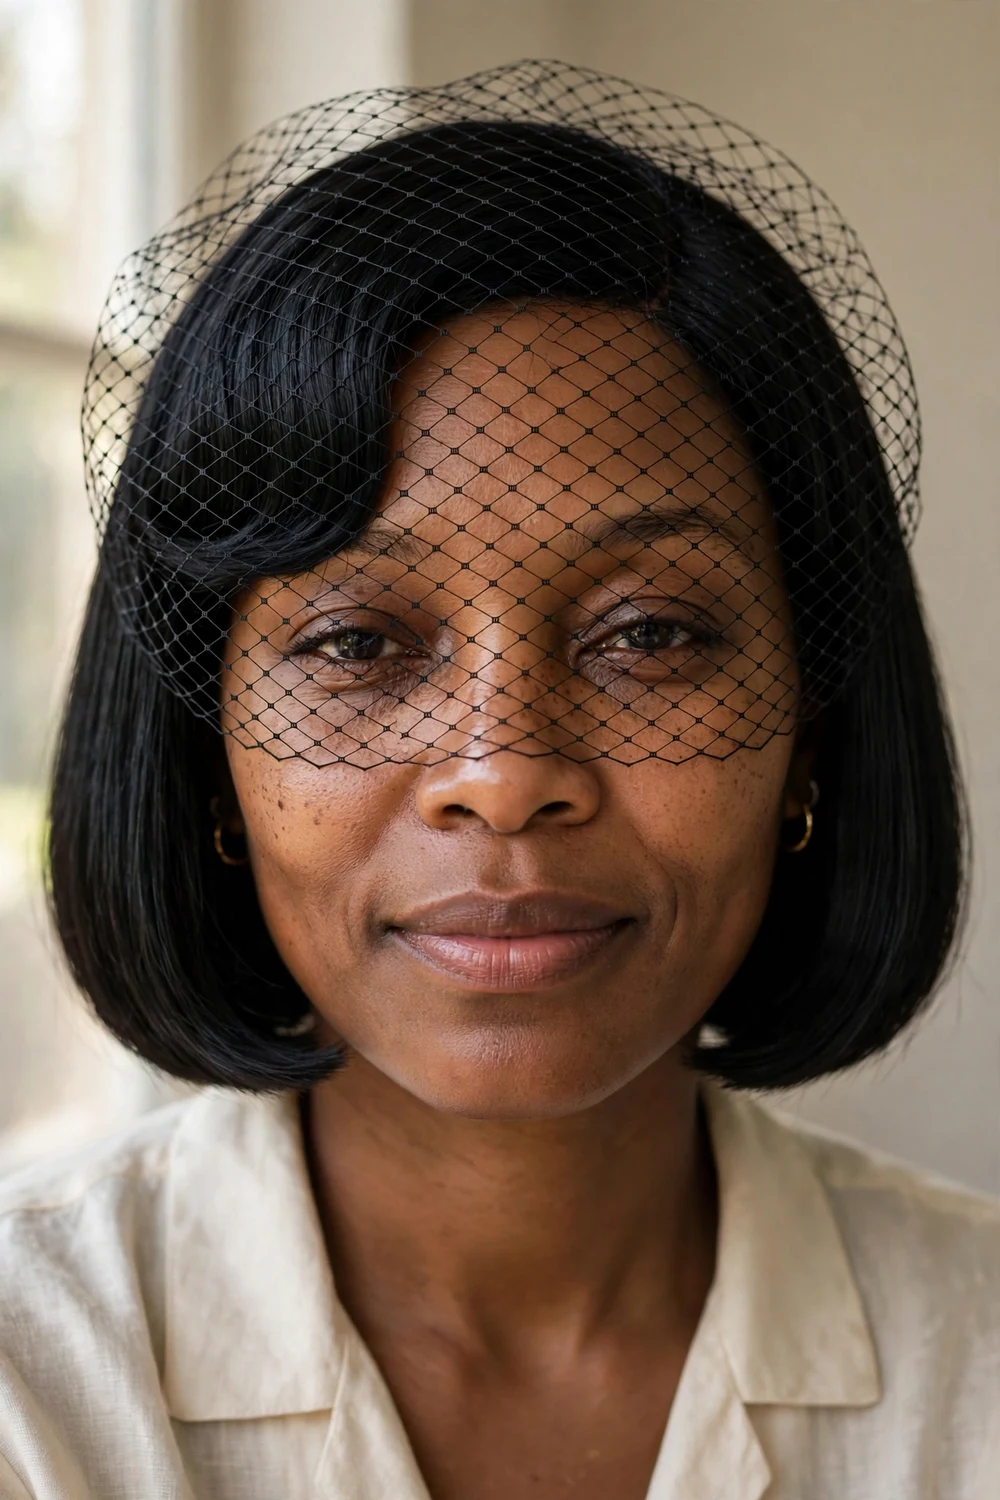
A sharp blunt cut plus a short birdcage veil is the classic retro bridal pairing. The veil’s netting sits over the eyes or just above them, attached at the crown. Because the bob ends at the chin, nothing tangles with the veil’s lower edge, which is the main practical reason this combo works so well. Ask your stylist to trim the bob a week before the wedding so the edge looks fresh. Pin the veil slightly off-center for a modern tilt, and keep the makeup simple so the veil stays the focus.
Try this: Ask your stylist to trim the bob a week before the wedding so the edge looks fresh, and pin the veil slightly off-center for a modern tilt. Difficulty: easy. Cost: $20 to $40 for a birdcage veil.
11. Deep Side-Swept Bob
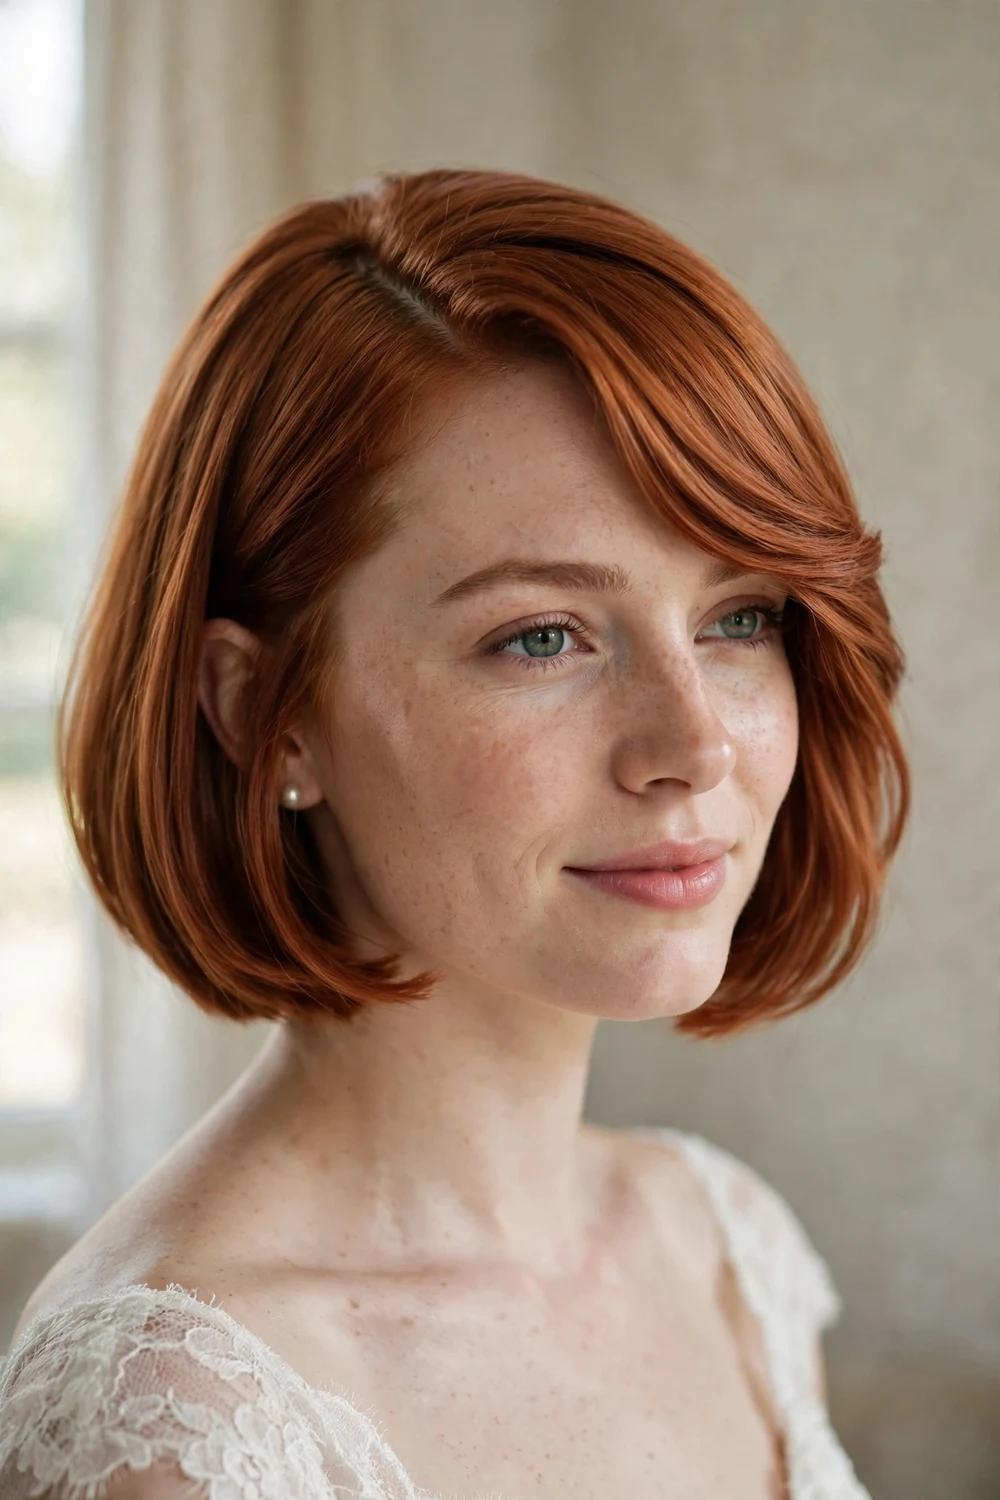
Part the bob deeply on one side and sweep the heavier section across the forehead. The asymmetry adds drama and volume at the roots, which helps fine hair look fuller in photos. It is a simple change from a center part, but it reads completely different on camera. Blow-dry the roots in the opposite direction first, then sweep them over for lift that lasts. A light-hold spray on the roots keeps the sweep from falling flat by dinner.
Try this: Blow-dry the roots in the opposite direction first, then sweep them over for lift that lasts. Difficulty: easy. Cost: under $10 in volumizing mousse.
12. Textured Tousled Bob

Work a texturizing spray through dry hair, scrunch the mid-lengths, and rough up the crown with your fingers. Choppy layers in the cut make this almost effortless. The tousled texture keeps a wedding look from feeling stiff, so it is a strong pick for casual or bohemian ceremonies where polished hair would look out of place. Spray texture into the roots, flip your head upside down, and blast with a diffuser for two minutes. Add one statement accessory, a jeweled pin or small comb, so the look reads intentional.
Try this: Spray texture into the roots, flip your head upside down, and blast with a diffuser for two minutes. Difficulty: easy. Cost: $10 to $18 for a texture spray.
For a sharper take on short wedding hair, a line bob haircuts shows how the angled cut changes the silhouette for formal occasions.
13. Sleek Side-Parted Bob
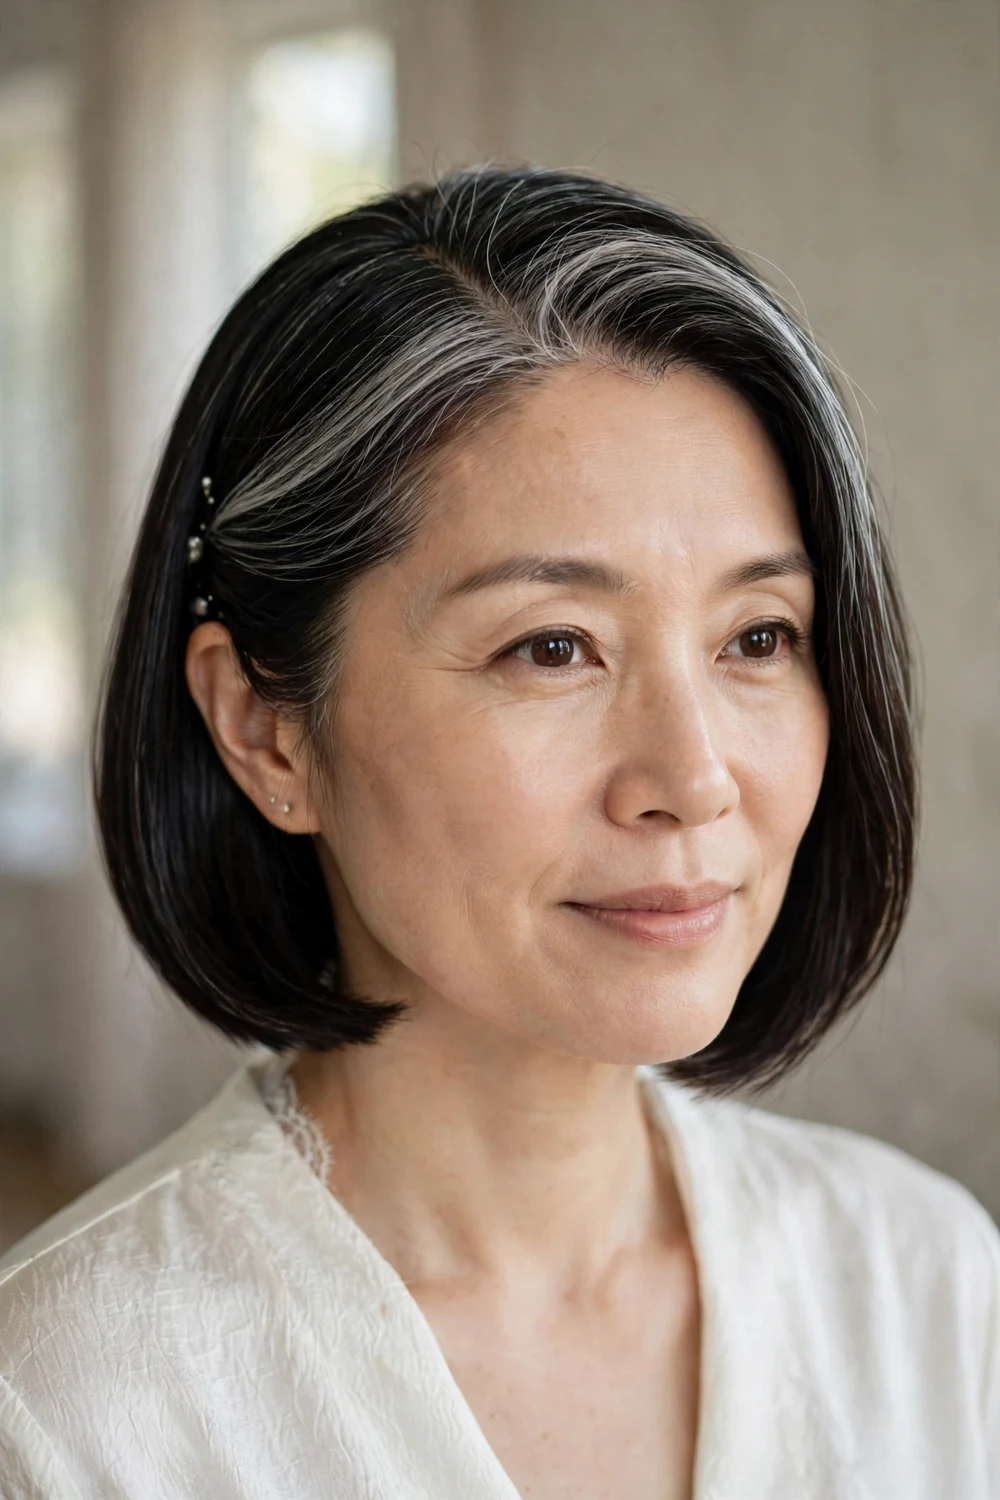
Skip the veil and accessories: a deep side part, glassy smoothness, and statement earrings carry this look on their own. The side part creates a diagonal line that draws the eye across the face, which is flattering in portraits. It is the lowest-maintenance option here that still looks intentional. Set the part with a fine-tooth comb while the hair is still warm from the iron, then cool it in place with a blast of cold air. Tuck the lighter side behind the ear to show off an earring.
Try this: Set the part with a fine-tooth comb while the hair is still warm from the iron, then cool it in place with a blast of cold air. Difficulty: easy. Cost: under $15 in serum and heat protectant.
14. Blunt Bob with Center Part
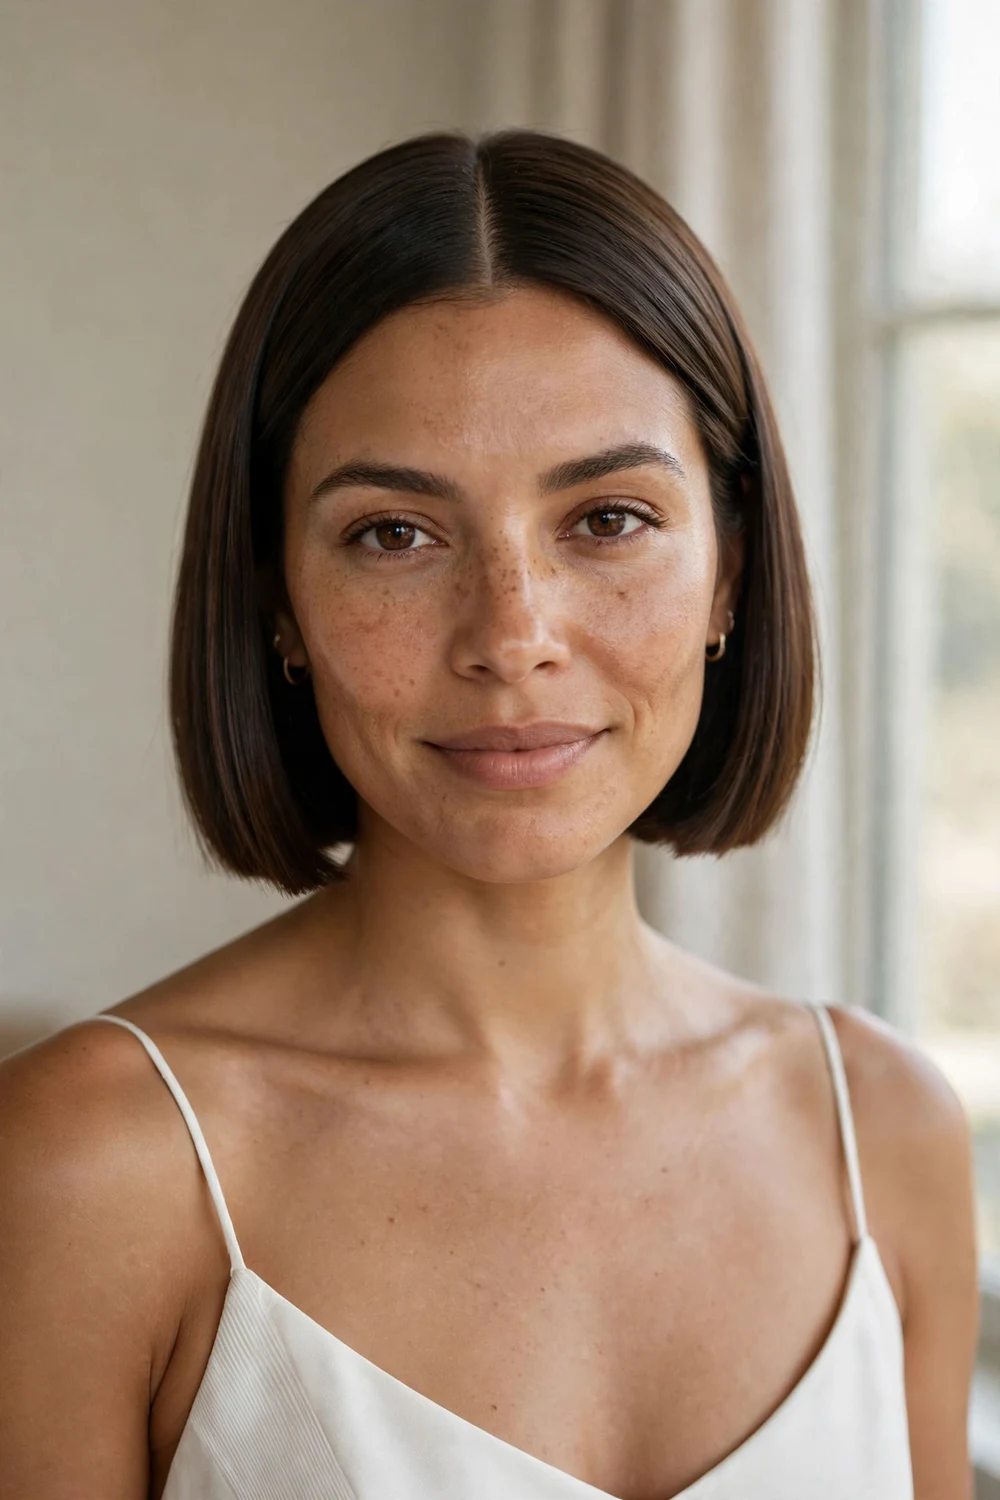
Divide the bob down the middle with a ruler-straight part and iron both sides perfectly smooth. The symmetry is architectural and modern, which pairs well with minimalist gowns and clean venue design. This look demands a precise cut, so it rewards brides who keep their bob freshly trimmed. Use a rattail comb for the part and a drop of anti-frizz oil on the ends to keep flyaways from breaking the line. Check the part in your phone camera before the ceremony; lenses catch crooked parts instantly.
Try this: Use a rattail comb for the part and a drop of anti-frizz oil on the ends to keep flyaways from breaking the line. Difficulty: easy. Cost: under $15.
15. Straight Bob with Bangs
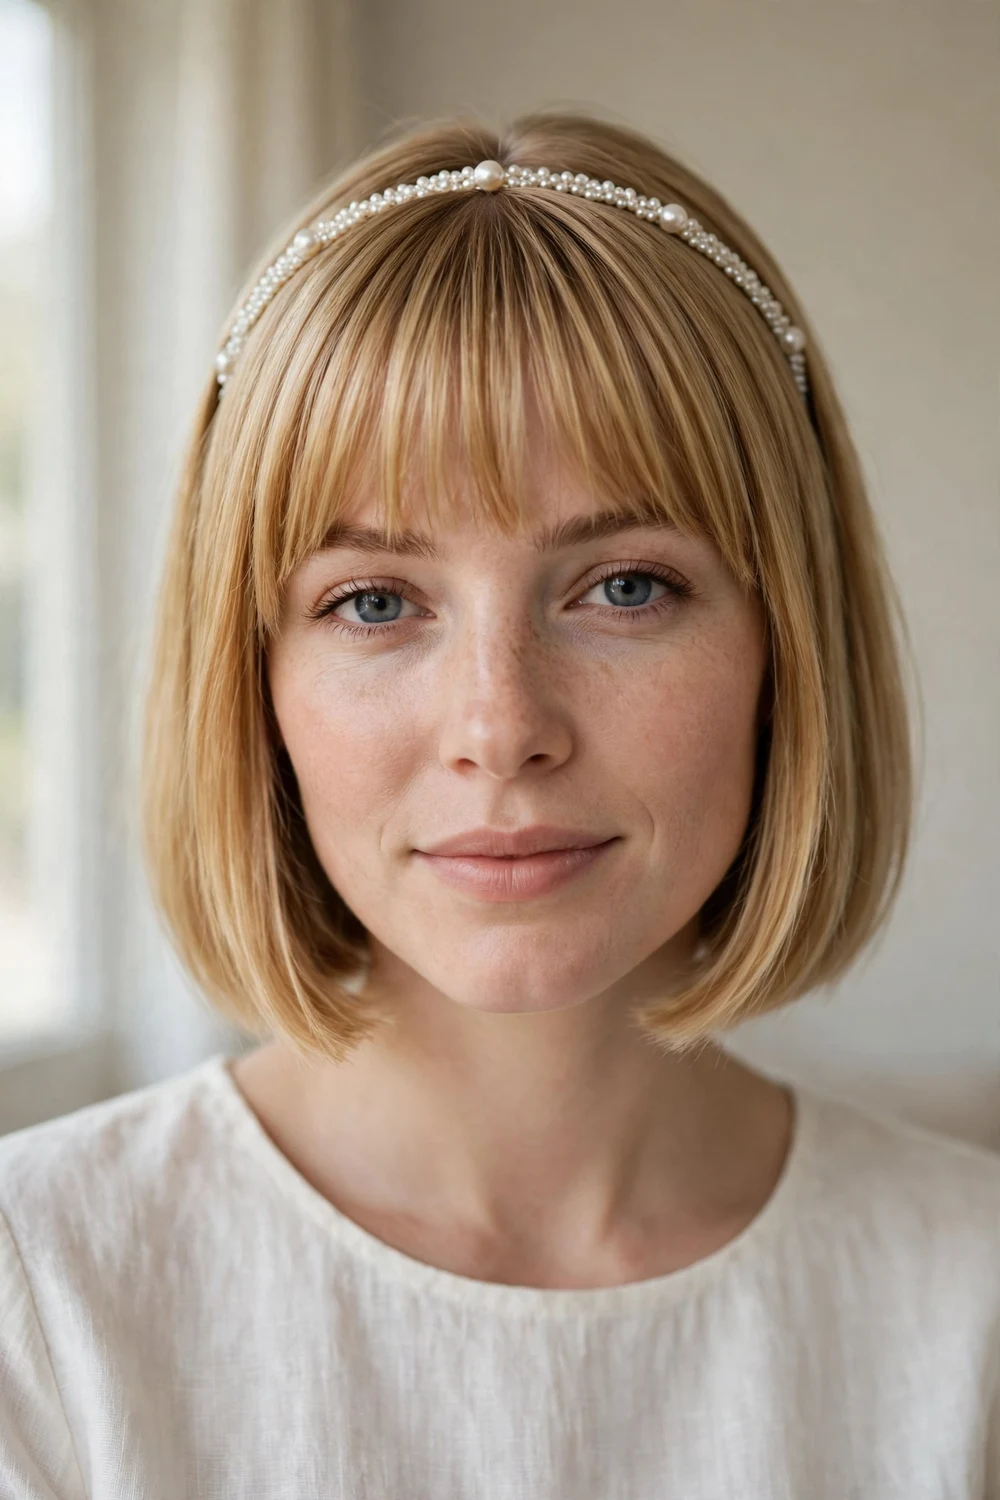
Full straight bangs plus a pearl headband turn a classic bob into a bridal look in about ten minutes. The bangs frame the eyes, the headband holds everything back during the ceremony, and the combination hides any forehead shine in photos. This works best when the bangs are trimmed two to three days before the wedding, not the morning of. Dry the bangs with a small round brush, rolling them under, and set the headband an inch behind the hairline. Keep a mini brush in your bag for a quick bang refresh before portraits.
Try this: Dry the bangs with a small round brush, rolling them under, and set the headband an inch behind the hairline. Difficulty: easy. Cost: $10 to $25 for the headband.
More bangs-forward options live in our guide to chin length bob hairstyles with bangs, which covers curtain, wispy, and side-swept variations.
16. Bouncy Blowout with Curls
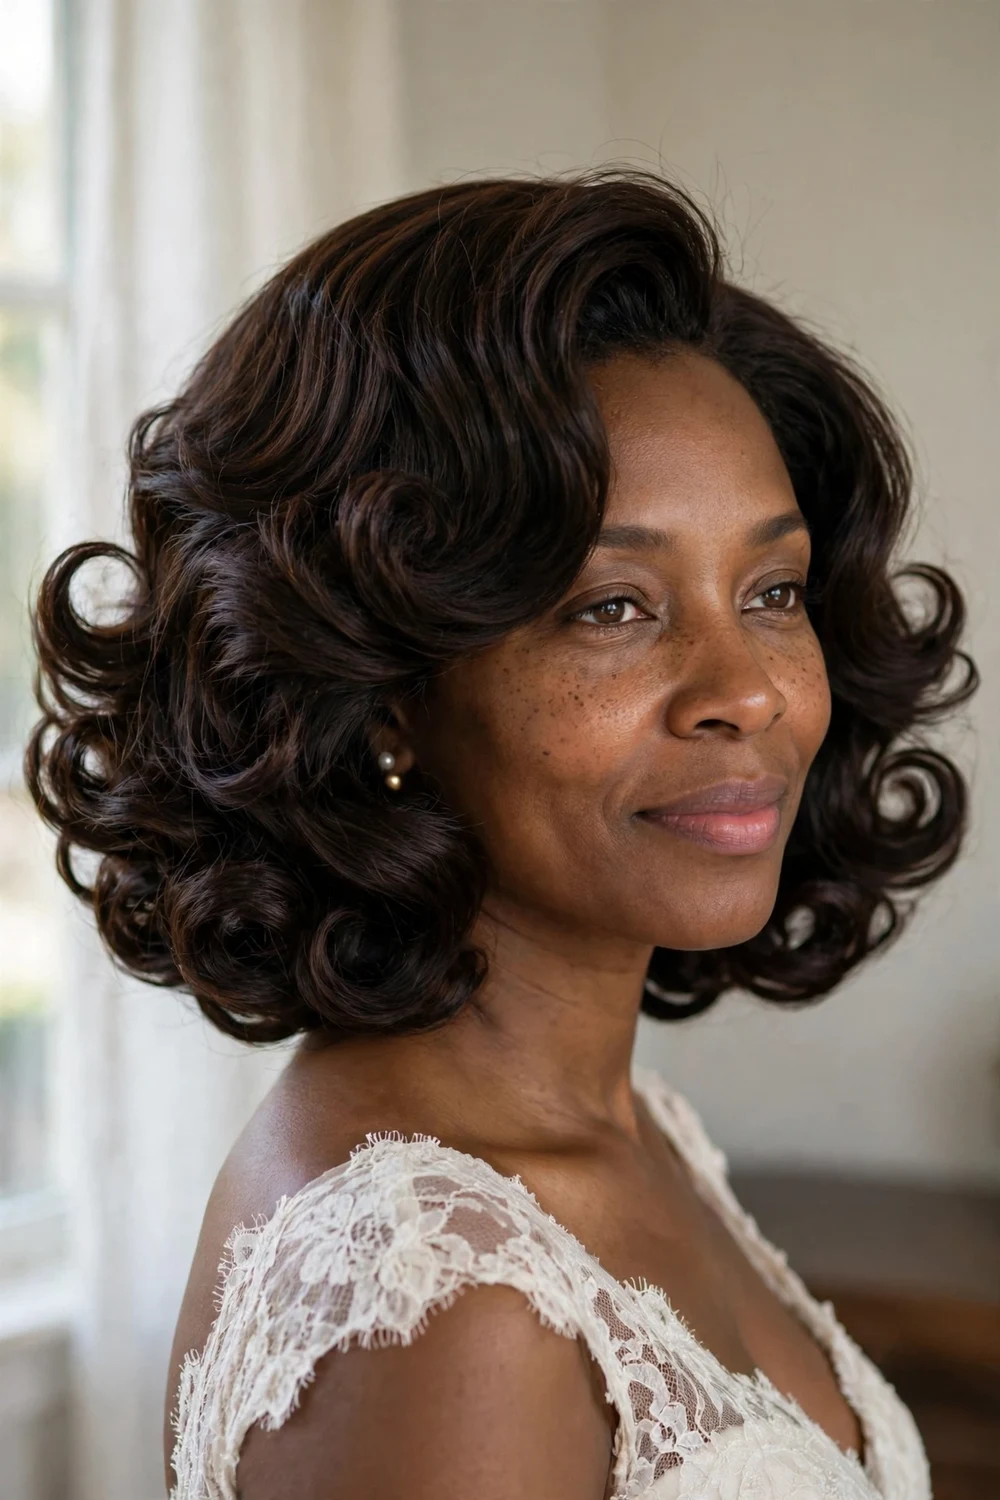
Blow-dry the bob with a large round brush, rolling each section under and outward for volume, then curl just the ends with a big iron. The result is a full, bouncy shape that moves when you do. Salon blowouts at this length last surprisingly well because the short hair does not pull the volume down. Book the blowout for the morning of, not the day before. Ask the stylist to set the curls with clips while they cool; that extra ten minutes doubles how long the bounce survives.
Try this: Book the blowout for the morning of, not the day before, and sleep on it only if you must. Difficulty: medium. Cost: $40 to $80 at a salon.
17. Pinned-Back Bangs with Waves
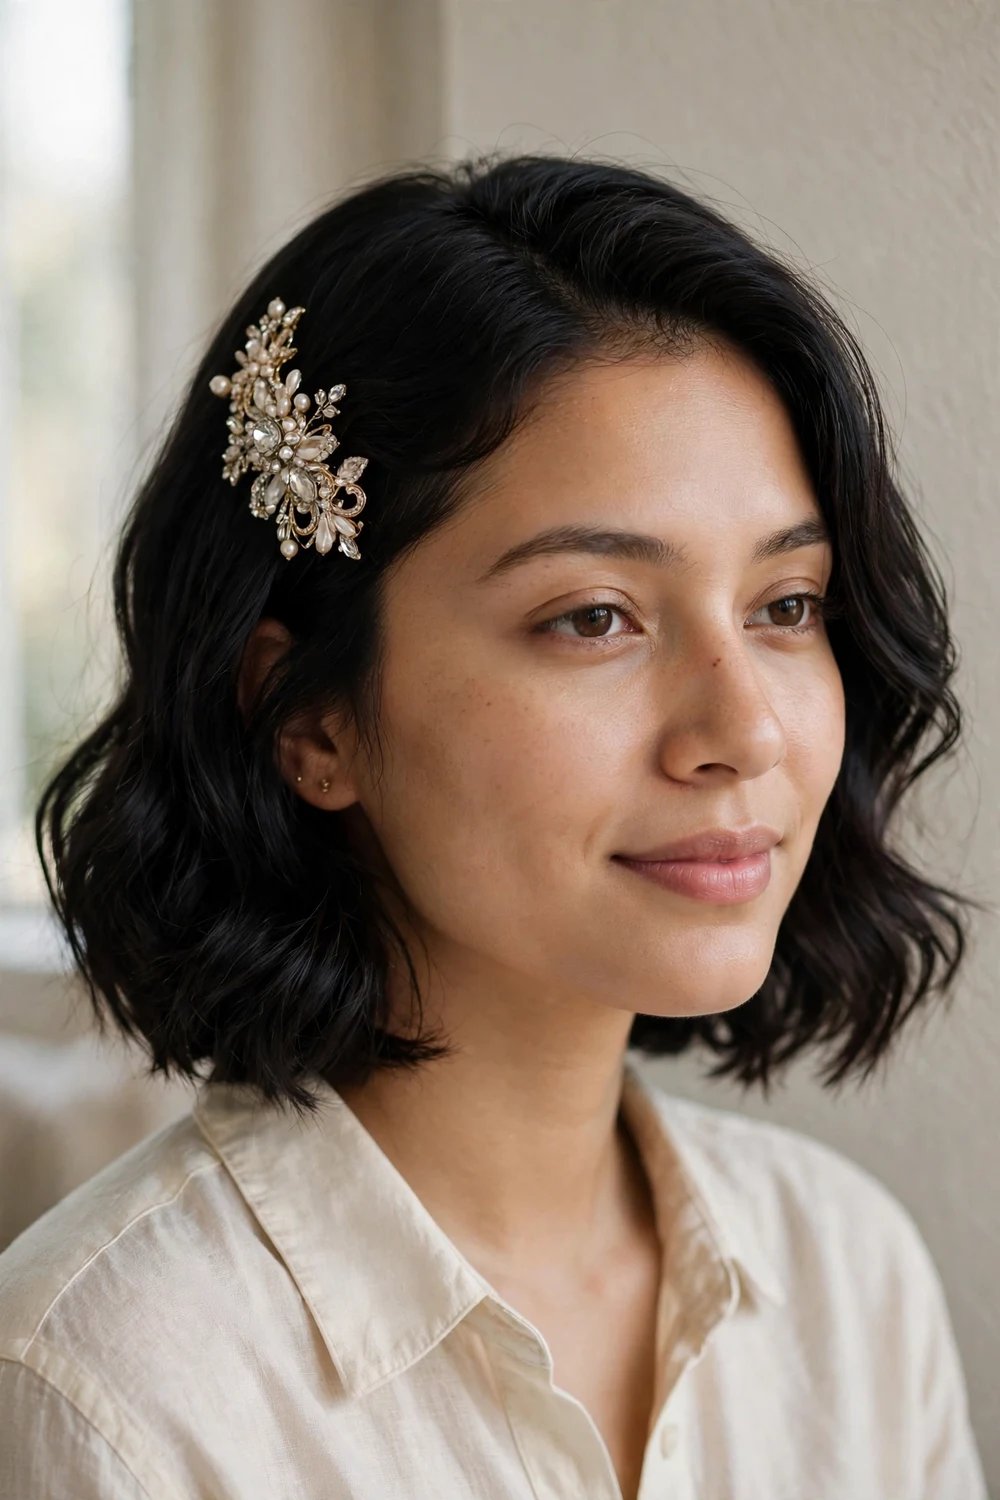
Curl the bob in loose waves, then sweep the front section back and secure it with an embellished clip at the crown. This solves the growing-out-bangs problem on a wedding day: no stray pieces fall in your face during the vows, and the jeweled clip becomes the focal point of the look. Cross two bobby pins under the clip in an X shape so it cannot slide, and tease the crown first for grip. Pull a few thin tendrils loose around the face to soften the pulled-back line.
Try this: Cross two bobby pins under the clip in an X shape so it can’t slide, and tease the crown first for grip. Difficulty: easy. Cost: $10 to $25 for the clip.
18. Natural Curls
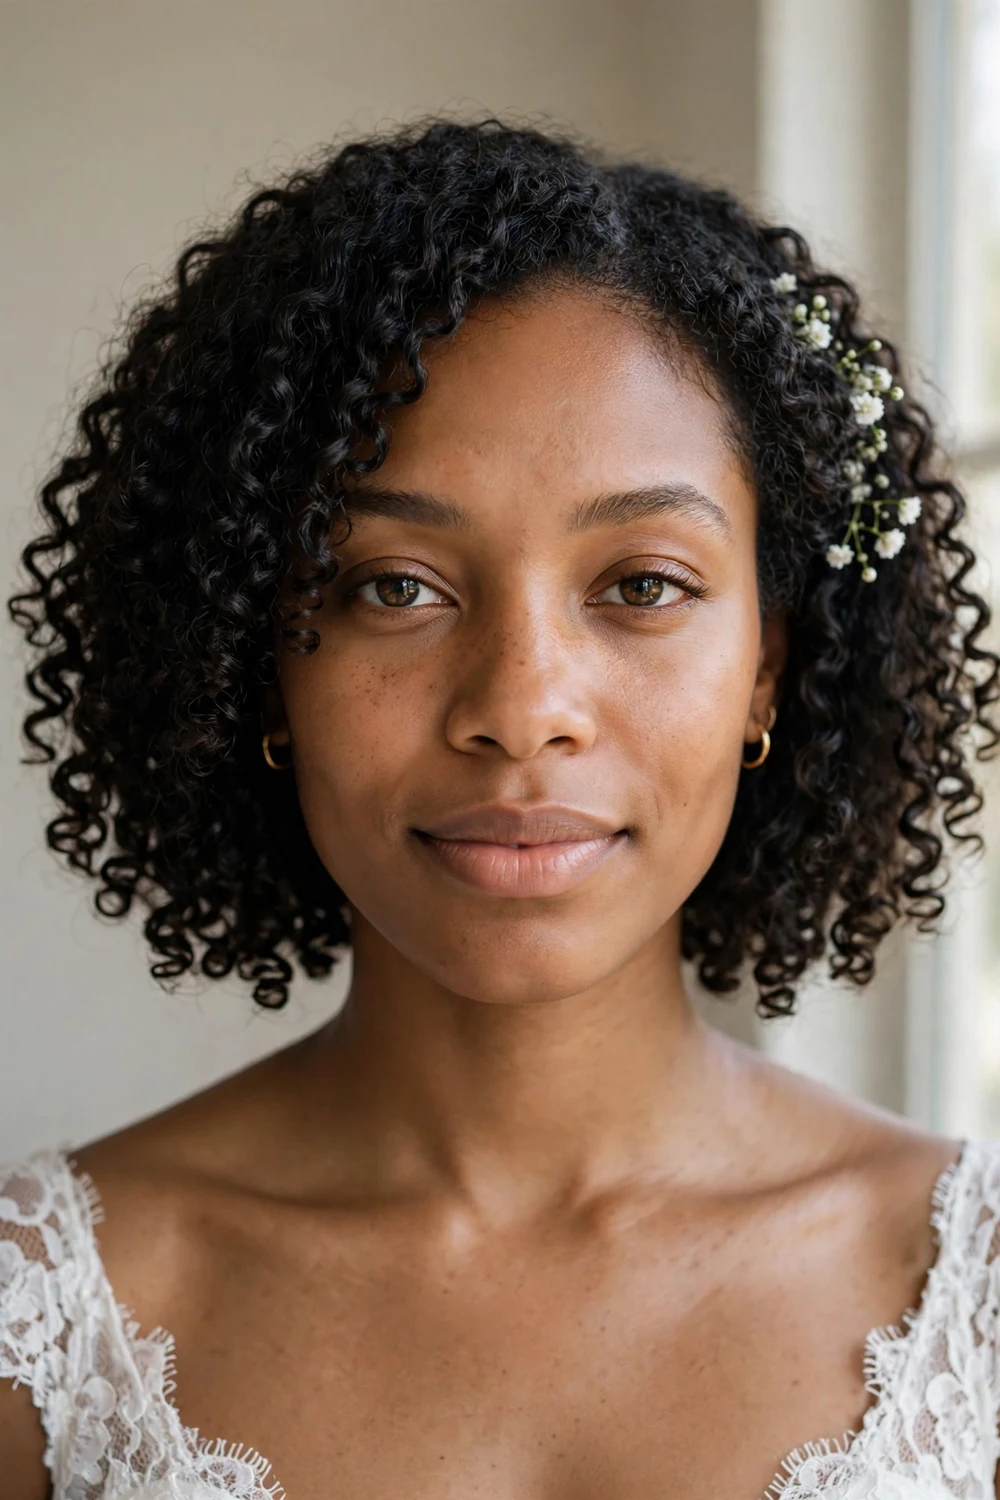
Wear your own curl pattern, defined and frizz-free. Wash with a sulfate-free shampoo, apply curl cream to soaking-wet hair, and diffuse on low heat. A side part or a few face-framing tendrils pulled loose keeps it from looking like an everyday wash-and-go. This is the most authentic option here: your hair, at its best. Do a deep-conditioning mask three days before the wedding, and carry a small bottle of curl refresher spray for the reception. Pineapple the curls overnight before the wedding to protect the definition.
Try this: Do a deep-conditioning mask three days before the wedding, and carry a small bottle of curl refresher spray for the reception. Difficulty: easy. Cost: under $20 in curl products.
19. Beach Waves for Destination Weddings
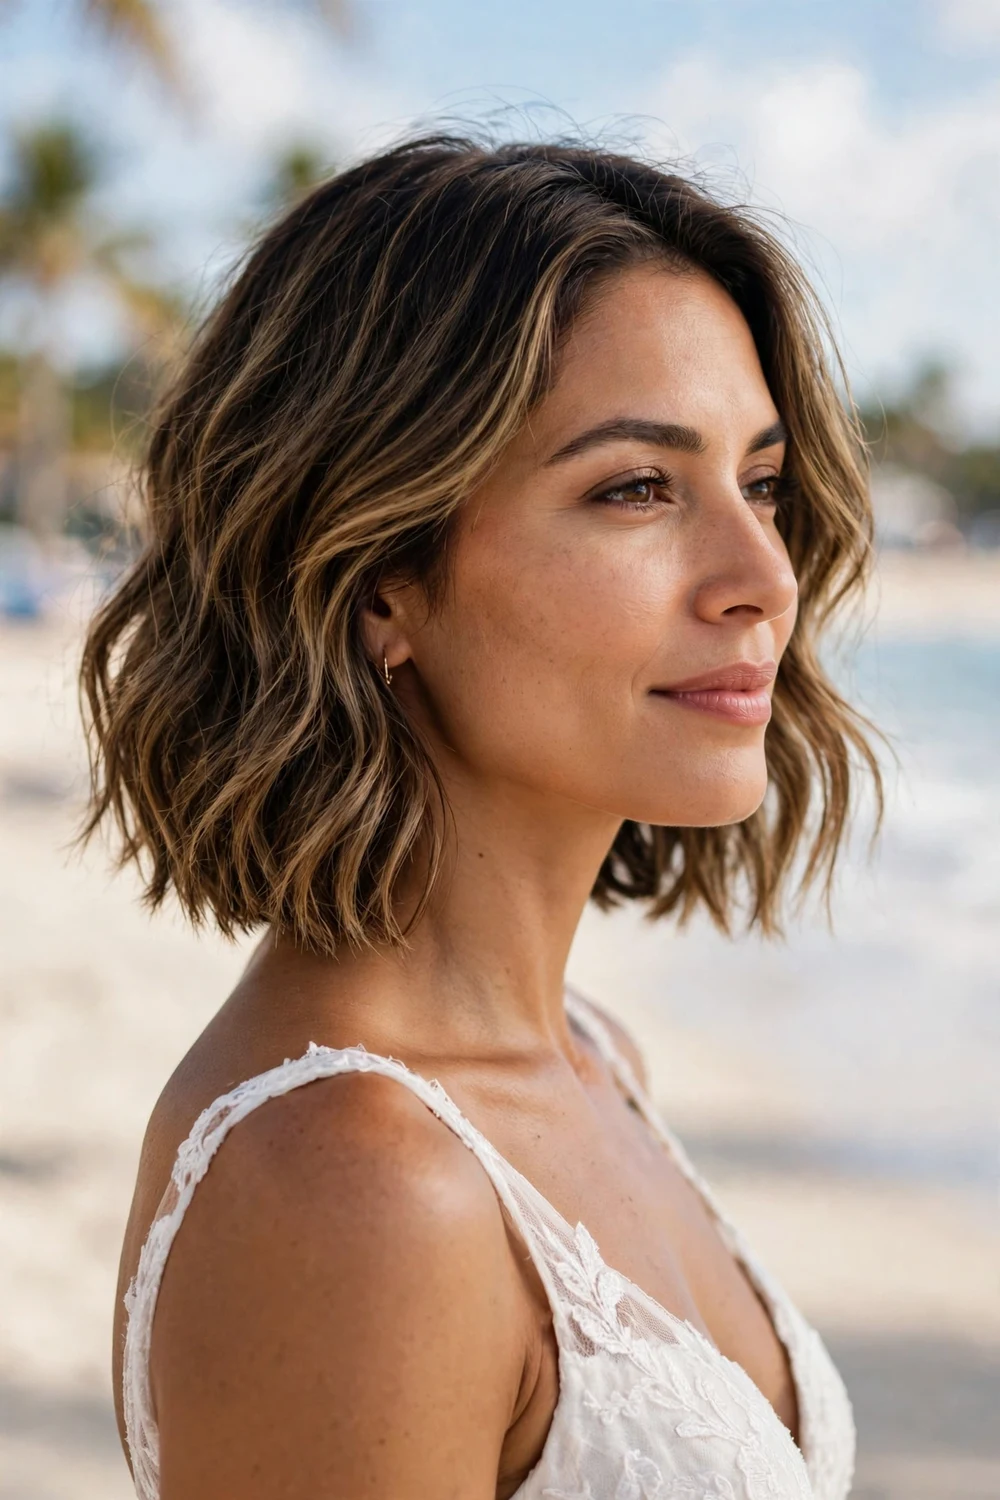
For sand-under-your-feet ceremonies, beachy texture is the honest choice. Mist with sea salt spray, twist random sections around your fingers, and let them air-dry. The slightly undone finish suits the setting, and humidity that would ruin a sleek blowout only improves this look. Apply the salt spray to damp hair, not dry, and scrunch upward for the most natural wave pattern. Add a single shell or pearl pin on one side so the look photographs as bridal rather than beach-day casual.
Try this: Apply the salt spray to damp hair, not dry, and scrunch upward for the most natural wave pattern. Difficulty: easy. Cost: under $15.
20. Tucked-Behind-Ears Minimalist Bob

Smooth the bob flat and tuck both sides behind the ears, showing off earrings and the full face. A center or deep side part both work. This takes five minutes, needs no pins, and looks deliberate rather than lazy when the hair is glossy and the makeup is polished. Dab a tiny amount of styling cream behind each ear to keep the hair from slipping forward during hugs and photos. Choose bold earrings; with the ears exposed, they become the main accessory.
Try this: Dab a tiny amount of styling cream behind each ear to keep the hair from slipping forward during hugs and photos. Difficulty: easy. Cost: under $10.
21. Bridal Hair Vine on Waves
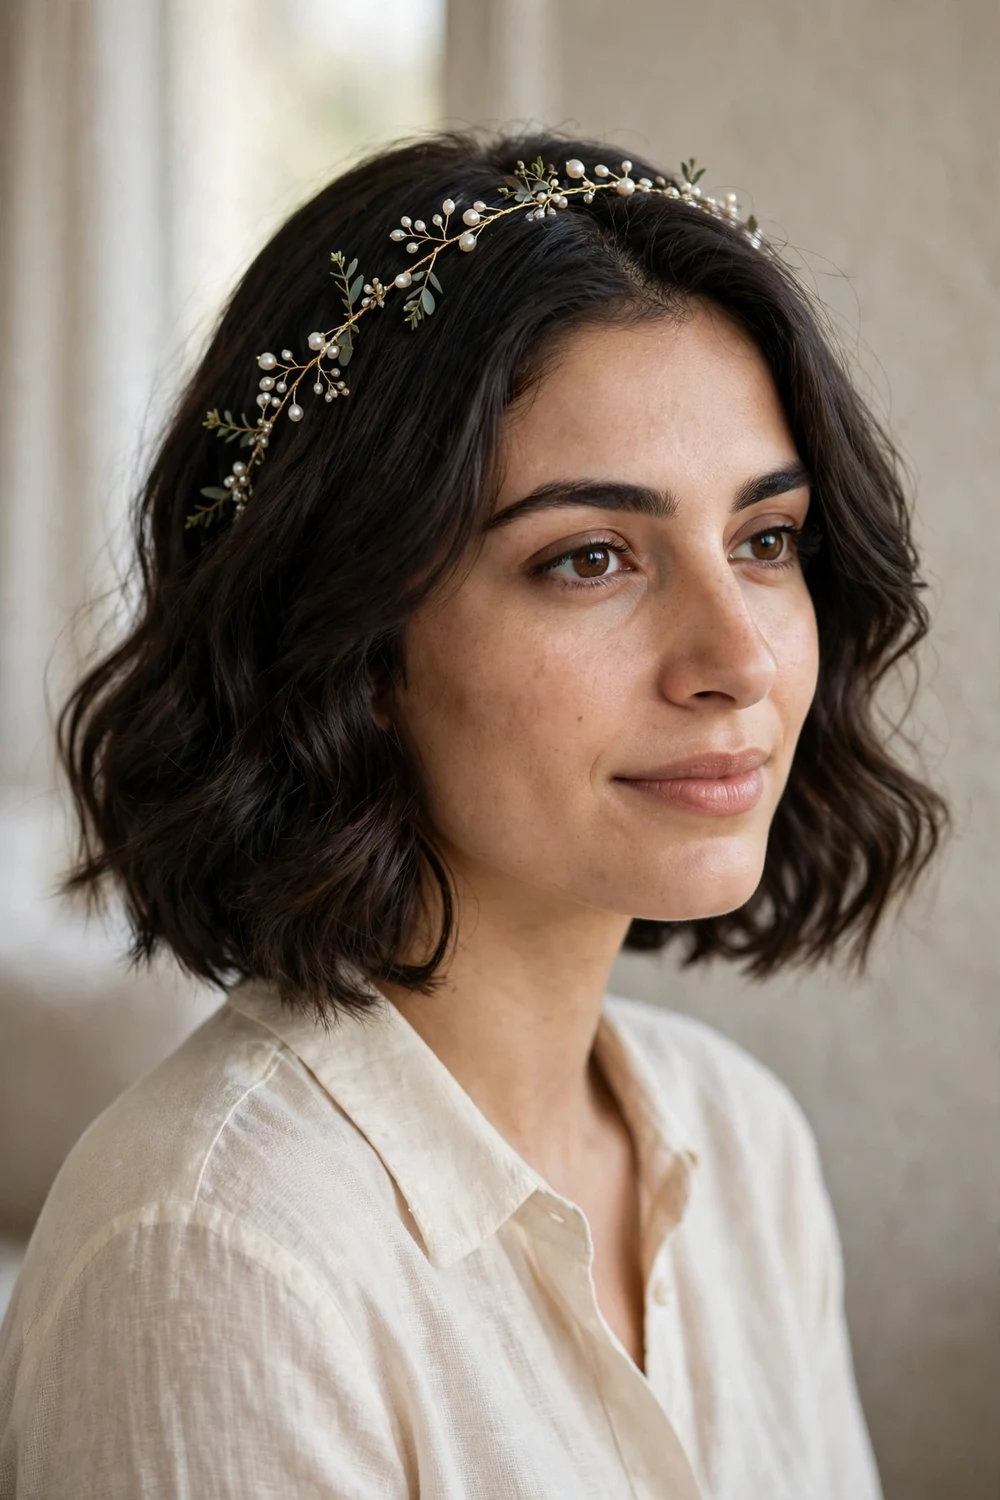
Style the bob in soft waves and lay a flexible bridal hair vine across the crown, pinning it at both temples. The vine follows the curve of the head and works like a headband with more detail. It is lighter than a tiara and does not need the updo a tiara usually requires, which is exactly why it suits a bob. Pin the vine first, then arrange the waves around it so the ends hide the attachment points. Bend the vine to follow your part line so it sits naturally instead of floating above the hair.
Try this: Pin the vine first, then arrange the waves around it so the ends hide the attachment points. Difficulty: easy. Cost: $15 to $40 for the vine.
22. Volume-Boosted Bob for Fine Hair

Fine hair can absolutely wear a wedding bob; it just needs lift at the roots. Apply volumizing mousse to damp roots, blow-dry with a round brush lifting upward, and roll the ends under for a rounded silhouette. Clip-in extensions matched to your color add fullness at the back if you want more body for photos. Tease the crown in three small sections and smooth the top layer over them; the hidden padding doubles the visible volume. Finish with a flexible-hold spray aimed at the roots only, so the ends stay soft.
Try this: Tease the crown in three small sections and smooth the top layer over them; the hidden padding doubles the visible volume. Difficulty: medium. Cost: $15 to $60, more with extensions.
See the everyday styling basics in chin length bob hairstyles, the general guide to wearing this cut well.
Chin Length Bob Wedding Styles at a Glance
| Style | Best Occasion | Difficulty | Hold Time |
|---|---|---|---|
| Sleek Straight Bob | Minimalist and city ceremonies | Easy | 6-8 hours |
| Soft Romantic Waves | Garden and outdoor receptions | Easy | 5-7 hours |
| Defined Bridal Curls | Formal evening weddings | Medium | 8-10 hours |
| Vintage Hollywood Waves | Retro and black-tie themes | Hard | 8-12 hours |
| Twisted Half-Up Half-Down | Classic church ceremonies | Easy | 6-8 hours |
| Side Accent Braid | Bohemian and rustic weddings | Easy | 6-8 hours |
| Braided Crown with Floral Clips | Garden and vineyard venues | Medium | 6-8 hours |
| Pearl Accents with Loose Waves | Romantic ballroom weddings | Easy | 5-7 hours |
| Sleek Gloss Finish with Side Veil | Rooftop and modern venues | Medium | 6-8 hours |
| Blunt Bob with Birdcage Veil | Vintage and courthouse weddings | Easy | 8-12 hours |
| Deep Side-Swept Bob | Cocktail and evening receptions | Easy | 5-7 hours |
| Textured Tousled Bob | Casual and boho ceremonies | Easy | 4-6 hours |
| Sleek Side-Parted Bob | Intimate and modern weddings | Easy | 6-8 hours |
| Blunt Bob with Center Part | Minimalist and gallery venues | Easy | 6-8 hours |
| Straight Bob with Bangs | Daytime and brunch weddings | Easy | 5-7 hours |
| Bouncy Blowout with Curls | Glamorous hotel weddings | Medium | 6-8 hours |
| Pinned-Back Bangs with Waves | Windy outdoor ceremonies | Easy | 6-8 hours |
| Natural Curls | Any theme, your own texture | Easy | 8-10 hours |
| Beach Waves for Destination Weddings | Beach and tropical venues | Easy | 4-6 hours |
| Tucked-Behind-Ears Minimalist Bob | Courthouse and elopements | Easy | 5-7 hours |
| Bridal Hair Vine on Waves | Romantic and fairy-tale themes | Easy | 5-7 hours |
| Volume-Boosted Bob for Fine Hair | Any theme, thin hair | Medium | 6-8 hours |
How to Choose the Right Wedding Bob for You
Start with the venue, not the mirror. An outdoor garden wedding argues for pinned styles, braids, and anything that survives wind. A formal ballroom supports sleek finishes, veils, and vintage waves. Beach venues forgive frizz but punish precision, so pick texture over polish there.
Next, consider your dress neckline. Strapless and off-shoulder gowns pair with everything here, but high necklines look best with sleek or tucked styles that don’t crowd the collar. If your dress has heavy back detail, keep the front simple so the hair doesn’t compete with it.
Finally, be honest about your morning-of skills and schedule. A sleek straight bob needs 15 minutes and one tool. Vintage Hollywood waves need a trial, a stylist, and an hour. The style you can execute calmly beats the style you love but can’t finish before the photographer arrives.
Mistakes to Avoid
Don’t wash your hair the morning of the wedding. Freshly washed hair is slippery; pins slide and curls drop. Wash it the night before so it has some grip, or use dry shampoo at the roots for texture.
Don’t skip the trial. Short hair shows mistakes more than long hair because there’s nowhere to hide a bad pin or a limp section. Wear the trial style for a full day to see how it holds.
Don’t choose a brand-new accessory on the wedding day. Heavy headpieces, unfamiliar veil combs, and stiff clips can pull or slip. Wear them once before the wedding so you know how they behave.
Don’t overdo the hairspray. A stiff, shellacked bob photographs like a helmet. Flexible-hold spray, applied in two light passes, keeps movement while holding the shape.
Frequently Asked Questions
Can I wear a veil with a chin-length bob?
Yes. Choose a shorter veil that falls below the chin, a birdcage veil, or a side veil pinned near the temple. The comb or clips anchor best when your hair has texture from spray or a light backcomb at the attachment point. A long cathedral veil can overwhelm a short cut, so keep the veil proportional to the hair length.
Can I style my chin-length bob myself on my wedding day?
You can, especially for sleek, wavy, or tucked styles. Do a full trial run a week before and time yourself. If your chosen style needs pin curls, finger waves, or a braided crown, book a stylist: short hair shows mistakes quickly, and wedding-day stress makes everything harder.
Can I add extensions to a chin-length bob for my wedding?
Yes. Clip-in extensions add volume and a little length without a salon appointment. Match your exact hair color and have your stylist trim the extensions so they blend with the bob’s edge. On fine hair, even two wefts at the back make a visible difference in photos.
Do chin-length bobs suit all face shapes for a wedding?
Mostly, with small adjustments. A deep side part softens round faces, a center part suits oval faces, and volume at the crown balances a strong jawline. Your stylist can tailor the part, the tuck, and the accessory placement to your face in a single trial session.
How do I make my wedding hairstyle last through the ceremony and dancing?
Start with hair washed the night before for grip, use heat protectant before styling, and curl slightly tighter than your target since curls relax in the first hour. Let curls cool pinned in place, finish with flexible-hold hairspray in two light passes, and pack bobby pins and blotting papers in your clutch for touch-ups.
Final Thoughts
A chin-length bob gives you fewer styling options than long hair, but the options it gives are strong: sleek lines, defined curls, pearl pins, and veils that actually stay put. Pick the style that matches your venue and your morning-of skills, do a trial, and pack your pins. The hair will hold.

