

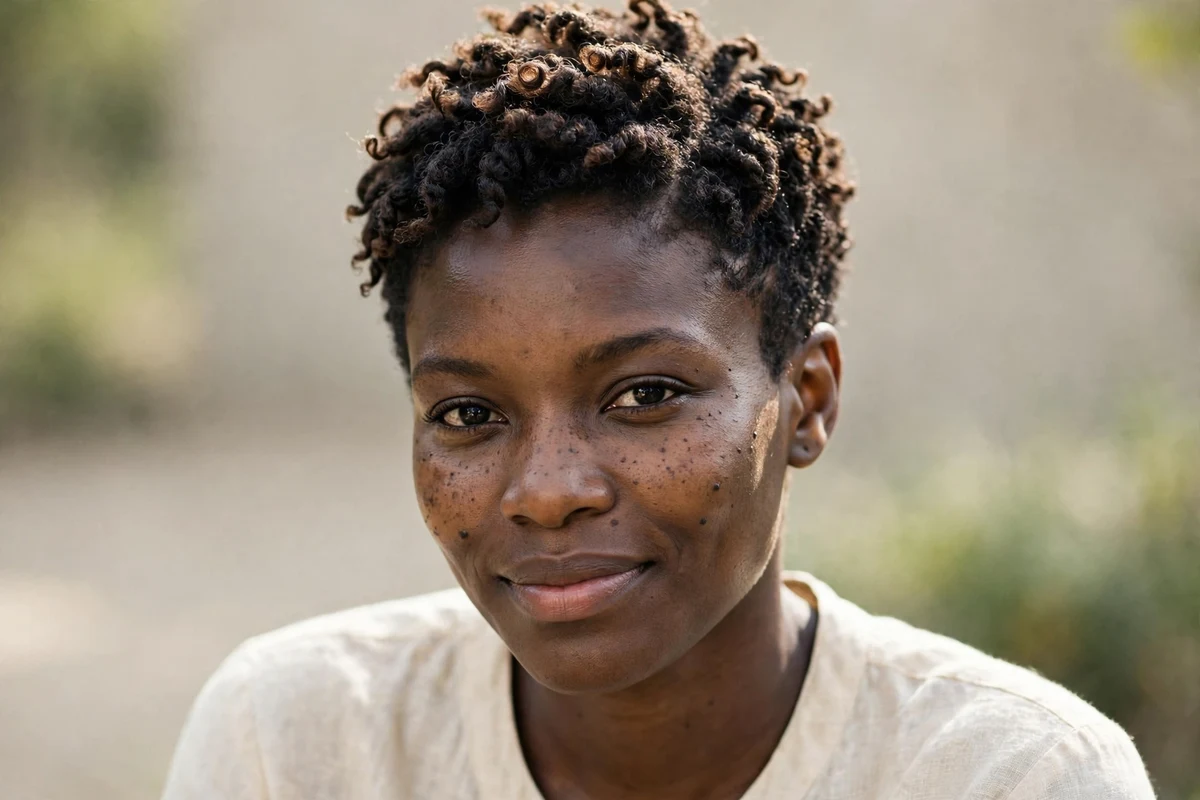
A pixie on natural hair is a different conversation than a pixie on straight hair. The cut is shaped by curl pattern, not by shears alone, and what leaves the salon chair changes as it dries. Watching how stylists handle 3c to 4c textures has made one thing clear: the best curly pixies are cut with shrinkage in mind from the first snip.
This guide collects 27 pixie haircuts for curly natural hair that honor texture instead of fighting it. Each one names the curl pattern it suits and how shrinkage, moisture, and dry-cutting factor in. Find the shape that matches your coils and your routine.
Quick Takeaways
- Ask for a dry or stretched cut so shrinkage does not steal the shape you approved in the chair.
- Tapered sides and napes keep 4c volume centered on top instead of spreading sideways.
- Moisture is the styling foundation: leave-in conditioner before any cream or gel.
- Shrinkage of 50 to 75 percent is normal for coily patterns, so plan for length that looks short when dry.
- A satin bonnet at night and edge control at the hairline keep a pixie fresh between trims.
1. Classic Tapered Coily Pixie

The classic tapered coily pixie keeps the sides and back cut close while coils stay longer through the crown, creating the clean silhouette that defines the look. For 4b and 4c hair, the taper controls the sideways expansion that coily textures naturally want, so the profile stays neat instead of ballooning outward. Shrinkage actually helps here, since it compacts the crown into a dense, defined cap of coils that sits close to the head. The contrast between the short sides and the textured top is what makes this cut read as intentional and polished.
Ask your stylist to shape it dry, coil by coil, so you see the true finished length before leaving the chair. At home, keep the top moisturized with a leave-in conditioner, then smooth a light gel over the tapered sections to keep the contrast crisp. Trims every three to four weeks hold the fade, and a silk scarf at night protects the shape. For more textured short looks, these pixie hairstyles for black women cover bolder variations on the same idea.
Try this: apply gel to the tapered sides with a toothbrush edge for a crisp hairline.
Difficulty: Low · Cost: $ (salon)
2. Wash-and-Go Coily Crop
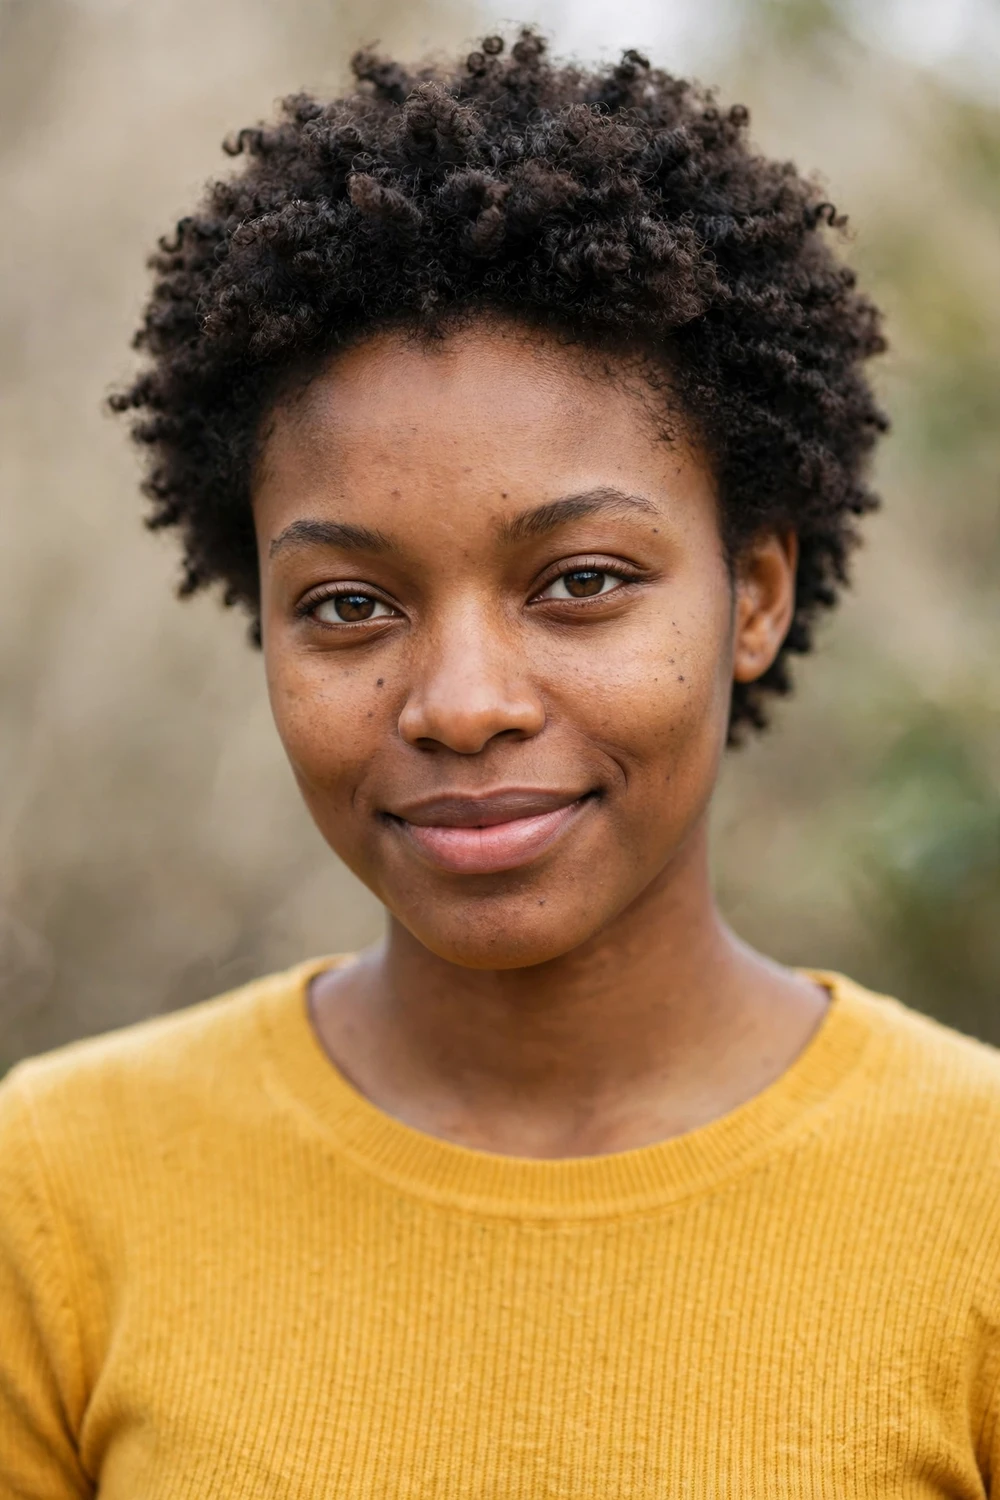
The wash-and-go crop is the shortest, simplest pixie on this list, and it works best on 4a to 4c coils with high shrinkage. The cut follows the head closely all around, letting tight coils do all the talking without any shaping tricks. Because the hair is short everywhere, wash day takes minutes, and the even length means shrinkage happens uniformly instead of distorting the shape. There is no fringe to behave and no taper to maintain, which makes this the most forgiving silhouette for new naturals still learning their pattern.
The routine is hydration, curl cream, and out the door. Apply products to soaking wet hair in sections so every coil gets coated, then avoid touching it while it dries to keep frizz down. This is the lowest-commitment cut here, but daily moisture is not optional, or short coils look dull fast. Refresh with water and a little cream each morning rather than re-washing. For a closely cropped companion, these low cut hair style black women ideas share the same bold, short attitude.
Try this: mist with water and smooth a dab of curl cream each morning to revive definition.
Difficulty: Low · Cost: $ (barber or salon)
3. Rounded Halo Curly Pixie
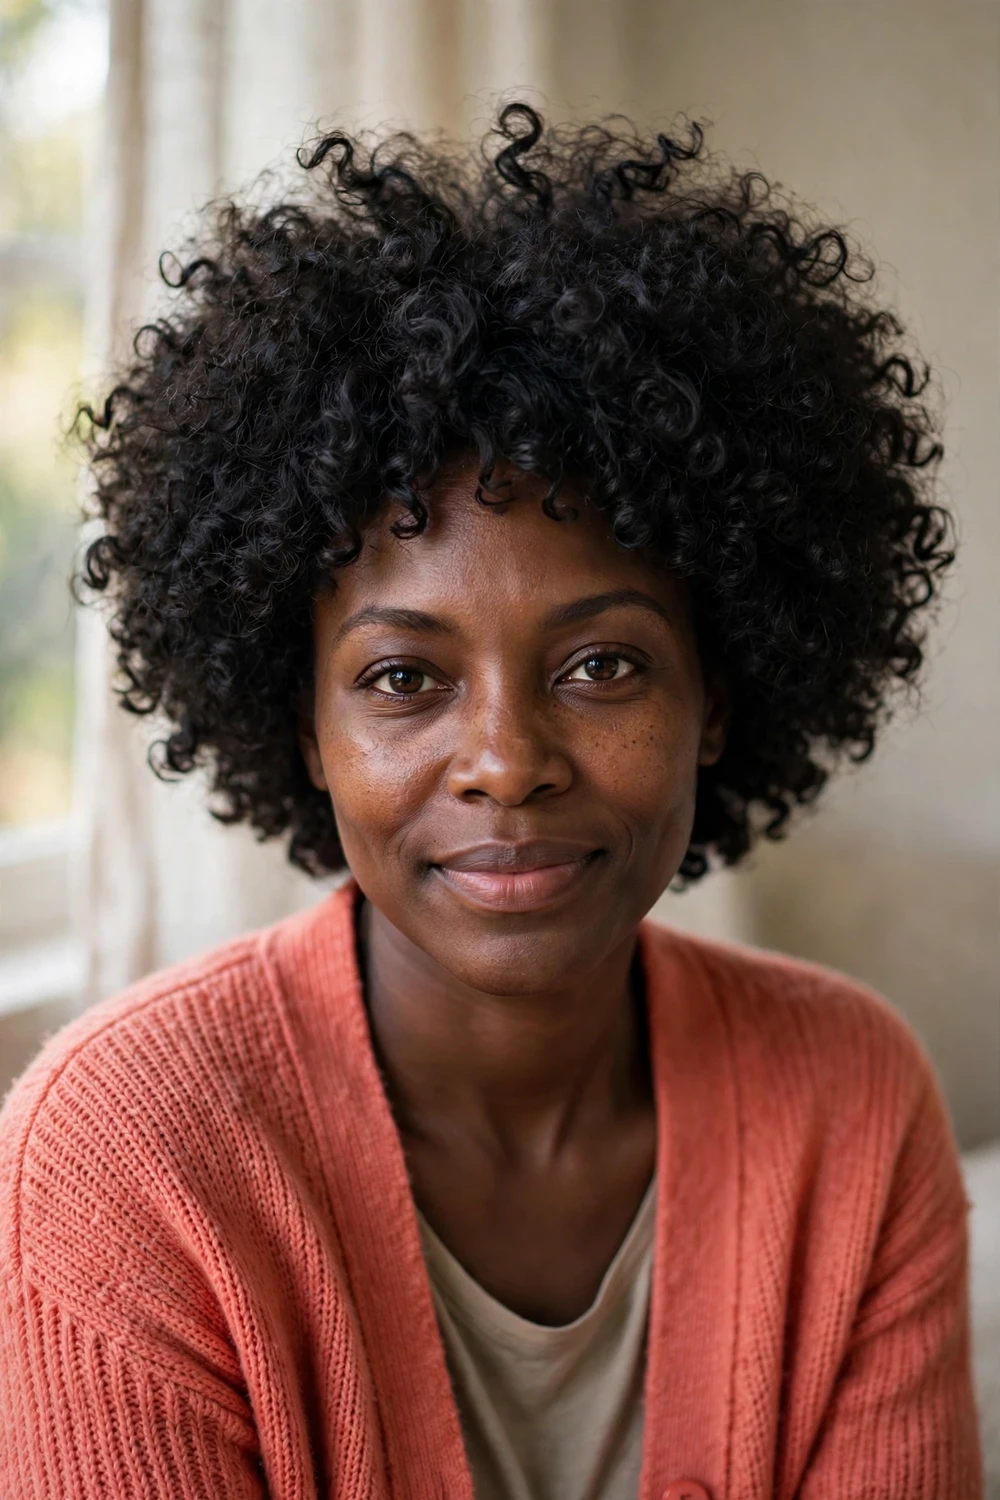
The rounded halo pixie builds volume evenly around the whole head, creating a soft, circular silhouette that suits 3c to 4a curls best. Layers are cut to distribute fullness rather than concentrate it, so the shape reads balanced from every angle instead of heavy in one spot. It flatters longer faces especially well, since the width at the sides counterbalances face length without adding extra height on top. The rounded outline also grows out more gracefully than sharp tapers, since there is no precise line to blur.
To keep the circle crisp, fluff the roots with your fingers after drying and avoid over-stretching the curls, which ruins the roundness. A diffuser on low heat sets the volume without frizz, while finger coiling stray sections keeps the outline tidy. Expect to refresh the shape every few days with water and a light cream, since flattened spots show quickly on a round cut. A satin bonnet overnight protects the even volume.
Try this: flip your head upside down and diffuse on low for even lift all around.
Difficulty: Medium · Cost: $ (salon)
4. Soft Layered Curly Pixie

Layering is the main tool against the triangle effect, where curly pixies go wide at the bottom and flat at the crown. This cut stacks soft layers through the interior so 3b to 4a curls keep movement and bounce without piling up at the ends. A subtle taper at the nape keeps the back from growing heavy, which is the usual spot where curly pixies lose their shape first. The layers also let each curl find its natural drop point, which matters most for medium-density hair that can look either flat or puffy.
Style with a leave-in and a mousse or cream, scrunching upward for definition. If your curls are fine as well as layered, mousse gives body without weight, while thicker textures do better with cream. Dry-cutting lets the stylist see exactly where each layer lands after shrinkage, which is the whole secret to layers that behave. Refresh the interior layers with water on non-wash days instead of adding more product, since buildup weighs soft layers down.
Try this: scrunch product in with your head tilted to each side to catch the interior layers.
Difficulty: Low · Cost: $ (salon)
5. Chunky Sponge-Curl Pixie
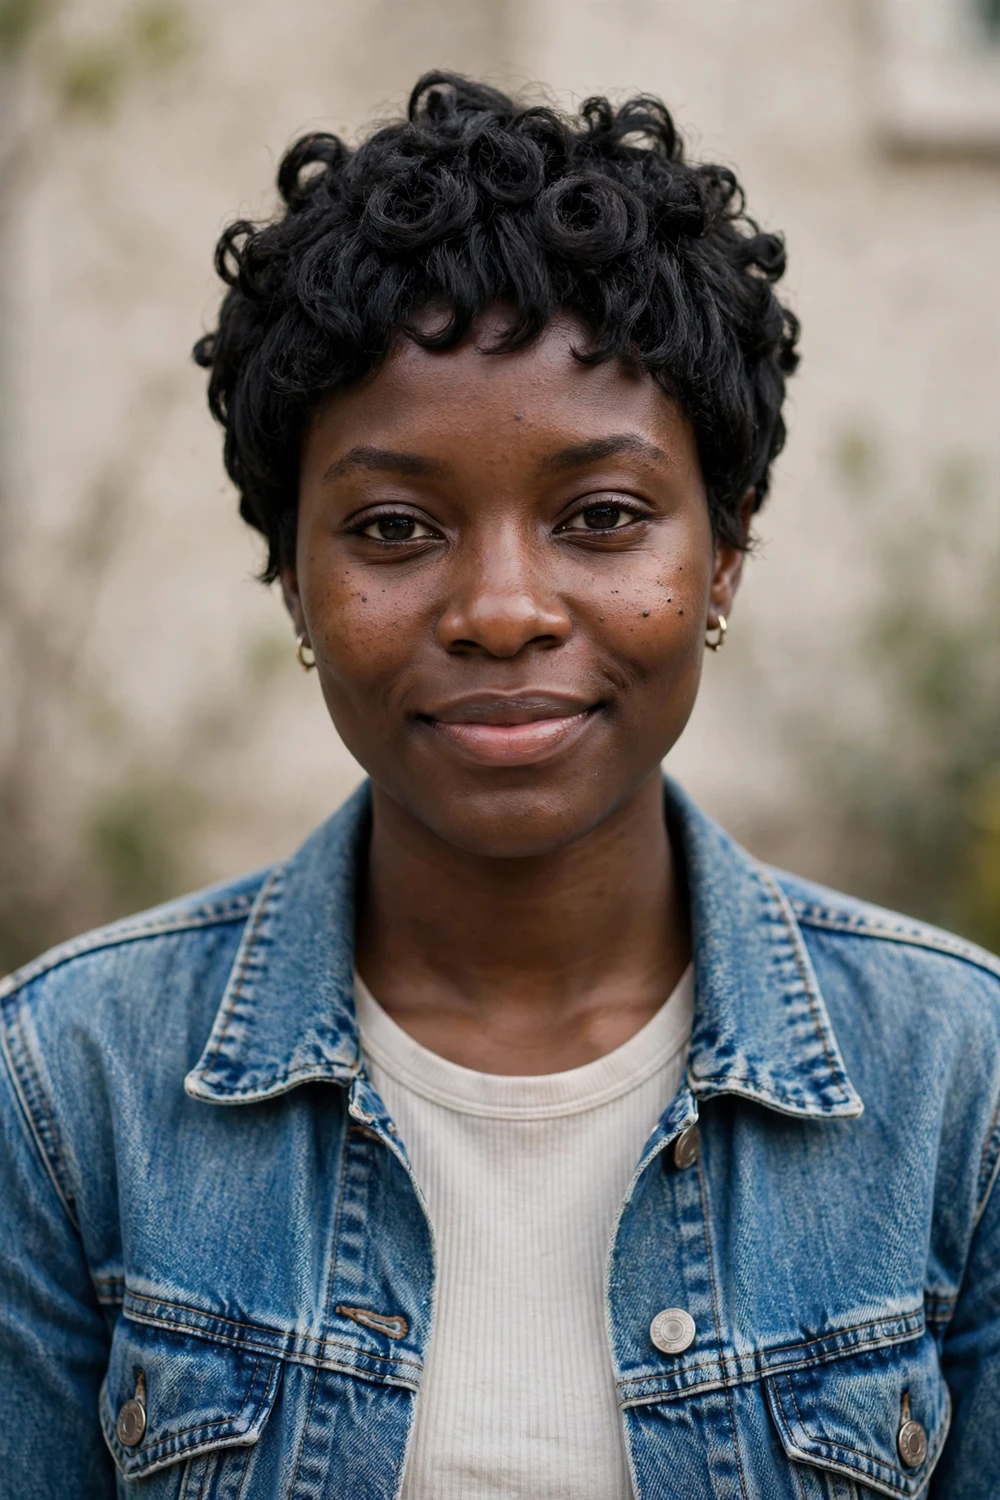
The sponge-curl technique turns a short crop into thick, defined texture in minutes, which makes it a favorite for 4c hair. You twist a curl sponge in small circles over a closely cut head, and the friction pulls coils into chunky, rope-like definition that looks far more deliberate than unstyled short hair. The cut underneath is short and even, so the sponge does the styling work and the barber cut stays simple. It is one of the fastest ways to get uniform coils on very short growth.
This is one of the quickest daily styles here: dampen the hair, add a leave-in, and sponge for about two minutes. The result looks thicker and more uniform than hand-styling alone, which suits very short growth especially well. Keep the sponge clean and replace it regularly, since a worn sponge snags instead of defining. Moisturize first so the friction does not rough up dry coils, and use gentle pressure rather than pressing hard.
Try this: work the sponge on damp, conditioned hair in quarter-sized sections for the thickest coils.
Difficulty: Low · Cost: $ (barber) plus a sponge
6. Side-Swept Fringe Curly Pixie
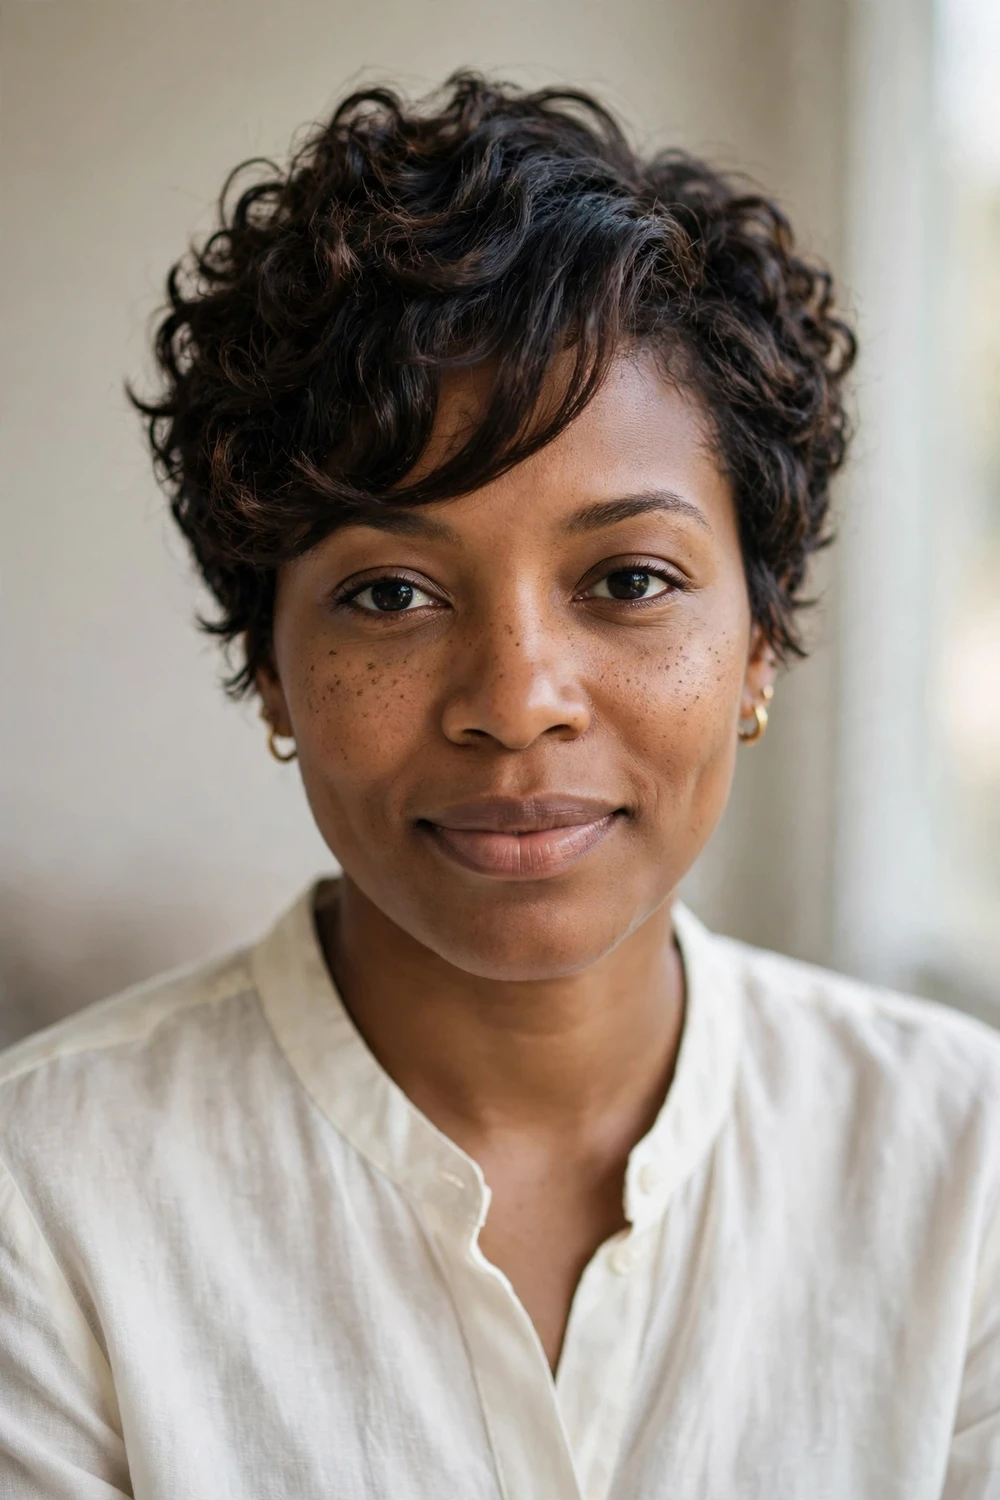
Extra length in the front lets 3c to 4a curls sweep across the forehead, which softens the whole cut and frames the face. The fringe is the styling playground of this pixie: wear it swept to one side, parted in the middle, or pinned back on busy days. The swept direction also gives you asymmetry without cutting one side shorter, and the longer front pieces draw attention to the eyes. It is a good middle ground if a full short fringe feels like too much commitment.
Shrinkage is the thing to watch, since a fringe that looks long wet can ride up an inch or two when dry. Ask for the fringe cut on dry hair so the real length is visible before you approve it. Style it while damp, guiding the curls in the sweep direction, and pin it overnight if you want a smoother lay in the morning. A little edge control along the part keeps the sweep from falling back.
Try this: clip the fringe in the sweep direction while it dries to train the curls.
Difficulty: Low · Cost: $ (salon)
7. Wispy Curtain-Bang Curly Pixie
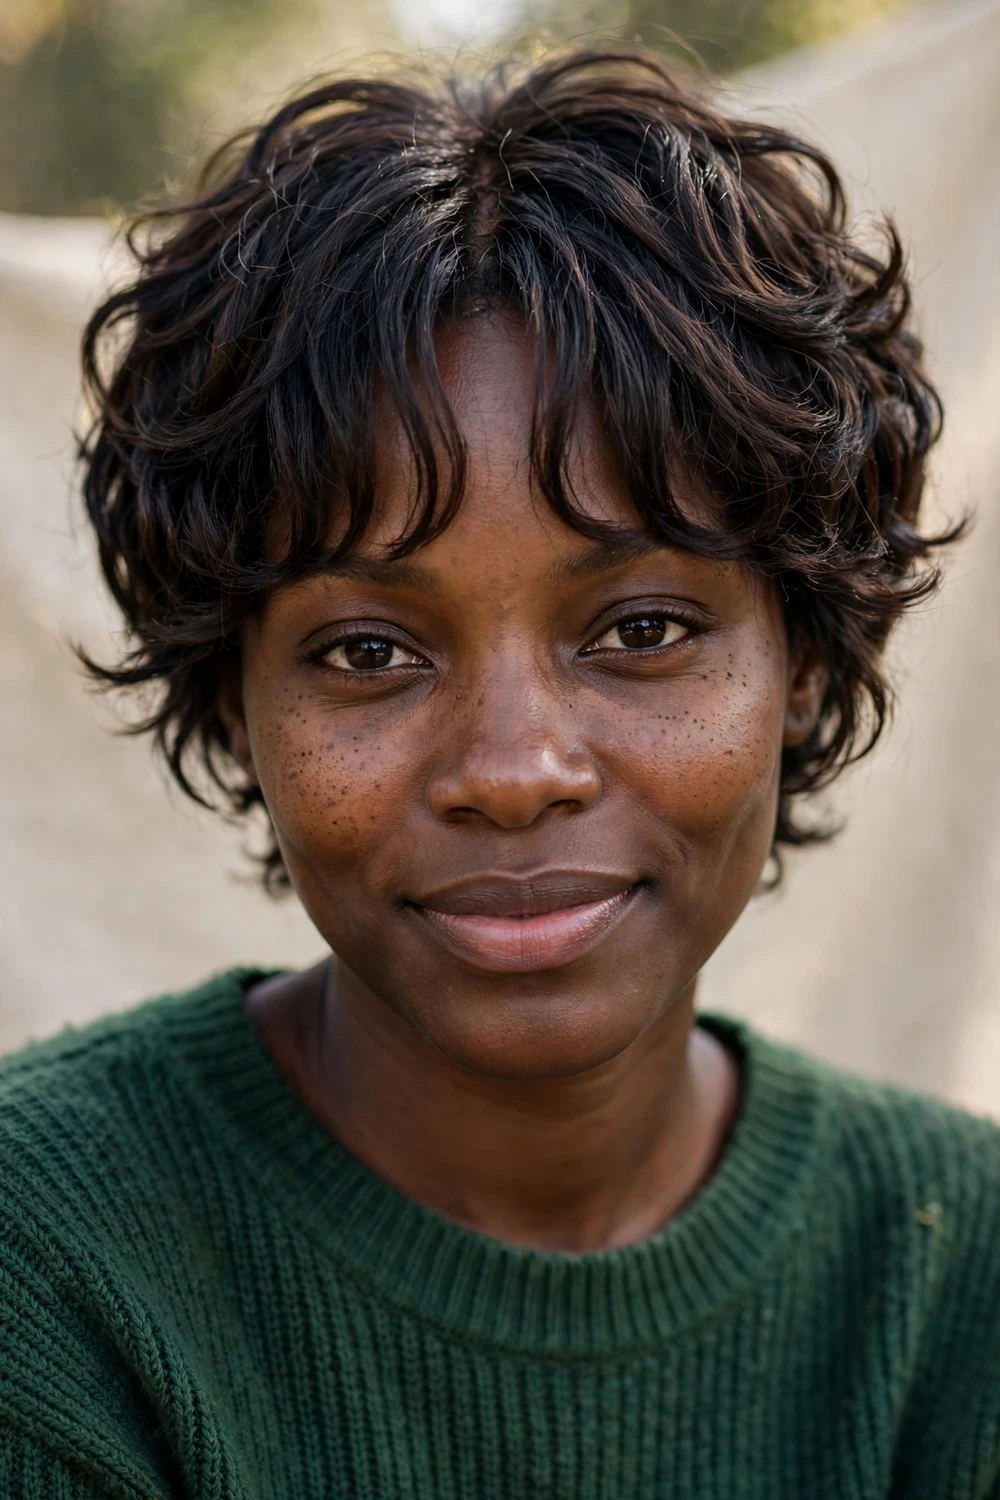
Curtain bangs on a curly pixie split in the center and melt into the sides, highlighting the cheekbones instead of covering the forehead. The wispy finish suits 3a to 3c curls, where lighter curl clumps separate naturally into soft pieces. Heavier 4c hair can wear it too, but the bangs need thinning so they part instead of matting together into a solid curtain. The center part keeps the face open, which makes this one of the most flattering bang options for round faces.
Define each bang curl individually with a little curl cream, twisting in the direction it falls. The split center means shrinkage pulls each side toward the temples, which keeps the part open instead of closing it. Touch the bangs up with water on day two and three, since the front shows dryness first. A tiny flat twist on each side at night holds the center part for the next morning.
Try this: twist each bang curl around your finger after applying cream for a clean split.
Difficulty: Medium · Cost: $ (salon)
8. Piecey Curly Baby Bangs Pixie
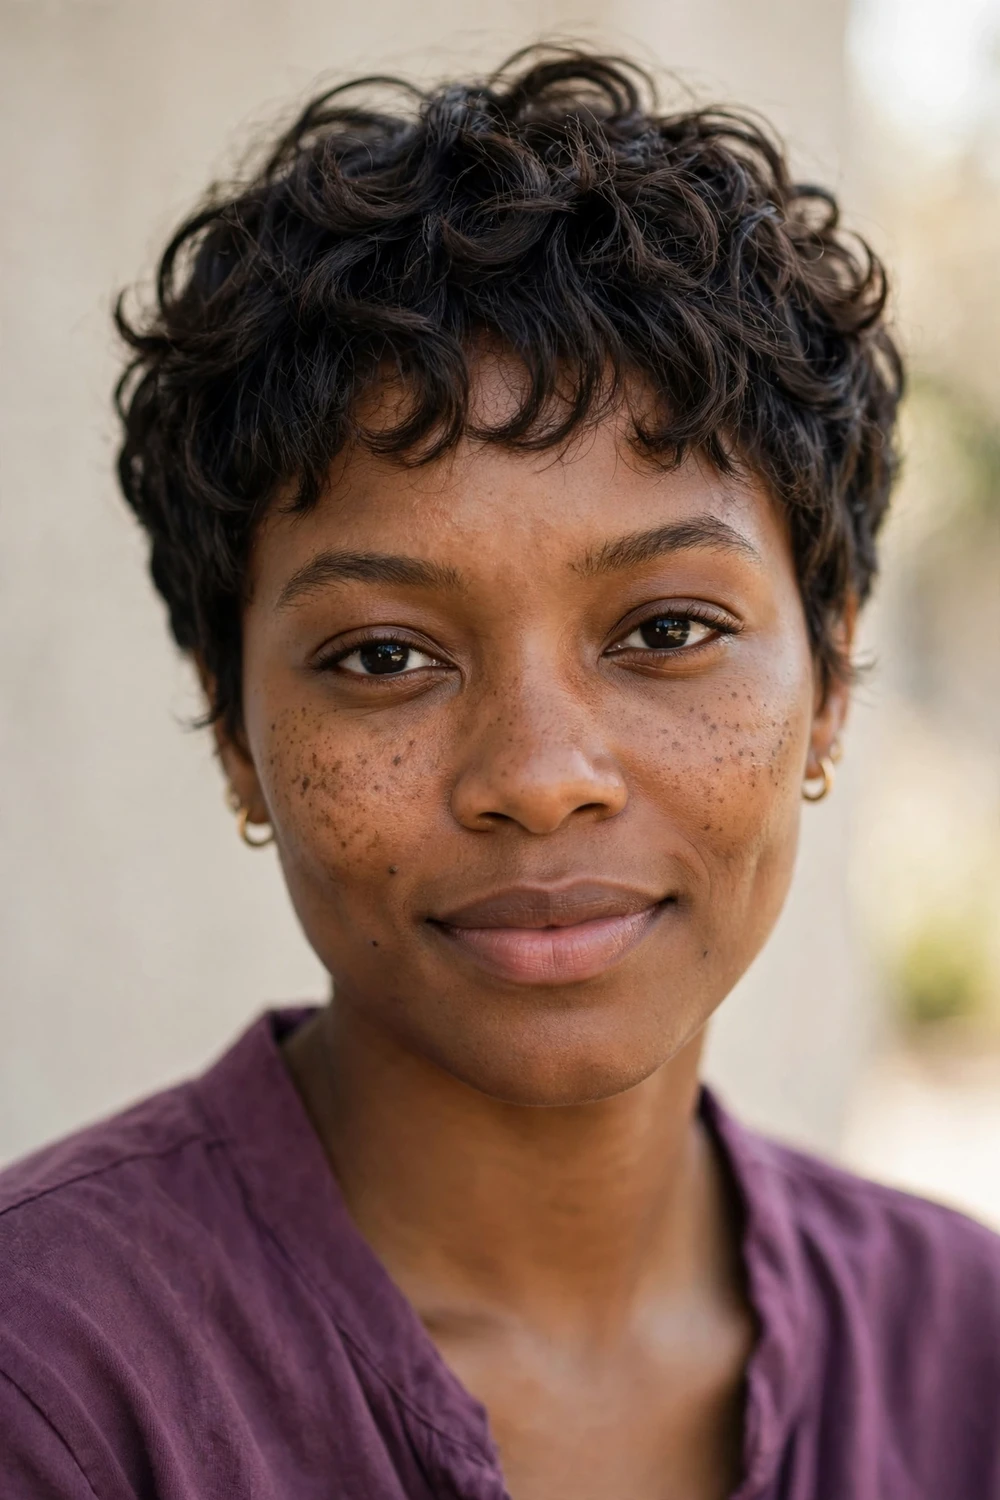
Baby bangs cut short across the forehead look striking on curly hair because the texture keeps them from reading as a blunt, heavy line. On 3b to 4a curls, the pieces land at slightly different lengths, which gives the fringe a natural, broken finish full of movement. The rest of the pixie stays cropped close, so all the attention goes to the bang detail. It is a bold choice that pairs well with strong brows and cheekbones, since nothing covers the face.
Shrinkage makes these bangs shorter than they look when cut, so dry-cutting is a must, and your stylist should leave them a touch longer than the target length. Piece them out with a tiny amount of cream, pulling curls apart rather than combing, which would blend them into one mass. They need trims more often than the rest of the cut to keep the proportions right, since even a quarter inch of growth changes the look.
Try this: rake a pea-sized bit of cream through the bangs and separate clumps with your fingertips.
Difficulty: Medium · Cost: $ (salon)
9. Curly Faux Hawk
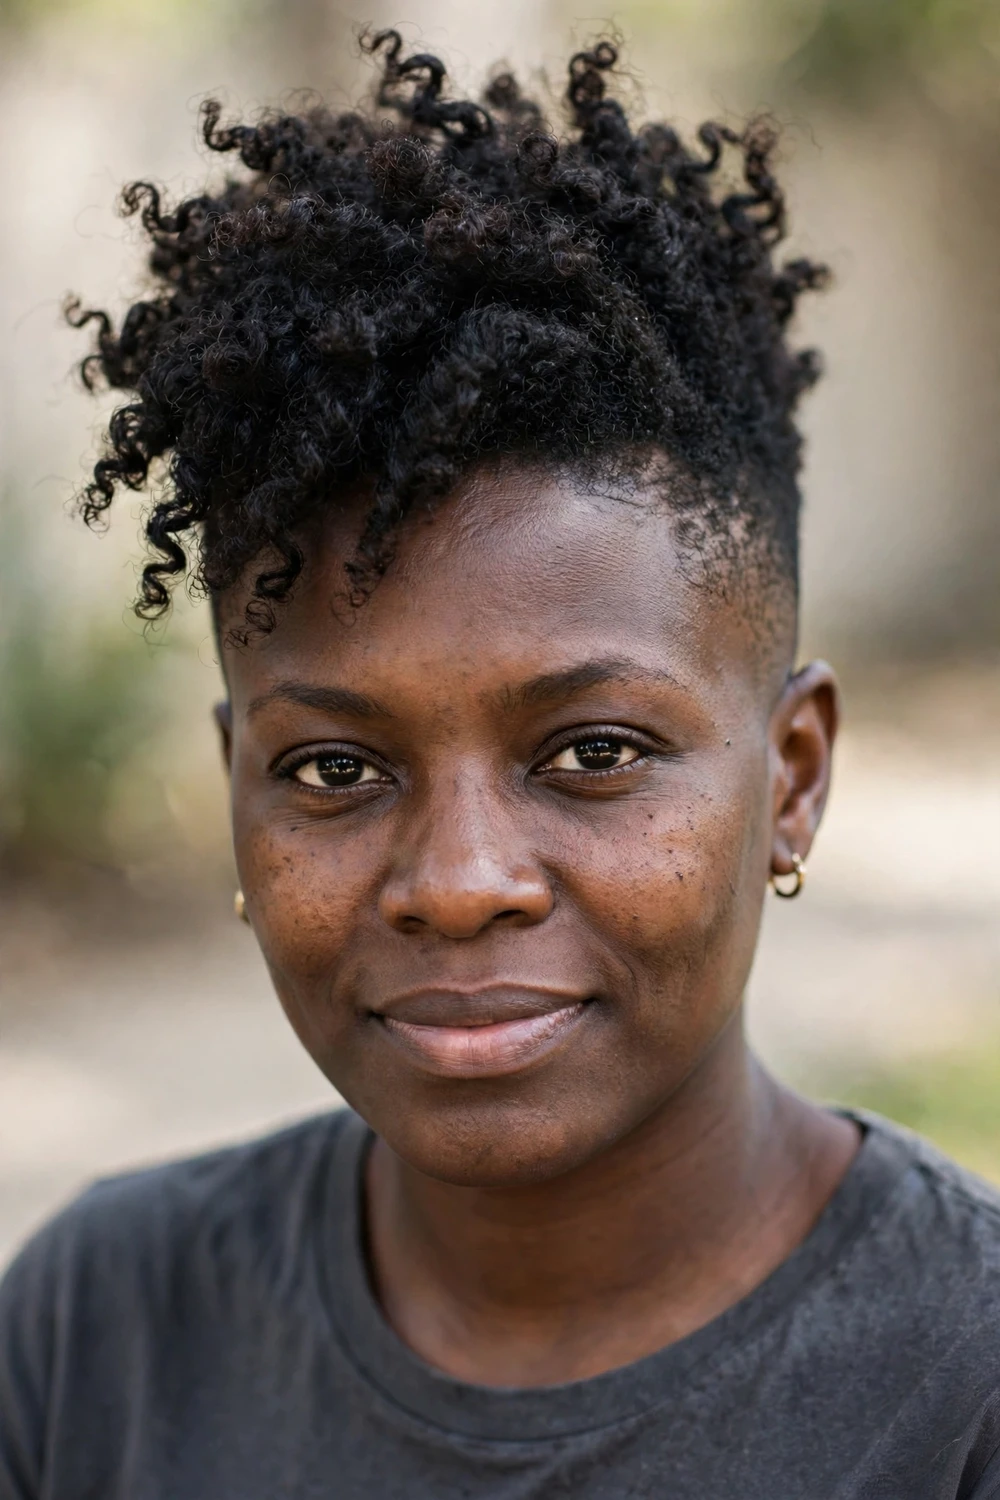
The curly faux hawk runs a strip of longer coils down the center with the sides cut shorter, letting 4a to 4c texture provide the height naturally. It is the boldest silhouette on this list, but it is surprisingly wearable: the curls give the center column a soft, rounded finish rather than a spiky one. Shrinkage works in your favor here, compacting the center into dense volume that stands up on its own. The tapered sides keep the overall shape tidy so the height reads as style, not chaos.
Style the center upward with a firm-hold gel applied to damp hair, then diffuse or air-dry without touching it while it sets. The sides need edge-ups every two to three weeks to keep the contrast sharp, or the whole cut softens. Sleep with a satin bonnet or the center flattens overnight and needs a full re-wet in the morning. A pick at the roots revives the height between washes, and a dab of gel smooths the tapered sides back down.
Try this: twist the center coils upward in sections while damp, then release once dry for height.
Difficulty: Medium · Cost: $ (salon)
10. Undercut Fade Coily Pixie
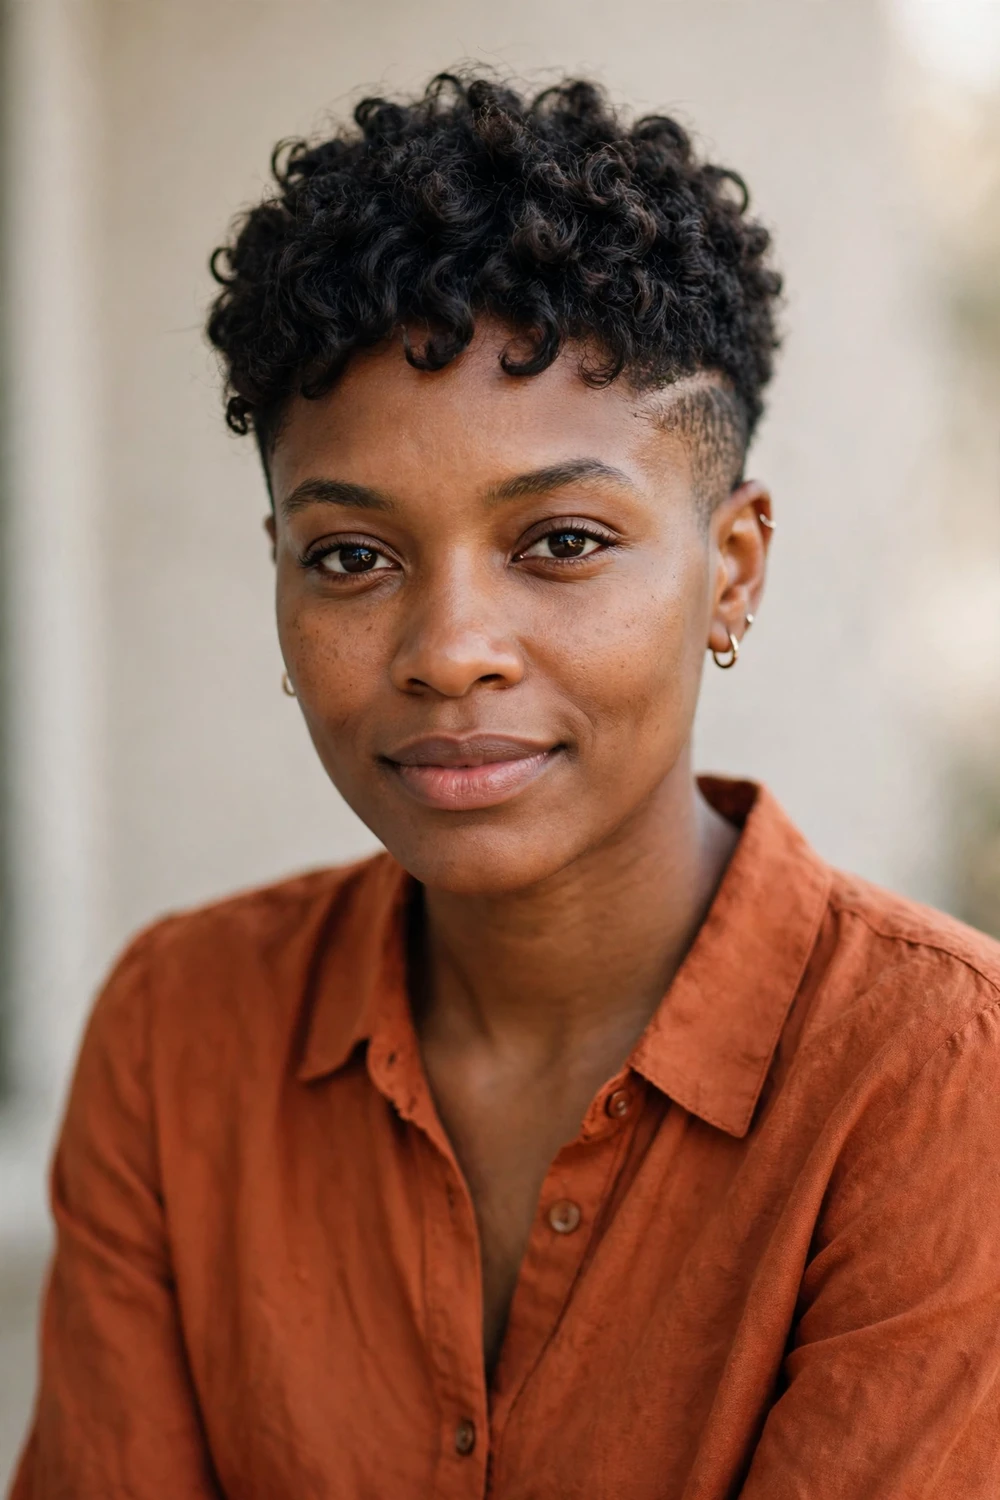
The undercut fade buzzes the sides and back close while a full crown of coils sits on top, creating the strongest contrast of any cut here. For 4b and 4c hair, the buzzed sections remove all the bulk that causes sideways spread, and the top coils look even more voluminous by comparison. The disconnect between the two zones is what gives the cut its edge, and the grow-out phase stays cute because the top keeps its shape while the sides fill in gradually.
The trade-off is maintenance: the fade needs barber touch-ups every two to three weeks or the line blurs and the contrast fades. The top is easy, though, since a leave-in and gel on damp hair sets the coils with no extra tools. Keep a moisturizing routine for the buzzed areas too, since short hair and scalp dry out fast without product. A daily scalp oil prevents the ashy look faded sections get.
Try this: outline the fade with a trimmer between appointments to stretch the crisp line.
Difficulty: Medium · Cost: $ (barber)
11. Asymmetrical Coily Pixie
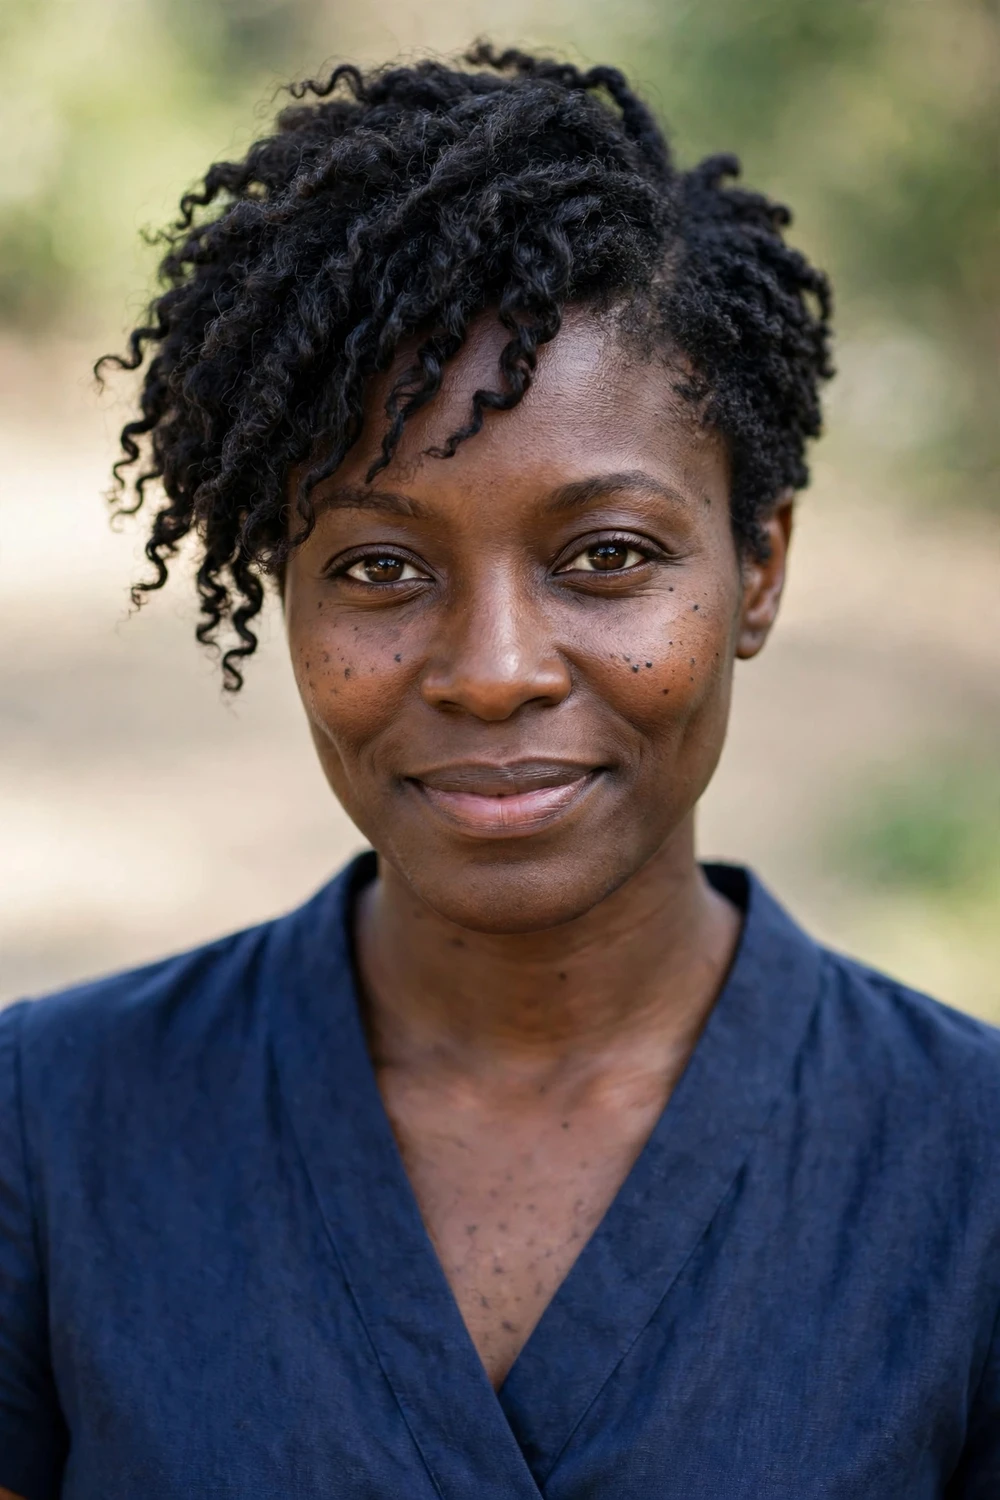
One side cut close and the other left longer gives 3c to 4b curls a dramatic sweep across the face. The deep side part emphasizes the difference, and the longer side can be styled over the forehead or tucked behind the ear for two different looks from one cut. Shrinkage makes the asymmetry dynamic, since the long side coils up into dense, springy volume that moves differently from the cropped side. It is the most fashion-forward shape on this list.
This cut needs a stylist comfortable with curly hair, because the two sides must be balanced against shrinkage, not against wet length. A flexible-hold gel on the longer side keeps the sweep in place without crunch, and a deep part set with a clip while drying locks it in. Expect to re-establish the part every morning, since curls redistribute overnight and the sweep loosens by day two without a refresh.
Try this: set the deep part with a clip while the gel dries so the asymmetry holds all day.
Difficulty: Medium · Cost: $ (salon)
12. Hard-Part Coily Pixie
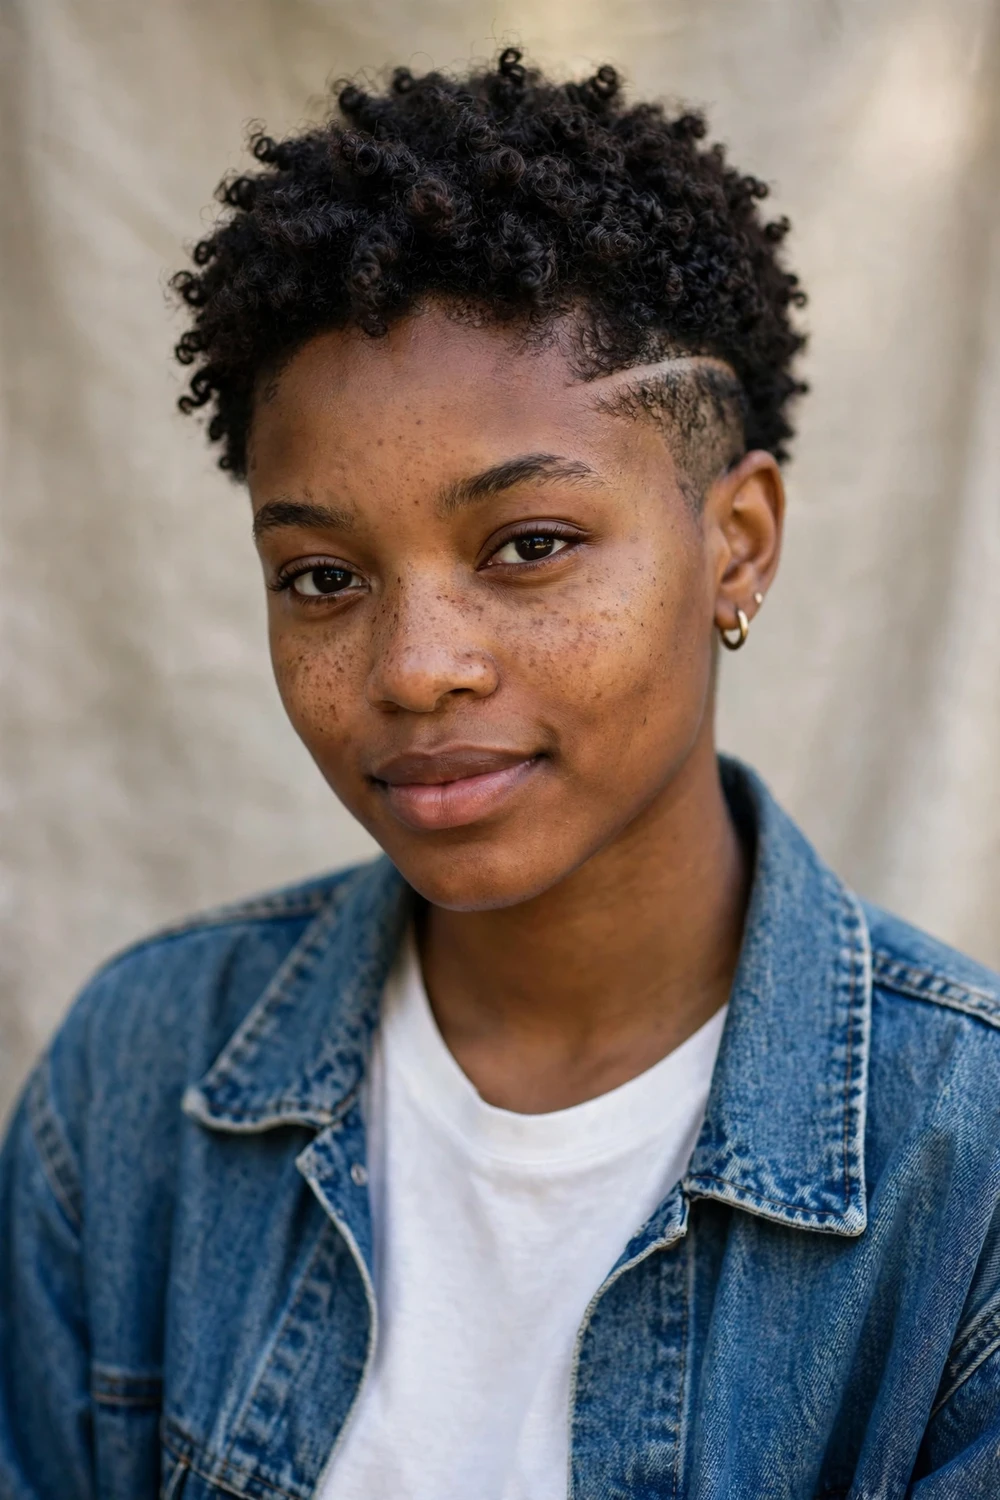
A razor line carved into the cut adds architectural structure that contrasts with soft coils. The hard part works on 4a to 4c hair because dense coils hold the line open, while looser textures let it disappear into the curl pattern. It gives the pixie a barbershop edge without changing the overall shape, and a double line doubles the effect for those who want more detail. The line itself is a styling choice, not a cut, so it can be added to almost any tapered base.
The line needs redrawing every one to two weeks, so factor regular barber visits into the real cost of this look. Edge control along the hairline keeps the area around the part crisp, and a silk scarf at night protects it from blurring while you sleep. Keep the surrounding coils moisturized, since the shaved line draws the eye and dryness shows faster next to it. Skipping the upkeep turns the line into a vague scar, so commit or skip it.
Try this: lay the coils flat near the line with gel so the razor detail stays visible.
Difficulty: Medium · Cost: $ (barber)
13. Geometric Shaved-Design Pixie
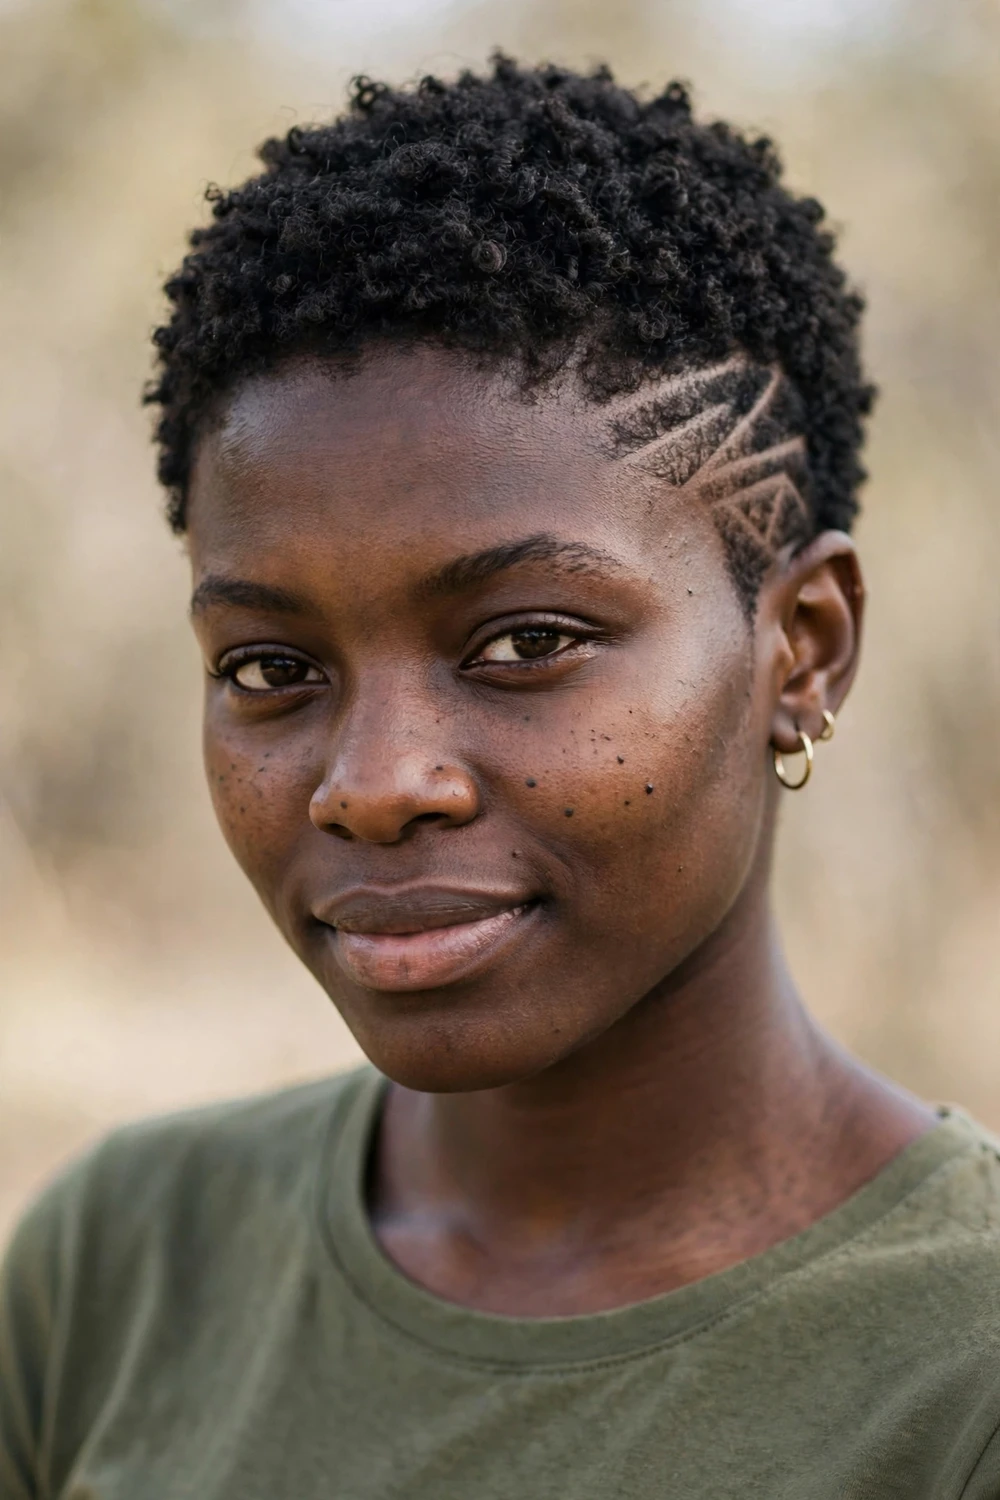
Shaved geometric designs turn the faded sides of a coily pixie into artwork. Lines, curves, or angular patterns are carved into the buzzed sections while the top keeps its coils, and for 4b and 4c hair the dense top contrasts sharply with the precise design below. That contrast is why this look photographs so well. It is the most expressive cut here, and no two are exactly alike since the design is drawn freehand for your head shape.
Designs blur as hair grows, so plan on barber visits every two weeks to keep the lines sharp, which makes this the highest-upkeep option on the list. The carving must be done on dry hair so the design lands where intended rather than shifting as it dries. Between visits, edge control and a soft brush keep the design area defined, and the top stays on the usual wash-and-go routine with a leave-in and gel.
Try this: bring a reference photo of the exact pattern so the barber carves what you pictured.
Difficulty: High · Cost: $$ (skilled barber)
14. Sculpted-Edge Crop
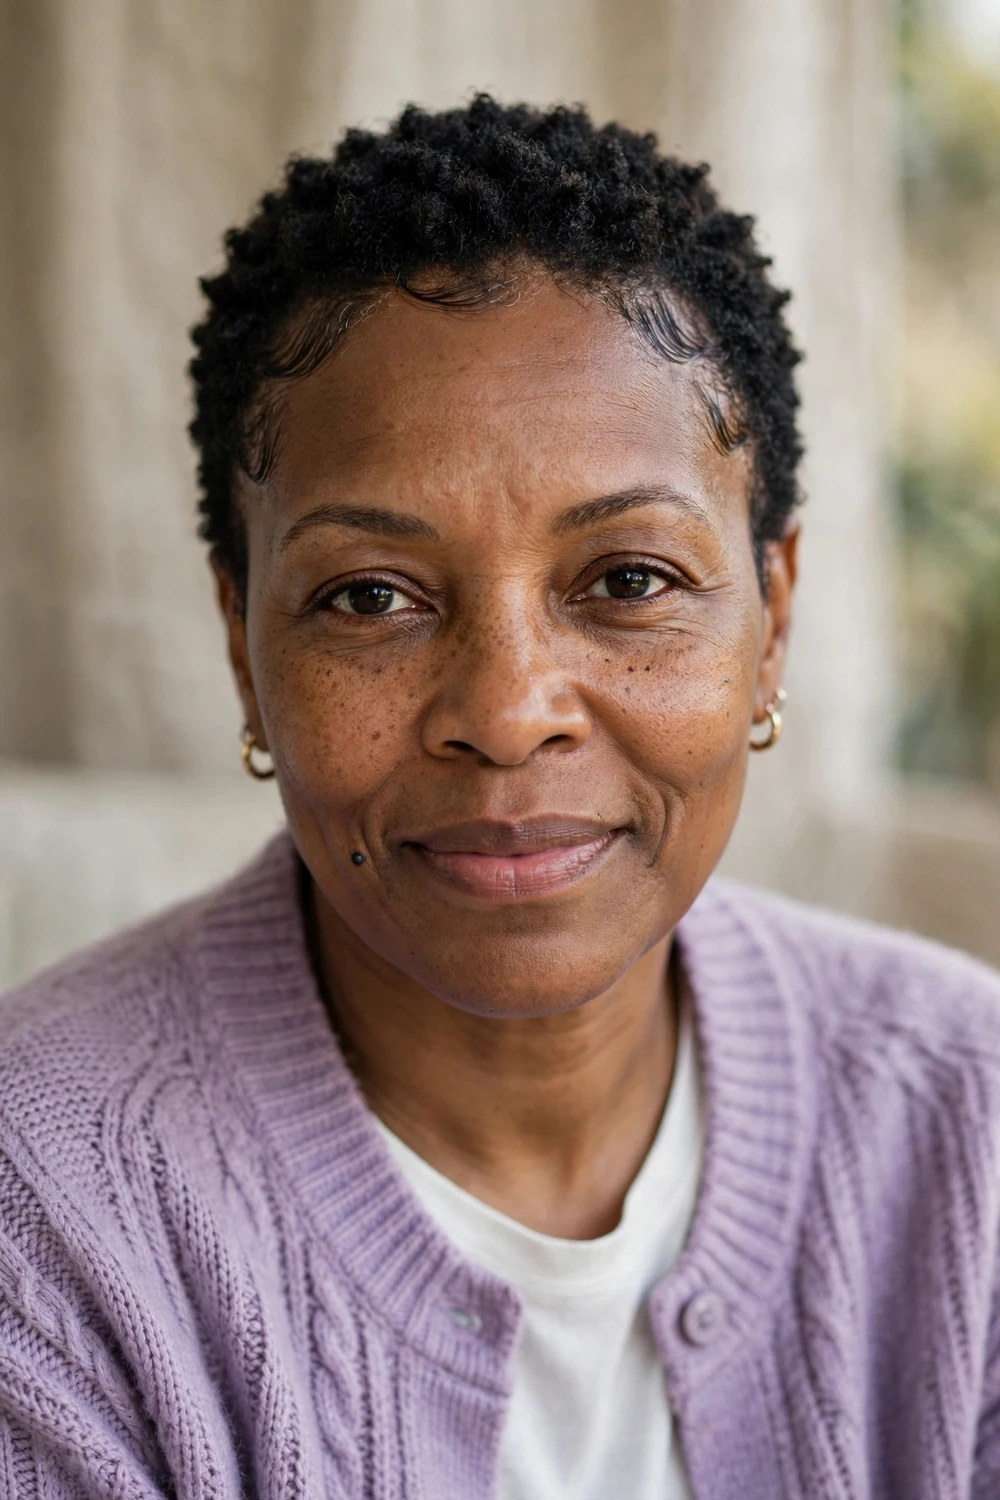
This crop keeps the hair short all over but defines the hairline with clean, sculpted edges around the forehead, temples, and nape. The crisp lines give 4a to 4c coils a polished, fresh-from-the-chair finish that lasts between visits, and the top stays soft and textured. The look balances sharp detail with natural softness, which keeps it from reading severe. It is also one of the most affordable cuts here, since the shape is simple and the detail comes from the line-up.
A trimmer or edge-up every week or two maintains the lines, which you can learn to do at home or book with your barber. Baby hairs swooped with edge control add an extra polished layer along the hairline, and a toothbrush works well as an applicator for precision. The short top needs only daily moisture and a little cream to stay defined, so the whole routine takes under five minutes.
Try this: swoop the front baby hairs with a toothbrush and edge control for a finished frame.
Difficulty: Low · Cost: $ (barber)
15. Twist-Out & Shingled Coily Pixie
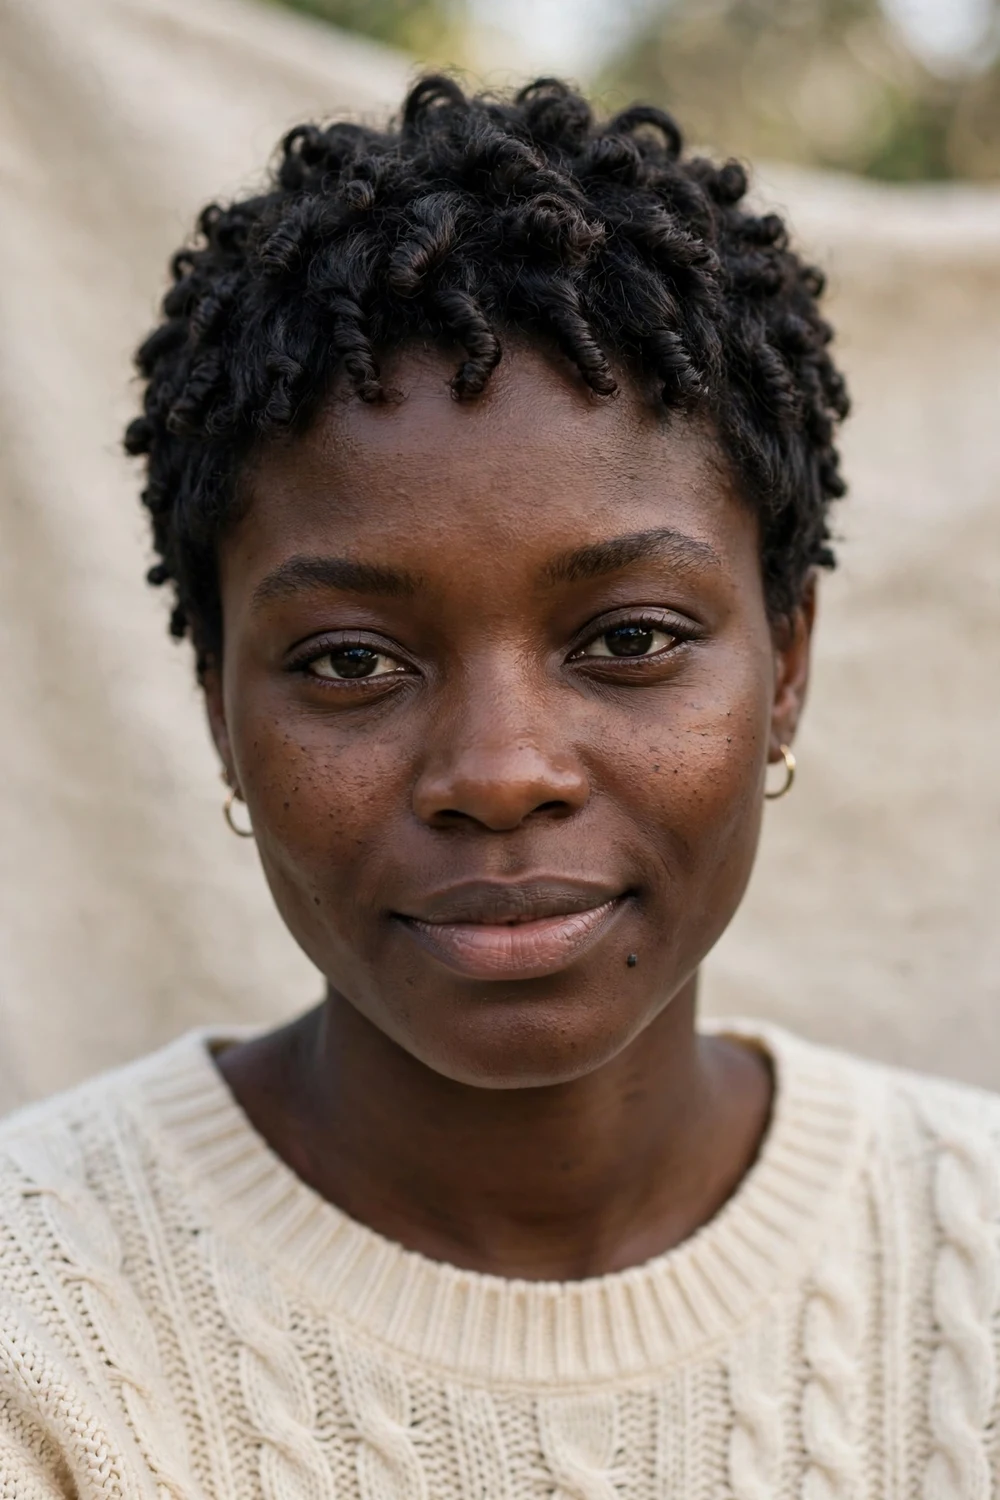
Two-strand twists set overnight and taken down in the morning give 4b and 4c pixies elongated, defined coils with far less shrinkage. The shingling method, applying product strand by strand, does the same job with even more separation and gloss, though it takes about twenty minutes. Both techniques turn a short coily crop into defined texture that lasts several days, and both stretch the hair without any heat. They are styling methods rather than cuts, so they work on top of any short coily base.
Twist on damp, conditioned hair with a twisting butter, and unravel carefully in the morning without pulling the ends apart. Shingling takes longer but the definition holds through the week with nightly protection. Refresh with water and a little oil on day three or four rather than re-twisting the whole head, which keeps the coils stretched longer. For more low-manipulation styling ideas, these short natural hair styles keep texture first.
Try this: pineapple the top with a loose scrunchie at night to protect the twist-out pattern.
Difficulty: Medium · Cost: $ (home styling) after the cut
16. Finger-Coiled TWA Pixie
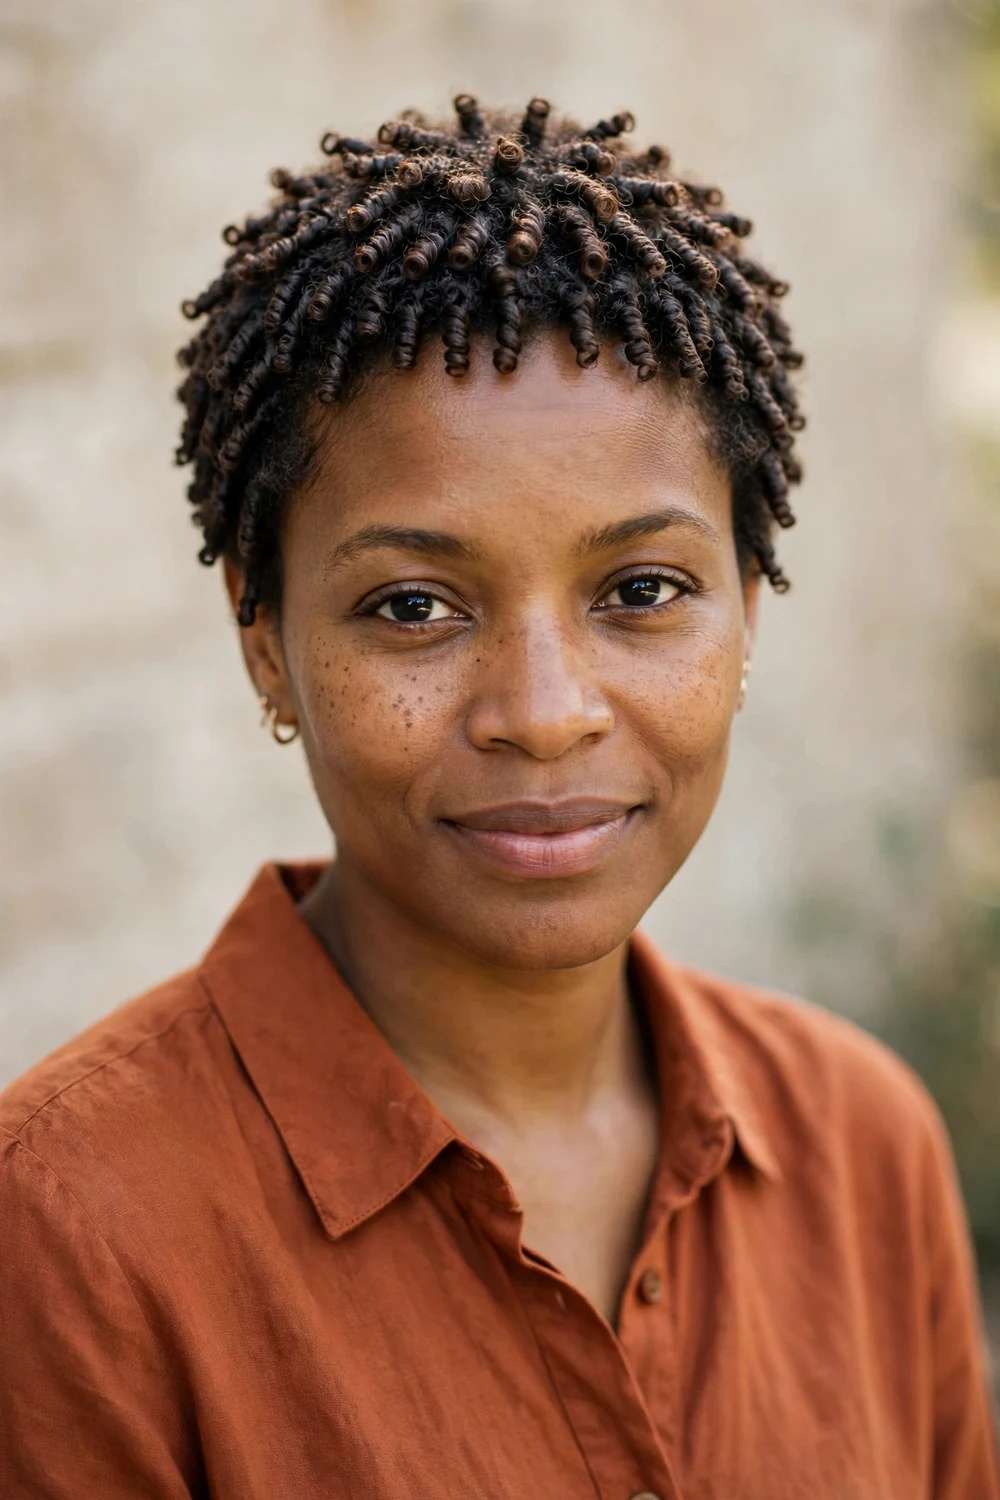
The teeny weeny afro, or TWA, is the starting point of many natural journeys, and finger coiling takes it up a level. Each section is twisted around a finger with curl cream so 4a to 4c coils form uniform ringlets close to the scalp. The result is neat, glossy, and full of bounce, with every coil visible and separated. It takes patience the first time, but the pattern holds for a week with nightly protection, which makes the effort pay off across several days of wear.
Work in small sections on damp hair with plenty of product, since dry sections frizz instead of coiling and the ringlets fall apart. Coil each section in the same direction for the most uniform pattern, then let the hair dry fully before touching it. A silk scarf or headband on top dresses the cut up instantly and protects the hairline on lazy days. Re-coil only the flattened spots mid-week instead of redoing everything.
Try this: coil in the same direction throughout for the most uniform ringlet pattern.
Difficulty: Medium · Cost: $ (home styling) after the cut
17. Tapered Fro Pixie
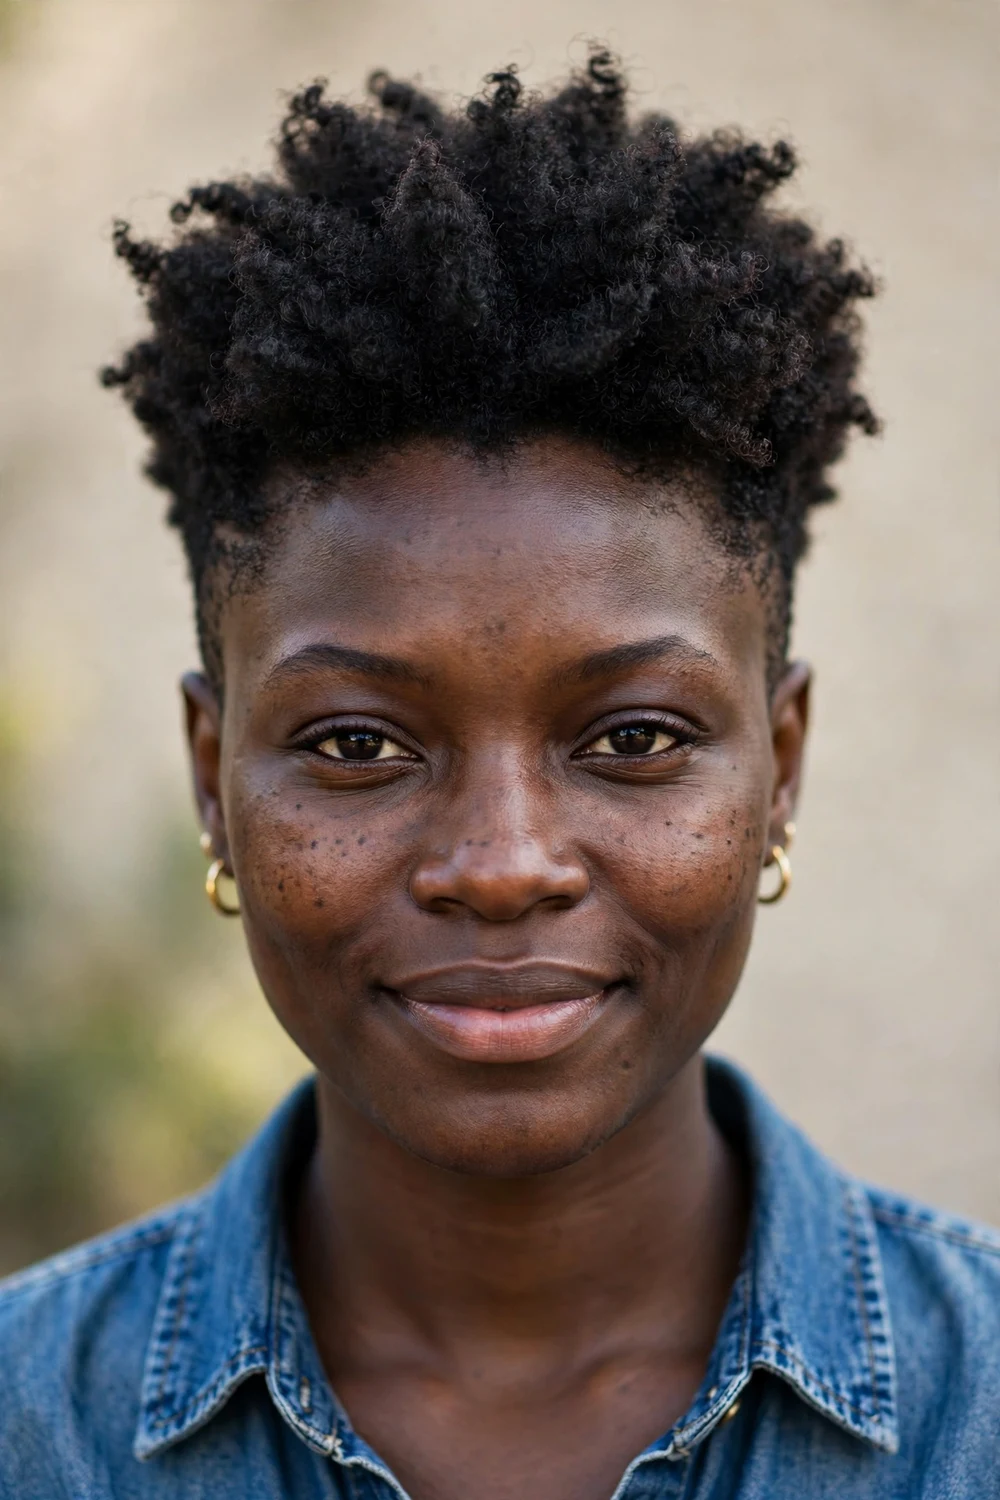
The tapered fro is the bridge between a full afro and a pixie: the crown keeps its rounded afro volume while the perimeter tapers neatly. For 4b and 4c hair, it celebrates natural density without the wide triangle a one-length short afro makes. The taper at the edges keeps the profile clean from the front and side, and the rounded crown gives the height that flatters most face shapes. It is the most natural-looking cut on this list, since it follows the hair’s own growth pattern.
Pick it out gently with a wide-tooth comb or pick, working from the ends toward the roots, then shape the outline with your hands for the rounded finish. Diffusing on low heat maximizes the rounded silhouette without flattening the coils, and a light cream keeps the surface smooth. Trims every five to six weeks keep the taper neat while the crown grows. Protect the shape at night with a satin bonnet so the picking lasts.
Try this: pick the roots only and smooth the surface with your palms for a clean rounded outline.
Difficulty: Low · Cost: $ (salon)
18. High-Top Fade Coily Pixie
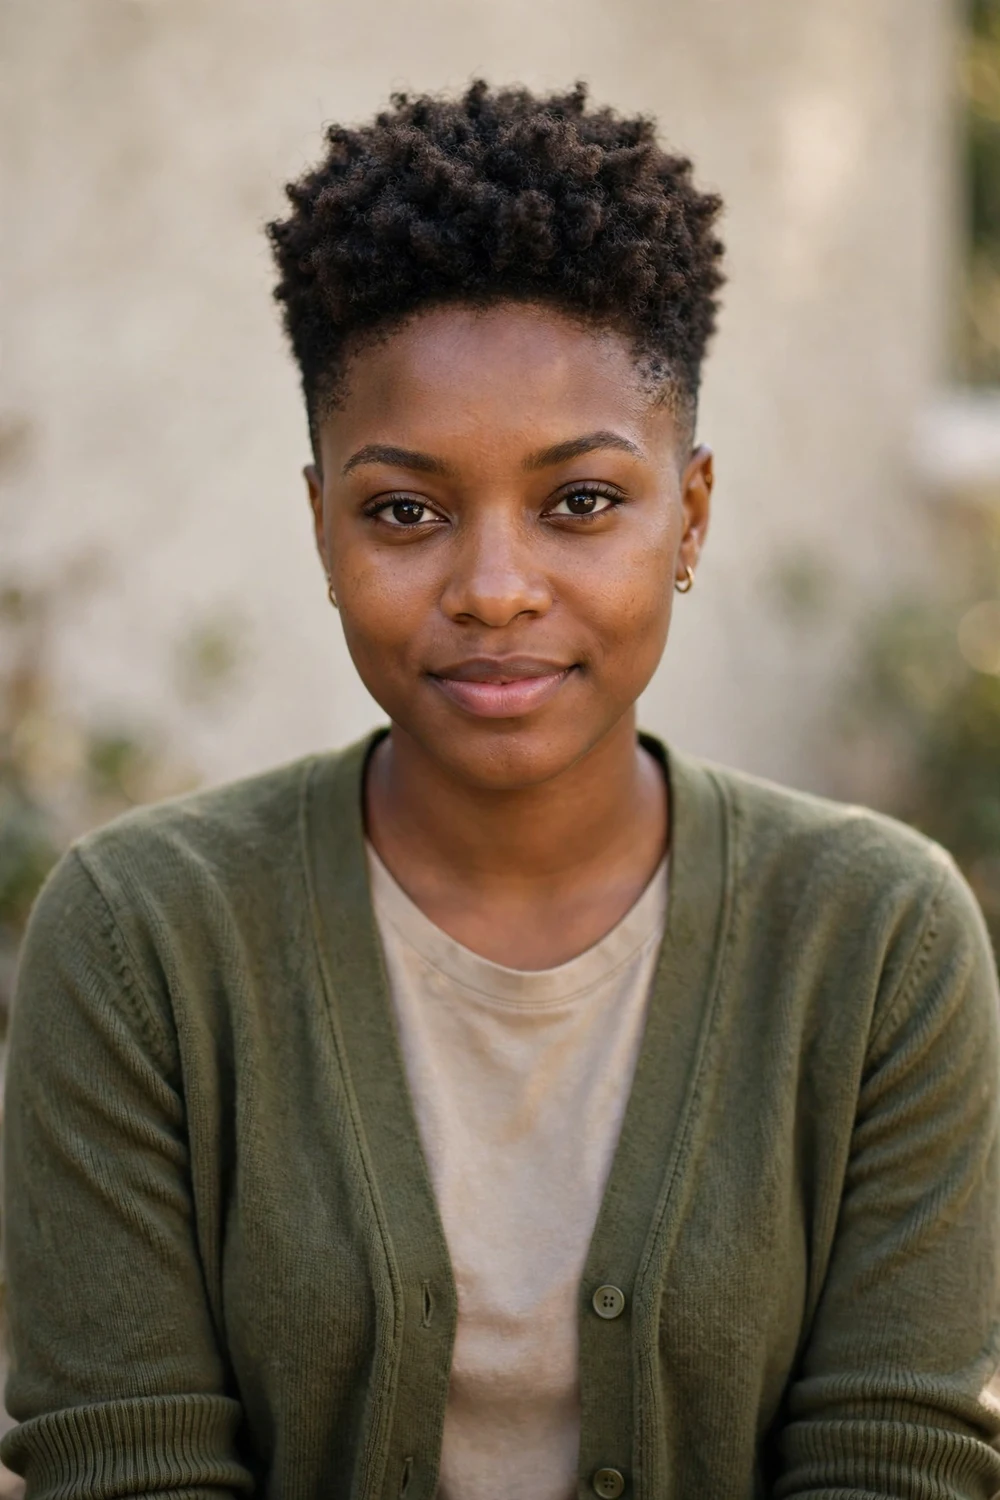
The high-top fade nods to 90s hip-hop style with a squared-off crown and completely shaved sides. On 4b and 4c coils, the top is shaped flat and even, which takes real skill to get right on coily texture, so choose a barber experienced with natural hair. The structure is bold and graphic, and it suits strong facial features and anyone who wants a statement silhouette. Shrinkage helps the top hold its boxy shape, since the coils compact instead of falling.
The flat top needs daily attention: a pick in the morning lifts it back into shape, and a satin bonnet at night is mandatory or it flattens and needs a full re-wet. The sides get buzzed every two weeks to keep the contrast sharp. Keep the top hydrated with a leave-in, since coily hair cut this short and styled upward dries out quickly without product. Mist with water before picking to avoid snapping dry coils.
Try this: mist the top with water before picking it up to avoid snapping dry coils.
Difficulty: High · Cost: $ (skilled barber)
19. Temple-Fade Ringlets Pixie
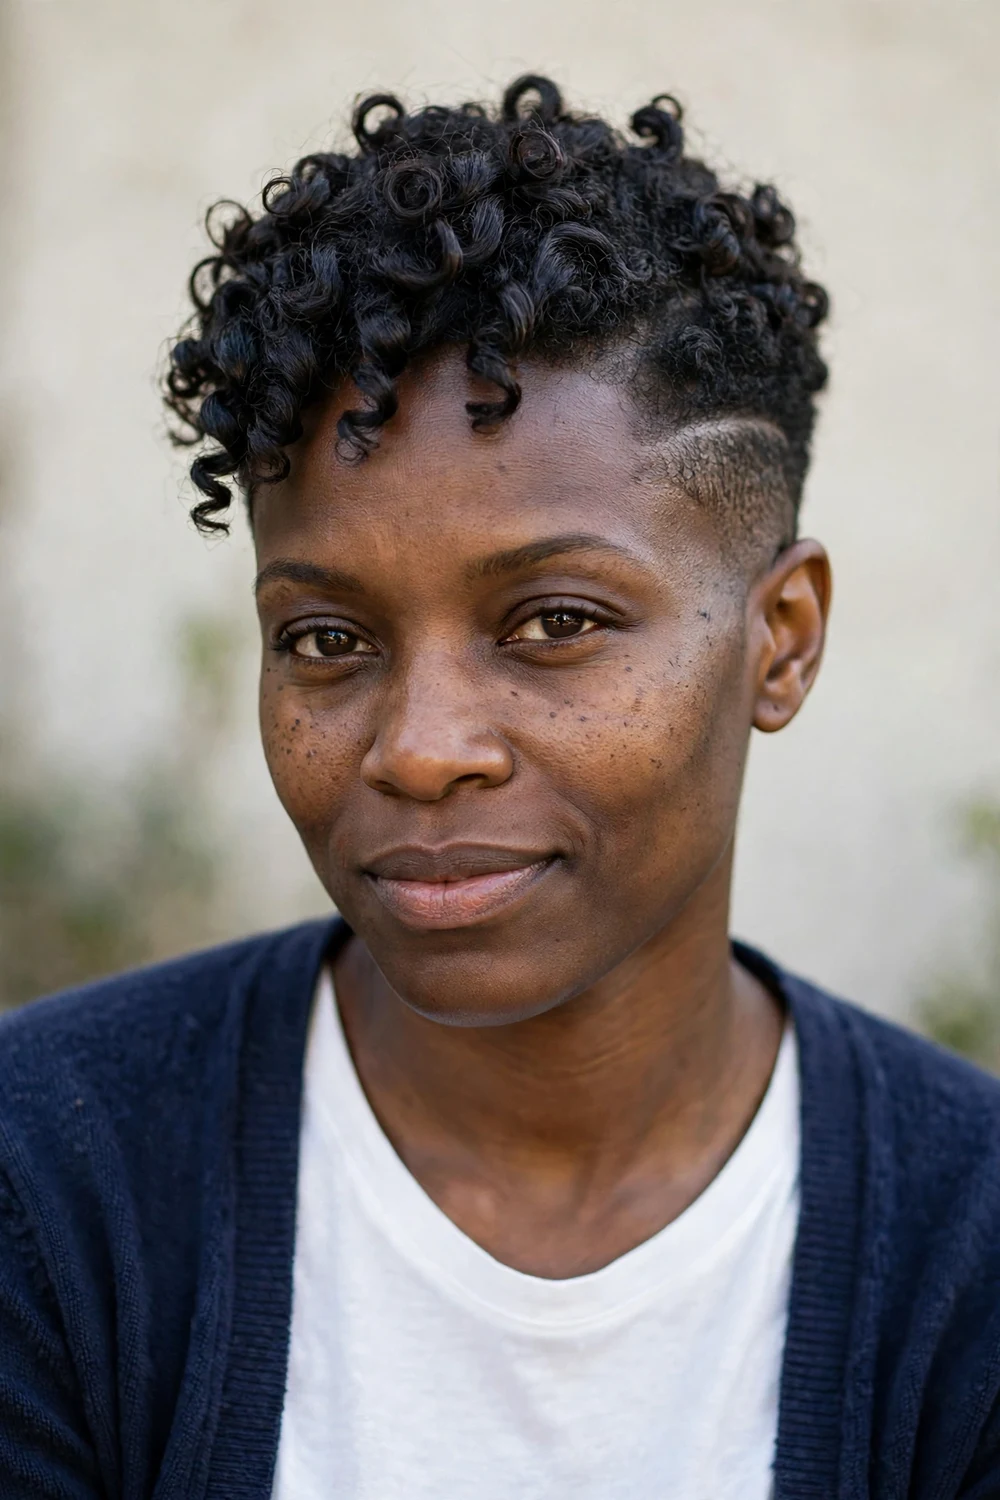
Fading just the temples is a smaller commitment than a full undercut but still gives the cut intention and shape. The defined ringlets on top stay the focus while the faded temples draw the eye upward and slim the sides, which flatters rounder faces. It suits 3c to 4a hair, where the contrast between the tight fade and the springy ringlets reads clearly. The effect is subtle from the front and striking from the side, giving the cut two personalities.
The temple fade grows out faster than a nape fade, so plan touch-ups every two to three weeks to keep the detail visible. Define the ringlets with a curl cream on damp hair, scrunching to encourage the coil pattern, and let them air-dry untouched. The fade area needs little product, just occasional moisturizer to keep the short hair from looking ashy. Ask the barber to blend gradually so the grow-out stays soft.
Try this: ask the barber to blend the fade gradually so it grows out without a harsh line.
Difficulty: Low · Cost: $ (barber)
20. Shaved-Nape Pixie
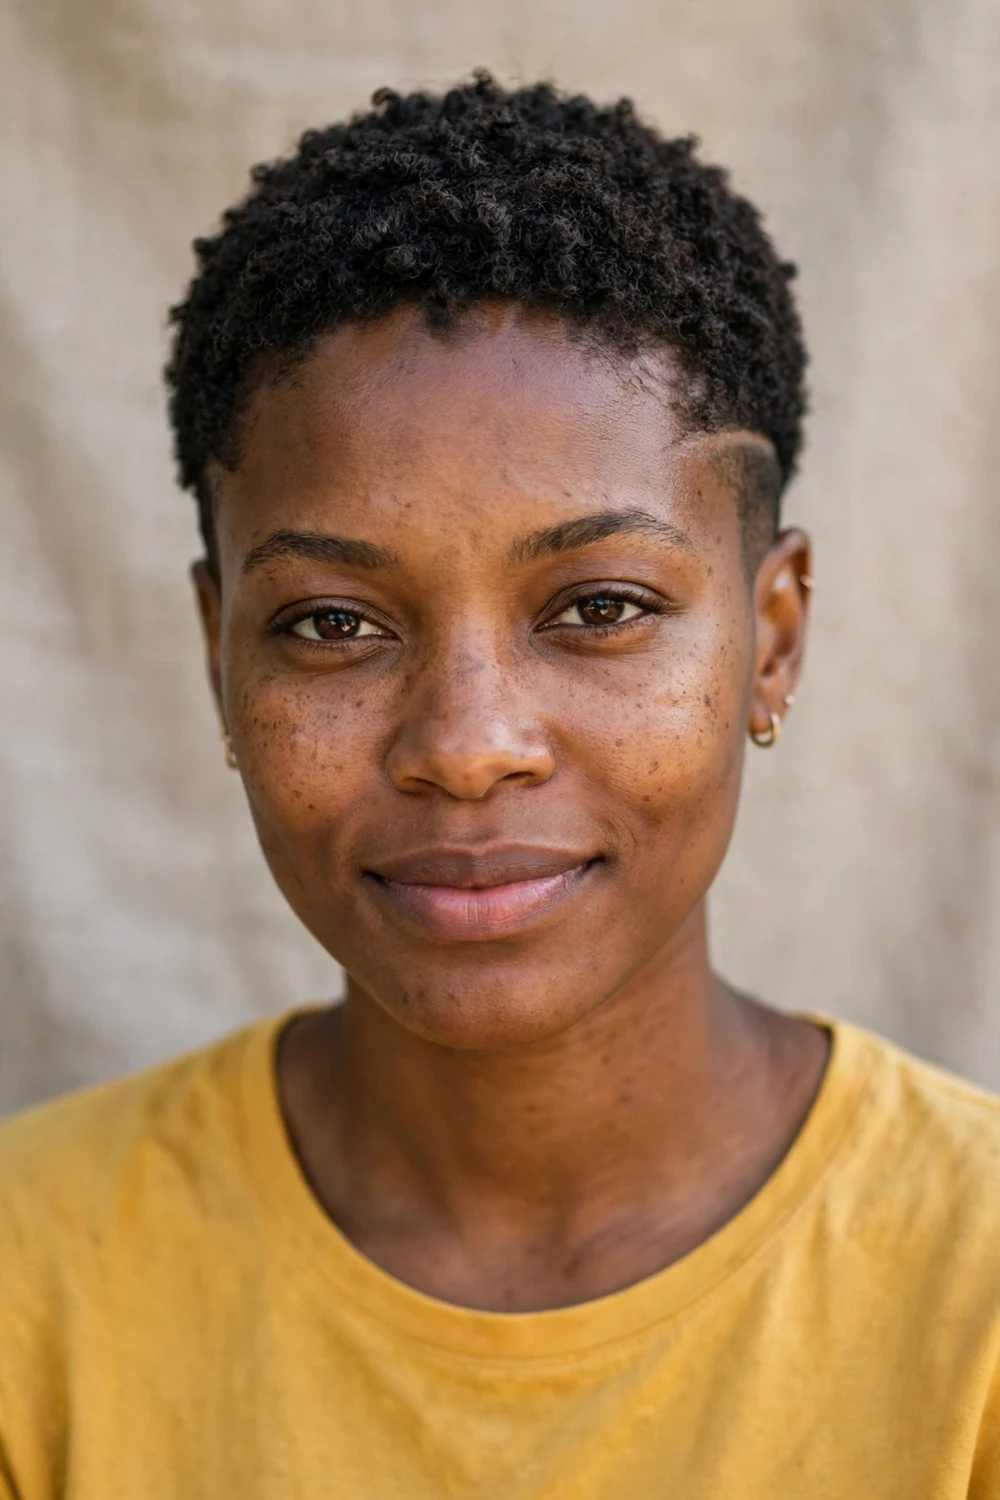
Shaving the nape keeps the neckline clean and cool, which matters when 4a to 4c coils want to mat at the back. A plain shaved nape is the tidy version, while a V-shaped point carved into it adds an unexpected detail visible when the hair moves or is swept forward. The rest of the pixie keeps its curls, so the surprise is all in the back, and the shaved area also prevents the sweating and tangling that happen when coils sit against the neck in warm weather.
The nape grows in fast and fuzzy, so touch-ups every three weeks keep it sharp rather than stubbly. The shaved skin needs moisturizer just like the scalp does, or it looks ashy against the curls. A V detail needs a steady hand, so have the barber do it rather than attempting it at home. Wear the hair swept forward once in a while to show off the detail from the front.
Try this: wear hair swept forward once a week to show off the nape detail.
Difficulty: Low · Cost: $ (barber)
21. Tapered-Sideburn Pixie
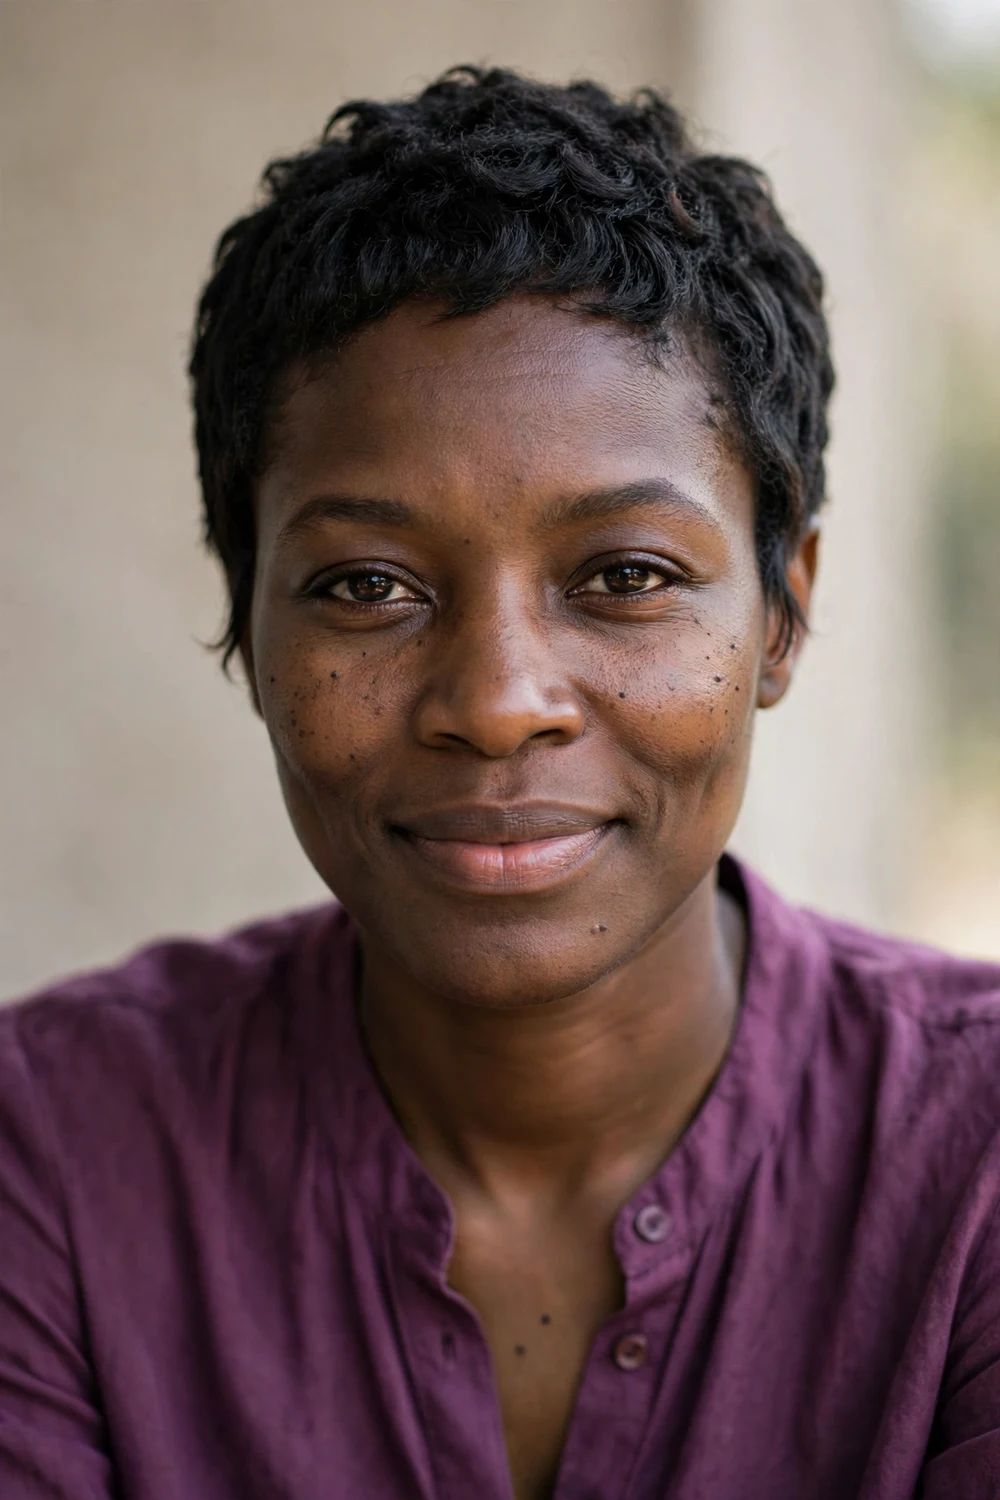
Pointed, tapered sideburns frame the face like contouring, giving a coily pixie a finished edge without changing the cut itself. They suit 4a to 4c hair, where the dense top contrasts with the precise points at the temples, and the detail draws attention to the cheekbones. Softer, longer sideburns give the same framing with a gentler finish for those who want less edge. It is a small detail with an outsized effect on how deliberate the cut looks.
The points need shaping every two weeks or they lose their definition and blur into the taper. Use a Denman-style brush on the longer top sections to lay the curls neatly above the sideburns, and trace the points with edge control each morning to keep them visible. The rest of the cut follows your usual moisture routine of leave-in and cream. Between barber visits, a trimmer keeps the points tidy.
Try this: trace the sideburn points with edge control each morning to keep them visible.
Difficulty: Low · Cost: $ (barber)
22. Platinum Blonde Coily Pixie
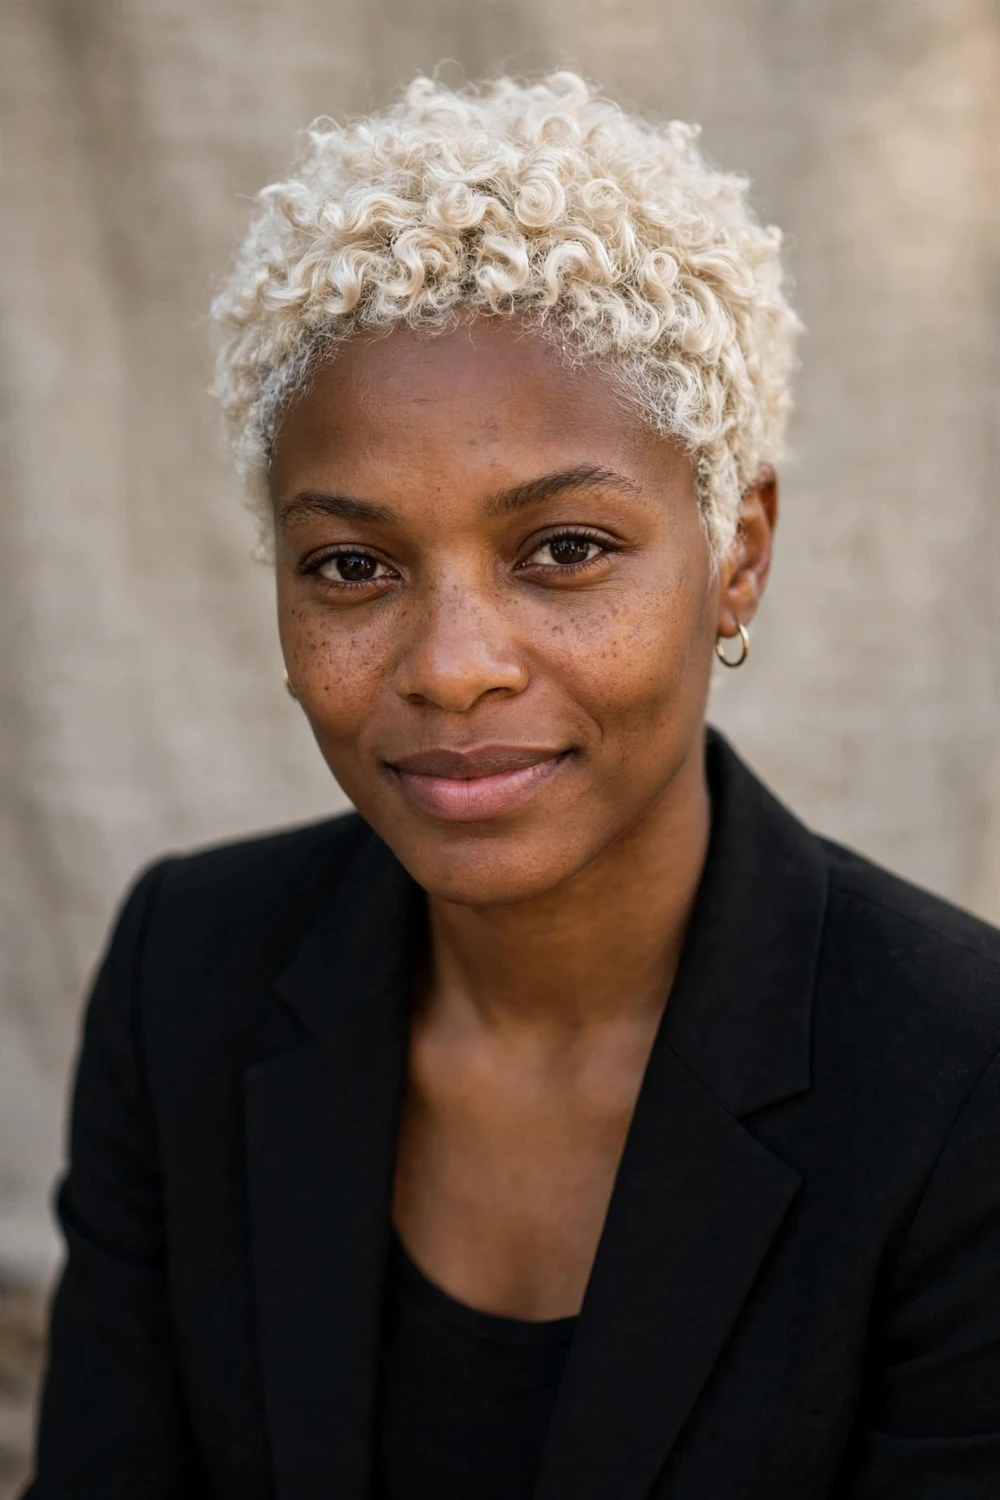
Bleaching coily hair to platinum turns every coil into a light-catching detail, and on a pixie the color covers the whole head evenly without the banding long hair gets. For 3c to 4c hair, the shorter length is actually an advantage: less old hair means less damage history, and regular trims remove compromised ends fast. The icy tone against deeper skin is striking, which is why this cut stays in demand despite the upkeep. It is the boldest color statement on this list.
Bleach and coils are a high-maintenance pairing. Deep-condition weekly, use bond-repair treatments, and expect the cut to need extra moisture every single day, since bleached coils lose some of their spring and dry out faster. Dry curl-by-curl shaping after coloring keeps the definition sharp and even. Purple shampoo once a week keeps the tone icy instead of brassy, and a protein treatment every two weeks keeps the bleached coils strong.
Try this: add a protein treatment to your routine every two weeks to keep bleached coils strong.
Difficulty: High · Cost: $$$ (color plus cut)
23. Copper Coily Pixie
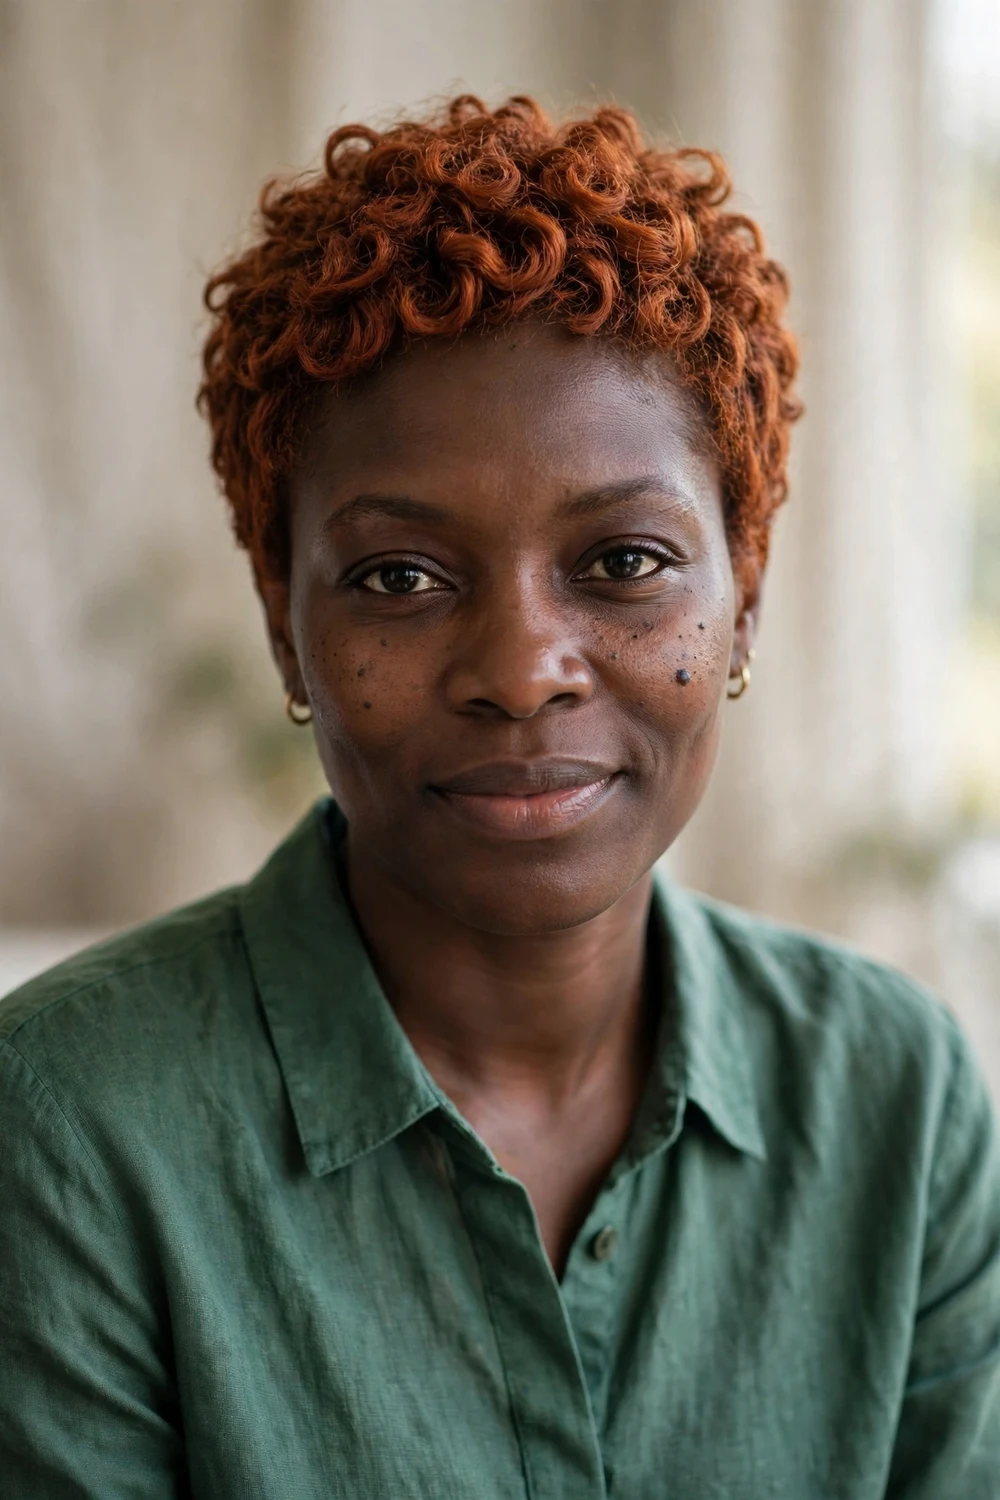
Copper is the warm metallic shade that flatters deeper skin tones especially well, and on a coily pixie it makes each coil look dimensional. The color ranges from true penny copper to a softer auburn, and the taper underneath keeps the cut neat while the top glows. For 3c to 4b hair, the color also helps defined coils read clearly in photos, since the warm tone separates each curl from the next. It is a softer commitment than platinum but still turns heads.
Copper fades faster than natural shades, so use color-safe shampoo and cool water to stretch it between appointments. The dye process dries coils out, which means the usual moisture routine gets more important, not less, with extra leave-in on the colored sections. A color-depositing conditioner every other week refreshes the tone between salon visits. Rinse with cool water after conditioning to seal the cuticle and hold the color noticeably longer.
Try this: rinse with cool water after conditioning to seal the cuticle and hold the color.
Difficulty: Medium · Cost: $$ (color plus cut)
24. Burgundy Red Coily Pixie
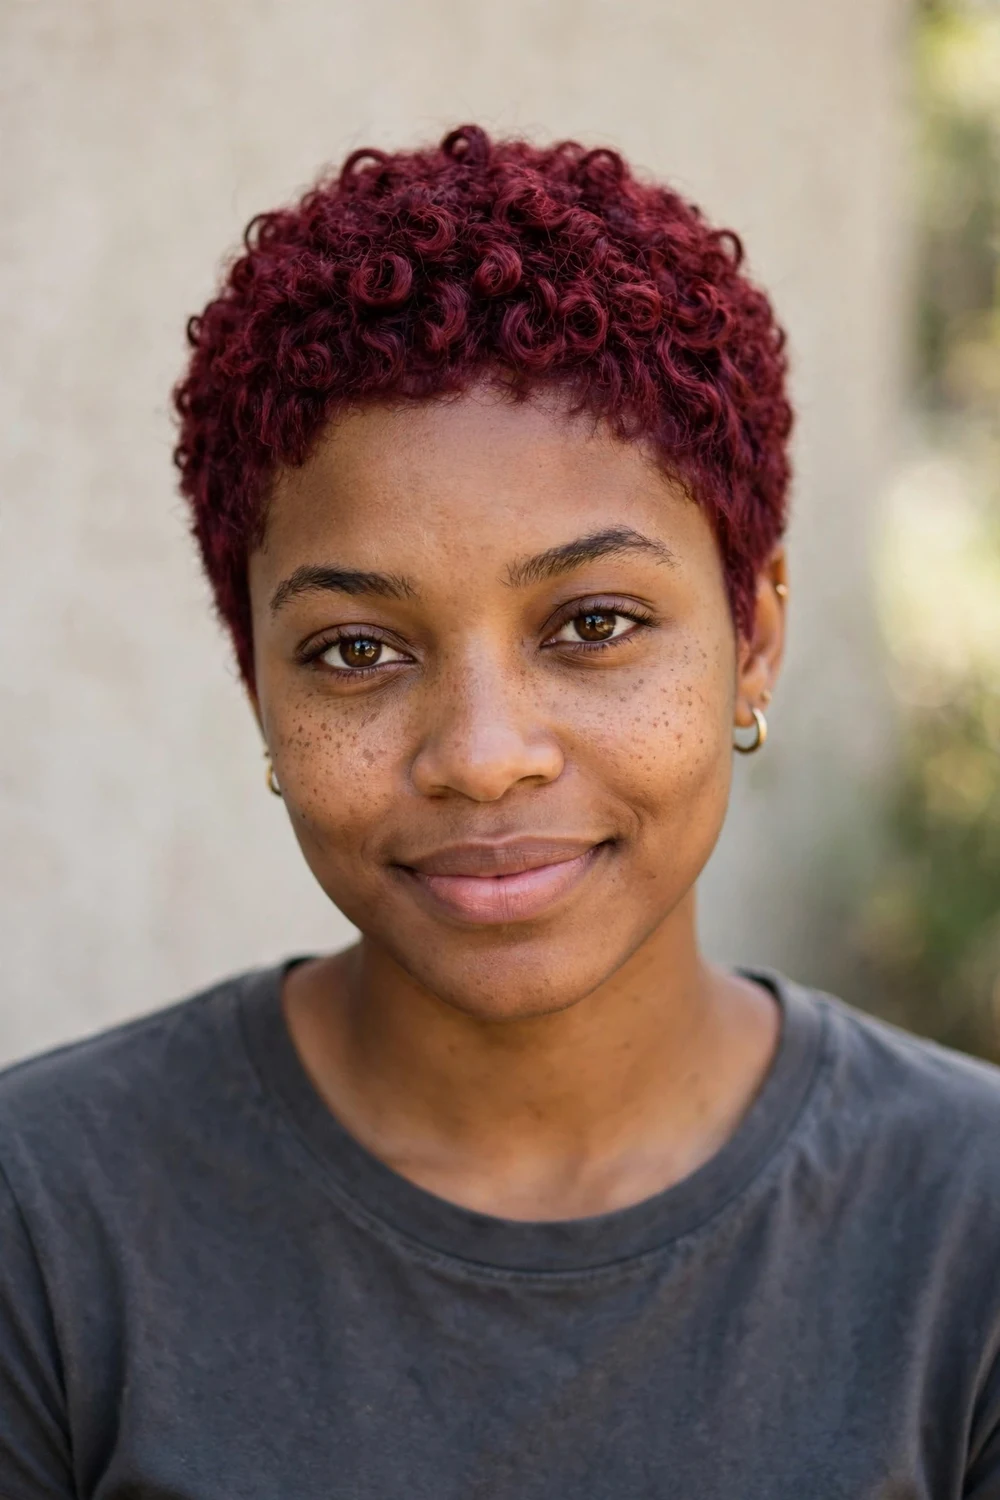
Deep burgundy gives coily pixies a rich, wine-colored finish that looks polished in any light. The dark red reads almost black indoors and glows red in sunlight, which gives the cut two personalities depending on where you are. On 4a to 4c hair, the color adds depth to dense coils and suits the tapered shapes on this list particularly well. It is the most office-friendly bold color here, since it stays deep rather than bright.
Red is the fastest-fading color family, so expect to refresh it every four to six weeks to keep it rich. Color-treated coils dry out quicker than virgin hair, so layer a leave-in under your styling cream and deep-condition weekly without skipping. The color looks best on well-moisturized hair, since dry coils mute the tone and make it look flat. Sleep in a satin bonnet to slow fading from pillow friction.
Try this: sleep in a satin bonnet to slow color fading from pillow friction.
Difficulty: Medium · Cost: $$ (color plus cut)
25. Honey Highlighted Pixie
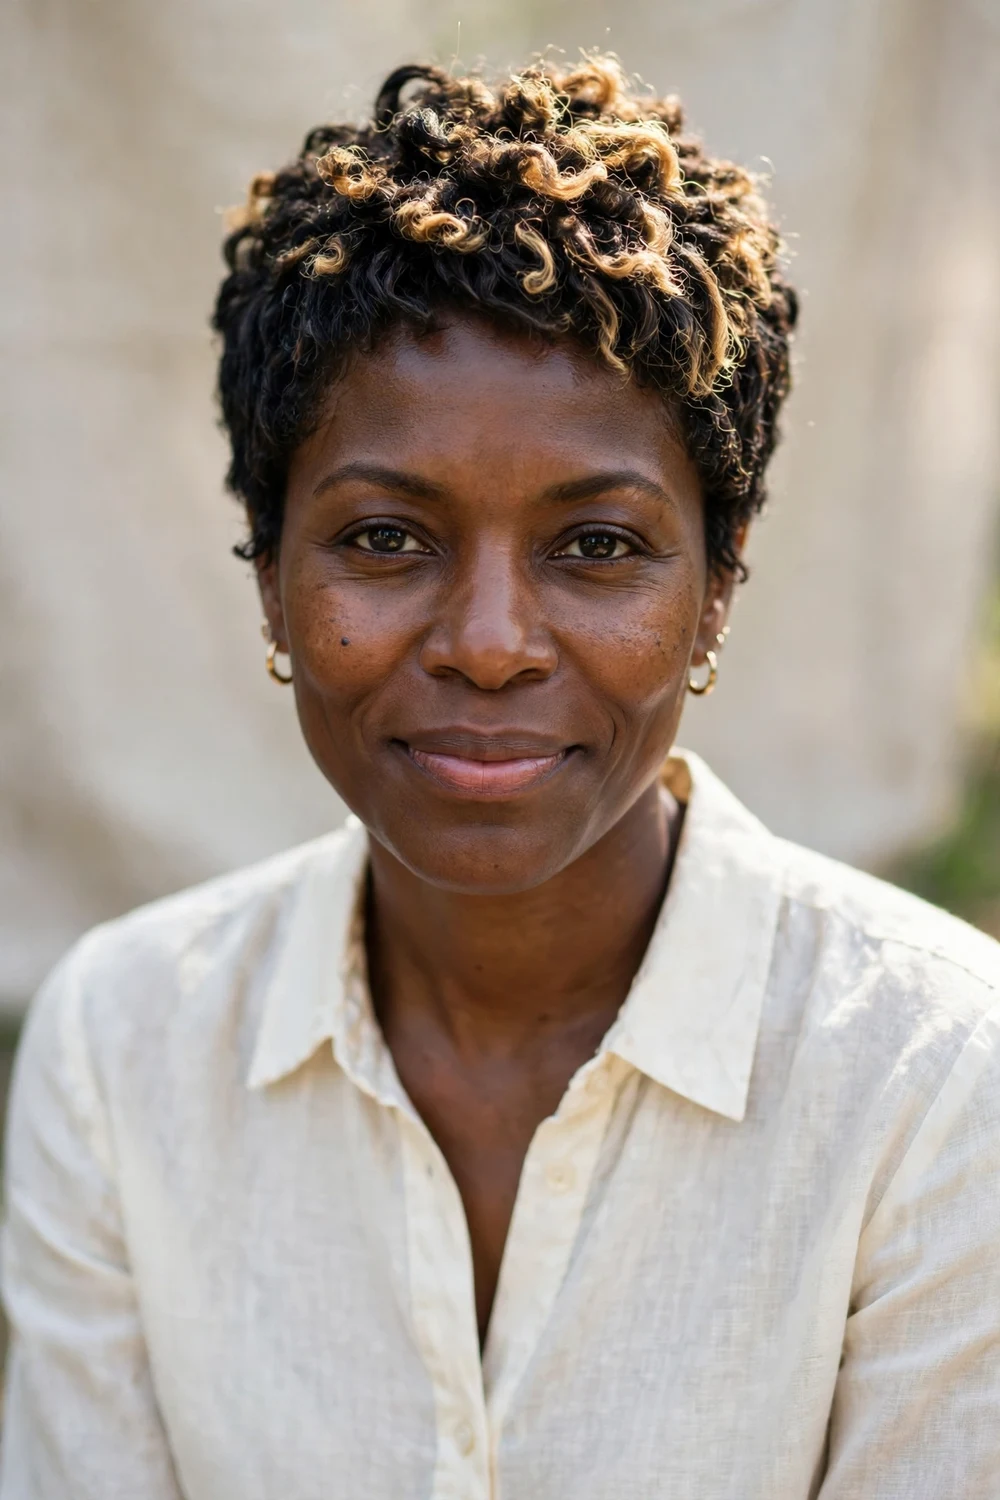
Honey highlights woven through the top coils add warmth and dimension without a full-head color commitment. The lighter pieces catch light as the curls move, which makes the curl pattern look deeper and more defined from a distance. On 3c to 4b hair, placing the highlights through the crown and front frames the face, while keeping the tapered sides dark creates contrast that sharpens the silhouette. It is the lowest-commitment color option on this list.
Highlights grow out softly on curly hair, so touch-ups stretch to eight or ten weeks without an obvious line. The lightened sections still need extra moisture, so spot-treat them with a heavier cream than the rest of the head. A gloss treatment between appointments keeps the honey tone from going dull or brassy over time. Scrunch a light oil over the highlighted coils to make the dimension pop on styling days.
Try this: scrunch a light oil over the highlighted coils to make the dimension pop.
Difficulty: Medium · Cost: $$ (partial color plus cut)
26. Jewel-Tone Tipped Pixie
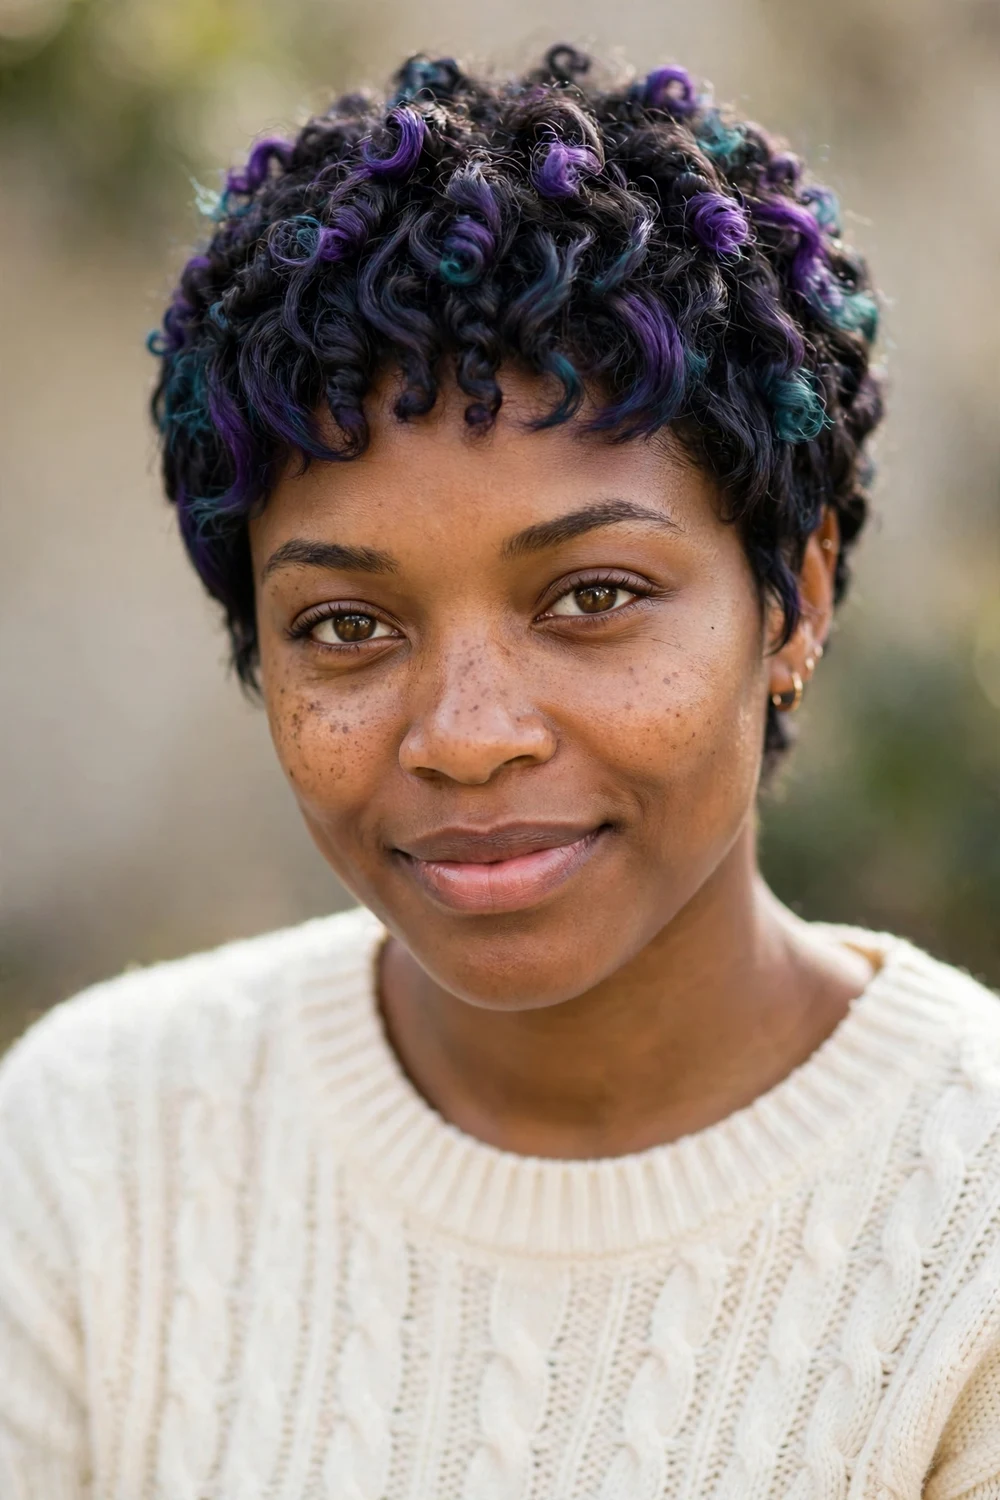
Painting just the ends in electric blue, emerald, or another jewel tone gives a coily pixie a fun accent without dyeing the whole head. The color sits on the tips of the coils, so it flashes when the hair moves and stays subtle when it rests. For 4a to 4c hair, tipping works best on a defined cut, since each colored coil end shows separately rather than blending into a block. It is the easiest color experiment here, since trims remove it completely.
Tips fade and fray first, so seal them with a styling product made for colored hair and trim the ends regularly to keep them neat. Most jewel tones need a lightened base to show up, which means the tips take extra damage, so treat them like bleached hair even if the roots are natural. The look refreshes with a simple re-dip every month or two, and the small area keeps salon time short.
Try this: coat the colored tips with a little extra cream to keep them from drying faster than the roots.
Difficulty: Medium · Cost: $$ (tip color plus cut)
27. Silver Gray Coily Pixie

Natural silver and salt-and-pepper coils bring their own dimension to a pixie, no dye required. The mix of gray and dark strands makes the curl pattern look deeper, and a tapered or cropped shape keeps the look current rather than aging. For women embracing their gray, this is the lowest-chemical option on the list, and the silver tone pairs especially well with deeper skin. A defined cut matters more than ever here, since the color does the talking.
Gray coils tend to be coarser and drier than pigmented hair, so moisture matters even more here than with dyed cuts. A purple or blue shampoo once a week keeps the silver bright instead of yellow, and a light serum adds the shine gray hair sometimes lacks. Deep-condition weekly to keep the coarser texture soft. These short curly hairstyles for older black women offer more mature takes on natural texture.
Try this: finish with a shine serum to keep silver coils looking luminous, not wiry.
Difficulty: Low · Cost: $ (salon)
At a Glance: 27 Curly Pixies Compared
| Cut | Best for | Curl-pattern perk | Upkeep |
|---|---|---|---|
| Classic Tapered Coily Pixie | 4b to 4c coils | Taper controls sideways spread | Trims every 3 to 4 weeks |
| Wash-and-Go Coily Crop | 4a to 4c coils | Even length, uniform shrinkage | Daily moisture, quick wash |
| Rounded Halo Curly Pixie | 3c to 4a curls | Even volume, no triangle shape | Diffuse on low heat |
| Soft Layered Curly Pixie | 3b to 4a curls | Layers stop heavy ends | Scrunch with cream |
| Chunky Sponge-Curl Pixie | 4c short coils | Two-minute defined texture | Sponge on damp hair |
| Side-Swept Fringe Curly Pixie | 3c to 4a curls | Fringe styled dry for true length | Clip fringe while drying |
| Wispy Curtain-Bang Curly Pixie | 3a to 3c curls | Split bangs frame cheekbones | Twist each bang curl |
| Piecey Curly Baby Bangs Pixie | 3b to 4a curls | Texture keeps bangs from blunting | Frequent bang trims |
| Curly Faux Hawk | 4a to 4c coils | Shrinkage builds center height | Satin bonnet nightly |
| Undercut Fade Coily Pixie | 4b to 4c coils | Buzzed sides, max top contrast | Fade touch-ups every 2 to 3 weeks |
| Asymmetrical Coily Pixie | 3c to 4b curls | Deep part, two looks in one | Re-set part daily |
| Hard-Part Coily Pixie | 4a to 4c coils | Razor line on dense coils | Redraw line every 1 to 2 weeks |
| Geometric Shaved-Design Pixie | 4b to 4c coils | Artwork on buzzed sides | Barber every 2 weeks |
| Sculpted-Edge Crop | 4a to 4c coils | Crisp hairline, soft top | Edge-ups weekly or biweekly |
| Twist-Out & Shingled Coily Pixie | 4b to 4c coils | Elongation without heat | Re-twist weekly |
| Finger-Coiled TWA Pixie | 4a to 4c coils | Uniform ringlets, holds a week | Silk scarf at night |
| Tapered Fro Pixie | 4b to 4c coils | Afro volume, pixie perimeter | Pick roots gently |
| High-Top Fade Coily Pixie | 4b to 4c coils | Graphic flat-top structure | Pick top daily |
| Temple-Fade Ringlets Pixie | 3c to 4a curls | Light fade, springy focus | Touch-ups every 2 to 3 weeks |
| Shaved-Nape Pixie | 4a to 4c coils | No nape matting or sweat | Clean-up every 3 weeks |
| Tapered-Sideburn Pixie | 4a to 4c coils | Face-framing points | Reshape every 2 weeks |
| Platinum Blonde Coily Pixie | Bleach-ready 3c to 4c | Light catches every coil | Deep-condition weekly |
| Copper Coily Pixie | 3c to 4b coils | Metallic depth on coils | Color-safe routine |
| Burgundy Red Coily Pixie | 4a to 4c coils | Two-tone light effect | Refresh every 4 to 6 weeks |
| Honey Highlighted Pixie | 3c to 4b coils | Dimension without full color | Gloss between appointments |
| Jewel-Tone Tipped Pixie | 4a to 4c coils | Color flash on coil ends | Re-dip monthly |
| Silver Gray Coily Pixie | Natural gray coils | Built-in dimension, no dye | Purple shampoo weekly |
How to Choose Your Curly Pixie
Start with your curl pattern, not your face shape. Looser 3a to 3c curls hold fringe and layered shapes well, since the curls separate into defined pieces. Tighter 4a to 4c coils do best with tapered or faded sides that channel the natural volume upward, because coils expand outward when left long all around. Shrinkage of 50 to 75 percent is normal for 4c hair, so the length you approve in the chair is never the length you live with unless the cut is done dry.
Next, be honest about your routine. Fades, hard parts, and shaved designs need barber visits every two to three weeks. Wash-and-go crops and tapered fros ask for daily moisture but almost no technique. Color adds a whole second routine of deep conditioning and toning. Pick the maintenance you will actually do, since a grown-out fade looks worse than a fresh simple crop.
Finally, talk to a stylist who cuts curly hair dry. Bring reference photos of the exact cut, not just the vibe, and ask how much shrinkage to expect. A good curly-hair stylist will shape the cut on your dry coils and show you the true length before you leave.
Caring for Natural Curls in a Pixie
Moisture. Short natural hair dries out fast because there is less of it to hold product. Layer a leave-in conditioner under your cream or gel every time you style, and deep-condition weekly. Washing with lukewarm water instead of hot keeps the cuticle closed, and a light oil sealed over the cream locks the moisture in.
Night protection. Cotton pillowcases pull moisture from coils and flatten pixie shapes overnight. A satin bonnet or silk scarf keeps the curls defined and the moisture where it belongs. For twist-outs and finger coils, pineappling the top with a loose scrunchie under the bonnet preserves the pattern through the week.
Edges and scalp. Short cuts put the hairline on display, so smooth edges with edge control and keep the scalp moisturized, especially on faded or buzzed sections. Short hair shows a dry, ashy scalp faster than long hair does. A light oil massaged along the hairline once a day keeps everything looking intentional.
Frequently Asked Questions
Do pixie cuts work for 4c natural hair?
Yes, pixies are one of the best cuts for 4c hair. Tapered sides, faded shapes, and short crops all channel 4c volume upward instead of letting it spread sideways, and the short length makes moisture routines quick. The key is a dry or stretched cut so shrinkage does not change the shape after you leave the salon. Ask a stylist experienced with coily hair to shape it on your dry coils.
Should a curly pixie be cut wet or dry?
Dry, or on stretched hair, whenever possible. Wet curls stretch longer than they will ever be in real life, so a wet cut on curly hair almost always comes out shorter than expected. A dry cut lets the stylist see the true finished length and place each layer where it will actually fall. For fringes and bangs especially, dry-cutting is the difference between the length you wanted and a surprise.
How much does a curly pixie shrink?
Shrinkage depends on the curl pattern. Looser 3a to 3c curls shrink roughly 25 to 50 percent from their wet length, while 4a to 4c coils commonly shrink 50 to 75 percent. That means a fringe cut at two inches wet can dry at under an inch on 4c hair. This is why dry-cutting matters so much for pixies: the cut is designed for the shrunken state, not the stretched one.
How often should I trim a curly pixie?
It depends on the shape. Fades, hard parts, and shaved designs need barber touch-ups every two to three weeks to stay sharp. Tapered pixies and wash-and-go crops hold their shape for three to five weeks. If you are growing the pixie out into a tapered fro, you can stretch visits to six weeks. The rule is simple: precise lines need frequent upkeep, softer shapes are forgiving.
How do I keep my curly pixie moisturized?
Layer products on damp hair: leave-in conditioner first, then a cream for definition, then a light oil to seal. Short hair needs this routine just as much as long hair, because coils lose moisture to the air quickly. Refresh between washes with water and a dab of cream rather than full re-styling. Sleeping in a satin bonnet and deep-conditioning weekly keep the coils soft and the cut looking fresh.
Final Thoughts
A curly pixie works when the cut is designed around shrinkage instead of against it, so pick your shape by curl pattern, insist on a dry or stretched cut, and keep the moisture routine simple enough to do every day. Do that, and natural coils give you a pixie that no straight-haired version can match.

