


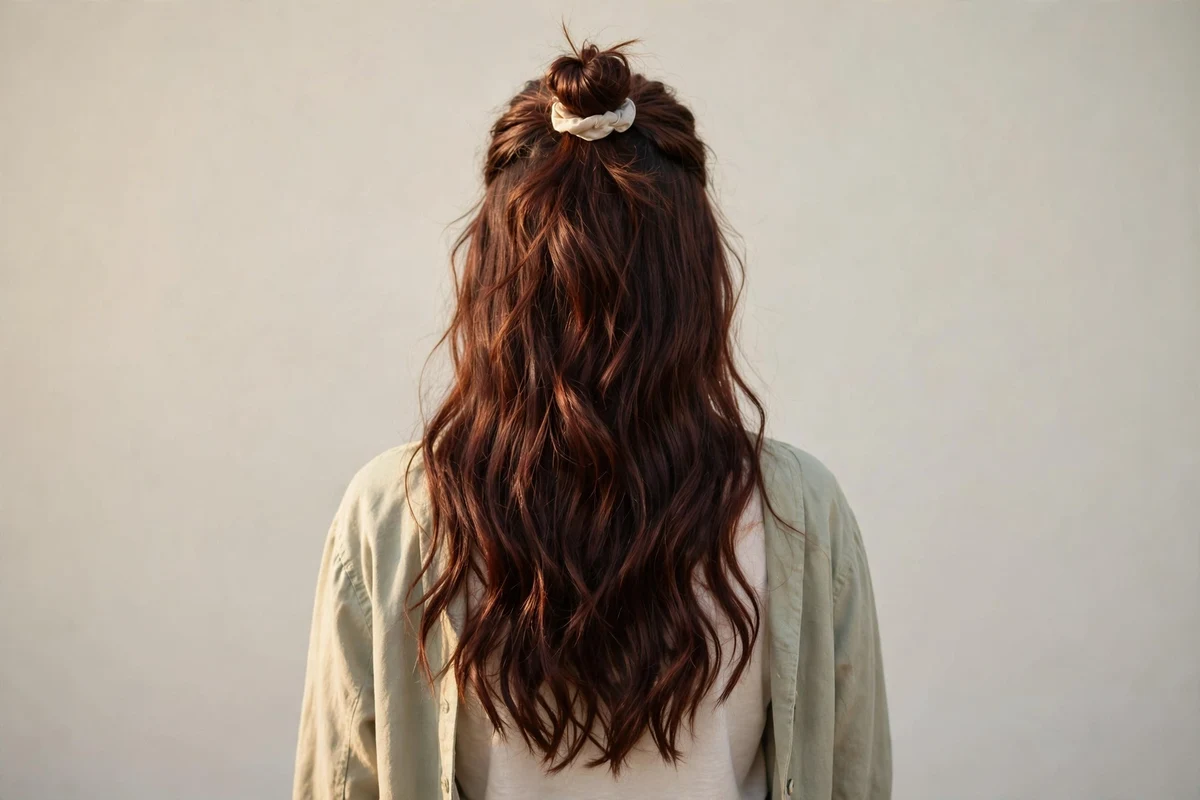
Long hair gives you room to play, and these cute hairstyles for long hair are made for real days: school runs, work shifts, coffee dates, and everything in between. This list has 25 easy everyday ideas, from bubble braids and messy buns to ribbon ponytails and claw clip twists. Most take under ten minutes, almost all work without heat, and every style suits casual daily wear rather than formal events.
Quick takeaways
- Most of these 25 styles take under 10 minutes once you have tried them twice.
- Second-day hair holds braids and buns better than freshly washed hair.
- A handful of elastics, bobby pins, and one claw clip cover almost every style here.
- All but one of these looks can be done with zero heat.
- Pick secure braids for active days and looser styles for relaxed ones.
25 cute everyday hairstyles for long hair
1. Bubble Braid
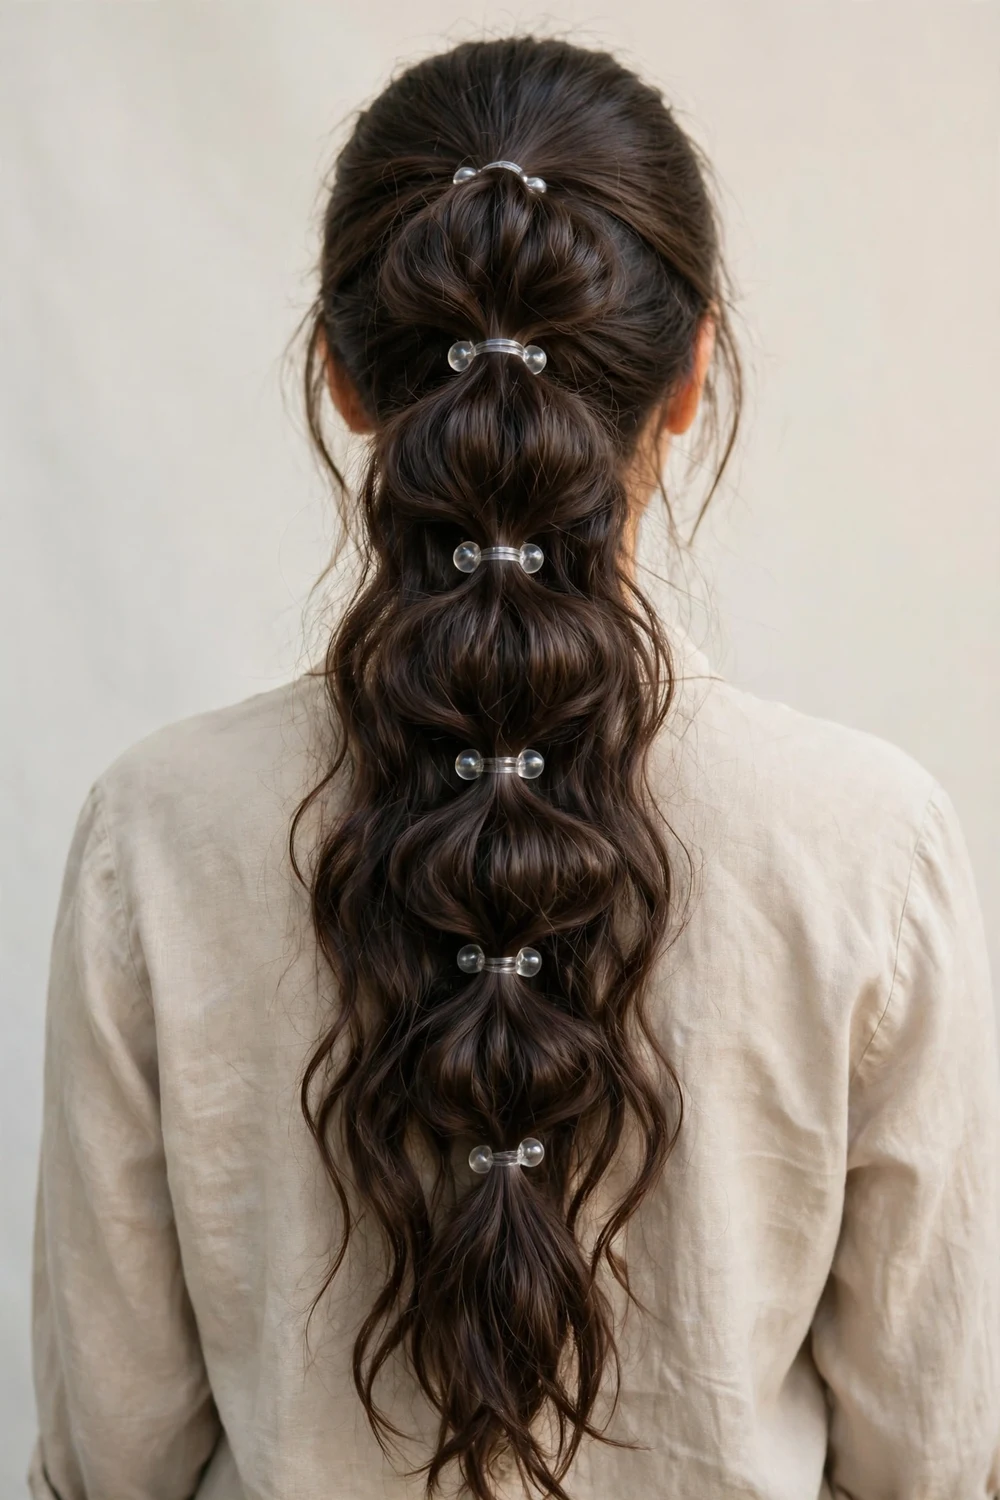
Secure a high or low ponytail with an elastic. Add a second elastic two to three inches down, then gently tug the hair between them to puff it into a bubble. Repeat down the length of the ponytail. This style works well on day-two hair and hides thin ends. Clear elastics disappear into the hair, while colored ones add a playful accent. For extra fullness, pancake each bubble by pulling its sides outward once it is shaped.
Try this: mist each section with light hairspray before tugging so the bubbles keep their shape all day.
Difficulty: Easy | Cost: $2-$5
2. Half-Up Bow
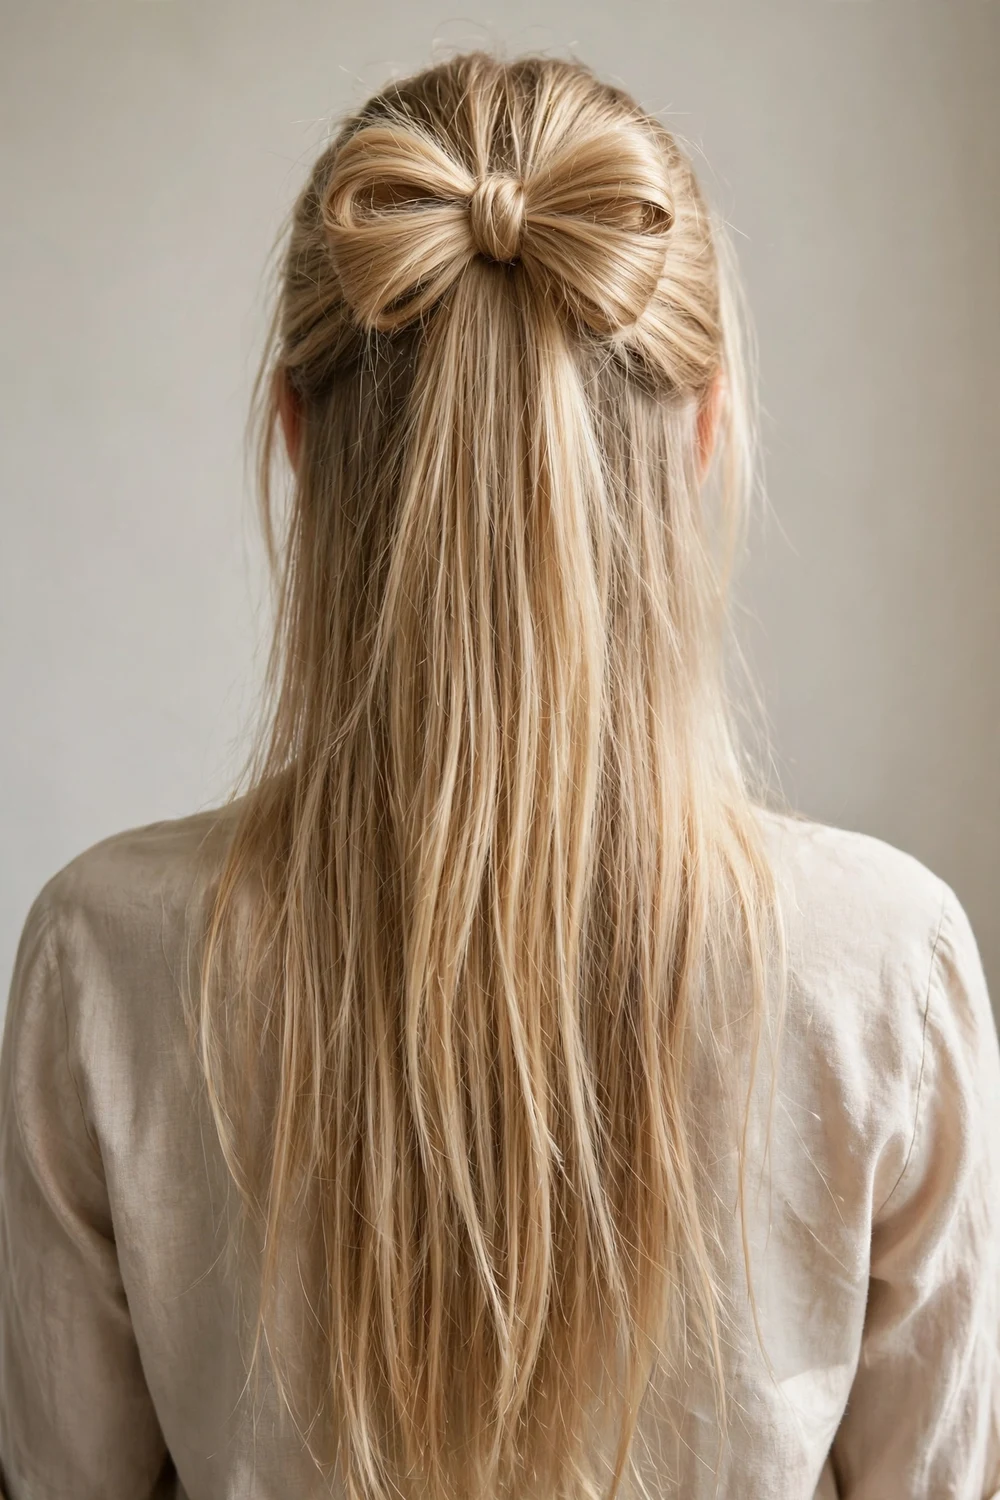
Gather the top half of your hair and loop it into a small ponytail. Split the loop into two halves and pin each side flat to form the bow loops. Pull a thin strand from underneath, wrap it over the center, and pin it behind to make the knot. The rest of your hair falls free below. It reads sweet without looking childish. A light mist of flexible-hold hairspray over the finished bow keeps the loops from drooping by afternoon.
Try this: use a texturizing powder at the crown first so the bow loops grip instead of sliding flat.
Difficulty: Medium | Cost: $0-$3
3. Soft Beach Waves
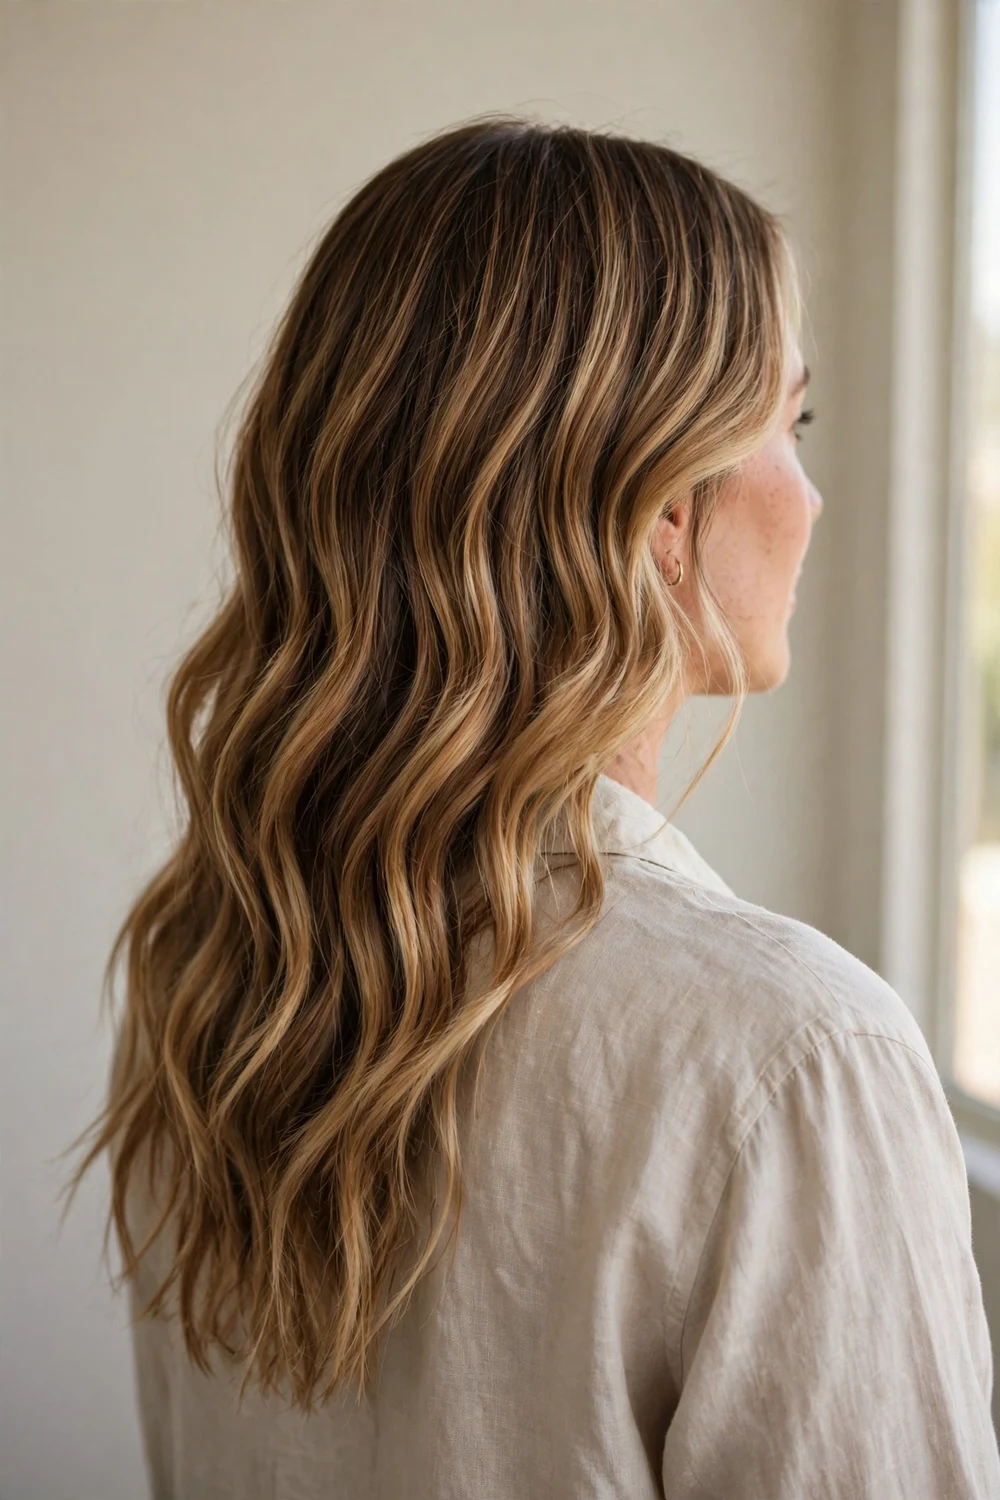
Spray a heat protectant through dry hair before you start. Wrap one- to two-inch sections around a 1.25-inch curling iron, leaving the ends out for a relaxed bend. Let the curls cool completely, then rake through with your fingers and finish with a light texturizing spray. The result looks casual and lived-in, not stiff. Work in horizontal sections from the bottom layer up, and let each curl cool pinned to your head for two minutes if your hair drops curls fast.
For more ways to wear curled hair, the curled hairstyles guide rounds up 30 curl looks, from beach waves to vintage glam.
Try this: curl the front sections away from your face to keep the waves open around your cheeks.
Difficulty: Medium | Cost: $0 (heat protectant you own)
4. Double Dutch Braids
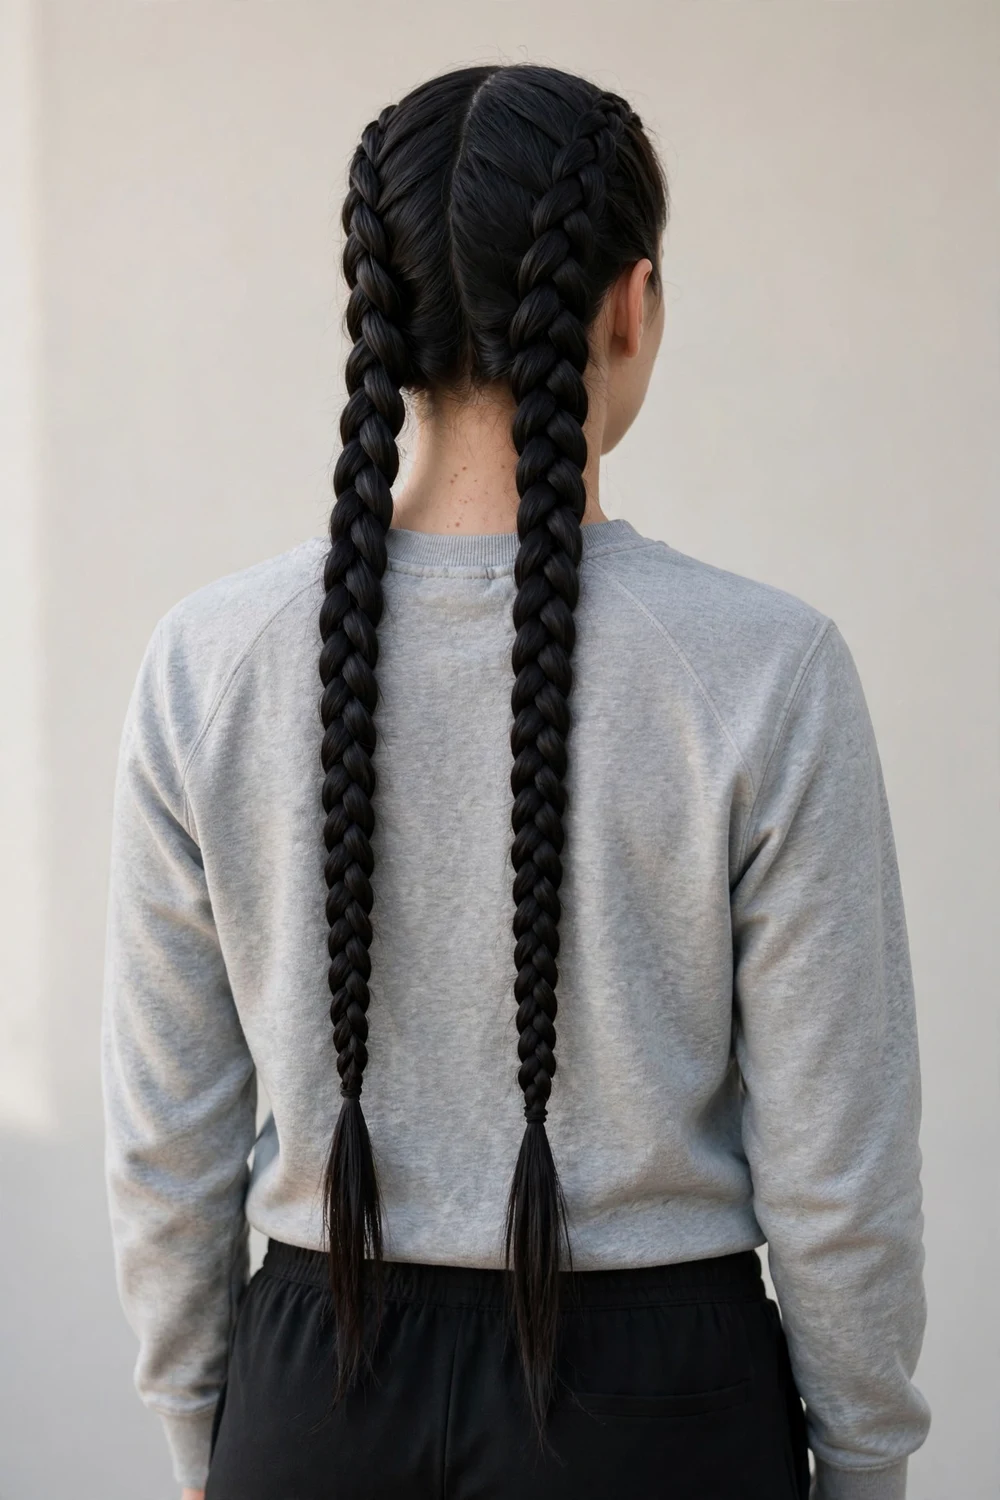
Part your hair down the middle. On each side, braid from the hairline to the nape by crossing strands under instead of over, adding hair as you go. Tie off with small elastics and gently pull the braid edges to widen them. This style stays put through workouts, bike rides, and windy days. If basketball is your sport, see basketball hairstyles for women. Keep your hands close to the scalp as you braid so the plaits sit tight instead of loose. A pea-sized amount of styling gel smoothed along the part line tames baby hairs.
For more braid ideas that work on textured hair, see these braided hairstyles for Black women.
Try this: braid on slightly damp hair for extra hold, then let it dry fully before loosening the edges.
Difficulty: Medium | Cost: $0-$2
5. Messy High Bun
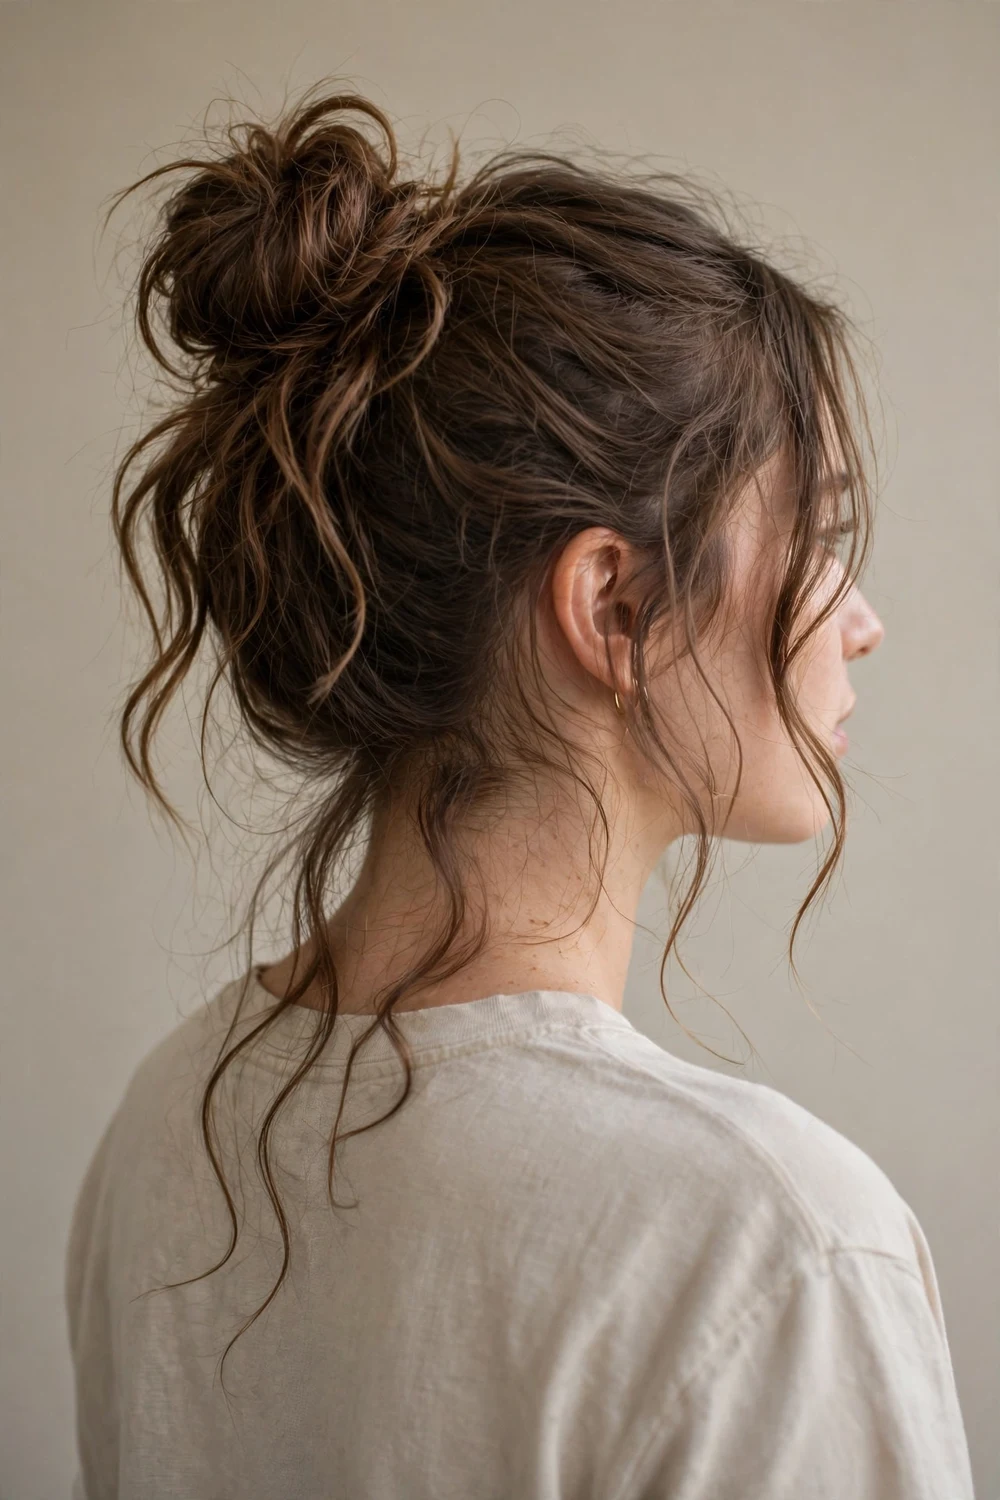
Flip your head upside down and gather all your hair into a high ponytail. Twist the ponytail loosely, coil it around the base, and pin it in place. Pull out a few face-framing strands and tug the bun wider for softness. It takes about two minutes and hides unwashed roots, which makes it a true everyday staple. Secure it with a second elastic wrapped around the base if your hair is very long and heavy.
Try this: backcomb the ponytail lightly before coiling to give fine hair more body in the bun.
Difficulty: Easy | Cost: $0-$3
6. Side Fishtail Braid
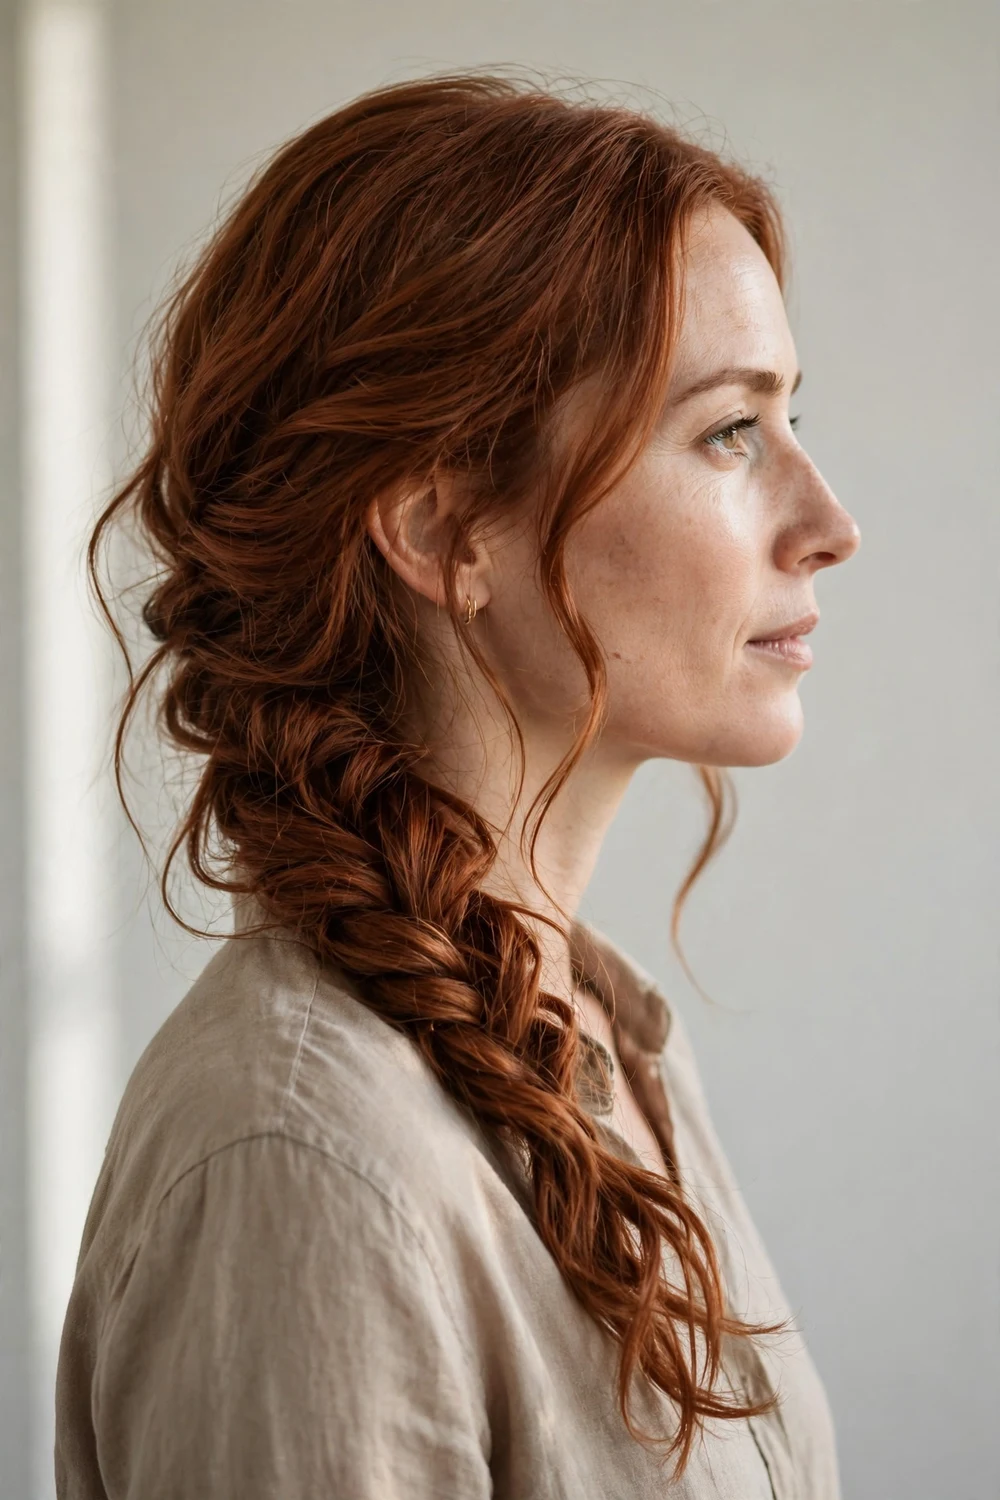
Sweep all your hair over one shoulder and split it into two sections. Take a thin strand from the outer edge of one section and cross it to the inner edge of the other. Repeat down the length and tie off. Pancake the braid by pulling the edges outward for a fuller look. It looks detailed but uses one simple repeating motion. Smaller outer strands make a finer, more detailed braid, while thicker strands finish the style faster.
Try this: start with a light mist of sea salt spray so silky hair does not slip while you weave.
Difficulty: A bit tricky | Cost: $0-$2
7. Ribbon-Tied Ponytail
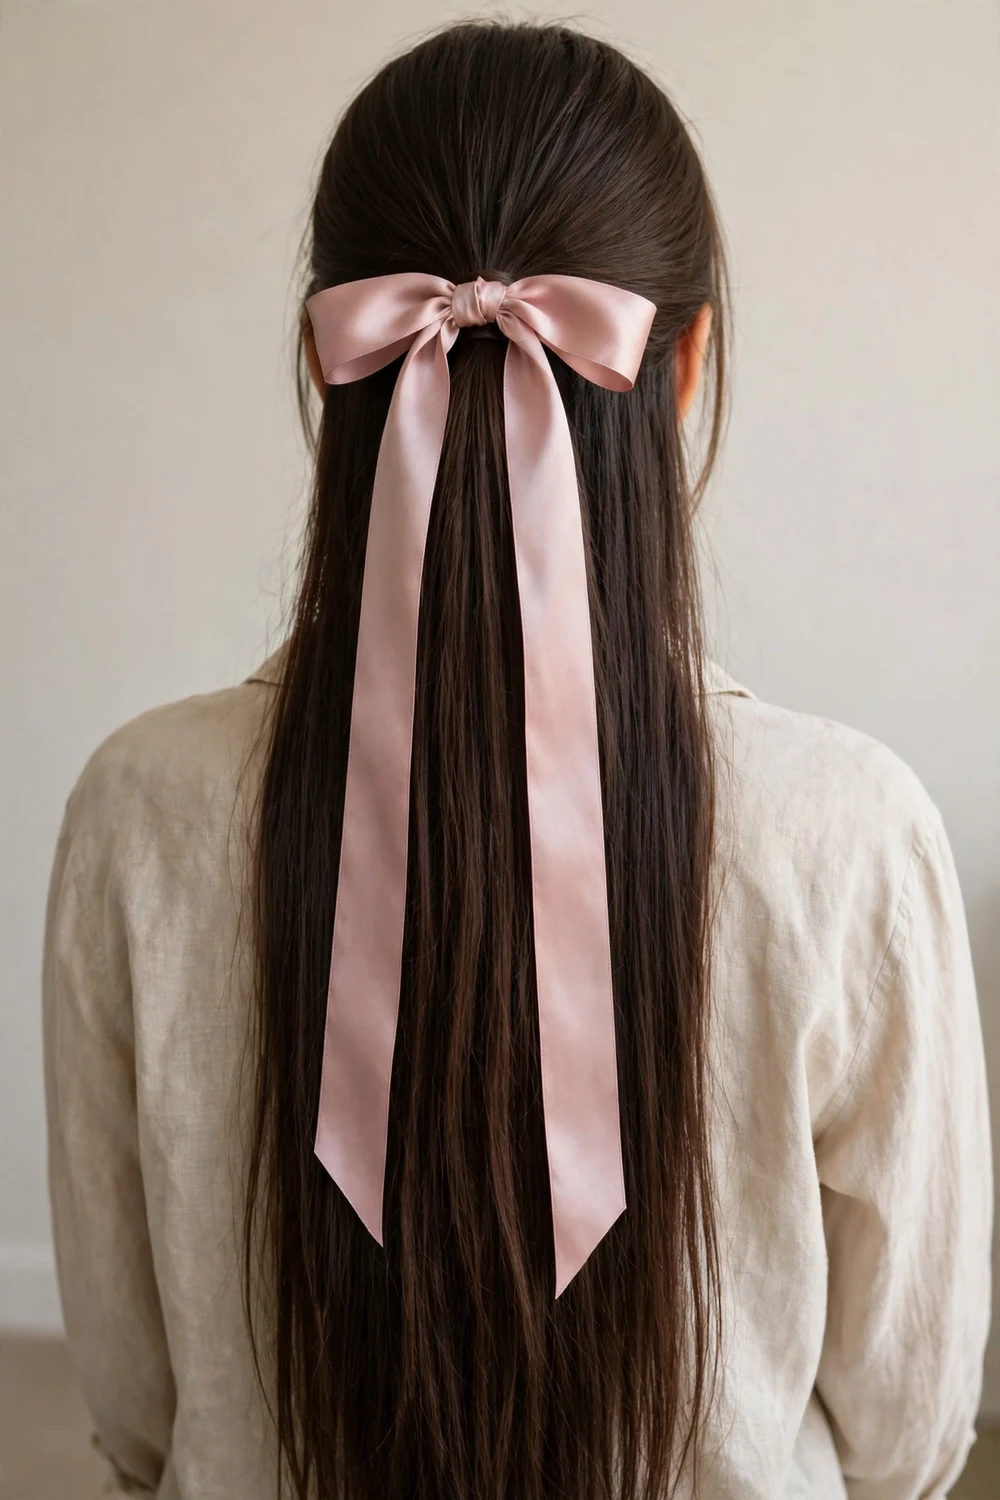
Pull your hair into a mid-height ponytail and smooth the top with a brush. Tie a satin or velvet ribbon around the elastic in a simple bow, letting the ends hang down along the hair. A one-inch-wide ribbon reads best on long hair. This turns the most basic style into something that looks planned. Cut the ribbon ends at an angle to stop fraying, and double-knot the ribbon before tying the bow so it stays put all day.
Try this: match the ribbon to your outfit, or pick a patterned one to make the ponytail the focal point.
Difficulty: Easy | Cost: $3-$8
8. Loose Curl Half-Up
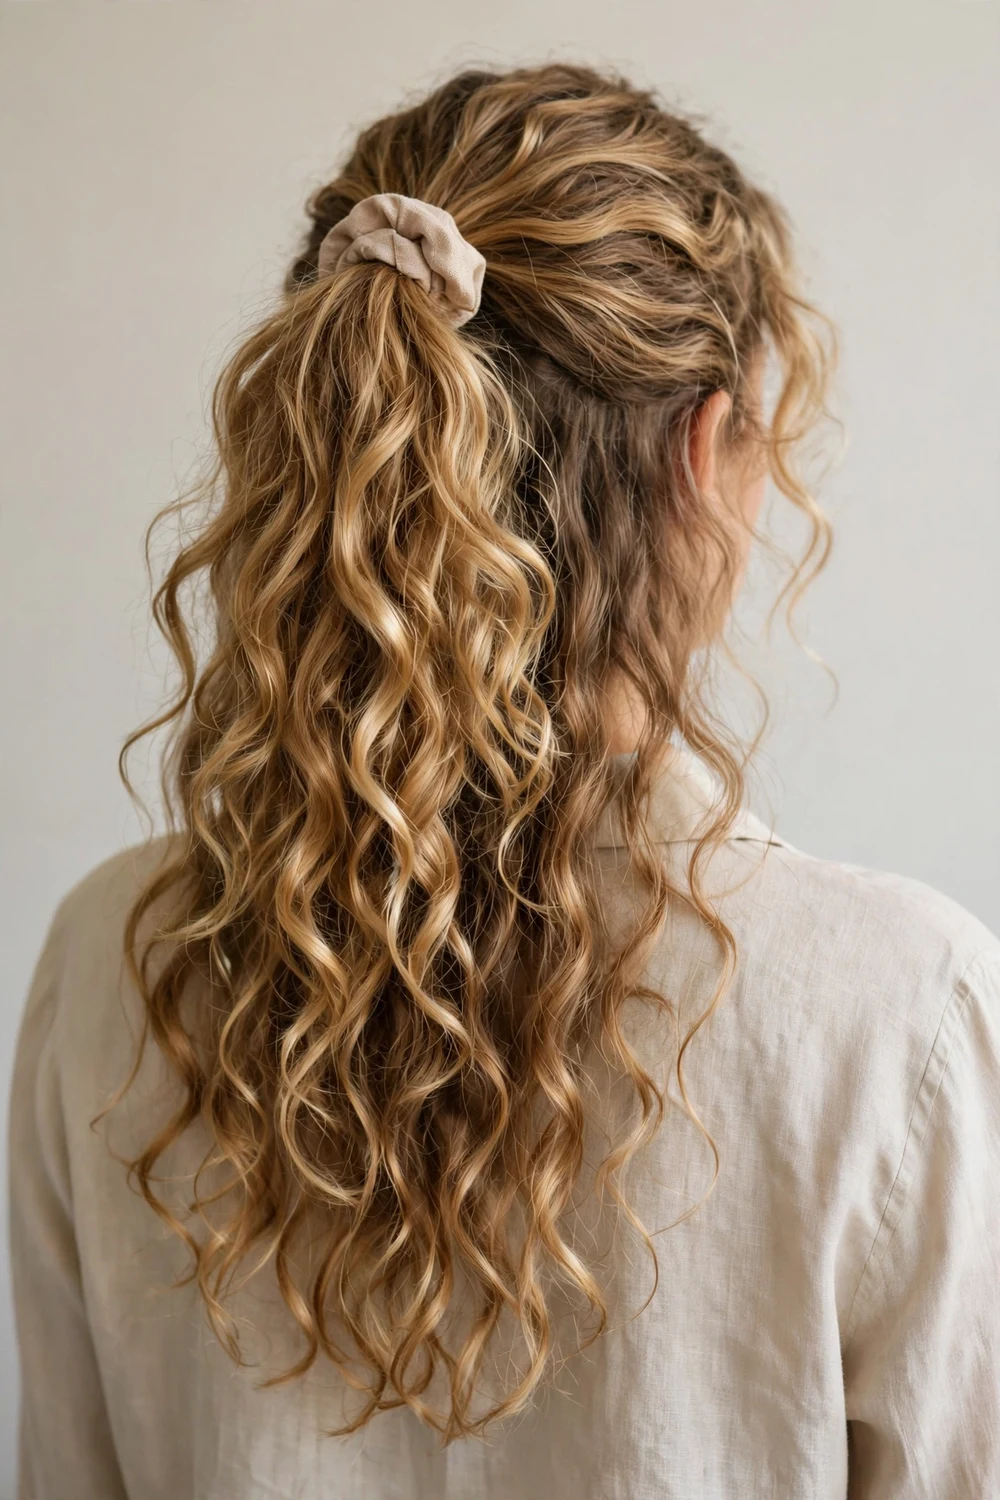
Curl the bottom half of your hair with large rollers, or sleep in loose braids for heatless waves. Gather the top third into a relaxed half ponytail and secure it, letting the curls fall freely below. Soften the part line with your fingers. A flower clip or small barrette pinned at the half-up base adds a sweet detail. If your curls fall flat by evening, a quick scrunch with texturizing spray brings them back.
Try this: pin the half-up section slightly higher than you think, since it always settles lower by midday.
Difficulty: Easy | Cost: $0-$3
9. Flower Crown
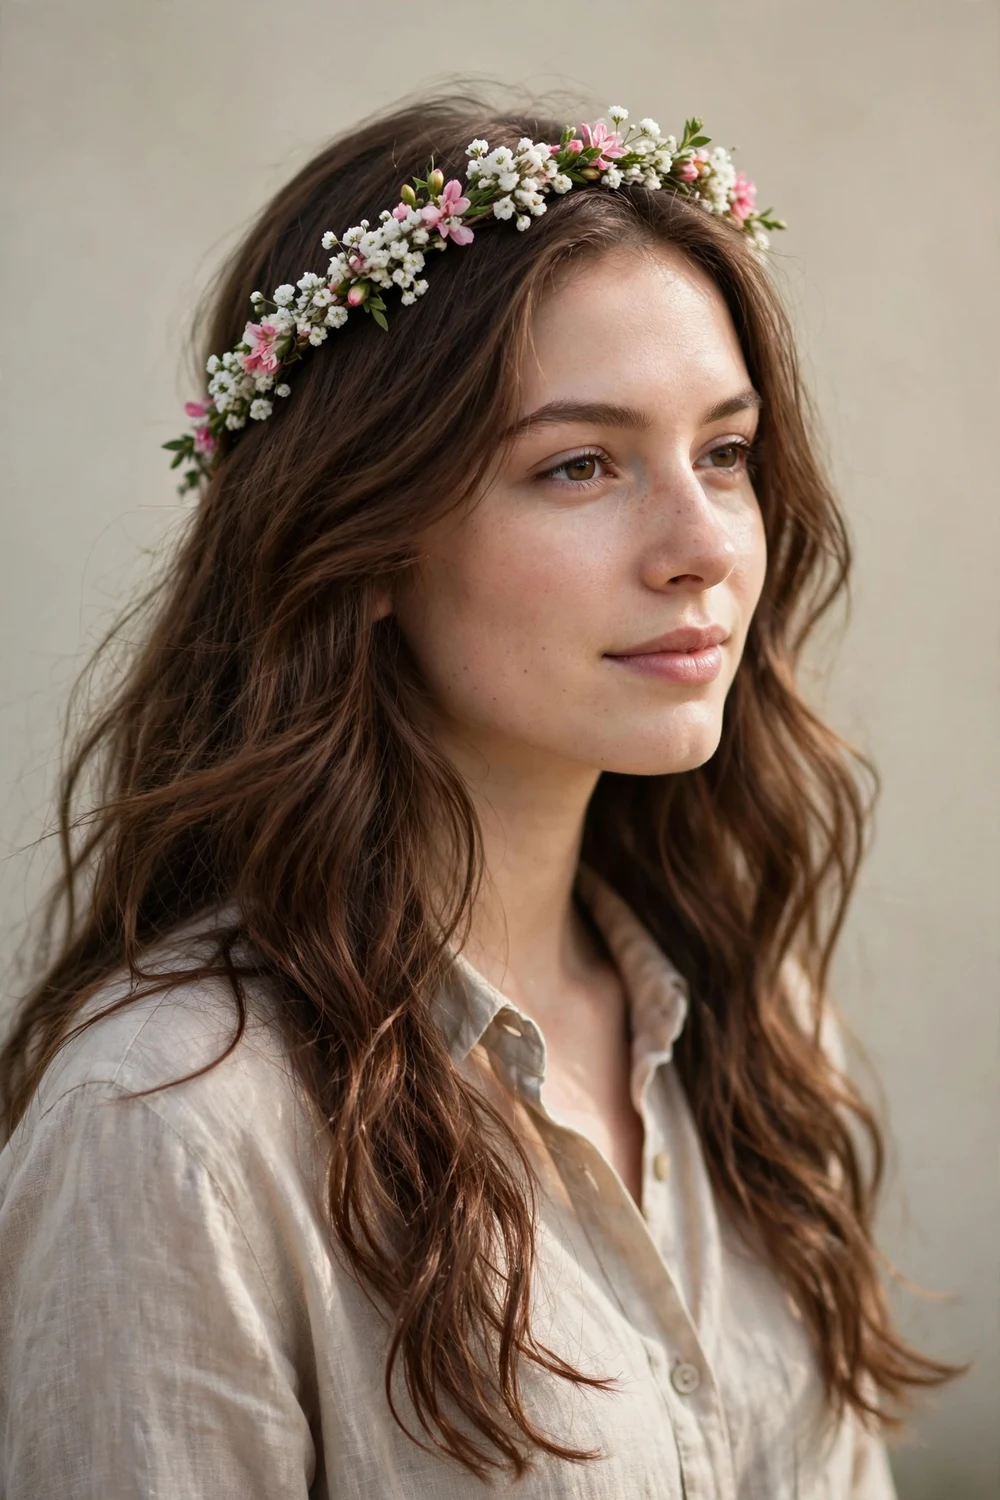
Start with loose waves or straight hair. Place a flexible floral crown or vine headband about two inches back from your hairline so it sits on hair, not skin. Tuck the front sections behind your ears or leave them loose. This is a weekend look for markets, picnics, and outdoor walks rather than daily errands. Pin the crown in two hidden spots with bobby pins so a breeze cannot lift it off.
Try this: choose a crown with wire stems so you can bend it to fit your head and keep it from sliding.
Difficulty: Easy | Cost: $8-$15
10. Twisted Side Braid
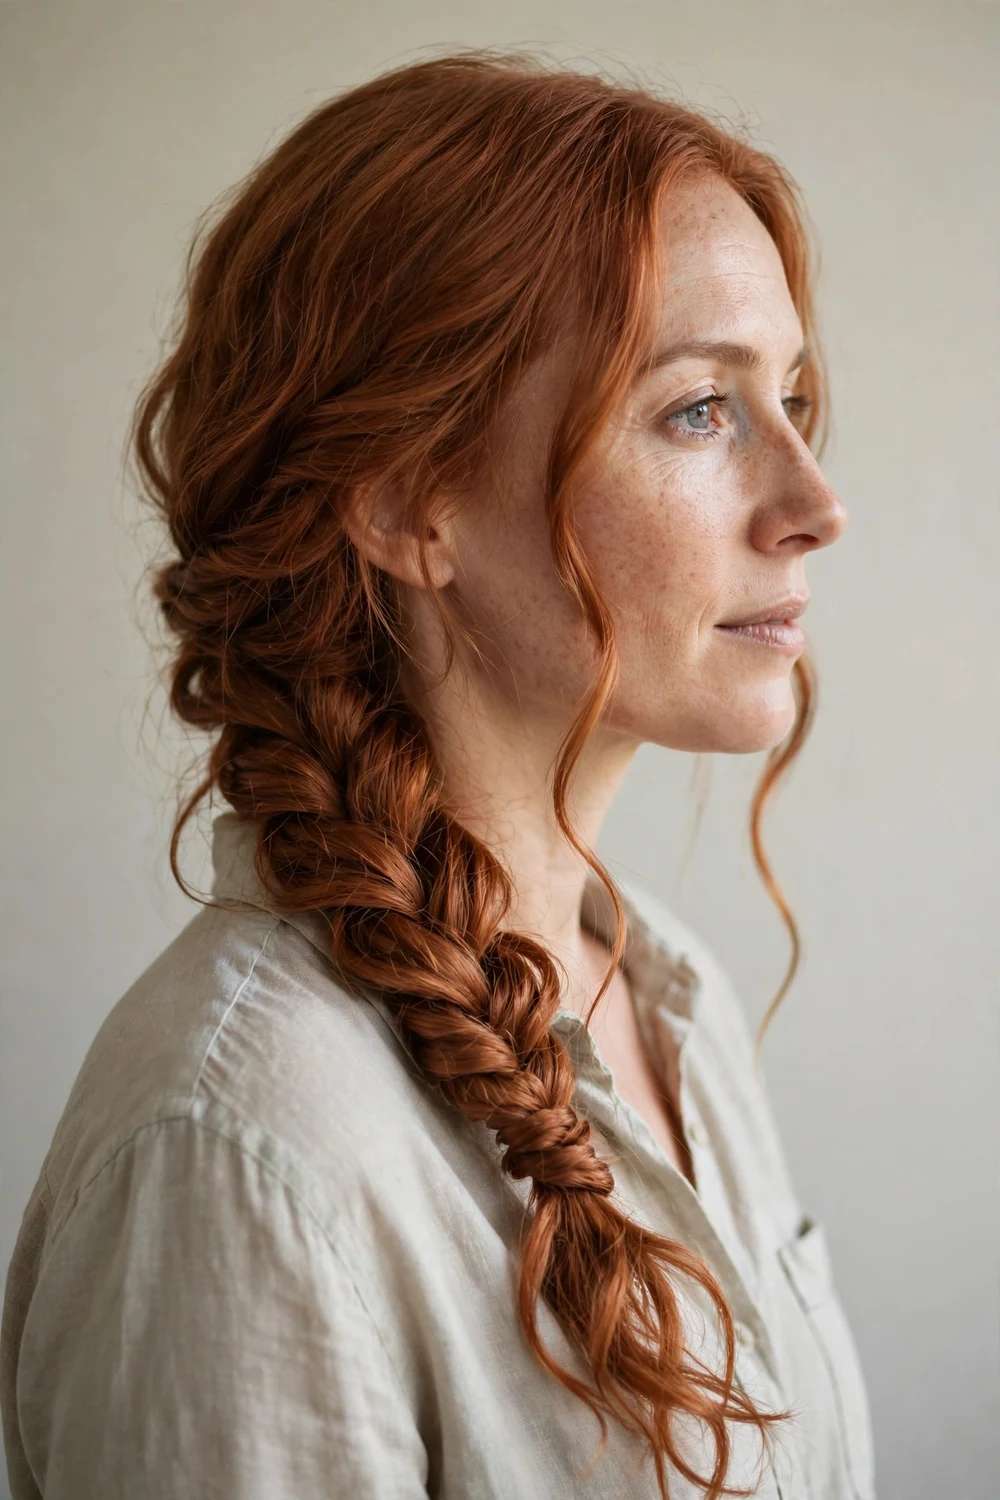
Part your hair to one side and sweep everything over the opposite shoulder. Divide into two sections, twist each section in the same direction, then wrap them around each other in the opposite direction to lock the rope. Tie off with an elastic. Add a few face-framing strands for a softer finish. Hold the finished twist taut for ten seconds after tying so the rope sets in shape, and use a clear elastic at the end to keep the finish invisible against the hair.
Try this: smooth a small dab of styling cream on the ends before twisting to stop them from unraveling.
Difficulty: Easy | Cost: $0-$2
11. Low Pigtail Braids
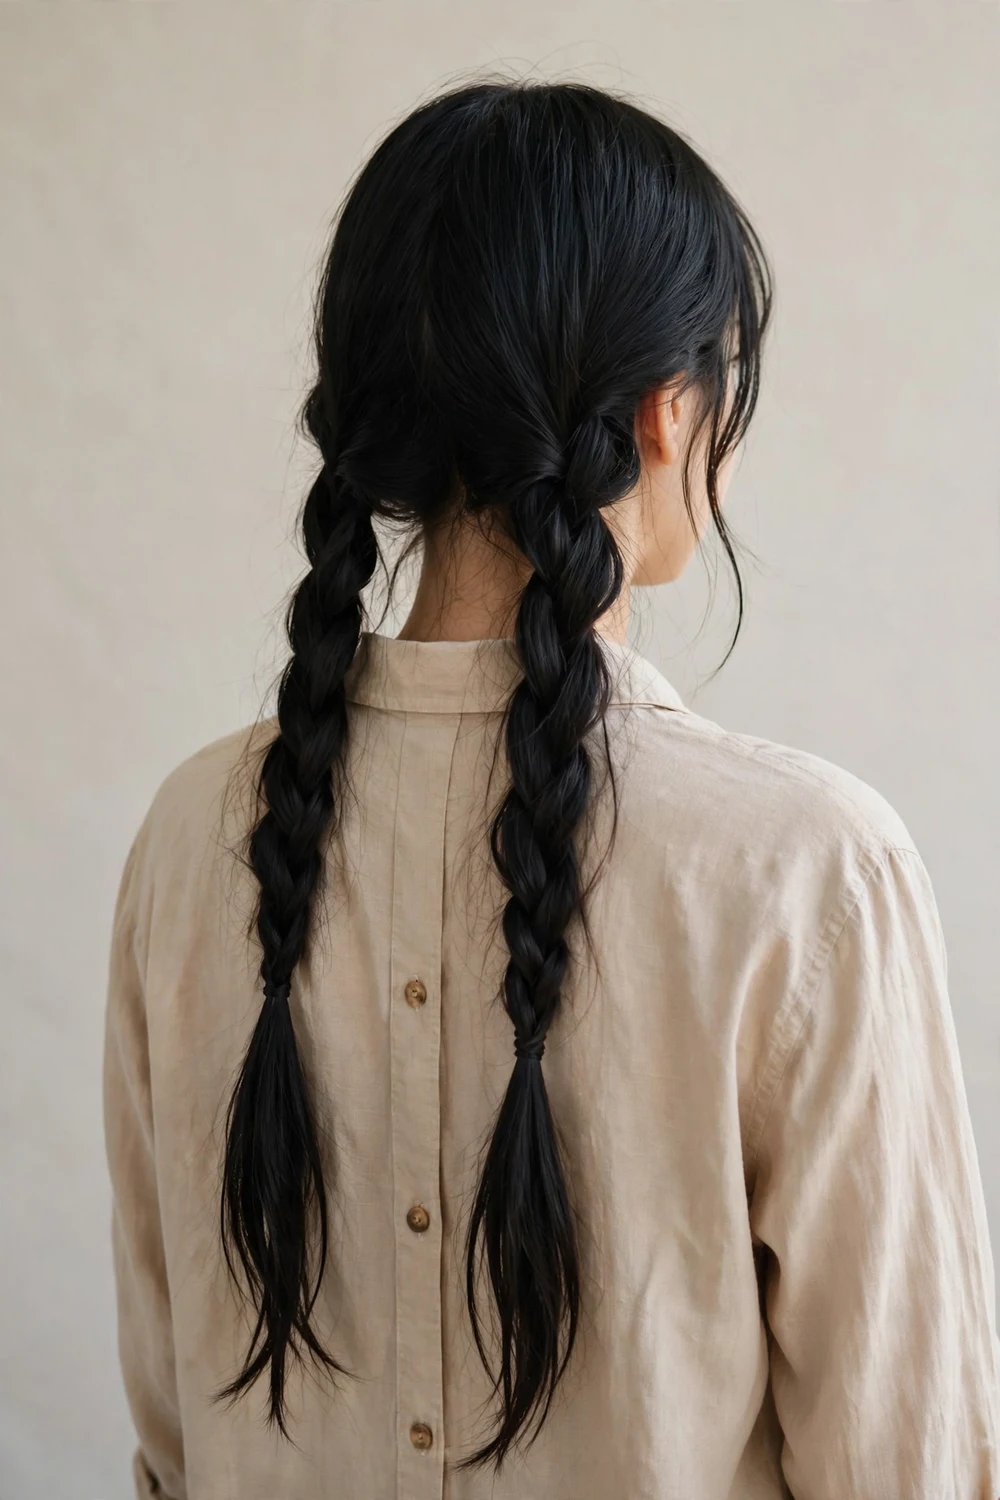
Part down the center and make two low three-strand braids starting behind your ears. Keep the tension relaxed and pull the edges gently for width. Tie each with a small elastic, then hide it by wrapping a thin strand of hair around it and pinning underneath. Keep them loose and low so they read grown-up. Start each braid slightly forward of your ears so they frame your jawline as they hang.
Try this: leave two thin face-framing pieces out before you braid to soften the center part.
Difficulty: Easy | Cost: $0-$2
12. Heart-Shaped Braid
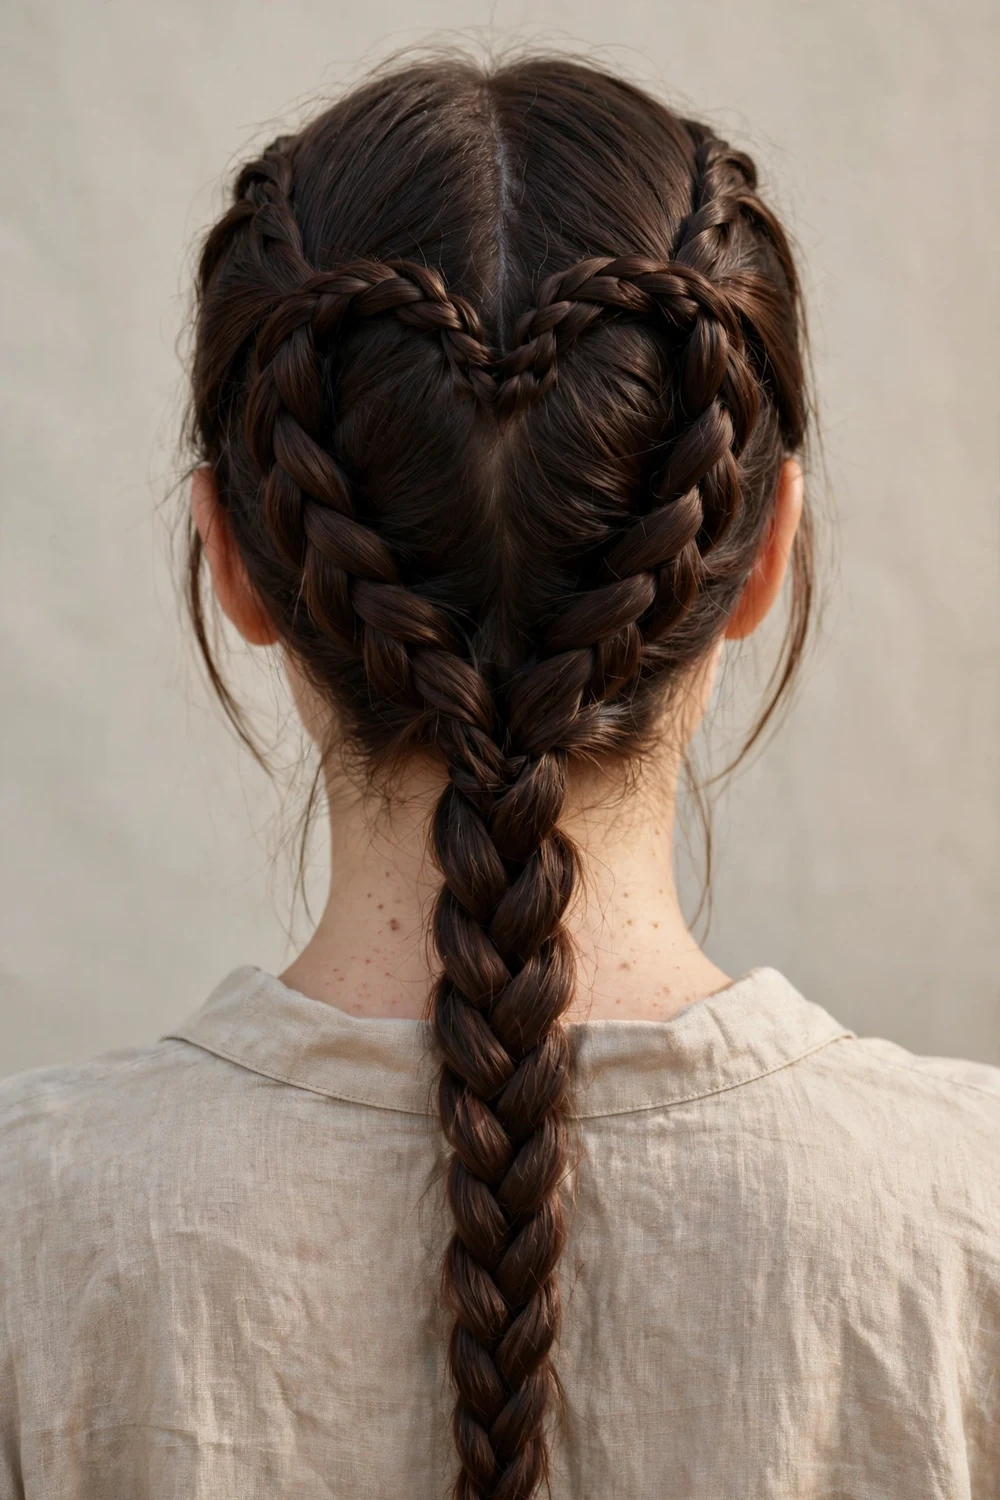
Part your hair in the middle at the back. On each side, start a Dutch braid near the crown and curve it inward as you work down so the two braids mirror each other. Join them into one braid or a ponytail at the nape. From behind, the curved braids read as a heart. Save this one for days when you have extra time. Use a hand mirror with your bathroom mirror to check the curve symmetry as you go.
Try this: practice the curved path once without adding hair so your hands learn the shape before the real attempt.
Difficulty: A bit tricky | Cost: $0-$2
13. Polished Low Ponytail
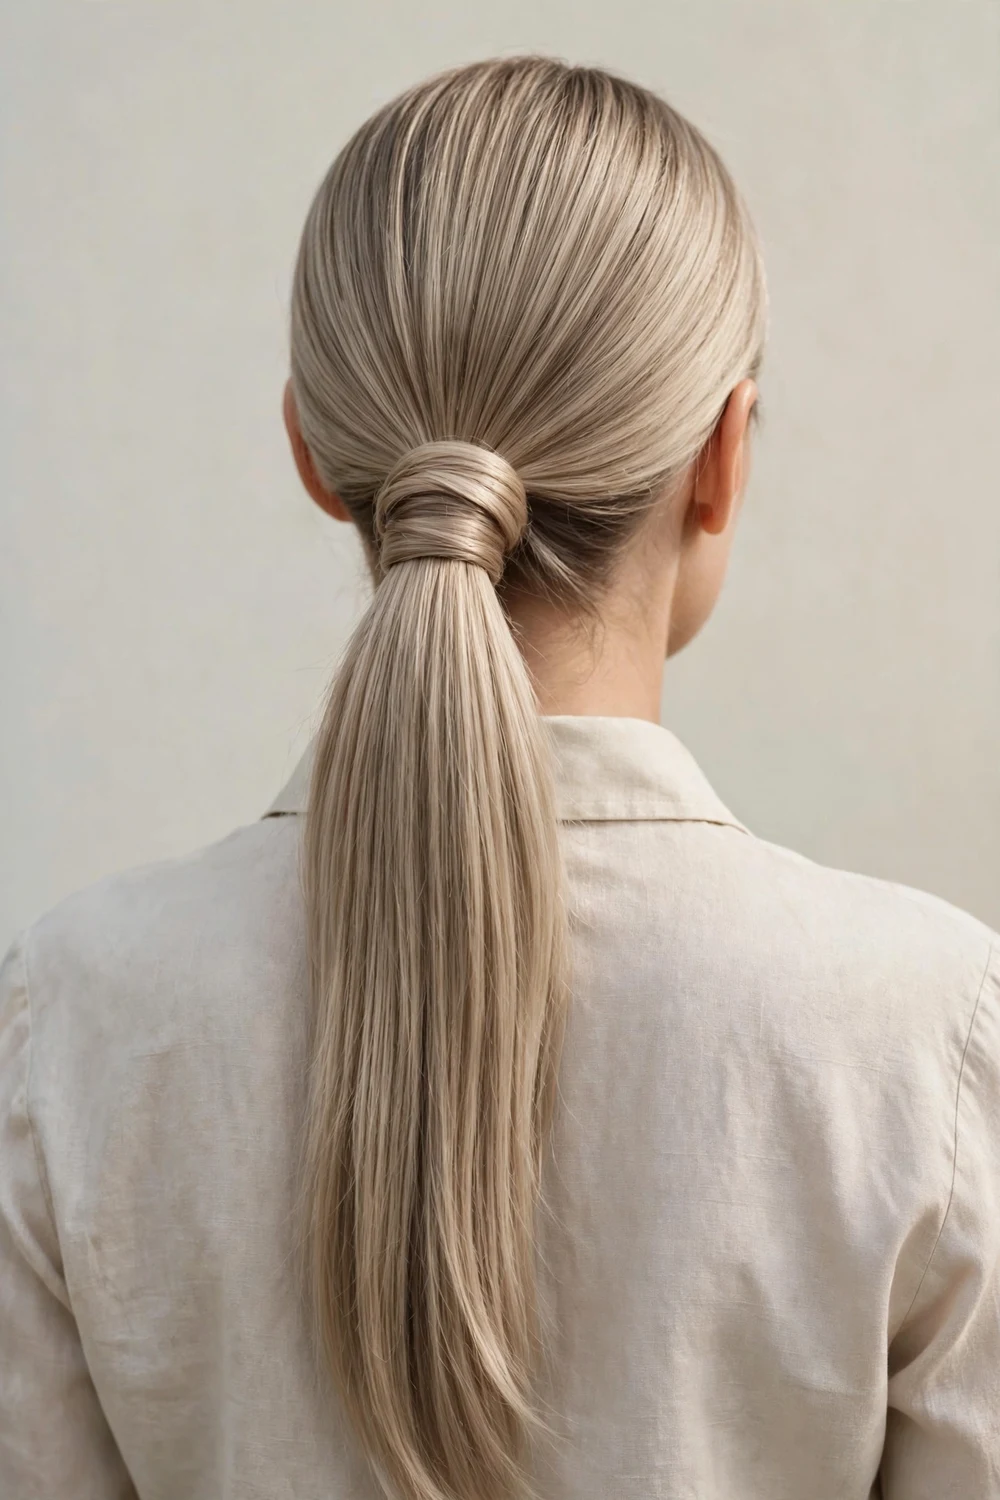
Brush your hair smooth and gather it at the nape with a deep side or center part. Secure with an elastic, then take a one-inch section from under the ponytail, wrap it around the elastic, and pin it underneath. A drop of smoothing serum on the surface tames flyaways. This works for workdays when you want to look tidy. Mist the brush, not the hair, with hairspray before the final smoothing pass to avoid stiffness.
Try this: use a boar-bristle brush for the final smoothing pass to get that glassy finish.
Difficulty: Easy | Cost: $0-$3
14. Low Twisted Bun
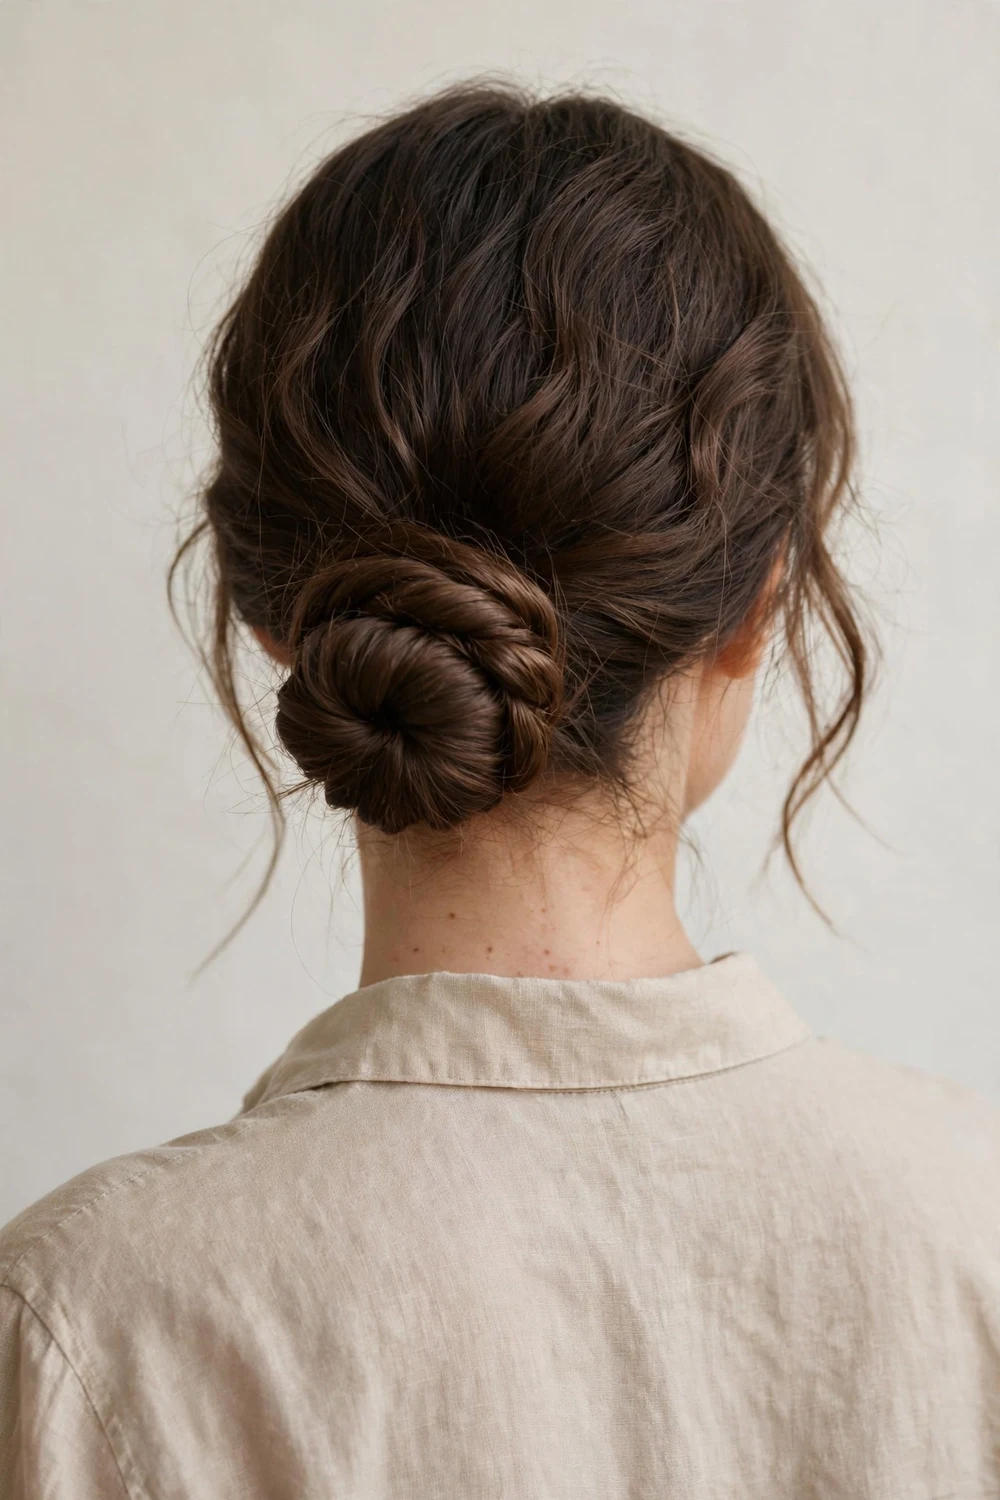
Make a low ponytail at the nape and split it into two sections. Twist the sections around each other into a rope, then coil the rope into a flat bun against your head. Pin securely and tuck the ends under. Because it sits low and flat, it rests comfortably against car seats and office chairs all day. Wrap the rope snugly, since a loose coil at the nape tends to sag by afternoon.
Try this: anchor the bun with pins crossed in an X pattern so it holds through a full day of sitting and moving.
Difficulty: Easy | Cost: $0-$3
15. Braided Ponytail
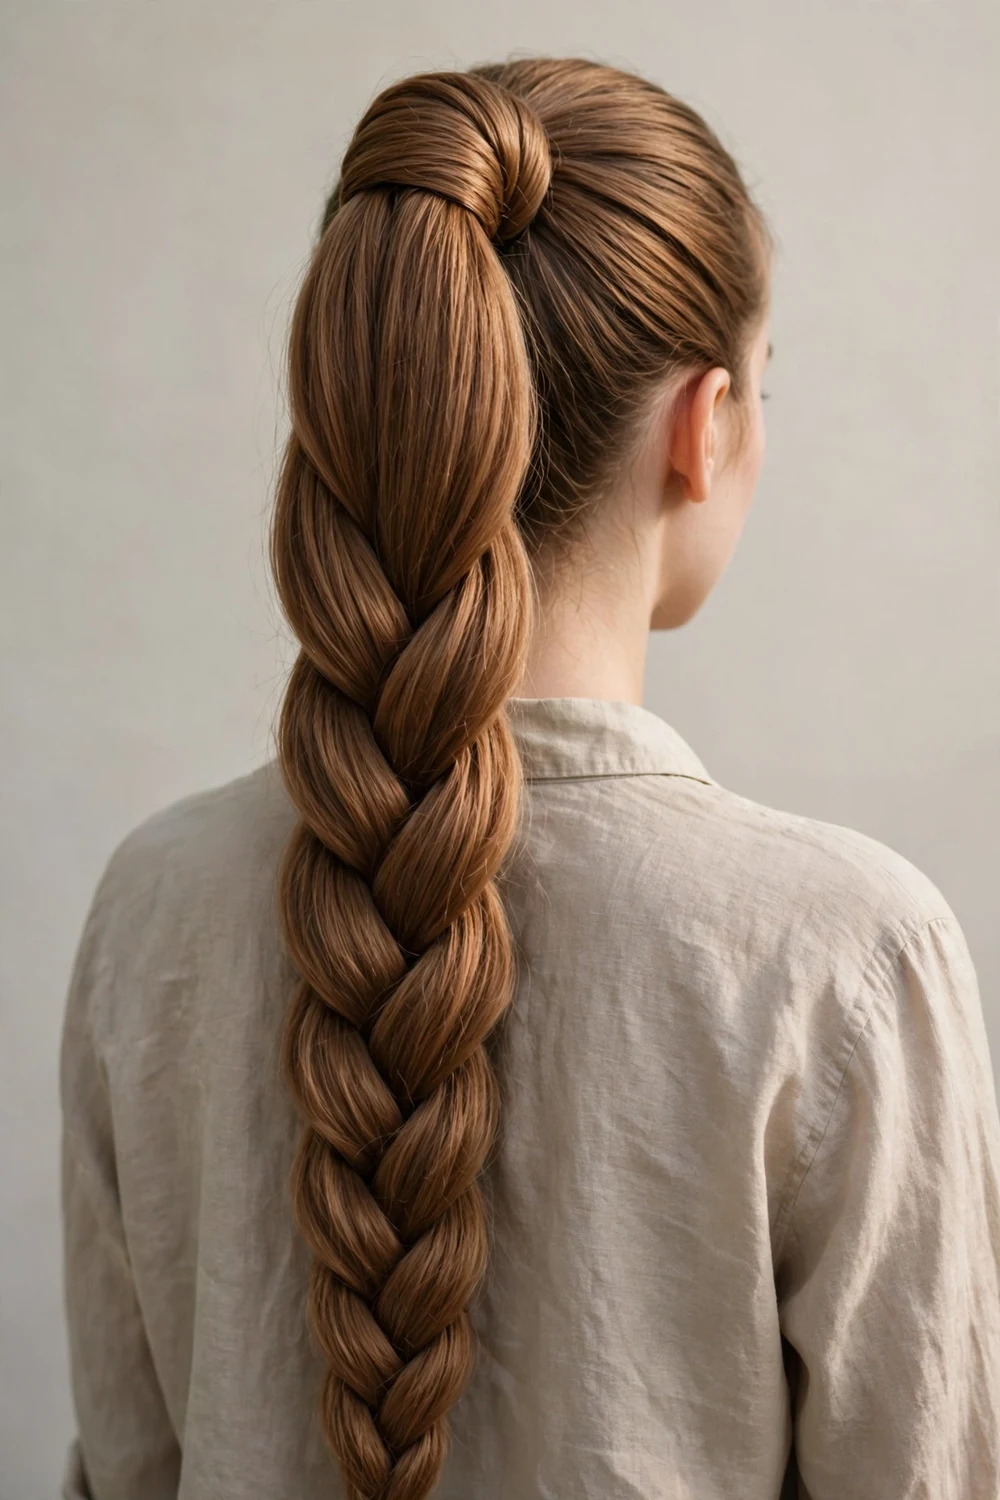
Pull your hair into a high or mid ponytail first, then braid the tail in a simple three-strand plait. Starting from a ponytail base keeps the braid neat and stops layers from poking out. Wrap a strand of hair around the base for a clean finish. You can also try a fishtail or Dutch braid on the tail for variety. Brush the ponytail tail smooth before braiding so the plait looks even from top to bottom.
Try this: pancake the braid by tugging each section sideways to make fine hair look twice as thick.
Difficulty: Easy | Cost: $0-$2
16. Double Claw Clip Bun
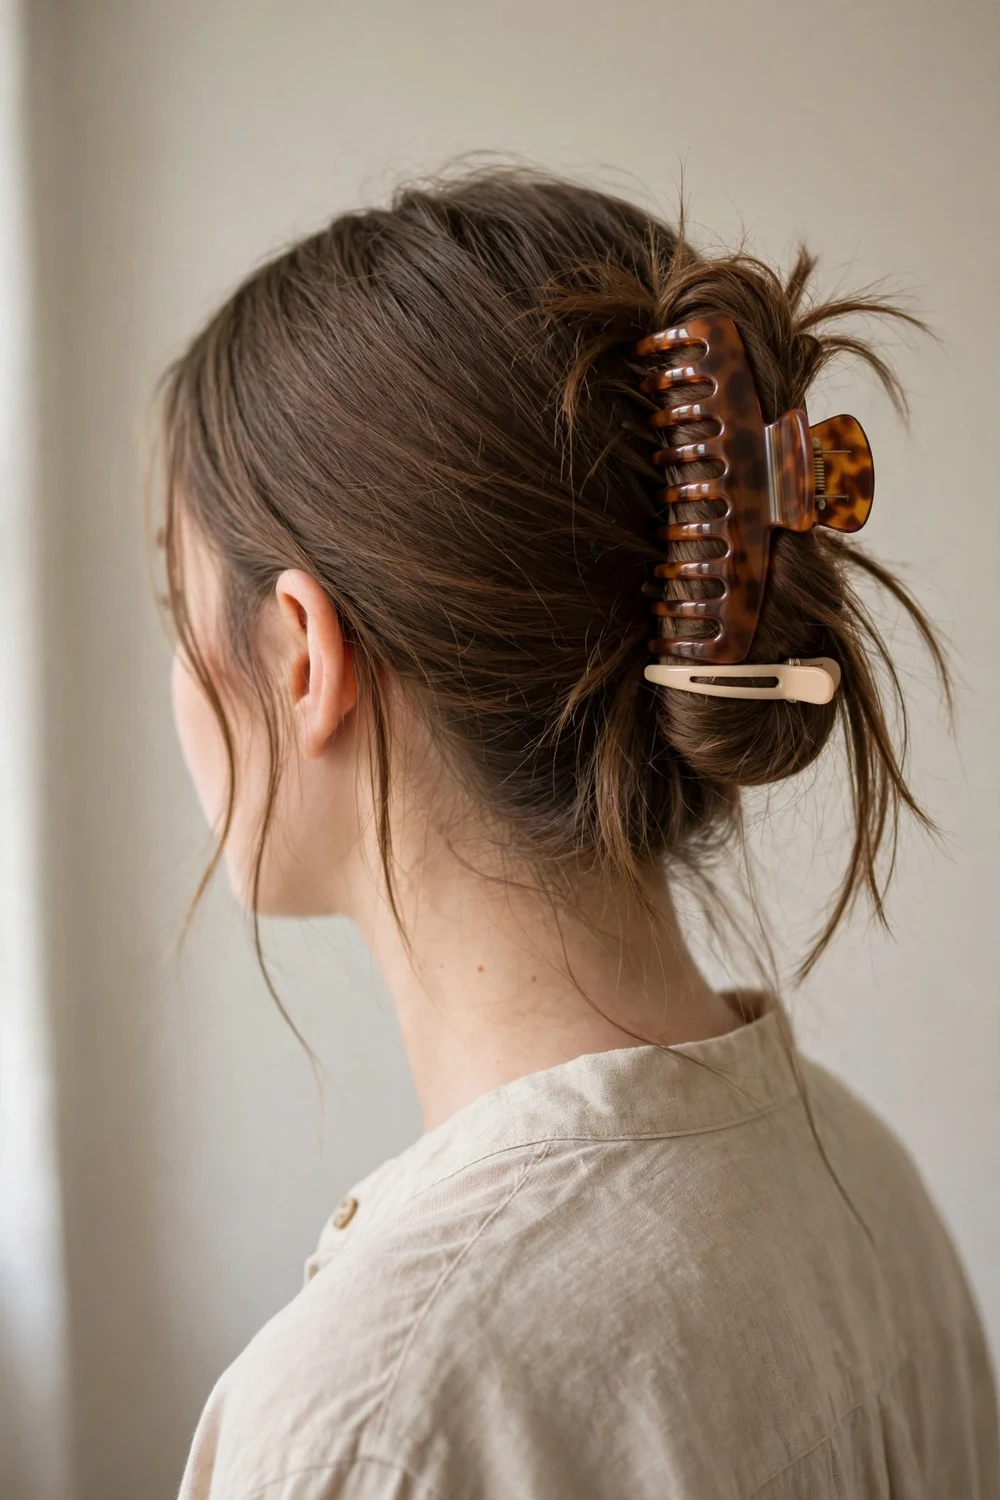
Twist all your hair up into a loose bun and hold it with one hand. Slide a large claw clip vertically over the bun to grip it, then add a second smaller clip horizontally across the base for backup. The two clips share the weight of long hair so neither pulls. This is quicker than pinning and holds better than one clip alone. Position the first clip with the teeth pointing down so gravity helps it grip the bun.
Try this: place the second clip against the direction of the twist to lock everything in place.
Difficulty: Easy | Cost: $5-$10
17. Top Knot
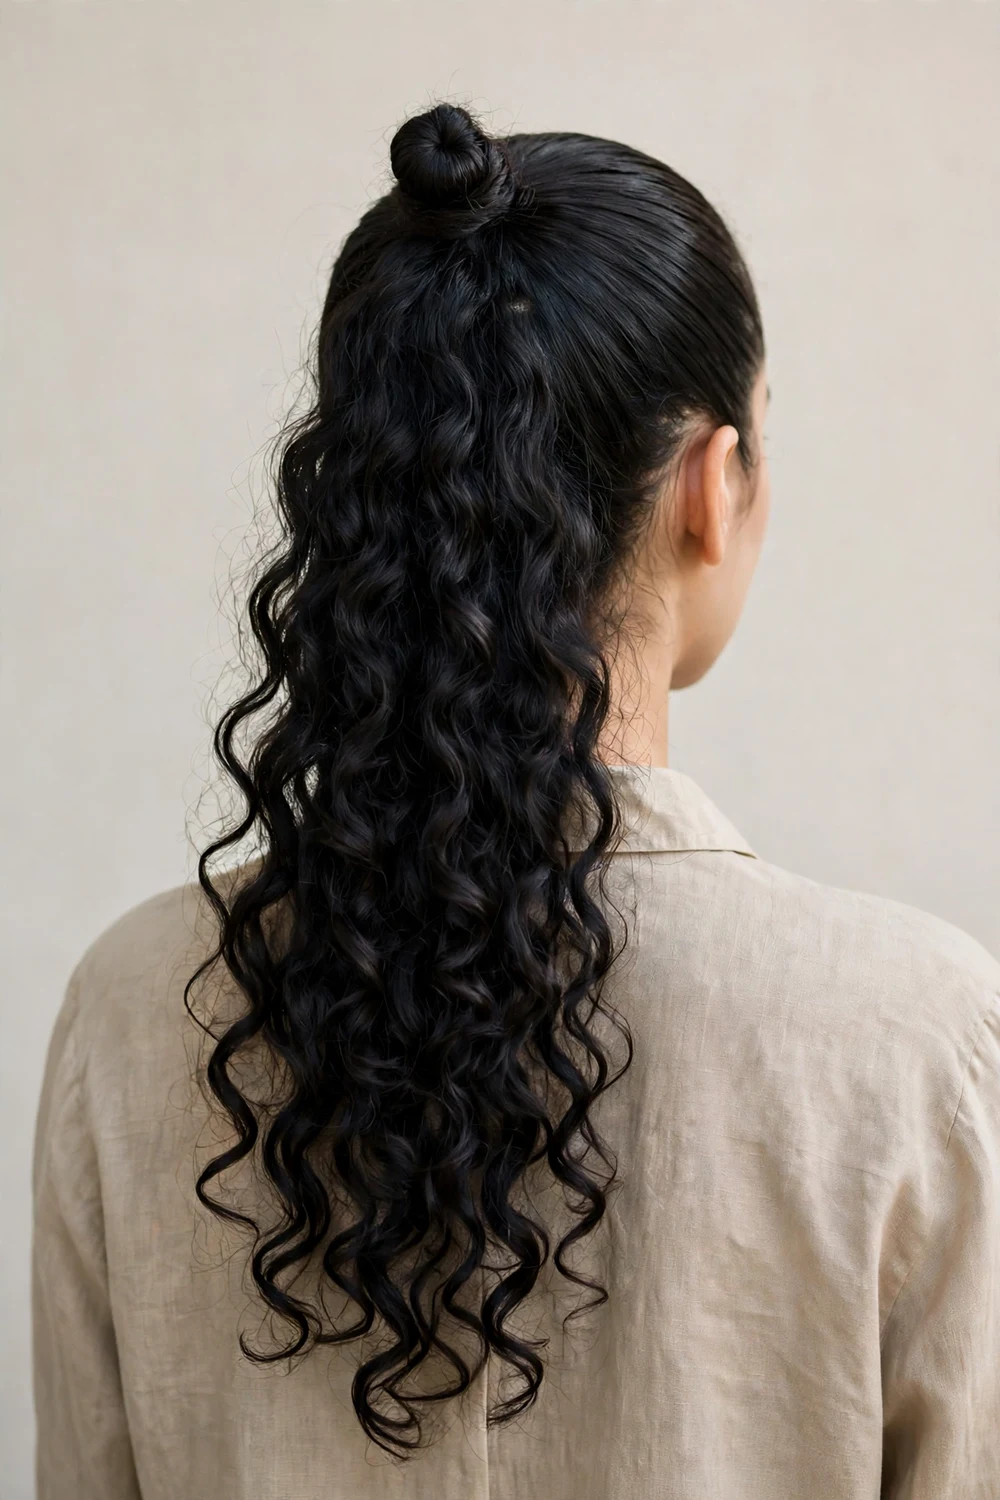
Gather all your hair straight up to the crown and secure it in a tight ponytail. Twist the tail and wrap it around the base into a small, neat knot. Pin the ends under and smooth the sides. Unlike a messy bun, this one is compact and tidy, which makes it a good pick for hot days and busy schedules. Smooth a little gel along the hairline before gathering to keep edges sleek all day.
Try this: use a small donut form inside the knot if your hair is fine and you want more volume.
Difficulty: Easy | Cost: $0-$3
18. Relaxed Low Chignon
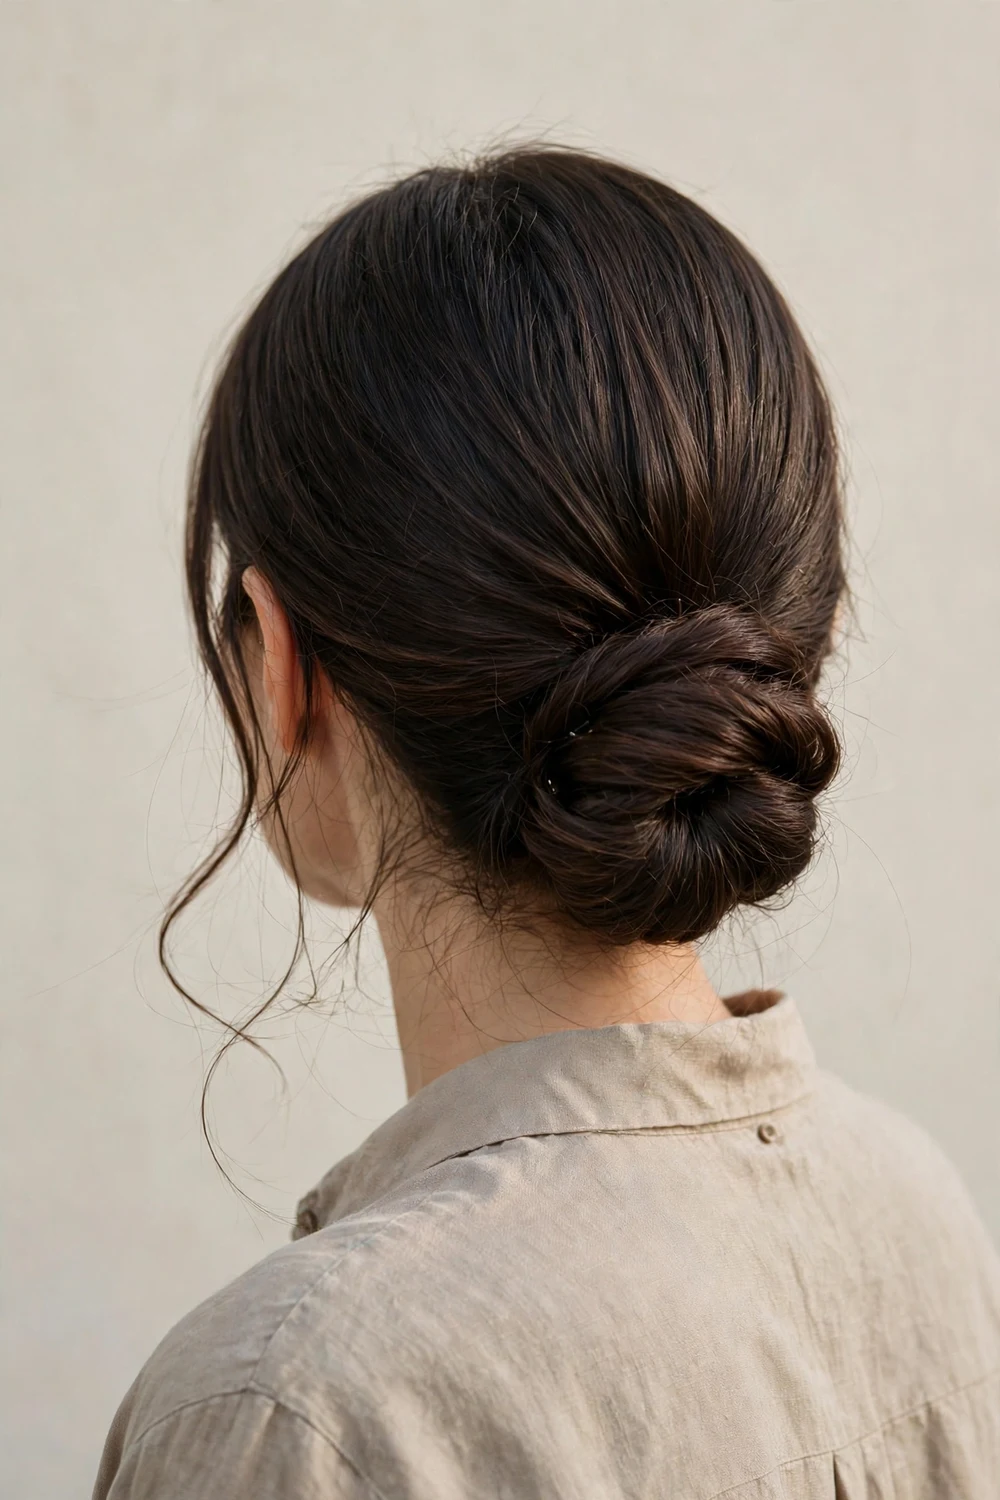
Make a low ponytail and twist it into a loose coil at the nape. Pin the coil flat against your head, tucking the ends underneath. Pull a few strands loose around your face so it reads soft and casual. A chignon does not have to be formal; worn loose, it is just a tidy low bun with a classic shape. Pin from four sides of the coil so the weight spreads evenly and nothing droops.
Try this: leave the chignon slightly off-center for a relaxed look that does not try too hard.
Difficulty: Medium | Cost: $0-$3
19. Half-Up Braided Crown
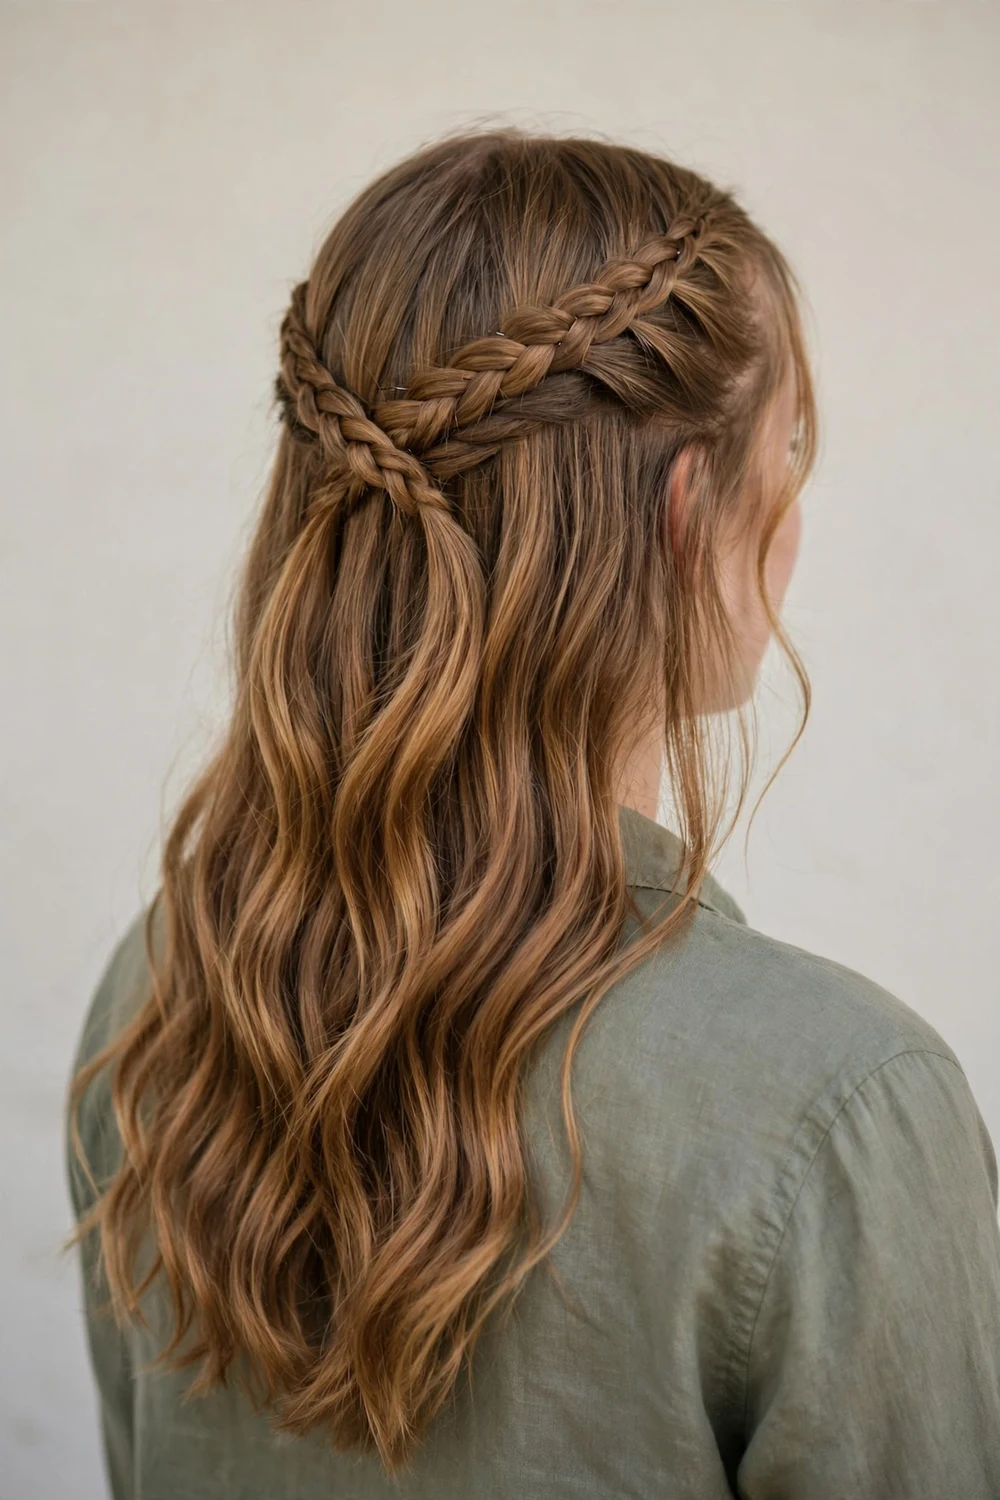
Take a two-inch section from above each ear and braid them toward the back of your head. Cross the two braids over each other at the back and pin them flat so they form a band across the crown. Let the rest of your hair fall loose underneath. This keeps the front tidy while showing off your length. Hide each pin under the braid it secures so no metal shows from any angle.
If you love pinned-up looks, these updo hairstyles for Black women have more ideas that work on long hair.
Try this: stretch each braid wider before pinning so the crown looks full even on fine hair.
Difficulty: Medium | Cost: $0-$3
20. Half-Up Top Knot
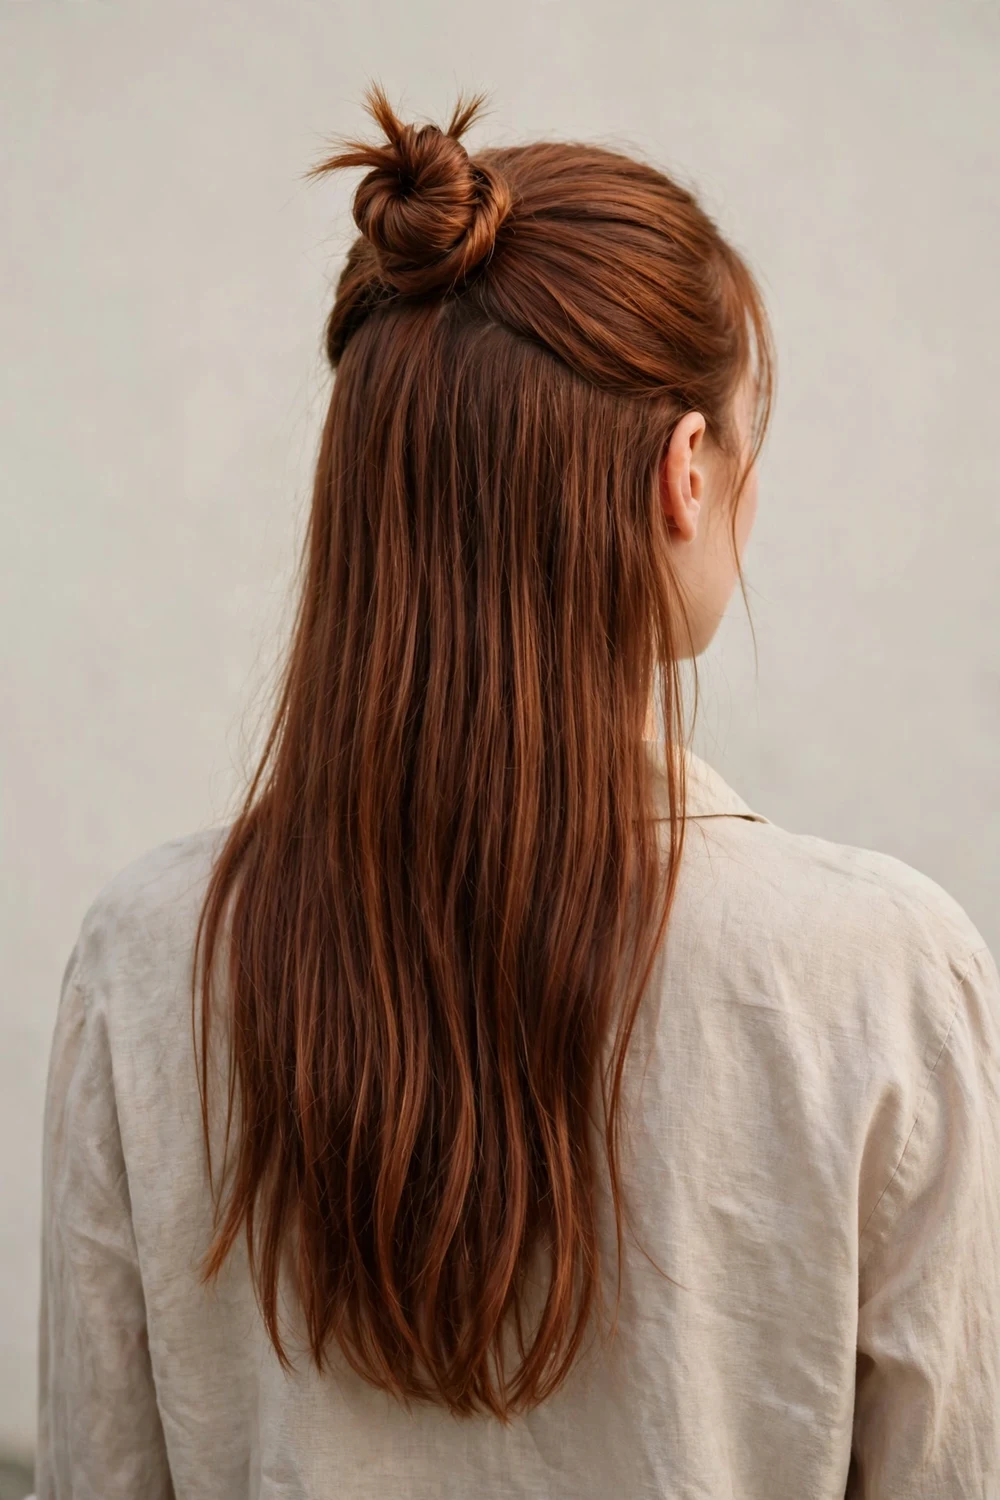
Gather just the top half of your hair into a high ponytail at the crown. Twist it into a small bun and pin it, leaving the bottom half down. This keeps hair out of your face while showing off your length, and it works on straight, wavy, or curly textures. It is one of the fastest half-up styles here. Anchor the bun with two crossed pins at the base so it survives a full day.
Try this: tease the ponytail lightly before twisting so a small amount of hair still makes a full-looking knot.
Difficulty: Easy | Cost: $0-$2
21. Classic Three-Strand Braid
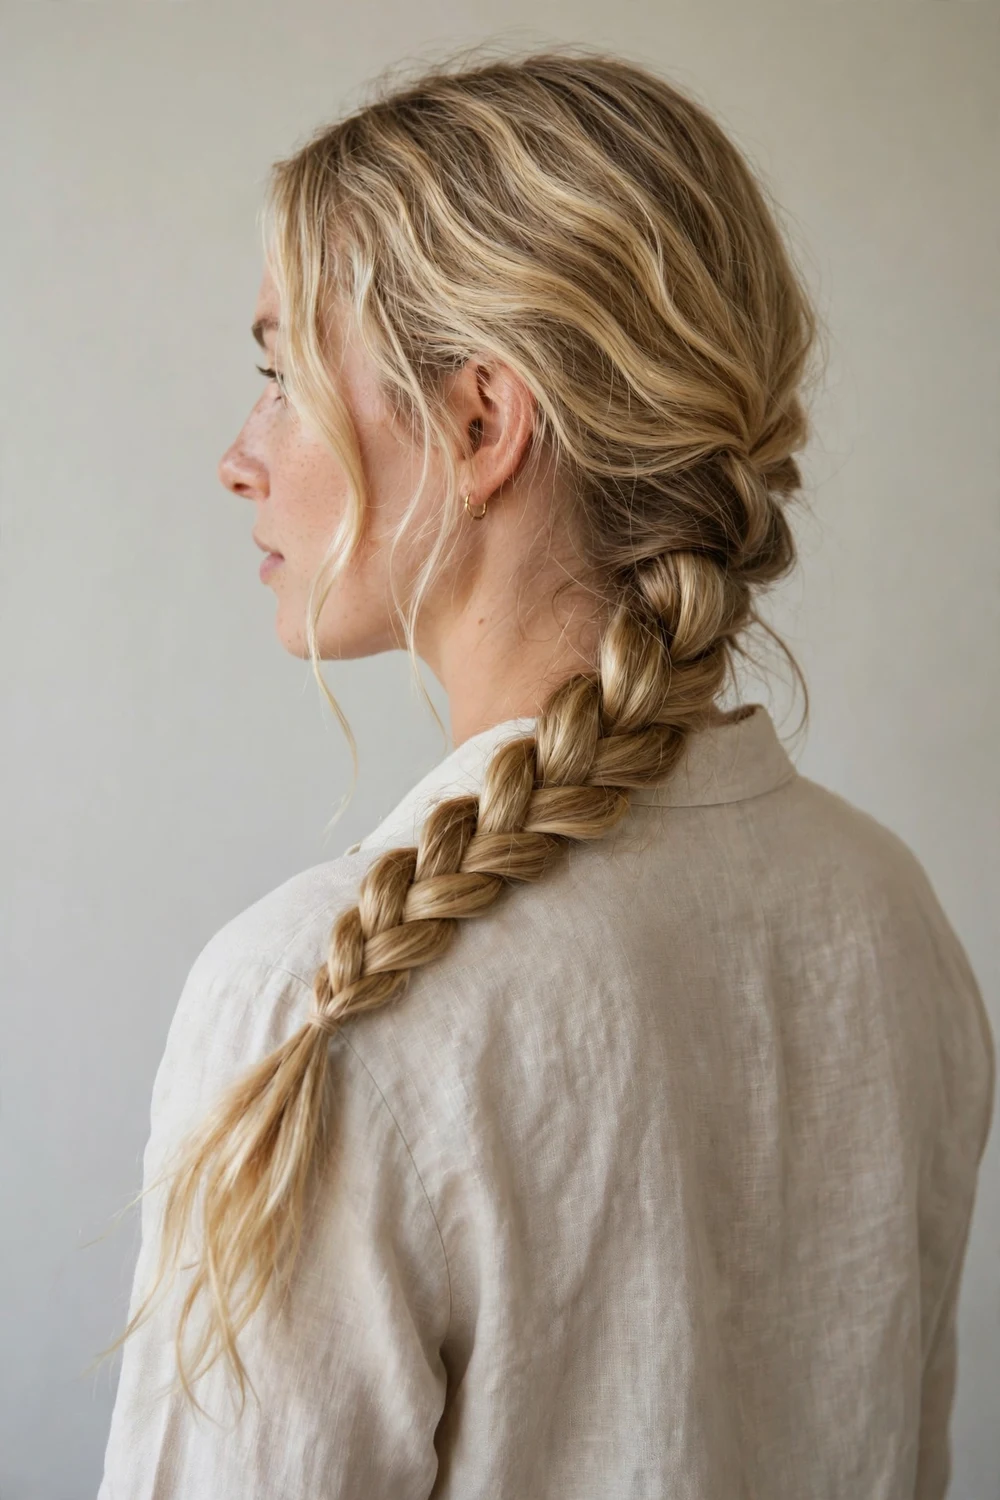
Brush out any tangles and pull your hair to one side or straight back. Split into three even sections and cross the outer sections over the middle, alternating sides, all the way down. Tie off with an elastic. It is the simplest braid there is, and it is the base technique for every other plait on this list. Keep the three sections even as you go, since uneven sections make a lumpy braid.
Try this: braid over one shoulder so you can see your hands and keep the sections even.
Difficulty: Easy | Cost: $0
22. Space Buns
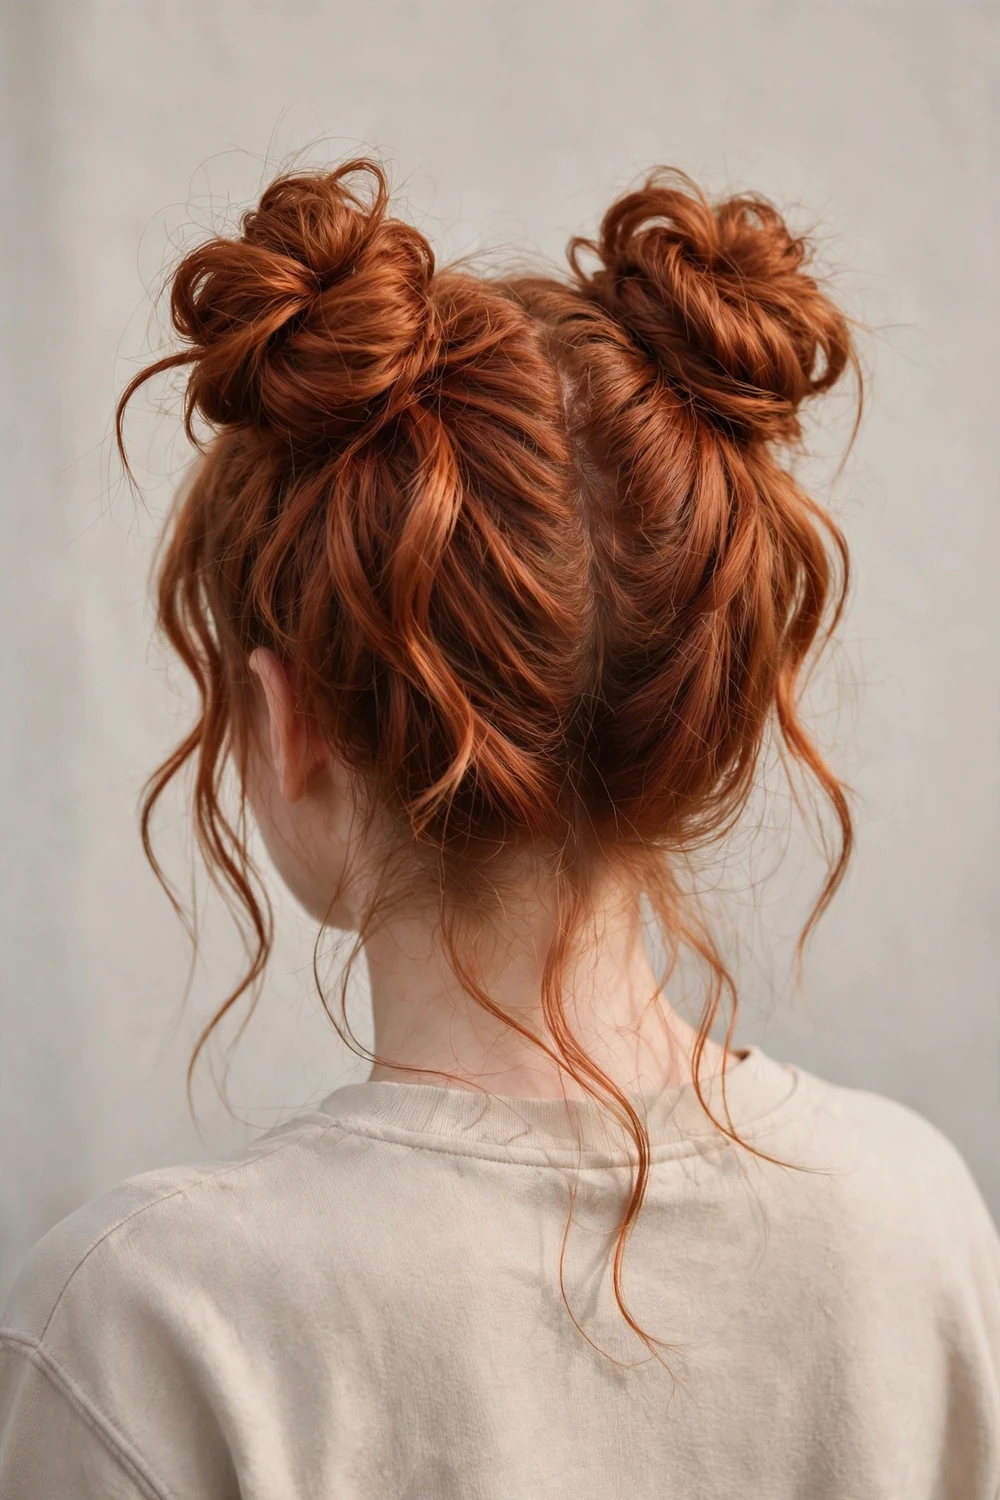
Part your hair down the middle and make two high pigtails. Twist each pigtail into a bun and pin it, keeping them symmetrical on top of your head. Pull out a few strands around your face for softness. This is a playful pick for weekends, concerts, and days when you want your hair completely out of the way. Check the symmetry in a mirror before pinning, since uneven buns are hard to fix later.
Try this: wrap a scrunchie around each bun base to hide the elastics and add a pop of color.
Difficulty: Easy | Cost: $0-$4
23. Claw Clip French Twist
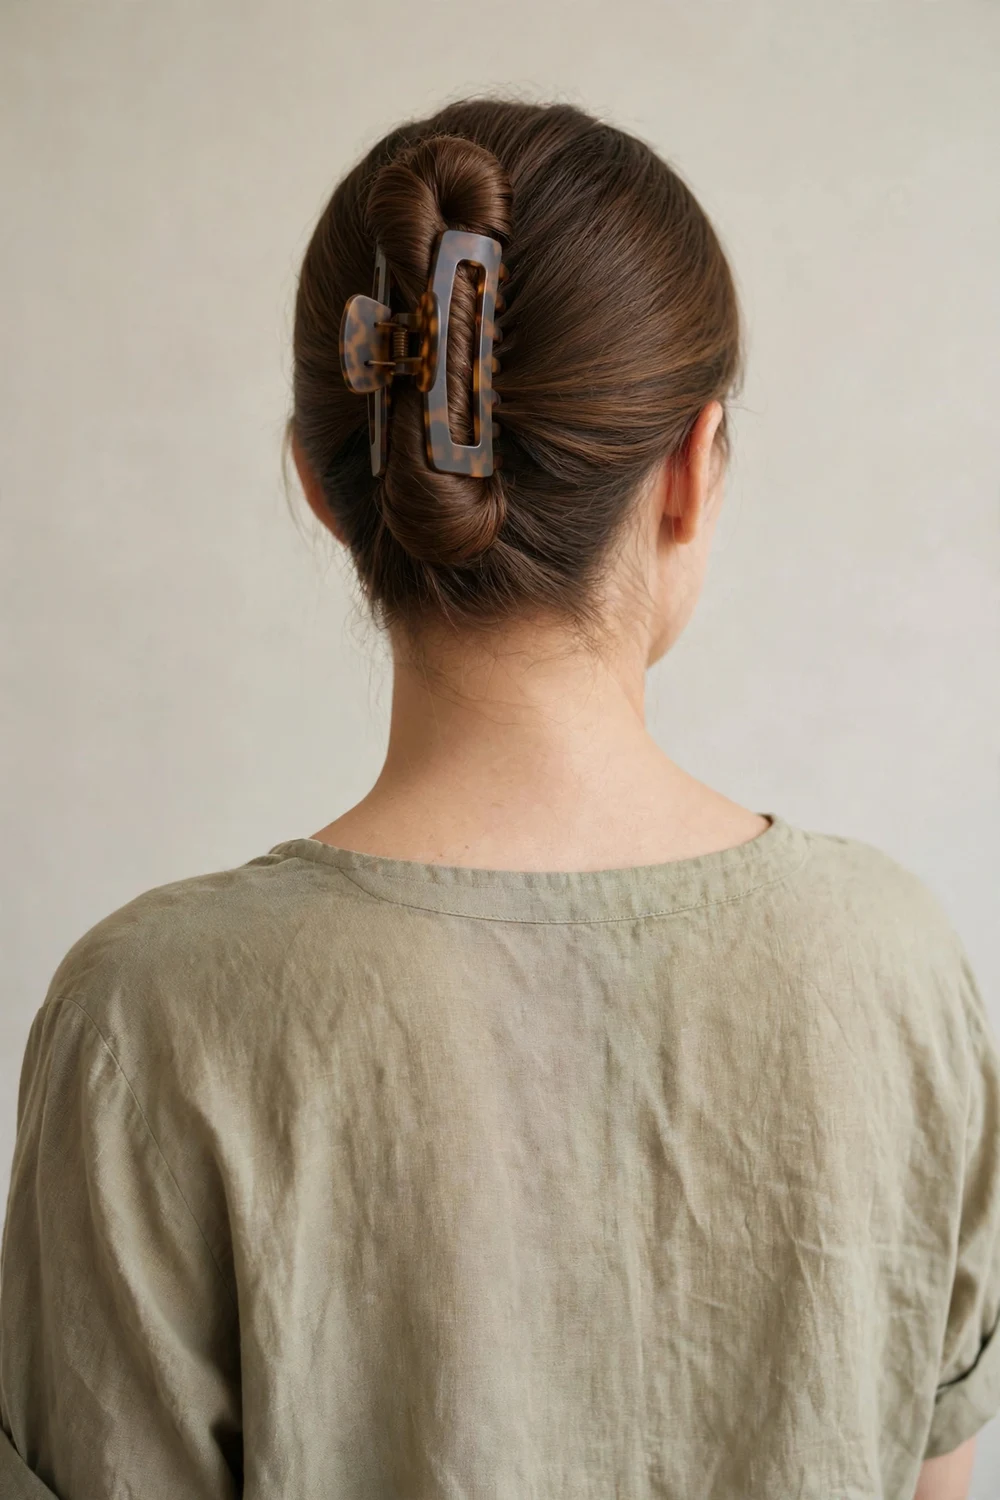
Gather your hair at the nape as if making a low ponytail, then twist the whole length upward against the back of your head. Fold the ends down and clamp a large claw clip vertically over the twist to hold it. Let the top stay slightly loose for a casual feel. No pins needed, and it comes out in seconds. Make sure the clip teeth catch hair from both sides of the twist for a secure hold.
Try this: choose a matte clip in a neutral tone for workdays and a patterned one when you want it to stand out.
Difficulty: Easy | Cost: $4-$8
24. Scarf-Tied Ponytail
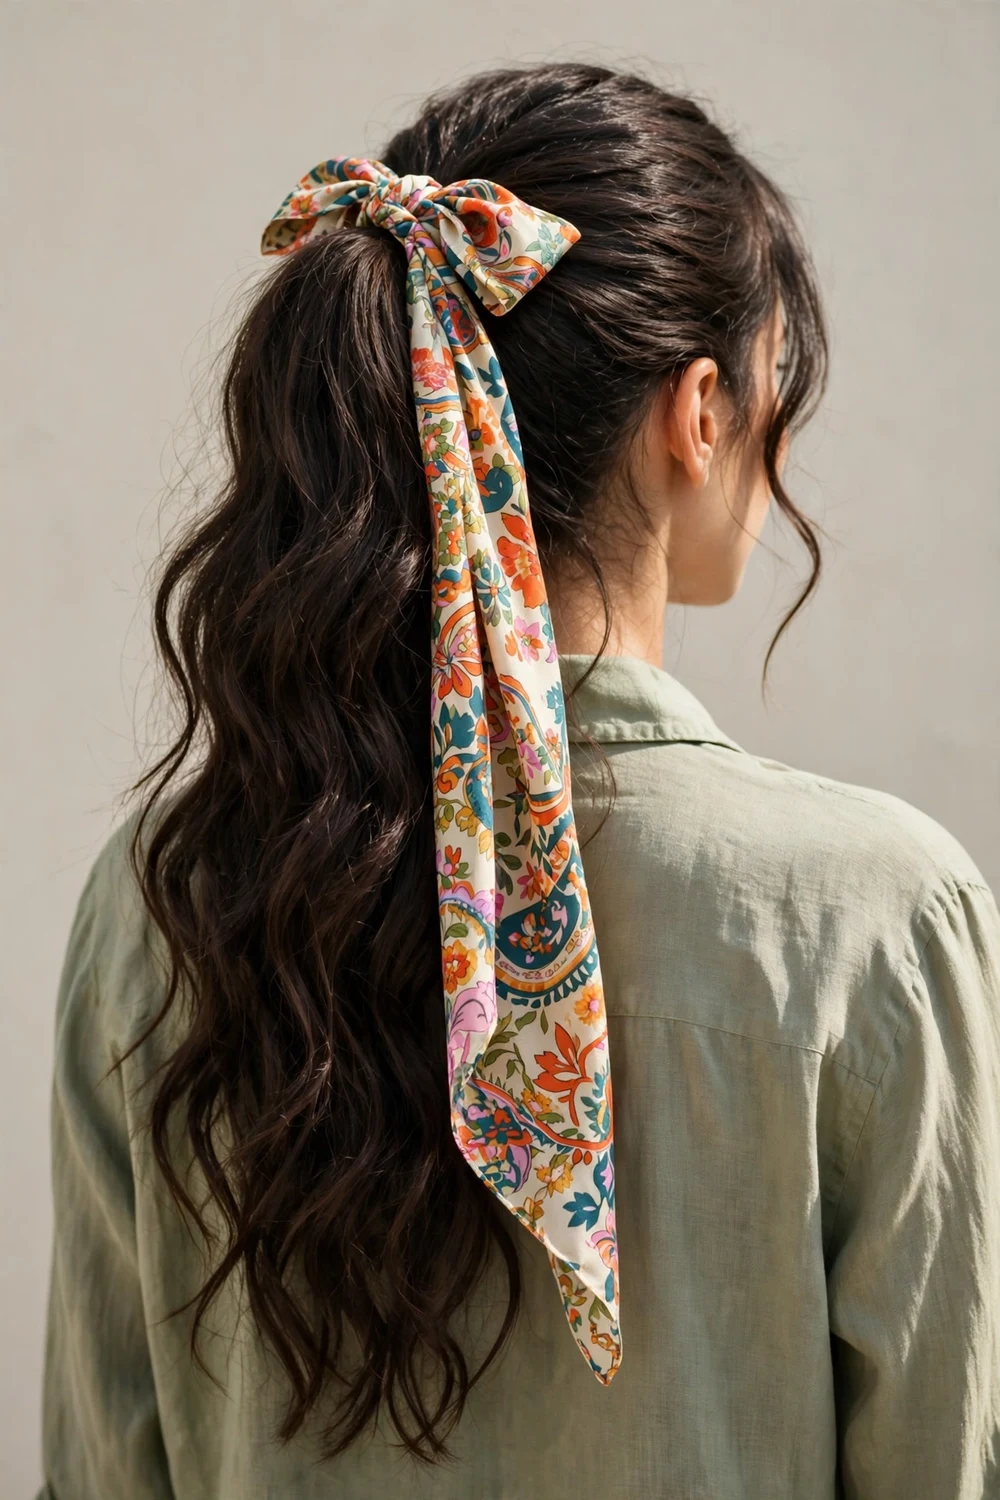
Make a high or mid ponytail and fold a square scarf into a long band. Wrap the band around the ponytail base and tie it in a knot or bow, letting the scarf ends trail down your hair. It adds color and personality with zero heat or product, and you can swap scarves to match different outfits. Tuck the scarf knot under the ponytail base so it sits snug and does not slip.
Try this: pick a silk-feel scarf in a print that picks up one color from your outfit to tie the whole look together.
Difficulty: Easy | Cost: $5-$12
25. Mini Front Twists
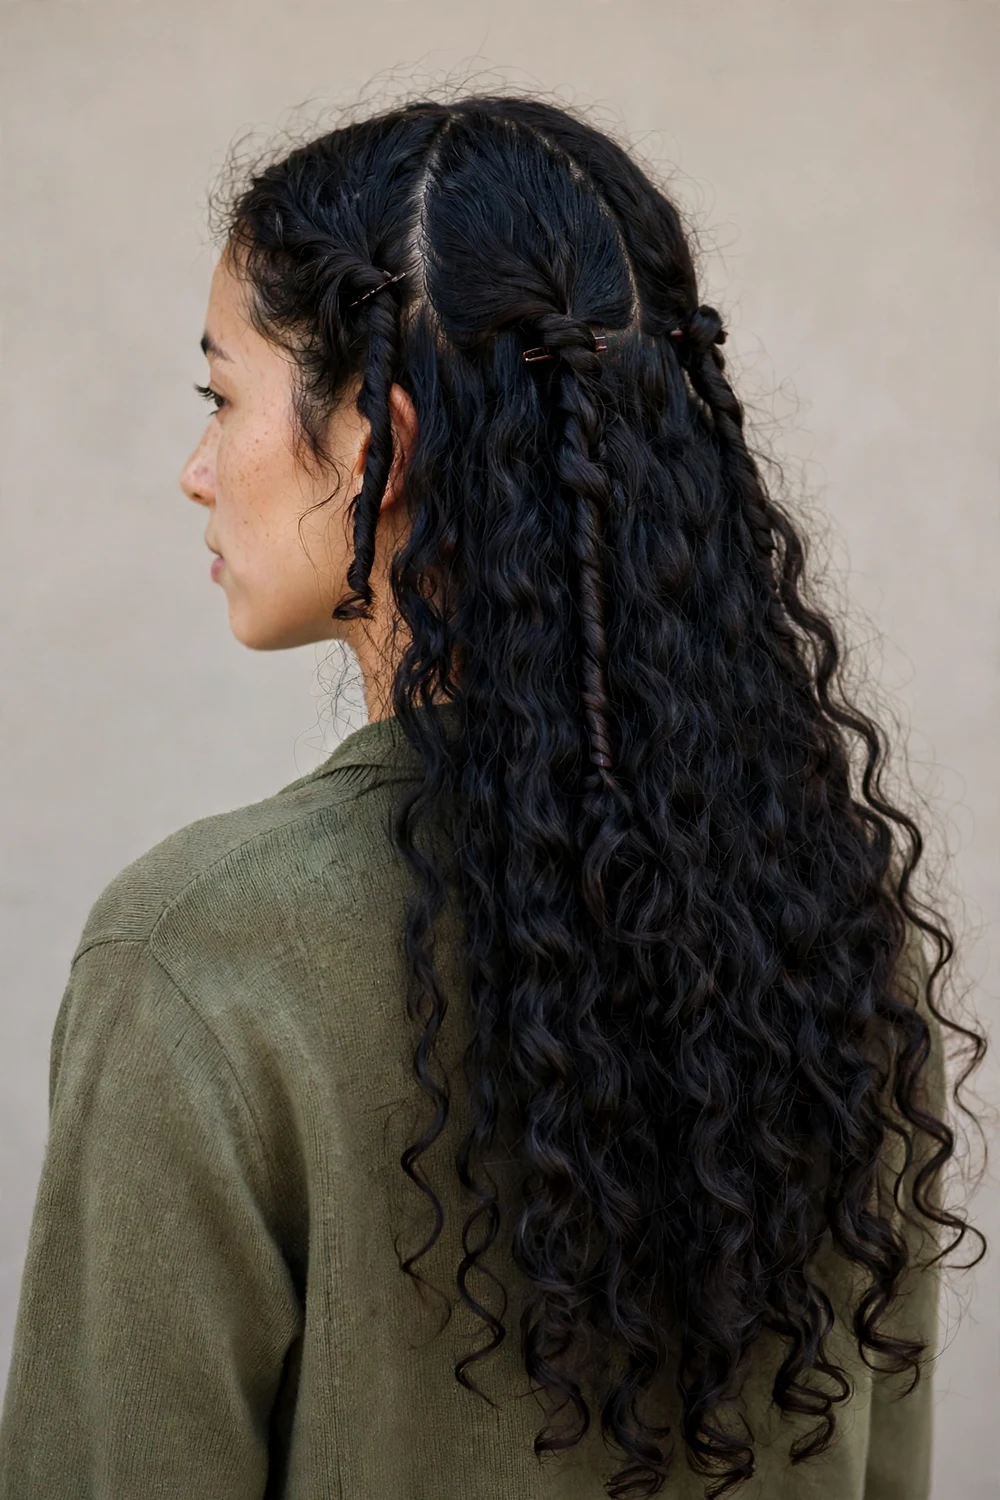
Take a one-inch section from each side of your part near the hairline. Twist each section back away from your face and pin it behind your ear or at the back with a small clip. Leave the rest of your hair down. It keeps layers and shorter pieces off your face in seconds and works on every texture. Secure each twist with a pin that matches your hair color so it blends in.
Try this: twist the two sections in opposite directions so they mirror each other and sit flat.
Difficulty: Easy | Cost: $0-$2
Compare the styles
| Style | Time needed | Difficulty | Best for |
|---|---|---|---|
| Bubble Braid | 5-7 min | Easy | Medium to thick hair |
| Half-Up Bow | 8-10 min | Medium | Silky straight hair |
| Soft Beach Waves | 15-20 min | Medium | All textures |
| Double Dutch Braids | 10-15 min | Medium | Active days |
| Messy High Bun | 2-3 min | Easy | Second-day hair |
| Side Fishtail Braid | 10-12 min | A bit tricky | Layered hair |
| Ribbon-Tied Ponytail | 3-5 min | Easy | Straight hair |
| Loose Curl Half-Up | 10-15 min | Easy | Wavy or curly hair |
| Flower Crown | 2 min | Easy | Outdoor weekends |
| Twisted Side Braid | 5 min | Easy | All textures |
| Low Pigtail Braids | 7-10 min | Easy | Thick hair |
| Heart-Shaped Braid | 20-25 min | A bit tricky | Special casual days |
| Polished Low Ponytail | 5 min | Easy | Workdays |
| Low Twisted Bun | 5-7 min | Easy | Long commutes |
| Braided Ponytail | 7-10 min | Easy | Fine hair |
| Double Claw Clip Bun | 2-3 min | Easy | Very long heavy hair |
| Top Knot | 3-5 min | Easy | Hot days |
| Relaxed Low Chignon | 8-10 min | Medium | Tidy casual look |
| Half-Up Braided Crown | 10-12 min | Medium | Keeping front hair back |
| Half-Up Top Knot | 3-5 min | Easy | Showing off length |
| Classic Three-Strand Braid | 3-5 min | Easy | Beginners |
| Space Buns | 5-8 min | Easy | Playful weekends |
| Claw Clip French Twist | 2-3 min | Easy | No-pin styling |
| Scarf-Tied Ponytail | 3-5 min | Easy | Adding color |
| Mini Front Twists | 2 min | Easy | Taming layers |
How to choose the right style for your day
Start with your hair texture. Fine hair looks fuller in pancaked braids like the bubble braid and braided ponytail, while thick hair needs stronger anchors like two claw clips or Dutch braids. Next, count your minutes: under five minutes points to a messy bun, top knot, or mini front twists, while ten or more opens up fishtails and braided crowns.
Think about face framing too. If you like softness around your cheeks, leave two thin pieces out before you start. If your mornings are always rushed, these medium hairstyles for busy women show cuts that style fast on any schedule. Finally, match the style to the day: secure braids for errands and workouts, loose half-up styles for relaxed days at home.
FAQs
What are the easiest cute hairstyles for long hair?
The easiest options are the messy high bun, the classic three-strand braid, mini front twists, and the double claw clip bun. Each takes two to five minutes and needs nothing more than elastics and pins. Start with these if you are new to styling long hair, then move on to braids like the bubble braid or Dutch braids once your hands learn the motions.
How do I stop long hair from tangling in these styles?
Brush out tangles before you start and work with detangled sections. Braided styles like Dutch braids and the braided ponytail keep hair contained, which prevents knots during the day. At night, a loose braid or a silk scrunchie ponytail reduces morning tangles. A wide-tooth comb and a light leave-in conditioner also help if your hair knots easily.
What accessories make long hairstyles look cuter?
Ribbons, claw clips, scrunchies, and small flower clips change a basic style with almost no effort. A satin ribbon turns a plain ponytail into the ribbon-tied ponytail, and two claw clips upgrade a bun into the double claw clip style. Keep one neutral set for workdays and a few patterned or colorful pieces for weekends.
How long do these everyday hairstyles take?
Most of the 25 styles take two to ten minutes. The fastest are mini front twists, the messy high bun, the claw clip French twist, and the double claw clip bun at about two to three minutes each. Only the heart-shaped braid and soft beach waves need more time, around fifteen to twenty-five minutes, so save those for days when you are not rushed.
Do these styles work on second-day hair?
Yes, and many work better on it. Second-day hair has more grip, which helps braids hold and keeps buns from slipping. The bubble braid, messy high bun, double Dutch braids, and space buns all look great on unwashed hair. If your roots look oily, a quick spray of dry shampoo at the crown before styling fixes that in seconds.
Final thoughts
Long hair does not need a special occasion to look cute. Pick two or three styles from this list that fit your texture and your mornings, and rotate them through the week. Once the motions become habit, even the trickier braids start to feel quick.

