



Simple hairstyles for short hair are styles you can finish in under ten minutes with three or fewer steps. No complicated braiding, no shelf of products, no second mirror needed. If your mornings are rushed, this is the list to bookmark.
A claw clip, five bobby pins, and one black elastic handle most mornings: these styles take under five minutes each, and everything below is designed for a workday routine.
You will find 20 ideas below, each with a realistic time estimate and the exact tools involved. This guide covers daily styling, not the cut itself. If you are still choosing a cut, our cute hairstyles for short hair guide walks through the shapes that style the fastest.
Quick Takeaways
- Most of these styles need only bobby pins, one elastic, and dry shampoo. That is the whole kit.
- Second-day hair holds simple styles better than freshly washed hair, so plan around your wash days.
- A deep side part or a tuck behind the ear counts as a style and takes under a minute.
- Keep hot tools for one idea only. The other 19 need no heat at all.
- Simple does not mean sloppy. Clean parts and smoothed flyaways are what make minimal styles look intentional.
1. The Clean Side Part
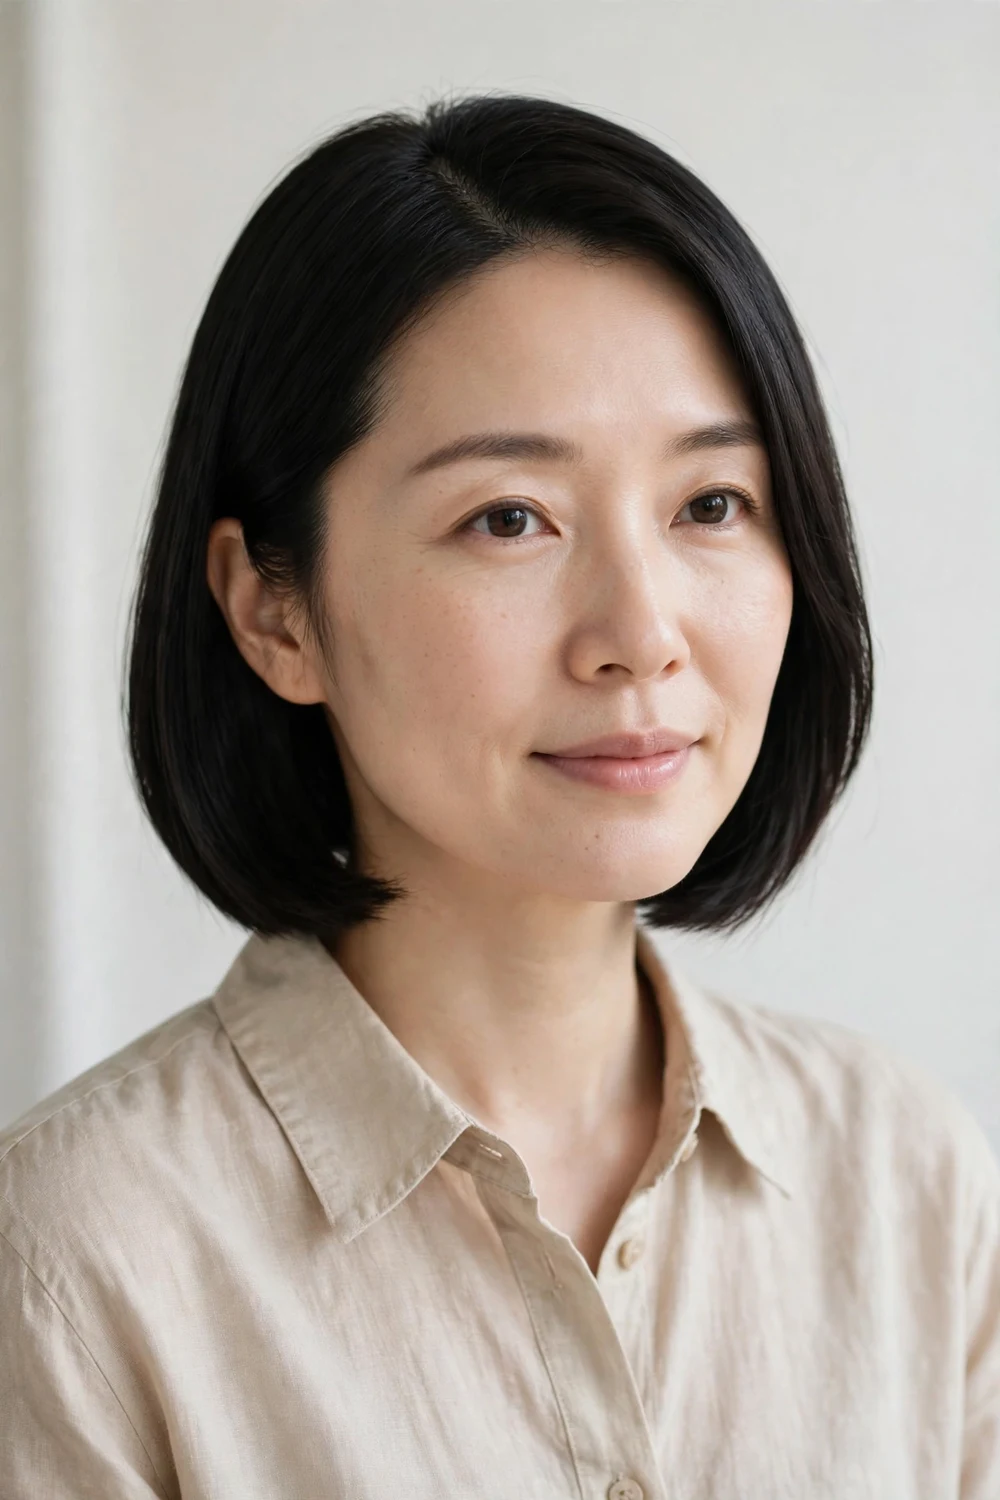
A clean side part is the fastest style on this list. Part your hair about two inches off center with the tail of a comb, then smooth each side down with your palms. The asymmetry adds shape to straight bobs and keeps the look neat without any pinning.
This works on freshly washed or second-day hair. If your part keeps drifting back to the middle, mist the roots with a light-hold hairspray before you part. The whole thing takes about sixty seconds once you know where your part sits best.
Try this: find your natural part by pushing all your hair forward and letting it fall. Part where it splits on its own.
Difficulty: Easy · Cost: $0
2. Tucked Behind One Ear
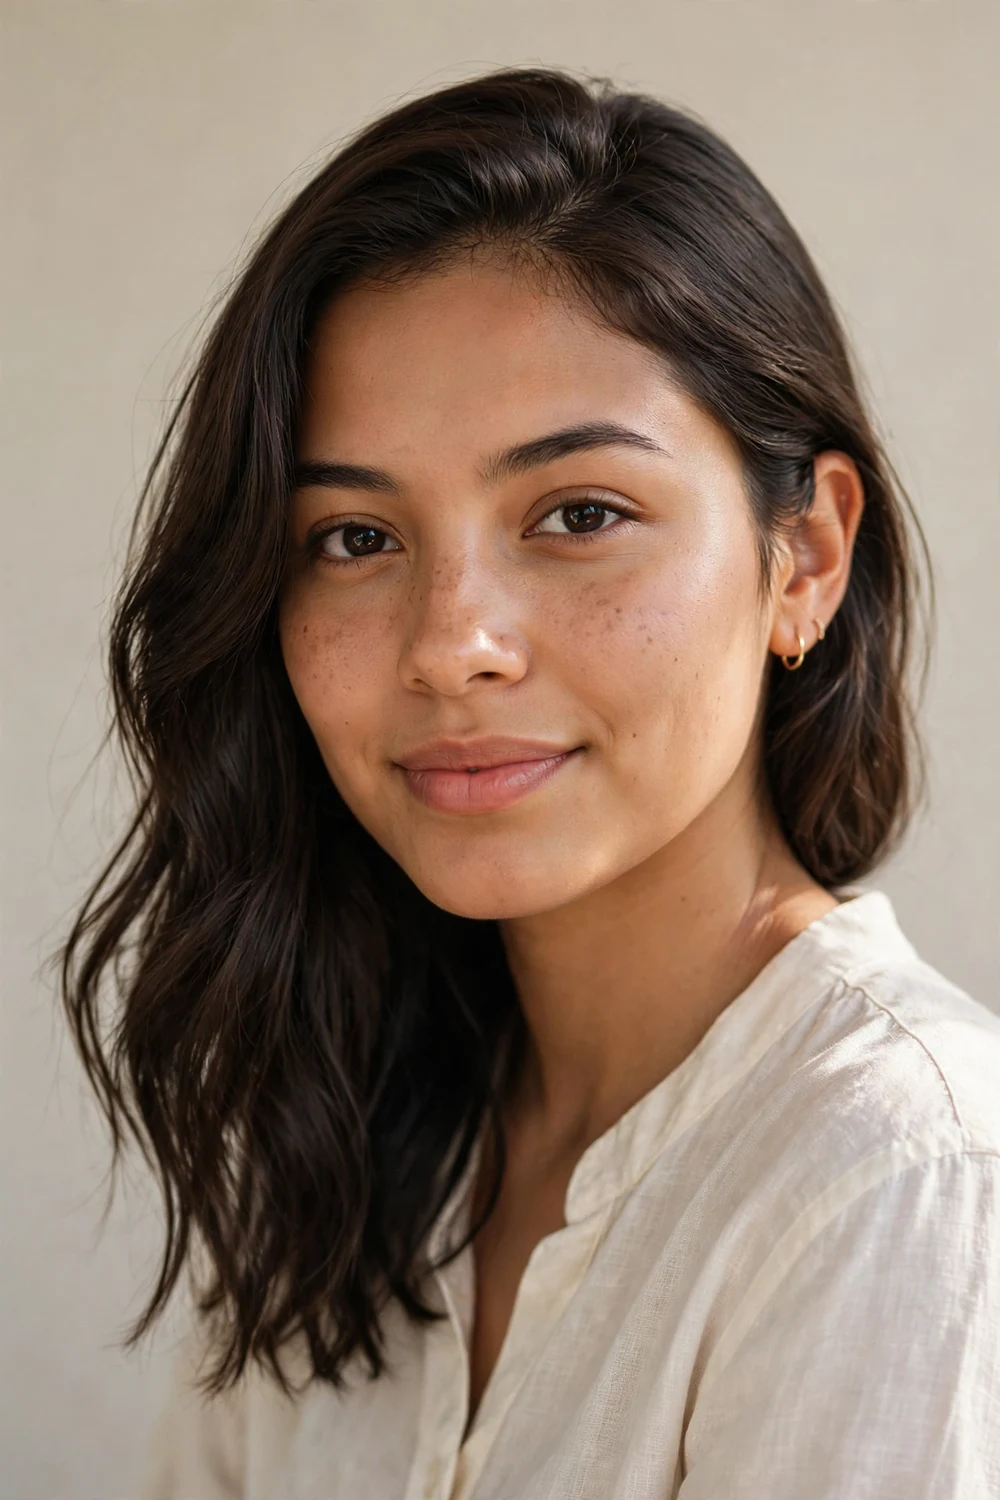
Tuck one side of your hair behind your ear and leave the other side loose. It sounds too plain to count as a hairstyle, but the asymmetry frames your face and shows off earrings. It suits lobs and bobs best, where the tucked side stays put on its own.
Use one bobby pin behind the ear if your hair is slippery or layered. Slide it in vertically, against the direction of the hair, so it grips. A tiny drop of styling cream on the tucked section stops flyaways from popping back out by noon.
Try this: tuck the side opposite your usual part for a small change that reads as a whole new style.
Difficulty: Easy · Cost: $0
3. The Low Sleek Ponytail
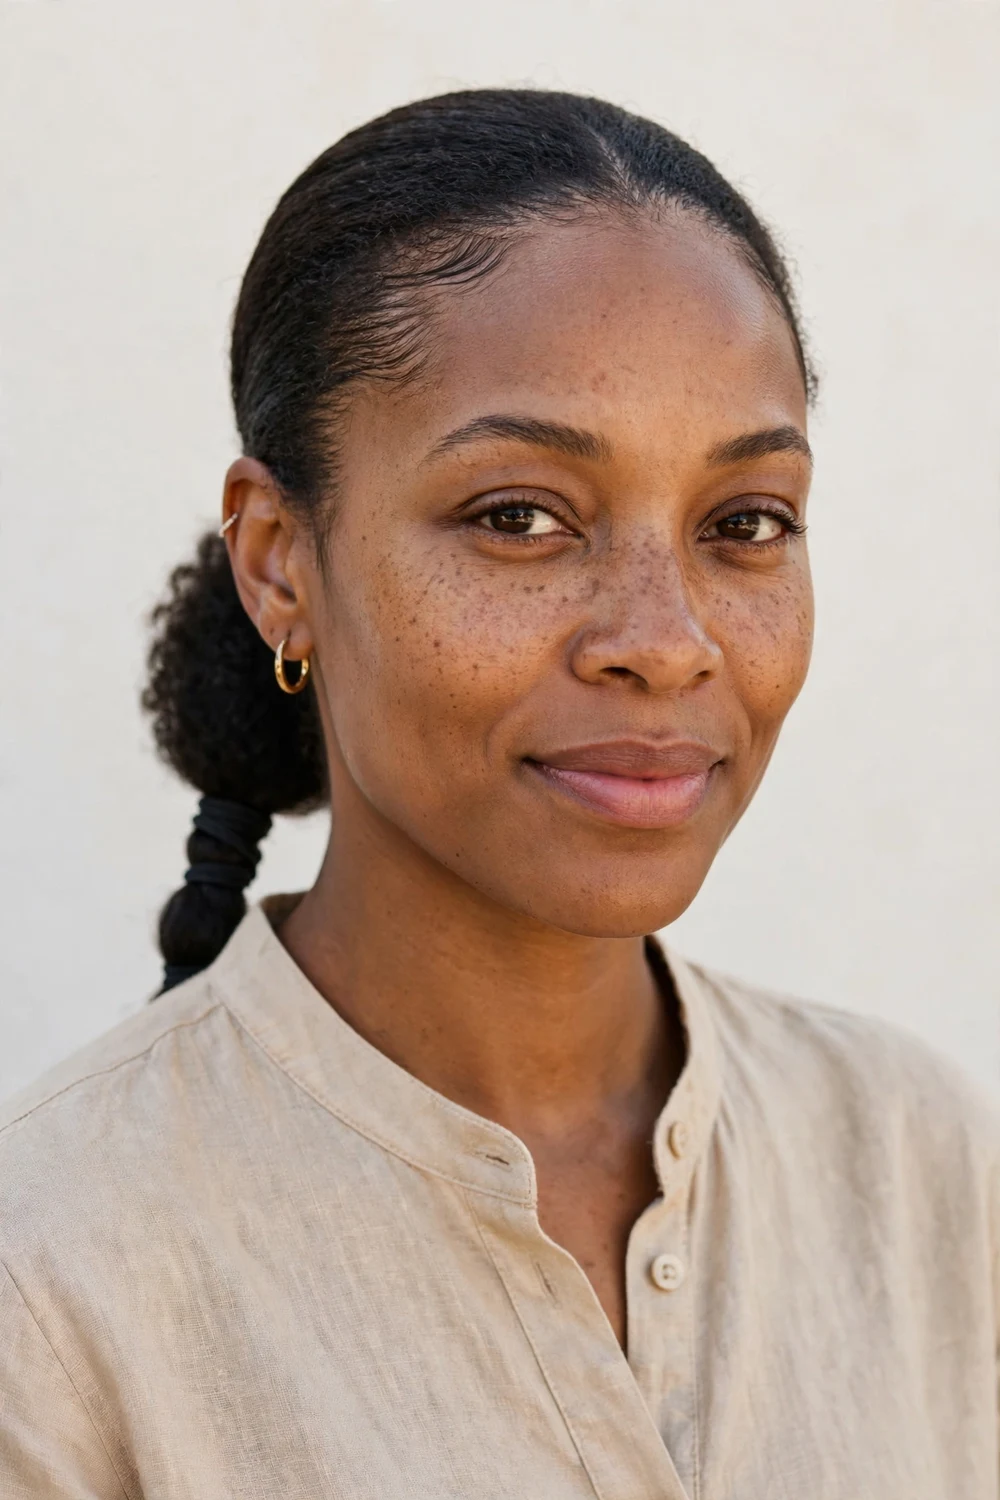
Gather your hair at the nape of your neck and secure it with one elastic. Brush the top smooth first so the crown looks polished, not puffy. Even chin-length hair can manage this if you use a small elastic and accept a tiny stub of a tail.
Wrap a thin strand of hair around the elastic and pin it underneath to hide the band. That one extra step takes twenty seconds and makes the ponytail look finished. A pea-sized amount of edge control or gel along the hairline keeps everything sleek through a workday.
Try this: tilt your head back slightly while gathering. It pulls the nape hair taut and stops bumps from forming.
Difficulty: Easy · Cost: $0–$6 (elastic pack)
4. Air-Dried Natural Texture

Wash, scrunch in a leave-in conditioner, and walk away. Air-dried texture is the lowest-effort style here because your hair does all the work while you get dressed. It suits wavy and curly short hair best, where the natural pattern reads as intentional.
The trick is to stop touching it while it dries. Every time you run your fingers through damp hair, you break up the wave pattern and invite frizz. If your ends dry poufy, twist two front sections away from your face while damp and release them once dry.
Try this: plop your hair in a cotton t-shirt for ten minutes after washing. It cuts drying time and defines waves.
Difficulty: Easy · Cost: $0–$8 (leave-in conditioner)
Layers make air-drying work noticeably better, since weight comes off the ends. Our short layered haircuts guide explains which layer patterns dry with the least fuss.
5. The Simple Headband

Slide on a headband and push your hair back. That is the entire style. A headband covers unwashed roots, tames regrowth, and adds a finished look in about fifteen seconds. Thin bands read polished, wide fabric bands read casual.
Place the band about an inch behind your hairline so it does not slide forward during the day. If it slips, two bobby pins crossed in an X over the band will anchor it. Keep one band in your bag and one at home so you are never without the option.
Try this: a dark band on dark hair looks subtle for work, while a patterned one dresses up weekend errands.
Difficulty: Easy · Cost: $0–$10 (headband)
6. The Half-Up Twist
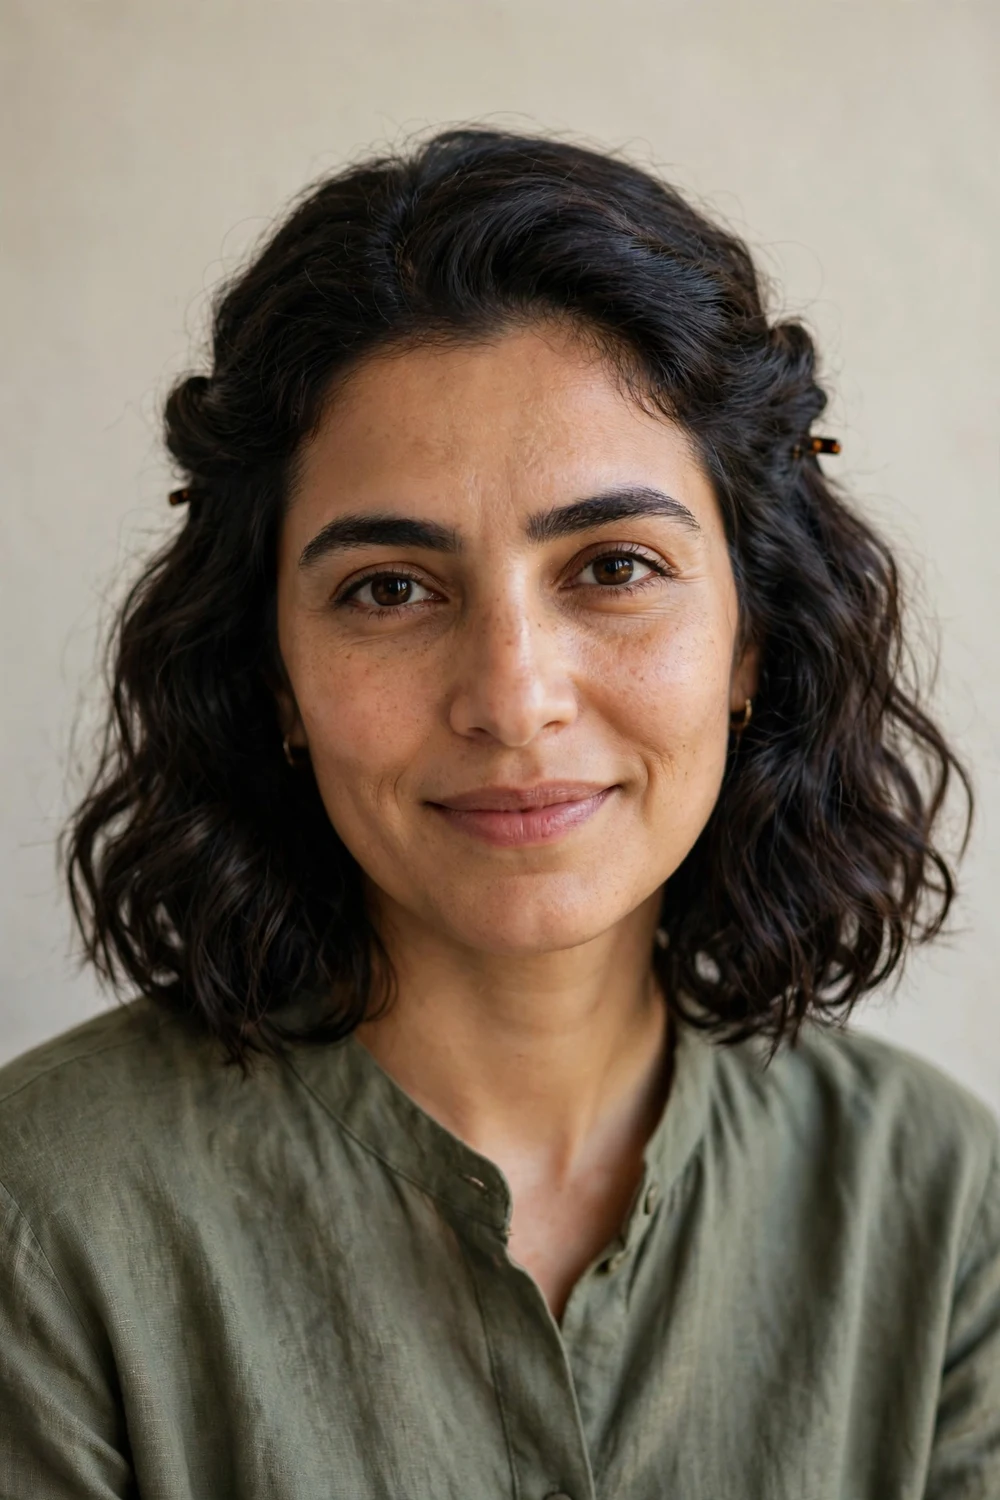
Take a two-inch section from each temple, twist both sections back, and pin them where they meet. The twist adds just enough detail to look styled while the rest of your hair hangs loose. It works on bobs and lobs, and even longer pixies can manage a small version.
Twist away from your face so the sections lie flat against your head. Cross two bobby pins over each other at the join for a hold that survives a full day. If shorter layers keep escaping, a light mist of hairspray before twisting gives them grip.
Try this: twist only one side and pin it for an asymmetric version that takes half the time.
Difficulty: Easy · Cost: $0
7. The Mini Top Knot
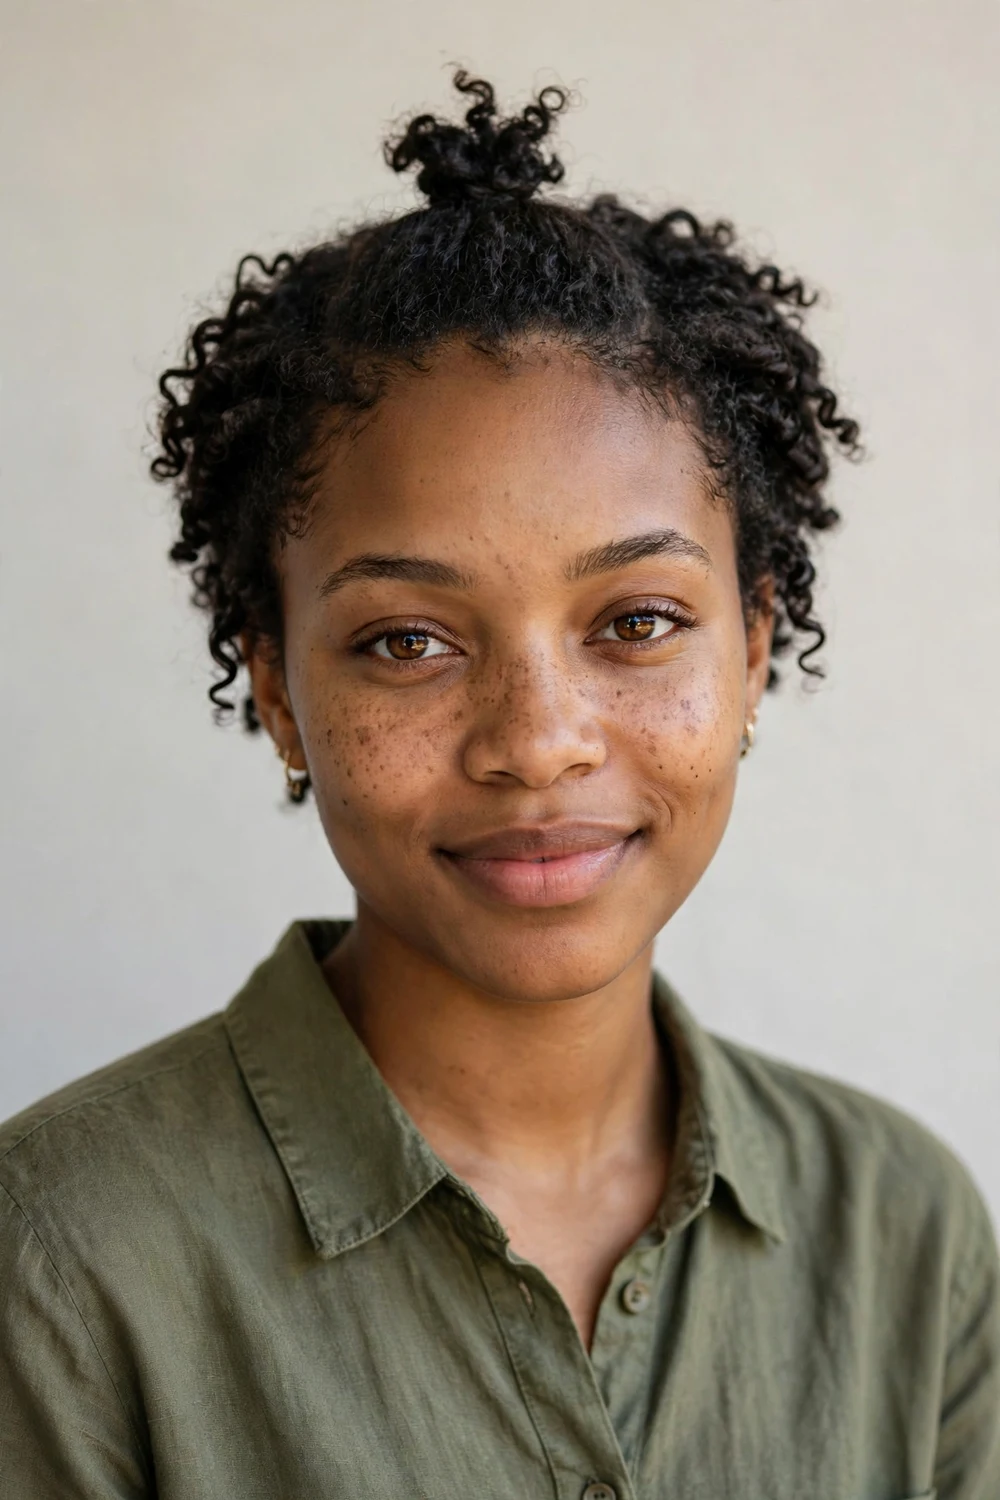
Gather the top section of your hair, twist it once, and coil it into a small knot on your crown. Secure with an elastic and one bobby pin. The mini top knot keeps hair off your face and reads playful without trying hard. Curly and coily textures hold this knot best.
Do not pull the knot too tight. A slightly loose coil looks softer and holds longer because the elastic is not fighting your hair all day. If your hair is very short on top, gather what you can and let the knot sit a little forward. It still reads as a top knot.
Try this: do it on second-day hair. The extra grip means you can skip the bobby pin entirely.
Difficulty: Easy · Cost: $0
8. The Claw Clip Twist
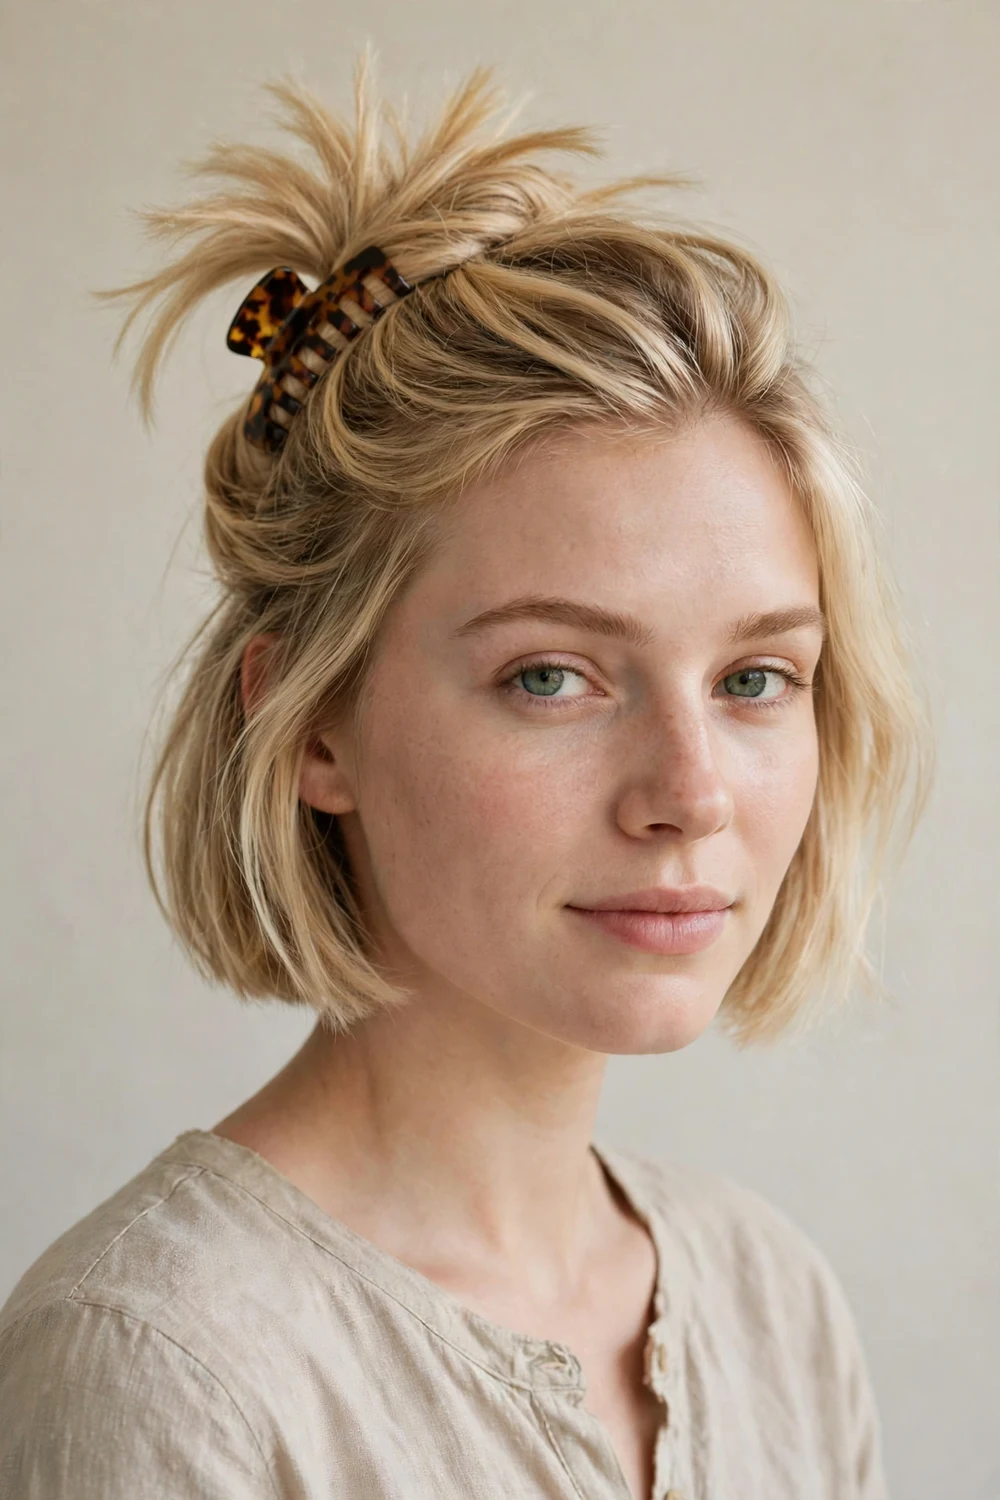
Gather your hair as if making a low ponytail, twist it upward, and clamp a claw clip over the twist. The ends fan out over the top of the clip, which is the whole look. It takes about forty seconds and holds through commutes, workouts, and long desk days.
Use a medium clip, not a large one. Oversized clips slide off short hair because there is not enough hair to fill them. Twist the hair snugly before clipping, then tug the crown gently for a little lift. This is the style I reach for most on rushed mornings.
Try this: flip your head upside down before gathering. The extra volume at the crown makes the twist look fuller.
Difficulty: Easy · Cost: $0–$8 (claw clip)
Once you have the twist down, these claw clip hairstyles show 27 ways to wear it on short, medium, and long hair.
9. The Slicked-Back Style
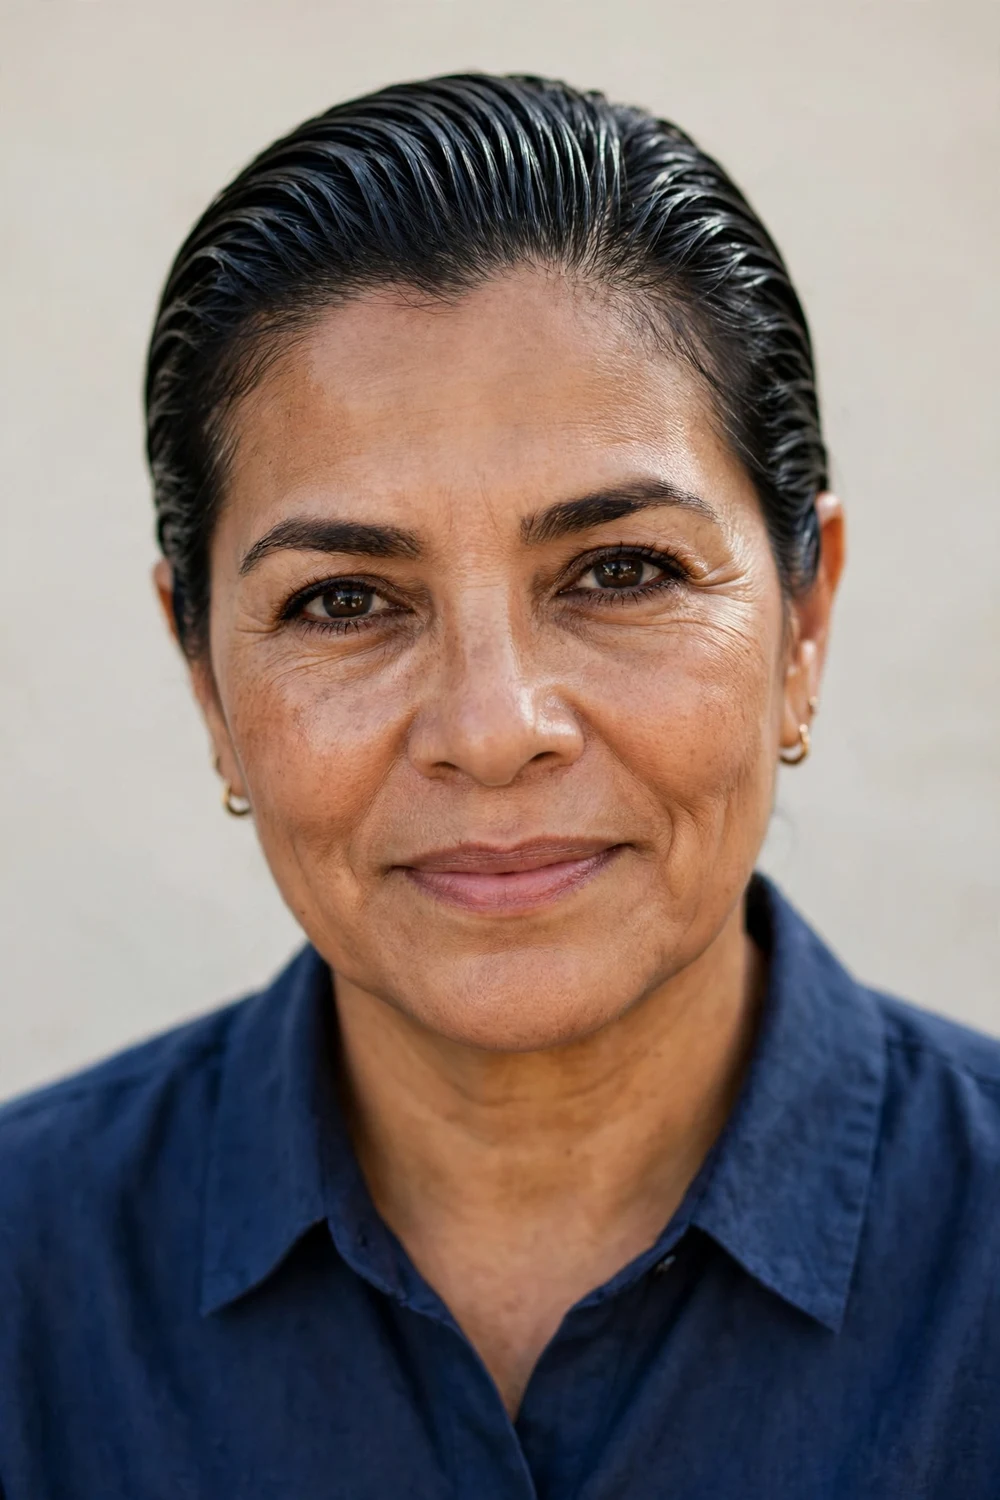
Comb a dime-sized amount of gel through damp hair and brush everything straight back. The slicked-back style looks sharp and takes two minutes. It suits pixies and short bobs best, and it is a strong choice when your hair is due for a wash but you have plans.
Work the gel through with your fingers first, then finish with a fine-tooth comb for clean lines. Do not overload the product. Too much gel goes crunchy by midday, while the right amount stays flexible. A light-hold gel beats a maximum-hold one here.
Try this: slick the top back but leave the ends untouched for a softer version that still looks deliberate.
Difficulty: Easy · Cost: $0–$7 (hair gel)
10. Two Thin Front Braids
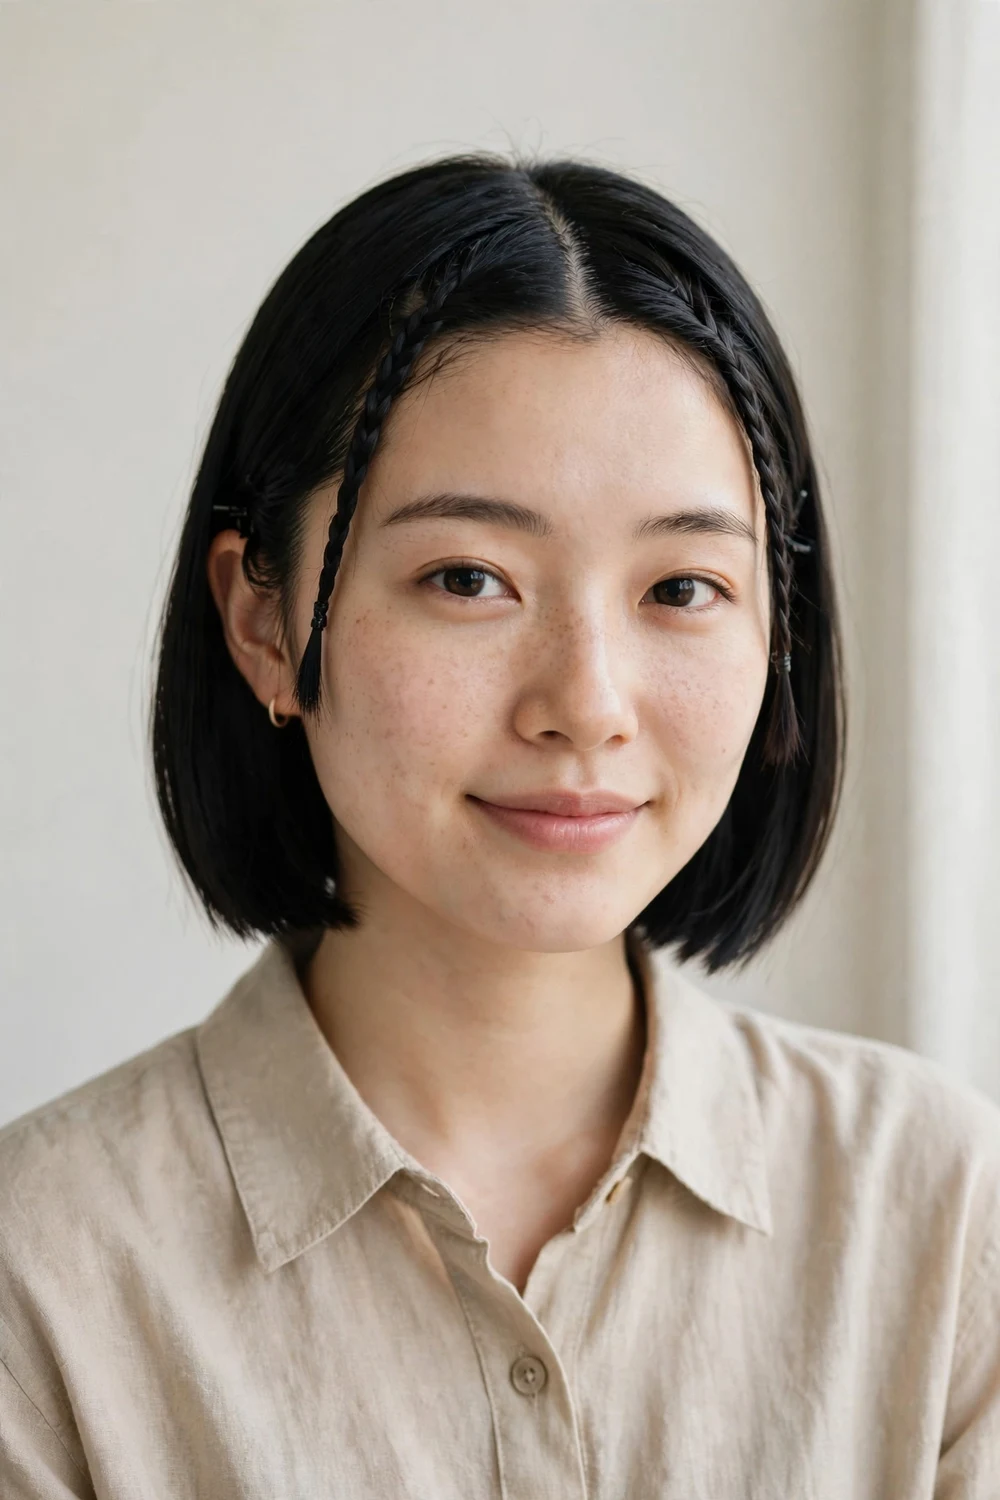
Braid a half-inch section on each side of your part, starting at the hairline and stopping behind the ear. Secure each with a clear mini elastic. The two thin braids keep front layers out of your face and add quiet detail without looking fussy.
Braid close to the scalp so the braids lie flat instead of puffing out. If your layers are too short to reach behind the ear, pin the braid ends instead of elasticating them. Clear elastics disappear into the hair, which keeps the look minimal.
Try this: braid on damp hair with a touch of styling cream. The braids set smoother and hold their shape longer.
Difficulty: Easy · Cost: $0–$4 (mini elastics)
11. The Low Loose Bun
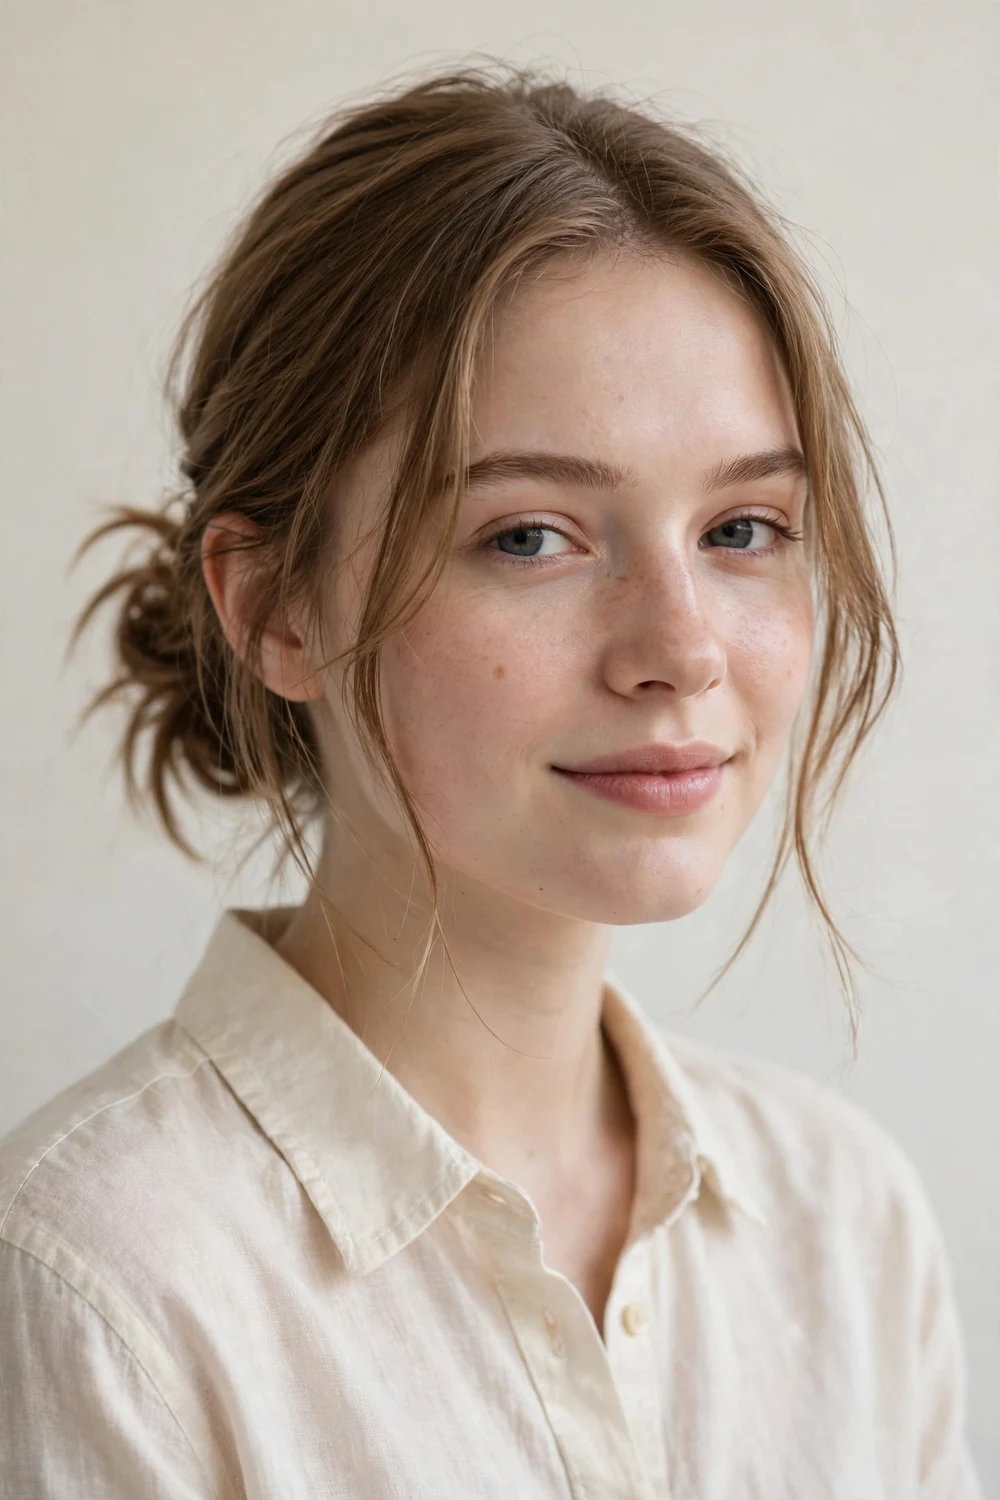
Gather your hair at the nape, twist it loosely, and wrap it into a bun. Pin it with three or four bobby pins and pull out two face-framing pieces. The low loose bun looks relaxed but tidy, and it survives a full workday without adjustments.
The looseness is the point, so do not aim for a tight ballerina bun. A soft coil with a few escaped pieces looks better on short hair and takes less pinning. If your hair is too short to wrap fully, fold it in half and pin the fold. It reads as a bun from every angle.
Try this: wrap the bun over a small elastic instead of pinning bare hair. The elastic gives short layers something to grip.
Difficulty: Easy · Cost: $0
For more pinned styles that work on short lengths, our short hair updos guide has options from two-minute twists to evening looks.
12. The Barrette Half-Up
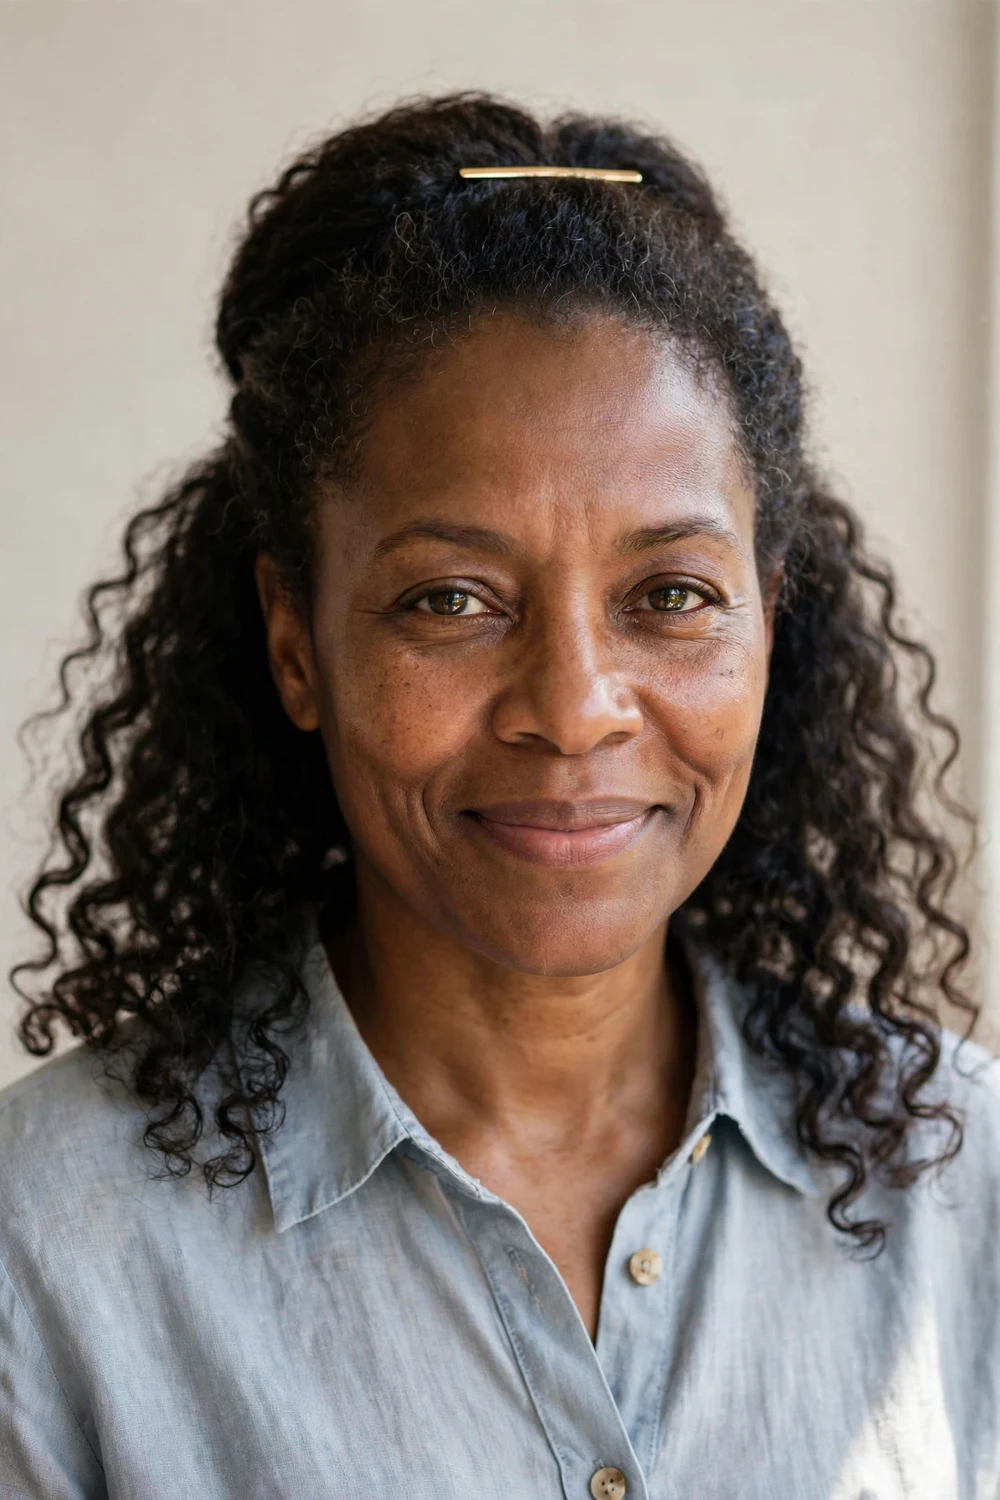
Scoop up the top half of your hair and fasten it with a single barrette at the back of your head. Leave the rest down. One statement clip does all the styling work here, which is why this takes under a minute and still looks finished.
Choose a barrette with teeth if your hair is fine or silky. Smooth clips slide out of short hair by lunchtime. Position the clip slightly above the occipital bone, where your head curves, so it sits flat instead of sticking out.
Try this: backcomb the crown section with two quick strokes before clipping. The extra lift keeps the barrette from pulling flat.
Difficulty: Easy · Cost: $0–$9 (barrette)
13. The Deep Side Sweep
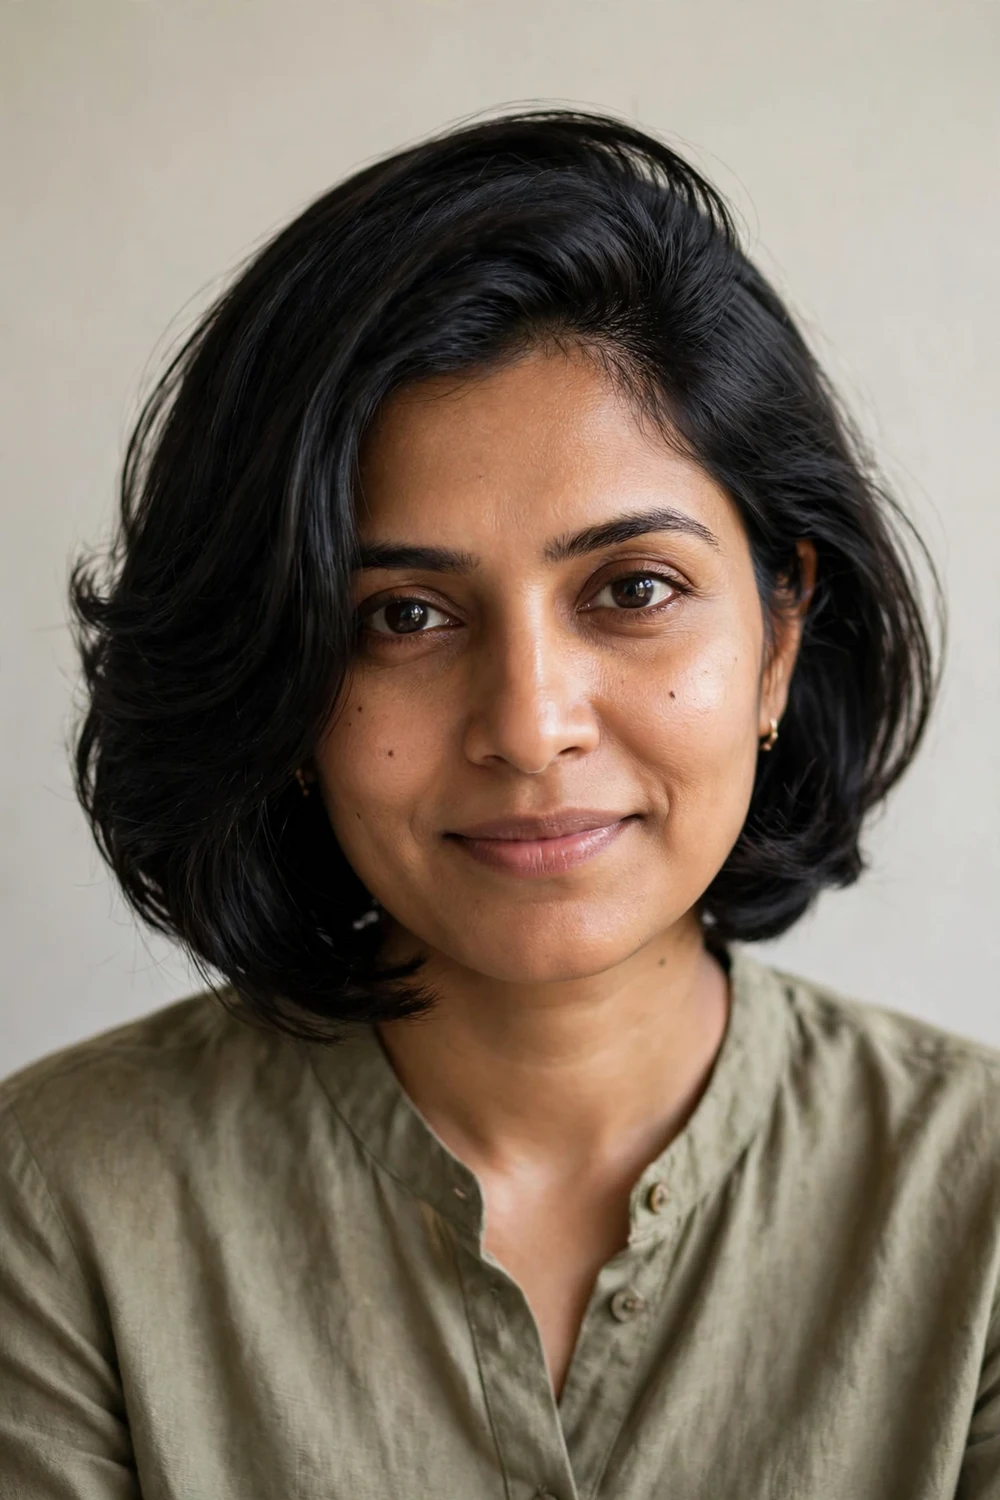
Part your hair far to one side, near the temple, and sweep everything across. The deep side sweep creates instant volume on top and a clean diagonal line. It flatters round and square faces because the asymmetry breaks up width.
Blow-dry the roots in the new direction for five minutes if you want it to hold all day. Without heat, pin the sweep behind the opposite ear and the style still lasts. A shot of dry shampoo at the roots before sweeping adds grip and keeps the heavy side from sliding.
Try this: train a new part by wearing the sweep overnight with two flat clips. A week of this sets the part.
Difficulty: Easy · Cost: $0–$8 (dry shampoo)
14. Finger-Styled Waves

Scrunch a golf-ball of mousse into damp hair and shape the waves with your fingers as it dries. No brush, no iron. Finger-styled waves look soft and natural on bobs and lobs, and the whole routine takes about three minutes of hands-on time.
Flip your head upside down while scrunching to build volume at the roots. Once the waves form, leave them alone until fully dry. Touching half-dry waves is the fastest way to turn definition into frizz, so set a timer and walk away.
Try this: twist one-inch sections around your finger while damp, then release. The coils dry into uniform waves.
Difficulty: Easy · Cost: $0–$9 (mousse)
15. The Silk Scarf Tie

Fold a square scarf into a band and tie it around your head like a headband, knot on top or tucked under. The silk scarf tie covers regrowth, adds color, and takes about a minute. It works on every short length, including pixies too short for pins.
Silk or satin scarves stay put better than cotton because they grip less and slide into place. Tie the knot snugly at the nape or off to one side. If the scarf creeps forward, one bobby pin through the scarf and into your hair at each temple locks it down.
Try this: match the scarf to one color in your outfit. The coordination makes a one-minute style look planned.
Difficulty: Easy · Cost: $0–$12 (scarf)
16. Pinned-Back Front Sections
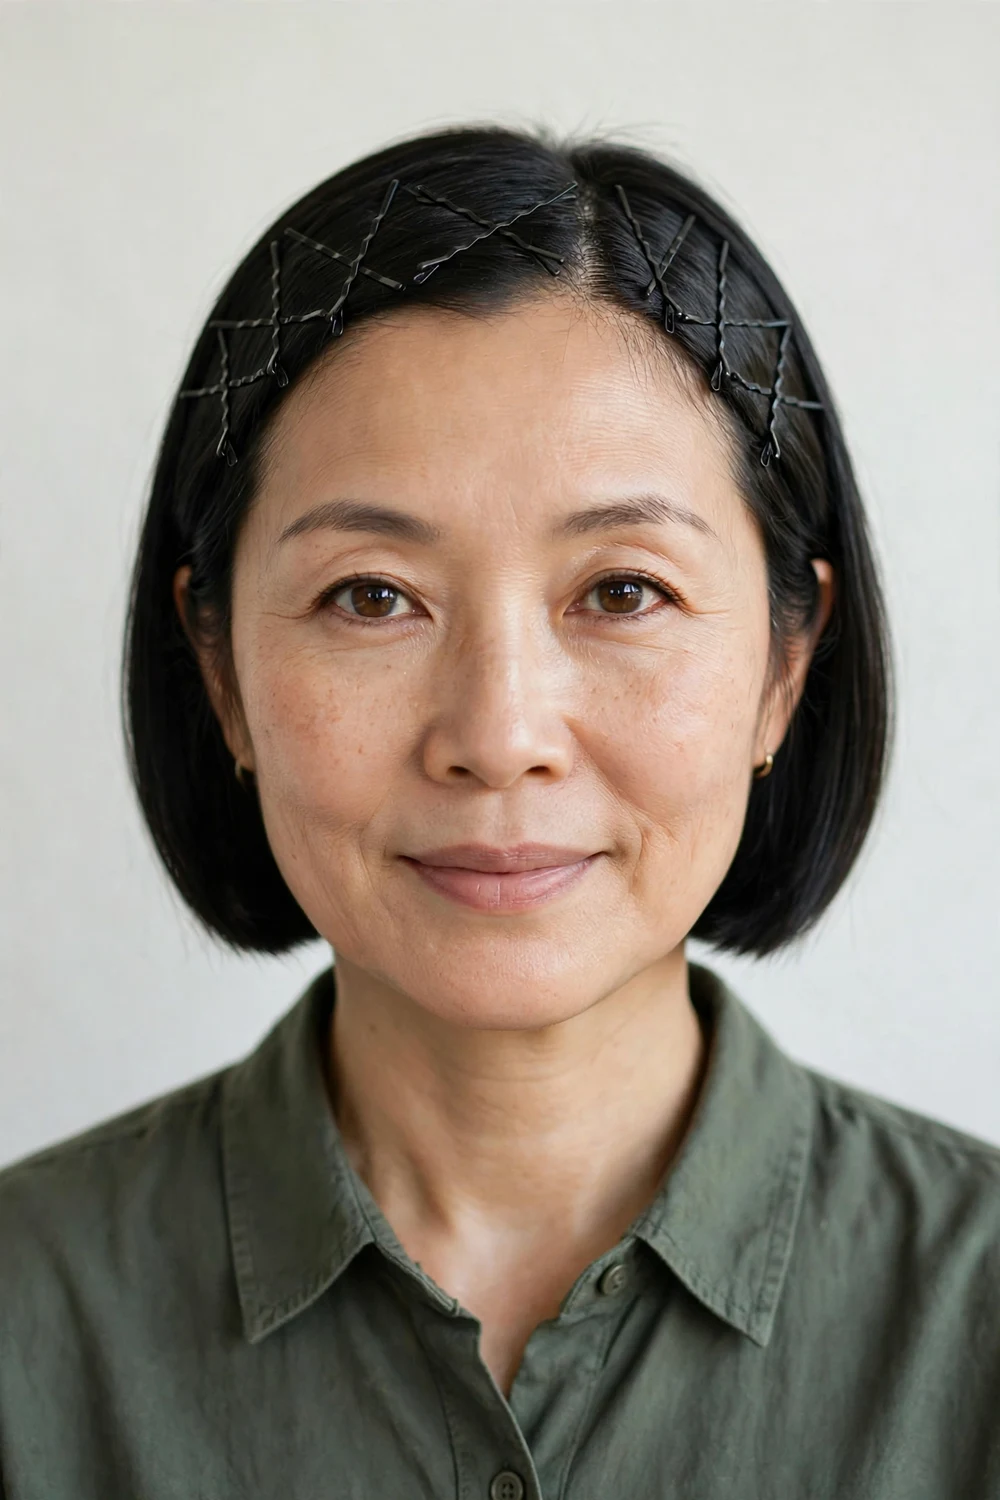
Take a one-inch section above each temple, pull both straight back, and pin them flat against your head. Pinned-back front sections open up your face and keep layers out of your eyes. It is the simplest possible pinned style, and it suits every face shape.
Slide each pin in against the direction of the hair for maximum grip. Two pins per side in an X pattern will hold through wind and errands. Decorative pins turn this into an evening look, while plain black pins disappear for daytime.
Try this: crisscross the pins visibly for a deliberate detail instead of hiding them.
Difficulty: Easy · Cost: $0–$3 (bobby pins)
17. The Flat-Iron Sleek Bob
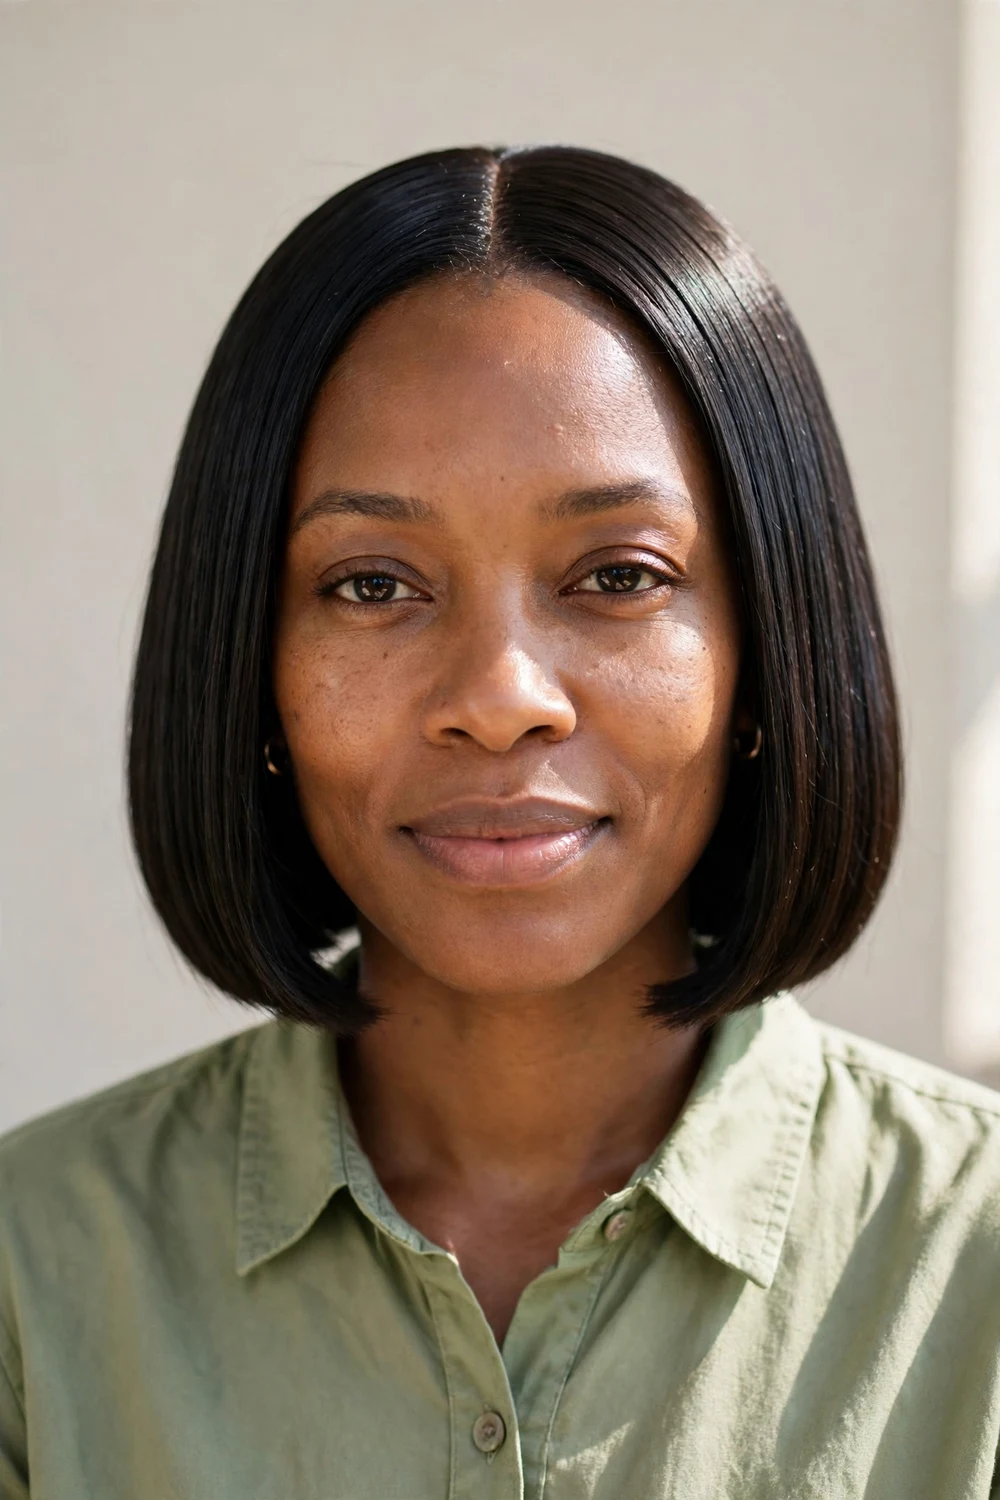
Run a flat iron through your bob in one-inch sections for a glassy, straight finish. This is the only heated style on the list, and it earns its place because ten minutes with an iron gives you two or three days of sleek hair. Apply heat protectant first, every time.
Work from the bottom layers up so the top stays smooth while you iron underneath. One slow pass per section beats three fast passes, and it causes less damage. Finish with a pea-sized drop of shine serum on the ends only, never at the roots.
Try this: wrap your hair in a silk scarf at night. The sleek finish survives until morning with no touch-ups.
Difficulty: Easy · Cost: $0–$10 (heat protectant)
18. The Tousled Texture
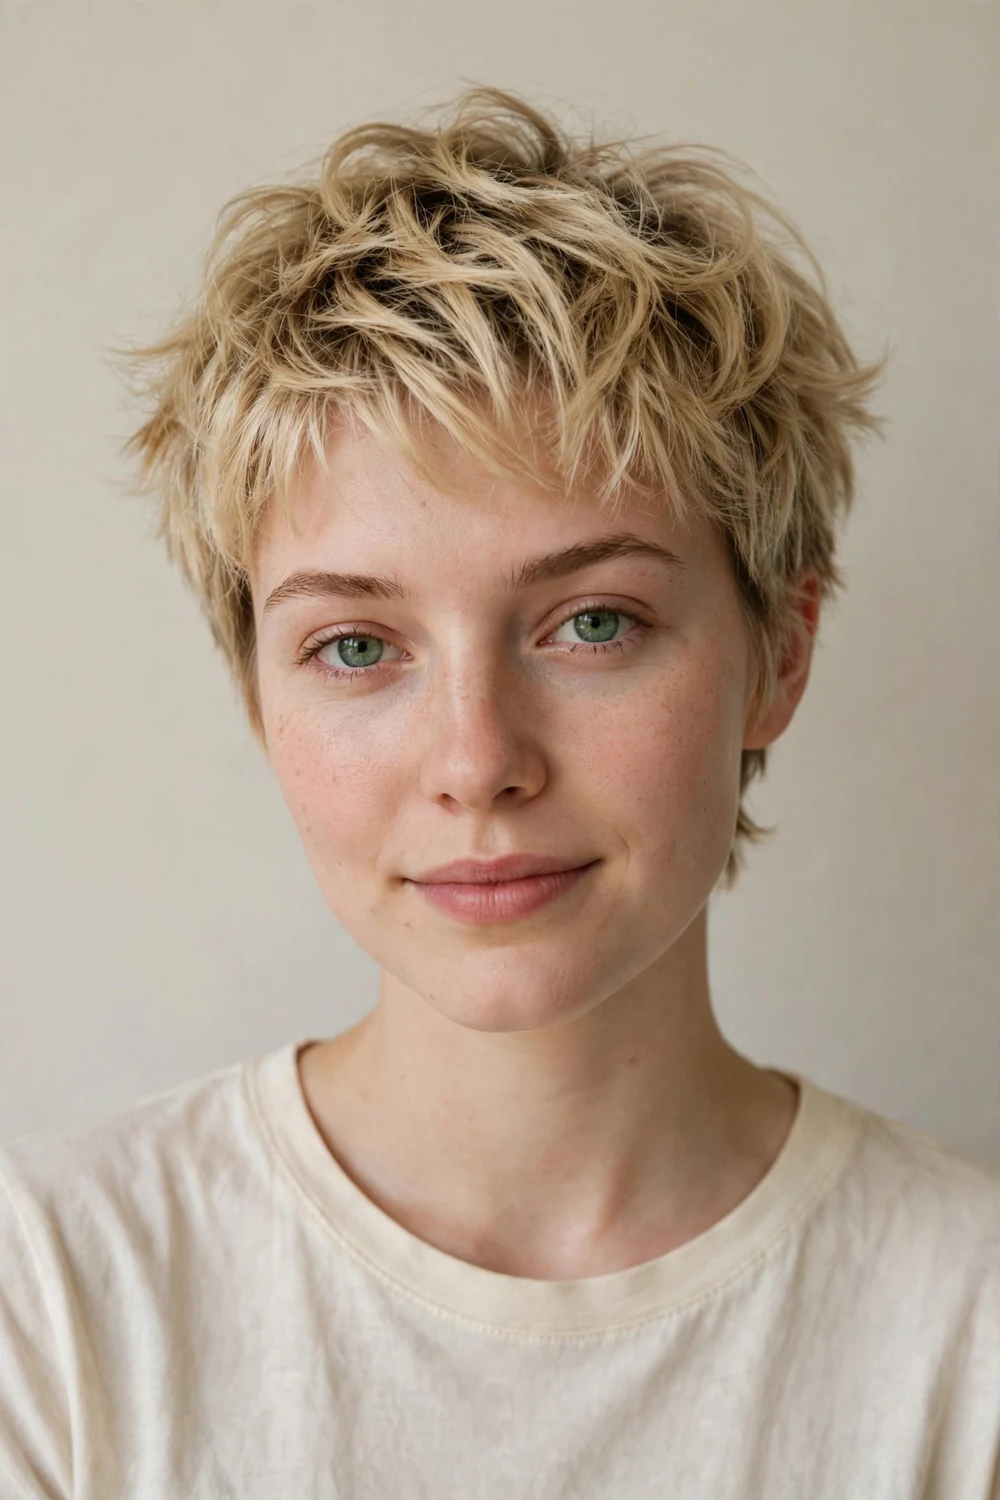
Spray texturizing spray through dry hair and scrunch with your fingers. The tousled texture takes ninety seconds and gives short crops that lived-in, piecey finish. It is the best simple style for fine hair because the texture creates the illusion of thickness.
Spray from eight inches away so the product mists evenly instead of landing in wet spots. Scrunch upward, not downward, to build lift at the roots. If your hair falls flat by afternoon, flip your head over and scrunch once more. The refresh takes ten seconds.
Try this: apply the spray the night before and sleep on it. Morning hair has even better texture with zero effort.
Difficulty: Easy · Cost: $0–$10 (texturizing spray)
Fine hair gets the most from this technique. Our short hairstyles for thin hair guide has more ways to add visible fullness to short cuts.
19. The Pinned Side-Swept Bangs
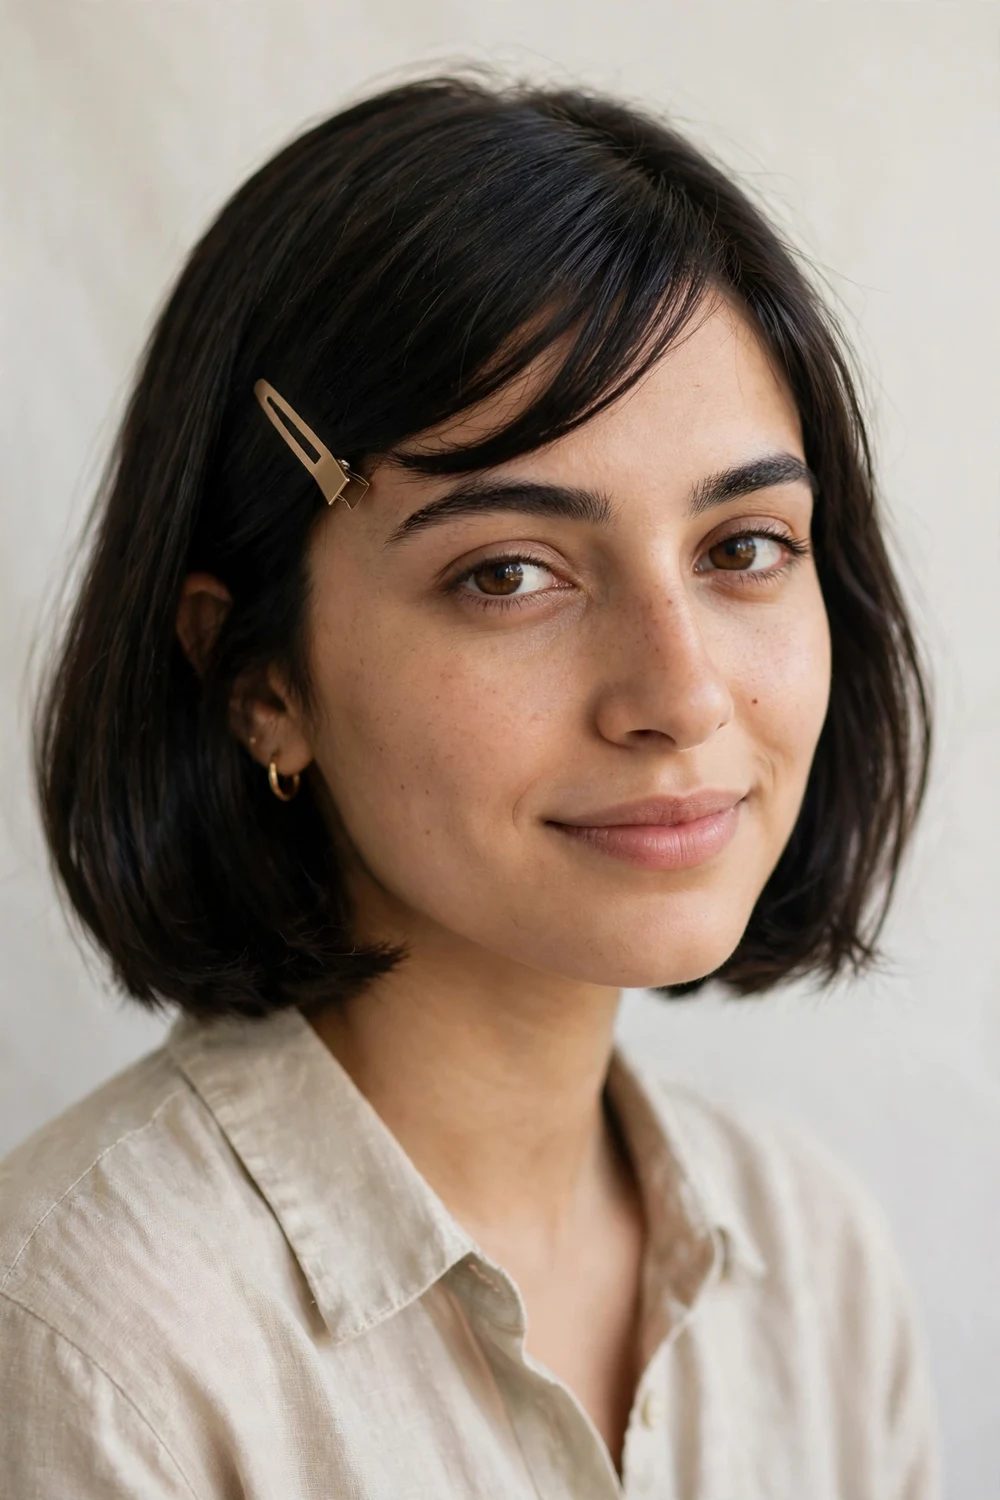
Sweep your bangs diagonally across your forehead and pin them at the temple. Pinned side-swept bangs change the whole shape of your face in under a minute. They suit growing-out bangs especially well, since the pin hides the awkward in-between length.
Use a flat clip or two bobby pins placed horizontally so they lie flush. Sweep the bangs while slightly damp for a smoother line that holds. If one side keeps popping loose, that side needs a second pin. Do not fight it with one.
Try this: sweep the bangs to the opposite side from usual once a week. It stops them from going flat in one direction.
Difficulty: Easy · Cost: $0
20. The Low Side Ponytail
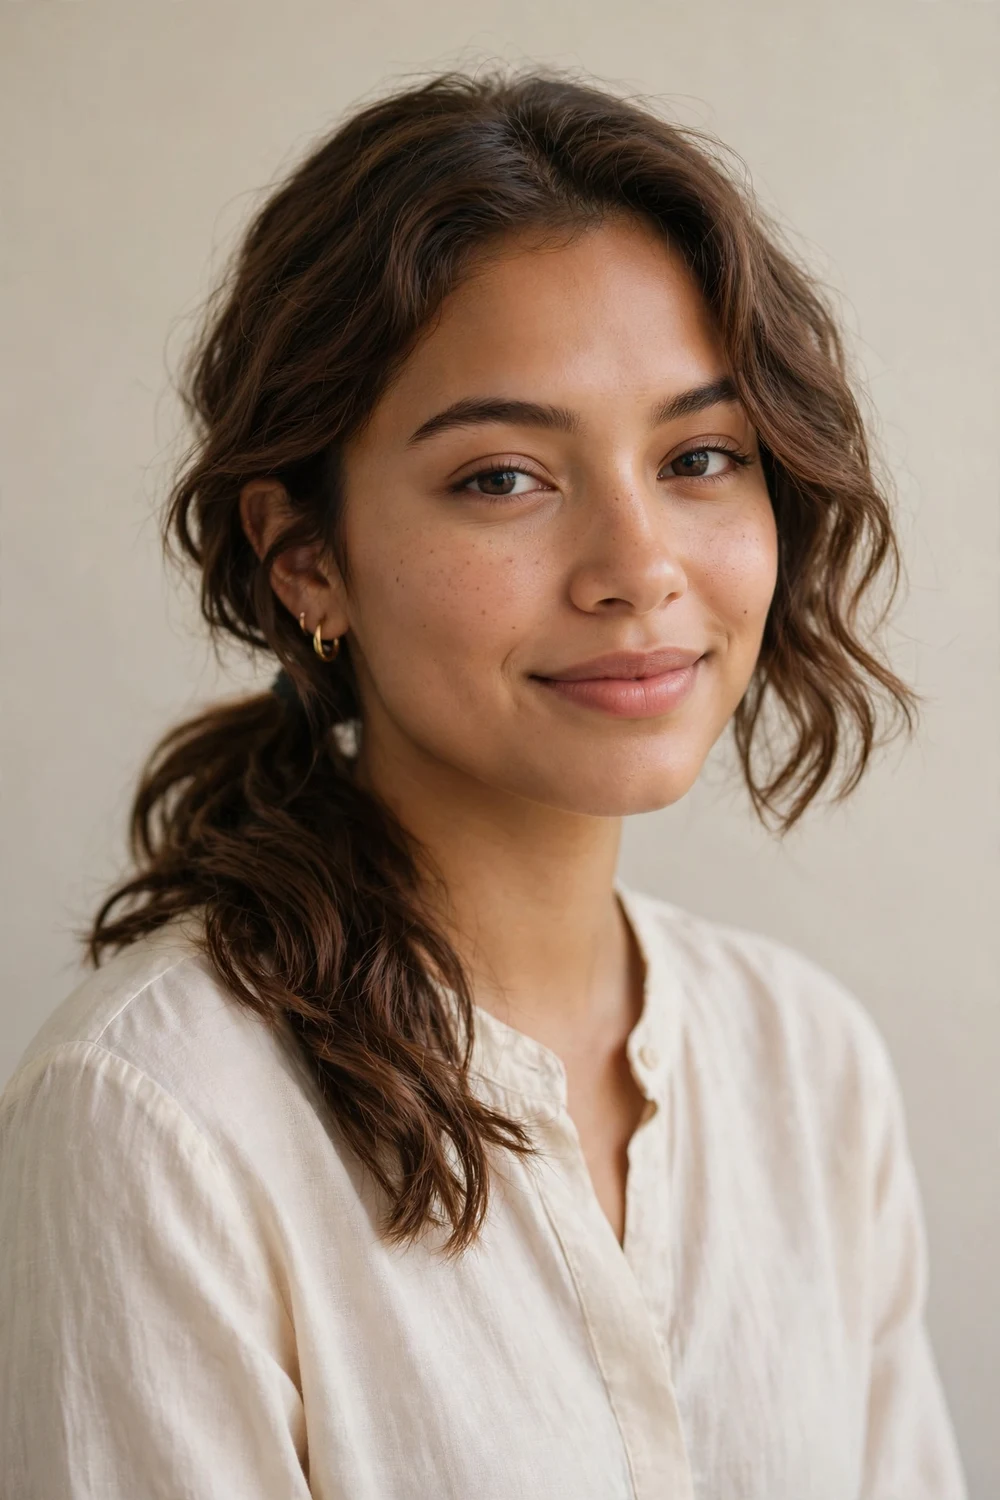
Gather your hair low behind one ear and secure it with an elastic. The low side ponytail drapes over one shoulder and looks softer than a centered ponytail. It works on lobs and longer bobs, and loose waves make it look fuller.
Keep the elastic loose enough to slide a finger underneath. A tight side ponytail pulls uncomfortably by midday and flattens the crown. Pull out a few strands around your face after securing to keep the look relaxed rather than severe.
Try this: tease the crown with three quick backcombing strokes before gathering. The lift balances the sideways weight.
Difficulty: Easy · Cost: $0
Quick Comparison
| Style | Time needed | Tools | Best for |
|---|---|---|---|
| Clean Side Part | 1 minute | Comb | Straight bobs; rushed mornings |
| Tucked Behind One Ear | Under 1 minute | Optional bobby pin | Lobs; showing earrings |
| Low Sleek Ponytail | 3 minutes | Elastic, brush | Chin-length and longer |
| Air-Dried Natural Texture | 0 minutes hands-on | Leave-in conditioner | Wavy and curly hair |
| Simple Headband | Under 1 minute | Headband | Unwashed roots; pixies |
| Half-Up Twist | 3 minutes | 2 bobby pins | Bobs and lobs |
| Mini Top Knot | 2 minutes | Elastic, 1 pin | Curly and coily textures |
| Claw Clip Twist | 1 minute | Claw clip | Busy days; all textures |
| Slicked-Back Style | 2 minutes | Gel, comb | Pixies; wash-day stretch |
| Two Thin Front Braids | 4 minutes | 2 mini elastics | Keeping layers off face |
| Low Loose Bun | 4 minutes | 3–4 bobby pins | Workdays; lobs |
| Barrette Half-Up | Under 1 minute | Barrette | Fine or silky hair |
| Deep Side Sweep | 2 minutes | Optional pin | Round and square faces |
| Finger-Styled Waves | 3 minutes | Mousse | Bobs and lobs; no heat |
| Silk Scarf Tie | 1 minute | Scarf | Regrowth cover; pixies |
| Pinned-Back Front Sections | 2 minutes | 4 bobby pins | Every face shape |
| Flat-Iron Sleek Bob | 10 minutes | Flat iron, heat protectant | Multi-day sleek finish |
| Tousled Texture | 2 minutes | Texturizing spray | Fine hair; crops |
| Pinned Side-Swept Bangs | 1 minute | Clip or pins | Growing-out bangs |
| Low Side Ponytail | 3 minutes | Elastic | Lobs; softer look |
How to Keep It Simple
Simple styling fails for predictable reasons. Avoid these and every style on this list gets easier.
Do not start with freshly washed, slippery hair. Clean hair refuses to hold pins and twists. If you washed this morning, add dry shampoo at the roots before you style. The grit gives every pin something to grip.
Do not use more product than the idea calls for. A pea-sized amount of gel or cream is enough for short hair. Extra product weighs hair down and makes simple styles look heavy instead of clean.
Do not keep ten tools on the counter. Pick the three you reach for most and store the rest. Decision fatigue is the real reason simple styles feel hard. A claw clip, five pins, and one elastic cover nineteen of the twenty ideas here.
Do not fight your hair’s natural direction. Styles that work with your growth patterns take seconds. Styles that fight them take twenty minutes and fall apart anyway. When in doubt, part where your hair wants to part.
Frequently Asked Questions
How long do simple hairstyles for short hair take?
Most take between one and five minutes. The fastest options, like a side part, a headband, or tucking hair behind one ear, take under a minute. The slowest here is the flat-iron sleek bob at about ten minutes, but that one lasts two to three days.
What products do I need for simple short hairstyles?
A minimal kit covers everything: bobby pins, one or two elastics, dry shampoo, and a light-hold hairspray. Add texturizing spray if you like tousled looks and gel if you like slicked looks. That is the complete list. Nothing else on this page needs a special purchase.
Can I do simple hairstyles on a very short pixie?
Yes. The headband, silk scarf tie, slicked-back style, pinned-back front sections, and tousled texture all work on pixies. The ponytail and bun ideas need at least chin-length hair, so skip those until your cut grows out.
How do I make simple styles last all day?
Start with second-day hair or add dry shampoo for grip. Cross bobby pins in X patterns instead of sliding in single pins. Finish with a light mist of hairspray from ten inches away. Keep two spare pins in your bag for midday fixes, which take seconds.
Do simple hairstyles work for thin or fine short hair?
They work especially well. Fine hair needs less pinning because there is less weight pulling styles down. The tousled texture and finger-styled waves add visible fullness, and a deep side part creates instant lift at the crown. Avoid heavy creams and oils, which flatten fine hair fast.
Final Thoughts
Simple styling is a habit, not a talent. Pick three ideas from this list that suit your length and keep their tools where you can reach them. Within a week, your morning routine will run on autopilot.
Start with the one-minute styles. A clean side part or a claw clip twist is enough on most days. Save the ten-minute flat-iron session for the mornings when you want the extra polish. Simple hair, handled well, always looks intentional.
Over 60 with fine hair? These medium hairstyles for fine hair over 60 add fullness to mid-length cuts.

