


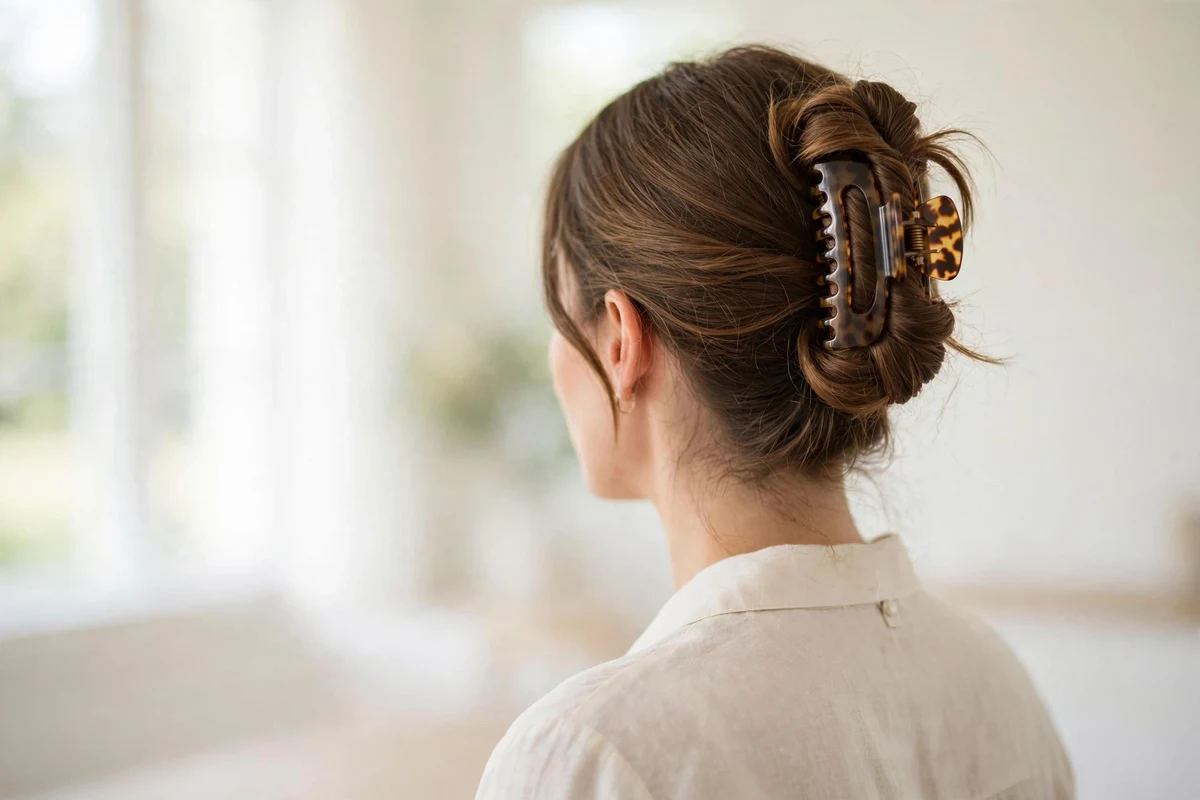
Claw clips earned their comeback. What started as a 90s staple is now the fastest way to get hair up and out of the way without elastics, pins, or heat. One clip, one twist, and you’re done in under a minute.
This guide covers 27 claw clip hairstyles for every hair length and texture. I’ve been reaching for claw clips on rushed mornings for years, and they still beat every other accessory for speed. You’ll find classic twists, half-up styles, braids, buns, and fixes for fine, thick, and curly hair.
Quick answer: The classic twist-and-clip works on almost everyone: gather your hair, twist it upward, and clamp a claw clip over the twist. Match clip size to your hair (small for fine or short, large for thick or long) and add texture spray if your hair is slippery.
Quick Takeaways
- Most claw clip hairstyles take 30 to 90 seconds once you know the twist.
- Clip size matters more than technique: a clip that’s too small is the top reason styles slip.
- Second-day hair or a little texture spray gives the clip something to grip.
- Claw clips distribute pressure evenly, so they cause less breakage than tight elastics.
- Half-up styles are the easiest entry point if you’re new to claw clips.
Why Claw Clips Work So Well
A claw clip holds hair with interlocking teeth instead of tension. That means no ponytail dent, no pulled hairline, and no headache by 3 p.m. The teeth grab sections of hair and lock against each other, so the hold comes from the clip’s structure rather than from pulling tight.
They also double as an accessory. Matte, tortoiseshell, metal, and patterned clips change the whole feel of a style. Keep a small, a medium, and a large clip in your bag and you can handle short layers, thick lengths, and everything between.
Picking the Right Clip Size
Small clips (around 2 to 3 inches) suit fine hair, short hair, and half-up styles. Medium clips (3 to 4 inches) handle medium-length hair and most everyday updos. Large clips (4 inches and up) are built for thick or long hair worn fully up.
When in doubt, size up. A large clip on medium hair still holds; a small clip on thick hair will pop open within the hour. Wide-toothed clips grip better and leave fewer marks than fine-toothed ones.
1. The Classic Twist-and-Clip
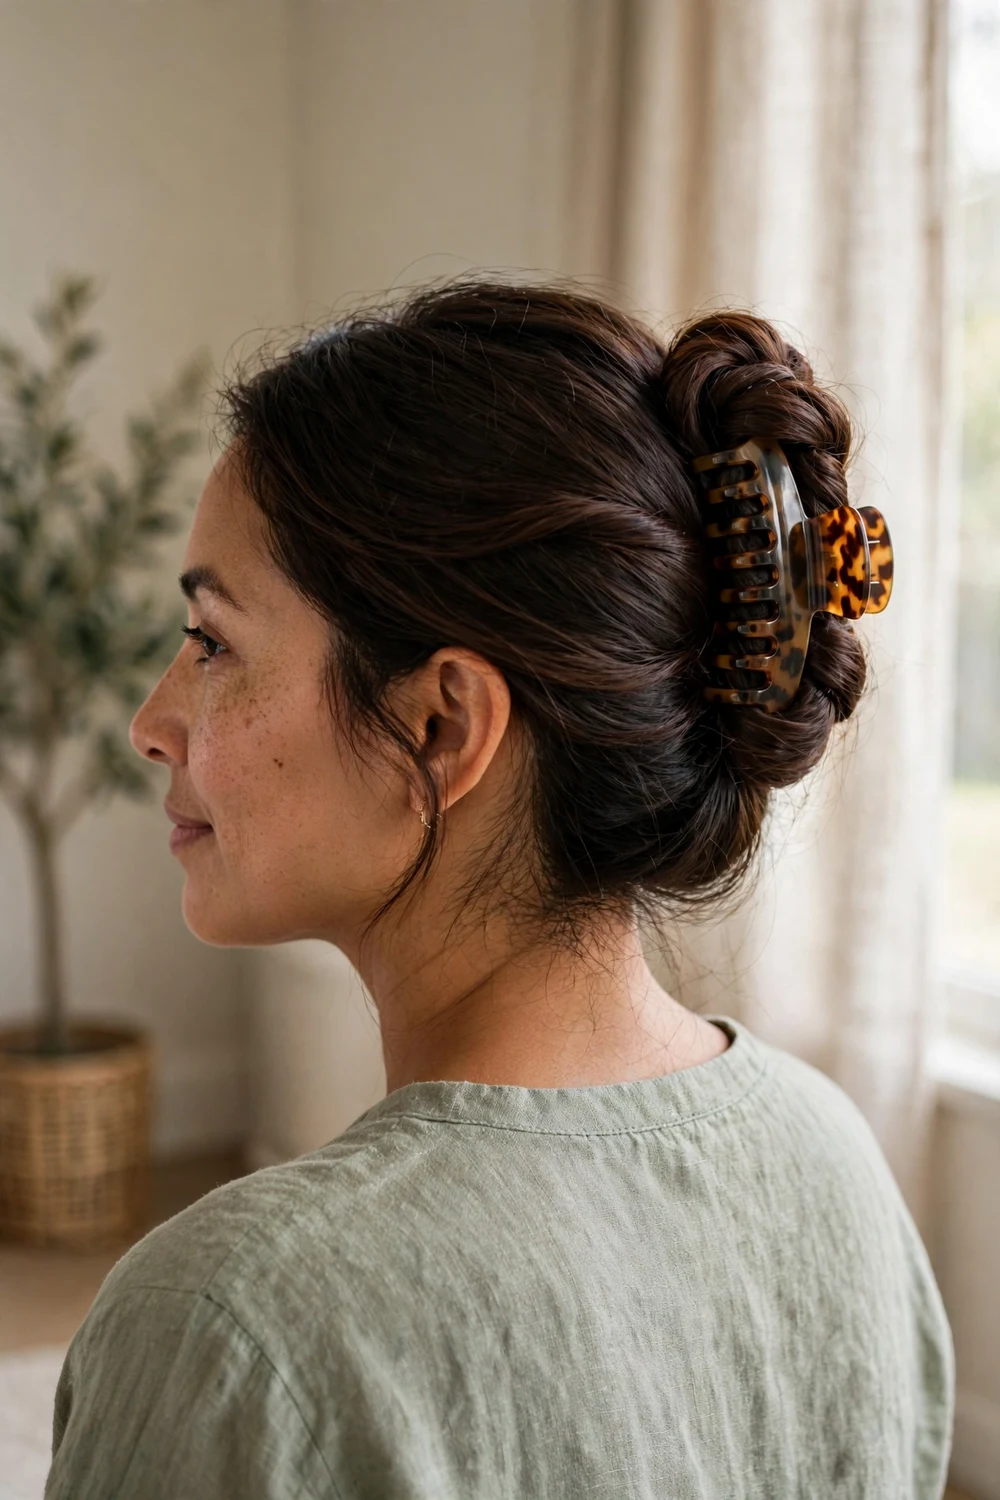
Gather all your hair as if making a low ponytail. Twist the length upward against the back of your head, then fold the ends down over the twist. Open a large claw clip and clamp it vertically over the whole twist so the teeth bite through both layers. This is the style that made claw clips famous, and it still works because the twist creates its own anchor. Leave the ends tucked for a clean finish or let them fan out for a softer look.
Try this: Twist away from your part rather than toward it. The twist sits flatter against the head and the clip grips more hair at the base.
2. French Twist
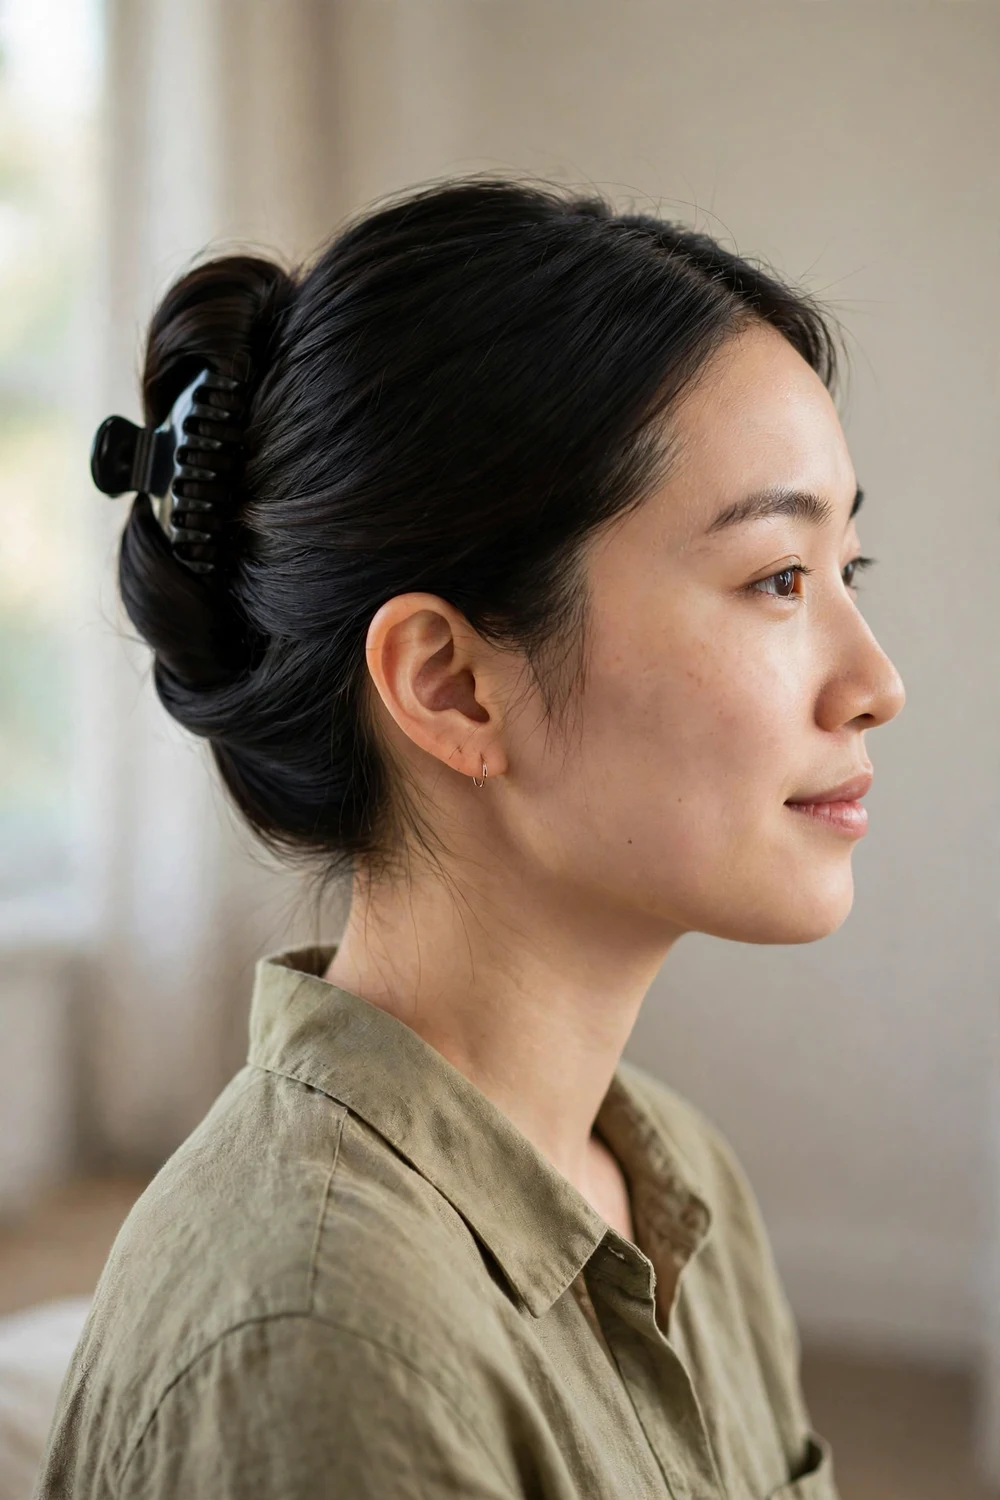
Sweep all your hair to one side and hold it at the nape. Roll the hair upward in a smooth vertical roll, tucking the ends inside as you go. Press a medium claw clip over the roll to lock it. A French twist with a claw clip reads polished enough for the office or dinner, and it takes about two minutes. Smooth the surface with a little serum before rolling if you want a sleek result.
Try this: Roll the twist tighter at the bottom and looser at the top. The shape holds longer and looks more even from the side.
3. French Braid with a Claw Clip
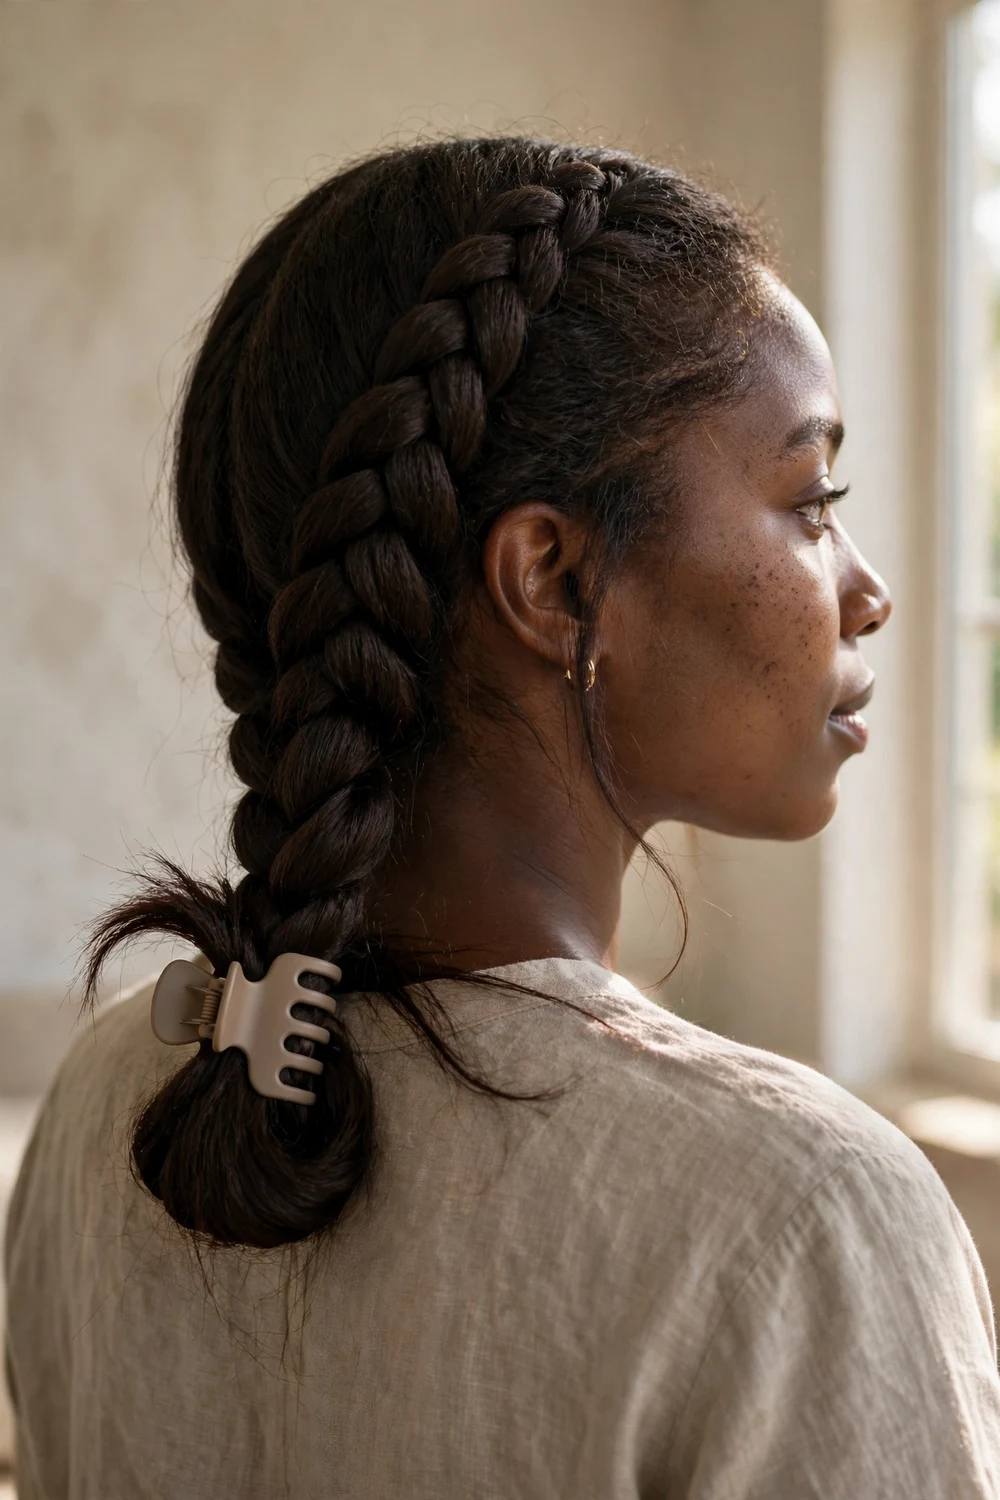
Braid your hair into a low French braid and secure the end with a small elastic. Fold the braid upward against the back of your head and clamp a claw clip over the folded section. The clip hides the elastic completely, so the braid looks like it ends in the clip. This keeps long braids off your back on warm days and stops the tail from swinging into your work.
Try this: Pancake the braid by gently pulling the edges wider before folding it up. The braid looks thicker and the clip has more to grab.
4. Classic Half-Up, Half-Down
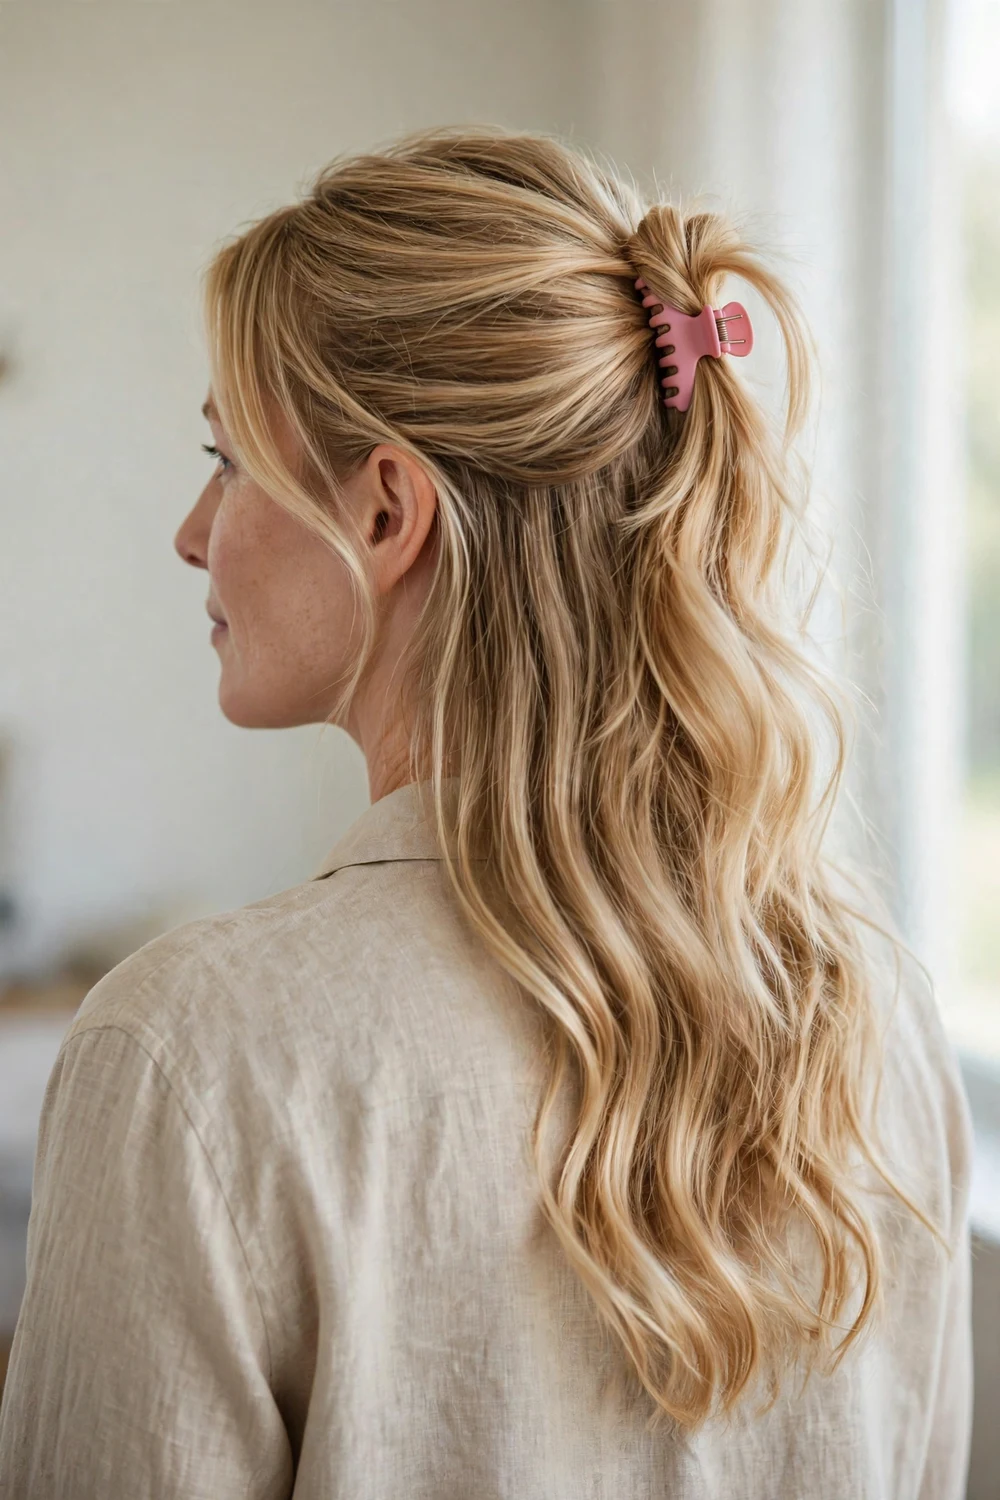
Section off the top half of your hair from temple to temple. Gather it at the crown and secure it with a small or medium claw clip, leaving the bottom half loose. This is the simplest claw clip style there is, and it suits every hair length past the chin. It keeps hair out of your face while showing off your length. Add a light mist of texture spray at the crown first if your hair is very smooth.
Try this: Tease the crown section lightly with a comb before clipping. You get lift that lasts all day instead of a flat top.
5. Half-Up Twist
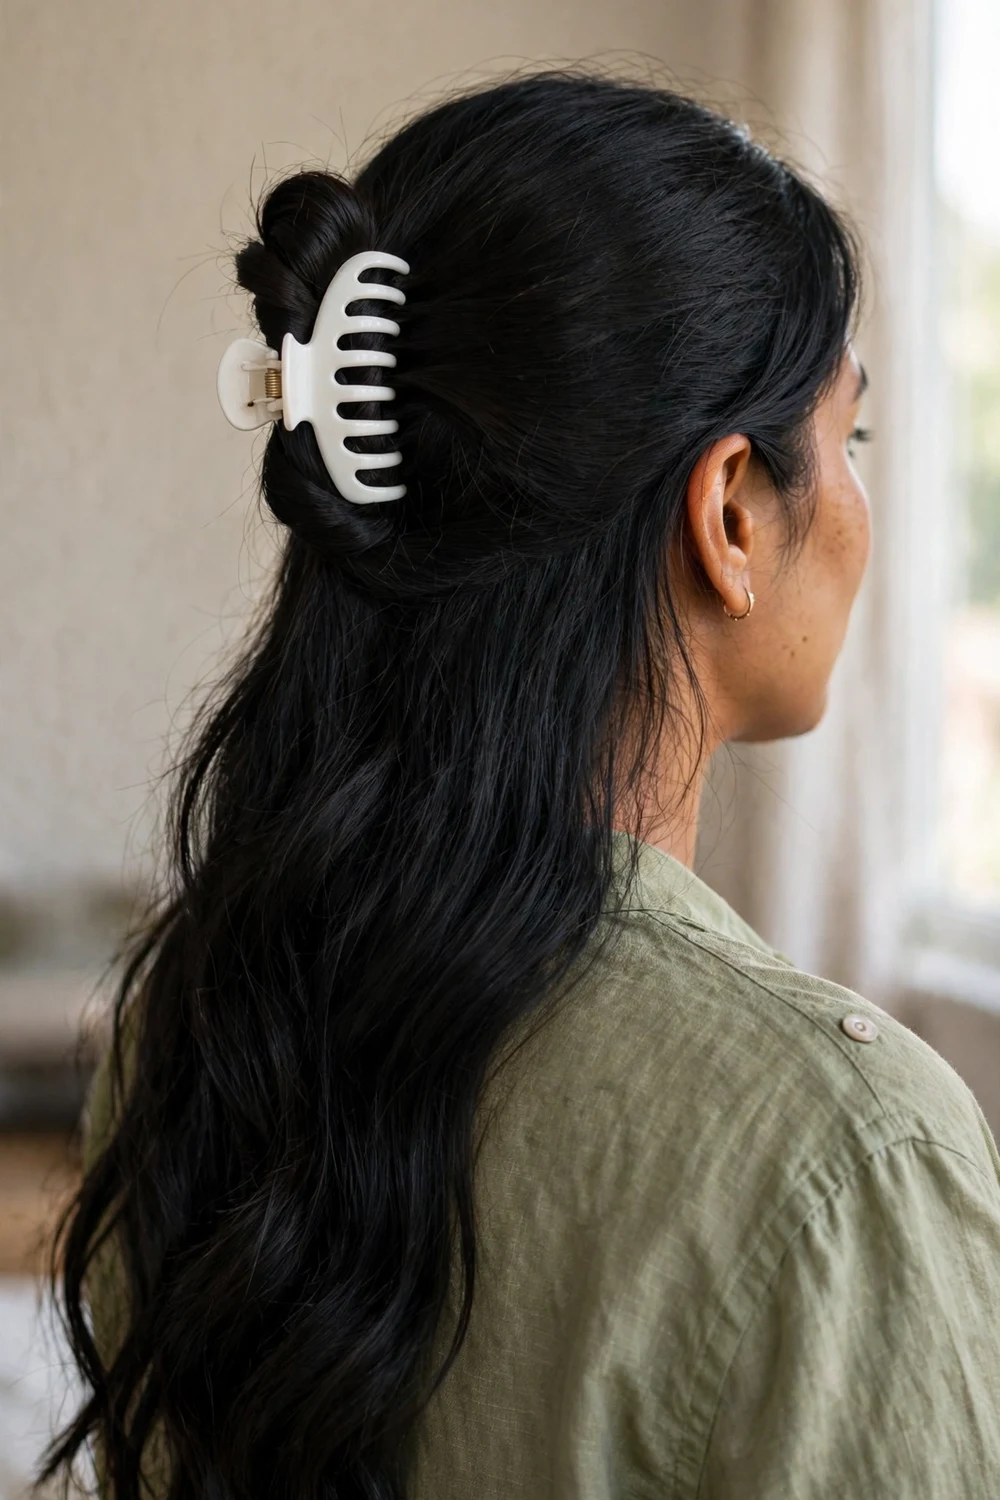
Take the top section of your hair and twist it once or twice before clipping. The twist adds structure that a plain gather lacks, so this version stays put through a full workday. Gather from ear to ear, twist the section toward the back, and clamp a medium clip over the twist. The twisted section catches light differently than the loose hair below, which gives the style more depth. A medium clip holds this shape best, since small clips can slip on the twisted section.
Try this: Twist the section loosely rather than tightly. A soft twist looks fuller and puts less strain on the clip.
A half-up twist with a claw clip is also one of the fastest picture day fixes since it opens the face for the camera; for more camera-ready versions of it, browse these cute hairstyles for picture day.
6. Fanned-Out Half-Up
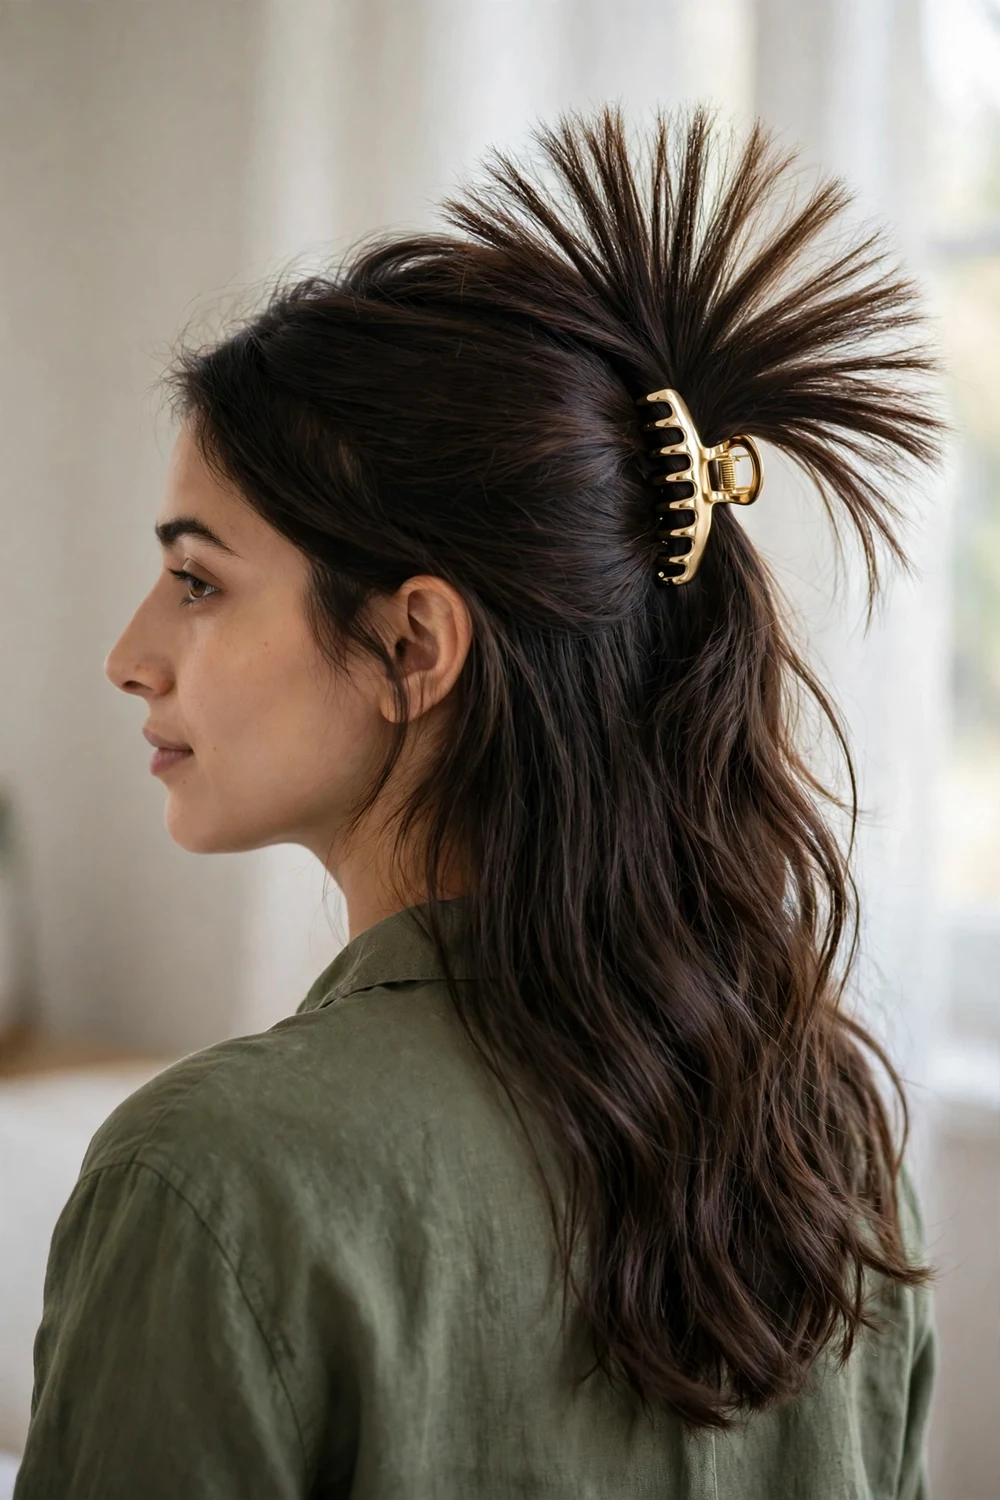
Gather the top section and clip it, then gently pull the clipped hair outward and upward to fan it over the clip. The fanning hides the clip partially and creates the illusion of more volume at the crown. This works especially well on medium-length hair that can look flat in a plain half-up. Use a small clip so it disappears under the fanned hair. Mist the fanned section with light-hold hairspray so the shape survives the day.
Try this: Fan the hair before the clip fully closes. Once the teeth lock, the shape is set and fanning gets harder.
7. Half-Up Bun
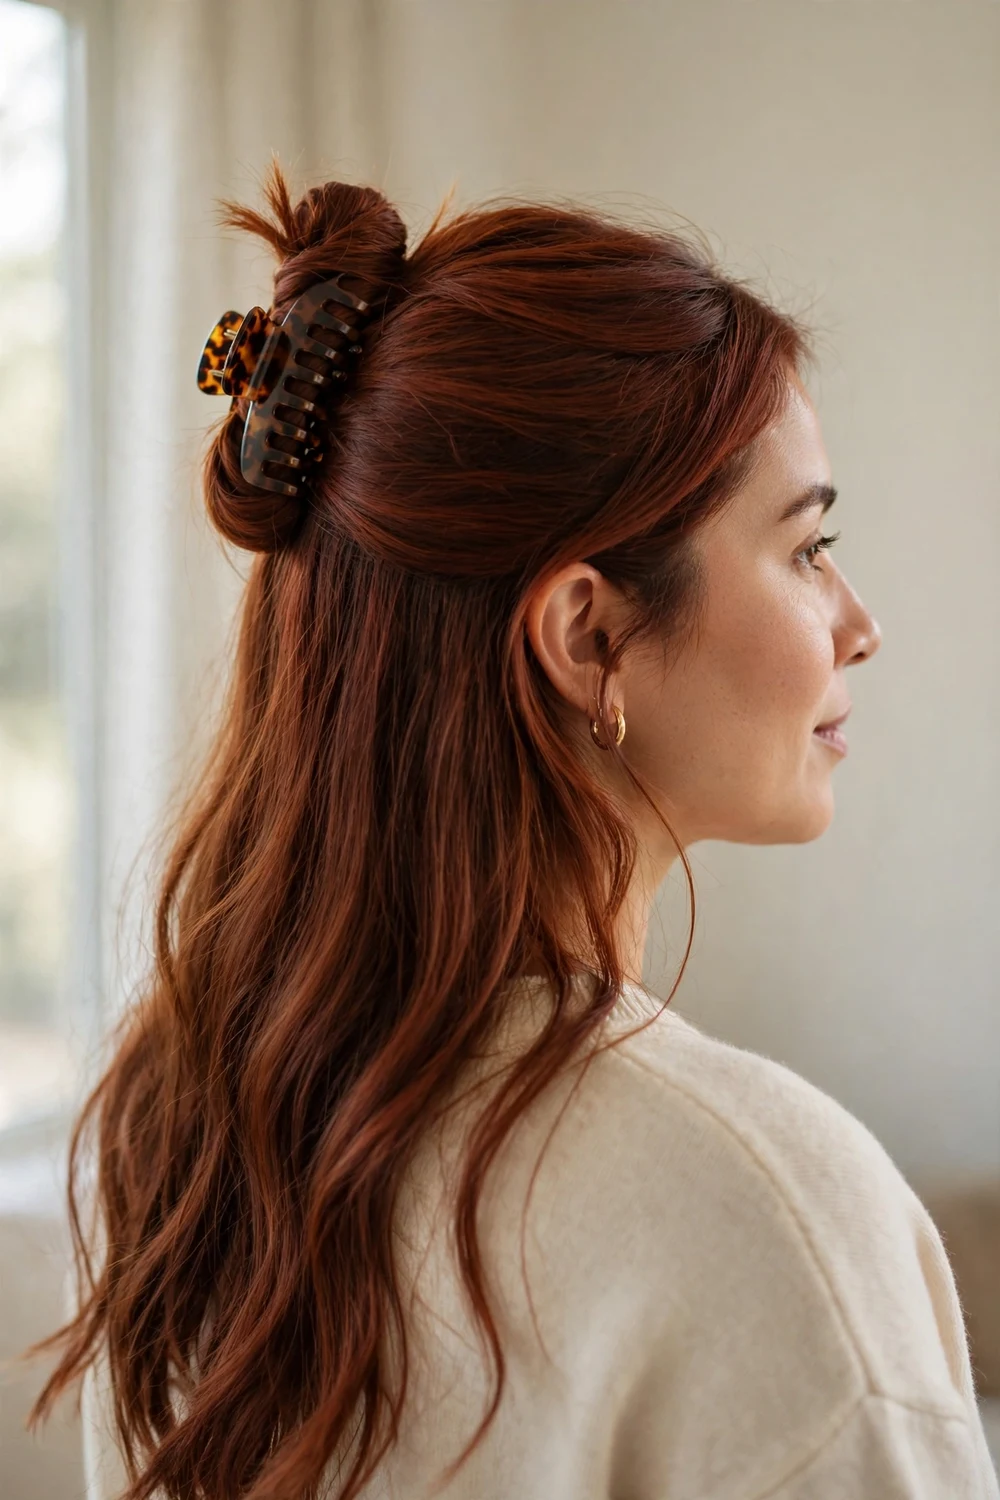
Gather the top half of your hair and coil it into a small bun at the crown. Instead of an elastic, clamp a medium claw clip over the base of the bun. The clip’s teeth hold the coil better than pins on most hair types. Leave the rest of your hair down. This gives you the trendy half-bun look with a sturdier hold, and the visible clip adds a deliberate accessory touch.
Try this: Wrap the coil loosely and let a few ends poke out before clipping. The undone finish looks intentional rather than messy.
8. Half-Up Ponytail
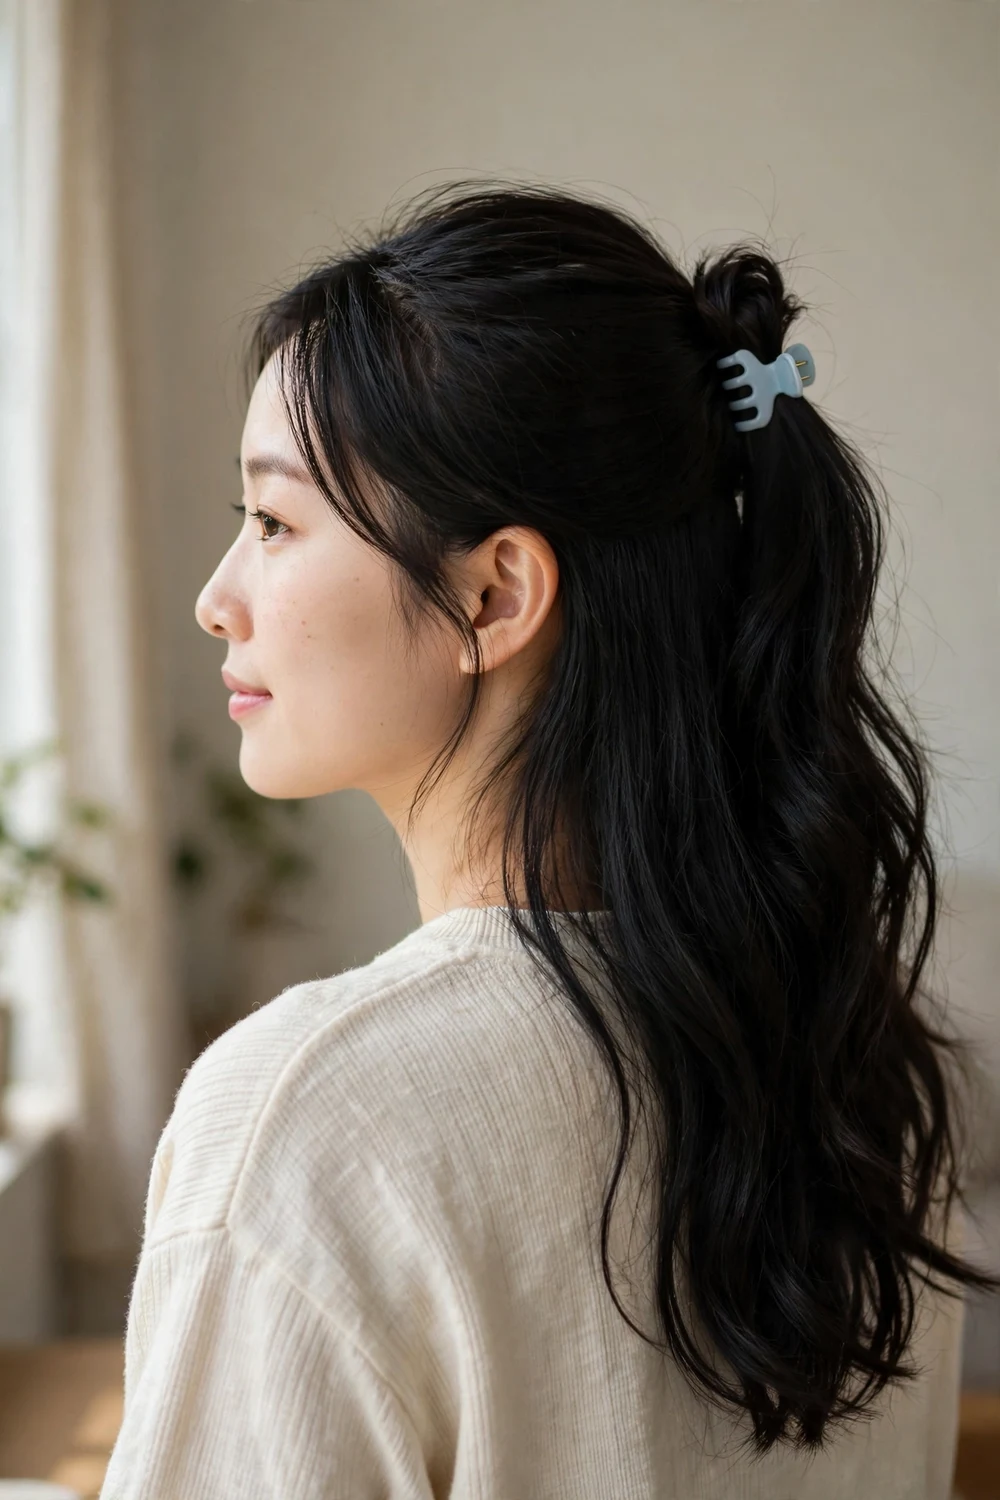
Pull the top section into a half ponytail and hold it with one hand. Open a small claw clip and clamp it right at the base where an elastic would sit. The clip replaces the elastic entirely. This is a good option if elastics crease your hair or give you headaches, and it takes about twenty seconds. It works on straight, wavy, and curly textures alike. Pick a clip with a strong spring so the gathered section doesn’t loosen by afternoon.
If you like your curls clipped up this way, the curled hairstyles guide includes a half-up claw clip look plus 29 more curl styles.
Try this: Position the clip horizontally across the base. A horizontal clamp grips the gathered hair more evenly than a vertical one here.
9. Side-Swept Half-Up
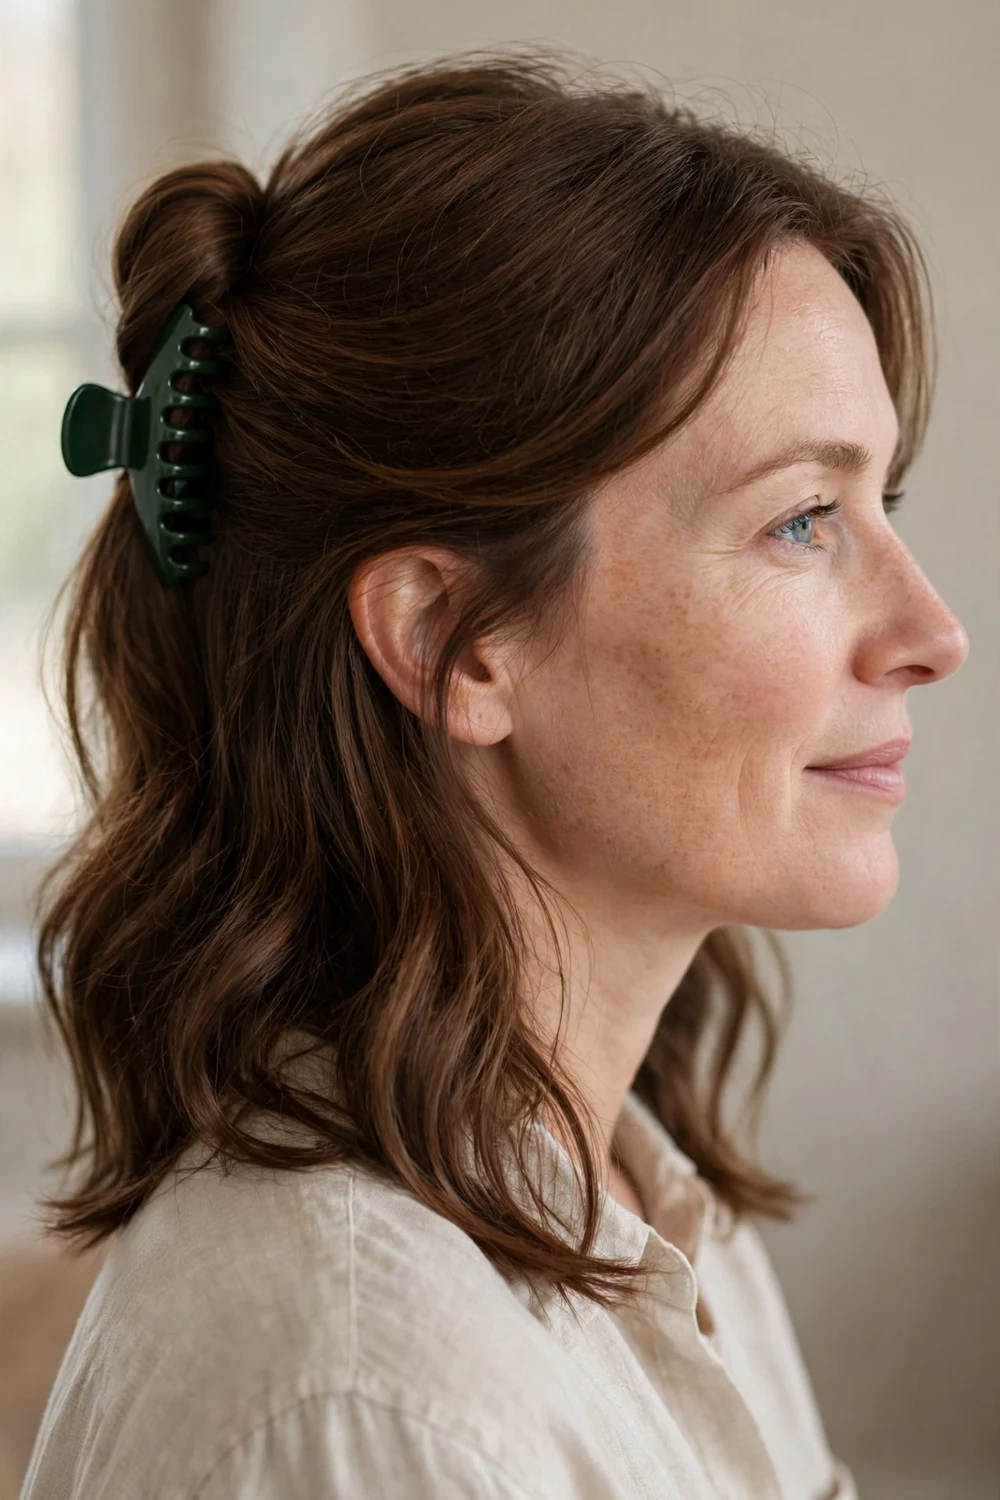
Sweep the front section of your hair across from one side and secure it on the opposite side with a small claw clip. The diagonal line this creates flatters most face shapes and adds interest to an otherwise simple style. Leave the rest of your hair loose. This is a quick fix for growing-out bangs or a heavy fringe on days you want it off your forehead. A decorative small clip works nicely here since the placement puts it on display.
Try this: Sweep from the deeper side of your part. The extra hair on that side gives the clip more to hold.
10. Sleek Low Bun
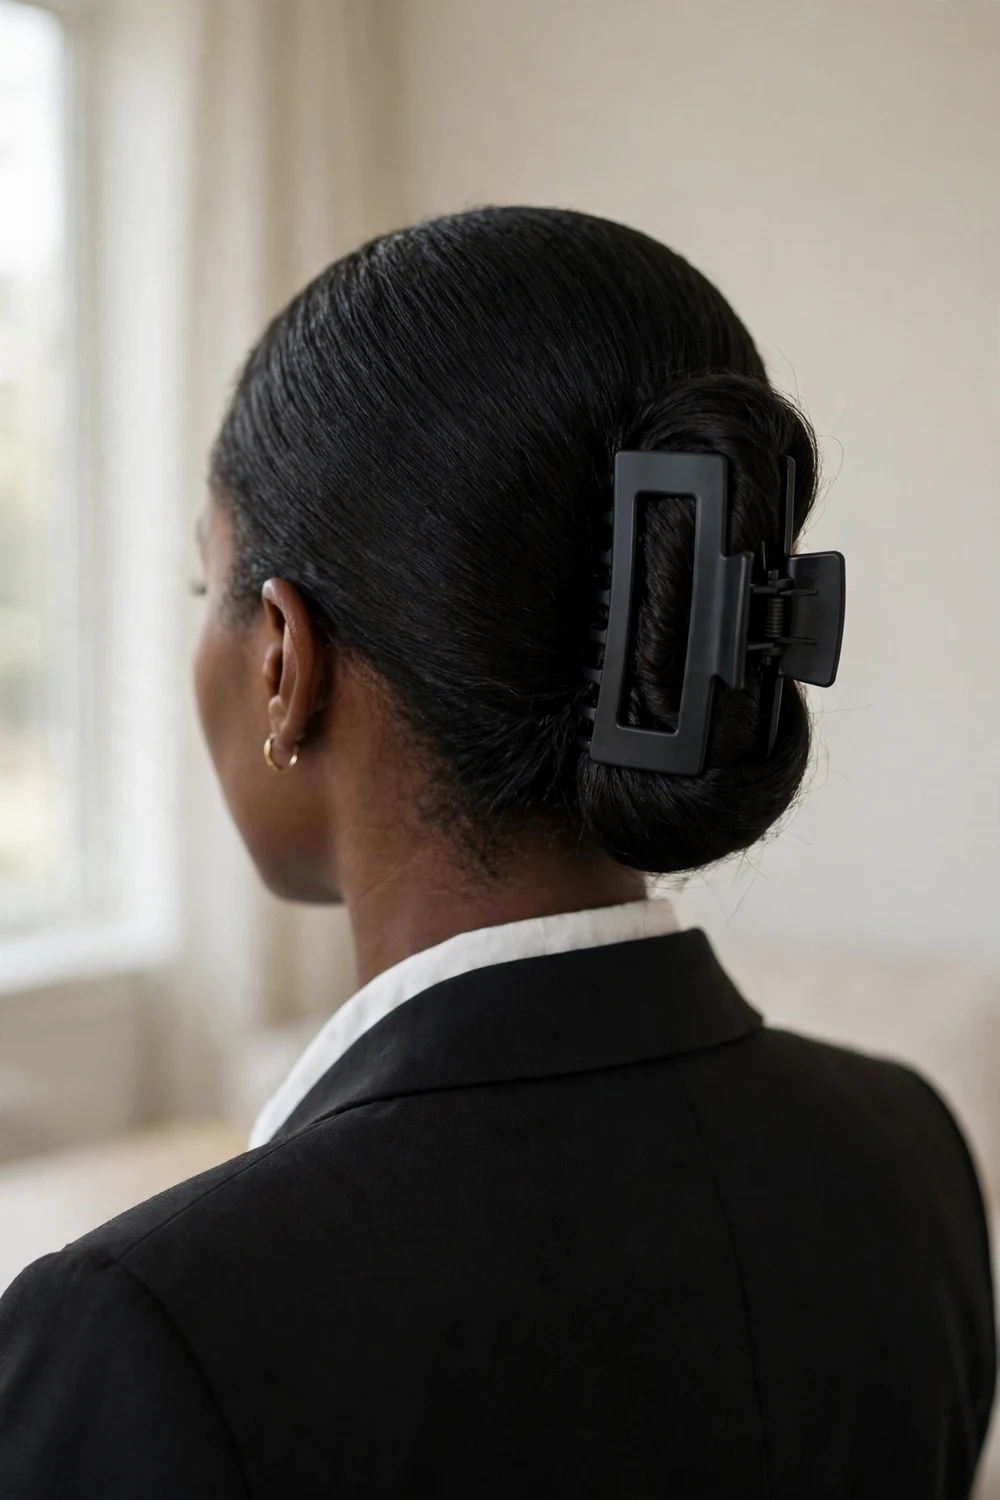
Brush your hair smooth and gather it into a low bun at the nape. Coil the ends neatly and clamp a large clip over the coil. Run a shine serum over the surface first for a glassy finish. The result looks office-polished but took three minutes. A rectangular clip sits flatter against a low bun than a round one, so the back of your head looks neat from every angle.
Try this: Coil the bun, then push the clip’s teeth through the coil and into the hair beneath it. Biting both layers is what keeps it from sliding.
11. Messy Bun
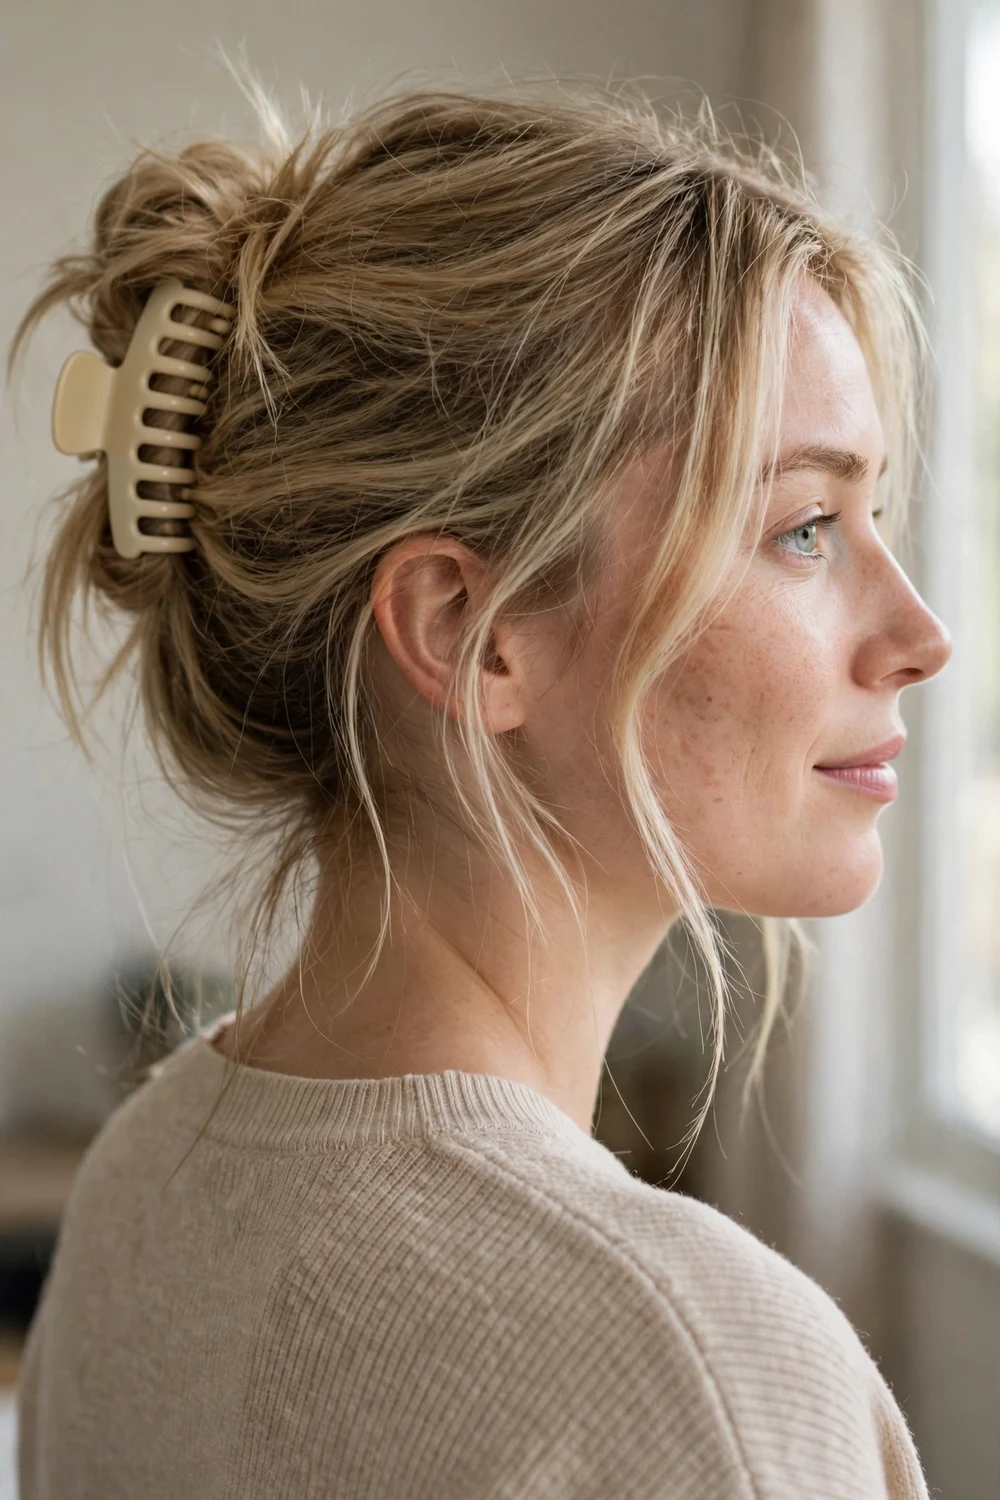
Pile your hair into a loose bun wherever it lands and clamp a medium claw clip over it. Pull a few pieces free around your face and at the nape. The messier the better, since the goal is an effortless weekend look. This is the style to reach for on errand days or when your hair needs washing but your schedule doesn’t allow it. Let the bun sit slightly off-center for a more relaxed, natural finish.
Try this: Build the bun on slightly dirty or dry-shampooed hair. The extra grit keeps the clip from sliding down as the day goes on.
12. Messy Top Knot
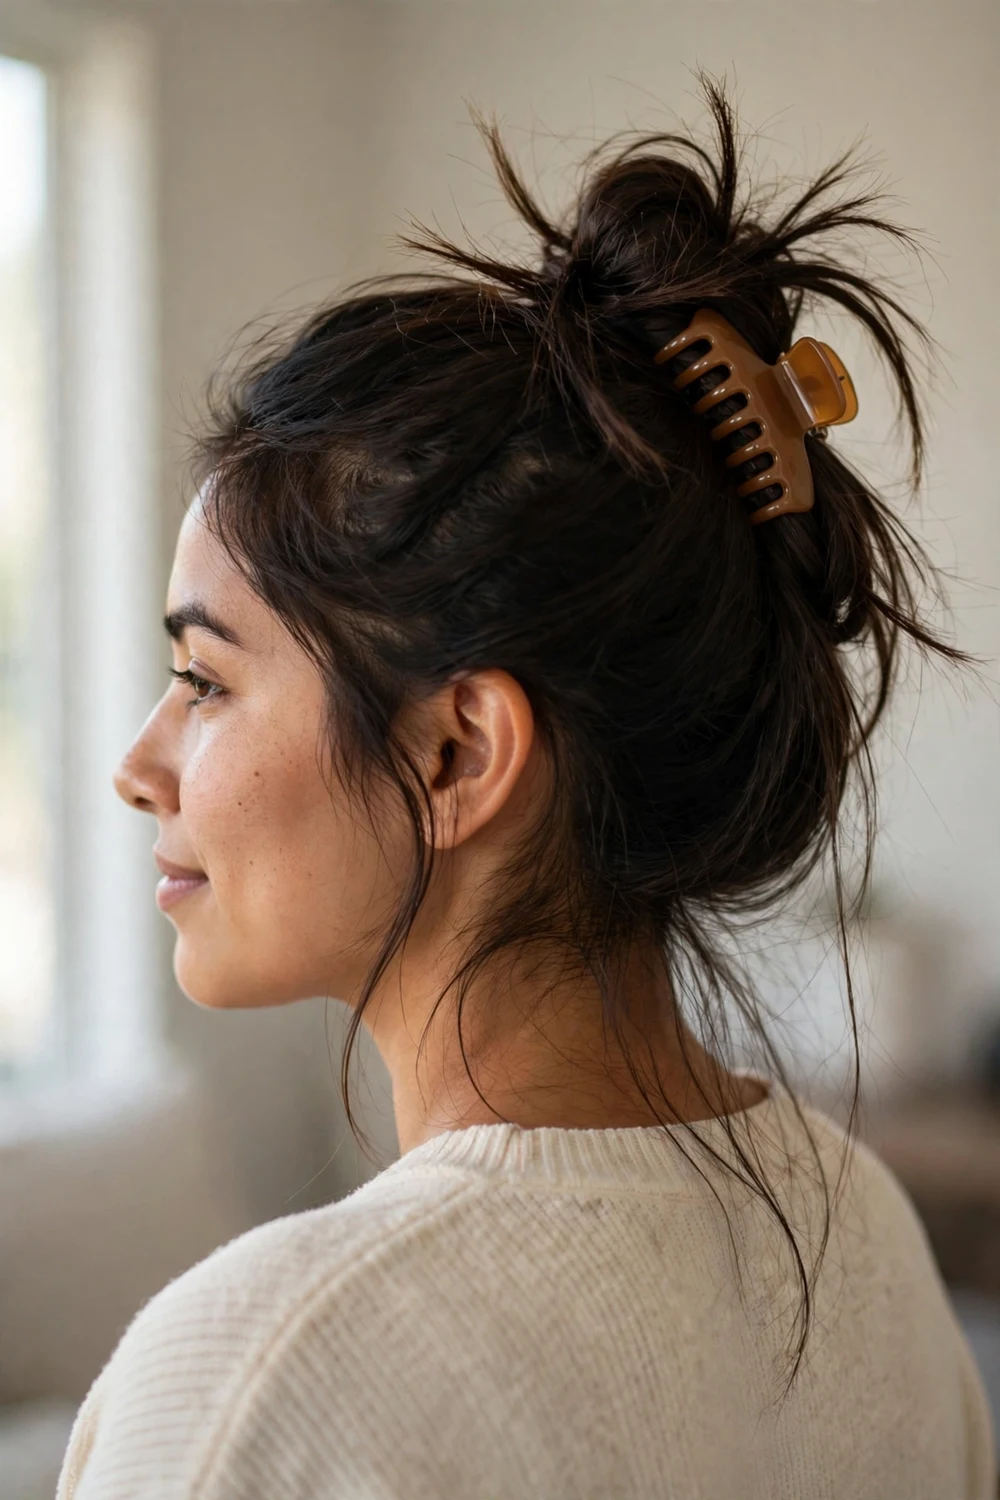
Gather your hair high at the crown and twist it into a loose knot. Clamp a medium or large claw clip at the base of the knot, letting the ends stick out in different directions. Pull out face-framing pieces for softness. A top knot sits higher than a bun and shows off earrings and necklines, which makes it a good pick for evenings out. Secure any wobbly spots with two bobby pins crossed in an X before you leave.
Try this: Flip your head upside down to gather the hair. You get more volume at the crown with zero teasing.
13. Low Claw Clip Ponytail
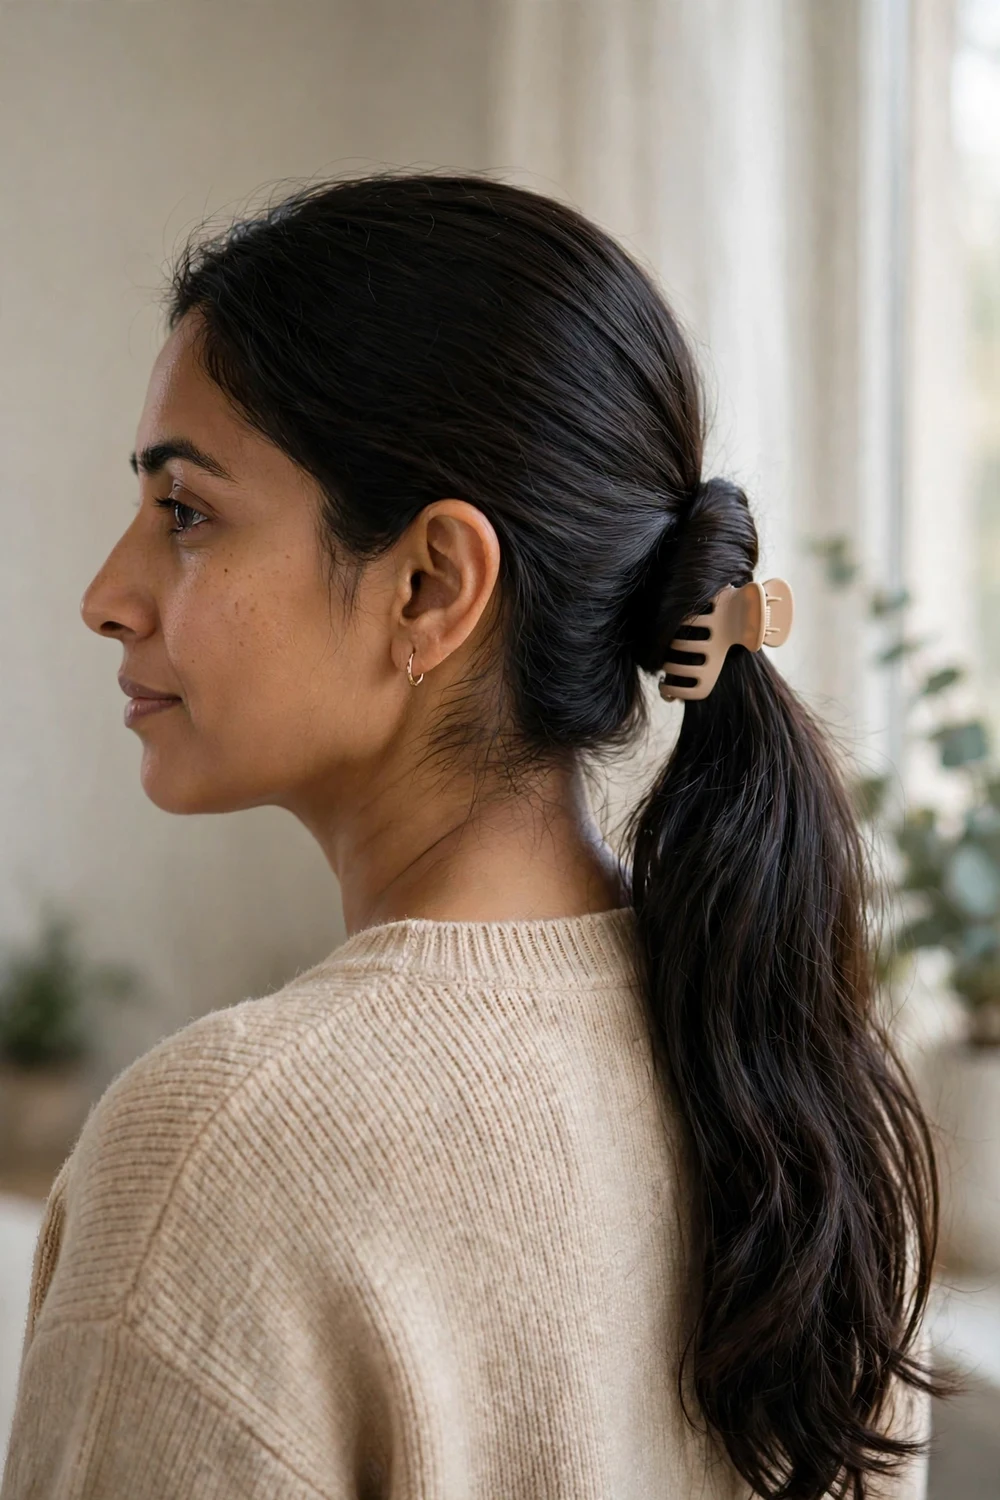
Gather your hair into a low ponytail at the nape. Wrap a thin strand of hair around the base to hide where the hair gathers, then clamp a small claw clip over the wrapped base. The clip does the job of an elastic while looking like jewelry. This works for workdays when you want a ponytail without the dent an elastic leaves behind. Smooth the wrapped strand with a dab of serum so it lies flat against the base.
Try this: Use a clip that matches your hair color for a seamless look, or a contrasting one when you want the accessory to show.
14. Thick Hair Twist-and-Clip
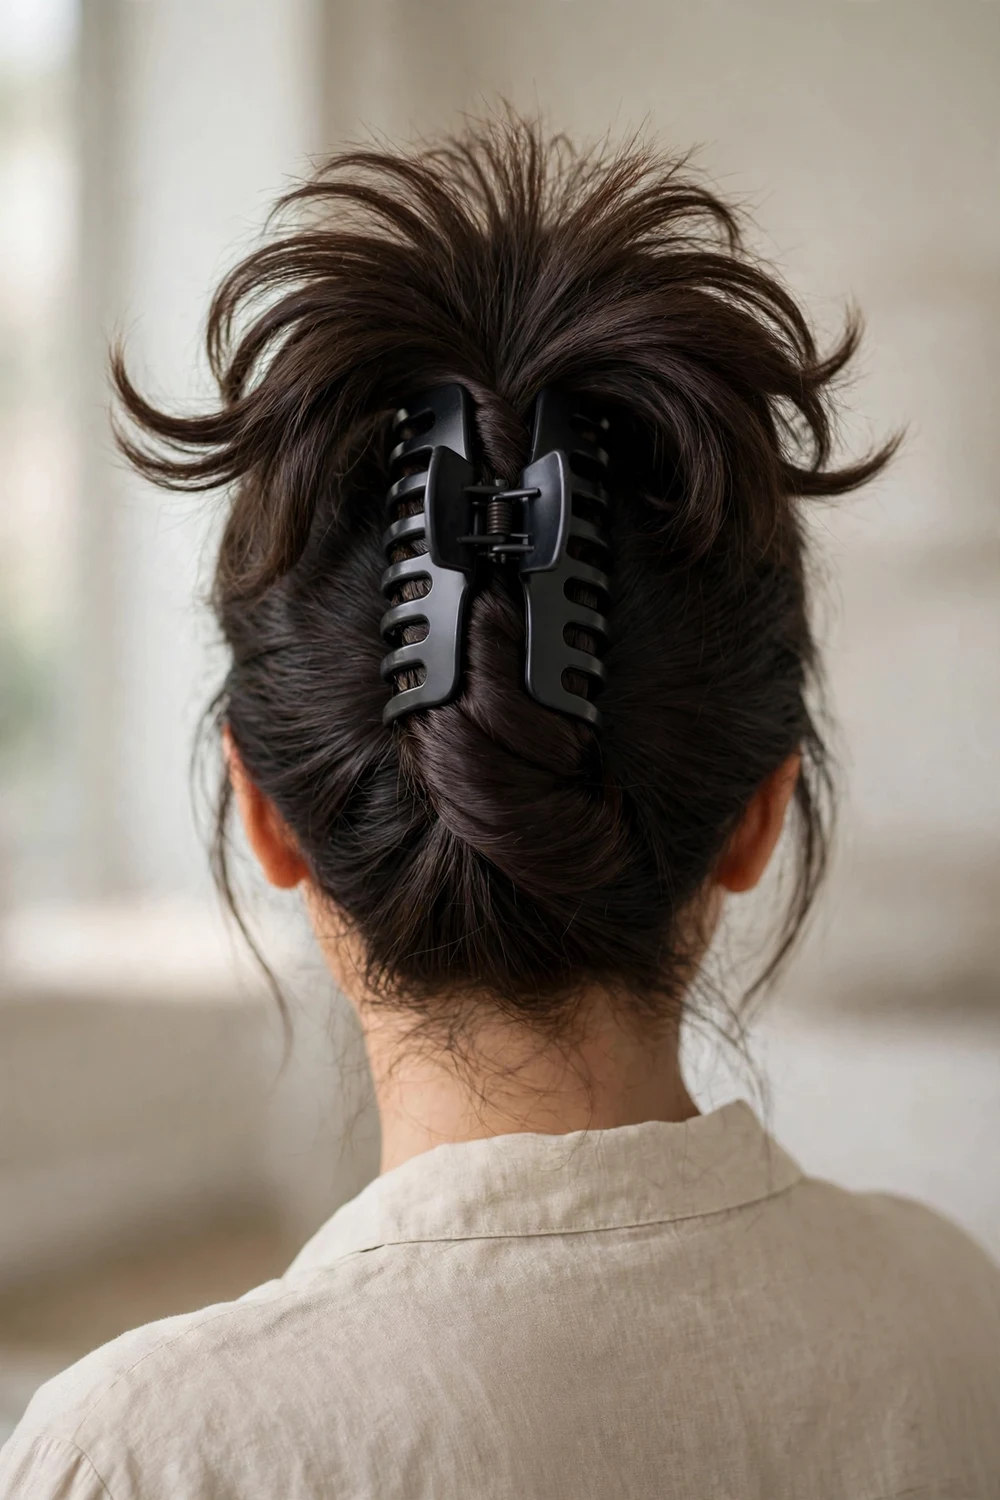
Thick hair needs a bigger clip and a two-step approach. First tie your hair into a low ponytail with an elastic so the weight is controlled. Then twist the ponytail up and clamp an extra-large claw clip over the twist. The elastic underneath stops the heavy twist from unraveling, and the clip does the visible work. Look for clips labeled XL or jumbo, at least 4.5 inches long. Test the clip’s spring in the store, since weak hinges won’t survive heavy hair.
Try this: Twist the ponytail in two sections instead of one. Each section is easier to control and the clip closes over both without straining.
15. Fine Hair Loop-and-Clip
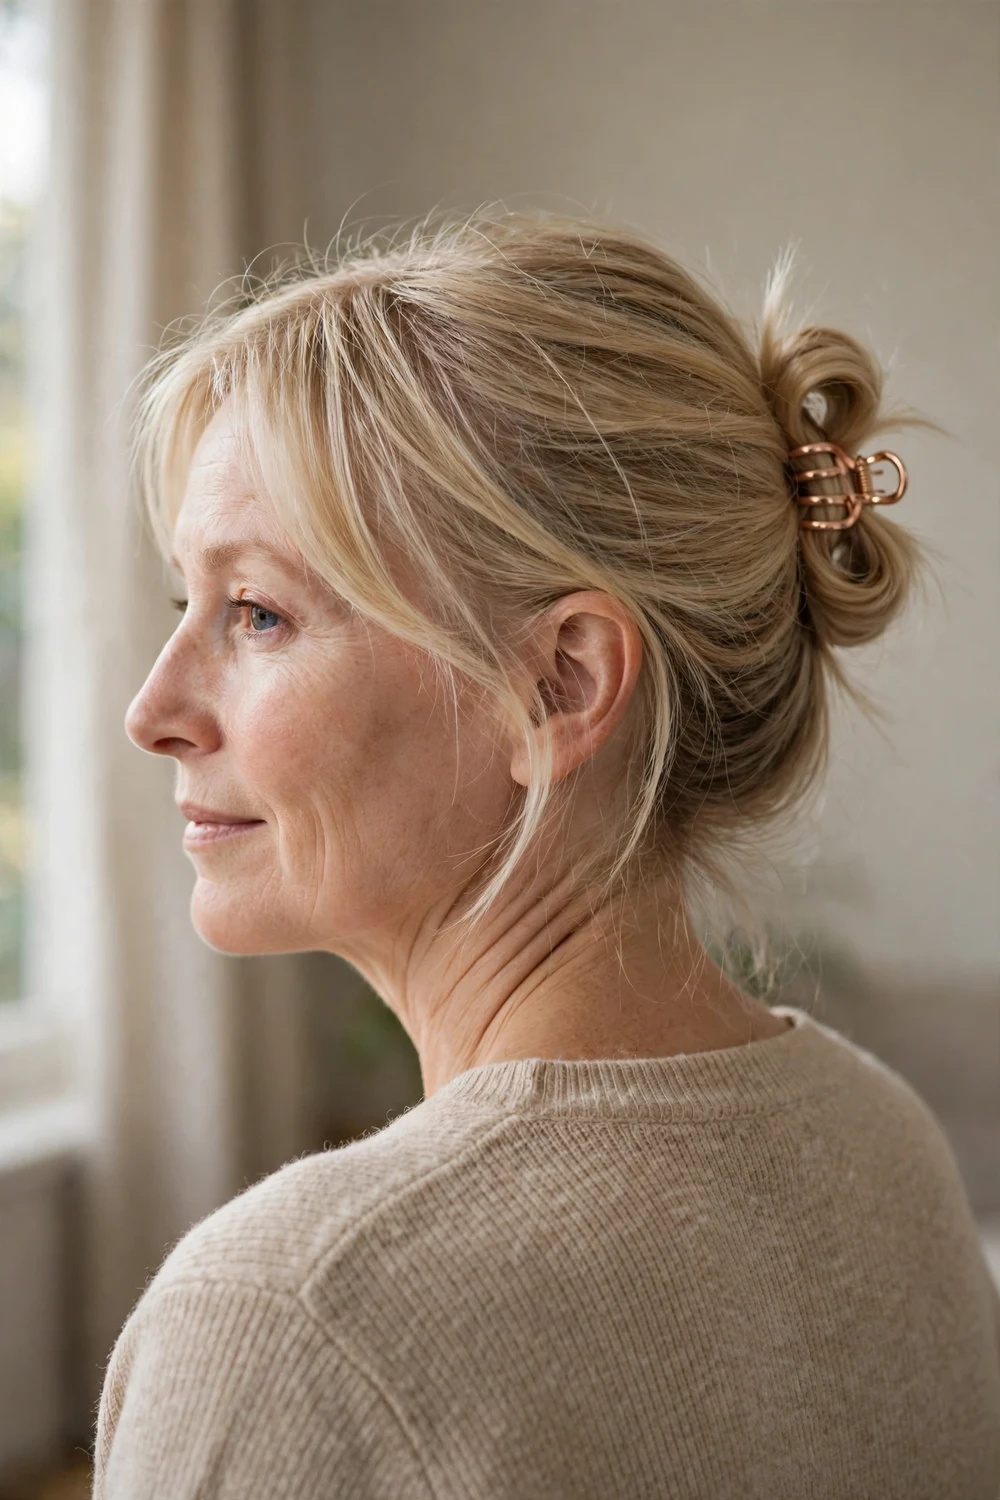
Fine hair slips out of big clips, so scale everything down. Gather your hair and wrap it around your index finger to form a small loop, then twist the loop once and clamp a small claw clip through it. The loop gives the clip’s teeth something compact to bite. A light mist of texture spray before you start makes a noticeable difference in how long this lasts. Avoid conditioner at the roots on styling day, since slick roots make clips slide.
Try this: Clip through the loop and the hair underneath it in one motion. Catching both layers doubles the hold on fine hair.
16. Curly Hair Twist
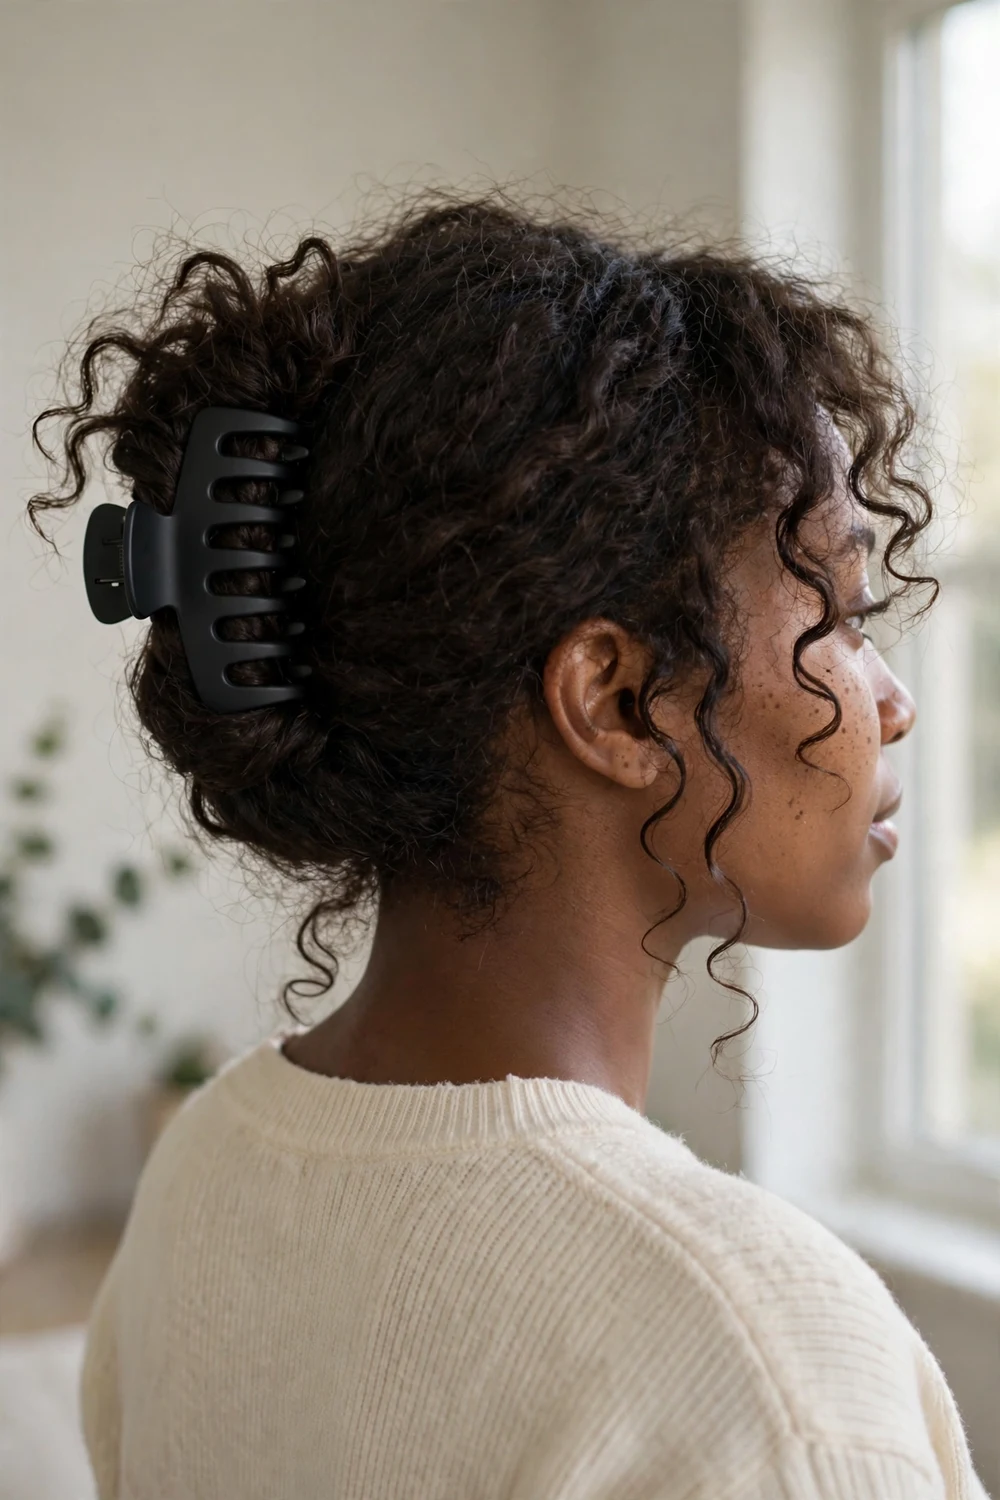
Leave a few curl tendrils free at the front, then loosely twist the rest of your hair at the back and fasten it with a large claw clip. Don’t pull the twist tight. Curly hair has natural volume that fills the clip, so a relaxed twist holds well and keeps the curl pattern intact. Finish with a little edge control gel at the hairline if you want a sleeker front. For more ways to wear your texture, curly hairstyles covers 30 styles built for natural curls.
Try this: Choose a clip with wide-set teeth. Narrow teeth snag curls, while wide teeth slide between them without disrupting the pattern.
17. Mohawk Braid
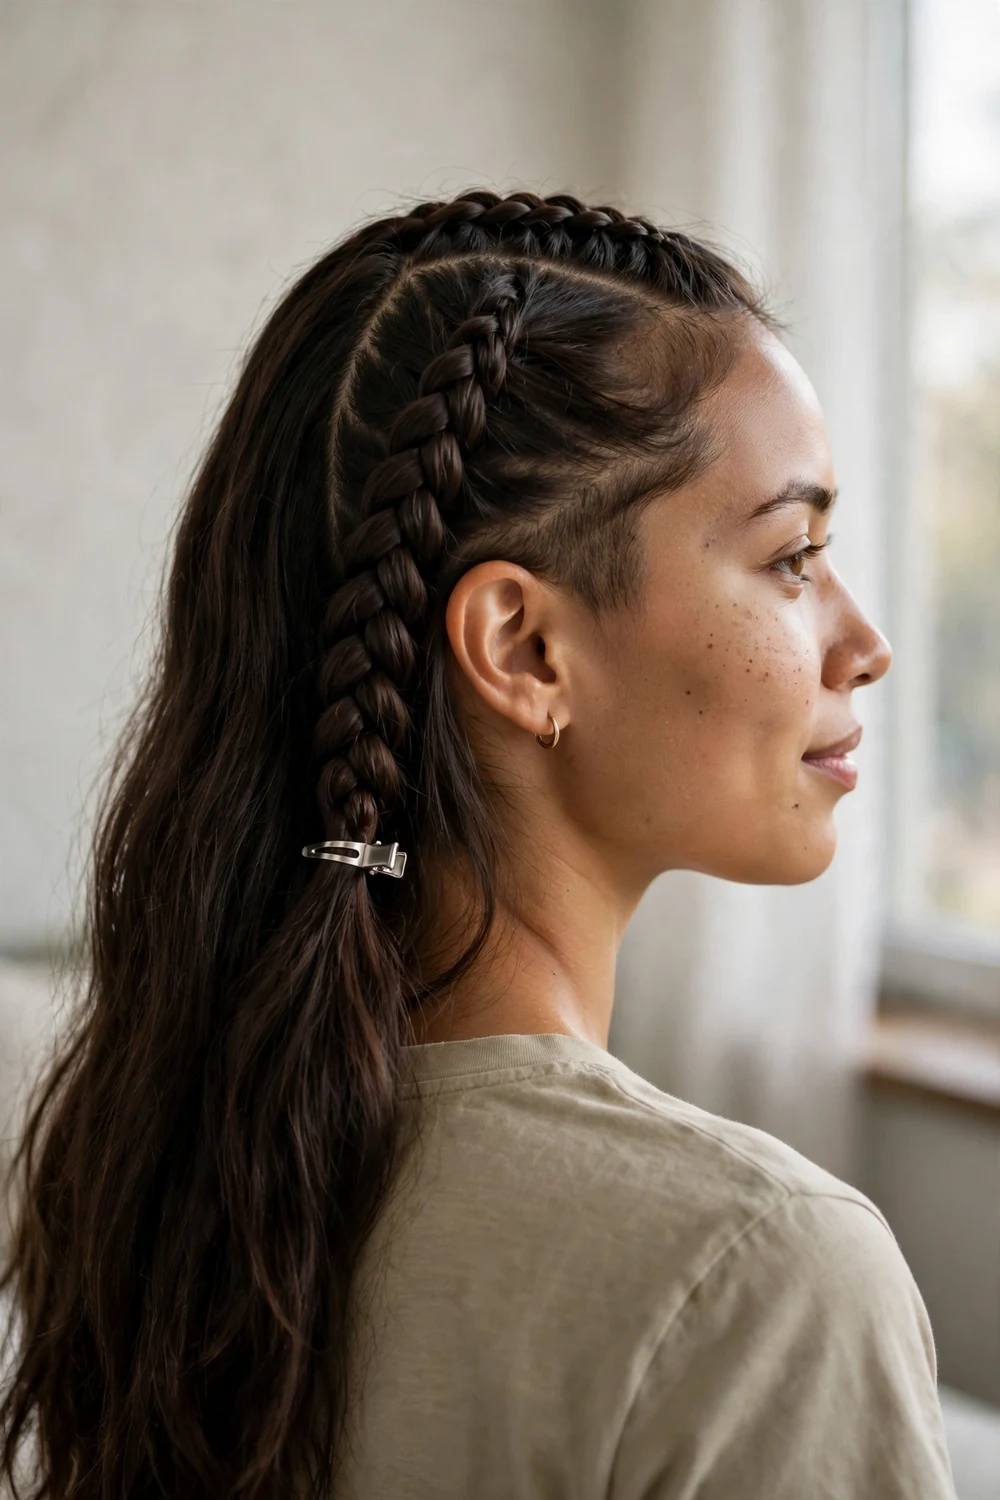
French braid a strip down the center of your head from forehead to nape, letting the sides stay loose or slicked back. Secure the end of the braid with a small claw clip instead of an elastic. The mohawk braid adds edge to the soft claw clip look, and the clip at the end keeps the braid from unraveling without a visible elastic. Tuck the braid’s tail under and let the clip cover the fold for the cleanest finish.
Try this: Keep the braid slightly loose at the crown. A little height there balances the narrow shape of the braid.
18. Double Braid Combo
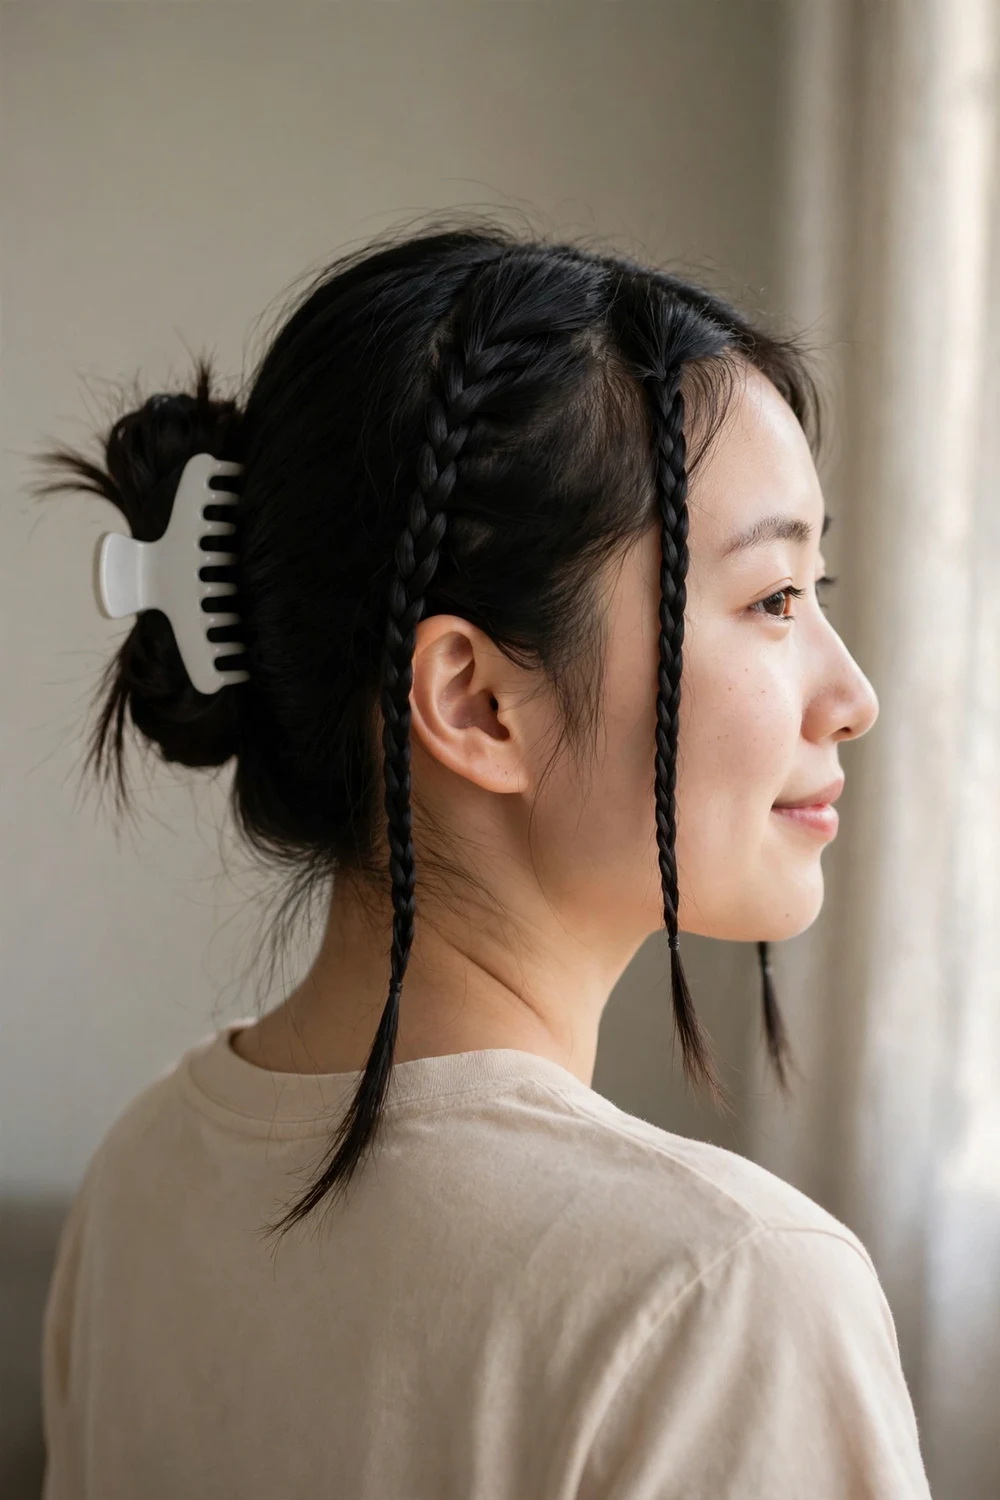
Braid two thin sections at the front of your hair, one on each side, and pin or tie them temporarily. Gather the rest of your hair back and secure it with a medium claw clip, then release the braids so they frame the style. The braids add detail that makes a simple clipped style look planned. This works for school, work, or casual weekends. Keep the braids thin, about the width of a pencil, so they read as detail rather than bulk.
Try this: Braid the front sections before gathering the back. It’s easier to keep the braids neat when the rest of your hair is out of the way.
19. Space Buns
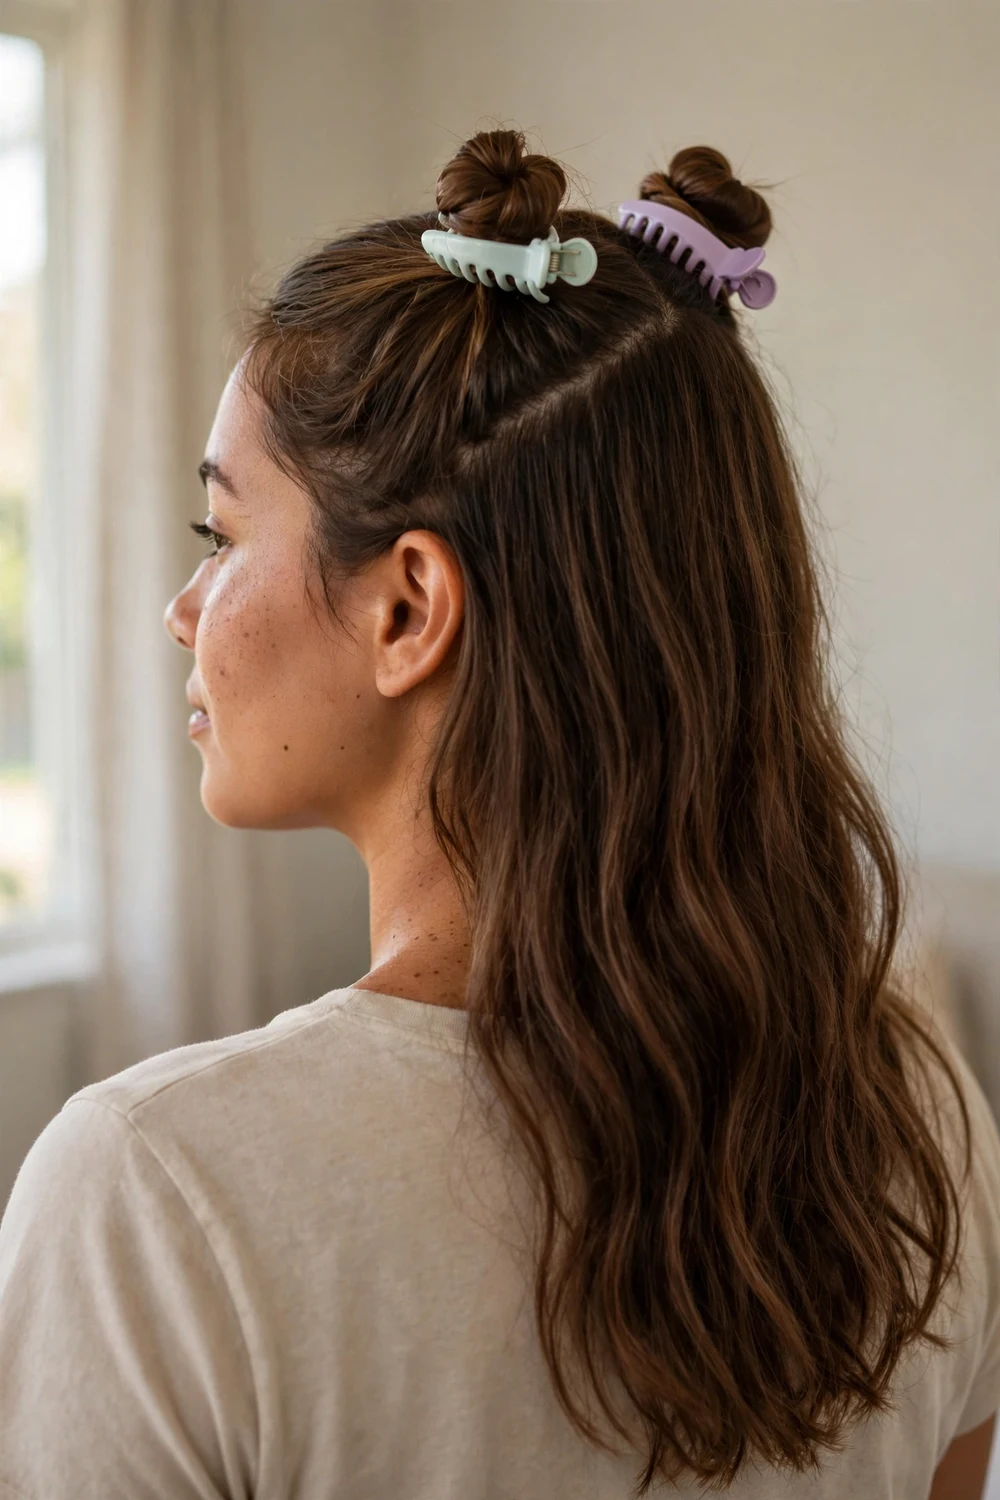
Part your hair down the middle and coil each side into a small bun high on the head. Secure each bun with a small claw clip instead of elastics. The clips hold mini buns surprisingly well and add a playful accessory detail. Leave the rest of your hair down or clip it all up. This is a fun pick for concerts, festivals, or weekends. Use two clips in different colors when you want the accessories to stand out more.
Try this: Make the buns slightly uneven in size. Matching buns can look stiff, while a small difference looks relaxed.
20. Textured Chignon
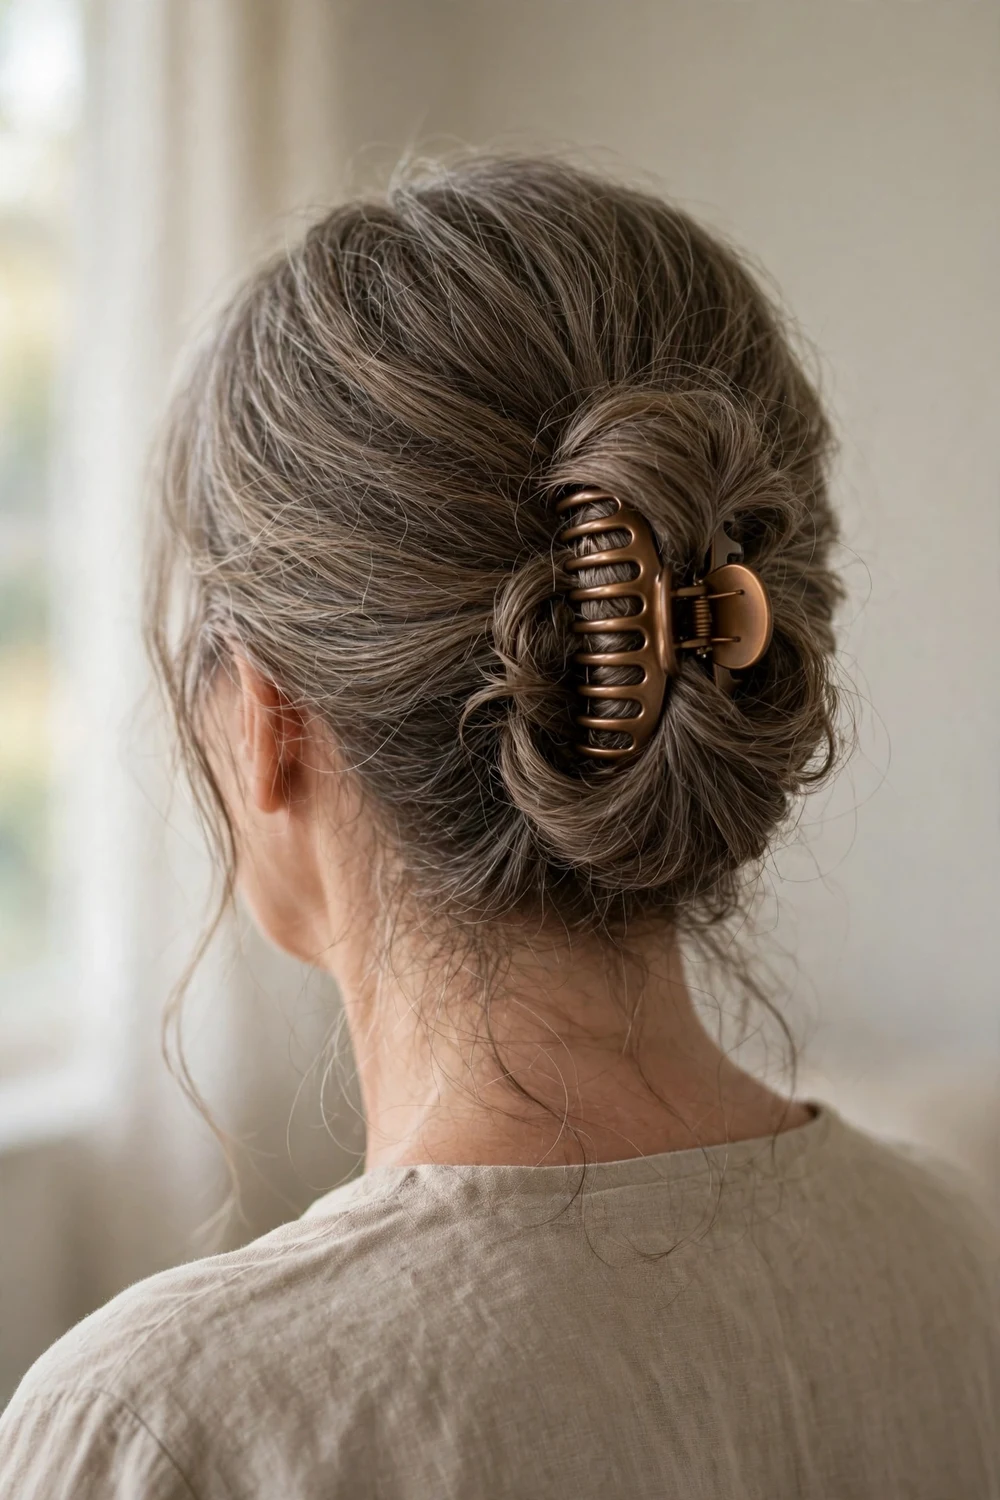
Curl your hair lightly or scrunch in texture spray, then gather it into a soft bun at the nape. Clamp a medium claw clip over the bun and pull a few wispy pieces free. The texture keeps the chignon from looking flat, and the clip adds a modern touch to a classic shape. This suits weddings, dinners, and any event where you want polish without stiffness. Pin the chignon’s base with two crossed bobby pins before adding the clip for extra security.
Try this: Build the texture the day before with overnight braids. Second-day waves give the chignon body with no heat styling.
21. Polished Evening Twist
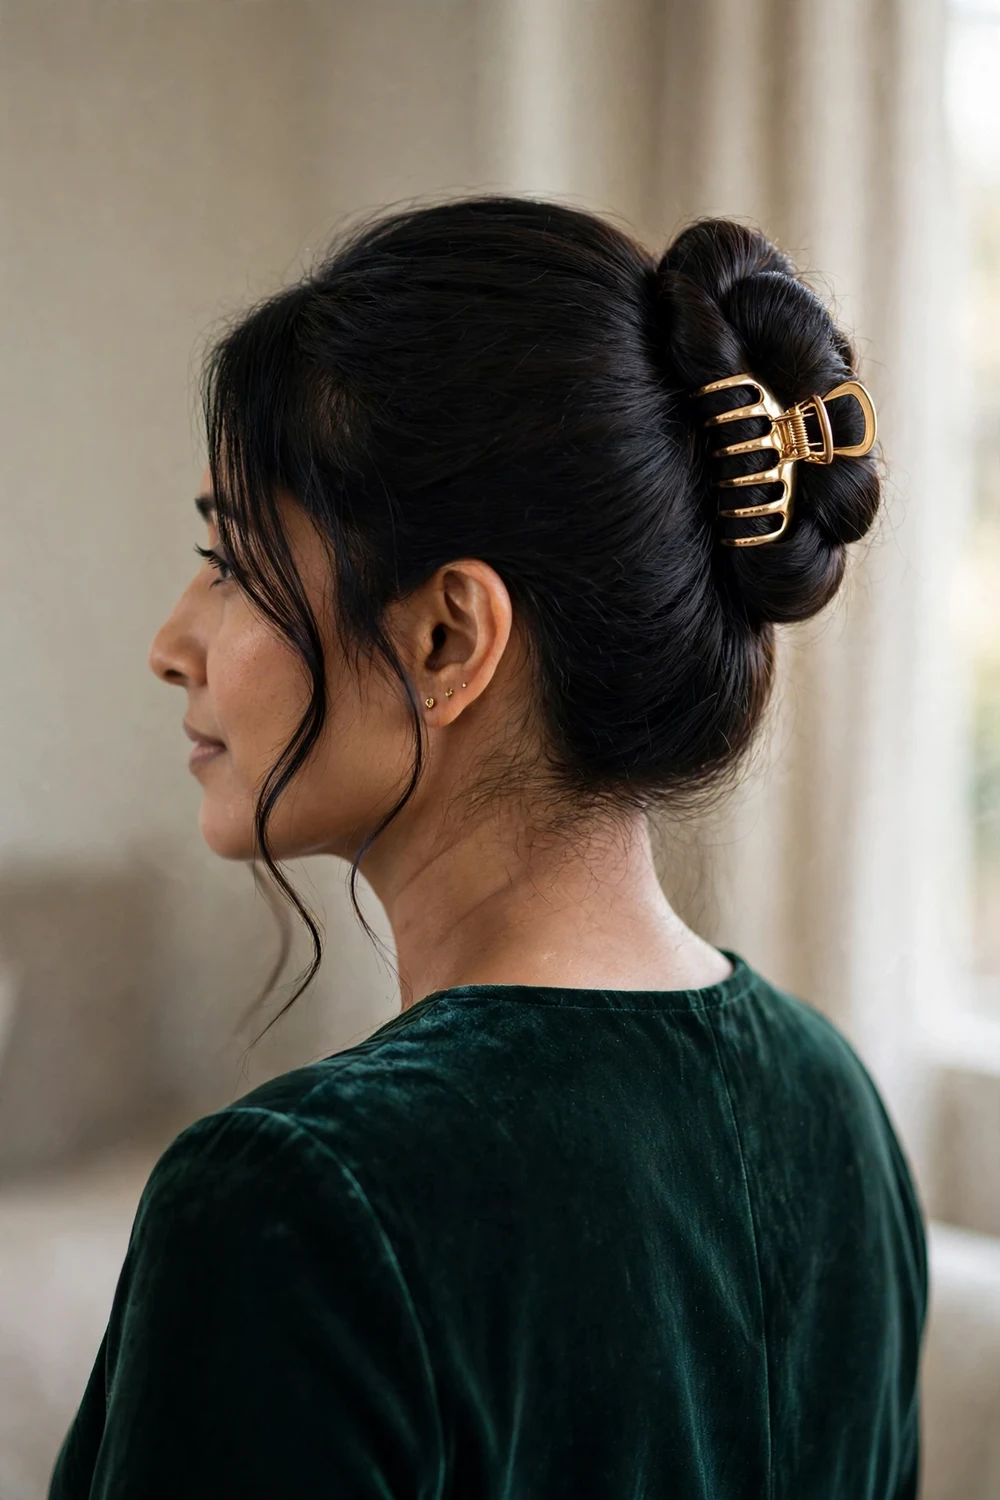
Smooth your hair with serum and twist it into a neat updo, securing it with a slim metal claw clip in gold or silver. Leave two soft pieces out at the front to frame your face. The metal clip reads as jewelry, which lifts the whole style for evening. Keep the twist compact and close to the head rather than loose and voluminous. A slim rectangular clip disappears into the twist while still showing its metallic finish.
Try this: Set the finished twist with a light-hold hairspray. It keeps the smooth surface intact without making the hair crunchy.
22. Beachy Waves
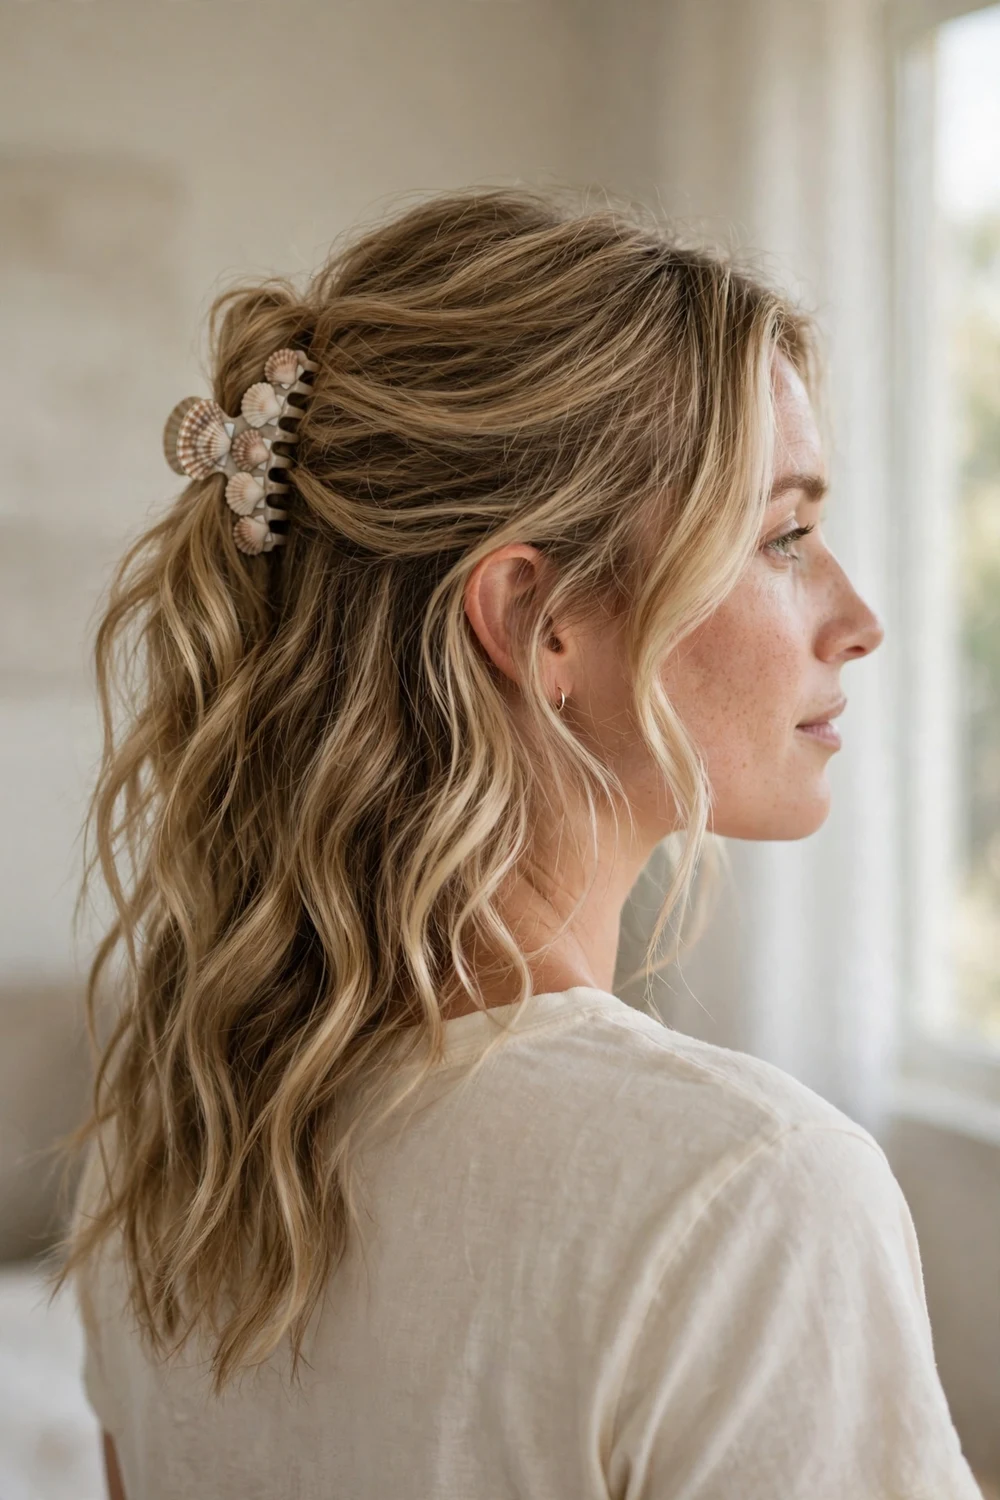
Scrunch sea salt spray into damp hair and let it air dry for natural waves. Gather just the back section loosely and pin it with a small patterned claw clip, leaving the front waves free around your face. The clip keeps the back tidy while the front keeps its beachy movement. A shell or tortoiseshell pattern fits the theme. Twist the pinned section once before clipping so the waves don’t pull loose in humidity.
Try this: Don’t brush the waves after they dry. Brushing breaks them into frizz, while fingers keep the wave pattern defined.
23. Layered Hair Gather
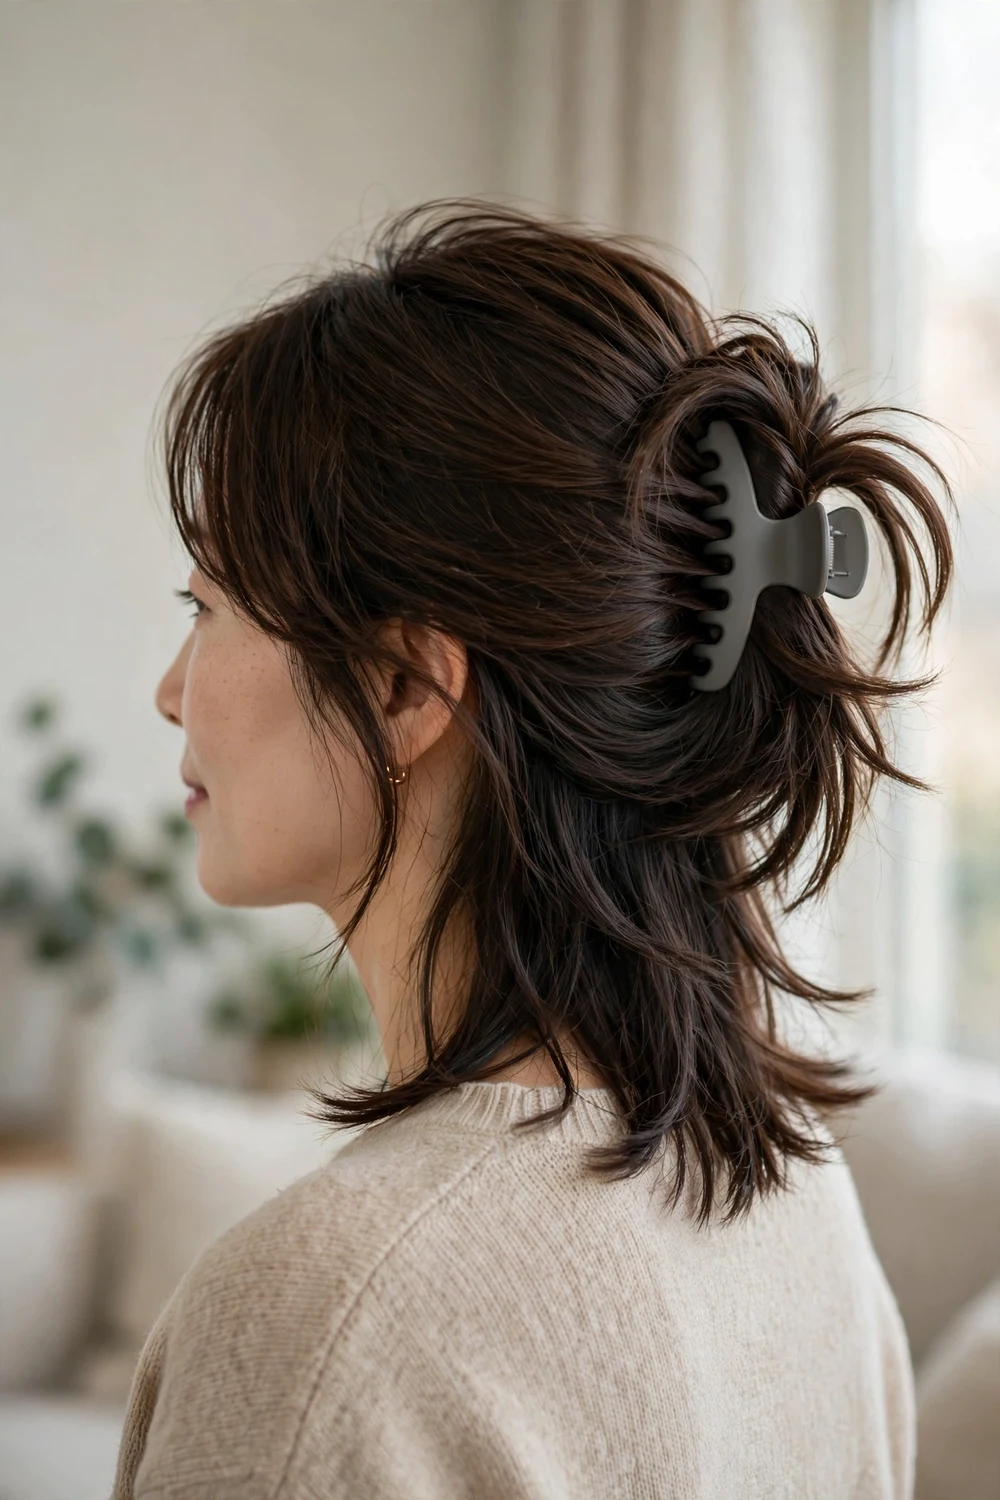
Layered haircuts fight most updos because short layers slip out. Gather everything loosely at the back and clamp a medium claw clip over the bunch, letting the shorter layers fall where they want. The trick is not fighting the layers. A loose gather with pieces escaping looks deliberate, while a tight one just sheds layers all day. A medium matte clip blends in best, letting the layers themselves be the focus.
Try this: Gather the hair lower than you think, near the nape. Gravity works with you there and fewer layers escape.
24. Claw Clip with Bangs
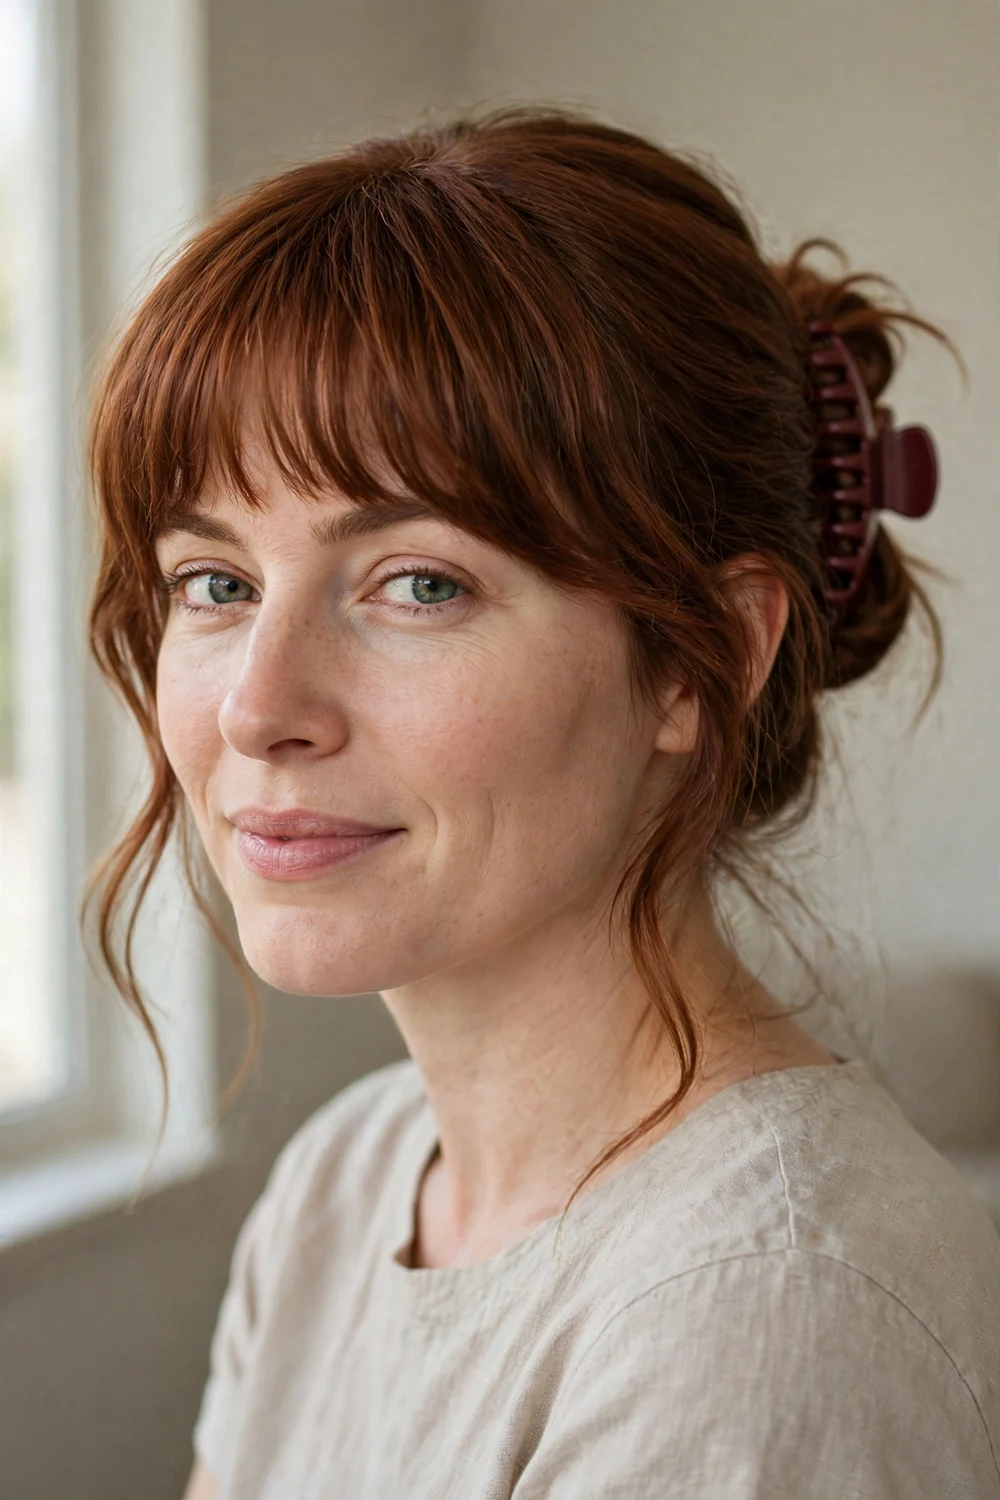
Sweep the rest of your hair into a loose twist and clip it, leaving your bangs down across your forehead. Bangs change the whole balance of a claw clip style because the front stays styled while the back is casual. This combination works with blunt, curtain, and wispy bangs. Style the bangs first with a round brush, then clip the rest up. Keep the twist loose at the crown so it balances the structured look of the bangs.
Try this: Clip the twist slightly off-center. It keeps the style from looking too symmetrical against straight-across bangs.
25. Asymmetrical Clip Placement
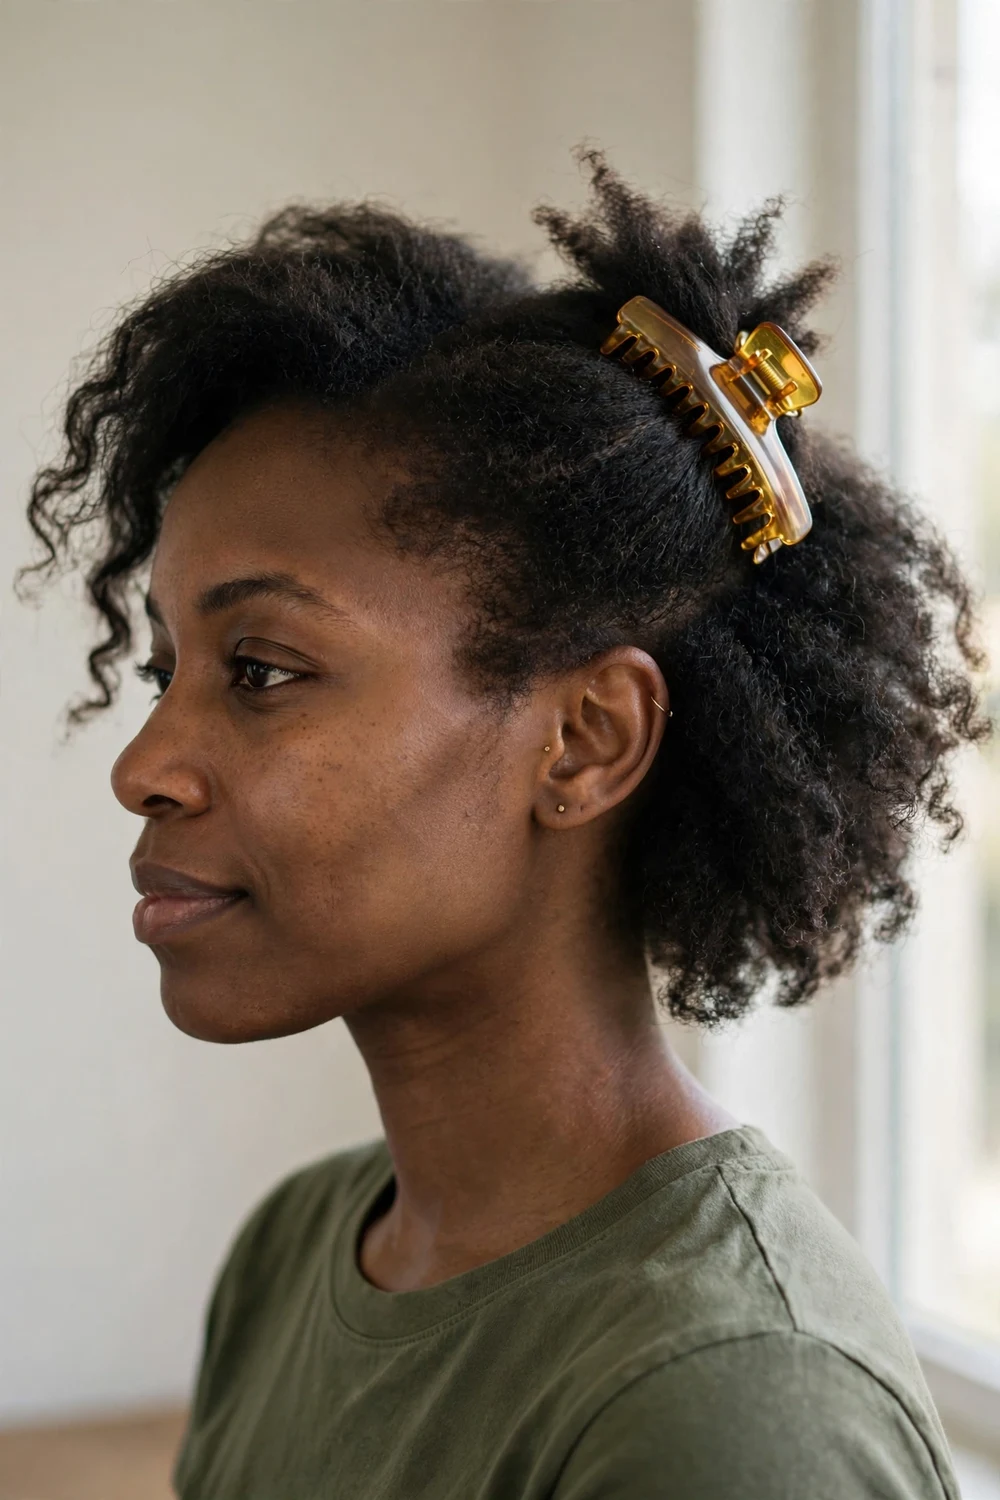
Instead of centering the clip, place it diagonally on one side. Pin one side of your hair up and back with a small claw clip while leaving the other side with its natural volume. The asymmetry suits short hair especially well, since short lengths can’t always reach a centered updo. It also works as a half-up variation on longer hair when you want something different. Smooth the pinned side flat with serum while leaving the other side full for contrast.
Try this: Angle the clip so the teeth point toward the fuller side. The clip grips more hair and the placement looks intentional.
26. Decorative Claw Clip Accent
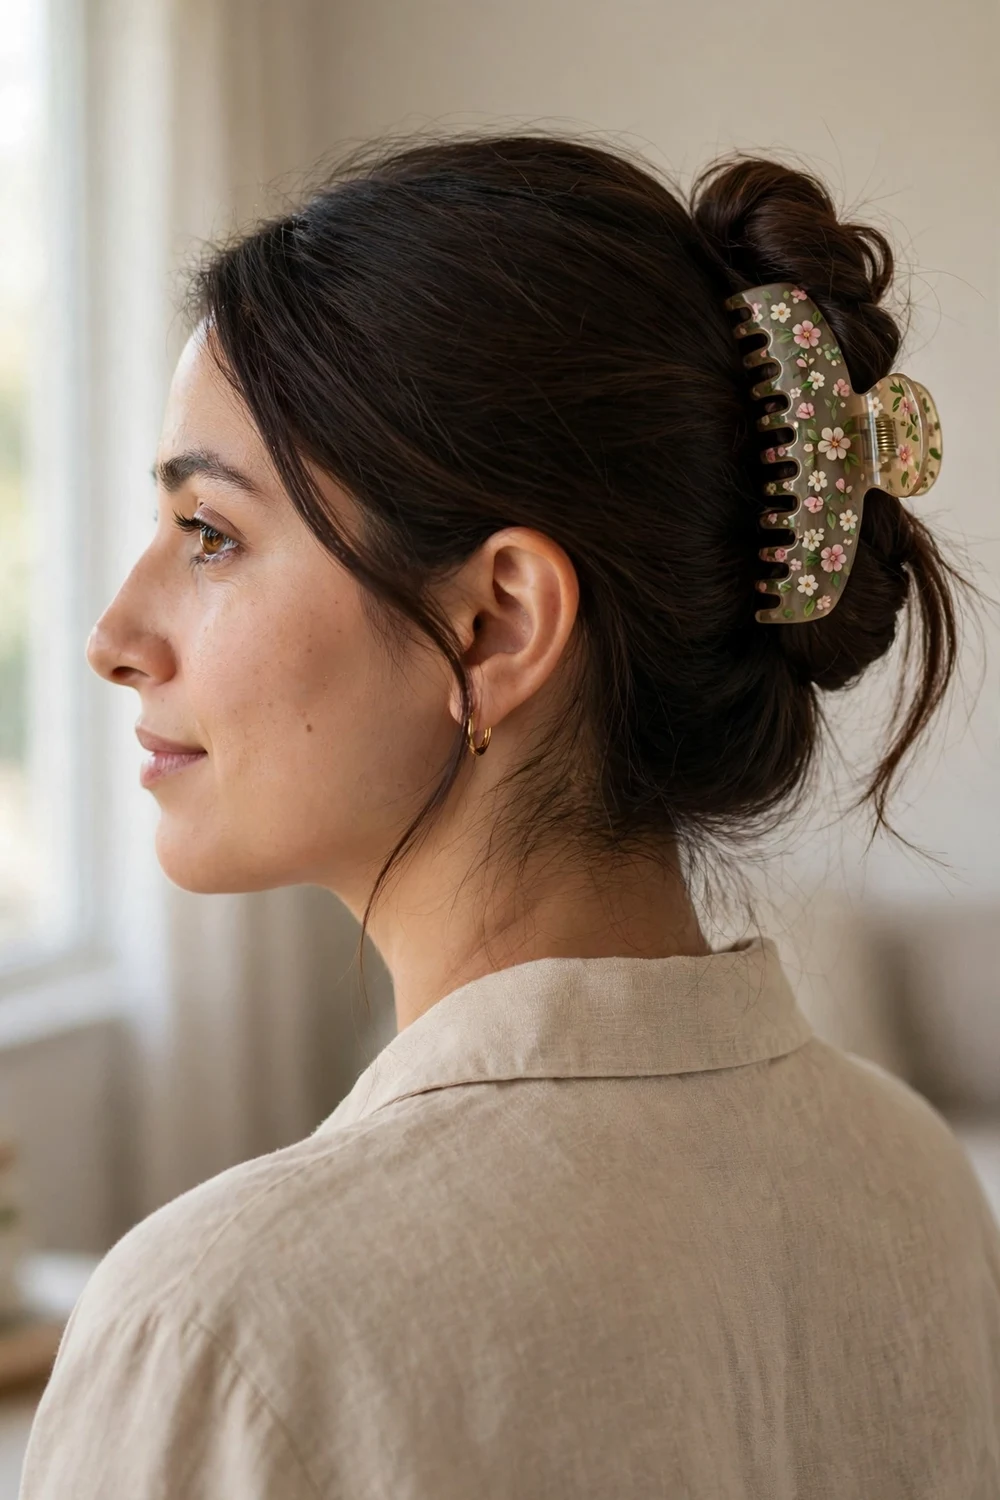
Keep the hairstyle simple and let the clip do the talking. Do a basic twist-and-clip, then choose a patterned, floral, or embellished clip as the focal point. Decorative clips turn a two-minute style into something that looks styled for an event. Match the clip’s colors to your outfit or pick a contrast color when you want it to stand out. Keep the twist itself simple, since a detailed clip plus a detailed style can look busy.
Try this: Buy decorative clips with the same strong spring as plain ones. Some embellished clips have weak hinges, so test the grip before relying on it.
27. Second-Day Hair Quick Clip
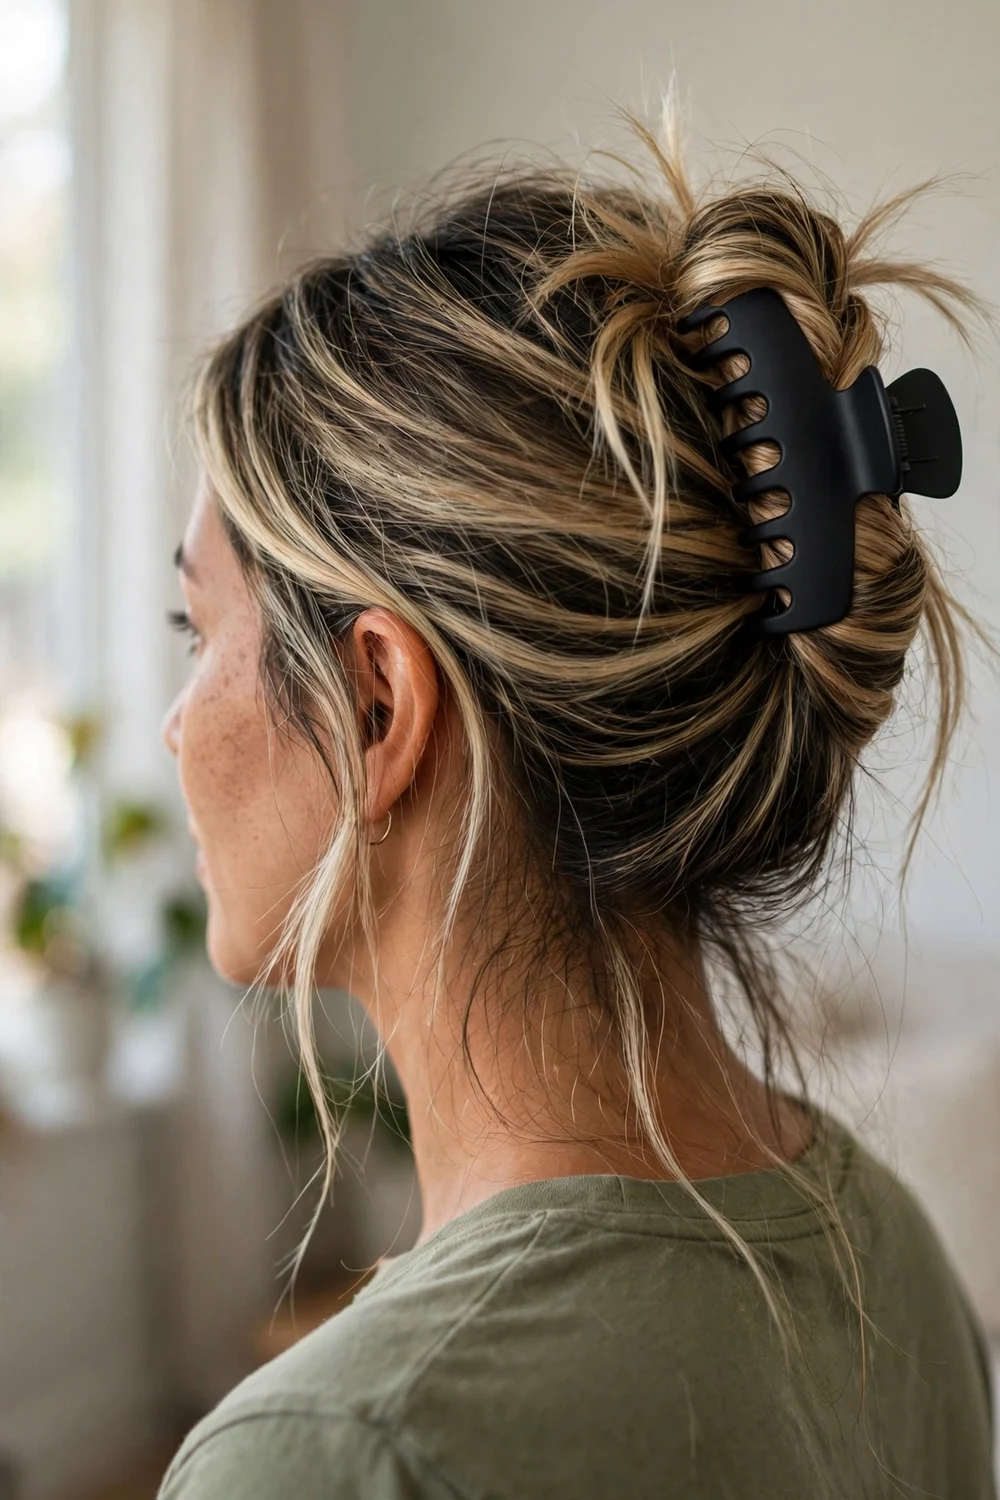
Second-day hair is actually ideal for claw clips because the natural oils give the teeth extra grip. Gather your hair, twist it up loosely, and clamp a large clip over it. Hit the roots with dry shampoo first if they look flat. The whole thing takes forty seconds and looks better than the same style on freshly washed hair. This is the ultimate lazy-morning or gym-run style. A large matte clip hides oily roots better than a shiny one, which reflects light onto them.
Try this: Twist the hair in the opposite direction from yesterday’s style. It resets any creases and gives the roots a little lift.
Claw Clip Hairstyles Comparison at a Glance
| Style | Best Occasion | Difficulty | Hold Time |
|---|---|---|---|
| The Classic Twist-and-Clip | Everyday, work | Easy | 6-8 hours |
| French Twist | Office, dinner | Medium | 5-7 hours |
| French Braid with a Claw Clip | Work, warm days | Medium | 8+ hours |
| Classic Half-Up, Half-Down | Everyday | Easy | 4-6 hours |
| Half-Up Twist | Work, school | Easy | 6-8 hours |
| Fanned-Out Half-Up | Photos, events | Easy | 4-6 hours |
| Half-Up Bun | Casual outings | Easy | 5-7 hours |
| Half-Up Ponytail | Everyday, errands | Easy | 4-6 hours |
| Side-Swept Half-Up | Everyday, dates | Easy | 4-6 hours |
| Sleek Low Bun | Office, interviews | Easy | 6-8 hours |
| Messy Bun | Weekends, errands | Easy | 3-5 hours |
| Messy Top Knot | Evenings out | Easy | 4-6 hours |
| Low Claw Clip Ponytail | Work, errands | Easy | 5-7 hours |
| Thick Hair Twist-and-Clip | Everyday, work | Medium | 6-8 hours |
| Fine Hair Loop-and-Clip | Everyday, office | Medium | 4-6 hours |
| Curly Hair Twist | Everyday, events | Easy | 6-8 hours |
| Mohawk Braid | Weekends, concerts | Medium | 8+ hours |
| Double Braid Combo | School, casual | Medium | 6-8 hours |
| Space Buns | Festivals, weekends | Easy | 4-6 hours |
| Textured Chignon | Weddings, dinners | Medium | 5-7 hours |
| Polished Evening Twist | Evenings, events | Medium | 5-7 hours |
| Beachy Waves | Beach, vacation | Easy | 3-5 hours |
| Layered Hair Gather | Everyday | Easy | 3-5 hours |
| Claw Clip with Bangs | Everyday, work | Easy | 5-7 hours |
| Asymmetrical Clip Placement | Casual, creative days | Easy | 4-6 hours |
| Decorative Claw Clip Accent | Events, parties | Easy | 6-8 hours |
| Second-Day Hair Quick Clip | Gym, lazy mornings | Easy | 4-6 hours |
How to Choose the Right Claw Clip Hairstyle for You
Start with your hair length. Short hair does best with half-up styles and small clips, since there isn’t enough length for a full twist. Medium hair can wear almost everything on this list. Long or thick hair needs large clips and styles with a built-in anchor, like a twist or a braid, so the weight doesn’t pull the clip open.
Then consider your hair’s slipperiness. Fine, freshly washed hair is the hardest to clip. If that’s you, lean toward styles with a twist or loop, which give the teeth more to grab, and keep texture spray nearby. Coarse, curly, or second-day hair grips easily, so simpler gathers work fine.
Match the style to your day. A sleek low bun or French twist fits professional settings. Messy buns, space buns, and beachy waves fit casual days. For events, pick one polished style and one decorative clip rather than combining several statement elements.
Mistakes to Avoid
The most common mistake is using a clip that’s too small for your hair. If the teeth can’t close fully around the gathered hair, the style will loosen within an hour. Size up before blaming your technique.
Clipping over the hair instead of through it is the second mistake. The teeth need to bite through the twist and into the hair beneath. Lay the twist flat, open the clip wide, and press it down so the teeth catch both layers.
Don’t sleep in a claw clip. The hard plastic presses into your scalp and the teeth can snag and break hair overnight. Take the clip out and use a loose scrunchie or braid for sleep instead.
Skip clips with sharp inner edges or weak springs. Run your finger along the inside of a new clip before buying. Rough edges snag hair, and a weak spring won’t survive a full day on medium or thick hair.
If your hair is fine and slips out of most updos, these easy hairstyles for thin hair include more low-tension ideas that pair well with small claw clips.
For long hair that needs a bigger clip and a stronger anchor, browse these cute hairstyles for long hair to find lengths and textures that work with the twist styles above.
Short hair works with claw clips too, especially half-up placements. These simple hairstyles for short hair show which lengths and cuts take a small clip best.
When mornings are rushed, a claw clip is often the fastest option in the rotation. These medium hairstyles for busy women round out a set of styles you can finish in under ten minutes.
Frequently Asked Questions
Are claw clips bad for your hair?
Claw clips are generally gentler than tight elastics because their wide teeth distribute pressure instead of pulling from one point. They don’t leave ponytail dents and they rarely cause the breakage that tight hair ties do. The main risks come from clips with sharp inner edges, which can snag, and from wearing any clip painfully tight. Choose smooth, well-made clips and you shouldn’t see damage.
What size claw clip should I get?
Match the clip to your hair’s length and thickness. Small clips around 2 to 3 inches suit fine hair, short hair, and half-up styles. Medium clips around 3 to 4 inches handle most medium-length hair and everyday updos. Large clips of 4 inches or more are needed for thick or long hair worn fully up. If you’re between sizes, go larger, since an oversized clip still holds while an undersized one pops open.
Do claw clips work on short hair?
Yes, with the right size and style. Small clips can hold half-up sections, side-swept front pieces, and short twists on hair as short as chin length. The twist-and-clip and half-up styles from this list adapt well to short hair. Very short pixie lengths may only manage front-section clips, but bobs and lobs have plenty of options.
How do I keep my claw clip from slipping out?
Slipping usually means the clip is too small or the hair is too smooth. Size up first. Then add grip with texture spray or dry shampoo, especially on freshly washed hair. Make sure the clip’s teeth bite through the twist and into the hair underneath rather than sitting on top. Twisting the hair before clipping also gives the teeth more structure to hold than a loose gather does.
Can I sleep with a claw clip in my hair?
It’s not recommended. The hard clip presses into your scalp when you lie on it, which is uncomfortable, and the teeth can snag and break hair as you move in your sleep. Take the clip out before bed. A loose braid or a soft scrunchie protects your hair overnight without the pressure points.
Final Thoughts
Claw clips work because they ask so little: one twist, one clamp, and you’re out the door. Start with the classic twist-and-clip or a simple half-up, then branch into braids and buns once the motion feels natural. Keep two or three sizes on hand and you’ll always have the right hold. I’ve kept a large tortoiseshell clip in my bag for years, and it’s still the fastest fix I own on busy mornings.

