

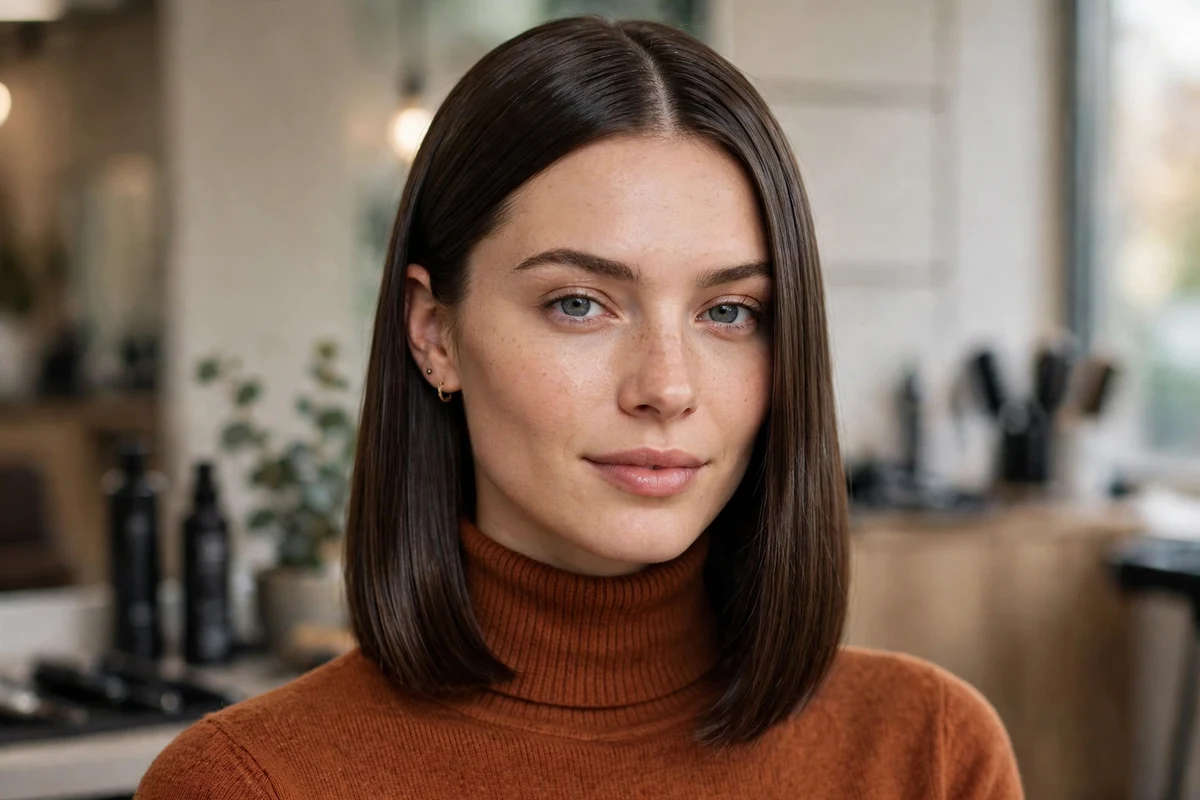
Medium length is the range I come back to when hair needs to look tidy without a long routine. Shoulder to collarbone hair sits flat more easily than long hair, holds a straight finish through the day, and still gives you enough length to change the part, add bangs, or pull it back. A sleek finish also shows the shape of the cut clearly, so the cut itself has to be right.
This list collects 22 sleek straight medium hairstyles for women and runs them by shape first: blunt lobs and parting changes, angled cuts, layered cuts, back shapes, and then bangs and styling finishes. Every idea stays in the shoulder to collarbone range and is worn straight. If you want the wider family first, the long bob hairstyles roundup covers lobs at several lengths side by side.
Quick Takeaways
- Blunt, one-length ends make straight medium hair look thicker and hold a straight finish the longest.
- Parting is the fastest change: a center part reads modern and even, a deep side part adds lift at the root.
- Layers should stay long, internal, or face-framing if you want to keep the sleek surface unbroken.
- Heat protectant, a paddle brush blow-dry, and one flat iron pass per section are the core of the routine.
- Book trims at six to eight weeks. Straight hair shows split ends and uneven growth sooner than wavy hair.
The table below groups the ideas by the job they do, so you can shortlist by hair type and upkeep before reading the full list.
| Cut family | Ideas on this list | Best for | Upkeep |
|---|---|---|---|
| Blunt and one-length | 1, 2, 6, 21 | Fine to medium hair that needs thickness at the ends | Medium |
| Angled and shaped backs | 3, 4, 5, 10, 11 | Straight hair that falls flat at the back | Medium to high |
| Layered but sleek | 7, 8, 9, 16, 17, 18 | Thick hair, or hair that needs movement without waves | Low to medium |
| Bangs and fringe | 12, 13, 14, 15 | Adding a front detail to a simple straight cut | Medium |
| Styling finishes | 19, 20, 22 | Changing the look without changing the cut | Low |
1. Blunt Lob with Center Part
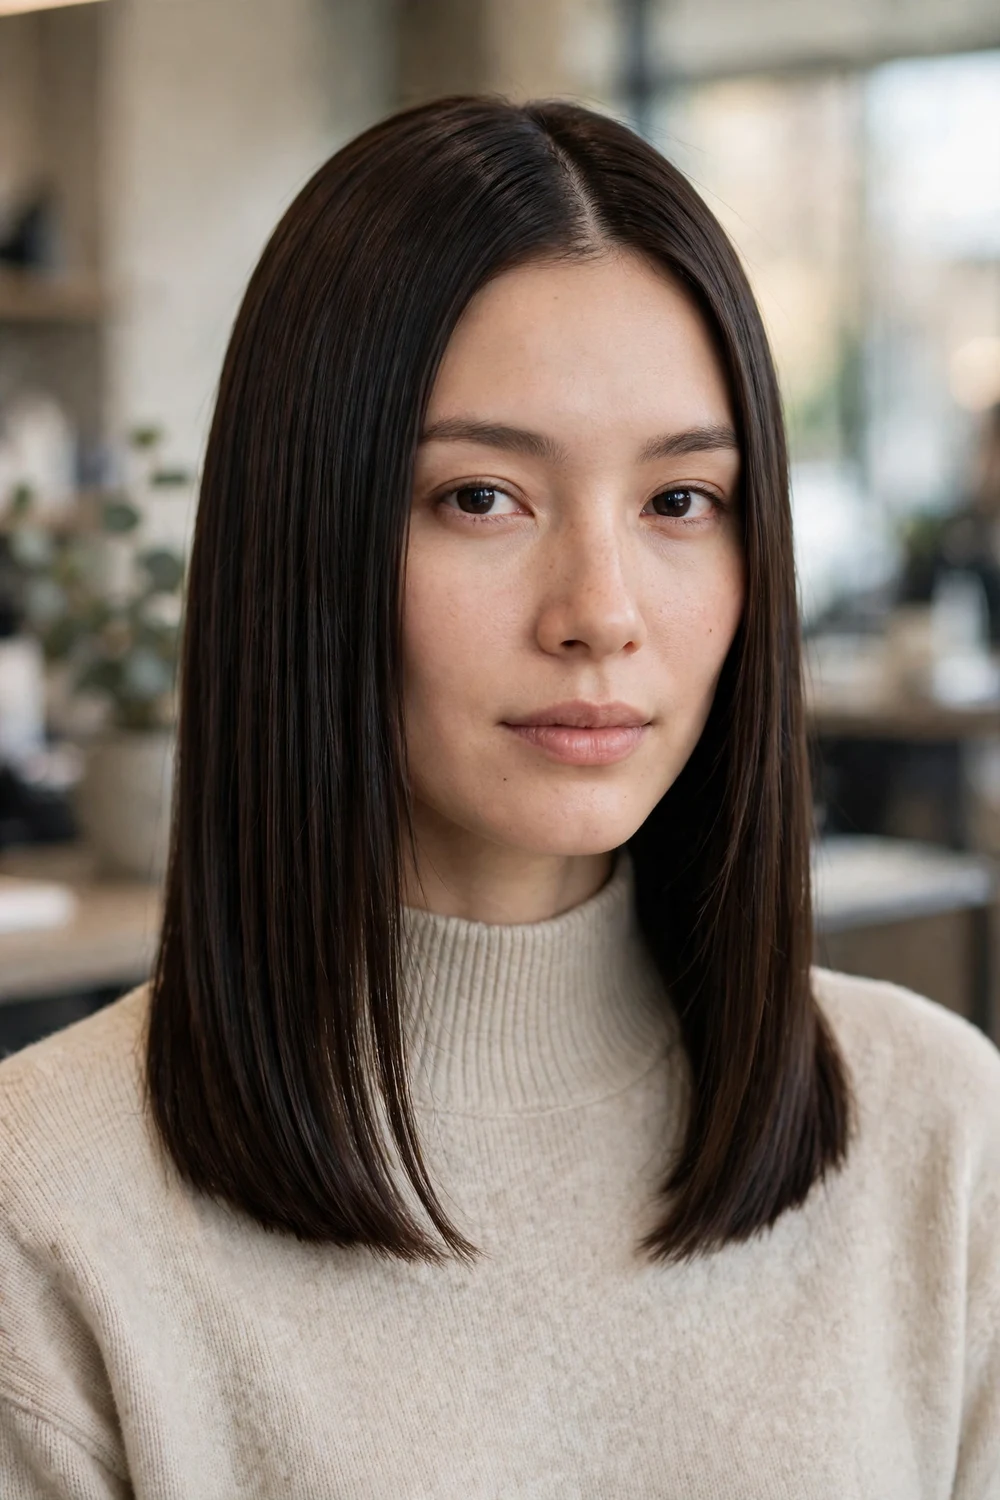
The blunt lob is cut at one length to the collarbone, with no layers and a straight perimeter. The center part splits the hair evenly, so both sides frame the face in the same line. On straight hair, the even ends reflect light in one sheet and make the hair look thicker at the bottom.
Blow-dry with a paddle brush and direct the air downward to keep the surface flat. Run a flat iron over the ends only if they kick out. A pea-size amount of smoothing serum on the mid-lengths controls flyaways without greasing the roots.
Try this: ask for the length to sit just below the jaw on both sides when dry, since straight hair shrinks very little and the line you see in the chair is the line you keep.
Difficulty: Low · Cost: $ (salon)
2. Sleek Lob with Deep Side Part

This version keeps the same collarbone length and moves the part to one side, above the outer corner of the brow. The longer side sweeps across the forehead and adds height at the root, while the shorter side tucks behind the ear. The shape suits round and square faces, since the diagonal line breaks up width.
Set the part while the hair is still damp, then blow-dry the roots in the opposite direction first and flip them back into place. That one step holds the lift for hours. Finish with a light hairspray on the part line only.
Try this: switch the side of the part every few weeks. Hair that always falls one way trains flat on that side, and a switch restores root lift.
Difficulty: Low · Cost: $ (salon)
3. A-Line Lob

An A-line lob is shorter at the back and longer at the front, with a gentle diagonal and no stacking at the nape. The front pieces reach the collarbone while the back sits at the shoulders. Worn straight, the diagonal line stays clean and the front pieces draw the eye down, which lengthens the look of the neck.
The angle only reads when the hair is smooth, so this cut rewards a careful blow-dry. Use a flat iron in small sections and follow the diagonal as you work. Keep the front pieces off the face with a light smoothing cream rather than a heavy oil.
Try this: keep the angle soft, around one to two inches of difference from back to front. A steep angle dates quickly and grows out unevenly.
Difficulty: Medium · Cost: $$ (salon)
4. Inverted Lob with Stacked Back

The inverted lob takes the A-line shape further. Short graduated layers stack at the back to build volume at the crown, and the front drops to the collarbone in two long pieces. It is a strong option for fine straight hair that collapses at the back, since the stacking does the lifting work. The wider medium bob hairstyles guide shows how this shape sits next to shorter bob lengths.
Blow-dry the back with a small round brush to keep the stack smooth and close to the head. Flat iron the front pieces in one slow pass each. The stack grows out faster than a one-length back, so plan trims closer to six weeks.
Try this: ask your stylist to show you the back with a hand mirror before you leave, and agree on the stack height you want to keep at trims.
Difficulty: Medium · Cost: $$ (salon)
5. Asymmetrical Lob
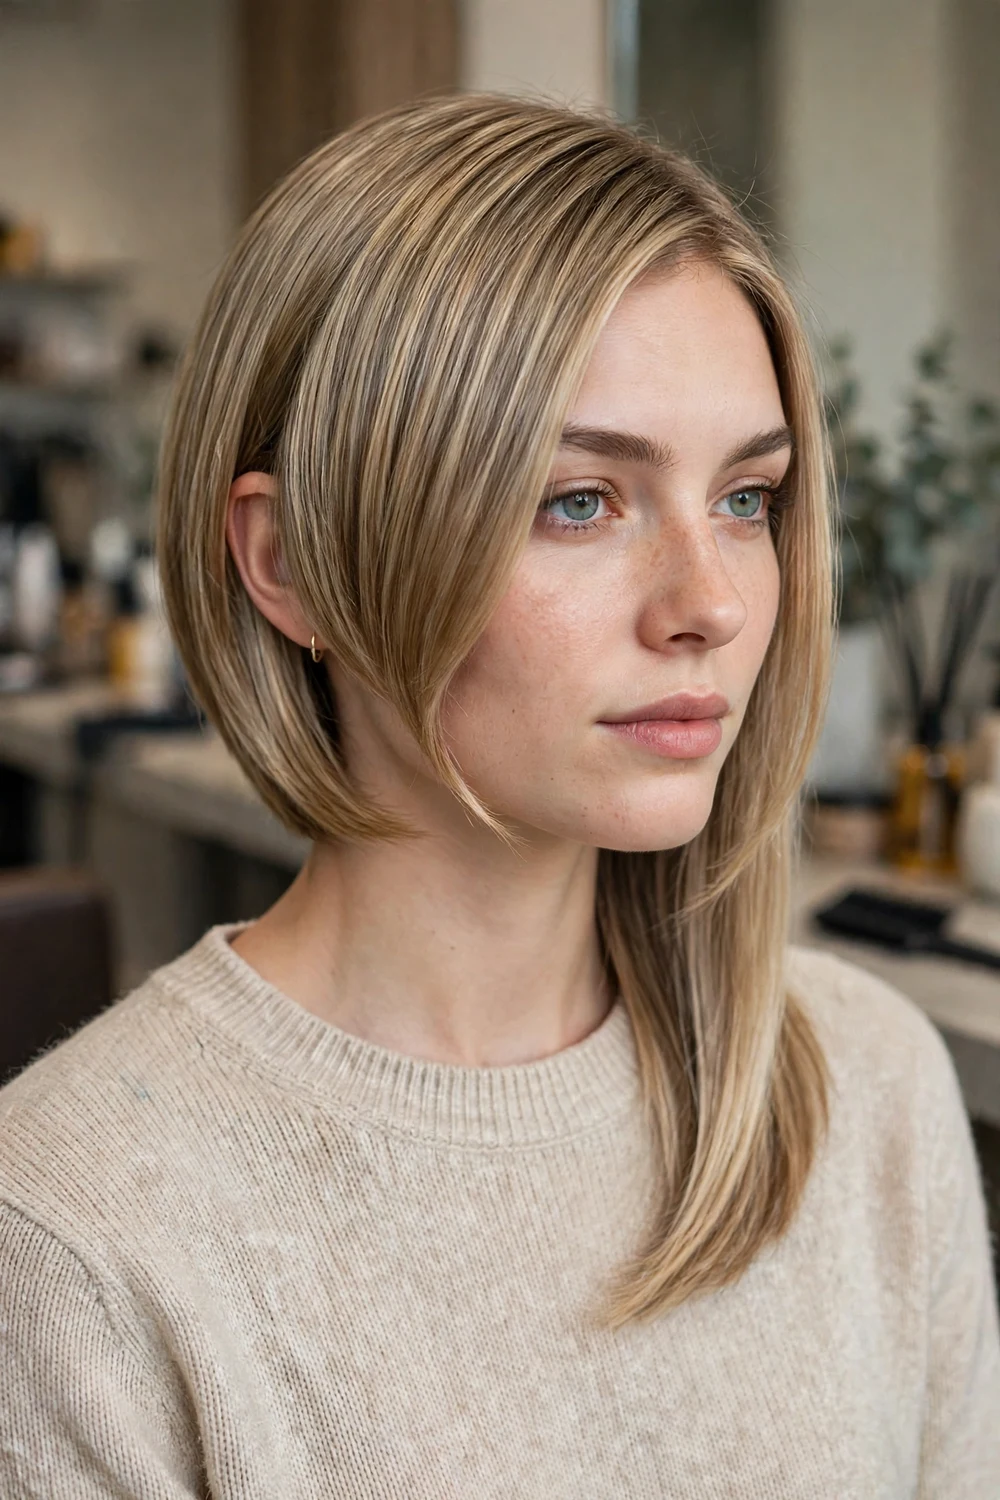
An asymmetrical lob is cut longer on one side than the other, usually with a deep side part at the high side. One side grazes the collarbone while the other stops at the jaw or shoulder. Worn straight, the uneven line reads deliberate and sharp rather than accidental.
Precision is the whole point of this cut, so the finish has to be smooth. Flat iron both sides fully, including the shorter side, which tends to flip out. Check the balance in natural light, since indoor salon light can hide a small difference in length.
Try this: start with a small difference, around one inch. You can take the long side longer at the next visit once you know you like the imbalance.
Difficulty: Medium · Cost: $$ (salon)
6. One-Length Shoulder Cut
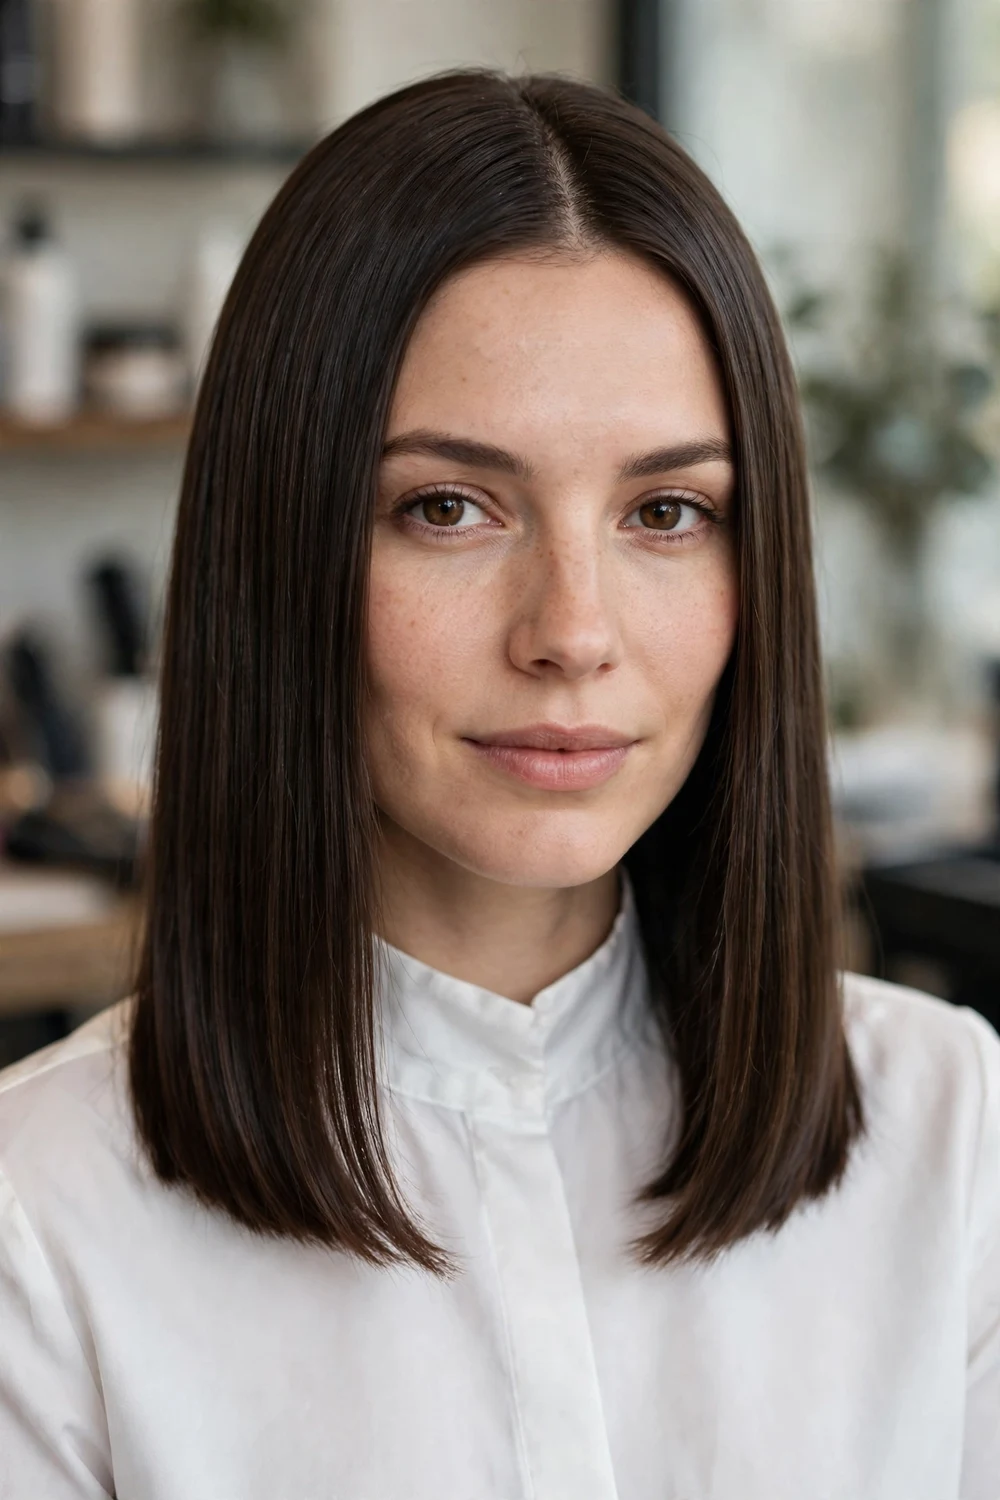
The one-length shoulder cut is the simplest shape on this list: hair cut straight across at the shoulders, no layers, no angle, parted where you like. It suits fine hair well, since every strand reaches the same line and the ends look full. It also grows out evenly, which makes it a calm choice between bigger changes.
Because there are no layers to hide behind, condition matters. Use a conditioner on the ends at every wash and a leave-in spray before heat. Blow-dry downward with a paddle brush and seal the ends with a cool shot of air.
Try this: if your ends look thin on one side, check your part first. Moving the part half an inch often evens out the look without a recut.
Difficulty: Low · Cost: $ (salon)
7. Long-Layered Lob
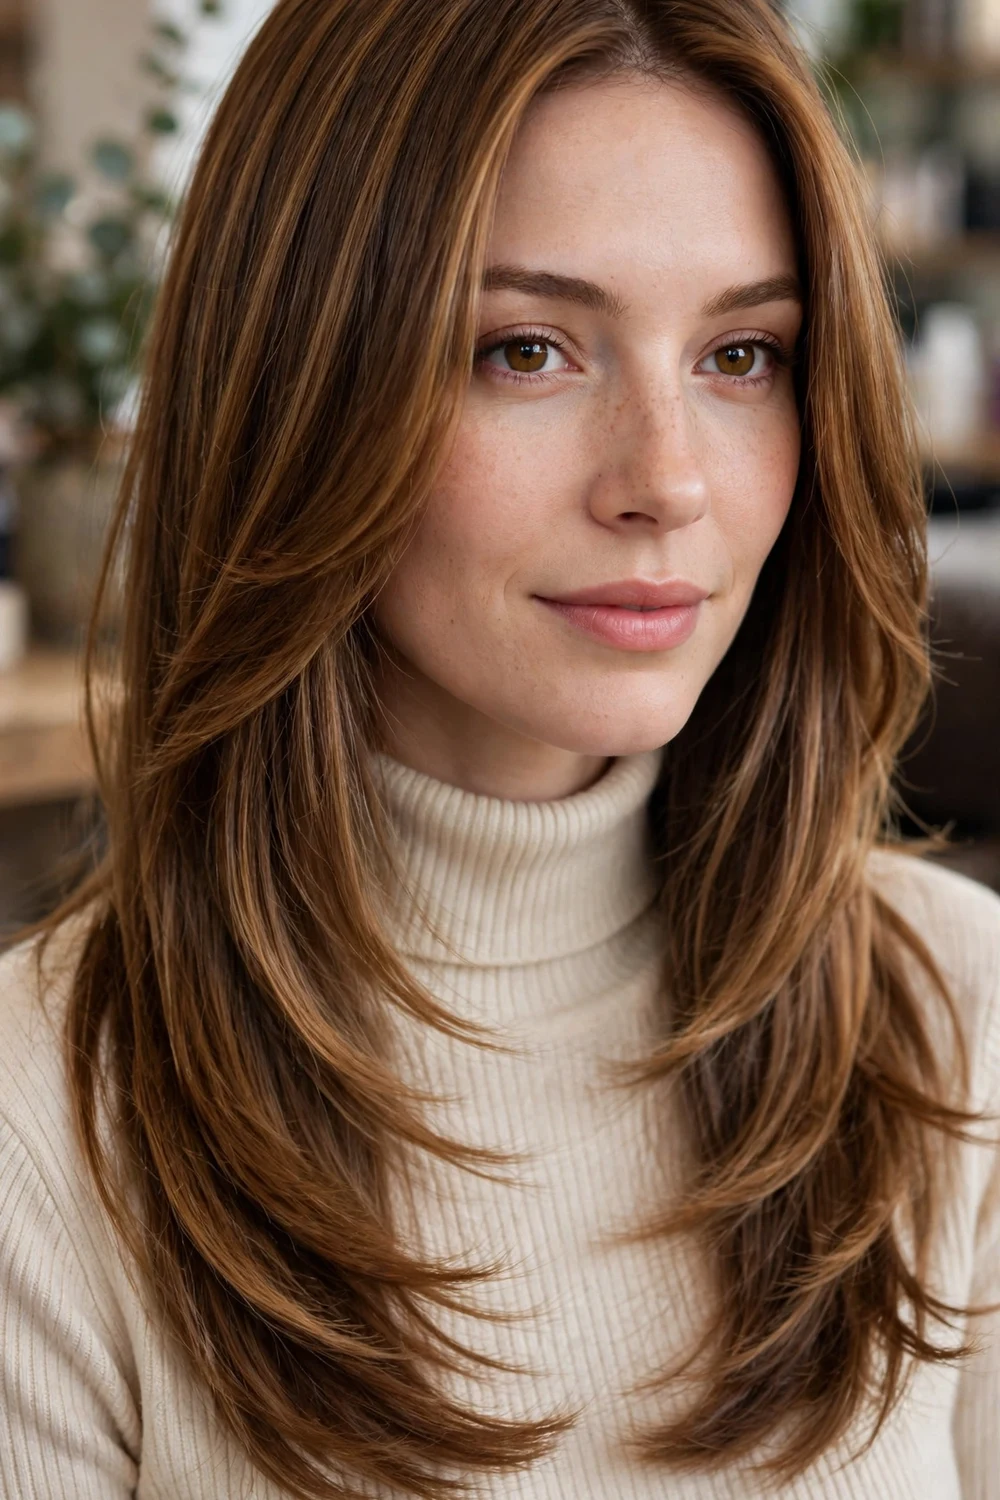
Long layers start below the chin and blend down through a collarbone length lob. The surface stays mostly smooth, and the layers show as gentle movement at the ends rather than steps. This is the layered cut to pick if you want the hair to swing when you turn your head while still wearing it straight.
Keep the layers long. Short layers on straight hair separate and can look stringy when worn sleek. Blow-dry the layers forward, then back, to settle them into the shape, and use a wide flat iron plate so each pass covers the full layer.
Try this: ask for layers only in the last third of the hair. The top two thirds stay solid, which protects the sleek finish.
Difficulty: Low to Medium · Cost: $$ (salon)
8. Face-Framing Layers

Face-framing layers leave the back at one length and cut shorter pieces only at the front, starting at the cheekbones or jaw. The front pieces curve in toward the face when worn straight and soften a blunt outline. The full face-framing layers haircut guide covers layer placement for fine and thin hair in more detail.
Style the front pieces separately from the rest. Dry them forward over the face, then sweep them back into place, which gives the curve without a curling iron. A light smoothing balm keeps the shorter pieces from separating during the day.
Try this: match the first layer to a feature: cheekbone height lifts the face, jaw height softens a strong jawline.
Difficulty: Low to Medium · Cost: $$ (salon)
9. Collarbone Cut with Invisible Layers

Invisible layers are cut inside the hair, under the top layer, so the outside still looks one length. The hidden layers remove weight and let the hair move without breaking the surface line. Thick medium hair benefits most, since it keeps the blunt look and loses the heavy, triangular shape.
Ask your stylist to keep the top layer untouched and work only underneath. At home, the routine is the same as a blunt cut: paddle brush blow-dry, flat iron pass, light serum. The difference shows when the hair moves and settles back faster.
Try this: if your hair poofs out at the sides by midday, invisible layers are a better fix than thinning shears, which can create frizz at the ends.
Difficulty: Medium · Cost: $$ (salon)
10. U-Shape Straight Cut

A U-shape cut keeps the center back at collarbone length and brings the sides up slightly, forming a soft curve at the back. From the front, the hair still reads medium and straight. From the back, the curve removes corner weight and helps the hair sit closer to the shoulders.
The shape shows best on hair worn down and straight, so keep the back smooth. Blow-dry the back in two sections and check the curve with a hand mirror once a week. Uneven growth shows in the curve first.
Try this: pair a U-shape back with a blunt front. You keep full-looking front pieces and a lighter, cleaner back.
Difficulty: Medium · Cost: $$ (salon)
11. V-Shape Straight Cut

A V-shape cut tapers the back to a soft point at the center, with the sides shorter than the middle. It is usually built with long layers, so the point has movement rather than a hard edge. On straight hair, the V reads clearly and gives medium hair a longer look from behind without adding length at the front.
The point is the oldest and thinnest hair, so it needs the most care. Apply conditioner past the point at every wash and trim it on schedule. A V that misses trims turns wispy and loses the shape.
Try this: keep the V shallow at medium length. A deep V needs long hair to carry it and can look thin at collarbone length.
Difficulty: Medium · Cost: $$ (salon)
12. Straight Cut with Curtain Bangs
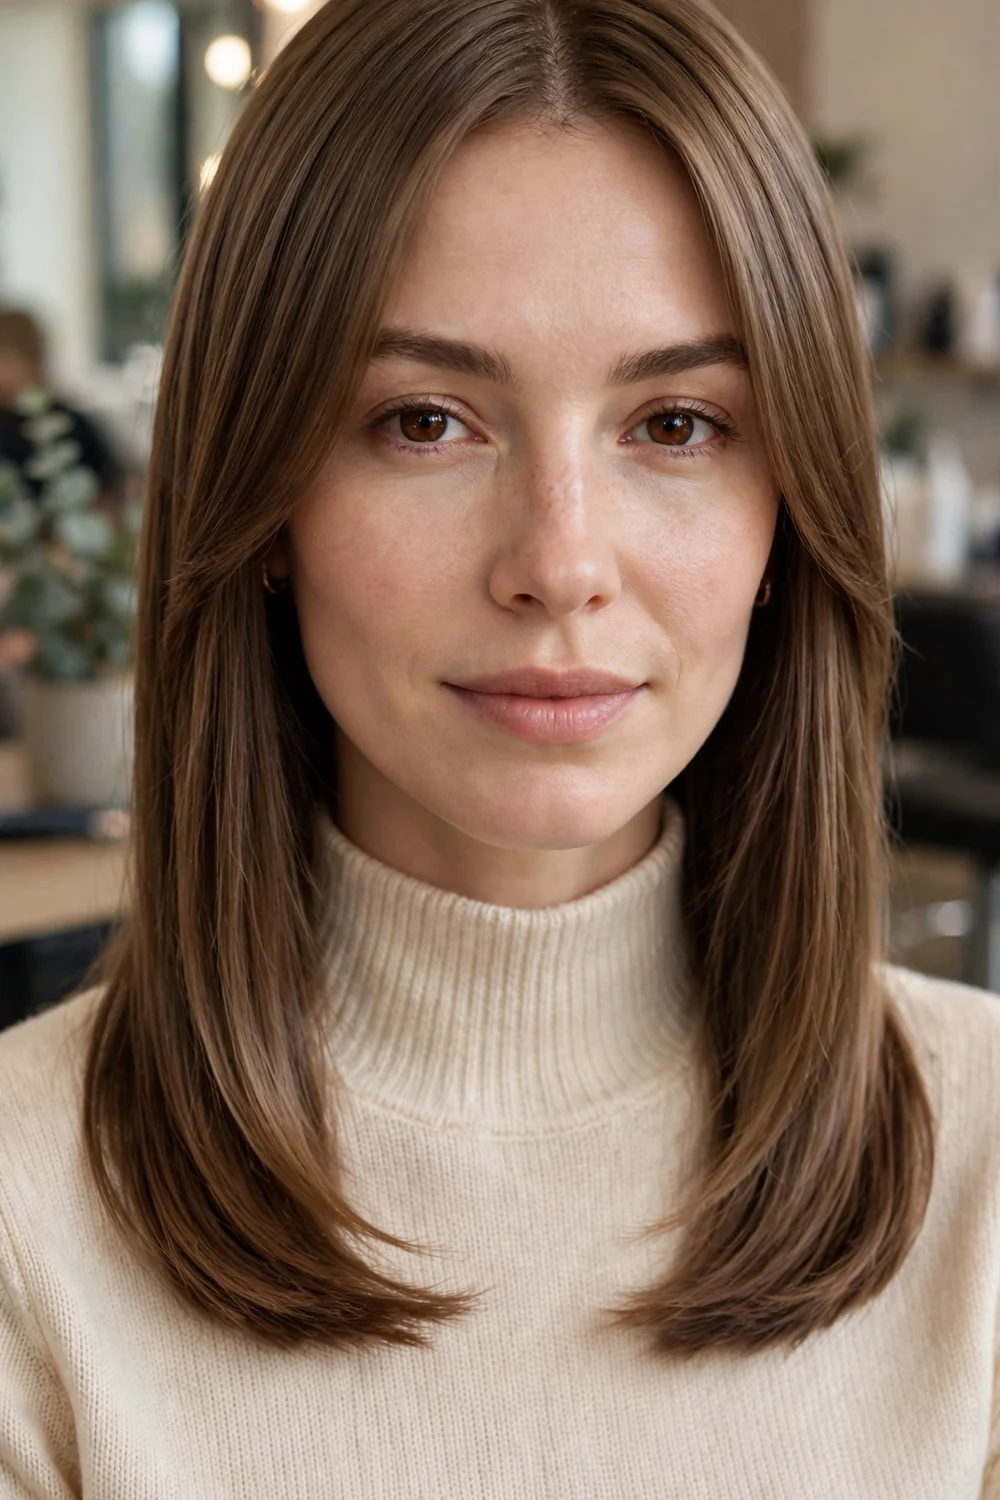
Curtain bangs part in the center and sweep to both sides, blending into shoulder length straight hair. The shortest point sits around the cheekbones, so the bangs frame the eyes and grow out into face layers without an awkward stage. The lengths stay one length or lightly layered.
Dry the bangs first, before the rest of the hair. Blow-dry them forward and down, then sweep each side back with a round brush. If you dry them last, they set in the wrong direction and fight the brush all day.
Try this: keep a small dry shampoo at the front hairline. Bangs pick up skin oil faster than the lengths and look flat a day sooner.
Difficulty: Low to Medium · Cost: $$ (salon)
13. Straight Cut with Blunt Fringe
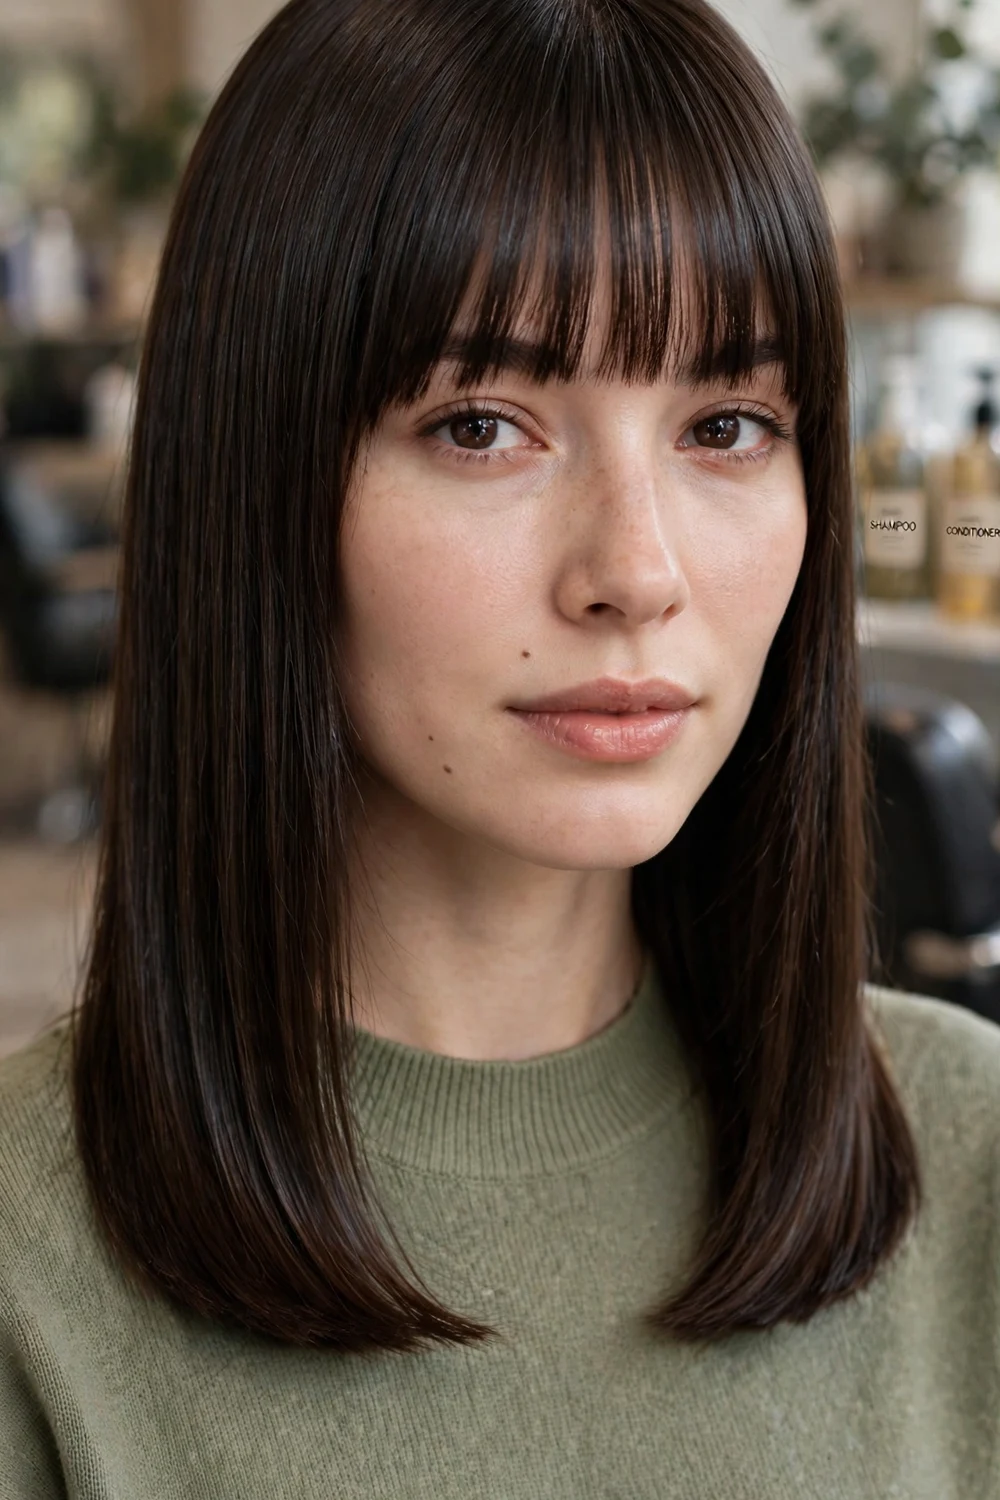
A blunt fringe is cut straight across at brow level over a shoulder length straight cut. The fringe adds a strong horizontal line at the front, which suits oval and long faces and gives a simple cut a clear focal point. The rest of the hair stays blunt to match.
Fringe upkeep is the trade. Plan a fringe trim every three to four weeks, which many salons do as a quick standalone service. At home, blow-dry the fringe side to side with the nozzle pointing down, which lays cowlicks flat without a flat iron.
Try this: bring a photo of the fringe width you want. A fringe taken too wide at the sides is hard to grow back into the lengths.
Difficulty: Medium · Cost: $$ (salon)
14. Straight Cut with Wispy Bangs
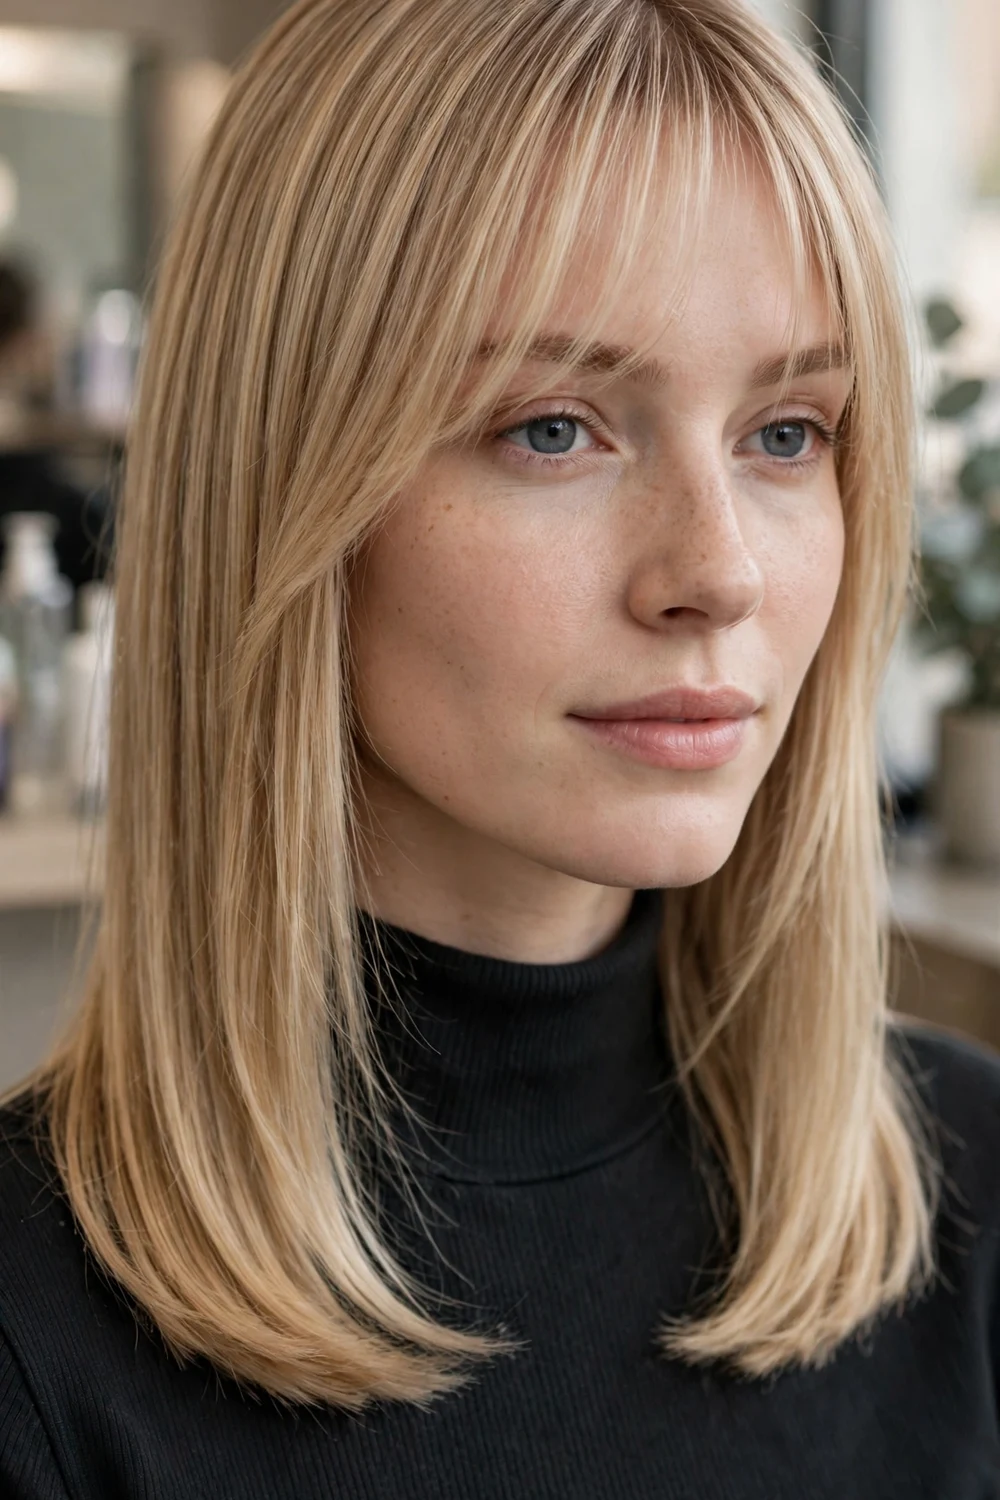
Wispy bangs are cut thin and feathery, with space between the strands, over a straight shoulder length cut. They soften the forehead without the weight of a full fringe, and they suit fine hair that cannot support a thick bang. The bangs blend into the sides as they grow, so the grow-out is gentle.
Use very little product on wispy bangs. Heavy serum makes them separate into strings. A light mist of hairspray on a fingertip, pressed along the bang line, holds the shape while keeping the airy look.
Try this: ask for the bangs to be cut dry. Wet bangs shrink as they dry, and a dry cut shows the true skimming length at the brows.
Difficulty: Low to Medium · Cost: $ (salon)
15. Straight Cut with Side-Swept Bangs
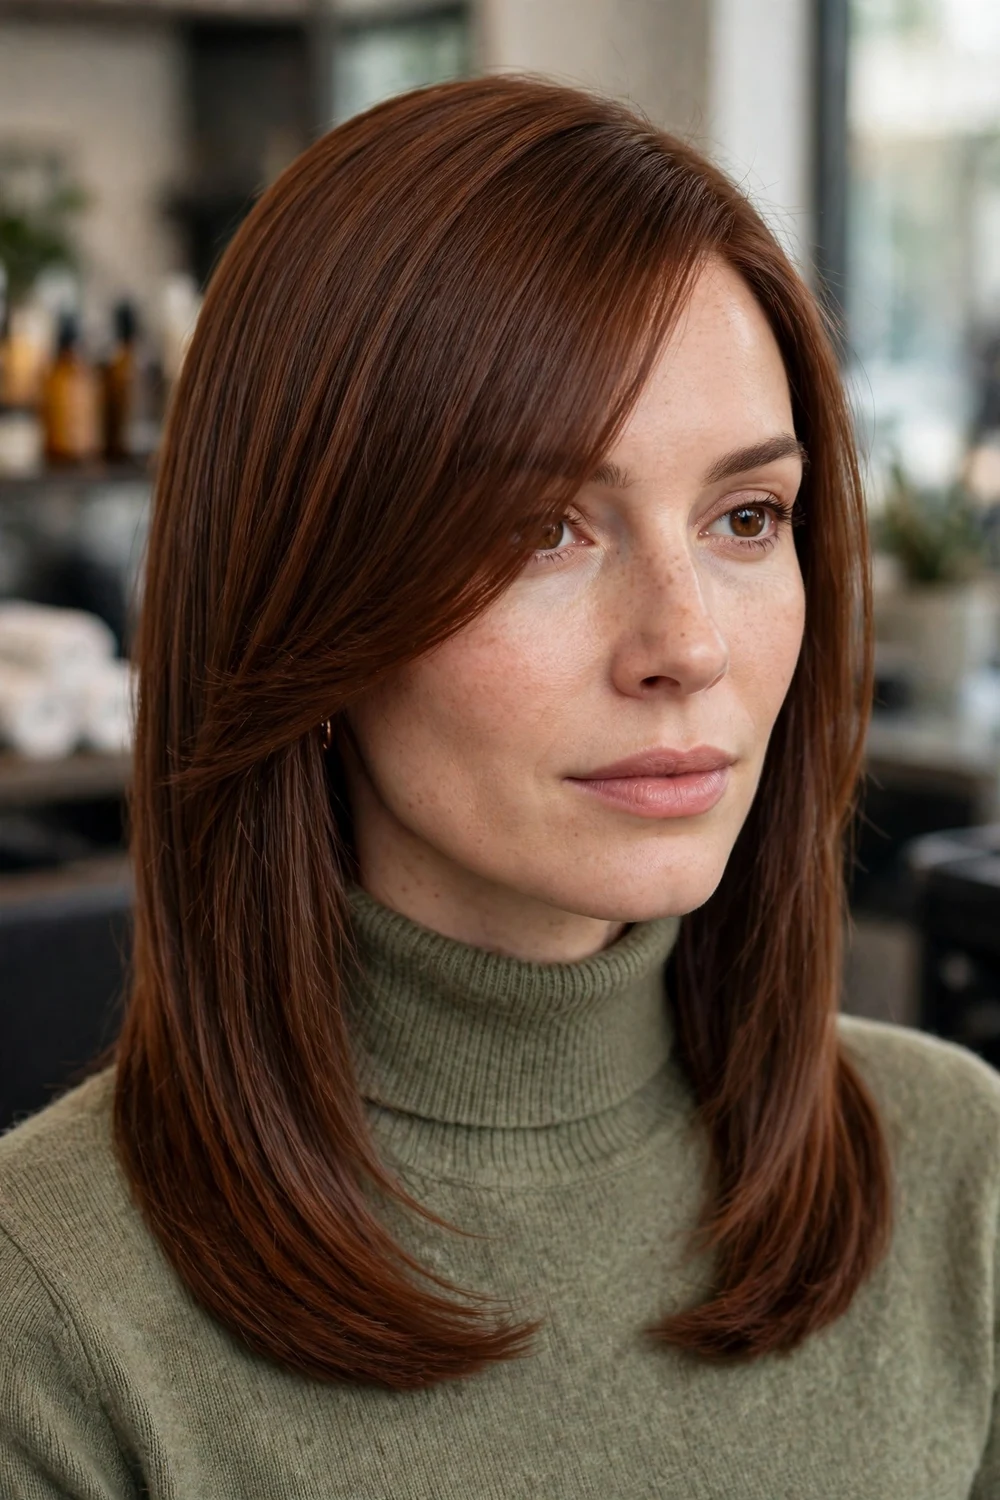
Side-swept bangs are cut long and angled, sweeping from one side of the forehead down to the opposite cheek. They pair with a side part and a straight collarbone cut, and the diagonal line suits round and square faces well. As they grow, they merge into face-framing layers.
Blow-dry the bangs forward first, then sweep them across. That order gives the root the direction it needs to lie flat across the forehead. Pin the sweep in place with a flat clip while you finish the lengths, then remove the clip once the hair cools.
Try this: if the sweep keeps falling into your eyes, the bangs are cut too long at the inner corner. A small trim at that corner fixes it.
Difficulty: Low to Medium · Cost: $ (salon)
16. Feathered Layers Worn Straight

Feathered layers are cut with soft, tapered ends that angle away from the face. Feathering is often shown with a flicked finish, but the same cut worn straight gives light, airy ends and a smooth surface. The layering sits around the face and through the last few inches of the lengths.
Keep heat low on feathered ends. Tapered ends are thinner and scorch faster than blunt ends. Use a heat protectant spray section by section and stop the flat iron just before the tips, letting the taper keep its softness.
Try this: ask for feathering only around the face if your ends are fine. Full-head feathering can thin out already light ends.
Difficulty: Medium · Cost: $$ (salon)
17. Choppy-End Lob Styled Straight
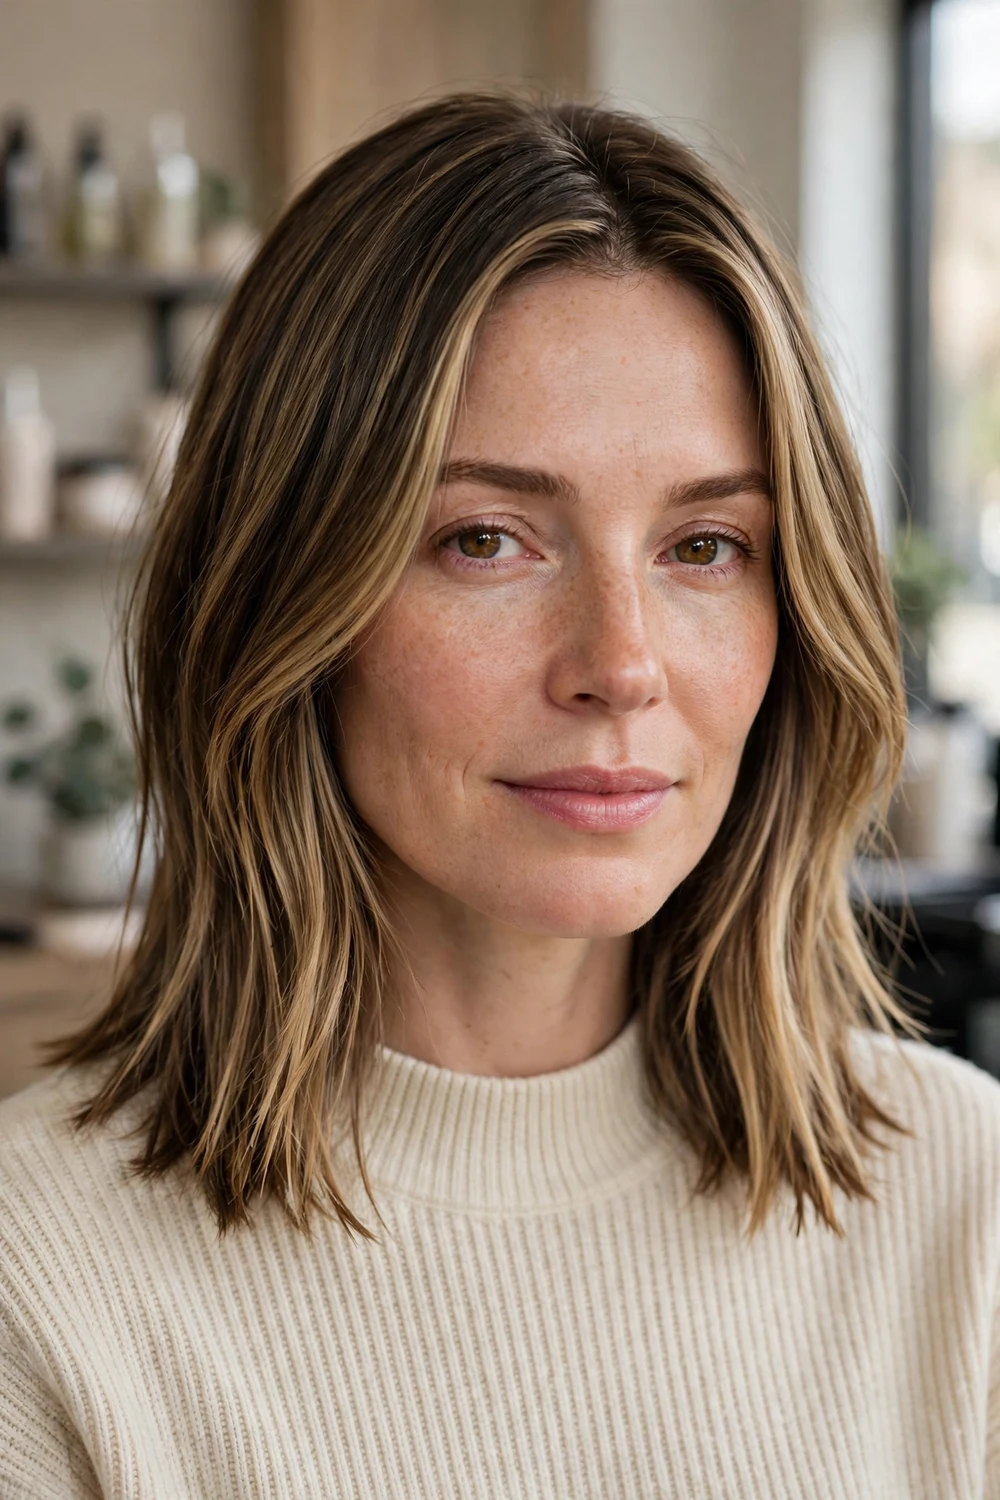
A choppy-end lob is point-cut at the ends, so the last inch separates into small pieces instead of one solid line. Styled straight, the lengths stay smooth and the piecey ends keep the outline from looking heavy. It suits straight hair that looks too severe with a blunt line.
Define the ends after straightening, with a tiny amount of styling cream worked between the fingers and pinched along the tips. Too much cream weighs the pieces down and hides the cut. Keep the mid-lengths product-free to hold the contrast.
Try this: schedule trims at six weeks. Choppy ends lose their separation as they grow, faster than a blunt line loses its shape.
Difficulty: Medium · Cost: $$ (salon)
18. Hush Cut Worn Straight

A hush cut uses fine, airy layers throughout, with delicate pieces around the cheeks and a light outline at the shoulders. It is often worn soft and tousled, but worn straight it reads as a smooth cut with gentle movement under the surface. The layering is finer than a standard layered cut, so the hair keeps a calm outline.
Blow-dry with a paddle brush rather than a round brush to keep the finish straight. A round brush adds bends that fight the sleek look. Finish with a shine spray held at arm length, so the mist settles evenly instead of spotting.
Try this: show your stylist photos of the hush cut worn straight, since the same name is used for a much more textured finish.
Difficulty: Medium · Cost: $$ (salon)
19. Straight Cut with Flipped Ends

Flipped ends keep the lengths straight and curve only the last inch or two outward at the shoulders. The cut underneath can be blunt or lightly layered. The flip adds width at the bottom of the hair, which balances narrow shoulders and gives a plain straight cut a finished detail.
Create the flip with a round brush at the very end of the blow-dry, or with one bend of the flat iron at the tips. Work on dry hair only. A flip set on damp hair falls out within the hour, while a flip set on dry, cooled hair holds through the day.
Try this: flip only the front and side ends and leave the back straight for a modern mix that takes two minutes to style.
Difficulty: Low · Cost: $ (salon)
20. Sleek Low Ponytail

A low ponytail gathers straight medium hair at the nape, smoothed flat with a center or side part. The tail reaches past the shoulders and shows the straight finish clearly. Wrapping a small section of hair around the elastic hides the band and gives the style a clean finish for work or events.
Straighten the hair fully before you gather it. A ponytail made from half-straightened hair shows every bend at the tail. Brush the hair down in sections with a smoothing cream, secure it low, then wrap and pin the covering section underneath.
Try this: use a fabric covered elastic and keep the tension gentle. Tight ponytails on straight hair leave a dent line that needs heat to remove.
Difficulty: Low · Cost: $ (salon)
21. Blunt Cut with Internal Layers for Thick Hair

Thick straight hair at medium length often pushes out into a triangle: narrow at the top, wide at the ends. This cut keeps a blunt outer line and removes weight with internal layers and, on very thick hair, a small hidden undercut section at the nape. From the outside the hair reads blunt and full. Inside, it sits closer and dries faster.
Tell your stylist clearly that the outer line must stay blunt. Weight removal that reaches the surface creates frizz and breaks the sleek finish. At home, dry the underlayers first, since thick hair traps moisture at the nape and puffs up as it air-dries later.
Try this: ask for a test at the nape only at the first appointment. If the hidden section helps, it can be extended at the next cut.
Difficulty: Medium to High · Cost: $$$ (salon)
22. Straight Cut with Ends Curved Under
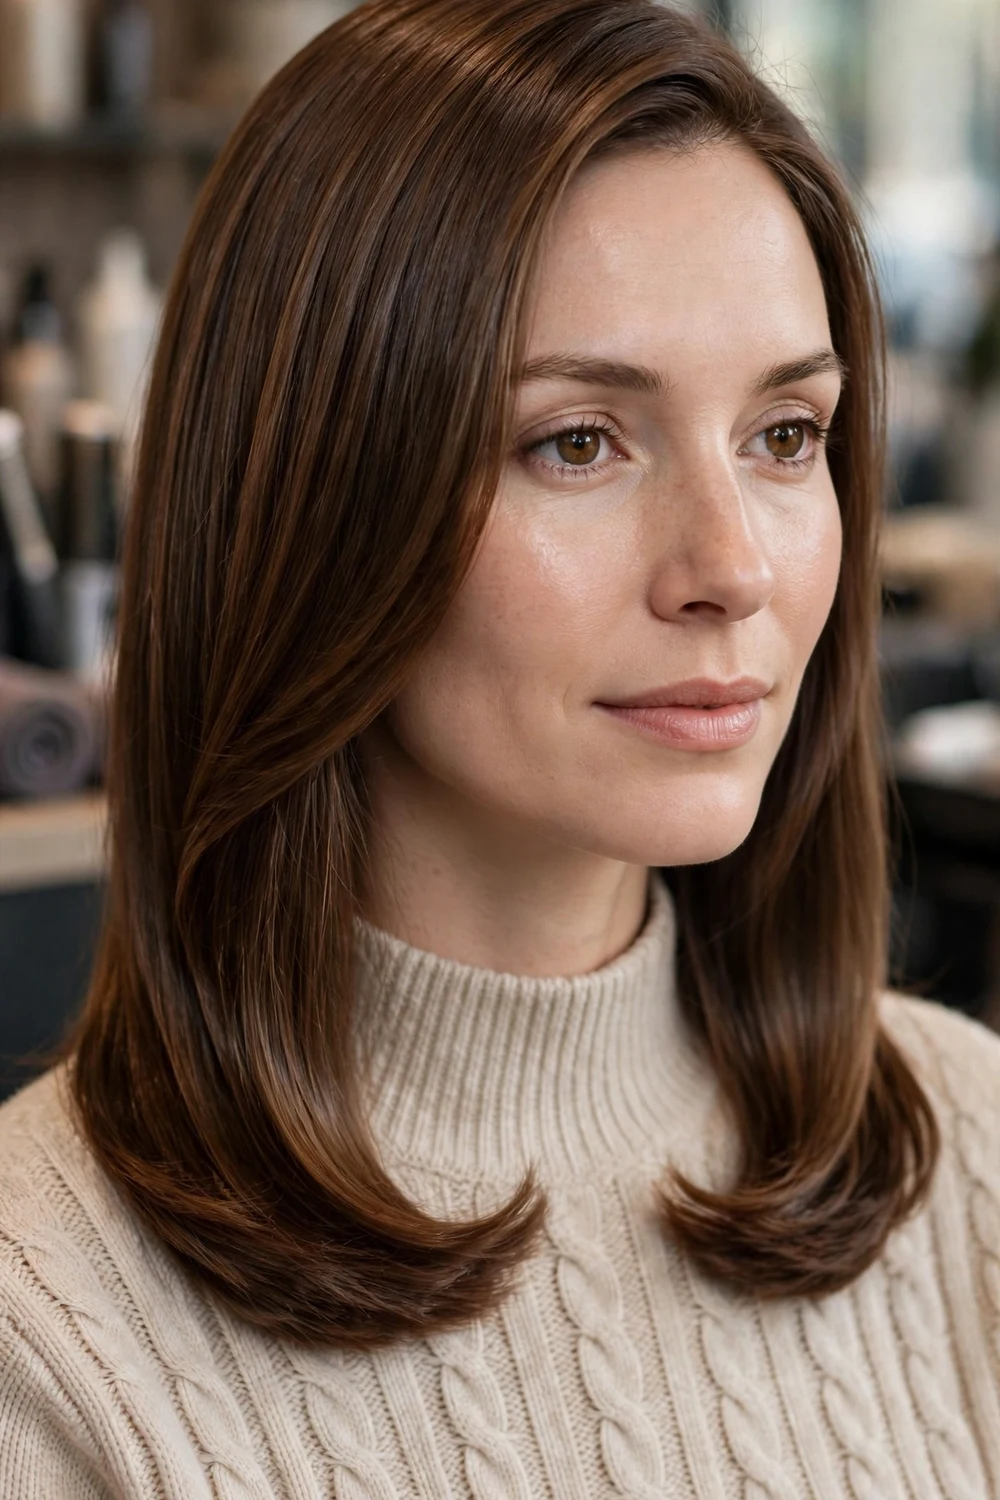
Curving the ends under keeps the lengths straight and turns only the tips inward, so the hair hugs the shoulders in a smooth arc. The cut is usually one length or a soft U-shape at the back. The inward curve suits women who find blunt straight ends too sharp against the neck and shoulders.
Set the curve with a round brush during the blow-dry and cool each section before releasing it. Cooling is what locks the curve in place. A flat iron run straight down undoes the curve, so keep heat off the last inch after drying.
Try this: sleep with the hair loose over the top of the pillow rather than under your head. Body weight flattens the curve on one side overnight.
Difficulty: Low · Cost: $ (salon)
Frequently Asked Questions
What length counts as medium for sleek straight hairstyles?
Medium hair usually falls between the shoulders and the collarbone. Some medium cuts sit just above the shoulders, but the hair is longer than chin length and shorter than chest length. All 22 ideas on this list sit in that shoulder to collarbone range.
How do I keep medium straight hair sleek all day?
Start with a smoothing shampoo and conditioner, apply heat protectant to damp hair, and blow-dry downward with a paddle brush so the cuticle lies flat. Finish with one flat iron pass per section and a small amount of anti-frizz serum on the ends. Avoid touching the hair through the day, since hands transfer oil and lift flyaways.
Which sleek straight cut works best for fine hair?
Blunt and one-length cuts work best for fine hair, including the blunt lob and the one-length shoulder cut. Every strand reaches the same line, so the ends look thicker. Long layers can also work if they stay in the last third of the hair. Short, heavy layering removes too much weight from fine ends.
How often should I trim a sleek straight medium cut?
Every six to eight weeks suits most of these cuts. Blunt lines, blunt fringes, and stacked backs sit at the shorter end of that range, around six weeks, because their shape is the point of the cut. One-length and long-layered cuts can stretch closer to eight weeks.
Can I get a sleek straight finish if my hair is naturally wavy?
Yes, with heat styling. Blow-dry the hair taut with a paddle brush first, then use a flat iron in small sections. A smoothing treatment at the salon can reduce daily styling time, but it is optional. On humid days, an anti-frizz serum and a low ponytail keep the finish tidy when loose hair will not hold.
Final Thoughts
Sleek straight medium hair works because the length and the finish support each other. The hair is short enough to lie flat and long enough to show the line of the cut, whether that line is blunt, angled, layered inside, or finished with bangs. Pick the shape by your hair type first, fine hair with blunt cuts, thick hair with internal weight removal, and then pick the part and finish you will actually style on a weekday morning.
When you are ready to compare lengths, the French bob hairstyles for wedding collection shows the shorter, polished end of this family styled for events.

