

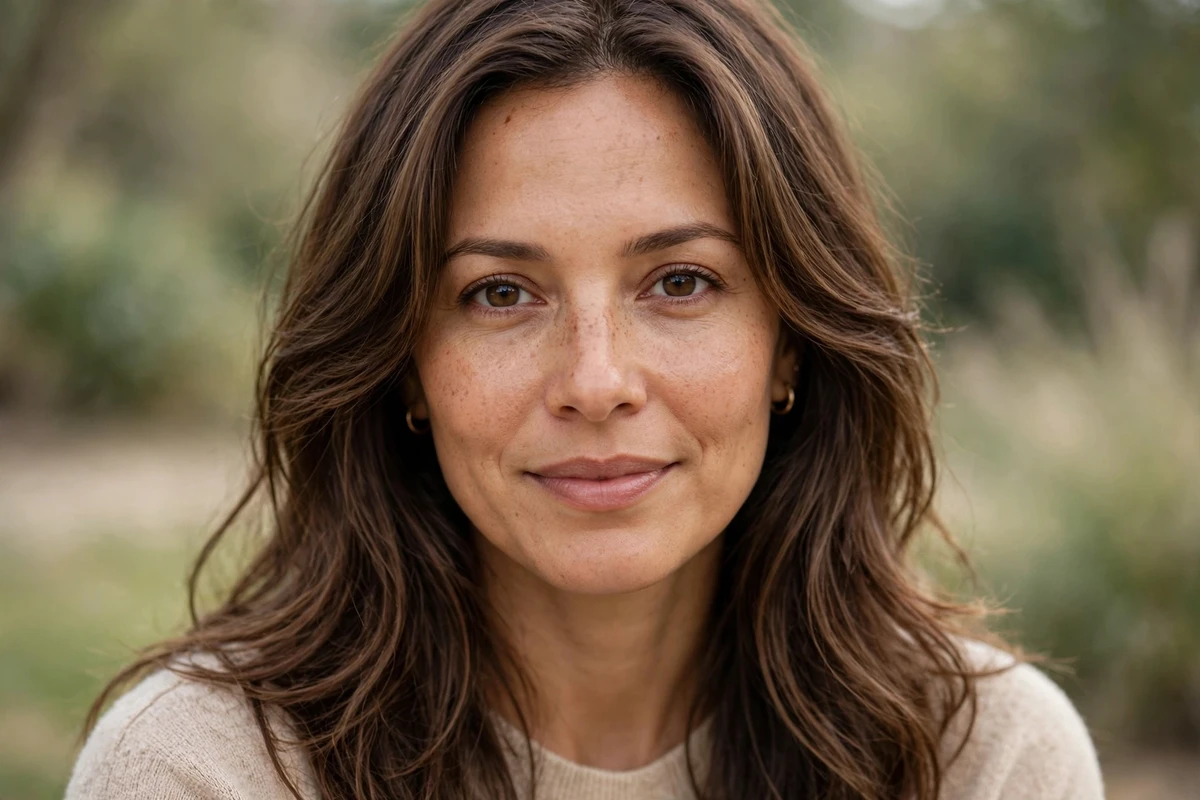
Face-framing layers can make fine thin hair look fuller, or they can wreck what little density you have. The difference comes down to placement, piece count, and the exact words you use in the chair. A stylist who hears “layers around my face” might cut short choppy pieces at the cheekbone or soft ones at the collarbone, and those two results look nothing alike on fine hair.
This face framing layers haircut guide for fine thin hair rounds up 23 looks that keep density intact, from two-piece frames on blunt cuts to invisible internal layers. Every idea includes what to ask for, what to avoid, and the maintenance it really needs, so you walk into your appointment with language your stylist can cut to.
Quick Takeaways
- On fine hair, fewer pieces beat more pieces: two soft front pieces on a blunt perimeter keep more density than layered-all-over cuts.
- Use body landmarks when you ask: “shortest piece at my chin” or “at my collarbone” is clearer than inches.
- Avoid thinning shears and razor work on the perimeter, since both hollow out ends that fine hair can’t afford to lose.
- Blunt ends plus hidden internal layers is the reliable formula for movement without visible thinness.
- Trims every 6 to 12 weeks keep fine framed hair from going stringy, depending on how short the framing is.
1. The Two-Piece Blunt Frame
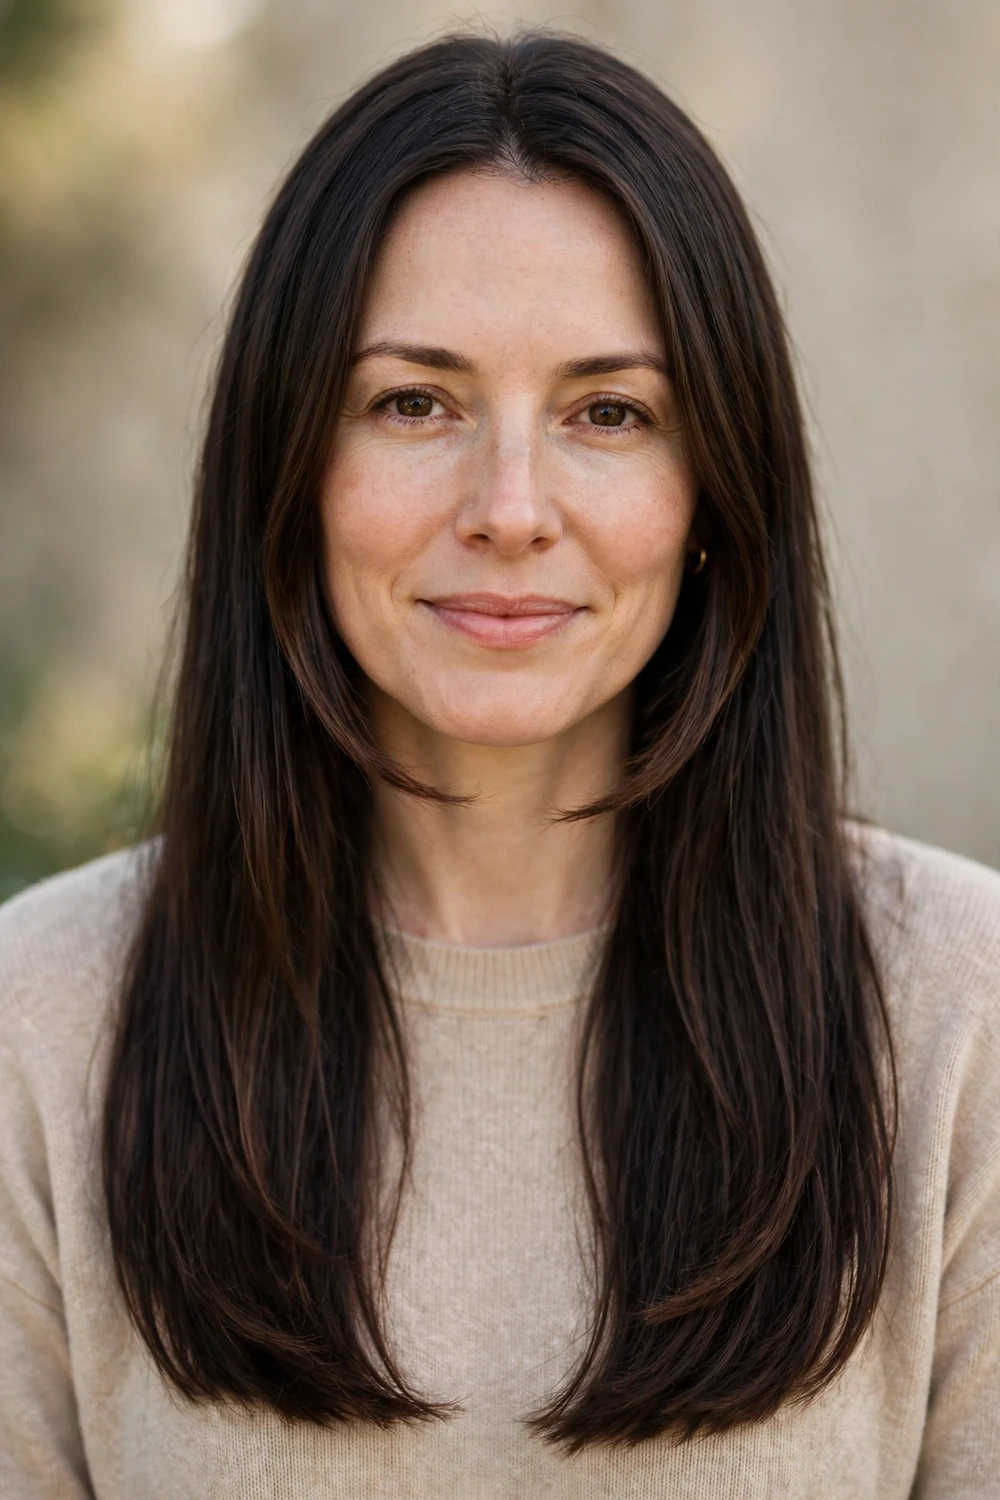
This is the safest face frame for fine thin hair: two soft pieces at the front of an otherwise blunt cut, with no internal layers and no thinning shears. The perimeter keeps all of its density, so the ends look thick, while the two front pieces give your face an outline and a little movement. Ask your stylist to keep the pieces long, starting around the chin, so they blend instead of standing out as obvious layers.
The trade-off is honesty about maintenance. A blunt perimeter only looks intentional when the ends are freshly cut, so book trims every 8 to 10 weeks before the bottom line softens. Style the pieces by blow-drying them away from your face with a round brush for about ten seconds, then let them fall. A pea-sized amount of lightweight cream keeps flyaways down without weighing the pieces flat. Because there are only two pieces, a sloppy cut shows, so pick a stylist who cuts fine hair regularly.
Try this: ask for “two soft pieces at the front, no internal layers, no thinning shears” and point to your chin as the shortest piece.
Difficulty: Low · Cost: $$ (salon)
2. Micro-Layers with an Invisible Start

Micro-layers remove hair in tiny amounts, high enough to create movement but not enough to thin the perimeter. Nobody, including you, can spot where the layer begins, which is exactly the point. This is the compromise between a blunt cut and a layered one: your hair moves like it has layers and reads like it has the density of one length. It suits fine hair that feels stiff and helmet-like when cut all one length.
Ask for “micro layers, invisible start point” and be clear the pieces should stay long, roughly from the cheekbone down. The cut needs a stylist with a light hand, since one aggressive pass turns micro into choppy. Style with mousse at the roots before blow-drying, since root lift does more for fine framed hair than any product worked through the ends. Trims every 10 to 12 weeks keep the invisible layers from growing into visible ones.
Try this: put mousse on damp roots only before drying, and keep product off the mid-lengths so the layers stay light.
Difficulty: Low · Cost: $$ (salon)
3. Barely-There Diagonal Sweep

A gentle diagonal runs from the cheekbone to the collarbone, cut with the hair falling naturally in your real part rather than pulled forward. Because nothing is pulled out of position during the cut, the framing lands exactly where you asked for it, and it survives air-drying better than any other version here. This is the frame for anyone who wants the effect without evidence anyone cut layers. The single diagonal also photographs well, giving the front of your hair gentle movement in pictures.
Ask your stylist to cut it in your natural part with the hair falling where it lives, and to keep the diagonal soft rather than stepped. On fine hair, the single diagonal removes almost no density, so the ends stay solid. Style by drying the front sections away from your face first, then letting them fall naturally. If the framing disappears by midday, the culprit is usually your part shifting, not the cut itself.
Try this: tell your stylist “cut it in my natural part” so the framing isn’t accidentally cut shorter than you asked.
Difficulty: Low · Cost: $$ (salon)
4. Chin-Skimming Frame
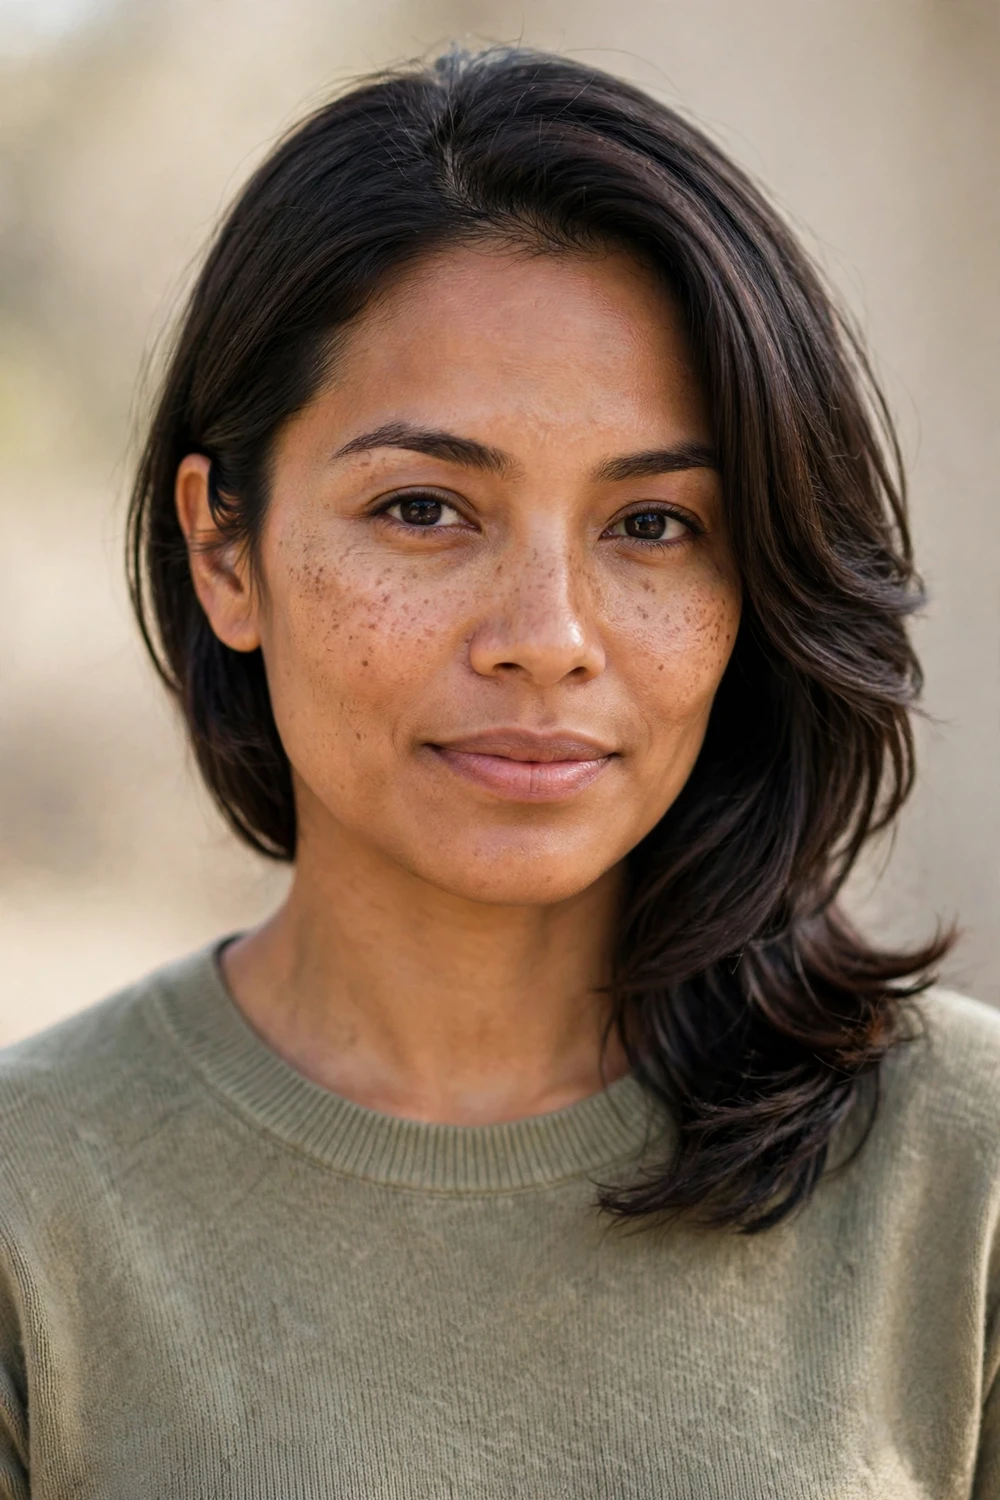
The shortest piece lands just below the jaw, long enough to tuck behind an ear and short enough to read as framing. This is the most commonly recommended starting point in salons because it flatters round, square, and heart faces without committing you to short layers. On fine hair, the below-chin length keeps weight along the perimeter, so the bottom edge doesn’t turn wispy. It also grows out cleanly, since the pieces simply blend into the length over the following weeks.
Ask for it in three words: “below the chin.” Then add that you want it blended into the length, not stepped, so the pieces flow into the back. Style by tucking one side behind your ear and leaving the other down; that small asymmetry is what makes below-chin framing look deliberate rather than grown-out. Trims every 10 weeks hold the line, since pieces that creep past the collarbone stop framing and start blending.
If you like framing at shorter lengths, these short french bobs show how cheek-skimming pieces behave on bob-length cuts.
Try this: tuck one side behind your ear and leave the other loose for an intentional, asymmetric finish.
Difficulty: Low · Cost: $$ (salon)
5. Collarbone-Length Frame

The shortest piece starts at the collarbone and everything else stays long, which makes this the safest first frame for anyone who has been burned by layers before. There is never an awkward grow-out stage because the pieces are long enough to blend into the length within weeks. For fine thin hair, the long start point protects density: the layers remove almost nothing, so the ends keep their weight. Stylists often suggest this version first when a fine-haired client is nervous about losing length.
Ask for “shortest piece at my collarbone, nothing above it,” since framing that starts above the shoulder on long hair can read as a mistake rather than a choice. A single bend of the shortest piece away from the face with a curling iron is all the styling this needs; straightened flat, it can read as one length again. It works with any face shape and grows out gracefully, making it the lowest-risk entry on this list.
Try this: bend only the shortest piece away from your face with a curling iron to make the framing show up.
Difficulty: Low · Cost: $$ (salon)
6. Curtain Fringe with Mini Layers

A curtain fringe parts in the middle and melts into delicate mini layers through the ends, giving fine hair airy fullness without over-thinning. The fringe opens up the face and transitions seamlessly into the longer pieces, so nothing looks chopped or disconnected. It is especially flattering on wider face shapes, where the center part and the long sweep create length down the middle of the face. Keep the layers delicate rather than chunky, since heavy pieces would undo the airy effect.
Ask for the fringe to graze the brows at its longest and for the mini layers to stay subtle through the ends. The catch is upkeep: if the fringe grows too long, it loses the airy separation that makes the cut work, so plan trims every 6 to 8 weeks. Blow-dry the fringe forward with a round brush, then part it in the center for the signature sweep, and keep heat styling light so the fine pieces don’t go flat.
Try this: twist each side of the fringe away from your face while blow-drying to set the curtain sweep.
Difficulty: Medium · Cost: $$ (salon)
7. Wispy Bangs with Chest-Length Layers
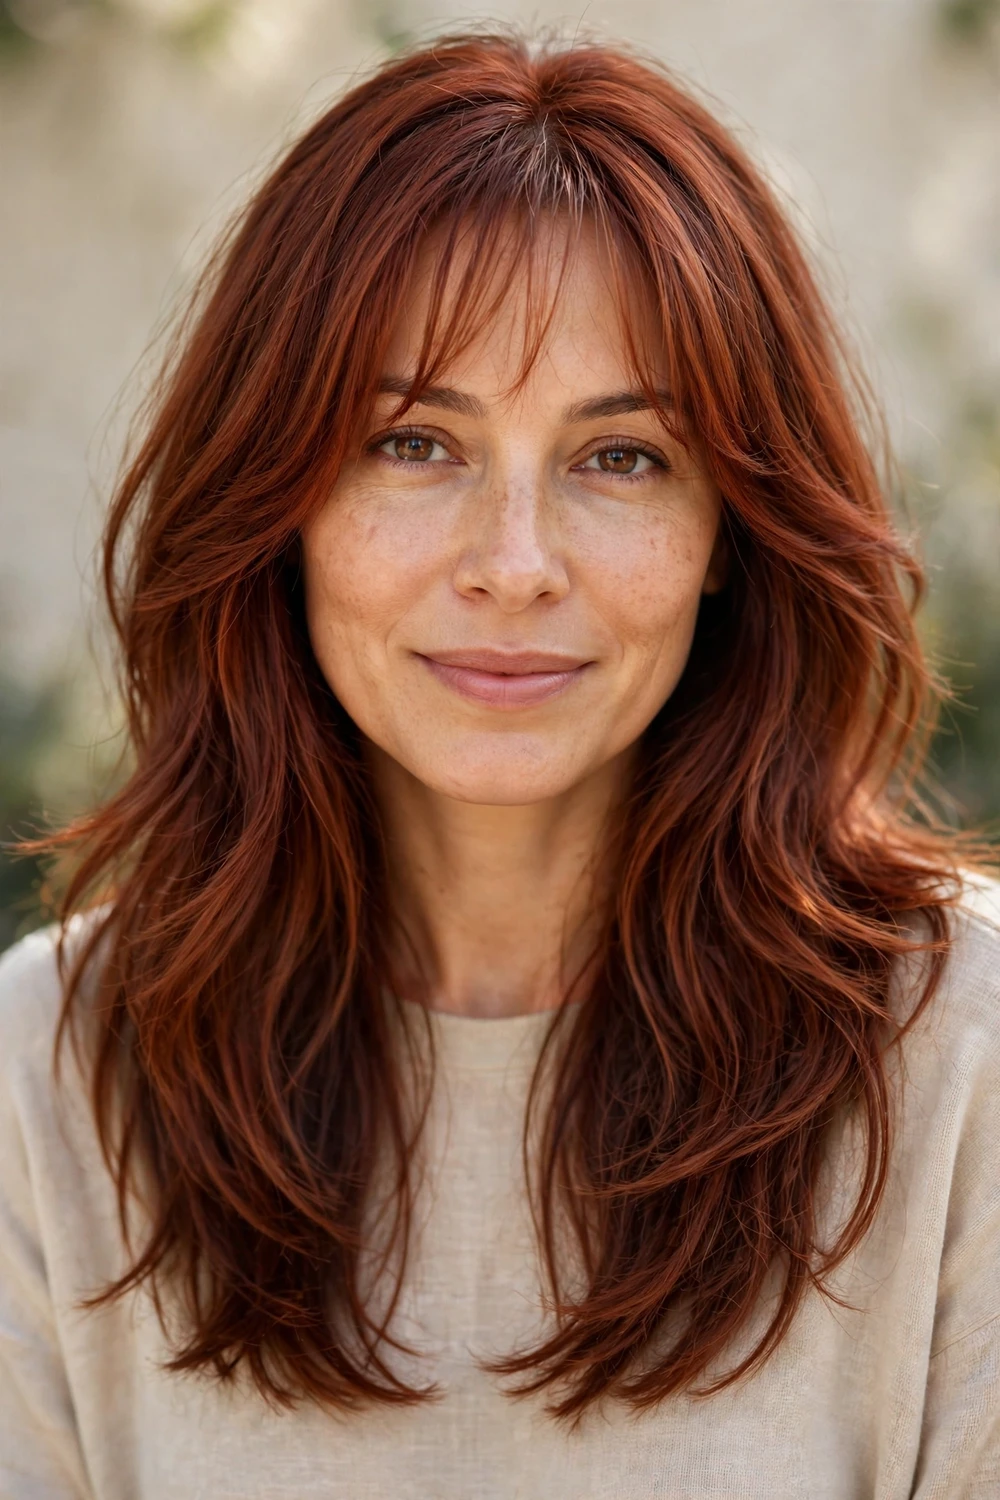
Wispy bangs are sheer enough to see through, which is exactly why they work on fine hair: they soften the forehead without removing the density a heavy fringe would cost. Paired with chest-length layers, the combination adds body and bounce around the face while the long layers keep the back full. This pairing suits medium-density fine hair best, since very sparse hair can struggle to fill both a fringe and layers.
Ask for feathered texture around the face rather than a blunt fringe, and keep the layers long and soft through the back. Style with a round brush to lift the ends, and know the trade-off: this look can fall flat without regular blow-drying or a light texturizing product at the roots. A quick refresh with dry shampoo at the crown on day two brings the shape back without a full wash.
Try this: ask for feathered, see-through bangs rather than a blunt fringe so density stays in the cut.
Difficulty: Medium · Cost: $$ (salon)
8. Butterfly Layers from the Cheekbone
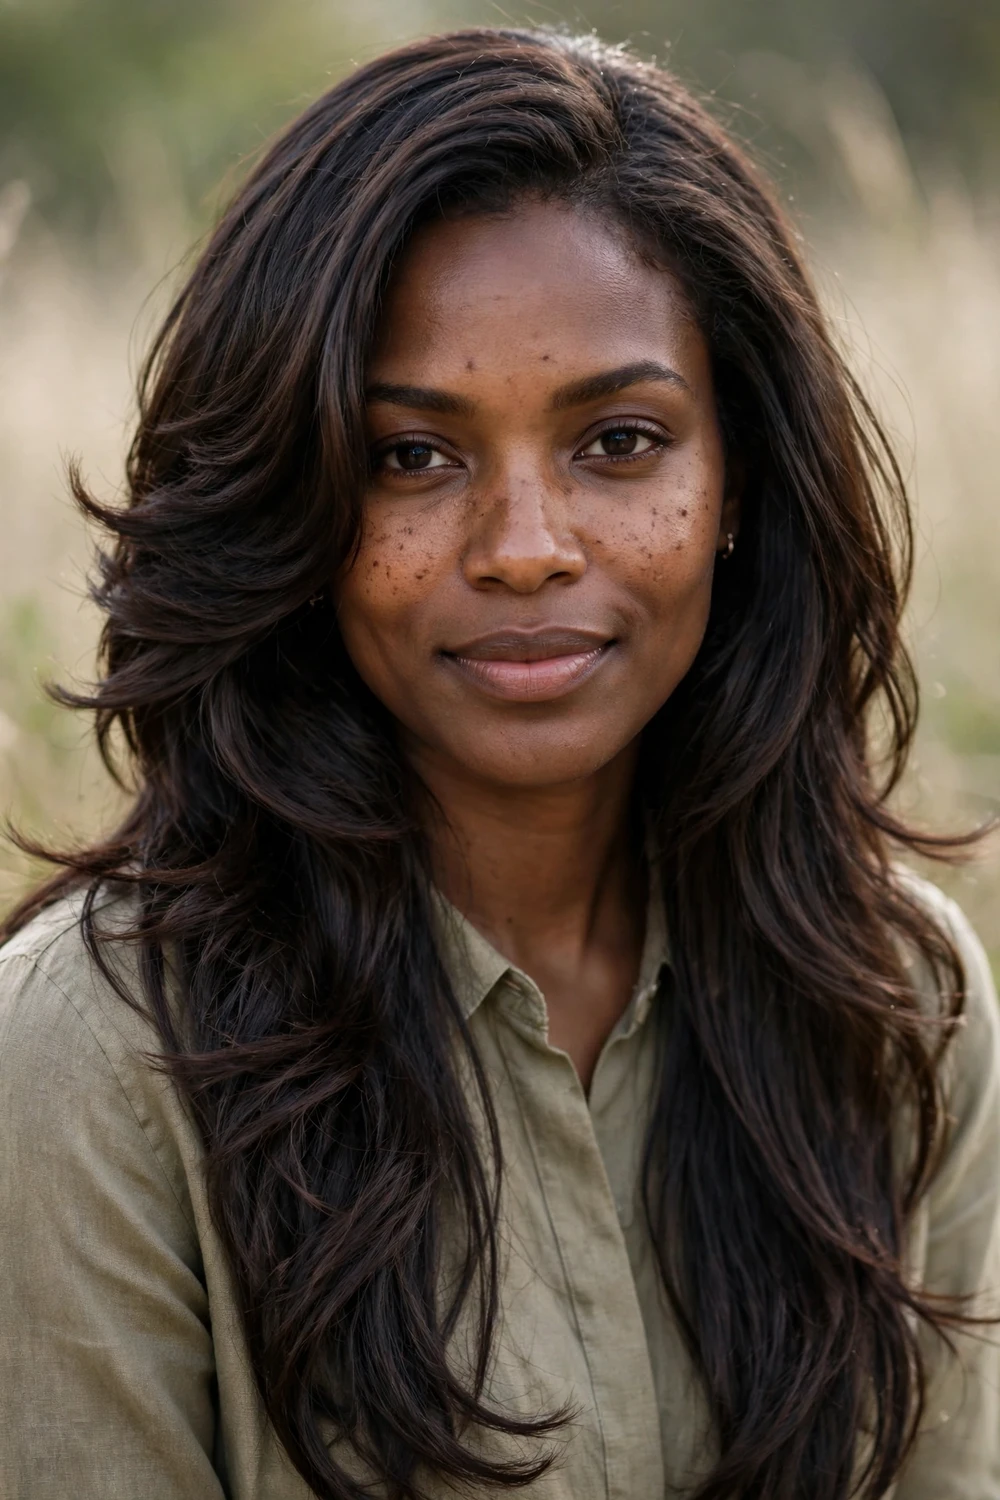
Butterfly layers start around the cheekbone and feather back from the face, giving the illusion of movement and volume without sacrificing length. On fine hair, the trick is restraint: keep the wings long and the piece count low, because the full social-media butterfly with lots of short layers hollows out thin hair fast. Done conservatively, the layers lift at the crown while the perimeter stays solid. Ask your stylist to count the pieces out loud so you both agree on how few there will be.
Ask for the shortest layer at the cheekbone and for the back to stay nearly one length so density pools at the bottom. Avoid asking for heavy face-framing plus short crown layers together; thin hair can’t fill both. It air-dries nicely but may need a light pass with heat to keep the wings lifted and stop the crown from going limp. Velcro rollers at the crown while you get dressed give the wings their bounce with almost no effort.
Try this: say “cheekbone start, back stays long” so the butterfly doesn’t get cut too aggressively for fine hair.
Difficulty: Medium · Cost: $$ (salon)
9. Soft ’90s Feathered Flick Frame

Long sleek hair with feathered layers around the face and subtly flicked-out ends gives fine hair movement and body with almost no layering through the back. The flick at the ends creates the illusion of fullness because the eye reads the turned-out tips as extra hair. It works with a center or side part, and it is one of the few retro shapes that suits fine strands, since the shape comes from styling the ends rather than cutting layers in.
Ask for long, feathered face-framing pieces with soft, flicked ends, and keep the back close to one length to protect density. The catch is styling: a round brush and a dryer are needed to turn the ends outward, since fine hair won’t hold the flick on its own. Set each flick with a cool shot from the dryer and finish with a light flexible spray so the movement lasts past midday.
Try this: flick the front pieces outward with a round brush and lock them with a cool shot from the dryer.
Difficulty: Medium · Cost: $$ (salon)
10. Chin-Length Bob with Subtle Front Layers
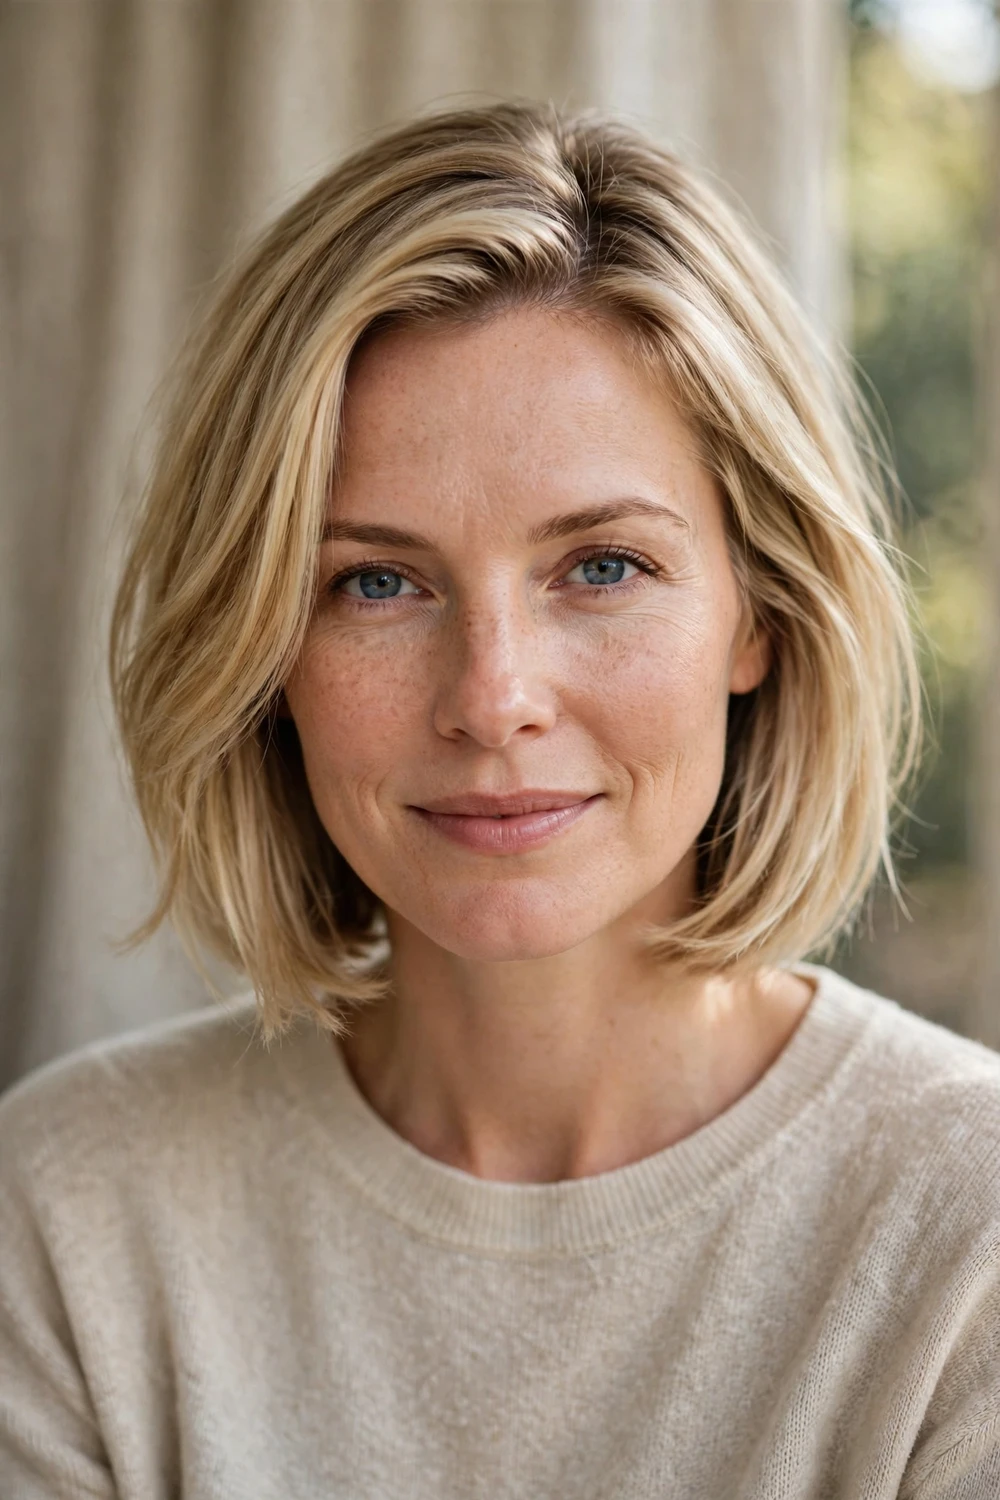
A chin-length bob with gentle layering through the sides and slightly tucked-under ends gives fine hair a rounded shape without heaviness. The front layers soften the jawline while the blunt-ish bottom edge keeps the perimeter looking thick. A deep side part lifts the crown, which matters on fine hair since the top is where thinness shows first. It suits straight to slightly wavy textures and works well on narrow or angular faces.
Ask for subtle layering through the sides with the ends tucked under, and a deep side part to build crown height. The tucked ends need a quick blow-dry or round-brush pass to hold their curve, so this isn’t a true wash-and-go cut. Trim every 6 to 8 weeks, since a chin bob loses its line quickly as it grows and starts flipping at the shoulders. A light volumizing spray at the roots before drying gives the deep side part extra lift.
Try this: blow-dry the ends under with a round brush and finish with a cool shot to hold the tuck.
Difficulty: Medium · Cost: $$ (salon)
11. Stacked Textured Bob with Front Softness
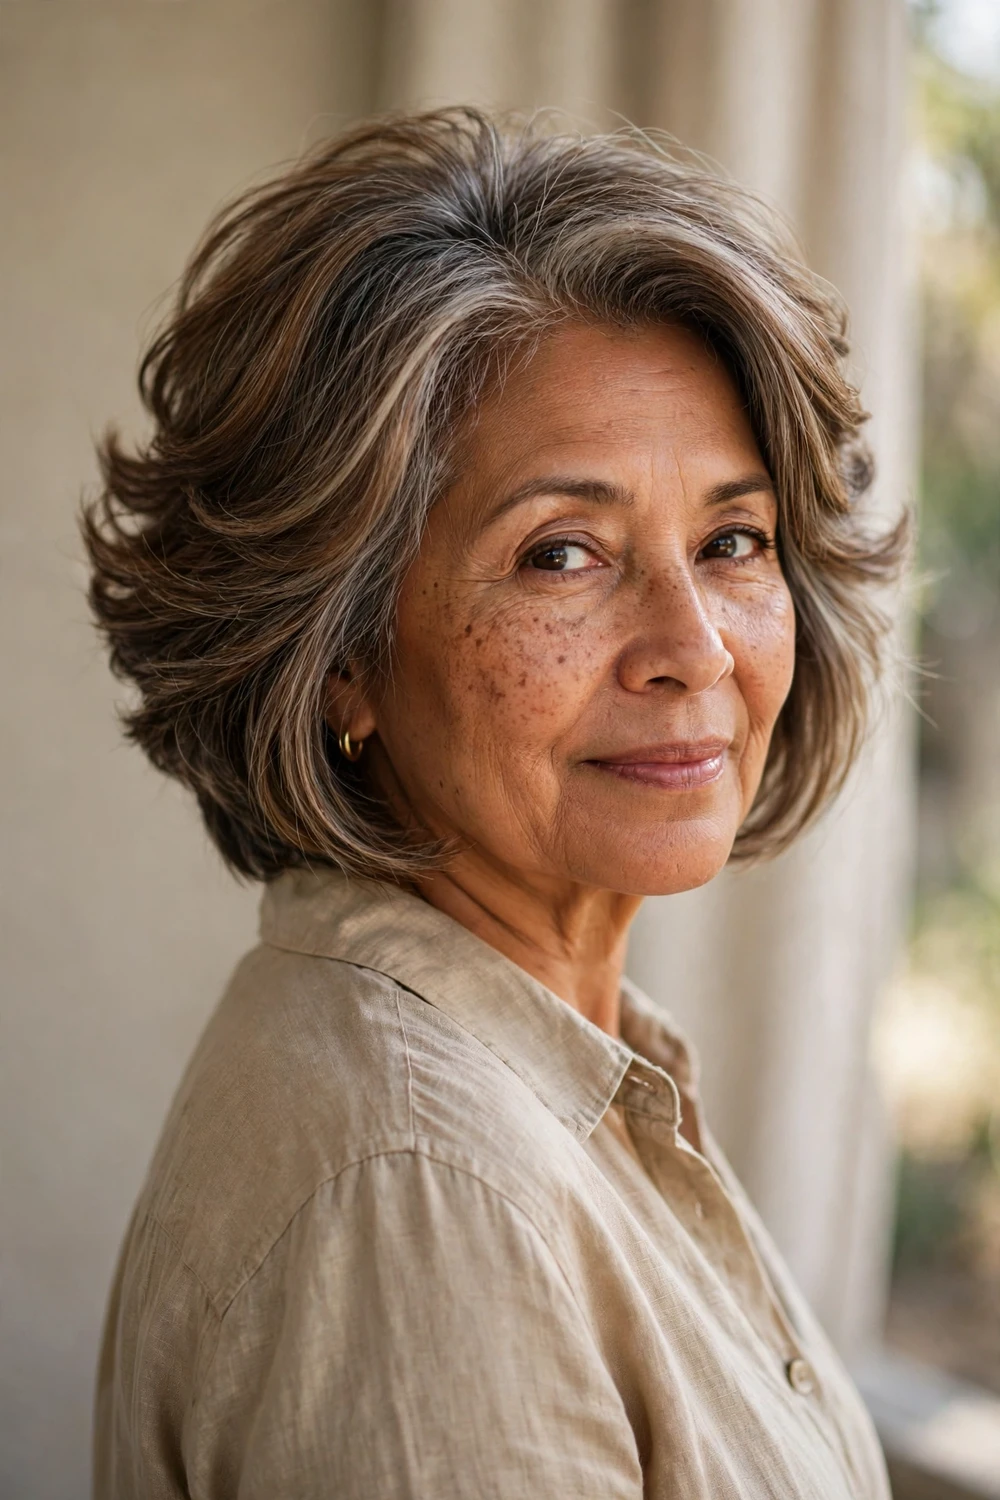
Graduated stacking through the back builds volume exactly where fine hair goes flat, while soft front pieces frame the jawline without removing length from the perimeter. The back is slightly stacked for lift and the front stays long enough to read as framing, so you get two effects from one cut. It works best on straight to wavy fine hair that can hold a smooth line. The combination suits anyone whose hair looks fine from the front but goes flat from the side.
Ask for clean stacking at the nape with soft, jaw-skimming front pieces, and keep the surface smooth so the shape reads polished rather than choppy. A round brush and a cool shot from the dryer lock in the lift, and the cut holds its shape for days between washes. For more short layered options in this family, these short layered hairstyles for women over 60 cover similar low-lift shapes with face-framing fronts.
Try this: flip your head upside down for the last minute of blow-drying to boost the stacked layers.
Difficulty: Medium · Cost: $$ (salon)
12. Layered Lob with Sliced Ends
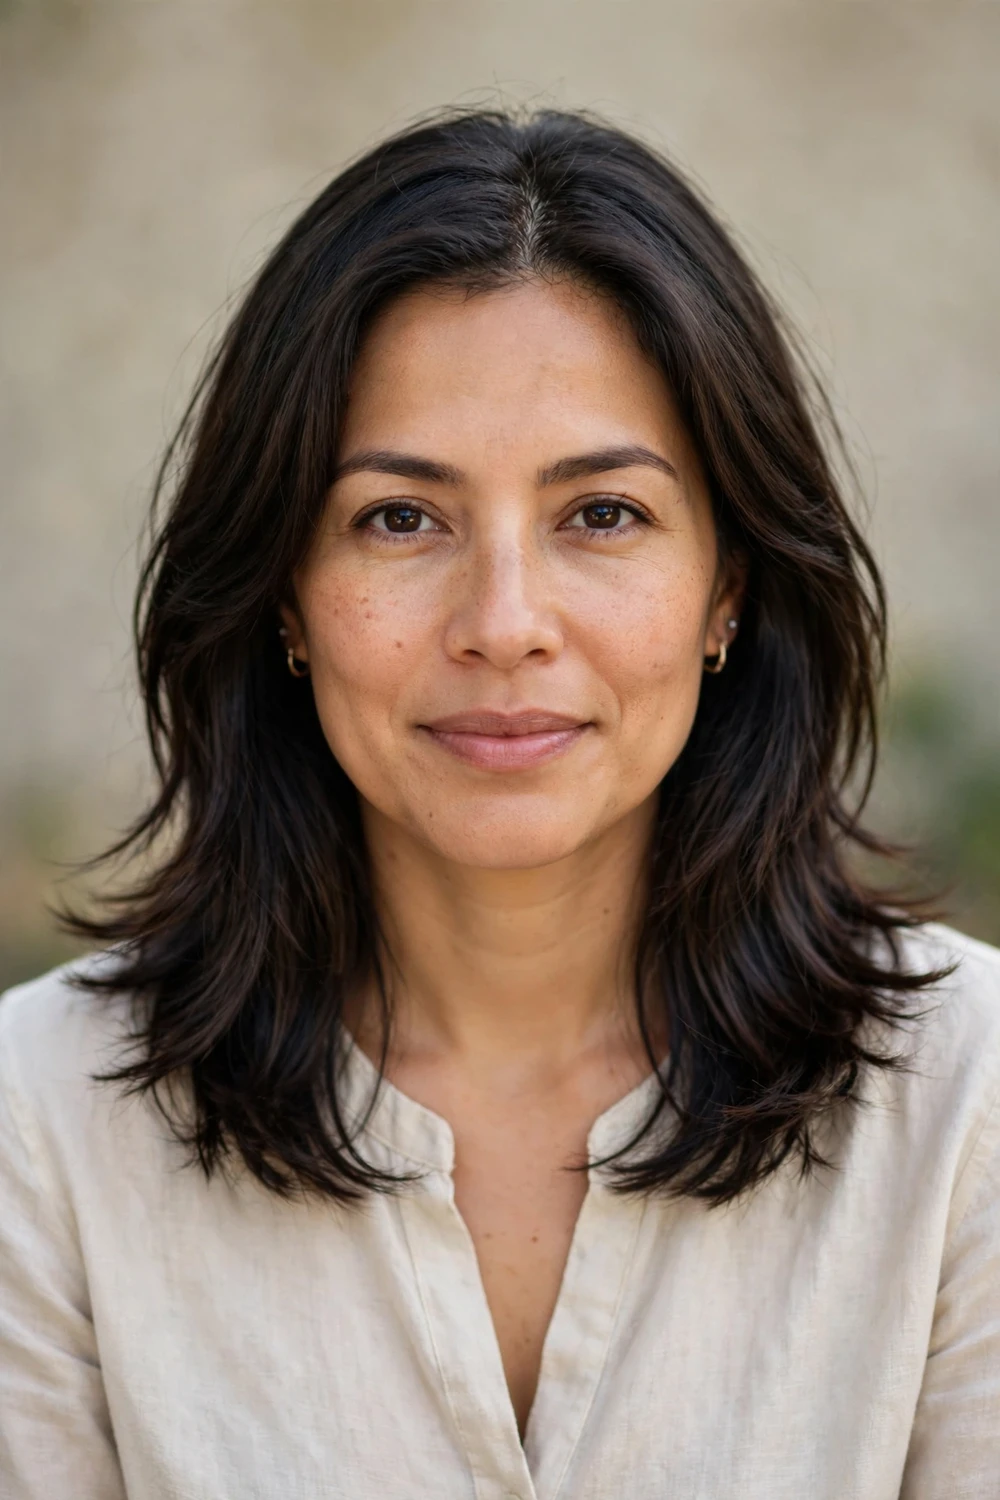
Sliced ends make the tips look feathered without bulk, which suits fine strands that get weighed down by heavy layering. The lob keeps clean lines with subtle volume through the mid-length, and a center part keeps the cut modern and symmetrical. Because the slicing removes weight vertically rather than horizontally, the perimeter keeps more of its density than it would with traditional layering. The result looks soft but deliberate, never ragged or overdone.
Ask for sliced ends rather than thinned ends, and be clear you want the slicing kept light: on very fine hair, over-sliced tips start to look sparse. The styling is low-fuss and the cut can air-dry nicely, which makes it one of the easier options here. Trims every 8 to 10 weeks keep the sliced edges from turning wispy, and a light texturizing spray adds separation on days the ends look too smooth.
Try this: say “sliced, not thinned” so the ends keep their density while losing bulk.
Difficulty: Low · Cost: $$ (salon)
13. Feathered Shoulder-Length Frame

Feathered shoulder-length layers frame the face with natural movement and lift thinning strands around the temples, where fine hair often looks sparsest first. The layering starts softly around the face and stays controlled through the sides, so the top keeps fullness while the ends move. It is an easy, low-drama cut that flatters oval and heart faces and works with or without bangs. Regular trims every eight weeks keep the feathered edges fresh and stop them from going stringy.
Ask for soft feathering around the face with the sides kept controlled, not hollowed out. The cut is easy to manage day to day: blow-dry with a round brush for polish or let it air-dry for a softer finish. If your hair is going gray, note that gray can be coarser than pigmented hair, so smooth a lightweight serum through the mid-lengths to keep the feathered ends from puffing out.
Try this: point to your temples and ask for lift there, since that’s where fine hair thins first.
Difficulty: Low · Cost: $$ (salon)
14. Soft Cascade Mid-Length Layers
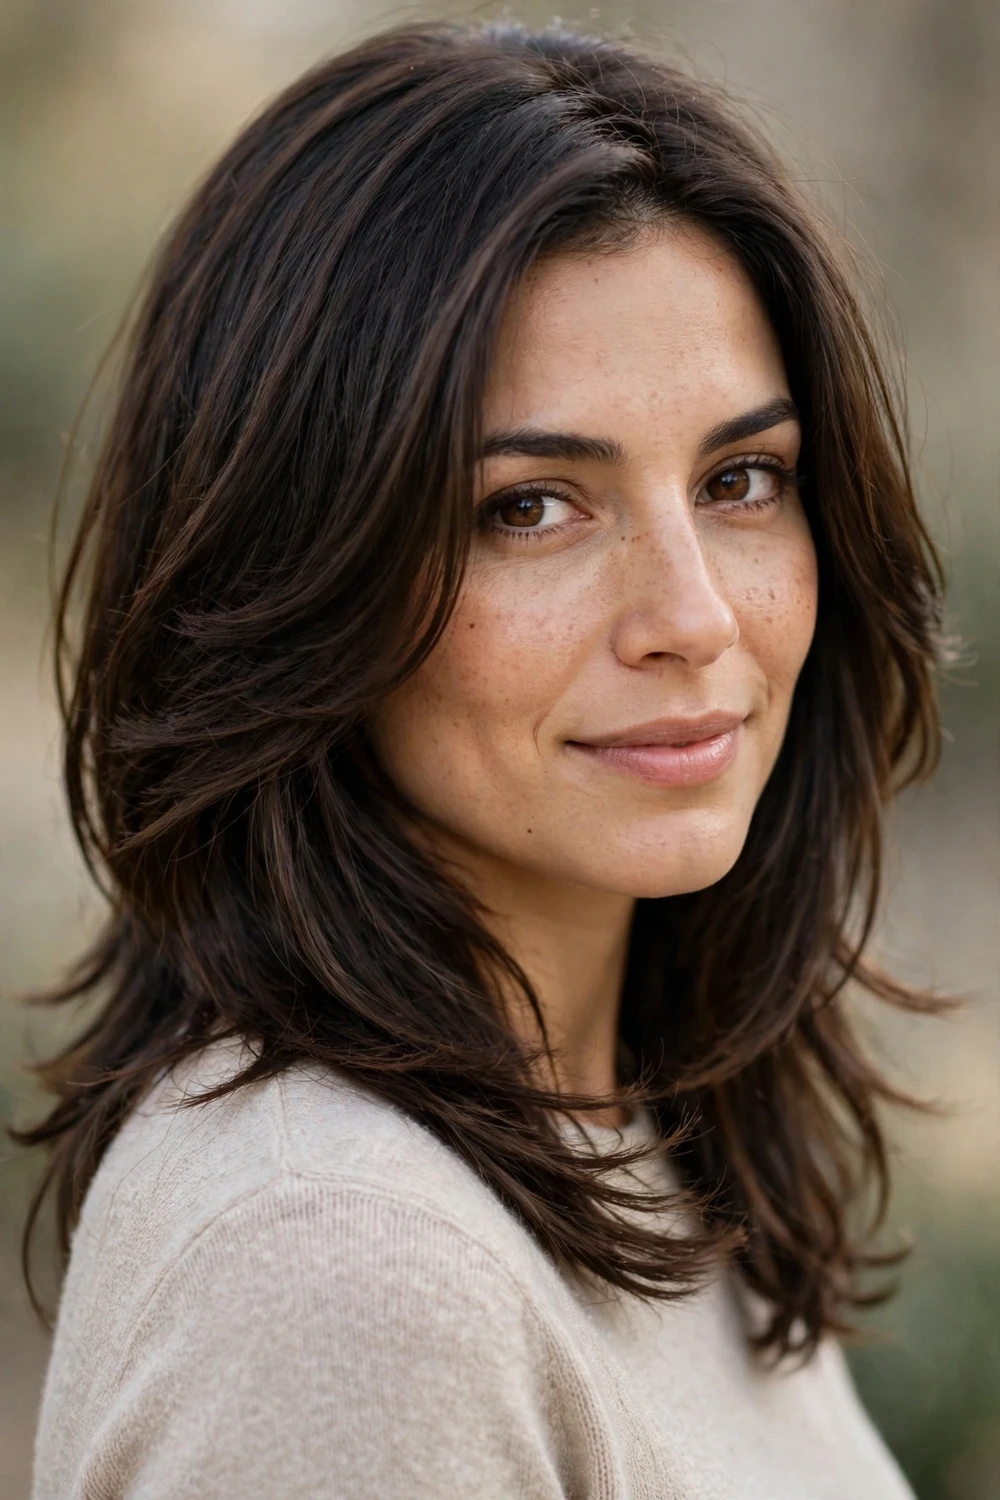
Gently tapered layers through a mid-length cut give fine hair volume with the ease of a shoulder-skimming shape. A darker root melting into a slightly lighter tone adds depth, which the eye reads as thickness, though the cut works just as well in one shade. The layers stay long enough that styling never takes more than a few minutes, making this one of the most practical options on the list.
Ask for tapered layers that cascade from the cheekbones down, with the shortest pieces kept long enough to blend. The versatility suits most face shapes, but managing different lengths takes a touch more styling time than a one-length cut. Blow-dry with a round brush directed upward at the roots for lift, and let the ends fall naturally. Trims every 8 to 10 weeks stop the cascade from growing into an undefined shape.
Try this: dry the roots upward with a round brush so the cascade starts with lift, not flatness.
Difficulty: Low · Cost: $$ (salon)
15. Ghost Internal Layers + Blunt Perimeter
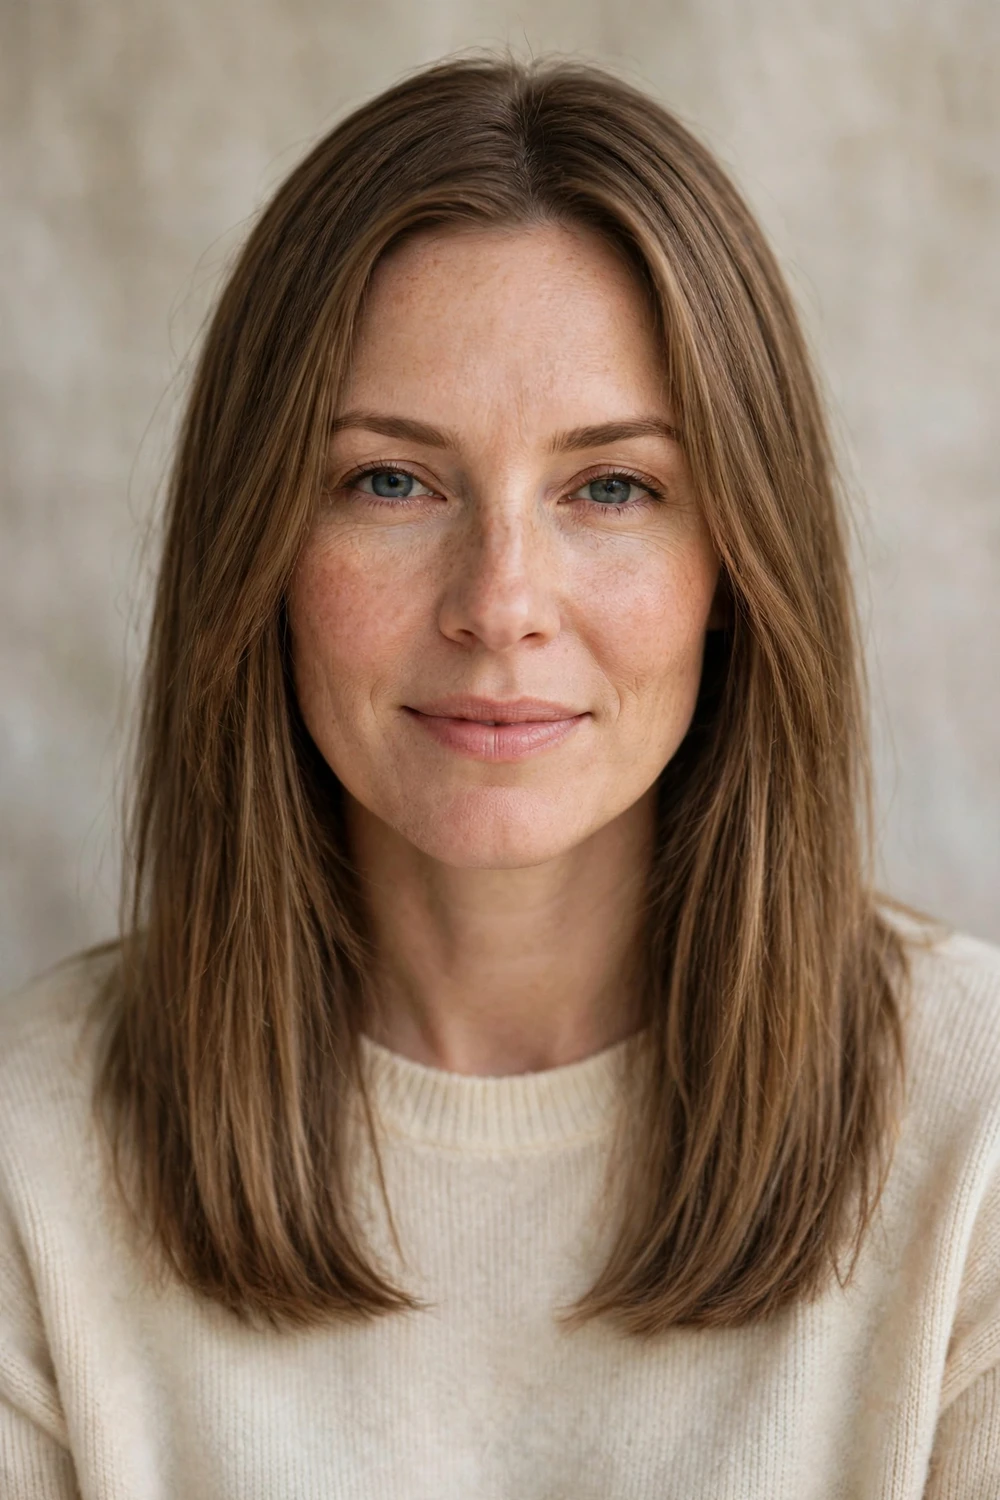
Ghost layers sit one to two inches shorter than the longest pieces and stay hidden under the outer surface, adding movement that nobody can see. From the outside, the cut reads as one solid length with a blunt perimeter; underneath, the shorter pieces create air gaps that let the hair move and the roots lift. It is the trick stylists use when fine hair wants layers without giving up the density of its ends.
Ask for “invisible internal layers under a blunt perimeter” and stress that the surface should stay untouched. Soft internal cuts lift roots, while choppy surface layers thin the ends, so the distinction matters. Style with a golf-ball amount of volumizing mousse at the roots only, then blow-dry upward. Never let a stylist finish this cut with thinning shears on the surface, since that undoes the whole geometry. Check the surface in the mirror before you leave the chair to confirm it still reads as one length.
Try this: say “internal only, surface stays blunt” to get the lift without visible layering.
Difficulty: Medium · Cost: $$ (salon)
16. Hidden Crown Layers for Root Lift
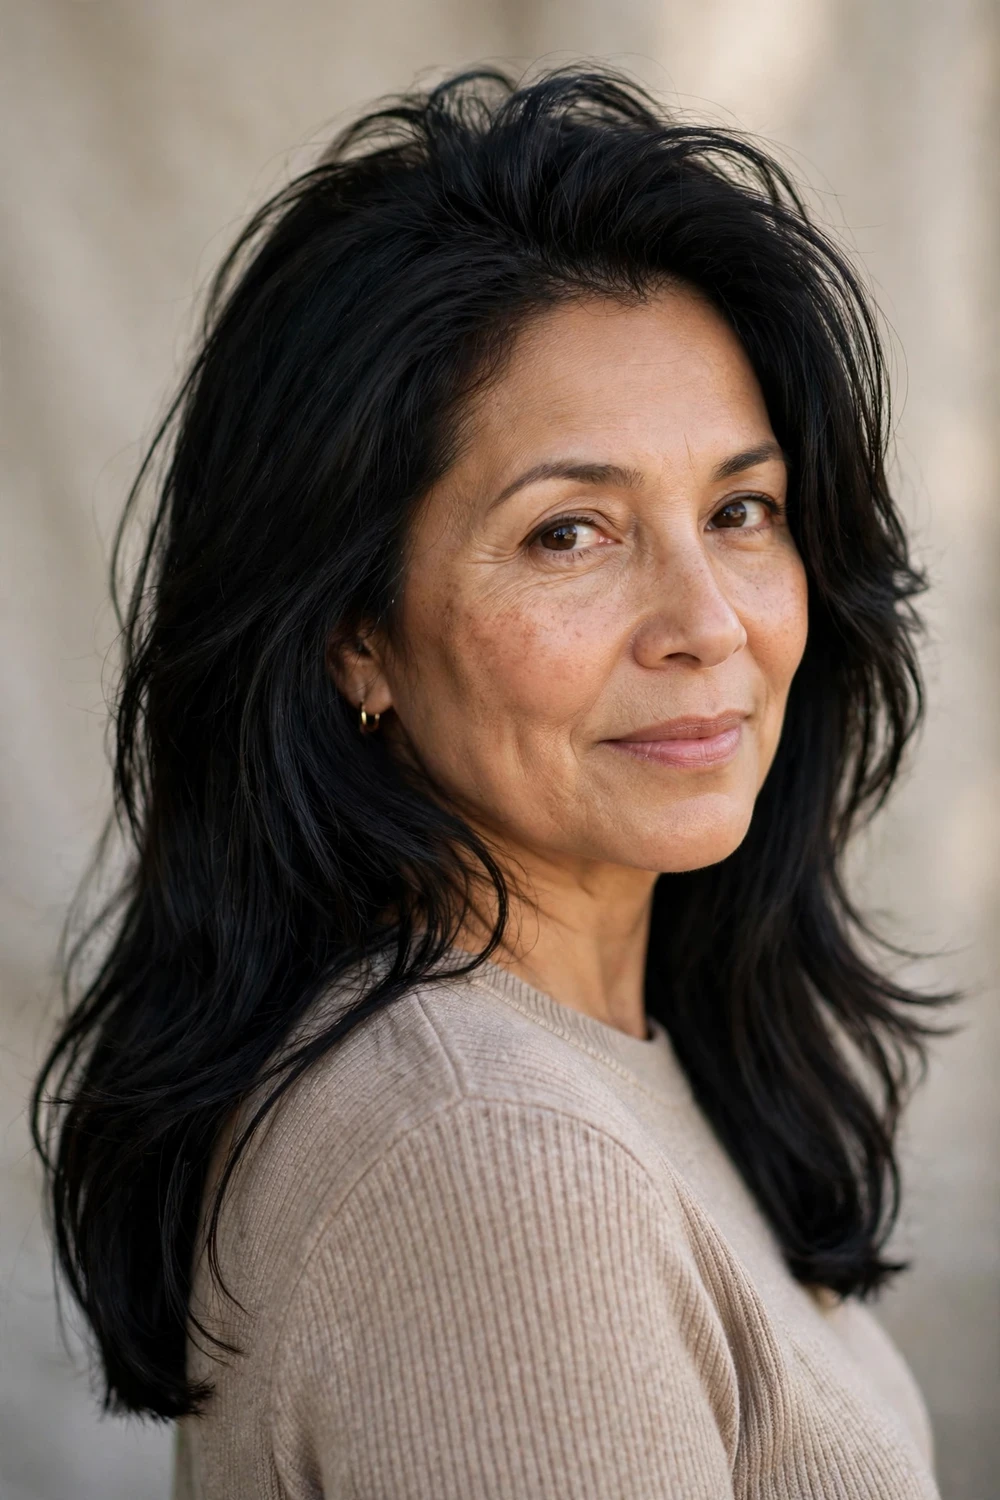
Shorter pieces concentrated through the crown create air gaps between strands, so light bounces differently and the hair reads as denser even though the strand count hasn’t changed. The front keeps soft face-framing pieces while the crown does the lifting work invisibly. This is the cut for fine hair that lies flat on top no matter what product you use, since the problem is weight, not hold. It pairs well with a center or side part, since the crown lift works under either.
Ask for short internal pieces at the crown with a nearly blunt perimeter everywhere else, and skip heavy masks the night before your appointment, since swollen strands make the stylist misread your hair’s true weight. Work mousse into damp roots only and blow-dry upward; coating the ends with the same product flattens the movement the layers were cut to create. Trims every 6 to 8 weeks keep the crown pieces short enough to keep lifting.
Try this: blow-dry the crown against its natural growth direction to lock in the lift the cut creates.
Difficulty: Medium · Cost: $$ (salon)
17. Subtle V-Cut with Face-Framing Tapers

A subtle V at the back keeps length through the center while the front layers taper inward toward the face, flattering heart-shaped and oval faces in particular. The shape creates the illusion of a fuller silhouette because the eye follows the V down the back, while the tapering front pieces soften the jawline. For fine hair, the key word is subtle: a deep V removes too much from the sides and leaves the back looking thin.
Ask for a soft V with light face-framing layers, and keep the back’s center point long so weight pools where it counts. Styling is flexible: wear it straight to show off the shape, or add soft bends with a curling iron held horizontally so the layers keep air between them instead of pulling into one thin rope. A light volumizing mousse at the crown keeps the top from going flat under the length.
Try this: say “subtle V, back stays long” so the shape doesn’t hollow out the sides.
Difficulty: Medium · Cost: $$ (salon)
18. Pixie-Bob with Face-Framing Pieces

An ear-length pixie-bob concentrates its layering at the crown and nape for structure and dimension, with a soft fringe offering just enough framing around the face. The close-cropped back adds clean shape that flatters petite and heart-shaped faces, and shorter hair always reads as denser than the same hair worn long. For very thin hair, going shorter is often the fastest way to look like you have more hair. The cut also dries in minutes, which saves real time every morning.
Ask for soft face-framing pieces around the cheeks with the length kept through the front, and keep the fringe piece-y so it never reads as a blunt block. The trade-off is upkeep: it grows out quickly and benefits from trims every 4 to 6 weeks to keep the shape crisp. Between appointments, a quick finger-tousle with a pea-sized amount of paste refreshes the texture in seconds. Ask your stylist to show you the nape in a hand mirror before you leave, since the tapered back is what makes the cut work.
For even shorter takes with face framing, these short pixie haircuts for older women gather the most flattering low-maintenance options with similar framing.
Try this: ask for the fringe soft and piece-y rather than blunt so it blends into the front layers.
Difficulty: Low · Cost: $ (salon)
19. Soft Wolf Frame, Fine-Hair Safe

A wolf frame uses shorter, choppier pieces around the cheekbone with visible separation from the length behind, and the fine-hair version keeps that idea conservative. The shortest framing lands at the cheekbone and stays connected to the length rather than stepped, which is the word that keeps it from reading as a grown-out fringe. Fewer, longer pieces give the shape without the density loss the full wolf cut demands. This look suits fine hair with medium density best, not very sparse hair.
Ask for “cheekbone start, connected not stepped, conservative piece count,” and be honest with yourself: this is the boldest option here and the hardest to reverse quickly. Sit with the idea before booking, and skip it entirely if your hair is sparse at the temples, since short pieces there expose scalp. Style with a small amount of cream through the front pieces to define them, and let the back air-dry for a softer finish.
If choppy texture appeals to you, these short shag hairstyles for women show how shaggy shapes behave on different hair textures.
Try this: use the word “connected” at your appointment so the cheekbone pieces blend instead of stepping.
Difficulty: Medium · Cost: $$ (salon)
20. Dry-Cut Frame for Fine Waves and Curls
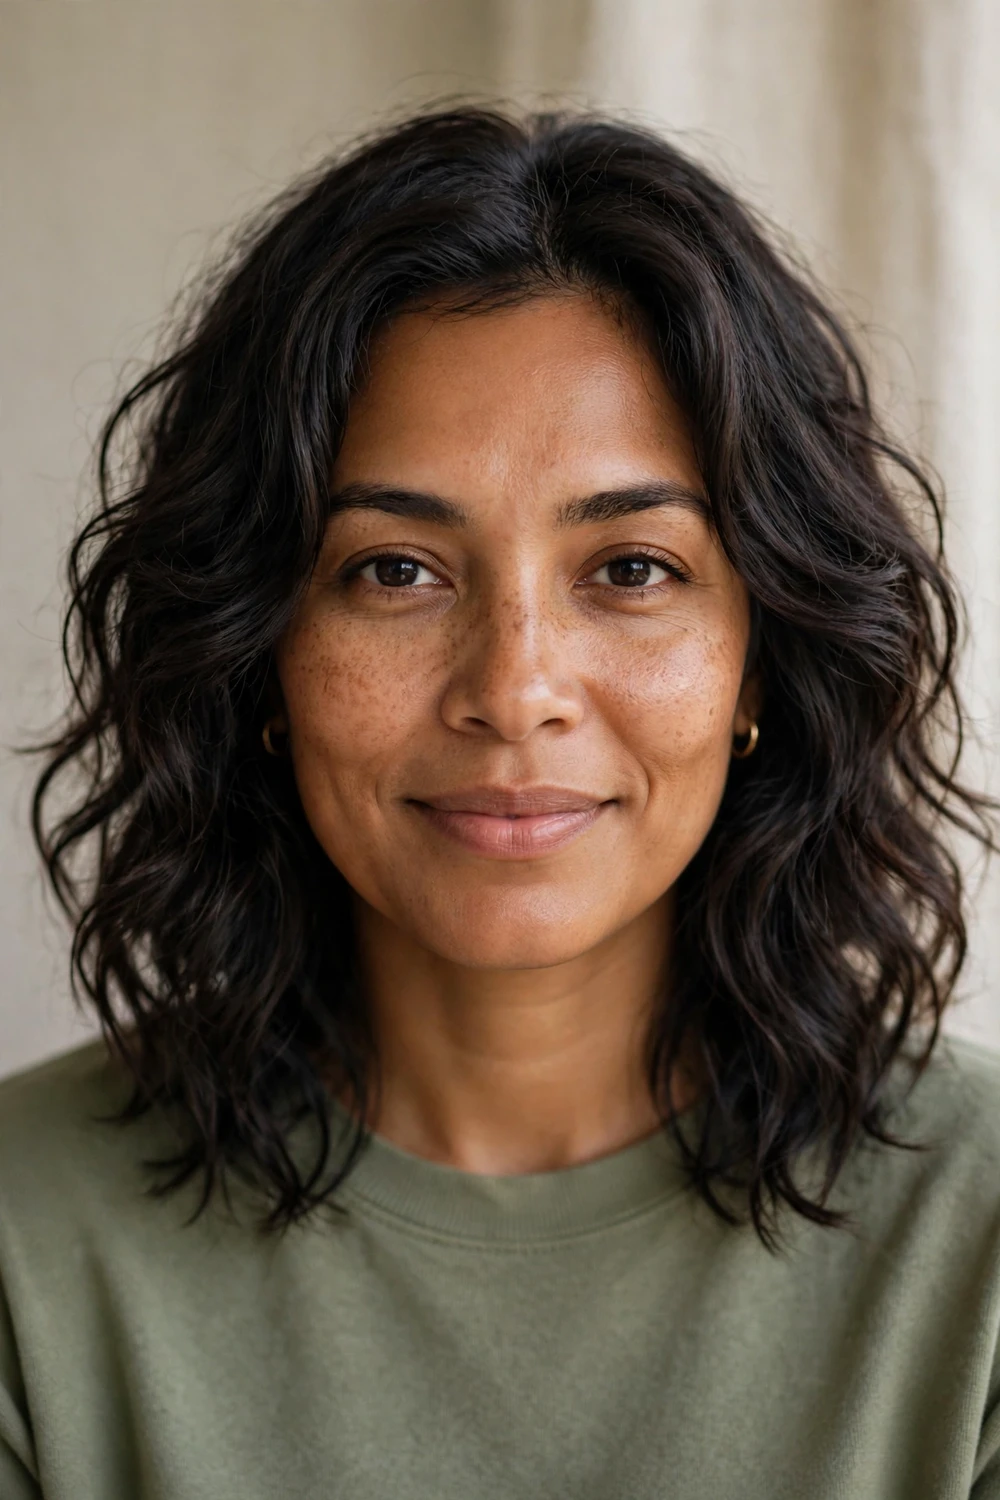
On wavy and curly fine hair, framing cut wet is a gamble: the spring factor means a layer cut at the chin can jump to the ear once dry. A dry cut, curl by curl, lets the stylist place each piece where it will actually sit, so the frame springs around the cheekbones instead of above them. This suits 2B through 4A textures, and every curl pattern can wear framing when it is cut to honor the pattern rather than fight it.
Ask for “cut dry, curl by curl,” and treat a stylist who offers to cut your curls wet in horizontal sections as a sign to book elsewhere. Diffuse until fully dry and don’t touch the framing curls until they are set, since they frizz first from handling. Trims every 3 to 4 months are enough, since curls hide grow-out well. A curl cream scrunched into the front pieces keeps them defined without pulling them straight.
Try this: ask “do you cut curls dry?” before booking; the answer tells you everything about the stylist.
Difficulty: High · Cost: $$ (salon)
21. Colour-Only Frame, No Scissors

Framing created with color alone puts warmer or brighter pieces at the front with no scissors involved, which makes it the zero-density-loss option. Contrast is what the eye reads as depth, so lighter pieces around the face make the hair look thicker without removing a single strand. It suits anyone growing their hair out, and anyone whose hair is too fine to give up length to layers. It also photographs well, since the bright front pieces draw the eye in pictures.
Ask for “face-framing color, no cut,” and request fine, woven highlights rather than chunky ribbons, which can expose the scalp between stripes. Cut first and color second if you are doing both, and tell the colorist where your shortest layer sits so the brightness lands on hair that stays. Warmer tones read as framing more clearly than cooler ones because they catch light at the hairline. Ask for a gloss at the end to seal the color and add shine.
Try this: ask for fine woven pieces near the face instead of chunky ribbons to avoid scalp showing through.
Difficulty: Medium · Cost: $$ (salon)
22. Silver Frame on Gray Hair

Silver and gray hair paired with long, flowing face-framing layers uses brightness as the framing tool: the cool, luminous tones at the front highlight the layers’ dimension and movement. It is a smart way to blend gray, since regrowth melts into the lighter front pieces instead of showing as a harsh line. The effect stays soft and flattering rather than high-contrast or severe, while the long layers keep density through the back.
Ask your colorist for a silver gloss or brightening pieces concentrated at the front, with the cut kept long and the layers soft. Use a purple shampoo once a week to keep the silver bright instead of dull, since dull gray emphasizes thin spots. A gloss treatment between appointments adds shine that makes fine strands look smoother and more substantial. Keep the front pieces conditioned, since lightened hair dries out faster than the back.
Try this: switch to a purple shampoo once a week to keep silver framing bright, not yellow.
Difficulty: Medium · Cost: $$ (salon)
23. Bottleneck Pieces into Long Layers

Bottleneck pieces start narrow at the top of the forehead and widen as they reach the cheekbones, then pour into long layers behind. The shape hugs the temples, which keeps the fringe from eating density across the whole forehead, and the widening at the cheeks draws attention to the eyes. On fine hair, the narrow start is the advantage: less hair committed to the fringe means more left for the length.
Ask for bottleneck bangs that start slim and blend into long, soft layers, with the widest point landing at the cheekbones. They grow out more gracefully than a blunt fringe because the shape is already tapered, so trims can stretch to 8 weeks. Style by blow-drying the pieces forward and down, then pushing them slightly apart at the center so they frame instead of covering the forehead. A round brush gives the pieces their slight outward curve at the cheekbones.
Try this: point to your cheekbones and ask for the widest part of the fringe to land there.
Difficulty: Medium · Cost: $$ (salon)
At a Glance: 23 Face-Framing Looks Compared
| Look | Best for | Fine-hair perk | Upkeep |
|---|---|---|---|
| Two-Piece Blunt Frame | Very fine, fragile hair | Zero density loss, thick ends | Trims every 8 to 10 weeks |
| Micro-Layers, Invisible Start | Fine hair that feels stiff | Movement with no visible layers | Trims every 10 to 12 weeks |
| Barely-There Diagonal Sweep | Air-dry fans | Survives air-drying intact | Trims every 12 weeks |
| Chin-Skimming Frame | Round, square, heart faces | Tuckable, keeps perimeter weight | Trims every 10 weeks |
| Collarbone-Length Frame | Long hair, layer-shy clients | No awkward grow-out stage | Trims every 12 weeks |
| Curtain Fringe + Mini Layers | Wider face shapes | Airy fullness, soft separation | Fringe trims every 6 to 8 weeks |
| Wispy Bangs + Chest Layers | Medium-density fine hair | Fringe without density cost | Blow-dry to hold shape |
| Butterfly Layers, Cheekbone | Oval and fuller faces | Lift with a long back | Light heat to keep wings up |
| ’90s Feathered Flick Frame | Straight to wavy hair | Flick fakes extra fullness | Round-brush styling |
| Chin Bob + Front Layers | Narrow, angular faces | Rounded shape, thick edge | Trims every 6 to 8 weeks |
| Stacked Bob + Front Softness | Flat-at-the-back hair | Volume where it goes flat | Round-brush blow-dry |
| Lob with Sliced Ends | Fine strands, easy routines | Weight out, density kept | Trims every 8 to 10 weeks |
| Feathered Shoulder Frame | Oval and heart faces | Lifts thinning temples | Wash and air-dry friendly |
| Soft Cascade Mid-Length | Most face shapes | Long layers, quick styling | Trims every 8 to 10 weeks |
| Ghost Layers + Blunt Edge | Density-first clients | Hidden movement, solid ends | Mousse at roots, blow-dry up |
| Hidden Crown Layers | Flat-on-top hair | Root lift without surface cuts | Trims every 6 to 8 weeks |
| Subtle V-Cut + Tapers | Heart and oval faces | Fuller-looking silhouette | Mousse at crown, soft bends |
| Pixie-Bob + Face Pieces | Very thin hair, short fans | Short reads denser | Trims every 4 to 6 weeks |
| Soft Wolf Frame | Bold, dense-enough hair | Shape with fewer pieces | Cream on front pieces |
| Dry-Cut Wavy/Curly Frame | 2B to 4A textures | Pieces land where intended | Trims every 3 to 4 months |
| Colour-Only Frame | Growing out, fragile hair | No scissors, no density loss | Tone every 8 weeks |
| Silver Frame on Gray | Blending gray | Brightness fakes dimension | Purple shampoo weekly |
| Bottleneck Pieces + Layers | Temple-sparse hair | Slim fringe saves density | Trims every 8 weeks |
How to Choose the Right Frame for Fine Thin Hair
Start with how much density you can spend. If your ponytail is slim or your scalp shows at the part, stay in the conservative zone: the two-piece blunt frame, micro-layers, the barely-there sweep, ghost internal layers, or the colour-only frame. These remove almost nothing. If your hair is fine but you have a lot of it, you can afford the butterfly, the soft wolf frame, or the feathered flick, which all take more hair to create their shapes.
Next, match the start point to your face shape. Round faces do best when the shortest piece starts below the chin and falls on a diagonal, which draws the eye down instead of widening the cheeks. Square faces need softness above the jawline to blur strong angles, so chin-skimming or cheekbone pieces work. Heart-shaped faces want fullness near the jaw to balance a wider forehead, which the curtain fringe and the chin bob both provide. Long faces should avoid framing that starts too high, since it adds height where they don’t need it.
Then vet the technique, not just the look. Ask whether your stylist plans to use thinning shears or a razor on the perimeter, and decline both on fine hair: shears hollow out the ends and razors shred them into frizz that never settles. Ask for the layers to be cut with scissors, blended rather than stepped, and cut in your natural part. Finally, be honest about styling: if you air-dry, pick the barely-there sweep or the feathered frame; if you heat-style, the butterfly and the flick reward the effort.
Fine-Hair Care That Protects Your Frame
Density. Fine hair shows damage fast, so protect the perimeter that keeps your frame looking thick. Trim on schedule, since split ends travel up and turn blunt edges wispy. Use a lightweight conditioner on the mid-lengths and ends only, and skip heavy masks right before a cut, since swollen strands make your stylist misread how much weight your hair really has.
Volume. Root lift is what makes framing show up on fine hair. Work a golf-ball amount of volumizing mousse into damp roots only, then blow-dry upward or against the natural growth direction. Keep oils, serums, and creams off the roots and on the ends, since product at the crown collapses the lift the cut created. A texturizing powder pressed into day-two roots restores height without a wash.
Styling. Dry the front sections away from your face first, then let them fall naturally; hair dried flat against the cheek loses the framing shape entirely. A round brush or a quick wrap around a flat iron sets the direction the pieces fall. If your framing keeps disappearing by midday, check your part before blaming the cut: framing designed around a center part collapses on a side part, and the reverse is just as true.
Frequently Asked Questions
Will face-framing layers make fine thin hair look thinner?
They can, but only when they are cut wrong for fine hair. Too many short pieces, thinning shears, or razor work on the perimeter hollow out the ends and leave them wispy. Cut right, with two soft pieces or micro-layers on a blunt perimeter, framing adds movement and dimension that make fine hair look fuller. The rule is simple: fewer pieces, longer start points, and no density-removing tools on the ends.
What should I ask my stylist so layers don’t thin out my fine hair?
Use landmarks and name the tools. Say where the shortest piece should land, using your chin, jaw, or collarbone rather than inches. Say whether you want the pieces blended or stepped, and ask for scissors only, with no thinning shears and no razor on the perimeter. Two sentences that protect fine hair are “keep the layers long and minimal” and “keep the perimeter blunt.” Bring a photo of the back of a cut you like as well as the front, since framing is built from behind.
What is the difference between face-framing layers and a fringe?
A fringe is cut across the forehead and usually needs daily styling to sit right. Face-framing layers start at the cheekbone or below and blend into your length, so they need little daily work and grow out without an awkward stage. On fine hair, framing is the lower-risk choice, since a fringe commits density across the whole forehead while framing only uses the front pieces. Bottleneck pieces and curtain fringes sit between the two: they frame like layers but read as a soft fringe.
How often should face-framing layers on fine hair be trimmed?
Every 6 to 12 weeks, depending on the technique. Shorter, more visible framing like curtain fringes and wolf pieces needs trims every 6 to 8 weeks to hold its shape. Minimal framing, micro-layers, and long collarbone pieces can stretch to 10 to 12 weeks. Fine hair shows grown-out layers faster than thick hair, since the pieces lose their lift and the ends start looking stringy, so don’t stretch past what your shortest piece can handle.
Do face-framing layers work on thin wavy or curly hair?
Yes, with a dry cut. Cutting waves and curls wet is a gamble on fine hair, because the spring factor can lift a chin-length piece to the ear once it dries. Ask for the framing to be cut dry, curl by curl, so each piece lands where it will actually sit. Keep the pieces long and minimal, since removing too much around the face exposes the scalp on sparse curl patterns. Diffuse until fully dry and avoid touching the front pieces until they are set, since they frizz first.
Final Thoughts
Face-framing layers are worth it on fine thin hair when the cut respects your density: few pieces, long start points, a blunt perimeter, and a stylist who reaches for scissors instead of thinning shears. Pick the look that matches your face shape and your real styling routine, use the exact wording at your appointment, and trim on schedule so the frame keeps doing its job.

