


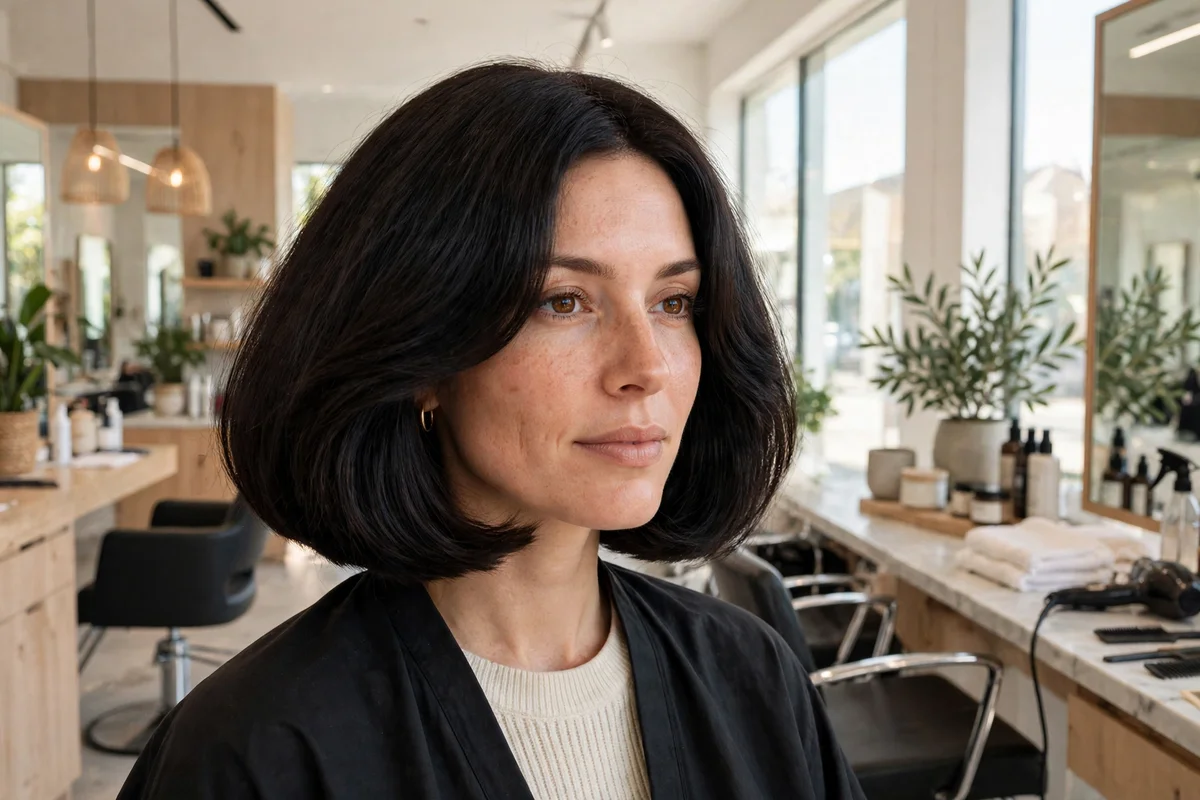
The right cut can make thin hair look twice as thick before you touch a styling product. These haircuts to make thin hair look thicker all work the same way: they create visual density through blunt edges, strategic layering, or shape. Bring this list to your appointment and point to the one that fits your length.
Two principles run through every cut here. First, solid ends read as thick; wispy ends read as thin. Second, the cut should match your texture: what thickens straight hair can expose thinness in curls. Each idea notes who it suits best.
Quick Takeaways
- Blunt edges are the fastest density trick: one-length ends look solid.
- Layers must be strategic: ghost layers lift, choppy layers can expose thinness.
- Shorter cuts look thicker because less weight pulls the roots flat.
- Tell your stylist “no thinning shears” unless they explain exactly why.
- Most thickening cuts need trims every 6 to 10 weeks to hold the edge.
1. Blunt Bob

Cut straight across at the chin with no layers, the blunt bob keeps every strand the same length so the ends look dense and solid. It is the most recommended thickening cut for a reason: the geometry does the work. Keep it between chin and collarbone; longer blunt cuts can drag thin hair down.
Ask for minimal internal layering or none at all. Style it sleek with a flat iron for maximum edge, or rough-dry with texture spray for a lived-in fullness.
Try this: say “one length, no layers, sharp edge” at the appointment. Vague requests get vague layering.
Difficulty: Easy · Cost: $50–$90 (salon cut, trim every 6–8 weeks)
2. Textured Lob

A collarbone-length lob with soft internal layers gives movement without sacrificing the solid edge. The length keeps it versatile while the subtle texture stops it looking helmet-like. Point-cutting the last inch adds piecey ends that read as fullness, not thinness.
Style with a round brush for a curved-under finish, or air-dry with mousse for natural texture. Avoid razor cuts here: razors thin the ends on fine hair.
Try this: ask for “soft internal layers, blunt perimeter.” You get movement inside and density at the edge.
Difficulty: Easy · Cost: $55–$95 (salon cut, trim every 8–10 weeks)
3. Classic Pixie

Short all over with clean lines, the classic pixie removes the weight that pulls thin hair flat. What is left looks dense because short hair stands up instead of lying down. It is a bold change but one of the most effective thickening cuts that exists.
Keep the top slightly longer than the sides for styling options. A little pomade worked through the top adds piecey definition that enhances the fullness.
Try this: bring a photo of the exact pixie length you want. “Short” means different things to different stylists.
Difficulty: Easy · Cost: $40–$75 (salon cut, trim every 4–6 weeks)
4. Layered Pixie with Longer Top

Short sides and back with longer choppy layers on top: the longer top gives you styling height while the short sides keep the silhouette dense. Keeping the top choppy builds body, and height at the crown is the whole game for thin hair.
Style with fingers and a lightweight pomade instead of a brush. Finger styling keeps the pieces separated and full-looking; brushing flattens them.
Try this: ask for the top to be cut with scissors, not clippers. Scissor cutting leaves soft ends that look thicker.
Difficulty: Easy · Cost: $40–$75 (salon cut, trim every 4–6 weeks)
5. Textured Pixie for Curls and Coils
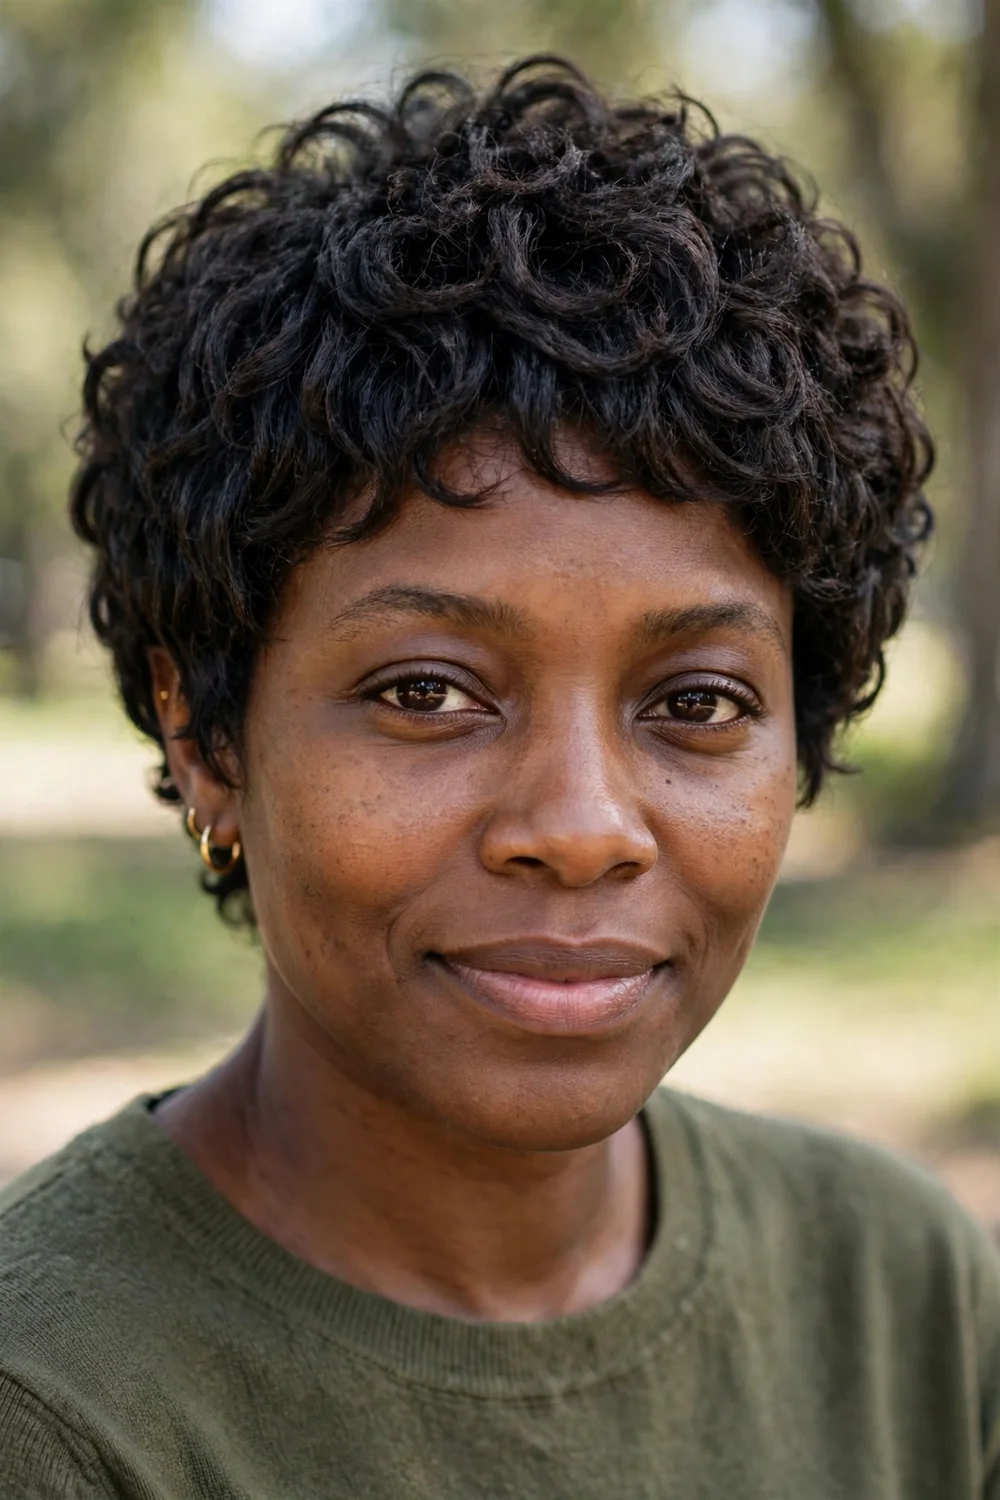
On curly and coily hair, a pixie with textured layers uses the hair’s natural volume instead of fighting it. The curls stack on each other and the short length keeps them springy. Lightly pick at the roots for extra lift.
Keep the shape rounded rather than flat on top. A rounded silhouette reads as full from every angle. Moisturize well: dry curls shrink and look thinner.
Try this: get it cut dry or stretched so the stylist sees the true length. Wet cutting surprises on curly hair.
Difficulty: Easy · Cost: $40–$80 (salon cut, trim every 6–8 weeks)
6. Chin-Length Cut with Blunt Ends
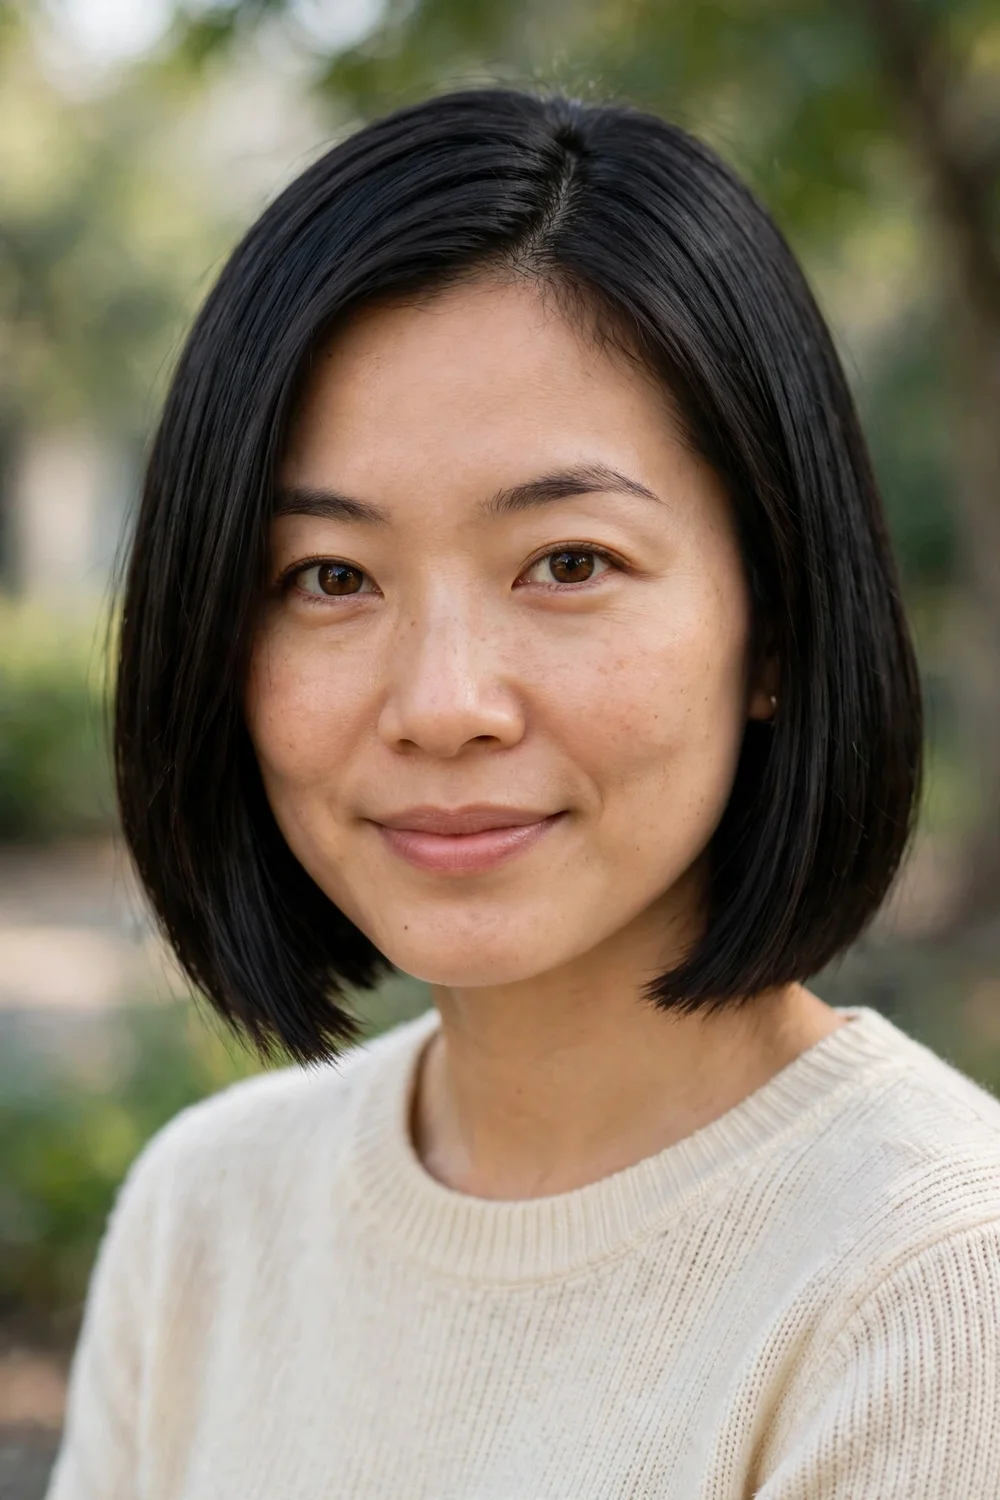
Chin length is the sweet spot for thin hair: short enough to hold volume, long enough to style. Blunt ends at this length create a strong horizontal line that the eye reads as density. Textured lengths on top pair well with the blunt edge for movement up top and weight at the bottom.
This cut suits oval, heart, and square faces especially well. Tuck one side behind the ear for an asymmetric look that shows off the edge.
Try this: blow-dry with a paddle brush straight down, then flat-iron just the last two inches. The ends look razor-sharp.
Difficulty: Easy · Cost: $50–$85 (salon cut, trim every 6–8 weeks)
7. Layered Ends

Layers concentrated at the ends rather than through the whole head: the top stays solid while the bottom gains lift and movement. It is a safe way to get layering benefits without the thinning risk of full layers. Works on bobs and lobs.
Pair it with a bob or lob so the layered ends have a solid shape to sit in. The combination gives volume up top and a thick finish at the bottom.
Try this: ask for the layers to start no higher than three inches from the ends. Higher layers defeat the purpose.
Difficulty: Easy · Cost: $50–$90 (salon cut)
8. Front-Facing Layers
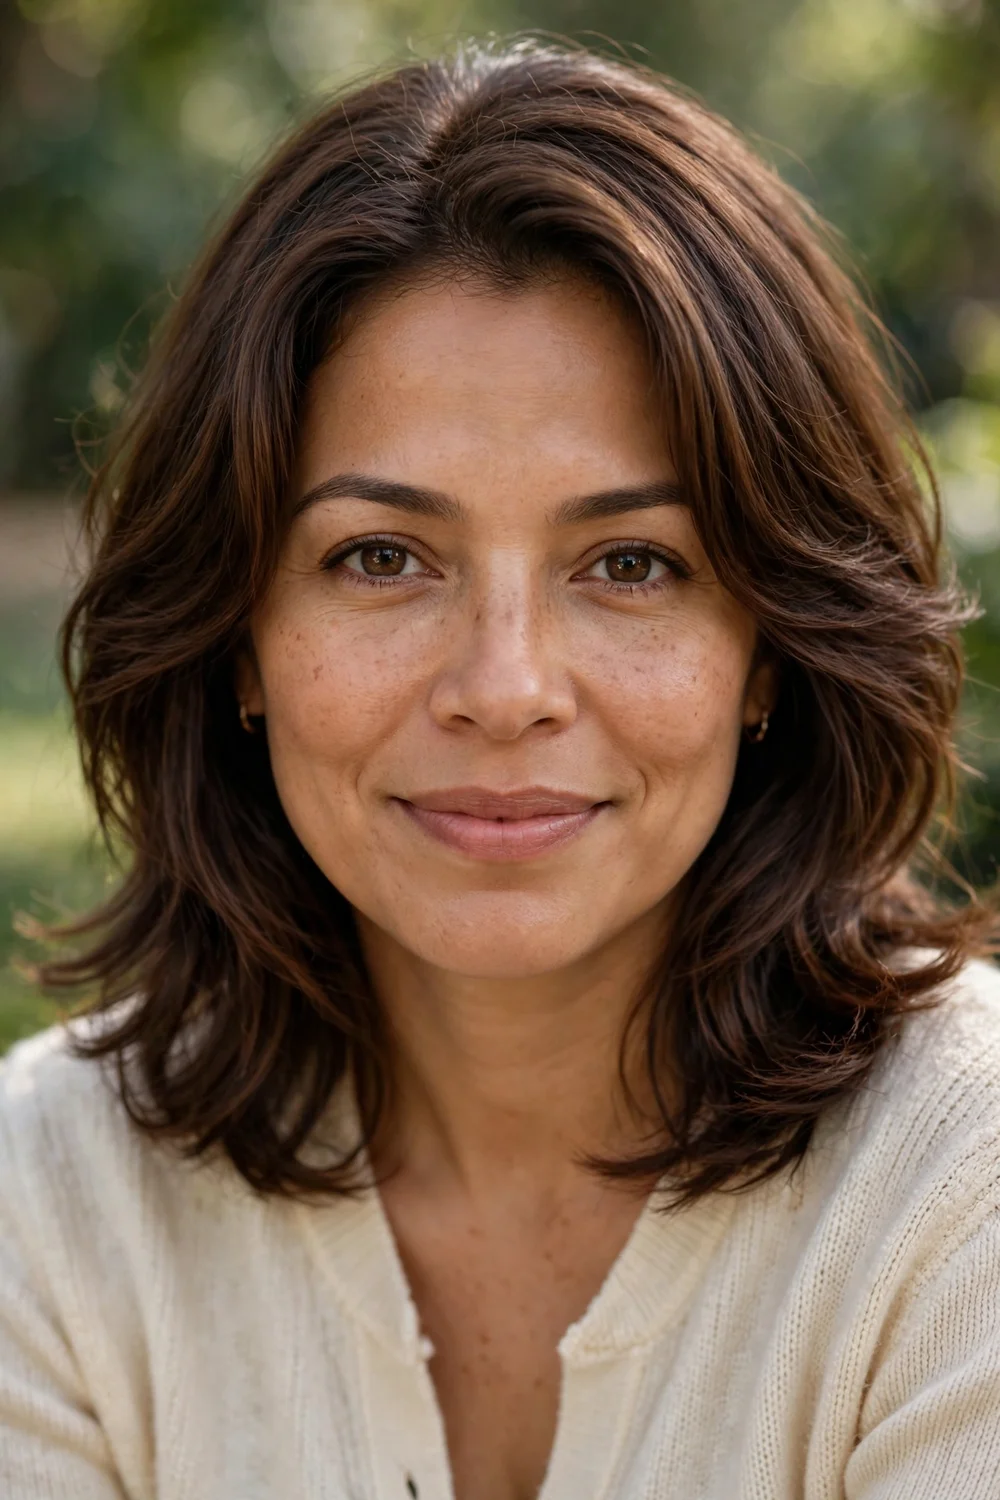
Layers kept shorter at the front and longer at the back add shape and movement right where people look. The front fullness frames the face while the back keeps its length and weight. It is one of the most flattering thickening cuts for medium to long hair.
Style the front layers with a round brush curving away from the face. The outward curve opens the face and shows the layering off.
Try this: keep the shortest front layer at cheekbone level. Shorter than that can look disconnected on thin hair.
Difficulty: Easy · Cost: $55–$95 (salon cut)
9. Micro Layers
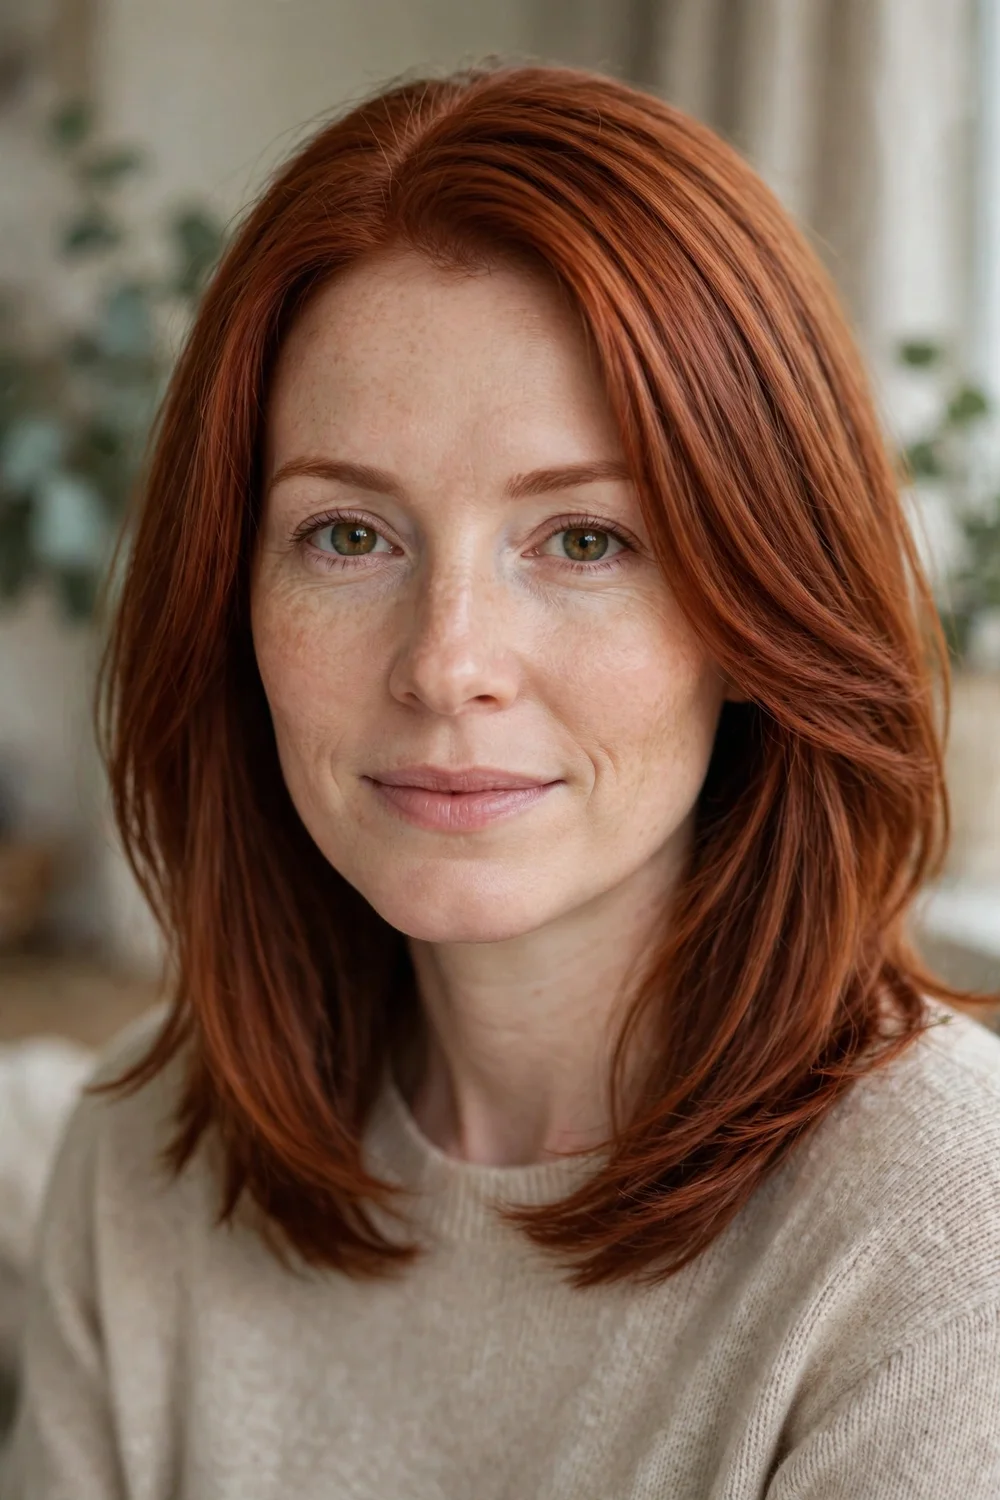
Layers don’t have to be dramatic: micro layers, cut just a half inch apart in length, add lift without visible steps. They are nearly invisible to the eye but the hair moves and separates more, which reads as body. Good for anyone scared of obvious layering.
This works best on straight to wavy thin hair. On very curly hair the effect gets lost in the curl pattern.
Try this: ask for “dusting layers” if your stylist uses that term. Same concept: tiny length differences, big movement payoff.
Difficulty: Easy · Cost: $50–$85 (salon cut)
10. Ghost (Invisible) Layers

Ghost layers are cut underneath the top section of hair, hidden from view. They prop up the outer layers for invisible lift while the surface stays smooth and solid. It is often the best cut for thin hair that needs movement without any visible layering.
Because the layers are hidden, the hair still looks one-length from the outside. Style normally; the lift is built into the cut.
Try this: specifically say “internal layers only, keep the perimeter solid.” That is the whole trick in one sentence.
Difficulty: Easy · Cost: $55–$95 (salon cut)
11. Short Shag
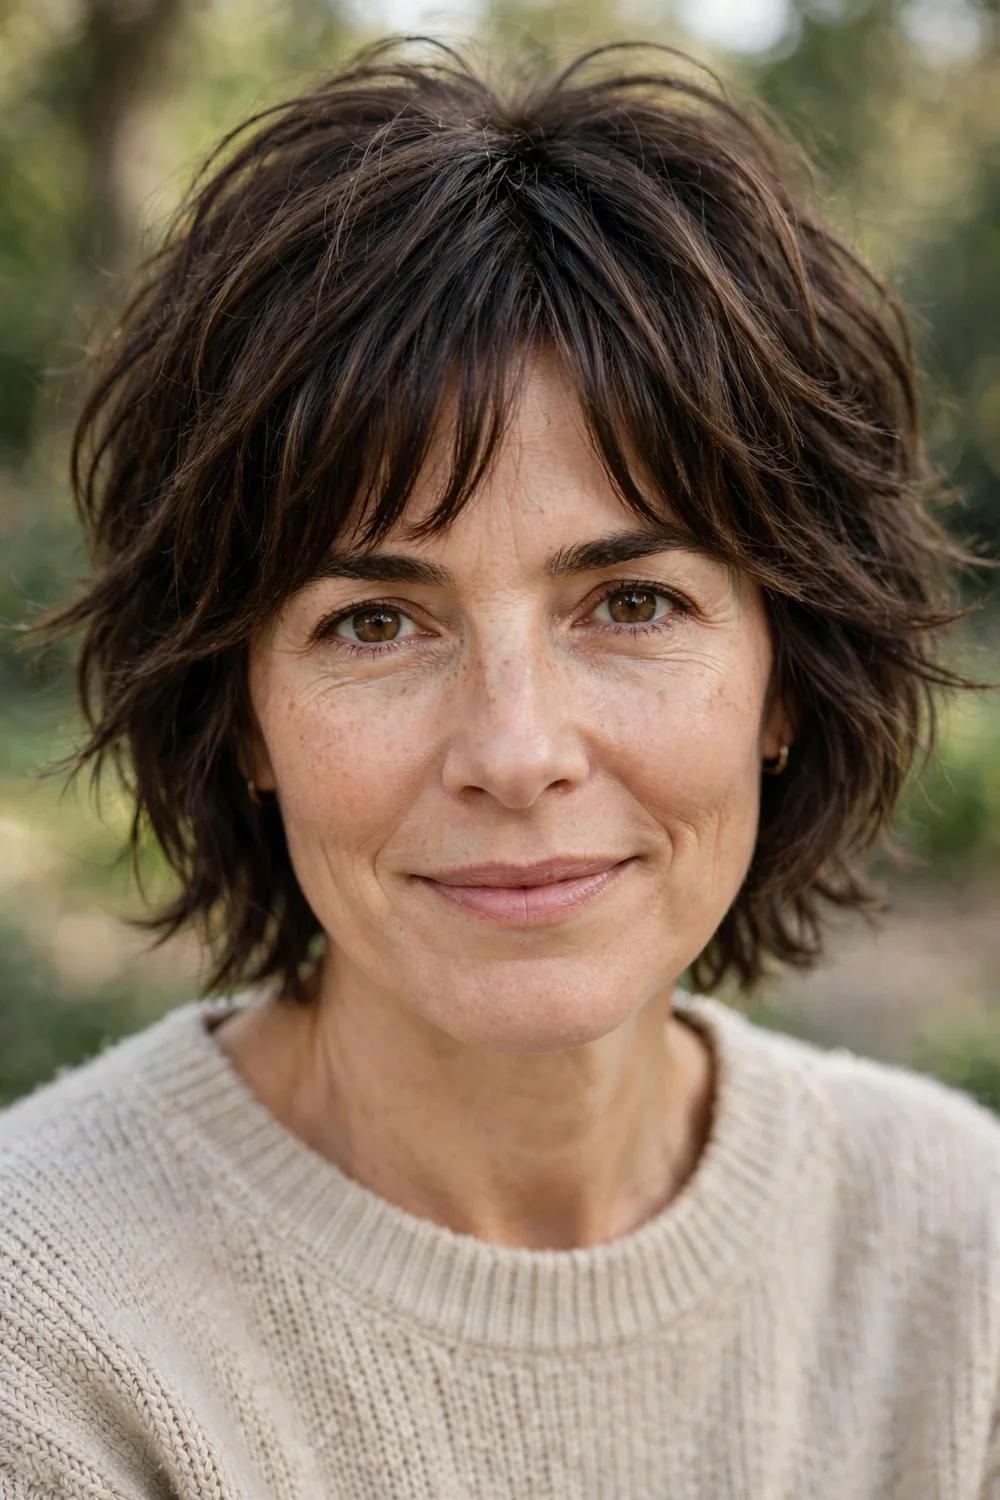
Lots of layers through a short cut with curtain bangs or feathered ends: the tousled texture adds instant volume and the short length keeps it all lifted. The shag’s messy finish is ideal for thin hair because it never looks flat, even unstyled.
Ask for the layers to be point-cut rather than razor-cut on fine hair. Razors can over-thin the ends. A texturizing spray scrunched in finishes the look.
Try this: keep the shag above the shoulders. Longer shags lose the lift that makes this cut work.
Difficulty: Easy · Cost: $55–$95 (salon cut, trim every 6–8 weeks)
12. Windswept Shag

A modern shag with long blended layers, worn with a side part and roughed up with texture spray. The side part adds asymmetry that reads as fullness, and the long layers keep the ends from looking sparse. Minimal razoring keeps the density.
Ask for a “controlled shag”: blended layers, not choppy ones. On thin hair, control beats chaos for the thicker look.
Try this: rough-dry upside down, then part to the side. The roots lift in every direction before the part sets them.
Difficulty: Easy · Cost: $60–$100 (salon cut)
13. French Bob with Fringe

Cropped at the jawline with a subtle inward bend and a soft fringe, the French bob’s boxy silhouette looks deceptively voluminous. The blunt ends and the fringe together concentrate hair around the face, which is where fullness matters most visually.
Style with a round brush curving the ends under. The inward bend is what gives the bob its rounded, full shape.
Try this: keep the fringe piecey, not solid. A solid heavy fringe can make the rest look thinner by comparison.
Difficulty: Easy · Cost: $50–$85 (salon cut, trim every 6 weeks)
14. Inverted Bob
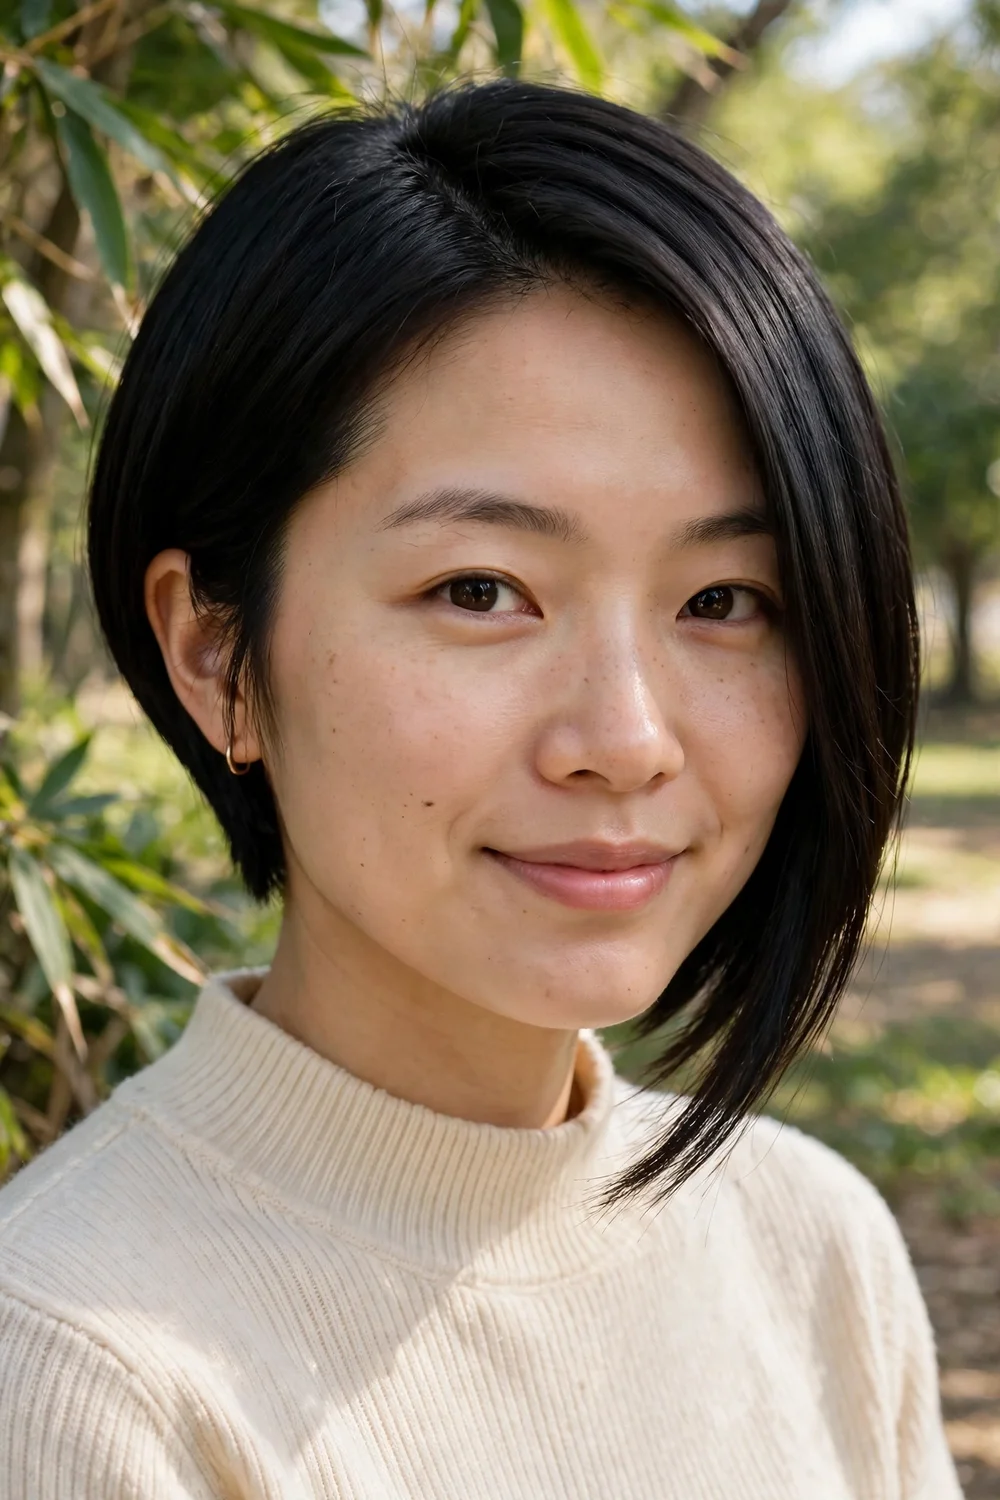
Shorter in the back, longer in the front: the stacked back builds volume at the crown while the longer front pieces frame the face. The angle creates shape that flat thin hair usually lacks. Blow-dry with a round brush to enhance the lift.
Keep the angle soft rather than extreme. A dramatic angle on thin hair can make the front pieces look stringy.
Try this: ask for the back to be stacked, not just angled. Stacking builds the crown volume this cut is known for.
Difficulty: Easy · Cost: $55–$95 (salon cut, trim every 6–8 weeks)
15. Inverted Lob

The longer version of the inverted bob: a soft angle from back to front with minimal layering. It keeps bulk in the ends while creating shape, which is the ideal combination for thin hair that wants length. Style with a round brush for body at the crown.
This suits anyone growing out a bob who wants to keep the thickening benefits. The shape holds as it grows because the angle is gradual.
Try this: part it deeply on one side. The asymmetry doubles the visual fullness of the angle.
Difficulty: Easy · Cost: $55–$95 (salon cut)
16. Side-Swept Pixie
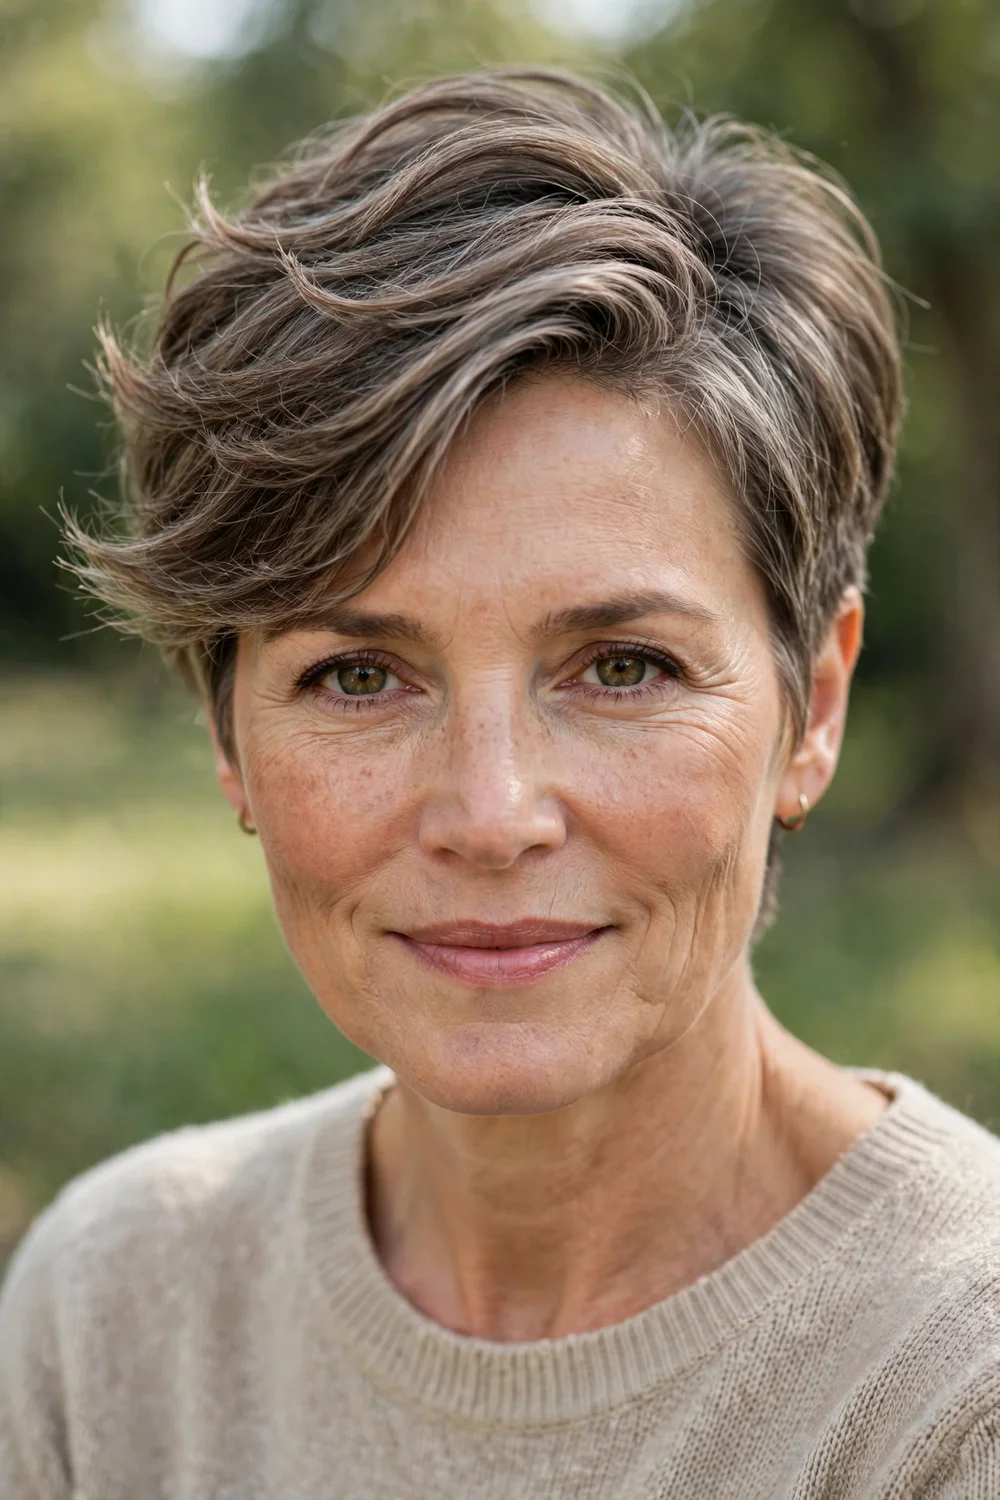
A pixie with the top swept to one side: the sweep creates a deep side part effect that piles hair where you want fullness. Keep it one solid color; highlights break up the silhouette and make thin pixies look thinner.
Bring a photo to the appointment. The sweep direction and top length are personal, and photos prevent miscommunication.
Try this: blow-dry the top in the sweep direction with a small round brush. The direction sets the fullness in place.
Difficulty: Easy · Cost: $40–$75 (salon cut, trim every 4–6 weeks)
17. Long Layers with Curtain Bangs

Long cascading layers plus piecey curtain bangs that blend into the cut. The bangs add face-framing fullness and the long layers add movement without removing weight. Blow-dry with a round brush and finish with texturizing spray for bend and fullness.
Keep the layers long: nothing above the collarbone on the sides. Shorter layers on thin long hair expose sparseness.
Try this: curtain bangs should part in the middle and blend by cheekbone level. Shorter curtain bangs look disconnected.
Difficulty: Easy · Cost: $55–$95 (salon cut)
18. Wavy Lob
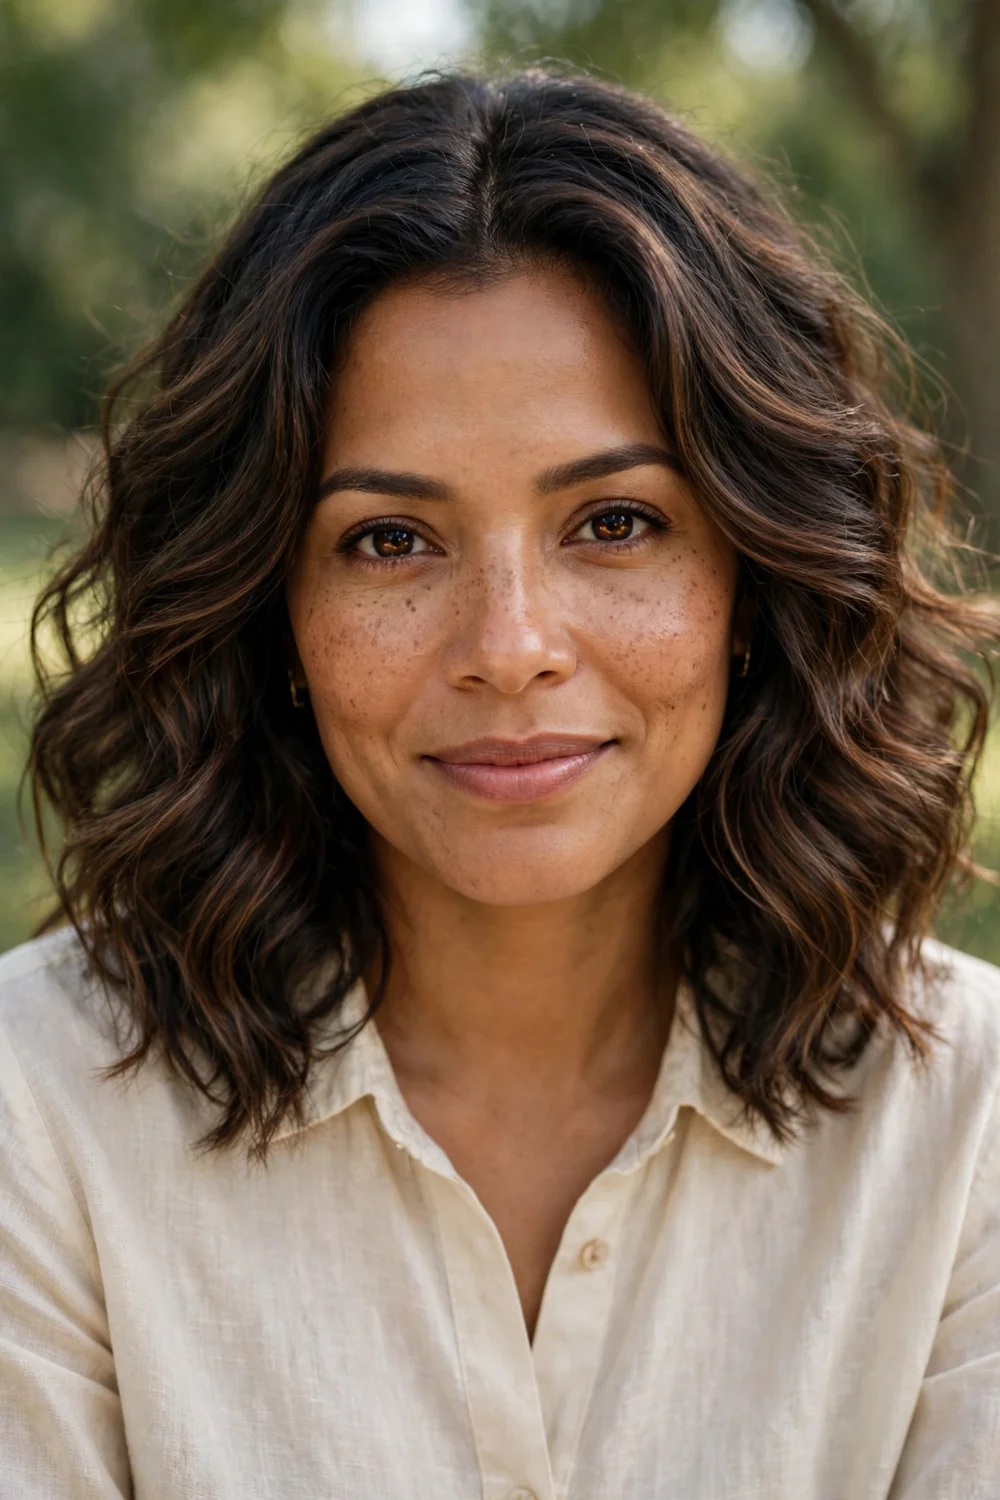
A lob just past the shoulders with natural waves enhanced by mousse: the waves add the volume while the length keeps it feminine and versatile. Scrunch mousse into damp hair and air-dry or diffuse for the fullest result.
This is one of the lowest-effort thickening cuts. The cut does the shaping and the waves do the volumizing.
Try this: use a volumizing mousse, not a curl cream. Mousse builds body; curl cream defines but can weigh fine hair down.
Difficulty: Easy · Cost: $55–$90 (salon cut)
19. Blunt Cut with Thick Bangs

A one-length blunt cut plus thick straight bangs: the bangs add a solid block of density across the forehead, and the blunt ends keep the perimeter full. Together they frame the face in hair, which reads as thickness everywhere.
Keep the bangs thick but not heavy enough to steal from the sides. Trim them every 3 weeks to hold the line.
Try this: flat-iron the bangs with one pass only. Over-ironing fine bangs makes them lie too flat.
Difficulty: Easy · Cost: $50–$85 (salon cut)
20. Layered Asymmetrical Bob
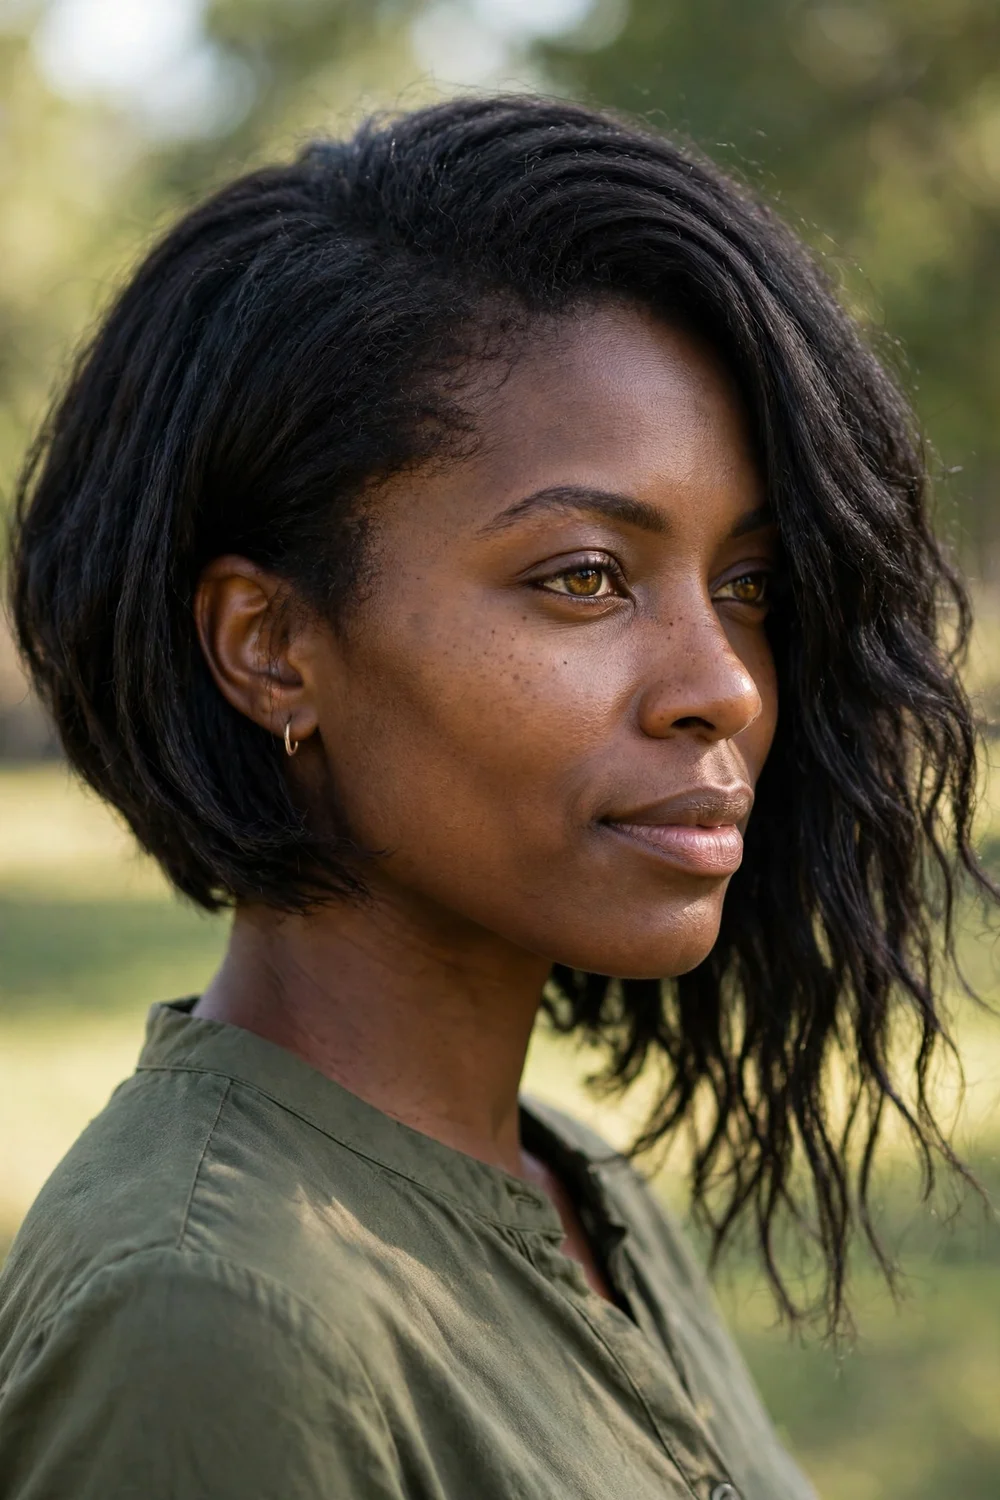
Longer on one side than the other, with subtle layering: the asymmetry tricks the eye into seeing more hair, and the longer side draws a diagonal line full of movement. A slightly stacked back boosts crown volume.
Blow-dry the longer side smooth and the shorter side with a little texture. The contrast between the two sides enhances the effect.
Try this: keep the length difference to two inches or less. More than that looks like a grow-out, not a style.
Difficulty: Easy · Cost: $55–$95 (salon cut, trim every 6–8 weeks)
21. Stacked Bob

Graduated layers stacked at the back build a rounded, full shape through the crown and nape. The stacking is the thickening mechanism: each layer sits on the one below, creating built-in volume. The front stays longer for face framing.
This cut needs a stylist comfortable with graduation. Done well it looks full for weeks; done poorly it looks dated. Check your stylist’s portfolio for stacked cuts.
Try this: ask for a “soft stack” rather than a severe one. Soft graduation looks modern on thin hair.
Difficulty: Easy · Cost: $55–$95 (salon cut, trim every 6 weeks)
22. A-Line Bob
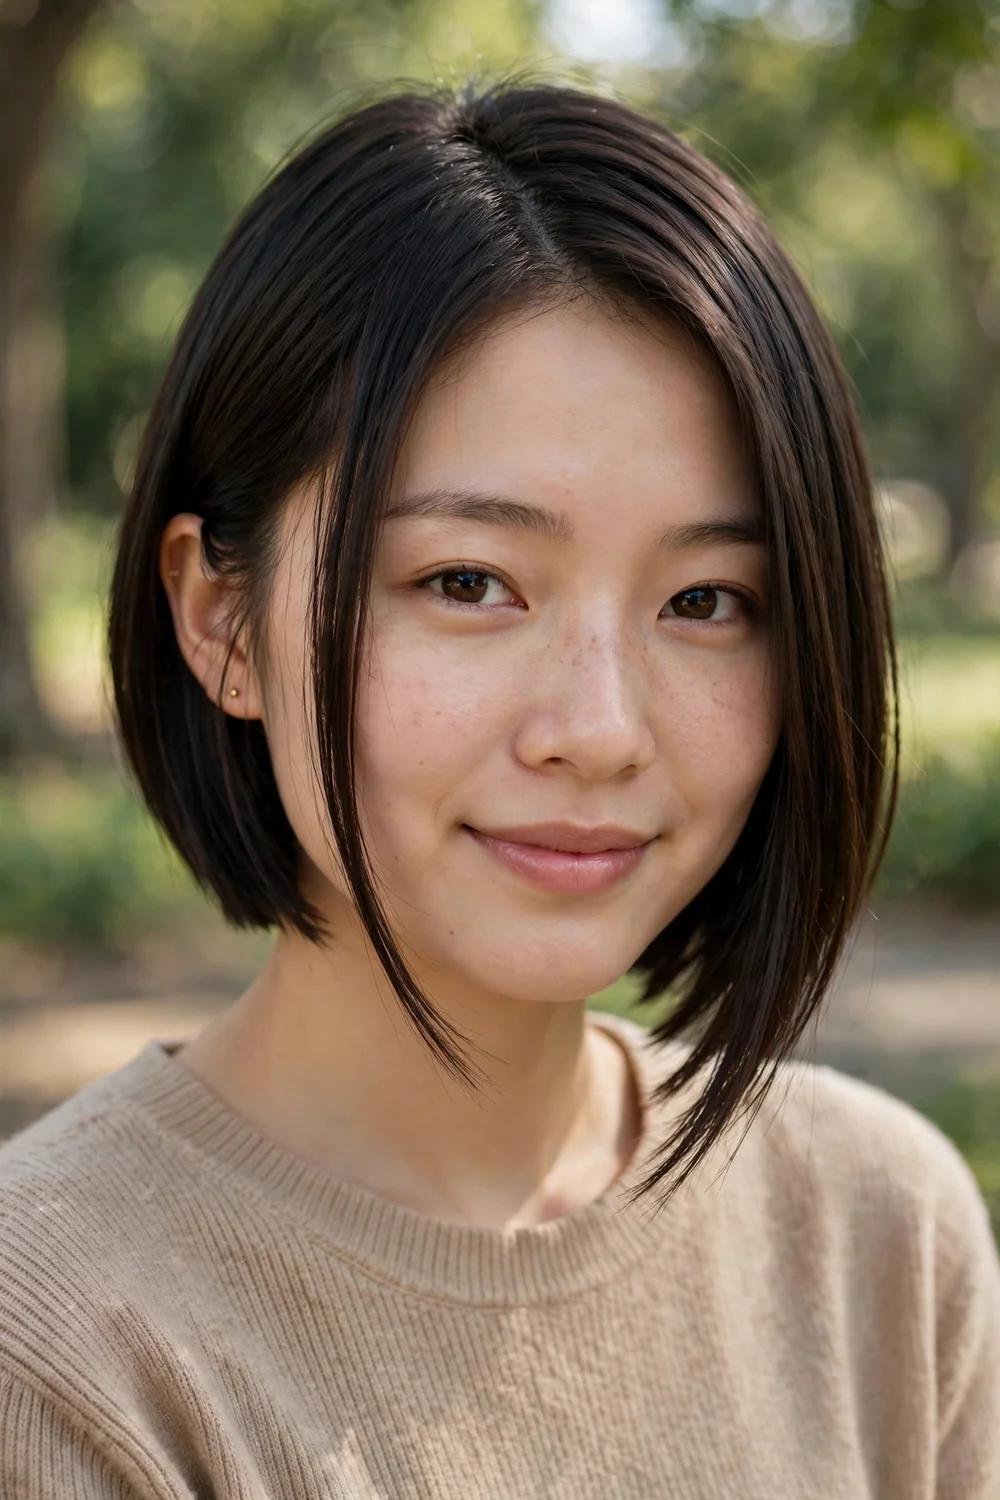
Shorter at the back, angling longer toward the front: the A-line’s forward slope creates a strong shape that makes thin hair look deliberate and dense. The angle draws the eye along the cut instead of to thin spots. Flat-iron smooth to show off the line.
Keep the angle moderate. An extreme A-line on thin hair can make the front pieces look separated and thin.
Try this: the back should sit at the nape and the front at the chin. That proportion flatters most face shapes.
Difficulty: Easy · Cost: $50–$90 (salon cut, trim every 6–8 weeks)
Once you have the cut, the right daily styling keeps the thickness going. These short hairstyles for thin fine hair pair well with the shorter cuts on this list.
Quick Comparison
| Cut | Length | Trim cycle | Best for |
|---|---|---|---|
| Blunt Bob | Chin to collarbone | 6–8 weeks | Straight fine hair |
| Textured Lob | Collarbone | 8–10 weeks | Fine to medium hair |
| Classic Pixie | Very short | 4–6 weeks | Bold change |
| Layered Pixie | Short | 4–6 weeks | Styling versatility |
| Textured Pixie (curls) | Short | 6–8 weeks | Curly/coily hair |
| Chin-Length Blunt | Chin | 6–8 weeks | Oval, heart, square faces |
| Layered Ends | Bob to lob | 8–10 weeks | Safe first layers |
| Front-Facing Layers | Medium to long | 8–10 weeks | Face framing |
| Micro Layers | Any | 8–10 weeks | Subtle movement |
| Ghost Layers | Medium to long | 8–10 weeks | Invisible lift |
| Short Shag | Above shoulders | 6–8 weeks | Effortless texture |
| Windswept Shag | Medium | 8–10 weeks | Side-part fullness |
| French Bob + Fringe | Jawline | 6 weeks | Face-framing density |
| Inverted Bob | Chin | 6–8 weeks | Crown volume |
| Inverted Lob | Collarbone+ | 8–10 weeks | Growing out a bob |
| Side-Swept Pixie | Short | 4–6 weeks | Asymmetric fullness |
| Long Layers + Curtain Bangs | Long | 8–10 weeks | Keeping length |
| Wavy Lob | Past shoulders | 8–10 weeks | Low effort |
| Blunt Cut + Thick Bangs | Medium | 6–8 weeks | Forehead density |
| Asymmetrical Bob | Chin | 6–8 weeks | Visual interest |
| Stacked Bob | Nape to chin | 6 weeks | Built-in crown volume |
| A-Line Bob | Nape to chin | 6–8 weeks | Strong shape |
How to Choose the Right Thickening Cut
Start with how short you will go. Shorter almost always looks thicker, so if you are open to a pixie or bob, start there. If you want to keep length, choose cuts that protect the perimeter: blunt edges, ghost layers, and long layers with curtain bangs.
At the appointment, be specific. “No thinning shears,” “keep the perimeter solid,” and “layers only where you can show me” are sentences that protect thin hair. Bring photos of the exact cut, not just the vibe. And schedule the trim cycle your stylist recommends: thickening cuts lose their edge fast when overgrown.
For styling ideas that keep the fullness going day to day, these layered hairstyles for thin hair show how layers and styling work together.
Frequently Asked Questions
What haircut makes thin hair look thickest?
A blunt bob at chin length is the most reliable answer: one-length ends look solid and dense with no styling tricks needed. For shorter hair, a textured pixie; for longer hair, a blunt cut with ghost layers underneath.
Are layers good or bad for thin hair?
Both, depending on the type. Ghost layers and long blended layers add movement without removing density. Short choppy layers and razor thinning can make thin hair look sparser. The rule: layers should add shape, never remove visible weight from the ends.
Should I get bangs if my hair is thin?
Yes, if they are cut right. Curtain bangs and piecey fringe add face-framing fullness. Thick blunt bangs work too but borrow hair from the rest of the head. Avoid wispy baby bangs on very thin hair; they can look sparse.
How short should thin hair be cut to look thicker?
There is no magic length, but chin to collarbone is the sweet spot for most people: short enough to hold volume, long enough to style. Pixies look thickest of all because short hair stands up instead of lying flat.
What should I tell my stylist to avoid?
Say no to thinning shears unless the stylist explains a specific reason, no razor cutting on the perimeter, and no short layers through the crown on long hair. Ask them to point-cut instead of razor-cut, and to keep the bottom edge solid.
Final Thoughts
A good cut does half the work of thick-looking hair before you ever pick up a styling tool. Whether you go blunt, layered, or short, the principle is the same: protect the ends, build the shape, and trim on schedule. Pick the cut that fits your length comfort zone and your stylist will handle the rest.

