

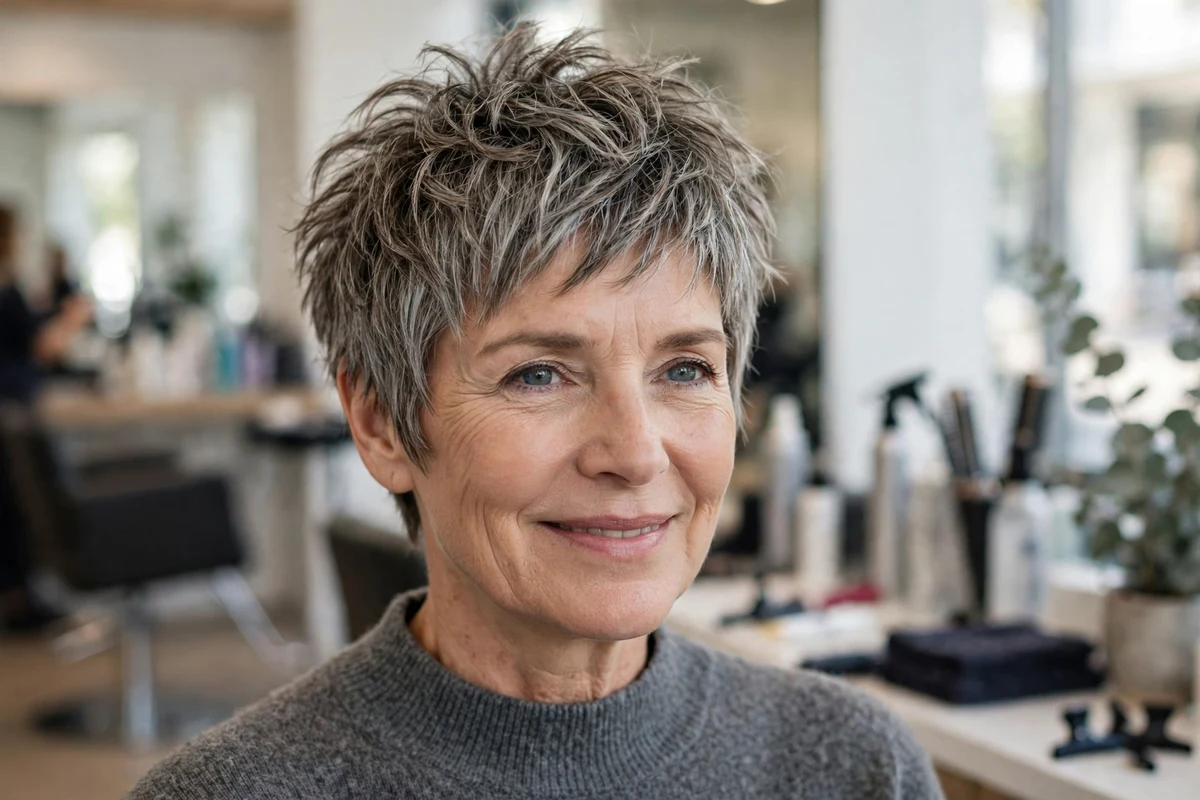
Quick Answer: A messy pixie is a short crop with point-cut, uneven layers that are styled with the fingers and left deliberately tousled. For women over 50, the texture makes fine hair look fuller, hides a flat crown, and keeps the morning routine under ten minutes for most versions on this list.
The 24 cuts below run from the shortest wake-up ready crop to a longer pixie bob hybrid, with options for curly, wavy, thick, and fine hair. Each idea explains how the cut is built, who it suits, and what the daily routine involves, plus a styling tip and a difficulty, cost, and time line. Cost lines use bands only: $ is a standard cut, $$ adds shaping detail or specialist cutting, and $$$ includes color work.
Start with the Silver Piecey Messy Pixie with Chunky Separation (idea 3) if you wear your gray in defined pieces, the Curly Messy Pixie Cut Dry, Curl by Curl (idea 9) if you have natural curls, or the Grown-Out Messy Pixie That Holds to Week Eight (idea 22) if your salon visits are spaced far apart. Fine hair starts at idea 7, thick hair at idea 17, and round faces at idea 24.
Key Takeaways
- Messy texture is cut in, not styled in: point-cut, uneven layers create the tousled finish before any product touches the hair.
- Fine hair does best with end-only texture, crown chop, or a mini quiff, since short layers prop each other up.
- Thick hair needs weight removed inside the cut or a soft nape undercut, so the top stays loose instead of forming a cap.
- Most versions style in 3 to 8 minutes with fingers and one product. The shortest crop on this list takes about 3 minutes.
- Trim cycles run from four weeks for very short or undercut versions to eight weeks for the grown-out cut.
1. Tousled All-Over Messy Pixie in Natural Gray
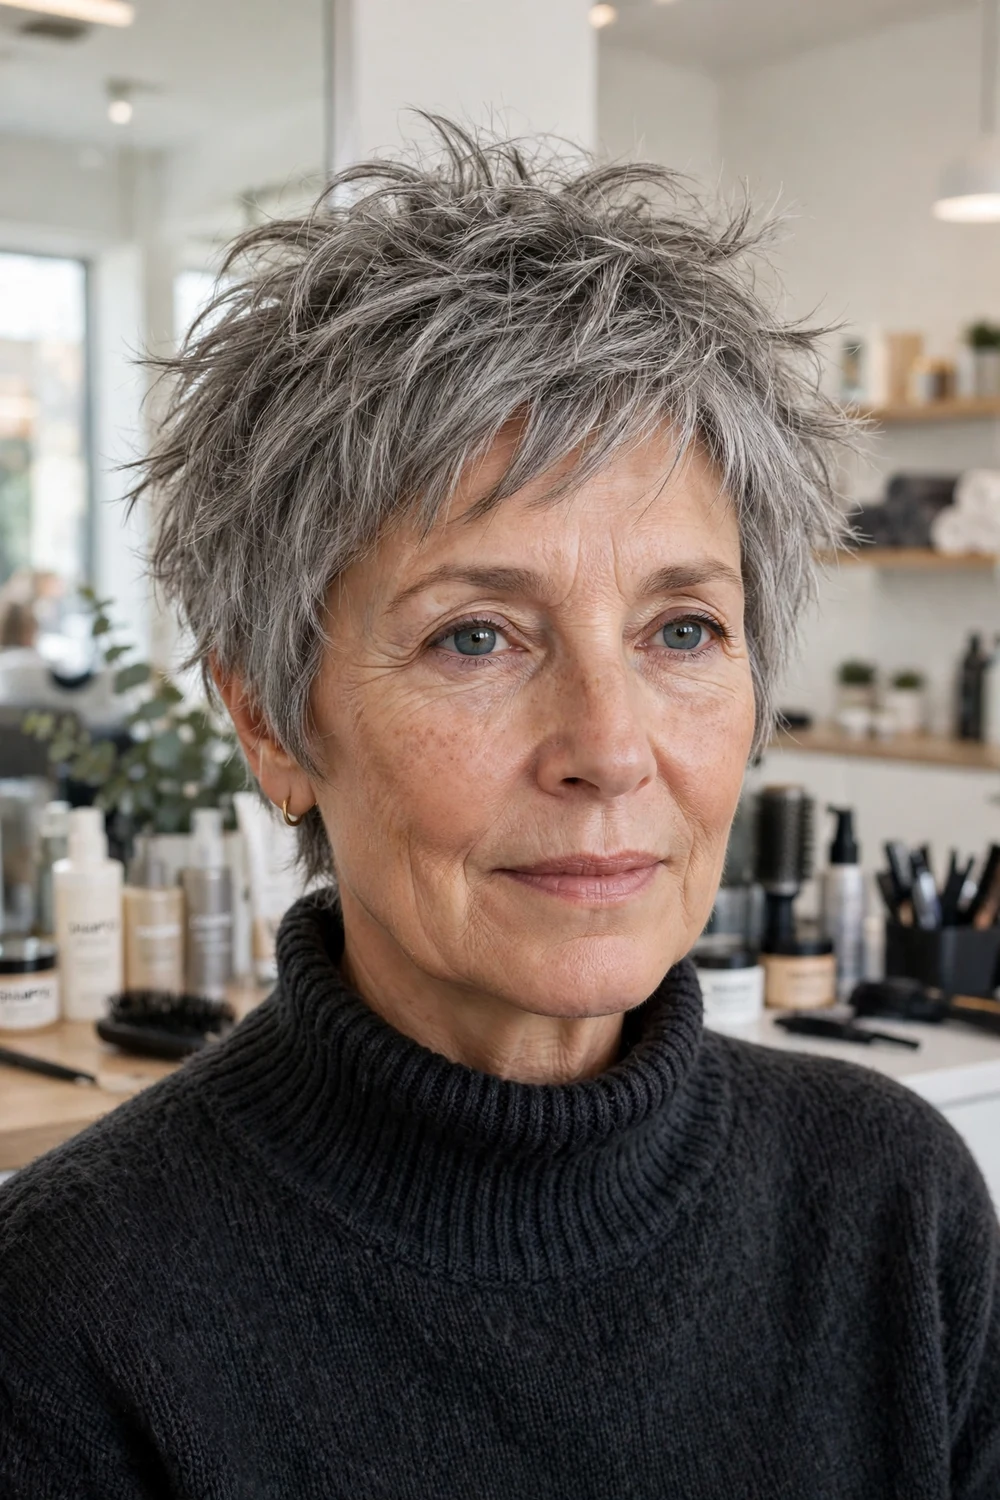
Point-cut layers run through the whole cut, and each layer is left a slightly different length. The top is pushed forward, sideways, and back with the fingers, so no single direction has to match. Natural gray shows the separation well, since light and darker strands sit in different pieces.
This suits straight to wavy hair in fine to medium density, and it forgives cowlicks and uneven growth patterns. Ask for point-cut ends and soft sides that follow the head shape.
Try this: Work a pea-size amount of matte paste through fully dry hair, then pinch the ends in different directions and leave the result alone.
Difficulty: Easy | Cost: $ | Time: 5 minutes
2. Choppy Crown Messy Pixie with Broken Ends

The chop is concentrated at the crown, where short, uneven pieces are cut with deep point cuts. The sides stay softer and closer, so the contrast puts all the movement on top. Broken ends catch light at different angles, which makes fine hair read thicker at the crown.
Ask your stylist to keep the perimeter full while the crown gets the heavy texture. This version suits oval, round, and square faces, since the crown height adds length above the forehead.
Try this: Mist sea salt spray on damp roots, scrunch the crown upward as it dries, and skip the brush entirely.
Difficulty: Easy | Cost: $ | Time: 5 minutes
3. Silver Piecey Messy Pixie with Chunky Separation
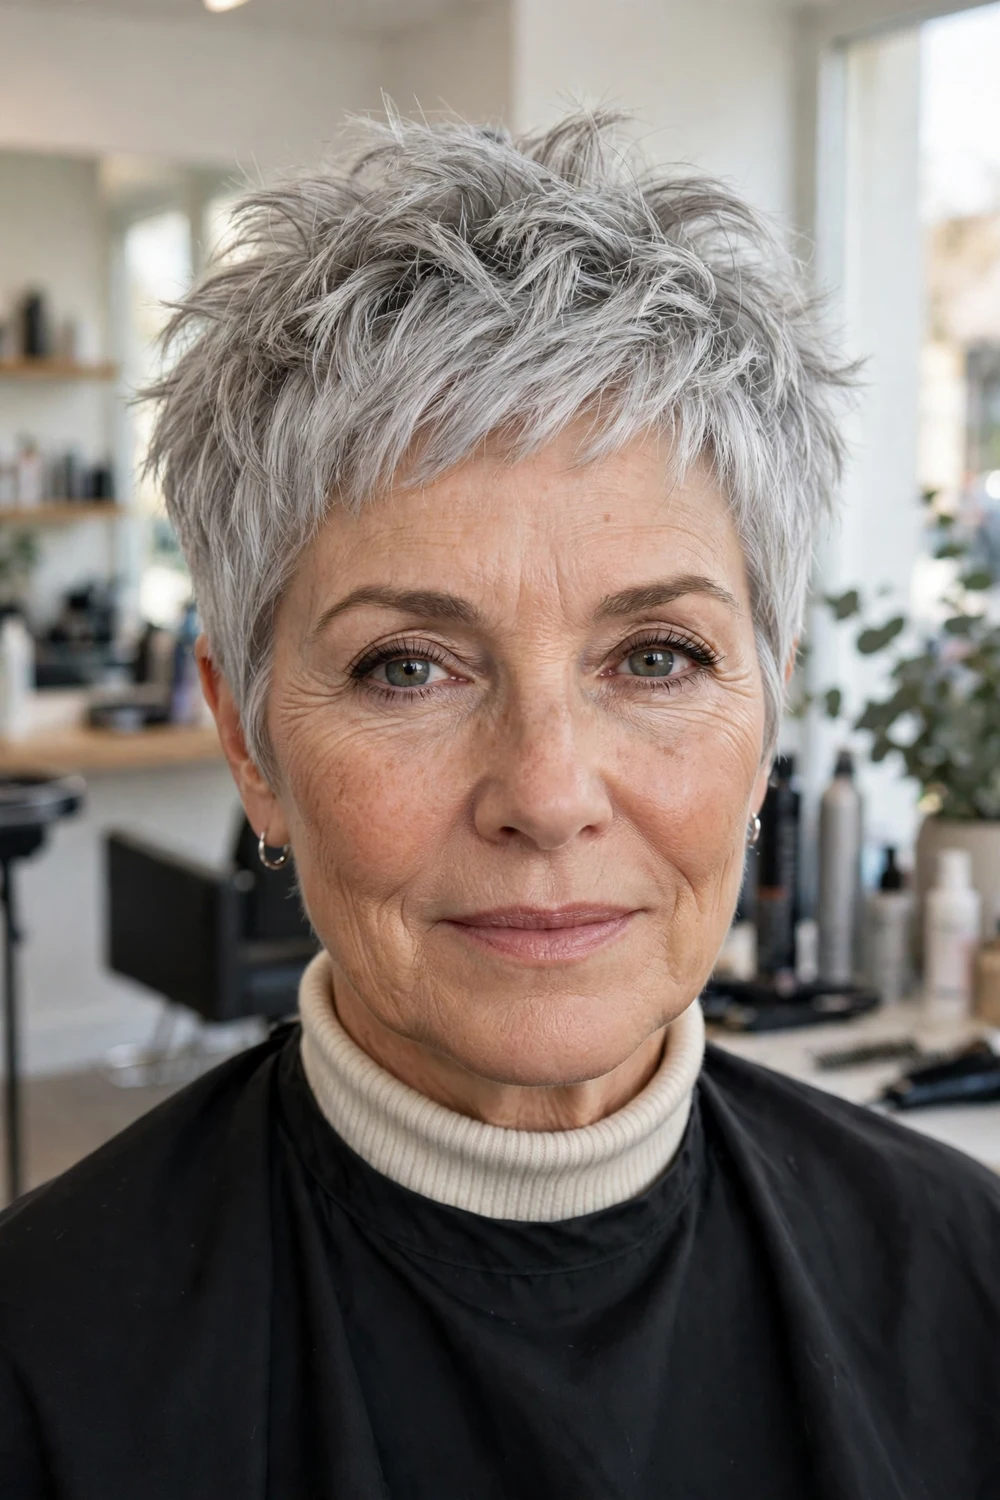
Silver hair is worn in chunky, separated pieces rather than brushed into one mass. The pieces are cut slightly longer than a standard crop, so each one holds its own shape. Separation keeps wiry silver strands looking deliberate and tidy at the edges.
This suits medium density silver or white hair. A purple shampoo once a week keeps the tone clear. Keep the pieces chunky when you style: fine, wispy separation disappears on silver hair by midday.
Try this: Pinch each piece into place with putty on dry hair, working from the crown forward, and leave gaps of shadow between pieces for contrast.
Difficulty: Easy | Cost: $ | Time: 5 minutes
4. Messy Pixie with a Wispy Broken Fringe

A broken fringe skims the forehead in separated wisps instead of one solid line. The fringe is point-cut and thinned only at the very ends, so it stays light and moves when you turn your head. The rest of the cut is tousled and loose, which keeps the front from looking formal.
This version sits well with glasses, since the wisps rest lightly above the frames. It suits fine to medium hair and softens a high forehead. Fringe trims every three to four weeks keep the length above the brows.
Try this: Dry the fringe forward with your fingers, side to side first, then let it settle. A light mist of texture spray holds the wisps apart.
Difficulty: Easy | Cost: $ | Time: 5 minutes
5. Wake-Up Ready Short Messy Pixie
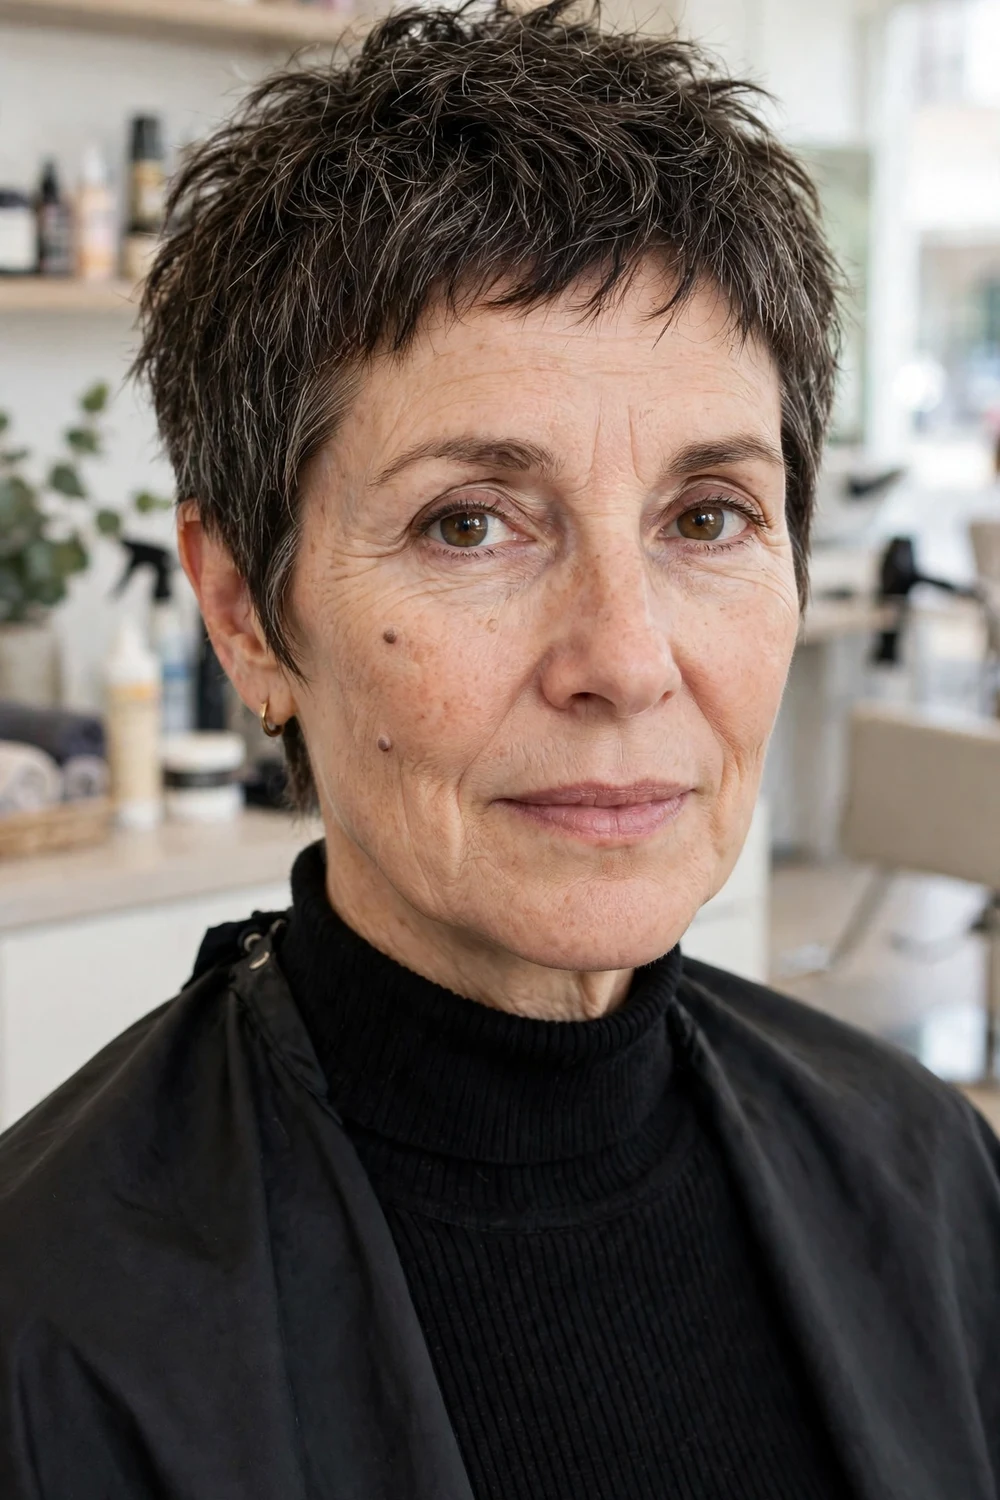
This cut is short and evenly textured all over, so the flattened, rumpled shape you wake up with is already most of the finished style. There is no long section to redirect and no fringe to reset. Dry shampoo at the roots on non-wash mornings absorbs oil and restores grip in seconds.
It suits medium density hair and women who want the lowest daily effort available. The trade-off is salon frequency: very short texture needs a trim every four weeks to stay even.
Try this: Keep dry shampoo by the bed. Spray the roots, wait a minute, then re-tousle everything upward with your fingertips.
Difficulty: Easy | Cost: $ | Time: 3 minutes
6. Long-Top Tousled Messy Pixie with Tapered Sides
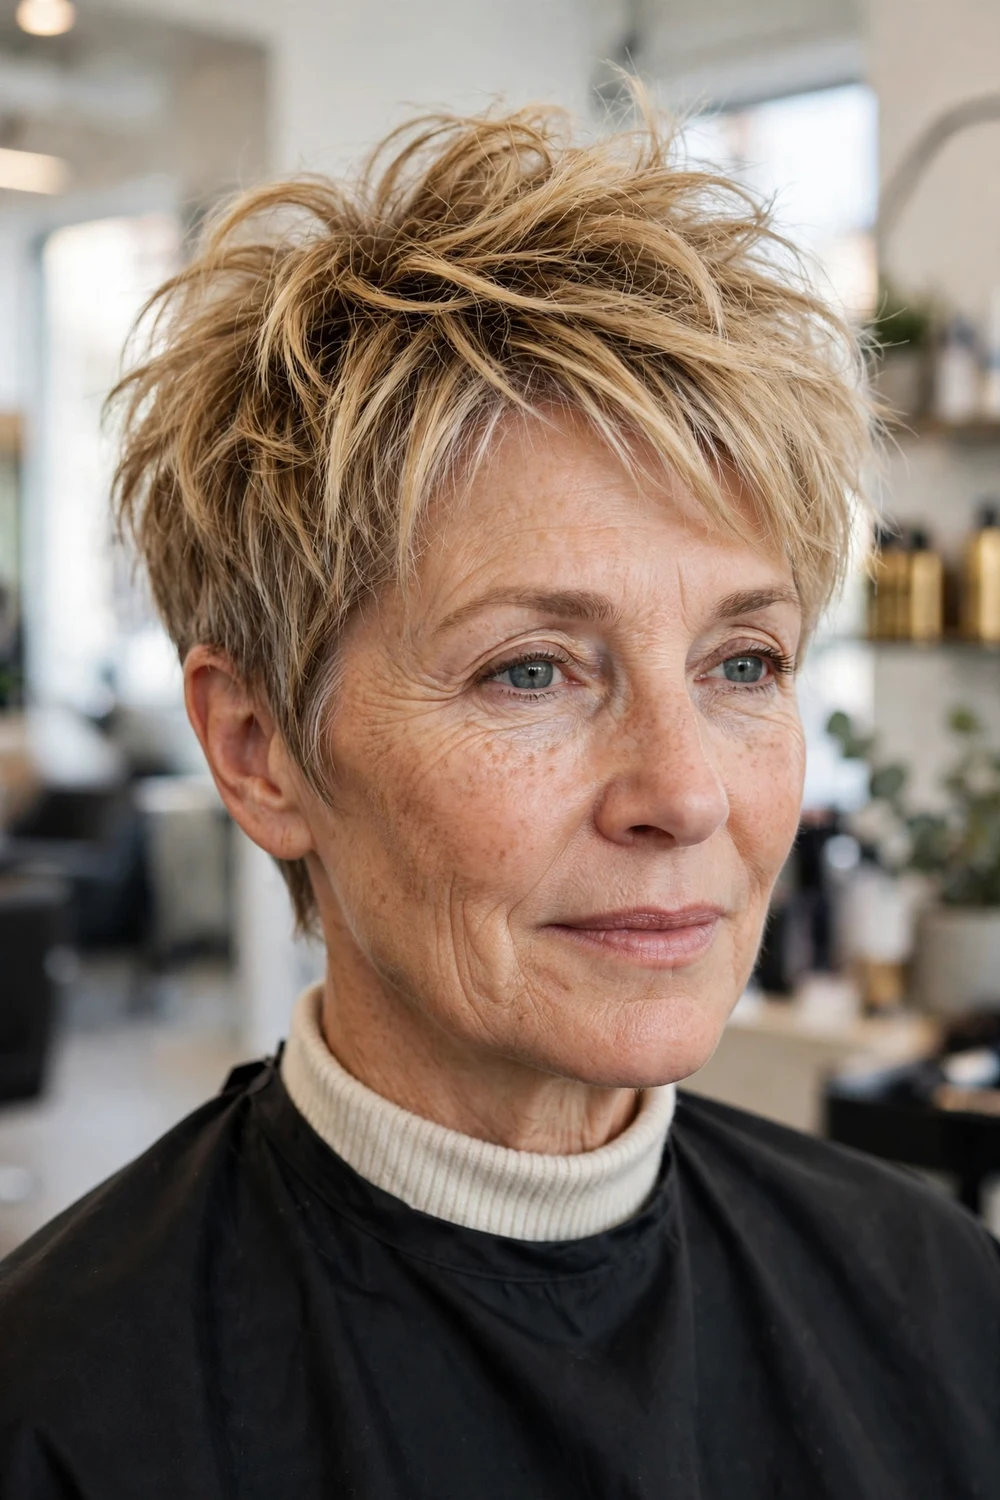
Extra length stays through the top while the sides taper close. The long top can be pushed forward as a loose fringe, swept to one side, or roughed straight up, and every direction still reads as a messy pixie. The tapered sides keep the longer top from widening the face.
This suits straight to wavy hair and women who like to change their part. If you are comparing shorter shapes first, the guide to short pixie haircuts for women over 50 shows the classic lengths side by side.
Try this: Use a dab of putty on the ends only. Product at the roots makes a long top flop by afternoon.
Difficulty: Medium | Cost: $$ | Time: 8 minutes
7. Fine-Hair Messy Pixie with End-Only Texture
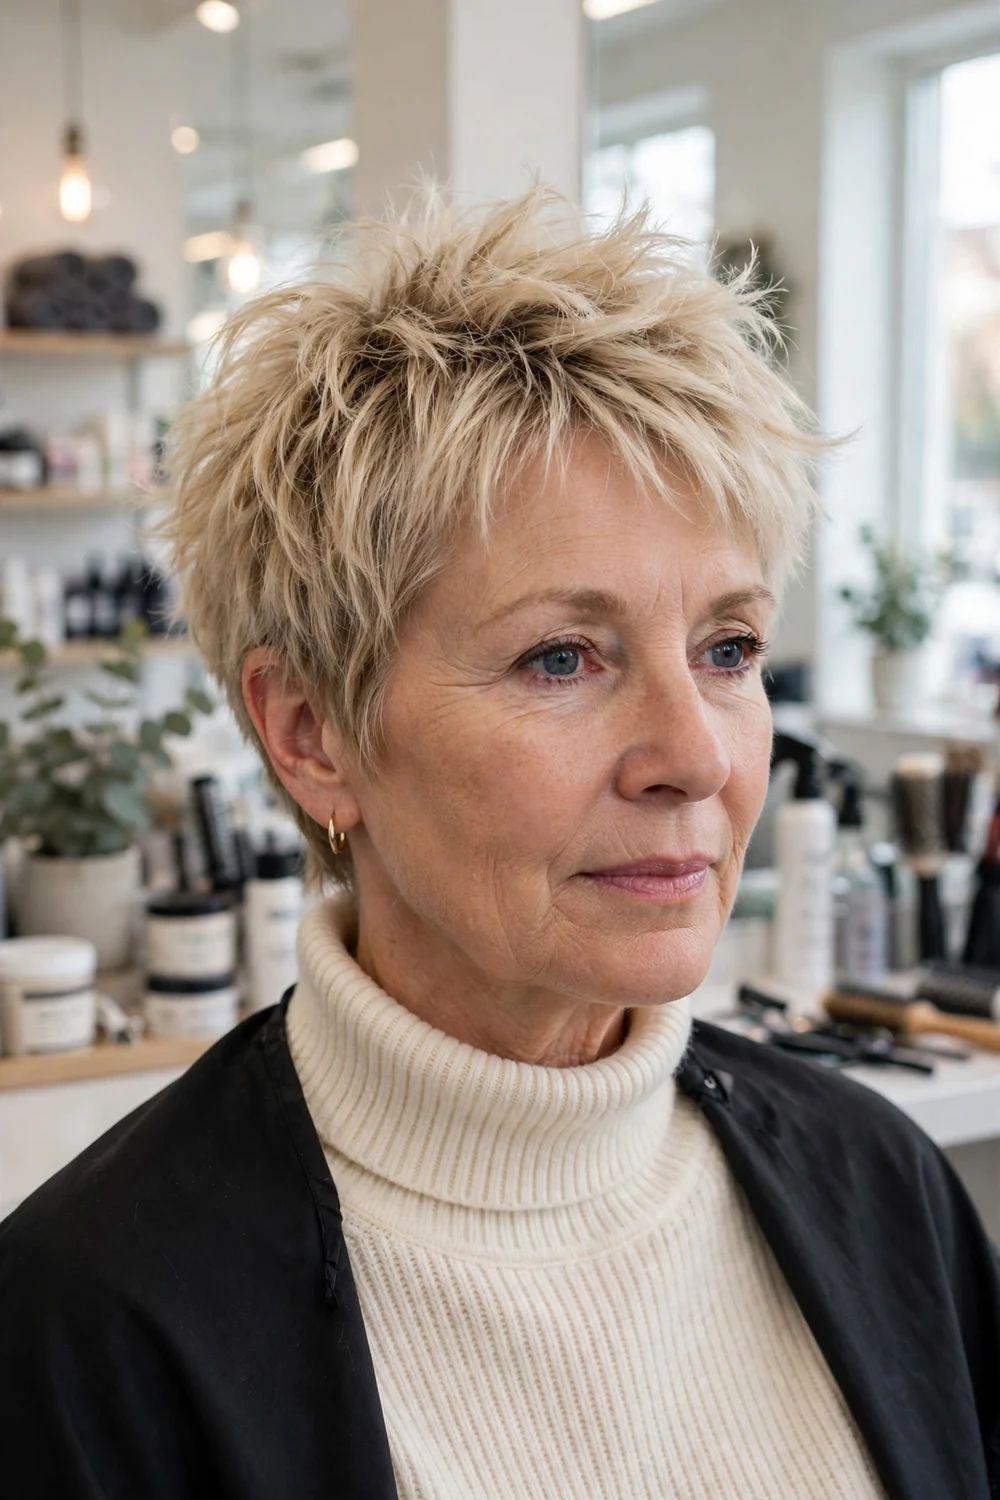
Fine hair is kept short, with texture cut into the ends only. Each short layer props the next one up, so hair that used to lie flat gains visible body. The interior is left alone, since thinning fine hair from inside removes the density the style depends on.
Style with mousse on damp hair rather than creams, which weigh fine strands down. This version suits oval and heart faces and needs a trim every five weeks to hold the layer lengths.
Try this: Apply mousse at the roots only, rough-dry with your head tilted forward, then pinch the ends apart once dry.
Difficulty: Easy | Cost: $ | Time: 5 minutes
8. Messy Pixie with Messy Side-Swept Bangs
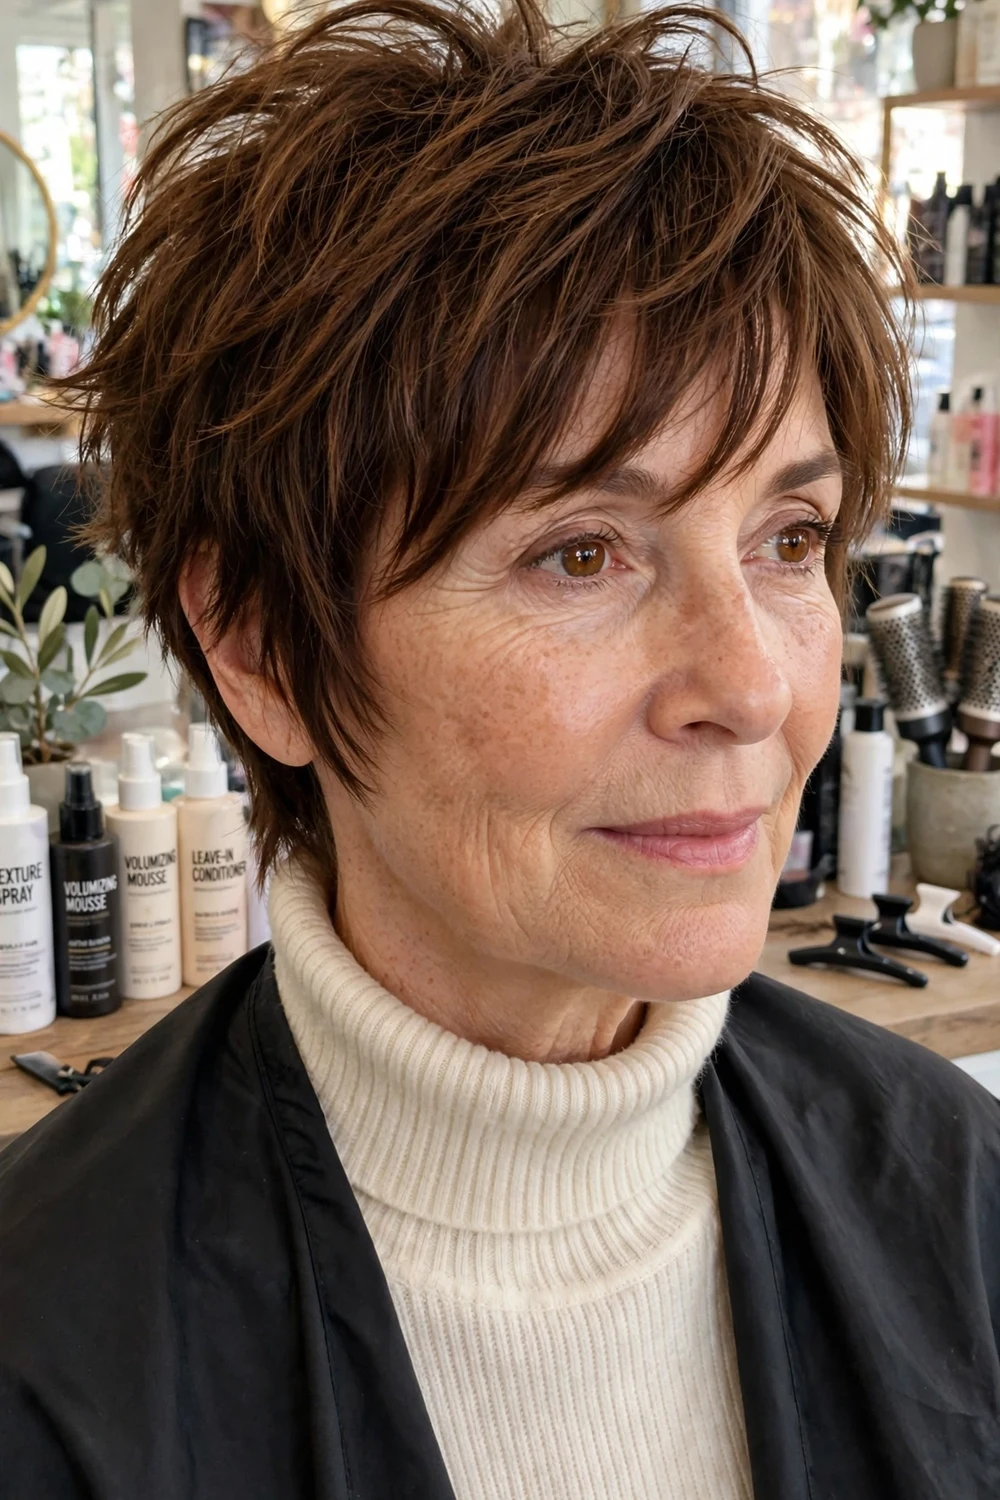
A longer fringe is swept loosely to one side and left deliberately unpolished. The diagonal line draws the eye across the face, which flatters round and fuller faces, and the sweep covers a thinning hairline more fully than a short fringe can.
Let the fringe dry in the direction it will fall, then tousle the crown in the opposite direction for contrast. Sea salt spray keeps the sweep soft. This suits straight to wavy hair in fine to medium density.
Try this: Dry the bangs first, before the crown. Once a fringe sets in the wrong direction, restyling rarely fixes it fully.
Difficulty: Easy | Cost: $ | Time: 6 minutes
9. Curly Messy Pixie Cut Dry, Curl by Curl
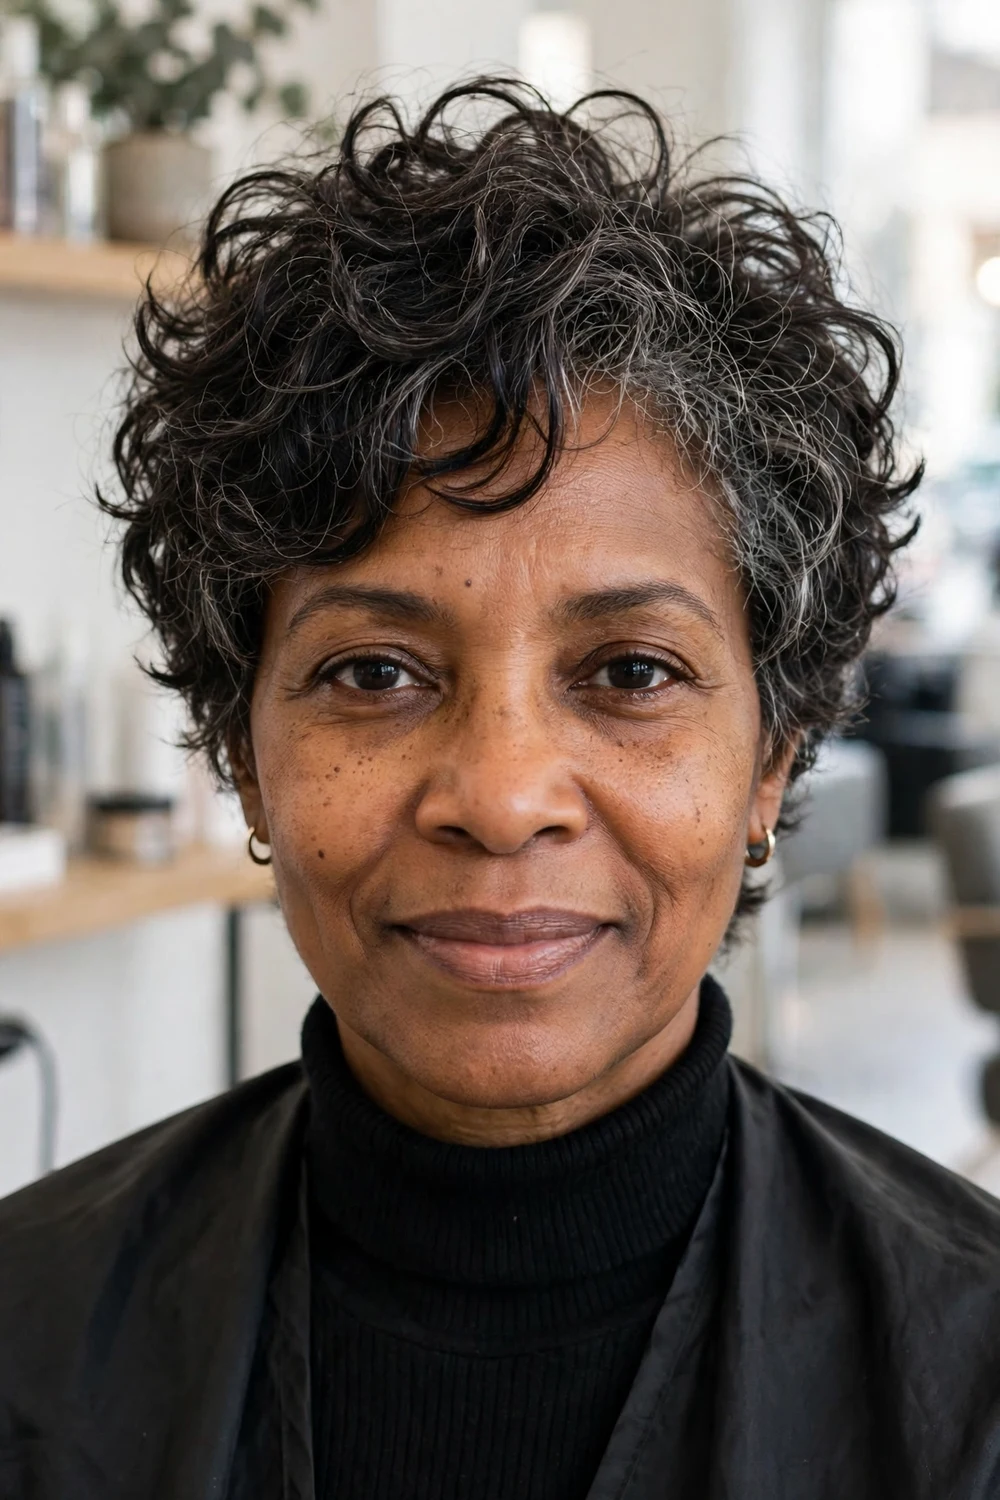
Curls are cut dry, one curl at a time, so the finished shape accounts for shrinkage. The top keeps enough length for the curl pattern to form, and the sides stay shorter so the silhouette stays round rather than wide. The result is full, springy, and almost entirely hands-off.
Scrunch a small amount of curl cream into damp hair and air-dry or diffuse on low heat. Never brush dry curls. This version suits round and square faces, and it grows out softly for six to eight weeks.
Try this: Refresh second-day curls with a water mist and a scrunch, instead of a full wash and restyle.
Difficulty: Easy | Cost: $$ | Time: 7 minutes
10. Wavy Tousled Messy Pixie with Beach Texture
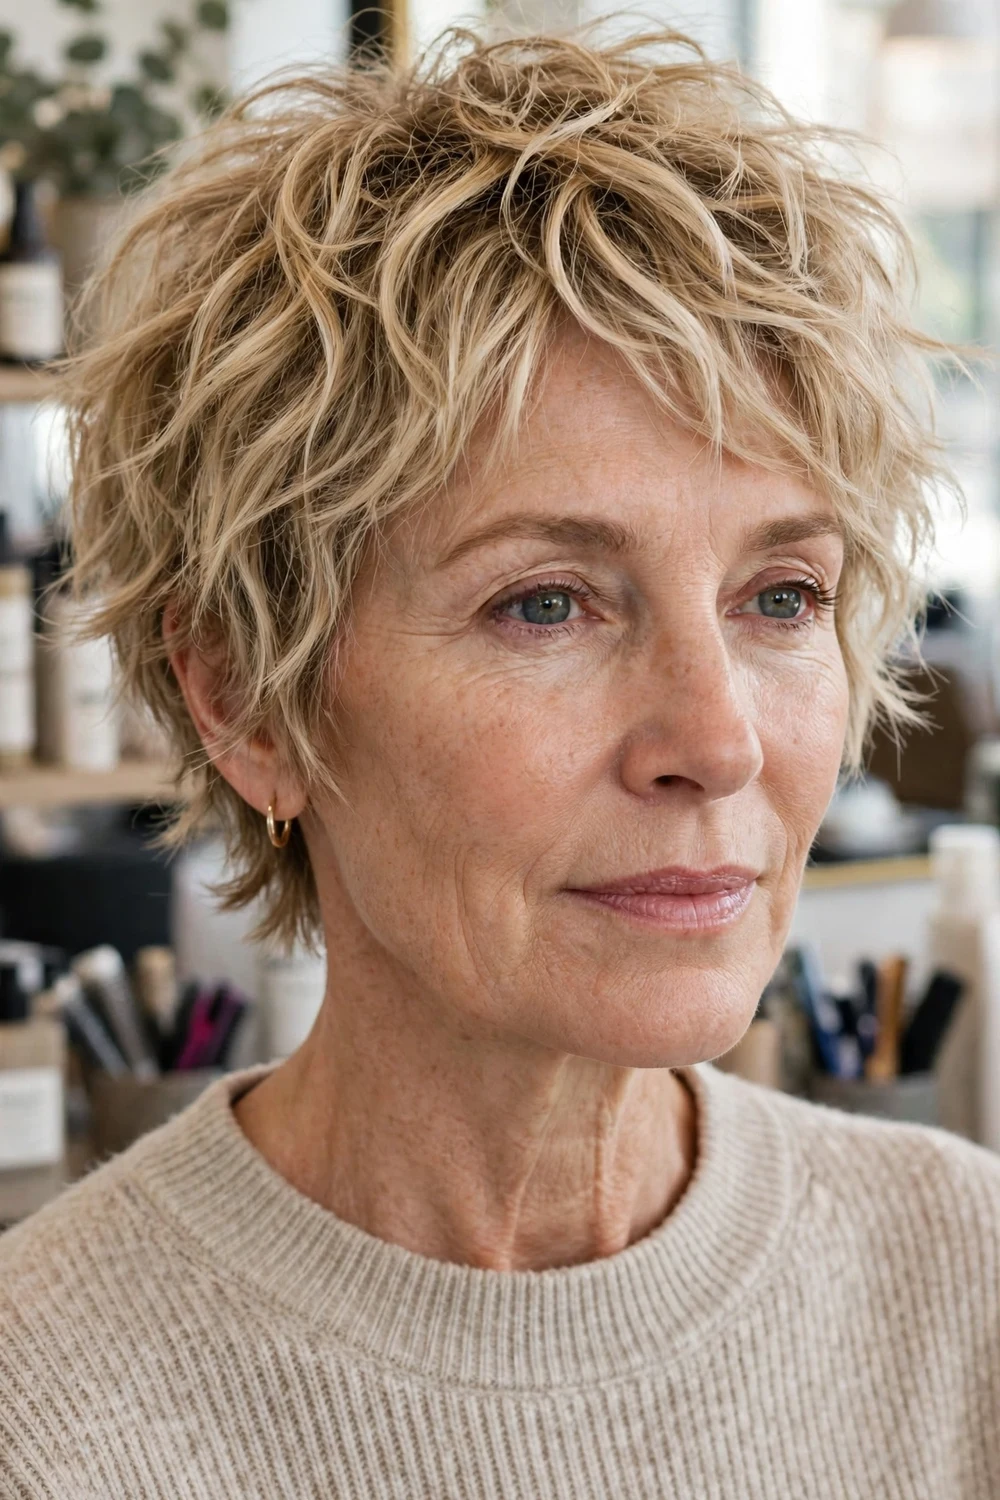
Natural waves do most of the work in this version. The cut follows the wave pattern with loose, uneven layers, and the tousled finish exaggerates the bend instead of flattening it. Sleeping with the hair slightly damp can set the waves overnight.
This is a good middle step if a very short crop feels like too big a change. It suits oval, heart, and long faces. Enhance the waves with sea salt spray and twist a few sections with your fingers as they dry.
Try this: Twist four or five sections while damp and leave them alone until fully dry. Breaking the twists early creates frizz.
Difficulty: Easy | Cost: $ | Time: 5 minutes
11. Messy Pixie with a Soft Undercut at the Nape

The nape and lower sides are clipped close while the messy top keeps its full texture. The close nape keeps the neck cool and removes the area where thick short hair puffs out first. The contrast reads modern, and the top covers the undercut as it grows.
Side tidy-ups every three to four weeks keep the nape clean, while daily styling stays minimal. For bolder clipped shapes, the edgy choppy pixie haircuts for women over 50 go further with contrast. This version suits thick, coarse hair best.
Try this: Work putty through the top and push the pieces in opposing directions. Leave the clipped nape completely alone.
Difficulty: Medium | Cost: $$ | Time: 6 minutes
12. Asymmetrical Messy Pixie with One Long Side

One side is left long enough to brush the temple, while the other side is cropped close. The longer side can be arranged to cover an uneven hairline or a strong cowlick, and the diagonal shape adds interest without bold color.
This version grows out toward a longer pixie bob shape, which makes the grow-out phase easy. Keep the long side textured with spray so it reads tousled. It suits oval and heart faces, and it needs a trim every four to five weeks to hold the contrast.
Try this: Part deep on the short side. The deep part gives the long side its full sweep and keeps the shape clear.
Difficulty: Medium | Cost: $$ | Time: 8 minutes
13. Messy Pixie Bob with Ear-Length Front Pieces
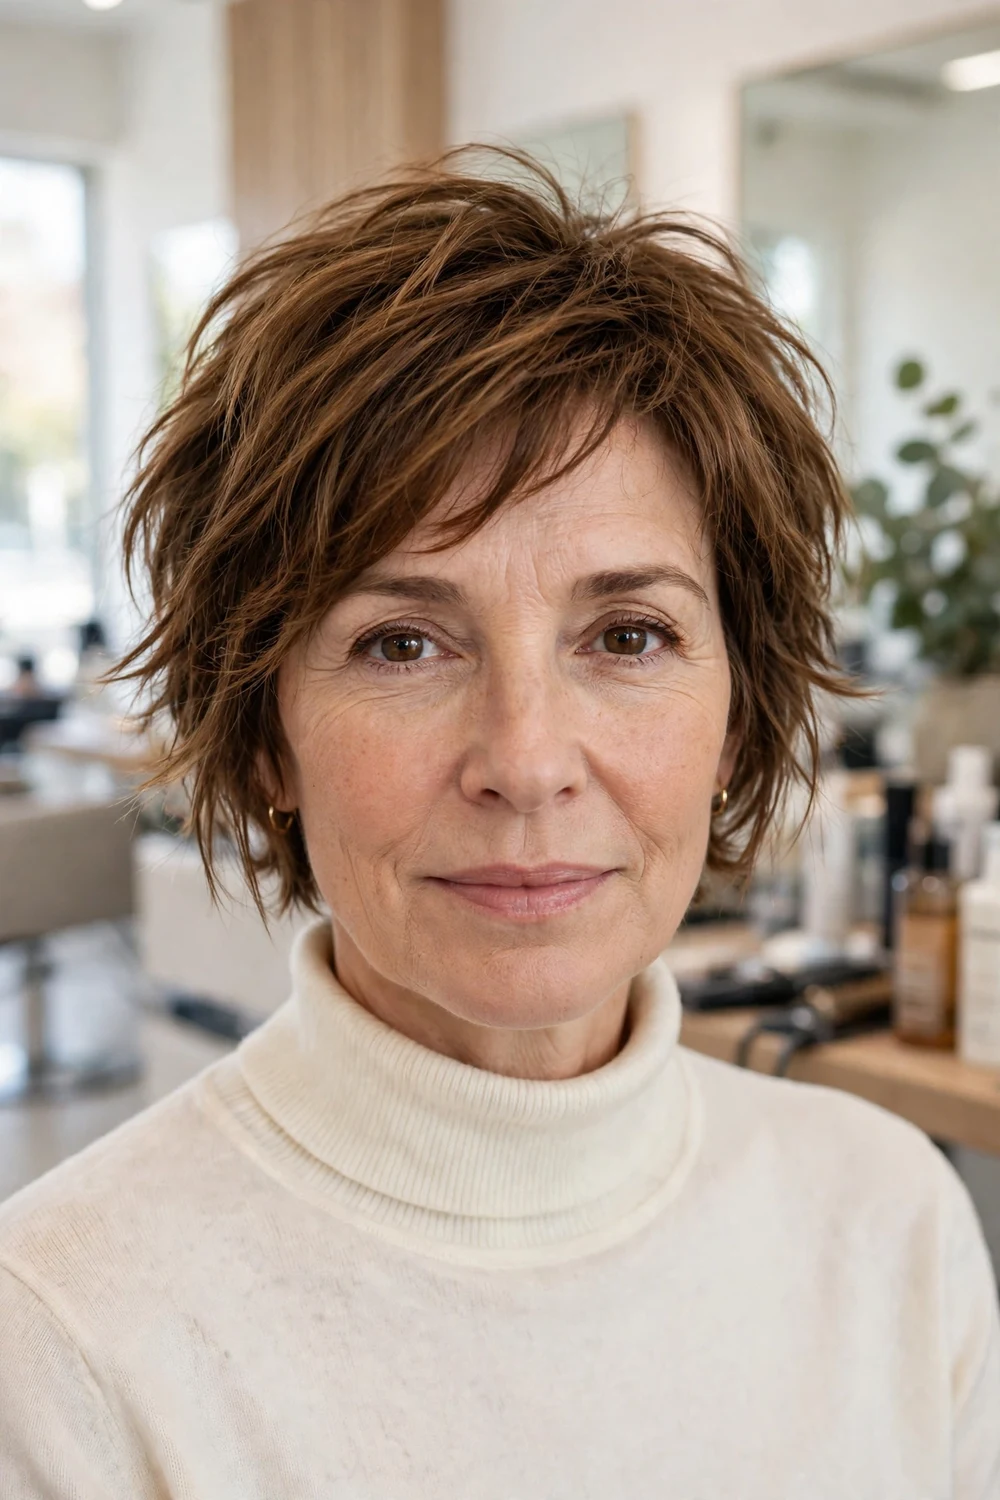
This hybrid keeps length around the ears and jaw while the back stays cropped and light. It gives the freedom of a pixie with more hair left to frame the face, which suits women moving down from a bob in stages.
A touch of mousse at the roots stops the longer front from falling flat by midday. Tousle the ends outward rather than tucking everything behind the ears. It suits fine to medium hair and most face shapes.
Try this: Blow-dry the front pieces away from the face with a small round brush, then rough up the back with your fingers.
Difficulty: Easy | Cost: $$ | Time: 8 minutes
14. Gray Grow-Out Messy Pixie with Blended Roots

Broken, choppy texture disguises the line between colored lengths and gray roots, so regrowth reads as part of the blend. The short length also means the last of the old color is trimmed away within a few months of regular cuts.
A purple shampoo once a week keeps the gray sections clear and bright. This version suits women at any stage of the gray transition, on straight to wavy hair. The choppy pixie cuts for women roundup shows more broken-texture options if you want extra chop.
Try this: Ask your stylist to place a few fine lowlights at the part during the transition. They soften the root line between cuts.
Difficulty: Easy | Cost: $ | Time: 5 minutes
15. Lifted-Crown Messy Pixie for a Flat Crown

Layers are kept longest and lightest right at the crown, then tousled upward so the lift is built into the cut. The sides stay closer, which keeps the height from turning into width. This is the version to choose when the crown is the main problem area.
Blow-dry only the crown section, forward and up, with a small amount of volumizing mousse. The rest of the cut can air-dry. It suits fine to medium hair and round faces, since crown height adds length to the face.
Try this: Dry the crown first, before any other section. Roots that dry flat in the wrong direction rarely lift again later.
Difficulty: Easy | Cost: $ | Time: 6 minutes
16. Feathered Messy Pixie with Flicked Ends
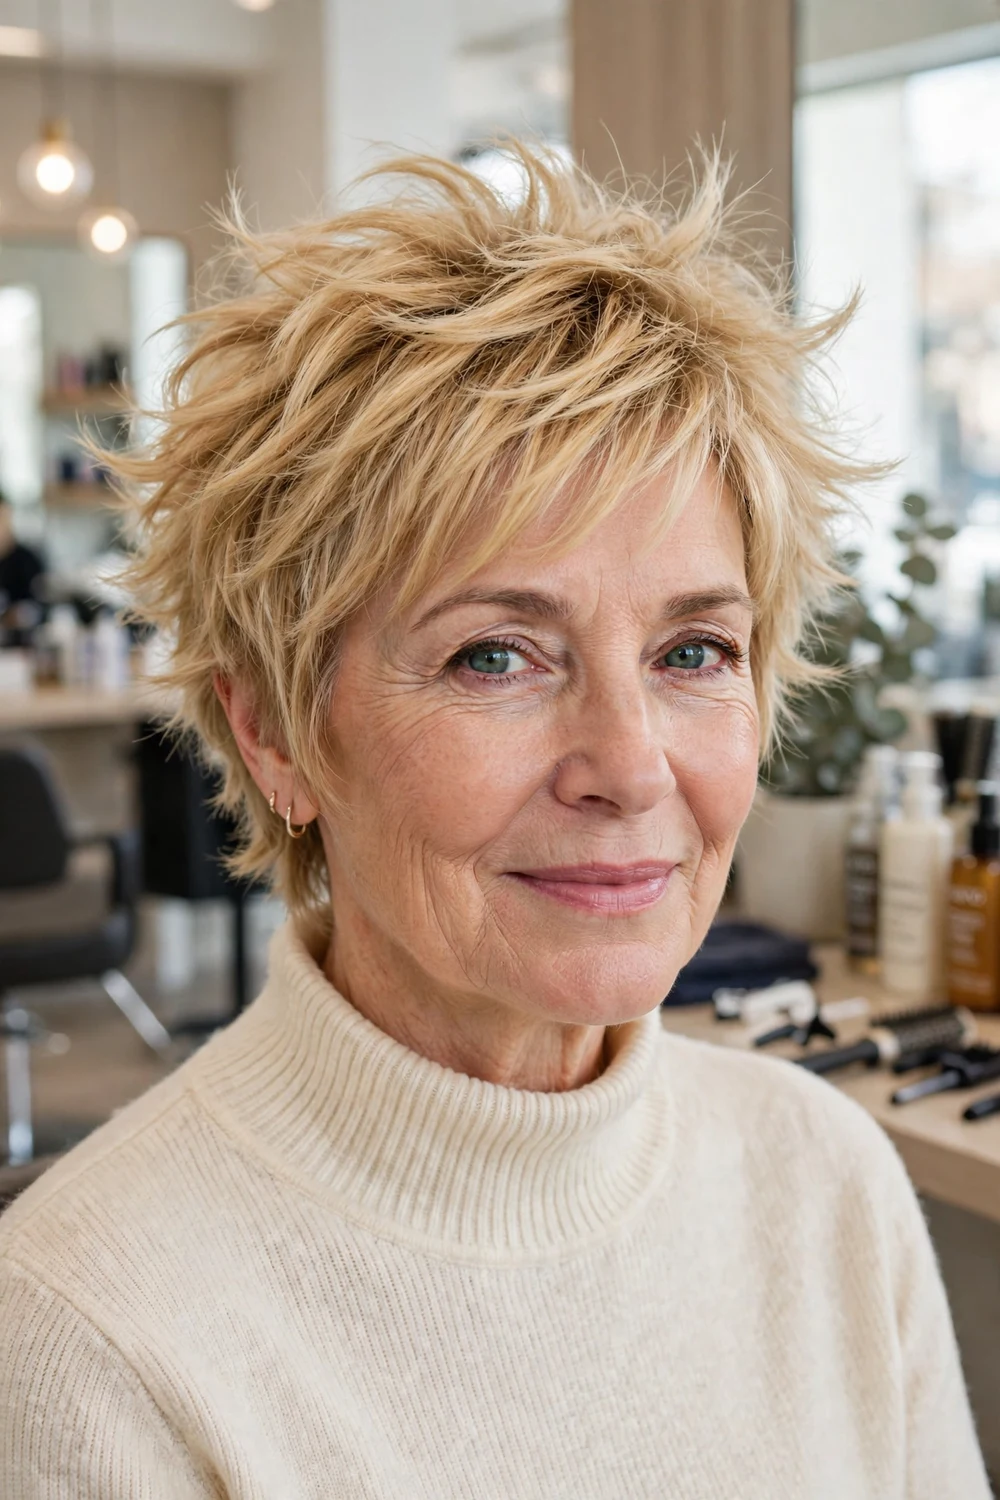
Feathering tapers the layers into fine, flicked ends that move when you do. The finish is lighter and softer than a choppy cut, which suits women who find heavy chop too bold. The outline stays loose, with the ends flipping in different directions.
This version flatters fine, straight hair that needs movement without weight. Use a light foam through damp hair and dry with your fingers lifting at the roots. Heavy wax closes the feathered ends into strings, so keep products airy.
Try this: Lift the roots with your fingertips while drying, and stop as soon as the hair is dry. Over-drying flattens feathered ends.
Difficulty: Easy | Cost: $ | Time: 6 minutes
17. Thick-Hair Messy Pixie with Weight Removed Inside
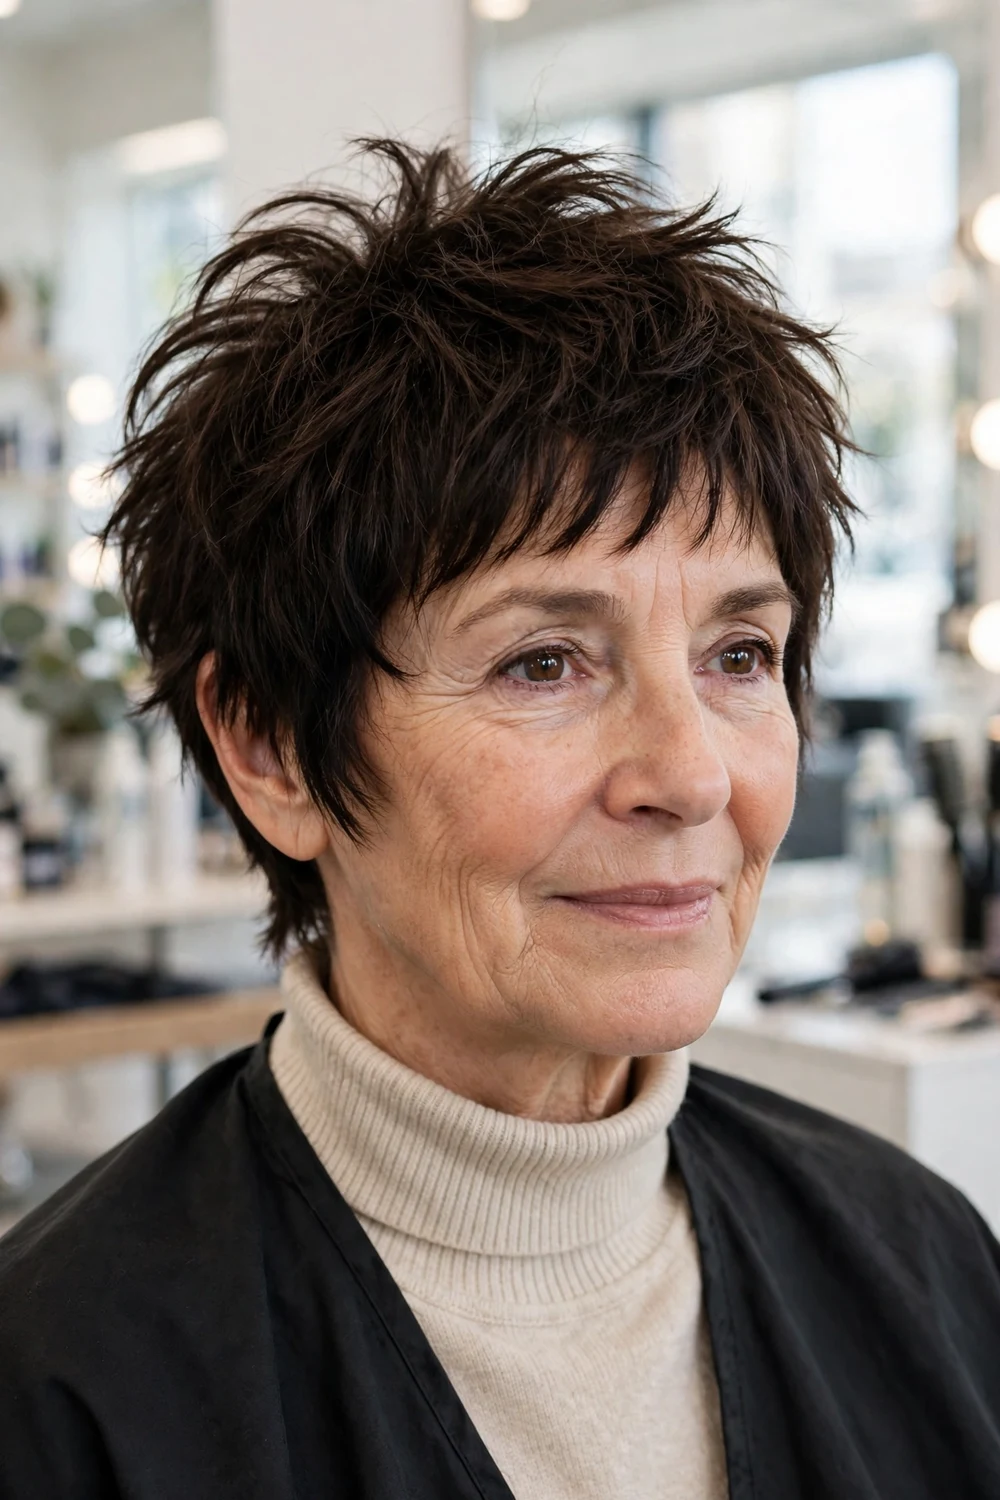
Thick hair in a short cut can turn into one solid cap. The fix is internal layering: weight is removed from underneath while the top keeps its full, messy surface. You keep the body and lose the bulk that makes thick pixies hard to control.
Ask for weight removal and sliced, piecey ends at the appointment. Styling foam worked through damp hair helps thick hair settle into pieces. It suits square and oval faces, and it needs a trim every five weeks as the interior grows back.
Try this: Dry thick hair in sections, crown first and sides last. One all-over blast leaves the underneath damp and puffy.
Difficulty: Medium | Cost: $$ | Time: 7 minutes
18. Messy Pixie with a Deep Side Part and Lifted Roots
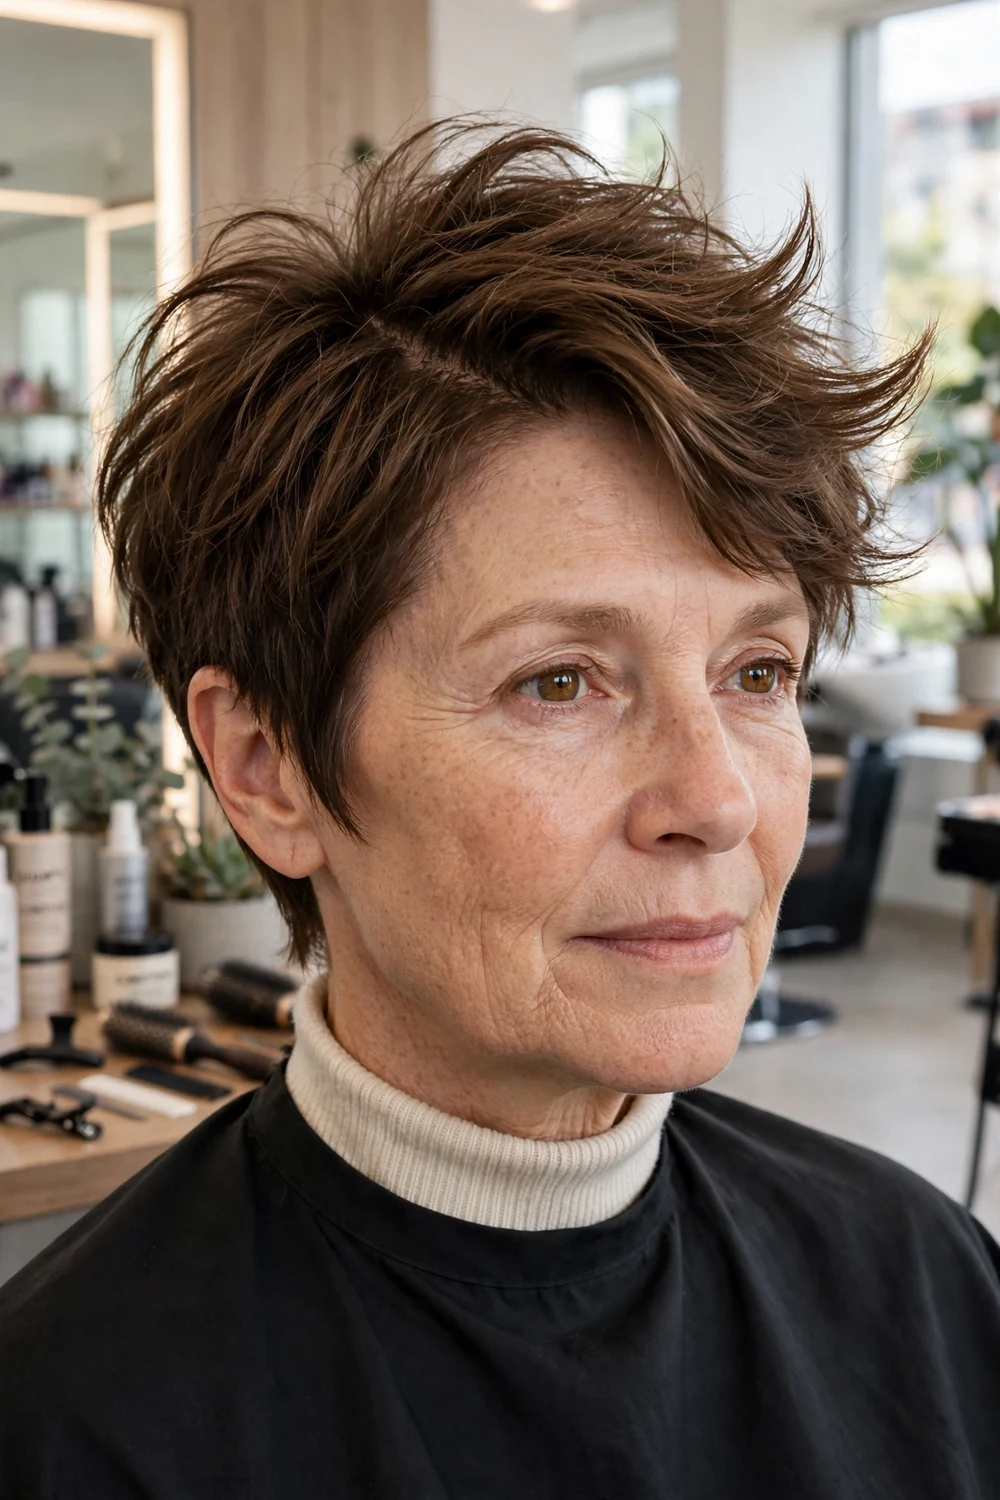
A deep side part traps lift on the heavy side of the head, so the roots stand up on their own. The part also creates a diagonal line across the forehead, which breaks up roundness and adds shape to a simple crop.
Dry against the part direction first, then flip the hair over into place for maximum body. Dry shampoo at the part on day two restores the lift. This version suits straight to wavy hair and most face shapes.
Try this: Change the part side every few weeks. Hair trained into one part for months resists lift in any direction.
Difficulty: Easy | Cost: $ | Time: 6 minutes
19. Razored Messy Pixie with Shredded Tips
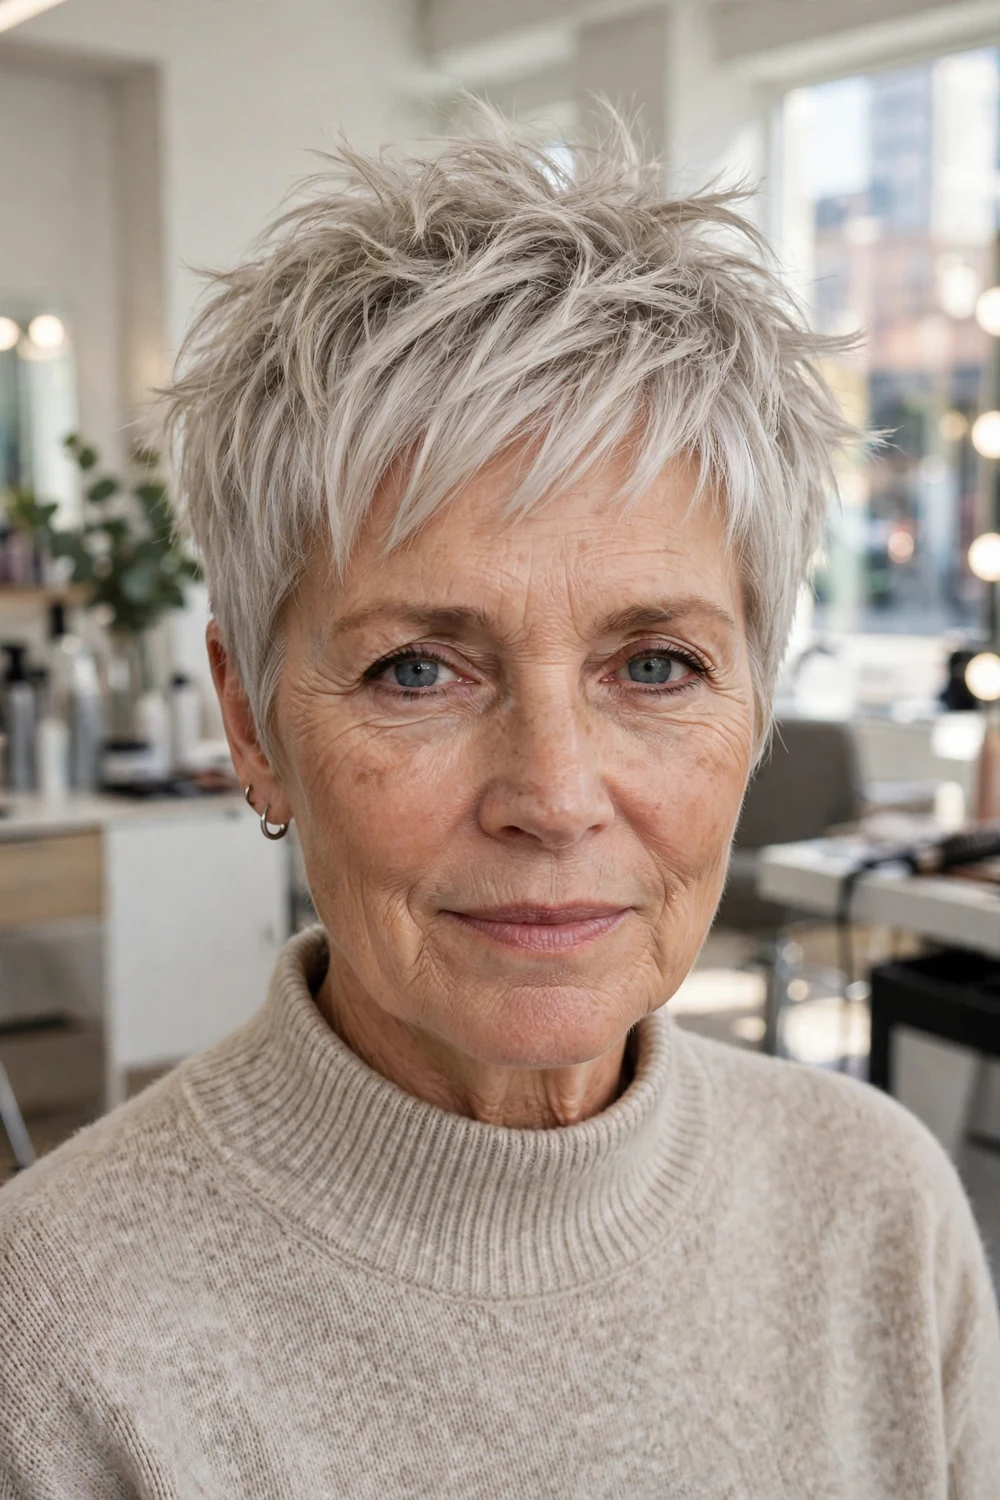
A razor slices the ends into fine, tapered points, which gives the loosest finish on this list. The shredded tips separate on their own, so the texture needs very little product. Razoring also removes bulk softly, which helps medium density hair sit closer at the sides.
Ask for a fresh blade, since a dull razor drags and splits the ends. This version suits healthy, undamaged hair best. The short shaggy pixie haircuts guide covers a close cousin of this finish, with shag layering through the top.
Try this: Scrunch a little sea salt spray into dry hair for extra separation on the razored ends, and avoid brushing afterward.
Difficulty: Medium | Cost: $$ | Time: 6 minutes
20. Bronde Messy Pixie with Face-Lightening Pieces
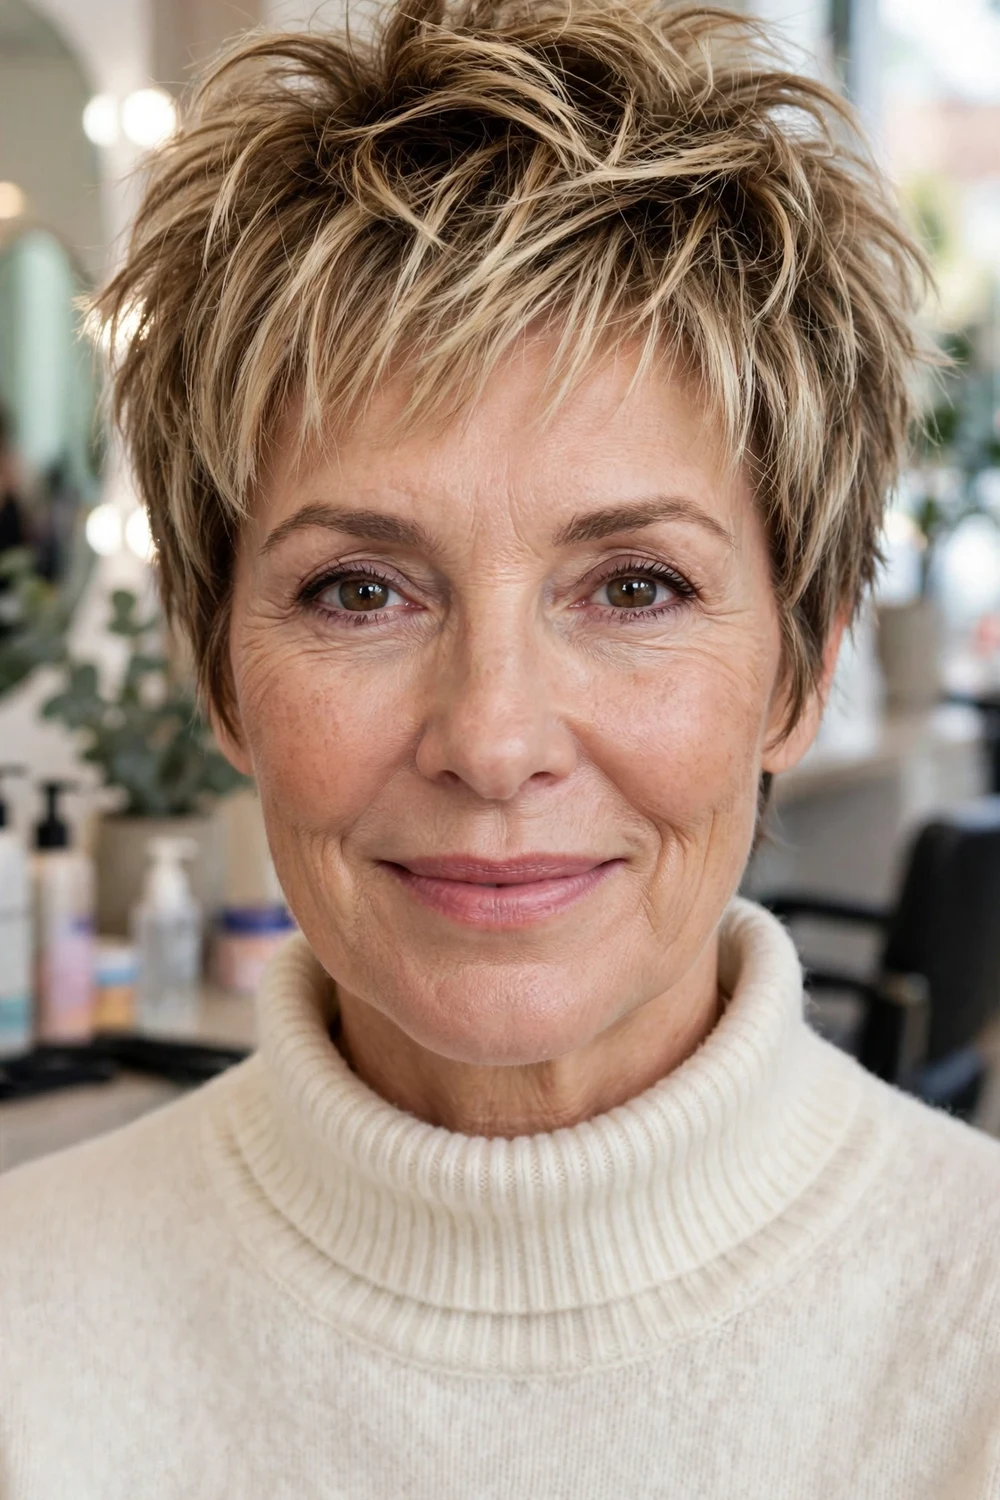
Bronde, a blend of brown and blonde, is placed lightest around the face and crown. The lighter pieces follow the messy layers, so every separated section catches light. The darker base underneath keeps fine hair reading thicker than a single pale shade would.
Ask for painted highlights rather than foiled stripes, which can look harsh at pixie length. A toner refresh every six to eight weeks keeps the bronde clear. This version suits warm and neutral skin tones.
Try this: Press a drop of shine serum over the surface only. Serum at the roots flattens the separation the color is meant to show.
Difficulty: Medium | Cost: $$$ | Time: 8 minutes
21. Salt and Pepper Messy Pixie with Mixed Tones
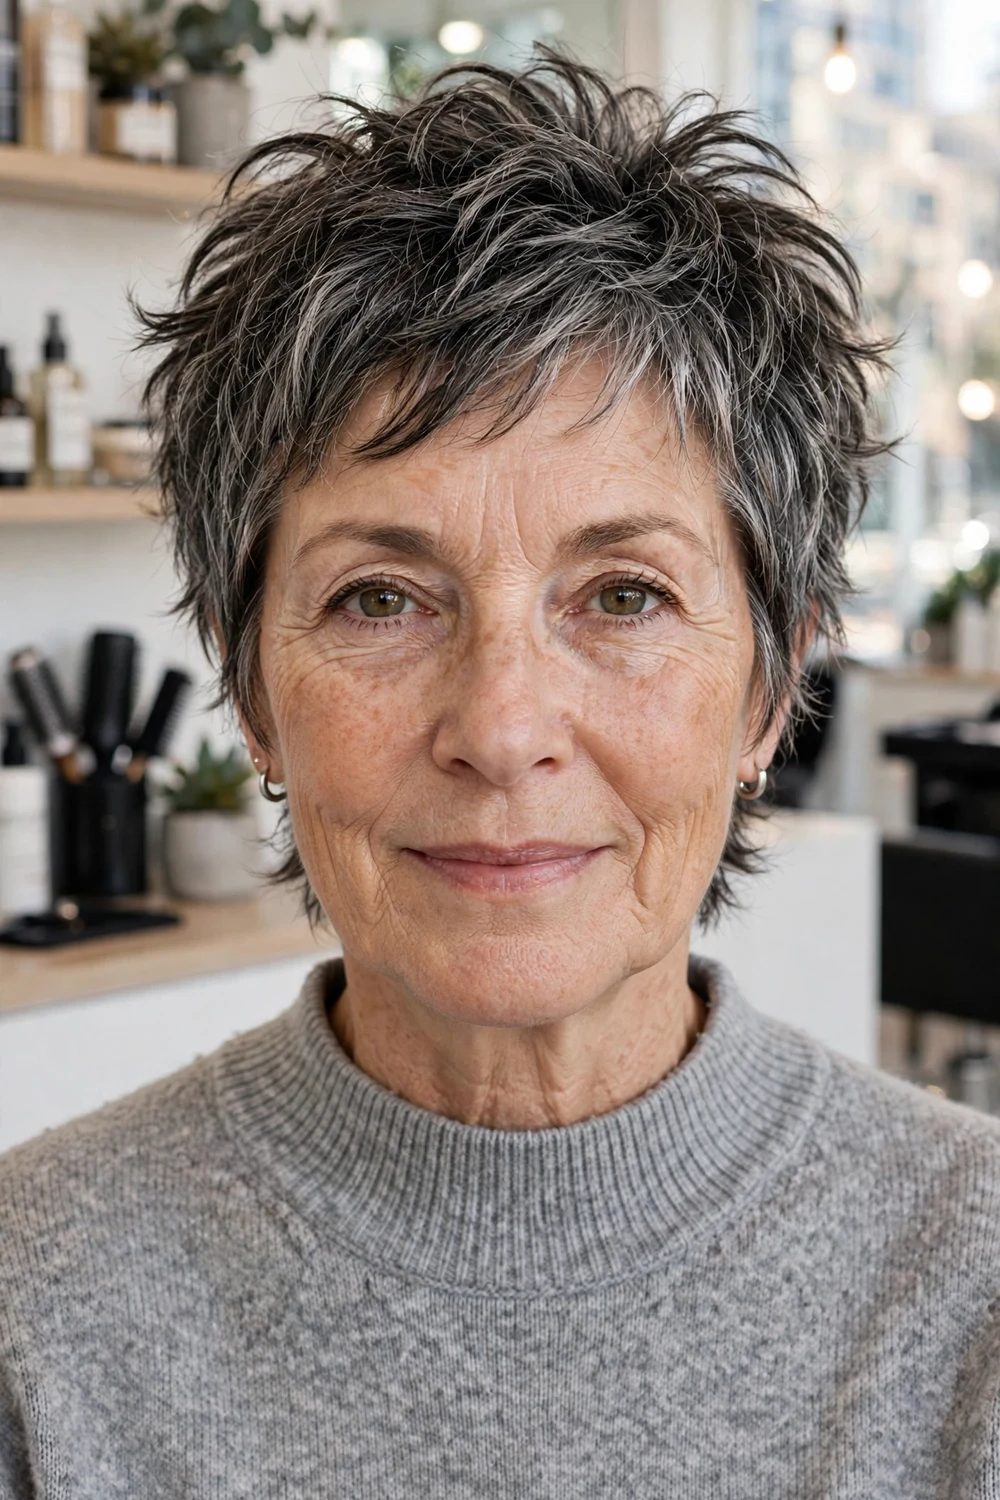
Salt and pepper hair already carries two tones, and tousled layers mix them evenly through the cut. Short layers stop dark and silver strands from sitting in separate blocks, so the color reads as one deliberate pattern.
Styling stays simple: a small amount of texture cream on dry hair, pieces pinched apart. A clarifying wash once a month removes product build-up, which dulls silver strands faster than darker ones. It suits straight to wavy hair in any density.
Try this: Separate the pieces while the hair is fully dry. Working salt and pepper hair damp blends the tones back into a flat mass.
Difficulty: Easy | Cost: $ | Time: 5 minutes
22. Grown-Out Messy Pixie That Holds to Week Eight
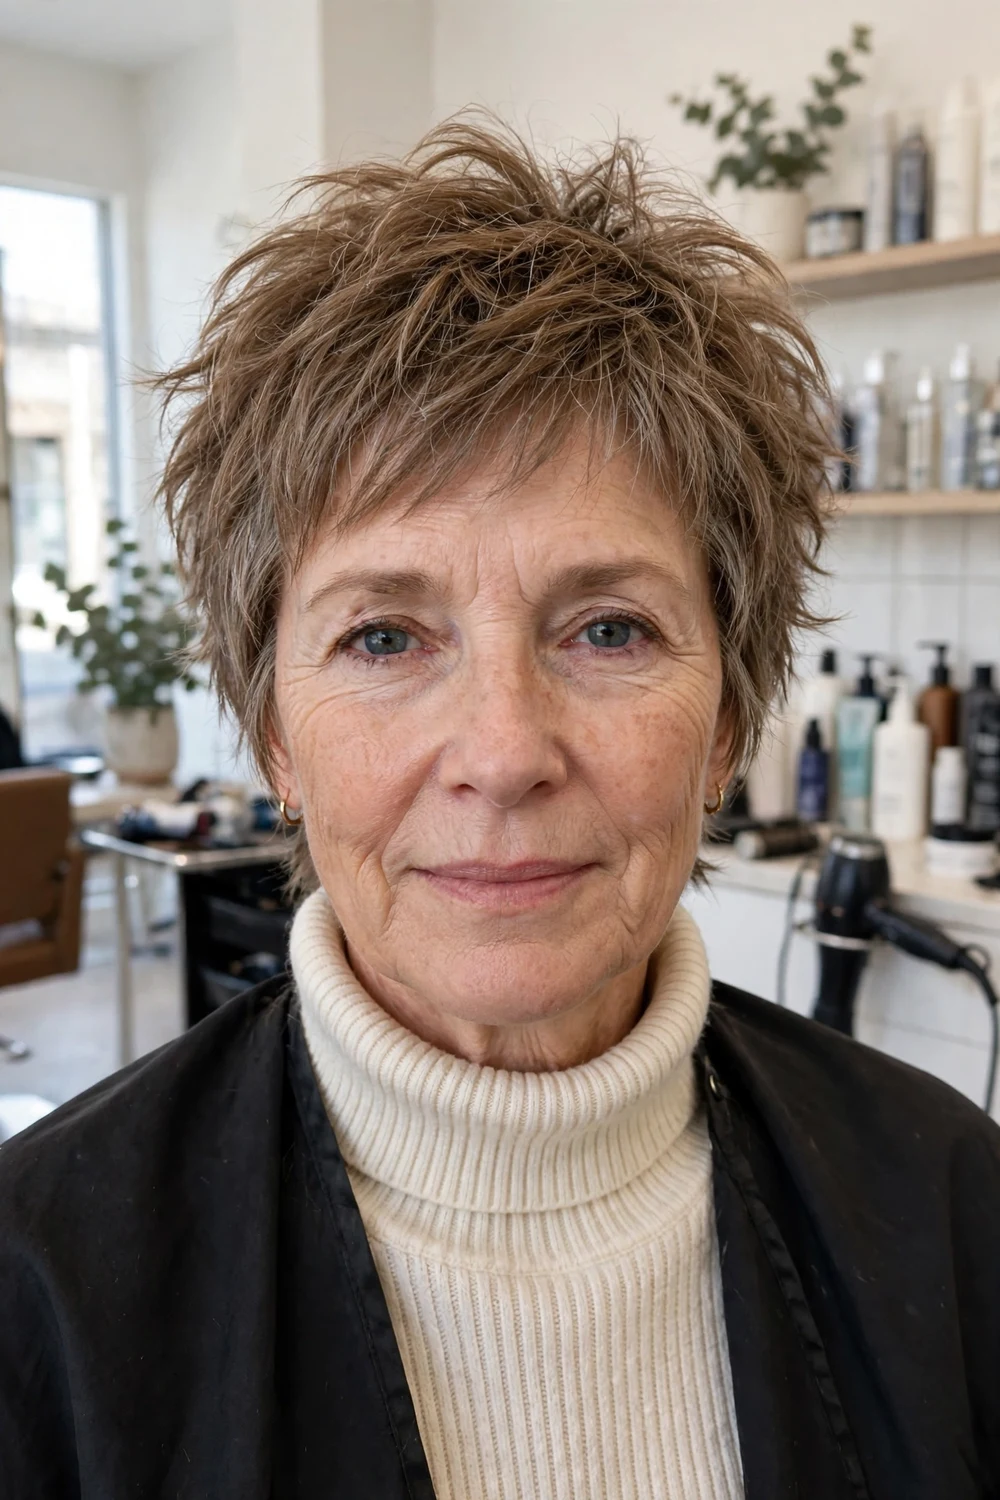
This version is cut slightly longer everywhere, with soft, blended edges that have room to grow. Because nothing depends on a precise line, the shape still looks intentional at week seven and eight, long after a sharp crop would need a tidy-up.
Choose this cut if your salon visits are spaced far apart. It suits straight to wavy hair and women growing a pixie toward a bob. Finger styling with a light cream is the whole routine; the length does the rest.
Try this: Book the next trim before you leave the salon, even if it is eight weeks out. Grown-out cuts drift when appointments drift.
Difficulty: Easy | Cost: $ | Time: 5 minutes
23. Messy Pixie with a Mini Quiff at the Front
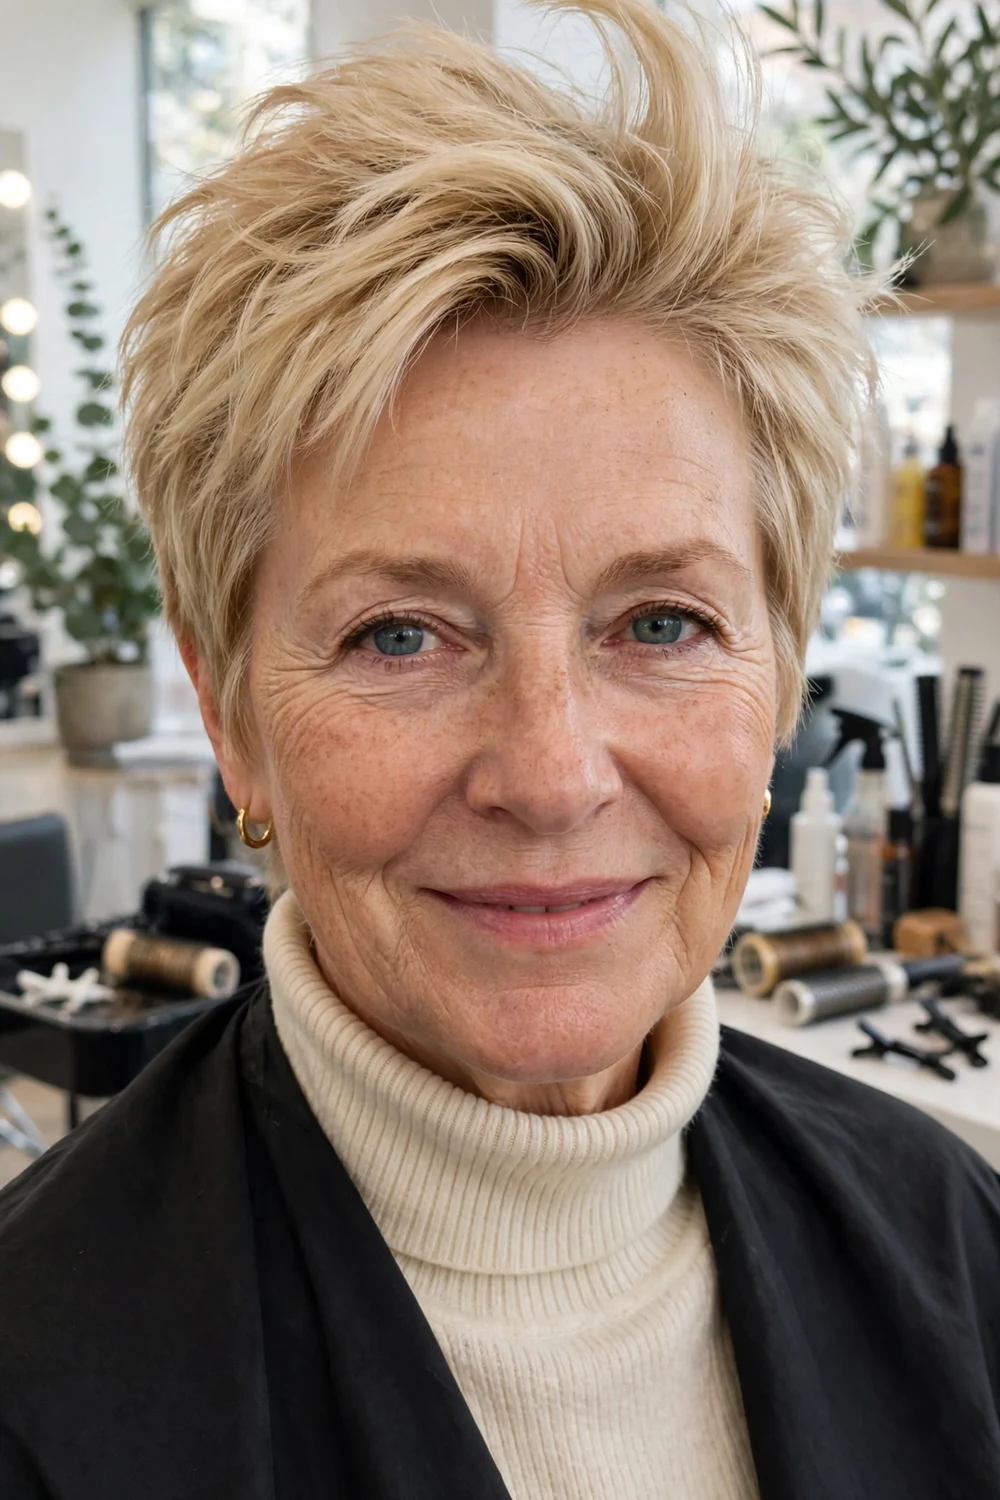
A short front section is lifted up and slightly back into a mini quiff, while the rest of the crown stays tousled. The lift sits at the front hairline, which adds height where fine hair usually falls forward and flat.
The front section needs three inches or so of length, so the top runs longer than the sides. Dry the front up and back with a small round brush, then break the surface with your fingers. It suits oval and heart faces.
Try this: Use pomade on the front section only. Product through the whole head makes a quiff look heavy and separated.
Difficulty: Medium | Cost: $$ | Time: 8 minutes
24. Messy Pixie for Round Faces with Height and Slim Sides
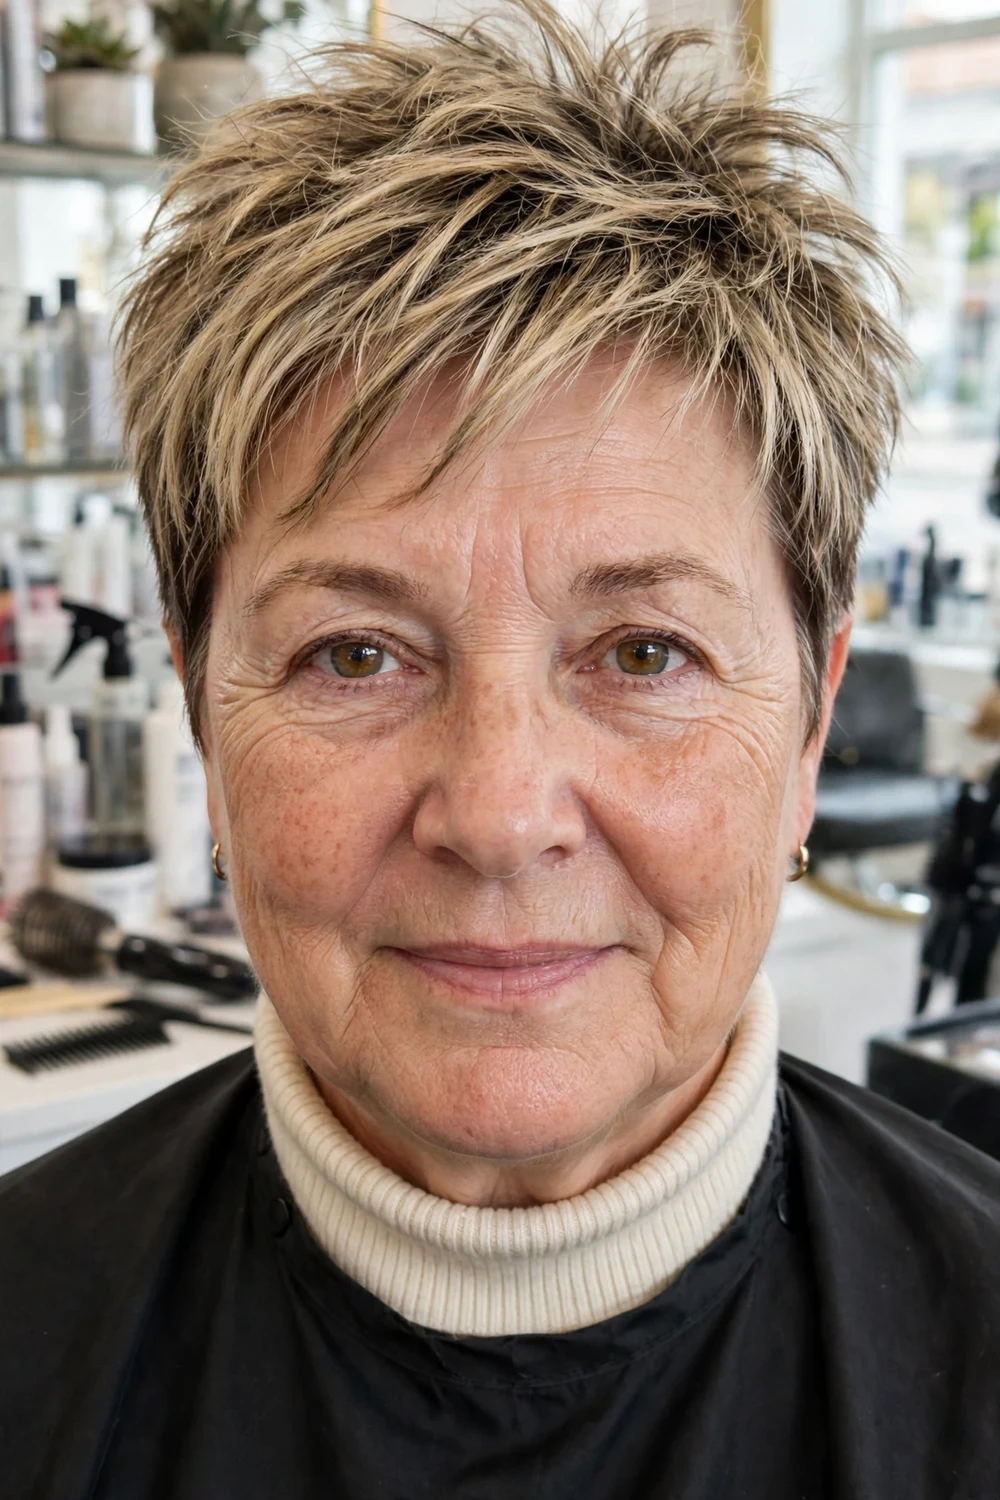
Height is built at the crown while the sides are kept close and flat against the head. That ratio, tall on top and slim at the sides, adds visual length to a round face. A short, broken fringe set on a diagonal strengthens the effect.
Avoid volume at the cheeks, which widens the outline again. Dry the crown upward and smooth the sides down in the direction they were cut. This version suits fine to medium hair, straight or wavy.
Try this: Check the outline in a hand mirror from the side before you leave the salon. Round-face pixies are judged by the side profile.
Difficulty: Easy | Cost: $ | Time: 6 minutes
Comparison Table
Use this table to compare daily effort and salon cost before you choose a shape. Idea numbers match the sections above.
| Name | Best For | Difficulty | Cost | Time |
|---|---|---|---|---|
| 1. Tousled All-Over Messy Pixie in Natural Gray | Everyday wear on straight to wavy hair | Easy | $ | 5 minutes |
| 2. Choppy Crown Messy Pixie with Broken Ends | Fine hair that needs visible texture on top | Easy | $ | 5 minutes |
| 3. Silver Piecey Messy Pixie with Chunky Separation | Silver hair worn in defined pieces | Easy | $ | 5 minutes |
| 4. Messy Pixie with a Wispy Broken Fringe | Soft forehead coverage with a light fringe | Easy | $ | 5 minutes |
| 5. Wake-Up Ready Short Messy Pixie | The shortest morning routine on this list | Easy | $ | 3 minutes |
| 6. Long-Top Tousled Messy Pixie with Tapered Sides | Styling options with a longer top | Medium | $$ | 8 minutes |
| 7. Fine-Hair Messy Pixie with End-Only Texture | Fine hair that flattens in longer cuts | Easy | $ | 5 minutes |
| 8. Messy Pixie with Messy Side-Swept Bangs | Round and fuller faces, thinning hairlines | Easy | $ | 6 minutes |
| 9. Curly Messy Pixie Cut Dry, Curl by Curl | Natural curls worn short and loose | Easy | $$ | 7 minutes |
| 10. Wavy Tousled Messy Pixie with Beach Texture | Natural waves with a relaxed finish | Easy | $ | 5 minutes |
| 11. Messy Pixie with a Soft Undercut at the Nape | Thick hair that needs bulk removed at the back | Medium | $$ | 6 minutes |
| 12. Asymmetrical Messy Pixie with One Long Side | Uneven hairlines and cowlicks | Medium | $$ | 8 minutes |
| 13. Messy Pixie Bob with Ear-Length Front Pieces | A first step from a bob toward a pixie | Easy | $$ | 8 minutes |
| 14. Gray Grow-Out Messy Pixie with Blended Roots | Growing out color toward natural gray | Easy | $ | 5 minutes |
| 15. Lifted-Crown Messy Pixie for a Flat Crown | A flat crown that collapses by midday | Easy | $ | 6 minutes |
| 16. Feathered Messy Pixie with Flicked Ends | A softer take on messy texture | Easy | $ | 6 minutes |
| 17. Thick-Hair Messy Pixie with Weight Removed Inside | Thick hair that forms a heavy cap | Medium | $$ | 7 minutes |
| 18. Messy Pixie with a Deep Side Part and Lifted Roots | Instant root lift without a fringe | Easy | $ | 6 minutes |
| 19. Razored Messy Pixie with Shredded Tips | Medium density hair that frizzes with blunt cuts | Medium | $$ | 6 minutes |
| 20. Bronde Messy Pixie with Face-Lightening Pieces | Dull color that needs brightness at the face | Medium | $$$ | 8 minutes |
| 21. Salt and Pepper Messy Pixie with Mixed Tones | Natural two-tone gray worn with texture | Easy | $ | 5 minutes |
| 22. Grown-Out Messy Pixie That Holds to Week Eight | Long gaps between salon visits | Easy | $ | 5 minutes |
| 23. Messy Pixie with a Mini Quiff at the Front | Fine hair that needs height at the front | Medium | $$ | 8 minutes |
| 24. Messy Pixie for Round Faces with Height and Slim Sides | Round faces that need length, not width | Easy | $ | 6 minutes |
Frequently Asked Questions
How often does a messy pixie need a trim?
Most messy pixies need a trim every five to six weeks. Very short versions and cuts with an undercut need attention sooner, at three to four weeks, because the close sections grow out first. The grown-out version on this list is cut to hold its shape for about eight weeks.
Will a messy pixie work on thinning hair?
Yes, in most cases. Short, uneven layers separate and stack, which covers the scalp more evenly than one-length hair lying flat. Keep the interior full and put the texture at the ends and crown. Very short micro lengths can expose the scalp on very fine hair, so stay at a standard pixie length if your density is low.
What product works best for a messy pixie?
A matte paste or putty is the main product for most versions. Work a pea-size amount through fully dry hair and pinch the ends apart. Fine hair does better with mousse at the roots on damp hair, and curly versions need curl cream instead of paste. Heavy gels and shine oils flatten the separation the cut depends on.
Can a messy pixie work with glasses?
Yes. Keep the fringe light and broken so it rests above the frames, or choose a side-swept version that clears one side of the face. Wear your everyday glasses to the appointment so your stylist can shape the sides and fringe around the arms of the frames.
How do I style a messy pixie in five minutes?
Start with dry or nearly dry hair. Add your product in the right order: mousse at the roots before drying for fine hair, or paste on dry hair for most other textures. Dry the crown first in the direction you want the lift, then pinch the ends into pieces with your fingers. Skip the brush, since brushing removes the separation.
Does a messy pixie suit a round face?
Yes, if the shape is built with height on top and slim sides. Crown lift adds visual length, while close sides avoid extra width at the cheeks. A diagonal fringe or a deep side part strengthens the effect. Idea 24 on this list is shaped for round faces.
Final Thoughts
A messy pixie earns its place after 50 because the texture does the work that styling time used to do. Pick the version that matches your hair type first, your face shape second, and your trim schedule third, then bring two photos to your appointment: one of the cut you want, and one that shows your natural texture honestly. With the right version, your morning routine shrinks to a few minutes, and the cut still looks deliberate on the days you do almost nothing to it.

