

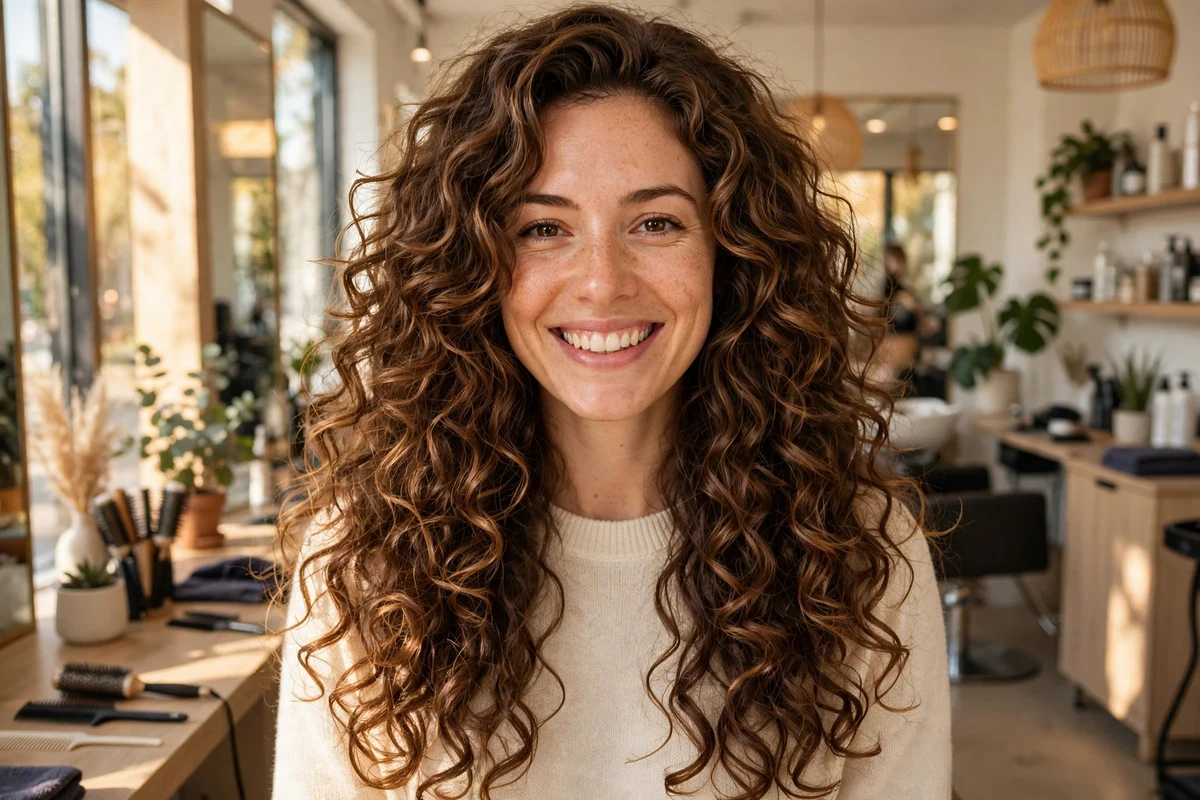
Long curly hair carries its weight at the ends, and one-length curls show it fast: flat at the crown, wide at the bottom, and hard to style into any shape that lasts past wash day. Layers fix the weight problem without giving up length. Shorter pieces spring up, longer pieces keep the silhouette long, and the curls separate instead of stacking into one heavy shelf.
This list collects 25 long curly haircuts with layers for women, ordered from the classic shapes to shaped hemlines, specialist dry-cut methods, and bolder cuts like the shag and wolf cut. Every idea notes the curl patterns it suits and what to ask for in the chair. If color is part of your plan too, the fall color ideas for curly hair roundup shows shades placed on curly lengths.
Key Takeaways
- Layers remove end weight so curls spring up, which adds crown volume and reduces the wide, triangular outline of one-length curly hair.
- Ask for a dry cut, curl by curl, whenever possible. Wet curls stretch, and a wet cut often dries shorter than planned.
- Match layer length to curl pattern: long, soft layers for 2c waves, medium blended layers for 3a and 3b curls, and careful dry shaping for 3c spirals.
- Fine curls should keep layers long and few, at the perimeter or inside sections, so the ends stay full.
- Most layered curly cuts hold their shape for ten to twelve weeks, with a light dusting of the ends in between.
1. Classic Long Layers
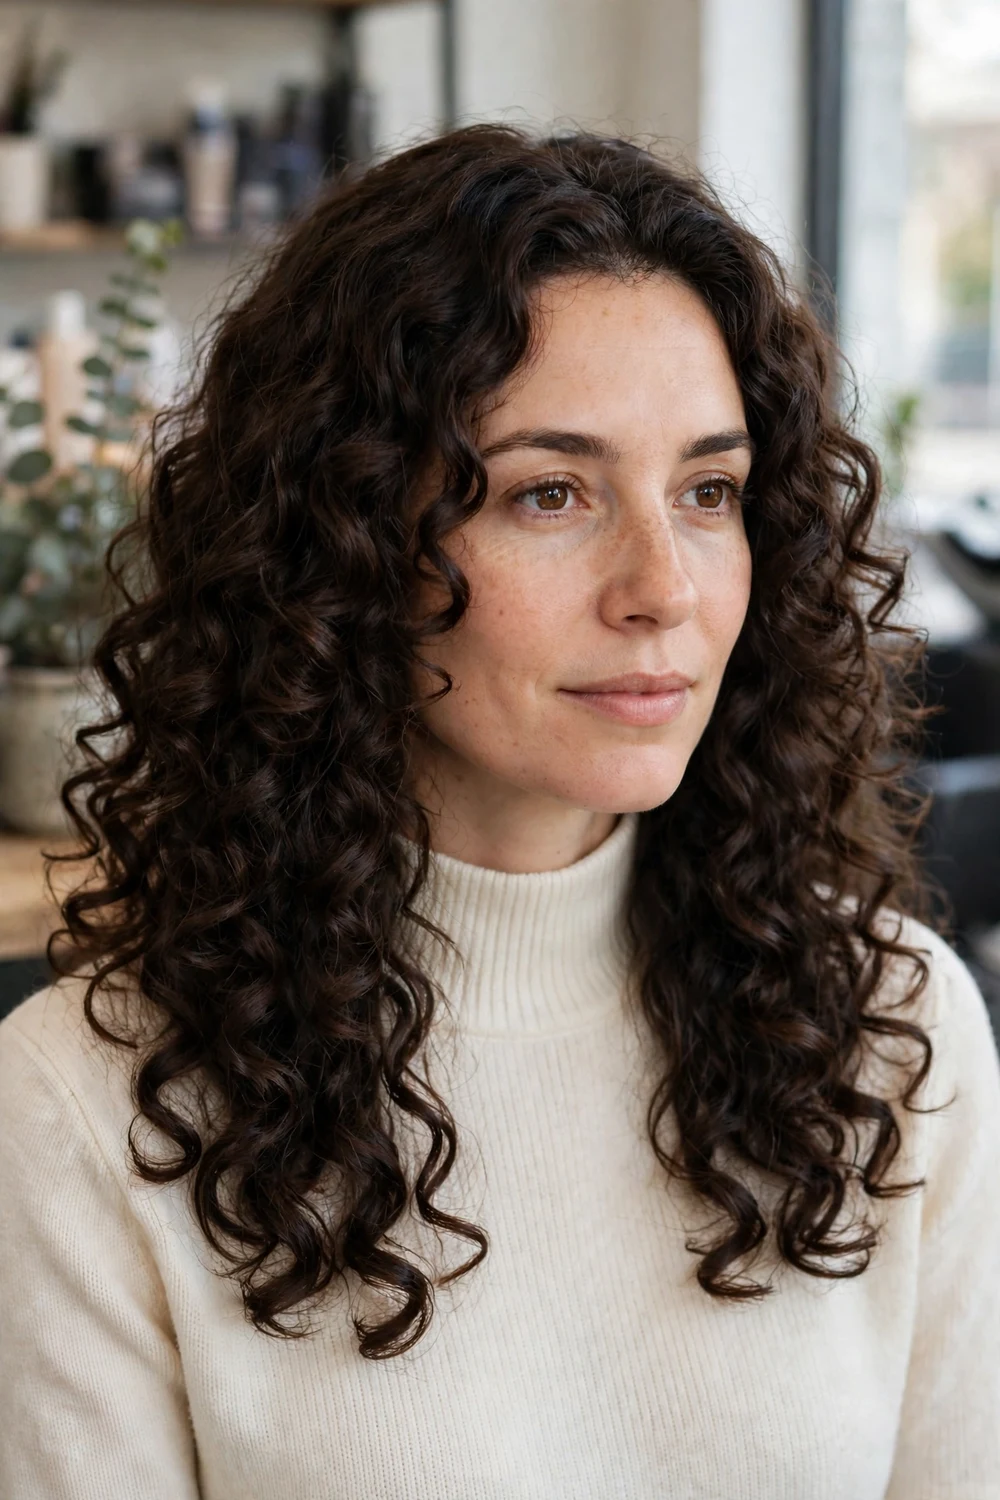
Classic long layers are the starting point for most long curly haircuts. A stylist cuts gentle layers through the whole head, usually starting around the collarbone, so weight comes off the ends while the full length stays. The shape reads rounded and even, with no sharp steps between one layer and the next.
This cut suits 3a and 3b curls best, since those patterns have enough spring to show the layer separation. Ask for the layers cut dry whenever possible. Wet curls stretch longer than they sit, and a wet cut often dries shorter and more choppy than planned.
Try this: Book a light dusting every ten to twelve weeks. Long layers grow out evenly, so the shape holds longer than shorter, more sculpted cuts.
Difficulty: Low to Medium · Cost: $$ (salon)
2. Face-Framing Layers
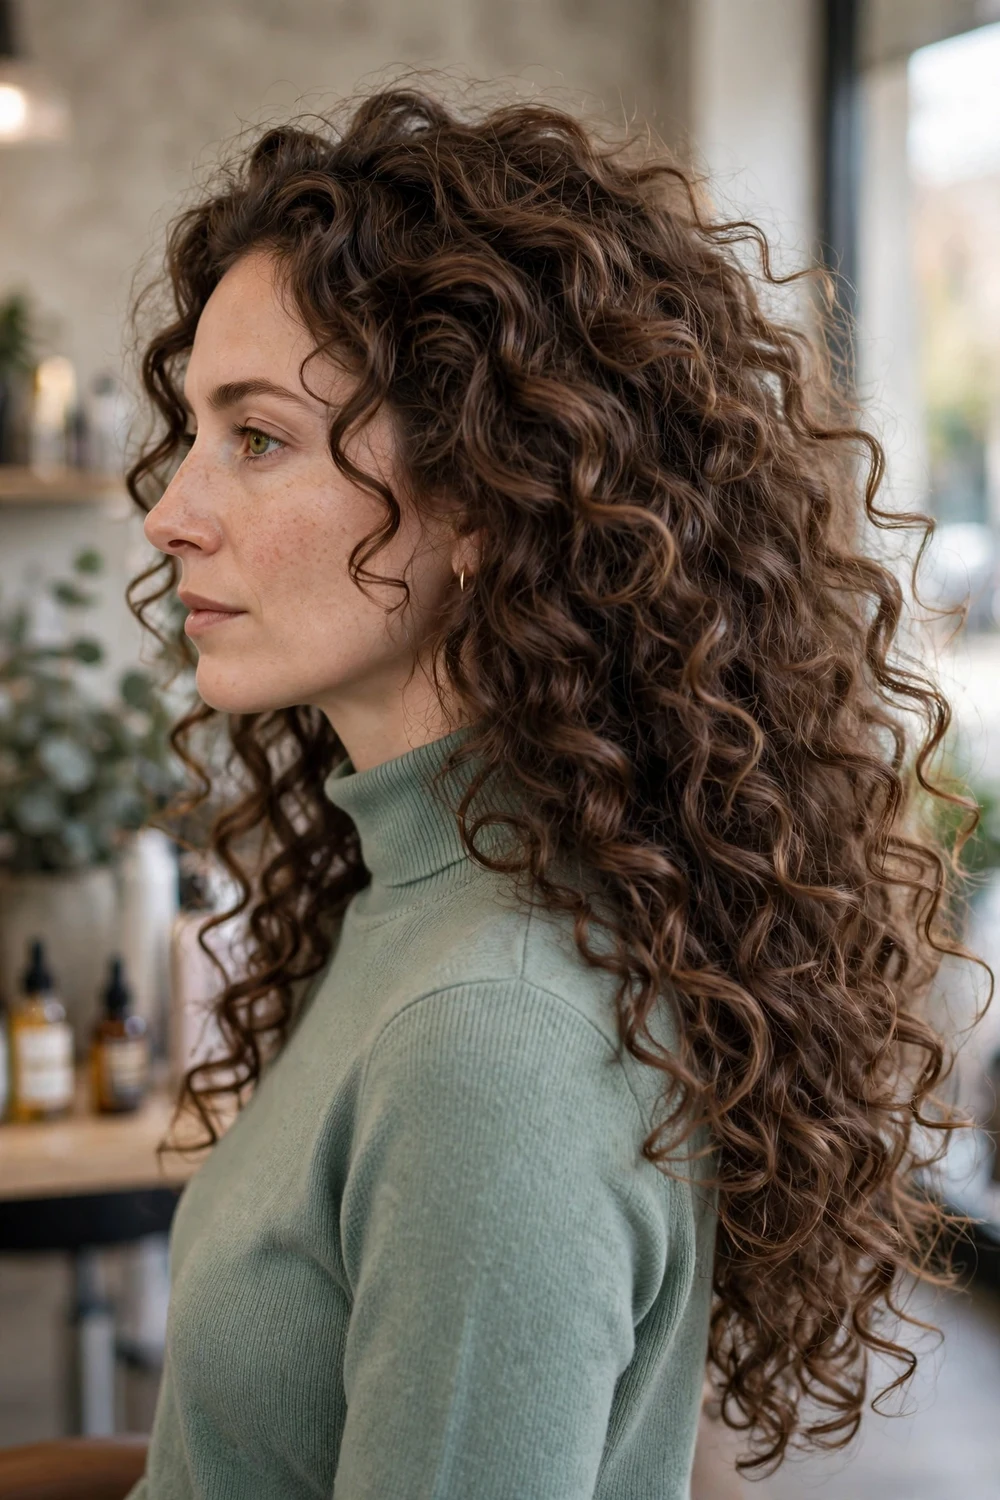
Face-framing layers put the shortest pieces at the front of the head, starting near the chin or cheekbone, while the back keeps most of its length. The front curls lift away from the face, which softens a strong jaw and draws attention to the cheekbones.
The front layers need to be cut curl by curl, because the curls around the face often run tighter or looser than the rest of the head. Tell your stylist where you part your hair before the cut starts, since the frame is built around that part.
Try this: Wear the cut for a week before judging the front pieces. Face-framing curls settle and shrink slightly after the first wash at home.
Difficulty: Low to Medium · Cost: $$ (salon)
3. Invisible Interior Layers

Invisible layers are cut into the inside sections of the hair only. The outer layer, called the canopy, stays long and untouched, so the haircut looks almost unchanged from the outside while a lot of hidden weight comes out underneath.
Thick, dense curls benefit most from this approach, since bulk is the main problem and the surface shape is already good. The trade-off is grow-out: hidden layers can puff as they lengthen, so this cut needs a reshape on a regular cycle rather than one annual trim.
Try this: Ask your stylist to show you the interior sections before cutting, so you agree on how much hidden weight actually comes out.
Difficulty: Medium · Cost: $$ (salon)
4. Long Layers for 2C Waves

Type 2c hair sits between waves and curls, and it needs longer, softer layers than tighter patterns do. Layers that start below the chin keep the wave pattern intact, while short layers on 2c hair tend to stick out and frizz at the crown.
Keep the layer count low. Two or three long levels through the lengths give movement without breaking up the S-shaped wave. Heavy products weigh 2c hair down fast, so a light mousse or gel suits this cut better than rich creams. If you also wear your hair blonde, the hairstyles for long blonde hair roundup shows how long layers sit on lighter lengths.
Try this: Ask for layers that start at least two inches below the chin. On 2c hair, that gap is what protects the wave from puffing out.
Difficulty: Low · Cost: $$ (salon)
5. U-Cut Layers
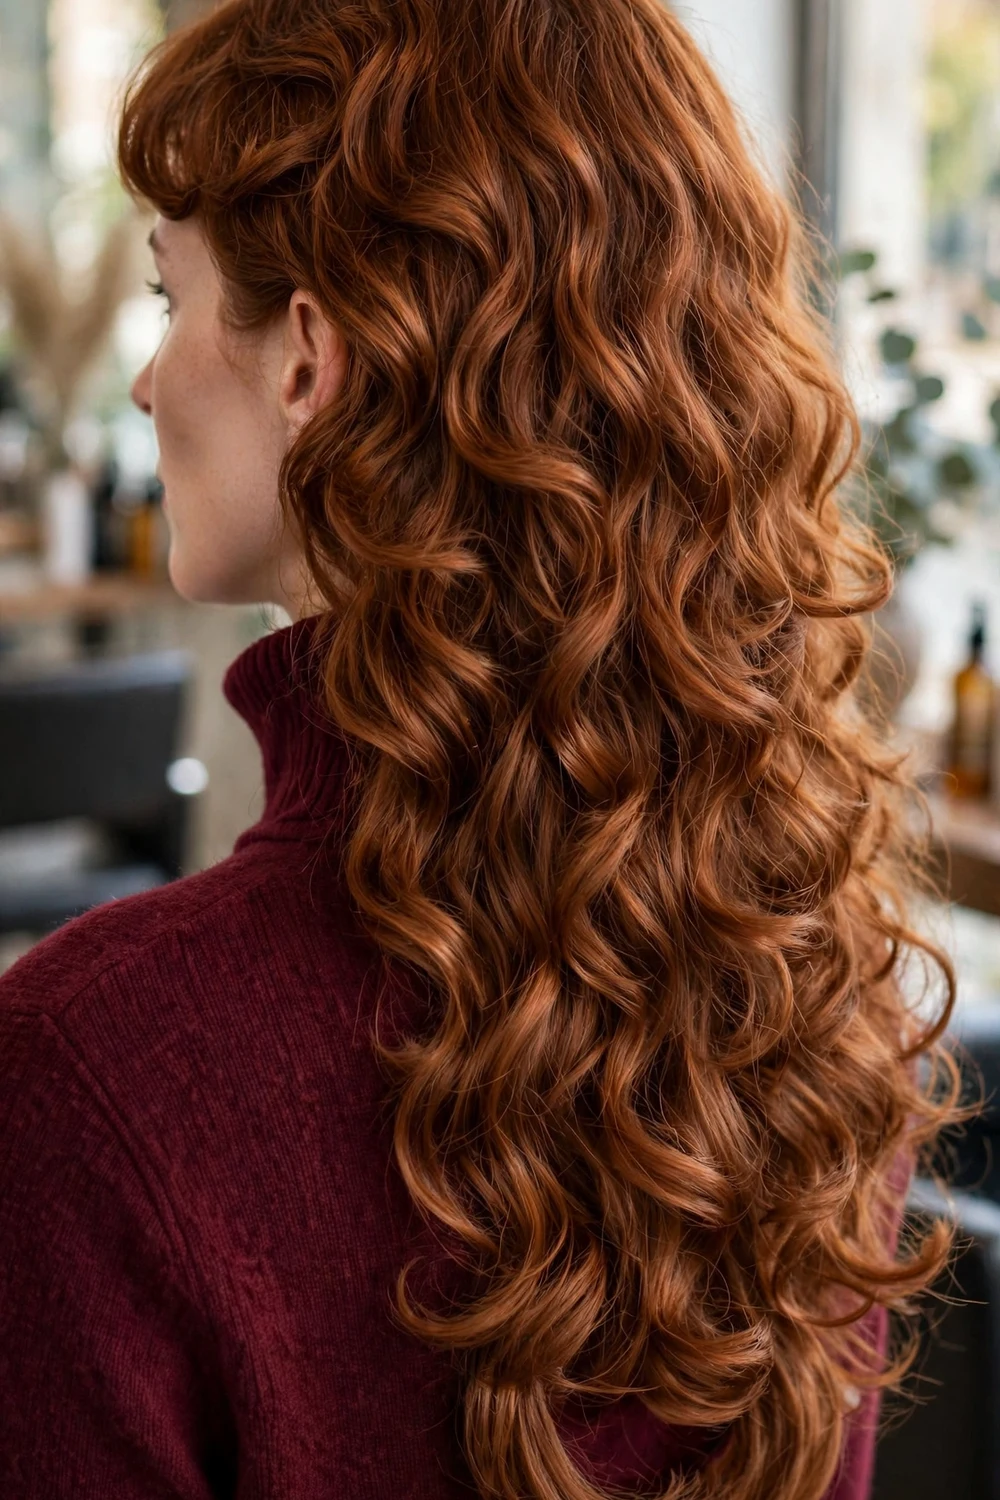
A U-cut shapes the back hemline into a soft curve, with the sides slightly shorter than the center back. Layers follow that curve, so the ends stay thick and full while the hair still moves. It is the gentler of the two shaped hemlines in this list.
The U shape suits women who want to keep as much density at the ends as possible. One-length curly hair often looks heavy at the bottom corners; the U trims those corners away without the pointed finish of a V-cut.
Try this: Take a photo of the back hemline at your first appointment. At trims, that photo shows your stylist the exact curve to restore.
Difficulty: Low to Medium · Cost: $$ (salon)
6. V-Cut Layers

A V-cut stacks layers so the back comes to a soft point at the center, with the sides angling up from that point. The shape keeps maximum length at the back and removes the most weight from the sides, where long curls tend to build width.
This cut works well on thick 3a and 3b hair that can spare side volume. On fine curls the point can look thin, so ask your stylist to blunt the last inch of the point if your ends run sparse. The V also shows best on hair past the shoulder blades, where the angle has room to read.
Try this: Check the point in a hand mirror before you leave the salon. A V that sits off-center is easy to fix in the chair and hard to fix at home.
Difficulty: Medium · Cost: $$ (salon)
7. Long Butterfly Layers
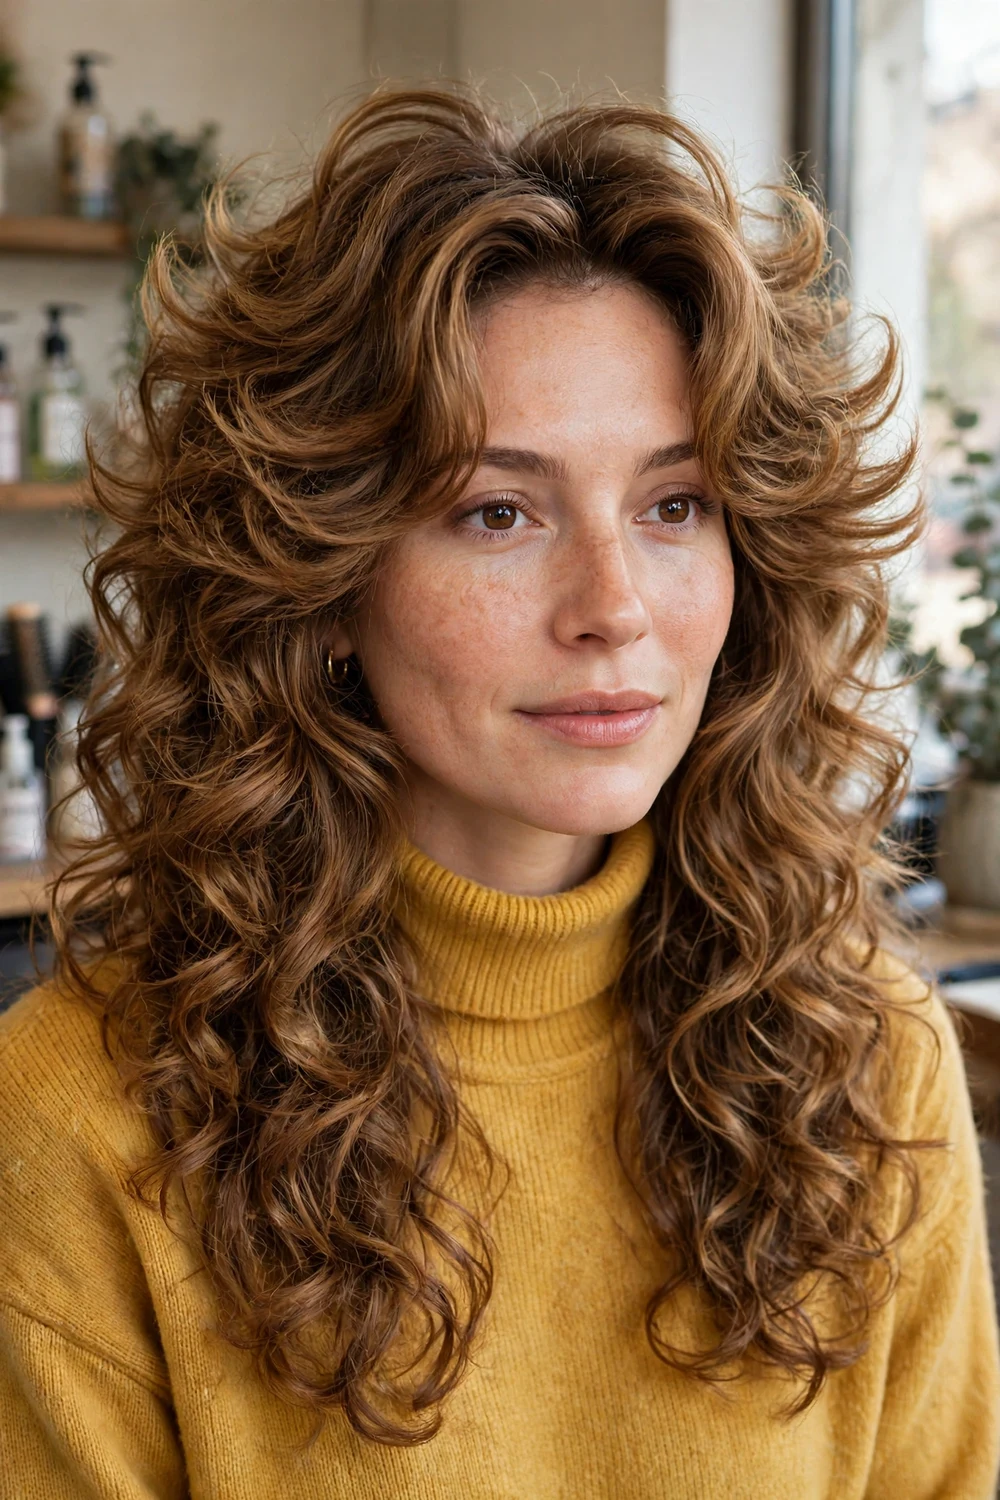
Butterfly layers split the head into two clear levels: shorter layers through the crown and around the face, and long layers that keep the full length underneath. The short top level lifts the crown and releases curls that were weighed down, while the long level keeps the overall silhouette long.
The gap between the two levels is the whole point, so this cut needs a stylist who will commit to it. A timid version with barely shorter top layers reads as ordinary layering. On curls, the top level should be cut dry so each short layer lands where the curl actually sits.
Try this: Bring a photo that shows the back view, not only the front. The winged outline at the back is what separates a butterfly cut from standard layers.
Difficulty: Medium · Cost: $$ (salon)
8. Butterfly Layers with Curtain Bangs
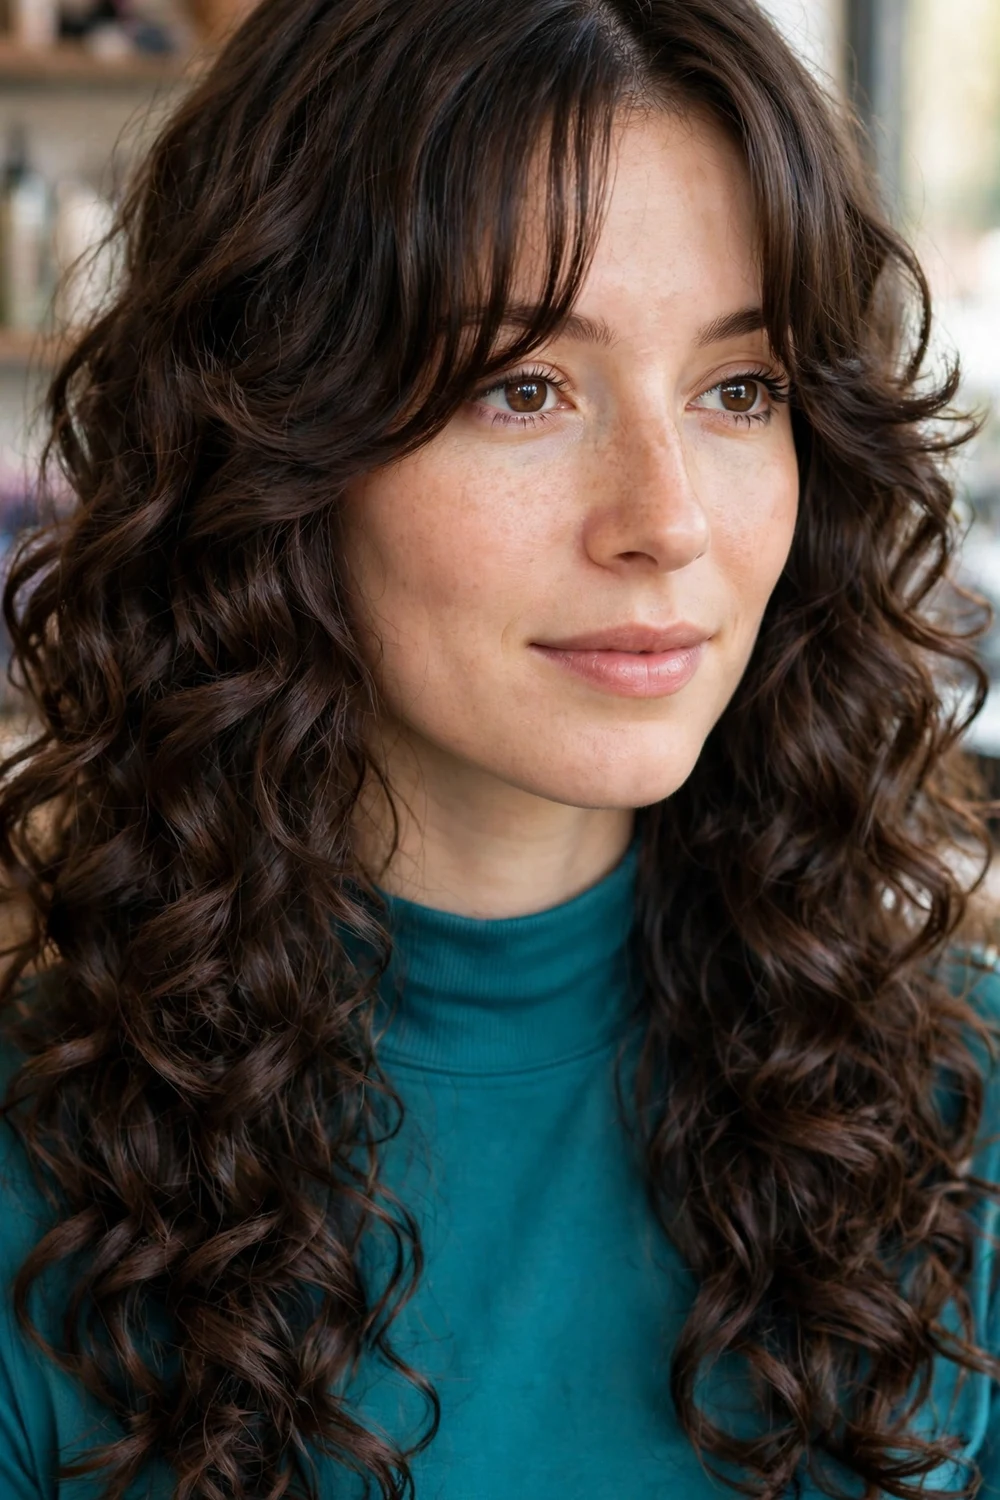
This version pairs butterfly layers with long curtain bangs that part in the middle and sweep into the side layers. The bangs start around the eyebrows or cheekbones when dry, and they blend into the shorter butterfly level so there is no hard line at the front.
Curly curtain bangs shrink more than the rest of the cut, so they should be cut longer than the finished look you want. This article focuses on the layered cut itself; if bangs are your main interest on long hair, the separate long hairstyles with curtain bangs guide covers bang shapes in depth.
Try this: Style the bangs forward with a diffuser for the first two weeks. Training the front curls early makes the parted shape much easier to keep.
Difficulty: Medium · Cost: $$ (salon)
9. Waterfall Layers

Waterfall layers are extra long, sweeping layers that step down the head one over another, like tiers. Each level is long enough to overlap the next, which suits very long hair where standard layers would get lost in the length.
This cut keeps drama in the back view, so it suits hair that reaches the mid-back or lower. Diffusing in sections helps each tier dry with its own separation. Scrunching the whole head at once blends the tiers together and hides the stepped shape you paid for.
Try this: Ask for the first tier to start below the shoulders. Tiers that start higher read as ordinary layers on very long hair.
Difficulty: Low to Medium · Cost: $$ (salon)
10. Rounded Graduated Layers
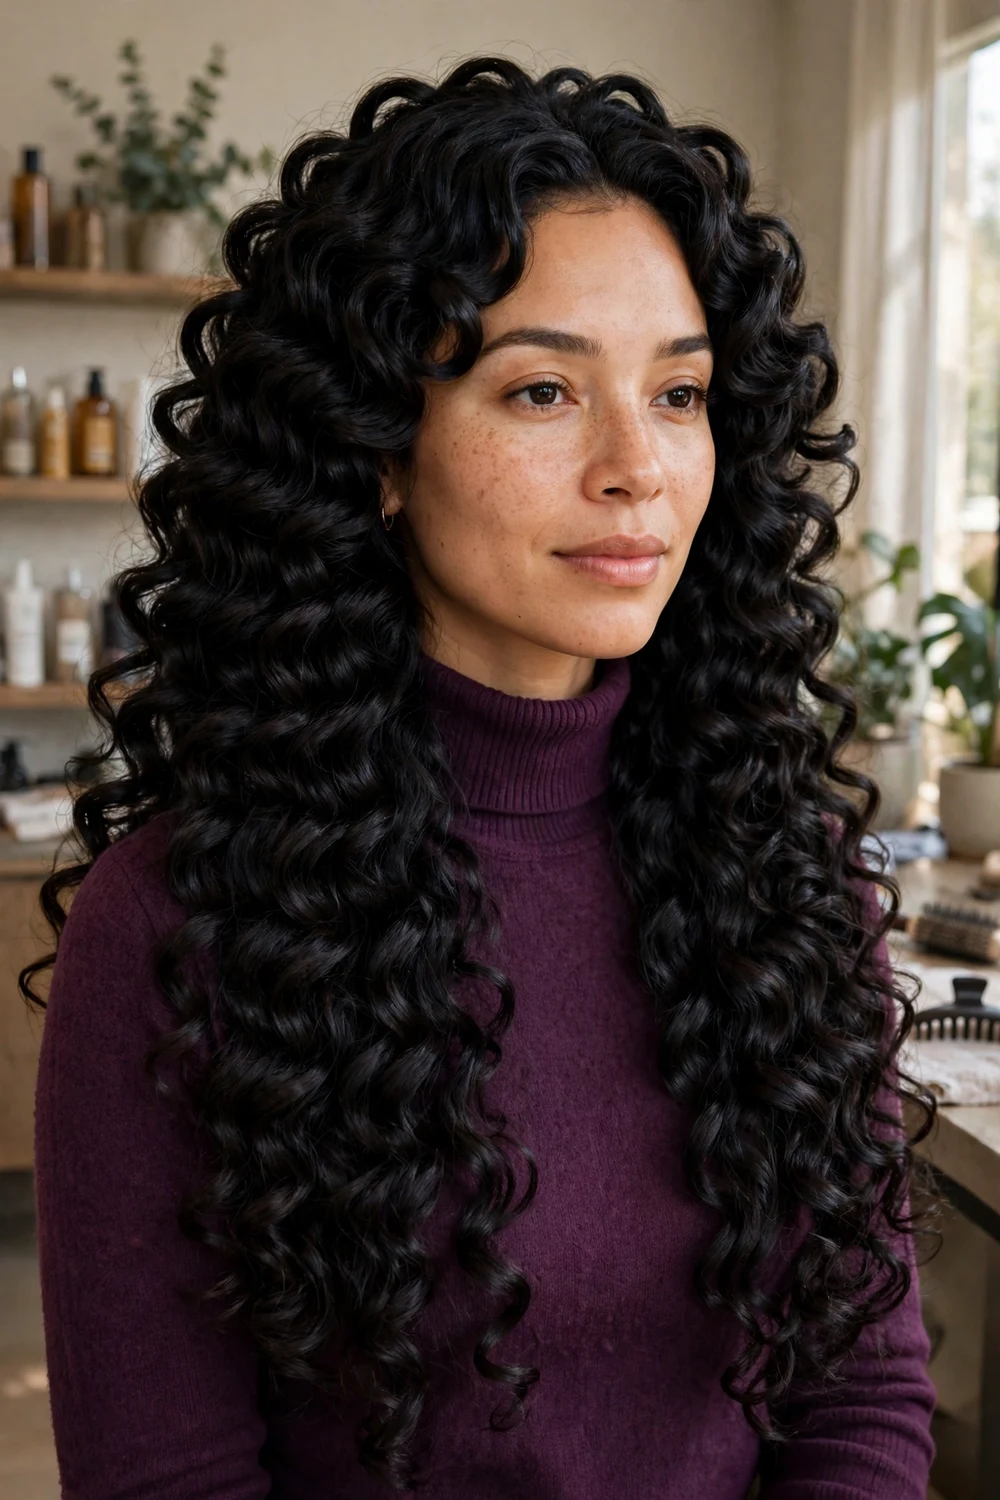
Rounded graduated layers build a globe-like shape: shorter at the crown, then gradually longer toward the ends, with each level following a curved line. The result is even volume all around the head instead of width concentrated at the bottom.
This is a strong choice for curls that grow out flat on top and wide at the ends, the pattern many women call triangle hair. The graduation has to stay smooth, so point cutting and dry shaping matter more here than in most cuts on this list.
Try this: Ask how the crown layers will grow out at eight weeks. A good rounded cut softens as it grows rather than collapsing at the top.
Difficulty: Medium · Cost: $$ (salon)
11. Perimeter Layers for Fine Curls
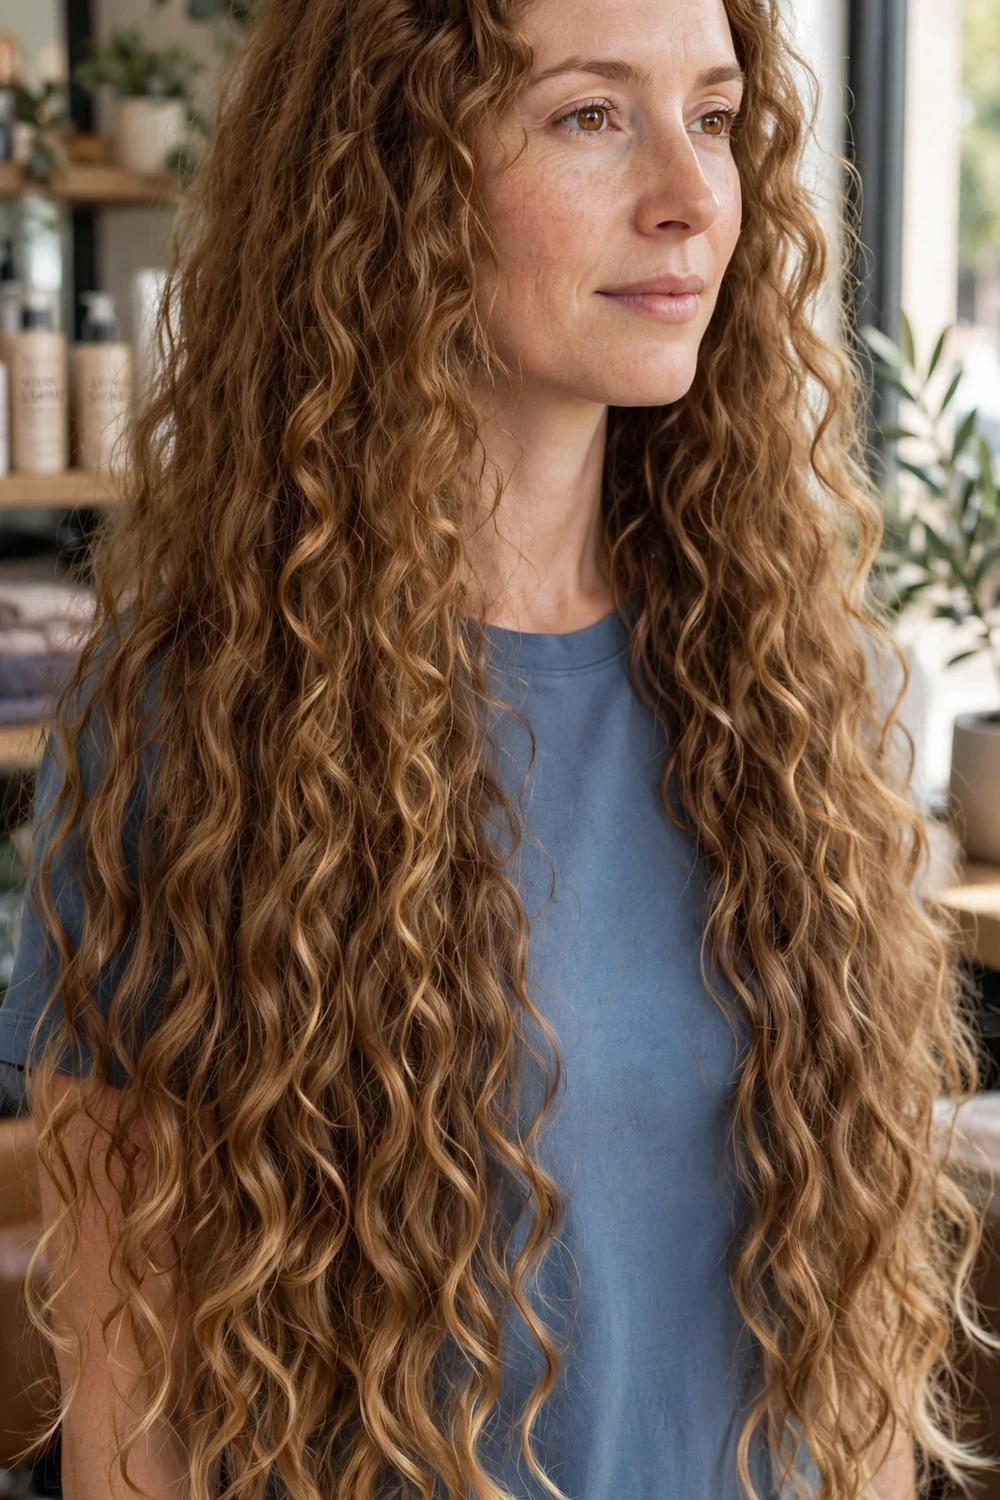
Perimeter layers are cut only into the last two to three inches of the hair. The inside and the length stay untouched, and the ends get a light, feathered finish that moves without thinning the body of the hair.
Fine and low-density curls are the target here. Standard layering removes hair that fine curls cannot spare, and the ends end up see-through. Perimeter layering gives the bottom edge shape while the fullness higher up stays exactly as it was.
Try this: Pair this cut with a blunt trim once a year. The blunt pass restores end density, and the perimeter layers restore movement.
Difficulty: Low · Cost: $ (salon)
12. Disconnected Under-Layers
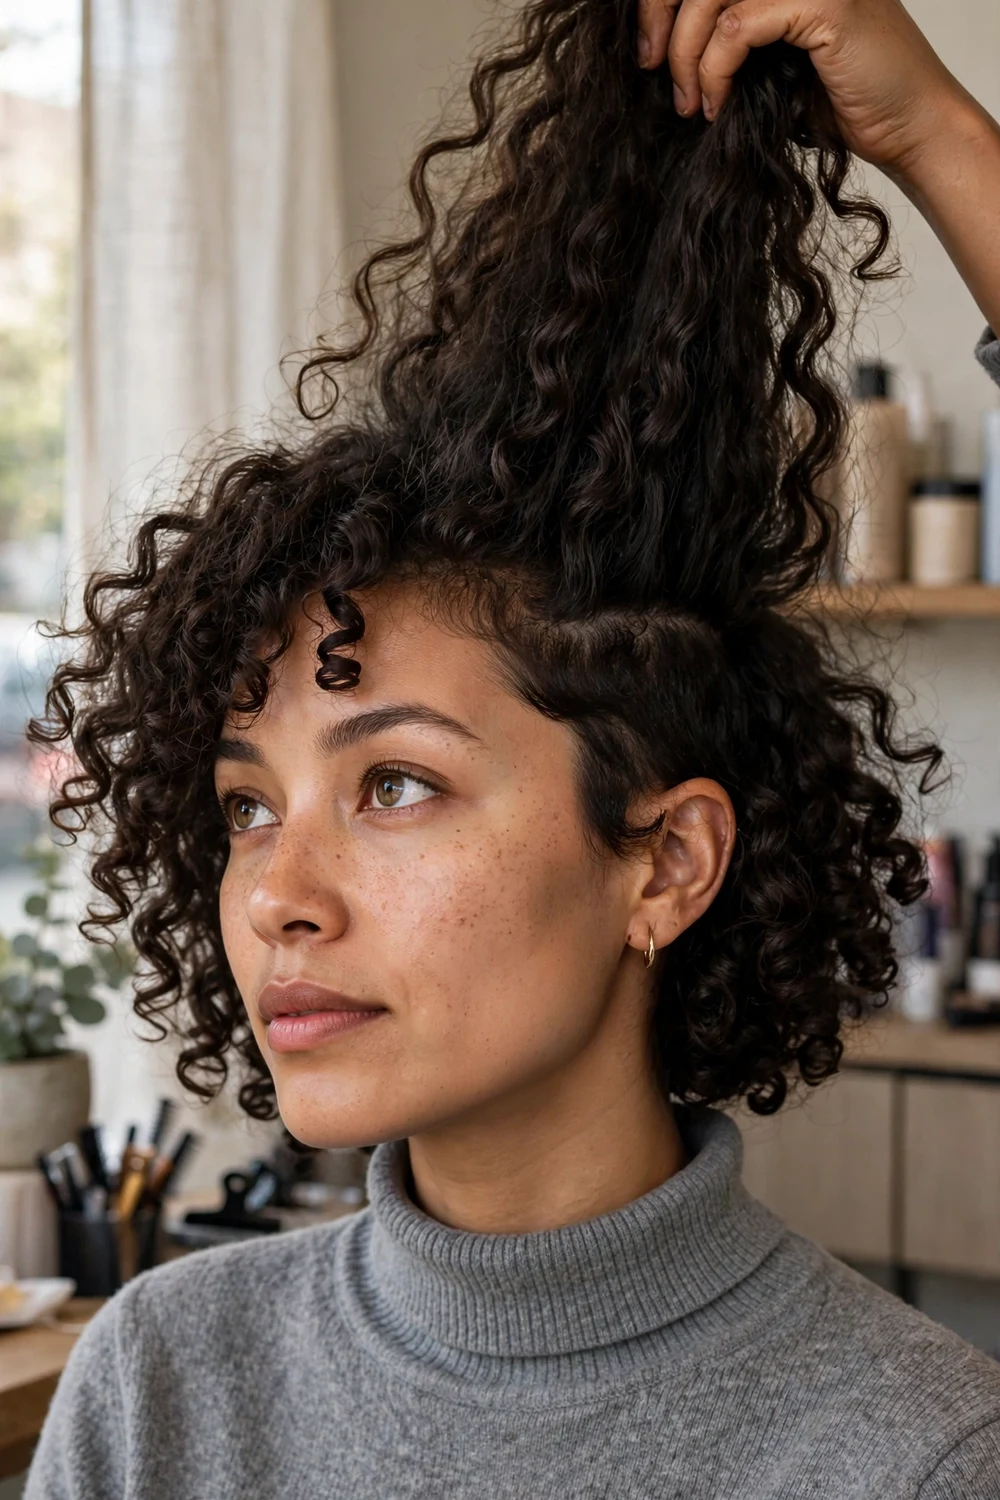
Disconnected under-layers keep the top canopy long while the bottom sections are cut noticeably shorter. Unlike invisible layers, which blend, disconnected layers are meant to differ in length, and that difference is what lifts the whole shape.
The lift at the roots can be dramatic, which suits very thick curls that sit flat under their own weight. The risk is a visible step if the top layer shifts, so this cut works best on dense hair where the canopy fully covers the shorter work below.
Try this: Test the cut with the under-layers only at the back first. If you like the lift, your stylist can extend them around the head next visit.
Difficulty: Medium to High · Cost: $$ (salon)
13. Deva-Style Curl-by-Curl Layers
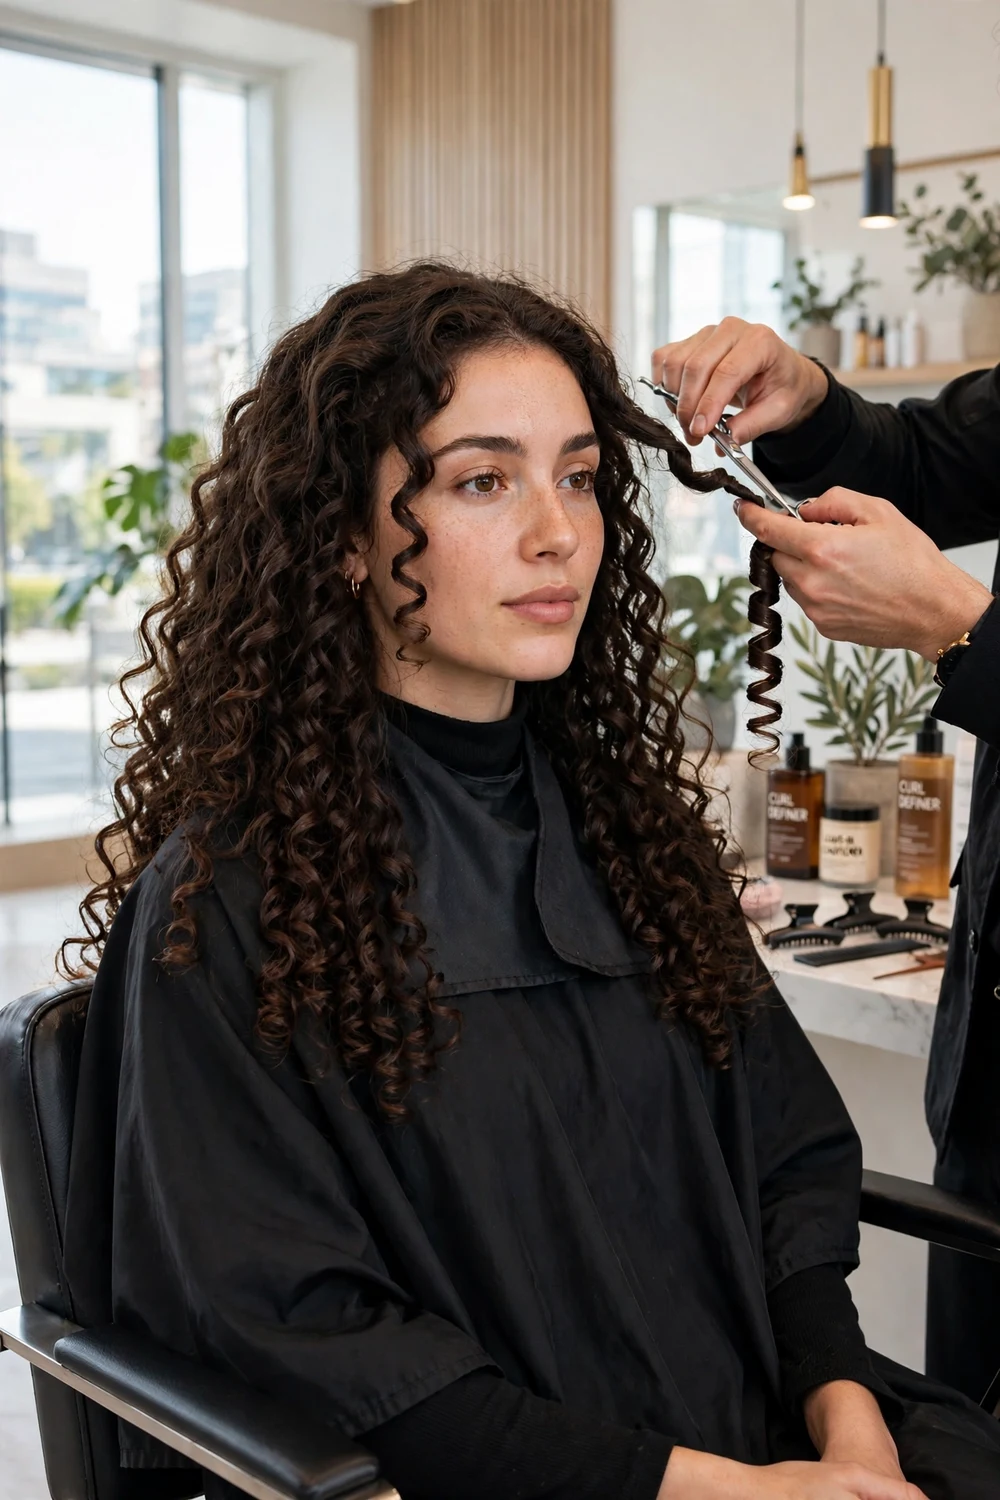
A Deva-style cut is shaped on dry hair, curl by curl, with the hair worn exactly as you wear it every day. The stylist picks up each curl, judges where it sits and how much it shrinks, and cuts it to build the overall shape in real time.
Because the method follows your actual pattern, it handles mixed textures well and avoids the surprise shortening that wet cuts can cause. These appointments run longer than a standard cut and are priced as a specialist service at most salons, which is reflected in the band below.
Try this: Arrive with your hair dry, detangled, and styled as usual, with no heavy products. The stylist needs to see your real curl pattern, not a stretched one.
Difficulty: Medium · Cost: $$$ (salon)
14. Rezo-Style Layers
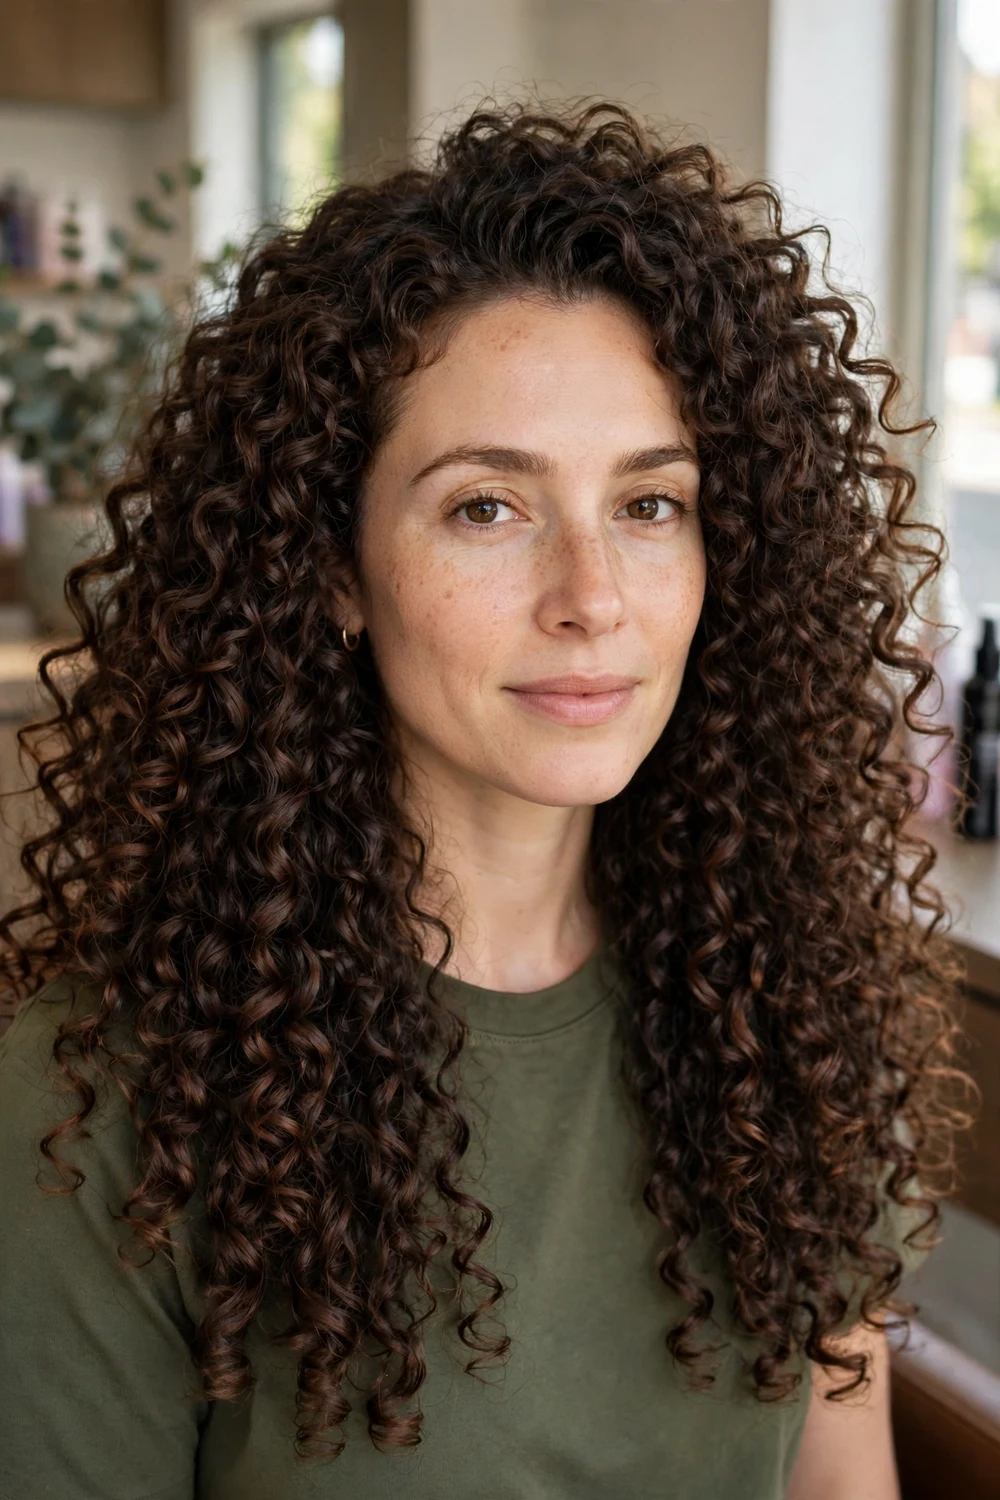
A Rezo-style cut aims for even volume around the whole head, root to tip, instead of volume gathered at the ends. The hair is cut dry in sections that free each curl while keeping the overall width balanced on both sides.
Women who like a full, wide silhouette choose this method over classic layers, which taper the shape. It suits medium and tight curl patterns that can hold width without looking heavy, and it grows out evenly because no single level carries the whole shape.
Try this: Ask whether the salon cuts this method on fully dry hair. The even-volume result depends on seeing the true width of each section.
Difficulty: Medium · Cost: $$$ (salon)
15. Spiral Layers for 3B and 3C Curls

Spiral layers are carved to follow tight ringlet patterns, mainly 3b and 3c curls. Each layer is placed so ringlets stack instead of piling into one heavy shelf, which keeps the crown lifted and the ends defined.
Tight spirals shrink a lot, sometimes several inches from wet to dry, so dry cutting matters more here than with any other idea in this list. Keep the layers medium length: very short layers on tight spirals spring up into a much rounder shape than most women expect.
Try this: Moisturize the ends between appointments. Tight spirals carry natural oils down the strand slowly, and layered ends dry out first.
Difficulty: Medium · Cost: $$ (salon)
16. Debulked Layers for Thick Curls
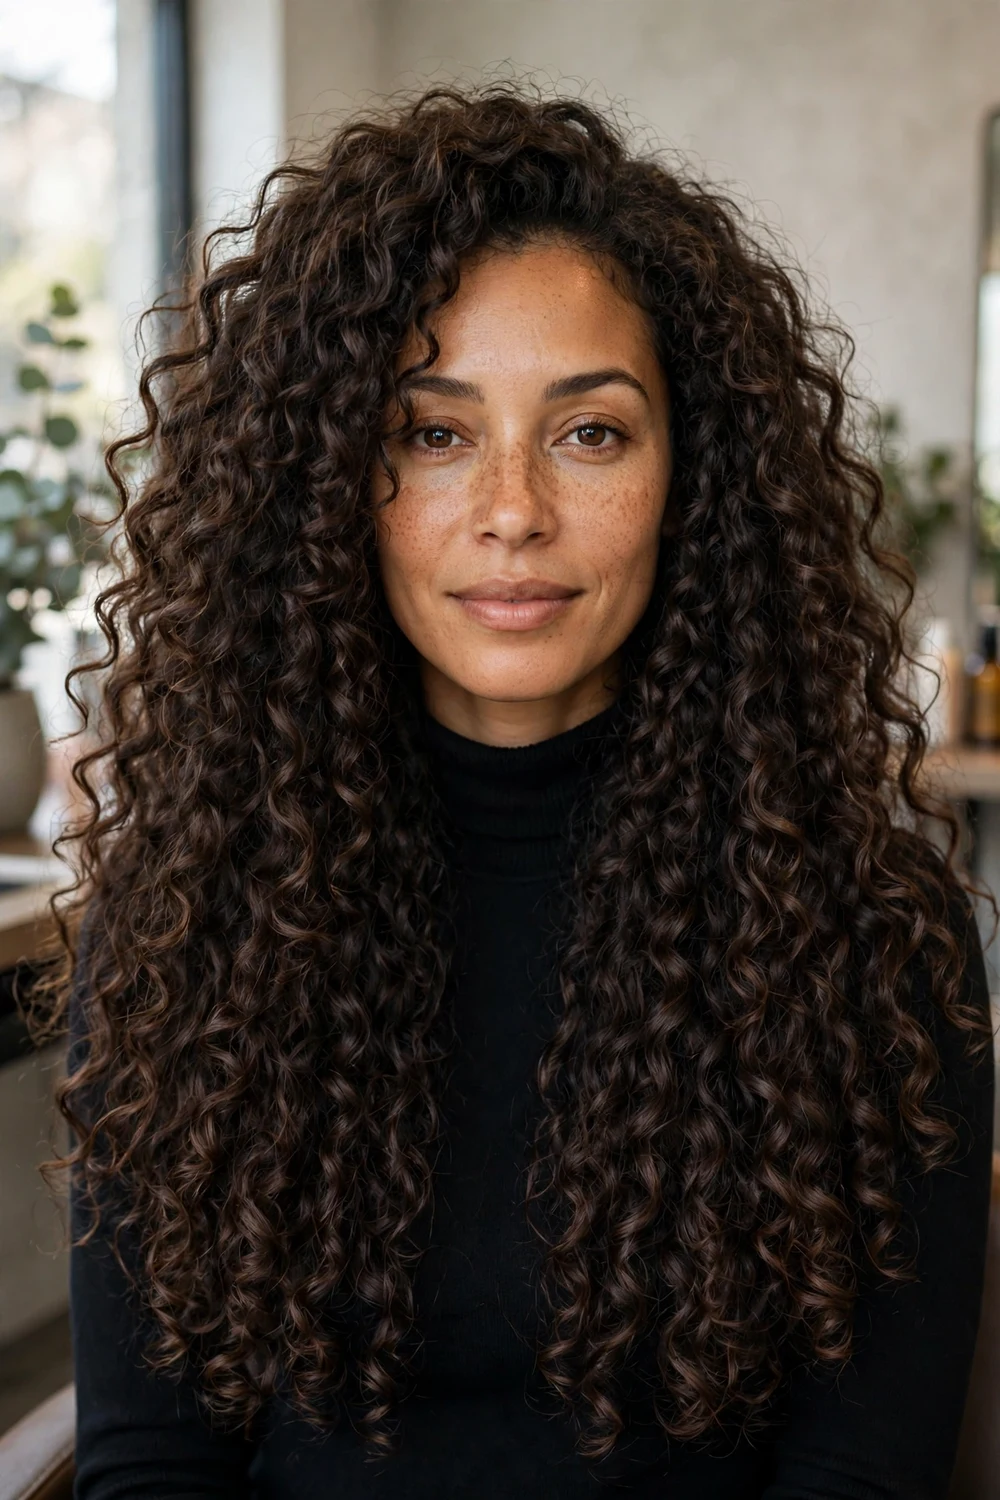
This cut is built for dense hair that feels heavy, hot, and wide. Long layers remove weight through the mid-lengths and sides, where thick curls stack up, while the surface keeps enough hair to look full rather than thinned.
Thinning shears are usually the wrong tool for this job on curls, since they can shred the ends of each curl and add frizz. Slide cutting and interior layering remove the same weight while keeping each curl whole. Tell your stylist if you wear your hair up often, since heavy top sections change how a ponytail sits.
Try this: Judge the result on day two, not wash day. Thick curls often sit higher after the first sleep, which shows the true weight removal.
Difficulty: Medium · Cost: $$ (salon)
17. Botticelli Layers for Soft Curls
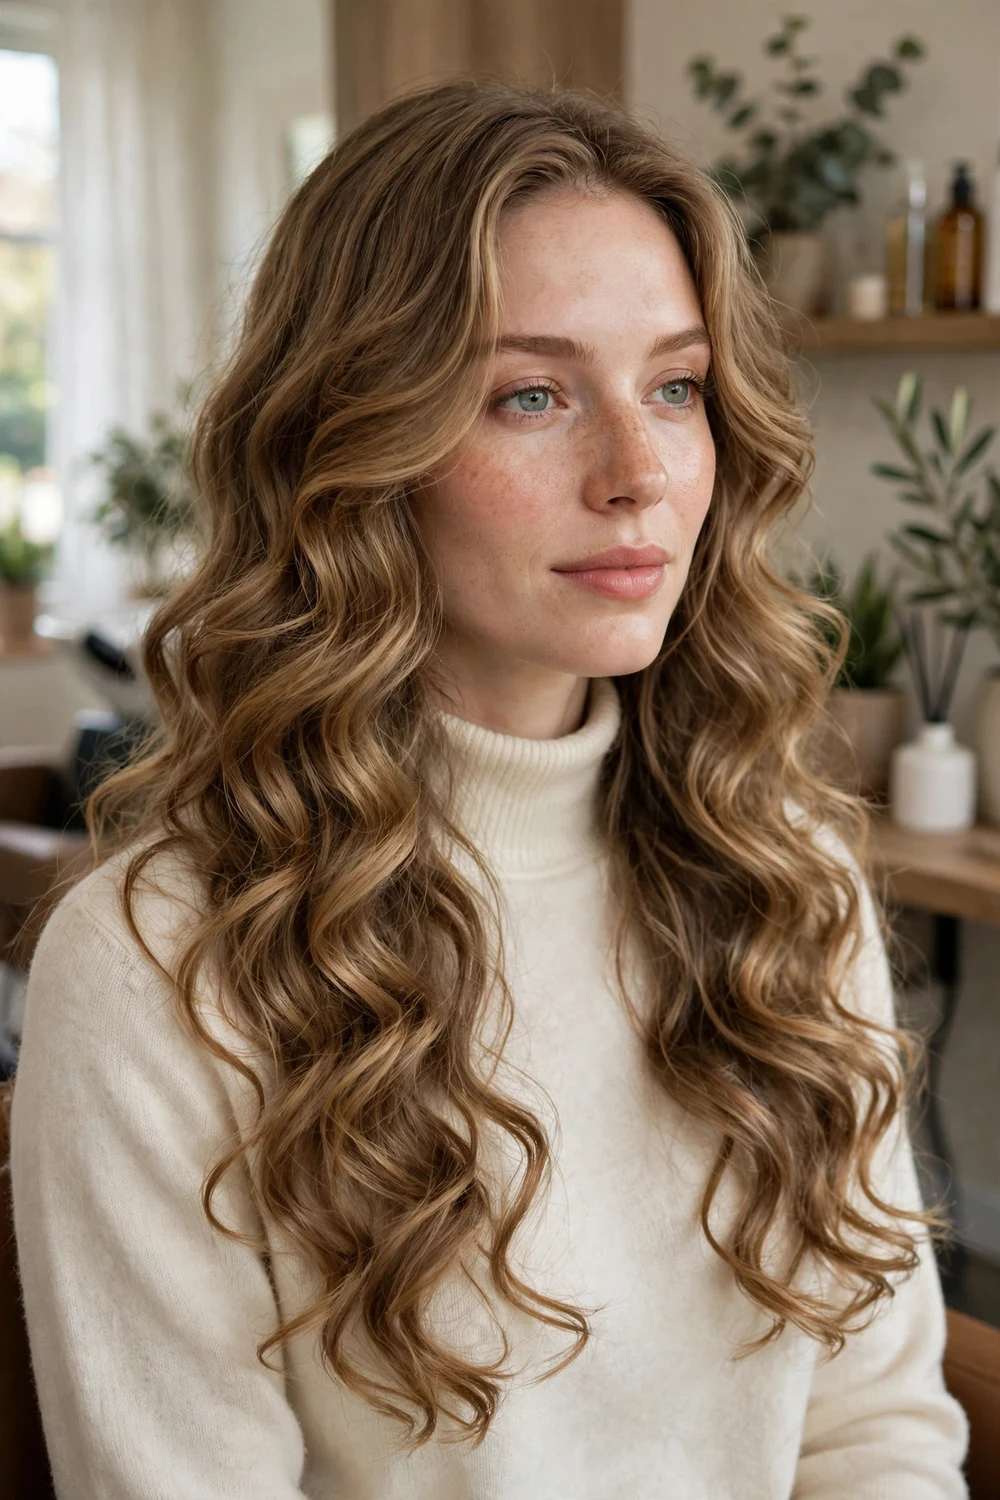
Botticelli curls are the loose, S-shaped ringlets named after the curls in Renaissance paintings. The layering here is long and subtle, placed to let each S-curve finish its bend instead of cutting through the middle of it.
Cutting through the curve is the common mistake with this pattern: it leaves half-waves that frizz at the break point. A stylist should map where each large curl bends and set the layer just below that point. Air drying suits this cut better than diffusing, which can over-lift the soft pattern.
Try this: Refresh with water and a small amount of leave-in conditioner rather than restyling. Soft S-curls reset easily and build up product fast.
Difficulty: Low to Medium · Cost: $$ (salon)
18. Mermaid Layers for Very Long Hair

Mermaid layers are built for hair at waist length or close to it. The layers start low, below the shoulders, and run deep, so the top stays smooth and heavy while the lower half gains movement and the ends flick freely.
Starting layers high on very long hair creates a thin, stringy top section and wastes the weight that keeps long curls hanging well. Low layers avoid that. The ends of very long hair are also the oldest hair on the head, so gentle handling and regular end care matter as much as the cut itself.
Try this: Sleep with the lengths in a loose braid or a high loose bun. Very long layered ends tangle at the layer steps overnight.
Difficulty: Low to Medium · Cost: $$ (salon)
19. Long Curly Shag
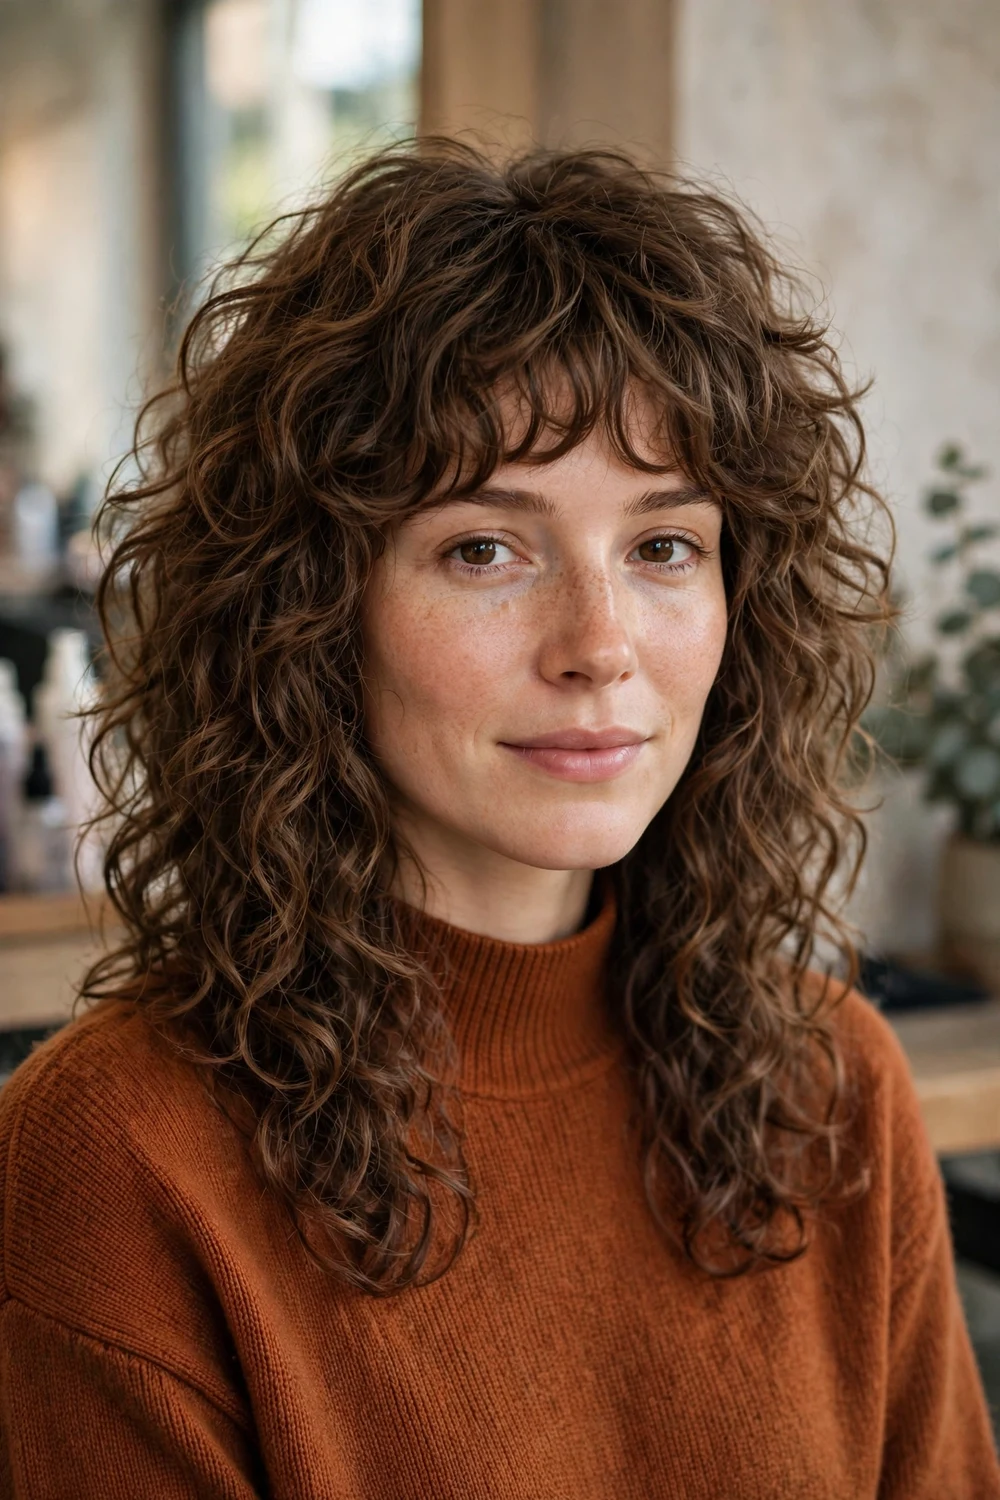
The long curly shag uses uneven, textured layers with extra shortness at the crown and longer, piecey ends. Many versions add a soft curly fringe. The shape is deliberately less polished than classic layers, with volume pushed up toward the top of the head.
Shag layers suit curls that can hold crown volume, usually 2c through 3b patterns. On very fine curls the short crown layers can look sparse, so keep them longer and fewer. The heatless hairstyles for long hair guide pairs well with a shag, since air-dried styling keeps the textured shape intact.
Try this: Ask for the crown layers cut dry and checked from the side. Shag balance is a side-view shape, and the front view alone can mislead.
Difficulty: Medium · Cost: $$ (salon)
20. Curly Wolf Cut with Long Layers
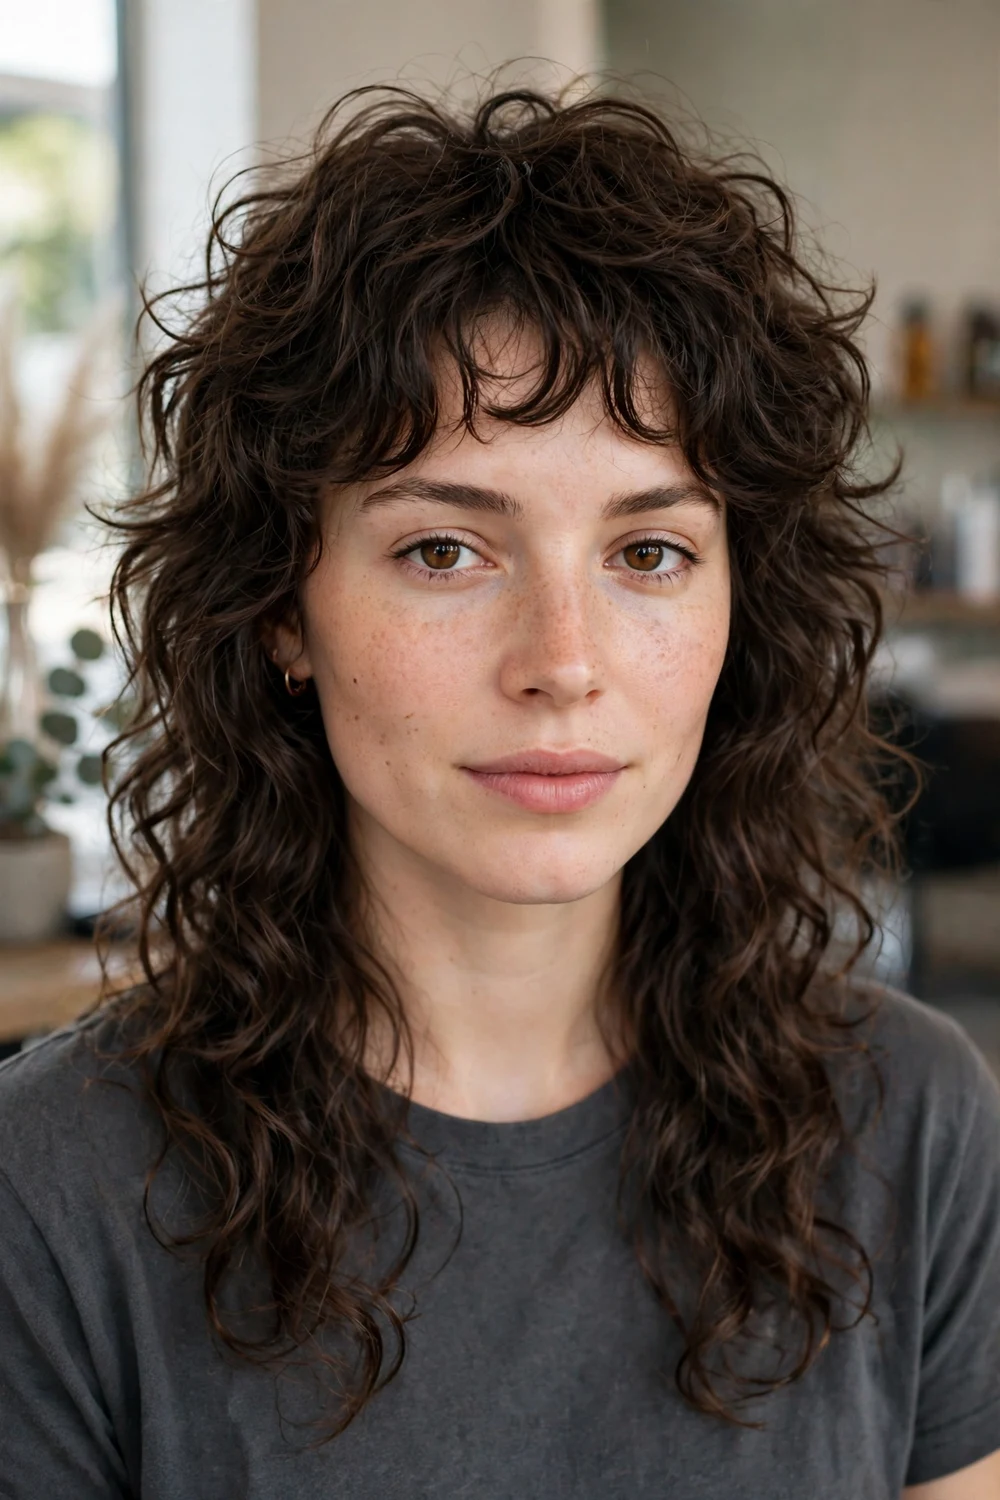
The wolf cut blends a shag top with mullet-style length: short, choppy layers through the crown and sides, then long layers that run to the ends. The contrast between the short top and the long back is the signature of the cut.
It suits women who want strong crown volume and are comfortable with a less blended grow-out. As the short layers lengthen, the shape passes through an awkward middle stage, so plan a tidy-up appointment around eight weeks to keep the contrast intentional.
Try this: Decide in advance how short the crown layers may go when dry. Wolf cut crown layers shrink up more than they look in the chair.
Difficulty: Medium to High · Cost: $$ (salon)
21. Layered Curly Mullet
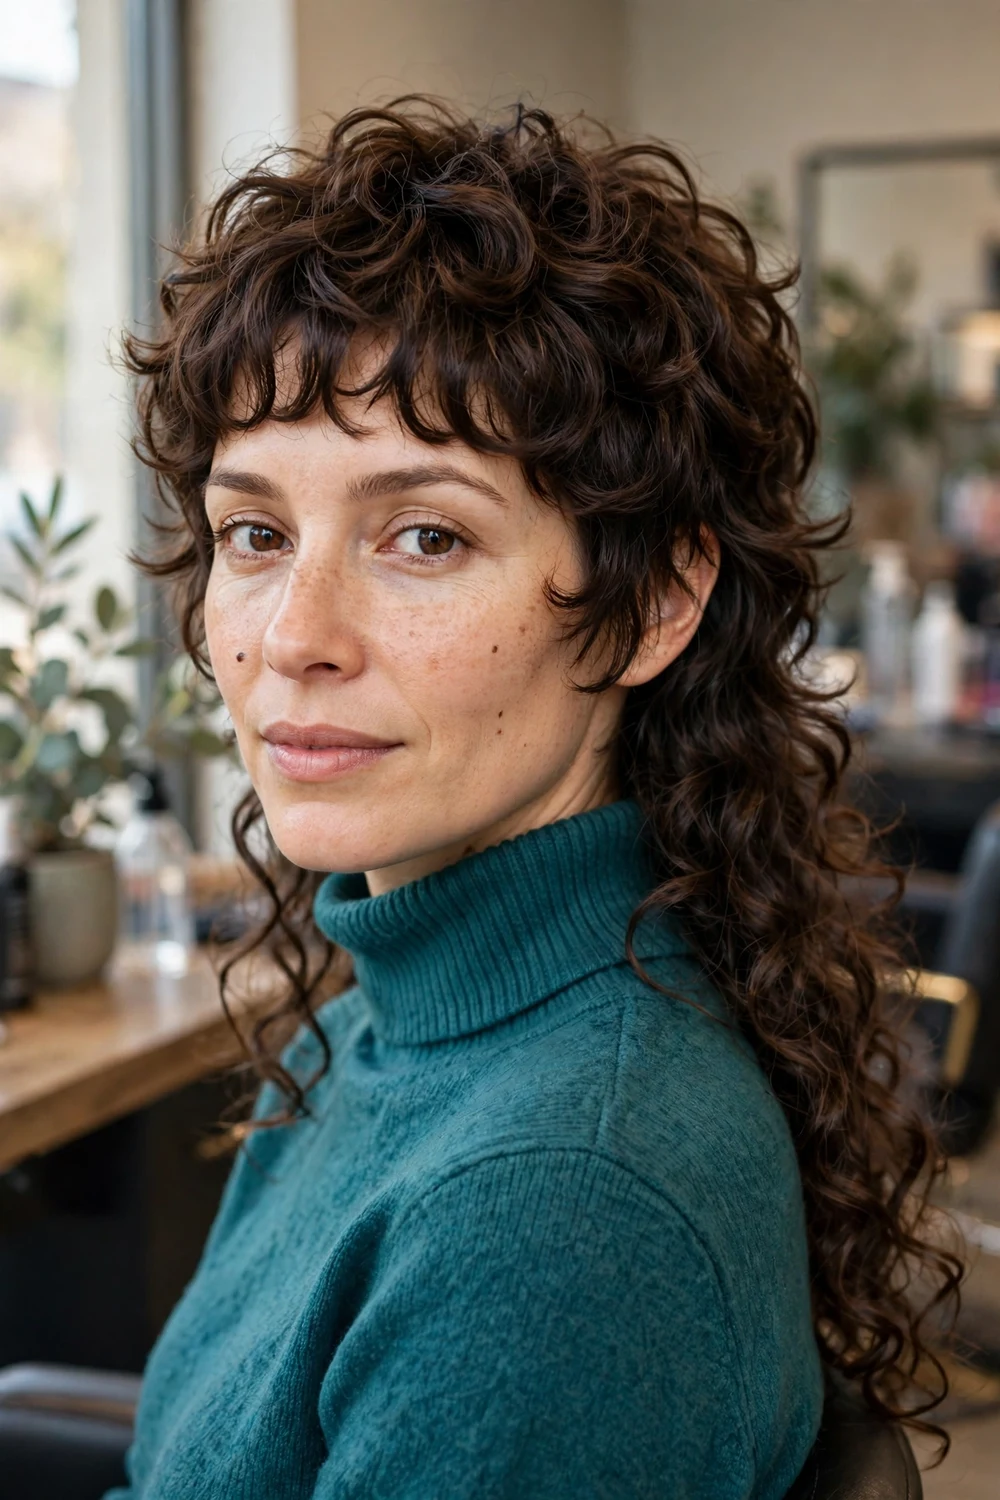
A layered curly mullet keeps shorter layers around the face and ears while the back stays long and layered. Curls soften the mullet outline, so the shape reads as textured and full rather than sharp.
Oval and heart-shaped faces carry this cut most easily, since the short front sections add width at the cheek level. Keep the back layers long and connected to the sides at the first appointment; a mullet can always go shorter at the next visit, but regrowing an over-cut front takes months.
Try this: Bring side-view photos as well as front photos. The mullet shape lives in the side profile, where the short-to-long step shows.
Difficulty: Medium to High · Cost: $$ (salon)
22. Curly Bangs with Long Layers
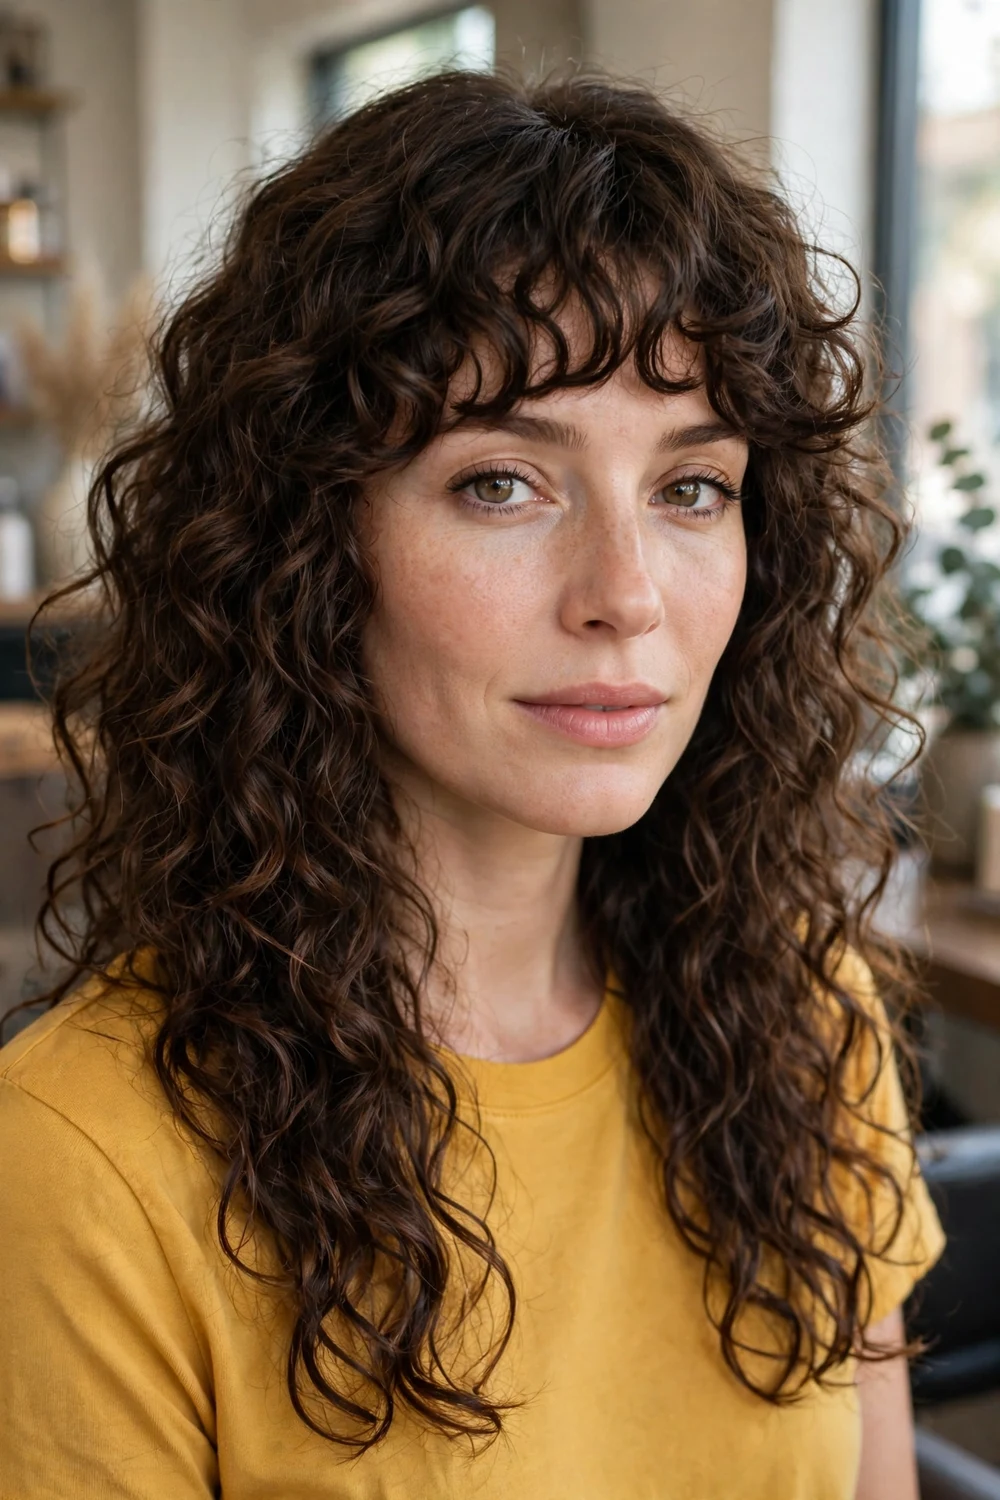
A full curly fringe paired with long layers gives the front of the haircut its own clear feature. The bangs are cut to sit at or just below the eyebrows when dry, and the layers behind them stay long so the fringe reads as a frame rather than a separate cap.
Curly bangs need cutting longer than the target length, often a full inch or more, because forehead curls spring up as they dry. Daily styling is light: the fringe usually needs a quick water refresh in the morning while the lengths can go several days between washes.
Try this: Cut the fringe in two stages across two visits if you are unsure. A slightly long fringe for one month is easier than a too-short one for three.
Difficulty: Medium · Cost: $$ (salon)
23. Wispy Bangs with Long Layers
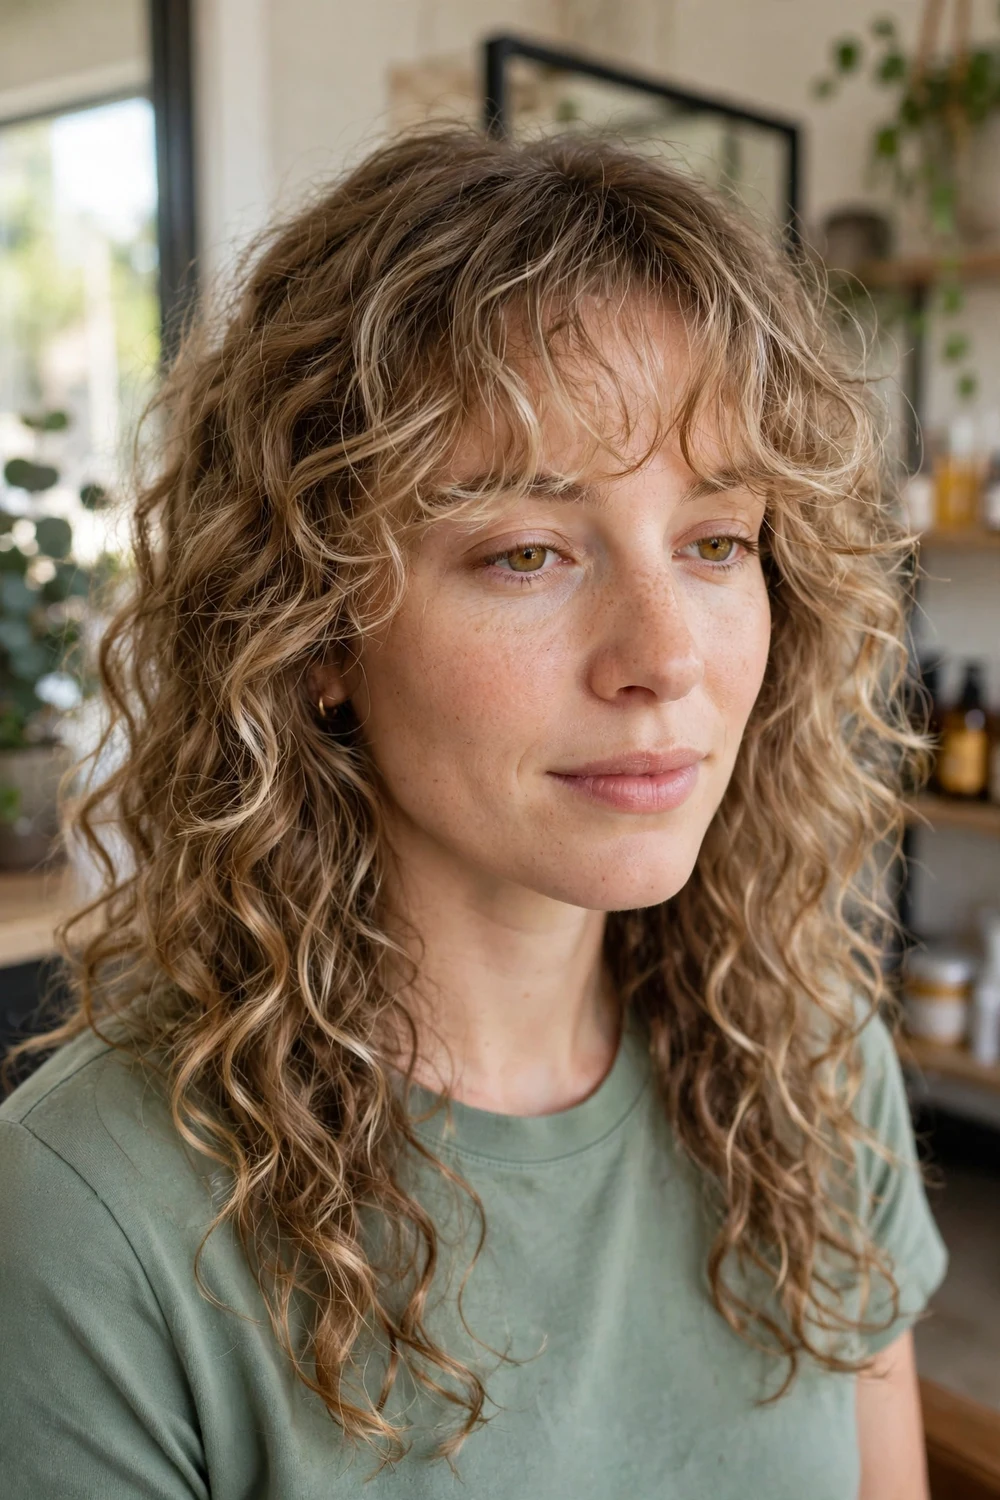
Wispy curly bangs are a lighter version of the full fringe: fewer curls, cut feathered at the ends, and blended straight into the face-framing layers. They soften the forehead without committing to a solid bang line.
This is the lower-risk bang option for a first try, since wispy pieces grow into face-framing layers within a few weeks if you change your mind. They suit finer curl patterns best; on very thick curls, a wispy fringe can disappear into the front layers entirely.
Try this: Ask your stylist to leave the two outermost bang curls longer. Those edge pieces are what blend the fringe into the layers.
Difficulty: Low to Medium · Cost: $$ (salon)
24. Side-Part Layered Curls

A deep side part changes how layered curls fall: one side gains root lift and sweep, the other lies closer, and the layers stack with a clear direction. The cut behind it is standard long layering, shaped with the part in place.
Cutting this style on a center part and wearing it on the side unbalances the layers, so the part has to be set before the scissors come out. Flipping the part to the opposite side is a quick way to add root volume on day two or three, since the roots were trained the other way.
Try this: Tell your stylist which side you part on and whether you ever flip it. Layers can be cut to allow one flip direction comfortably.
Difficulty: Low · Cost: $ (salon)
25. Mixed-Pattern Layers

Most heads carry more than one curl pattern: looser at the front, tighter at the back, or straighter underneath. Mixed-pattern layers are cut section by section, with each area layered to its own shrinkage so the finished shape looks even even though the cuts differ.
This is a gap many standard cuts miss, because a single layering pattern applied everywhere makes the tight sections jump up and the loose sections hang. Ask your stylist to assess your patterns out loud during the consultation. Naming each zone, and how it will be cut, is the sign the approach is actually being tailored.
Try this: Take a back photo every few months. Mixed patterns grow at different visual rates, and photos catch imbalance before it becomes obvious.
Difficulty: Medium to High · Cost: $$$ (salon)
Layered Curly Cuts at a Glance
The table below sums up the main layer families in this list, so you can narrow the field by curl pattern and by how much weight you actually need removed before you book.
| Cut family | Best curl patterns | Weight removed | Typical trim cycle |
|---|---|---|---|
| Classic long layers and waterfall layers | 2c to 3b | Light to medium | 10 to 12 weeks |
| U-cut and V-cut layers | 3a to 3c, thick hair | Medium, mostly at sides | 10 to 12 weeks |
| Butterfly layers | 2c to 3b | Medium, at crown and face | 8 to 10 weeks |
| Invisible, perimeter, and disconnected layers | Fine curls (perimeter) to very thick curls (disconnected) | Targeted, inside or ends only | 8 to 12 weeks |
| Deva-style and Rezo-style dry cuts | 3a to 3c, mixed patterns | Medium, curl by curl | 10 to 12 weeks |
| Shag, wolf cut, and curly mullet | 2c to 3b | High, at crown | 8 weeks |
Frequently Asked Questions
Do layers work on long curly hair, or do they add frizz?
Layers work well on long curly hair when they are cut dry and kept in proportion to the curl pattern. Frizz usually comes from cutting into the middle of a curl, using thinning shears, or cutting layers too short for the pattern. Long, blended layers that respect where each curl bends reduce bulk without breaking up the curl clumps.
Should long curly hair be cut wet or dry?
Dry cutting is the safer choice for most curly hair. Curls stretch when wet, so a wet cut can dry several inches shorter and in a different shape. A dry cut, done curl by curl with the hair styled as you normally wear it, shows the stylist the true length, shrinkage, and pattern of every section before anything is removed.
How often do layered curly haircuts need a trim?
Most long layered curly cuts hold their shape for ten to twelve weeks. Shorter, more sculpted shapes such as the shag, wolf cut, and butterfly layers need attention closer to eight weeks, because the contrast between levels fades as they grow. A light dusting of the ends between reshapes keeps split ends from climbing the layered sections.
Will layers make my curly hair look shorter?
Layers make curls look a little shorter at first, because removing weight lets each curl spring up to its natural position. The longest layer keeps your full length, so the overall silhouette stays long. Cutting dry controls the effect, since you and your stylist can see the true finished length in the chair.
Are layers a good idea for fine or thin curly hair?
Yes, with limits. Fine curls do best with long, few layers placed at the perimeter or in the interior sections, which add movement without thinning the ends. Short, heavy layering removes hair that fine curls cannot spare and can leave the bottom of the cut looking sparse. Tell your stylist that keeping end density matters more to you than maximum volume.
Final Thoughts
Long curly hair with layers is a set of clear choices rather than a single cut: how much weight comes out, where the shortest layer starts, and whether the shape is blended or deliberately disconnected. Start with your curl pattern, then pick the family that solves your actual problem, whether that is a flat crown, heavy sides, sparse ends, or a mix of patterns on one head. Bring photos, ask for a dry cut, and agree on where each layer will sit before the cut begins. When the colder months arrive, the winter hairstyles for long hair roundup shows ways to wear long layered lengths through the season.

