

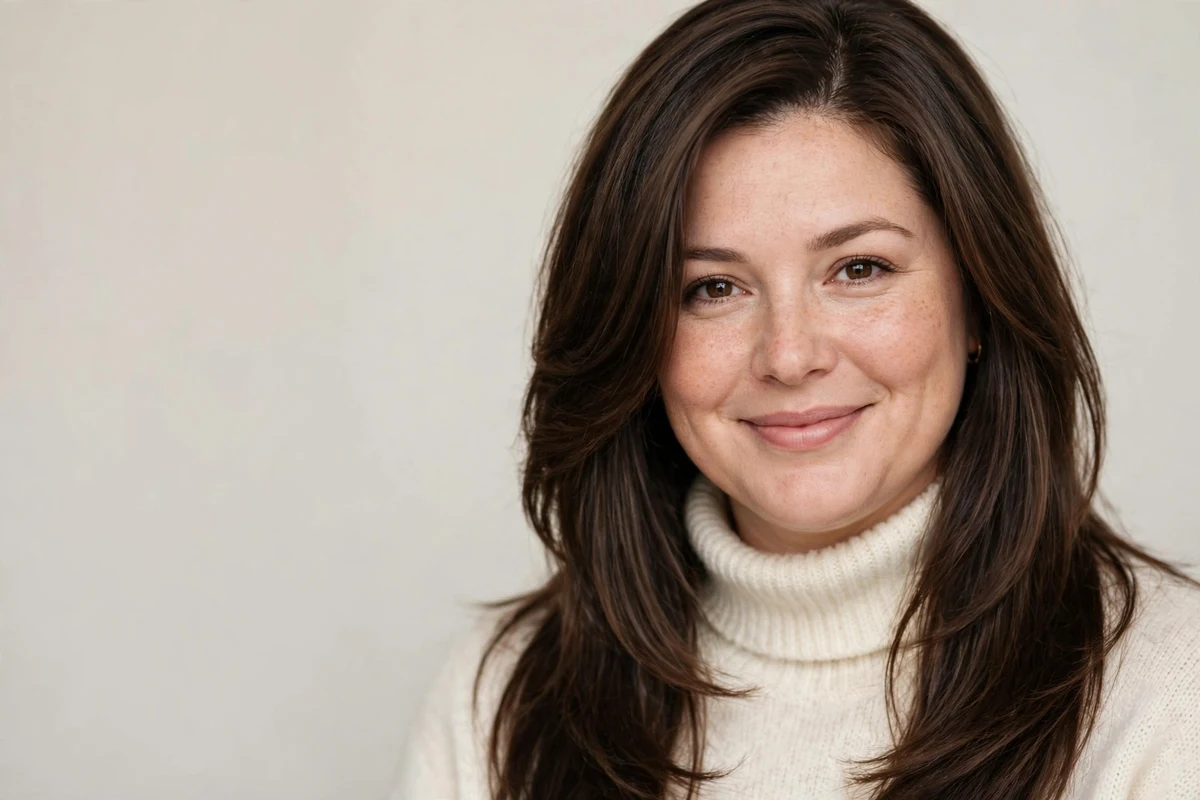
A round face has near equal width and length, soft jaw corners, and its widest point at the cheeks. Hair cannot change that bone structure, and it does not need to. What hair can change is where the eye travels. Styles that pull the eye up and down, with length below the chin, height at the crown, and slim sides, make the same face read longer and leaner. Styles that stop at the cheeks or puff out at cheek level do the opposite.
This guide collects 26 hairstyles to slim a round face and explains the placement logic behind each one: where the length sits, where the volume sits, and what happens at the cheek and jaw line. The list runs from long cuts through lobs and bobs to short cuts, fringes, curly shapes, and updos, so you can work with the length you already have. If you want the seasonal cut list instead, the fall hair cuts for round faces roundup covers autumn shapes; this guide is the year-round strategy version.
Key Takeaways
- End the cut below the chin. Length that stops at the cheeks underlines the widest point of the face.
- Put volume at the crown and keep the sides slim. Height adds length; width at cheek level adds roundness.
- Start layers below the chin so movement and fullness sit low, near the jaw and collarbone.
- A deep side part draws a diagonal across the face and breaks up its symmetry.
- Long, side-swept, or curtain fringes slim. Short, heavy, straight-across fringes widen.
- High ponytails, top knots, and high buns lift the whole outline and lengthen the neck.
The Logic Behind Slimming a Round Face
Every idea on this list uses one of four moves. The first is vertical length: hair that runs past the chin and toward the collarbone gives the eye a long line to follow, so the face looks longer by comparison. The second is crown height: lift at the top adds inches above the forehead while the sides stay close, which shifts the proportions upward. The third is the diagonal: side parts, swept fringes, and angled hemlines cut across the face at a slant, and slanted lines read leaner than horizontal ones. The fourth is placement control: layers, waves, and curl all add volume somewhere, and the goal is to keep that volume above the crown or below the jaw, away from the cheeks.
The cuts to be careful with follow the same logic in reverse. A blunt bob that ends at chin level draws a horizontal line at the widest part of the face. Short layers that flip out at the cheekbones add width exactly where a round face is already widest. A flat center part with no face-framing pieces can leave the face looking wider on some heads, because both sides mirror each other with nothing to break the outline. The detailed guide to face-framing layers shows how layer placement changes the outline on finer hair.
1. Extra-Long Layers That Start Below the Chin
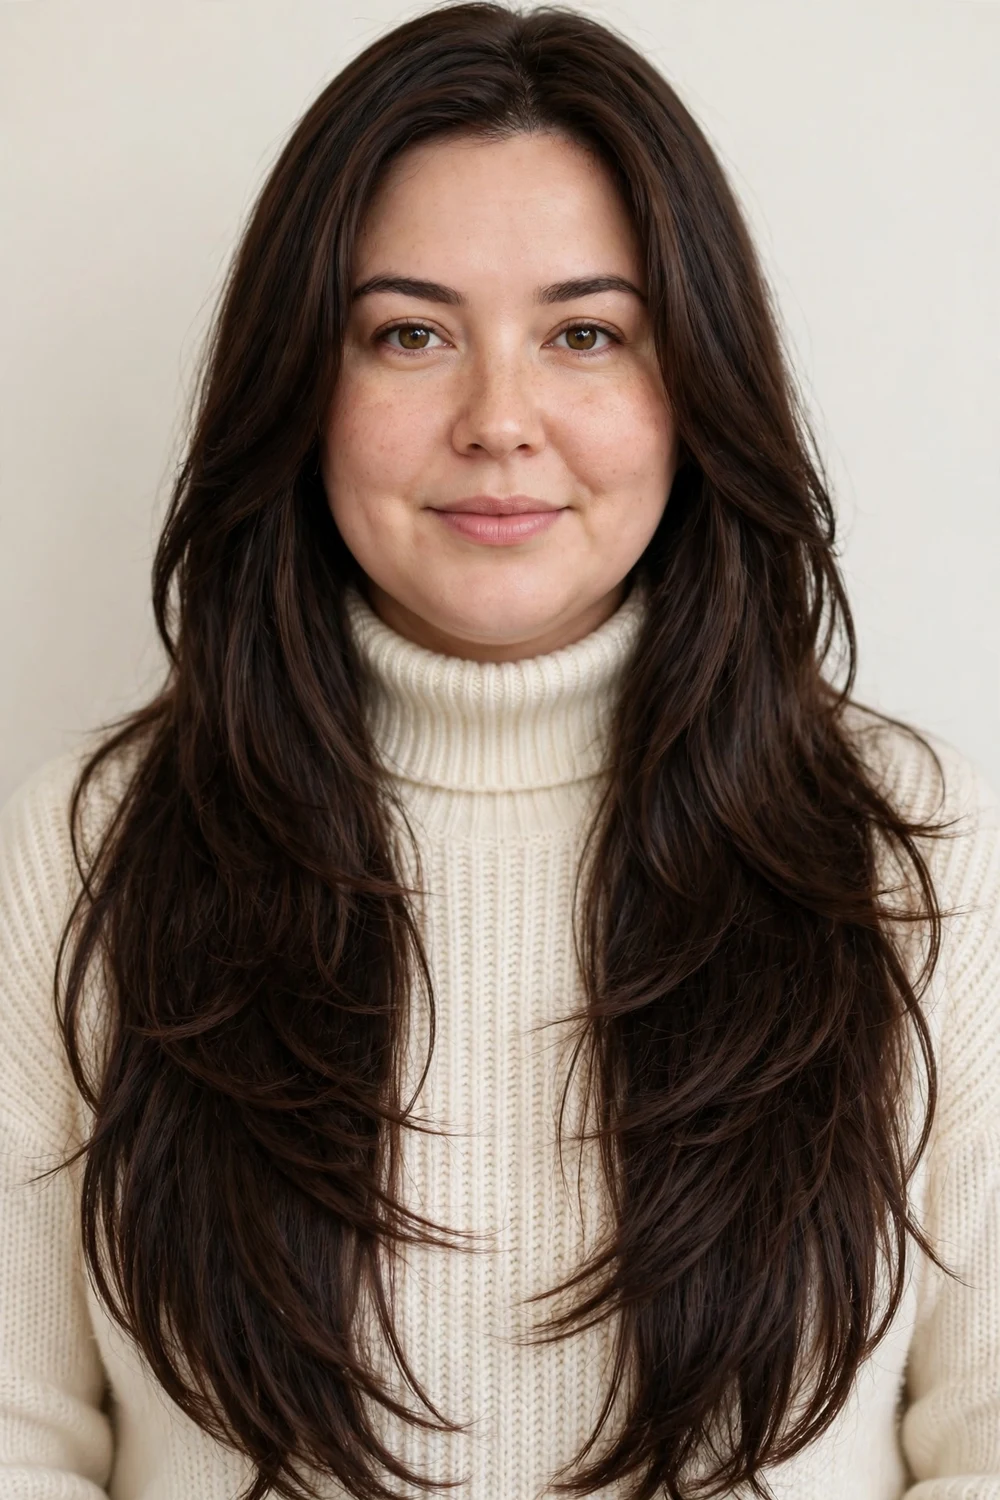
Length is the simplest slimming tool a round face has, and this cut uses the most of it. The hair stays long, past the shoulders and toward the chest, and the first layer is cut below the chin. That starting point matters: the cheek zone stays smooth and close, while all the movement and separation happen lower down, near the jaw and collarbone.
Because the layers sit low, the eye follows the hair downward instead of across the cheeks. Ask your stylist to keep the front pieces long and to remove weight from the ends rather than the mid-lengths. The cut suits straight and wavy hair, and it works on thick hair once the ends are thinned enough to lie flat at the sides.
Try this: blow-dry the front sections forward and down with a paddle brush so they hug the jaw line instead of swinging out at the cheeks.
Difficulty: Low · Cost: $$ (salon)
2. Sleek Glass-Straight Length with a Deep Side Part
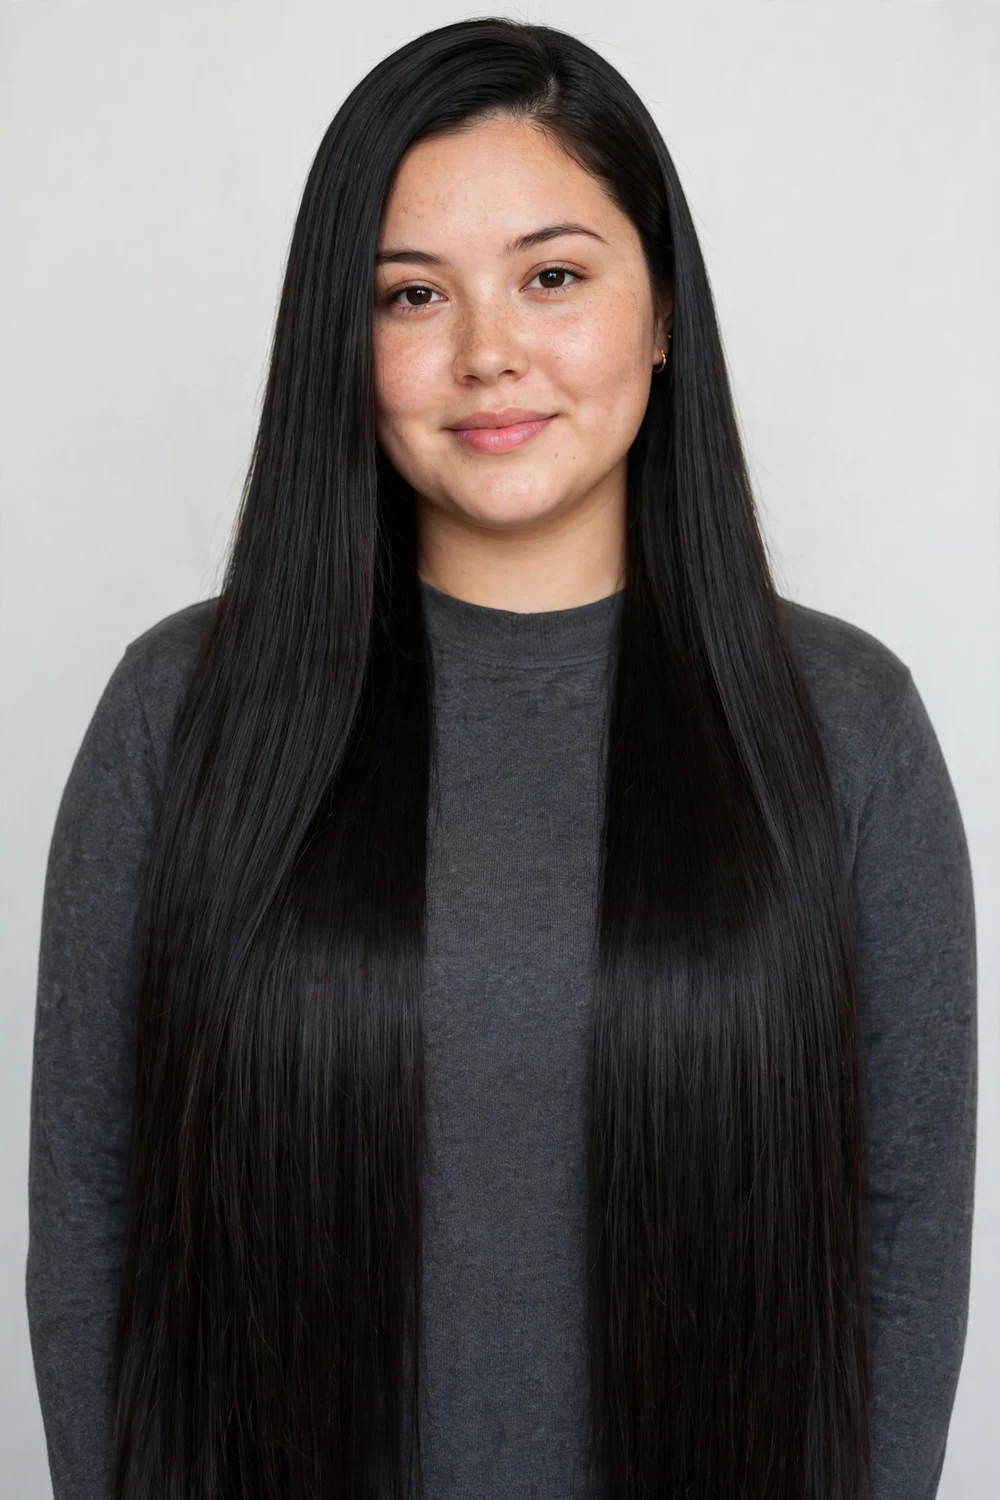
A flat, glossy, straight finish creates the longest unbroken vertical line of any style on this list. The hair lies close to the head at the sides, so nothing widens the cheek area, and the lengths run straight down past the shoulders. The deep side part does the second half of the work: it sends the top section across the forehead on a diagonal and lifts the roots on the heavy side.
This style asks for a flat iron pass and a smoothing serum, so it suits women who already straighten their hair. Naturally straight and relaxed hair holds it longest. On wavy or curly hair it is an occasional look rather than a daily one, since humidity will push the sides back out.
Try this: place the part in line with the outer edge of your eyebrow. A part that sits too close to the center loses the diagonal effect.
Difficulty: Medium · Cost: $ (at home)
3. Long V-Cut with the Weight at the Back

The V-cut keeps the longest point at the center back and lets the sides graduate shorter toward the front. From the front, the visible hair beside the face is the shorter, lighter part, so the outline next to the cheeks stays narrow. From behind, the deep V point pulls the whole silhouette downward.
The front pieces should still clear the chin by a wide margin; if the shortest front layer lands at the cheekbone, the shape works against you. The cut needs length to begin with, ideally hair that already reaches below the shoulder blades, and it suits straight to loosely wavy textures best.
Try this: ask for the V to be cut soft rather than sharp. A softer point grows out evenly and needs fewer corrective trims.
Difficulty: Low · Cost: $$ (salon)
4. Loose Waves That Begin Below the Cheekbones
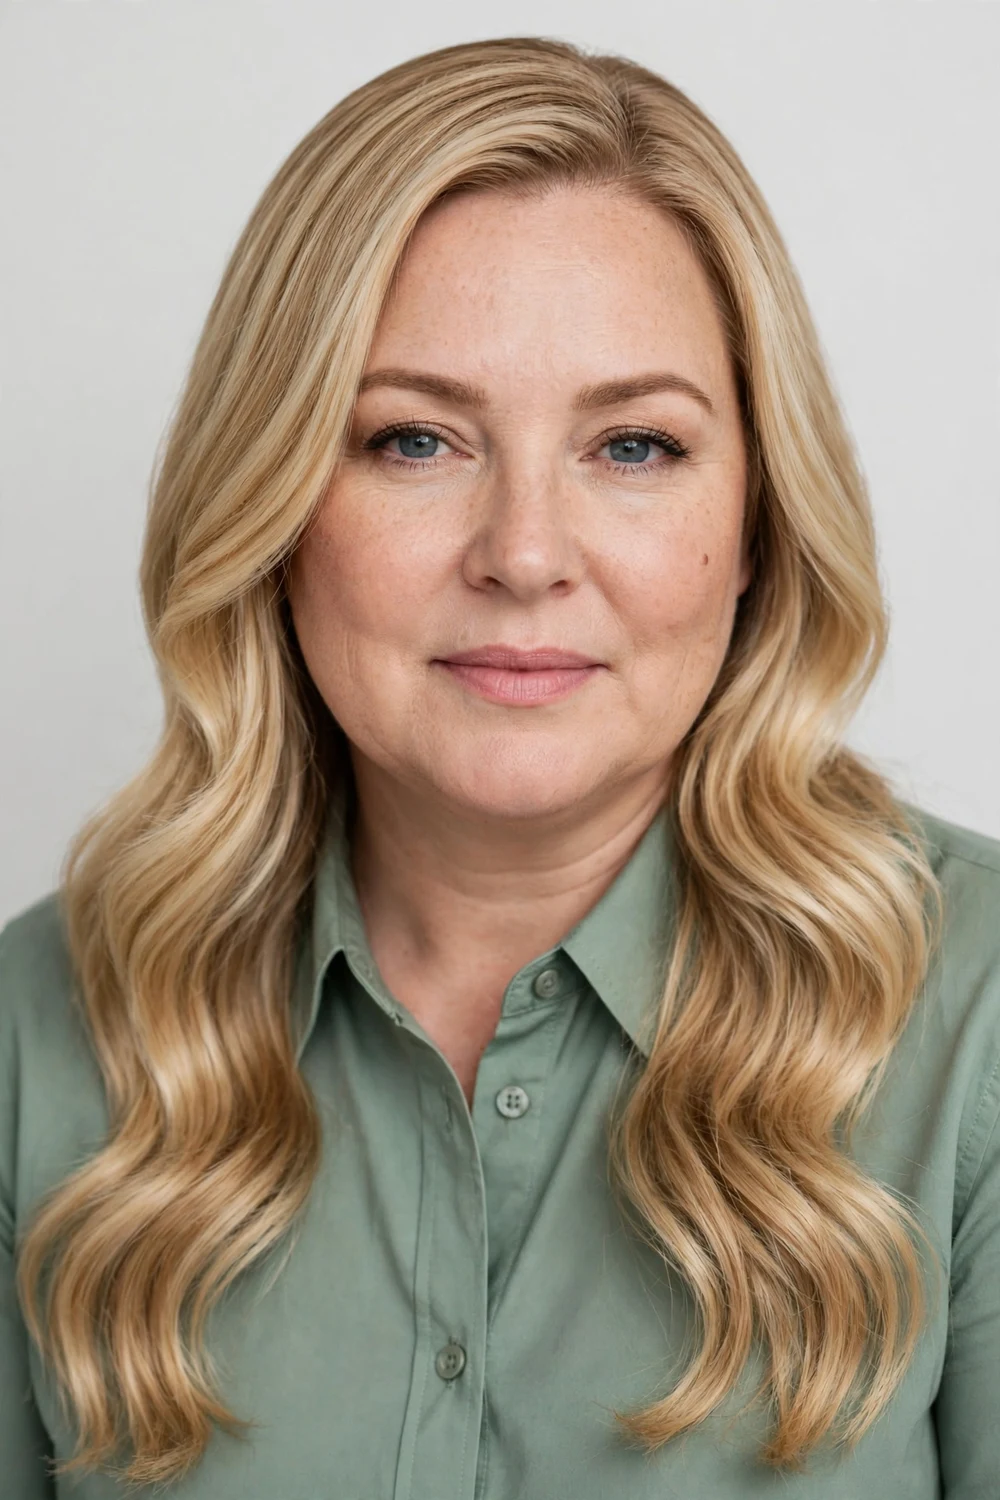
Waves are welcome on a round face as long as they start in the right place. When the first bend begins below the cheekbones, the top and sides of the head stay smooth and the width of the wave pattern lands at jaw level and lower, where it balances the cheeks instead of echoing them.
Wrap the iron or wand from the jaw down, and leave the top four to five inches of each section straight. Brush the waves out once they cool so they fall in one vertical sheet rather than separate ringlets at the sides. This works on medium and long hair, and on naturally wavy hair it is mostly a matter of scrunching product into the lower half only.
Try this: apply mousse or curl cream from the chin down and keep the roots product-free, so the crown stays flat and close.
Difficulty: Medium · Cost: $ (at home)
5. Face-Framing Angles That Run Past the Jaw

Angled face-framing pieces are cut on a slant: the shortest point starts at or below the jaw and each following piece runs longer, down toward the collarbone. Those two diagonal lines sit directly beside the cheeks, and the eye reads the slant as length. The cheeks themselves are left uncovered and unweighted, with no layer ends flicking out at cheekbone height.
This is a modification rather than a full restyle, since the angles can be added to most medium and long cuts. It suits anyone whose current layers start too high. If your shortest layer sits at the cheekbone now, growing it out to jaw level before recutting usually gives a cleaner slant.
Try this: bring a photo that shows the angle starting point clearly. Stylists read “face-framing” in several ways, and the starting height is the detail that decides whether this slims.
Difficulty: Low · Cost: $$ (salon)
6. Vertical Balayage Ribbons Along the Face

Color placement can do part of the slimming work on its own. Light ribbons painted vertically along the two front sections give the eye two bright lines to travel down, from the cheek area to the ends. The darker hair behind and between them recedes, so the bright frame reads narrower than the full head of hair.
Ask for the lightest pieces to start around cheek level and strengthen toward the ends, with the brightness concentrated at the front rather than spread evenly around the head. An all-over lightening does the opposite, since it widens the whole outline. This pairs well with the long cuts earlier in the list and grows out softly, so salon visits can stay spaced out.
Try this: keep the ribbons two to three shades lighter than your base. A bigger jump reads as stripes; a smaller one reads as light.
Difficulty: Medium · Cost: $$$ (salon)
7. Angled Lob That Ends Past the Collarbone
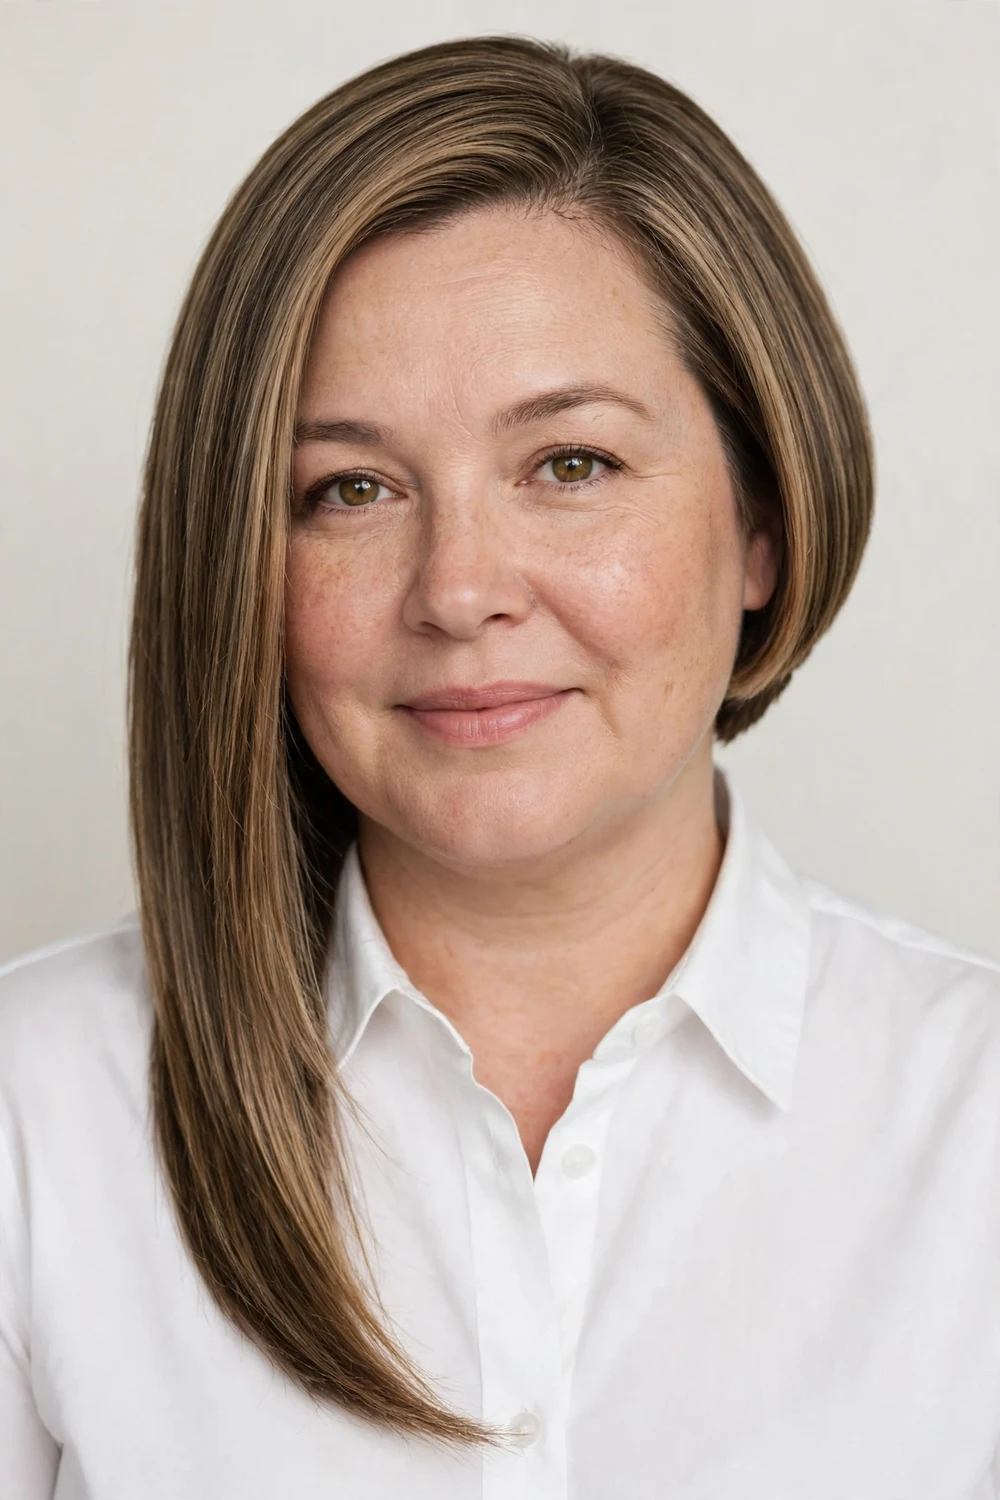
The angled lob is cut shorter at the nape and slopes forward until the front pieces pass the collarbone. That forward slope is the slimming element: the hemline points down toward the chest instead of sitting level at the jaw, and the longest part of the cut sits well below the widest part of the face.
Wear it smooth or with a slight bend through the front pieces only. The back can be stacked lightly for shape, but keep any stacking low at the nape so it does not push the sides out. The cut suits straight and wavy hair and is a steady choice for women moving from long hair to something shorter for the first time.
Try this: check the front length in the mirror before you leave the salon. The front pieces should clear the jaw by at least two inches on each side.
Difficulty: Low to Medium · Cost: $$ (salon)
8. A-Line Bob with a Forward Slope

The A-line bob follows the same forward slope as the angled lob, cut shorter and sharper. The back sits high at the nape, the sides run diagonally down, and the front points land below the chin. From the side, the whole hemline is one descending line, and that line is what lengthens the profile.
Because the cut is shorter overall, the front points must still clear the chin. An A-line that ends at the jaw draws its longest line across the widest area. The shape holds best on straight hair or hair that is straightened most days, since wave can lift the back and break the slope.
Try this: book trims every six to eight weeks. Once the back grows out, the slope flattens and the bob starts to read wider.
Difficulty: Medium · Cost: $$ (salon)
9. Below-the-Chin Bob with Textured Ends

A classic bob can work on a round face when two details are handled. First, the length lands one to two inches below the chin, past the jaw curve, so the hemline sits under the widest point rather than on it. Second, the ends are point-cut and textured instead of blunt, so the bottom edge breaks up instead of drawing one hard horizontal line.
A soft side part adds a diagonal on top. Wear the bob tucked behind one ear or both to open the jaw line further. This length suits fine to medium hair; very thick hair may need internal layering so the ends do not flare into a triangle shape at the sides.
Try this: if your current bob ends exactly at the chin, growing it out for two months usually moves it into this safer zone without a new cut.
Difficulty: Low · Cost: $$ (salon)
10. Deep Side Part with a Swept-Over Top

This is a styling change rather than a cut, and it works on almost any length from a lob down. The part is placed far to one side, and the heavier section is swept over the top of the head. The sweep creates a long diagonal across the forehead, lifts the roots on the heavy side for crown height, and leaves the light side lying flat against the cheek.
Blow-dry the heavy section up and over while it is damp, then set the part with a light spray. Hair that has been parted in the center for years may resist for the first week; drying it in the new direction each wash retrains it. The long hairstyles with curtain bangs guide shows the same parting logic applied to longer, fringed styles.
Try this: flip your part to the opposite side every few days. The roots lift higher on a fresh side, and the extra height adds to the slimming effect.
Difficulty: Low · Cost: $ (at home)
11. Long Curtain Bangs on Medium Hair

Curtain bangs slim a round face when they are cut long. The two sections part in the middle, sweep down past the cheekbones, and blend into the lengths, so each side of the face gains a vertical frame. The center opening also shows the forehead, which keeps the top of the face looking open and tall.
The length is the deciding detail. Curtain bangs that end at the cheekbone sit on the widest point and widen it; bangs that reach the jaw or below pull the eye past it. Style them by blow-drying forward first, then sweeping each side back and down so the ends curve away from the face.
Try this: ask for the shortest point of the curtain to sit at the jaw, not the cheek. You can always trim shorter later; you cannot add length back.
Difficulty: Medium · Cost: $$ (salon)
12. Medium Shag with a Slim, Tapered Outline

A shag earns its place on this list when the outline is controlled. The layers on top are choppy and lifted, which builds height at the crown, while the sides are tapered close and the ends run below the chin. The shape is widest at the very top of the head and narrowest beside the cheeks, which reverses the round face outline.
Ask your stylist to keep the layering concentrated on top and through the ends, with the mid-lengths at the sides left lean. Too much layering at the sides turns a shag round, so this is a cut to discuss with photos. It suits wavy hair well, since the natural bend fills the top layers without help.
Try this: style with a small amount of texture spray at the crown only, and smooth the sides down with your palms while the hair dries.
Difficulty: Medium · Cost: $$ (salon)
13. Butterfly Layers with a Lifted Crown

The butterfly cut pairs short face-framing layers with long layers underneath, and it is styled as a blowout with the crown lifted. For a round face, the framing layers need to start at the chin rather than the cheekbone, so they sweep outward below the widest point and the volume lands low.
The lifted crown does the vertical work, and the long underlayers keep the overall length past the shoulders. This is the highest-effort blowout on the list: a round brush, section by section, with each piece rolled away from the face. It suits medium to thick hair with some natural body.
Try this: set the crown section in a large roller while it cools. The lift lasts hours longer than brush work alone.
Difficulty: High · Cost: $$ (salon)
14. Long Pixie with Height at the Crown
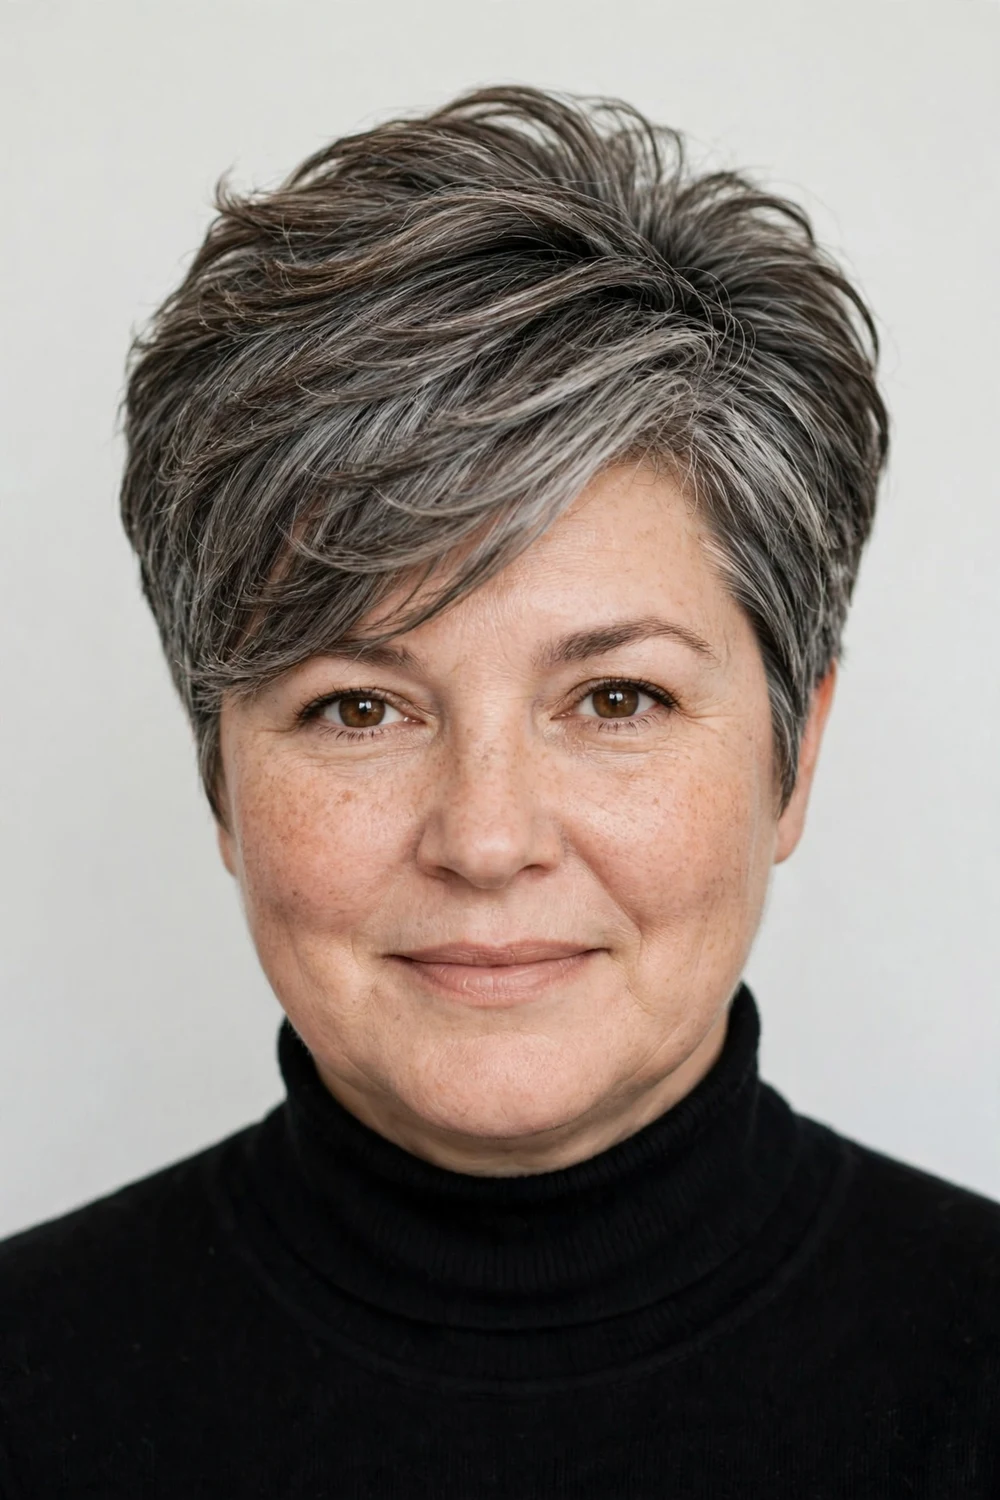
Short hair slims a round face when the height goes on top. A long pixie keeps the sides and back close and tapered, and leaves enough length on top to lift upward and sweep forward. The tall top section lengthens the face outline, and the close sides add no width at the temples or cheeks.
Ask for the top to stay long enough to style in more than one direction, since that length is what gives you the height. Style by blow-drying the top up and forward with a small amount of matte paste at the roots. This cut needs trims every four to six weeks to keep the sides from growing out into cheek-level bulk.
Try this: if you are cutting long hair short, ask for the long pixie first rather than a classic short pixie. The extra top length is the part that does the slimming.
Difficulty: Medium · Cost: $$ (salon)
15. Asymmetric Pixie with One Long Side
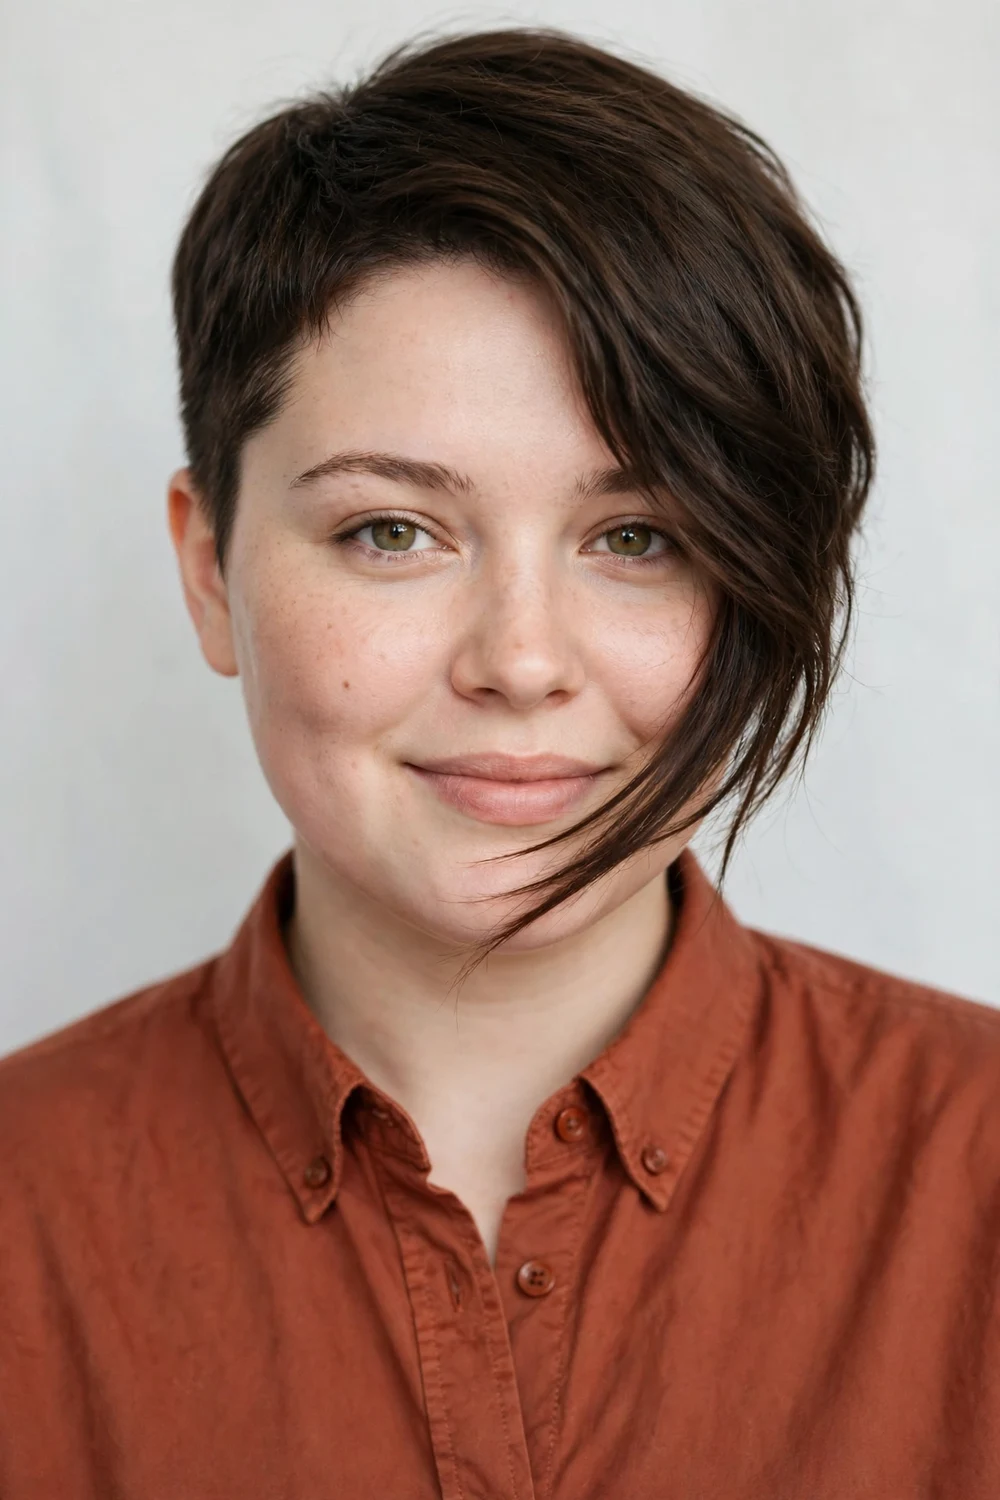
The asymmetric pixie is cropped close on one side and left long on the other, so a sweeping section falls diagonally across the forehead and one cheek. A round face is symmetrical and curved; this cut answers with one straight diagonal and two different lengths, which breaks the round outline at a glance.
The long side should reach at least to the cheekbone and ideally below it, so the diagonal runs long. The short side can be tapered or lightly undercut. This is a strong shape that suits straight and wavy hair, and it reads best when the long side is kept smooth rather than curled outward.
Try this: wear the long side on the side you photograph most. The diagonal does its work on the side the camera sees.
Difficulty: Medium · Cost: $$ (salon)
16. Bixie with Front Pieces Below the Cheekbones

The bixie sits between a pixie and a bob: cropped and layered at the back, with bob-length pieces left at the front. Those front pieces are the slimming element. They fall below the cheekbones and frame the jaw, so the face is bordered by two vertical lines even though most of the cut is short.
Keep the back light and the crown textured for a little height. The bixie suits women who want short hair with a softer edge than a pixie gives, and it grows out toward a bob, which makes the in-between stage easier to manage. Fine hair may need a texturizing spray to keep the front pieces separated.
Try this: tuck one front piece behind your ear and leave the other down. The uneven frame adds another diagonal.
Difficulty: Medium · Cost: $$ (salon)
17. Stacked Bob with Long Front Pieces
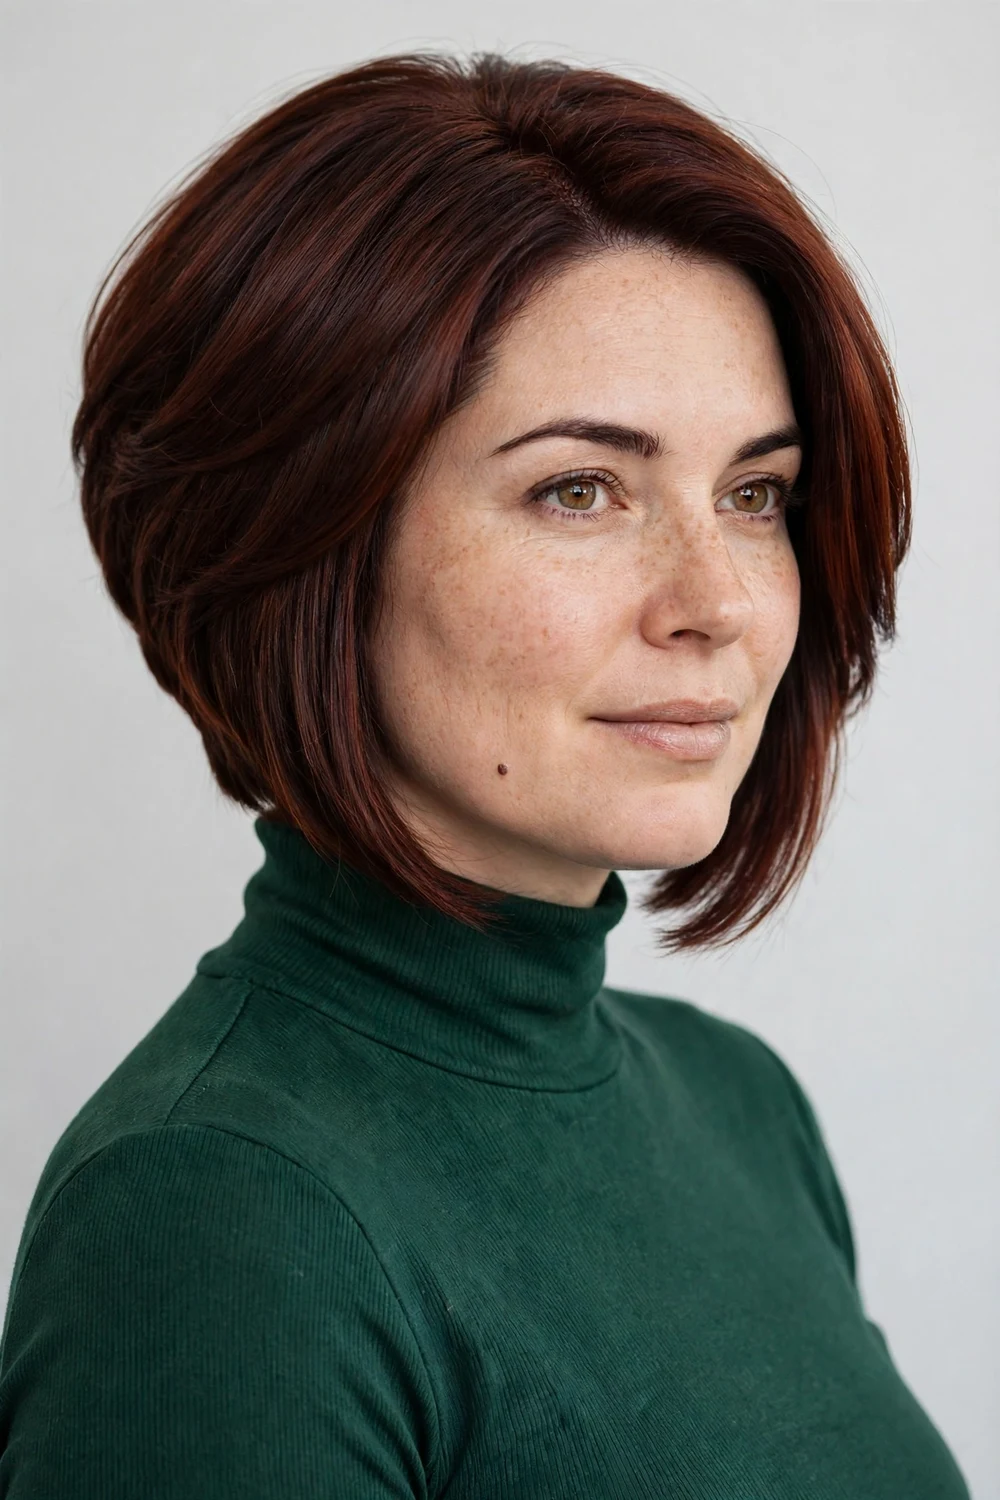
Stacking builds short graduated layers at the nape, which lifts the back of the cut and gives the crown area a taller profile. The front is left long, with pieces that run below the chin. Height at the back plus length at the front is the same up-and-down logic as the long cuts, compressed into a bob.
The stack should stay at the nape and lower back. Stacking that climbs too high and too wide can round out the back of the head and push the sides outward. Ask for a gentle stack with the front length confirmed in the mirror before cutting. The shape suits straight and lightly wavy hair.
Try this: dry the nape area first and lift it with a small round brush. A flat back lets the front pieces look heavier and wider by comparison.
Difficulty: Medium · Cost: $$ (salon)
18. Choppy Comb-Over Bob
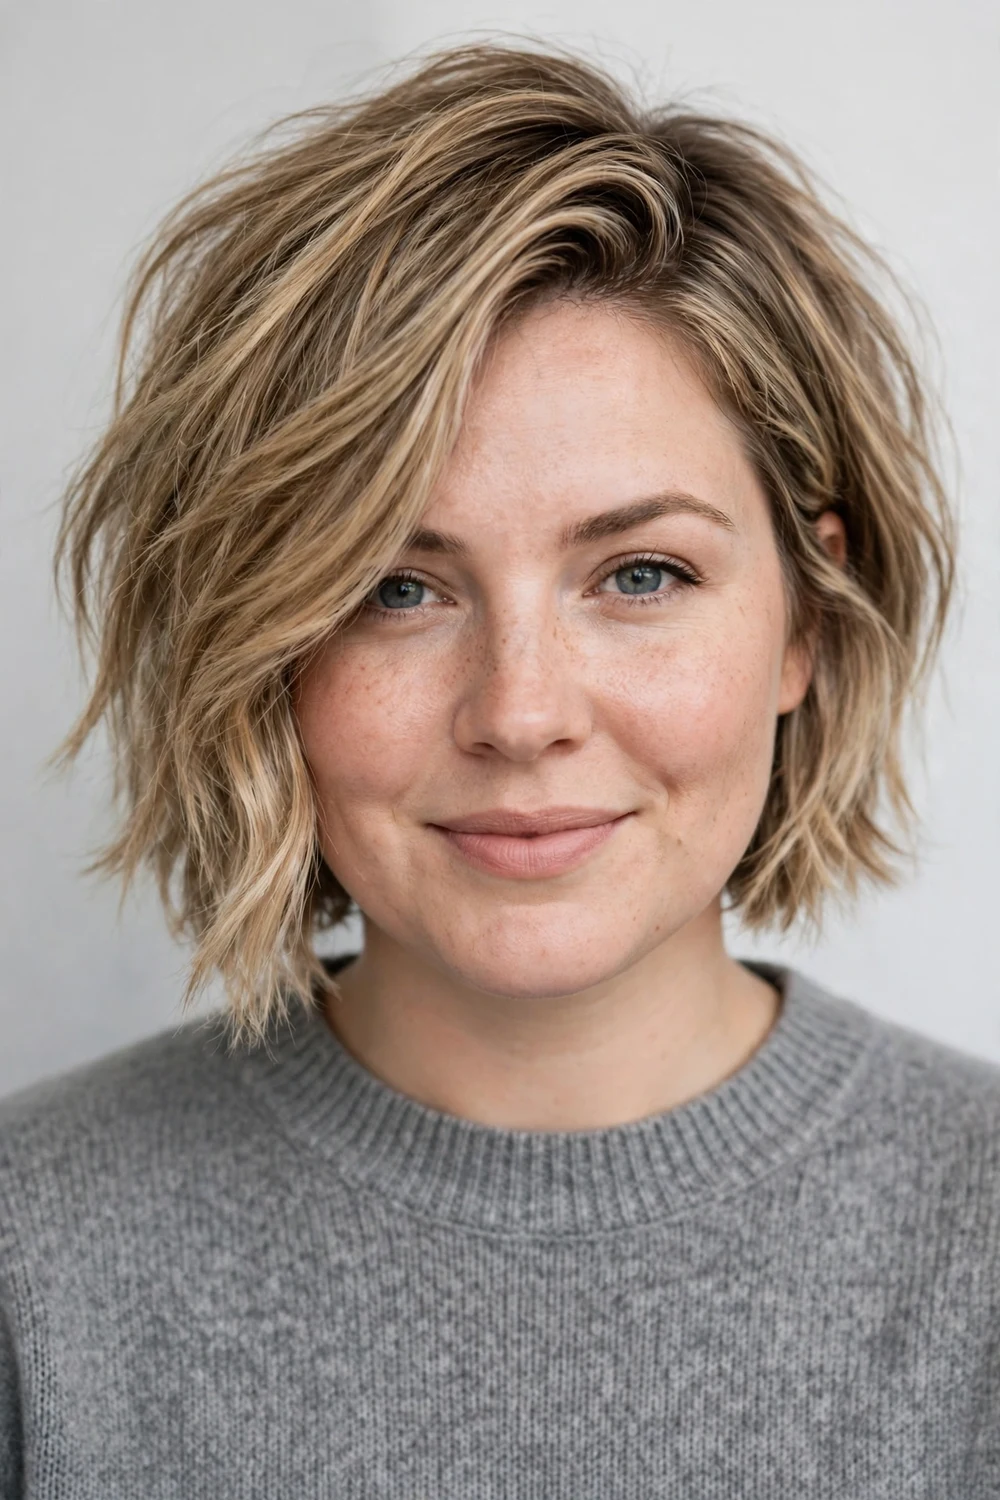
The comb-over bob is parted deep on one side and swept across, with choppy textured layers through the ends. The sweep gives the top a diagonal direction, the deep part adds root lift on the heavy side, and the choppy ends stop the hemline from forming a single straight band at jaw level.
Keep the length just below the chin so the swept side falls past the cheek. Texture paste worked into the ends, rather than the roots, keeps the top smooth and the bottom piecey. This bob suits fine to medium hair that needs movement, and it is forgiving on mornings when you have five minutes rather than twenty.
Try this: comb the hair over while it is still damp and let it air-dry in that direction twice a week. The part sets faster and holds with less spray.
Difficulty: Low to Medium · Cost: $$ (salon)
19. Diagonal Side-Swept Fringe Across the Forehead

A long side-swept fringe is the single most reliable fringe for a round face. It crosses the forehead on a long diagonal, covers part of one side of the face, and ends below the cheekbone. The diagonal shortens the visible width of the forehead and draws a slant across a face that has very few straight lines of its own.
The fringe can be added to long hair, a lob, a bob, or a long pixie, and it needs to be cut longer than you expect: it should reach the cheekbone at its shortest point and the jaw at its longest when dry. Blow-dry it across the forehead with a paddle brush, following the direction of the sweep, and finish with a light hold spray.
Try this: have the fringe cut while your hair is dry and in its natural fall. Wet cutting shrinks the length, and a fringe that dries too short loses the diagonal.
Difficulty: Low · Cost: $ (salon)
20. Feathered Wispy Bangs That Taper at the Sides

Wispy bangs work for a round face because they are see-through. A light, feathered fringe softens the forehead without drawing the heavy horizontal line that a thick blunt fringe creates, and the tapered sides melt into the lengths instead of ending in two hard corners at the temples.
Ask for the center of the fringe to sit around brow level with the sides left longer, reaching toward the cheekbones, and pair it with medium or long hair so the overall outline stays vertical. This fringe suits fine hair that cannot support a thick bang, and it grows out into a curtain shape, which keeps it useful between trims.
Try this: dry the fringe first, before the rest of your hair, brushing it down and then side to side. It takes under a minute and stops it splitting in the middle.
Difficulty: Low · Cost: $ (salon)
21. One-Side Tuck That Opens the Jaw Line
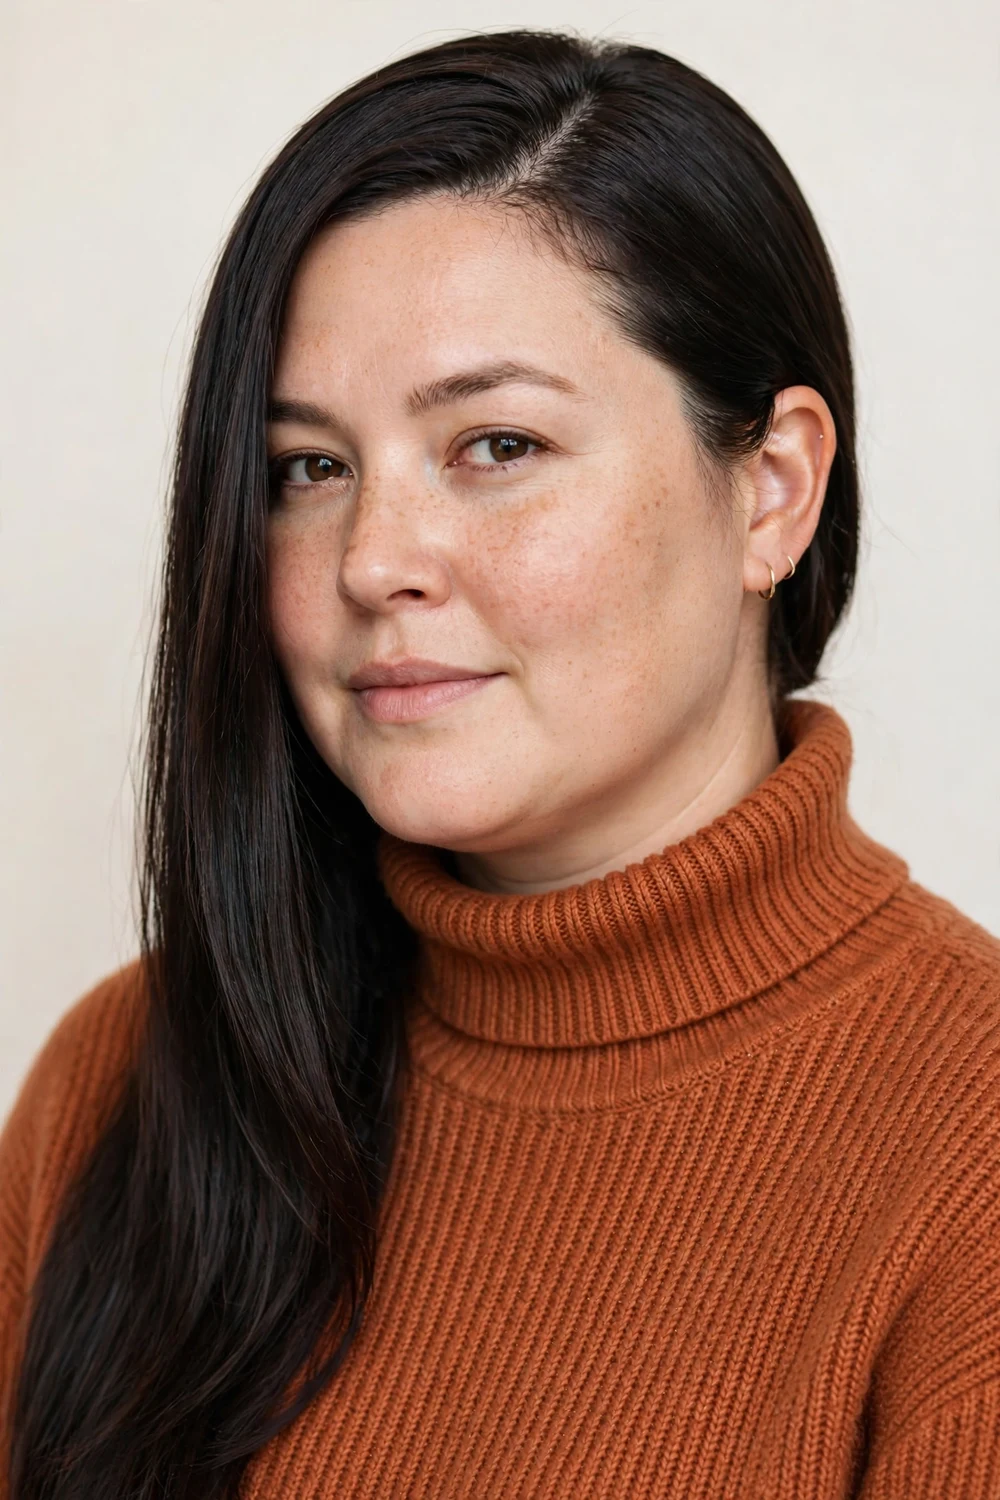
Tucking one side behind the ear is a two-minute styling move that changes the outline of long or medium hair. The tucked side opens up, showing the jaw line and the side of the neck, while the loose side falls forward past the chin. One open side and one covered side reads as an angle, and angles are what a round face borrows from hair.
Pair the tuck with a side part so the loose side has enough weight to stay forward. A small pin or a flat clip behind the ear keeps thick hair in place. The move works on straight, wavy, and curly hair, and it is a useful test run: if you like how the open side looks, an asymmetric cut formalizes the same idea.
Try this: tuck the side opposite your part. The part side carries more hair, so it falls forward with more weight and a cleaner line.
Difficulty: Low · Cost: $ (at home)
22. Curly Cut with Height on Top and Tapered Sides

Curls add width by nature, so a curly cut for a round face is planned around placement. The curls are encouraged upward at the crown for height, cut tapered and closer at the sides so no bulk sits at cheek level, and left longer below the chin so the bottom of the shape pulls down.
Ask for the cut to be done dry, curl by curl, so the stylist can see where each section actually lands. Layers at the sides should be kept long to weigh the curls down rather than spring them outward. This shape suits type 2 and type 3 curls; the heatless hairstyles for long hair guide covers overnight methods that set curls without pushing them wider.
Try this: apply styling cream with your head upright and scrunch only the top and ends. Scrunching the sides at cheek level is what builds the width you are avoiding.
Difficulty: Medium · Cost: $$ (salon)
23. Coily Tapered Cut with a Tall Silhouette

For coily hair, the tapered cut builds the slimming shape directly into the silhouette. The sides and back are cut short and neat, following the head, while the top is left longer so the coils stand tall. The finished outline is taller than it is wide, which is the proportion a round face benefits from most.
The taper needs regular upkeep, usually a tidy-up every two to three weeks, to stop the sides growing out into the cheek zone. Moisture matters for the top section: a leave-in conditioner keeps the coils defined so the height reads as shape rather than frizz. The cut suits women who want a short, low-manipulation style with a clear shape.
Try this: pick the top up gently with a hair pick at the roots only, lifting straight up. Picking the sides outward undoes the taper.
Difficulty: Low to Medium · Cost: $$ (salon)
24. High Ponytail with Two Face-Framing Strands

A high ponytail lifts the whole face outline. Placed at the crown rather than the back of the head, it pulls the hair up and away from the cheeks, lengthens the look of the neck, and adds height above the forehead. The two loose strands matter as much as the ponytail: left long enough to reach the jaw, they frame the face with vertical lines so the pulled-back style does not leave the cheeks fully exposed and round.
Brush the hair up at an angle, following the line of your cheekbones toward the crown, and secure it there. Smooth the sides close to the head rather than letting them puff. This works on medium and long hair of most textures, and a wrapped section of hair around the band finishes it without extra tools.
Try this: tilt your head back while you gather the ponytail. The underside stays smooth and the base sits higher.
Difficulty: Low · Cost: $ (at home)
25. Half-Up Top Knot with Crown Lift

The half-up top knot takes only the top section of hair and places a small knot high on the crown. That knot is a height marker: it extends the outline of the head upward while the loose hair below keeps the length running past the jaw and shoulders. Height above and length below is the full slimming formula in one style.
Take the top section from temple to temple, brush it straight up, and twist it into the knot at the highest point of the crown rather than the back. Leave the sides of the loose section smooth against the head. The style suits medium and long hair and is a practical option for second-day hair.
Try this: pull two thin pieces out at the front after the knot is set, and let them fall beside the jaw for a softer frame. Shorter flyaway pieces at the hairline can be smoothed down with a damp fingertip.
Difficulty: Low · Cost: $ (at home)
26. High Bun with Long Curtain Pieces

A high bun places all of the hair’s volume at the top of the head, which is the one place volume lengthens a round face. The sides are brushed smooth and close, the neck is fully open, and the bun itself adds several inches of height. The long curtain pieces left out in front keep the style from looking severe and give the jaw two framing lines.
Leave the curtain pieces long enough to pass the cheekbones; short tendrils that curl at cheek level add the width the bun removes. This is a strong option for events and photographs, and the quick updos for short hair guide covers the shorter-length version of the same high placement idea.
Try this: build the bun from a high ponytail first. The ponytail base holds the height better than pins alone, especially on thick hair.
Difficulty: Medium · Cost: $ (at home)
Slimming Strategies at a Glance
| Strategy | Where the length or volume sits | Works best on | Cost band |
|---|---|---|---|
| Length below the chin | Hemline and layers sit at the jaw, collarbone, or lower | Long layers, angled lobs, A-line bobs | $$ (salon) |
| Height at the crown | Volume sits on top of the head, sides stay close | Long pixies, tapered curls, blowouts | $$ (salon) |
| Deep side part | Top section sweeps diagonally across the forehead | Almost any length, straight to wavy hair | $ (at home) |
| Face-framing angles | Slanted pieces run from the jaw toward the collarbone | Medium and long cuts, curtain bangs | $$ (salon) |
| Sleek straight finish | Lengths lie flat against the sides in one vertical sheet | Long straight or straightened hair | $ (at home) |
| High updos | All volume sits at the crown, neck left open | High ponytails, top knots, high buns | $ (at home) |
Frequently Asked Questions
What hairstyle makes a round face look slimmer?
Cuts and styles that add length below the chin and height at the crown make a round face look slimmer. Long layers that start below the chin, angled lobs that end past the collarbone, and long pixies with a lifted top all follow that pattern. Deep side parts and long side-swept fringes add a diagonal line, and high ponytails or buns lift the outline. The shared rule is placement: volume belongs at the crown or below the jaw, away from the cheeks.
Is long or short hair better for a round face?
Both can work, because placement matters more than length. Long hair slims when layers start below the chin and the sides stay close. Short hair slims when the top is left long enough to lift, as in a long pixie, a bixie, or a stacked bob with long front pieces. The lengths that cause trouble sit in the middle of the face: cuts that end exactly at the chin or cheeks, at the widest point.
Should a round face avoid a center part?
A center part is not off limits, but it needs help. Worn with long curtain bangs or long front pieces that frame the jaw, a center part can still create vertical lines. Worn flat with no face-framing, it mirrors both sides of the face and can make the width more obvious. A deep side part is the more reliable choice for most round faces, since the diagonal sweep and root lift slim without any cutting.
What bangs slim a round face?
Long side-swept bangs, long curtain bangs that reach the jaw, and light wispy bangs that taper at the sides all slim a round face. Each one either draws a diagonal across the forehead or frames the face with vertical lines. Short, heavy, straight-across bangs do the opposite: they draw a horizontal line across the top of the face and make it look shorter and wider.
What hairstyles should a round face avoid?
The main styles to avoid are blunt bobs that end at chin level, short layers that flip out at the cheekbones, curls or volume concentrated at the sides of the face, and thick straight-across fringes. Each one adds a horizontal line or extra width at the widest point of the face. Most of them can be adjusted rather than abandoned: a chin-length bob grown two inches longer, or layers recut to start below the chin, usually fixes the problem.
Final Thoughts
Slimming a round face with hair comes down to placement, and placement is a choice you make at every cut and every styling session. Keep the length running below the chin, keep the volume at the crown or below the jaw, borrow diagonals from side parts and angled pieces, and keep the cheek zone smooth. Start with the free moves, a deeper side part, a one-side tuck, a higher ponytail, and live with them for a week. Then take the cut ideas to your stylist with the starting points marked: layers below the chin, fringe ending at the jaw, front pieces past the collarbone. If your next trim lands in autumn, the fall hair cuts for round faces list applies the same placement rules to seasonal shapes.

