

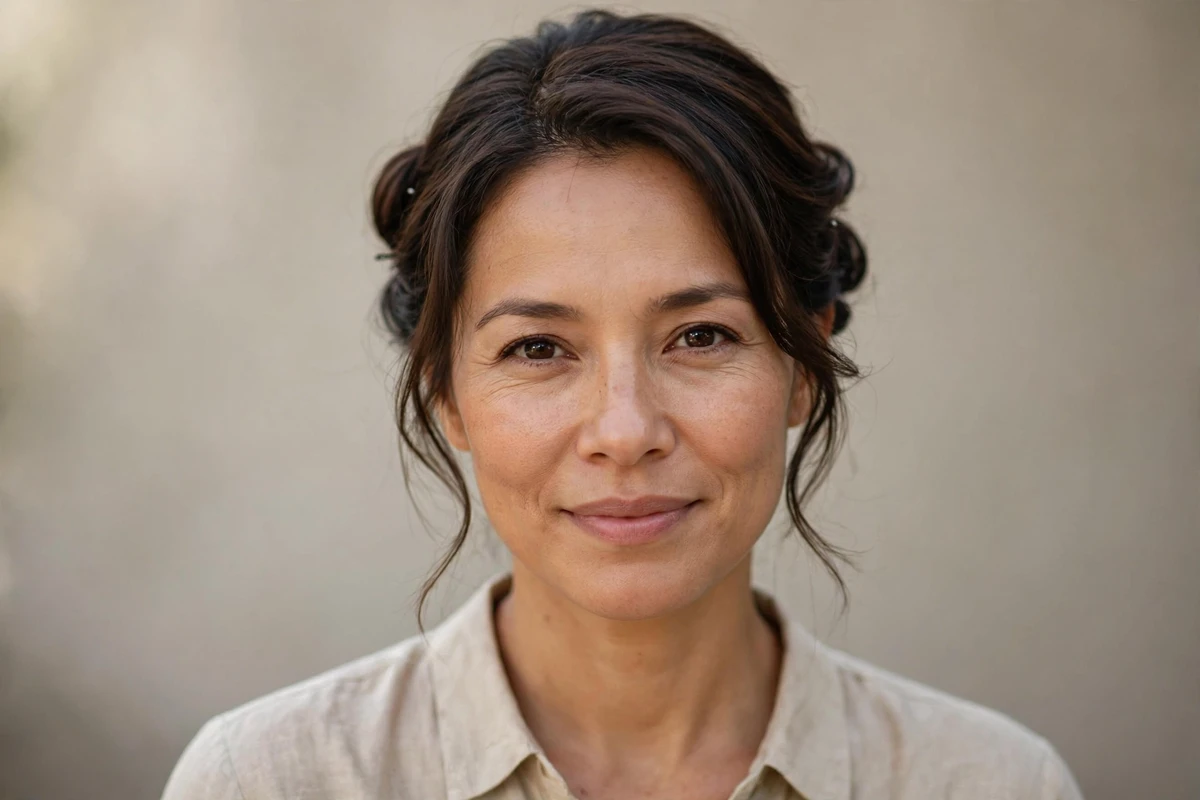
Short hair slips out of updos. That is the whole frustration in one sentence. You twist it, pin it, walk out the door, and by the first coffee the ends are poking out like they were never invited. After years of styling short hair, I know the trick is working with the texture, not against it.
This list rounds up 29 quick updos for short hair for women, ordered from the fastest casual twists to polished formal styles. Every one takes about five minutes or less, and each comes with a real time estimate, pin count, and hold tips so the style survives from your busy morning into the evening.
Quick Takeaways
- Second-day hair holds an updo better than freshly washed hair, since natural texture gives pins something to grip.
- Use texturizing spray before styling and hairspray after, that two-step order is the hold formula.
- U-pins hold French twists and thick sections better than bobby pins do.
- Cross bobby pins in an X shape instead of sliding them in straight for a grip that lasts all day.
- Match the style to your length: pixies and grow-outs tuck, wrap, and accessorize, while bobs twist, knot, and roll.
1. Under-4-Minute Twisted Nape Updo
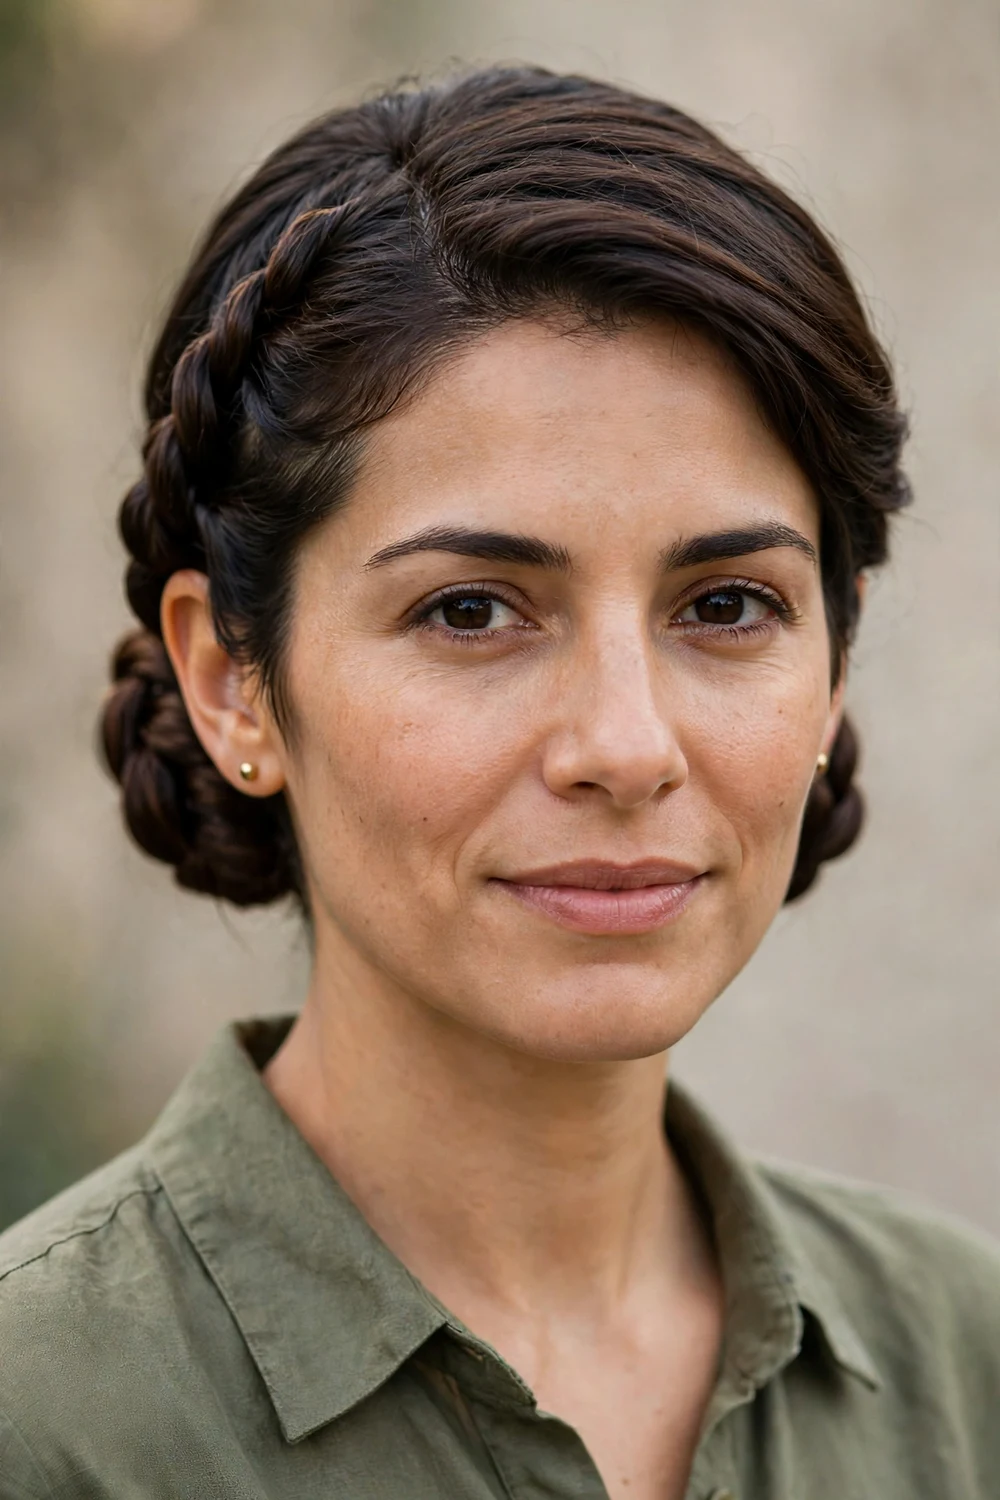
Make a side part, then take a one-inch section at each temple and rope-twist it back toward the nape. Pin each twist flat against your head as you go, crossing the bobby pins in an X so they lock. The twist tension does the holding work for you, and the whole thing takes about three to four minutes. You need four to six bobby pins and nothing else.
This is the fastest polished option on the list, and it works on hair that is too short for a ponytail. It lasts a full workday because flat-pinned twists cannot unravel the way wrapped buns do. Mist texturizing spray through the roots first if your hair is freshly washed and slippery.
Try this: twist each section tight at the start and let it relax as it reaches the nape, so the style stays smooth around your face.
Difficulty: Low · Cost: $ (products)
2. Effortless Messy Bun

Gather your hair into a loose low ponytail and skip the elastic wrap, instead twist it once and fold it into an irregular loop. Hold the loop with two crossed duck-bill clips for about ninety seconds so the shape sets, then replace the clips with bobby pins and pull out a few face-framing pieces. Total time is about five minutes, and it works on hair as short as three inches.
The two-clip set is what makes this version survive the day. Folding instead of wrapping keeps the loop chunky on short lengths, and the loose finish hides pins that poke out. Use medium-hold hairspray at the end, since strong-hold spray can freeze the messy texture into something stiff.
Try this: leave the clips in while you do your makeup, then pin and spray last for a bun that holds without looking overworked.
Difficulty: Low · Cost: $ (products)
3. Sleek Low Bun

Straighten your hair first, then smooth it into a tight low ponytail at the nape and twist the tail into a small bun. Pin the ends underneath and finish with a strong-hold hairspray plus a drop of shine serum smoothed over the surface. The whole process takes about five minutes if your hair is already dry, and you need an elastic, three to four pins, and spray.
This is the office-to-interview classic because it looks deliberate and tidy on camera. It suits straight to straightened hair best, and the slick finish keeps short layers from springing out. Tuck a tissue under the bun for ten seconds after pinning to press flyaways flat before you spray.
Try this: brush a tiny amount of gel along the hairline before smoothing the ponytail for a clean finish that resists frizz.
Difficulty: Low · Cost: $ (products)
4. Textured Twisted Chignon

Curl your hair loosely first, then gather it into a low ponytail at the nape and twist the tail into a chignon, pinning as you wrap. Pull a few temple pieces loose and let them fall around your face, then pin the ends of the twist underneath the bun. The pre-curling takes about ten minutes total, but the chignon itself takes three, and you need an elastic plus four to six pins.
The texture makes short hair look fuller, since the curls fill in the gaps a straight twist would leave. This one carries you from the office to dinner without a restyle, and it hides a day-old blowout better than any slick style. Use spin pins instead of an elastic at the base if your hair is thick, since they hold more with less tension.
Try this: curl only the outer layers and the front pieces to save time, since the inner hair gets covered anyway.
Difficulty: Medium · Cost: $ (salon)
5. High Mini Bun (Ballerina-Style)

Pull your hair into a smooth high ponytail, twist the tail tightly, and coil it into a compact bun at the crown. Pin around the base in a circle, then smooth the crown with a boar-bristle brush and a light mist of hairspray. On bob-length hair it takes about four minutes, and you need one elastic and four to five bobby pins.
The high placement lifts your face and shows off your neckline, which makes it a favorite for warm days and workouts. Keep the bun small and tight on short hair, since a big loose coil will collapse by midday. A gel-smoothed crown keeps short layers from popping up around the base.
Try this: flip your head upside down while smoothing the ponytail, so the crown lies flat with no bumps before you twist.
Difficulty: Low · Cost: $ (products)
6. French Twist

Gather your hair toward one side at the nape, then roll it upward and inward like a yoga mat, tucking the ends inside as you roll. Slide U-pins horizontally through the roll, six to eight of them, since U-pins hold a twist far better than bobby pins. Once you learn the roll, it takes about three minutes.
This is the fastest formal updo on short hair, and it looks far harder than it is. Backcomb the hair at the nape lightly first if your hair is fine, since the extra texture stops the roll from slipping. Finish with strong-hold spray aimed at the seam where the roll meets your head.
For more timeless pinned styles, these updo hairstyles older women round out the classics that work for weddings and formal events.
Try this: practice the roll once with dry hair before an event day, since the first attempt is the slow one.
Difficulty: Medium · Cost: $ (products)
7. Quick Clip French Twist

Do the same gather-and-roll as a French twist, but clamp the whole roll with one large claw clip instead of pinning it. The clip grabs short hair instantly, so this version takes under a minute and needs no pins at all. Position the clip vertically along the seam of the roll and let the ends peek out the top for a casual finish.
This is the errand-day version of the formal twist, and it reads as a style rather than a half-done updo. It works best on medium-density hair, since very thick hair may need two smaller clips. Keep a spare clip in your bag and you can redo it anywhere in seconds.
Try this: use a clip with teeth rather than a smooth one, since teeth grip short layers that would slide out otherwise.
Difficulty: Low · Cost: $ (products)
8. Braided Crown

Braid a three-strand section from one temple, arc it across your crown, and pin it underneath itself so the pins stay invisible. Repeat on the other side and let the two braids meet at the back, or braid both sides toward the back on very short hair. Each side takes about two minutes, and you need four bobby pins hidden under the braids.
The crown trick fakes two to three extra inches of length, which is why it flatters bobs and growing-out pixies. Stretching each braid outward, pancaking it, after pinning makes thin hair look twice as thick. This one suits weddings and garden parties, and it holds through wind better than most pinned styles.
For more braid-forward looks, these braided hairstyles for gray hair over 50 include crown styles that work on shorter lengths too.
Try this: braid on slightly damp hair with a little styling cream, since damp braids dry tighter and hold the arc longer.
Difficulty: Medium · Cost: $ (salon)
9. Fishtail Braid Low Bun

Gather your hair to one side and fishtail-braid it, crossing thin outer strands from each side to the other, then coil the braid into a low bun and pin the tail underneath. The fishtail looks intricate but it is only two strands, and the whole style takes about five minutes once you know the crossover. You need an elastic and four to five pins.
This reads as an evening style even though the technique is simple, so it is a strong pick for dates and dinners. Tie off the braid with a small clear elastic so the coil sits neatly, and pull the edges of the fishtail gently for width before you wrap. A light hairspray mist keeps the thin crossover strands from loosening.
Try this: braid slightly off-center at the nape, so the coil sits where short layers can actually reach it.
Difficulty: Medium · Cost: $ (salon)
10. Upside-Down Braid Bun

Flip your head upside down and French-braid from the nape up to the crown, then gather the remaining hair into a bun on top and pin it. The upside-down braid builds volume right at the crown where short hair usually falls flat, and the whole style takes about five minutes. You need an elastic and four pins.
Short layers stay tucked into the braid instead of springing out, which solves the main short-hair braiding problem. Keep the braid snug at the nape where hair is shortest, and let it loosen toward the crown for a softer top. This one holds well through active days because the braid anchors the bun from below.
Try this: braid with your head fully inverted, not just tilted, so the nape sections reach cleanly into the braid.
Difficulty: Medium · Cost: $ (products)
11. Double Side Braids Pinned Back

Make a side or center part, then French-braid down each side toward your ears, adding hair as you go. Pin each braid wherever it reaches instead of forcing it to the back, which makes this the bohemian fix for hair too short for a full crown. Each side takes about two minutes, and you need four bobby pins.
Asymmetrical pinning looks intentional, so pin one braid slightly higher than the other if they end at different spots. Stretch the braid edges for thickness and mist the finished style lightly. This works on straight and wavy hair, and it keeps bangs or front pieces off your face on hot days.
Try this: add a tiny bit of pomade to your fingertips while braiding, since it keeps short frizzy strands inside the braid.
Difficulty: Medium · Cost: $ (products)
12. Topsy-Tail Tuck Bun
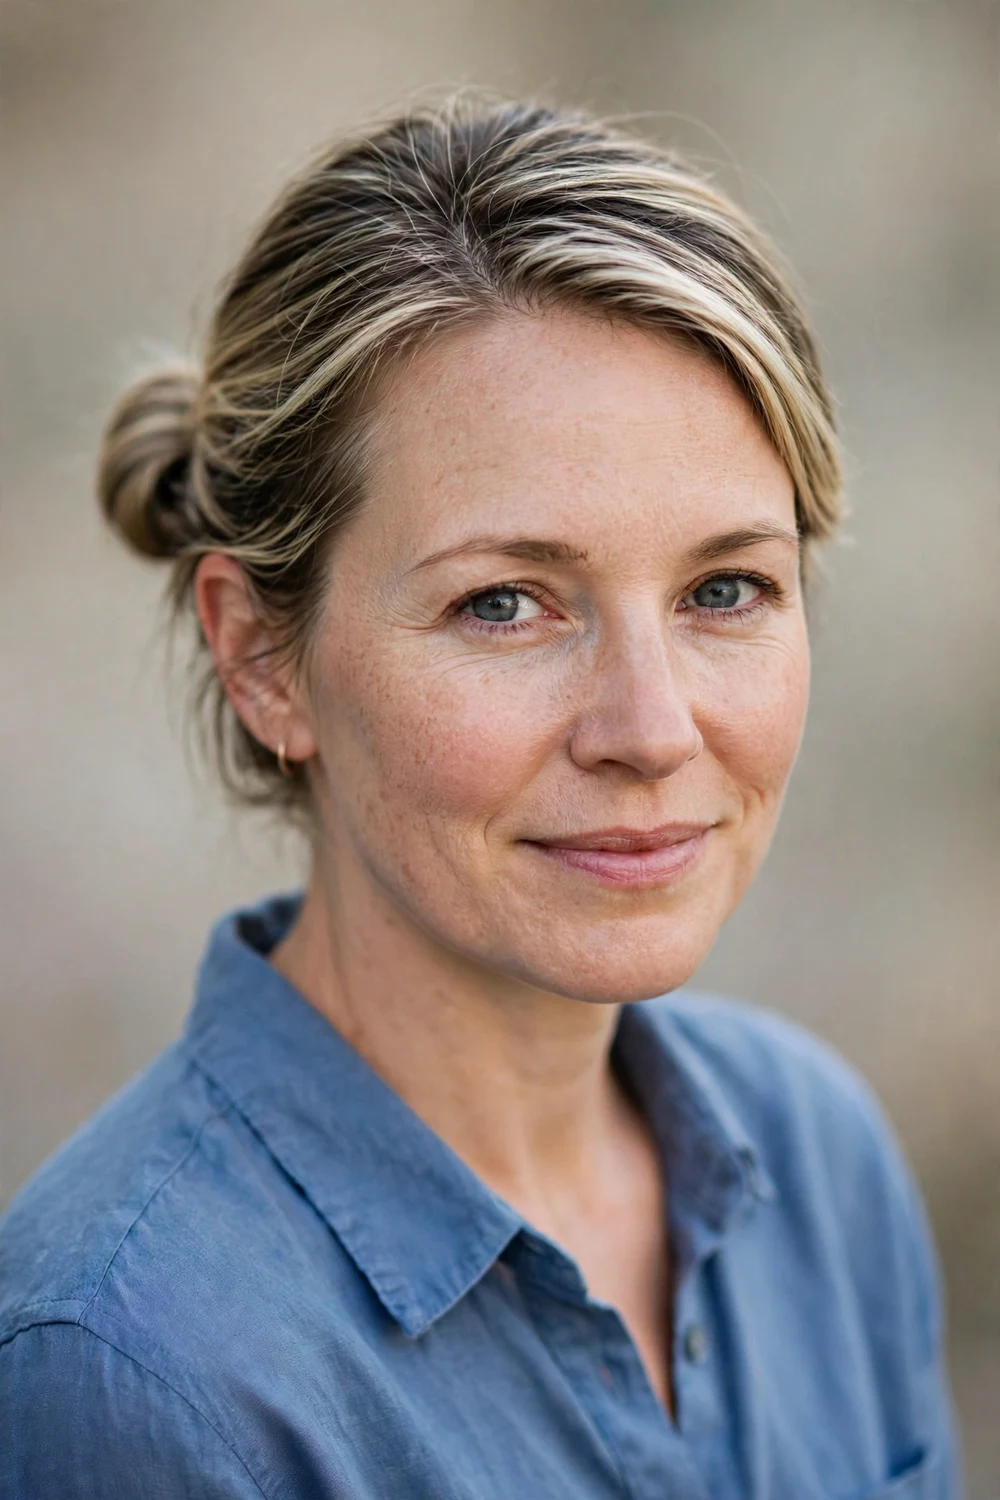
Make a low ponytail, then part the hair above the elastic with your fingers and flip the ponytail up and through the gap, creating an upside-down topsy-tail loop. Tuck the looped ends under and pin them at the nape, then fan the loop slightly for a rounded bun shape. This takes about sixty seconds, needs one elastic and three pins.
The tucked loop looks like a folded bun from the front, which is why people assume it took much longer. Keep the first ponytail a little loose, since a tight elastic makes the flip harder and the loop flatter. Two crossed pins at the base of the loop hold the whole shape against slipping.
Try this: use a thin snag-free elastic, since thick bands show through the loop on short hair.
Difficulty: Low · Cost: $ (products)
13. Layered Double-Wrap Bun
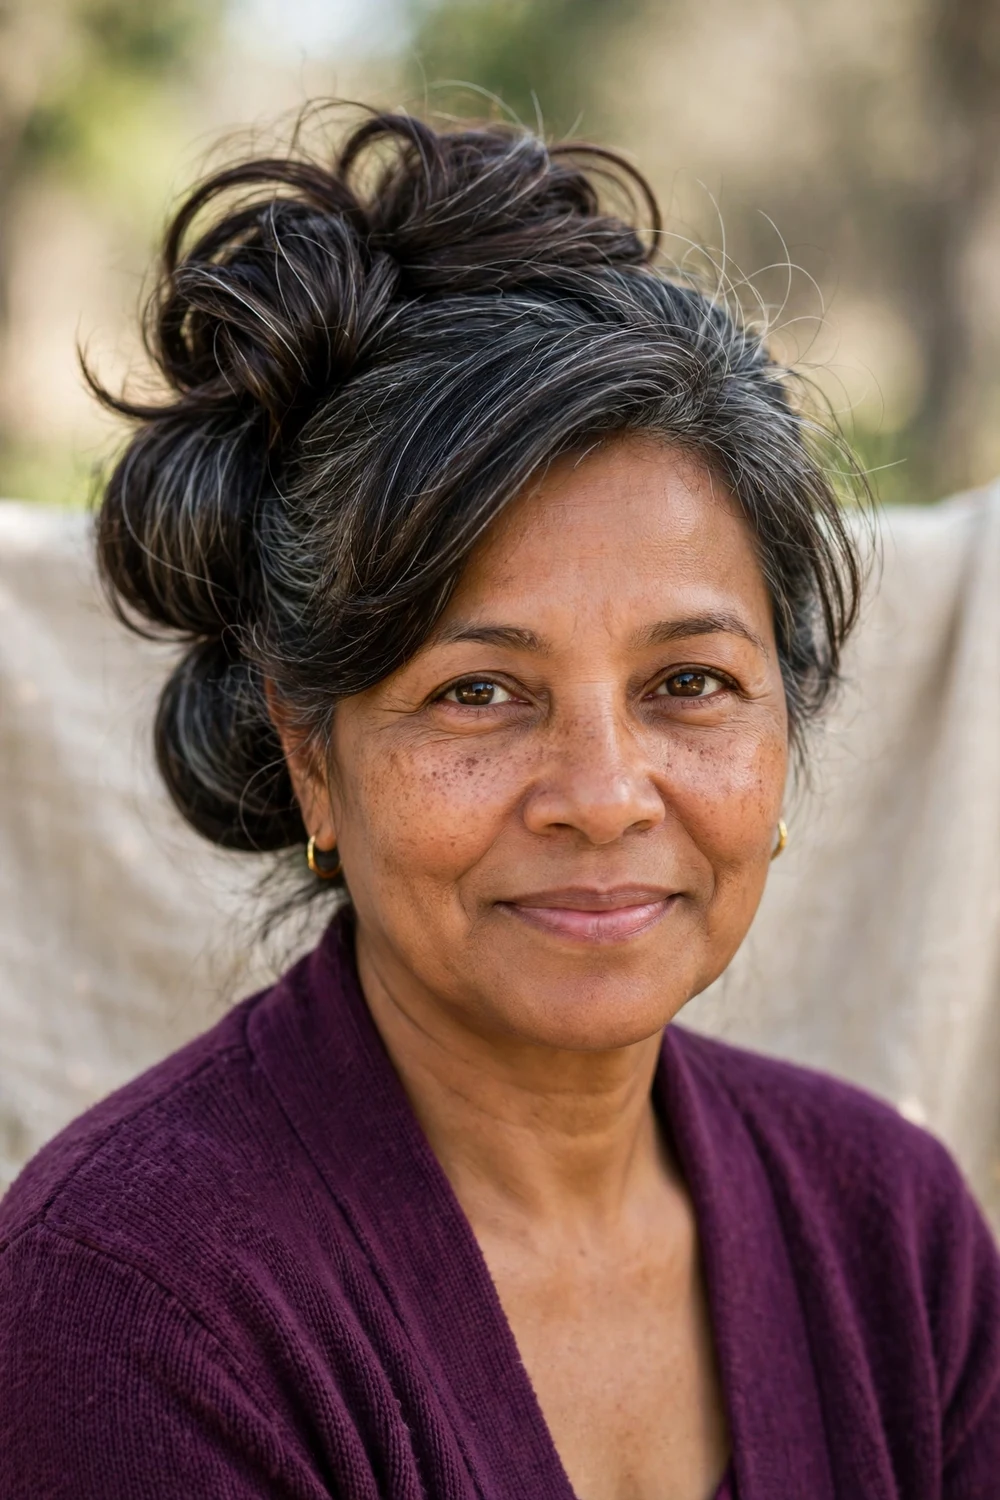
Tease the bottom section of your hair and pin it into a loose low bun first, then gather the top section, flip it upside down as an inverted ponytail, and wrap it around the bottom bun before pinning the ends underneath. The layered wrap looks salon-done in about three minutes, and you need an elastic plus six to eight pins.
The two-layer trick gives short hair the fullness of a much longer updo, since the top wrap covers the pinning underneath. Tease with a fine-tooth comb at the crown only, keeping the front smooth for a clean hairline. Mist between the layers, not just on top, so the inner structure holds too.
Try this: pin the bottom bun slightly off-center, so the top wrap has somewhere to grip and the finish looks artful.
Difficulty: Medium · Cost: $ (products)
14. Side-Swept Twisted Updo

Make a deep side part, twist the larger front section upward and back, and pin it near the crown. Gather the rest into a low bun at the back, then pull a few strands loose to cascade over one shoulder. The style takes about five minutes, needs four to six pins, and suits one-sided necklines and dresses.
The asymmetry does the visual work, so the bun itself can be simple. Twist the front section snugly at first, since looser twists relax into flatness by midday. A decorative pin at the twist anchor doubles as jewelry and hides any visible pin work.
Try this: pin the front twist while your head is tilted slightly toward that side, so the twist follows your natural hairline curve.
Difficulty: Medium · Cost: $ (salon)
15. Classic Bob Side Pin-Back

Add loose waves to your bob, then take one side section, twist it once behind your ear, and pin it flat. Two bobby pins crossed in an X hold the twist, and the waves on the open side keep the style from looking severe. This takes about three minutes total and needs just two pins.
It is the simplest refresh on this list, and it turns a day-three bob into something that looks styled. Gel the twisted section lightly before pinning so short layers stay put, and leave the front strand in front of your ear for a softer line. For bolder days, use decorative pins and make the X pattern visible on purpose.
If a pin-friendly length appeals to you, these short french bobs show the cut shape that takes this kind of twist best.
Try this: twist the section tighter than you think you need, since waves relax and the twist loosens within the hour.
Difficulty: Low · Cost: $ (products)
16. Pinned-Back Waves

Curl your hair in one-inch sections and let the curls cool before touching them, then pin the front sections back with decorative clips on each side. Let the back curls fall freely over the pinned sections, and mist the whole style with flexible-hold spray. Curling takes about ten minutes, the pinning takes one, and you need two statement clips.
Cooling the curls before pinning is what keeps them springy all evening, so do not skip that step. This is the five-minute party look that works for dinners and photos, and the clips add shine near your face where it counts. Pin the sections slightly above the ears so the clips stay visible under the top curls.
Try this: pin the clips in an upward angle, which lifts the front and keeps the curls from sliding forward.
Difficulty: Low · Cost: $ (products)
17. Glamorous Vintage Rolls

Section your hair into two or three pieces, roll each one inward into a smooth curl, and pin the rolls at the back of your head so they stack like vintage victory rolls. Set each roll with strong-hold spray before you release your fingers, and smooth the surface with a brush first so the rolls shine. Allow about ten minutes and six to eight pins.
This is the most formal style on the list, built for weddings and black-tie nights. Short hair actually rolls more easily than long hair here, since there is less length to fight. Roll on dry, smooth hair only, since damp sections will not hold the curl shape.
Try this: backcomb the inside of each section before rolling, so the roll has something to grip and keeps its height.
Difficulty: High · Cost: $$ (salon)
18. Retro Pin-Up Curls

Curl the front sections of your hair into defined ringlets, then gather the back into a low bun and pin it. Add a headband pushed back from the hairline for the full pin-up feel, and let the curled front pieces fall in front of your ears. The whole style takes about eight minutes and needs an elastic, three pins, and a headband.
This gives you brunch-date vintage without the full roller set, and it photographs well because the curls frame your face. Pin the bun low and slightly loose, since a tight bun reads modern and breaks the retro spell. The headband also hides any unevenness in the bun, which makes this forgiving for beginners.
Try this: curl the front pieces away from your face, so they fall in the classic pin-up direction.
Difficulty: Medium · Cost: $ (products)
19. Bohemian Headband Tuck Updo

Slide a stretchy headband over your hair crown-style, then take sections from temple to temple and wrap them up and over the band, tucking the ends underneath. Work front to back on both sides until all the hair is tucked, and leave a few loose strands around your face. This takes about four minutes and needs zero pins for most lengths.
The elastic band does all the holding, which makes this the best no-pin option on short hair. It suits festivals, travel days, and second-day hair that will not behave. Use a fabric-covered band rather than a slick one, since fabric grips hair instead of sliding off.
Try this: tuck in small sections rather than big ones, since small tucks stay put and big tucks slip out.
Difficulty: Low · Cost: $ (products)
20. Faux Bob

Curl your lob-length hair, pull it into a low loose ponytail, then roll the tail upward and pin it under itself so the ends disappear. The pinned-up length creates a clean, shorter blunt-bob illusion that looks like a fresh cut. This takes about five minutes and needs an elastic plus five to six pins hidden underneath.
It is the famous trick for trying short hair without scissors, and it works for events when you want a different silhouette. Keep the pinned roll sitting above the nape, since too low reads as an updo rather than a bob. Fluff the top after pinning so the faux bob has the rounded shape of a real cut.
Try this: pin in a crisscross pattern underneath the roll, since the pins carry all the weight and need to lock.
Difficulty: Medium · Cost: $ (products)
21. Half-Up Twist Knot
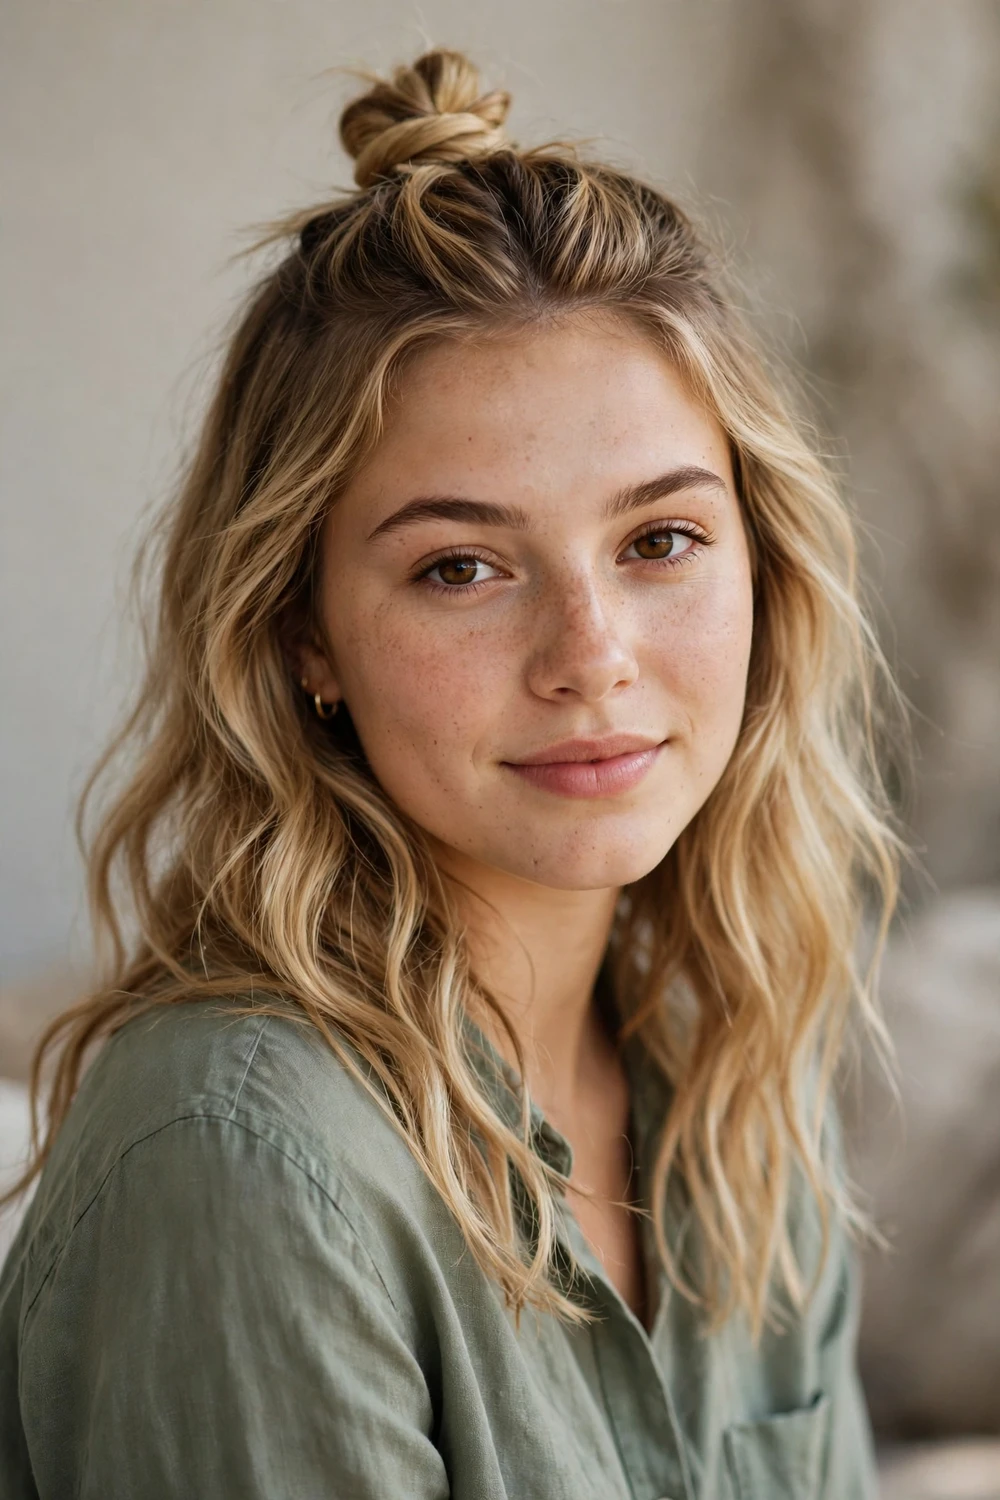
Gather the top section of your hair from temple to temple, twist it once, and coil it into a small knot at the crown. Pin the knot and leave the bottom half down in waves. This takes about three minutes, needs three pins, and suits days when you want hair up but still want length showing.
The knot adds height at the crown, which flatters round faces, while the loose bottom keeps the style casual. Twist the section before coiling so the knot looks textured rather than like a stub. A light mist of spray on the knot keeps short layers from escaping, and the bottom half needs nothing.
Try this: tease the crown lightly before gathering, since the knot looks better sitting on a little lift.
Difficulty: Low · Cost: $ (products)
22. Twist-Around Side Braid

Pull your hair into a side ponytail, then split the hair above the first elastic and loop the ponytail through it to make a topsy-tail. Add another elastic a few inches down and repeat, working down the length until you have a twisted chain. This takes about four minutes and needs three to four small elastics.
The chain looks like complex braiding but it is only repeated loops, so it is forgiving on short layers. Gently pull each loop wider after finishing to add fullness, and pin the tail end up at the nape if you want it to read as a true updo. Clear elastics keep the hardware nearly invisible.
Try this: space the elastics evenly, since uneven spacing is what makes the chain look messy instead of neat.
Difficulty: Low · Cost: $ (products)
23. Mini Twist-Cluster Faux Updo

Separate your hair into tiny sections, twist each one into a mini bun, and pin it where it sits, scattering the clusters across your head. On pixie-length hair this takes about five minutes and needs eight to ten small bobby pins. The visible pins are part of the casual look, so do not stress about hiding them.
This is one of the few true updos for strands too short to gather, and it looks playful rather than like a failed ponytail. Work the clusters from the nape forward so you can see what you are doing in the mirror. A dab of pomade on each twist keeps fine hair from unraveling before you pin it.
Try this: use mini bobby pins rather than full-size ones, since they disappear into the small clusters better.
Difficulty: Medium · Cost: $ (products)
24. Double Mini Buns (Space Buns)

Part your hair down the middle, gather each side into a high mini ponytail, and twist each tail into a messy bun on either side of the crown. Pin each bun at its base and pull the loops slightly for fullness. This takes about four minutes, needs two elastics and four pins, and reads sporty and fun.
Space buns suit fine short hair especially well, since the two small buns make thin hair look fuller than one would. Keep the part clean with a comb for a neater finish, or zigzag it for a casual vibe. They hold through workouts and festivals because the weight is split across two anchors.
Try this: place the buns slightly behind the crown rather than right on top, so they photograph better and feel balanced.
Difficulty: Low · Cost: $ (products)
25. Bantu Knots Updo
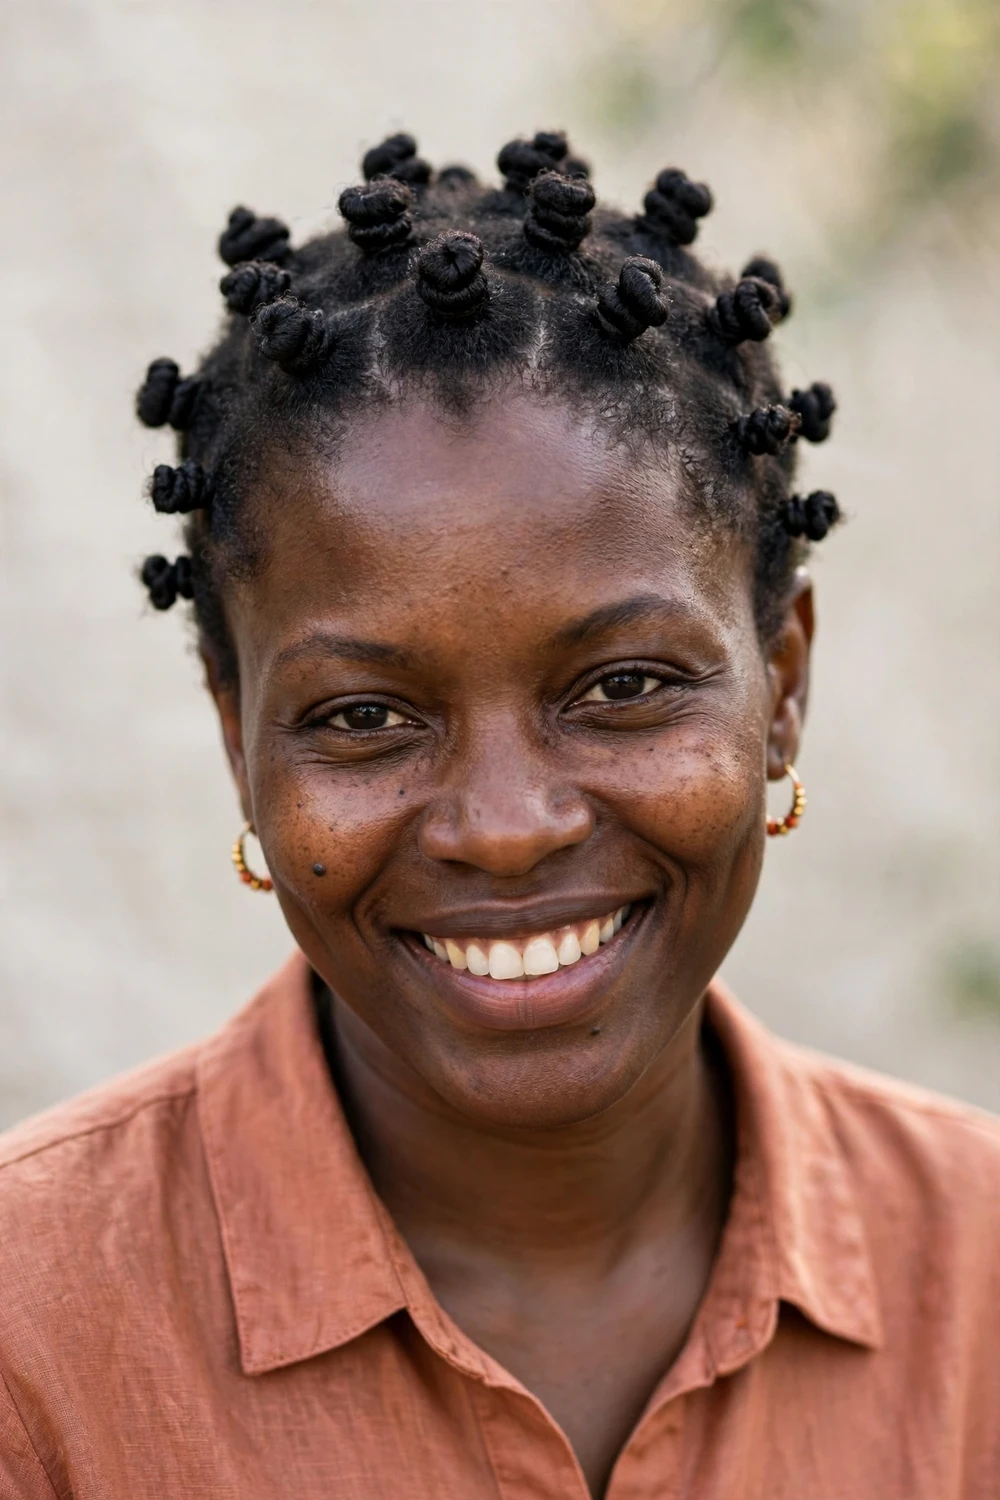
Part your hair into small square sections, twist each section from root to tip, and coil it into a knot against your scalp, pinning or tucking the end underneath. Repeat across the head in a neat grid or a scattered pattern. Six to ten knots take about ten minutes, and each knot needs one pin or a tucked end.
This bold style celebrates natural curls and coils and holds for days with proper moisture underneath. Twist on damp, conditioned hair so the knots set smoothly, and seal each section with a little oil or cream before coiling. The knots double as a protective style, since the ends stay tucked and covered.
For more styles that celebrate natural texture, these updo hairstyles for black women gather formal and casual options in one place.
Try this: keep the sections even, since uniform knots look polished and uneven ones look accidental.
Difficulty: High · Cost: $ (products)
26. Bow Bun

Pull your hair into a ponytail but stop the last elastic pull halfway, leaving a loop. Split the loop into two halves, flatten each into a bow shape, and wrap a thin strand from underneath around the center to hide the elastic. Pin the bow halves and the wrapped strand, and you are done in about four minutes.
This playful style suits parties and dates, and it works on bob-length hair because the loop does not need much length. Keep the two loops even by pulling them gently apart before pinning, and hide all the pins under the center wrap. A touch of spray on the loops keeps them from collapsing.
Try this: use a strand from the underside of the ponytail for the center wrap, since it is the longest piece available.
Difficulty: Medium · Cost: $ (products)
27. Accessorized Pixie Pin-Up

When strands are too short to twist, the accessory becomes the updo. Clip a hair chain on both sides of your part and let it drape across, or place sparkly clips at the temples where a twist would sit. Tuck the front pieces behind your ears and let the hardware do the styling. This takes two minutes and needs whatever accessories you choose.
It reads as intentional evening hair even though you barely styled it, which makes it the pixie answer to the formal updo problem. Choose chains and clips that match your jewelry so the look feels coordinated. A little pomade through the top pieces gives the hair enough polish to sit next to sparkle.
Try this: anchor each accessory at two points, since single-point clips rotate and slide on short hair.
Difficulty: Low · Cost: $ (products)
28. Silk Scarf-Wrapped Updo

Fold a silk scarf into a wide band, wrap it around your head at the nape and ears like a headband, and tie it at your part or at the nape with the ends in a bow. Tuck your hair up and into the band from underneath, working around the back until the ends disappear. This takes about five minutes and needs one scarf plus two or three hidden pins.
The scarf hides every pin and adds color in one step, so it rescues a style that is not quite working. It suits travel days and bad-hair mornings, and silk grips hair better than cotton while causing less frizz. Tie the knot at the top of your head for a retro feel, or at the nape for something quieter.
Try this: tuck the hair in before tying the final knot, since the tension of the knot locks the tucks in place.
Difficulty: Low · Cost: $ (products)
29. Textured Crown Twist with Statement Pins

Twist the top section of your hair loosely back from your face and pin it into a soft crown twist, leaving the texture piecey rather than smooth. Then weave three to five pearl or crystal pins through the twist along the part line. The twist takes three minutes, the pinning one more, and you need four regular pins plus the statement set.
The statement pins turn a three-minute morning twist into evening hair, which makes this the best day-to-night trick on the list. Keep the twist loose and low for daytime, then add the pins before you head out. The pins also act as anchors, so the twist holds longer than it would on its own.
Try this: cluster the pins on one side rather than spacing them evenly, since asymmetry looks more modern.
Difficulty: Low · Cost: $ (products)
At a Glance: 29 Quick Updos Compared
| Style | Time | Best for | Difficulty |
|---|---|---|---|
| Under-4-Minute Twisted Nape Updo | 3-4 min | Rushed work mornings | Low |
| Effortless Messy Bun | 5 min | Casual days, 3-inch hair | Low |
| Sleek Low Bun | 5 min | Interviews and the office | Low |
| Textured Twisted Chignon | 10 min with curls | Work to dinner, no restyle | Medium |
| High Mini Bun (Ballerina-Style) | 4 min | Warm days and workouts | Low |
| French Twist | 3 min | Formal events | Medium |
| Quick Clip French Twist | Under 1 min | Errands and quick exits | Low |
| Braided Crown | 4 min | Weddings and garden parties | Medium |
| Fishtail Braid Low Bun | 5 min | Dates and dinners | Medium |
| Upside-Down Braid Bun | 5 min | Active days, volume seekers | Medium |
| Double Side Braids Pinned Back | 4 min | Hair too short for a crown | Medium |
| Topsy-Tail Tuck Bun | 1 min | Fastest true bun | Low |
| Layered Double-Wrap Bun | 3 min | Salon look on short hair | Medium |
| Side-Swept Twisted Updo | 5 min | One-shoulder necklines | Medium |
| Classic Bob Side Pin-Back | 3 min | Day-three bob refresh | Low |
| Pinned-Back Waves | 10 min with curls | Parties and photos | Low |
| Glamorous Vintage Rolls | 10 min | Black-tie and weddings | High |
| Retro Pin-Up Curls | 8 min | Brunch dates, vintage looks | Medium |
| Bohemian Headband Tuck Updo | 4 min | No-pin days, festivals | Low |
| Faux Bob | 5 min | Testing short hair, events | Medium |
| Half-Up Twist Knot | 3 min | Keeping length showing | Low |
| Twist-Around Side Braid | 4 min | Elastic-only styling | Low |
| Mini Twist-Cluster Faux Updo | 5 min | Pixie lengths | Medium |
| Double Mini Buns (Space Buns) | 4 min | Fine hair, workouts | Low |
| Bantu Knots Updo | 10 min | Natural curls and coils | High |
| Bow Bun | 4 min | Parties and playful days | Medium |
| Accessorized Pixie Pin-Up | 2 min | Strands too short to pin | Low |
| Silk Scarf-Wrapped Updo | 5 min | Travel and bad-hair days | Low |
| Textured Crown Twist with Statement Pins | 4 min | Day to evening, no restyle | Low |
How to Choose the Right Quick Updo
Start with your hair texture, since it decides what will hold. Fine, slippery hair does best with twists, topsy-tail loops, and styles that rely on tension rather than bulk, while thick hair handles buns and rolls without extra teasing. Curly and coily hair shines in knots and twist clusters, where the texture becomes the decoration. Pick the technique that suits what your hair already does.
Then match the style to the occasion and your skill level. For the office, reach for the twisted nape updo, sleek low bun, or quick clip French twist, since they look polished and take almost no practice. Evenings call for the French twist, pinned-back waves, or the statement-pin crown twist. Try a new style on a low-stakes morning before you need it for an event, since the first attempt is always the slowest.
Finally, consider your face shape and your length. Height on top flatters round faces, side-swept styles soften square jawlines, and tucked styles keep pixie grow-outs looking deliberate. If your hair is shorter than chin length, lean toward tucks, wraps, and accessories rather than buns that need length you do not have.
Prep and Hold Tips for Short Hair Updos
Texturize before, spray after. Mist texturizing spray or dry shampoo through your roots before you start styling, since grip products need to be inside the style, not on top of it. Finish with hairspray only after pinning, so the hold locks the finished shape. Reversing this order is the most common reason short updos slide apart.
Work on second-day hair. Freshly washed hair is at its slipperiest, which is why updos fail fastest on wash day. If you must style on wash day, rough-dry with texturizing spray and a little pomade first to fake some grip. Your scalp’s natural oils are genuinely useful here, so do not wash them away before a formal style.
Pin as you go and cross the pins. Secure each section the moment you twist or tuck it, instead of building the whole style and pinning at the end. Slide bobby pins in crossed pairs, and choose pins that match your hair color so any visible ones disappear. For French twists, reach for U-pins, which hold thick rolled sections with far less slipping than bobby pins.
Work in small sections. Sections about two fingers wide twist tighter and pin more securely than big handfuls. Small sections are also easier to hide when you run out of length, which happens fast on short hair. Patience here pays off in a style that survives the whole day.
Do not use gel before a messy bun. Gel makes hair slick and heavy, which is the opposite of what a loose bun needs. Save gel for sleek styles like the low bun and the high mini bun, and use texturizing spray or dry shampoo for everything messy.
Do not use jumbo pins on fine hair. Oversized pins slide right out of fine strands and leave visible bumps. Match the pin to your hair: mini pins for pixies and fine hair, standard bobby pins for medium hair, and U-pins or spin pins for thick sections.
Do not style on soaking-clean, slippery hair. An updo built on freshly washed, conditioner-heavy hair will unravel by lunch. If your hair is too clean, add dry shampoo at the roots and wait a few minutes before you start pinning.
Give a French twist two minutes to set. A twist that gets sprayed and rushed out the door has not bonded to the pins yet. Wait after the final spray, then check the seam and add one more pin if anything feels loose.
Frequently Asked Questions
Can I do a quick updo on very short hair, like 2 to 3 inches?
Yes. At that length, skip styles that need a ponytail and go for tucking, twisting, and accessories instead. The twisted nape updo, mini twist clusters, the headband tuck, and the accessorized pixie pin-up all work on hair as short as two to three inches. Mini bobby pins and a little pomade for grip matter more than length here.
What is the fastest updo for short hair, taking 1 minute or less?
The quick clip French twist is the fastest: gather, roll, and clamp with one large claw clip in under a minute. The topsy-tail tuck bun is close behind at about sixty seconds. Both need no bobby pins, which is why they beat every pinned style on speed.
How do I make a short-hair updo hold all day without falling apart?
Three things decide hold: texture, pinning, and order of products. Style on second-day hair or add texturizing spray to clean hair first, pin each section as you go with crossed bobby pins, and apply hairspray only after pinning is done. Styles built on twist tension, like the nape updo and French twist, outlast wrapped buns because there is nothing to unravel.
What products do I actually need for a quick short-hair updo?
A small kit covers nearly everything on this list: texturizing spray or dry shampoo for grip, a medium-hold hairspray for finishing, bobby pins in your hair color, a few U-pins for twists, and one or two snag-free elastics. Add a strong-hold spray and pomade if you wear sleek styles often. You do not need a full salon shelf to get all-day hold.
What basic tools do I need for a quick short-hair updo?
Keep it simple: a paddle brush or comb for smoothing, a fine-tooth comb for teasing and parting, bobby pins, U-pins, small clear elastics, and a couple of duck-bill clips for setting buns. A headband, a large claw clip, and a silk scarf cover the no-pin styles. Most of these tools cost a few dollars and last for years.
Final Thoughts
Short hair does not need to limit your updo options, it just asks you to pick the right technique. Start with one fast style from the top of this list, learn how your hair holds with pins and texture, and keep a claw clip and a few U-pins in your bag. Once the basics feel easy, the formal styles stop feeling risky and start feeling like fun.

