


Naturally curly hair does best when the style starts from the curl pattern you already have. A cut or style that fights shrinkage, density, or the way your curls clump will take daily work to hold. A style that follows the pattern holds its shape with far less effort, and it grows out in a way you can plan for.
This list brings together 26 hairstyles for naturally curly hair across patterns 2C to 4C, from dry cuts and shaped bobs to twist-outs, flat twists, and protective twists. Every idea notes the curl patterns it suits, how the shape is built, and what upkeep it asks for at home. For day to day styling variations on the same curls, the curly hairstyles guide shows how one cut can be worn several ways.
Key Takeaways
- Match the style to your curl pattern first. Loose 2C waves, 3A to 3C curls, and 4A to 4C coils each need a different shape and a different amount of layering.
- Dry cutting and curl-by-curl cutting show the stylist your true length and shrinkage, so the finished shape matches how you wear your hair.
- Short shaped cuts, tapered crops, and bobs give natural curls a clear outline with low daily styling time.
- Twist-outs, flat twists, and passion or Senegalese twists protect the ends and stretch the roots without heat.
- Most curly shapes hold best with a trim every 8 to 12 weeks and a refresh routine built on water, leave-in conditioner, and a light gel or cream.
How to Pick a Style for Your Curl Pattern
Start with pattern and density. Type 2C waves sit close to the head and lose shape under heavy layers, so blunt ends and long, spaced layers keep them looking full. Type 3 curls form clear spirals and carry most shapes well, as long as layers remove weight from the right places. Type 4 coils shrink the most and show length slowly, so shaped cuts, stretched styles, and protective twists often give the clearest change in outline.
Then decide how much daily styling you will do. Wash day styles such as finger coils and twist-outs ask for time once, then hold for days. Salon shapes such as a stacked bob or a dry cut ask for almost no daily work, and the effort moves to trim appointments instead. If color is part of your plan, the fall color ideas for curly hair roundup covers placements that follow the curl pattern.
| Style family | Best curl patterns | Daily upkeep | Trim or refresh cycle |
|---|---|---|---|
| Shaped bobs and lobs | 2C to 3C | Low | Trim every 8 to 10 weeks |
| Long layered cuts, U-cut and V-cut | 3A to 3C, thick hair | Low to medium | Trim every 10 to 12 weeks |
| Short tapered cuts and pixies | 3C to 4C | Low | Shape-up every 4 to 6 weeks |
| Set styles, coils and twist-outs | 3B to 4C | Medium on wash day, low after | Restyle every 5 to 7 days |
| Protective twists | 3C to 4C | Low | Wear 4 to 8 weeks per install |
1. Finger Coils Set on Short Coils for 4A Hair
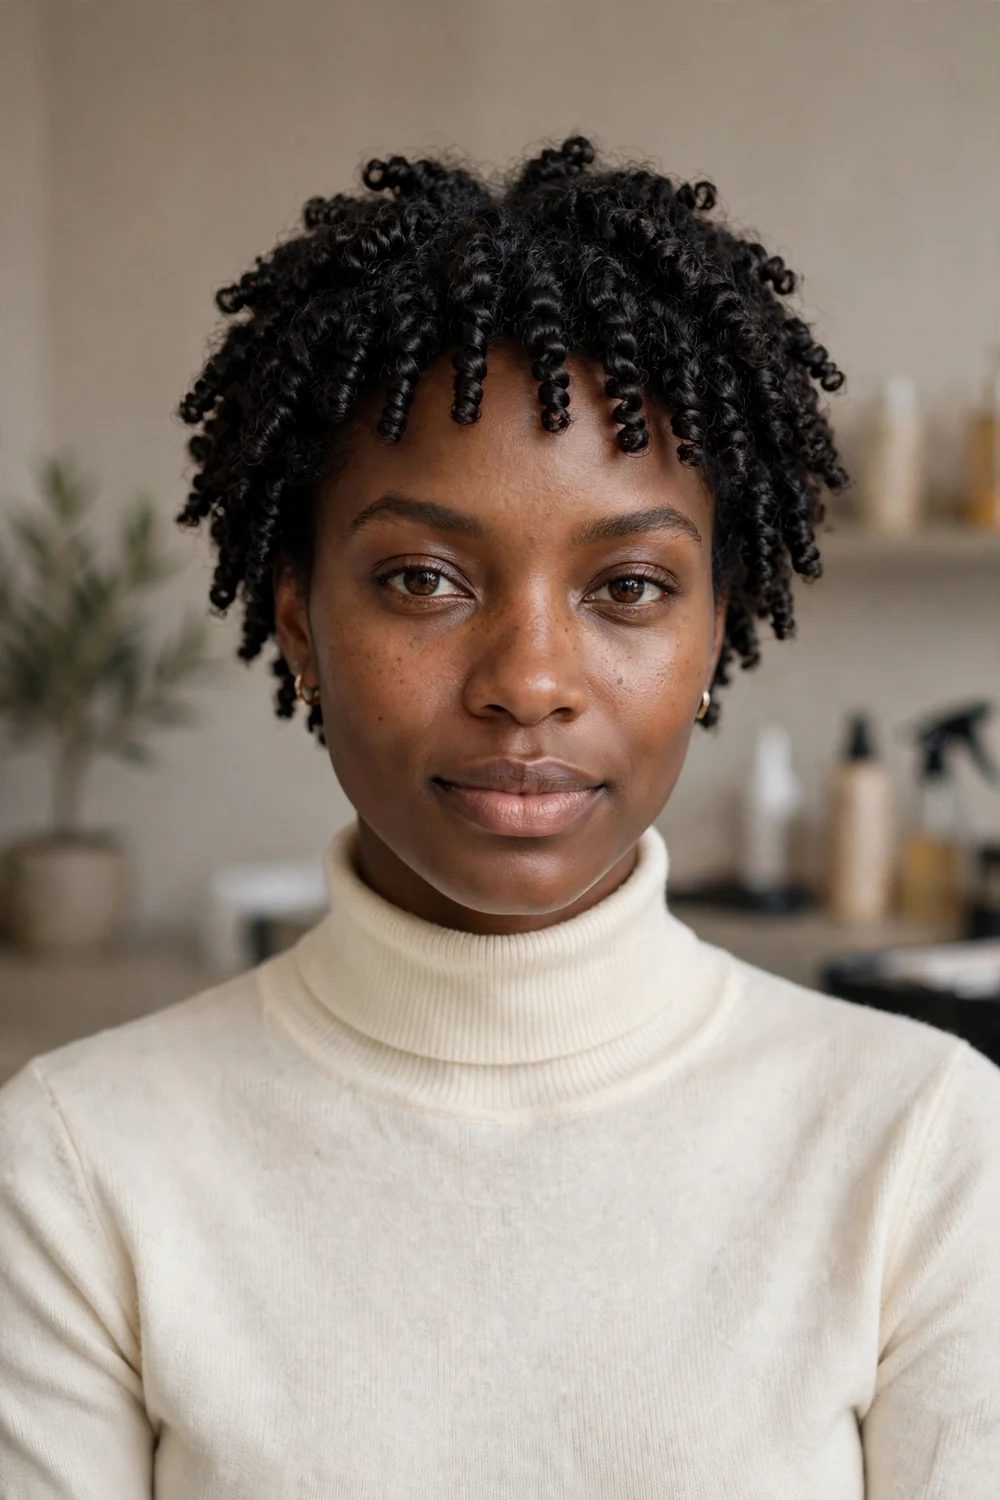
Finger coils are built one small section at a time. On damp hair with leave-in conditioner and a firm gel, each section is twirled around a finger until it forms a tight, smooth coil, then left to dry fully before it is touched. On 4A hair the coils sit close together and give short hair a neat, even outline with clear definition in every coil.
The set takes time on wash day, and the coils need to dry all the way through before you separate or fluff them. Once dry, the style holds for several days with a satin bonnet at night and a light oil on the fingertips when you refresh. Keep the sections small and even, since uneven sections show up as uneven coils.
Try this: coil in the direction your hair already curls. Forcing a coil against its natural turn makes it frizz and loosen faster.
Difficulty: Medium · Cost: $
2. Pineapple Updo with Loose Front Curls
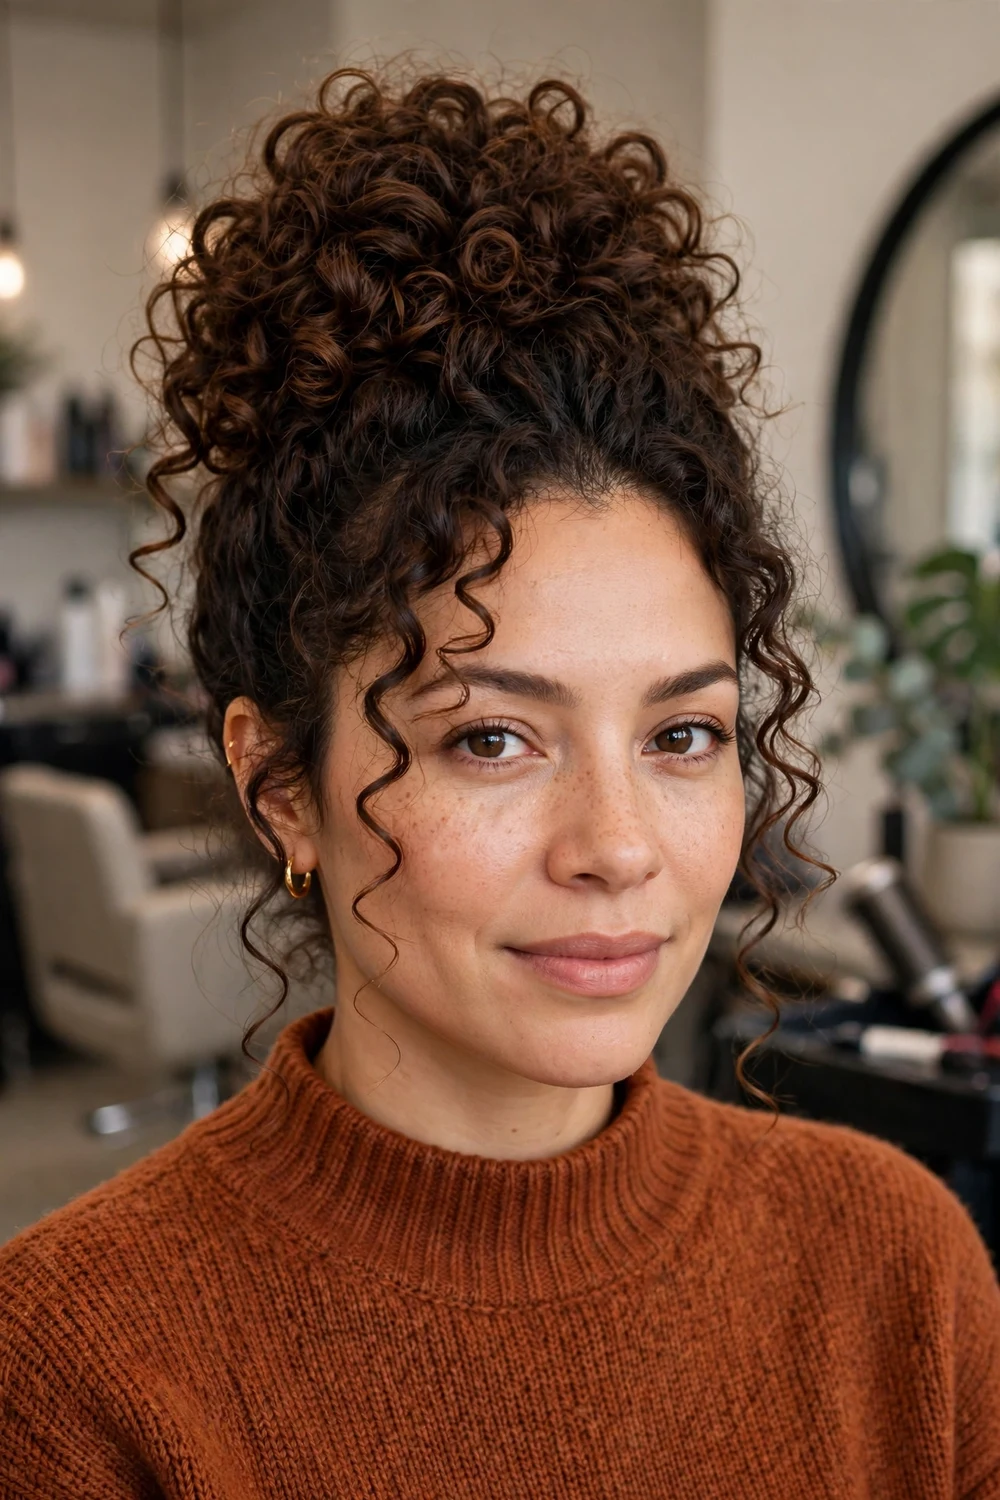
The pineapple gathers long or medium curls into one loose, high ponytail right at the top front of the head, so the curls spill forward and down the sides. Leaving two or three front curls out softens the hairline and keeps the style from looking pulled tight. It works on 3A to 4A patterns with enough length to reach the top of the head.
Many wearers use the pineapple to sleep in, because it keeps curls off the pillow and holds volume at the roots. Worn out of the house, it needs a soft satin scrunchie rather than a tight elastic, and one loose wrap rather than several, so the base leaves no dent in the curls.
Try this: bend forward and gather the curls with your hands only. Skipping the brush keeps the clumps intact and the front smooth.
Difficulty: Low · Cost: $
3. Claw Clip Twist-Up with Curly Tail

This updo twists the back of the hair upward in one motion and clamps it with a large claw clip, while the ends spill over the top as a short curly tail. The twist gives the back a clean line, and the loose ends keep the natural texture on show. It suits medium to long curls from 2C to 3C that are thick enough to fill the clip.
A claw clip holds curls without the tight pull of pins or elastics, so the style comes out in seconds at the end of the day with no kinks. Choose a clip with smooth, wide teeth and test the hold with a head shake before you leave, since heavy, dense curls may need a second smaller clip at the side.
Try this: twist the hair to one side rather than straight up the center. The off-center twist sits flatter and holds longer on thick curls.
Difficulty: Low · Cost: $
4. Two-Strand Twist-Out with Stretched Roots for 4C Hair
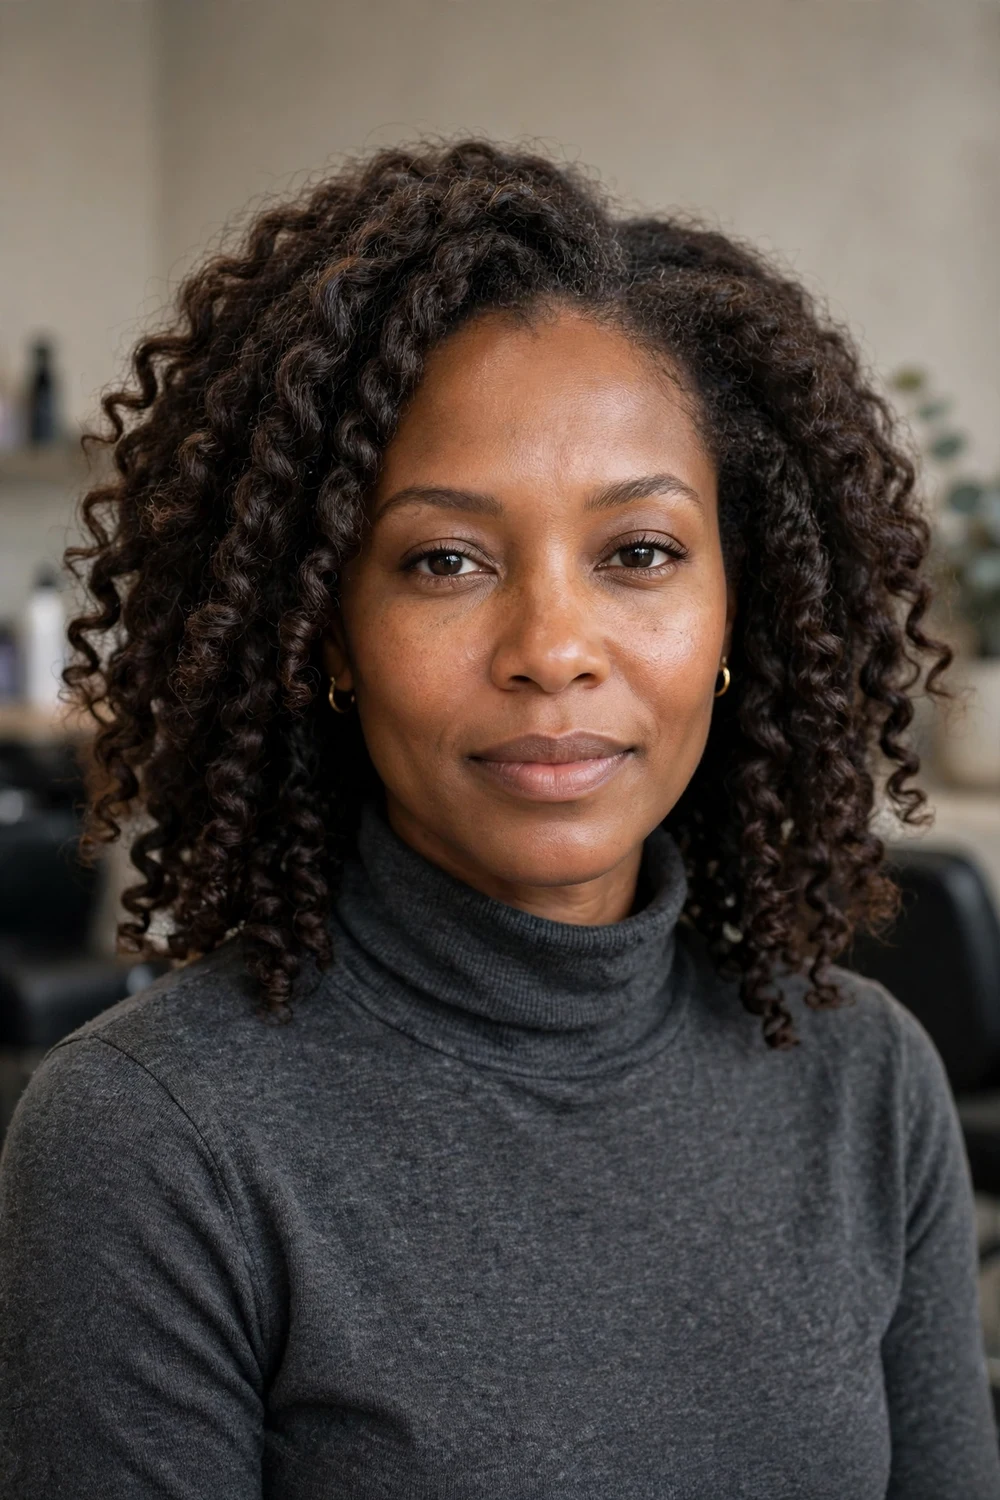
A twist-out starts with two-strand twists set on damp, conditioned hair and left to dry fully, often overnight. When the twists come out, the hair keeps the wave the twists set in, and gentle pulling at the roots during the set stretches them so 4C shrinkage shows less and the style reads longer.
The result is a soft, defined shape that lasts four to seven days with a bonnet at night and a pineapple or loose twists to sleep in. The twists must be fully dry before they are opened. Damp twists unravel into frizz, and the definition is lost for that wash cycle.
Try this: use fewer, larger twists for a looser, fuller result, and more, smaller twists when you want tighter definition that lasts longer.
Difficulty: Medium · Cost: $
5. Flat Twist Side Sweep with Loose Curly Ends
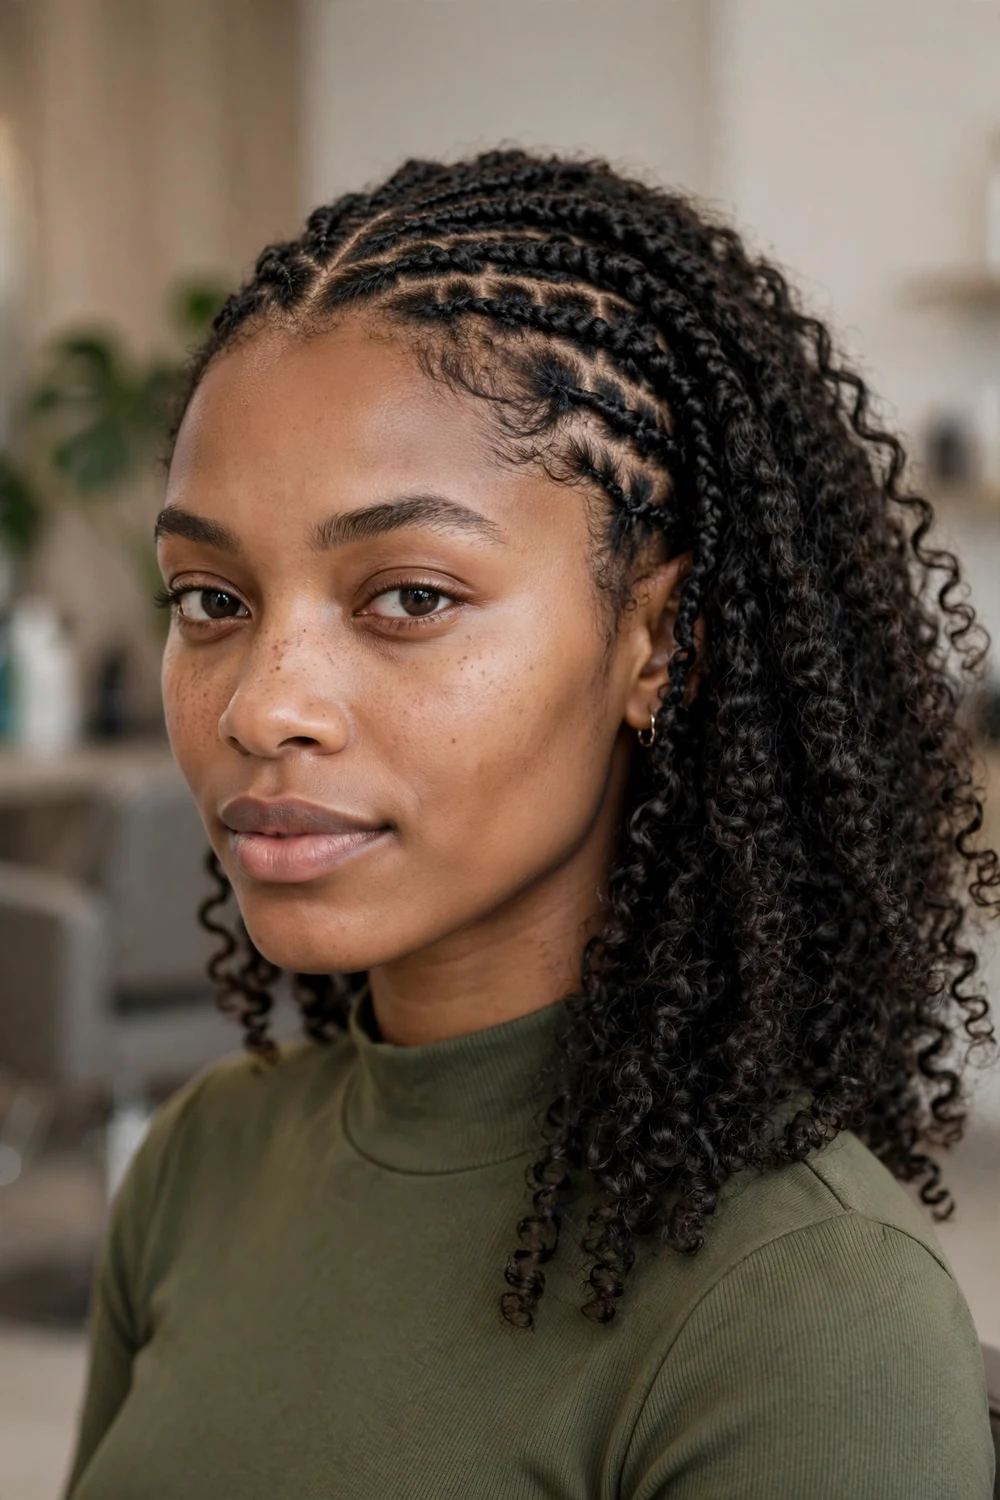
Flat twists roll two strands along the scalp, the way cornrows do, and pick up more hair as they travel. In this style, three to five flat twists run from one side of the head toward the other, and the remaining hair falls loose in its natural curl over one shoulder. The twisted side stays flat and neat while the loose side keeps its volume.
The twists protect the side hair from friction and tangling, and the style holds for a week or more on 3C to 4C hair. Keep the tension even and gentle at the edges, and moisturize the twists with a light spray every few days so the hair stays soft when they come out.
Try this: twist on stretched, detangled hair rather than soaking wet hair. The twists lie flatter and the loose ends dry with less shrinkage.
Difficulty: Medium · Cost: $
6. Passion Twists with Curly Ends at Shoulder Length

Passion twists use wavy extension hair twisted into the natural hair in two strands, which gives each twist a springy, curled finish rather than a smooth rope. At shoulder length the twists move like loose curls, sit light on the head, and frame the face without the weight of a longer install.
This is a protective style: your own hair stays tucked inside the twists, away from daily handling, heat, and weather. Most installs last four to six weeks with a clean scalp routine and a light mousse to calm frizz at the roots. Keep the base twists loose at the hairline to protect the edges.
Try this: ask for the twists in two sizes, medium through the back and slightly smaller at the front, so the hairline looks neat and the back keeps its fullness.
Difficulty: High · Cost: $$$
7. Stacked Curly Bob with Shorter Back Layers
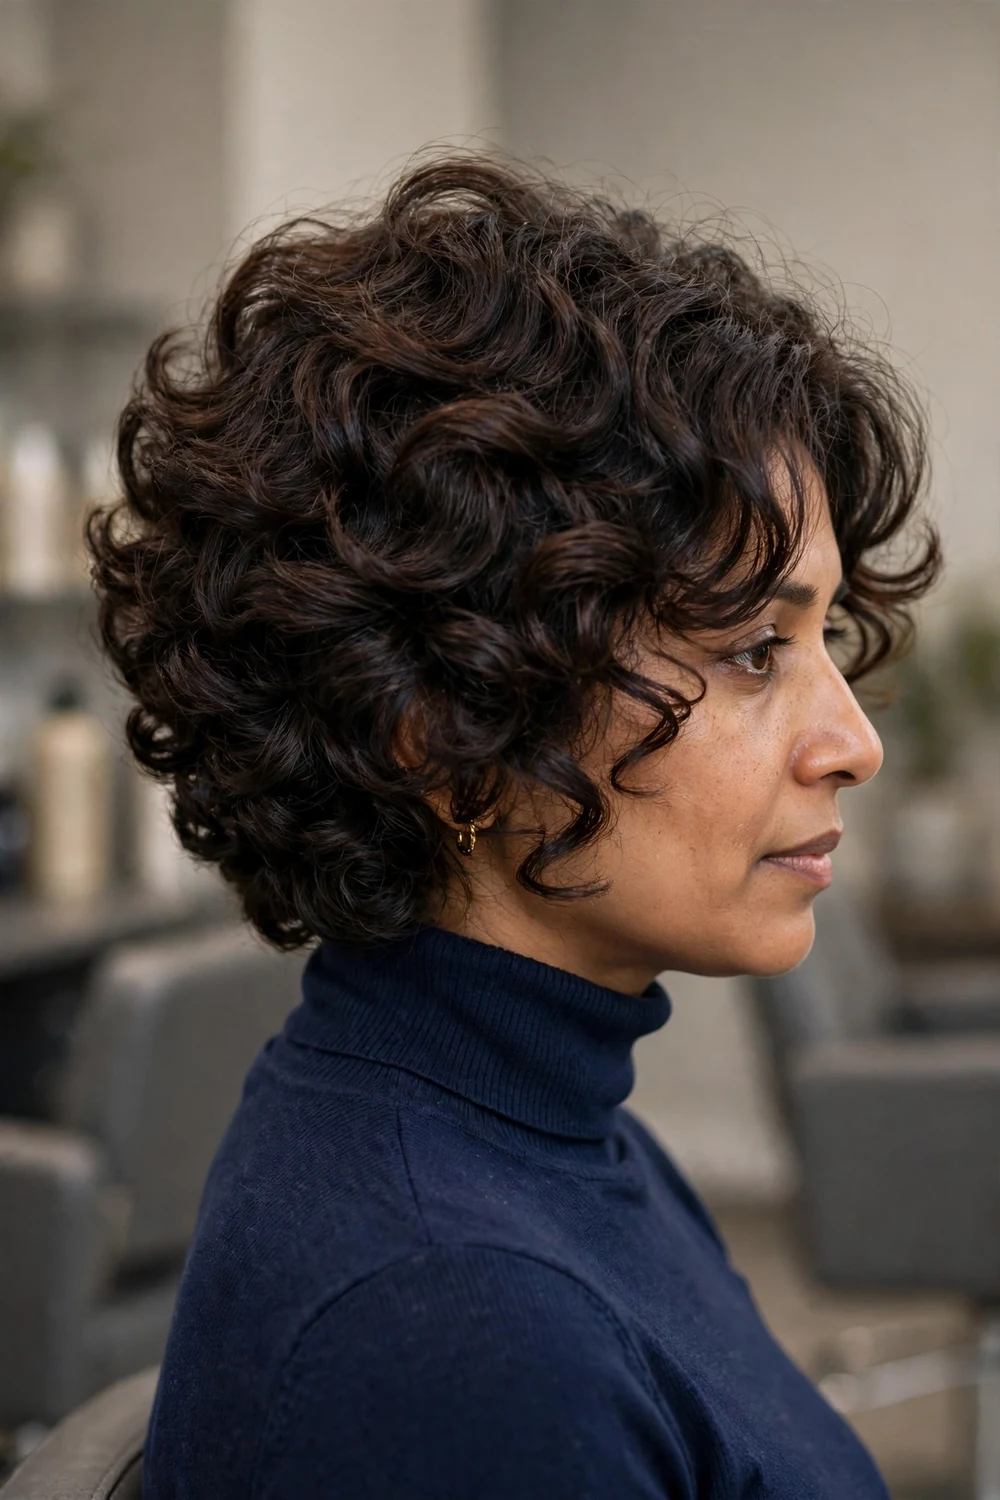
A stacked bob cuts the back shorter in graduated layers, so the curls build up in a rounded stack at the nape and lengthen toward the front. On curly hair the stack lifts the back of the shape and stops the bob from hanging in one heavy block. It suits 2C to 3B patterns and fine to medium density that needs help at the crown. The wider curly bob hairstyles roundup shows how this shape compares with other bob lengths.
The back layers need a trim every eight to ten weeks to keep the stack clean. At home, the cut asks for little: refresh with water and leave-in, scrunch, and let the shape do the work. Ask your stylist to cut the back on dry curls so the stack height matches your real shrinkage.
Try this: bring a photo of the back view you want. The stack is the part you cannot see in the mirror, and it is the part that defines this cut.
Difficulty: Medium · Cost: $$
8. Inverted Curly Bob with Longer Front Curls

The inverted bob angles the cut so the back sits high at the nape and the front pieces fall longer, often to the jaw or just past it. On curls, the angle gives a clear diagonal line that reads even through the texture, and the longer front curls frame the face while the back stays light and easy to wash.
This shape works on 2C to 3C hair and needs the angle checked as it grows, since curly growth softens the line within two to three months. Diffuse the front pieces forward so they dry at their longest point, and keep heavy products off the nape so the short back keeps its lift.
Try this: ask for the front length measured on dry, styled curls. Wet measuring stretches the curl and the front can dry shorter than you planned.
Difficulty: Medium · Cost: $$
9. Rounded Halo Bob for Dense 3C Curls
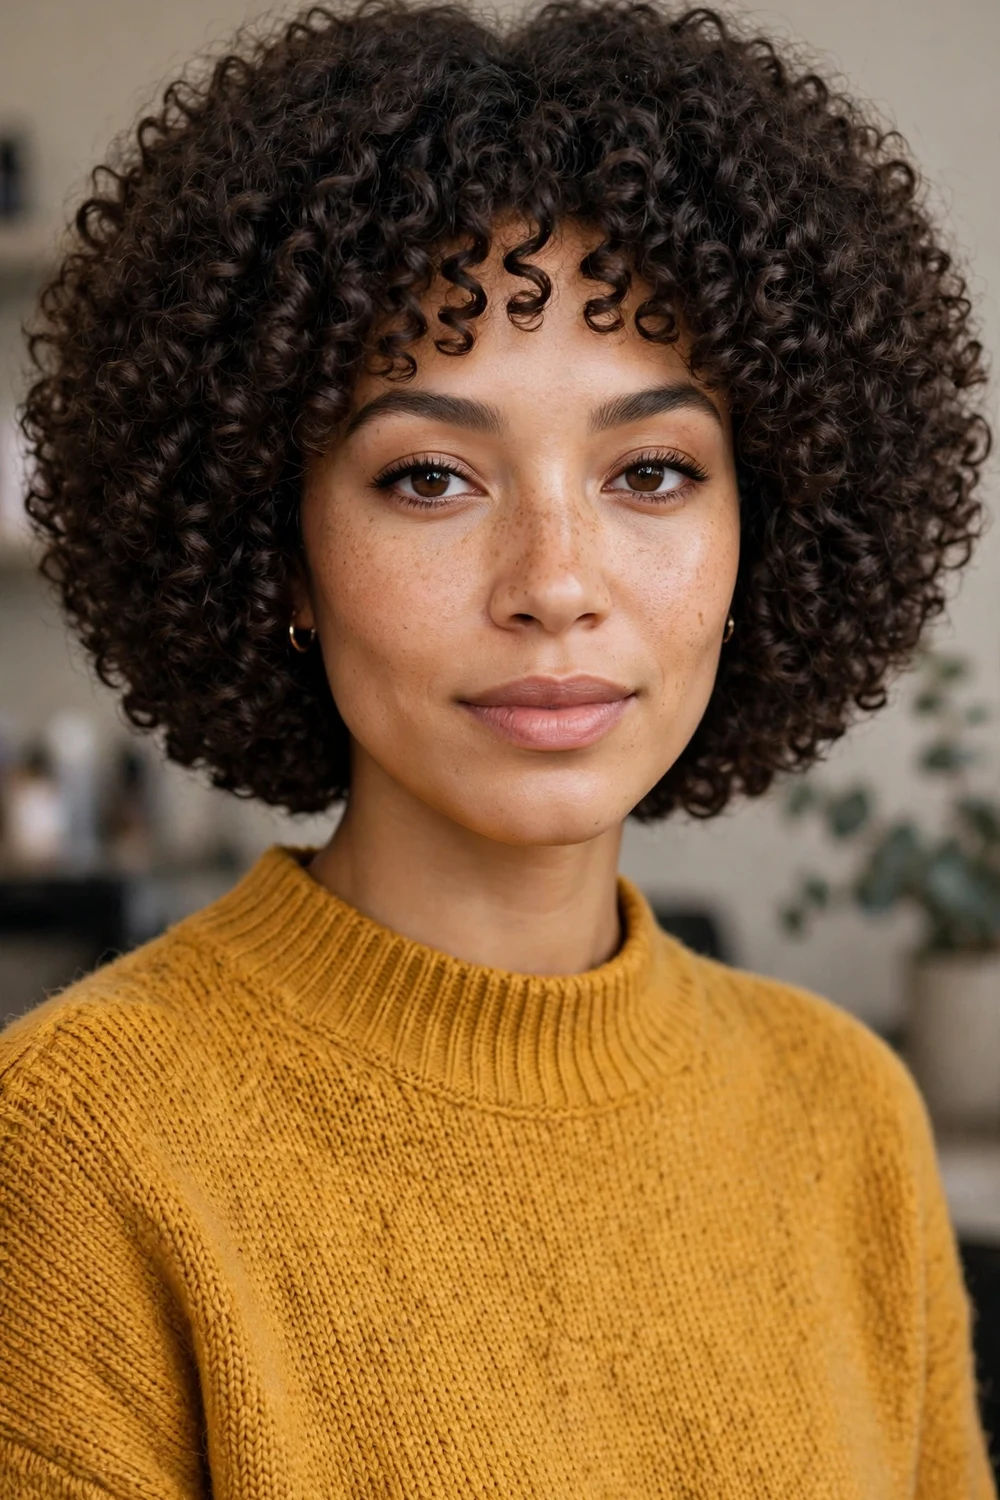
The halo bob cuts dense curls into one even, rounded outline that circles the head at chin to jaw length. Each curl is trimmed to support the round shape, so the hair fans out evenly instead of widening only at the bottom. Dense 3C curls hold this outline well because the pattern has enough body to keep the circle full.
This cut is shaped dry, curl by curl, and it grows out as a softer, larger round, which many wearers like for a full two to three months. At home, definition matters more than volume products: apply gel on wet hair, let the curls set in the round, and pick only at the roots once dry.
Try this: tell your stylist where you part your hair before the cut starts. A halo shaped around the wrong part falls unevenly at home.
Difficulty: Medium · Cost: $$
10. Blunt-End Curly Lob for Fine 2C Curls
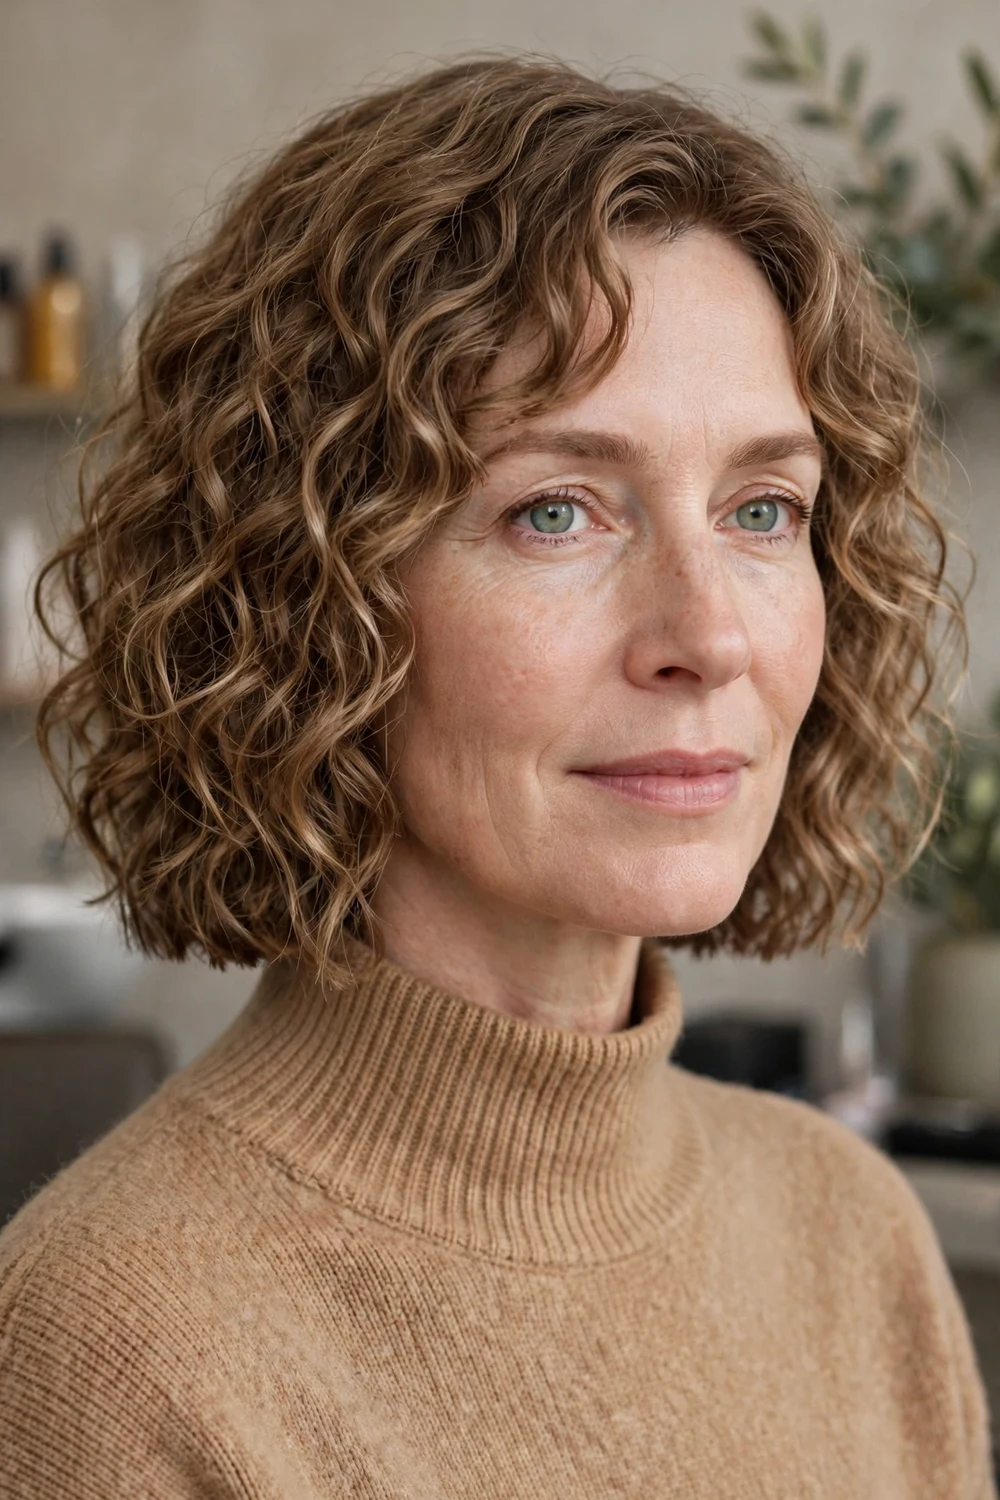
A lob lands at the collarbone, and a blunt end keeps the bottom edge cut in one clean line with no layers at the perimeter. For fine 2C curls and waves, that blunt edge is the point: it keeps the ends looking thick, while light interior shaping, kept away from the bottom two inches, stops the shape from going flat at the crown.
Fine curls lose this shape to weight and to over-layering, so keep styling products light: a mousse or a small amount of gel, scrunched in and diffused on low heat. The blunt line needs a tidy-up trim at eight weeks, since fine ends show uneven growth sooner than thick ends do.
Try this: ask for the length checked with your hair dry and parted as you wear it. Collarbone length on wet 2C hair can dry up to shoulder length.
Difficulty: Low · Cost: $$
11. Long U-Cut with Rounded Layers for 3A Curls

The U-cut shapes the back hemline of long hair into a soft curve, longest at the center and shorter at the sides, with rounded layers through the lengths. On 3A curls the curve keeps the back from looking like one straight shelf, and the layers let each spiral separate instead of stacking into a triangle.
Long curls keep this shape for ten to twelve weeks between trims. The ends are the oldest hair on the head, so a weekly deep conditioner and gentle detangling in the shower protect the curve. Readers who want more long-length options can compare shapes in the long curly haircuts with layers for women guide.
Try this: ask for the U kept shallow. A deep U on curly hair reads much shorter at the sides once shrinkage pulls the curls up.
Difficulty: Low · Cost: $$
12. Long V-Cut with Light Ends for Thick 3B Curls

The V-cut takes the back hemline to a soft point at the center, with layers stepping down toward it. Thick 3B curls carry the V well because the density fills the point, and the stepped layers remove the bulk that makes long thick curls flare out at the bottom.
The point is the first place this cut loses its line, so plan trims at ten weeks and keep the last few inches conditioned. The V shows best worn loose down the back. In a ponytail the lengths gather and the point disappears, which makes this a loose-hair cut first.
Try this: have the V cut on dry hair and check it from behind in a second mirror before you leave. Small asymmetries hide in wet curls and show once dry.
Difficulty: Low · Cost: $$
13. Curl-by-Curl Dry Cut for Mixed Curl Patterns

Many heads carry two or three curl patterns at once: looser at the front, tighter at the crown or nape. A curl-by-curl dry cut trims each curl on its own, on dry styled hair, so the tighter curls are not cut to the same wet length as the looser ones. The finished outline looks even because every curl was judged at its true dry length.
Book this cut with a stylist who works on dry curly hair, and arrive with your hair washed, conditioned, and styled the way you wear it, with no ponytail dents or clips. The appointment takes longer than a wet cut, and the shape holds eight to twelve weeks as the patterns grow at their own speeds.
Try this: point out your tightest and loosest areas at the start. A good dry-cut stylist will plan the outline around those two zones first.
Difficulty: Medium · Cost: $$$
14. Layered Curly Mullet with Soft Short Sides

A curly mullet keeps the top and back long and layered while the sides sit shorter and closer to the head. On natural curls the contrast reads soft rather than sharp, since the short sides still show texture. The long back layers keep movement, and the shorter sides stop the shape from widening at ear level.
This cut suits 2C to 3B patterns and faces that suit volume on top. The sides grow out fastest and need a tidy at six to eight weeks, while the back can go longer between trims. Style with a light cream and let the top fall forward for the clearest mullet outline.
Try this: keep the side shortness gradual for a first try. You can take the sides closer at the next appointment once you know you like the contrast.
Difficulty: Medium · Cost: $$
15. Tapered Curly Crop with Full Top for 4A Coils

The tapered crop keeps length and fullness on top and shortens the sides and back in a gradual taper that follows the head shape. On 4A coils the top keeps its spring and volume, while the tapered edges give a clean line at the hairline, ears, and nape with no hard shaved contrast unless you ask for one.
Daily care is short: moisturize, define the top with a sponge brush or fingertips, and go. The taper needs a shape-up every four to six weeks to stay clean, and the top benefits from a deep conditioner every wash day, since short coils still dry out at the ends.
Try this: decide the top length by shrinkage, not by stretched length. Four inches of stretched 4A hair can sit as a much shorter coil on the head.
Difficulty: Low · Cost: $$
16. Curly Pixie with Long Top Curls and Short Sides

This pixie leaves the top long enough for the curls to form full turns, while the sides and back are cut short and close. The long top can fall forward as a soft fringe or be pushed to one side, and the short sides keep the whole cut light and quick to wash. It suits 3A to 4A patterns with strong curl at short lengths. More short options sit in the pixie haircuts for curly natural hair roundup.
A curly pixie grows out top first, so expect a reshaping trim at five to seven weeks. Keep the top moisturized and define it with a small amount of gel on wet hair. Heavy waxes and butters weigh short curls down and blur the outline within days.
Try this: ask for the top left longer than you think you need. Curly pixies can always be taken shorter at the next visit, and shrinkage adds up fast.
Difficulty: Low · Cost: $$
17. Short Tapered Afro for 4C Coils

A short tapered afro shapes 4C coils into a rounded top that is cut to one even outline, with the edges tapered shorter at the temples and nape. The round top shows the coil pattern at its fullest, and the tapered edges keep the shape tidy without daily styling tools or heat.
Moisture is the main upkeep: a leave-in on wash day, a light oil or butter to seal, and a satin bonnet at night. Pick the shape out gently with fingers or a wide pick at the roots only, since combing through the lengths daily breaks the coils and dries the ends.
Try this: get the outline cut on picked-out, dry hair. Cutting the afro shape wet or shrunken leads to an uneven round once it dries.
Difficulty: Low · Cost: $$
18. Curtain Bangs with Long Cascading Curls

Curtain bangs part in the center and curve away from the face on both sides, cut longer at the outer edges than at the middle. On long curls, the bangs blend into the front layers instead of sitting as a separate straight fringe, and they give long hair a face frame without giving up length anywhere else.
Curly curtain bangs must be cut dry and longer than the target, because the curl lifts them as they dry. They suit 2C to 3B patterns best. Tighter patterns can wear them with more length left in, and a stylist who cuts curls dry will judge the spring before taking anything off.
Try this: style the bangs first, while the rest of the hair is still clipped up. Curtain bangs set the front shape, and the lengths fall into place around them.
Difficulty: Medium · Cost: $$
19. Baby Bangs with Chin-Length Curly Bob

Baby bangs sit short, above the eyebrows, and on a chin-length curly bob they open the face and give the round bob a clear focal point. The fringe is cut in small curly sections so each piece springs to its own short length, and the bob below keeps its full, rounded outline.
Short curly fringe grows out quickly and needs a tidy every three to four weeks, which many salons do as a quick fringe trim between full cuts. The look suits 3A to 3C curls that form a defined turn at short lengths. Very loose patterns may need daily finger styling to keep the fringe in place.
Try this: start the fringe a finger width longer than your target. You can judge the true spring after one wash at home, then trim to the final length.
Difficulty: Medium · Cost: $$
20. Side Braid with Loose Curls Over One Shoulder
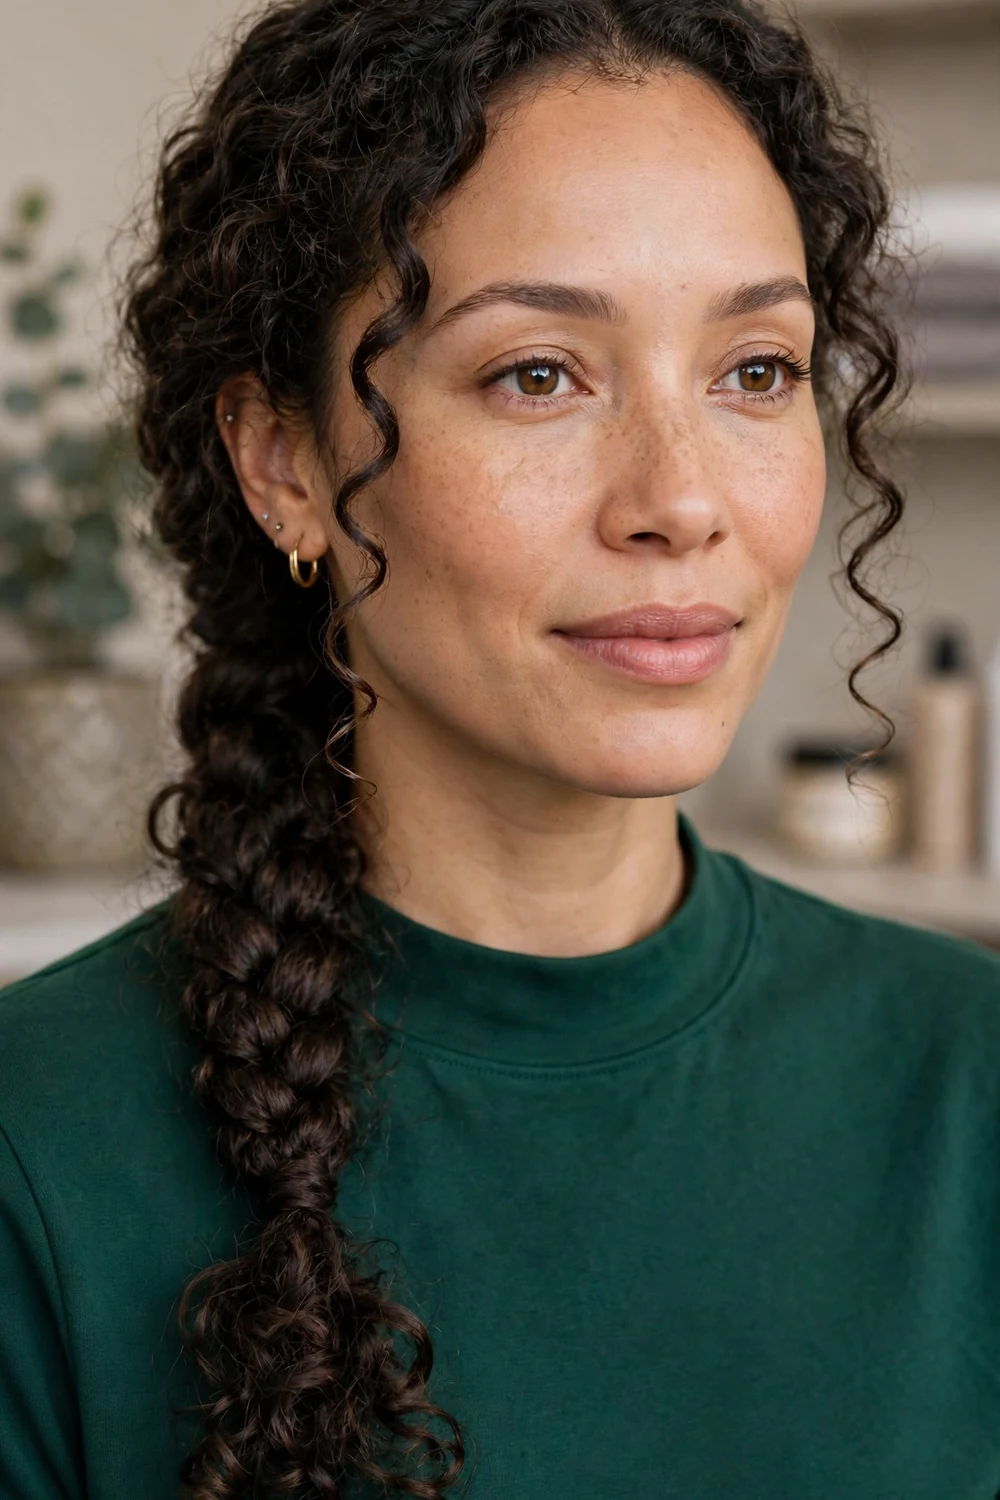
The side braid gathers medium or long curls to one side and braids them loosely so the braid sits over one shoulder and the curl texture still shows through each section. A loose braid is the point here: tight braiding pulls the curl pattern flat, while a soft three-strand braid with the sections gently eased out keeps volume from root to tip.
This style takes minutes, needs no heat, and works on 2C to 3C hair with enough length to reach past the shoulder. Leave the last two inches unbraided and secure with a small clear elastic, so the curly ends fan out and the braid reads soft rather than finished tight.
Try this: braid on day two curls rather than fresh wash day hair. Slightly set curls grip the braid better and frizz less at the hairline.
Difficulty: Low · Cost: $
21. Low Chignon with Accent Braid and Loose Curls
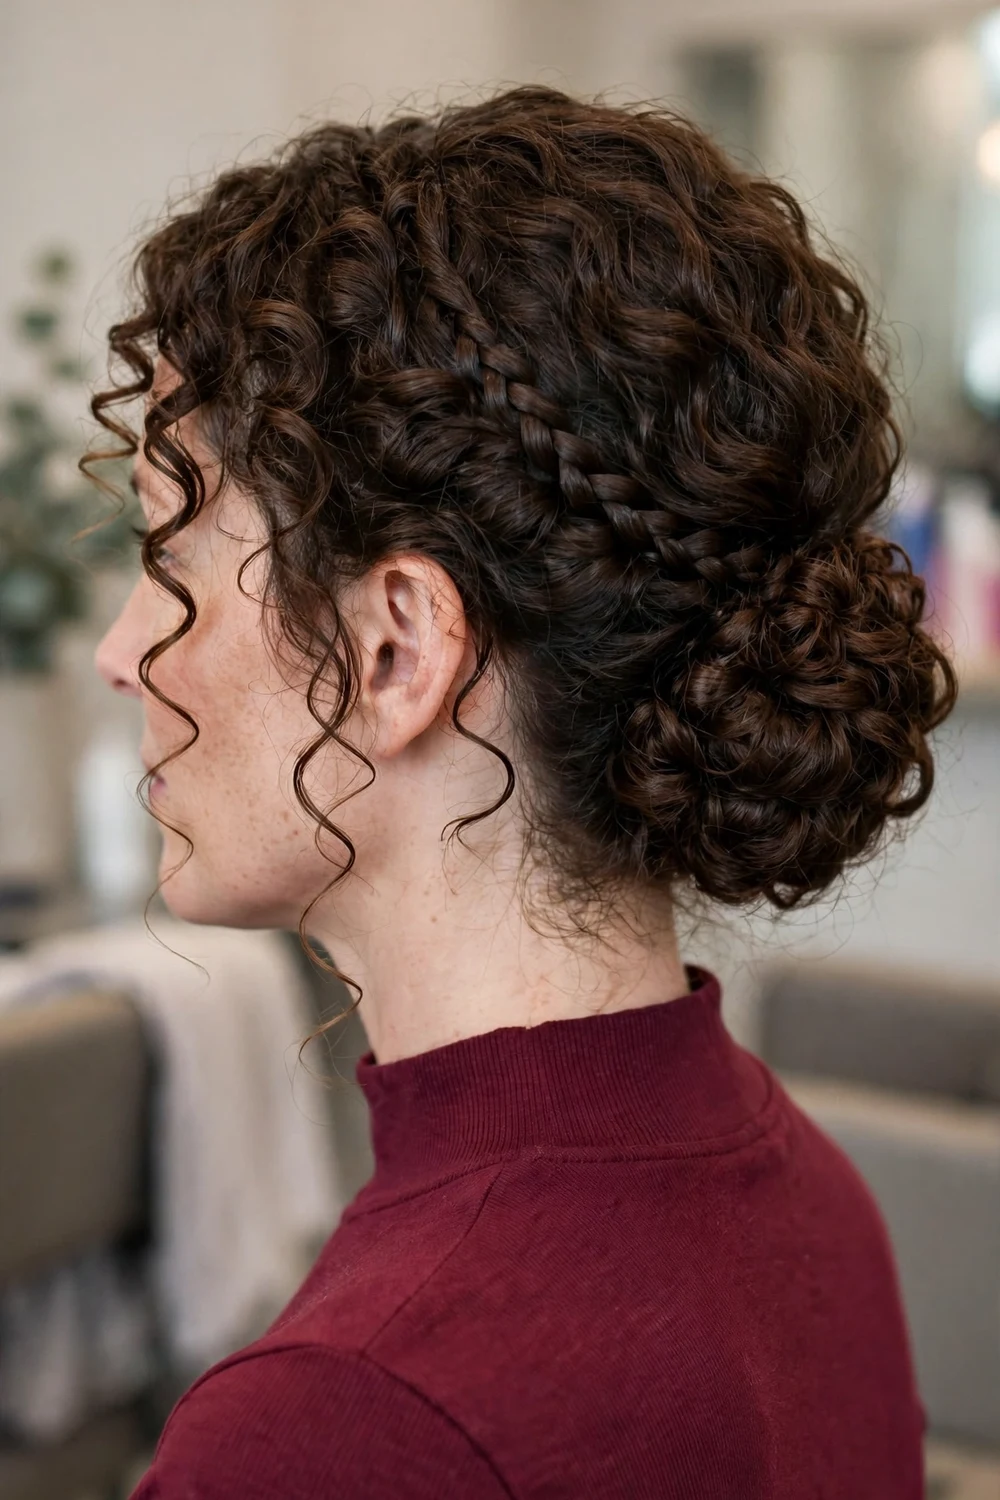
The low chignon gathers curls into a soft bun at the nape, and a thin braid worked along one side gives the style its detail. A few curls left loose at the front keep the outline soft and stop the style from reading severe. It suits medium to long curls from 2C to 3C and holds well for events, photos, and long days.
Build it on dry, defined curls: braid the accent section first, then gather everything low and twist it into the bun, pinning in sections rather than pulling it tight in one go. Curly hair grips pins well, so fewer pins hold than you would expect, and the texture hides them.
Try this: cross two pins in an X at each side of the bun. Crossed pins lock into curls and hold far longer than single pins placed side by side.
Difficulty: Medium · Cost: $$
22. Braided Ponytail with Curly Tail for Medium Hair

This ponytail braids the top and sides of the hair back toward one gathering point, then lets the rest fall as a full curly tail. The braided base keeps the front and edges neat for days, while the tail keeps the curl pattern loose and visible. It works on medium 3B to 4C hair and doubles as a short-term protective base.
Keep the braids firm but comfortable, and moisturize the tail as you would loose hair, since it stays exposed. The style holds three to five days, and sleeping with the tail in a loose bonnet keeps the curls from flattening against the pillow.
Try this: feed the braids toward the crown if you want a higher tail, or toward the nape for a lower one. The braid direction sets the tail height.
Difficulty: Medium · Cost: $
23. Center-Part Loose Curls for 2C Waves

A center part splits loose 2C waves and curls evenly on both sides, which gives the face a balanced frame and lets the wave pattern fall in matching S shapes. The style relies on the cut underneath: even lengths on both sides and light layers at the ends, so neither side sits heavier than the other.
Loose patterns lose their turn under heavy creams, so style with a light gel or mousse on wet hair, scrunch, and diffuse or air-dry without touching until fully dry. Refresh on day two with a water mist and a scrunch rather than more product, which only builds weight.
Try this: set the part while your hair is soaking wet in the shower. A part set on damp or dry 2C hair drifts back to its old line within hours.
Difficulty: Low · Cost: $
24. Shoulder-Length Tousled Curls with Side-Swept Front
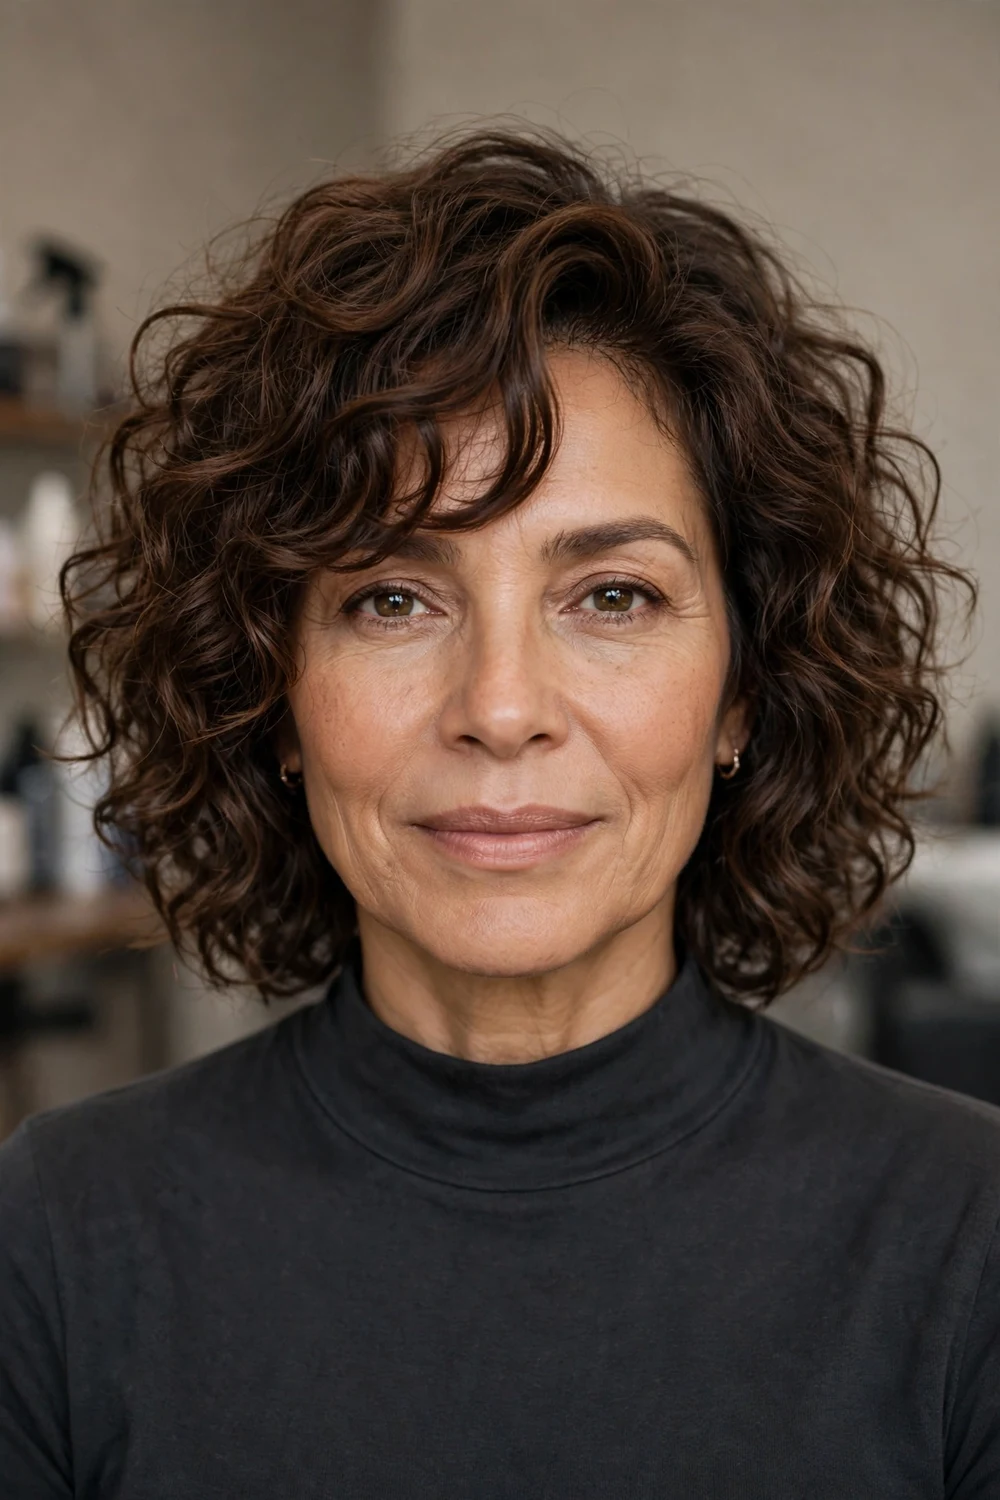
Shoulder-length curls with a side-swept front keep the length even and move the front section across the forehead in a deep side sweep. The sweep gives the style direction and softens the hairline, while the tousled finish through the lengths keeps it relaxed and quick to wear day to day.
This is a forgiving shape for 2C to 3B hair, since the tousle hides uneven curl days and the length still pulls back into a clip or low ponytail when needed. Use a light cream, scrunch, and shake the roots with your fingertips once dry to lift the sweep.
Try this: clip the swept front section in place while it dries. Ten minutes with a small clip sets the sweep so it holds without spray.
Difficulty: Low · Cost: $
25. Debulked Long Layers for Thick Curly Hair

Thick curly hair often keeps its length but loses its shape, widening at the bottom and sitting heavy at the mid-lengths. Debulked long layers remove weight from inside the hair, through the mid-sections and underneath, while the surface curls and the length stay in place. The result keeps the full look and loses the heavy, wide outline.
This work belongs to a stylist who cuts curly hair dry and can see where the bulk sits on your head. Ask for weight removal in small passes with a shape check between them, since thick curls can go from full to thin in one over-cut section. Trims land at ten to twelve weeks.
Try this: show your stylist a photo of your hair at its widest, on a humid day. That is the shape the debulking needs to solve, and dry salon hair rarely shows it.
Difficulty: Medium · Cost: $$
26. Senegalese Twists Worn Loose at Mid-Back Length

Senegalese twists twist two strands of smooth extension hair around your own hair in a tight rope, which gives a sleek, even twist that hangs with weight and swing. Worn loose at mid-back length, the twists move as one full style, pull up into buns and ponytails, and keep your natural hair fully tucked away inside.
Installs take several hours and last six to eight weeks with scalp care: a light oil or spray at the parts, a gentle cleanse at the roots every one to two weeks, and a bonnet at night. Keep the first row at the hairline installed with low tension, and take the twists out on schedule, since overdue installs stress the edges as new growth twists at the base.
Try this: choose mid-back length for a first install. It gives the full loose look with less weight on the scalp than waist length while your neck adjusts.
Difficulty: High · Cost: $$$
Frequently Asked Questions
Should curly hair be cut wet or dry?
Dry cutting suits most natural curls, because the stylist sees your true length, shrinkage, and pattern as you wear them. Wet hair stretches the curl, so a wet cut can dry shorter and less even than planned. Wet cutting can still work for loose 2C waves with a simple shape. For mixed patterns, tight coils, bangs, and any shape built around the outline, a dry curl-by-curl cut gives the most predictable result.
How often should naturally curly hair be trimmed?
Most curly shapes hold best with a trim every 8 to 12 weeks. Short tapered cuts and pixies need a shape-up sooner, every 4 to 6 weeks, because the outline is the style. Long layered curls can often go the full 12 weeks if the ends stay conditioned and tangle-free. Split, thinning ends that catch and knot during detangling are the sign to book sooner, whatever the calendar says.
Which styles work best for 4C hair without heat?
Twist-outs, finger coils, flat twists, and shaped tapered cuts all work on 4C hair with no heat at all. Twist-outs and finger coils set the pattern while the hair dries, flat twists protect the hair along the scalp, and a tapered afro or crop holds its outline with moisture and gentle picking at the roots. Protective twists such as passion twists and Senegalese twists also need no heat and keep the ends tucked away for weeks.
How do I keep curls defined on day two and three?
Sleep with your curls protected: a pineapple, loose twists, or a satin bonnet keeps the pattern from flattening and frizzing overnight. In the morning, mist the curls lightly with water, smooth a small amount of leave-in conditioner over the frizzy areas, and scrunch gently. Let the hair dry fully before you separate or fluff it. Adding heavy product on dry hair usually adds weight rather than definition, so water first, product second, and only a little.
Can fine curly hair wear layers without looking thin?
Yes, with the right layer placement. Fine curls keep their fullness when layers stay long, spaced out, and away from the ends, and when the perimeter is cut blunt so the bottom edge reads thick. Short, choppy layers through the ends are what make fine curls look thin. Ask your stylist for interior shaping that lifts the crown, keep the last two inches in one line, and style with light mousse or gel rather than heavy creams.
Final Thoughts
Your curl pattern is the plan, and the right style follows it rather than working against it. Pick by pattern and density first, then by the time you will give the style on wash day or at trim appointments, and the shape will hold with far less daily effort. I would start with one change at a time: a dry cut that fixes the outline, or one set style you can repeat each wash day, and let your routine settle before you add the next idea.

