

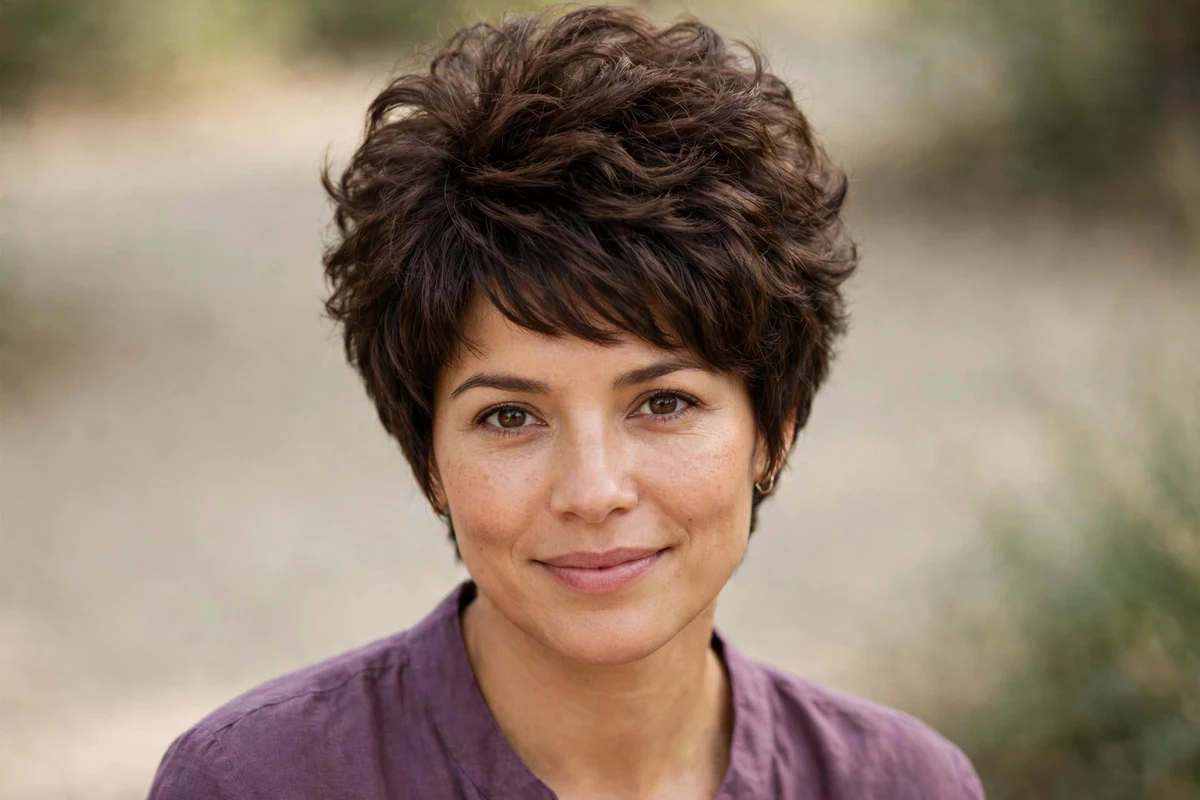
Fine hair and pixies have a quiet understanding. Long fine hair lies flat at the roots and turns wispy at the ends, but a pixie removes the weight that drags it down and gives every strand somewhere to stand. I have spent years looking at short cuts for fine hair, and the pixie keeps winning for one simple reason: the right cut builds its own volume.
This list rounds up 29 pixie haircuts for fine hair, each chosen because it adds visible fullness through a specific cutting technique. You will find the salon wording to ask for, the face shapes each cut suits, and honest upkeep. Fine hair is not a limitation here. It is the starting point.
Quick Takeaways
- Keep length on top: longer crown hair is the raw material every volumizing pixie is built from.
- Ask for point cutting or light razor work on the ends, never thinning shears on top of fine hair.
- Stacked or tapered layers underneath create lift, so the top sits high instead of collapsing flat.
- A deeper root color or soft highlights add shadows the eye reads as density.
- Style the roots, not the ends: mousse at the scalp and finger-drying upward does more than any end product.
1. Stacked Crown Pixie with Point-Cut Texture

This is the volume workhorse of the fine-hair pixie world, and it earns that spot through structure alone. Your stylist cuts the crown in short, graduated layers, each one physically propping up the one above it, so lift is built into the shape instead of into your morning routine. The top is then point-cut, which breaks the edges into soft pieces that catch light at different angles and read as density. On fine hair, this pairing creates genuine height without backcombing, and the shape survives second-day hair better than almost any other pixie here.
It suits straight to slightly wavy hair and flatters oval, heart, and long faces, since the height on top lengthens the silhouette. The point cutting matters most at the very tips: ask for soft texture on the ends only, with no thinning shears near the root, because protecting that root density is what keeps the crown standing tall. Style with a pea-size amount of root-lift mousse on damp hair, then dry with your fingers lifting at the crown. Five minutes, done.
Try this: dry your hair upside down for the first minute, then flip it back to lock in the stacked lift.
Difficulty: Low · Cost: $ (salon)
2. Long-Crown Pixie
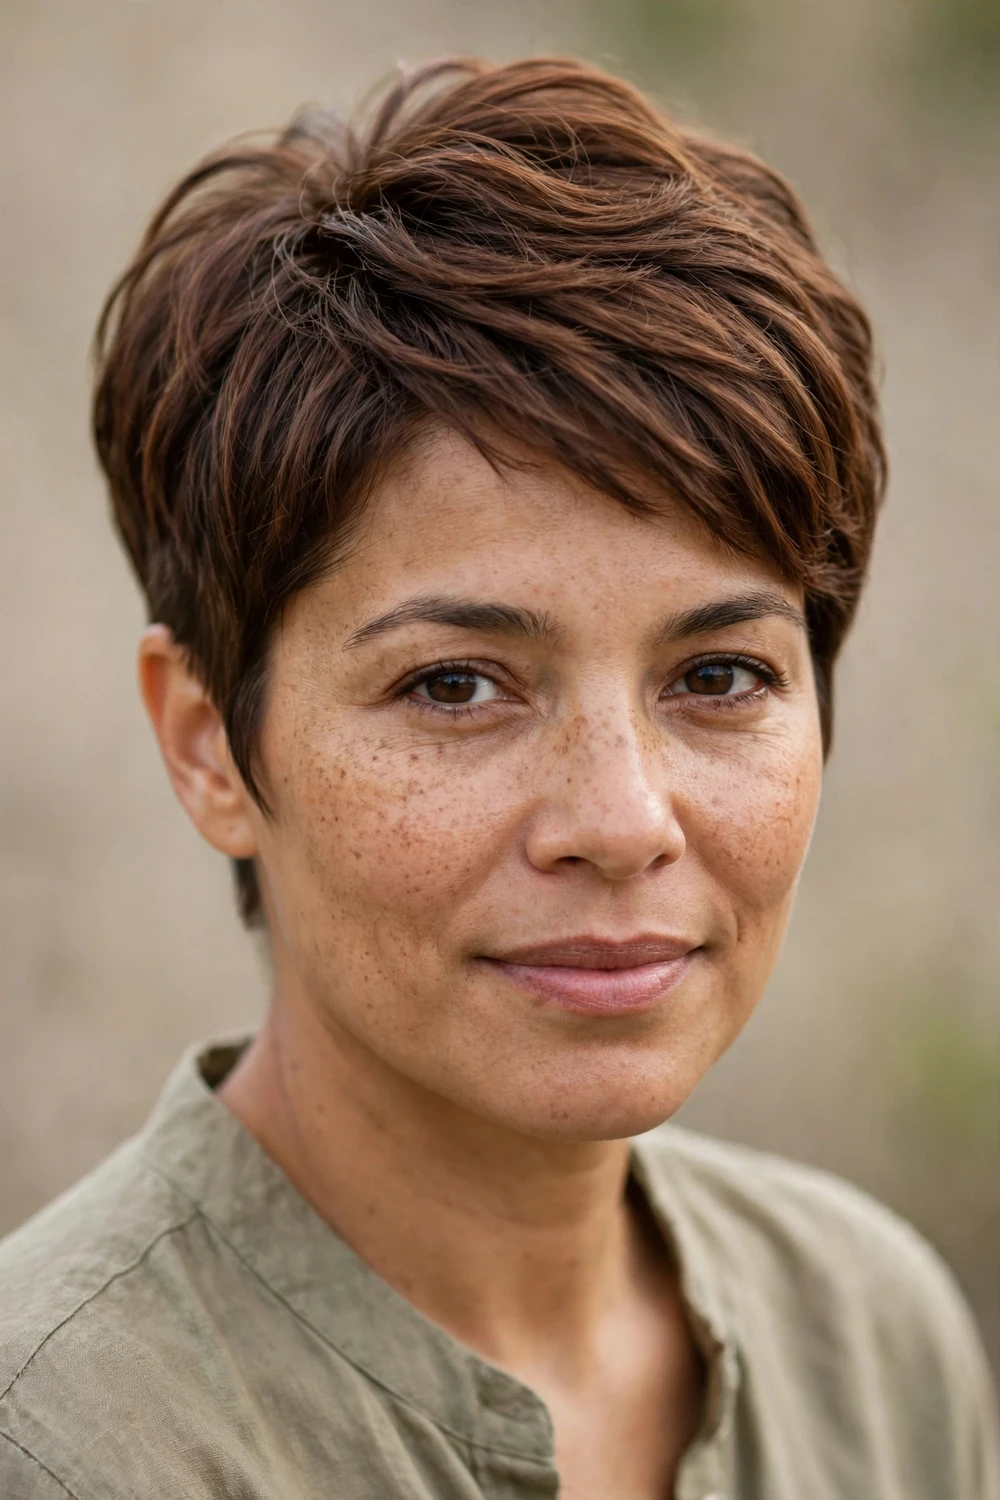
Everything below the crown is kept short and neat while the top stays long enough to lift, flip, or sweep. The contrast is the whole trick: short sides and a clean nape make the longer top look dramatically fuller by comparison, and that longer top is raw material you can style in several directions. For low-density fine hair, this cut doubles as coverage, since the long top falls over the scalp and hides any see-through patches. It is the safest first pixie if you are nervous about going very short all over, because you keep styling options while losing the weight that flattens fine hair.
It works for straight and wavy fine hair and suits most face shapes, particularly oval and round faces where the height balances width. Ask your stylist to keep the crown long for coverage and volume, with short tapered sides and nape. Blow-dry the top upward with your fingers or a small round brush for daily lift, or sweep it across for a softer line. Trim every five to six weeks, since the long crown grows shaggy faster than a uniform pixie.
Try this: flip the top to the opposite side of your usual part for instant root lift on flat days.
Difficulty: Low · Cost: $ (salon)
3. Tapered Pixie with Fuller Temples

Flat sides are fine hair’s silent enemy. When the sides cling to the head, the whole silhouette narrows and everything looks thinner. This pixie fixes that with graduated tapering through the back and nape, finished neatly at the neckline, while deliberately leaving a touch more length at the temples. That extra hair at the temples curves gently toward the cheekbones, adding width at eye level and balancing the volume on top. From behind it is clean and polished, which makes the fullness above it look even bigger by contrast.
It flatters straight to slightly wavy hair and suits oval, heart, and long faces especially well. Ask for a tapered pixie with the sides left slightly fuller at the temples and the nape cut to lie flat in your natural growth direction. To style, blow-dry the sides by brushing them back first, then let them fall forward so they keep a soft bend off the head. A neat tapered back also means this cut looks sharp from behind, which matters more than most people realize.
Try this: smooth a tiny amount of styling cream over the nape to keep the taper neat between trims.
Difficulty: Low · Cost: $ (salon)
4. Choppy Pixie with Piecey Top
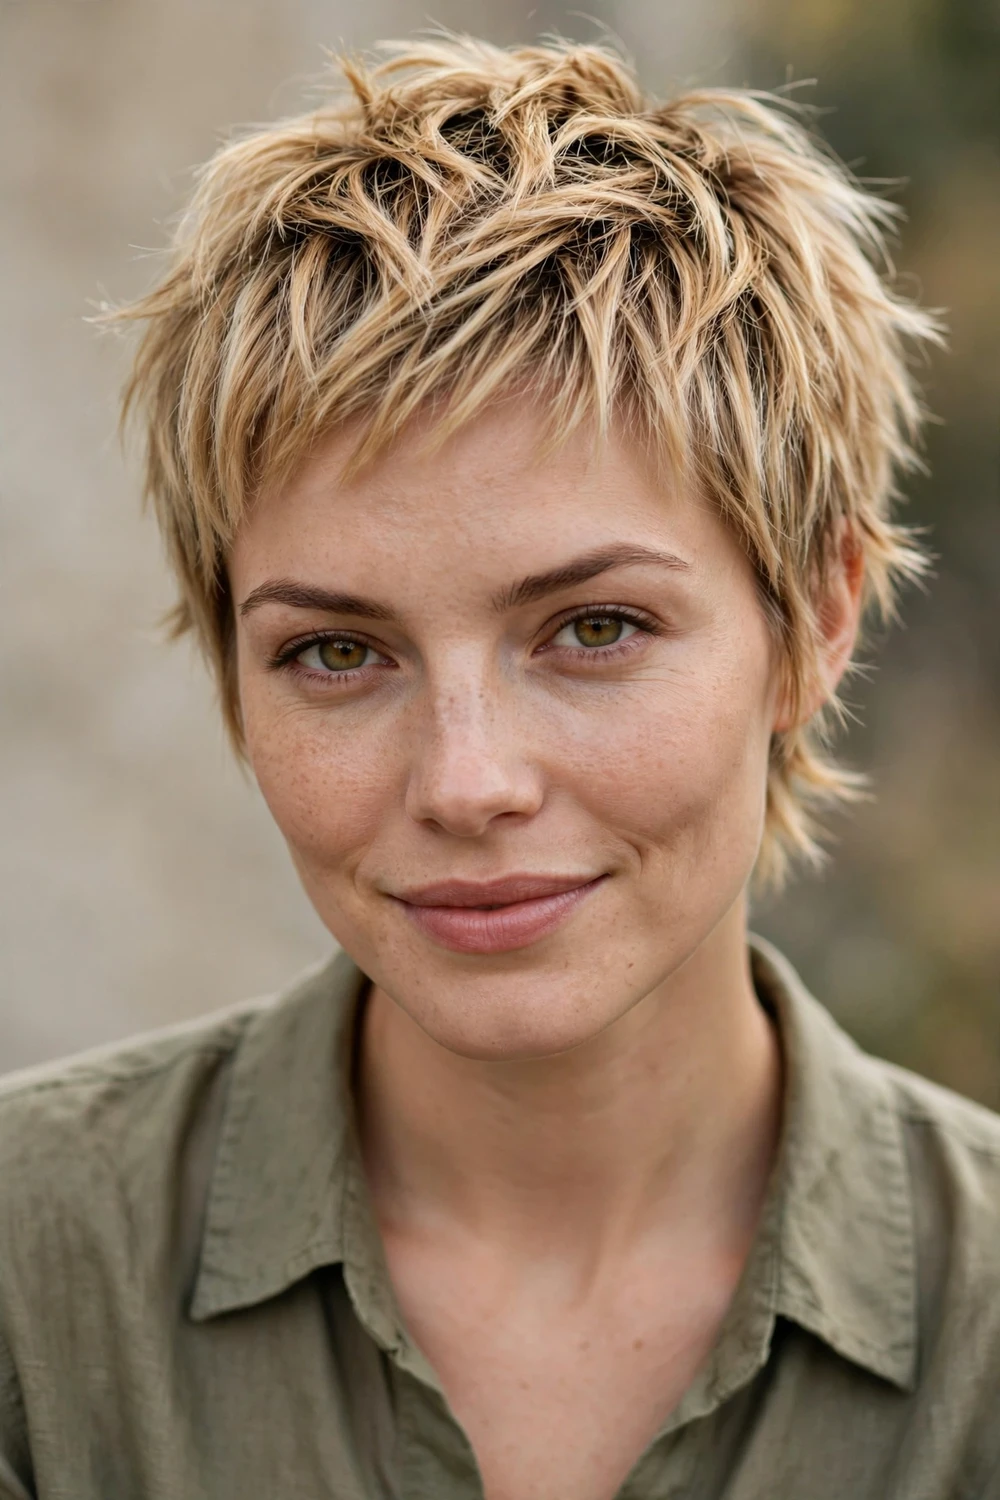
Choppy means deliberate, uneven layering, and on fine hair that unevenness is a feature, not a flaw. When every piece is a slightly different length, the hair refuses to clump into one flat sheet, and each separated piece catches light on its own. The eye reads that broken-up surface as movement and movement as fullness. The top gets the heaviest texture, with pieces of varying lengths that you define with a matte paste or texture spray, while the sides stay a little longer around the ears so the silhouette keeps its shape.
This cut loves straight fine hair that lies flat, and it suits oval and heart faces with most styling approaches. The one line to say in the chair: choppy texture on the ends, but do not over-thin the top. Fine hair cannot spare the density that heavy texturizing removes. Warm a pea-size amount of matte paste between your fingers and pinch pieces on dry hair for separation that looks intentional rather than messy. It is a fingers-not-brushes cut, which keeps mornings short.
Try this: work the paste through dry hair only, since damp hair spreads it too evenly and kills the separation.
Difficulty: Low · Cost: $ (salon)
5. Tousled Razored Pixie
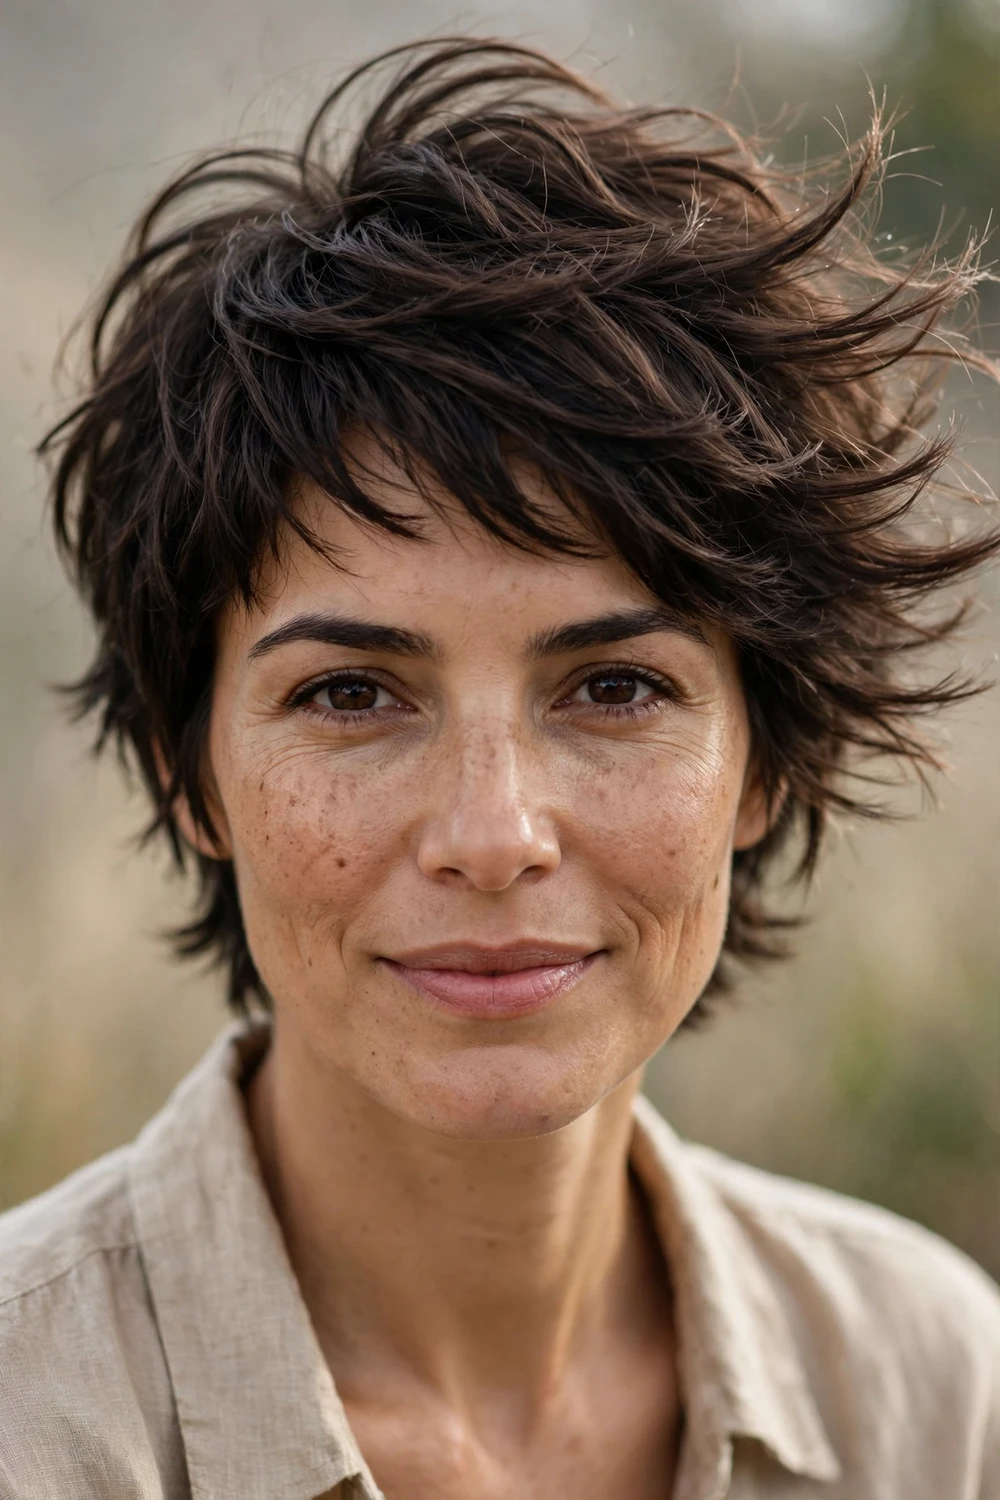
A razor in a skilled stylist’s hand creates texture that shears cannot replicate. Razored ends taper to fine points instead of blunt edges, which gives fine hair natural separation and airy movement without removing bulk. The key word is light: the razor should be used only on the top layers and the fringe tips, never through the interior where it would carve out density. Done right, the feathered finish makes each strand look like several, and the cut air-dries into shape with almost no help.
It suits straight to wavy fine hair and flatters oval, heart, and square faces, softening strong jawlines with its wispy outline. Ask for a razor-cut pixie with soft texture on top, and say clearly not to razor-thin it to nothing on the crown. Style with sea salt spray on damp hair, scrunch with your fingers, and leave it alone while it air-dries. Book trims every four to six weeks, since razor-cut ends on fine hair can turn wispy if they grow out too long.
Try this: pinch the crown pieces upward while air-drying to encourage the feathered ends to stand apart.
Difficulty: Low · Cost: $ (salon)
6. Blunt-Edged Pixie with Soft Fringe

When scalp shows through, the answer is usually fewer layers, not more. Every layer removes weight, and fine hair cannot spare much. This pixie keeps the lengths even across the top and finishes with a blunt perimeter, so the outline stays dense and solid from every angle. A soft, slightly blunt fringe across the brow covers the part line, which is often the first place thinning shows. The result reads as one confident, solid shape instead of a collection of thin strands.
It works best on straight fine hair with low to medium density and suits oval and long faces very well. Ask your stylist for a blunt-edged pixie with minimal layering, and have the fringe finished with point cutting only at the very tips to soften the line without making it sparse. Style smooth with a small round brush or simply comb it into place while damp. If you are nervous about bangs, this cut proves they can be coverage, not commitment.
Try this: dry the fringe first, before the rest of the hair, so it sets flat instead of shrinking up later.
Difficulty: Low · Cost: $ (salon)
7. Bixie with Ear-Skimming Sides

Part pixie, part bob, all volume. The bixie keeps pixie shortness through the back with bob length through the front and sides, and the sides skim the top of the ears in a soft, rounded outline. That roundness is the point: fine hair cut into a curved shape holds that curve, so your sides stop sticking to your head and start framing your face. You get more hair to play with than a true pixie, and the extra length around the face makes the whole head look wider and fuller.
It is a good first step into very short hair and suits straight to wavy fine hair on nearly every face shape. Ask for a bixie with a short stacked back and longer, rounded sides and front. Style with a light volumizing spray and a quick round-brush pass at the sides only; the rounded outline does most of the work. It also grows out more gracefully than a true pixie, stretching trims to every five to seven weeks.
Try this: curl just the ear-skimming pieces inward with a round brush to exaggerate the rounded silhouette.
Difficulty: Low · Cost: $$ (salon)
8. Pixie-Bob Hybrid with Blunt Ends

If you want to keep the maximum hair possible while still getting pixie-style lift, this is your cut. The back is cut short and stacked like a true pixie, while the front grows longer, ending somewhere between the ear and the jaw. Blunt ends are the secret weapon here: fine hair always looks thickest at a blunt edge, so the cut keeps the outline solid and full all the way around while the shorter, bouncy back adds lift. You get length where it shows and volume where it counts.
It suits straight to wavy fine hair and flatters round, oval, and heart faces, since the longer front pieces slim the cheeks. Ask your stylist for a short stacked back with jaw-skimming front and blunt ends throughout, with no thinning at the perimeter. Style by blow-drying the front pieces forward and under, and enjoy one of the most forgiving grow-outs on this list. This is also the cut most people choose when growing out a shorter pixie, so it doubles as your exit strategy.
Try this: tuck one side behind your ear and leave the other loose for two different looks from the same cut.
Difficulty: Low · Cost: $$ (salon)
9. Long Pixie with Root Lift

The grown-out pixie sits right between a classic pixie and a short bob, with three to four inches on top that you can push around however you like. The extra length gives you something to tousle, and tousled hair always reads fuller than smooth hair because movement hides thinness. When the top is slightly messy, the eye sees texture instead of gaps. Ask for the sides and back kept a little longer than a traditional pixie too, so the whole cut stays soft and wearable while the roots do the lifting.
This is one of the most forgiving options for fine hair with low density, and it suits oval, round, and heart faces. The softer, airier version with wispy pieces around the ears and neck belongs to the same family; it simply leans more feminine with feathered edges. Style with texture spray at the roots, scrunched in with your fingertips, then leave it alone. The cut stretches trims to every six to eight weeks, the longest interval on this list.
Try this: mist texture spray at the roots only, never the ends, to keep the top airy instead of weighed down.
Difficulty: Low · Cost: $ (salon)
10. Side-Swept Pixie with Deep Side Part
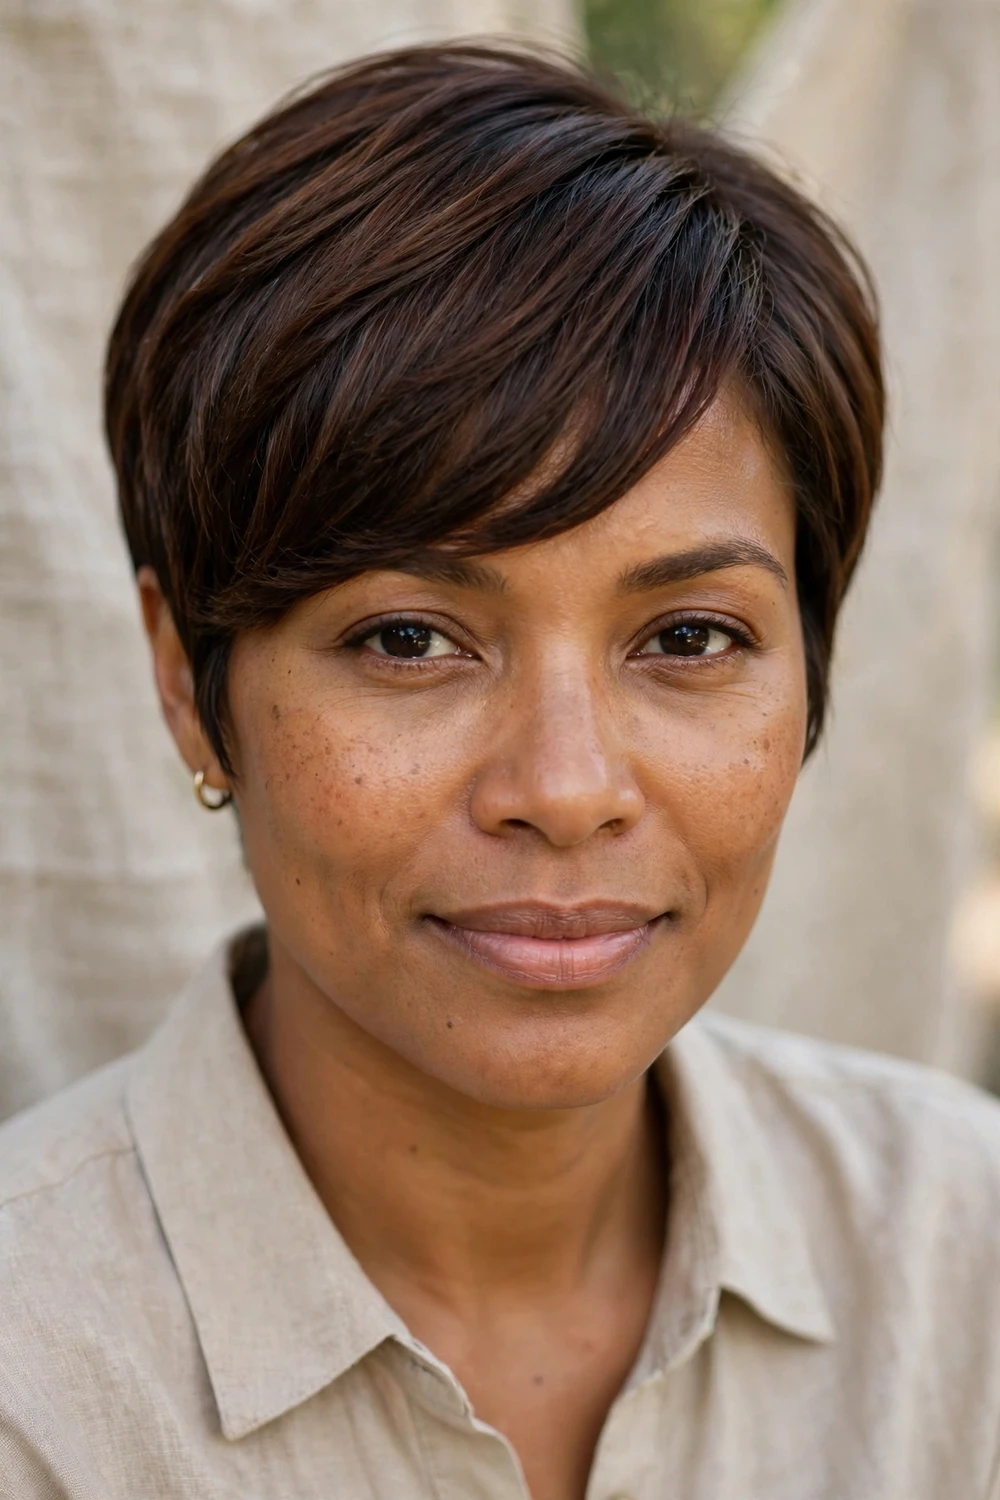
A deep side part is the quickest volume trick in the book. When you flip hair over from a part you normally do not use, the roots stand up on their own because they are being pushed against their natural direction. This cut is built around that: longer top layers sweep diagonally across the forehead in a soft wave of height, while tapered sides keep everything neat so the volume on top stands out even more. The diagonal line is one of the most reliable fullness illusions in cutting, and it also covers a high or widening forehead.
It flatters round and square faces in particular, since the diagonal sweep slims, and it works on straight to wavy fine hair. Ask for a pixie with a deep side part, three to four inch top layers, and a tapered nape, cut so the top falls naturally in the new direction. If your part has sat in the same spot for years and gone flat, switching it one inch to the side can hide a lot before you even book the cut.
Try this: train the new part while your hair is damp, and it will fall into place by the second week.
Difficulty: Low · Cost: $ (salon)
11. Soft Faux-Hawk Pixie
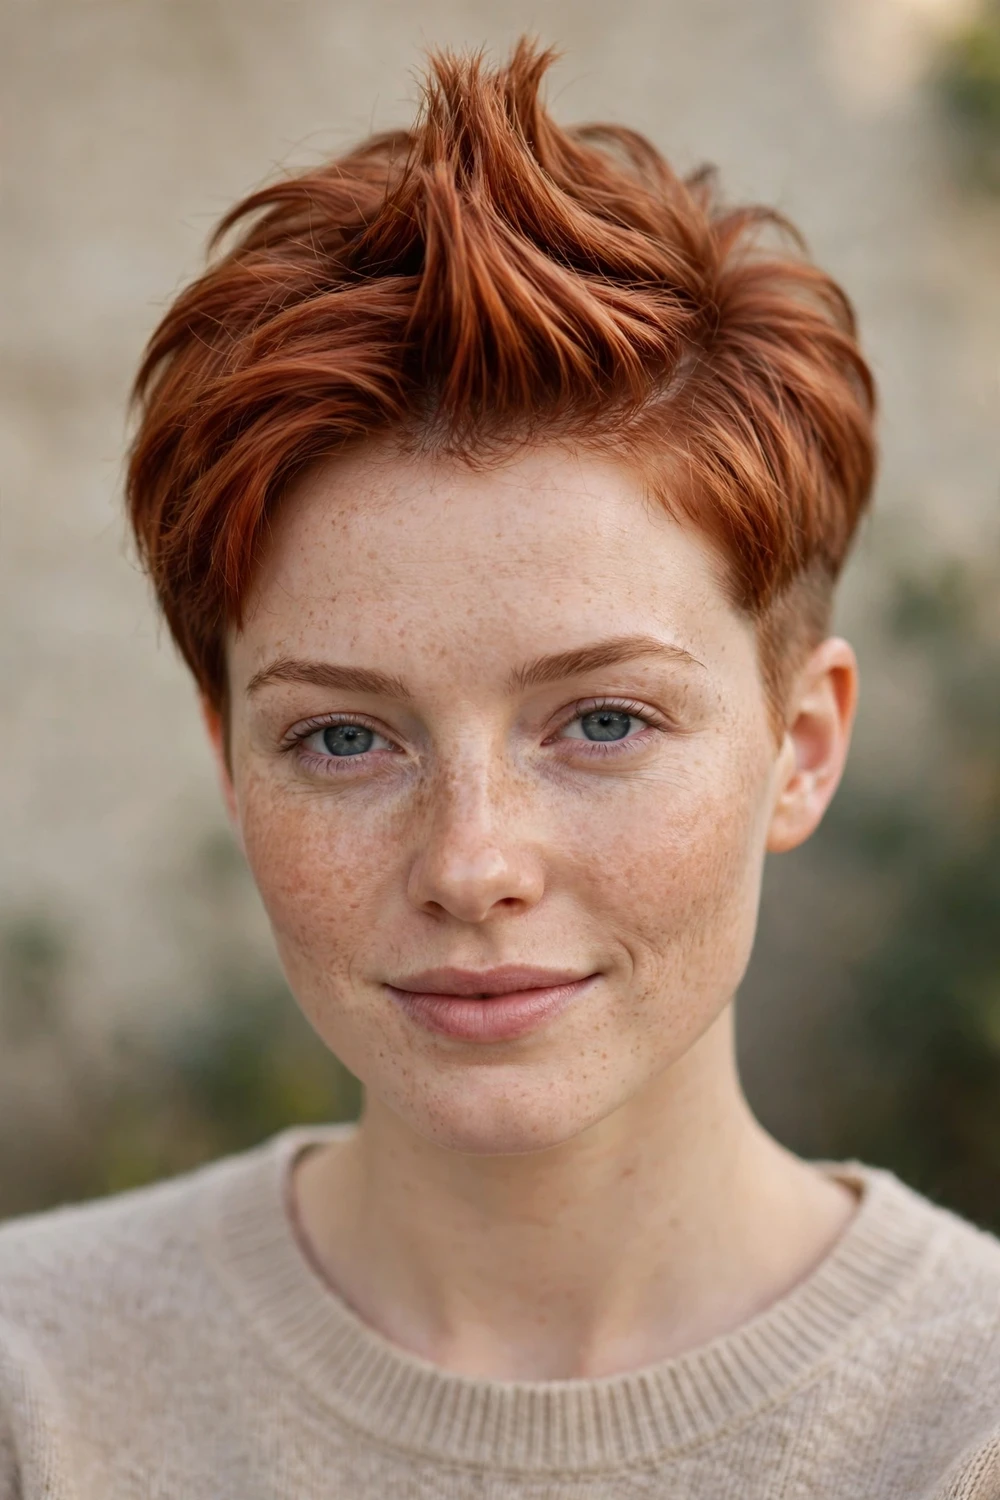
Do not picture a punk mohawk. This is a gentle version where the center of the head stands just a little taller than the sides, and that small difference in height makes the whole head look fuller because the eye follows the line upward. The top is cut two to three inches long, longest down the center, while the sides stay short and close without being shaved. A matte paste pushes the center up and slightly forward, and the result is vertical volume you can see from across the room.
It suits fine straight to wavy hair and flatters round and heart faces, since the height lengthens the face. Ask your stylist for a faux-hawk shape with the center longer than the sides and a tapered back. Style by warming matte paste between your fingers, pushing the center up and forward, then messing it slightly. On lazy days, brush it all forward with damp fingers and it turns into a soft textured crop in seconds.
Try this: keep the sides close and the center tall; the contrast between the two is what sells the volume.
Difficulty: Medium · Cost: $ (salon)
12. Undercut Pixie with Volume on Top

Removing hair underneath while leaving length on top concentrates your density exactly where it shows. This is a genuine volume trick, not just a style choice: with the sides and nape clipped short, every strand you have pools on top, and the contrast makes the crown look dramatically fuller. It is especially effective for fine hair that grows densely but lacks individual strand thickness, since it hides thinness at the sides where clinging shows most.
It suits confident dressers and works on straight to wavy fine hair with decent density. Very low-density hair should skip the close clip and ask for a softer taper instead. Ask for an undercut pixie with faded or clipped sides and the top kept long for volume. Style by sweeping the top across, lifting it upward, or slicking it back, all with a little mousse at the roots. The trade-off is maintenance: the fade needs a touch-up every three to four weeks or the shape blurs.
Try this: ask for a subtle undercut panel at the nape first; you can go bolder at the next appointment.
Difficulty: Medium · Cost: $$ (salon)
13. Spiky Pixie
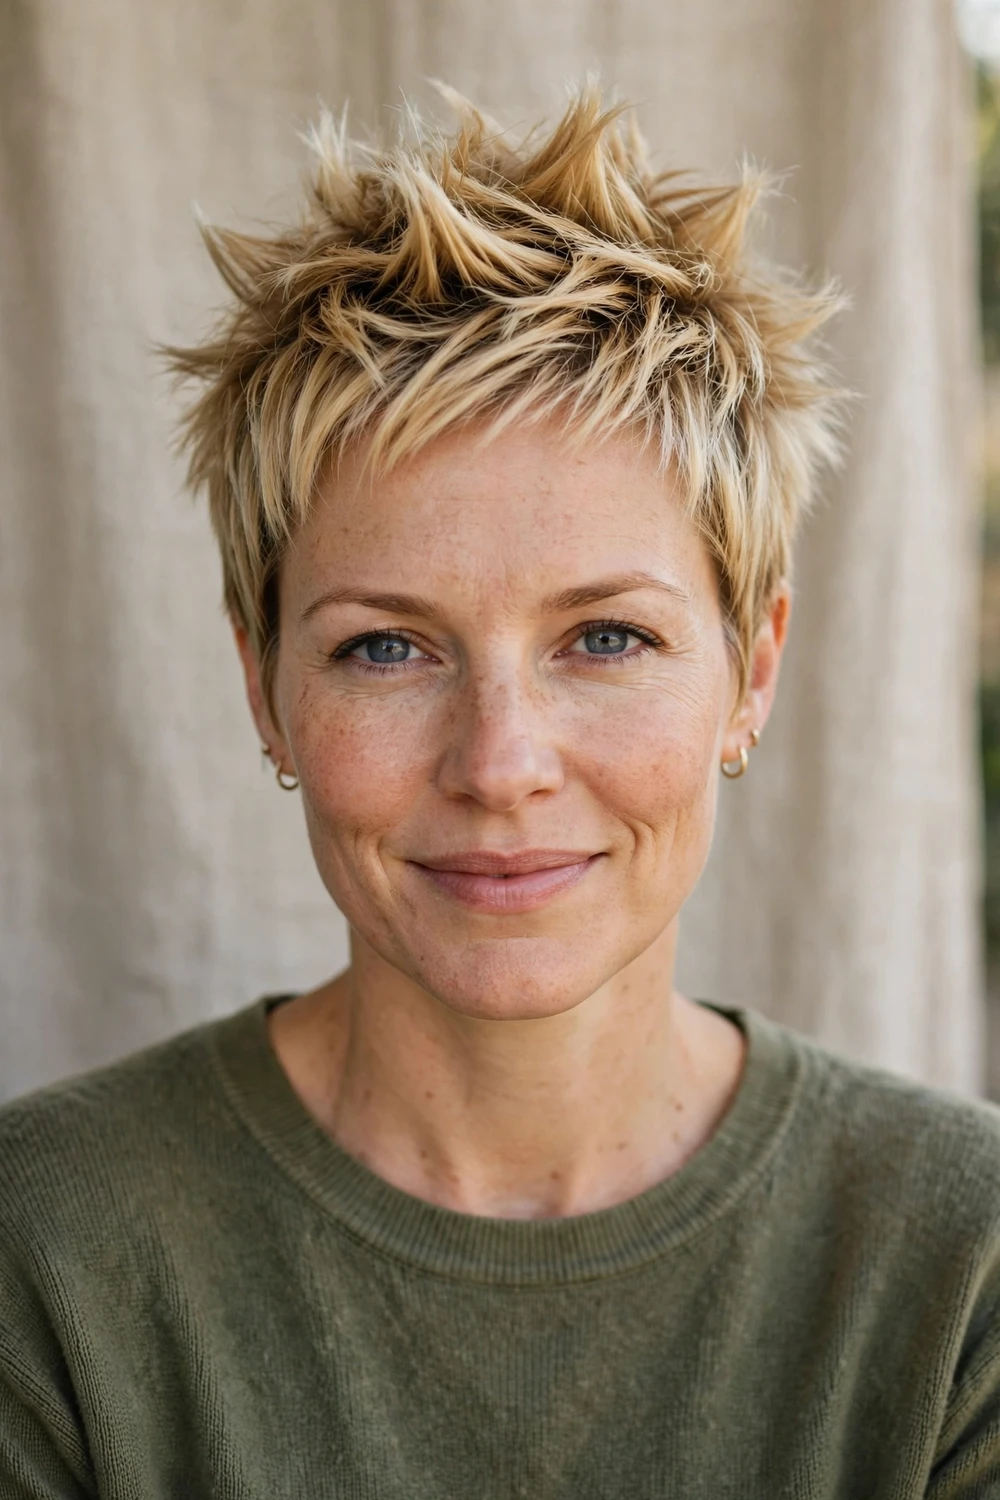
Spikes are vertical volume you can see from across the room, and fine hair spikes easily with the right product. The cut itself is straightforward: short textured layers through the crown that you lift into defined spikes with a texturizing product. Because every spike stands away from the scalp, the hair can never lie flat, which solves fine hair’s main complaint by construction. It is an honest cut about its upkeep: daily styling is part of the deal, but that styling takes about two minutes.
It suits fine straight hair and flatters oval and heart faces, showing off the cheekbones and eyes. Ask for a spiky pixie with short textured layers you can spike up, and get a product recommendation before you leave the chair. A strong-hold matte clay on dry hair gives the sharpest definition; work it through while pinching pieces between your fingers. Keep trims tight at every four weeks, since spikes need a sharp shape to stand.
Try this: apply product to dry hair only, working from the mid-lengths up so the roots stay light and lifted.
Difficulty: Medium · Cost: $ (salon)
14. Asymmetrical Pixie

One side stays longer than the other, often long and swept on one side and cropped on the other, and the diagonal line creates movement that makes fine hair look deliberately styled rather than limply short. The asymmetry also gathers more length on one side of the face, so there is visibly more hair where the eye lands. For strong cowlicks, your stylist can place the longer side where your hair naturally wants to fall, turning the growth pattern into the starting point of the shape instead of the problem in it.
It suits oval and square faces and fine hair with some natural texture. Ask for an asymmetrical pixie with a long sweep on one side and a short, neat opposite side. Style the longer side with a flat iron to define the line, and spray a light root lift at the crown for volume. Keep trims every four to five weeks, since asymmetry looks best sharp and a grown-out diagonal loses its edge.
Try this: part to the side and wear small stud earrings on the shorter side to show off the contrast.
Difficulty: Medium · Cost: $$ (salon)
15. Pixie with a Faded Side

This cut keeps a close fade on one side only, with the longer top swept over it, and the contrast is the entire point. One side shows the scalp on purpose while the other side looks twice as full, which is a bold but legitimate density trick. Unlike a full undercut, the single faded panel is easy to grow out or flip to the other side, so the commitment stays manageable. A shaved design line through the fade is optional, but the volume illusion works without it.
It suits dense fine hair only: low-density hair cannot hide a shaved side gracefully, so be honest with your stylist about your density before committing. It flatters oval and heart faces and reads as confident and modern. Ask for a close fade on one side with the top kept long enough to sweep over. Keep the fade crisp with a refresh every two to three weeks, and style the top with a little mousse at the roots for lift that balances the close side.
Try this: sweep the top over the fade for daytime polish, then flip it up for evening height.
Difficulty: Medium · Cost: $$ (salon)
16. Curly Pixie

Each curl is its own little volume unit, and fine curly hair gains bounce the moment length stops dragging the curls flat. This pixie keeps the curls longer on top and shapes the sides close, so the springs stack into a rounded, full silhouette instead of stretching into stringy length. It is one of the best cuts for fine curly hair because the shape protects curl pattern while removing the weight that pulls it down. Ask to have it cut dry or mostly dry if your curl pattern allows, so the stylist sees the true length of each curl.
It suits naturally curly or wavy fine hair and flatters most face shapes, with the rounded top softening angular faces. Style with a curl-defining cream on damp hair rather than heavy gel, and let it air-dry or diffuse on low heat. Curls forgive growth, so trims stretch to every six to eight weeks. The compact shape also means the cut holds its line between appointments better than most pixies on this list.
Try this: define the curls with cream on soaking wet hair, then do not touch them until they are fully dry.
Difficulty: Medium · Cost: $$ (salon)
17. Wavy Pixie with Long Crown
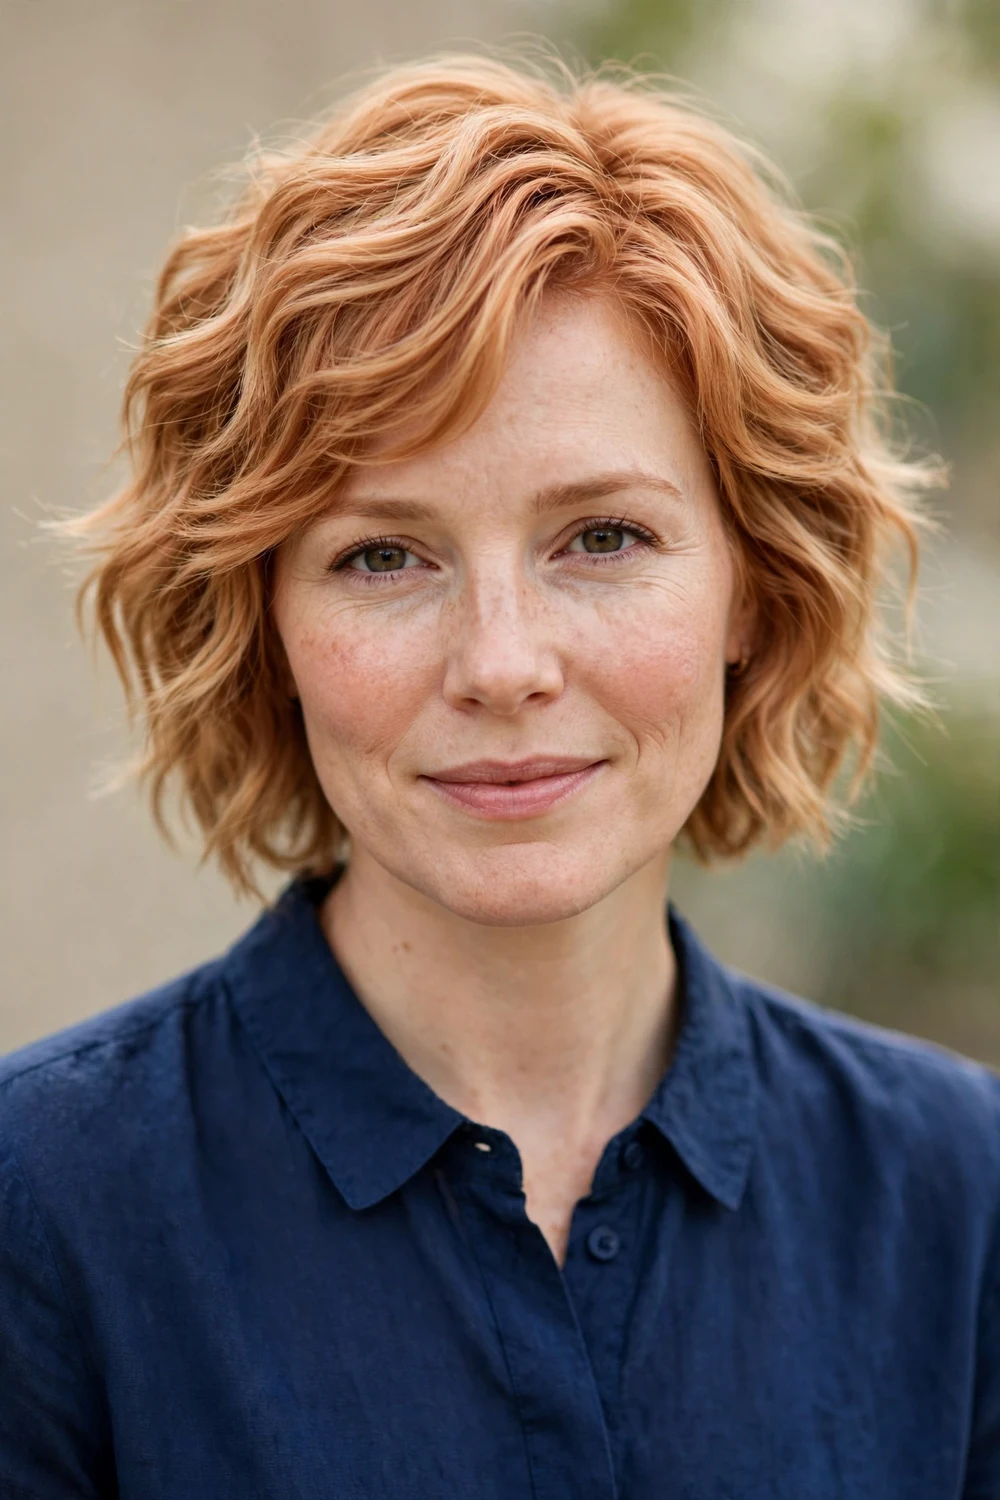
Waves take up more space than straight hair, and that simple geometry works wonderfully on fine hair. This pixie keeps the sides neat and short while leaving the top long enough to wave, so the wave does the volumizing work for you. Even fine hair looks thicker when the ends bend instead of hanging straight. At home, you can bend random sections with a flat iron twisted half a turn: you are not making curls, just little bends that push the hair away from the scalp and hold the sides off the head.
It suits slight natural wave and low-effort stylers, and it flatters oval, heart, and long faces. Ask for a pixie with a long wavy crown and neat tapered sides. Always use a heat protectant before the flat iron, since fine hair breaks easily and breakage is the last thing thin hair needs. A quick scrunch with texturizing spray is the whole routine on most days, which makes this one of the easiest cuts here to live with.
Try this: bend only the top and front sections with the iron, leaving the tapered sides smooth for contrast.
Difficulty: Low · Cost: $ (salon)
18. Pixie Shag
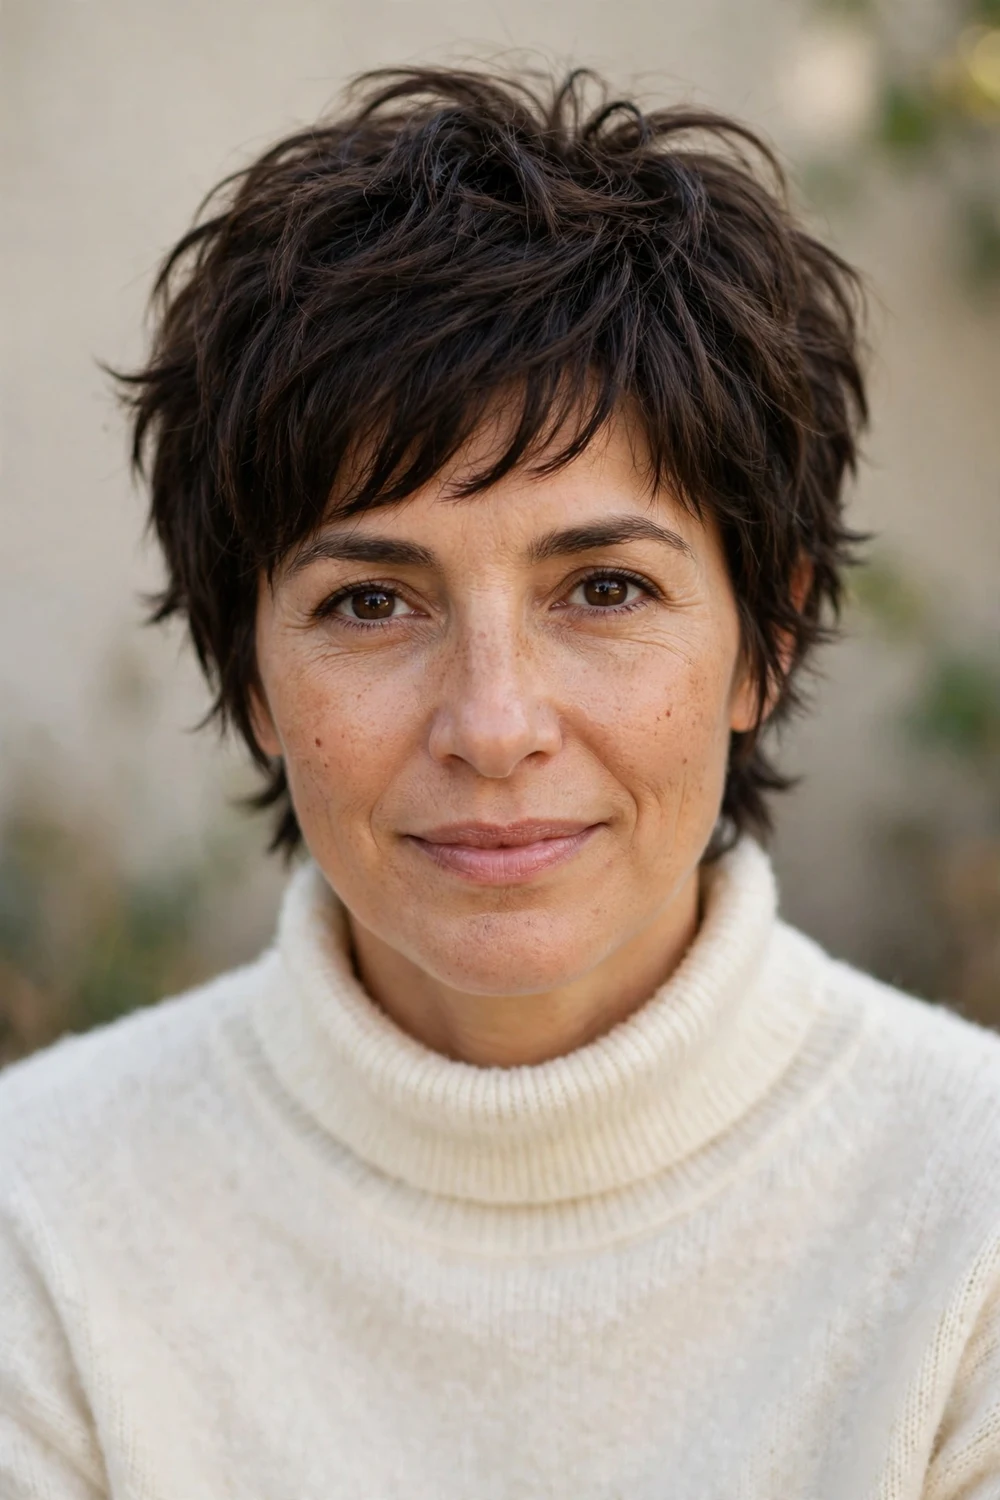
The shag brings feathered, 70s-inspired layering down to pixie length, and it is made for fine hair that needs movement without spikes. A soft fringe blends into piece-y crown layers, and the feathered ends stack into a full, airy shape that reads as abundance. Because the layers are graduated rather than blunt, the cut grows out into a nice long pixie instead of an awkward in-between stage, which means fewer anxious weeks between appointments.
It suits wavy fine hair best and flatters oval, heart, and square faces, softening strong lines with its feathered outline. Ask your stylist for a pixie shag with feathered layers and a soft fringe. Style with a little texture spray scrunched into damp hair and let it air-dry; the cut is designed to look lived-in. If choppy layers are your thing, these short shag hairstyles for women show how the cut works at longer lengths too.
Try this: let it air-dry without touching it, then break up the layers with your fingers once fully dry.
Difficulty: Low · Cost: $$ (salon)
19. Pixie with Curtain Bangs
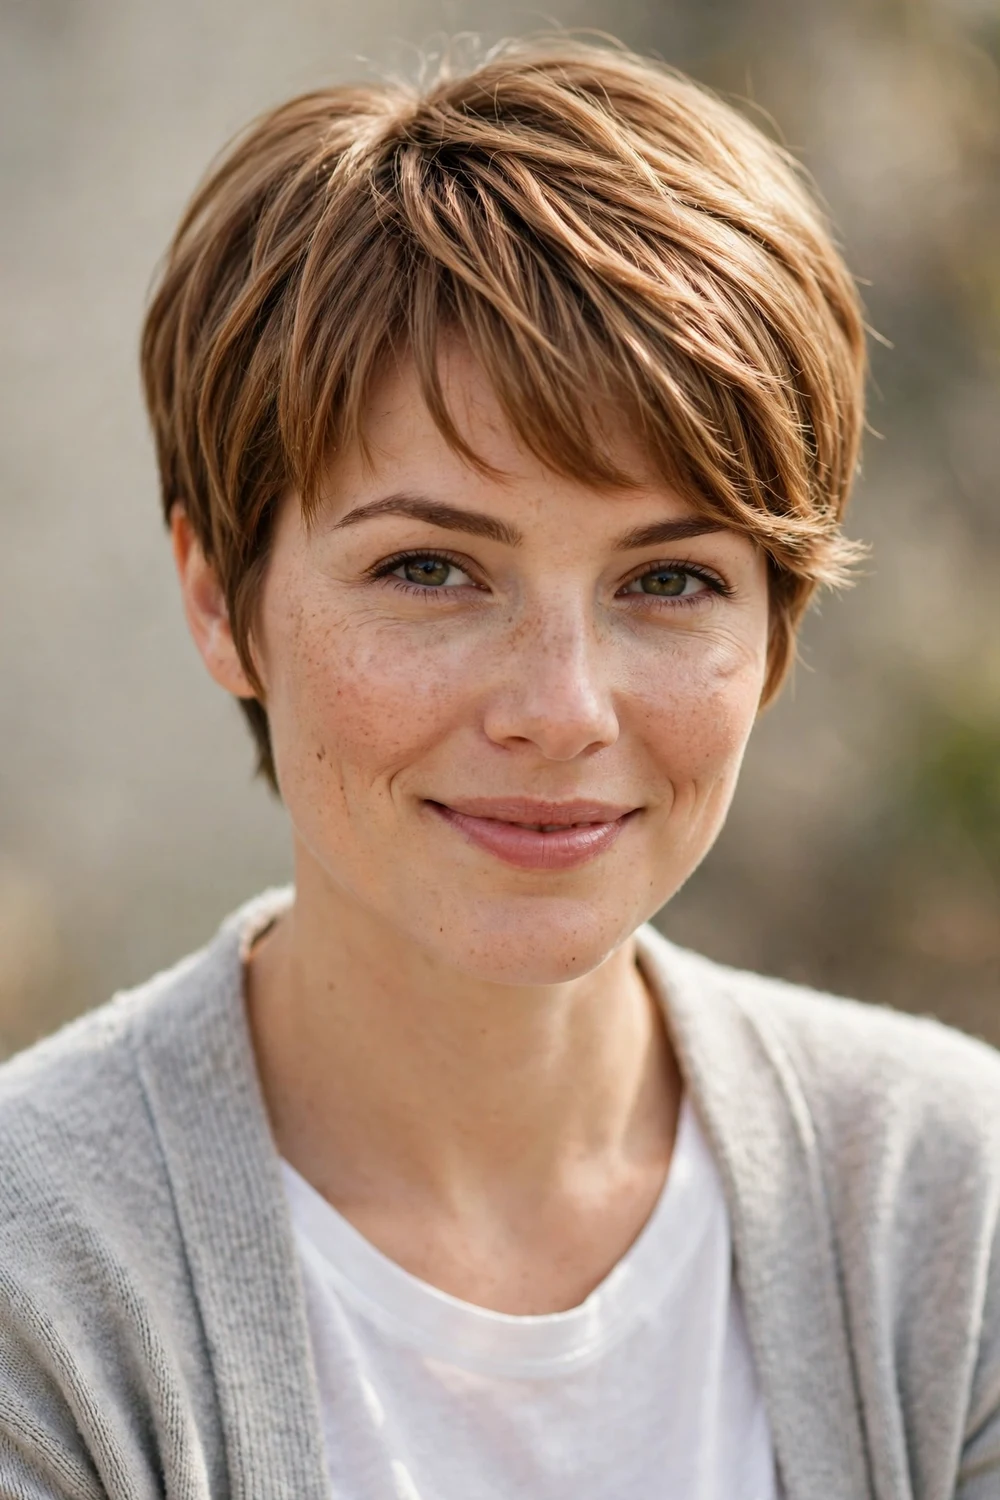
The fringe is parted in the middle and sweeps to both sides, blending into the pixie, and that widened front balances a narrow forehead while adding face-framing fullness. Curtain bangs cover the hairline at the temples, which is often the first place hair thins, and because they split open they never look heavy or helmet-like on fine hair. The style also works as a grow-out plan: curtain bangs blend into longer layers, so you are never stuck with an awkward fringe stage. Bottleneck bangs, wider at the temples and shorter through the middle, are a slightly more structured option within the same family.
It suits straight to wavy fine hair and flatters narrow, long, and oval faces. Ask for curtain bangs on your pixie, parted in the center and blended into the sides, keeping the fringe soft rather than heavy so it never overwhelms the shorter cut beneath it. Style by blow-drying the bangs forward with a small round brush, then letting them split naturally. Trim the bangs every three to four weeks between full cuts if they start reaching your eyes.
Try this: dry the fringe in two directions, then let it split, for the signature curtain sweep.
Difficulty: Low · Cost: $ (salon)
20. Swept-Back Pixie

The whole top is brushed back off the face with volume at the roots, and the back-swept direction lifts every strand away from the scalp. If your front hairline has a strong cowlick, this cut stops fighting it: the front is cut to follow your growth pattern, so the cowlick becomes the lift instead of the problem. The result showcases the face and earrings, looks styled on purpose, and suits mornings when bangs would take too long to tame.
It suits fine hair with good density and confident wearers, and it is particularly striking on silver and salt-and-pepper pixies where the swept-back direction shows off the color. Ask for the top left two to three inches long and the front cut to follow your growth pattern, not a straight line. On sleek days, use a tiny bit of cream and comb it back while damp; on casual days, let it dry naturally and shake it out.
Try this: blow-dry the front straight up off your forehead first, then settle it back for maximum root lift.
Difficulty: Low · Cost: $ (salon)
21. Soft Pixie with Wispy Bangs

A soft, feathered fringe over a short pixie adds weight and interest at the front, right where fine hair can otherwise look sparse. The bangs are feathered rather than blunt, with deliberate breaks that keep them airy, and they blend into the textured top so nothing looks heavy. This is the gentlest entry in the bangs family: it gives you face-framing softness without a solid fringe line, and it forgives the limitations of fine hair instead of fighting them.
It suits straight fine hair and flatters oval, heart, and long faces. Ask for wispy bangs, feathered and blended into the sides, never blunt. Style by blow-drying the bangs forward, then finger-separating the pieces for that airy finish. Air-dry while pushing the bangs to one side on lazy days; a touch of pomade on the ends adds piecey definition. Trim the bangs every three to four weeks so they stay above the eyes.
Try this: separate the fringe pieces with your fingers while they are still warm from the dryer to set the airy breaks.
Difficulty: Low · Cost: $ (salon)
22. Gamine Pixie

The classic Audrey shape: neat and close at the sides, softly longer on top, every edge deliberate. The gamine is elegant rather than edgy, and it never looks dated. On fine hair it works because the precision is the point: a crisp outline makes fine hair look intentional and groomed instead of thin, and the smooth finish catches light evenly so the silhouette reads as one solid shape. It is the pixie for people who like their short hair polished.
It suits fine hair with good density, petite features, and oval or heart faces. Ask for a classic gamine pixie with neat sides, soft length on top, and nothing spiky. Style smooth with a brush and a pea-size amount of cream, combing in the desired direction. Because the shape is precise, trims every four to five weeks keep it crisp. For more polished short options with easy upkeep, these short pixie haircuts for older women gather the most flattering low-maintenance picks.
Try this: smooth a little cream over the top while damp, then comb it flat for a sleeker finish on dressier days.
Difficulty: Low · Cost: $ (salon)
23. Brushed-Forward Textured Crop
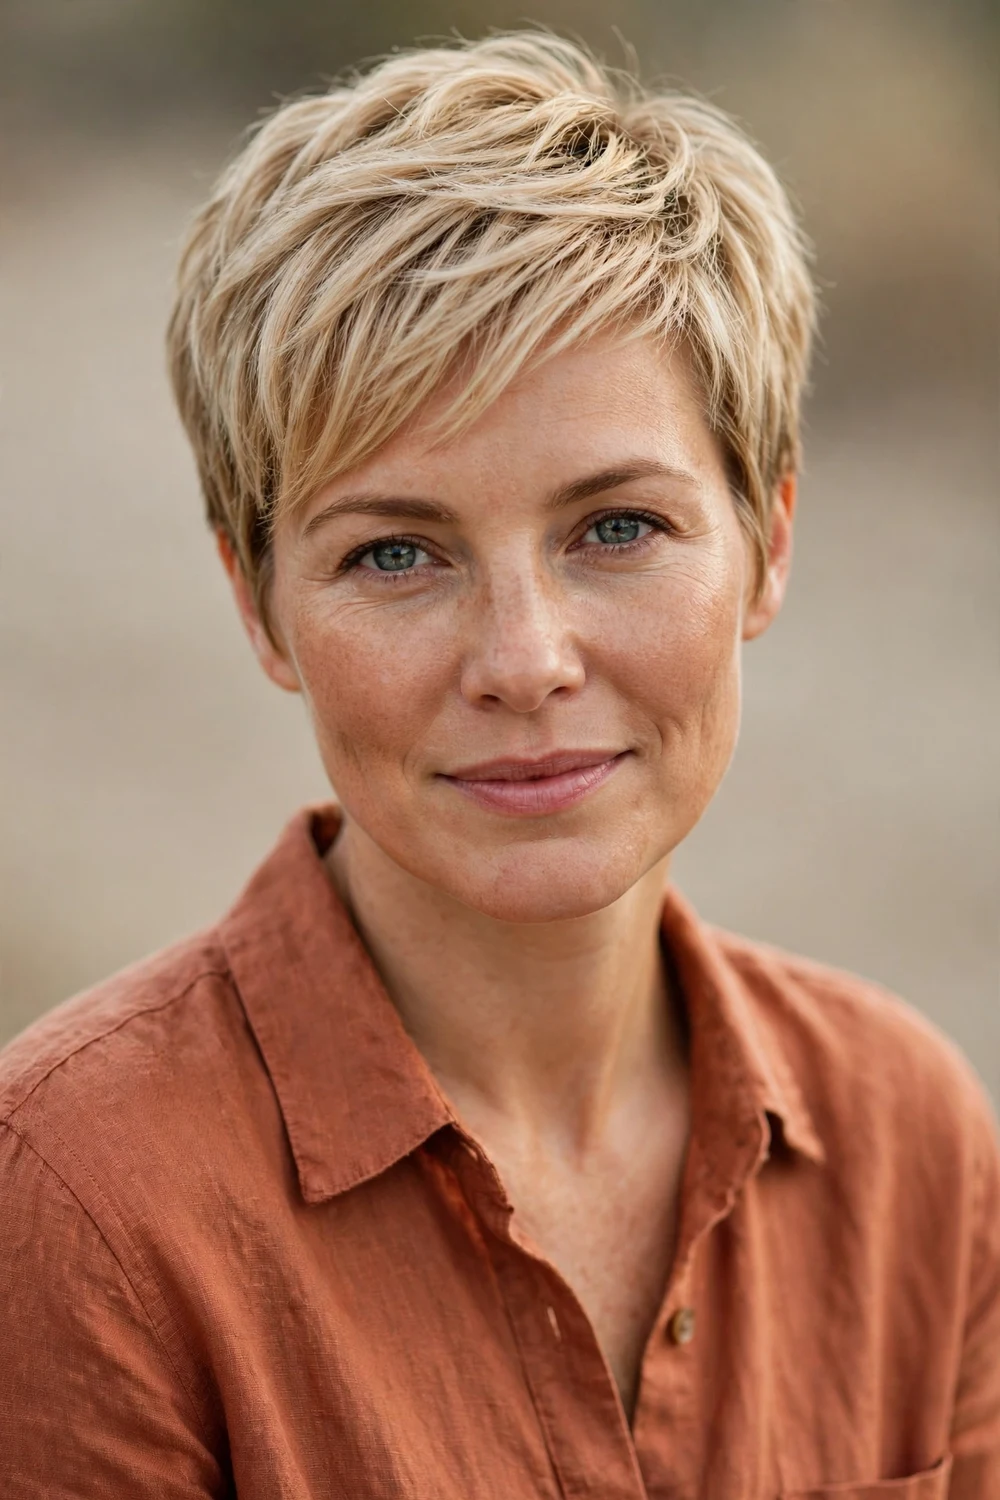
Brushing hair forward is one of the oldest tricks for a thinner front, and this cut is built so the hair naturally falls toward the face every morning. The top is textured and brushed forward with a short, piecey fringe that breaks up the hairline, while the sides stay neat and close to keep the shape clean. The uneven fringe is a deliberate choice: a perfectly straight line shows gaps, while a choppy edge hides them. Fine hair with a receding or thinning hairline gets real, honest coverage from this shape.
It suits straight to wavy fine hair and flatters oval and long faces. Ask for a textured crop with the top cut to fall forward and an uneven, piecey fringe. Style with a light cream or texture spray, brushing everything forward with your fingers while damp and leaving it alone to set. It is one of the lowest-effort cuts on this list, which makes it a strong pick if you want coverage without a daily styling project.
Try this: keep the fringe uneven on purpose; a choppy edge hides a thinning hairline better than a straight one.
Difficulty: Low · Cost: $ (salon)
24. French Pixie

Shorter than a traditional pixie, with a soft piecey fringe across the forehead and a slightly imperfect, lived-in quality that is the entire point. The French pixie does not chase precision: it is meant to look a little undone, which is generous to fine hair since the texture reads as fullness. The soft fringe adds coverage at the front, the short length removes all dragging weight, and the whole thing air-dries into shape. It is Parisian in the way that matters: effortless, not unfinished.
It suits straight to wavy fine hair and flatters oval, heart, and round faces. Ask for a French pixie with a soft piecey fringe and light texture through the top. Air-dry whenever possible, or run a flat iron over the ends for a subtle bend. A small amount of cream worked through tames frizz without weighing the cut down. For more Parisian-inspired short cuts, these short french bobs bring the same spirit to a slightly longer length.
Try this: let it air-dry completely before touching it; the lived-in finish is built by leaving it alone.
Difficulty: Low · Cost: $ (salon)
25. Cropped Pixie

The cropped pixie sits shorter than a classic pixie, with length under three inches all over, and it suits fine hair remarkably well for one blunt reason: the minimal length removes any weight that would drag the strands down. There is nothing to lie flat, so there is nothing to look flat. What remains is pure texture, close to the head, shaped by the cut itself. A matte clay worked through dry hair with finger-combing is the entire styling routine, and no tools are required.
It suits confident wearers with strong bone structure and straight fine hair, and it flatters oval and heart faces. Ask for a cropped pixie kept very short all over with soft texture on top. Because the cut is so short, trims every three to four weeks keep the shape from growing fuzzy. It is the boldest, lowest-maintenance option on this list, and on fine hair it often looks fuller than longer cuts that collapse by noon.
Try this: rub a pea-size amount of matte clay between your palms and finger-comb it through dry hair for instant shape.
Difficulty: Low · Cost: $ (salon)
26. Soft Layered Pixie

Soft, rounded layering creates gentle movement that flatters fine hair without the harsh angles of choppier cuts. Where the choppy pixie breaks the hair up, this one rounds it into a smooth, feminine shape: the layers are graduated and blended, the outline stays soft, and the overall effect is polished rather than edgy. It is pixie energy with feminine softness, and the rounded silhouette gives fine hair a full-looking curve instead of a jagged one. Tell your stylist you want feminine layering rather than choppy texture, and the cut will land exactly here.
It suits straight to wavy fine hair and flatters oval, heart, and long faces. Style with a lightweight cream worked through with your fingers, keeping the shape soft and touchable instead of crispy or over-defined. Because the layers are blended rather than jagged, the grow-out stays smooth for weeks and never passes through an awkward stage. If you like soft layers in other short cuts too, these short layered hairstyles for women over 60 show flattering options with similar gentle shapes.
Try this: use cream, not paste, on this cut; heavier products fight the soft rounded finish.
Difficulty: Low · Cost: $ (salon)
27. Pixie with Highlights

Color is the quiet volume trick almost nobody talks about, and it works on any pixie shape. Strategic highlights create dimension that mimics density: fine highlights placed through the top, with brighter pieces around the face, catch light at the layered ends and make the cut look intentional and significantly fuller. Lighter pieces also shrink the contrast between hair and scalp, so any see-through spots become far less visible. Ask your colorist for placement that catches light at the layered ends and keeps your natural root depth at the scalp.
This pairs with any of the cuts above, from choppy to gamine, and suits every face shape. It is especially worth considering if your pixie is one solid dark color, since one flat shade from scalp to tip makes fine hair look thinner. Style with a small amount of pomade for piecey definition so the color and cut work together. Plan a gloss or toner every four to six weeks to keep the dimension fresh and the tone clean.
Try this: ask for brighter pieces around the face and softer pieces underneath for the most natural-looking depth.
Difficulty: Medium · Cost: $$ (salon)
28. Pixie with Babylights and Root Smudge
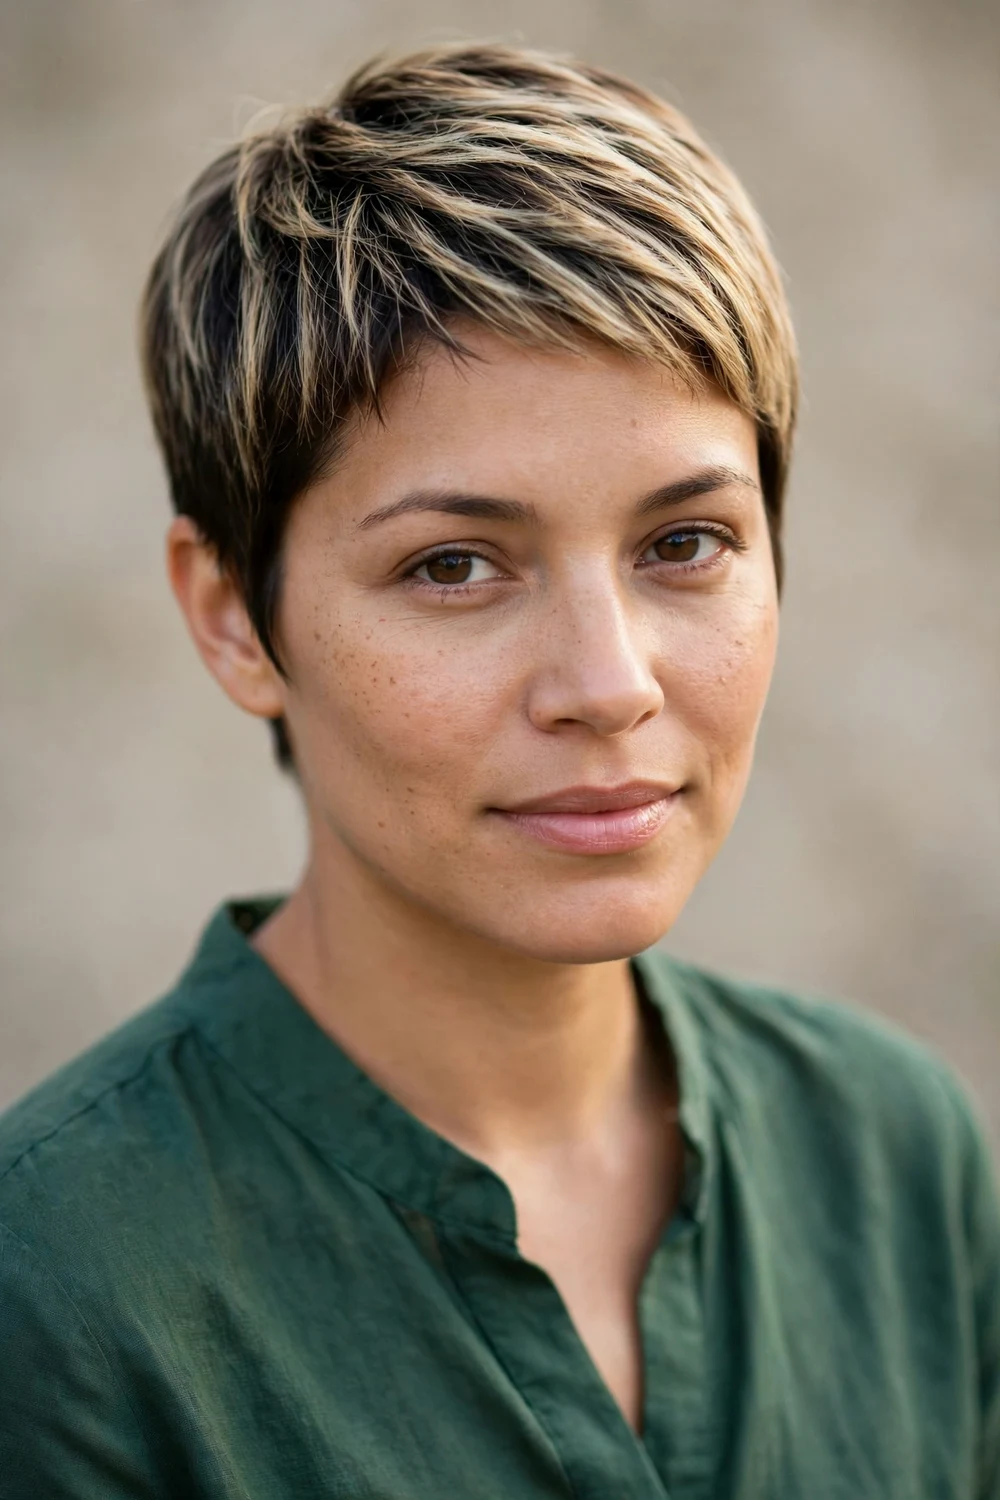
Babylights are finer than highlights, creating dimension that looks natural rather than streaky, and paired with a root smudge they are a masterclass in faking thickness. The babylights add little ribbons of light through the hair for depth, while the root smudge blends the color at the scalp so the line between skin and hair looks softer. The result is hair that looks like it has more strands than it really does, without changing the cut at all. The cut underneath is a soft, simple pixie with gentle layers, letting the color do the talking.
It suits straight to wavy fine hair and every face shape, and it is one of the best options when the scalp shows through at the part. Dress it up with a smooth side part and a little shine spray, or dress it down scrunched with sea salt spray. Because the root is smudged rather than harsh, the grow-out is softer than traditional highlights, though a refresh every six to eight weeks keeps the babylights bright.
Try this: ask for the root smudge in your natural shade so regrowth blends instead of drawing a line.
Difficulty: Medium · Cost: $$ (salon)
29. Long Pixie with Chin-Length Front Pieces

This is the cut for anyone nervous about going short. From the front, it still looks like you have length: face-framing pieces near the chin soften the cheeks and give you hair to tuck, wave, or sweep. From the back and sides, you get all the lift and lightness of a pixie, with the top left long and soft at four to five inches and the back kept short and tapered. The longer front pieces also slim the face and draw attention to the eyes, which is a flattering trade for anyone worried short hair will expose too much.
It suits straight to wavy fine hair and flatters round, square, and heart faces. Ask for a long pixie with chin-length face-framing pieces, a long soft top, and a short tapered back, and point out exactly where you want the front pieces to end. Style with volumizing spray at the roots and tuck one side behind the ear for a two-sided look. It grows out gracefully, so you can stretch trims to every six to eight weeks without an awkward stage.
Try this: tuck the chin-length piece behind your ear while cooking or working, then let it fall loose for evenings.
Difficulty: Low · Cost: $$ (salon)
At a Glance: 29 Pixie Haircuts for Fine Hair Compared
| Cut | Best for | Fine-hair perk | Upkeep |
|---|---|---|---|
| Stacked Crown Pixie with Point-Cut Texture | Straight to wavy hair; oval, heart, long faces | Layers prop each other up for built-in lift | Mousse at roots, finger-dry |
| Long-Crown Pixie | Low-density fine hair; most face shapes | Long top covers scalp and builds height | Blow-dry top upward; trims every 5 to 6 weeks |
| Tapered Pixie with Fuller Temples | Straight to wavy hair; oval, heart, long faces | Temple width balances a full crown | Brush sides back, then let fall forward |
| Choppy Pixie with Piecey Top | Straight flat hair; oval, heart faces | Uneven pieces stop hair clumping flat | Matte paste on dry hair, fingers only |
| Tousled Razored Pixie | Straight to wavy hair; oval, heart, square faces | Feathered ends create separation without removing bulk | Salt spray, scrunch, air-dry |
| Blunt-Edged Pixie with Soft Fringe | Straight hair; low to medium density | Solid outline hides see-through scalp | Comb into place; dry fringe first |
| Bixie with Ear-Skimming Sides | Straight to wavy hair; all face shapes | Rounded shape keeps sides off the head | Volumizing spray, round-brush sides |
| Pixie-Bob Hybrid with Blunt Ends | Straight to wavy hair; round, oval, heart faces | Blunt edges make fine hair look thickest | Blow-dry front forward and under |
| Long Pixie with Root Lift | Low-density fine hair; oval, round, heart faces | Tousled length hides thinness with movement | Texture spray at roots; trims every 6 to 8 weeks |
| Side-Swept Pixie with Deep Side Part | Straight to wavy hair; round, square faces | Deep part lifts roots against their direction | Train part damp; direct fringe across |
| Soft Faux-Hawk Pixie | Straight to wavy hair; round, heart faces | Taller center reads as overall fullness | Matte paste, push center up and forward |
| Undercut Pixie with Volume on Top | Dense fine hair; bold dressers | All density concentrates on the crown | Mousse at roots; fade touch-up every 3 to 4 weeks |
| Spiky Pixie | Straight fine hair; oval, heart faces | Spikes can never lie flat | Matte clay on dry hair; trims every 4 weeks |
| Asymmetrical Pixie | Textured fine hair; oval, square faces | Diagonal line makes hair look styled, not limp | Flat-iron long side; trims every 4 to 5 weeks |
| Pixie with a Faded Side | Dense fine hair; oval, heart faces | Contrast makes the long side look twice as full | Fade refresh every 2 to 3 weeks |
| Curly Pixie | Naturally curly fine hair | Each curl is its own volume unit | Curl cream on damp hair; diffuse or air-dry |
| Wavy Pixie with Long Crown | Slight natural wave; low-effort stylers | Waves take up more space than straight hair | Heat protectant plus flat-iron bends |
| Pixie Shag | Wavy fine hair; oval, heart, square faces | Feathered layers stack into an airy shape | Texture spray, scrunch, air-dry |
| Pixie with Curtain Bangs | Straight to wavy hair; narrow, long, oval faces | Fringe covers thinning temples softly | Round-brush bangs forward, let split |
| Swept-Back Pixie | Fine hair with good density | Back-swept direction lifts every strand off scalp | Blow-dry up off forehead, then settle back |
| Soft Pixie with Wispy Bangs | Straight fine hair; oval, heart, long faces | Feathered fringe adds weight at the front | Blow-dry forward, finger-separate |
| Gamine Pixie | Fine hair with good density; petite features | Crisp outline makes hair look groomed, not thin | Cream and comb smooth; trims every 4 to 5 weeks |
| Brushed-Forward Textured Crop | Straight to wavy hair; thin hairlines | Forward fall plus uneven fringe hides thin front | Light cream, brush forward with fingers |
| French Pixie | Straight to wavy hair; oval, heart, round faces | Lived-in texture reads as fullness | Air-dry; touch of cream for frizz |
| Cropped Pixie | Straight fine hair; strong bone structure | Almost no length means nothing can lie flat | Matte clay finger-combed through dry hair |
| Soft Layered Pixie | Straight to wavy hair; oval, heart, long faces | Rounded silhouette gives a full-looking curve | Lightweight cream, fingers only |
| Pixie with Highlights | Any pixie shape; all face shapes | Dimension mimics density; lighter pieces hide scalp | Pomade for definition; gloss every 4 to 6 weeks |
| Pixie with Babylights and Root Smudge | Straight to wavy hair; visible scalp at part | Smudged root softens the hair-to-skin line | Side part plus shine spray; refresh every 6 to 8 weeks |
| Long Pixie with Chin-Length Front Pieces | Straight to wavy hair; round, square, heart faces | Front length frames face while back lifts | Volumizing spray at roots; trims every 6 to 8 weeks |
How to Choose Your Pixie for Fine Hair
Start with your density, not your face shape. Part your hair and look at your scalp in a bright mirror. If the scalp shows only slightly, you have fine hair with decent density, and almost every cut on this list works for you. If the scalp shows clearly in wide lines, your density is lower: keep extra length on top, avoid very close-cropped sides, and skip cuts with lots of exposed scalp, like the faded side. A stylist can confirm in seconds, so ask directly: is my density low enough that we should keep the top longer?
Next, match the cut to your routine. If you spend two minutes on hair, pick a cut that styles itself: the tousled razored pixie, the French pixie, or the cropped pixie. If you will spend five, the stacked crown and choppy pixie reward the effort. Be honest about trims, too. Pixies with fades, spikes, and asymmetry need touch-ups every three to five weeks, while long pixies and bixies stretch to six or eight. Pick the schedule you will actually keep, since a grown-out precise pixie looks worse than a fresh easy one.
Finally, say the right words in the chair. Tell your stylist your hair is fine and thin, ask for lift at the crown and soft texture on the ends, and say clearly not to use thinning shears on top. Bring two or three photos from this list and point to where your hair is thinnest. Ten minutes of clear communication does more for the result than any product you will buy afterward.
Styling and Care Tips for Fine Pixies
Washing. Fine hair gets weighed down fast, so use a lightweight volumizing shampoo and keep conditioner to the ends, if you use it at all. Wash with lukewarm water instead of hot, and try not to wash daily: second-day roots lift better because your scalp’s natural oils give the hair some grip.
Styling. Volume is built at the scalp, so put mousse or root-lift spray at the roots and leave the ends alone. Blow-dry upward with your fingers or a small round brush, then stop touching the hair. The winning products for fine pixies are root-lift mousse, texture spray, and a pea-size amount of matte paste; the ones to skip are heavy oils, thick creams, and shine serums near the root, which flatten everything within the hour.
Maintenance. Most pixies on this list need trims every four to six weeks to hold their shape, since layers lose their lift fast on fine hair. Dry shampoo at the roots on day two or three absorbs oil and adds grip that reads as fullness. And if your color involves highlights or babylights, a gloss or toner every four to six weeks keeps the dimension that makes fine hair look denser.
Frequently Asked Questions
Will a pixie make my fine hair look thinner?
Usually the opposite happens. Shorter hair weighs less, so the roots lift more, and short ends stay denser than long ones. The key is a cut with a strong outline and no thinning shears: stacked crowns, blunt perimeters, and point-cut texture all build fullness, while an evenly cropped cut with no shape can expose the scalp. Tell your stylist your hair is fine and ask for lift at the crown.
What is the best pixie cut for fine hair?
The stacked crown pixie with point-cut texture is the strongest all-around pick because its lift is built into the shape. For low-density hair, the long-crown pixie or the long pixie with root lift give more coverage. For a visible scalp at the part, the blunt-edged pixie or babylights with a root smudge hide it best. The right choice depends on your density, your face shape, and how much daily styling you will do.
What should I ask my stylist for a pixie that adds volume?
Say your hair is fine and thin, ask for lift at the crown and soft texture on the ends, and say clearly not to use thinning shears. Useful phrases include: stacked layers at the crown, tapered sides with fullness left through the top, point-cut ends, and keep my root depth. Bring two or three photos, point to where your hair is thinnest, and say how many minutes you spend styling each morning.
How often should I trim a pixie with fine hair?
Every four to six weeks keeps most pixies crisp, since layers lose their lift fast on fine hair. Fades, spikes, and asymmetrical cuts need touch-ups every three to five weeks to stay sharp. Longer pixies and bixies can stretch to six to eight weeks if you do not mind a softer look in between. Book the next appointment before you leave the salon so the shape never collapses.
What products work best for a fine-hair pixie?
Root-lift mousse at the scalp, texture spray for grip and piecey texture, and a pea-size amount of matte paste for defining pieces are the three products worth owning. Use dry shampoo at the roots on day two or three for lift without washing. Skip heavy oils, thick creams, and shine serums near the root, since they flatten fine hair within the hour. Start with less product than you think; you can always add more.
Final Thoughts
Fine hair is not a reason to avoid the pixie; it is the reason to get one. Every cut on this list turns short length into an advantage, whether through stacked layers that lift themselves, razor work that separates without removing bulk, or a fringe that covers exactly what needs covering. Pick the one that fits your density, your face, and the minutes you will actually spend each morning, then tell your stylist what you want in plain words. The volume you have been chasing with products was in the cut all along.

