


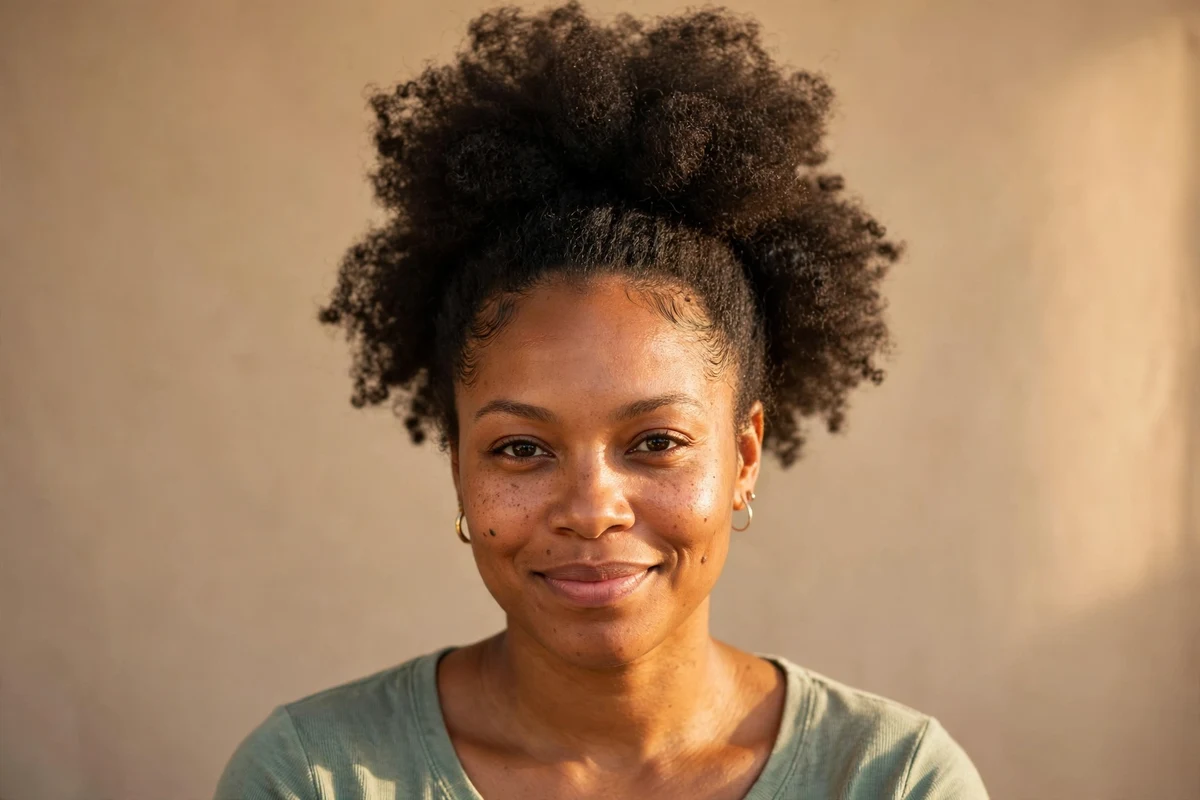
Growing out 4C hair comes with a phase nobody warns you about: too long for a TWA, too short for most styles, with shrinkage hiding every inch of progress. This is the awkward length stage, and the fix isn’t waiting it out with boring hair. Styles that stretch the hair, protect the ends, and work with short lengths (two-strand twists, puffs, twist-outs, flat twists, and bantu knots) carry this phase with shape and intention.
Below are 33 awkward length 4C hairstyles built for this exact stage. Each one handles the real problems of in-between hair: coils that shrink up to 70 percent, uneven growth, and ends that need protection while length builds.
Quick Takeaways
- Stretch before you style. Banding, twists, or braids worn overnight add visible length without heat.
- Low-manipulation styles (twists, flat twists, box braids) protect ends and help retain every inch you grow.
- Moisture first, style second. A leave-in plus oil or cream keeps short 4C hair soft enough to style without breakage.
- Satin at night is non-negotiable. A bonnet or scarf keeps puffs, twists, and outs neat for days longer.
- Uneven lengths are normal during grow-out. Parted styles, puffs, and tucked ends hide the difference while hair catches up.
1. Two-Strand Twists
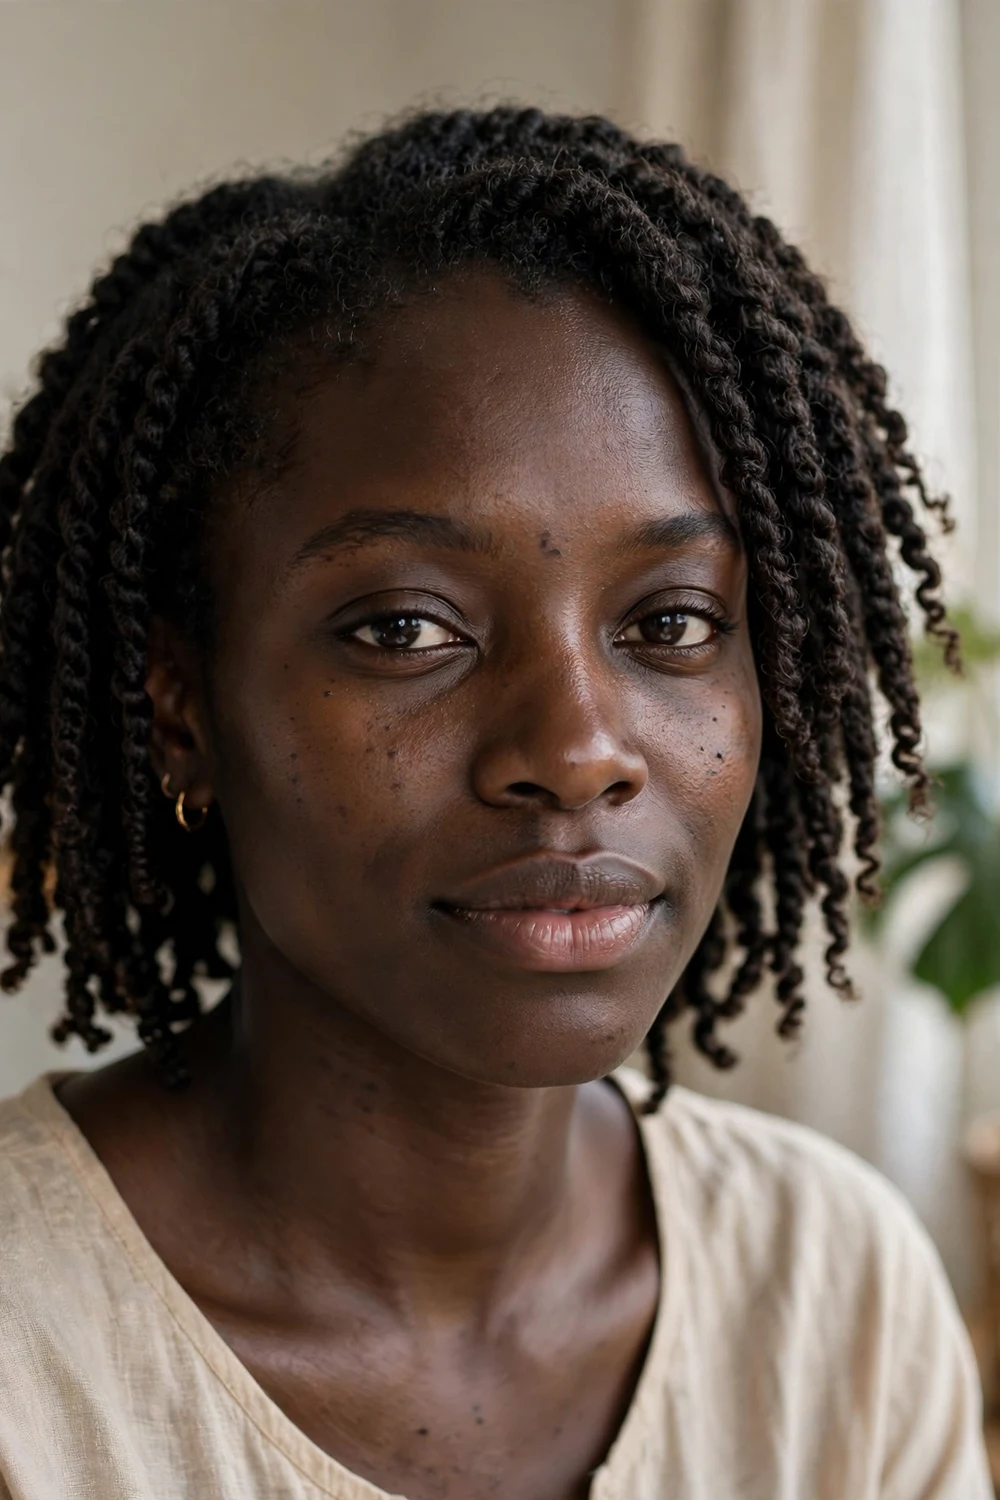
Two-strand twists are the workhorse of the grow-out phase. They keep every strand stretched and tucked away, which cuts down on tangles and breakage while length builds underneath. On damp hair with leave-in and a light butter, medium-sized twists take about an hour to install and hold for two to three weeks with nightly care.
This style also doubles as a length check. As weeks pass, the twists hang a little lower, and that visible progress keeps motivation up through the slow months.
Try this: Keep twists medium rather than tiny to cut install time in half. Re-twist only the fuzzy roots each week instead of redoing the full head.
Difficulty: Easy | Cost: $0–$10
2. High Puff
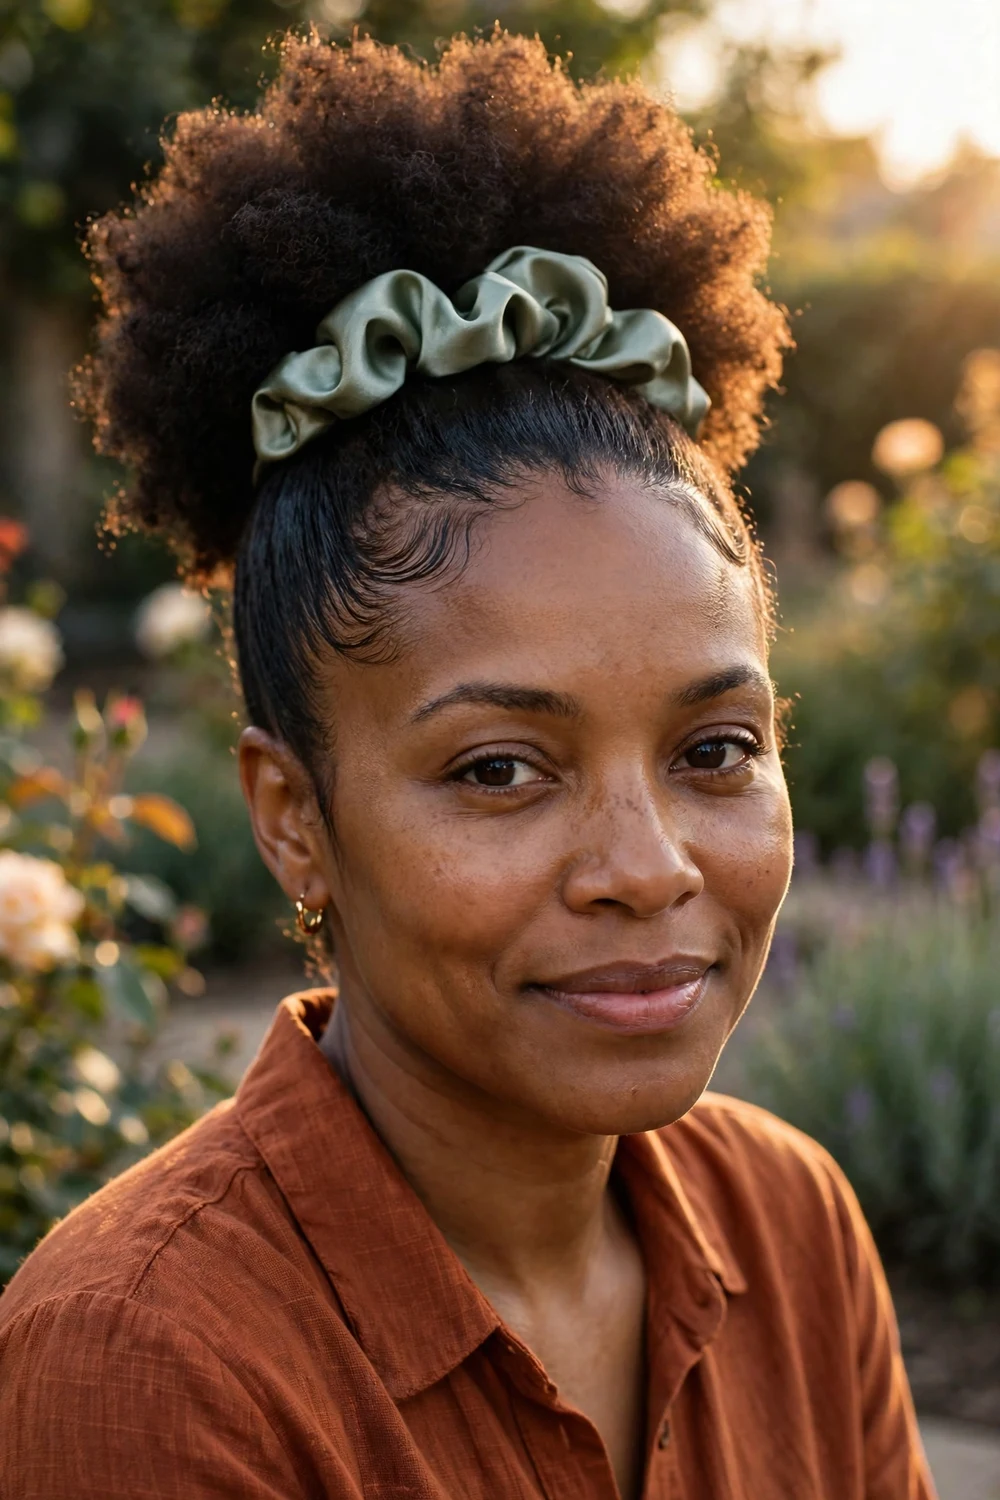
The high puff turns shrinkage into shape. Stretch hair first with banding or loose twists overnight, then gather everything to the crown with a satin scrunchie. A little edge control smooths the hairline, and the puff itself shows off density and texture in one quick move.
Because the ends sit tucked inside the puff, they stay protected from rubbing against collars and scarves. The whole style takes under fifteen minutes once hair is stretched.
Try this: Keep the band slightly loose to avoid tension headaches. Fluff the puff with fingers only, since a pick can disturb the shape.
Difficulty: Easy | Cost: $0–$8
3. Half-Up Half-Down Twists
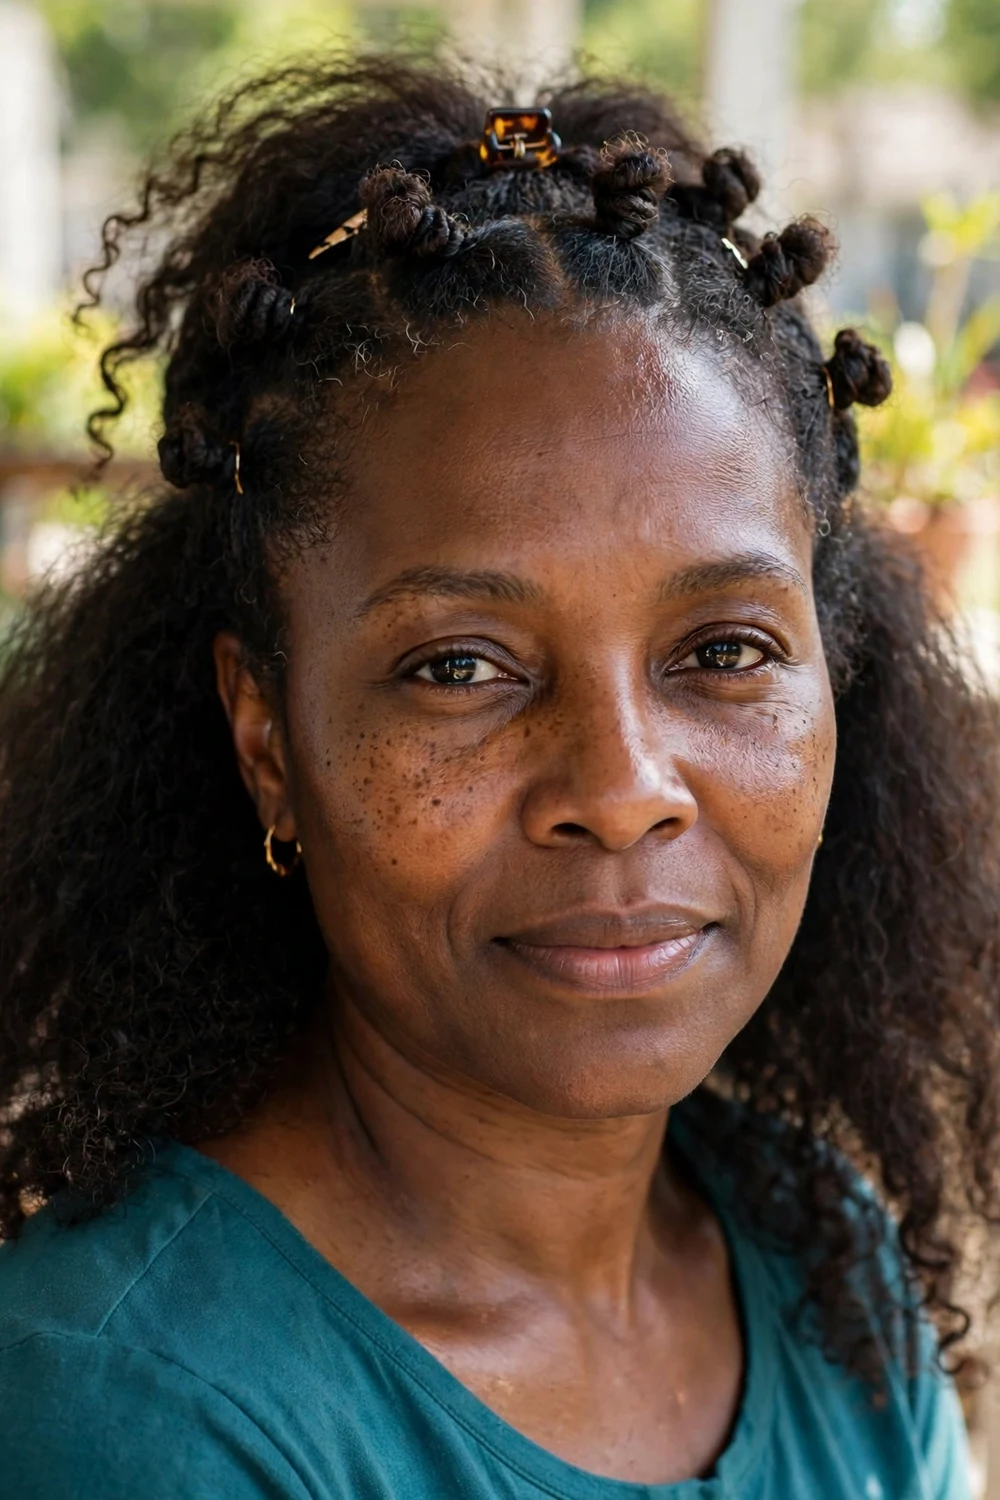
When the front grows slower than the back, this style hides the gap. Twist the top and front sections into small twists and pin them back at the crown, leaving the rest loose in a twist-out or its natural shrunken state. The twisted section reads neat and deliberate while the loose hair shows texture.
It works for casual days and dresses up fine with a pair of gold cuffs slid onto two of the front twists.
Try this: Use small jaw clips instead of bobby pins for front pieces too short to pin. They grip better and don’t slide out by noon.
Difficulty: Easy | Cost: $0–$5
4. Mini Bantu Knots
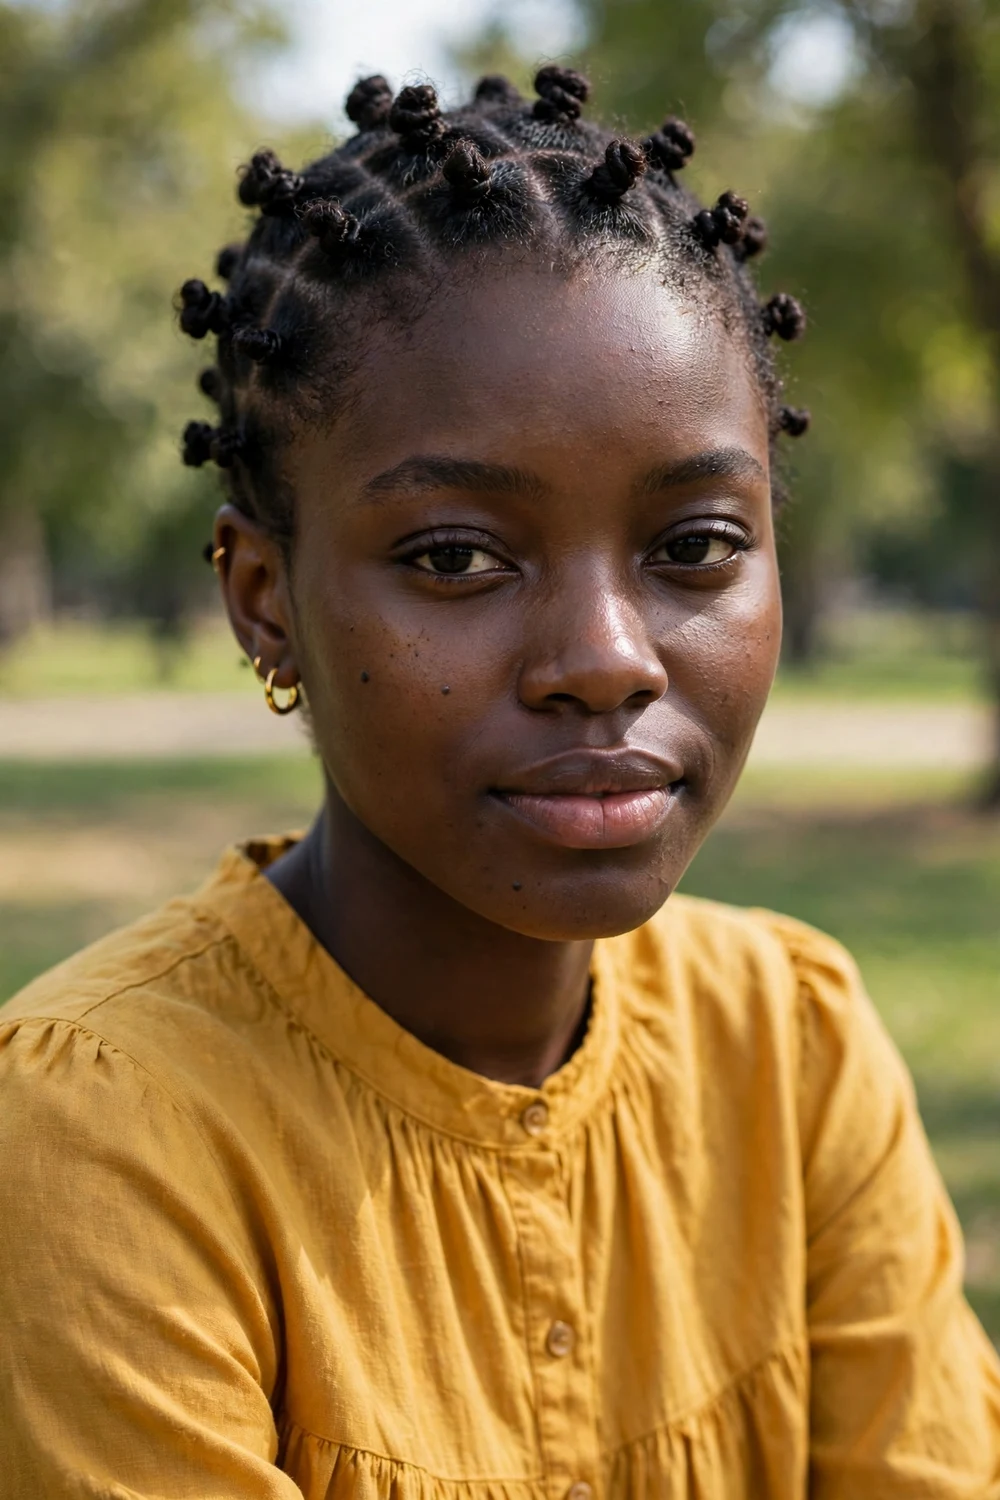
Mini bantu knots give two styles for one install. Section hair into eight to twelve parts, twist each section, and coil it into a small knot secured with a pin. Wear the knots for two or three days, then unravel for a full, springy knot-out that lasts several more.
Ends stay completely tucked inside the knots, which makes this one of the most protective options for fragile growing hair. A satin bonnet at night keeps both the knots and the knot-out neat.
Try this: Apply leave-in before coiling so the unravel reveals defined, moisturized curls instead of dry ones.
Difficulty: Easy | Cost: $0–$5
5. Twist-Out
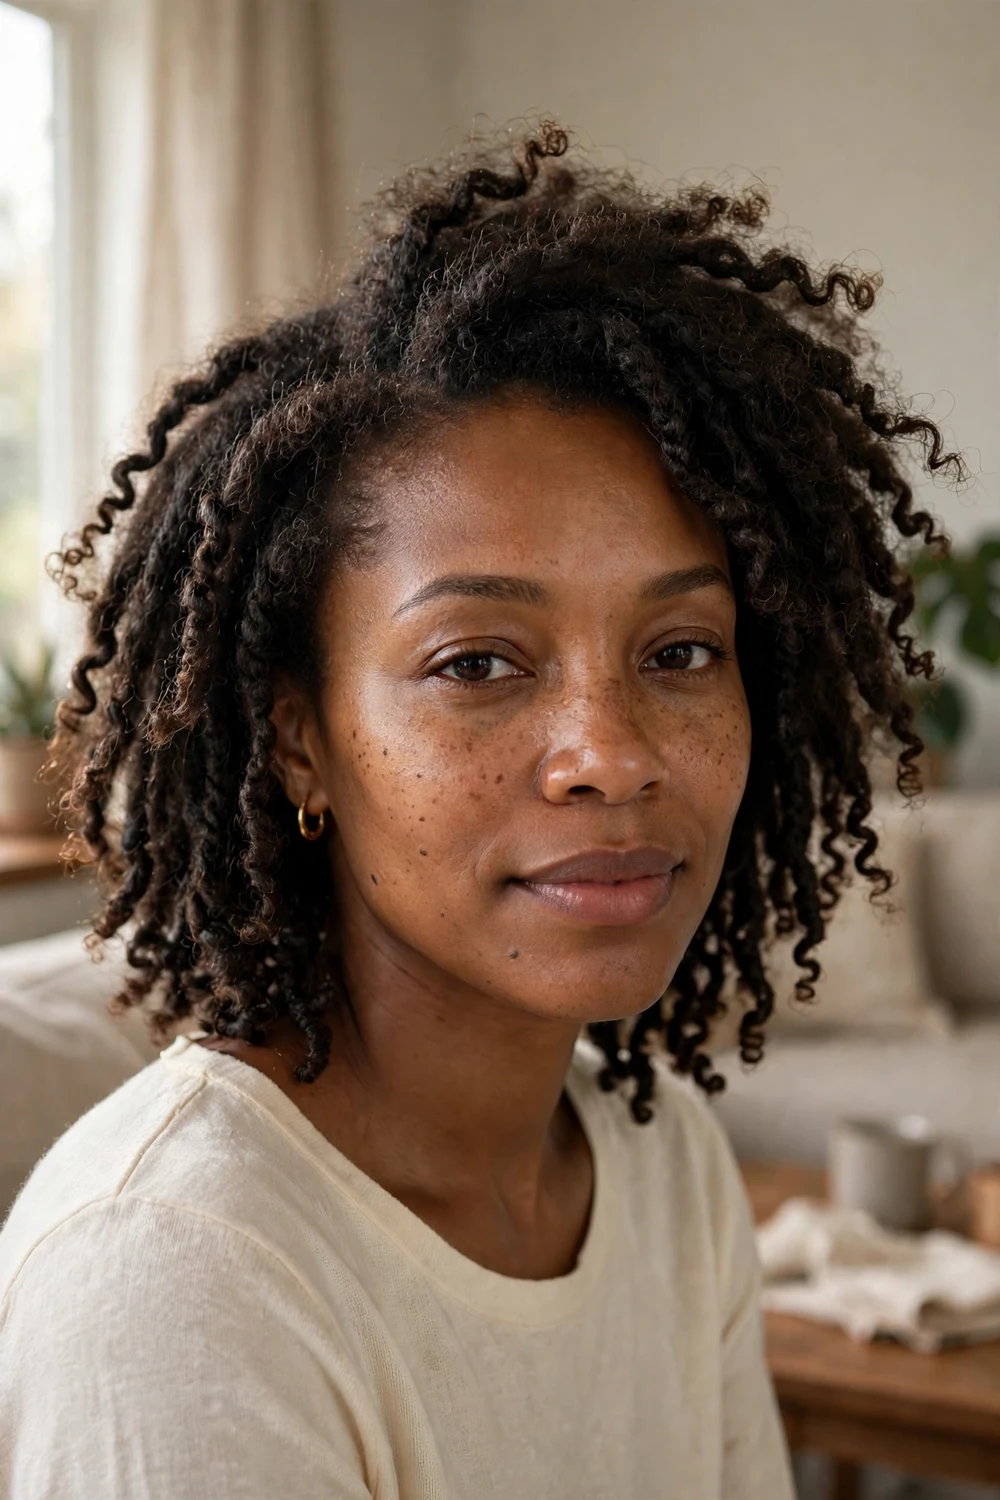
The classic twist-out earns its place in every grow-out routine. Twist damp, conditioned hair in medium sections, let it dry fully, then unravel and separate. Day one brings definition, and days two and three bring bigger volume as the coils loosen.
At awkward lengths the set won’t last a full week the way it does on longer hair, but three to four good days is realistic with a pineapple or loose twists at night.
Try this: Separate each twist only once. Every extra pull adds frizz and shortens the life of the set.
Difficulty: Easy | Cost: $0–$10
6. Braid-Out
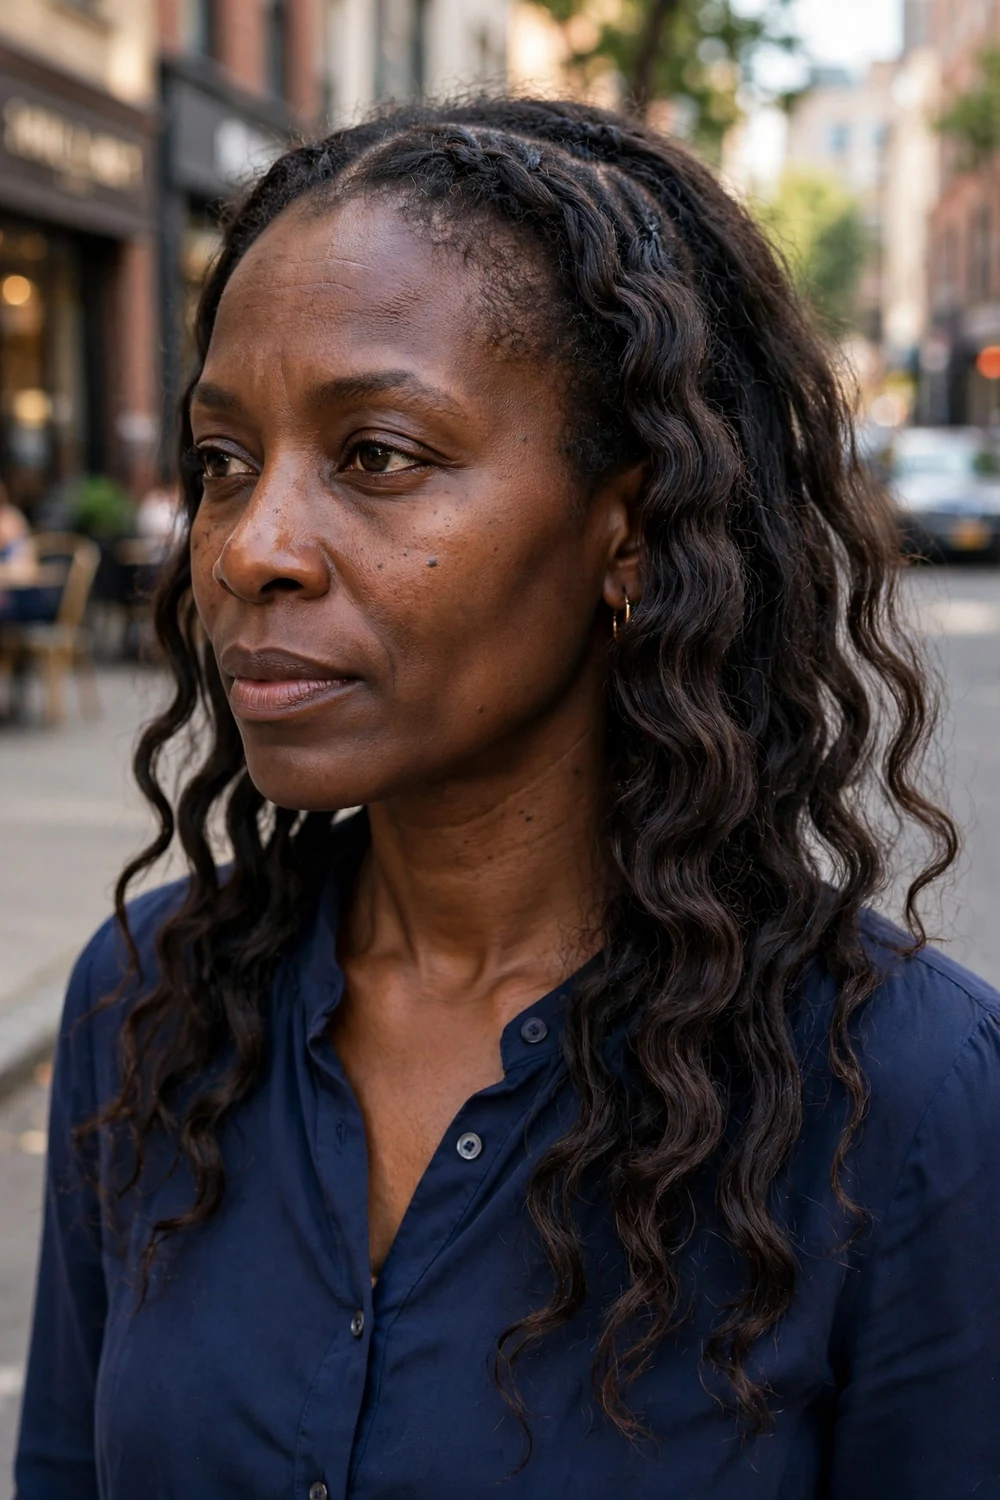
Swap twists for braids and the result stretches further. A braid-out on six to ten braids gives a looser, longer wave pattern than a twist-out, which matters when shrinkage eats most of your visible length. It also tends to last a day or two longer on 4C hair.
Braid on damp hair with a cream that has some hold, and don’t unravel until the braids feel completely dry to the touch. Damp centers unravel into frizz.
Try this: Braid on already-stretched hair for maximum length. Banding the night before plus braids the next day shows the most growth.
Difficulty: Easy | Cost: $0–$10
7. Parted Puffs
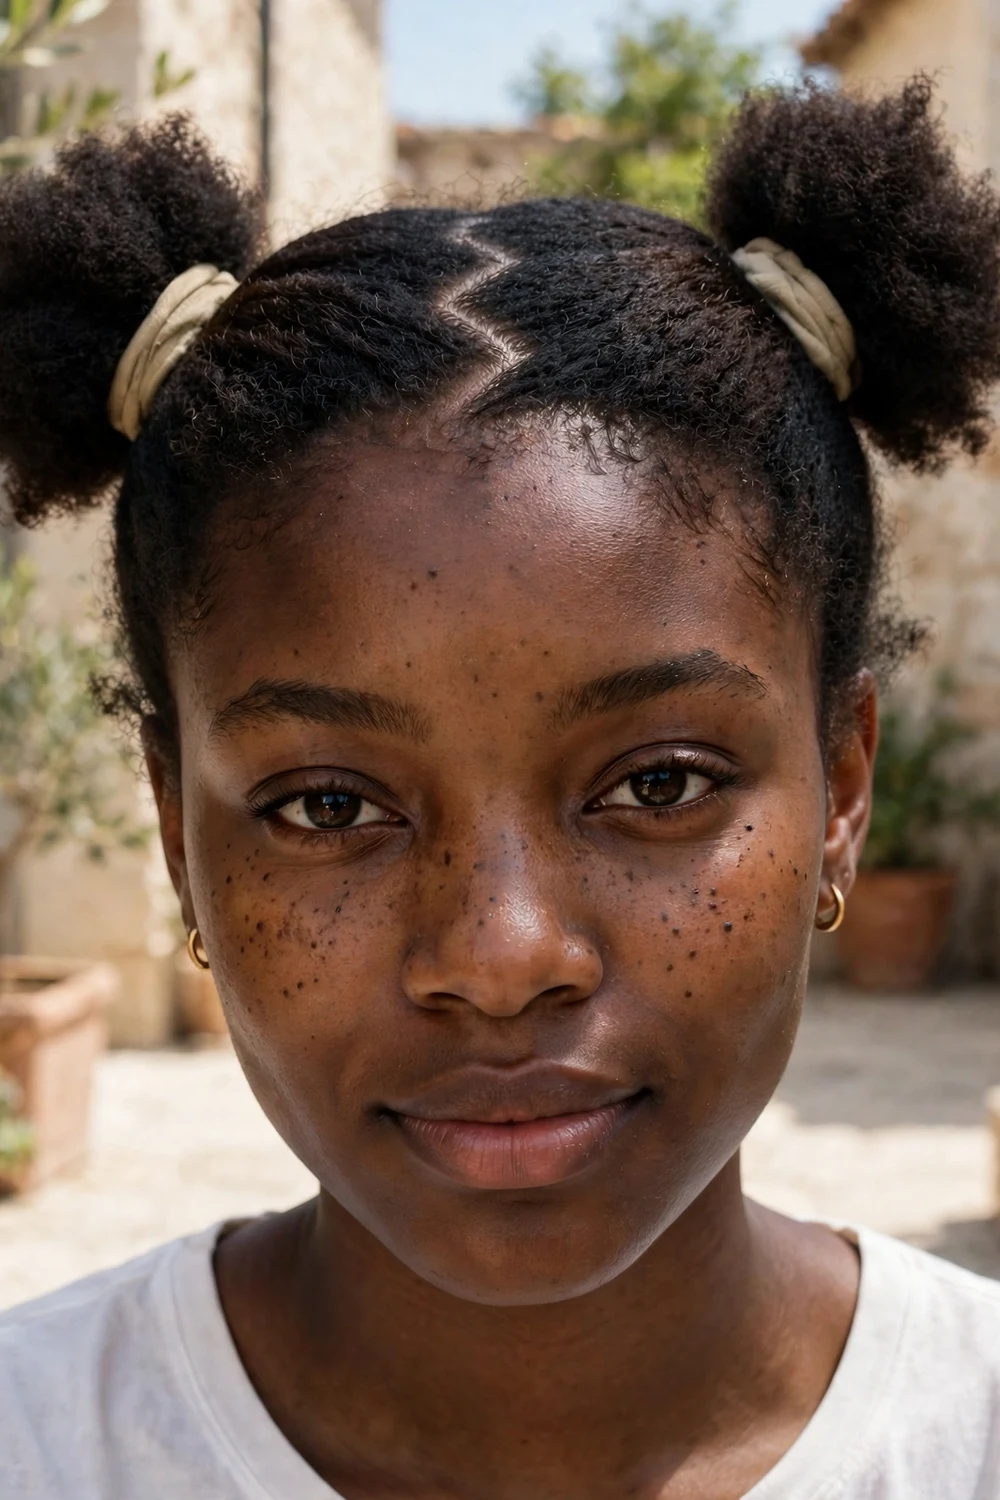
Parted puffs solve the uneven-length problem section by section. Divide hair into two to four parts and gather each into its own small puff with a soft band. Shorter sections get their own puff instead of struggling to reach one big one, so nothing looks left out.
Zigzag or curved parts add interest and help camouflage any thin spots along the part lines. The style takes about twenty minutes and holds for two to three days.
Try this: Stretch each section before puffing so the puffs sit fuller. A dab of edge control along each part keeps lines clean.
Difficulty: Easy | Cost: $0–$5
8. Finger Coils
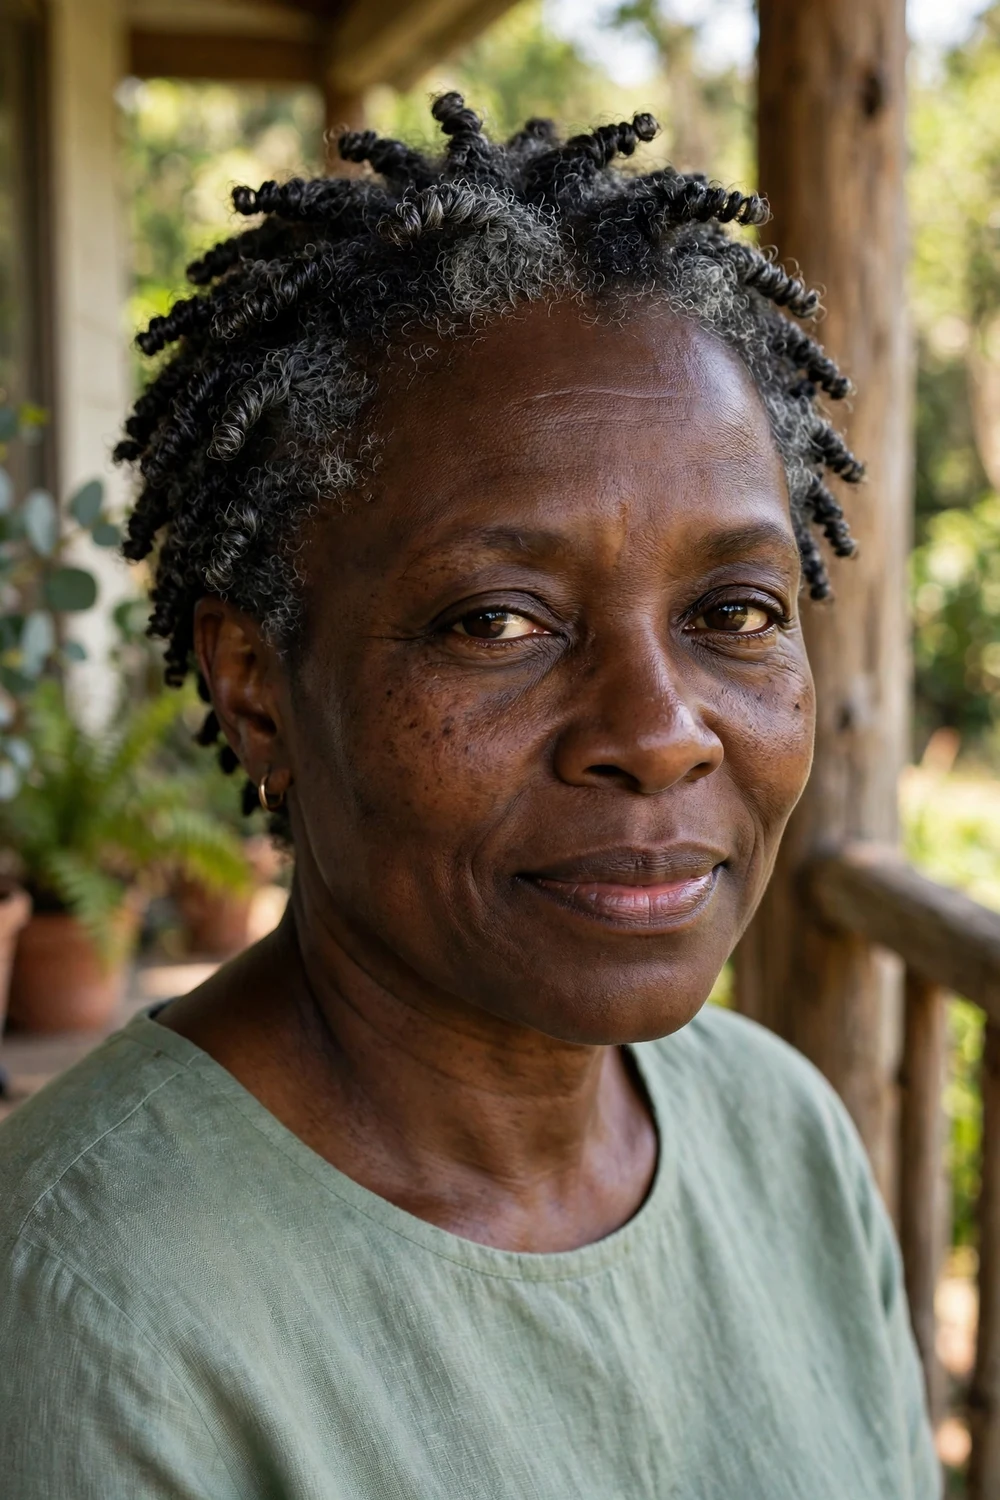
Finger coils bring order to the shortest awkward lengths. Working with a defining gel on damp hair, coil small sections around a finger from root to tip. The result is springy, uniform definition that holds its shape for up to two weeks under a satin bonnet.
This style suits the early grow-out months best, when hair is long enough to coil but too short for puffs or buns. It also trains the curl pattern with repeated wear.
Try this: Coil on freshly conditioned, damp hair and don’t touch the coils until fully dry. Touching wet coils creates frizz that won’t settle.
Difficulty: Moderate | Cost: $5–$12
9. High Twisted Bun
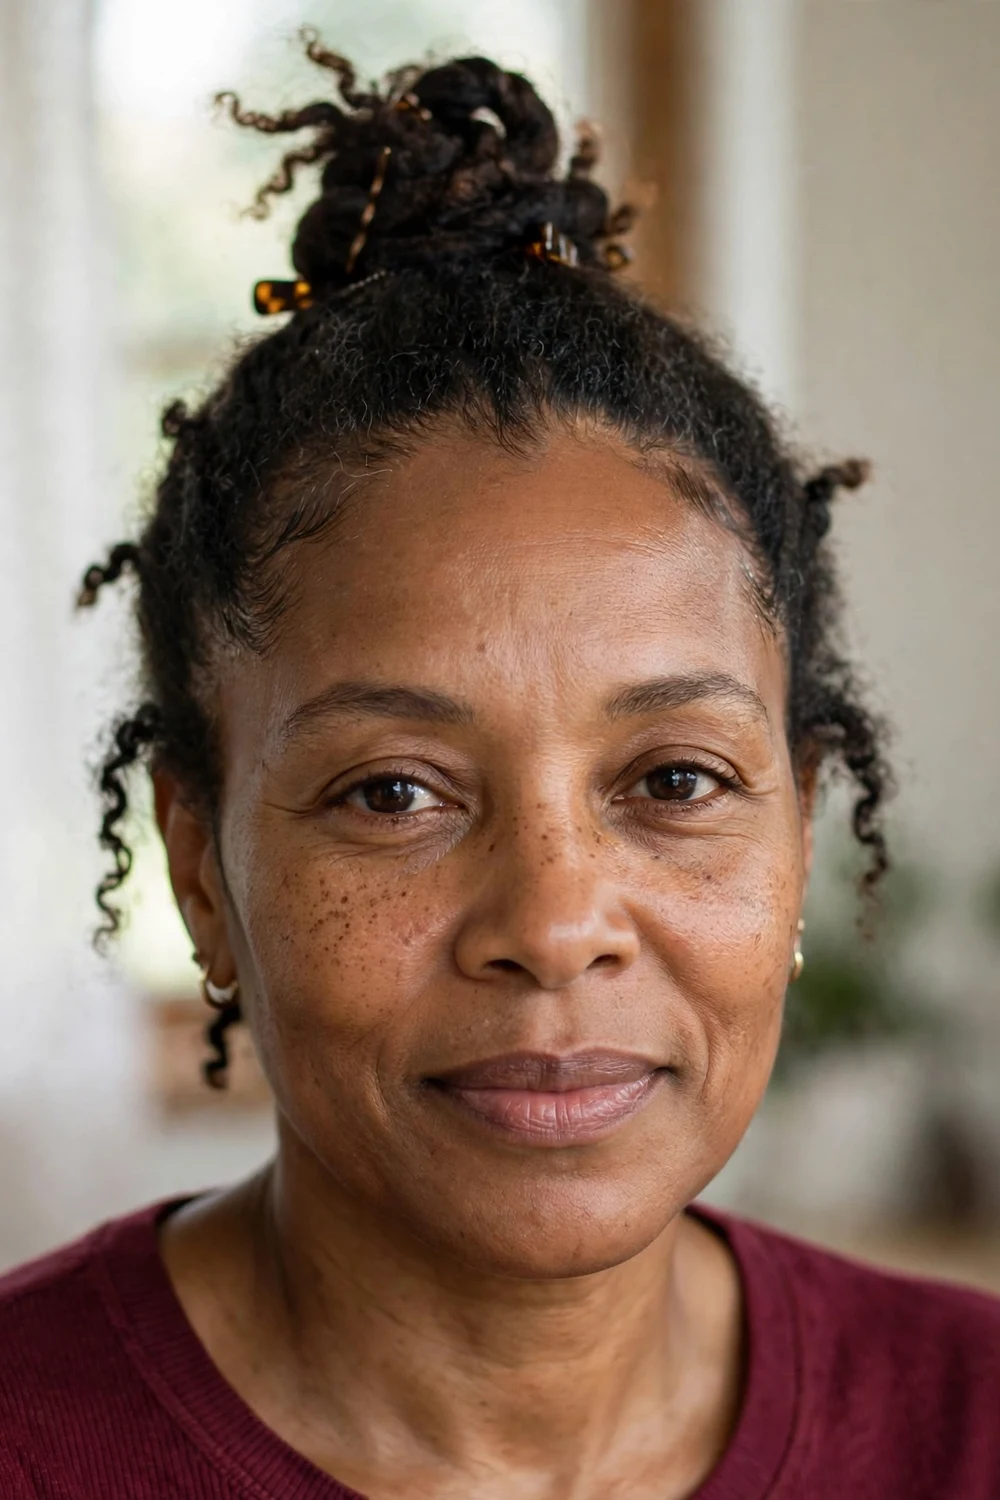
For days that need a polished finish, gather twisted hair into a bun at the crown. Start from two-strand twists or a stretched twist-out, coil the lengths around the base, and pin the ends underneath. Nothing hangs loose, so every end stays protected all day.
The bun reads formal enough for weddings and interviews while keeping manipulation near zero. Refresh the hairline with edge control on day two and three.
Try this: Skip the hair donut unless there’s enough length to wrap it. Pinning twists directly gives a fuller bun on shorter hair anyway.
Difficulty: Easy | Cost: $0–$5
10. Side Cornrows with Twists
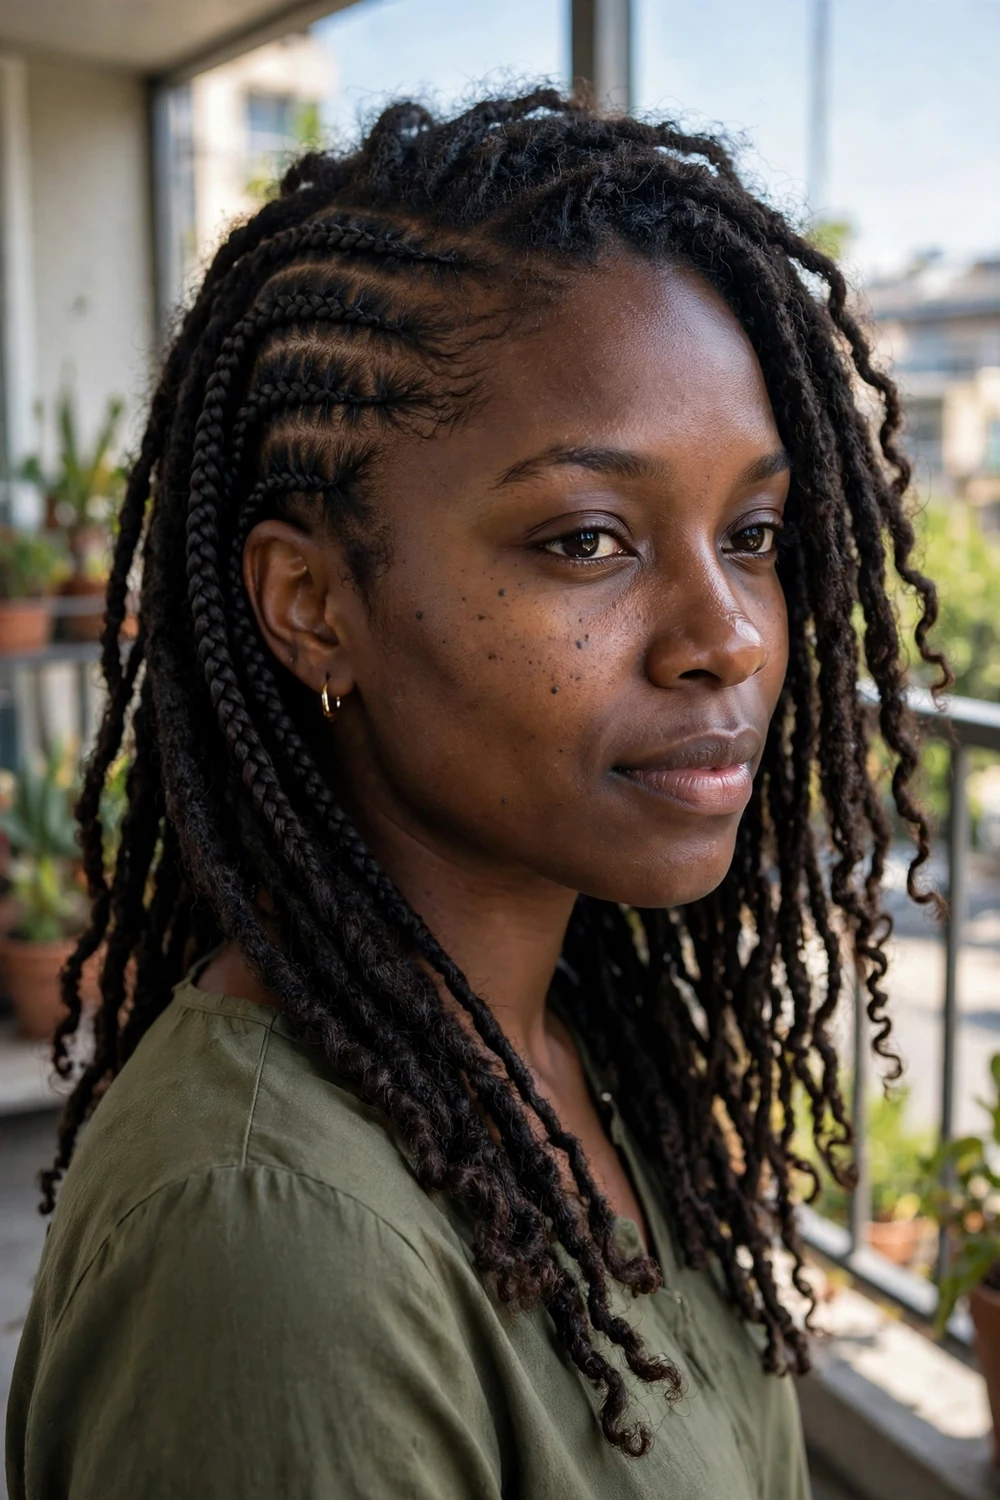
This combo style keeps one side sleek and controlled while the rest shows texture. Braid three to five cornrows along one side of the head, then leave the remaining hair in loose two-strand twists. It handles the common grow-out issue where one side always behaves worse than the other.
The style lasts one to two weeks with a scarf at night. Keep the cornrows gentle at the hairline to protect edges during the grow-out.
Try this: Cornrow the side that shrinks most or grows slowest. The braid stretches it while the twists show off the better-behaved side.
Difficulty: Moderate | Cost: $0–$10
11. Loose Box Braids
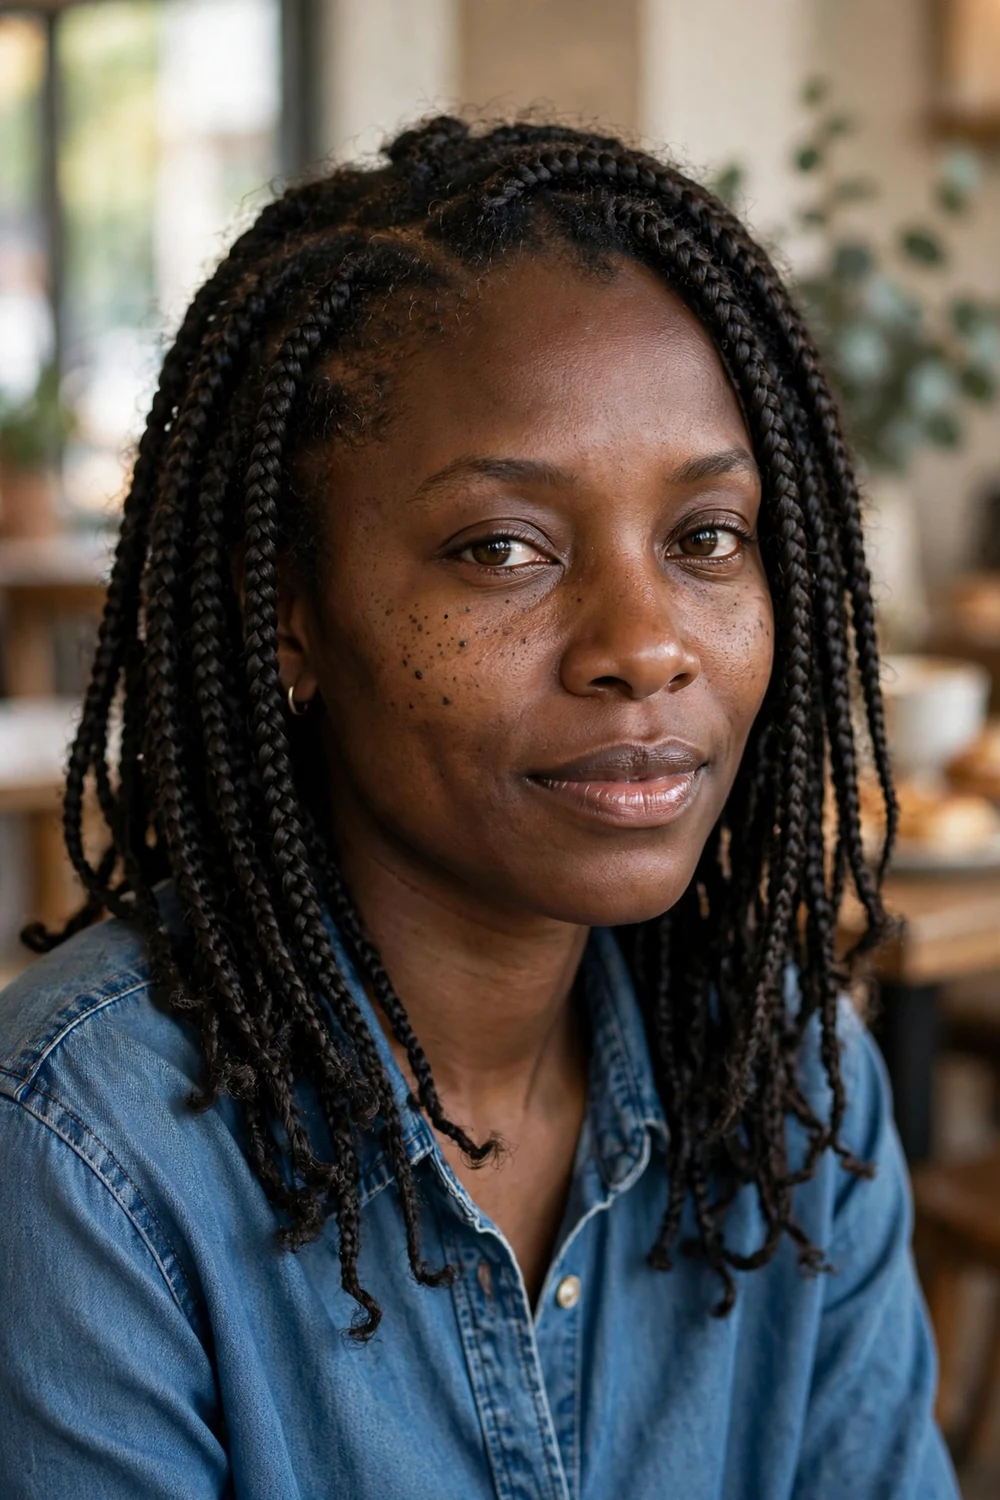
Box braids give growing hair a full break from daily styling. Medium-sized braids worn for four to six weeks mean almost no manipulation, which is exactly what fragile new length needs. The key word is loose: braids gripped too tight at the root cause breakage that erases months of growth.
At awkward lengths, starting each braid with your own hair for an inch or two before feeding in extension hair keeps the base secure without excess weight pulling on short roots.
Try this: Tell the braider upfront to keep roots slack. Moisturize the scalp with a light oil twice a week while the braids are in.
Difficulty: Moderate | Cost: $30–$80
12. Defined TWA
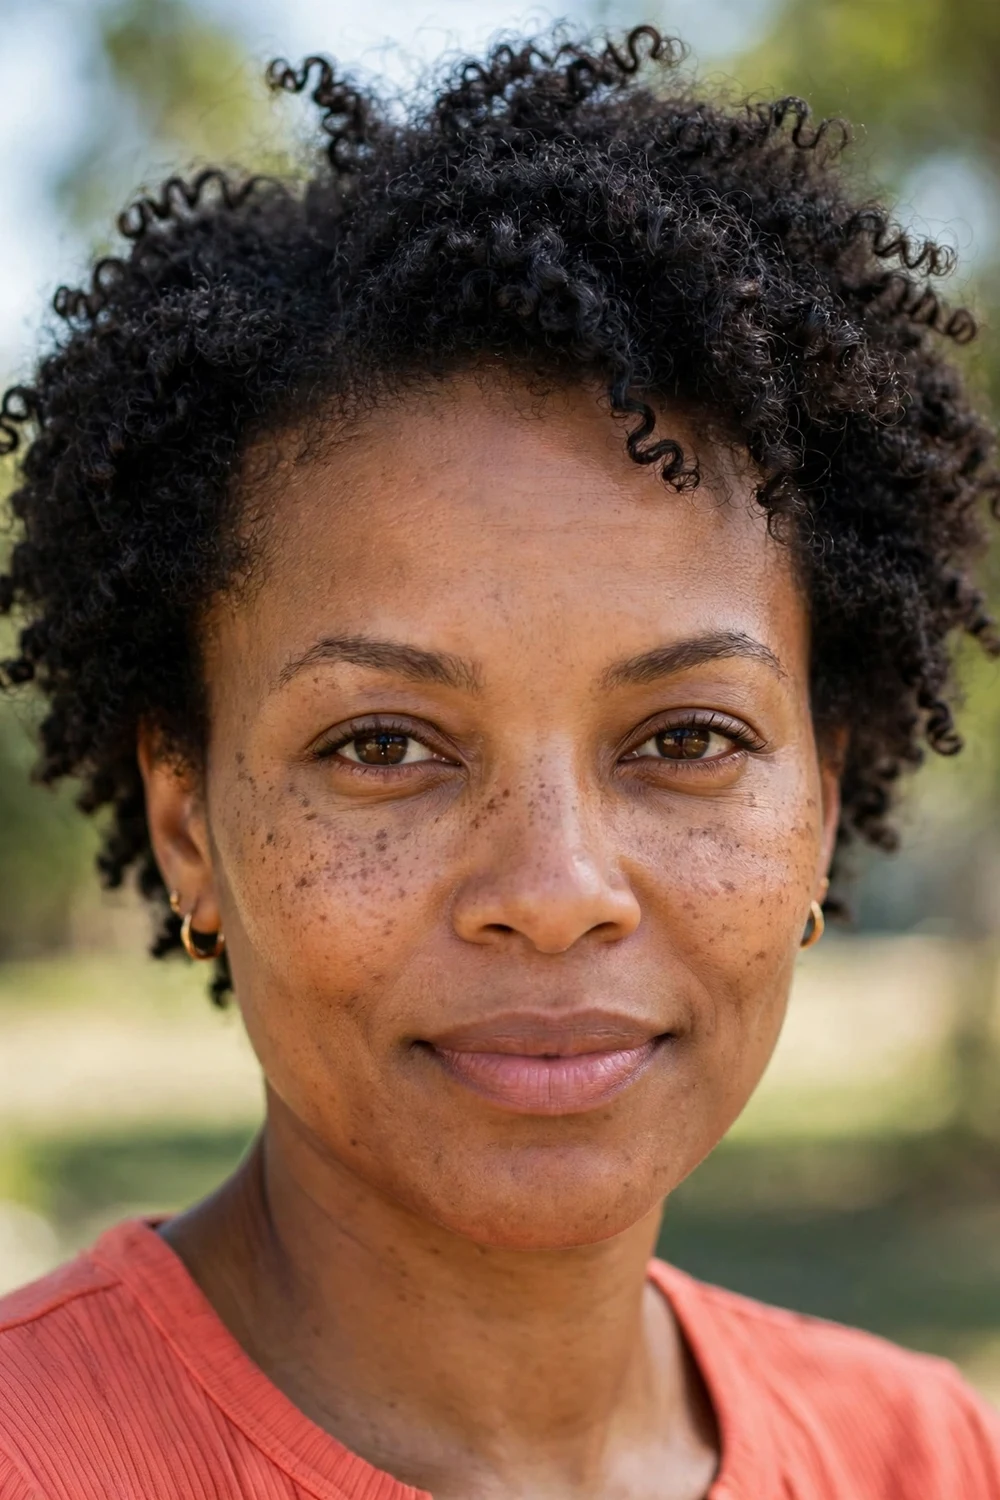
Early in the grow-out, a clean shape makes all the difference. A defined TWA with a shaped cut reads intentional instead of in-between. Work curl cream through damp hair, define with fingers or a brush, and pick the roots for height.
Keep the shape trimmed every six to eight weeks while the length builds. Trimming the shape, not the length, keeps the grow-out looking neat without losing progress.
Try this: Ask the stylist to shape only. A dusting of the ends during the same visit removes splits that would travel upward.
Difficulty: Easy | Cost: $0–$15
13. Cornrows on TWA
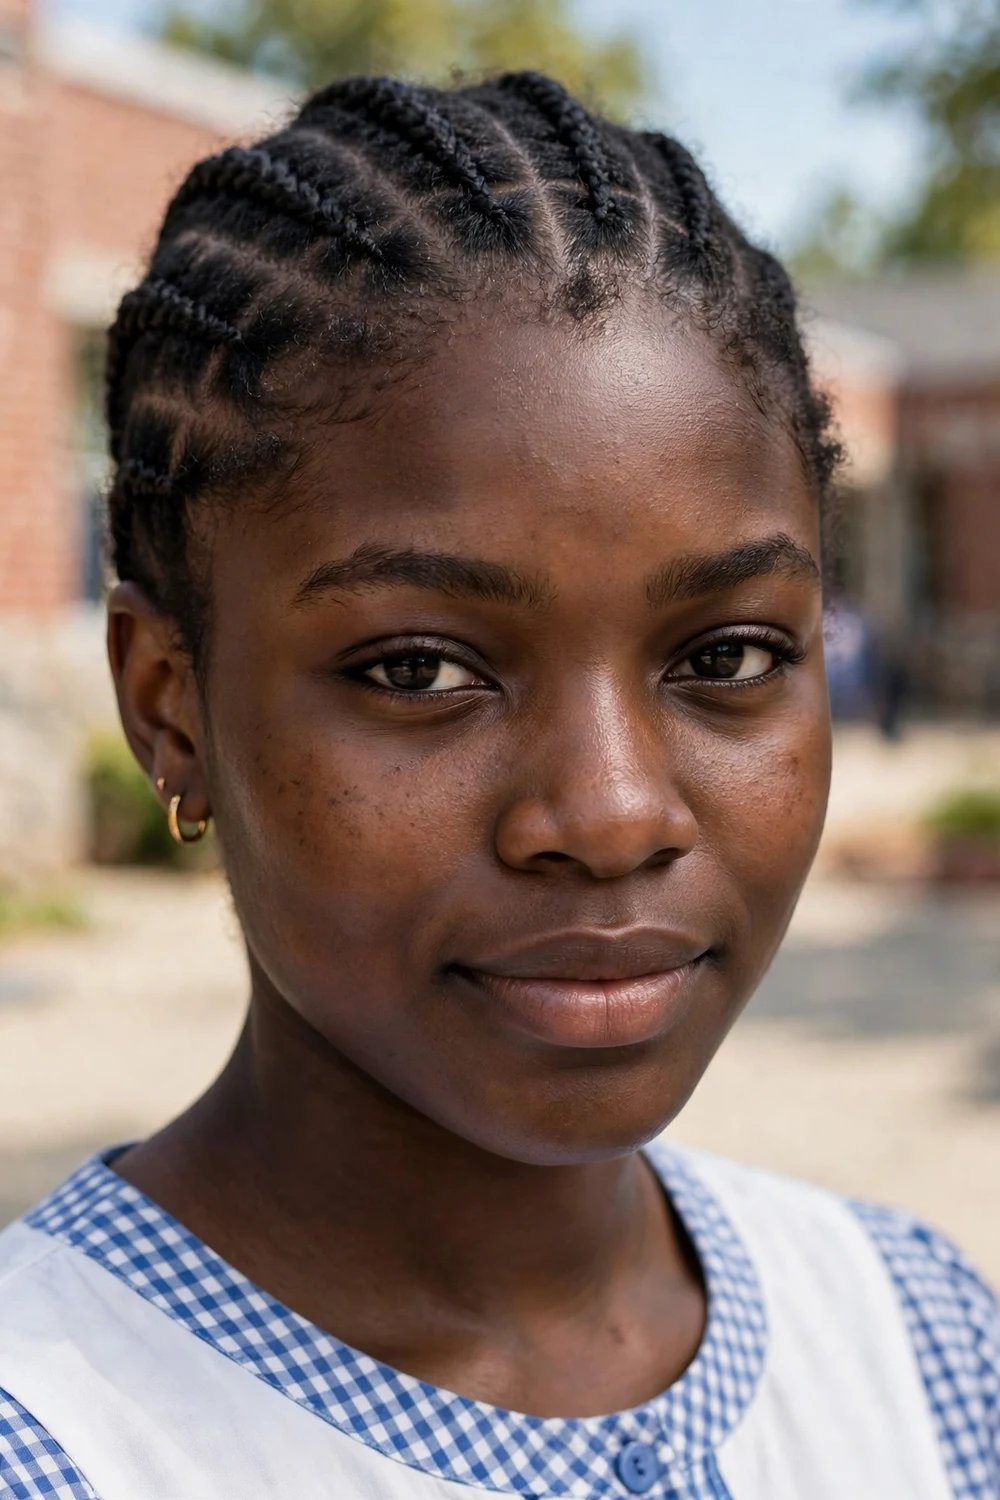
When hair is too short for puffs but too long to leave alone, short cornrows fill the gap. Braid straight back or in gentle curves, keeping sections neat and tension light. The style lasts one to two weeks and stretches the hair slightly with each wear.
Night care is simple: a durag or satin scarf keeps the braids flat and frizz-free. Between installs, give the hair a full wash and deep condition before re-braiding.
Try this: Run a light oil along the parts every few days. Short cornrows expose the scalp, which dries out faster than covered hair.
Difficulty: Moderate | Cost: $0–$15
Growing out from a short cut comes with its own styling rules, and a dedicated guide to low cut hair style black women covers the earliest stage in more detail.
14. Bantu Knot-Out with Cornrows
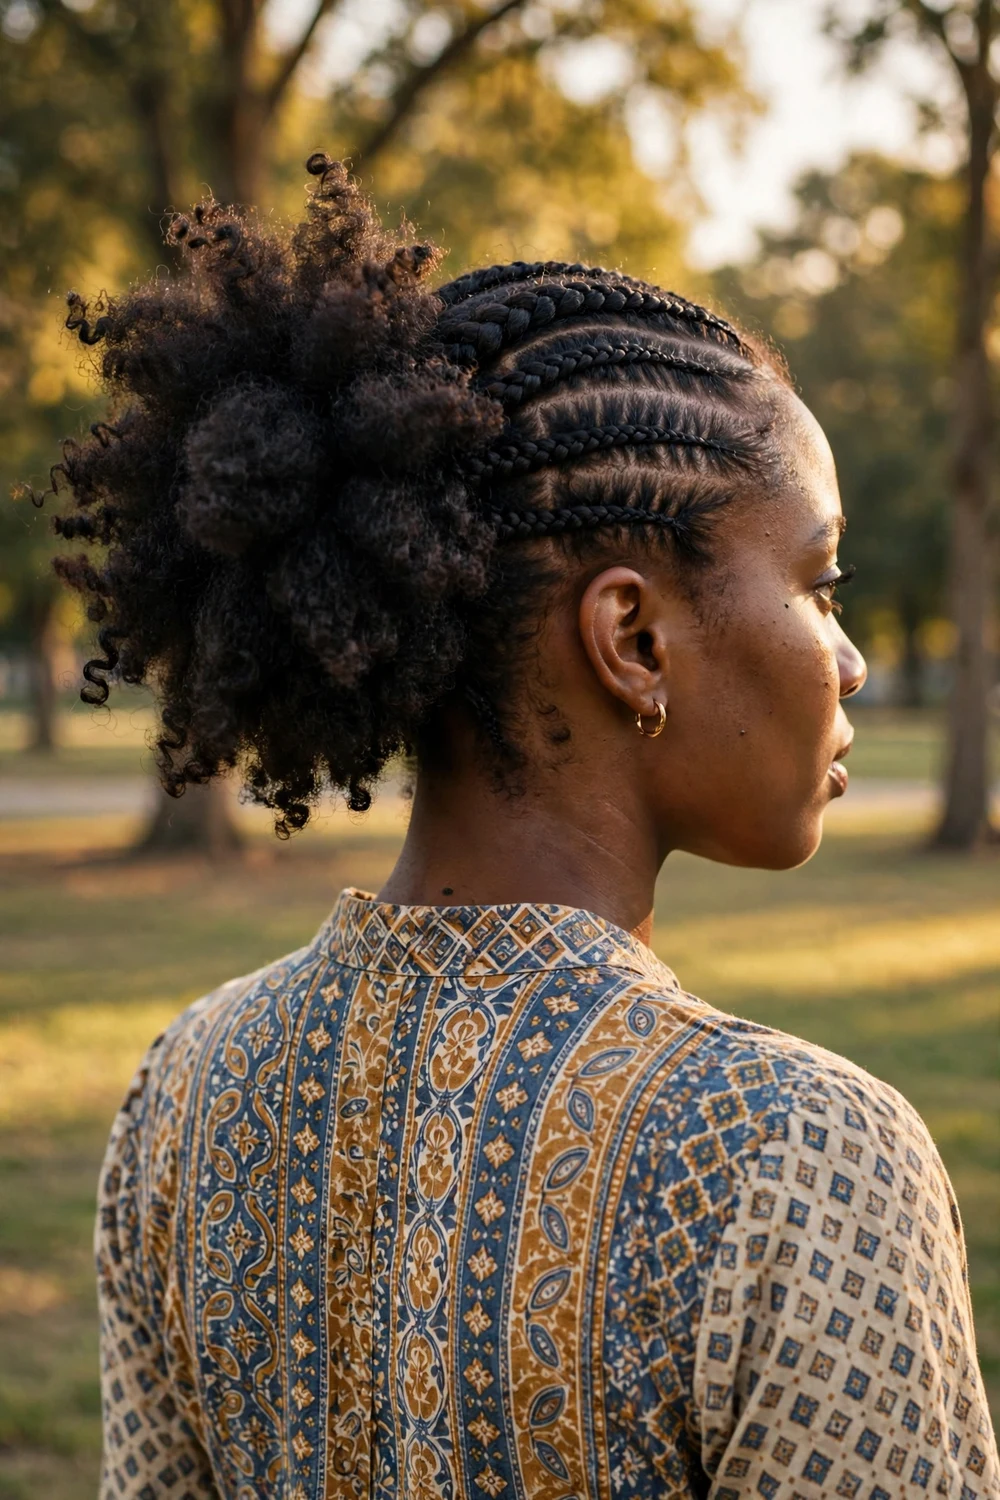
Cornrows in front, knot-out in back: this pairing manages two problem zones at once. The front cornrows keep short, hard-to-control pieces flat and neat, while unraveled bantu knots in the back create volume where the hair is longest. The mix also suits heads where the front and back grow at different speeds.
Install the knots on damp, conditioned hair and wait until everything is fully dry before unraveling. Rushing the dry time is the main reason knot-outs fall flat.
Try this: Make the front cornrows curve slightly toward the crown. The curved lines draw the eye up and make the style look planned.
Difficulty: Moderate | Cost: $0–$10
15. Defined Twist-Out
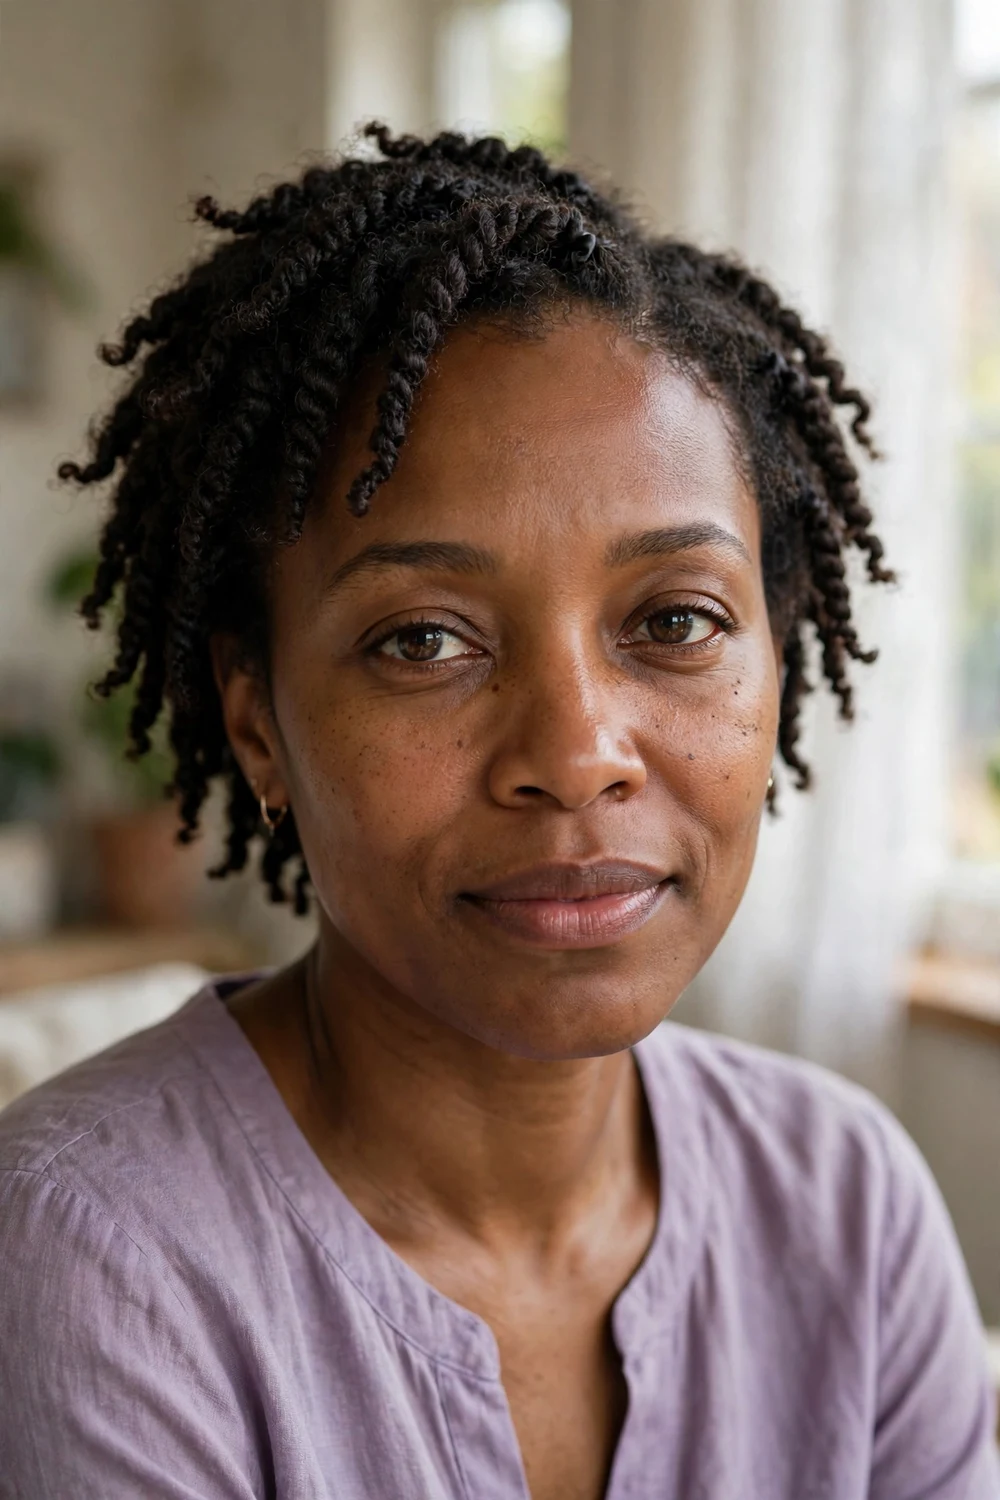
A defined twist-out uses smaller sections than the everyday version, and the payoff is sharper coil definition that holds for three to five days. It takes longer to install, so save it for weeks with events, photos, or occasions that matter.
Twist in the same direction throughout the head for the most uniform curl pattern. Mixing directions gives a more textured, piecey finish if that’s the goal instead.
Try this: Use a twisting butter with light hold rather than a heavy gel. Butters define without the crunch that needs scrunching out later.
Difficulty: Easy | Cost: $0–$10
16. Chunky Twist-Out on Stretched Hair
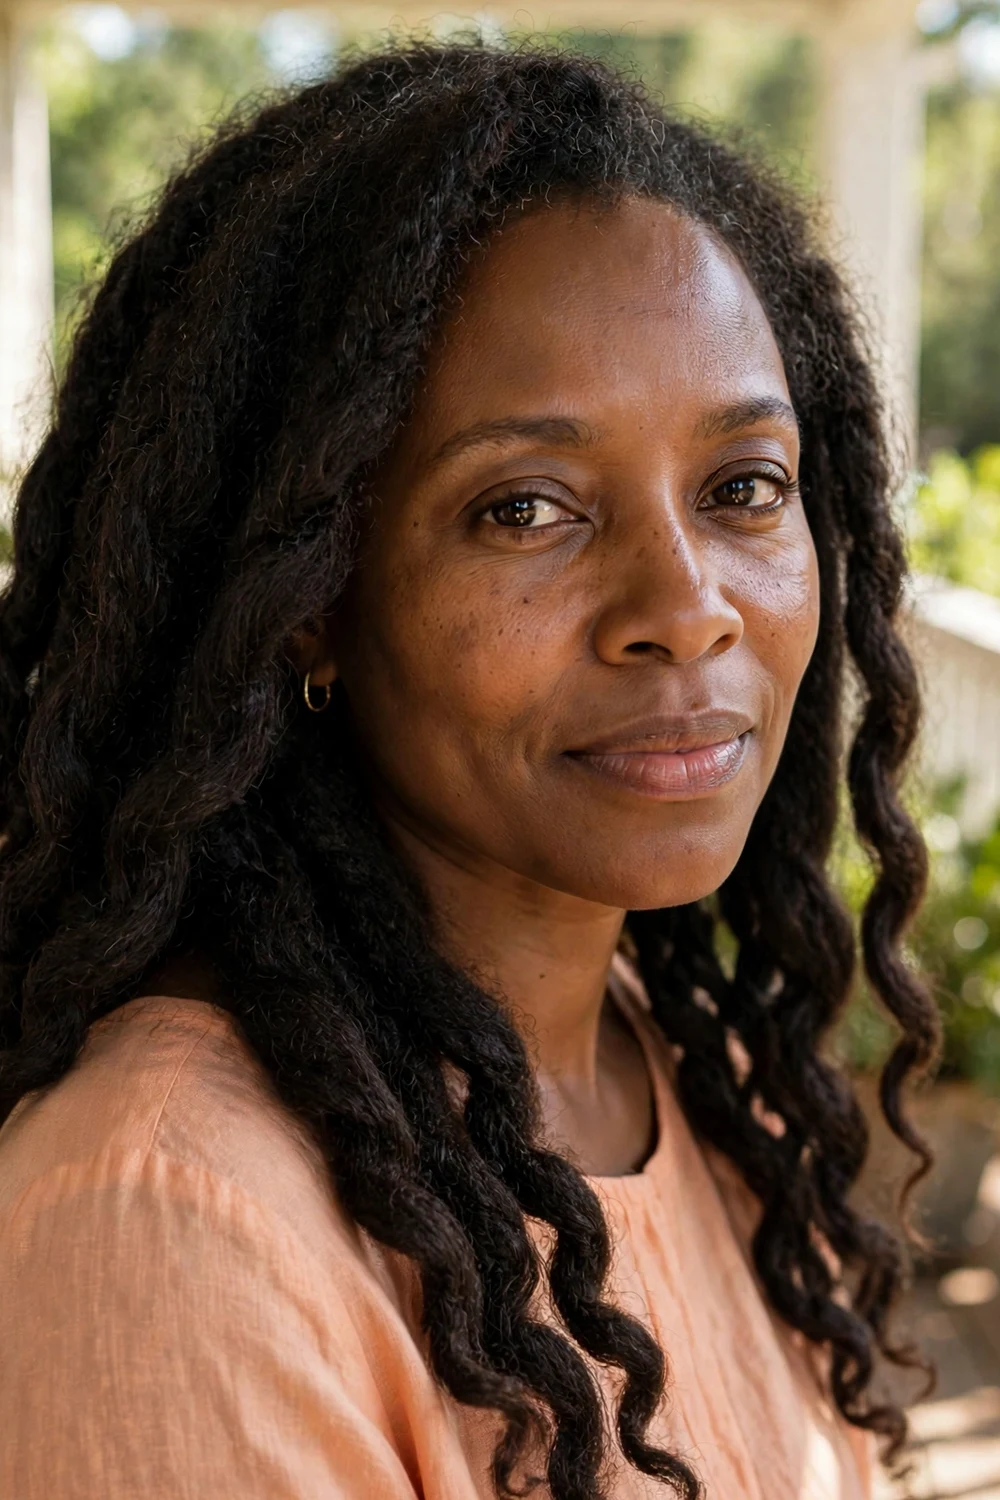
For maximum visible length, stretch first and twist second. Band the hair or blow-dry on low heat with a heat protectant, then install eight to ten chunky twists. The unravel reveals soft, elongated waves that show how much length is actually there under the shrinkage.
Fewer, bigger twists also mean faster installs: this version takes about thirty minutes compared to over an hour for small sections. The waves hold for three to four days with a pineapple at night.
Try this: Stick to heat-free stretching when the goal is a regular routine. Save the blow-dryer for occasional length checks.
Difficulty: Easy | Cost: $5–$15
17. Curled Afro Puff
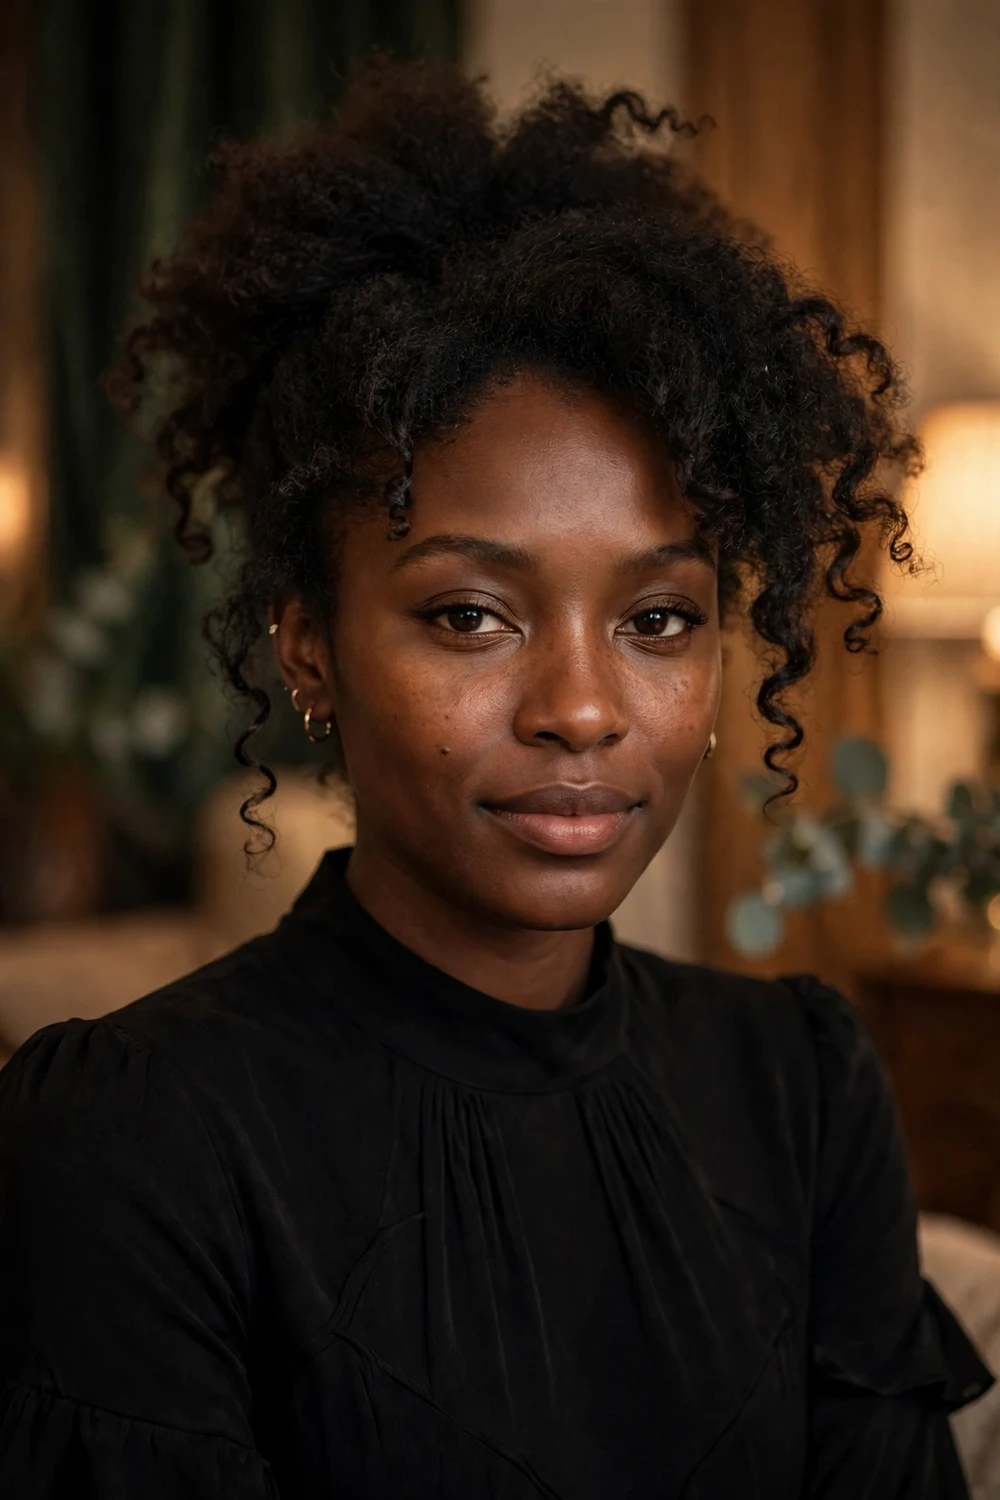
Take the everyday puff up a level by curling the ends. Gather hair into a high puff, then set the last two inches on small flexi rods or finger-coil them with gel. Once dry, the puff keeps its fullness while the ends fall in soft curls.
This version suits events and evenings when the plain puff feels too casual. The rods come out in the morning and the style holds all day with a light mist of leave-in.
Try this: Rod only the last two inches. Curling deeper into the puff flattens the volume that makes the style work.
Difficulty: Easy | Cost: $5–$12
18. Low Messy Bun

A low bun at the nape is the quiet achiever of grow-out styles. Gather stretched hair loosely, twist it into a soft bun, and let a few coils spring free around the hairline. It takes five minutes and looks right in offices, classrooms, and everywhere in between.
Because the bun sits low, even shorter awkward lengths can reach it. A satin scrunchie and two pins hold everything without the tension of tight elastics.
Try this: Stretch the hair the night before with loose twists. A low bun on shrunken hair pulls too tight and won’t sit smooth.
Difficulty: Easy | Cost: $0–$5
19. Half-Up Half-Down Puff
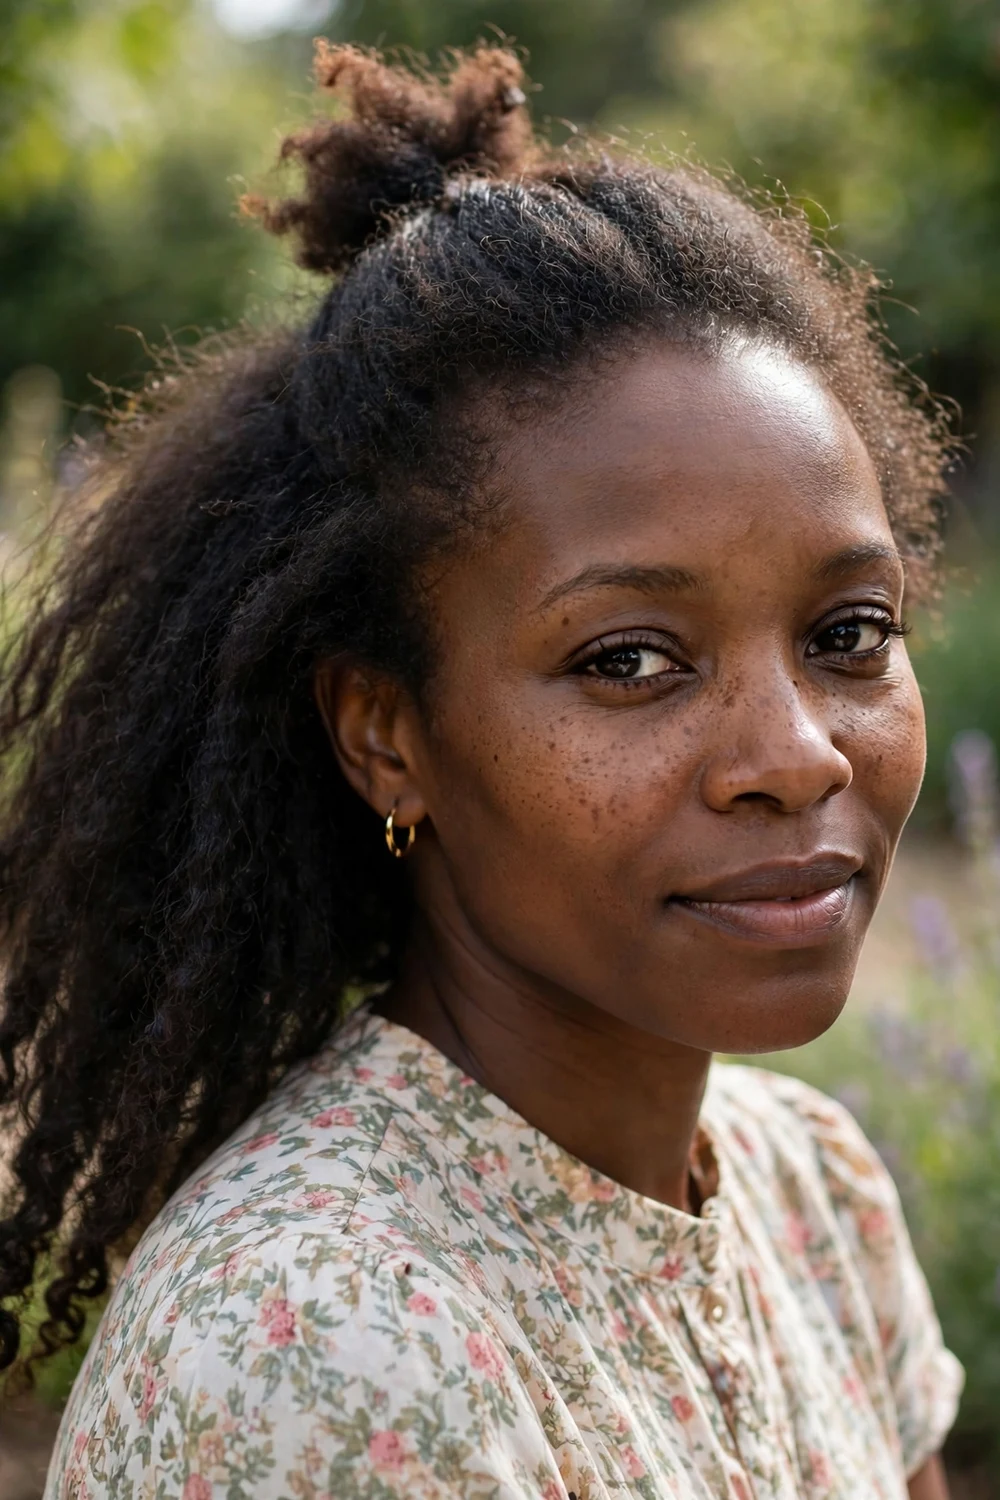
This style splits the difference between control and length. Gather the top half into a puff at the crown and leave the back loose and stretched. The top stays neat all day while the loose section shows off texture and growth.
It flatters the grow-out phase because the puff hides the shorter top layers that never seem to catch up. Stretch the back section the night before for the smoothest result.
Try this: Position the puff slightly forward of the crown. It lifts the face and keeps the back section from looking weighed down.
Difficulty: Easy | Cost: $0–$5
20. Flat Twists
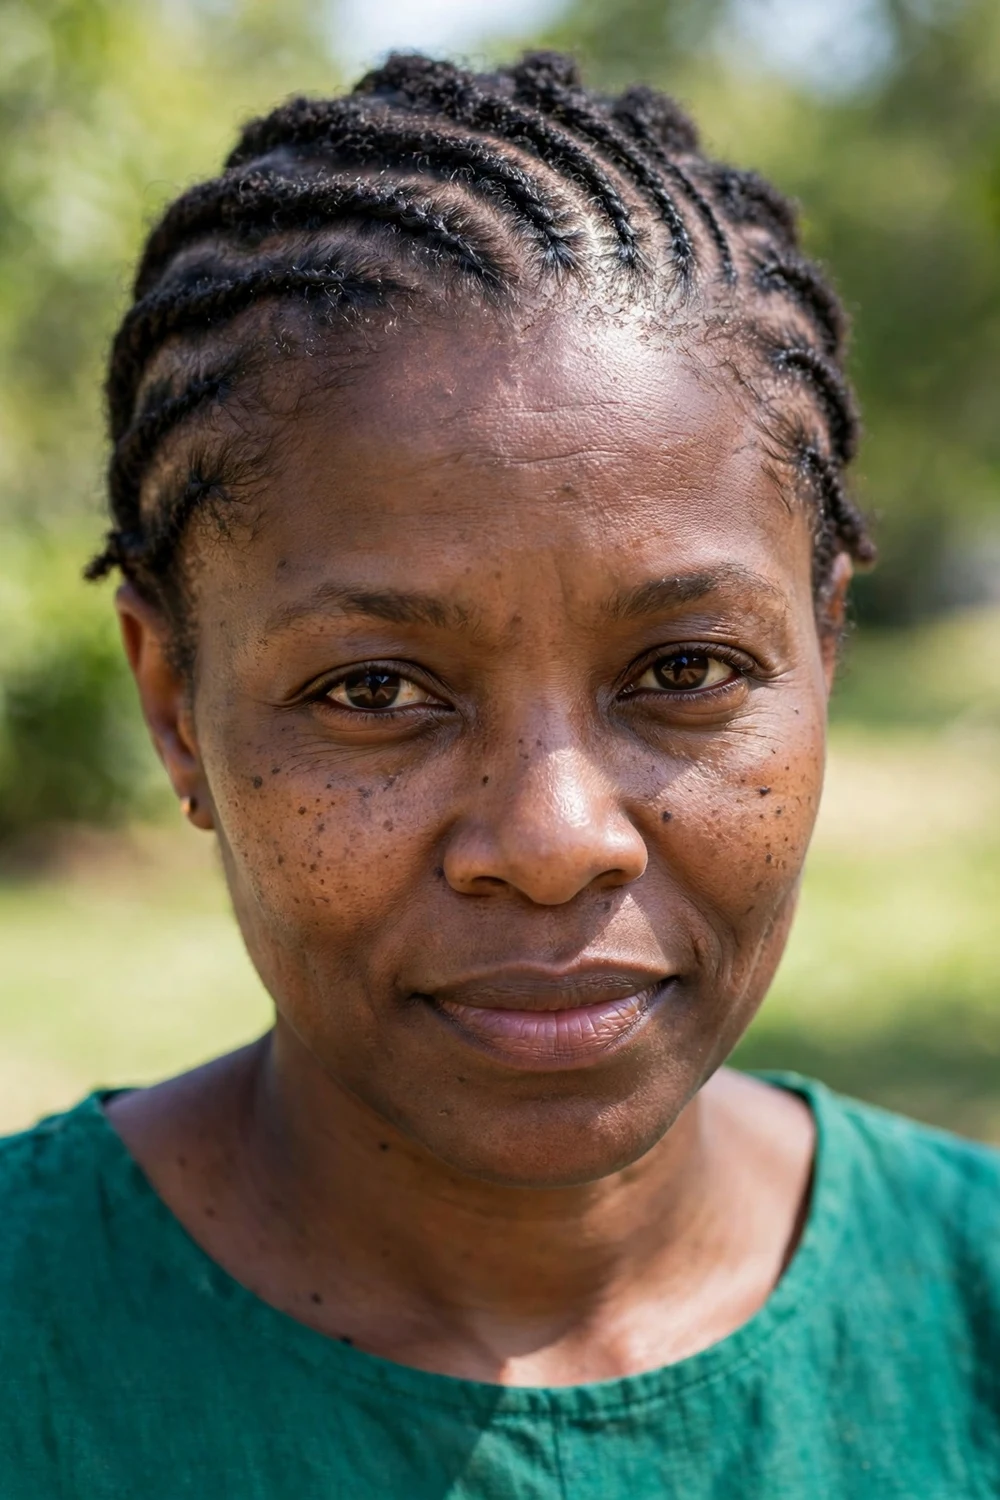
Flat twists work like cornrows with gentler tension. Twist sections flat against the scalp in rows going back or in curved designs. They hold for one to two weeks, protect the hair underneath, and unravel into a soft twist-out when it’s time for a change.
The flatter profile also stretches the hair slightly, so each install shows a bit more length than the last. Mist with water and leave-in before re-twisting any fuzzy edges mid-week.
Try this: Keep the twists close to the scalp but never tight. Tenderness at the roots is a sign to redo that row looser.
Difficulty: Moderate | Cost: $0–$10
For more braided inspiration once length builds, the collection of braided hairstyles for Black women picks up where these grow-out styles leave off.
21. Halo Flat-Twist
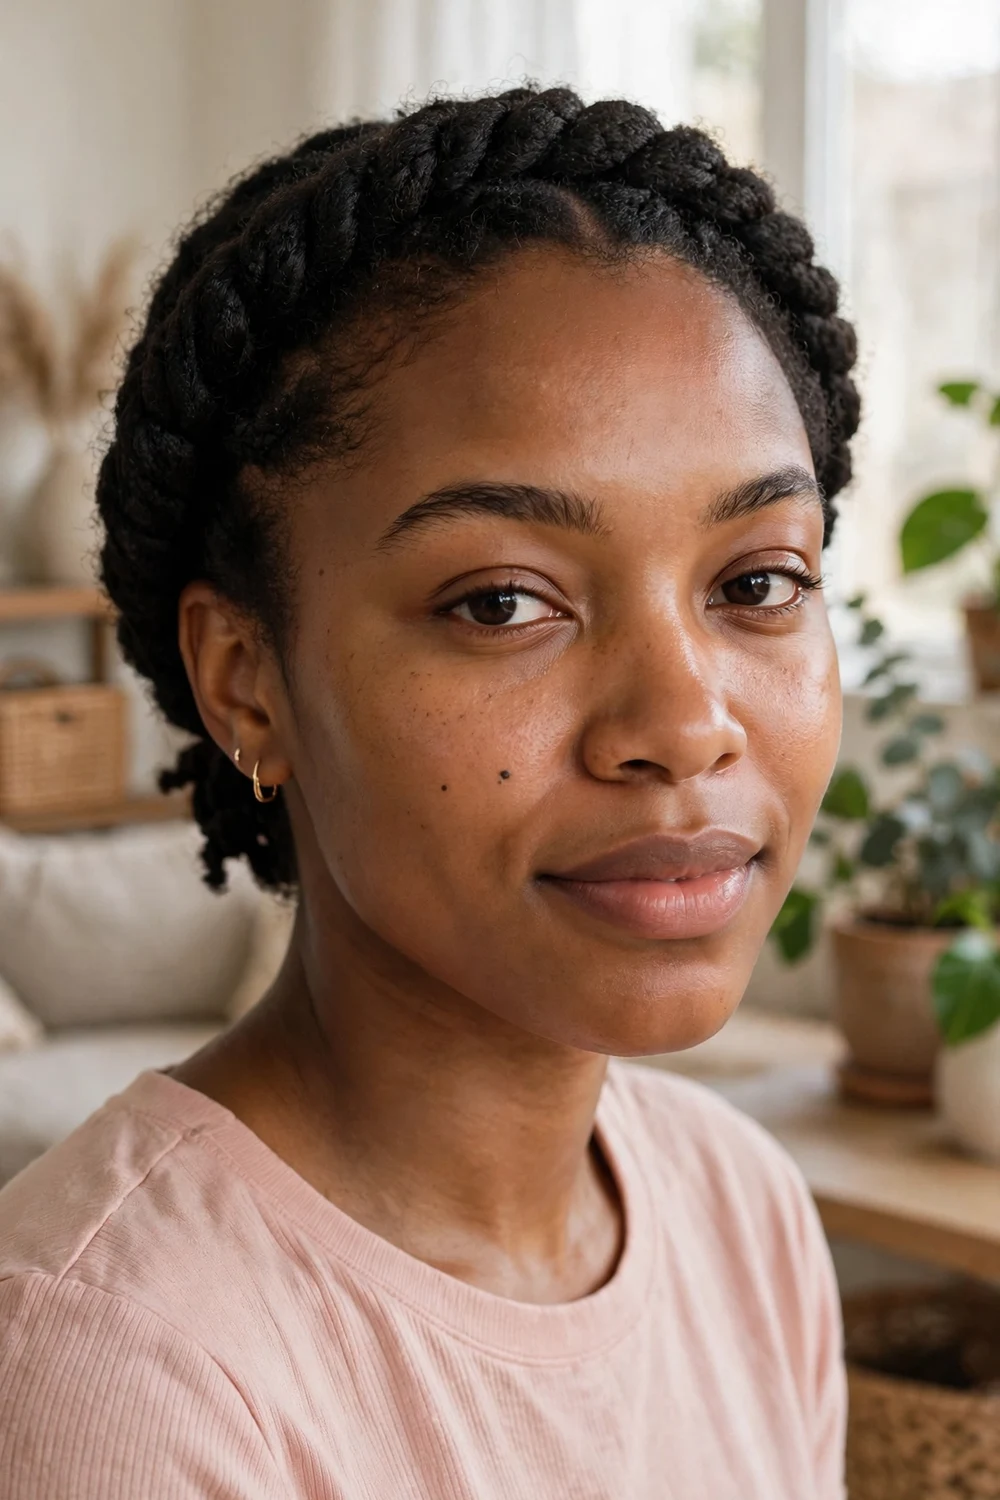
The halo flat-twist wraps flat twists around the head in a continuous band, with the ends tucked under the start. Every strand stays contained, which makes it fully protective, and the wrapped shape looks elegant enough for formal occasions.
Plan for about forty-five minutes to install. The style holds for a week or more with a scarf at night, and the tucked ends avoid the rubbing that causes splits.
Try this: Overlap each twist slightly over the last one. Small scalp gaps show more as the style loosens through the week.
Difficulty: Moderate | Cost: $0–$10
22. Pineapple Updo
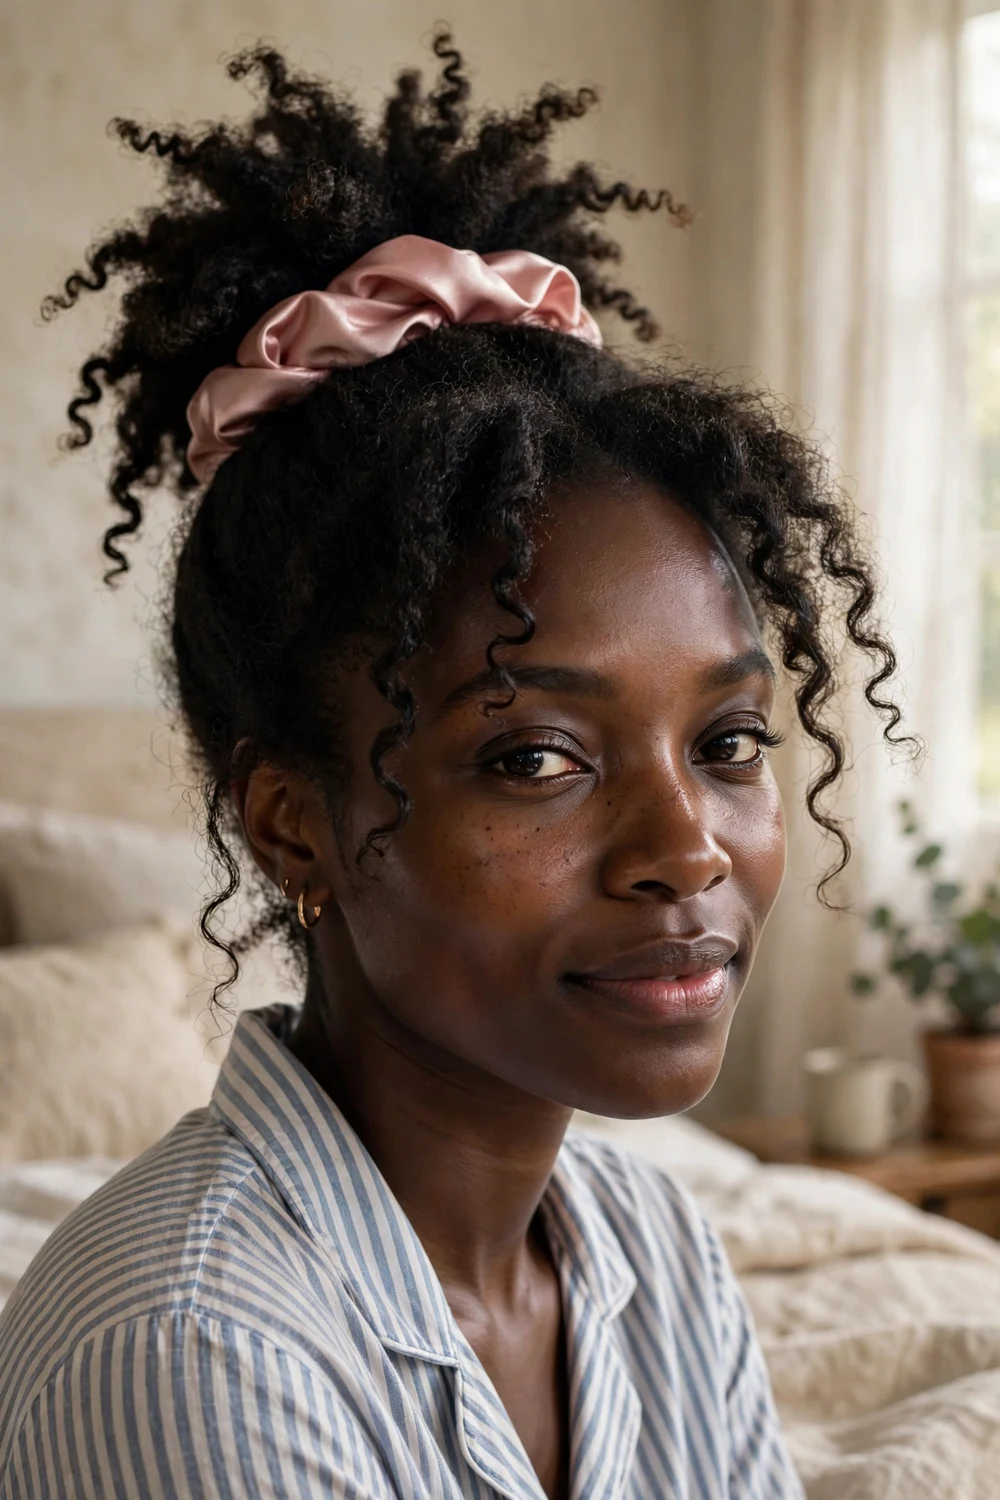
The pineapple is both a daytime style and a nighttime preservation method. Gather hair loosely at the very top of the head with a satin scrunchie and let the ends fall forward. It shows length, keeps curls from flattening overnight, and takes about two minutes.
During the day it reads as a deliberate updo. At night it protects twist-outs, braid-outs, and wash-and-gos from being crushed against the pillow.
Try this: Never use a tight elastic for the pineapple. A satin scrunchie holds without denting the curl pattern or stressing edges.
Difficulty: Easy | Cost: $0–$5
As hair moves past the in-between stage, the roundup of updo hairstyles for Black women offers longer-length options built on these same techniques.
23. Wash and Go
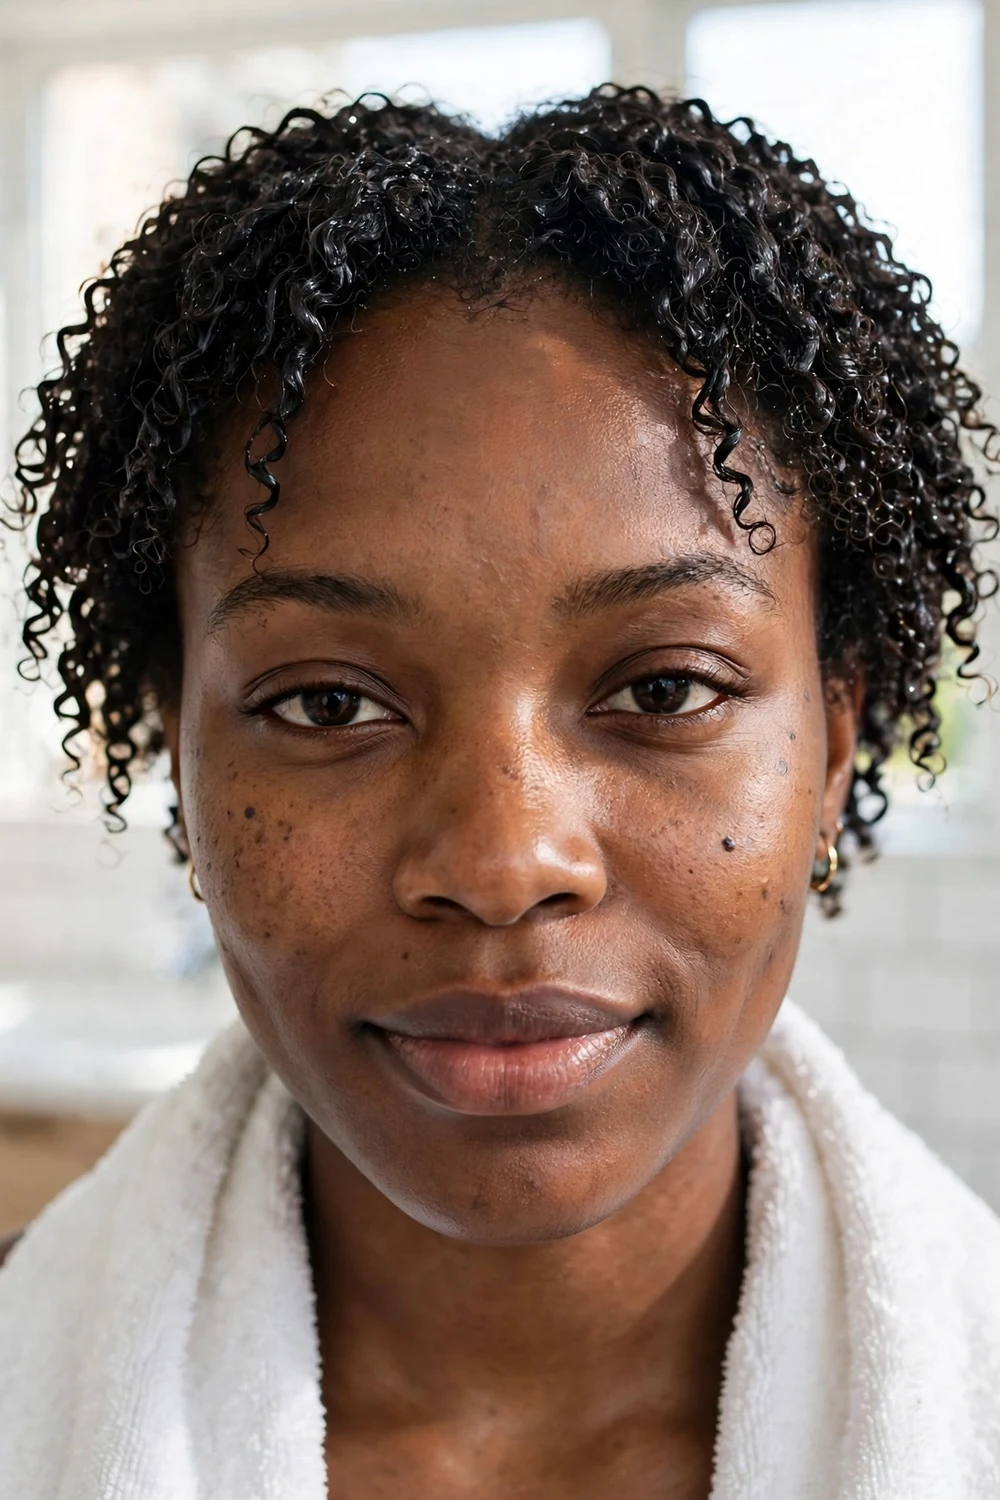
The wash and go is the fastest routine in the grow-out toolkit. Wash, apply leave-in in small sections, follow with a light gel, and let the hair air dry or sit under a hooded dryer. Shrinkage is part of the look here, not a problem to fix.
It works best on healthy, well-moisturized hair, since there’s no stretching to hide dryness. Coat every coil by working in small sections so the definition holds for two to three days.
Try this: Refresh on day two with a water and leave-in mist instead of re-washing. Full wash days every time dry out short hair faster.
Difficulty: Easy | Cost: $5–$15
24. Space Puffs
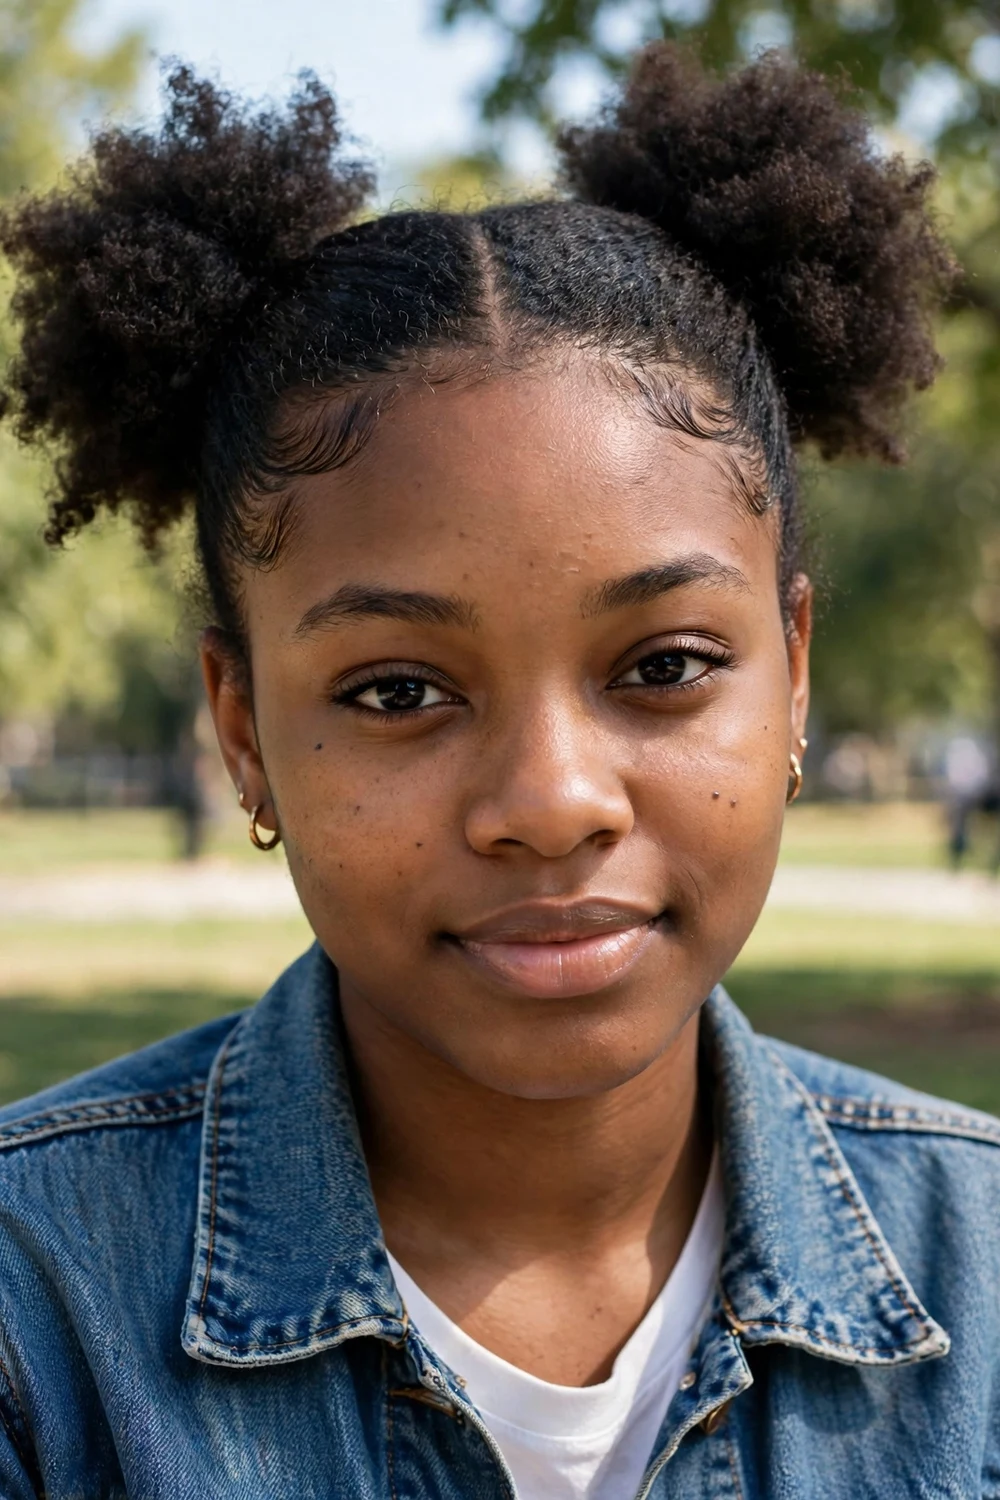
Two high puffs need less length per puff than one big one, which makes them ideal for the shorter end of the awkward stage. Part down the middle, stretch each side, and gather into puffs with satin scrunchies. The whole style takes about ten minutes.
It’s playful without reading childish on adults, especially with sleek edges and a confident outfit. Each puff also protects its own section’s ends.
Try this: Make the center part first and stretch both sides evenly. Uneven stretching is the main reason one puff ends up bigger than the other.
Difficulty: Easy | Cost: $0–$5
25. Low Puff
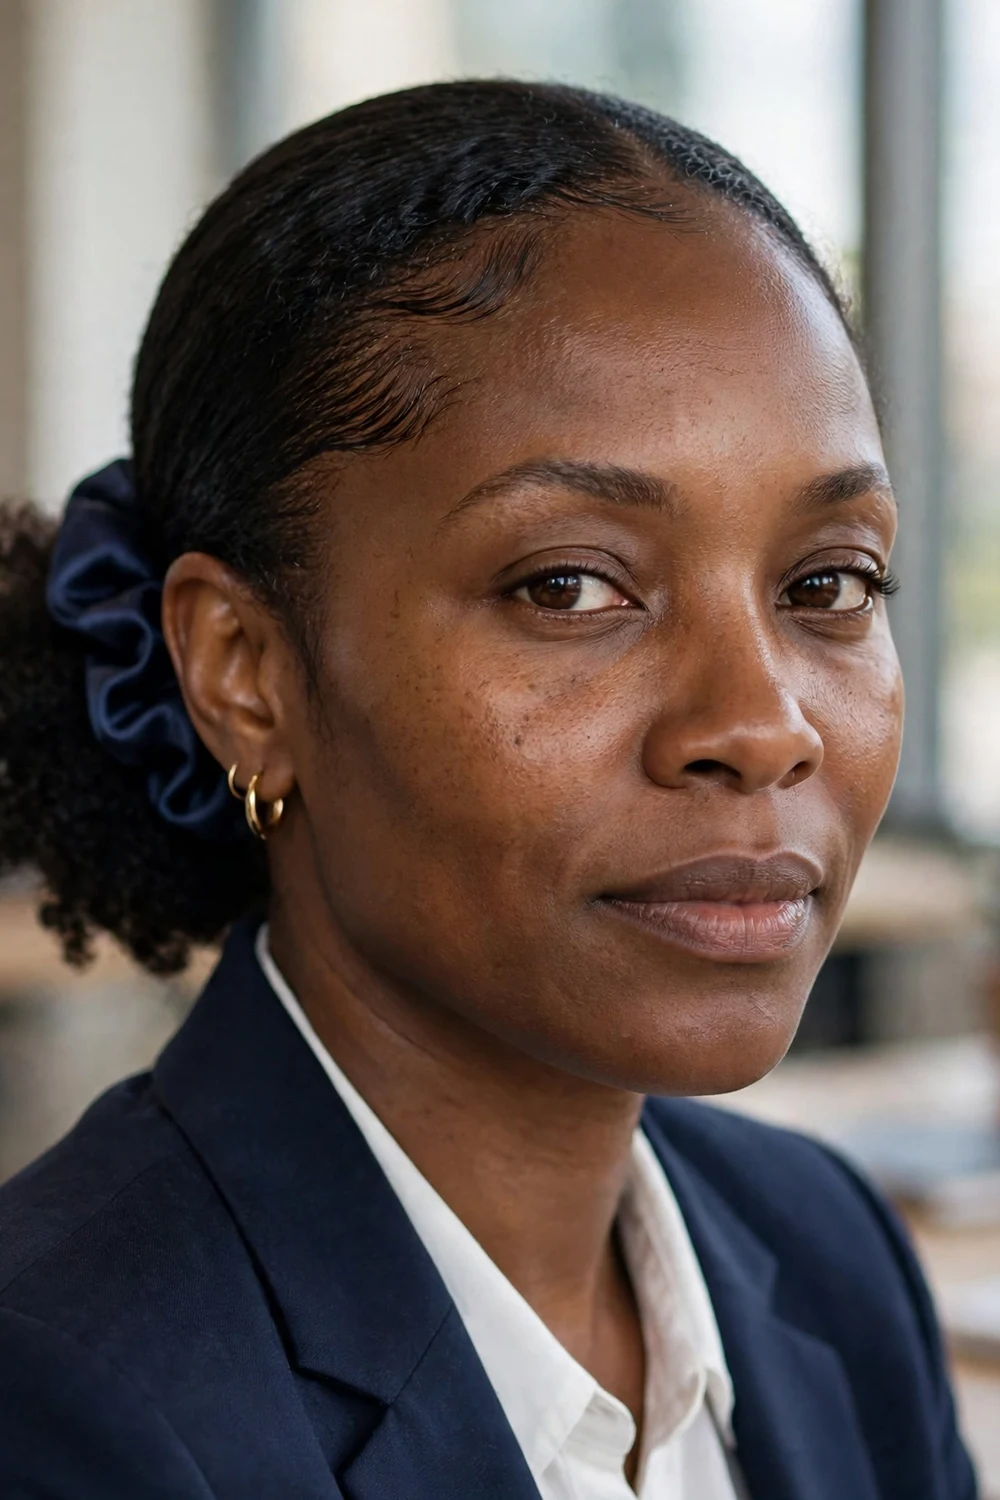
The low puff is the office-ready answer to short grow-out hair. Smooth stretched hair back with gel and a soft bristle brush, then gather at the nape with a satin scrunchie. It keeps every strand contained through long workdays and commutes.
This is also the puff to choose when the top layers are too short for a high puff. Gathering low needs less length to look full and neat.
Try this: Brush with a soft boar bristle brush for smoothness. Stiff brushes snap short 4C hair at the hairline.
Difficulty: Easy | Cost: $0–$8
26. Braided Headband
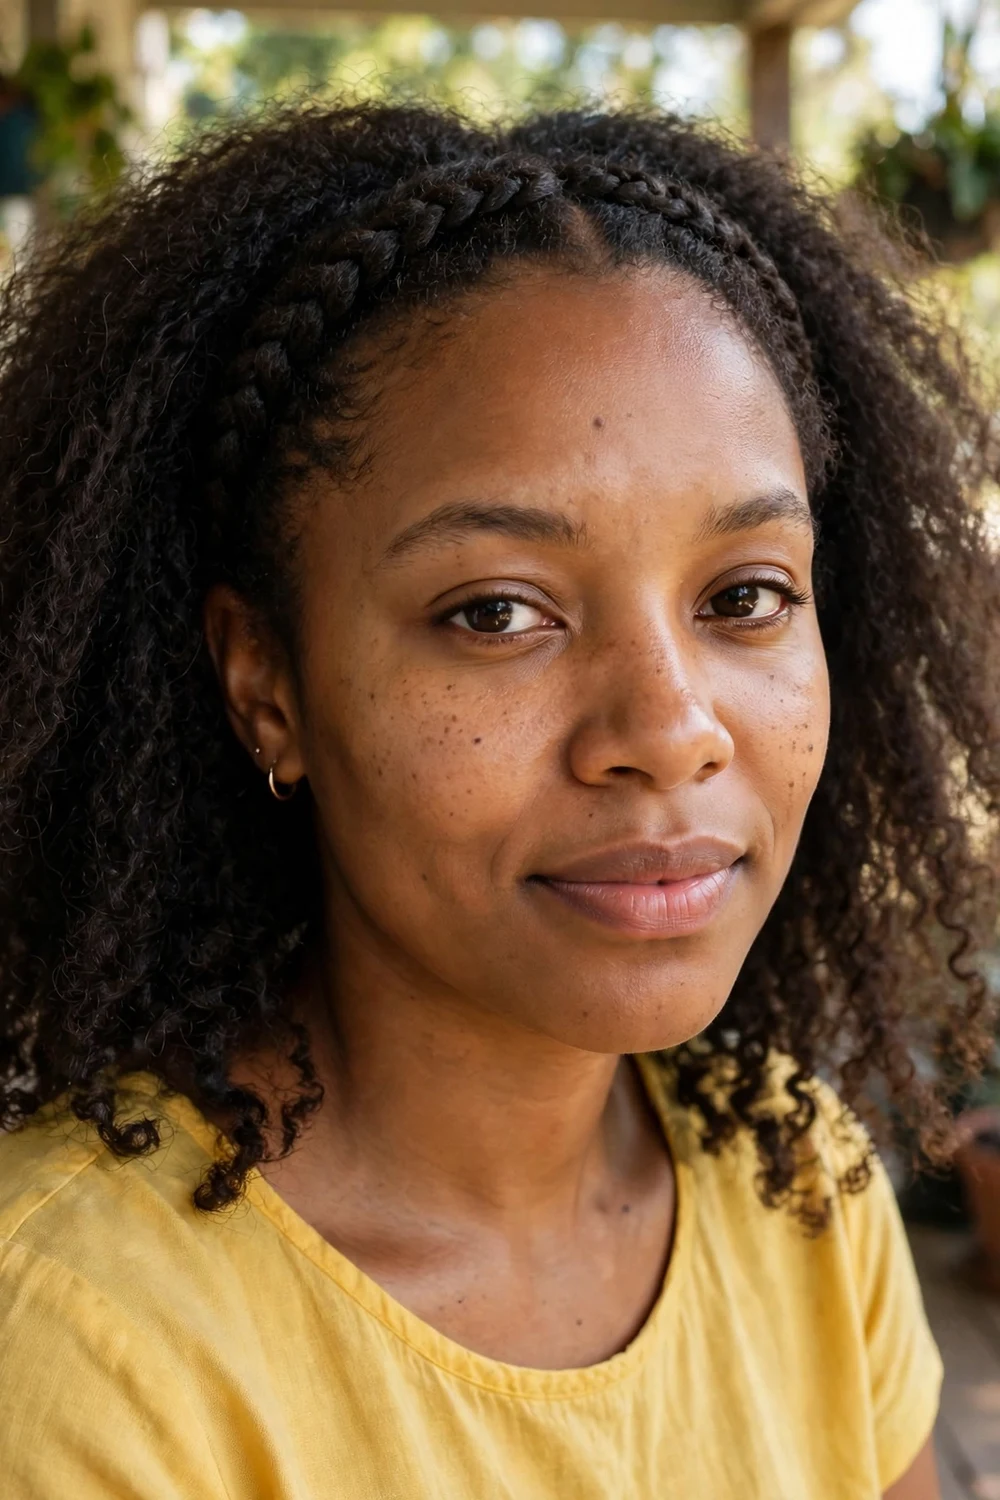
A single braid across the front hairline works like a built-in headband. Braid from one ear across to the other, slightly behind the hairline, and leave the rest loose in a puff or twist-out. Short front pieces that won’t stay tucked get braided in instead of sticking out.
The braid also protects the fragile front hairline from daily manipulation. It takes about ten minutes once the motion becomes familiar.
Try this: Braid slightly behind the hairline, not right on it. Braiding on the edge line pulls and thins the baby hairs over time.
Difficulty: Easy | Cost: $0–$5
27. Faux-Hawk Updo
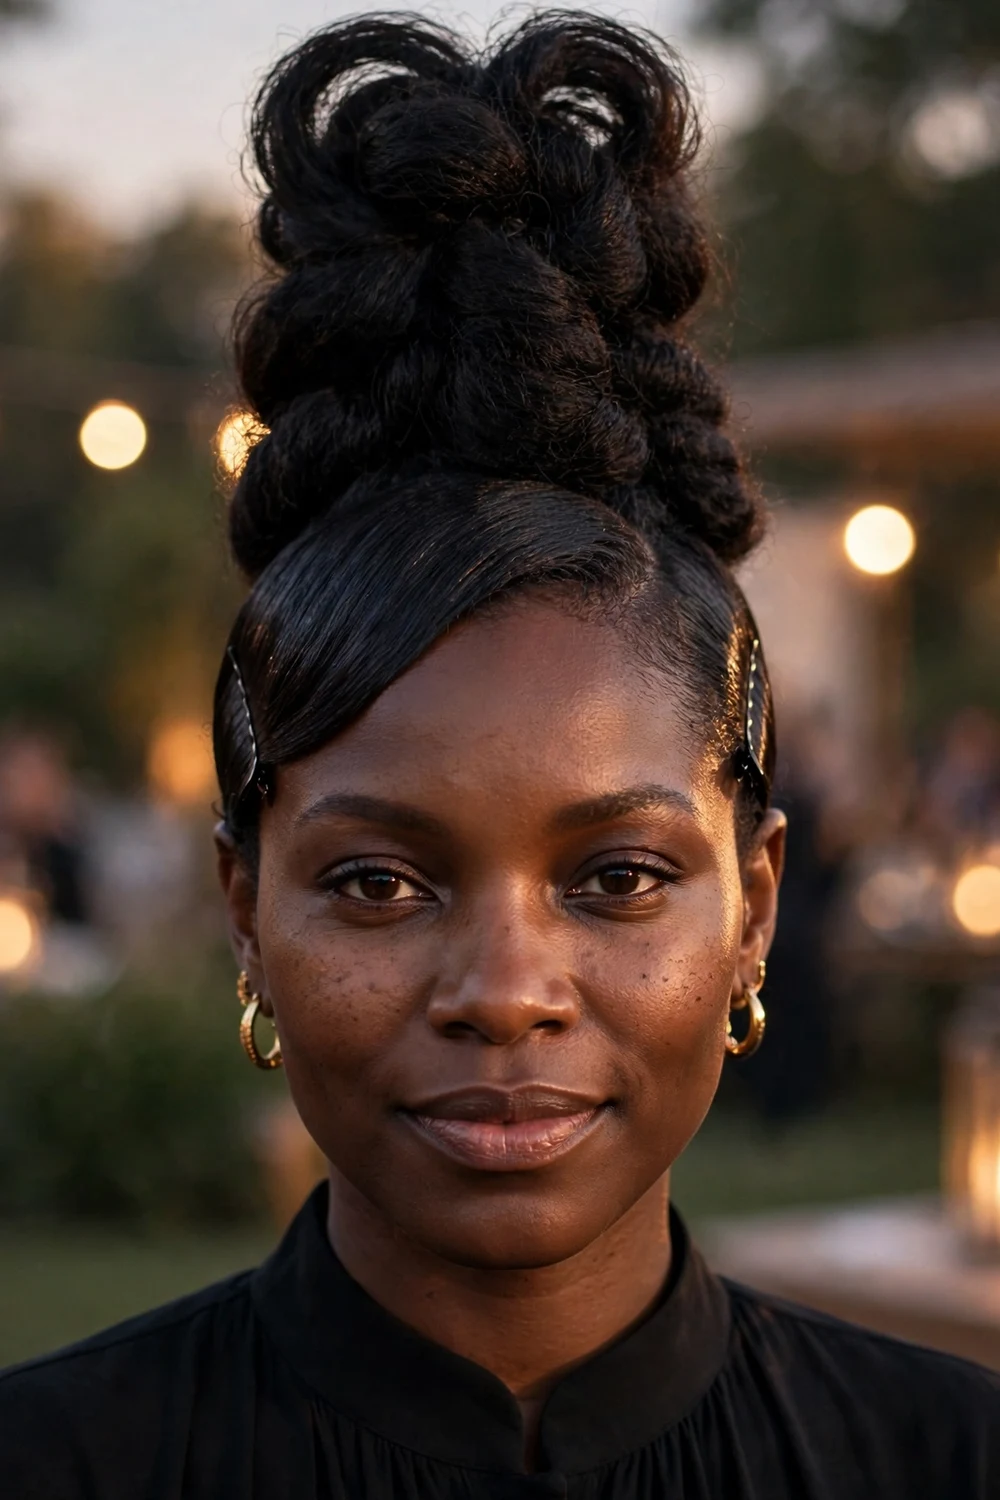
The faux-hawk needs almost no length on the sides, which makes it a natural fit for uneven grow-out. Pin both sides flat toward the center and leave the middle section voluminous in twists, coils, or a stretched fro. The contrast between sleek sides and full center creates the shape.
Crisscrossed bobby pins grip short hair better than pins placed in parallel. The style holds all day and suits evenings out especially well.
Try this: Twist the center section the night before for extra height. Bigger center volume makes the hawk shape read clearly.
Difficulty: Moderate | Cost: $0–$5
28. Headband Tuck Style
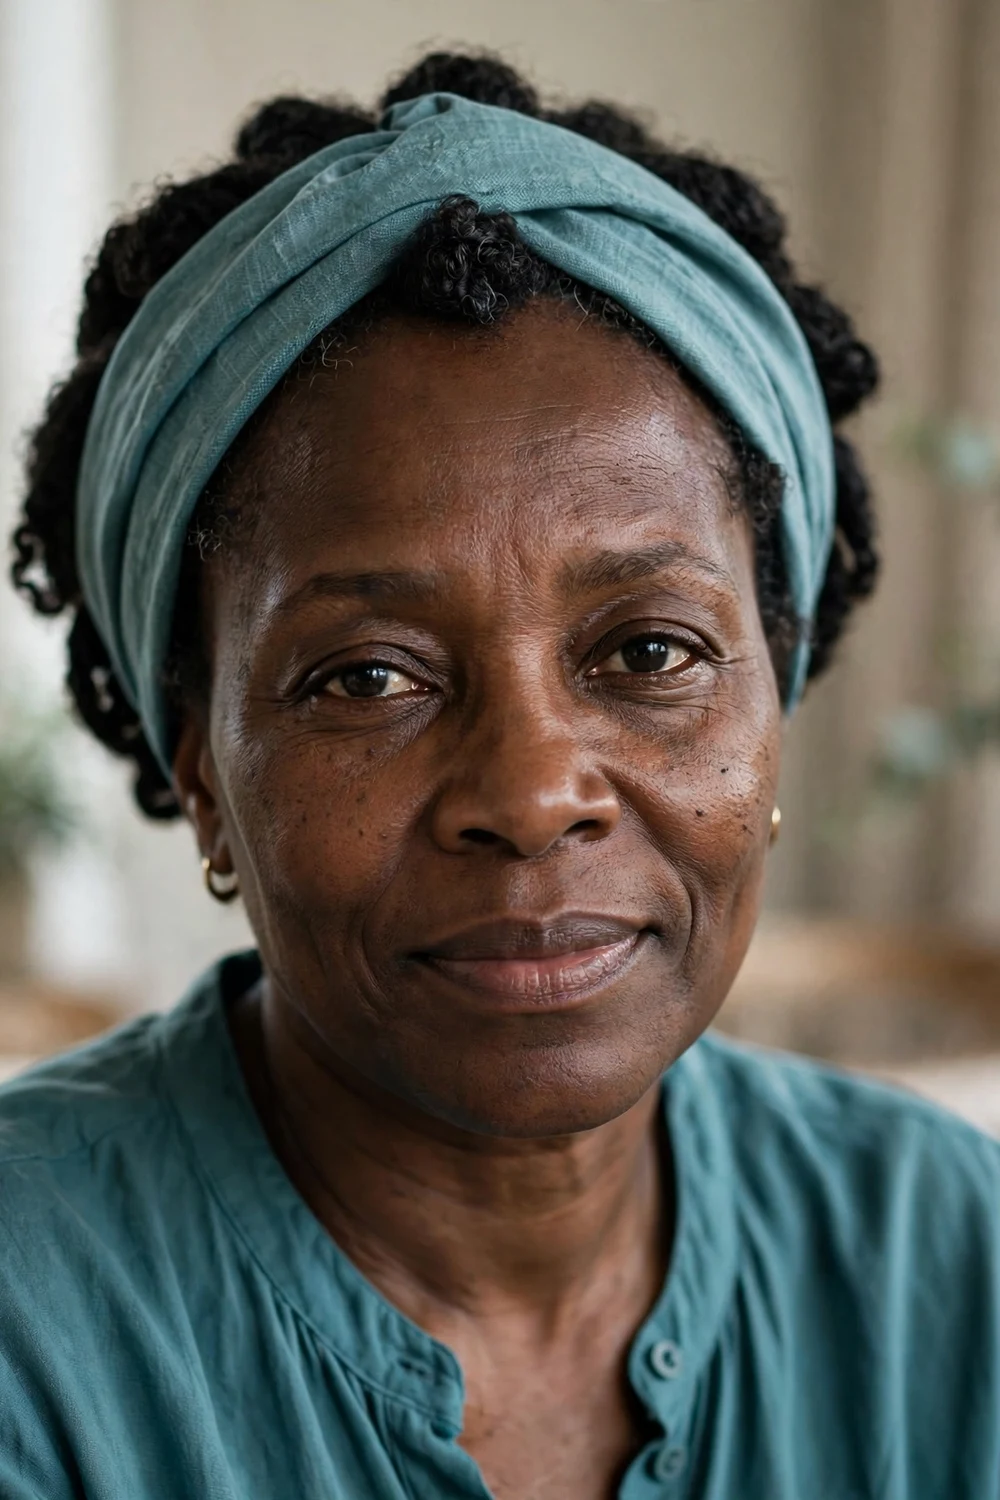
When the ends are too uneven to show, tuck them away. Place a wide fabric headband over the hair, then roll and tuck the ends up under the band all around. Nothing ragged shows, and the band itself becomes the style’s focal point.
Choose a non-slip fabric so the band stays put through the day. This works on hair too short for buns and too uneven for loose styles.
Try this: Tuck in small sections rather than all at once. Smaller tucks hold tighter and look smoother from every angle.
Difficulty: Easy | Cost: $3–$10
29. Scarf-Wrapped Puff
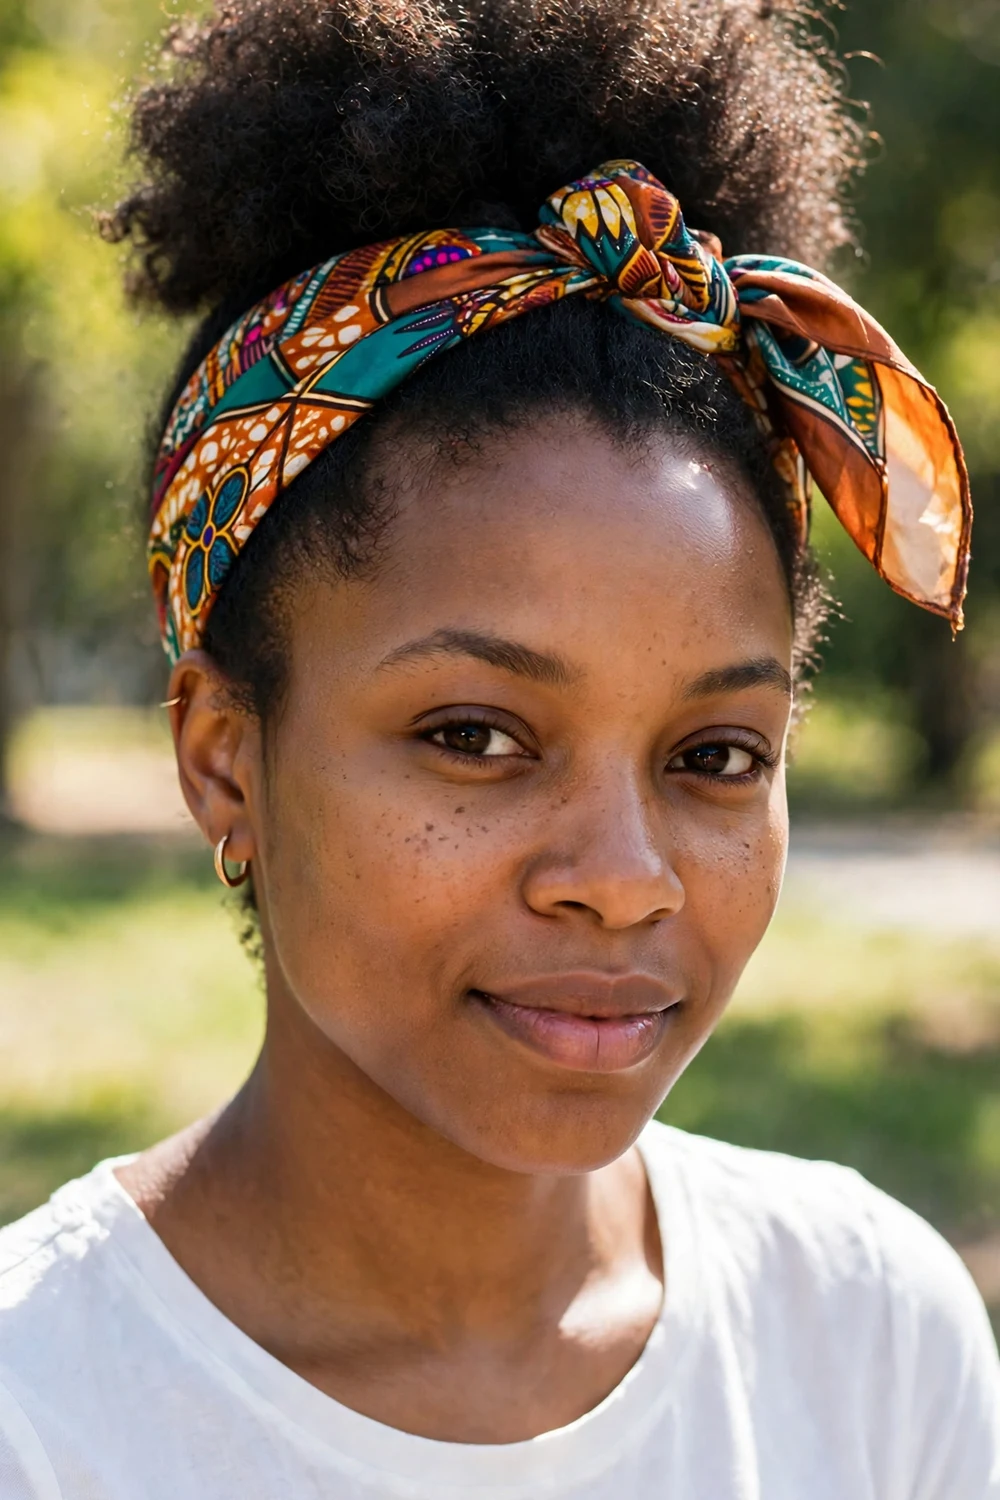
Wrap a silk scarf around the base of a puff and two things happen: the style gains color and pattern, and fuzzy roots get covered for extra days of wear. Fold the scarf into a three-inch band, wrap it around the puff’s base, and tie at the back or side.
At night, unwrap and re-tie the same scarf as a bonnet. One accessory covers both day styling and night protection.
Try this: Match the scarf to an outfit color for a pulled-together look. Bold prints also distract from new growth at the roots.
Difficulty: Easy | Cost: $5–$12
30. Clip-In Accents on Stretched Hair
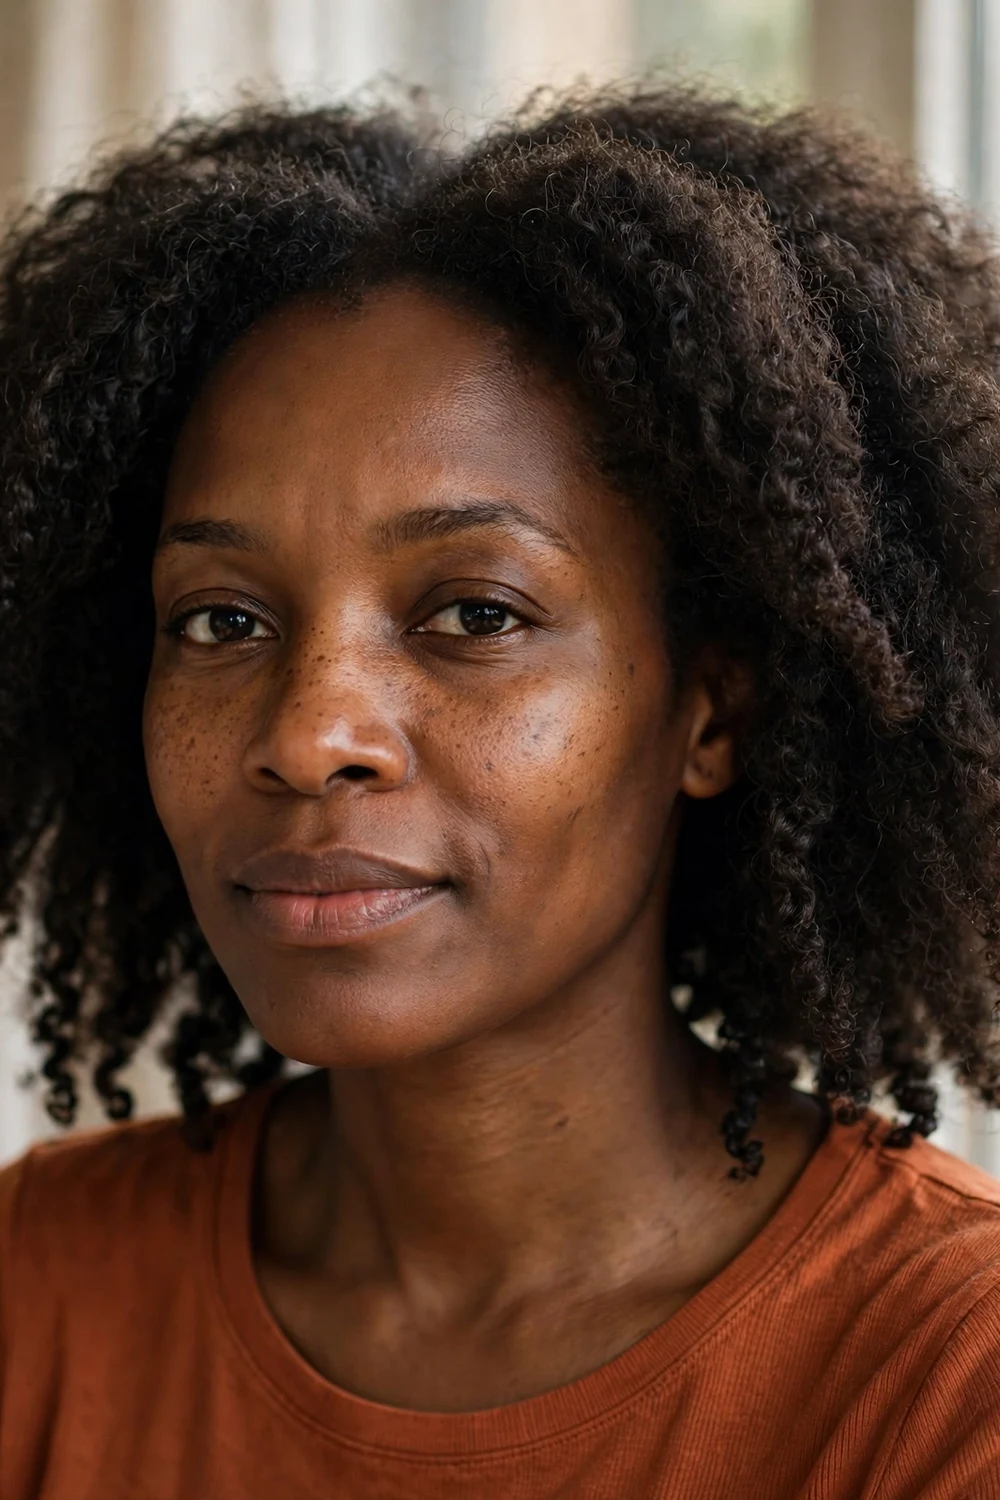
A few kinky-textured clip-ins add instant length while natural hair keeps growing underneath. Stretch your own hair first, then clip in two or three wefts at the back and sides for fullness. They work for events, photos, or any day when the grow-out feels frustrating. Remove them every night so the clips never stress the roots.
The trick is matching the clip-ins to your stretched texture, not your shrunken one. Mismatched textures are what make extensions obvious.
Try this: Place wefts under your top layer of hair, not on top of it. Your own hair covering the clips hides every attachment point.
Difficulty: Easy | Cost: $20–$45
31. Stretched Low Ponytail Puff

Banding is the heat-free way to show real length. After washing, place small satin bands down the length of damp hair and let it dry fully. The bands stretch the coils as they dry, and the reveal shows inches that shrinkage normally hides.
Gather the stretched hair into a low ponytail puff with a satin scrunchie. Fluff only the roots so the stretched length stays smooth and visible. Re-band at night to keep the stretch for a second day.
Try this: Remove the bands gently and slowly. Yanking them off creates tangles that undo the whole point of the stretch.
Difficulty: Easy | Cost: $0–$5
32. Twisted Front, Puff Back Combo
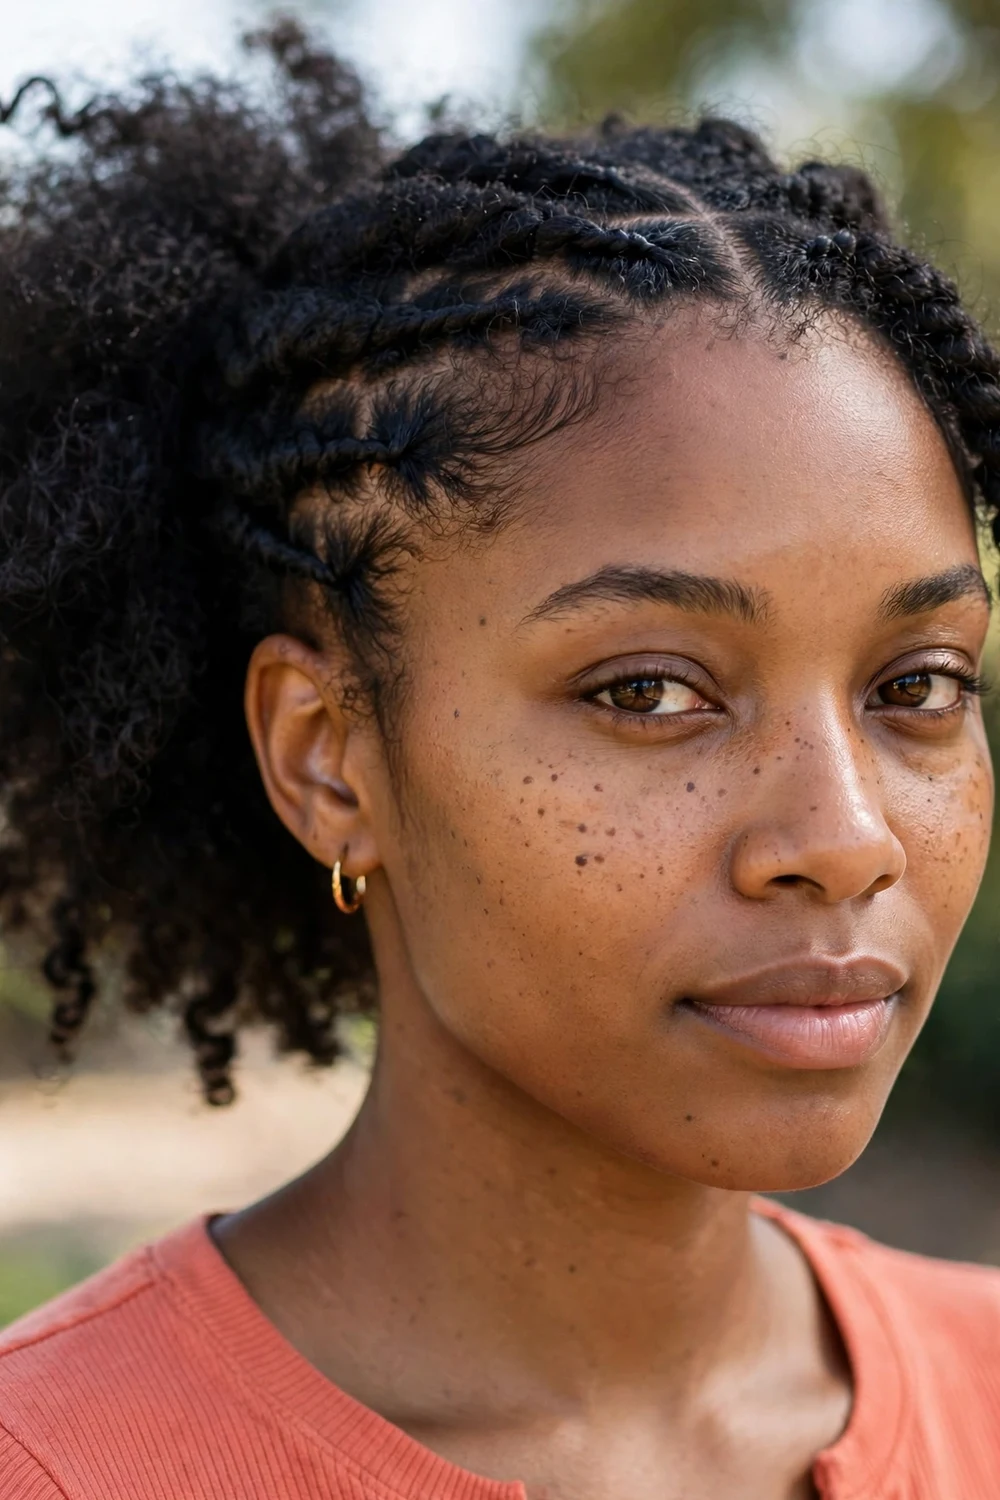
The classic grow-out headache is a front too short to reach the puff. This combo fixes it: flat-twist the front two to three inches straight back, then gather everything behind into a puff. The twists control the short pieces while the puff shows the longer back.
Chunky front twists hold short hair better than skinny ones, and they add a designed detail that makes the style look complete rather than improvised.
Try this: Twist the front on damp hair with a little gel. Dry front pieces slip out of twists by midday.
Difficulty: Easy | Cost: $0–$5
33. Mini Twists with Curly Ends
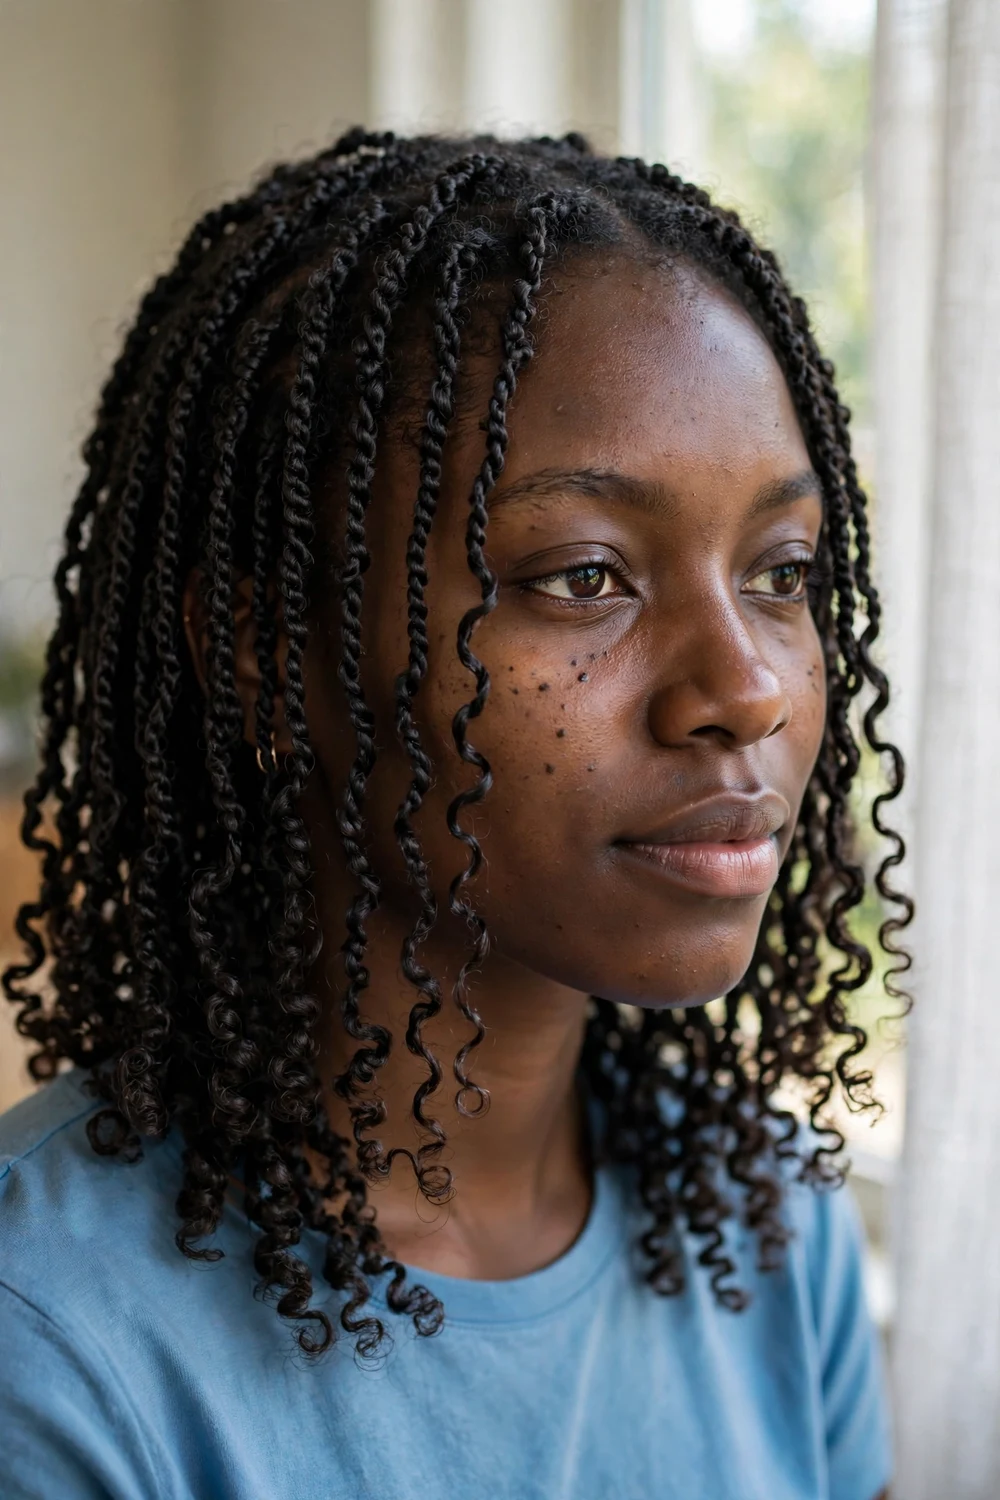
Mini twists protect like a full protective style, but leaving the last inch curly keeps the finish soft. Install tiny twists through most of the length, then leave the ends free to coil on their own with a dab of cream.
The curly ends need a little attention: check weekly for single-strand knots and trim them before they travel. With that small upkeep, the style wears for three to four weeks.
Try this: Seal the free ends with a drop of oil after twisting. Oiled ends tangle slower and stay defined longer between washes.
Difficulty: Moderate | Cost: $0–$10
Awkward Length 4C Hairstyles Compared
| Style | Typical Hold | Difficulty | Why It Works at Awkward Length |
|---|---|---|---|
| Two-Strand Twists | 2–3 weeks | Easy | Low manipulation protects new length while it grows |
| Twist-Out | 2–4 days | Easy | Adds shape and definition to uneven, shrunken hair |
| Braid-Out | 4–7 days | Easy | Stretches more than a twist-out, showing hidden length |
| Flat Twists | 1–2 weeks | Moderate | Gentle scalp style that controls short sections |
| Mini Bantu Knots | 2–3 days, then knot-out | Easy | Two styles in one install; ends fully tucked |
| High Puff | 1–2 days | Easy | Turns shrinkage into volume in fifteen minutes |
| Finger Coils | 1–2 weeks | Moderate | Brings definition to the shortest grow-out lengths |
| Loose Box Braids | 4–6 weeks | Moderate | Longest break from manipulation for fragile new growth |
| Pineapple Updo | 1 day, or nightly | Easy | Preserves curl sets and shows length with zero effort |
| Wash and Go | 1–3 days | Easy | Fastest routine; works with shrinkage instead of fighting it |
How to Choose the Right Style
Match the style to the week ahead, not just the mirror. Pick a protective style like twists, flat twists, or box braids for busy stretches when daily styling isn’t realistic. Choose a stretched style like a braid-out or banded puff for weeks when showing length matters more.
Check what the hair can actually reach before committing. If the top won’t gather into a high puff yet, the low puff or the twisted-front combo gets the same effect with less length. Fighting the hair into a style it can’t reach causes tension breakage, which sets growth back.
Keep moisture steady under any style. A light leave-in two or three times a week, sealed with oil, prevents the dryness that snaps short ends. And whatever the style, cover it with a satin bonnet or scarf every night.
Once the hair grows past this in-between phase, styles open up considerably. The guide to medium length hairstyles for Black women covers what to try when awkward length is behind you.
FAQs
What does awkward length 4C hair mean?
It means hair stuck between a TWA and longer lengths. The hair is long enough to need styling but too short for most styles, and shrinkage can hide up to 70 percent of the actual length. Growth also comes in uneven, so some sections behave while others won’t cooperate.
How long does the awkward length stage last?
It depends on the starting length, but expect several months to over a year. Hair grows around half an inch per month on average, so moving from a two-inch TWA to a length that pulls into easy styles takes time. Protective, low-manipulation styles help retain every bit of that growth.
What are the best protective styles for growing out 4C hair?
Two-strand twists, flat twists, mini twists, bantu knots, and loose box braids protect best because they tuck the ends away and need little daily handling. Wear them for one to six weeks at a time, moisturize the scalp and hair underneath, and always cover them with satin at night.
How do you reduce shrinkage at awkward length?
Stretch the hair before styling. Banding damp hair with satin bands, wearing twists or braids overnight, and choosing braid-outs over twist-outs all show more length. Keep hair well moisturized too, since dry coils shrink tighter and tangle faster.
Can you do a puff with short awkward length 4C hair?
Yes, once stretched hair reaches about three to four inches. Stretch first with banding or twists, then gather with a satin scrunchie. If the top still won’t reach, try a low puff at the nape or parted puffs, which need less length per section.
Final Thoughts
Awkward length is a stage, not a sentence. With stretched styles, tucked ends, and steady moisture, this phase can look deliberate the whole way through. Pick the styles that fit the week, protect the ends, and let the length build quietly underneath.
