

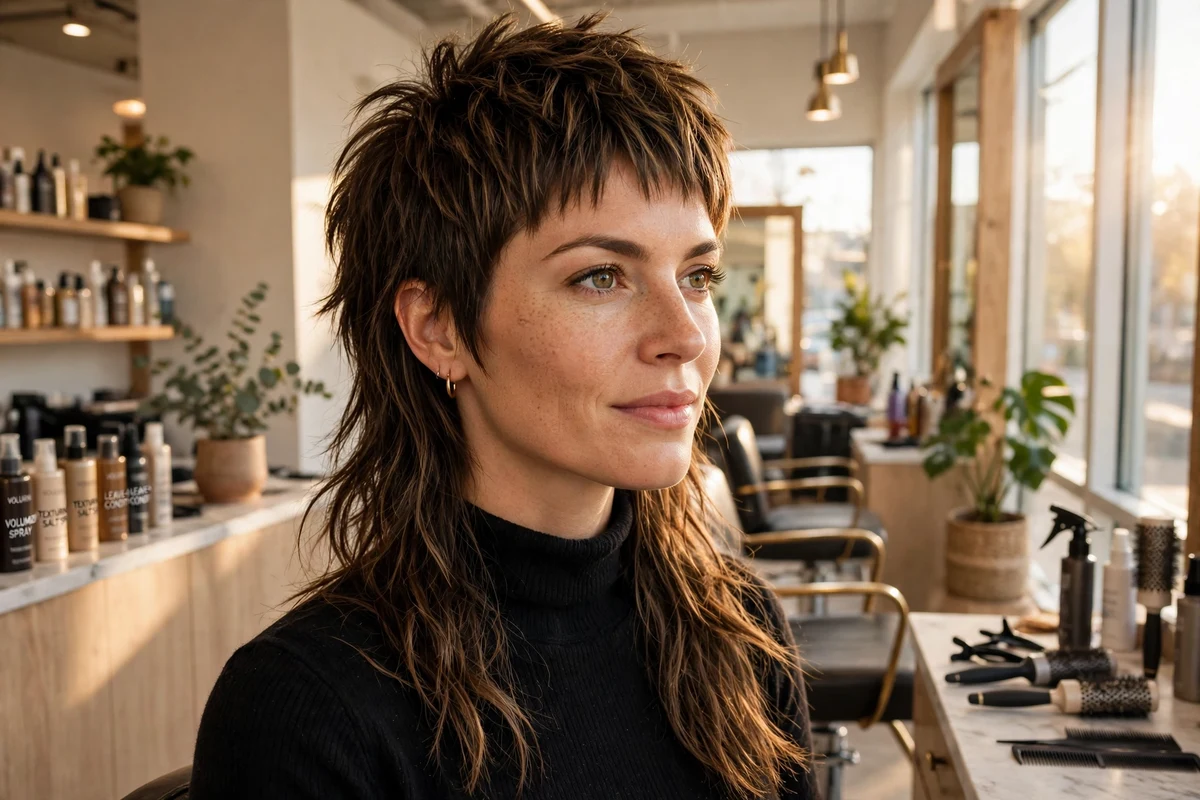
The pixie mullet keeps a true pixie at the front, short at the crown and sides, and leaves the length where a classic pixie would clip it away: at the back, over the nape. That contrast is the whole cut. I keep coming back to this shape because it gives short hair a back view worth looking at, and because small changes to the fringe, the sides, or the color turn one cut into a dozen different ones.
This list collects 25 edgy pixie mullet hairstyle ideas and runs from the core shapes first, through fringe and texture versions, and ends with the color and detail versions. Every idea keeps the top at pixie length and notes the upkeep honestly. If you want the longer, softer cousin of this cut, the shaggy mullet hair ideas roundup covers that territory. This page stays short on top.
Quick Takeaways
- The shape is fixed: pixie-short crown and sides, longer back. Fringe, texture, and color are what change the look.
- Undercuts and shaved sides give the strongest contrast and the fastest trim cycle, usually every 3 to 4 weeks.
- Fine hair needs short, blunt-ish layers and matte product. Thick hair needs weight removed at the back.
- Bold color costs the most upkeep. A colored fringe or tips give the same effect with a smaller commitment.
- Bring photos of the back, not just the front. The nape length is where pixie mullets go wrong.
How the Pixie Mullet Differs from a Regular Pixie
A regular pixie tapers short all the way around, including the nape. A pixie mullet keeps the front and crown just as short, then lets the back section drop past the ears toward the neckline. The sides can stay scissor-cut and soft, or they can be clipped and undercut for a harder line. Styling time stays pixie-level: most versions on this list take five minutes with a pea-sized amount of product worked through the crown and back with your fingers.
| Style group | Best for | Trim cycle | Cost band |
|---|---|---|---|
| Undercut and shaved versions | Thick hair, strong contrast | Every 3 to 4 weeks | $$ |
| Fringe-led versions | Most face shapes | Every 4 to 5 weeks | $ to $$ |
| Texture-led versions | Fine, wavy, and curly hair | Every 5 to 6 weeks | $$ |
| Color-led versions | Pre-lightened or light bases | Color refresh at 4 to 6 weeks | $$$ |
1. Choppy Pixie Mullet with a Piecey Crown

This is the base version most other ideas on this list build on. The crown is point-cut into separated pieces, the sides sit close above the ears, and the back drops two to three inches past the hairline in broken, textured ends. The length balance is clear from every angle: cropped at the front, visibly longer at the back.
It works on straight and wavy hair and forgives a wide range of face shapes because the piecey crown adds height without width. Styling is a matte paste worked through dry hair, pinching the crown pieces apart and letting the back fall where it wants.
Try this: ask your stylist to keep the back ends point-cut and uneven. A blunt back edge makes the cut read as a bob from behind.
Difficulty: Low to Medium · Cost: $$ (salon)
2. Pixie Mullet with a Shaved Side
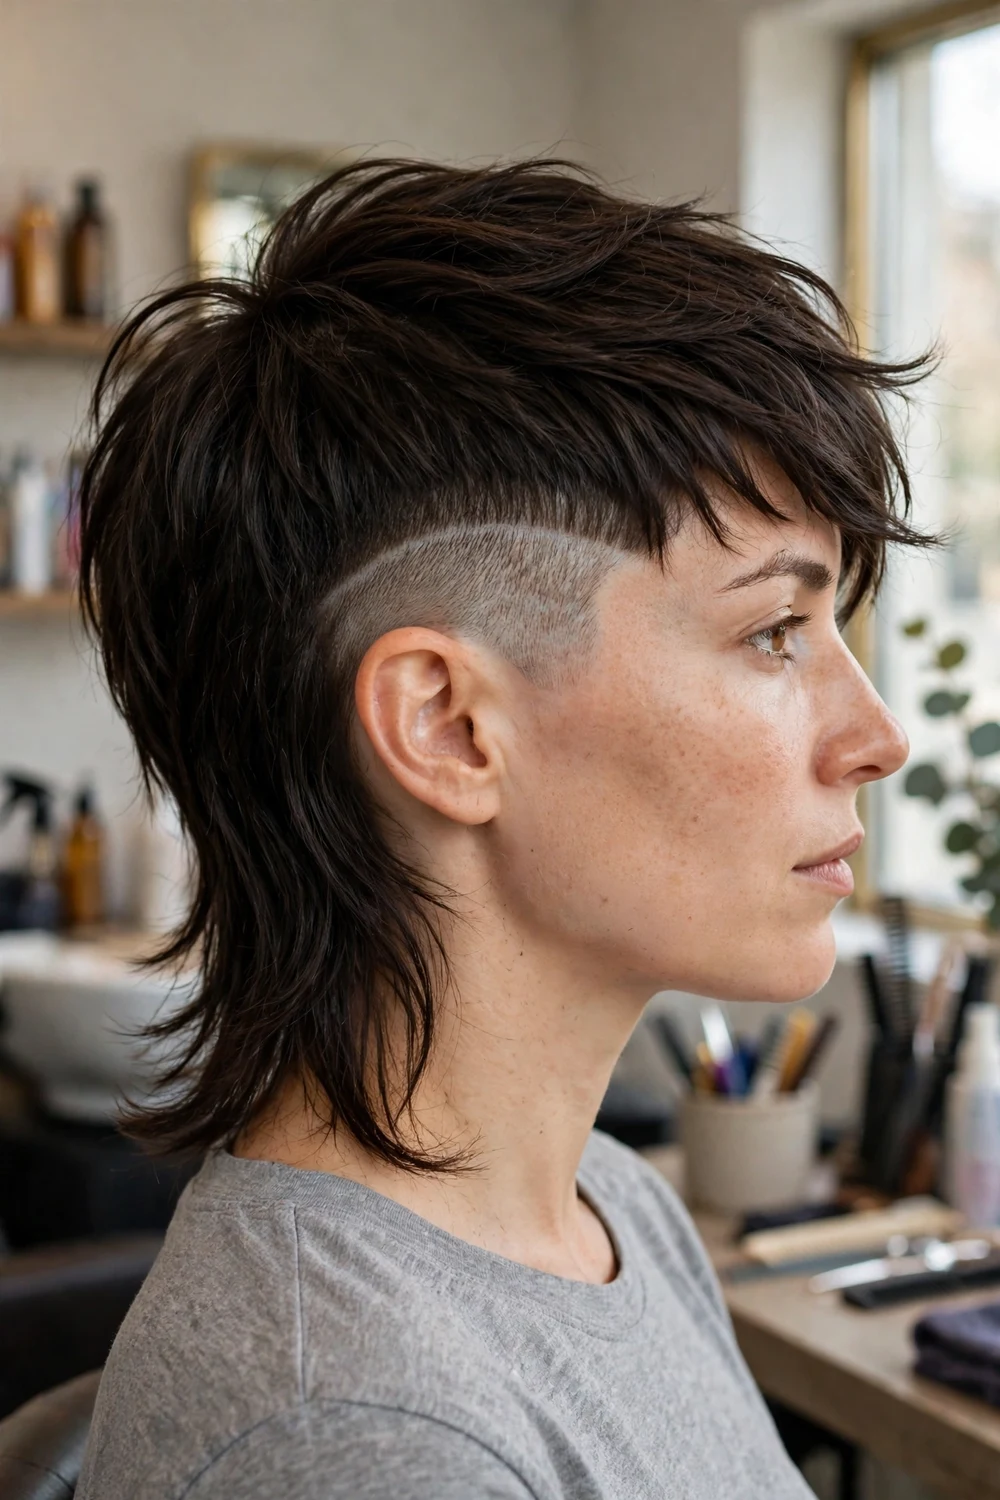
One temple is clipped down close while the top sweeps over it from the other side. The back keeps its mullet length, so the shaved panel reads as one sharp detail inside a longer shape. The contrast is strongest on dark hair, where the clipped section and the swept top separate cleanly.
Pick the shaved side based on your part. The sweep needs enough top length to cover and uncover the panel, so keep the crown a touch longer than a standard pixie. The clipped side grows out fast and needs a tidy-up every three weeks to stay sharp.
Try this: start with a longer clipper guard on the shaved side. You can always go shorter at the next appointment.
Difficulty: Medium · Cost: $$ (salon)
3. Disconnected Undercut Pixie Mullet
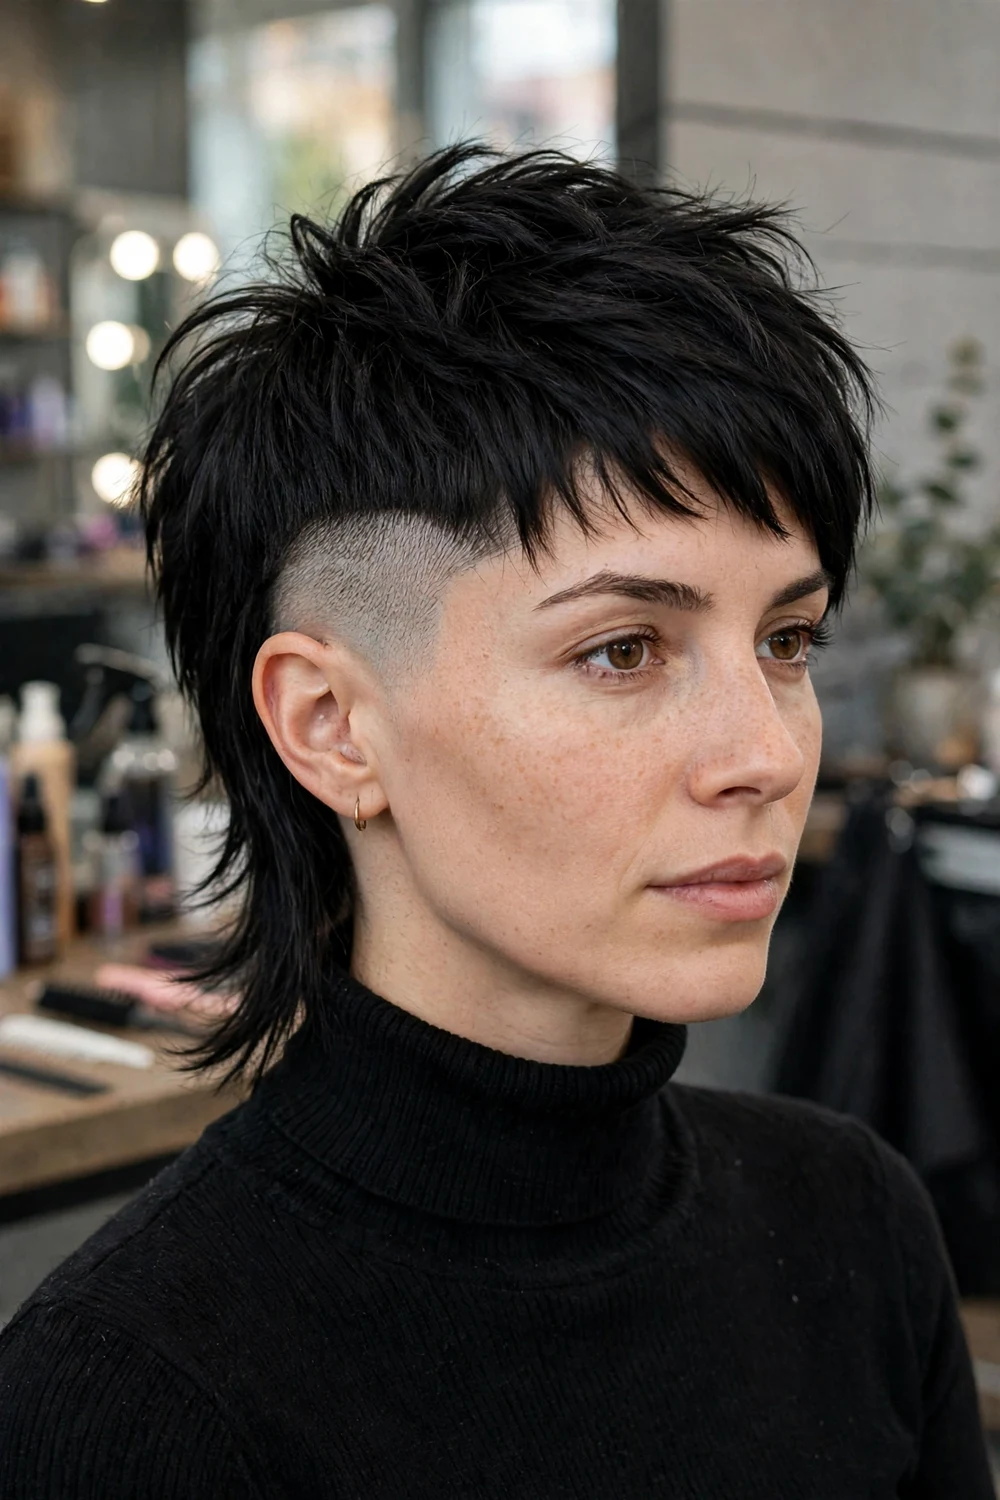
Both sides and the lower nape are clipped short, and the top layer falls over the undercut with a visible, unblended line. That hard break is the point of the cut. The back section hangs from the top layer, so the mullet length sits over a clean, clipped base.
This version removes a lot of bulk, which makes it a practical pick for thick or coarse hair that overwhelms a standard pixie. The trade-off is commitment: the disconnection shows as it grows, and the undercut needs re-clipping every three to four weeks.
Try this: decide the undercut height with your hair dry and styled. The line sits higher once the top is pushed back.
Difficulty: Medium to High · Cost: $$ (salon)
4. Razor-Cut Pixie Mullet with Feathered Ends

A razor does the shaping here instead of scissors, which leaves every end soft, thin, and feathered. The pixie front melts into the longer back without a single hard line, and the whole cut moves when you turn your head. It is the lightest-feeling version on this list.
Razor work suits fine to medium straight and wavy hair. On very curly or coarse hair the feathered ends can frizz, so ask for a scissor-cut test section first if your texture is strong. The wider razor cut hair ideas guide shows the same finish on longer shapes.
Try this: style with a light cream rather than wax. Heavy product clumps feathered ends together and hides the razor work.
Difficulty: Low to Medium · Cost: $$ (salon)
5. Pixie Mullet with a Micro Fringe
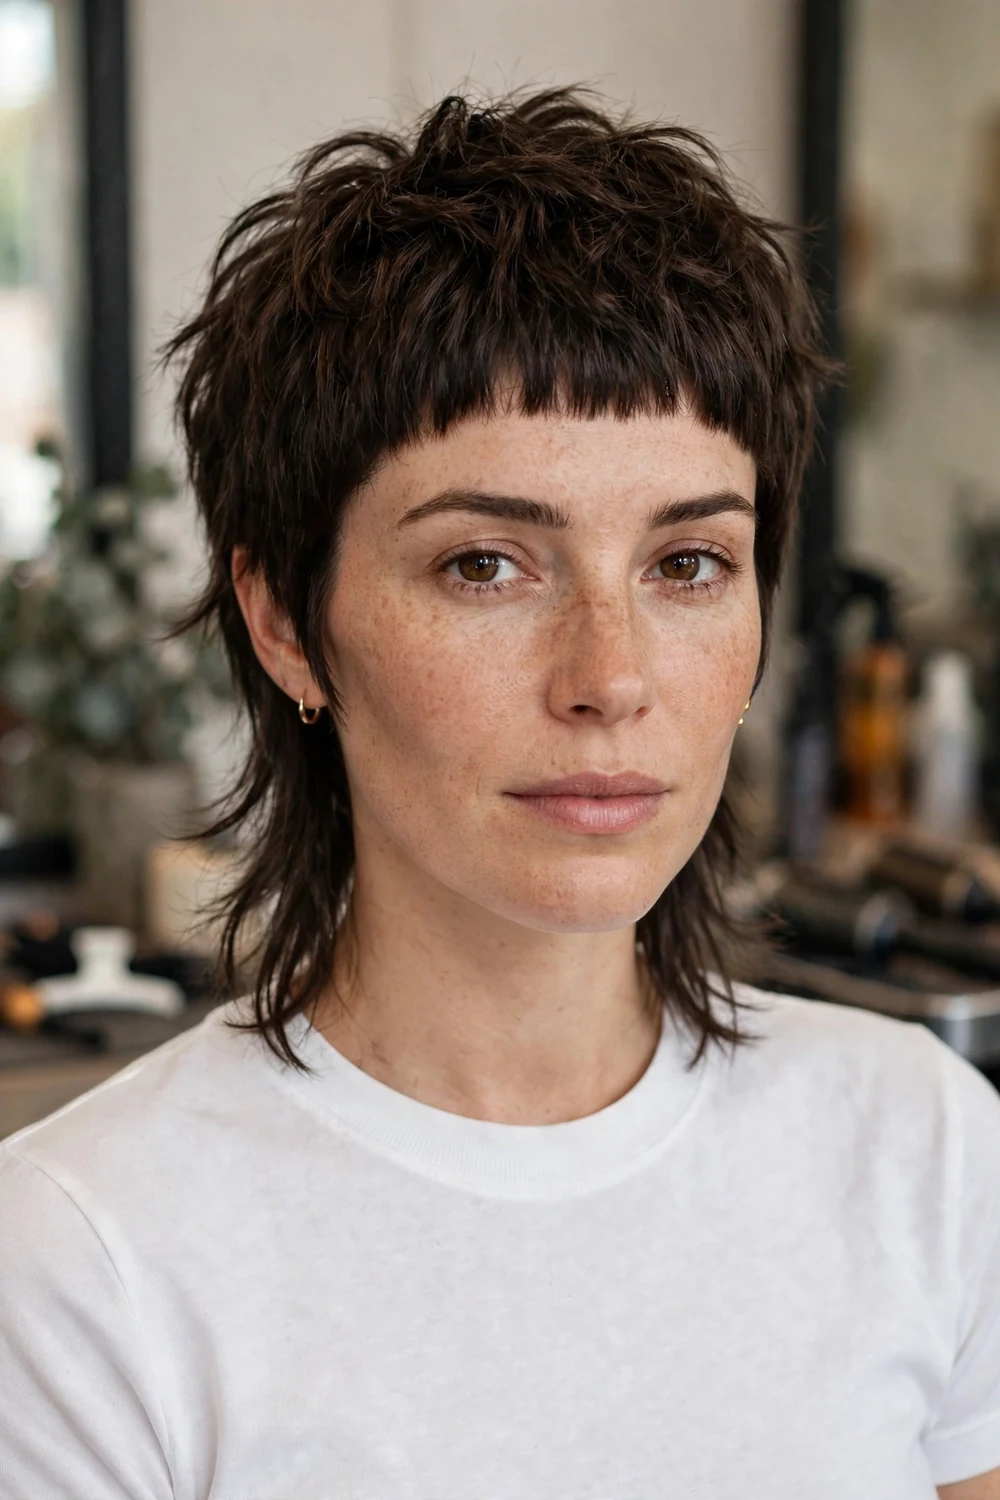
The fringe is cut high, well above the eyebrows, and usually a little uneven. Against the longer back, that tiny front line makes the whole silhouette look sharper. The crown stays short and textured, and the sides tuck in close so the fringe stays the focus.
Micro fringes suit oval and longer face shapes best, since the exposed forehead lengthens the face visually. The fringe itself needs a trim every two to three weeks to stay micro. Between trims it grows into a baby fringe, which is a fine look, just a different one.
Try this: ask for the fringe cut dry. Wet hair shrinks up as it dries, and a micro fringe cut wet often ends up shorter than planned.
Difficulty: Medium · Cost: $ (salon)
6. Pixie Mullet with a Blunt Fringe

The opposite fringe choice: a heavy, straight line cut at brow level, kept dense from temple to temple. The back stays longer and piecey, so the solid front and broken back play against each other. On straight hair the fringe sits flat and graphic.
This version needs enough natural density at the front hairline to hold a solid fringe without gaps. Wavy hair can wear it, but the fringe will need heat or a strong blow-dry routine to sit straight each morning. Fringe trims land every three to four weeks.
Try this: keep the corners of the fringe slightly longer than the middle. The soft step stops the line from looking like a helmet edge.
Difficulty: Medium · Cost: $ (salon)
7. Pixie Mullet with Bottleneck Bangs

Bottleneck bangs are short in the center of the forehead and curve out into longer pieces that land at the cheekbones. They frame the face in an arc while the crown stays cropped and the back keeps its length. It is the softest fringe option on this list, and it still reads edgy because the top is so short.
The longer side pieces blend the fringe into the sides of the cut, which helps round and square faces. Styling takes a round brush or your fingers and a dryer for two minutes: push the center up and let the sides fall forward.
Try this: if you are growing out a blunt fringe, this is the natural next shape. Your stylist reshapes the corners first and the center catches up.
Difficulty: Low to Medium · Cost: $ (salon)
8. Asymmetric Pixie Mullet with One Long Side

One side is cropped above the ear while the other side keeps a long section that sweeps past the cheek. No shaving is involved; the contrast comes from length alone. The back stays mullet-long across the full width, which keeps the silhouette balanced from behind.
This is a good route into asymmetry if a shaved side feels like too much. The long side can be tucked behind the ear for a calmer look at work, then swept forward when you want the full shape. It needs a stylist who checks the balance from the front at the end of the cut, since the two sides are meant to differ by a set amount.
Try this: wear your part on the cropped side for a week before the cut, so you know the sweep direction feels natural.
Difficulty: Medium · Cost: $$ (salon)
9. Curly Pixie Mullet with a Short Fringe
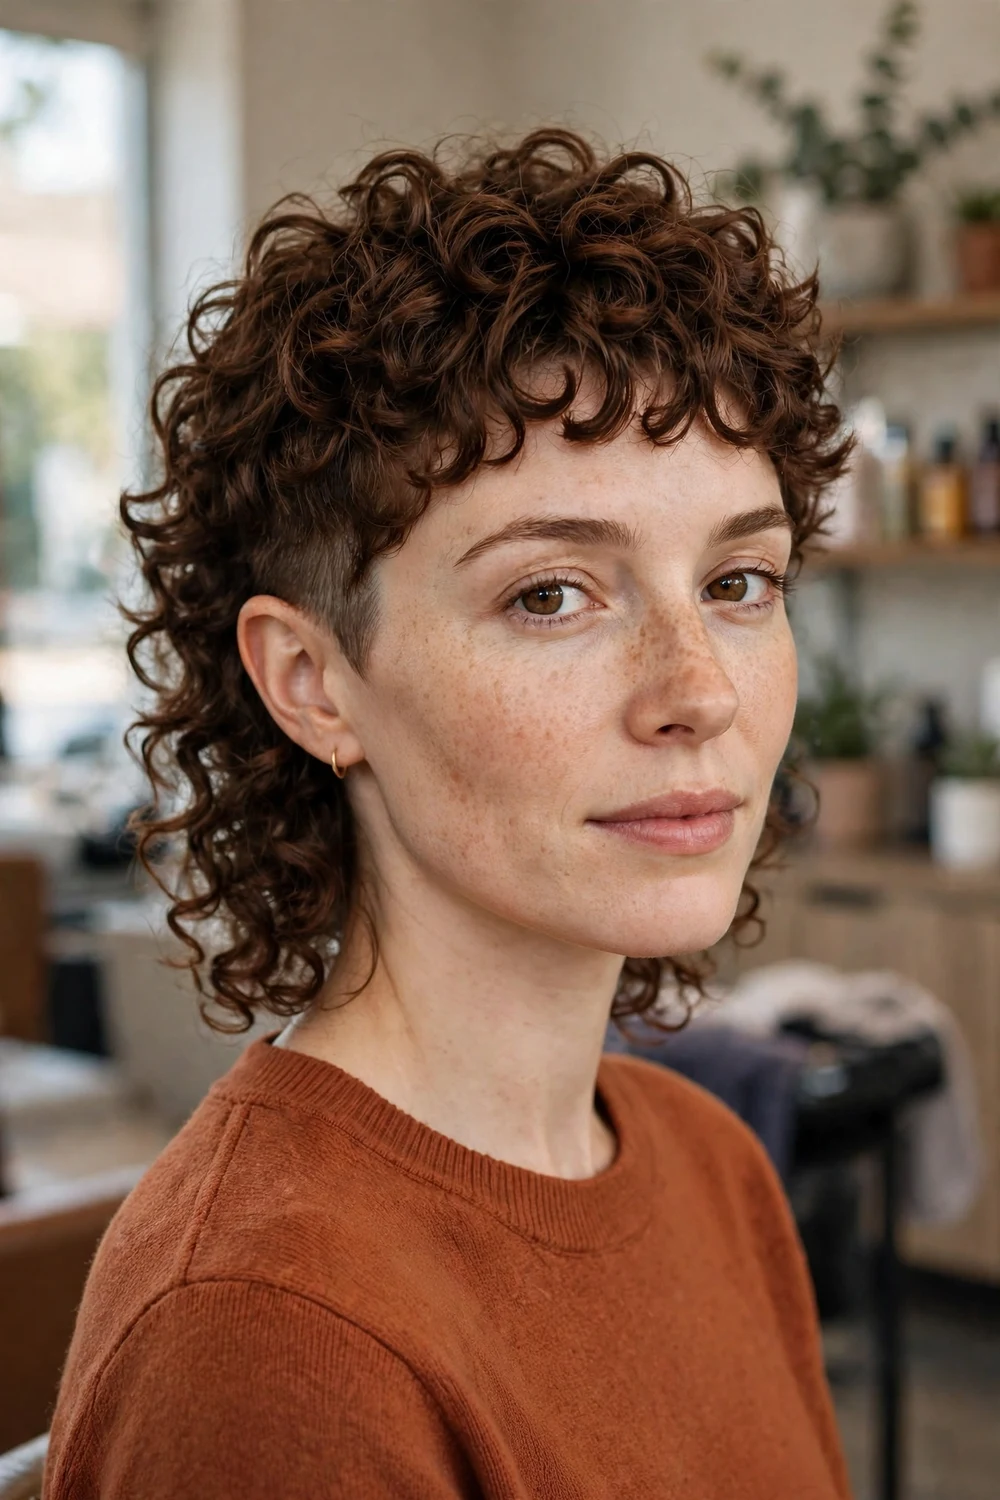
Curls change how this cut reads. The fringe is a row of short curls on the forehead, the sides are cropped close enough to show the curl pattern tightening, and the back holds longer curls that stack at the nape. Cut curl by curl, the shape stays compact on top and full at the back.
Length planning matters more here than with any other idea on the list, since curls spring up as they dry. Ask for the back to be left longer than your target and trimmed in a second pass. The pixie haircuts for curly natural hair guide covers curl-specific shaping in more depth.
Try this: book the cut on dry, styled hair. A curly pixie mullet cut wet almost always dries shorter and rounder than planned.
Difficulty: Medium · Cost: $$ (salon)
10. Wavy Pixie Mullet with Tousled Layers
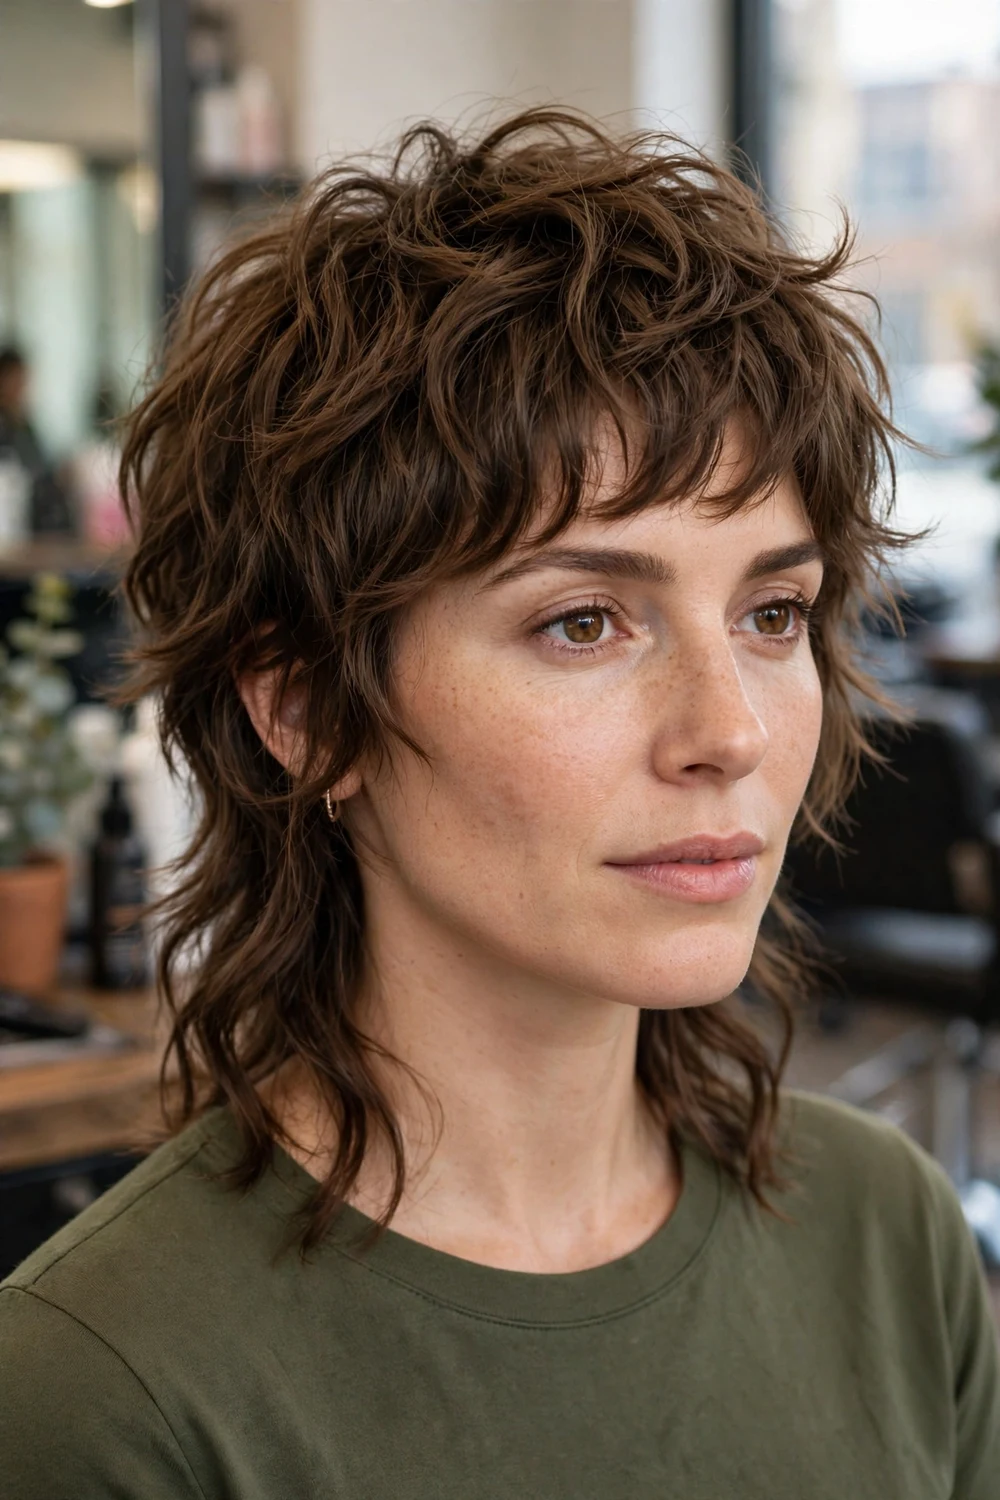
Natural waves do most of the styling work in this version. Short layers through the crown let the wave pattern bend and separate, and the longer back shows the wave at its loosest. The finish is finger-styled and a little undone, with the pieces at the front pushed in different directions.
It suits anyone whose hair already has a bend and who wants a cut that works with air-drying. A salt spray or light mousse scrunched in while damp is the whole routine. Trims every five to six weeks keep the crown layers from collapsing into the back length.
Try this: ask for the layers concentrated at the crown. If the back gets layered as heavily as the top, the mullet length thins out and disappears.
Difficulty: Low · Cost: $$ (salon)
11. Pixie Mullet for Thick Hair with a Thinned-Out Back

Thick hair holds this shape well as long as the weight comes out of the right places. The crown keeps its density for height, the sides are debulked close to the head, and the back is thinned with texturizing shears so the length hangs in separated pieces instead of one solid curtain.
Without that thinning, a thick-haired pixie mullet puffs at the nape within two weeks of a cut. With it, the shape holds five to six weeks. More thick-hair shaping notes sit in the pixie haircuts for thick hair collection.
Try this: ask your stylist to thin the back from the mid-lengths down only. Thinning near the root of the back section makes it stick out.
Difficulty: Medium · Cost: $$ (salon)
12. Pixie Mullet for Fine Hair with a Matte Finish

Fine hair needs the opposite approach: shorter layers, blunter ends, and a back length kept modest so the ends still look full. Heavy layering is what thins fine hair out, so this version uses compact layering at the crown and leaves the back mostly one length with light texture at the tips.
The finish does half the work. Matte, dry-texture products grip fine strands and keep the crown pieces standing apart, while oils and glossy creams weigh the whole cut down by midday. The pixie haircuts for fine hair guide goes deeper on density-friendly cutting.
Try this: apply texture powder at the roots on day two instead of washing. Fine hair styled on slightly lived-in texture holds this shape better.
Difficulty: Low to Medium · Cost: $ (salon)
13. Platinum Pixie Mullet with Dark Roots
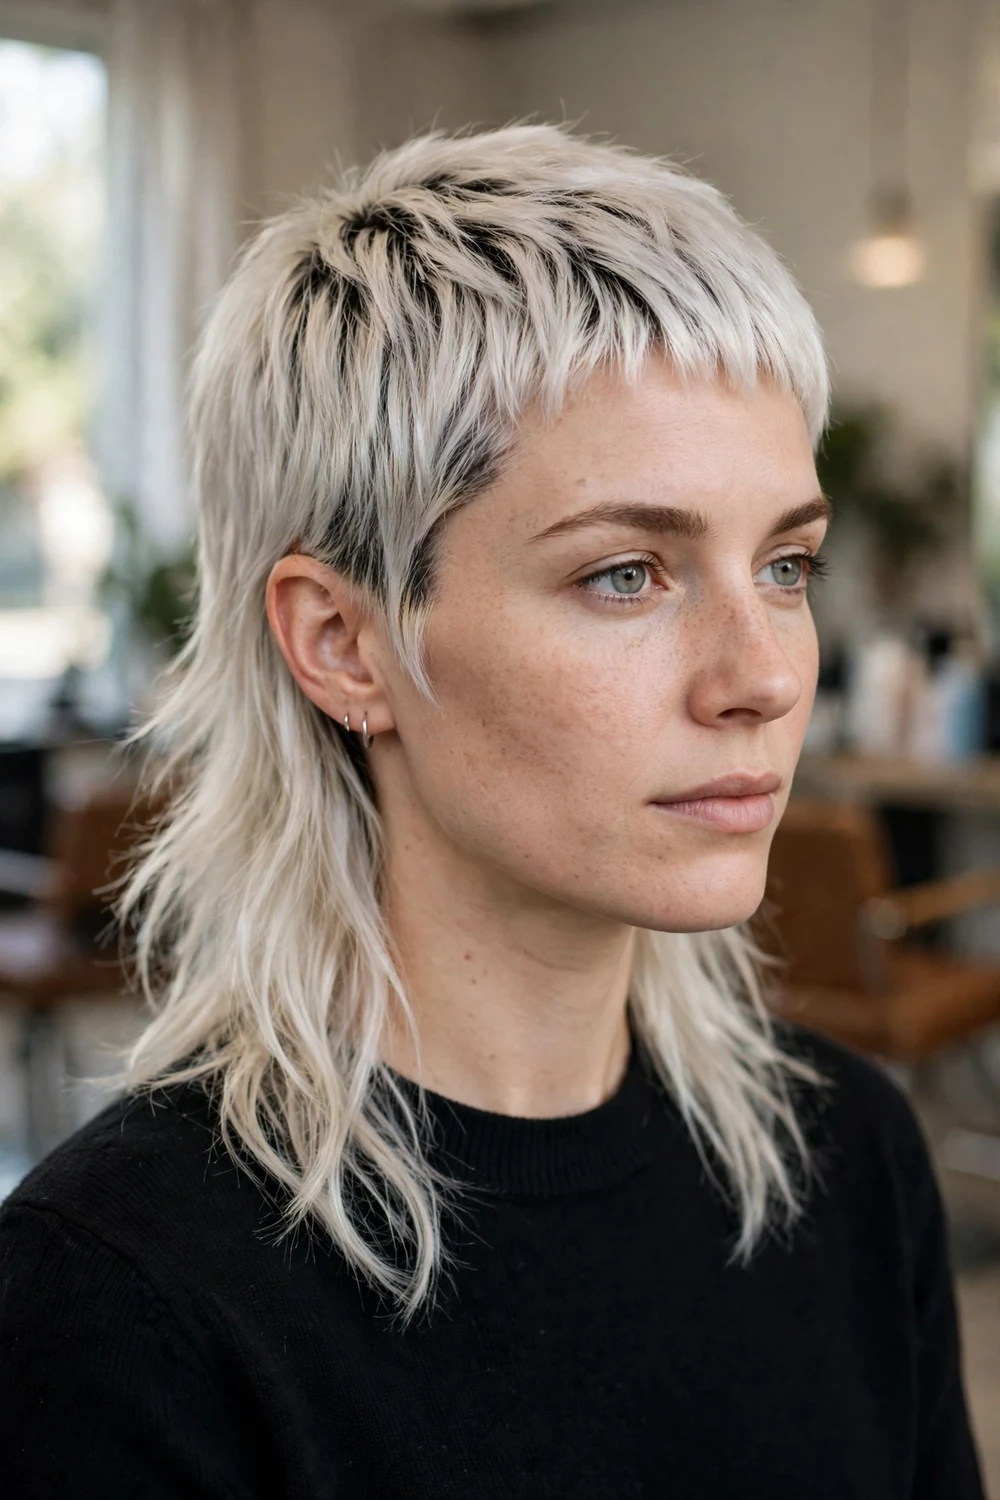
Full platinum over a pixie mullet makes every layer in the cut visible, since light hair shows texture clearly. The roots are left a shade or two darker on purpose, which softens the grow-out line and adds depth at the crown where the pieces separate.
Reaching platinum needs a lightened base, and short hair is the kindest length to bleach because damaged ends get cut away quickly. The upkeep is still the highest of the natural-color group: toner at four to five weeks and purple shampoo in rotation to keep the tone icy.
Try this: keep the back slightly darker than the crown. The subtle gradient makes the mullet length read longer.
Difficulty: High · Cost: $$$ (salon)
14. Jet Black Pixie Mullet with Feathered Layers
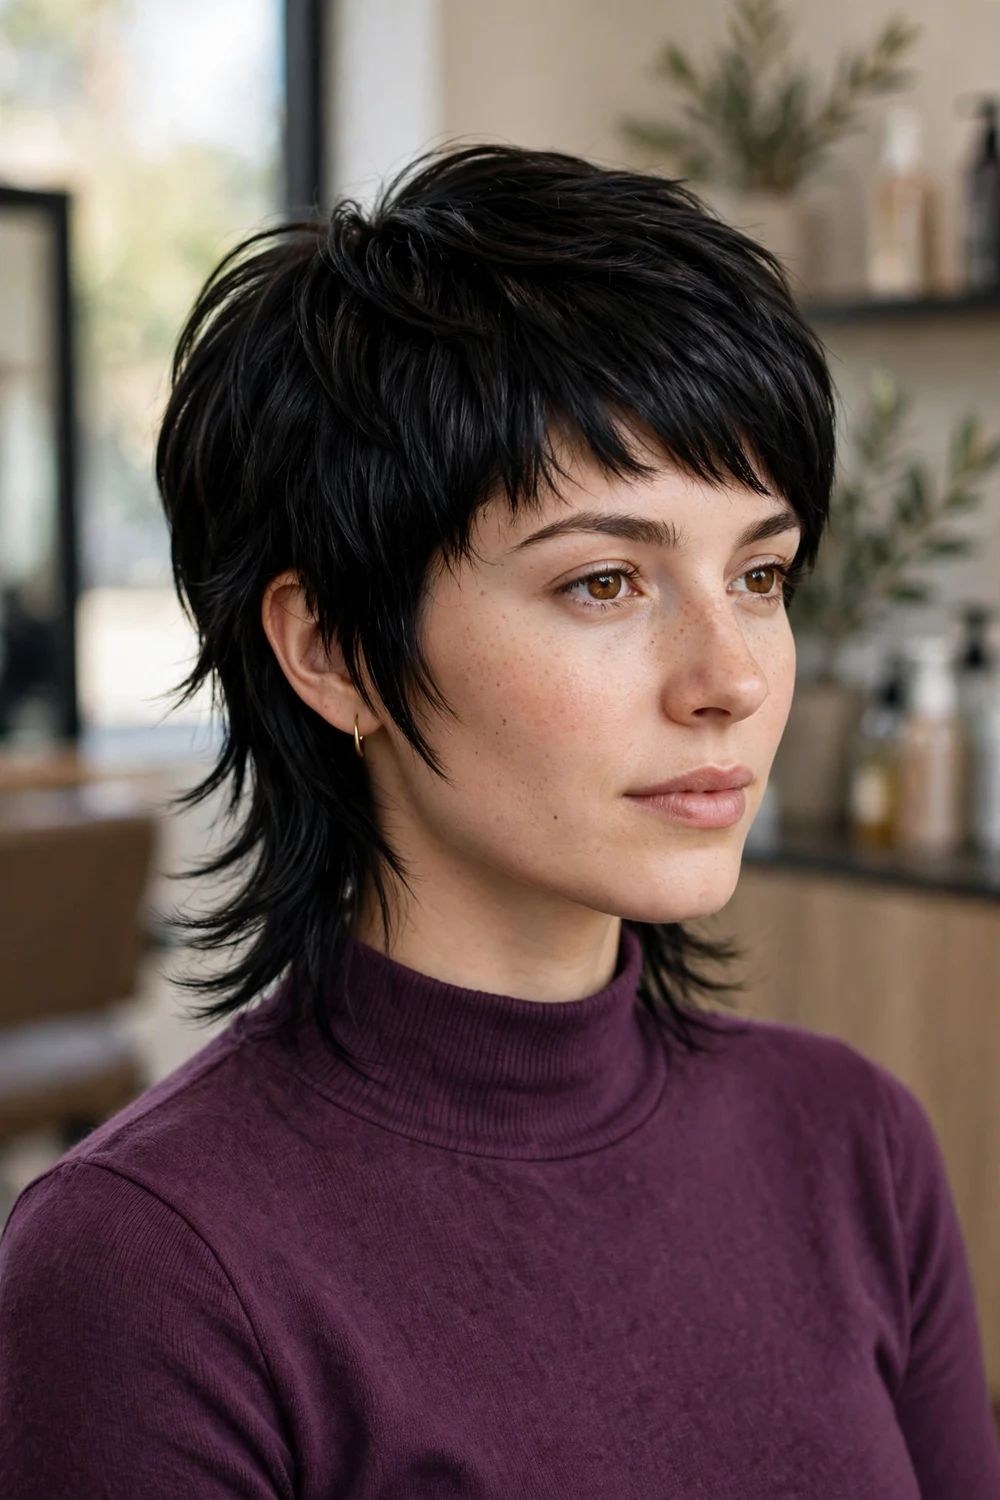
Jet black color plus feathered layering gives a sharp outline with soft movement inside it. The layers are cut to flick and separate rather than stack, so the black reads textured instead of helmet-like. The back feathers out over the nape in fine pieces.
On naturally dark hair this is a low-cost color route: a gloss or demi-permanent black refreshes the depth without a lifting step. The cut itself needs trims every four to five weeks, because feathered layers lose their flick as the ends grow blunt.
Try this: finish with a shine spray only on the crown. Keeping the back matte makes the feathering easier to see.
Difficulty: Medium · Cost: $$ (salon)
15. Copper Pixie Mullet with Wispy Ends

Copper warms up the pixie mullet without changing the cut at all. The shade sits at a mid copper, bright enough to show the wispy ends at the back and the piecey crown. Wispy ends matter with copper: the color looks lighter and more varied where the hair is thin at the tips.
Light brown and dark blonde bases reach this shade in one process in most cases. Copper fades warm and soft rather than dull, so the grow-out is forgiving, with a gloss refresh at five to six weeks to restore the brightness.
Try this: ask for the ends a touch brighter than the roots. The built-in gradient gives the back extra movement as it grows.
Difficulty: Medium · Cost: $$$ (salon)
16. Electric Blue Pixie Mullet
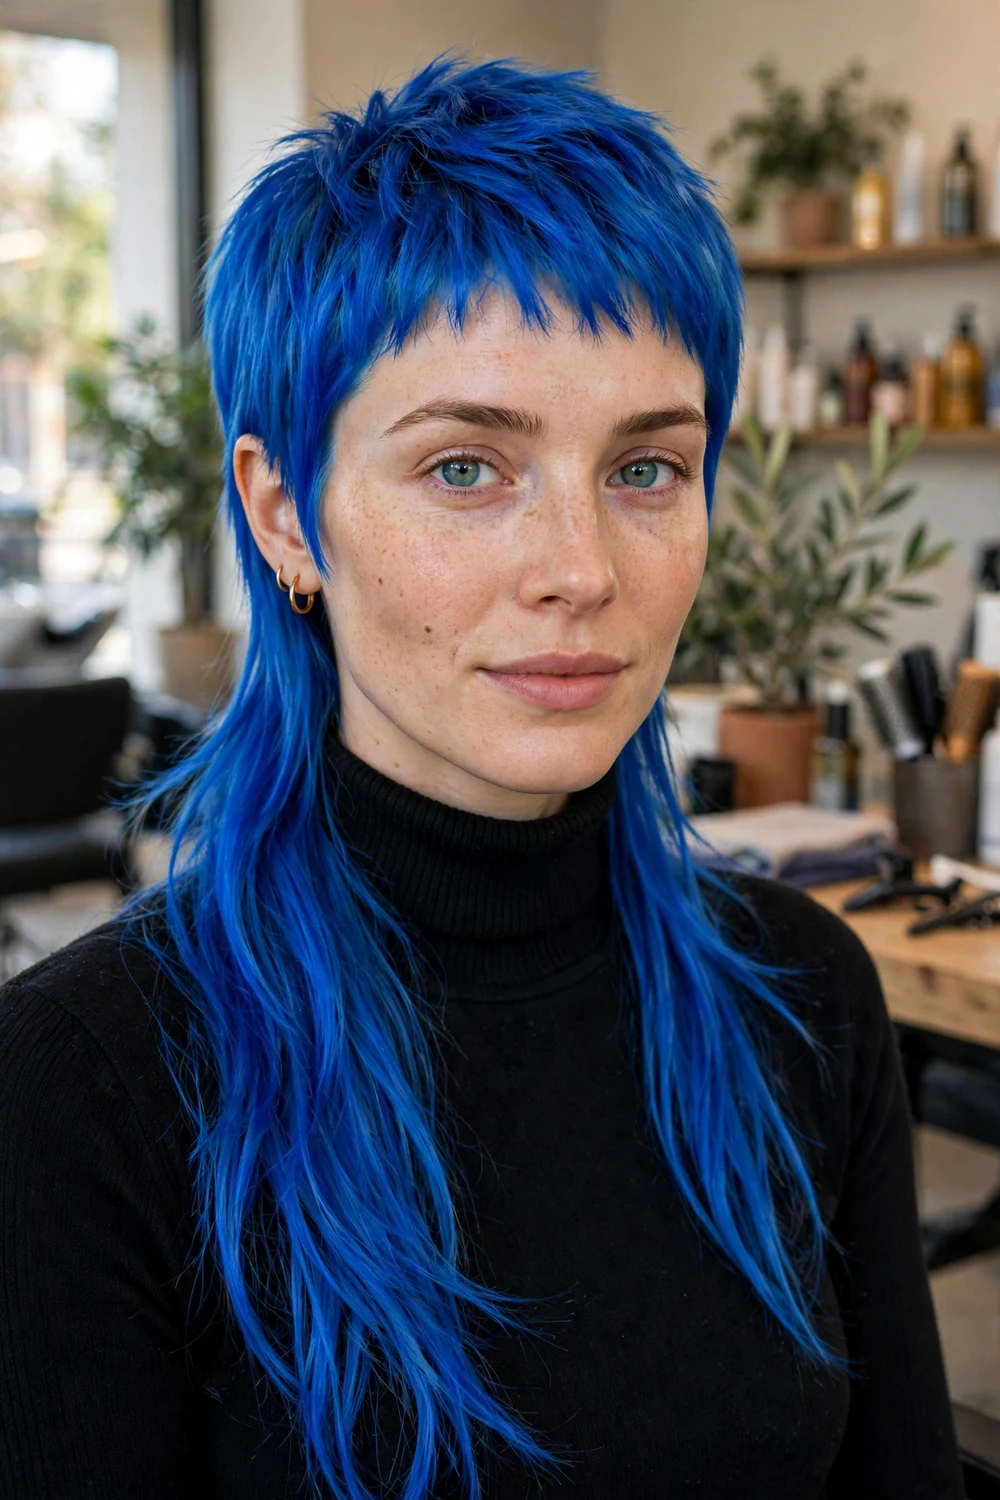
A saturated blue over the whole cut turns the short front and long back into one strong color statement. The blue shows every piece in the crown, and the longer back carries the color furthest, which is where it catches light as you move.
This shade needs a pale, pre-lightened base or the blue turns muddy and green-leaning. It also fades with every wash, so cool water and fewer washes are part of the deal. Short hair helps: the refresh covers a small area and the faded ends are trimmed away on a normal cycle.
Try this: mix a small amount of the blue dye into your conditioner for wash days. It tops up the tone between salon visits.
Difficulty: High · Cost: $$$ (salon)
17. Icy Lilac Pixie Mullet with an Undercut

Pale lilac sits over a clipped undercut, so the soft pastel top contrasts with bare, short sides. The back keeps lilac length over the clipped nape. Pastel shades read light and airy, and the undercut stops the overall look from turning sweet.
Lilac needs the palest base of any color on this list and fades to a silvery blonde within weeks. Plan on it being a short-run color unless you commit to regular toning. The undercut follows its own three to four week clipper cycle.
Try this: photograph the color in daylight on day one. Lilac shifts a lot between salon lighting and outdoor light, and you want to know your true shade.
Difficulty: High · Cost: $$$ (salon)
18. Deep Plum Pixie Mullet
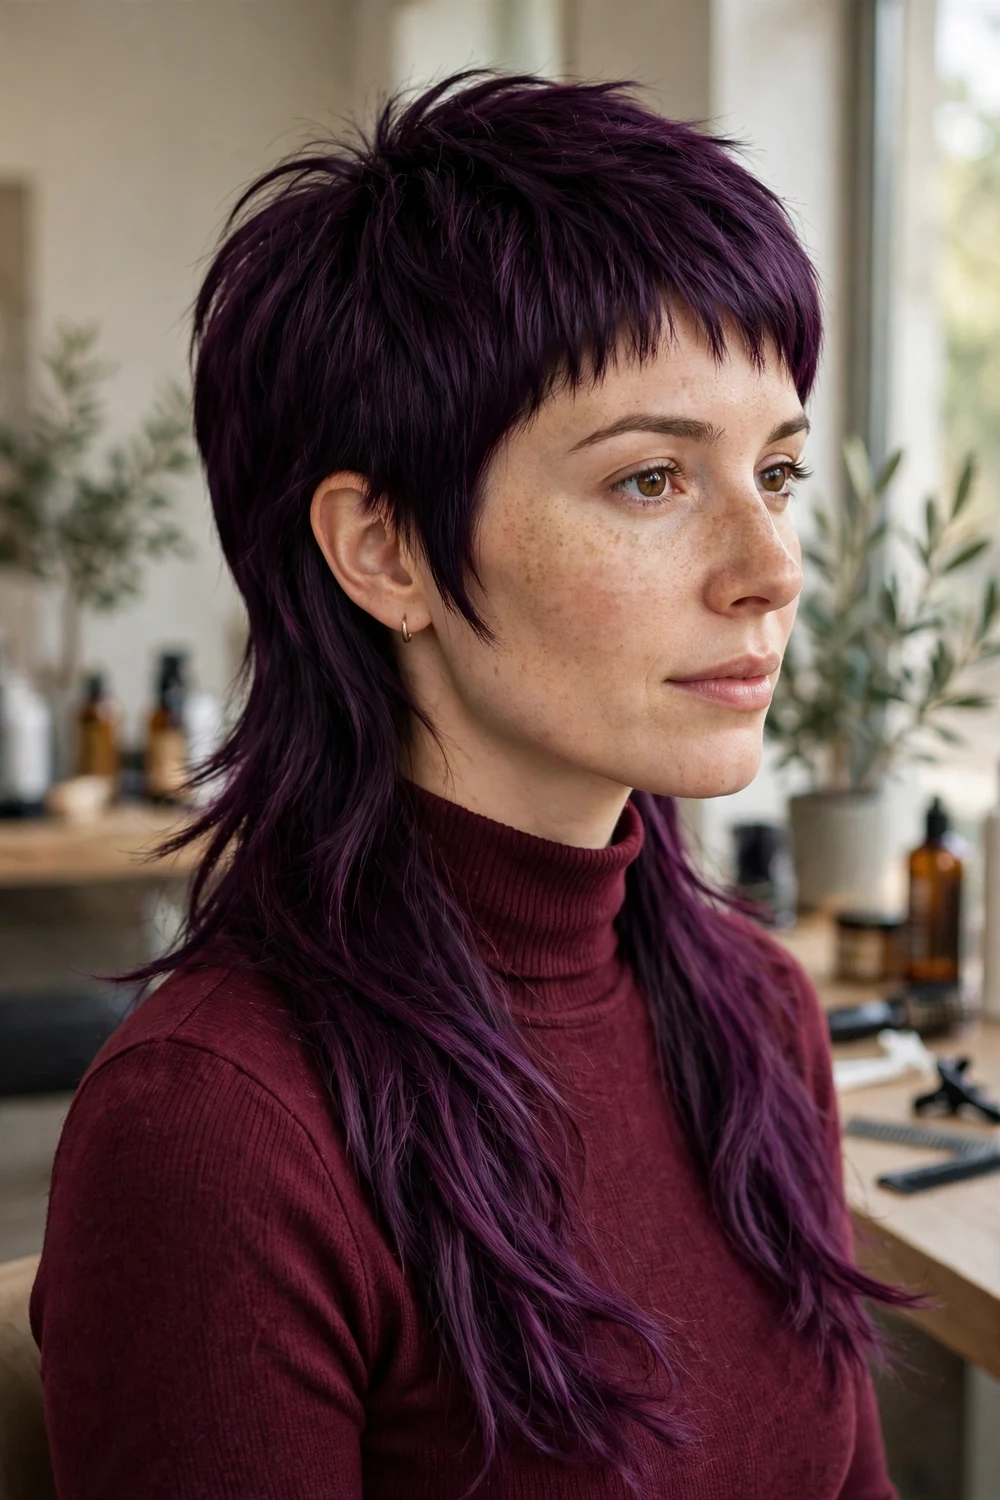
Deep plum lays a dark purple over a brunette or black base, so the color shows as a violet cast in bright light and near-black depth indoors. The pixie mullet shape stays the same; the plum makes the back length look glossier and the crown pieces more defined.
This is the lowest-lift fashion color on the list. Many dark bases take plum with no bleaching at all, using a high-lift or direct dye formula. It fades toward a warm brown-purple, which grows out softly against dark roots.
Try this: ask for the plum concentrated at the crown and back ends, with your natural shade left at the roots for the softest grow-out.
Difficulty: Medium · Cost: $$ (salon)
19. Red Highlight Pixie Mullet on a Dark Base
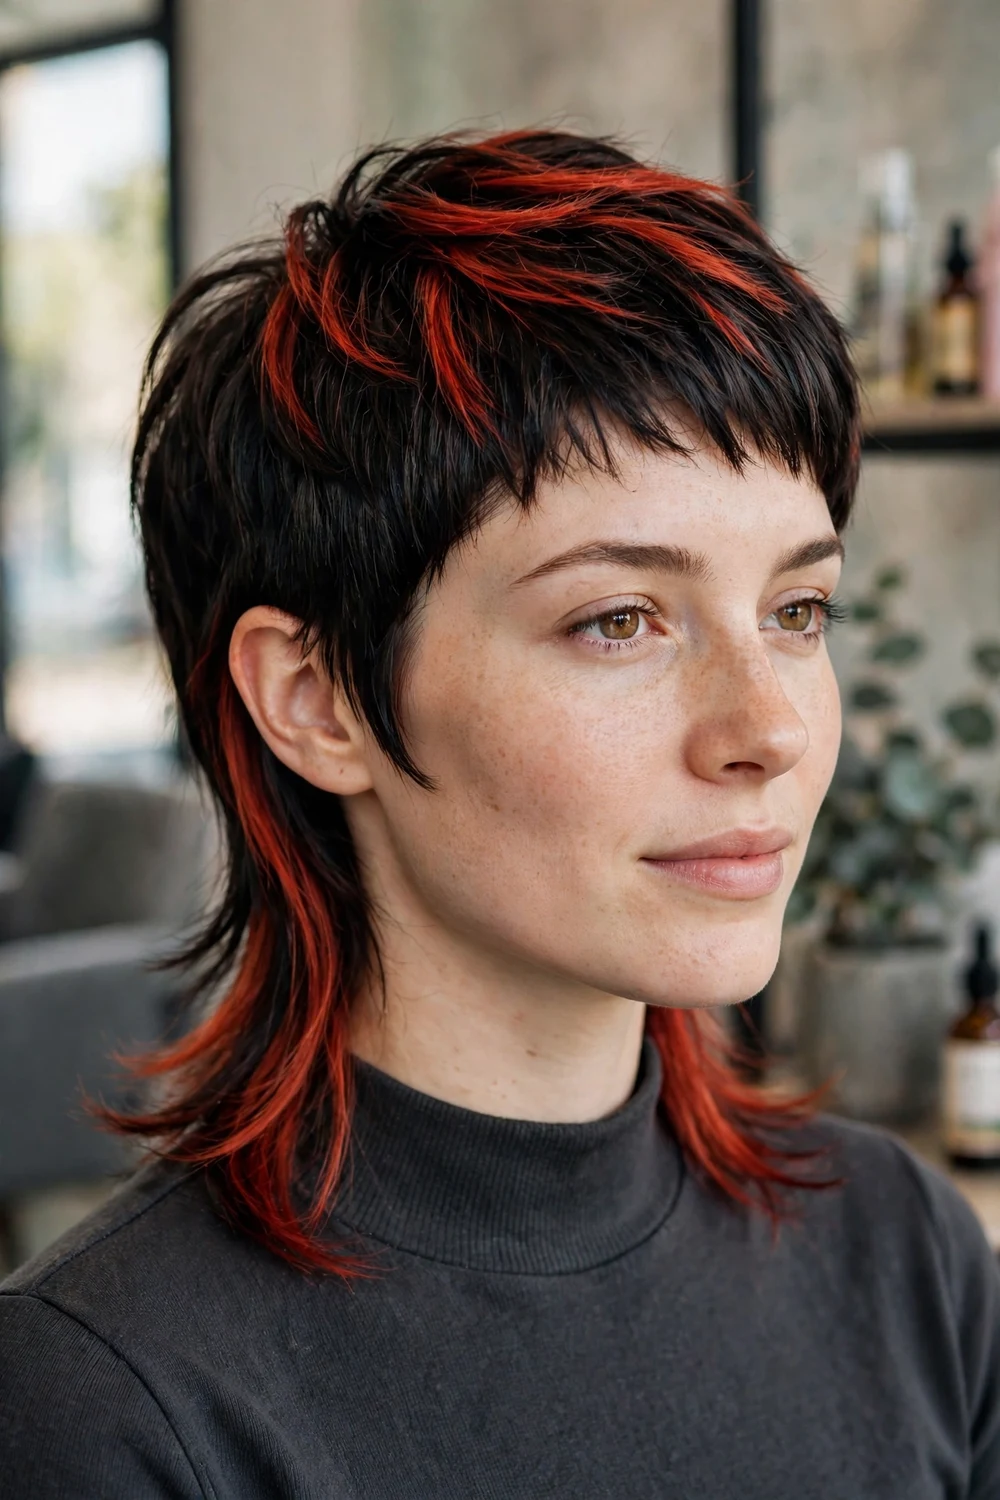
Panels of strong red are placed through a dark brown or black pixie mullet, mostly at the crown and running into the back. The dark base stays in charge; the red shows in ribbons where the layers separate. Placement follows the cut, so the longest back pieces carry the longest red streaks.
Only the highlighted pieces need lightening, which keeps the service smaller than a full color change. Red pigment fades faster than the dark base, so the contrast softens over about six weeks and a red gloss brings it back in one short appointment.
Try this: keep the red panels chunky rather than fine. Fine red highlights disappear into a short textured crown.
Difficulty: Medium to High · Cost: $$$ (salon)
20. Blonde-Tipped Pixie Mullet with Undercut Sides
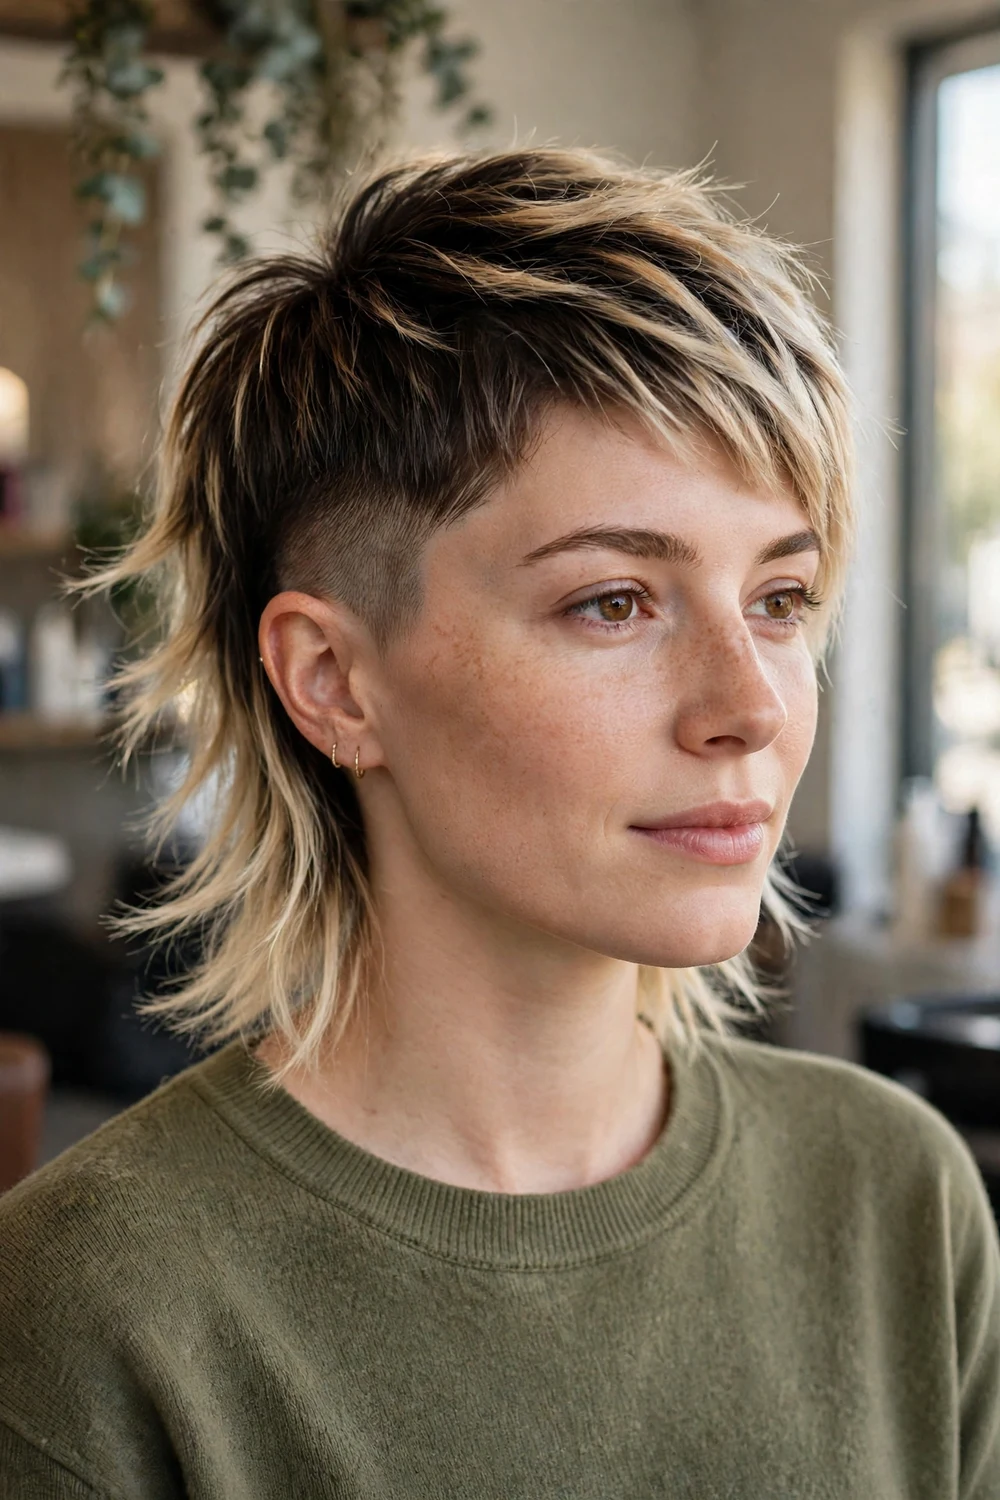
The ends of the top and back are lightened to blonde while the roots and undercut sides stay dark. Every layer line in the cut gets outlined in blonde, which makes the short-to-long shape easy to read. The back tips carry the most blonde, since they are the longest pieces.
Because only the tips are lightened, the damaged part of the hair is exactly the part that gets trimmed away at each appointment. The undercut sides keep their three to four week cycle, while the tips are refreshed only when the contrast grows out, around eight weeks.
Try this: ask for the blonde to start lower on the back pieces than on the crown. The stepped placement makes the length difference look bigger.
Difficulty: Medium to High · Cost: $$$ (salon)
21. Two-Tone Pixie Mullet with a Colored Fringe
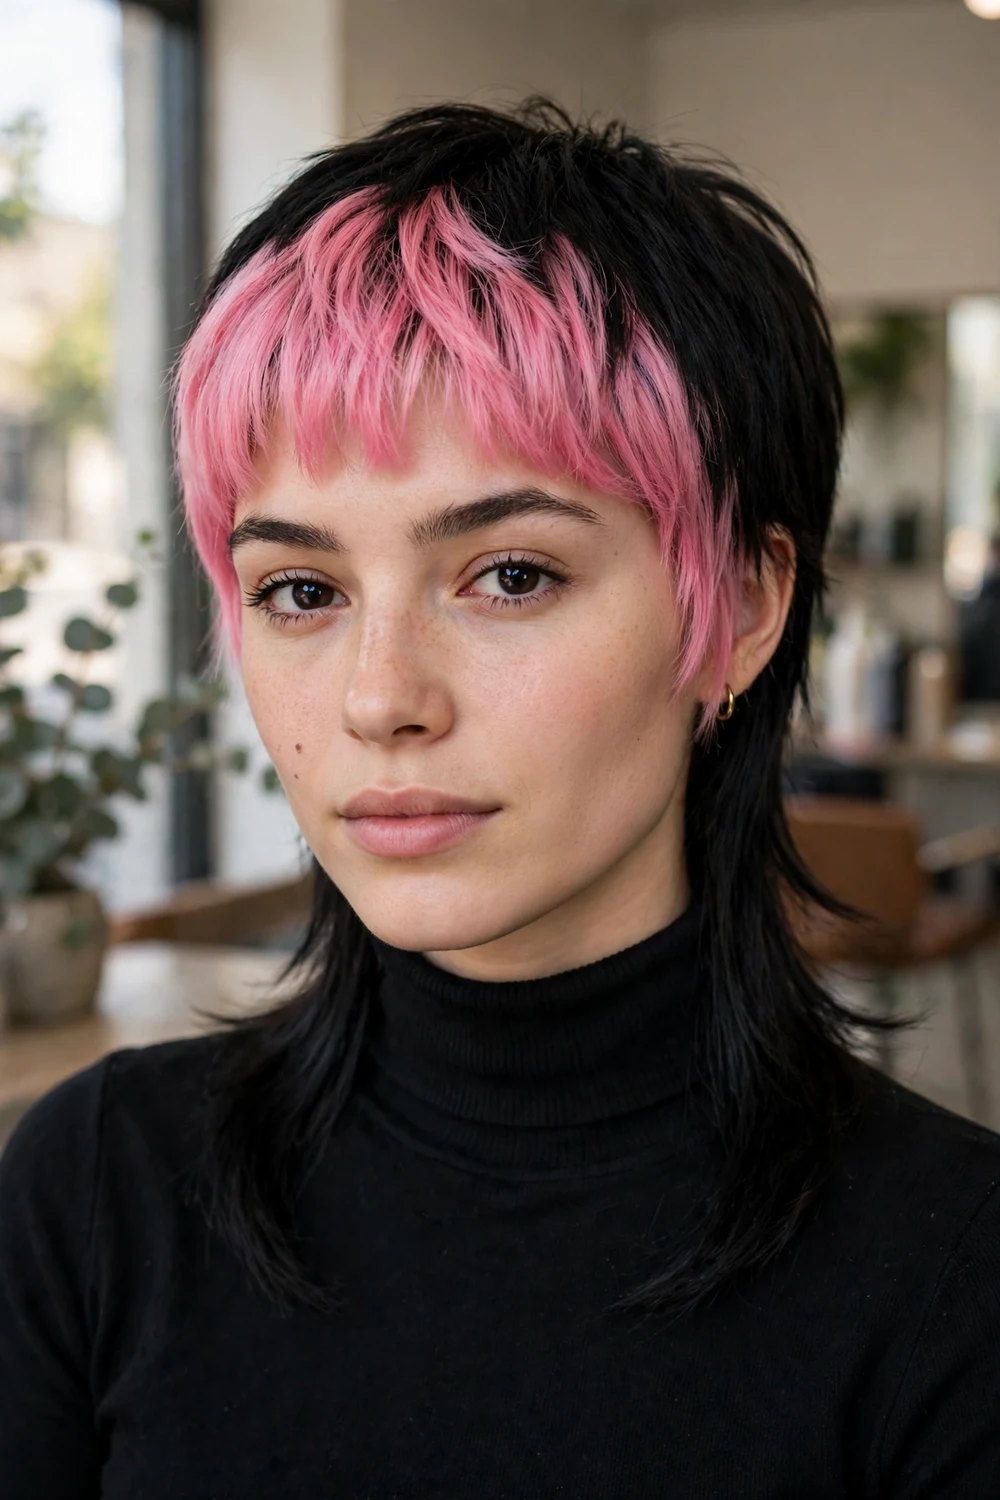
Only the fringe gets the fashion color, pink in this version, while the crown and back stay black. The small colored panel does the talking, and the rest of the cut keeps its edge from the shape alone. It is the smallest color commitment on this list that still changes the whole read of the cut.
The fringe section is small, so the lightening and coloring are quick and the upkeep is a home toner or a mini salon service. When you tire of the panel, it grows out or trims away within weeks, which no other color idea here can match.
Try this: pick the fringe color against your skin in daylight. A panel this close to the face has nowhere to hide.
Difficulty: Medium · Cost: $$ (salon)
22. Spiky Crown Pixie Mullet

The crown is cut short enough to stand and styled up into separated spikes, while the back is left longer and flatter against the neck. The height difference between the lifted crown and the hanging back is the widest on this list, and it suits straight hair that already wants to stand up.
This version lives or dies on product: a strong matte wax on dry hair, worked in at the roots and pinched into points. On wavy or curly hair the spikes soften into texture, which is a good look, just a different one.
Try this: style the back first and the crown last. Product on your hands from the crown will flatten the back pieces you want hanging loose.
Difficulty: Medium · Cost: $ (salon)
23. Slicked-Back Pixie Mullet with Tapered Sides
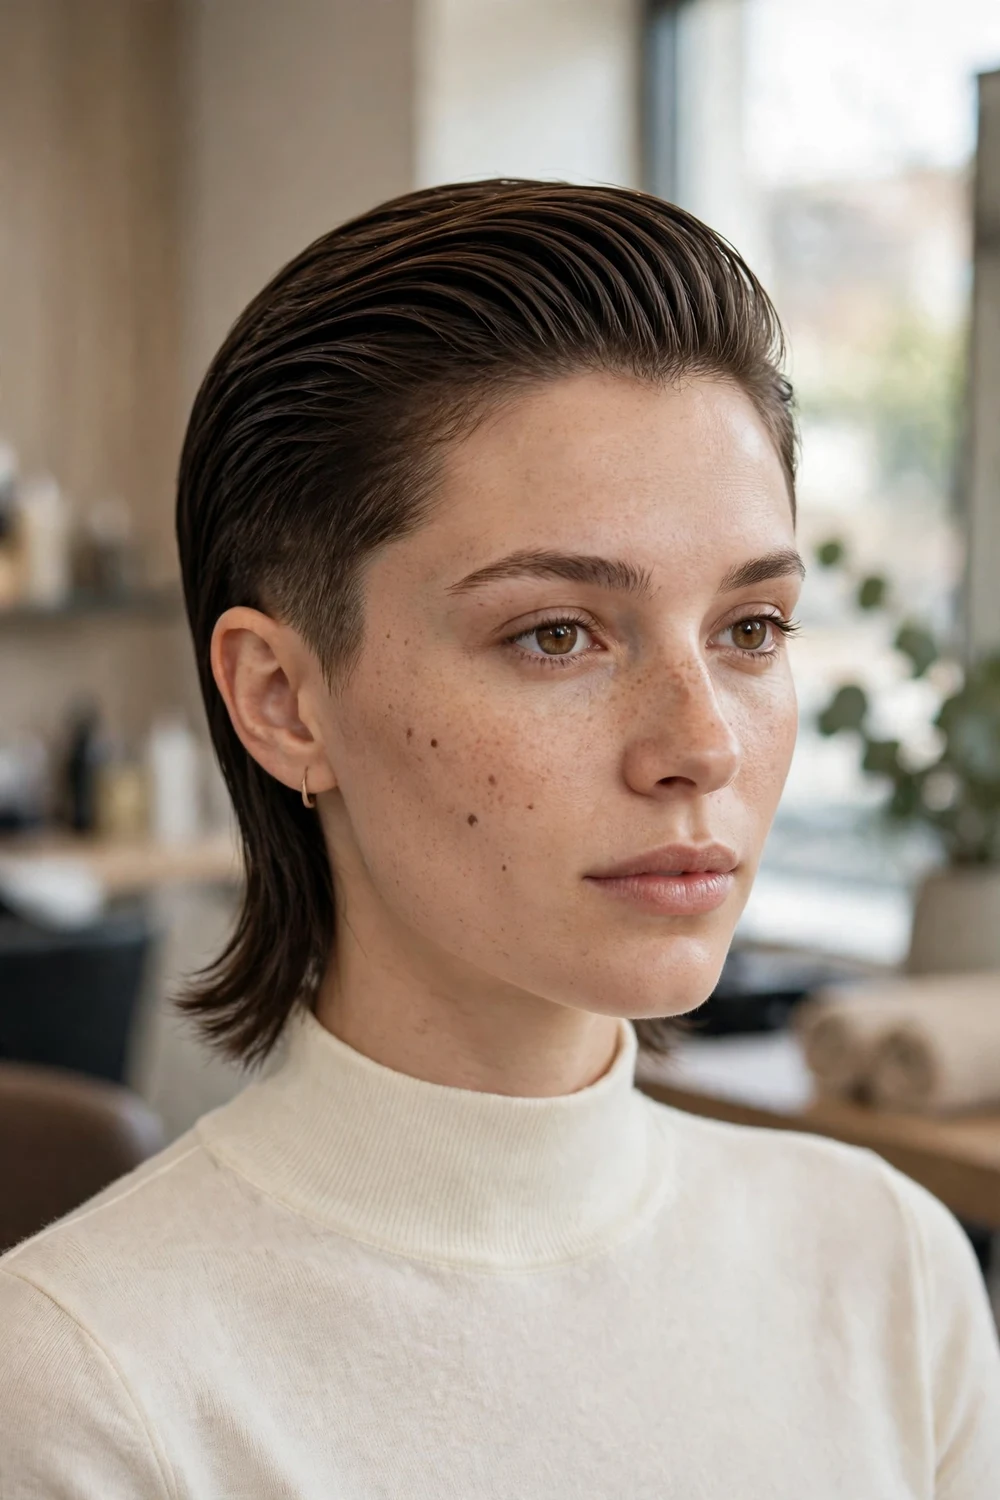
The top is kept long enough to sweep straight back in one smooth direction, the sides taper in cleanly without a hard undercut line, and the back length flows from the swept top into the nape. It is the most polished version here, and it still shows the pixie mullet outline clearly from the side.
A taper differs from an undercut in the blend: the sides graduate rather than break. That makes this the easiest strong version to grow out, since no disconnection line appears. Style with a smoothing cream and a brush while drying, pushing everything back and slightly down at the sides.
Try this: dry the top back with the dryer nozzle pointing from front to back. Air-dried slick styles fall forward again within the hour.
Difficulty: Low to Medium · Cost: $$ (salon)
24. Pixie Mullet with Shaved Nape Lines
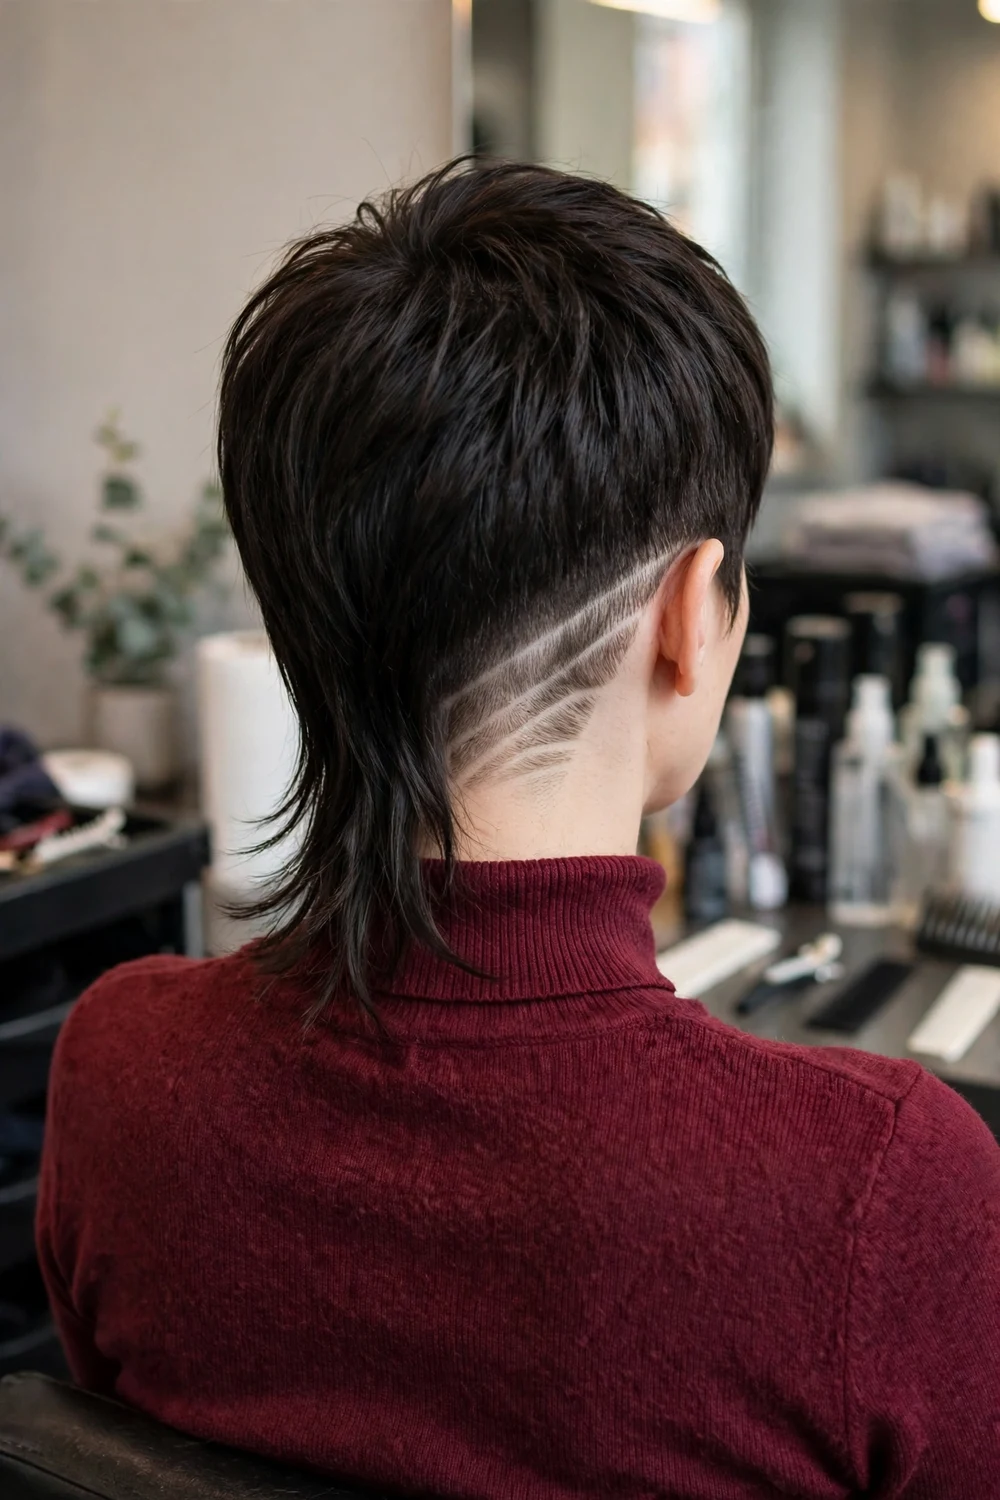
Under the longer back section, the nape is clipped short and one or two clean lines are etched into it. The design hides when the back hangs down and shows when the hair is lifted or pushed aside. The front and crown stay a standard choppy pixie, so the detail is a surprise rather than the whole look.
Etched lines grow out in about two weeks and blur as they go, so this detail is a short-run extra added at a regular trim rather than a style of its own. Ask for the nape clipping at the same appointment as your main cut so the lengths are planned together.
Try this: keep the first design to one line. Fine detail blurs fastest, and a single bold line reads clearly the longest.
Difficulty: Medium · Cost: $ (salon)
25. Grown-Out Pixie Mullet with Soft Edges
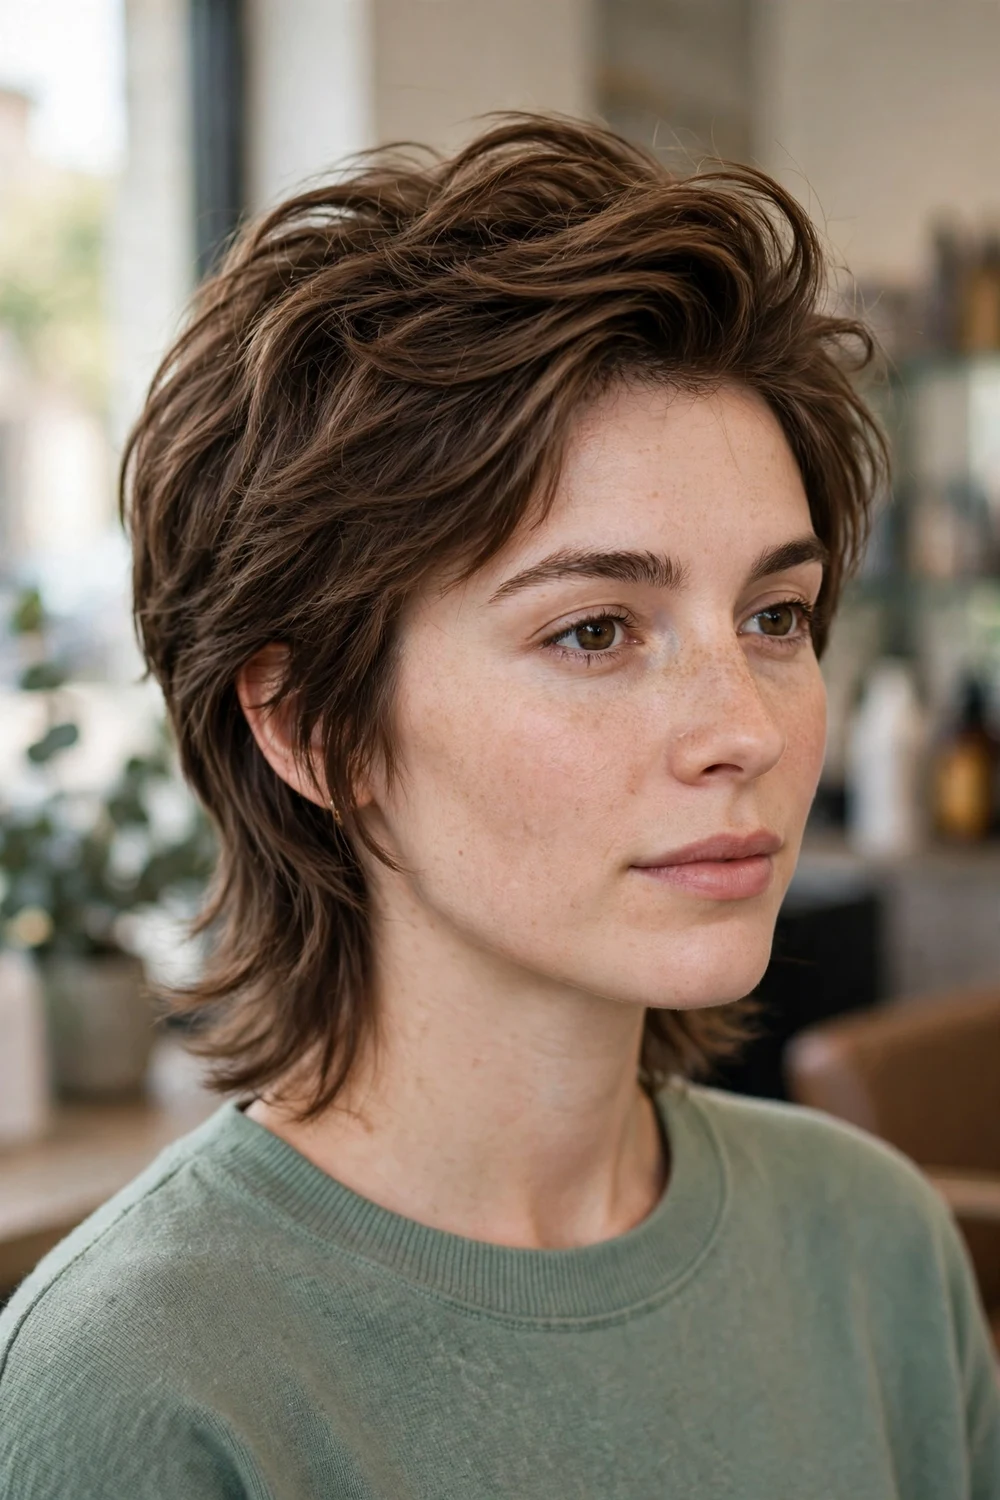
This version is what a pixie mullet becomes at the three-month mark when it is shaped on purpose instead of just left alone. The crown has grown to finger length, the sides cover the tops of the ears, and the back is longer and softer at the edges, with the outline cleaned up at every trim.
It is the practical pick for anyone growing out a short pixie who wants the awkward stage to look like a choice. The maintenance is the lowest on this list: a shaping trim every six to eight weeks that tidies the outline and takes weight out of the sides while the back keeps gaining length.
Try this: bring a photo of your original pixie to the shaping appointment. Your stylist can see which sections to protect and which to keep cutting.
Difficulty: Low · Cost: $ (salon)
Frequently Asked Questions
What is a pixie mullet haircut?
A pixie mullet pairs a short pixie cut at the front, crown, and sides with longer length at the back, over the nape. The top is usually textured or choppy, and the back drops past the ears toward the neckline. It differs from a regular pixie, which tapers short all the way around, and from a full mullet, which keeps more length at the sides as well.
How often does a pixie mullet need trimming?
Most versions need a trim every 4 to 6 weeks to keep the contrast between the short top and the longer back. Undercuts and shaved sides need attention sooner, every 3 to 4 weeks, because clipped sections grow out visibly fast. Fringes are the quickest detail to lose shape: a micro fringe needs a tidy-up every 2 to 3 weeks.
Does a pixie mullet work on fine hair?
Yes, with the right cutting choices. Fine hair does best with shorter, more compact layers, blunter ends, and a modest back length so the ends stay full. Matte, dry-texture styling products help the crown look thicker. Heavy layering and long, thin back sections are the two choices that make fine hair look sparse in this cut.
Can you wear a pixie mullet with curly hair?
Yes. Curly versions keep a short curly fringe, cropped sides that show the tightened curl pattern, and longer curls stacked at the back. The cut should be done dry or curl by curl, because curls spring up as they dry and a wet cut usually dries shorter than planned. Leave the back longer than the target length and trim it in a second pass.
How do you style a pixie mullet at home?
Start with dry or nearly dry hair. Work a pea-sized amount of matte paste or texture cream through the crown with your fingers, pinching the pieces apart for separation. Let the back fall naturally or smooth it down with the leftover product on your hands. Most versions take about five minutes, and second-day hair often holds the shape better than freshly washed hair.
Final Thoughts
Start from the base shape and change one thing at a time. A choppy pixie mullet with a plain fringe tells you within one trim cycle whether the silhouette suits you, and from there a shaved side, a razor finish, or a colored panel is a small step rather than a leap. I would book the first version at the lower-upkeep end of this list, live with the back length for a month, and then decide how far to push it.

