


Thick hair is the best friend and the worst enemy of a pixie cut. Density gives you instant body and movement that finer hair cannot fake, but leave that weight uncut and the same pixie turns into a helmet: puffy at the sides, heavy at the crown, shapeless by week three. The fix is never to fight the thickness. The fix is to cut with it, using techniques built to remove bulk instead of adding it.
This list gathers 18 pixie cuts designed for thick hair specifically. Every idea names the weight-removal method behind it, from undercuts and tapers to razor texturizing and interior layering, plus the face shapes each one flatters. I have spent years watching short cuts on dense hair, and one rule never changes: fine hair needs volume built in, while thick hair needs weight taken out. Pick the cut that matches your density, your texture, and your morning routine.
Quick Takeaways
- The goal of a thick-hair pixie is weight removal, not volume: ask for undercuts, tapers, or texturizing at your appointment.
- Point cutting and razor work break up density so thick hair lies in shape instead of puffing outward.
- Keeping the sides and nape close removes the most bulk, since that is where thick hair widens first.
- Trims every four to six weeks hold the shape, because thick pixies grow out fast at the nape.
- Use lightweight products only; heavy creams and oils weigh thick pixies down and kill the movement.
1. Classic Tapered Pixie

The classic tapered pixie is the honest baseline for thick hair: short through the sides and nape with length kept on top. Your stylist tapers the perimeter with scissors so density fades gradually instead of stopping in a blunt wall, which is exactly what makes thick hair puff sideways. Because the weight leaves through the taper, the top can stay long enough to sweep, spike, or smooth while the silhouette stays narrow and clean.
It suits oval, heart, and square faces especially well, since the close sides show off bone structure and the longer top balances width. Styling is minimal: work a little paste through damp hair, push the top where you want it, and walk away. Thick hair gives this cut its body for free, so skip volumizing products and ask your stylist to thin the crown interior at every appointment. It also handles humidity better than blunt pixies, since the tapered outline gives swelling hair less room to expand.
Try this: ask for the nape tapered tight and thinned underneath so the grow-out stays neat for weeks.
Difficulty: Low · Cost: $ (salon)
2. Undercut Pixie
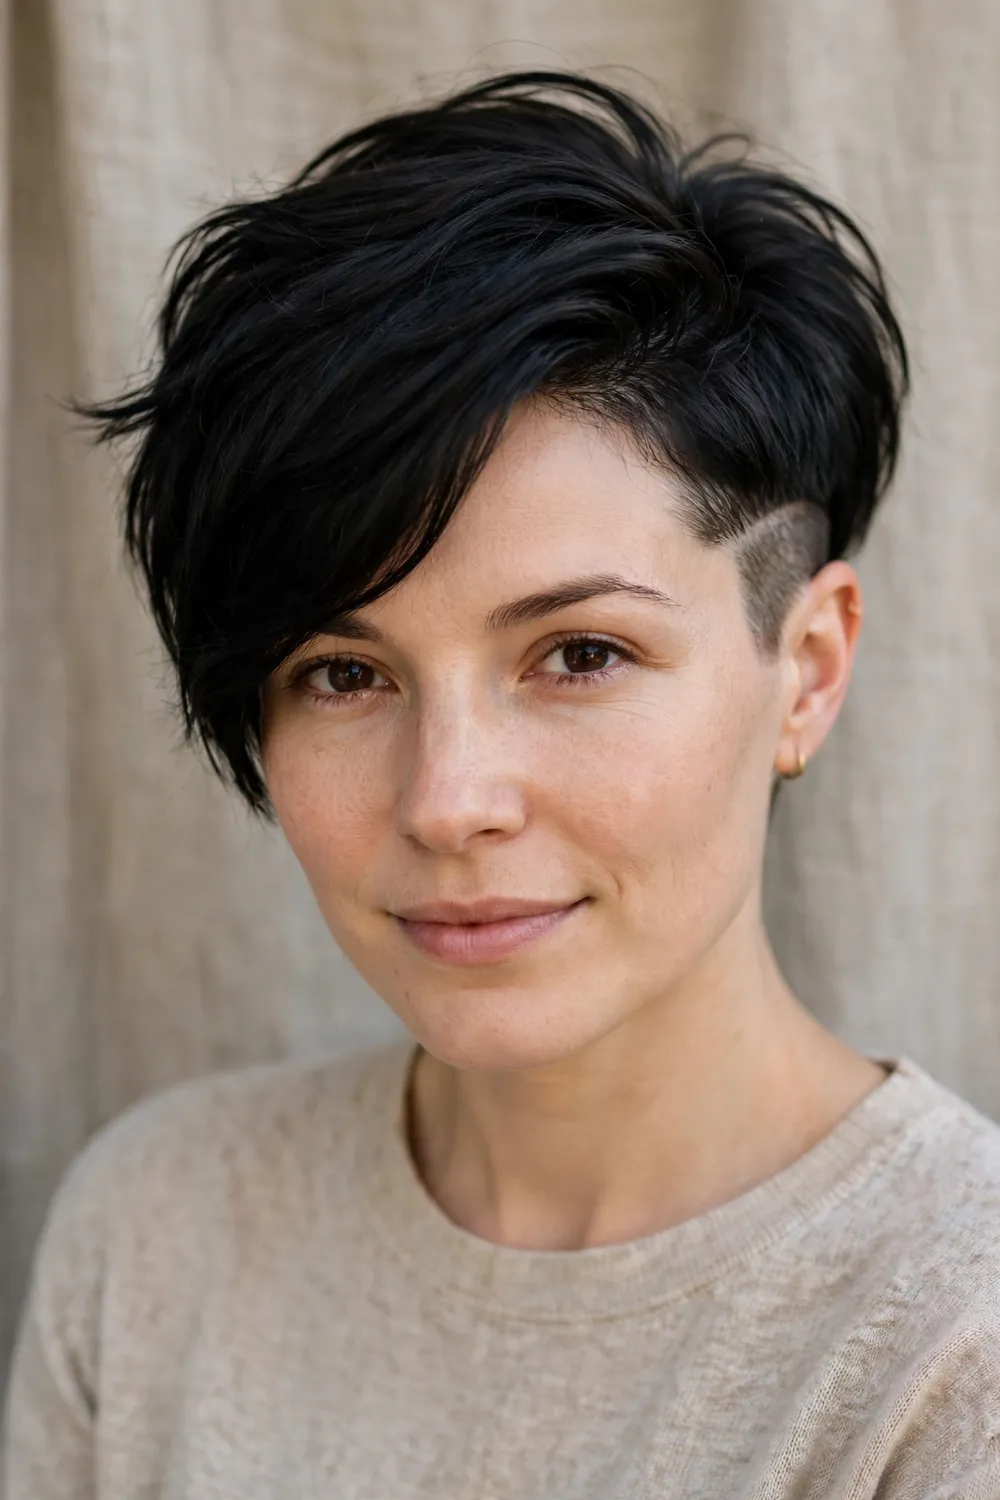
When your hair feels heavy more than it feels long, the undercut pixie is the fastest relief. The sides and back are clipped short underneath while the top stays full, which deletes a large amount of density exactly where thick hair builds up. The disconnection between the short undercut and the longer top is the whole trick: you keep the style and movement up top while the bulk underneath is simply gone.
It flatters round, oval, and square faces, because the height on top lengthens the face while the close sides keep width in check. Wear the top sleek for polish or tousled for edge; both work because the undercut does the heavy lifting. It also stays cooler at the neck in warm weather. Plan a tidy-up every four to five weeks, since the clipped section shows growth lines before the top does.
Try this: grow the top slightly longer than usual so you can hide or reveal the undercut as you like.
Difficulty: Low · Cost: $$ (salon)
3. Shaved-Temple Undercut Pixie
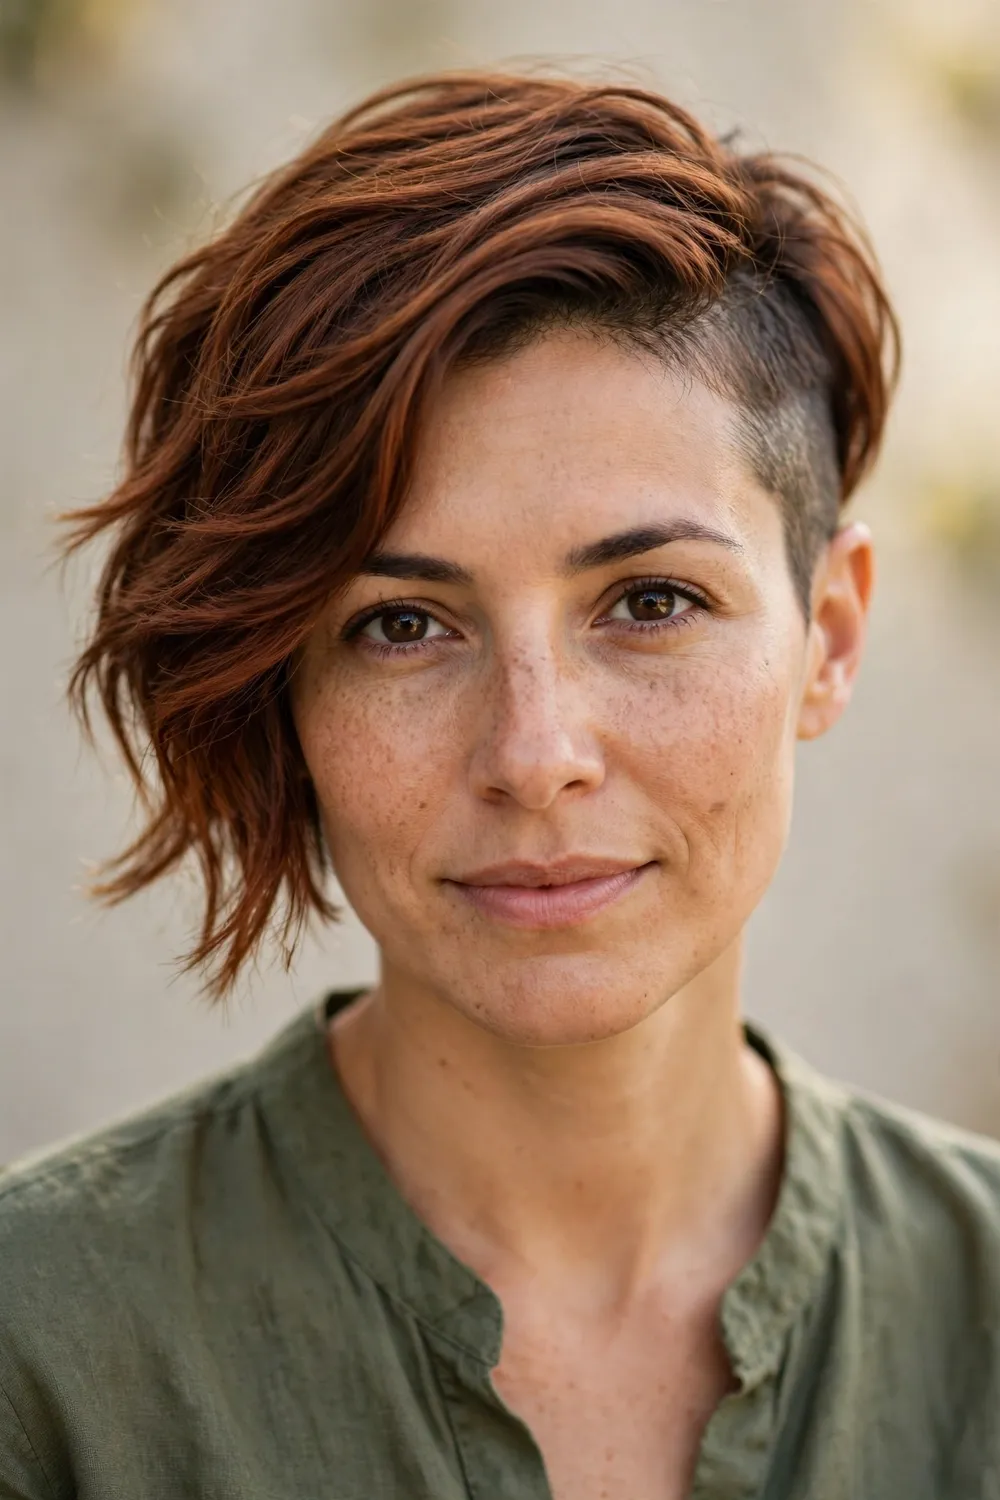
A shaved temple takes the undercut idea and places it where it shows: one or both temples clipped close while the rest of the pixie stays full. For thick hair this is targeted weight removal with a visible payoff, since the temples are exactly where dense hair pushes outward and widens the silhouette. The contrast between the clipped temple and the longer crown gives the cut its edge and its slimming line in one move.
Oval, long, and heart-shaped faces wear this best, as the vertical line of the shaved section lengthens the face. Keep the clipper work fresh with a trim every three to four weeks, or let it soften into a taper for a quieter grow-out. Style the top away from the shaved side to show off the contrast, and keep earrings simple since the temple becomes a focal point. A small amount of texturizing spray on the longer side keeps it separated from the clipped section.
Try this: start with just one temple if you want the weight loss without the full commitment.
Difficulty: Medium · Cost: $$ (salon)
4. Choppy Textured Pixie
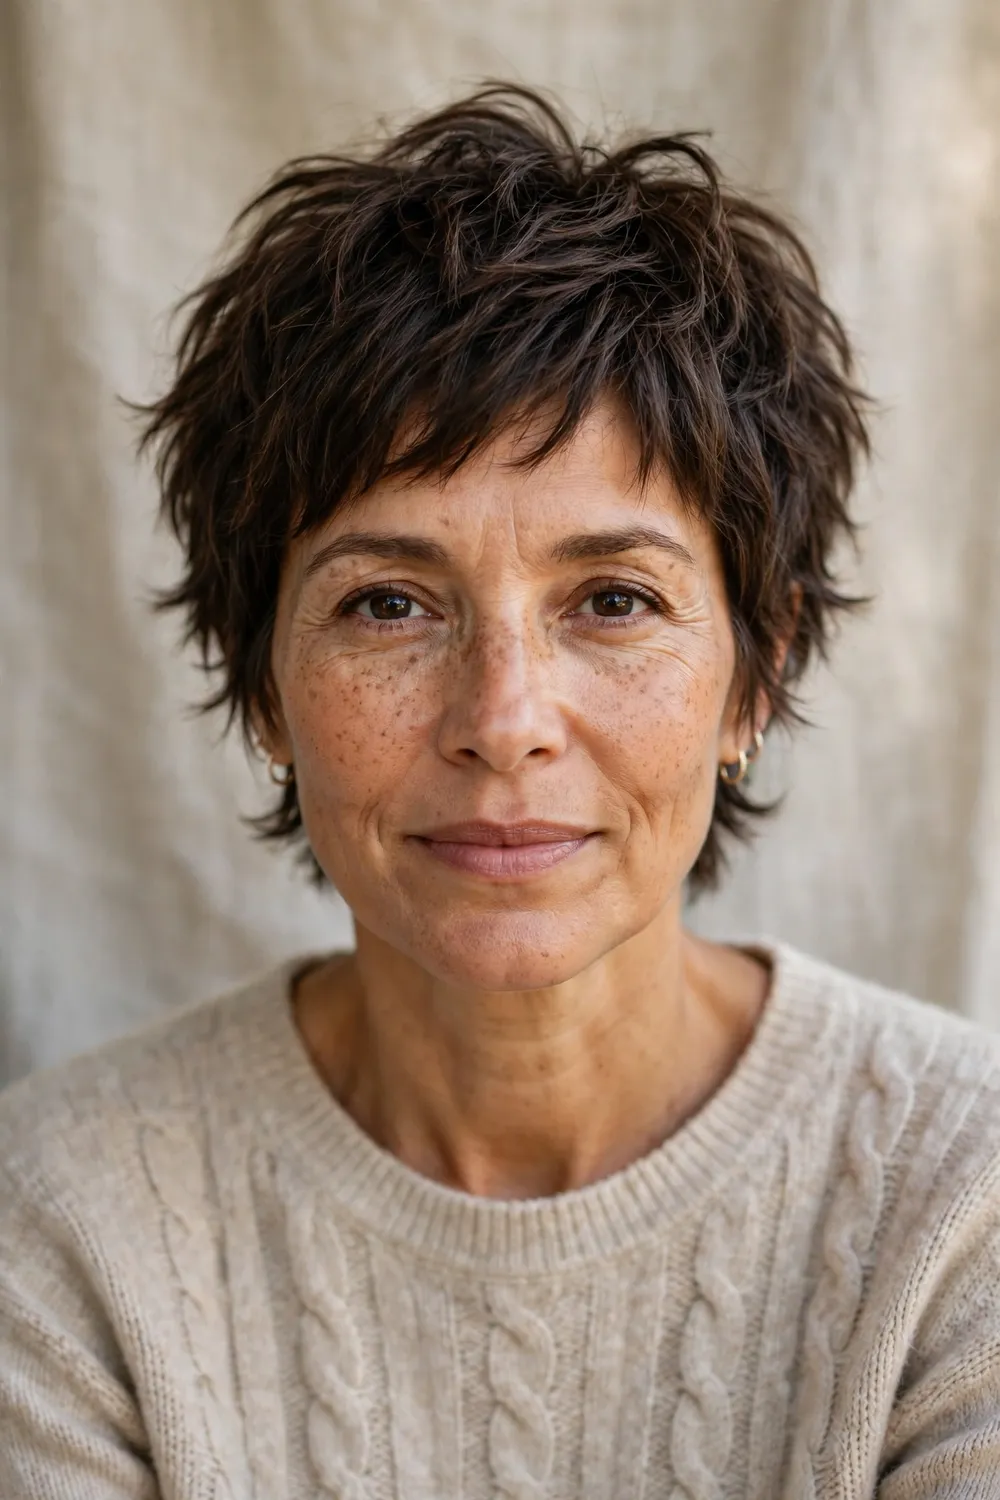
Choppy texture is point cutting doing its best work. Instead of cutting the ends straight across, your stylist snips into them at angles, which breaks thick hair into separated pieces that move on their own. That separation is what stops dense hair from sitting like one solid mass. The result looks airy and light even though your hair is still thick; the density is just divided into pieces instead of packed into a block.
It works on nearly every face shape, and it is especially kind to round and square faces because the broken outline softens edges without adding width. Styling takes minutes: warm a little matte paste between your palms and pinch the ends into place. It grows out better than blunt pixies, since the uneven ends blur growth lines, so you can stretch trims to five or six weeks. Ask your stylist to keep the interior slightly longer than the ends so the pieces fall with natural separation.
Try this: use thinning shears only at the very ends, never at the roots, to avoid frizz at the scalp.
Difficulty: Low · Cost: $ (salon)
5. Messy Layered Pixie
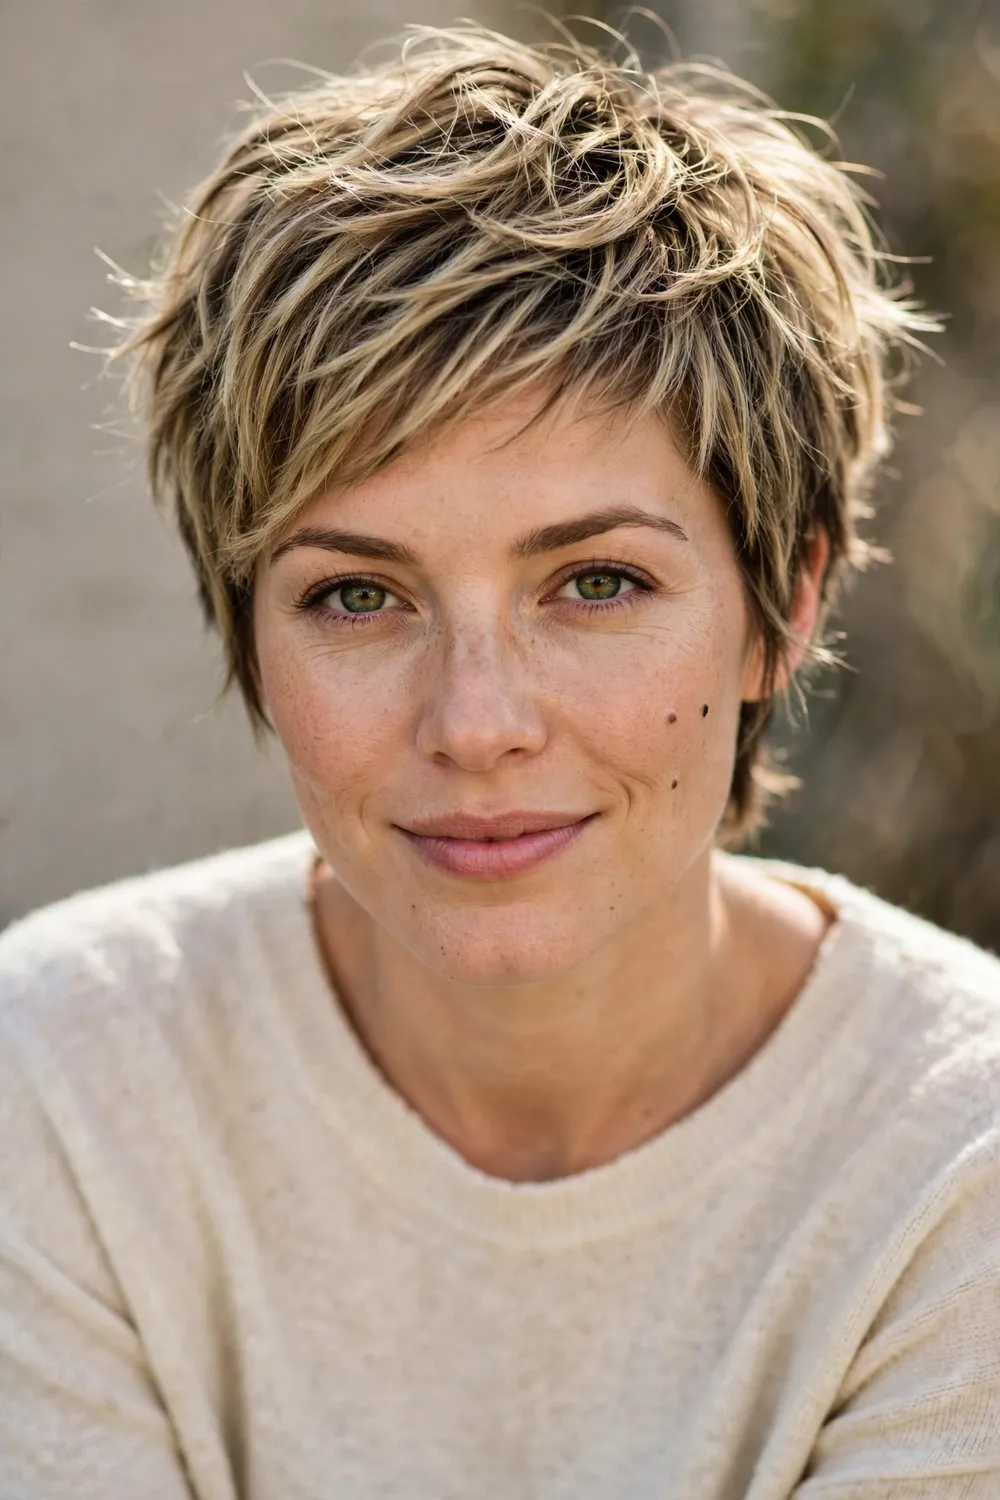
The messy layered pixie hides serious engineering under a carefree finish. Interior layers are cut shorter underneath the top surface, which removes weight from the inside of the haircut without changing how long it looks. For thick hair that means the bulk disappears while the length and shape you see stay exactly where you want them. The tousled surface is just the visible half of the cut; the debulking underneath is the part that matters.
Oval, heart, and diamond faces suit this cut, since the layered top adds soft height that flatters all three. Morning styling is finger-combing with a light cream, and the messier the better, which makes this one of the lowest-effort options here. Ask your stylist to keep the layers connected at the perimeter so the outline stays clean even when the interior is loose. On second-day hair, a quick shake and a dab of dry shampoo at the roots refreshes the whole cut.
Try this: flip your head upside down and scrunch the layers while damp for instant lived-in texture.
Difficulty: Low · Cost: $ (salon)
6. Shaggy Textured Pixie
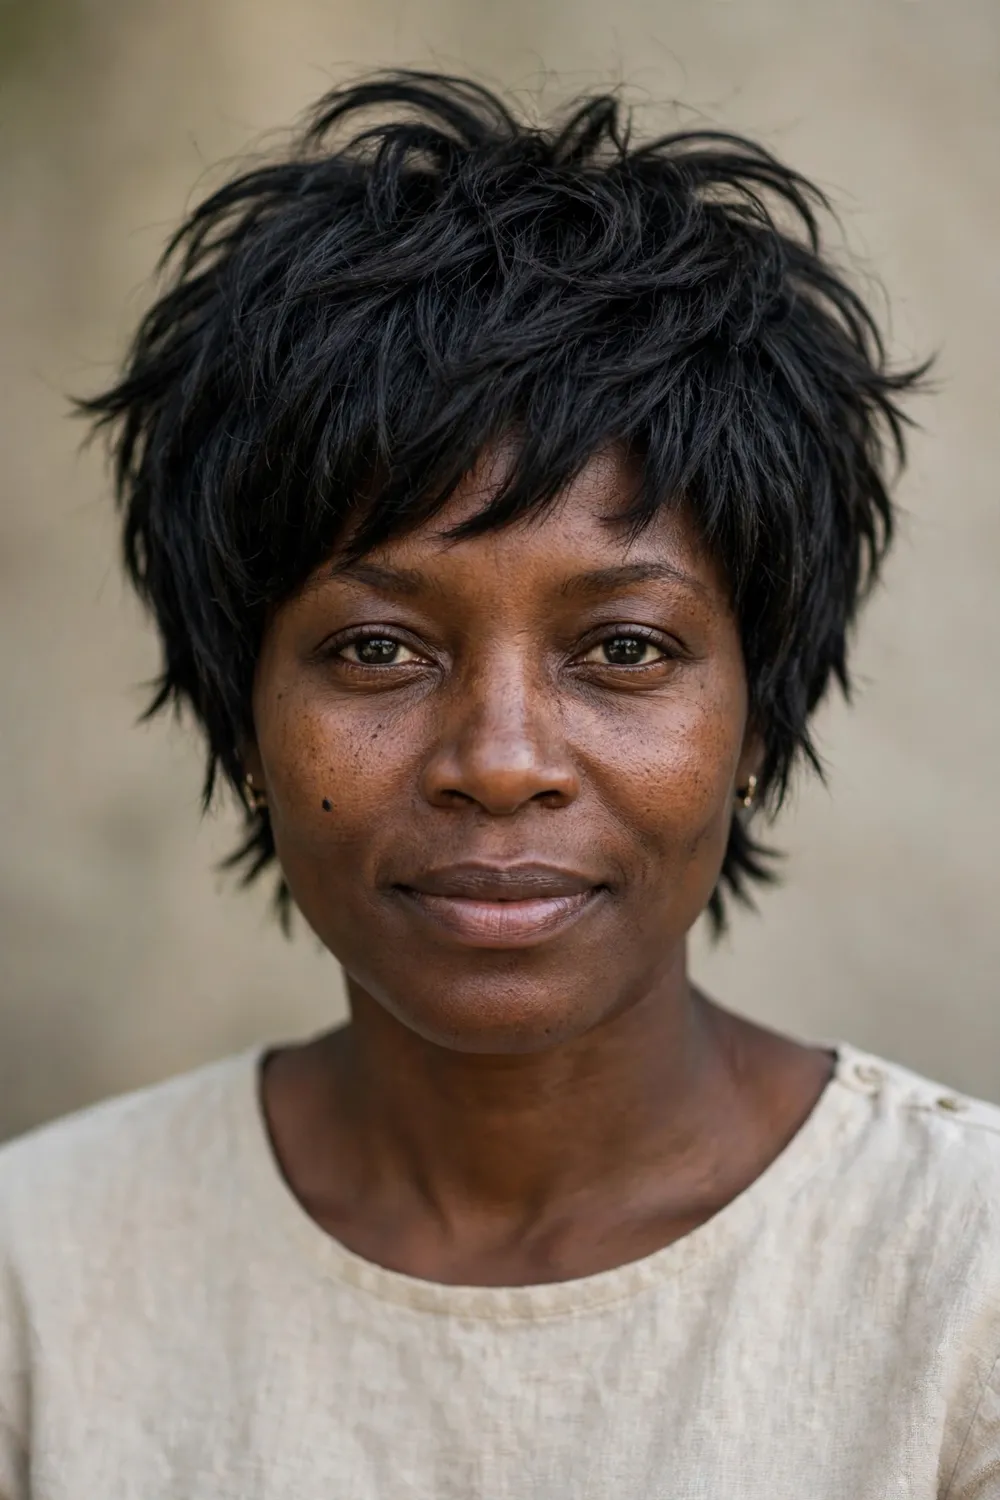
Borrowed from the shag playbook, this pixie layers heavily through the crown and thins the ends so thick hair collapses into texture instead of puffing into shape. The shaggy outline is forgiving by design: uneven pieces, a broken perimeter, and plenty of internal movement. On dense hair it reads as controlled texture rather than bulk, because every layer is cut to release weight instead of stacking it. The result is a cut that looks deliberately undone while being one of the most carefully engineered shapes for dense hair.
It suits wavy and coarse textures best and flatters oval and round faces with its face-framing pieces. The grow-out is graceful since there are no hard lines to lose, so this is a strong pick if you stretch salon visits. If you want more shag inspiration at slightly longer lengths, these short shag hairstyles for women show how the same layering logic works past pixie length.
Try this: ask for the ends thinned with a razor so the shaggy pieces fall soft instead of flipping out.
Difficulty: Low · Cost: $$ (salon)
7. Spiky Textured Pixie

Spikes get a bad reputation, but on thick hair a spiky pixie is pure weight management. The top is cut short enough to stand up, and texturizing through the tips removes the heaviness that would otherwise pull pieces flat. Your natural density becomes the structure: each spike has enough hair to hold its shape with almost no product, which is something finer hair cannot copy. The shorter the spikes, the lighter the cut feels, so this is also one of the coolest options for hot weather.
Oval, heart, and long faces wear this well, since the upward direction adds height and draws the eye up. Keep the sides tapered tight so the silhouette stays narrow; wide sides plus a spiky top is what creates the dreaded helmet. A pea-sized amount of matte wax defines the tips, and trims every four weeks keep the spikes crisp instead of shaggy. Work the wax through dry hair only, since damp hair makes the spikes clump instead of separate.
Try this: pinch only the very tips with wax and leave the roots alone for natural-looking lift.
Difficulty: Medium · Cost: $ (salon)
8. Curly Pixie

Thick curly hair and pixies are a natural match once the cut respects the curl. Your stylist should cut it dry, curl by curl, so each coil lands at the right length, and taper the sides close so the silhouette stays narrow instead of widening into a triangle. Done right, the density that makes long curly hair exhausting becomes the pixie’s best feature: defined, springy curls with real presence. Book a stylist experienced with curly hair specifically, since curl-by-curl cutting is a different skill from wet cutting.
Round, heart, and oval faces suit this cut, and keeping some length on top prevents the dreaded pyramid shape. Style with a light curl cream on damp hair and let it air-dry or diffuse on low heat; heavy gels will crush the curls. Because curls shrink as they dry, always cut a curly pixie longer than you think you want it. Refresh second-day curls by spritzing with water and scrunching a tiny amount of cream through the ends.
Try this: ask your stylist to cut it dry and never straighten it first, so the true curl length shows.
Difficulty: Medium · Cost: $$ (salon)
9. Wavy Pixie

A wavy pixie lets your natural bend do the styling. Layers are cut to release the wave pattern, which takes weight out of the mid-lengths while the ends flip and move on their own. On thick hair this is the anti-puff cut: the wave breaks up density into soft curves, so the hair reads as texture instead of mass. Flat-ironing is optional here, and skipping it usually looks better. The cut works best when the waves are left alone to set naturally right after washing.
Oval, long, and square faces flatter this shape, especially with a deep side part that gives the waves direction. Scrunch a little mousse or sea-salt spray into damp hair and let it air-dry; the cut is designed to look good with zero heat. If your waves are uneven, ask for slightly longer pieces where the wave is weakest so the pattern looks intentional all over. Avoid brushing it dry, since a brush breaks the wave clumps and turns the texture into frizz.
Try this: sleep on damp hair in a loose twist for second-day waves that need no restyling.
Difficulty: Low · Cost: $ (salon)
10. Sleek Side-Swept Pixie
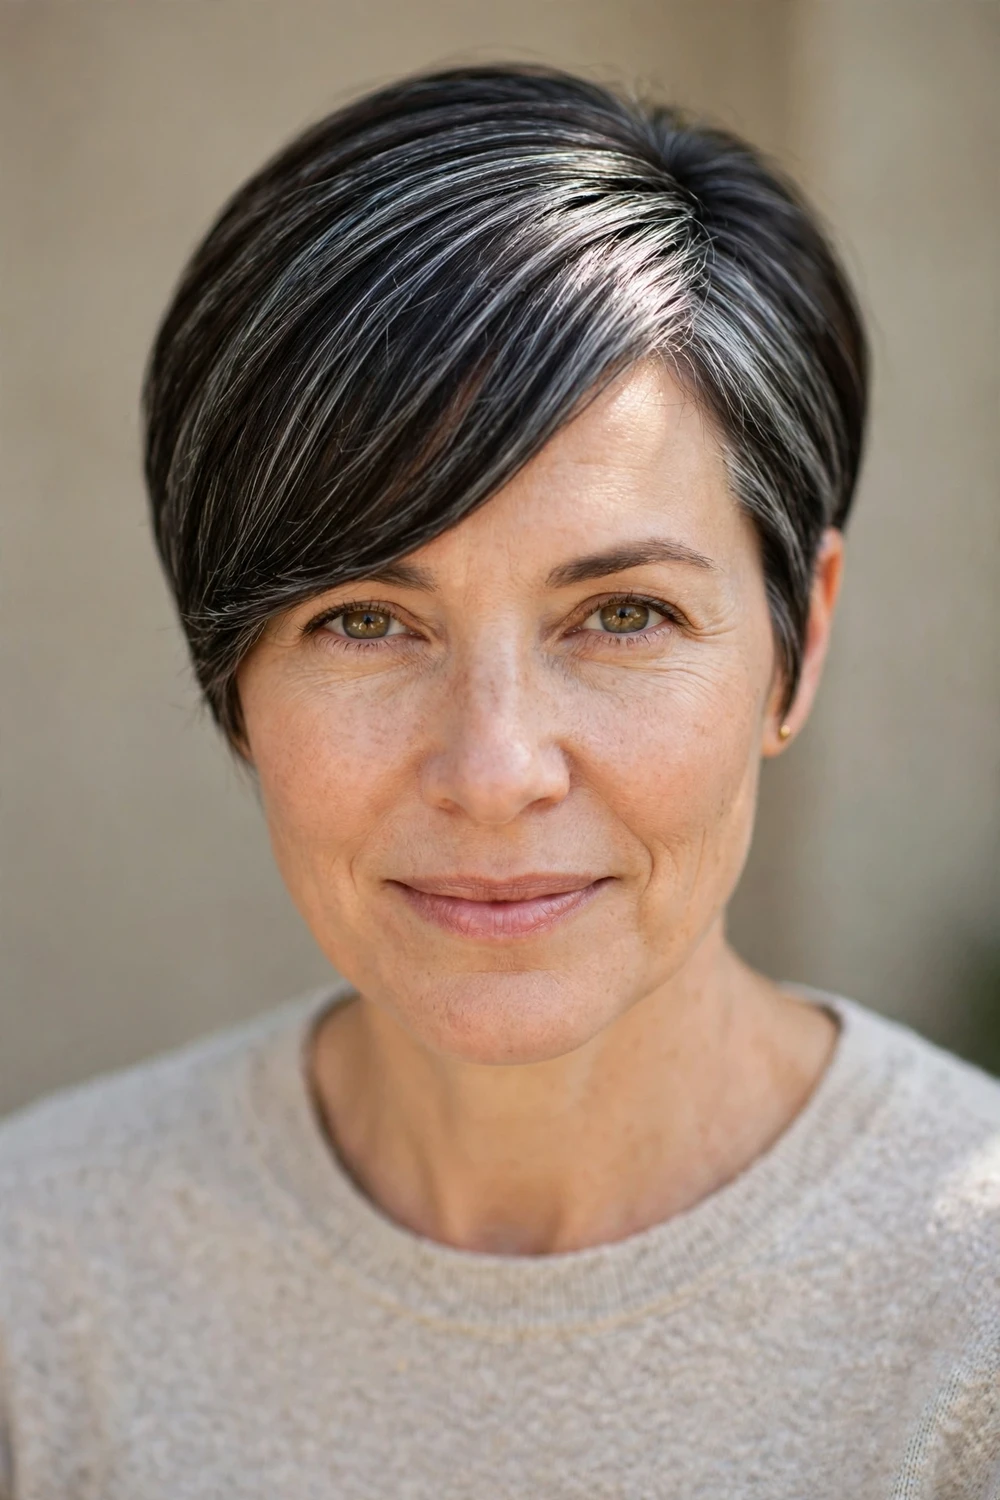
Sleek is a strategy, not just a finish. Sweeping the top to one side and smoothing it flat presses thick hair into a controlled line, which stops the crown from lifting into unwanted volume. The side part breaks the hair’s natural tendency to expand evenly in all directions, redirecting all that density into one smooth, intentional sweep. It is the most polished answer to thick hair that wants to misbehave.
Round, square, and heart faces benefit most, since the diagonal sweep slims and lengthens. Blow-dry the top across the part with a flat brush, then smooth a light serum over the surface; skip heavy pomades that will collapse the sweep by midday. For more polished short shapes, these short french bobs use the same sleek, side-parted logic at a slightly longer length.
Try this: train the part by blow-drying it in place for the first week, then it will fall there on its own.
Difficulty: Medium · Cost: $$ (salon)
11. Side-Swept Bangs Pixie

When the bangs lead the haircut, thick hair gets a pressure valve. A long, side-swept fringe gives all that forehead density somewhere to go, pulling weight forward and across instead of letting it stack up at the crown. The diagonal line of the fringe also breaks the solid wall that thick pixies can form across the forehead, replacing it with movement and a softer frame. It also draws attention to the eyes, which is why this is one of the most requested pixie variations in salons.
Square, round, and heart faces suit this cut, since the angled fringe narrows width and draws attention to the eyes. Keep the fringe thinned at the ends so it lies flat instead of kicking outward, and trim it every three weeks since bangs show growth first. The rest of the pixie can stay classic and tapered; the fringe is doing the visual work. If the fringe starts sitting too heavy between trims, ask your stylist to thin it rather than shorten it.
Try this: blow-dry the fringe flat against your forehead in the sweep direction to set the line.
Difficulty: Low · Cost: $ (salon)
12. Short Edgy Bangs Pixie
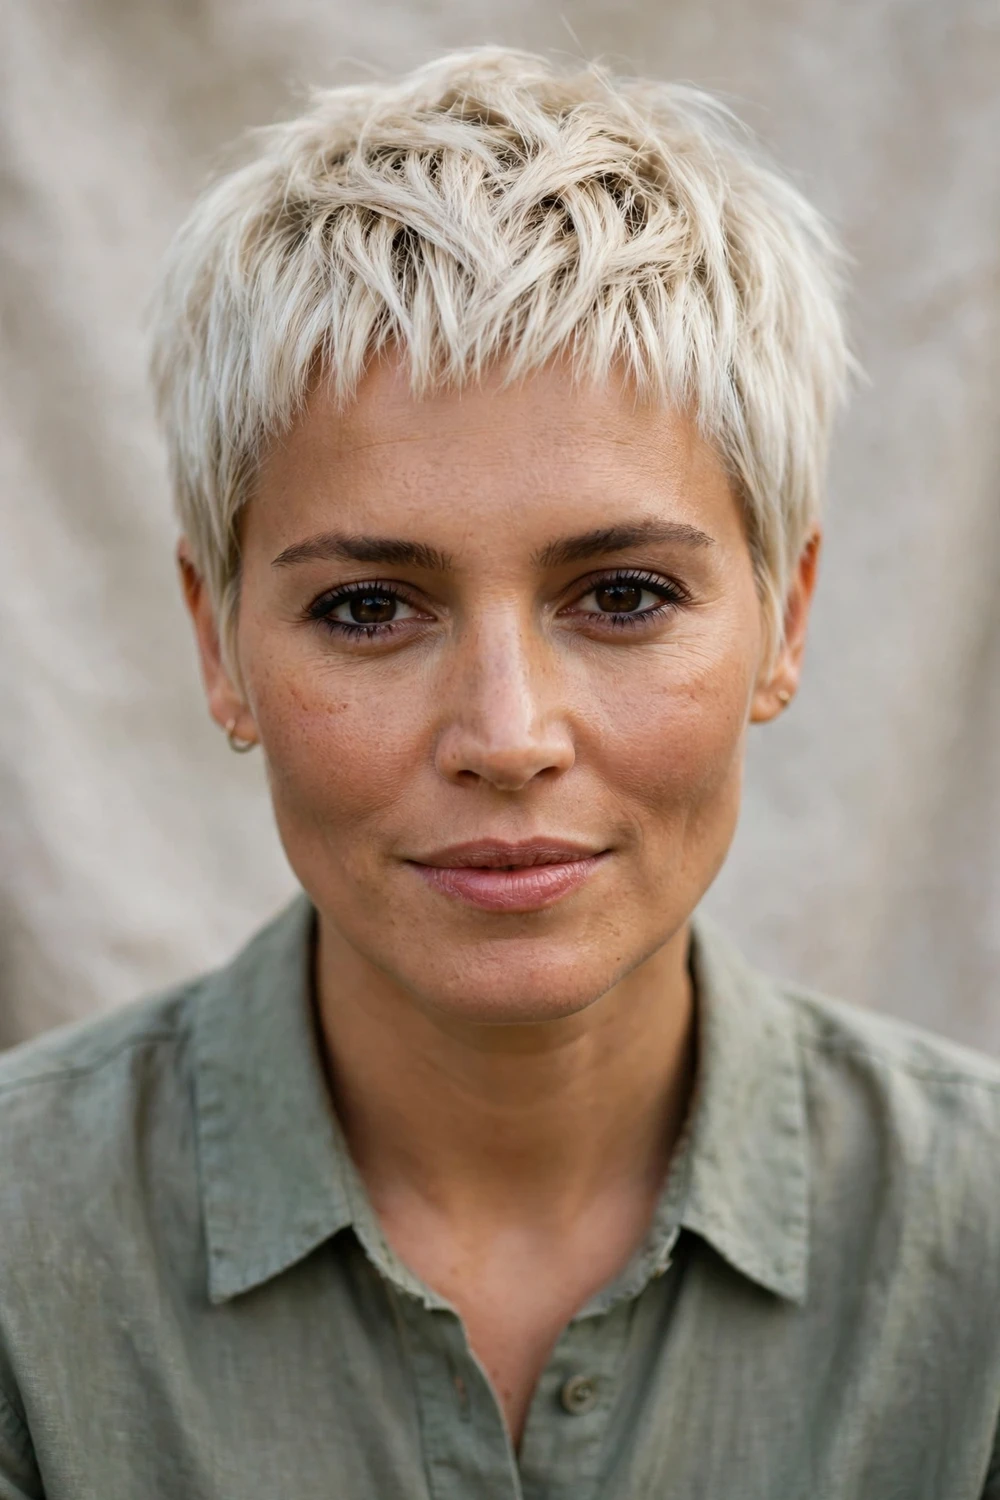
A cropped, textured fringe changes the whole geometry of a thick pixie. Short bangs expose more forehead, which visually lengthens the face and offsets the width that dense hair creates at the sides. The edgy part comes from texturizing: the fringe ends are cut unevenly so they sit in separated pieces instead of a heavy solid line, which keeps thick bangs from looking like a visor. The separated pieces also let the fringe move naturally instead of sitting stiff across the forehead.
Oval, long, and heart faces carry this best, since the short fringe adds width high on the face. It needs the most frequent bang trims on this list, every two to three weeks, but each trim is a five-minute job. Pair the fringe with tapered sides so the cut stays balanced, and keep styling product light so the pieces stay piece-y. Many salons offer free bang trims between appointments, so ask about that when you book.
Try this: ask for the fringe point-cut rather than blunt-cut so thick hair does not form a solid shelf.
Difficulty: Medium · Cost: $ (salon)
13. Asymmetrical Pixie
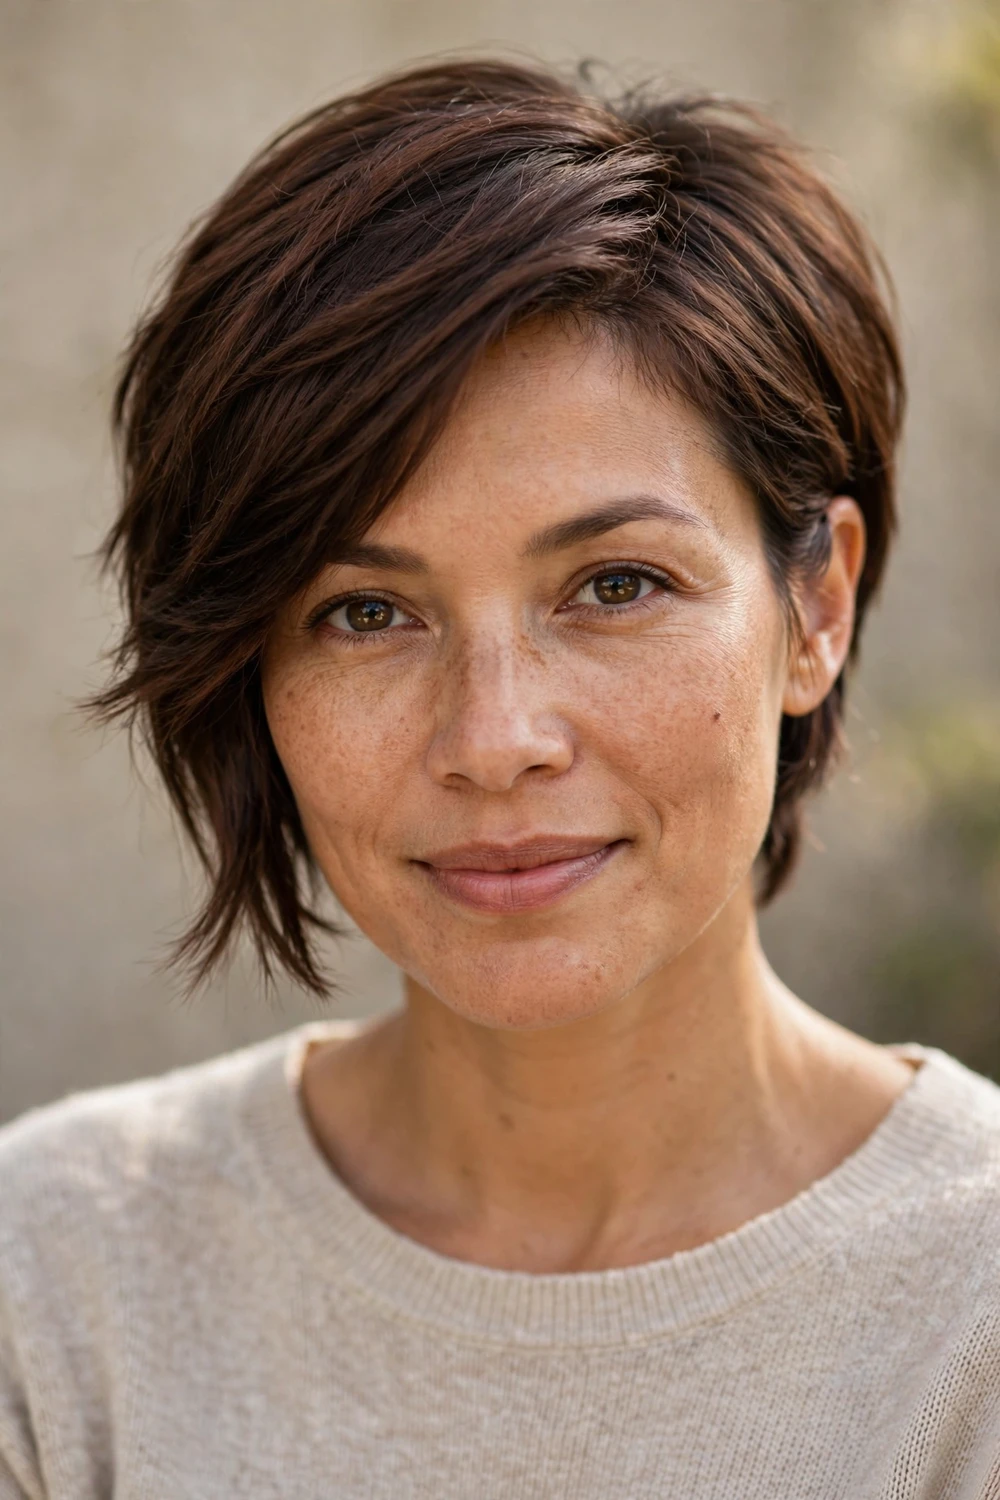
Asymmetry is camouflage for density. Cutting one side noticeably longer than the other distributes thick hair diagonally instead of evenly, which stops the eye from reading the haircut as one wide block. The longer side carries the weight in a controlled sweep while the short side stays tight, so the bulk has a direction instead of just a volume. It is the most architectural solution on this list. Ask to see the cut from the back during the appointment, since the diagonal line should read clearly from every angle.
Round, square, and heart faces flatter this cut, since the diagonal line slims and adds angles. The longer side needs the ends thinned so it drapes instead of flipping, and the short side needs tapering to stay clean. Style the long side forward over the cheek for evenings or tuck it behind the ear for a sharper daytime look. A light smoothing cream on the longer side keeps it sleek, while the short side needs almost nothing.
Try this: keep the length difference obvious, at least two inches, or the asymmetry reads as a mistake.
Difficulty: Medium · Cost: $$ (salon)
14. Asymmetrical Pixie Bob
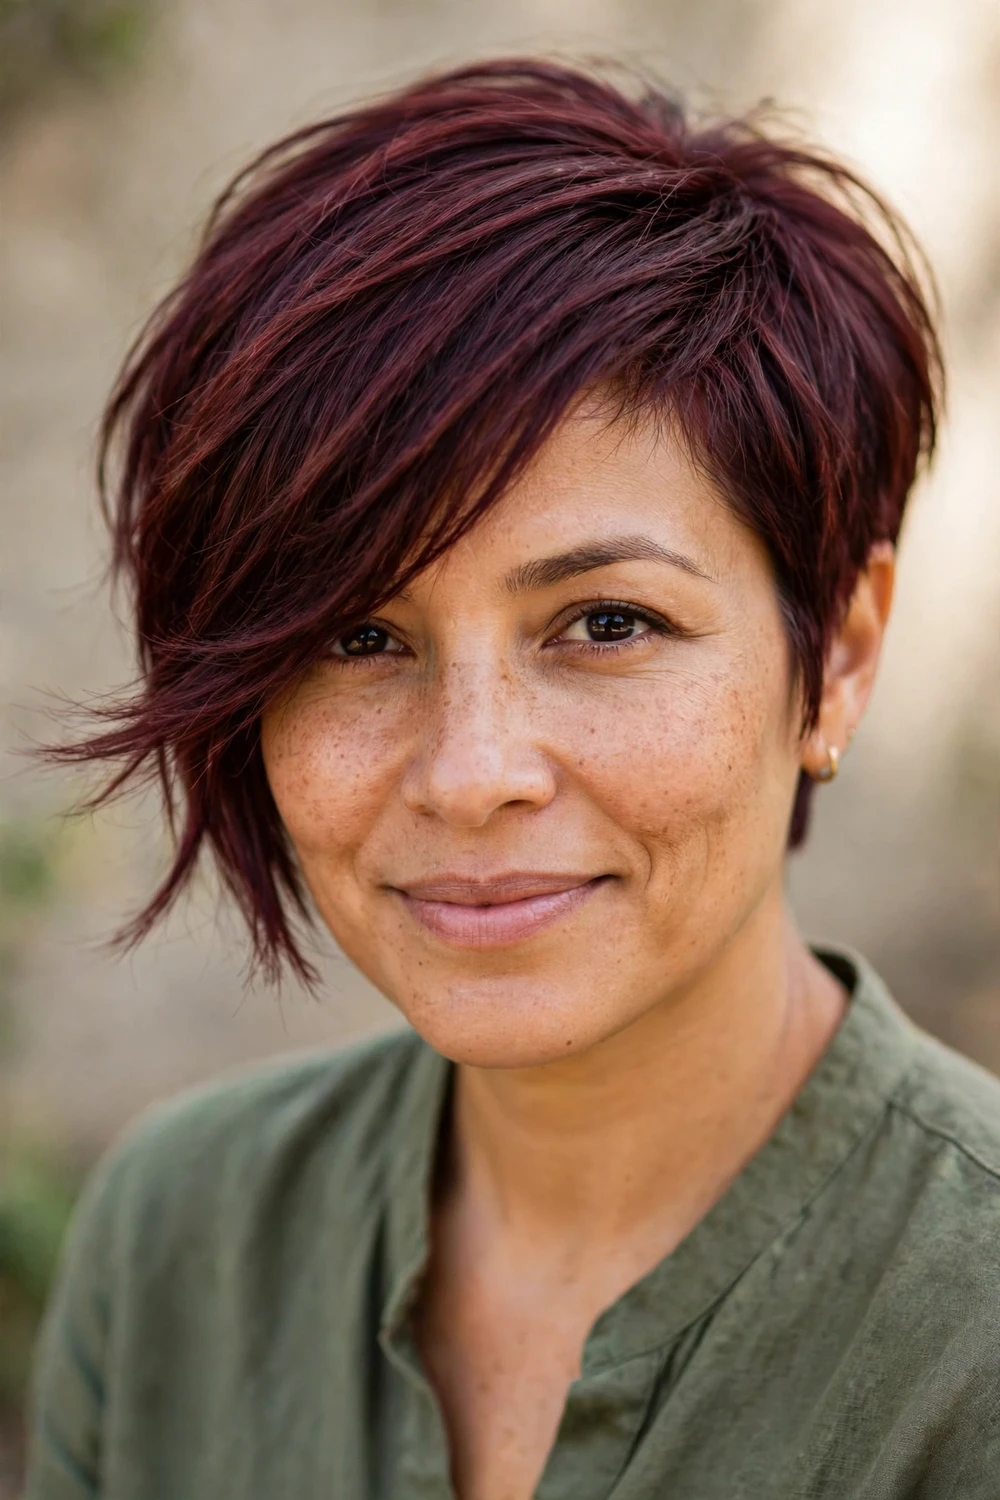
The pixie bob, or bixie, sits between pixie and bob length, and the asymmetrical version uses that extra length strategically. One side grazes the jaw while the other stays cropped near the ear, giving thick hair a long, weighted line on one side that pulls the whole cut downward. Gravity becomes your styling tool: the longer side’s own weight keeps it smooth and flat against puffiness. This is also the most forgiving option if you are growing out a shorter pixie and want it to look intentional.
Round, oval, and long faces suit this shape, since the uneven hemline breaks up the symmetry that can make round faces look rounder. The longer side needs interior thinning so it stays sleek, and the shorter side needs a clean taper. Tuck the long side behind the ear to switch the look completely without restyling. Blow-dry the longer side downward with a paddle brush to encourage it to lie flat, and let the short side air-dry for contrast.
Try this: part on the shorter side so the longer sweep gets maximum diagonal length.
Difficulty: Medium · Cost: $$ (salon)
15. Long Pixie Bob
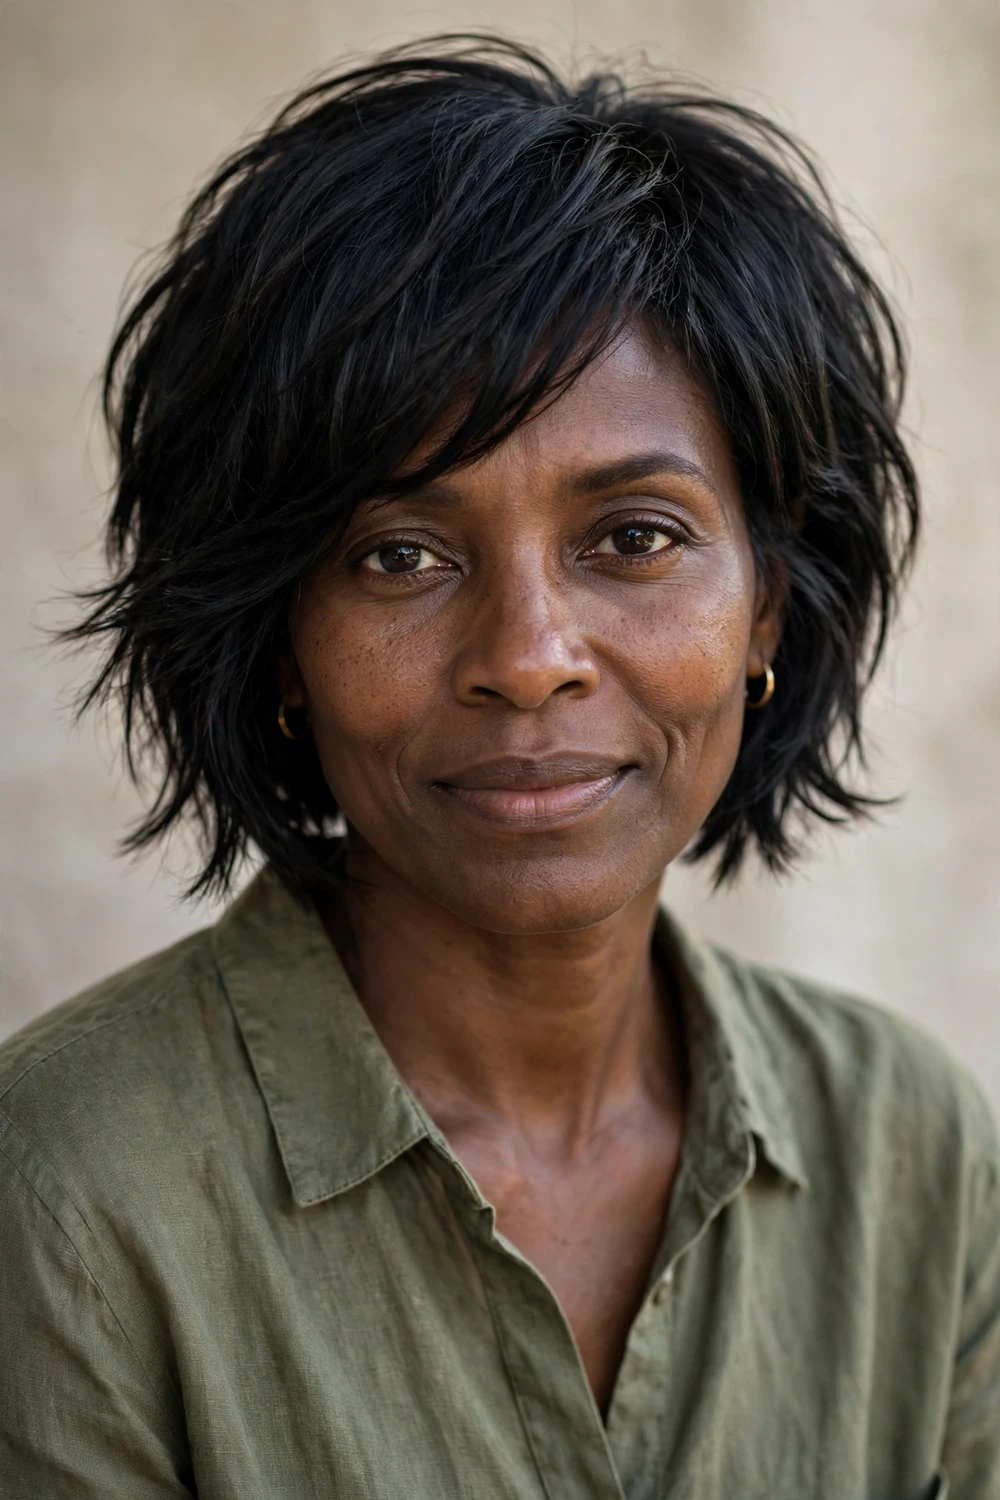
If going very short feels like a leap, the long pixie bob keeps enough length to feel safe while still removing serious weight. The back and sides stay pixie-short and tapered, but the top and front run long enough to tuck, sweep, or pin. For thick hair this is the best of both worlds: the bulk leaves through the short back while the length you keep gives you styling options a true pixie cannot.
Oval, long, and square faces wear this well, since the extra length around the face softens angles. It also grows out more gracefully than shorter pixies, so it suits anyone testing short hair for the first time. If you like soft layers at slightly longer lengths, these short layered hairstyles for women over 60 show flattering options with similar face-framing shapes.
Try this: keep the nape tapered tight so the long top has a clean foundation to grow from.
Difficulty: Low · Cost: $$ (salon)
16. Stacked Pixie Bob
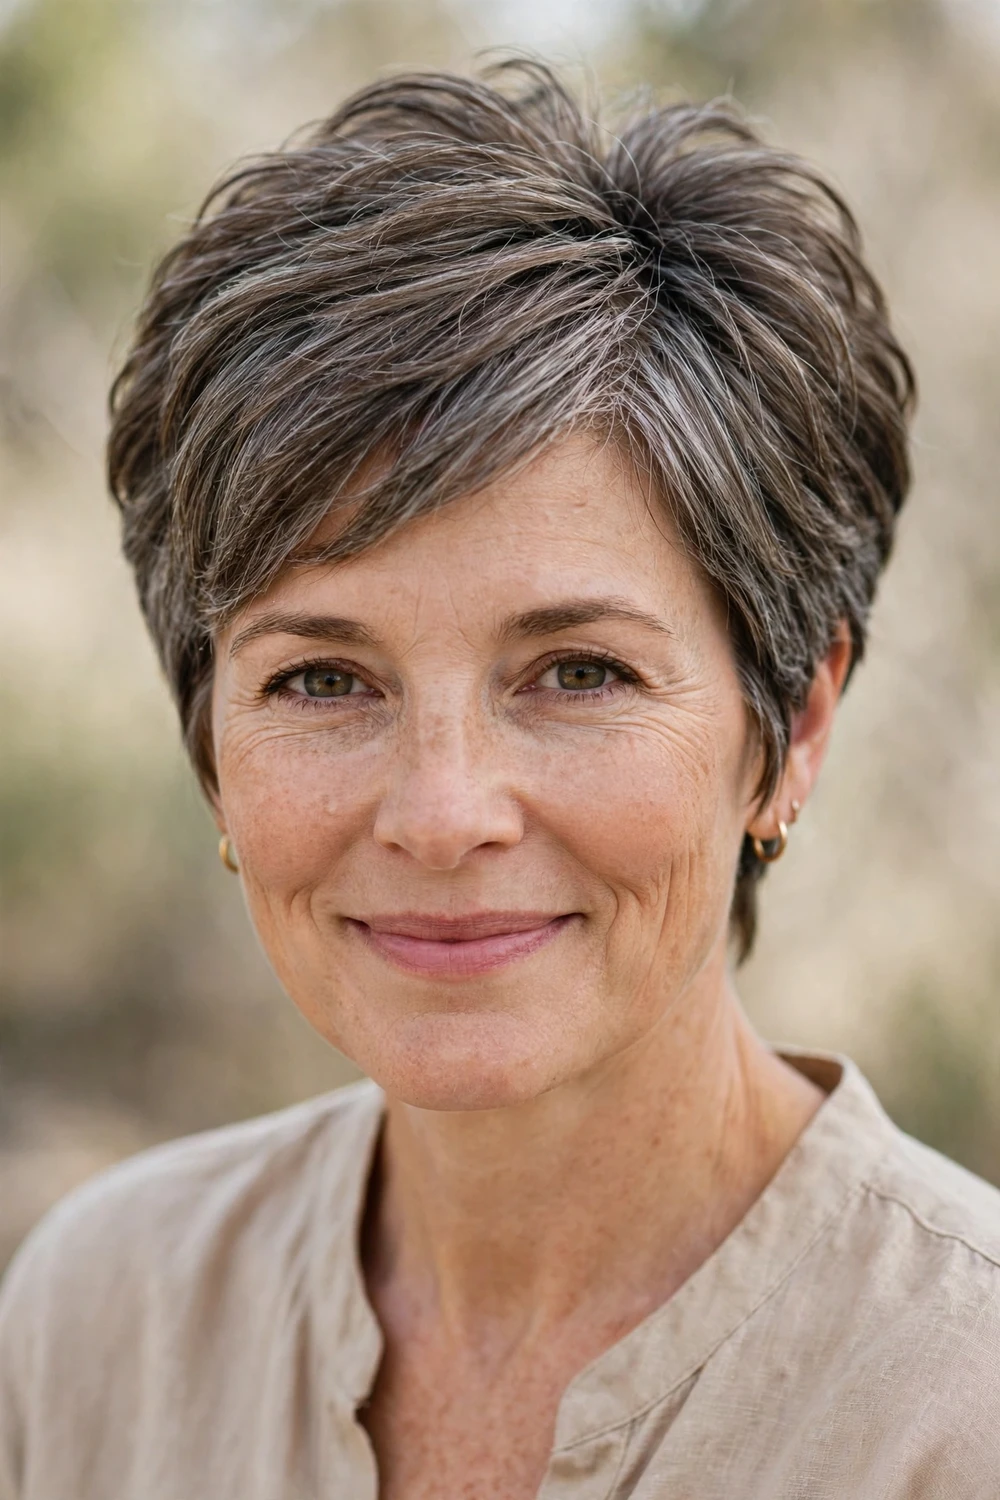
Stacking is graduation with a purpose. Shorter layers at the nape build up in graduated tiers, which lifts thick hair at the back instead of letting it sit heavy and flat. Each stacked layer is cut to remove weight from the one above it, so the back of the head stays rounded and full while the actual density is far less than it looks. It is the rare thick-hair cut that keeps volume exactly where you want it.
Oval, heart, and round faces flatter this shape, since the stacked back adds height that lengthens the face. The graduation needs refreshing every four to five weeks or the tiers grow into a shelf. Blow-dry the back with a round brush to define the stacking, and keep the front pieces longer for contrast. A small amount of mousse at the crown before blow-drying boosts the stacked tiers, but skip it at the sides where thick hair needs no help.
Try this: ask for the stacking to start high at the occipital bone for the most dramatic lift.
Difficulty: Medium · Cost: $$ (salon)
17. Grown-Out Pixie

The grown-out pixie is a haircut with a plan, not an accident. Your stylist reshapes a pixie that is past its prime by evening out the perimeter and re-texturizing the ends, turning awkward growth into an intentional shaggy crop. For thick hair this works especially well, since density fills in the gaps that make grown-out cuts look thin on finer hair. It is the smart move between appointments or between lengths.
It suits every face shape, since the soft, uneven outline adapts to bone structure rather than fighting it. Finger-style with a light cream and let the texture do the talking; this cut looks better slightly undone. If you are weighing pixie options across ages, these short pixie haircuts for older women gather the most flattering low-maintenance choices.
Try this: book a reshaping appointment instead of a full cut to turn grow-out into a style.
Difficulty: Low · Cost: $ (salon)
18. Razor-Cut Pixie
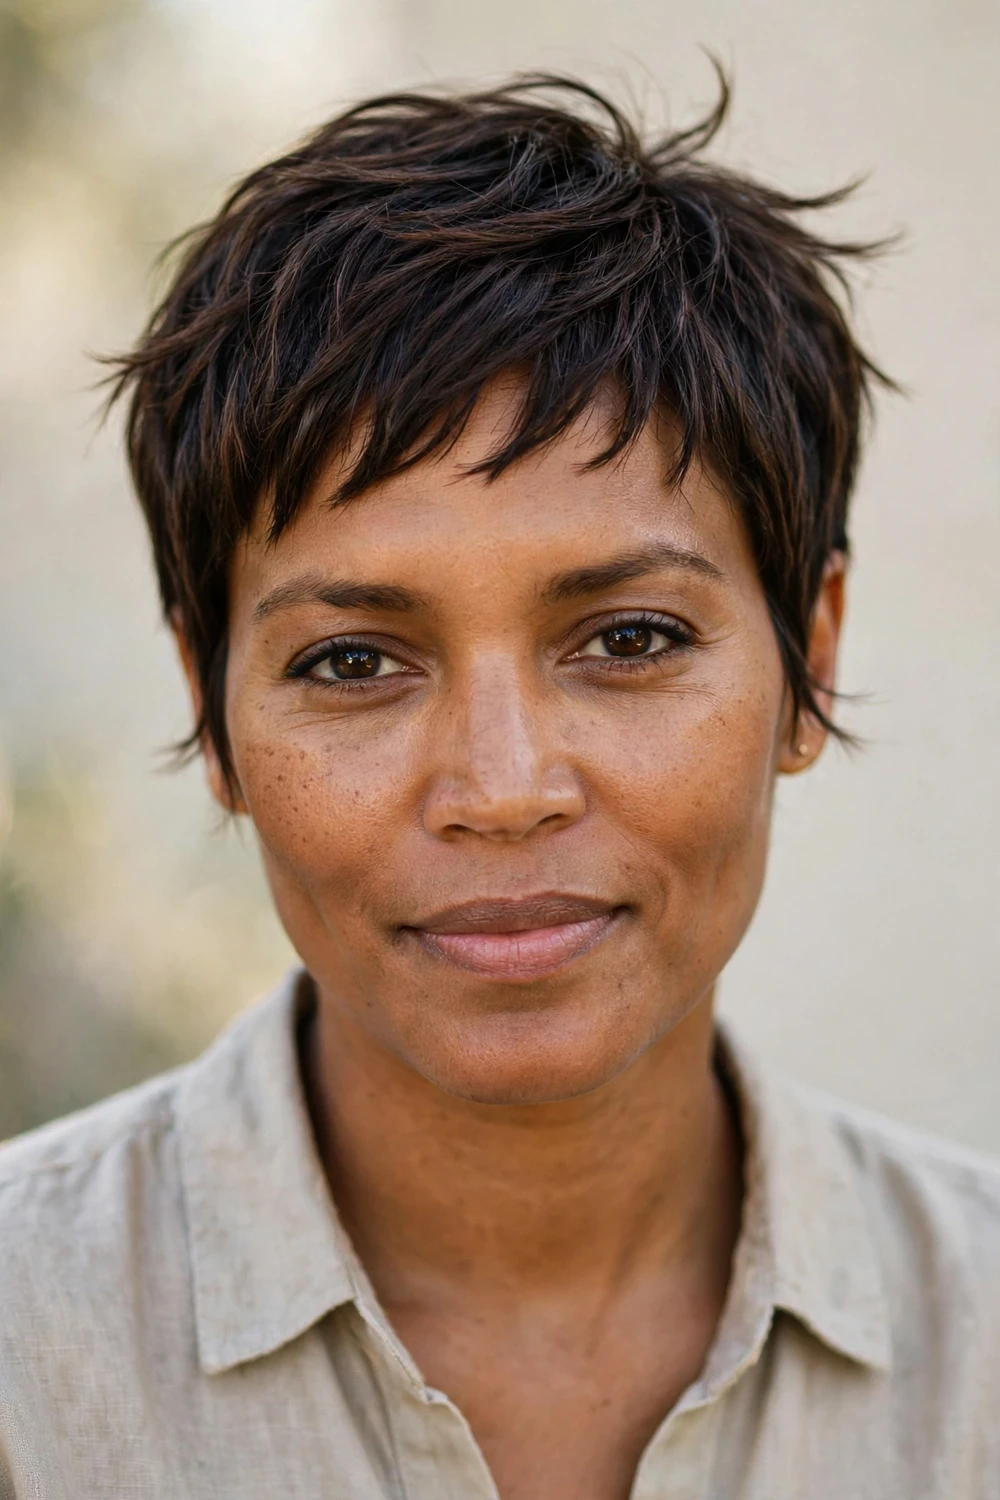
The razor is thick hair’s best friend in the salon. Unlike scissors, which cut a clean blunt line, a razor feathers the ends and carves out interior weight in one motion, leaving edges that lie soft and separated. On a pixie this means the entire cut breathes: density melts away through the lengths while the outline stays intact. Ask for this technique by name if your hair always feels too heavy after a scissor cut.
Straight to slightly wavy thick hair responds best, and oval, square, and heart faces suit the soft, feathered outline. The razor finish grows out softly, so trims can stretch to six weeks, but only let an experienced stylist razor-cut your hair since rough razor work causes frizz. Style with almost nothing; the texture is already built in. If your ends ever start feeling blunt between appointments, a quick razor refresh of just the perimeter brings the softness back.
Try this: ask for razor work through the mid-lengths and ends only, never at the roots.
Difficulty: Medium · Cost: $$ (salon)
At a Glance: 18 Thick-Hair Pixies Compared
| Cut | Best for | Thick-hair perk | Upkeep |
|---|---|---|---|
| Classic Tapered Pixie | Oval, heart, square faces | Tapered sides remove sideways bulk | Paste, trims every 4 to 6 weeks |
| Undercut Pixie | Round, oval, square faces | Deletes density under a full top | Clipper tidy-up every 4 to 5 weeks |
| Shaved-Temple Undercut Pixie | Oval, long, heart faces | Targets bulk where hair pushes out | Temple trims every 3 to 4 weeks |
| Choppy Textured Pixie | Round, square faces | Point cutting splits density into pieces | Matte paste, trims every 5 to 6 weeks |
| Messy Layered Pixie | Oval, heart, diamond faces | Interior layers debulk invisibly | Finger-style with light cream |
| Shaggy Textured Pixie | Wavy, coarse hair | Thinned ends turn bulk into texture | Wash and air-dry, graceful grow-out |
| Spiky Textured Pixie | Oval, heart, long faces | Short tips shed weight upward | Matte wax, trims every 4 weeks |
| Curly Pixie | Round, heart, oval faces | Dry cutting shapes each curl | Curl cream, diffuse on low heat |
| Wavy Pixie | Oval, long, square faces | Wave pattern breaks up mass | Mousse, air-dry with no heat |
| Sleek Side-Swept Pixie | Round, square, heart faces | Smoothing redirects crown volume | Flat-brush blow-dry, light serum |
| Side-Swept Bangs Pixie | Square, round, heart faces | Fringe absorbs forehead density | Bang trims every 3 weeks |
| Short Edgy Bangs Pixie | Oval, long, heart faces | Cropped fringe offsets side width | Bang trims every 2 to 3 weeks |
| Asymmetrical Pixie | Round, square, heart faces | Diagonal cut distributes bulk | Thin the long side, taper the short side |
| Asymmetrical Pixie Bob | Round, oval, long faces | Long side weight pulls cut downward | Interior thinning, tuck behind ear |
| Long Pixie Bob | Oval, long, square faces | Short back removes bulk, top keeps options | Taper the nape, graceful grow-out |
| Stacked Pixie Bob | Oval, heart, round faces | Graduation lifts weight off the neck | Round-brush blow-dry, trims every 4 to 5 weeks |
| Grown-Out Pixie | Every face shape | Density fills in sparse grow-out gaps | Reshaping visit, finger-style cream |
| Razor-Cut Pixie | Oval, square, heart faces | Razor feathers carve out interior weight | Almost no product, trims every 6 weeks |
How to Choose a Pixie for Thick Hair
Start with your density, not your face shape. If your hair feels heavy at the nape and pushes outward at the sides, you need aggressive weight removal: an undercut, a shaved temple, or stacked graduation. If the bulk sits mostly at the crown, interior layering or razor texturizing will do the job without changing the outline. Tell your stylist where your hair feels heaviest, since that decides the technique more than any photo.
Next, match the cut to your texture and routine. Curly and wavy thick hair should always be cut dry so the true length shows, while straight thick hair benefits most from tapers and razor work that keep it from puffing. If you style daily, a sleek side-swept or classic tapered pixie rewards the effort. If you want wash-and-go, pick a shaggy, messy, or grown-out pixie that looks better slightly undone.
Finally, be realistic about maintenance. Undercuts and short bangs need trims every three to five weeks, while choppy and razor-cut pixies can stretch to six. The technique that removes the most weight usually needs the most upkeep, so choose the schedule you will actually keep.
Styling and Caring for a Thick-Hair Pixie
Washing. Thick hair holds onto natural oils, so two to three washes a week is usually enough. Overwashing strips moisture and makes dense hair frizzier, which is the opposite of what a pixie needs. Use a sulfate-free shampoo and condition lightly, keeping conditioner off the roots so the crown does not go flat.
Products. Lightweight is the rule. A pea-sized amount of matte paste, wax, or light cream defines pieces without adding weight. Avoid heavy pomades, thick gels, and rich oils, which collapse thick pixies into a solid, greasy shape. Fine hair needs volumizing products; thick hair needs the opposite, so leave the root-lift sprays on the shelf.
Drying. Most thick-hair pixies air-dry well because the cut already controls the shape. If you blow-dry, use a flat or round brush to direct the hair where the cut wants it to go, especially side-swept tops and stacked backs. Diffuse curly pixies on low heat to keep the curl pattern intact.
Humidity and puff. Thick hair expands in humidity, so a light anti-frizz serum on the surface helps on damp days. Keeping the sides and nape trimmed tight is the real defense: short perimeters leave less hair to swell. If puff is your constant battle, ask your stylist about a keratin smoothing treatment compatible with short cuts.
Trims. Book every four to six weeks depending on the cut. Thick pixies lose their shape at the nape first, so a quick perimeter clean-up between full cuts can buy you an extra two weeks.
Frequently Asked Questions
Will a pixie cut make my thick hair look puffy?
Only if the cut ignores your density. Puffiness happens when thick hair is cut blunt with no weight removal, so the ends push outward. Every cut on this list avoids that with a specific technique: undercuts, tapers, point cutting, razor texturizing, or interior layering. Tell your stylist that taming bulk is your top priority, and ask which method they plan to use before the scissors come out.
Which pixie removes the most weight from thick hair?
The undercut pixie removes the most weight because it physically deletes the dense hair underneath while keeping the styled top. The shaved-temple undercut is a close second for targeted bulk at the sides, and the stacked pixie bob removes the most weight at the back of the head. If clippers feel too drastic, a razor-cut pixie carves out interior weight with scissors-free softness.
How often do I need to trim a thick-hair pixie?
Most thick-hair pixies need a trim every four to six weeks. Undercuts and short bangs show growth fastest, so they sit at the three-to-five-week end, while choppy, razor-cut, and shaggy pixies can stretch to six weeks because their uneven texture hides growth lines. The nape loses shape first on thick hair, so a quick perimeter tidy-up between full cuts keeps the cut looking fresh.
Can I get a pixie if my thick hair is curly?
Yes, and thick curly hair is one of the best candidates for a pixie. The key is a dry cut, curl by curl, so each coil lands at its true length, plus tapered sides that keep the silhouette narrow instead of triangular. Use a light curl cream rather than heavy gel, and expect to trim a little more often since curls spring up as they dry. Ask for extra length on top at first; you can always go shorter.
What is the difference between a pixie for thick hair and one for fine hair?
They are opposites. A fine-hair pixie is built to create volume with blunt lines, stacking, and volumizing products. A thick-hair pixie is built to remove weight with undercuts, tapers, texturizing, and interior thinning. Using fine-hair advice on thick hair, like adding layers for volume or using root-lift spray, usually makes thick hair bigger and harder to manage. Always follow guidance written for your density.
Final Thoughts
Thick hair does not disqualify you from a pixie; it just changes the brief. Choose the cut whose weight-removal technique matches where your hair feels heaviest, keep the sides and nape trimmed on schedule, and let lightweight products do the finishing. Do that, and your density stops being the problem and starts being the reason the cut looks good.

