


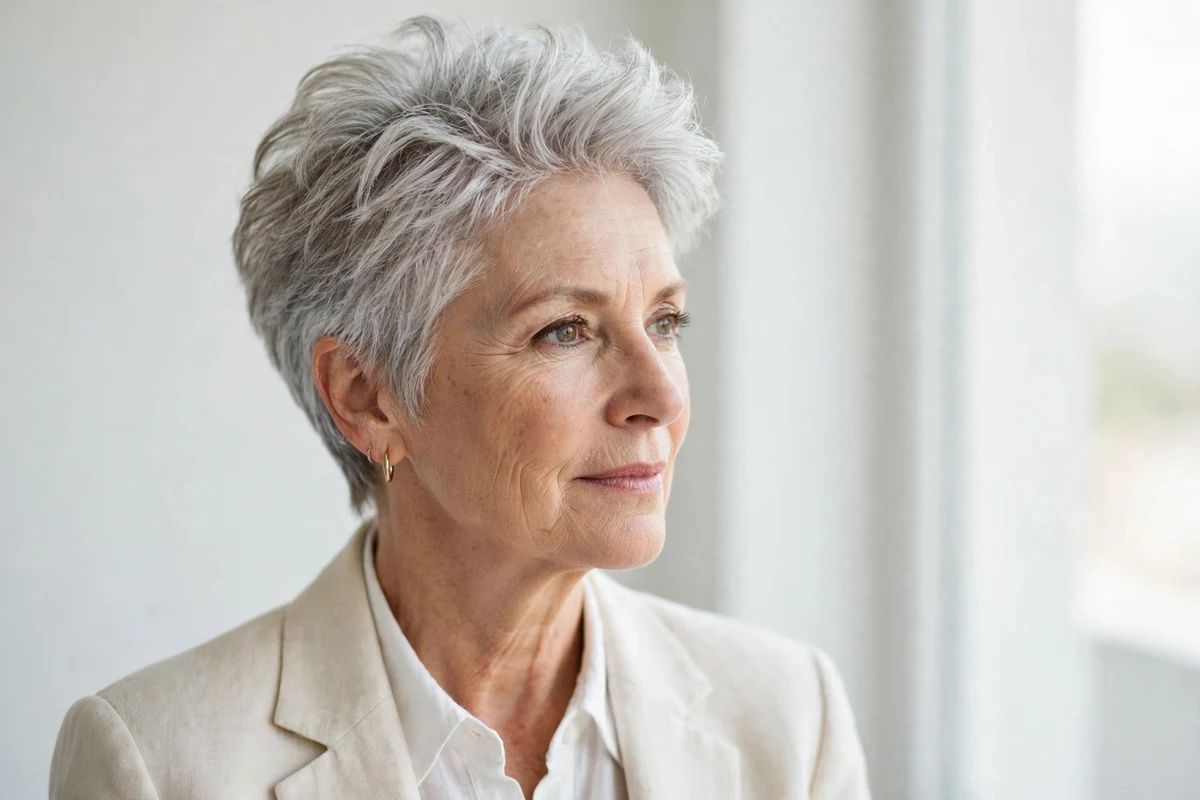
Thin hair after 50 does not have to mean flat hair. The right pixie cut builds lift where you need it most, at the crown and around the face, while removing the length that pulls fine strands down. I have spent years covering short hair for mature women, and the pixie remains the single best shape for making thin hair look fuller.
This guide brings you 30 pixie cuts for thin hair over 50, each one chosen for how it creates volume. You will find stacked crowns, smart layering, texture that adds visual density, and color tricks like babylights and lowlights that make hair look thicker. Pick a few favorites to show your stylist, read the choosing guide, and check the FAQs for thinning-hair questions.
Quick answer: The best pixie cuts for thin hair over 50 use stacked layers at the crown, tapered sides, and light texture to create lift and fullness. Feathered, choppy, and side-parted pixies work well, and color like babylights or lowlights adds visual thickness. Regular trims every 4 to 6 weeks keep the shape and volume intact.
Quick Takeaways
- Stacked and layered crowns build volume into the cut itself, so styling takes less effort.
- Tapered sides and napes remove bulk where thin hair clings, making the top look fuller.
- Light texture, feathering, and choppy ends add visual density without heavy product.
- Babylights, lowlights, and root color tricks create the illusion of thicker hair.
- Trim every 4 to 6 weeks. An overgrown pixie loses its lift and looks thinner.
Why Pixies Work So Well for Thin Hair After 50
Shorter hair has less weight, and less weight means thin strands can lift at the root instead of lying flat. A pixie also gives your stylist control over exactly where fullness sits. Strategic layers at the crown create height, while a tapered neckline and sides keep the silhouette clean so the top reads as fuller.
Texture matters as much as length. Blunt, one-length cuts on thin hair can show the scalp and look stringy. Feathered edges, choppy pieces, and point-cut texture break up the surface so light bounces around and hair looks denser. Color plays a role too. Highlights swell the hair shaft slightly, and lowlights or a darker root add depth that reads as thickness.
There is one honest caveat. A pixie is not a wash-and-go cut for everyone. Most volume pixies need a few minutes with a round brush or a light mousse to look their best. The good news is that the styling routine is short, and the volume it produces lasts all day with far less product than longer cuts need.
1. Crown-Stacked Pixie
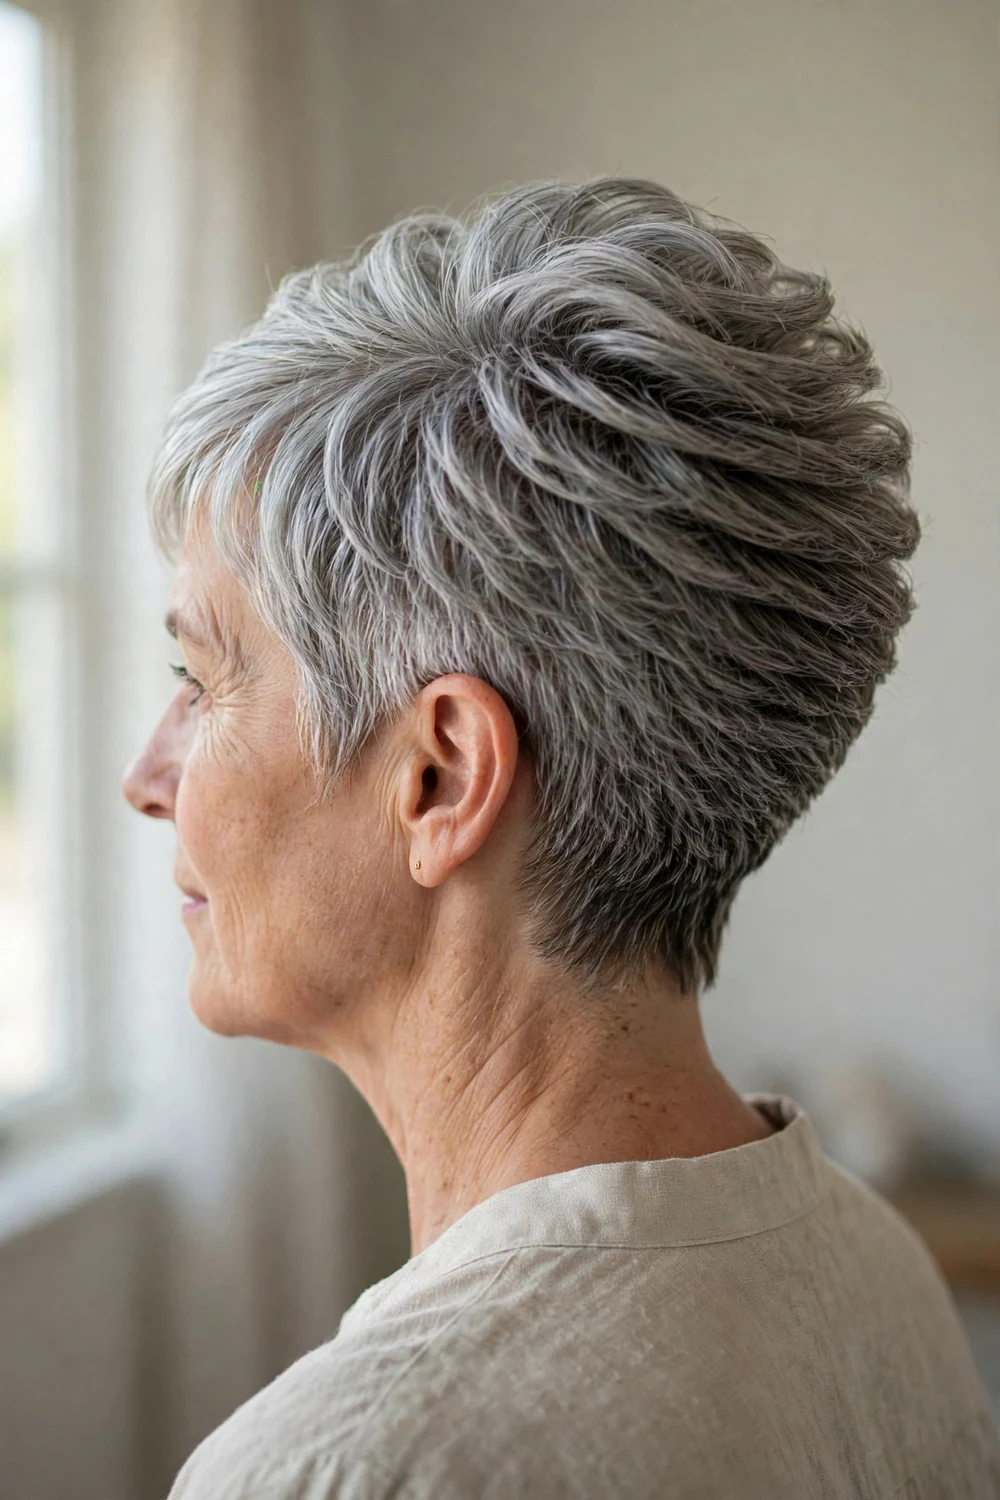
Stacking is the fastest way to build height into a short cut. The stylist layers the hair at the crown in graduated tiers so each layer pushes the one above it upward. That creates real, cut-in lift that does not depend on teasing or heavy styling. The sides stay tapered and close, which makes the crown look even taller by contrast. It works on straight and slightly wavy textures, and it suits oval, heart, and long face shapes because the height balances proportions.
Try this: Blow-dry the crown with a small round brush, lifting straight up at the roots. Finish with a root-lift spray along the part line and scrunch lightly for 10 seconds.
2. Layered Pixie with Long Crown Volume
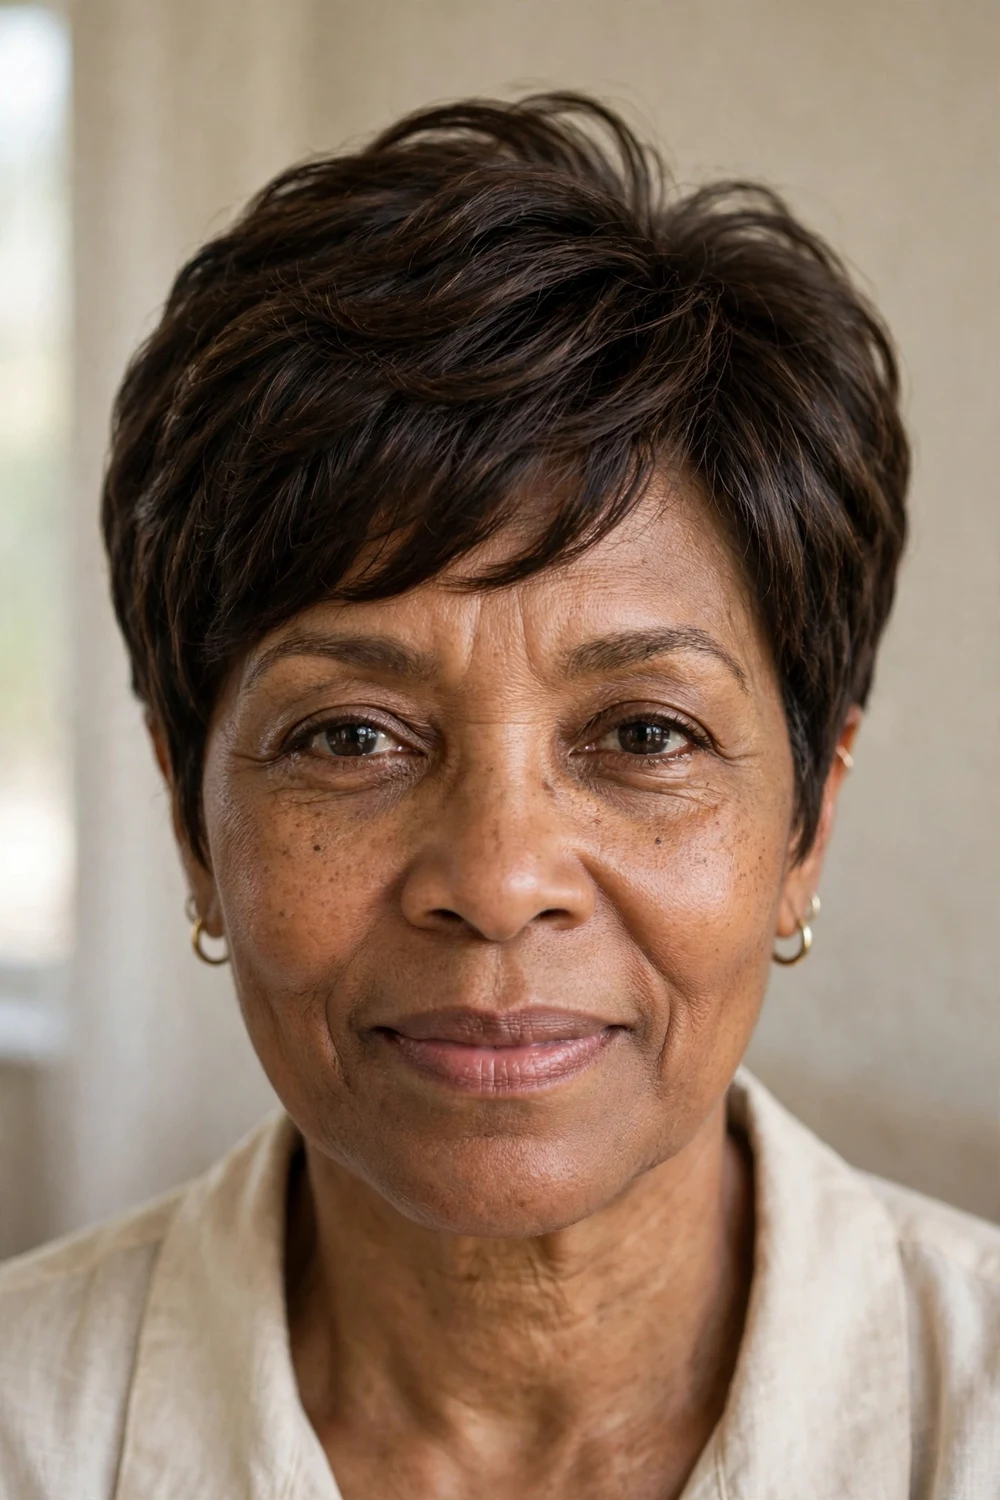
Longer layers through the crown give you options. You can sweep them to the side, brush them back, or let them fall forward, and each direction produces a different kind of volume. The extra length up top is the whole point for thin hair, since it can be directed where coverage is thinnest. The layers stay soft rather than choppy, so the shape looks polished instead of edgy. Ask your stylist to keep the perimeter just above the ears and nape so the cut still reads as a pixie, not a shag.
Try this: Apply a golf-ball-sized amount of volumizing mousse to damp roots, then blow-dry upside down for two minutes before flipping upright and shaping.
3. Textured Volume Pixie
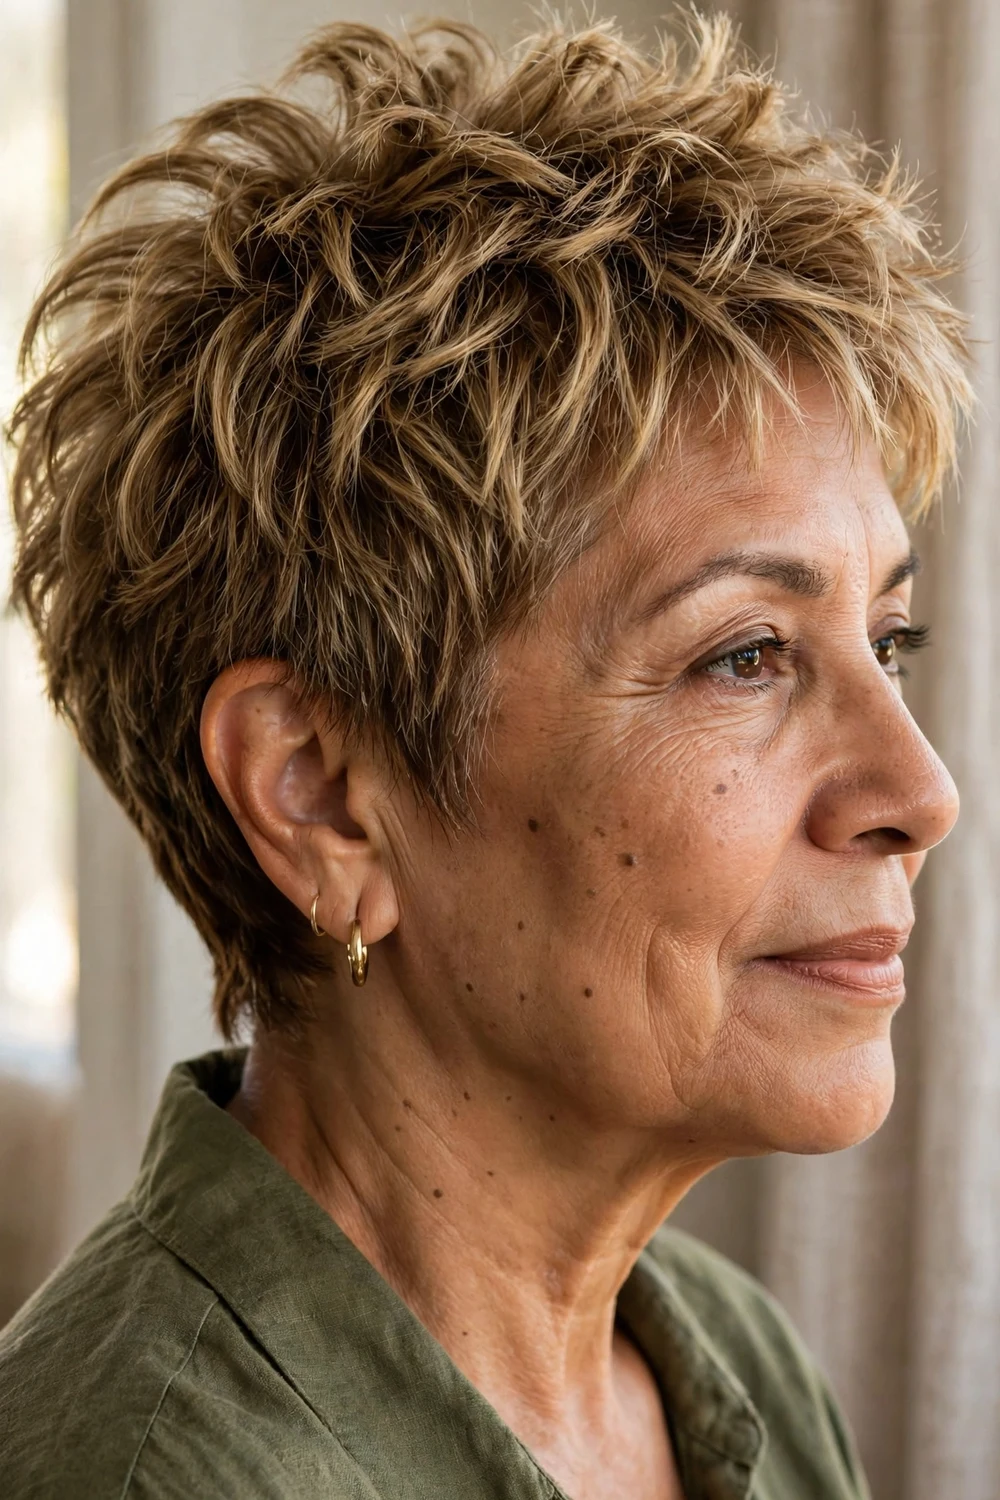
Texture does for thin hair what padding does for a thin mattress: it fills in the gaps visually. Choppy, piecey ends catch light at different angles, which makes the whole head of hair look denser than it is. The cut uses short internal layers and point cutting at the ends rather than blunt lines. This is a forgiving option if your hair is also fine, not just thin, because it never asks the strands to do anything heavy. A small amount of product is all it takes to define the pieces.
Try this: Rub a pea-sized amount of texture paste between your palms and pinch the ends. Work from mid-length out, never near the roots, to keep lift intact.
4. Tapered Pixie with Crown Volume
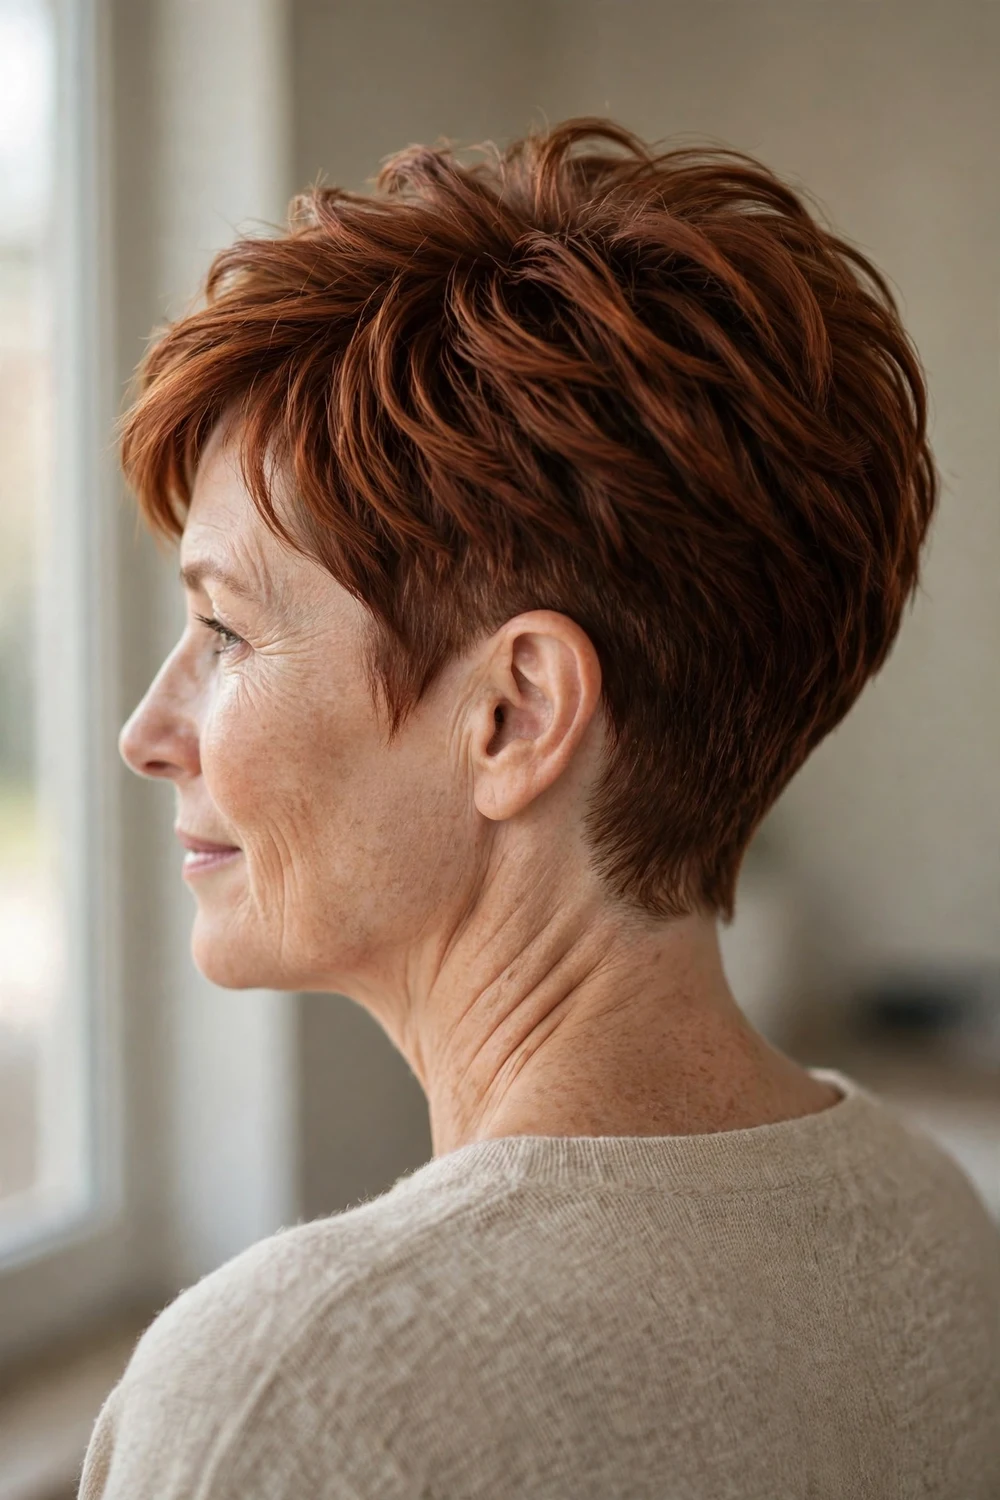
Tapered sides are doing two jobs here. First, they remove the bulk that makes thin hair cling to the head around the ears. Second, the contrast between the close sides and the fuller crown makes the top look taller. The crown itself carries soft layers that lift with a round brush. This cut flatters rounder faces because the height on top visually lengthens the face. It also grows out neatly, since the taper keeps the perimeter tidy between appointments.
Try this: Use a vent brush to blow-dry the crown upward, then press the sides flat with a cool shot from the dryer to set the contrast.
5. Side-Parted Volume Pixie
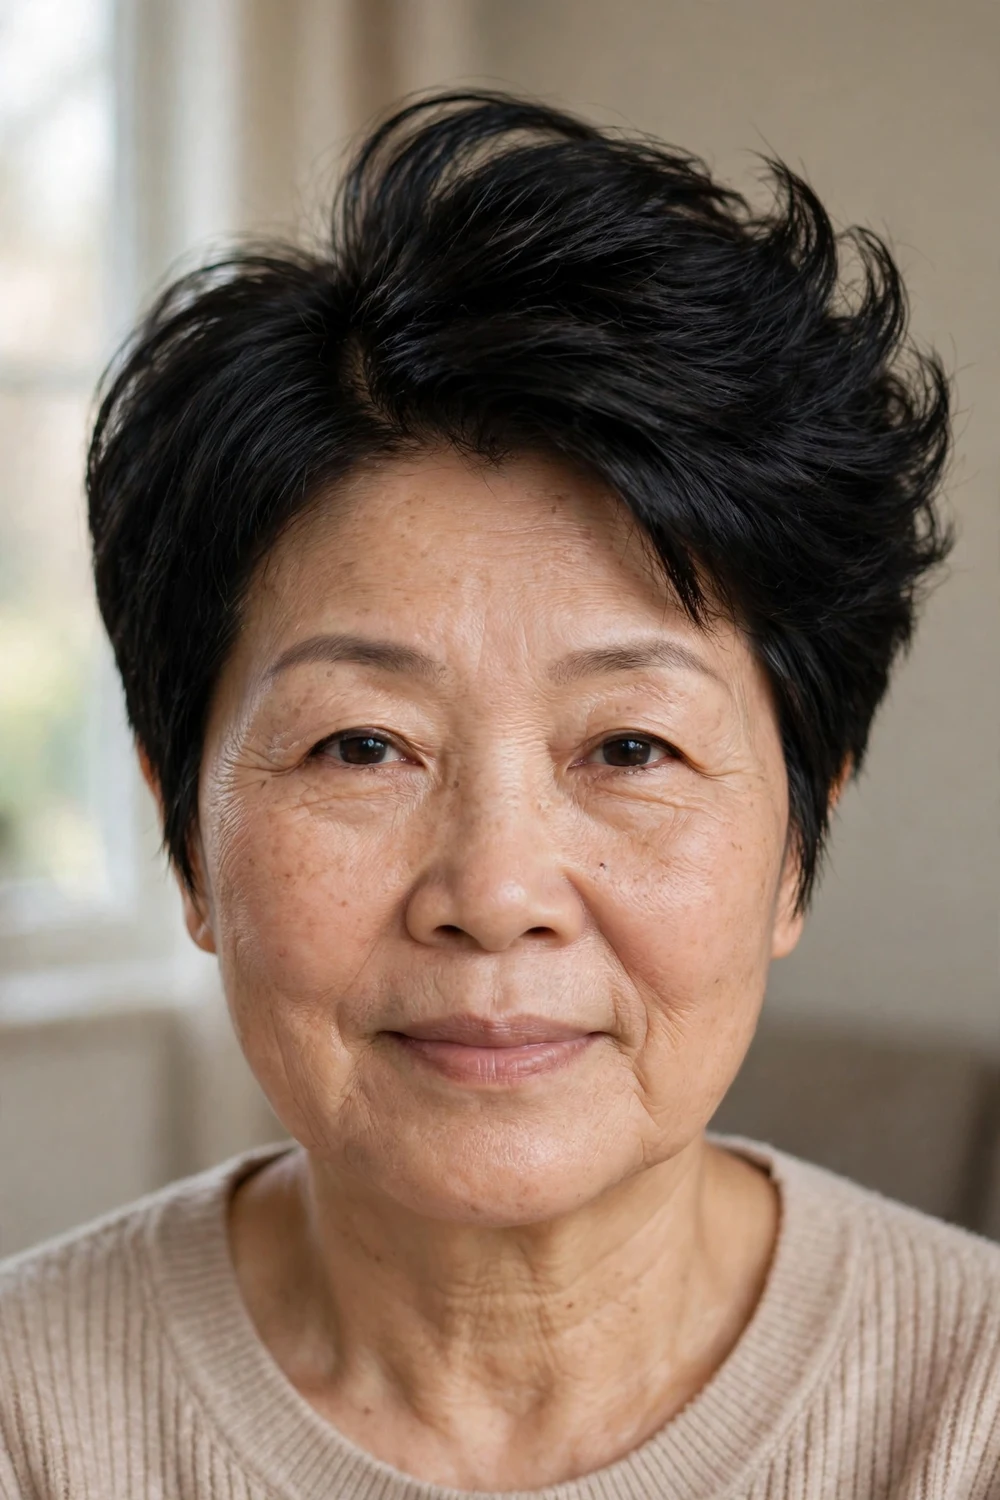
Moving the part a couple of inches to the side is the oldest volume trick in the book, and it still works. Hair that has lain in one direction for years loses its will to lift. A deep side part forces the roots on the heavier side to stand up, which creates instant body with zero extra styling time. This cut pairs the part with lightly layered crown hair so the lift has something to work with. It is also a smart choice for covering a widening part line.
Try this: Blow-dry the crown in the opposite direction of your part first, then flip the hair over into place. Set the roots with a velcro roller for five minutes while you get dressed.
6. Feathered Volume Pixie
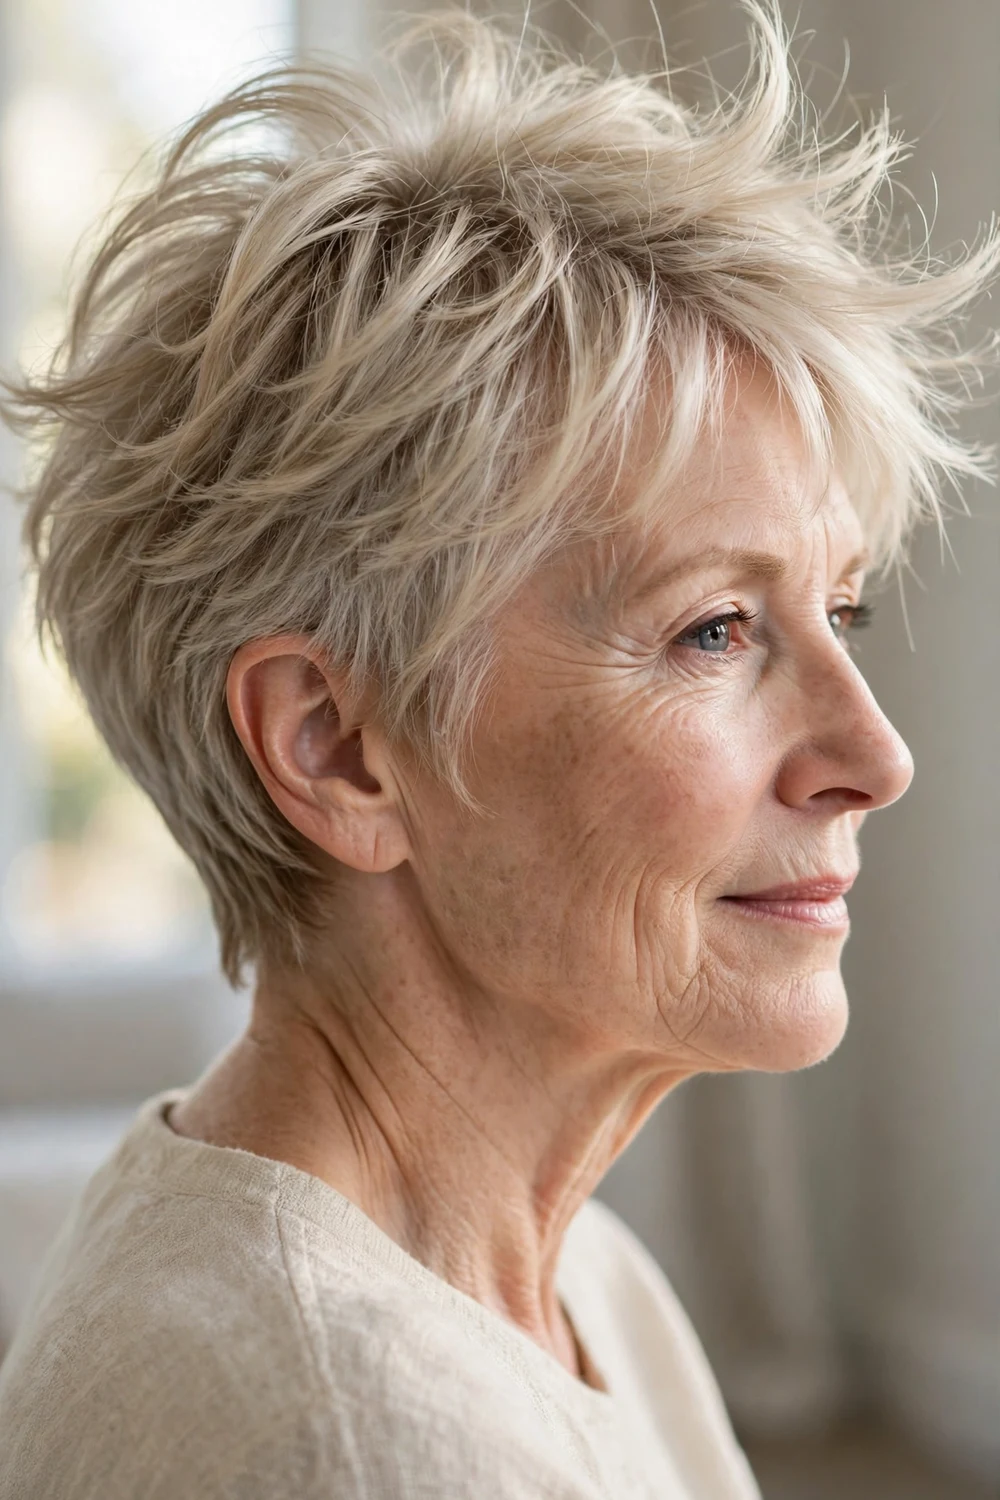
Feathering uses fine, wispy layers that flick outward instead of lying flat. On thin hair, that airy movement is more flattering than a sleek finish because it prevents the hair from looking plastered to the scalp. The layers are cut with a razor or thinned scissors for a soft, broken edge. This style suits women who want something gentle rather than edgy. It dries quickly and falls into place with minimal help, which makes it a strong low-effort option.
Try this: Blow-dry with your fingers, flicking the ends outward as you go. A light mist of flexible hairspray holds the feathered shape without stiffness.
7. Choppy Volume Pixie
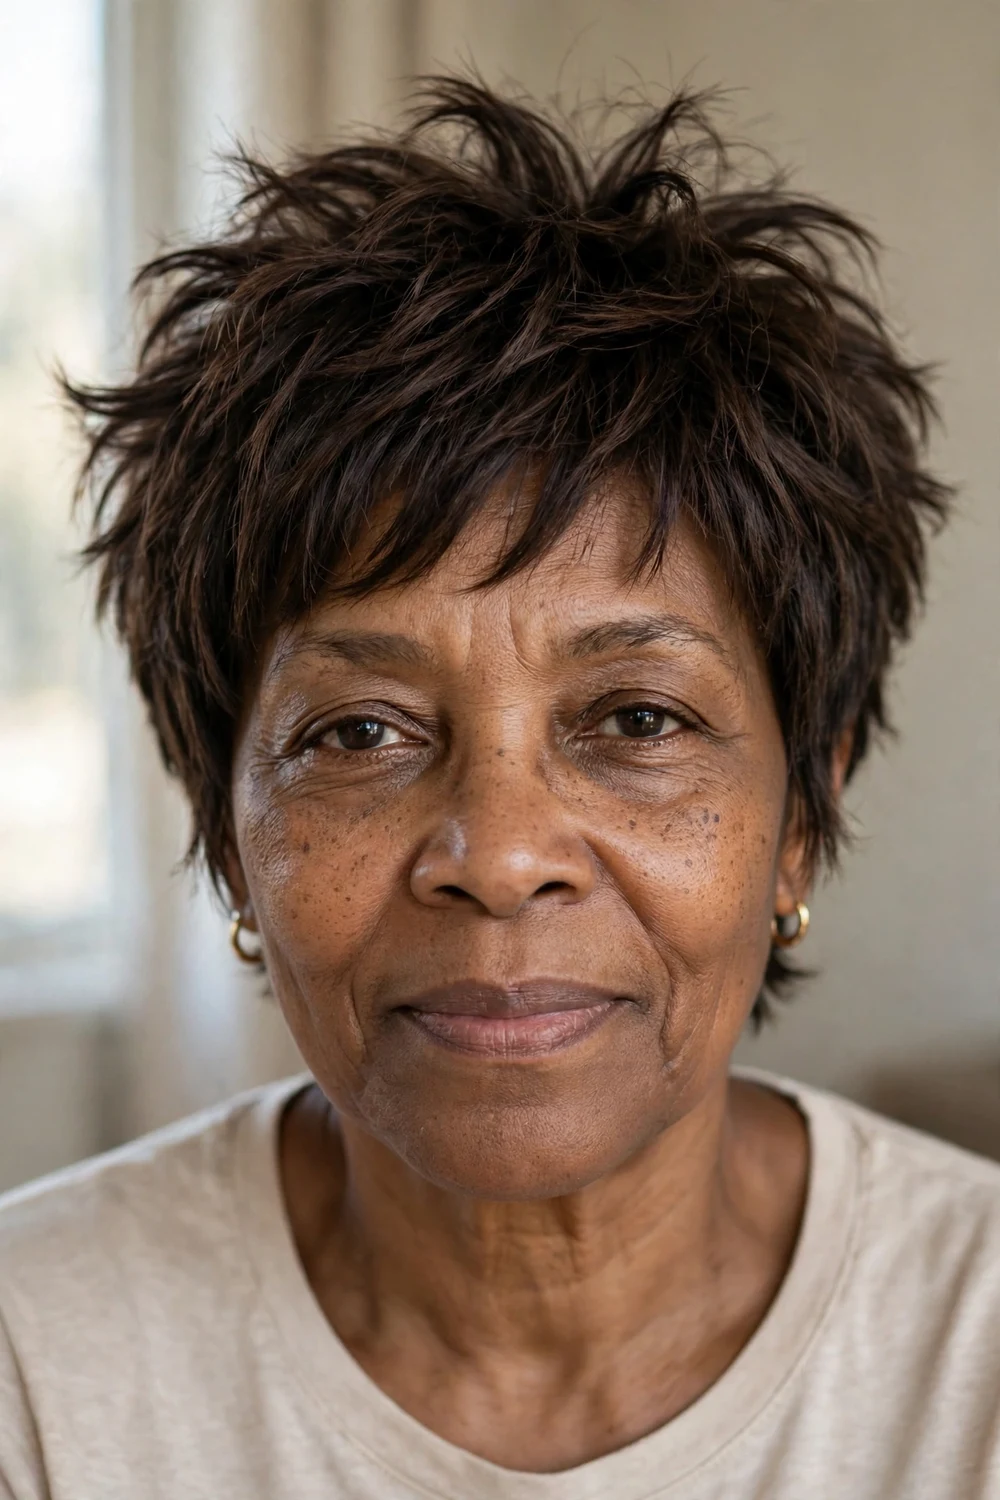
Choppy layers break up flatness better than any product. The uneven lengths create texture and depth that read as fullness, even on very thin hair. The cut works best when the choppiness is concentrated through the crown and top, with the sides kept shorter and cleaner for balance. Ask for the layers to be cut dry or at least checked dry, since thin hair shrinks differently when wet and wet-cut choppiness can come out too short.
Try this: Spritz sea salt spray on damp hair and roughly dry with the dryer on medium heat. Finger-style the crown upward for a disheveled, full finish.
8. Stacked Pixie Bob
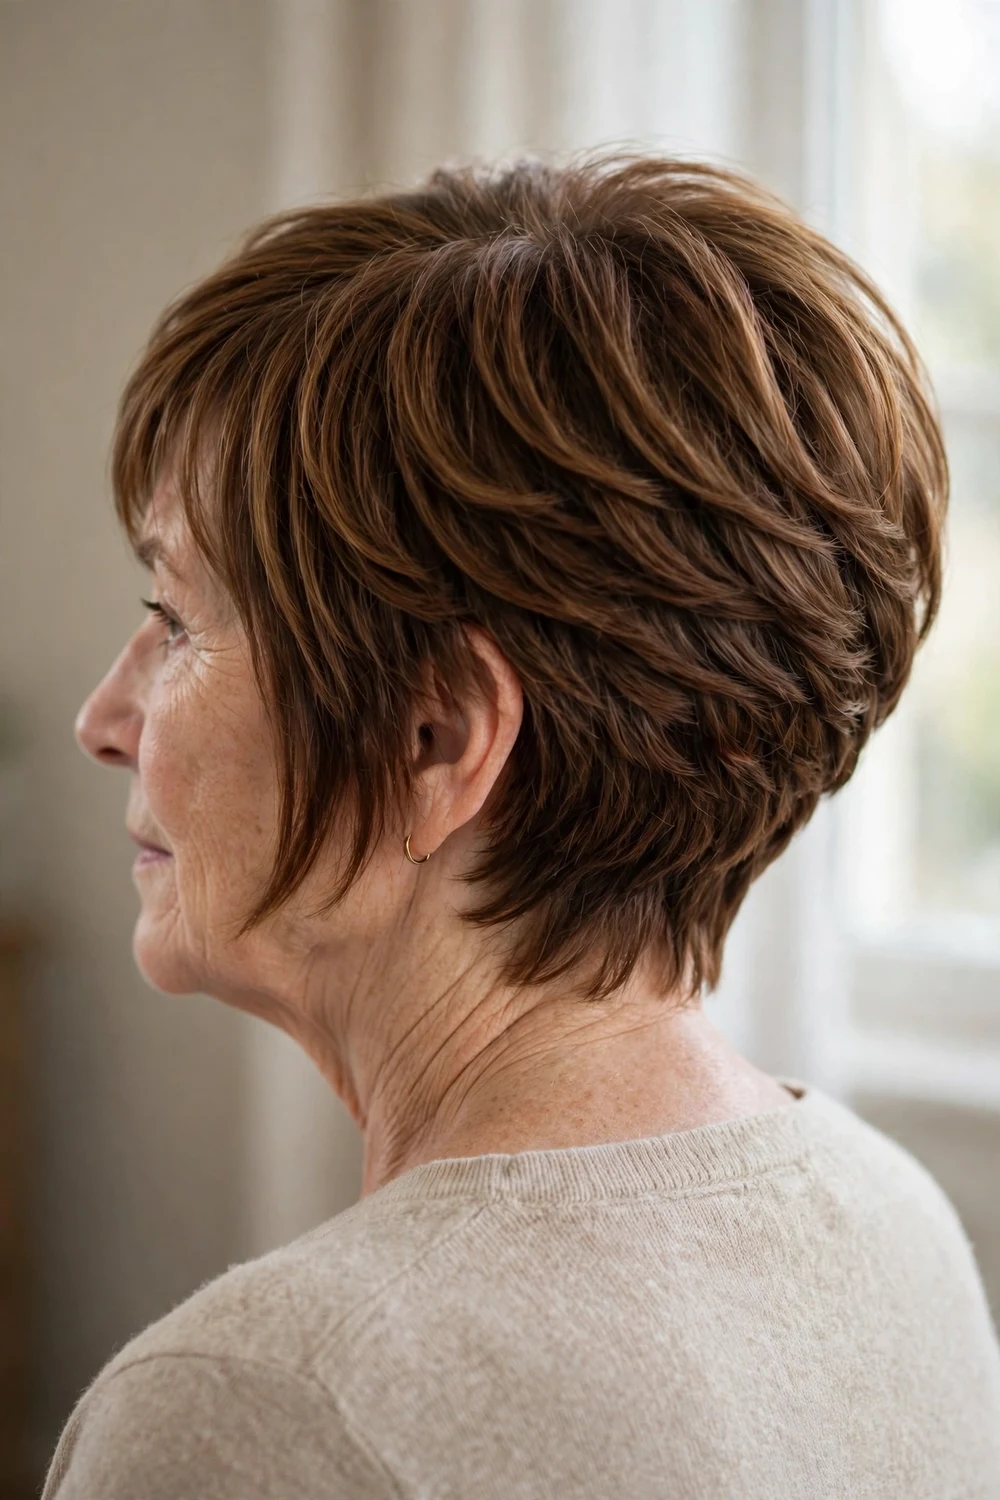
Not ready for a full pixie? The pixie bob keeps the stacked, graduated back of a pixie and adds a little more length through the front and sides. The stacking builds the same crown fullness, while the longer front pieces give you styling options and soften the jawline. It is a comfortable middle ground that still delivers the thin-hair benefits of a short cut. Trim every five to six weeks to keep the back stack from losing its shape.
Try this: Round-brush the back sections under for fullness, and keep smoothing serum only on the front pieces, never on the stacked back where it would weigh things down.
9. Tousled Volume Pixie
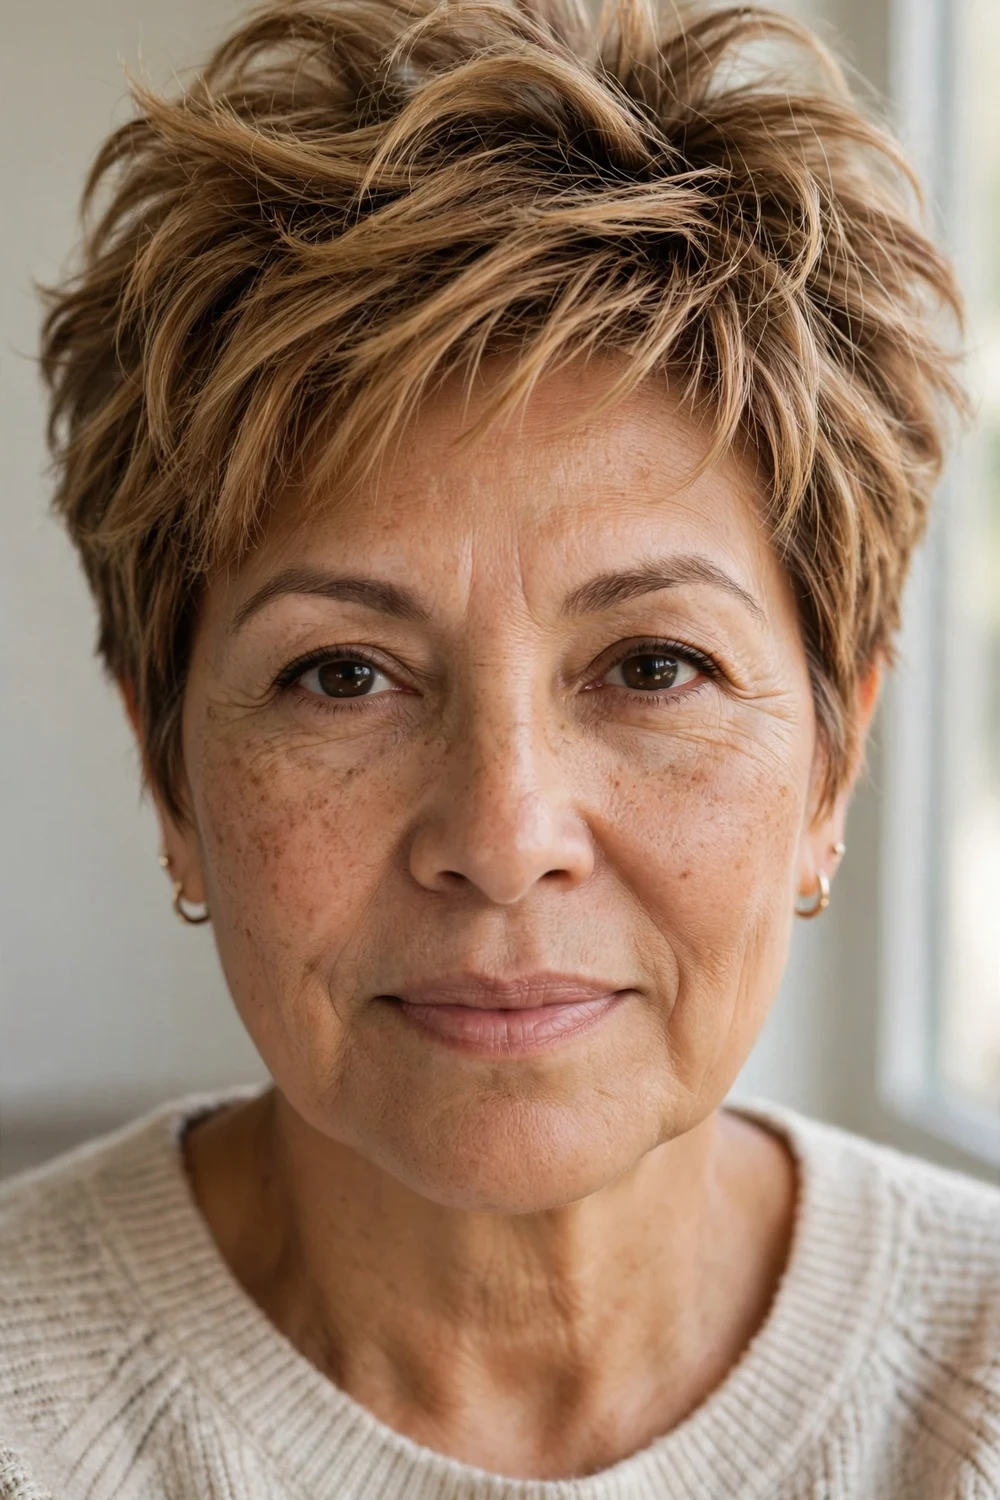
Deliberate messiness is a thin-hair strategy, not a lazy one. A tousled finish lifts the roots in every direction, so no single flat spot shows. The cut underneath uses medium-length layers with a shattered finish, and the styling is the star. This is the pixie to pick if you hate round brushes and precision. It suits active women who need a style that survives wind, hats, and long days without looking ruined.
Try this: Work volumizing mousse into damp roots, then air-dry or diffuse upside down. Finish with dry texture spray at the roots for all-day body.
10. Sleek Side-Parted Volume Pixie
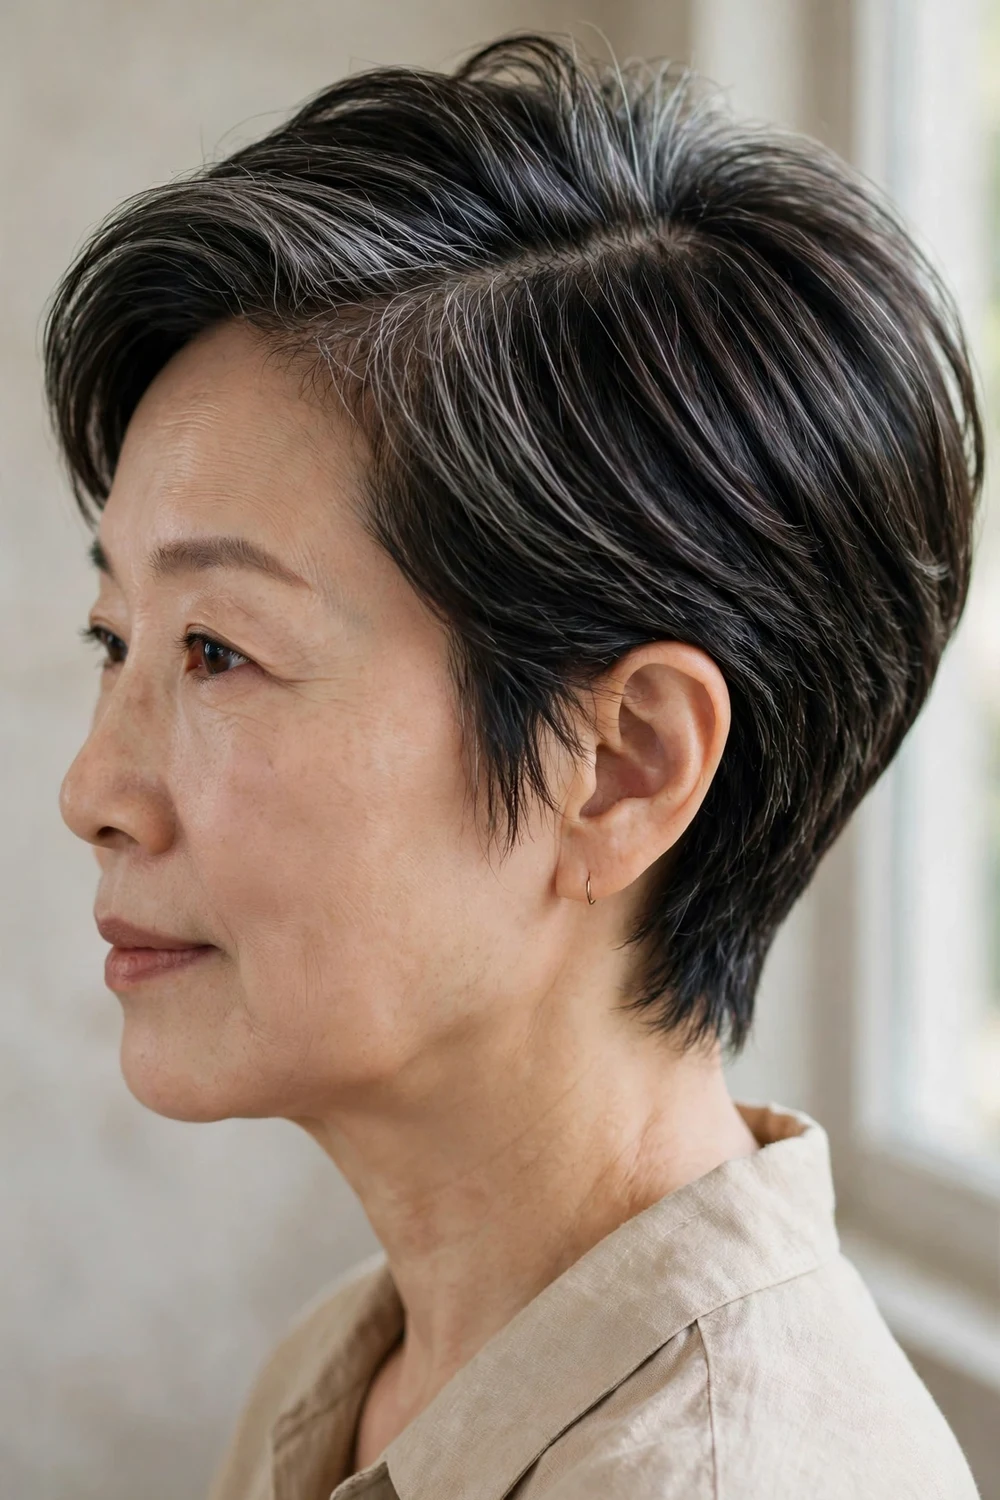
Volume does not have to mean messy. This polished version keeps a deep side part and smooths the lengths while lifting only the roots. The contrast between the sleek surface and the lifted crown makes hair look both refined and full. It works best on straight or slightly wavy hair and on women who dress for work or events regularly. You will need a flat iron or smoothing brush for the lengths and a round brush just at the crown.
Try this: Flat-iron the lengths for smoothness, then go back over only the crown with a round brush and a shot of root spray to build the height.
11. Airy Layered Pixie
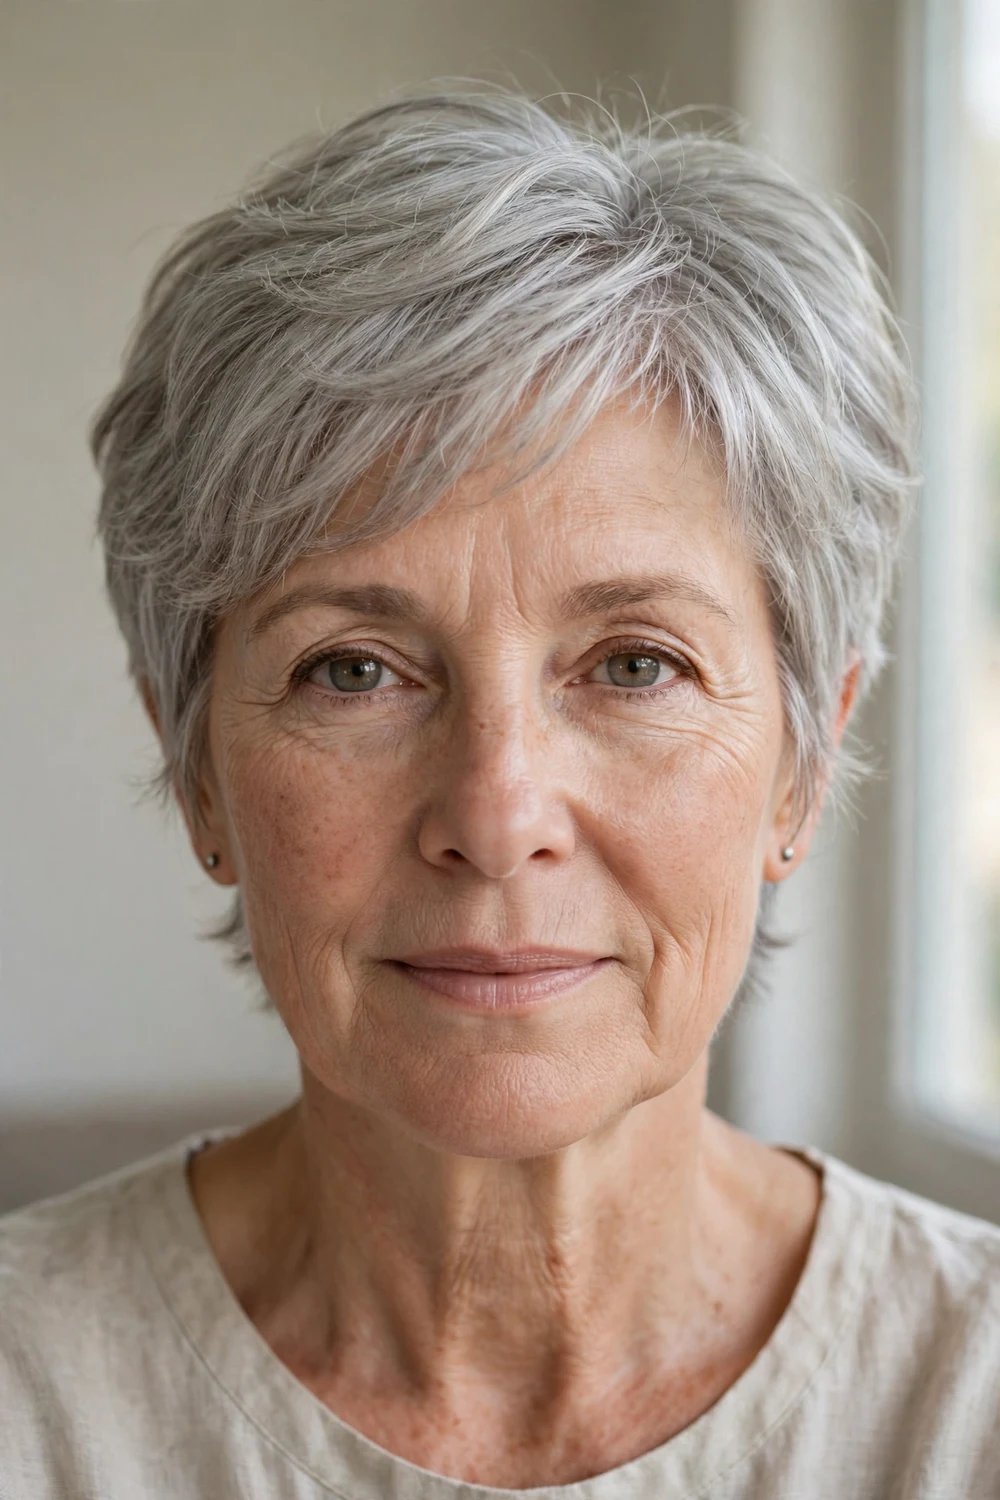
Some cuts add volume by removing weight in exactly the right places. The airy layered pixie uses delicate, widely spaced layers that keep the hair light so it can lift on its own. Nothing is heavy enough to drag the roots down. The result feels fresh and effortless, with soft movement around the face. It is especially kind to very fine strands that collapse under product, since this cut barely needs any.
Try this: Let it air-dry after applying a pea-sized amount of lightweight leave-in. Scrunch the crown once while damp and leave it alone.
12. Undercut Volume Pixie
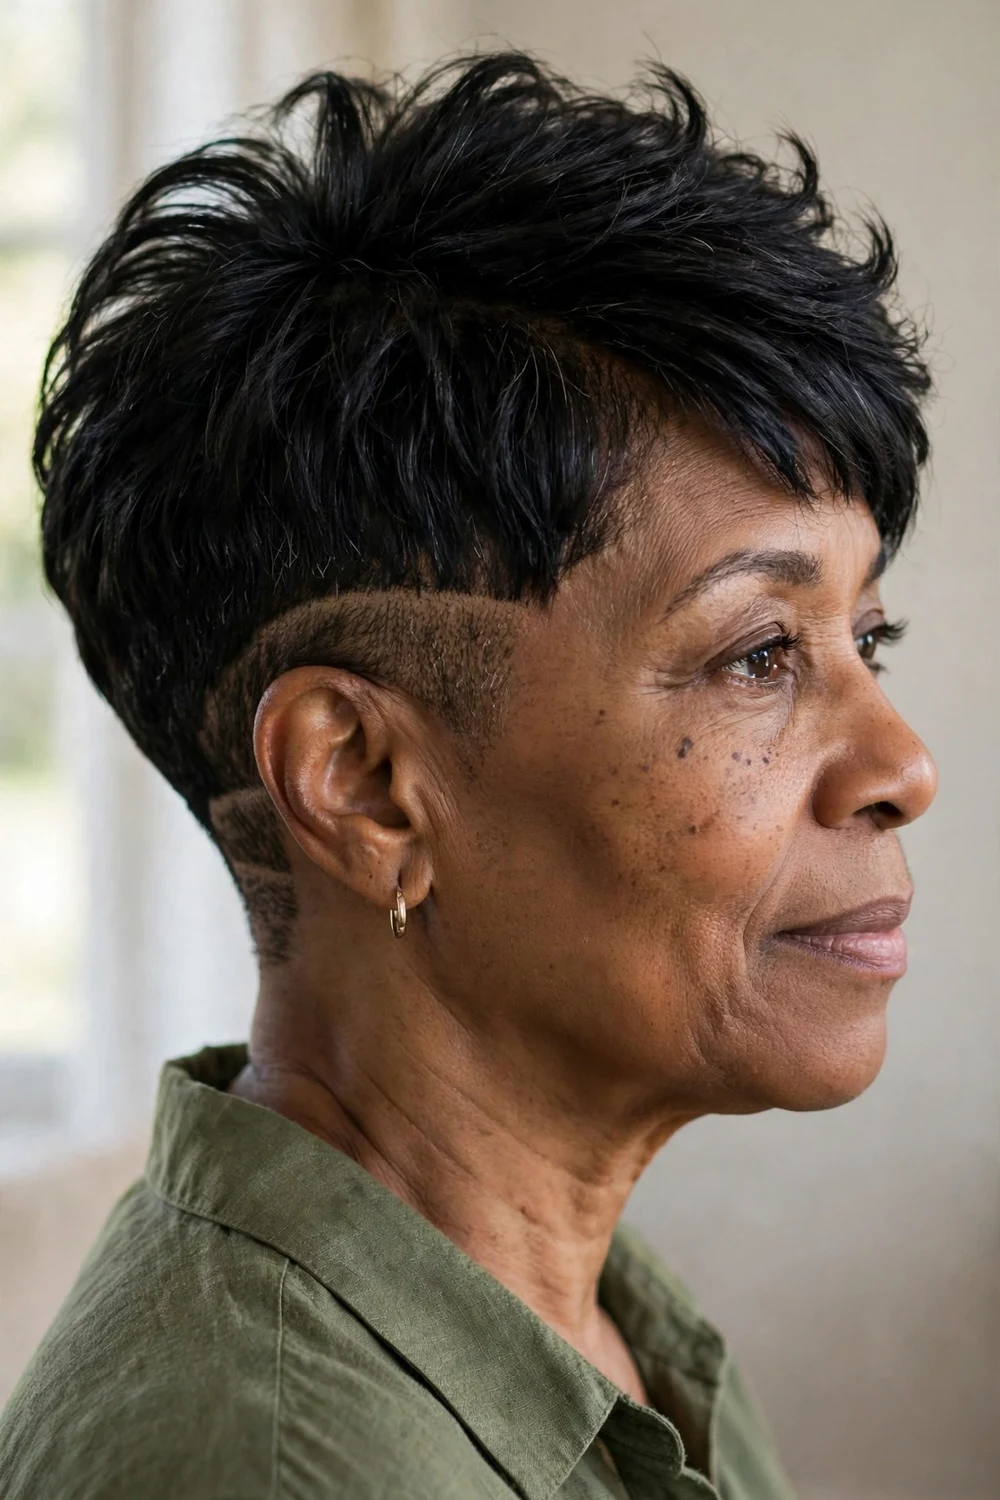
An undercut removes the hair underneath, usually at the nape and sometimes the sides, so the top layers have nothing weighing them down. The contrast between the closely cut underneath and the fuller top makes the top look dramatically thicker. This is a modern, slightly edgy option that works well for women who like their pixies with attitude. The grow-out needs planning, so keep your stylist on a four to five week schedule.
Try this: Style only the top layers with mousse and a round brush. Leave the undercut to air-dry, since product there serves no purpose.
13. Wedge Pixie
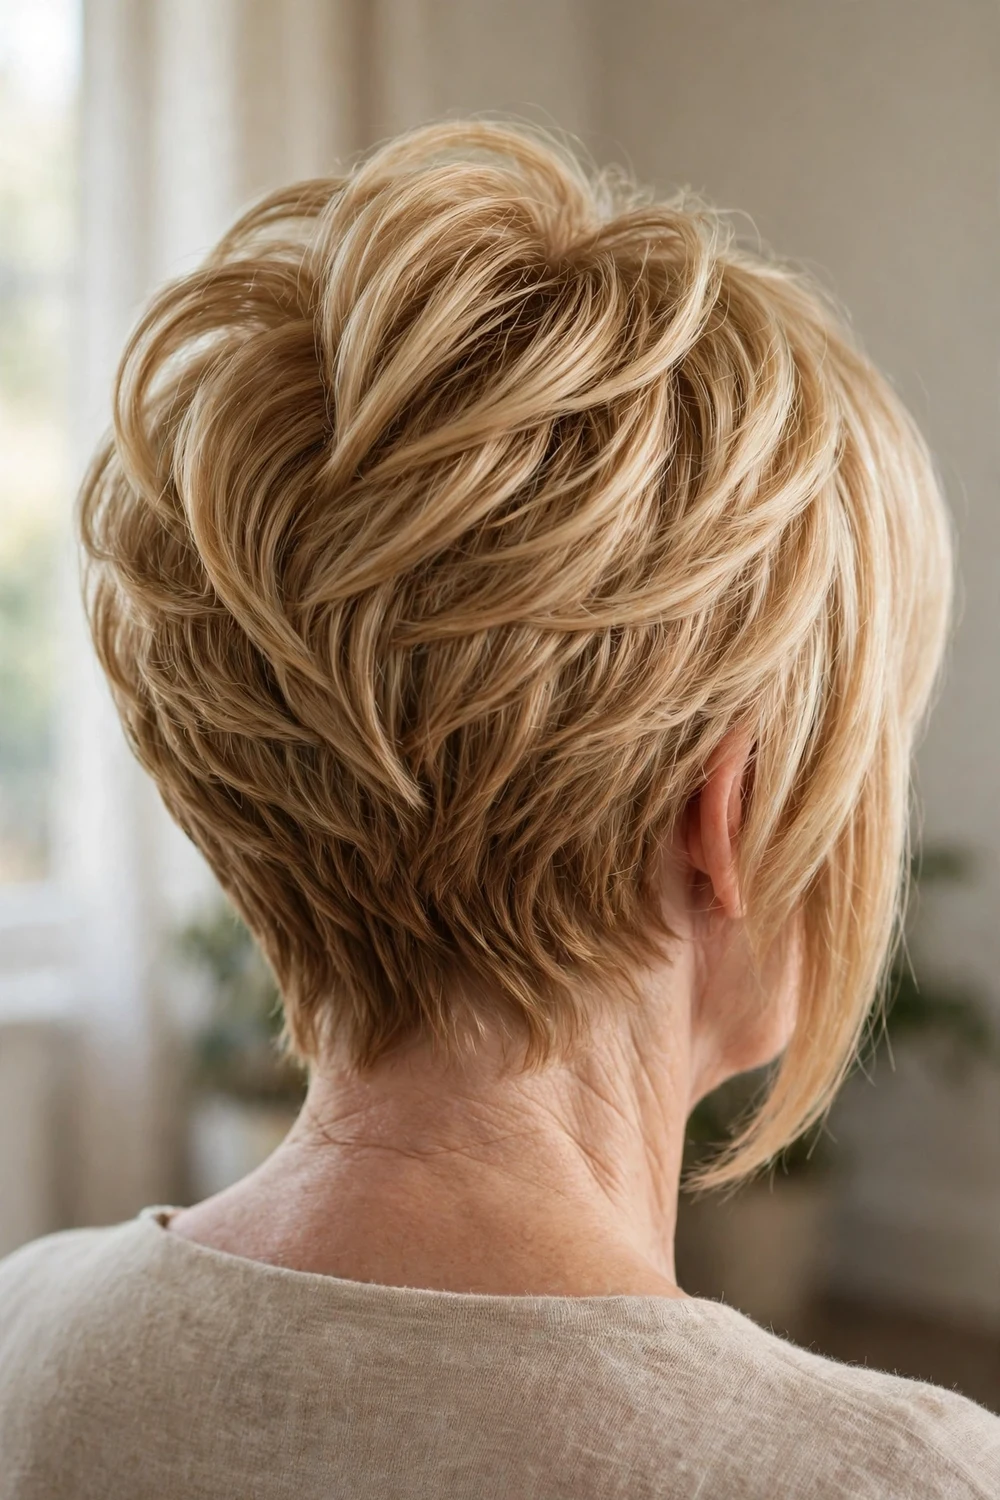
The wedge is a classic for a reason. Stacked layers through the back create automatic crown height, while the front stays sleeker and longer for contrast. On thin hair, the wedge shape directs fullness upward where it matters instead of letting it spread sideways. It suits straight textures best and rewards women who like a defined, architectural shape. Keep the precision sharp with trims every five to six weeks.
Try this: Blow-dry the back sections up and forward with a round brush. Use a smoothing cream only on the front lengths to emphasize the wedge line.
14. Curtain Bangs Pixie
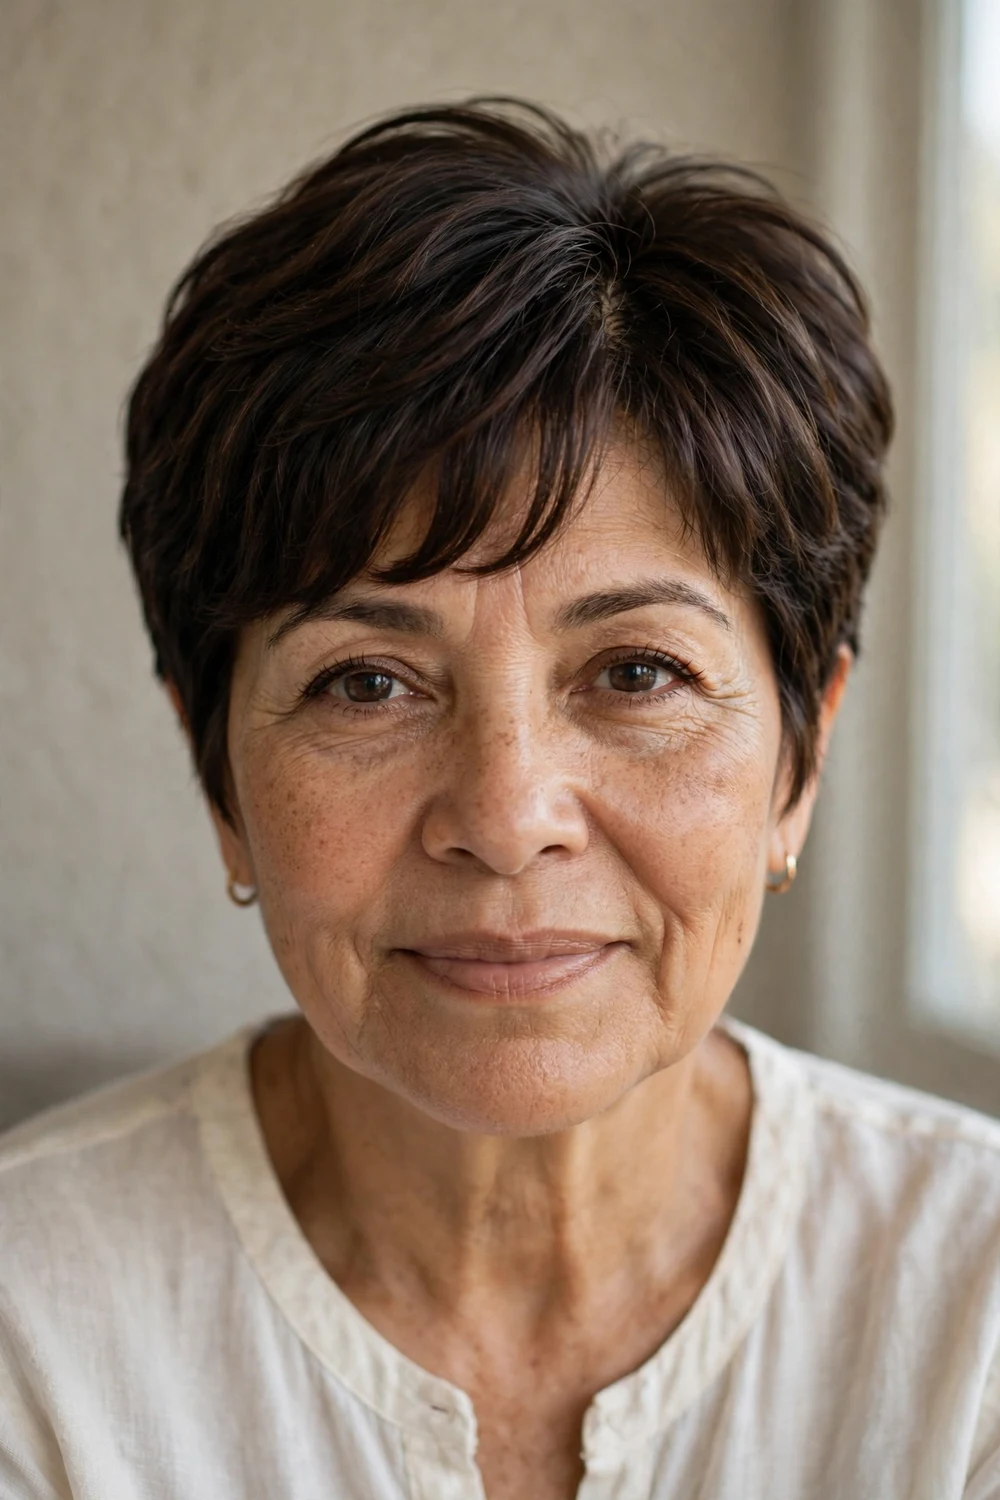
Curtain bangs solve a specific thin-hair problem: the temples and hairline where thinning shows first. The parted fringe fills in that area visually while the pixie crown handles the volume up top. The bangs should be long enough to part and tuck behind the ears when you want them gone. This cut is flattering on higher foreheads and works with glasses, since the soft parting breaks around frames instead of colliding with them.
Try this: Blow-dry the bangs forward first, then split and train each side outward with a round brush. A light root spray at the temples adds fullness.
15. Side-Swept Bangs Pixie
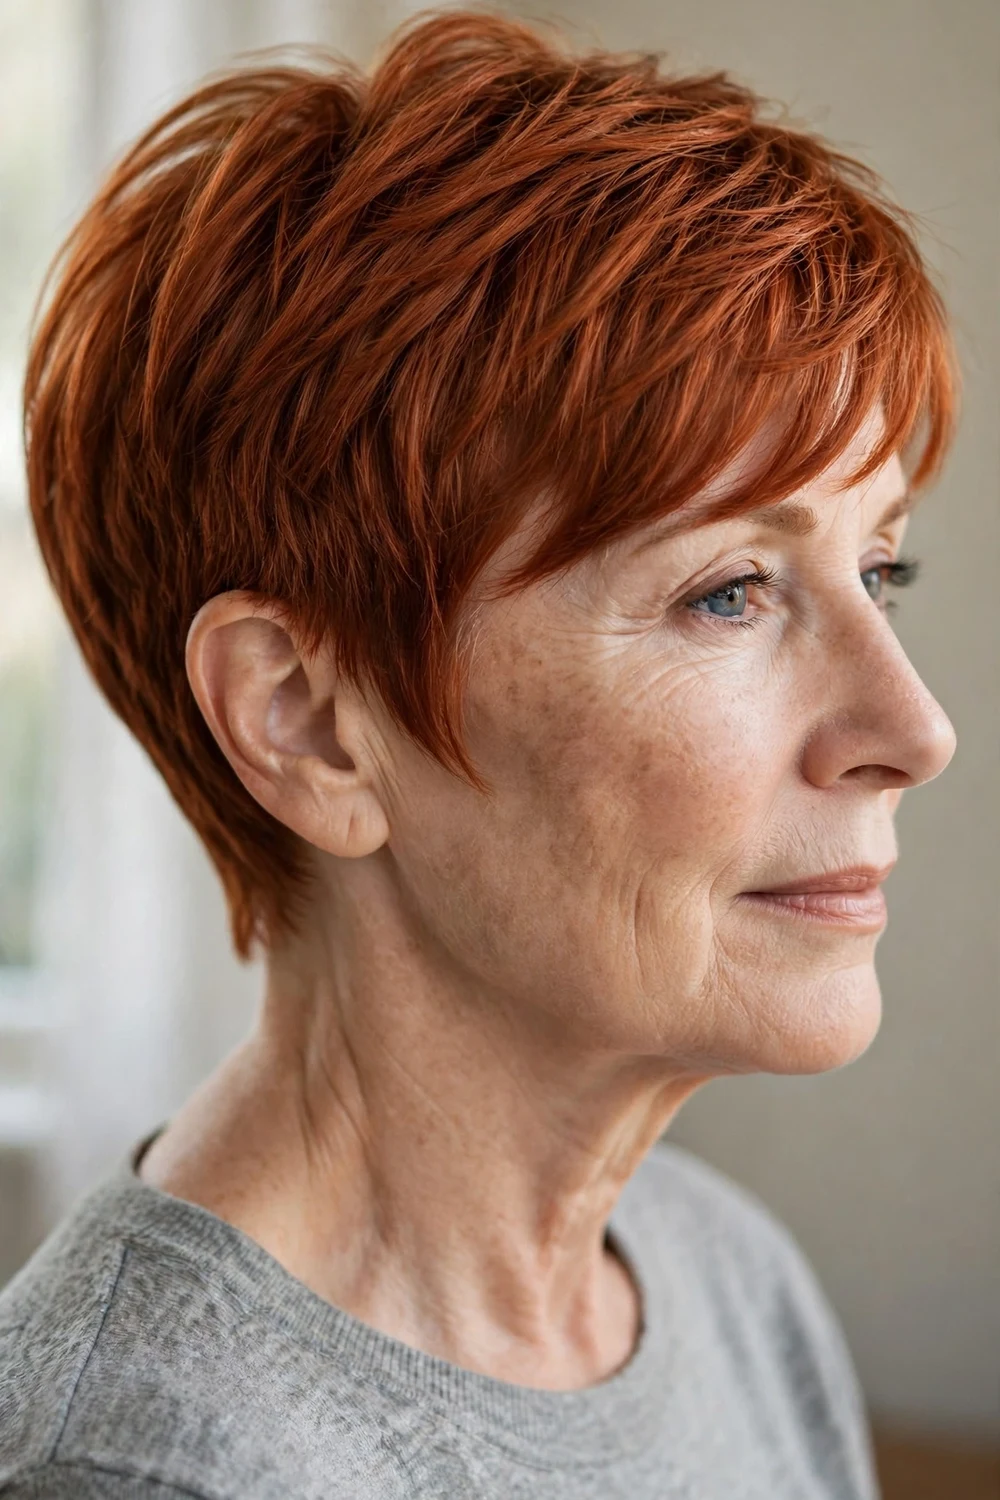
A longer fringe swept across the forehead does more for thin hair than most people expect. It covers the hairline, adds weight where the part would otherwise expose scalp, and gives the whole front of the cut something to do. The sweep direction can also camouflage one thinner temple if you have one. Keep the fringe trimmed every four weeks. Bangs that grow past the brow start to drag the cut down and cost you volume.
Try this: Direct the fringe across with a small round brush, then set it with a touch of hairspray. Tuck one side behind the ear for an easy variation.
16. Wispy Bangs Pixie
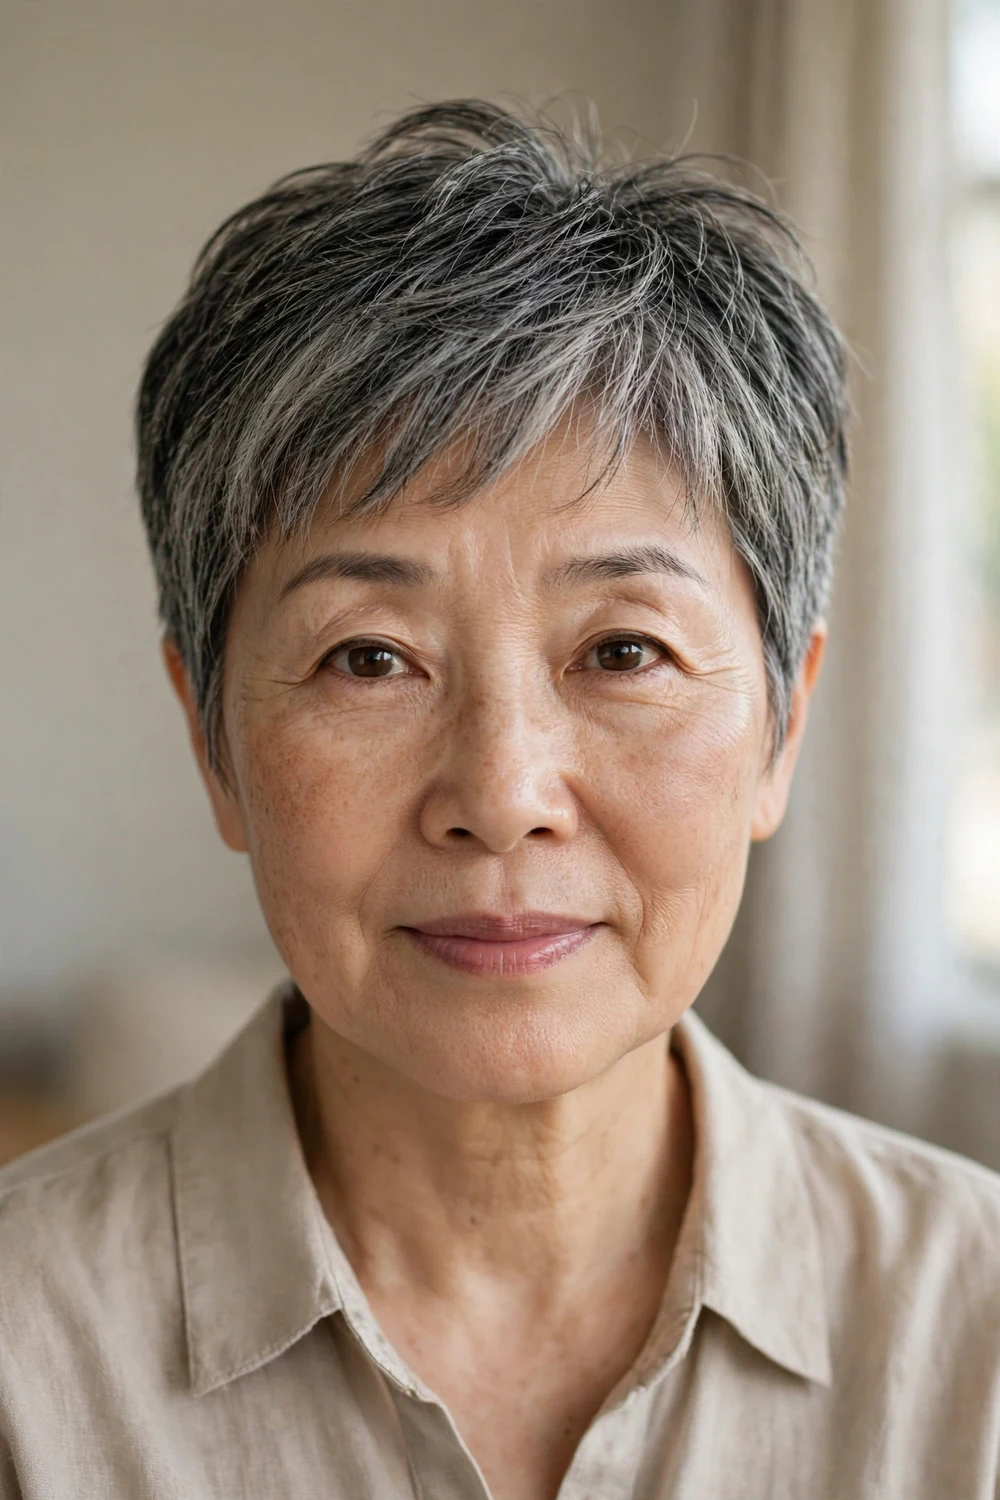
Wispy bangs are the low-commitment fringe. The feather-light strands sit just above the brow and add softness to the forehead without the weight of a full bang. On thinning hairlines, that lightness is an advantage, since heavy bangs can separate and reveal scalp. The rest of the pixie stays piecey through the top and tapered at the sides. A quick bend with a round brush is all the styling the bangs need.
Try this: Bend the wisps slightly forward with a small round brush, then mist with light hairspray. Do not over-style them. Airiness is the point.
17. Brushed-Back Pixie
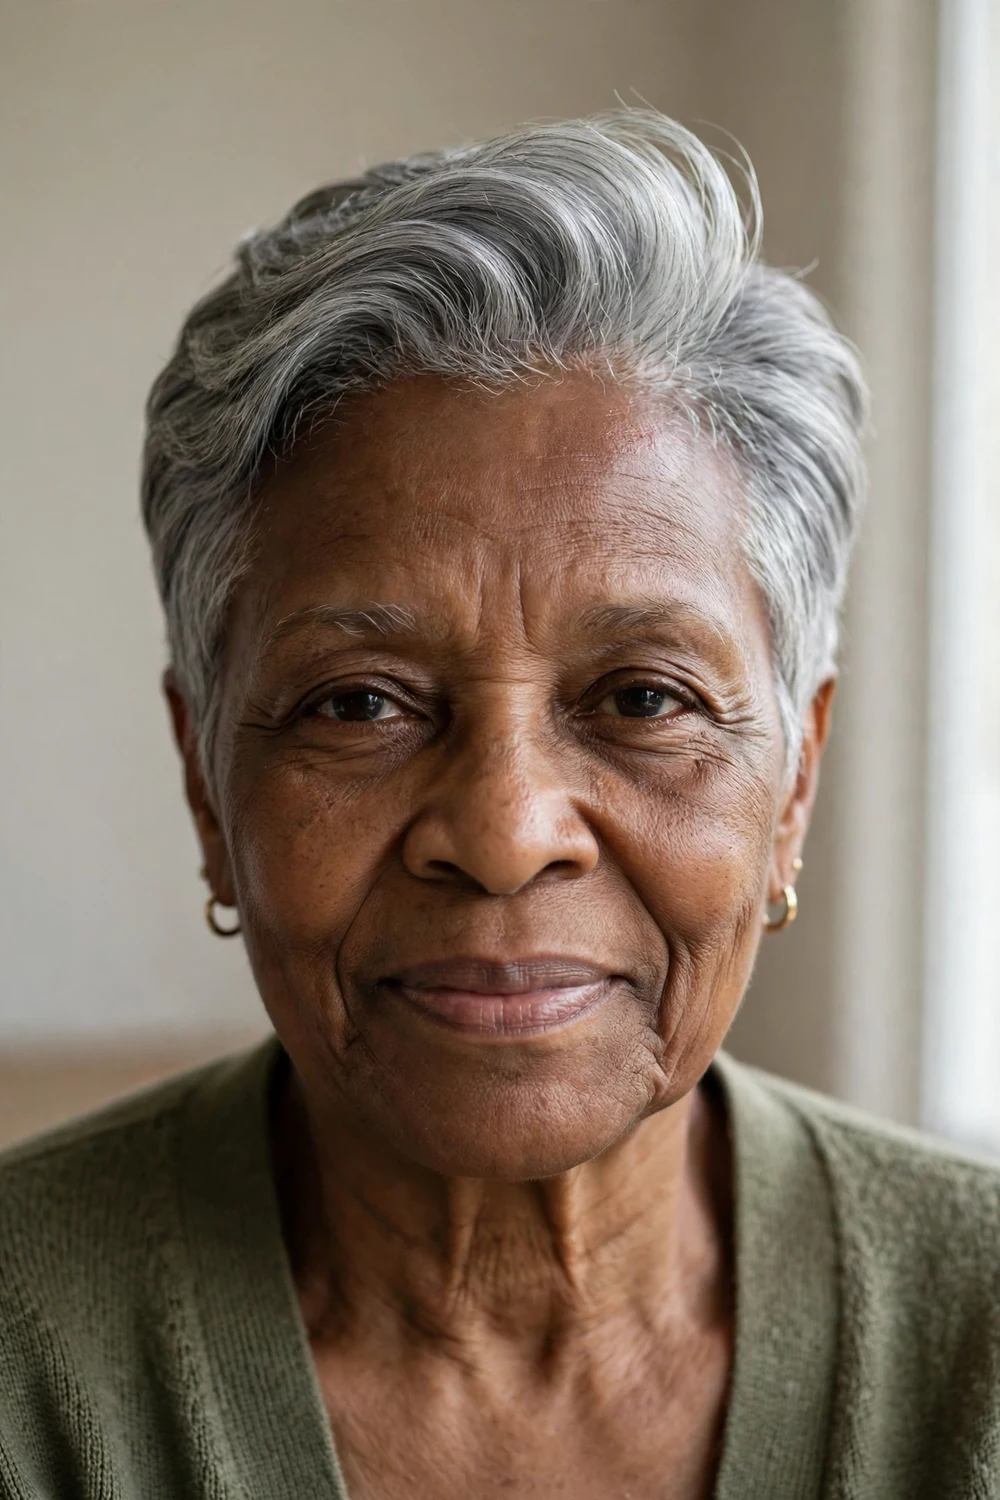
Brushing everything back from the forehead in one direction traps volume along the crown and exposes the face. The style reads confident and clean, and it works well for women with strong cheekbones since nothing hides the face. You need enough length on top to make the sweep, about two to three inches. A smoothing cream through damp hair gives you control, and a medium-hold pomade keeps the direction set through the day.
Try this: Blow-dry everything backward with a vent brush, lifting at the front hairline. Press a small amount of pomade through the top to lock the direction.
18. Pompadour Pixie
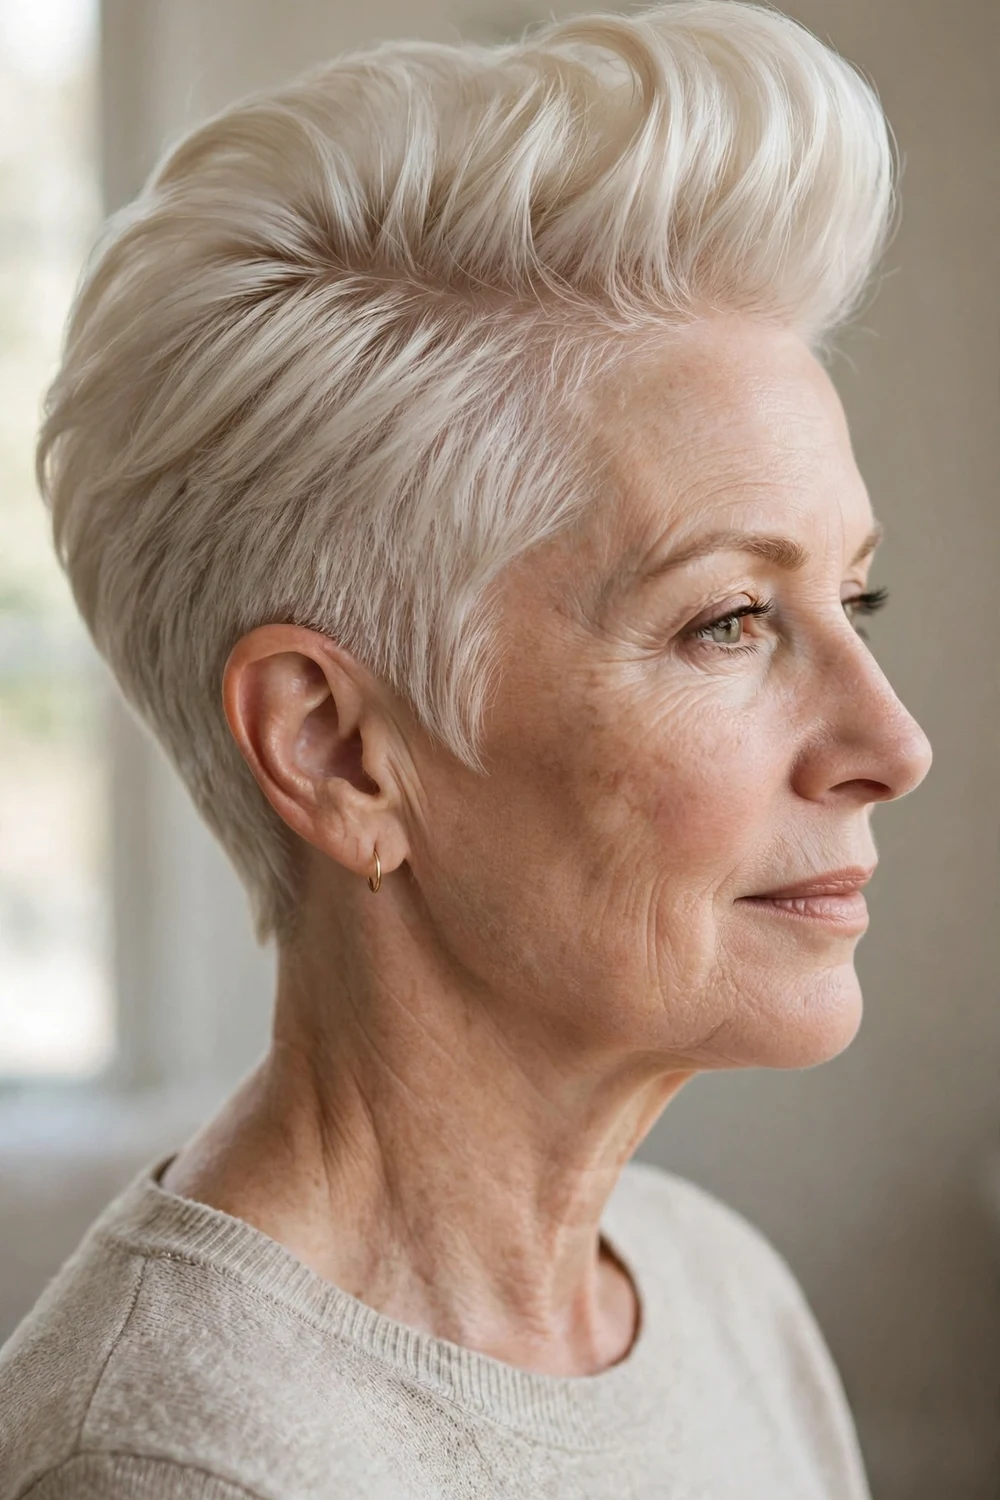
For maximum drama, the pompadour sweeps the top up and back into a defined, lifted shape. The vertical lift is the highest of any pixie on this list, and the cropped sides make it look even taller. This is a statement cut for women who want presence. It needs a strong-hold product and a few minutes of styling, but the payoff is a silhouette no one forgets. Keep the sides tight so the contrast stays sharp.
Try this: Blow-dry the top upward and back while smoothing the sides flat. Lock the shape with a strong-hold hairspray applied in short bursts from a distance.
19. Cropped Crown Pixie
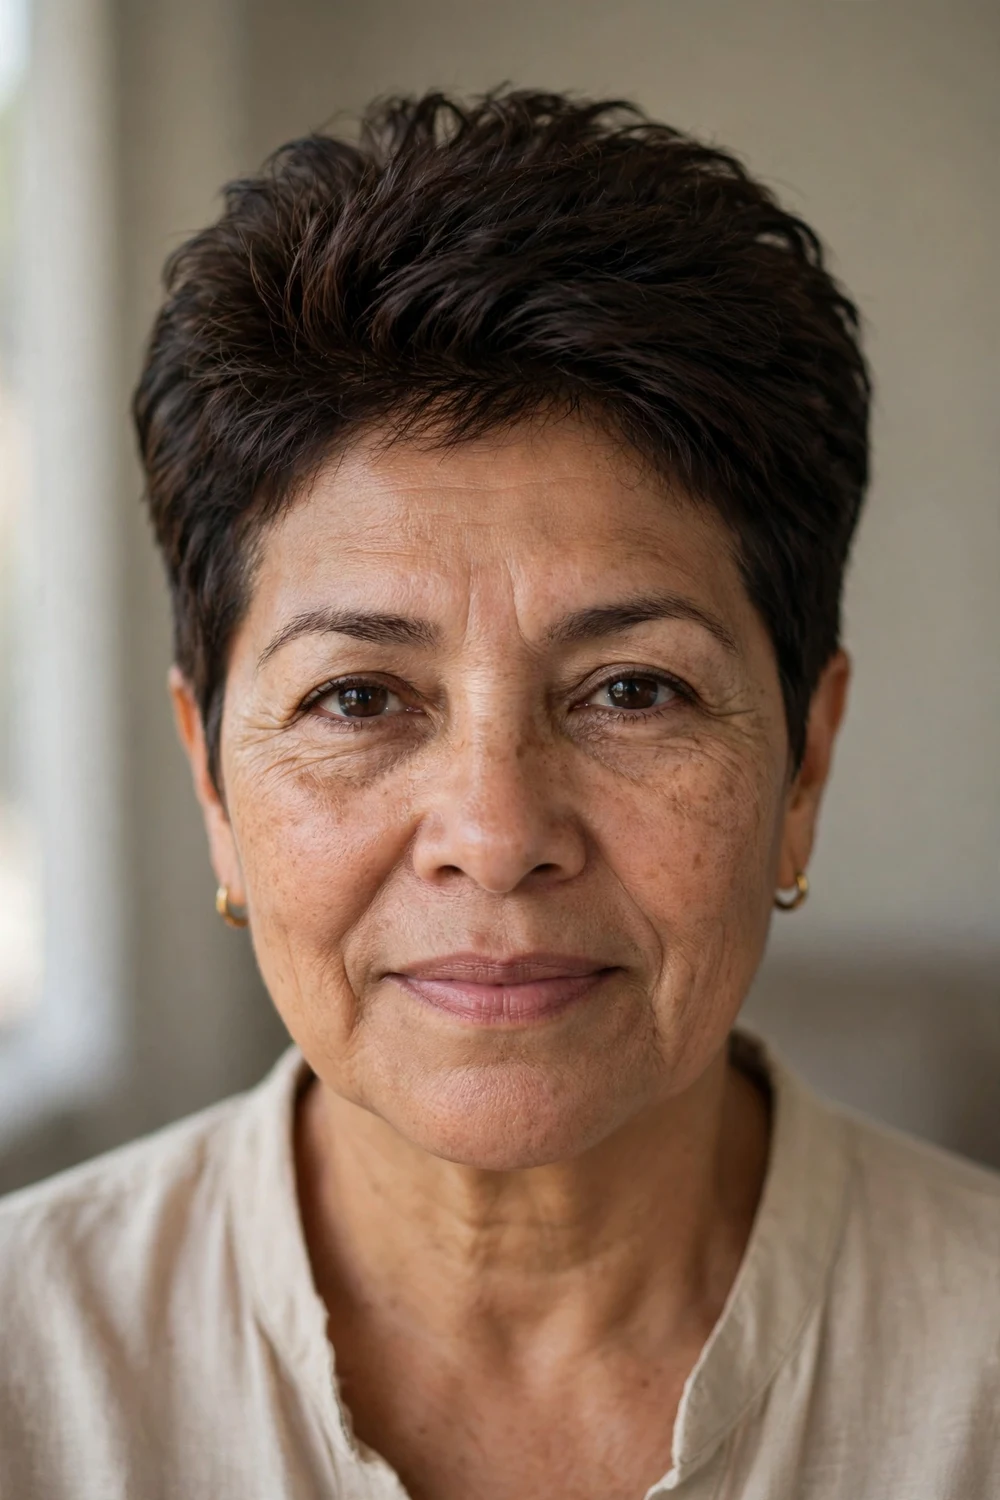
Here the crown is cut slightly longer than the rest of the head, so the volume lives exactly where thin hair needs it. The sides and nape are cropped close and neat, which frames the fuller crown. Matte products work best with this cut because shine products can make thin hair look wet and flat. This is a good choice for women who want crown volume without committing to long top pieces that need daily styling.
Try this: Work a matte clay through the crown with your fingertips, lifting and separating pieces. A root-lift spray at the part line adds extra body.
20. Babylights and Soft Highlights Pixie
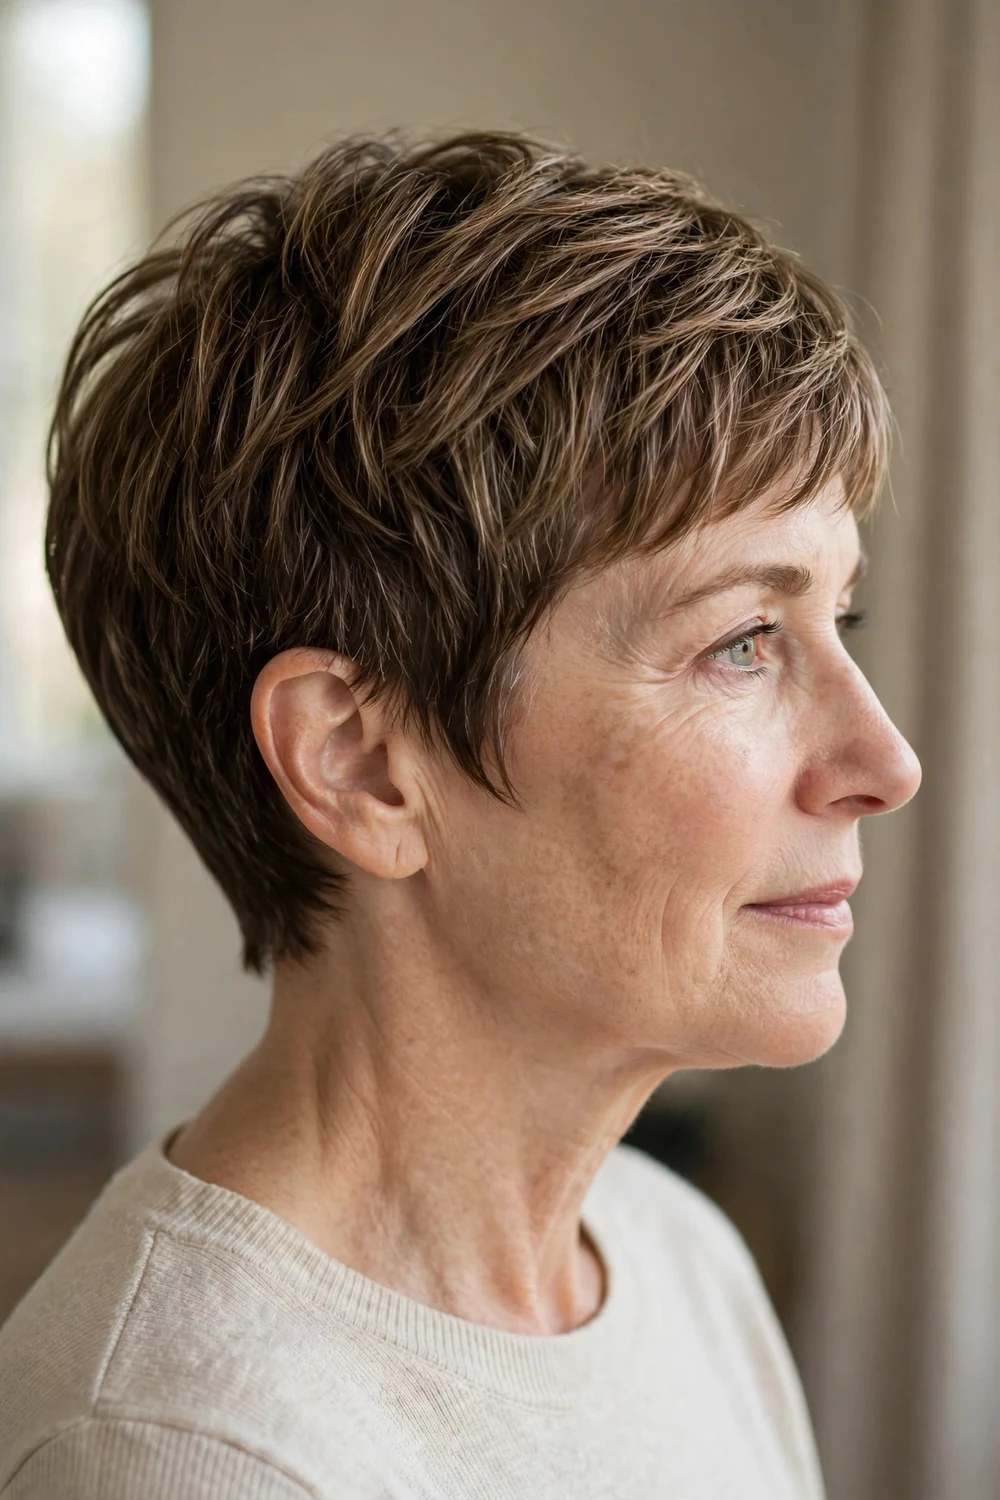
Color is a volume tool. Fine babylights woven through the cut create dimensional variation that makes thin hair look layered even where it is not. The lightening process also swells each strand slightly, which adds real, measurable thickness. Keep the highlights close to your natural shade for low-maintenance grow-out. A gloss treatment every two months refreshes the tone without another full color appointment.
Try this: Ask your colorist for babylights concentrated through the crown and part line, where dimension creates the strongest illusion of density.
21. Lowlights and Root Fade Pixie
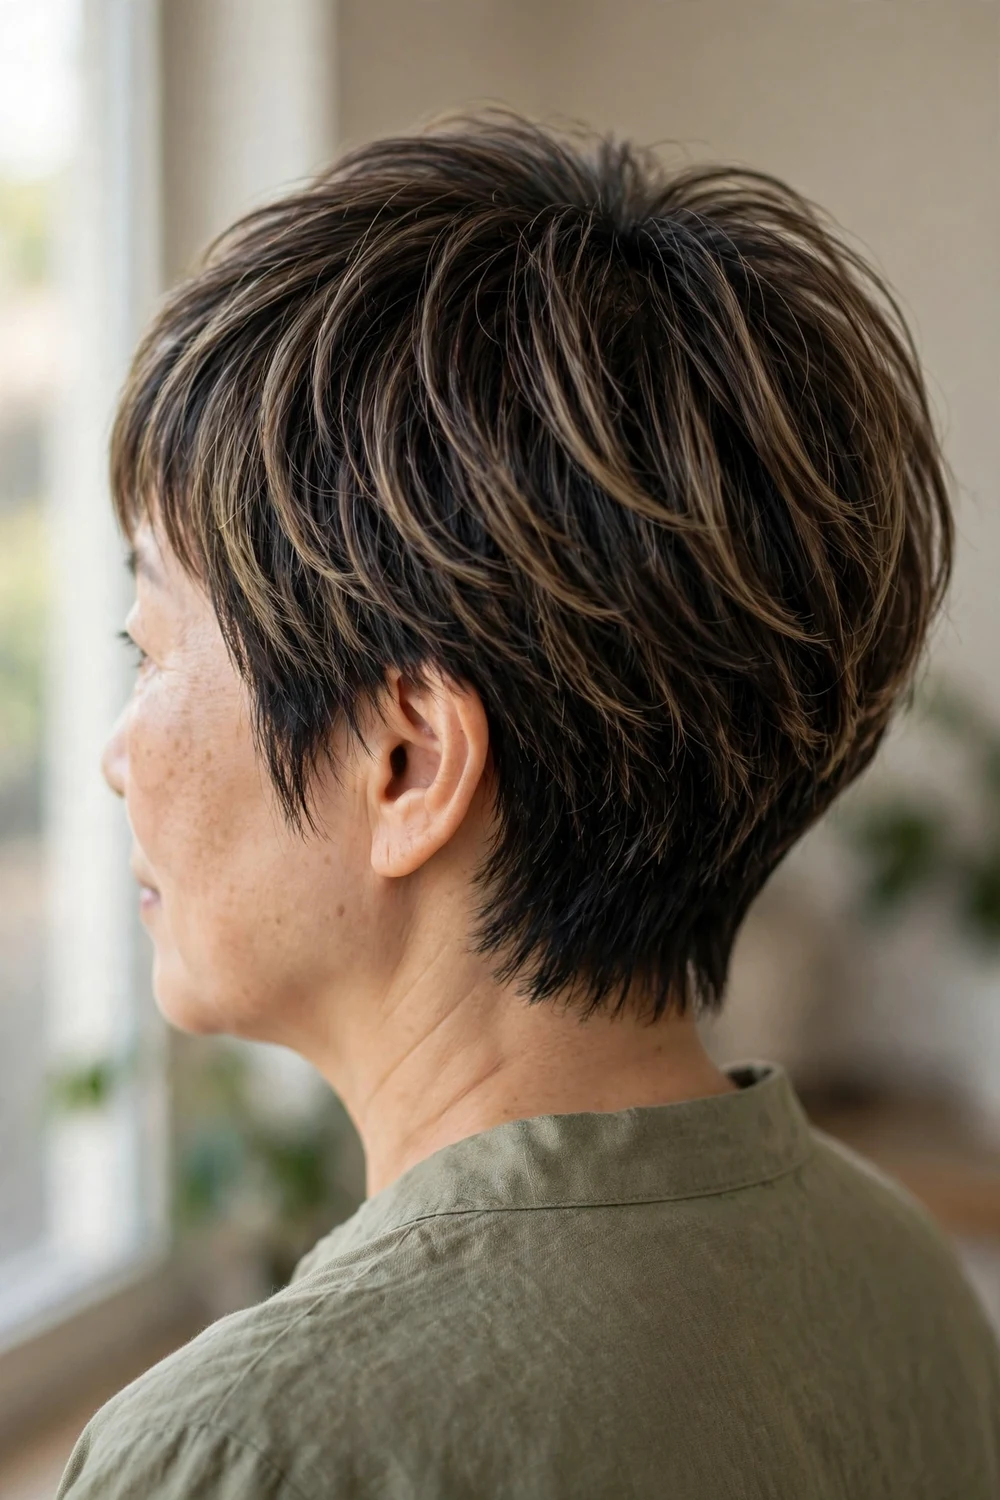
Darker tones underneath lighter ones create depth, and depth reads as thickness. Lowlights or a soft dark root fade through a pixie make the scalp far less visible, which is the real trick for thinning hair. The contrast also makes the lighter pieces on top pop with more apparent volume. Keep the contrast soft rather than striped. A natural-looking root shadow grows out gracefully and extends the time between appointments.
Try this: Ask for a root smudge one to two shades darker than your ends. It camouflages sparse roots and adds instant depth to any pixie shape.
22. Money Piece Pixie
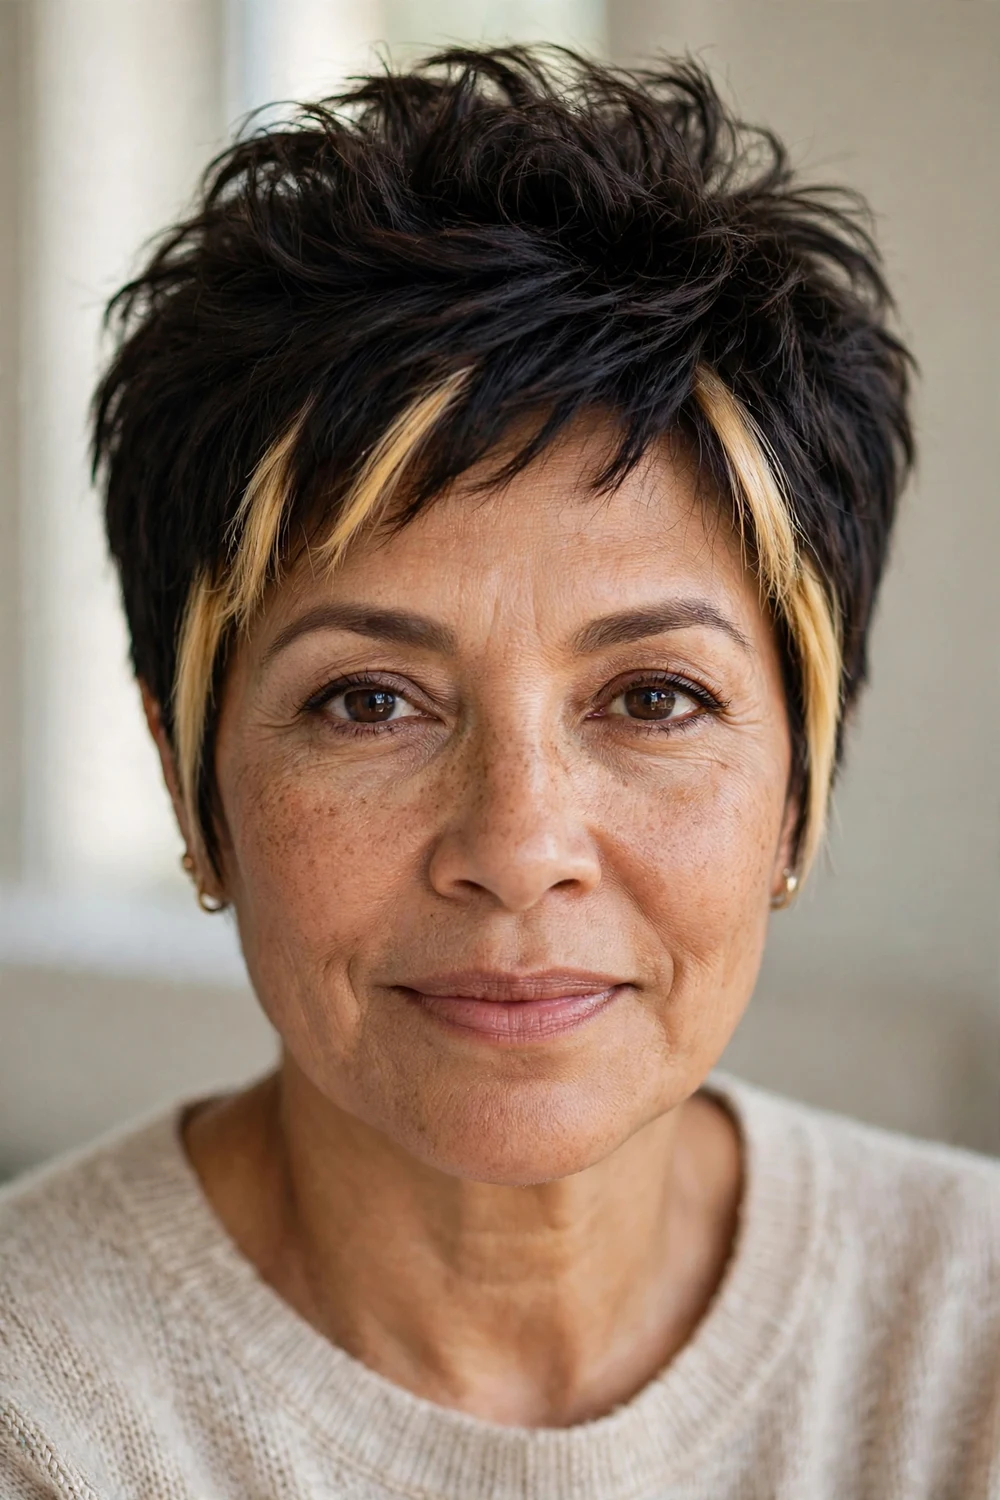
Two brighter face-framing strands do outsized work on a pixie. The money piece draws the eye to the face and creates the illusion of density exactly where people look. It also brightens mature skin in a flattering way. The lightened sections need protection, so use a bond-building treatment weekly and a toner every six weeks to keep the contrast clean instead of brassy.
Try this: Pair the money piece with any structural volume element on this list, like a stacked crown or textured top, for a compounded fullness effect.
23. Asymmetrical Pixie
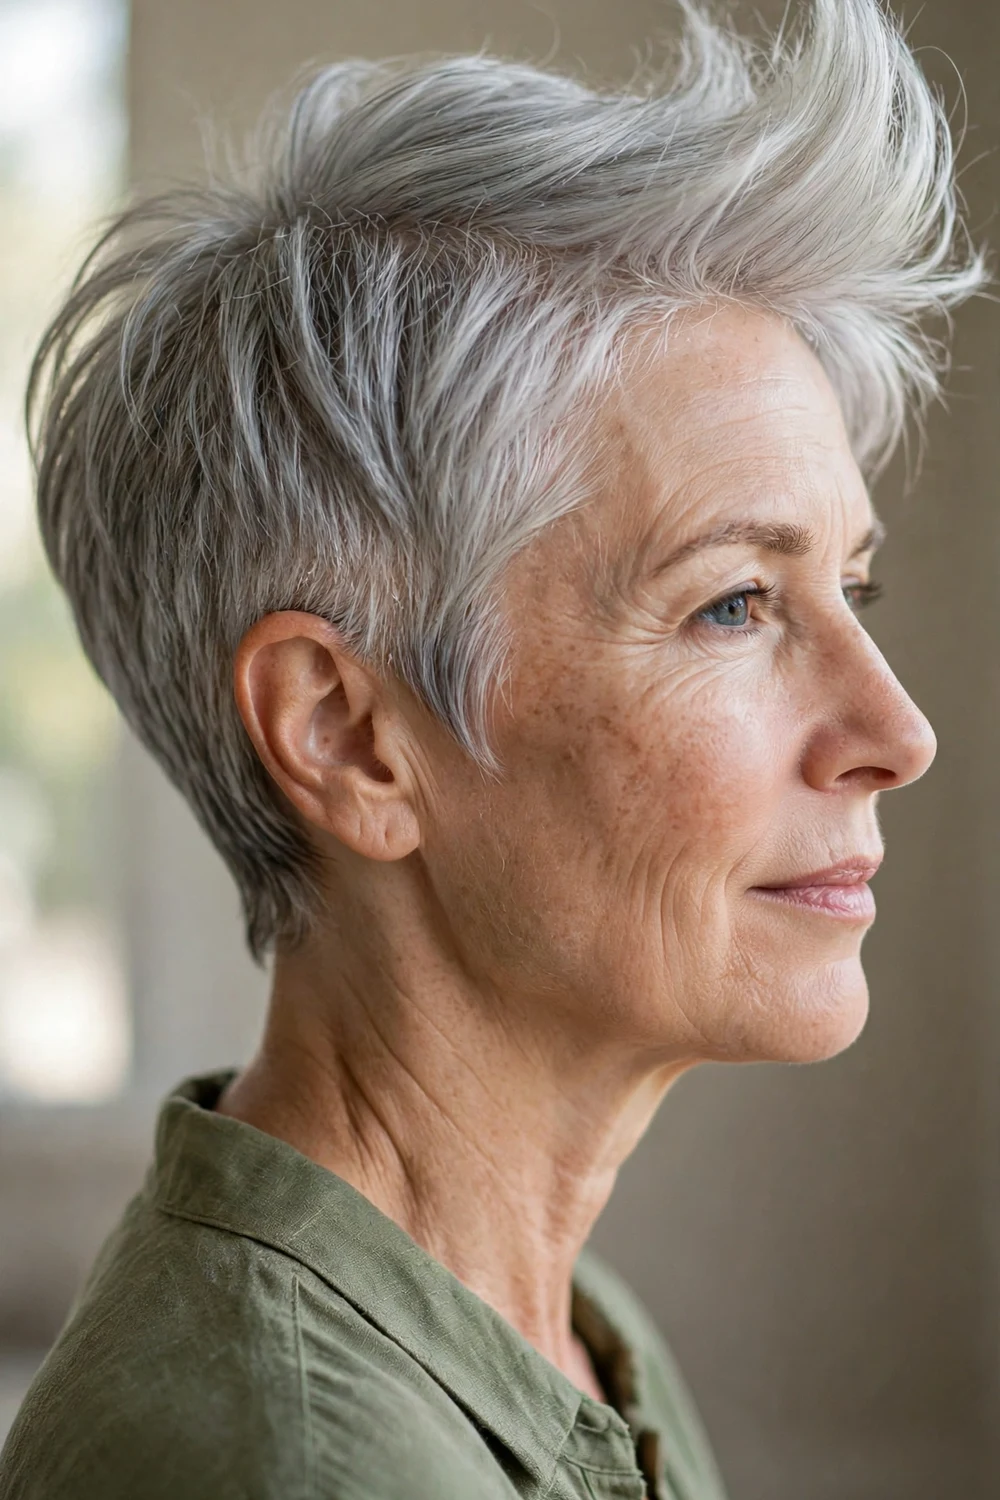
Cutting one side slightly longer than the other creates deliberate imbalance, and that imbalance reads as volume. The longer side can be styled with lift while the shorter side tucks behind the ear for a sleek contrast. Asymmetry also distracts from uneven thinning, since the eye follows the shape instead of scanning for sparse spots. This cut suits women who like a modern edge without going full undercut.
Try this: Style the longer side with a small round brush for maximum lift. Keep the shorter side flat behind the ear to emphasize the contrast.
24. Long Pixie with Bangs
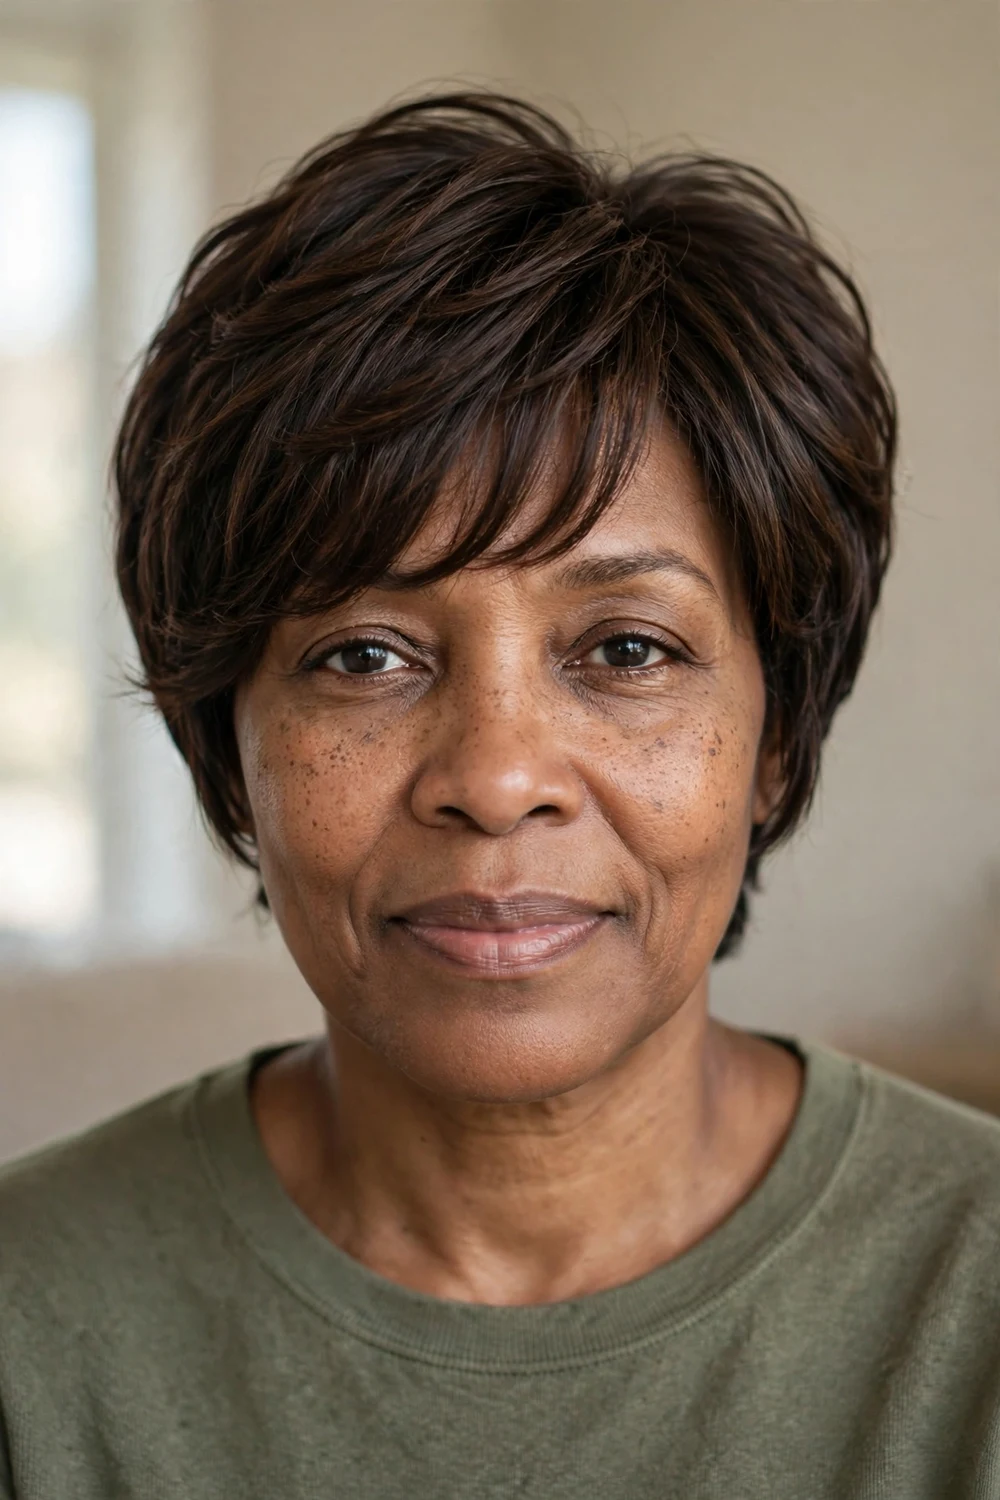
The long pixie is the transition cut for women nervous about going short. The extra length through the top and front gives you coverage and styling flexibility while still removing enough weight to lift the roots. Bangs add forehead coverage and frame the eyes. This version works on round faces too, since the longer pieces can be directed to create vertical lines that lengthen the face.
Try this: Use a volumizing mousse from roots to ends on damp hair, then blow-dry with a vent brush, directing the front pieces diagonally for softness.
25. Baby Bangs Pixie
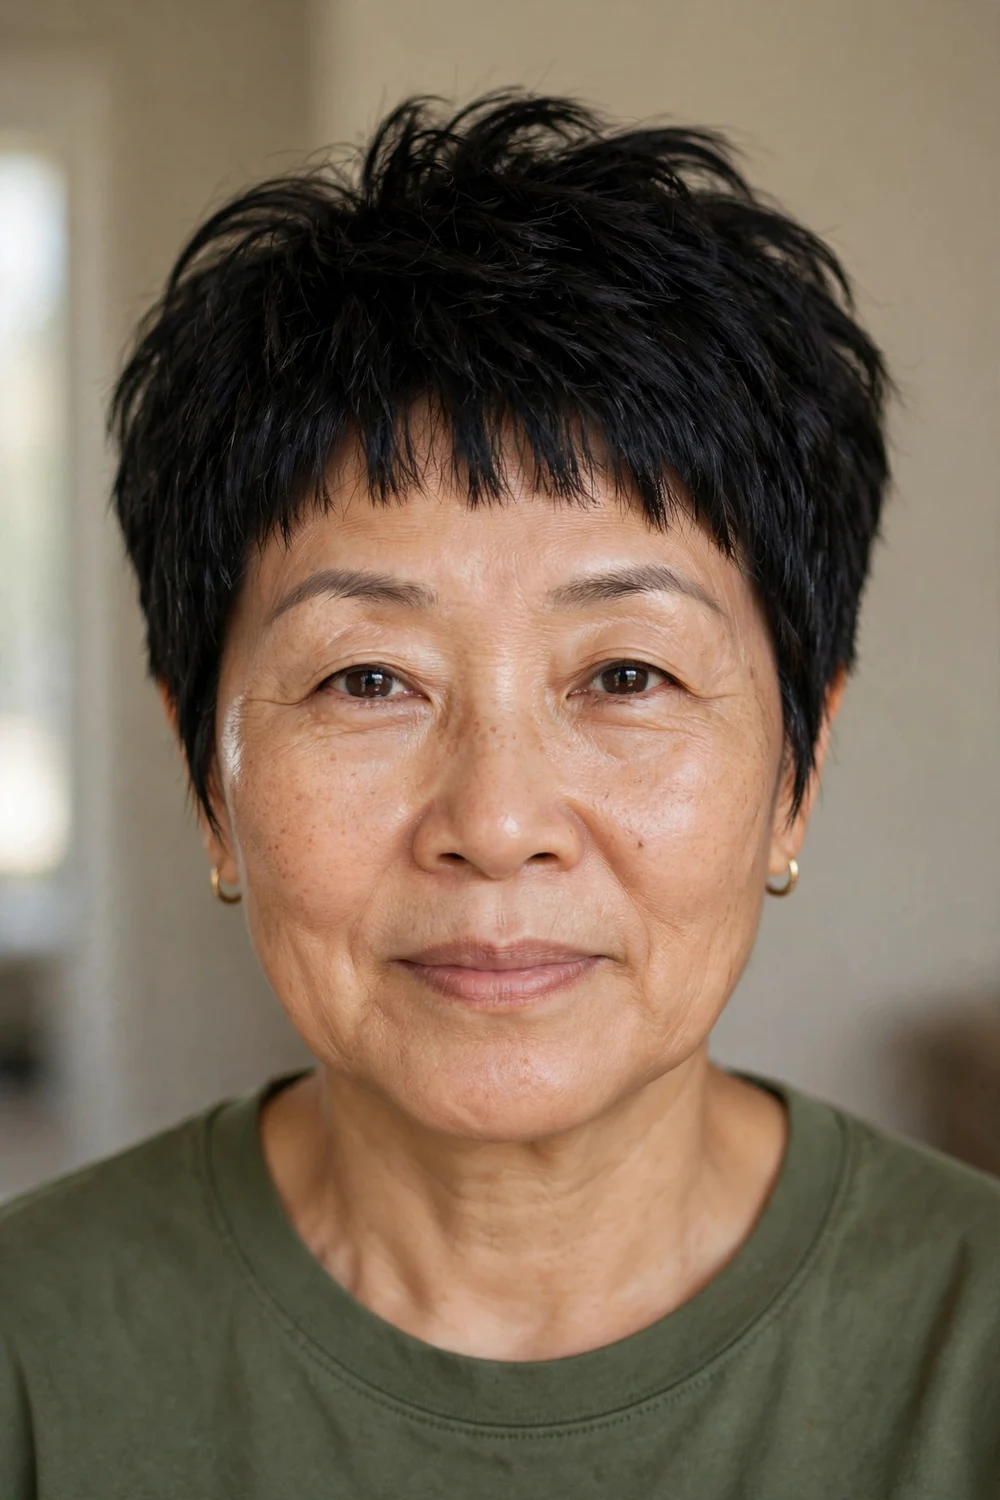
Baby bangs, cut well above the brow, bring all the attention to the eyes and cheekbones. On thin hair they work because the short fringe needs very little density to look intentional. The cut reads youthful and a little bold, which is a fun direction after 50. Pair it with a textured crown so the short fringe has a fuller top to balance it. Oval and square face shapes carry this look best.
Try this: Keep the baby bangs piecey with a tiny amount of texture cream. Blow-dry them straight down with a small brush for a clean edge.
26. Curved Top Pixie with Defined Texture
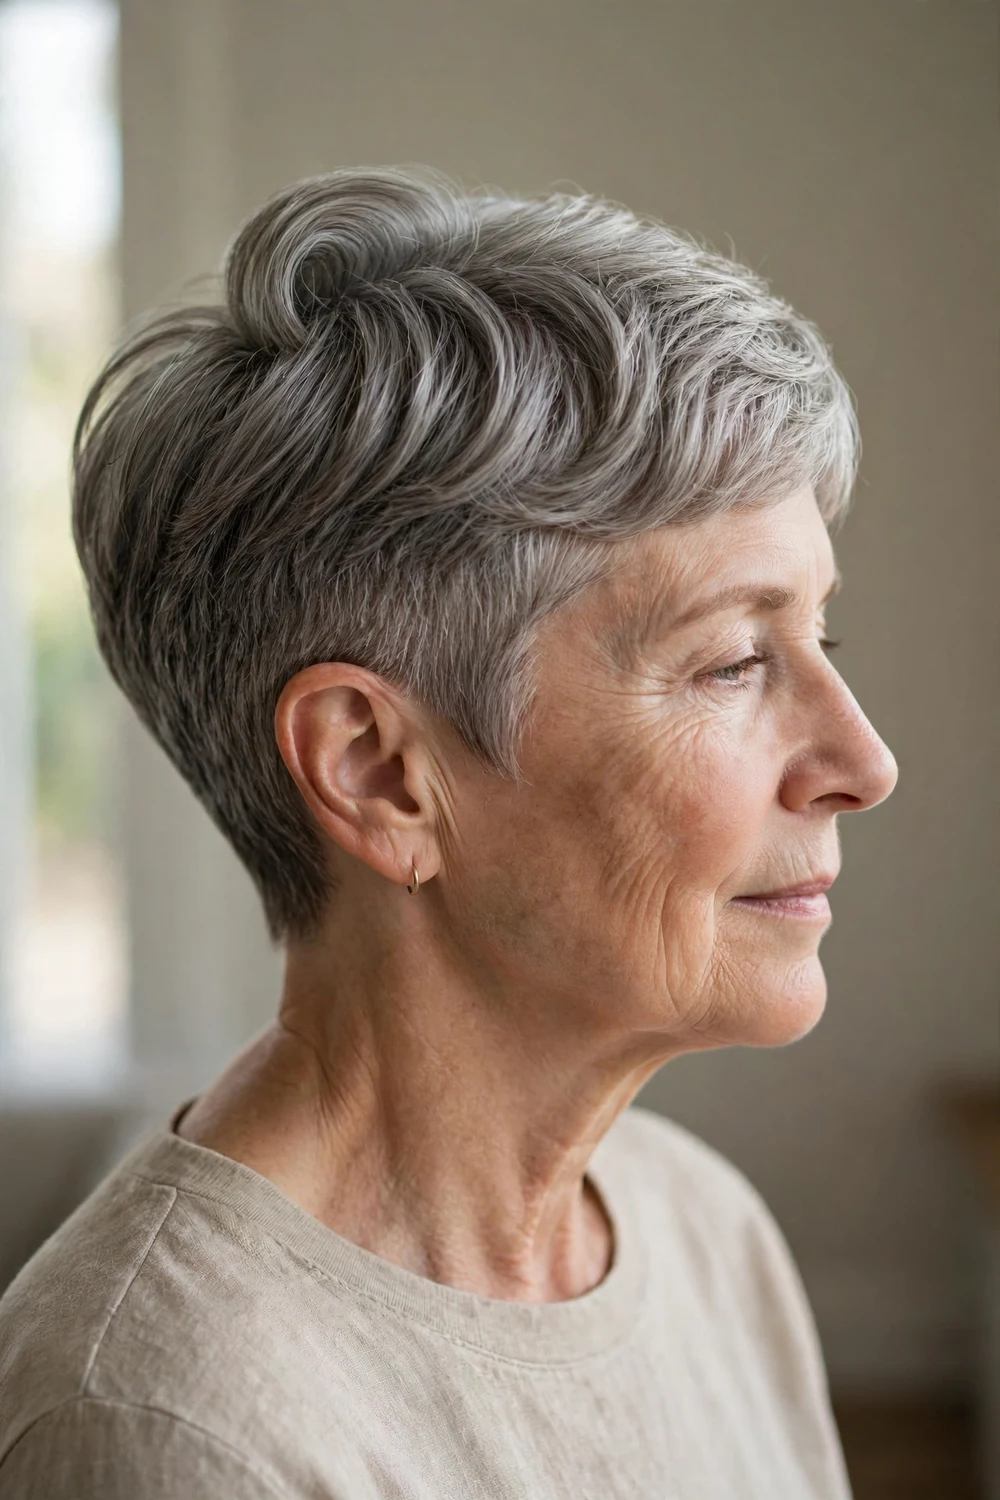
The curved top pixie is sculpted into a rounded shape with subtle lift built into the silhouette. Sculpted texture through the crown creates fullness that holds its form, while close-cropped sides keep the shape clean. A darker base color underneath adds depth that makes fine hair look denser. This cut needs some styling to keep the curved shape, so it suits women who enjoy a few minutes with a brush and dryer.
Try this: Blow-dry the crown in sections with a round brush, rolling each section under to build the rounded shape. Set with flexible hairspray.
27. Short Wash-and-Go Pixie Crop
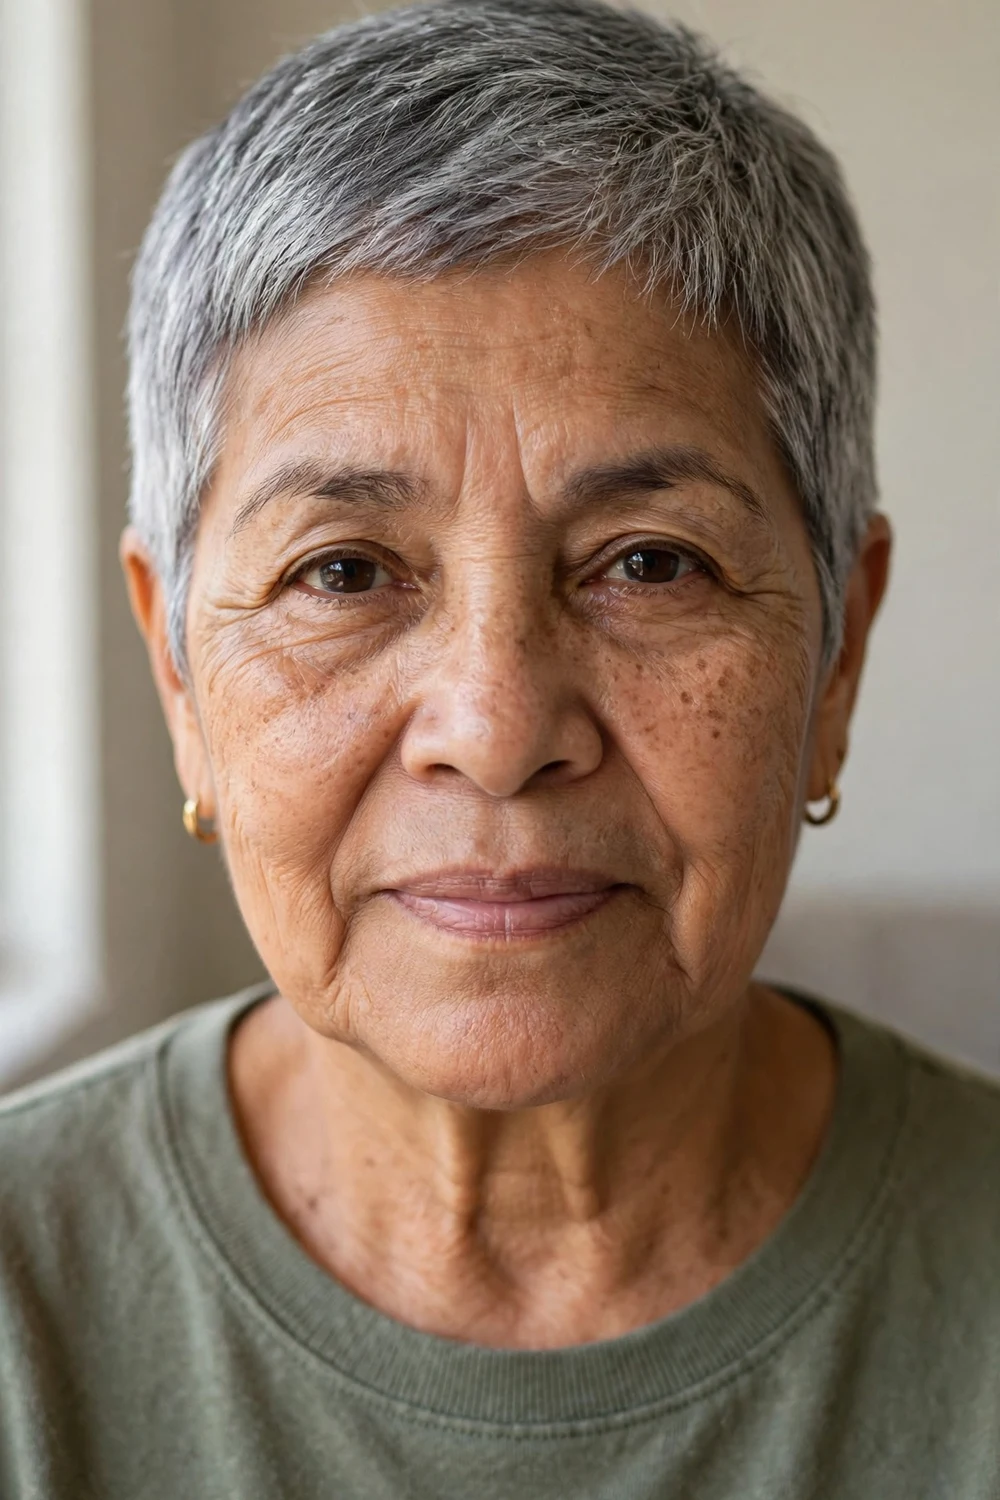
Some days you want a cut that asks nothing of you. The short crop keeps length minimal so the hair lifts at the roots naturally and holds its shape with almost no styling. The cut itself does the volume work through short, supportive layers. It is ideal for busy schedules, travel, and anyone tired of long styling routines. Because the shape is simple, precision matters. Book trims every four weeks to keep it sharp.
Try this: Towel-dry, apply a light-hold mousse, and go. If the crown needs a boost, blast it with the dryer upside down for 60 seconds.
28. Spiky Androgynous Pixie
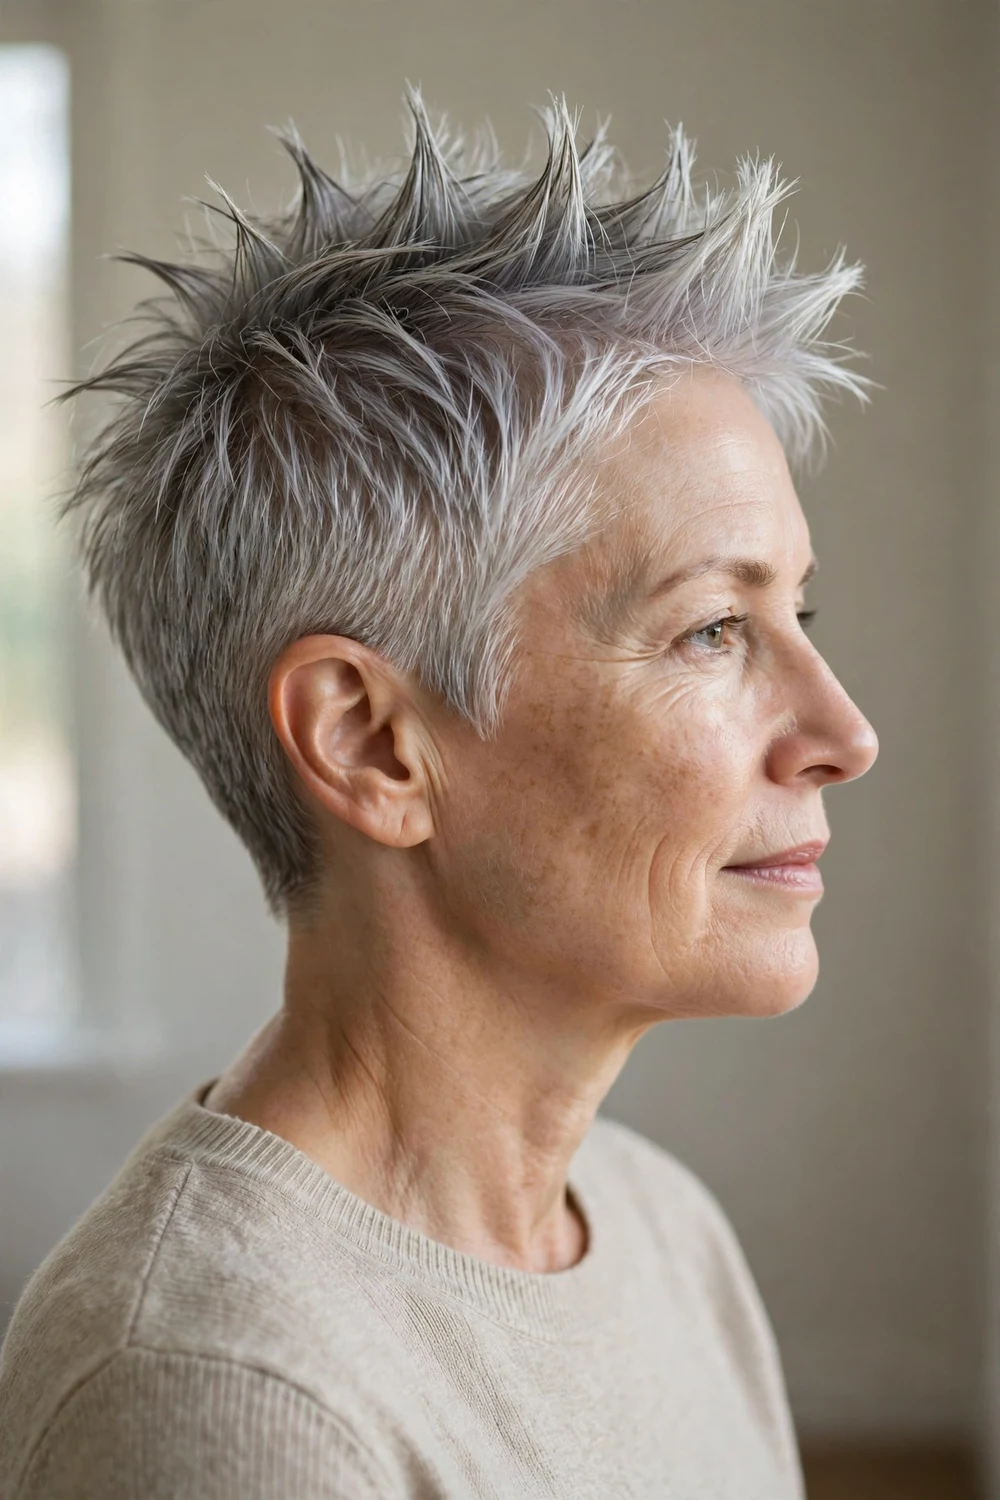
Spikes are pure texture, and texture is pure volume. The spiky androgynous pixie uses defined, separated pieces through the top to create height and movement in every direction. It is a confident, modern look that needs very little length to succeed, which makes it forgiving on thin hair. A matte wax or paste gives the spikes definition without the wet look that can flatten fine strands.
Try this: Pull small sections upward with a matte paste, working from the crown forward. Keep the sides smooth for contrast and definition.
29. Silver Pixie with Natural Grey
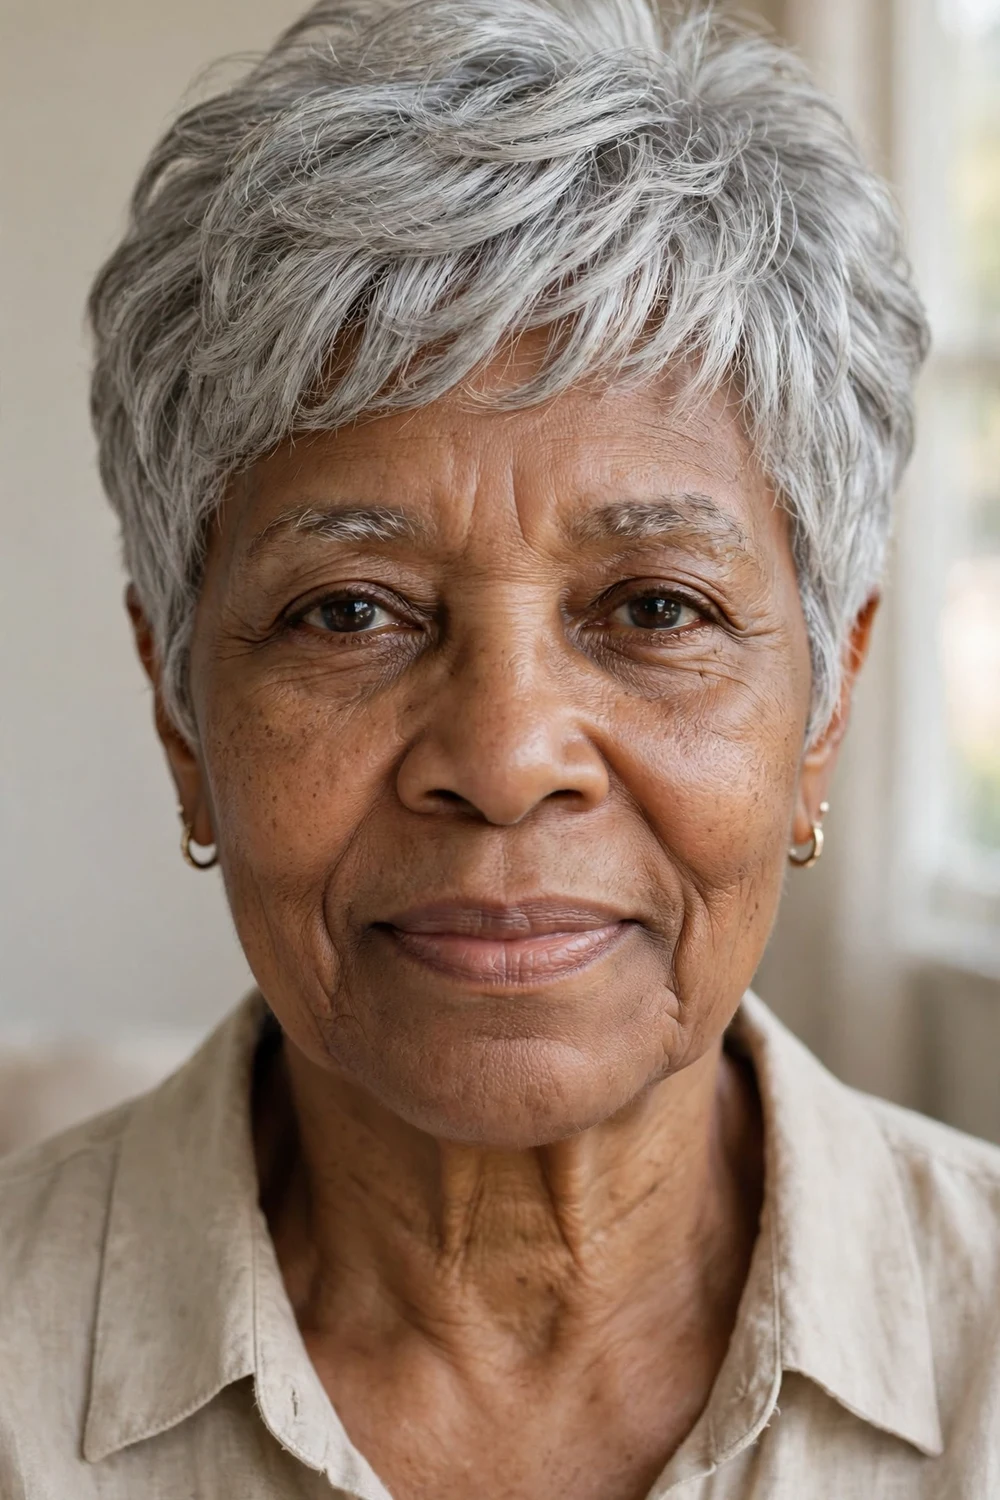
Growing out your natural grey in a pixie is one of the smartest moves for thin hair. Silver and grey tones have natural dimension that makes fine strands look thicker, and the short cut makes the grow-out transition fast instead of agonizing. A textured or feathered finish keeps the silver from looking flat. Purple shampoo once every two weeks keeps the tone bright instead of yellow.
Try this: Ask for soft texture through the top to show off the silver dimension. A silver gloss treatment between cuts keeps the color luminous.
30. Short Pixie Shag
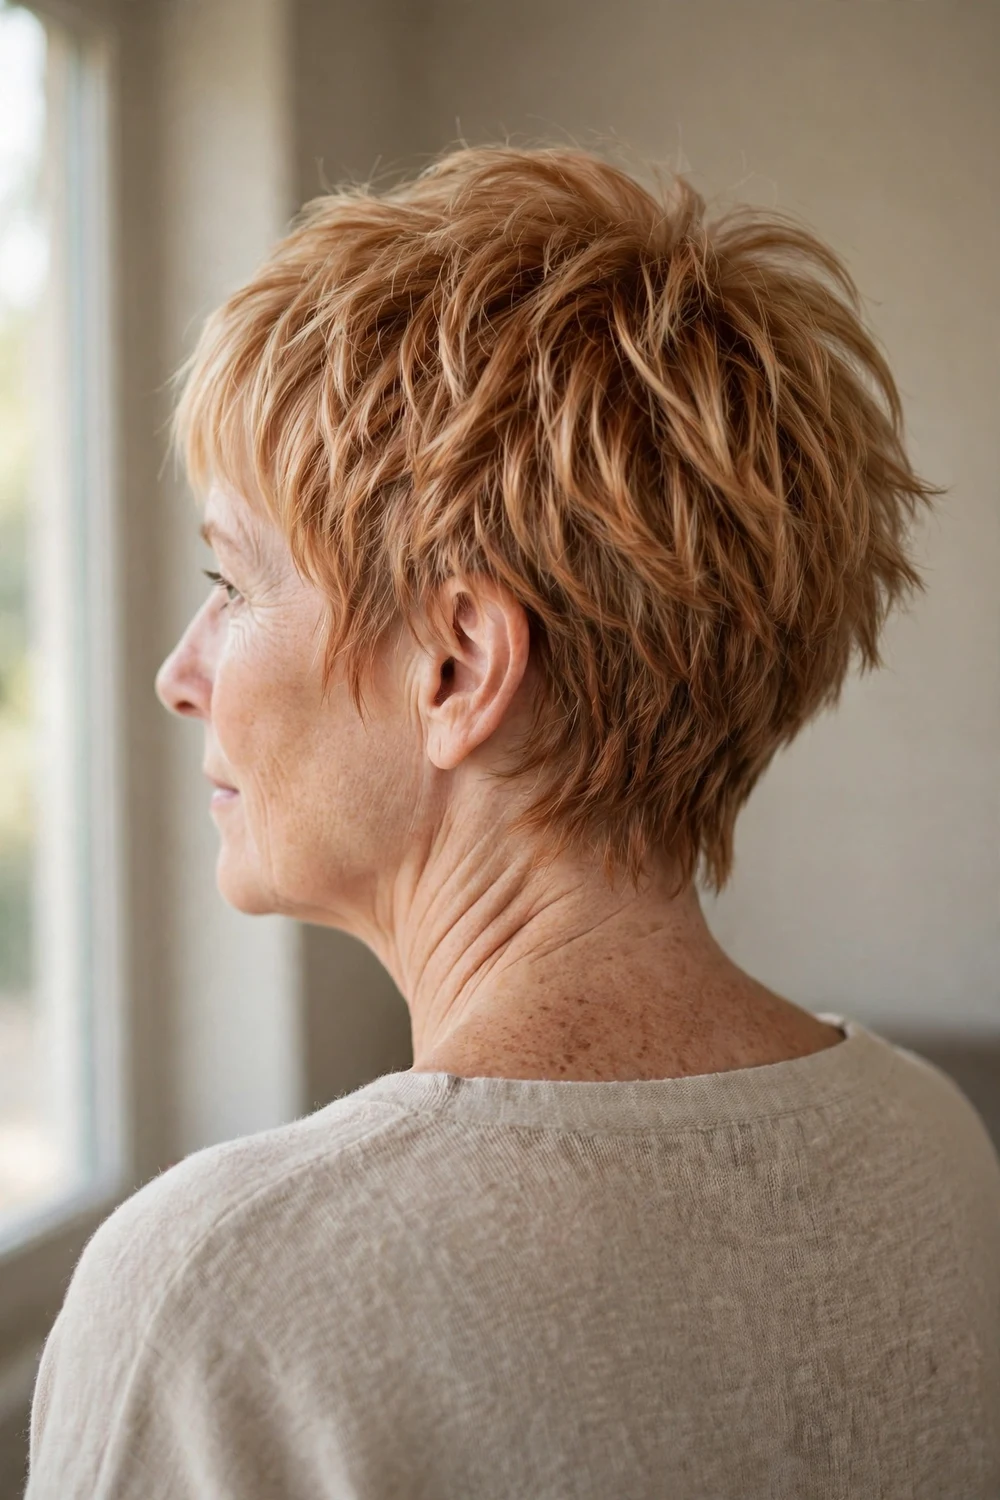
The pixie shag borrows the shag’s choppy layers and applies them to pixie length. The result is a cut with built-in movement and piecey texture that makes thin hair look fuller from every angle. It is less precise than a classic pixie, which means it grows out well and forgives skipped trims better than most short cuts. Style it with sea salt spray or paste for separation.
Try this: Spritz sea salt spray through damp hair and dry roughly with your fingers. Pinch the ends with paste to define the shaggy pieces.
Pixie Cuts for Thin Hair Over 50: Comparison at a Glance
| Style | Best Occasion | Difficulty | Hold Time |
|---|---|---|---|
| Crown-Stacked Pixie | Daily wear, work | Easy | All day |
| Layered Pixie with Long Crown Volume | Daily wear, events | Easy | 8 to 10 hours |
| Textured Volume Pixie | Casual, weekends | Easy | All day |
| Tapered Pixie with Crown Volume | Work, formal | Medium | 8 to 10 hours |
| Side-Parted Volume Pixie | Daily wear | Easy | 6 to 8 hours |
| Feathered Volume Pixie | Daily wear | Easy | 6 to 8 hours |
| Choppy Volume Pixie | Casual, nights out | Easy | All day |
| Stacked Pixie Bob | Work, events | Medium | 8 to 10 hours |
| Tousled Volume Pixie | Casual, travel | Easy | 6 to 8 hours |
| Sleek Side-Parted Volume Pixie | Formal, office | Medium | 8 to 10 hours |
| Airy Layered Pixie | Daily wear | Easy | 6 to 8 hours |
| Undercut Volume Pixie | Nights out, creative settings | Medium | All day |
| Wedge Pixie | Work, daily wear | Medium | All day |
| Curtain Bangs Pixie | Daily wear, with glasses | Easy | 6 to 8 hours |
| Side-Swept Bangs Pixie | Daily wear, events | Easy | 8 to 10 hours |
| Wispy Bangs Pixie | Daily wear | Easy | 6 to 8 hours |
| Brushed-Back Pixie | Evenings, events | Medium | 8 to 10 hours |
| Pompadour Pixie | Special occasions | Hard | 8 to 10 hours |
| Cropped Crown Pixie | Daily wear | Easy | All day |
| Babylights and Soft Highlights Pixie | Any, after salon color | Easy | 6 to 8 weeks of color |
| Lowlights and Root Fade Pixie | Any, after salon color | Easy | 6 to 8 weeks of color |
| Money Piece Pixie | Daily wear, events | Easy | 6 weeks of color |
| Asymmetrical Pixie | Casual, creative settings | Medium | All day |
| Long Pixie with Bangs | Daily wear | Easy | 8 to 10 hours |
| Baby Bangs Pixie | Casual, creative settings | Easy | All day |
| Curved Top Pixie with Defined Texture | Work, formal | Medium | 8 to 10 hours |
| Short Wash-and-Go Pixie Crop | Daily wear, travel | Easy | All day |
| Spiky Androgynous Pixie | Casual, nights out | Easy | All day |
| Silver Pixie with Natural Grey | Daily wear | Easy | All day |
| Short Pixie Shag | Casual, weekends | Easy | All day |
If you want more ideas in the same family, take a look at pixie haircuts for fine hair for cuts aimed specifically at fine strands.
How to Choose the Right Pixie for You
Start with your thinning pattern. If the crown is the thinnest area, pick a structural solution like the crown-stacked pixie or the wedge, where the cut itself builds height. If the hairline or temples are the concern, choose a fringe option such as curtain bangs, side-swept bangs, or the money piece pixie, which fills in the front visually.
Next, be honest about your styling time. Five minutes with a round brush opens up the stacked, tapered, and curved-top options. Two minutes or less points you toward the tousled pixie, the short wash-and-go crop, or the airy layered pixie. There is no wrong answer, but the cut has to match the routine or you will not wear it.
Consider your face shape and glasses. Height on top flatters round faces. Side-swept and curtain bangs soften strong jawlines and sit well with glasses frames. And if you are growing out natural grey, the silver pixie turns a transition into a style advantage. Bring three or four photos to your stylist and ask which one suits your density, not just your face.
For readers comparing age-specific options, short pixie haircuts for women over 50 covers more cuts designed for this exact age group.
Mistakes to Avoid
The biggest mistake is cutting a pixie too blunt. One-length pixies on thin hair show the scalp and look stringy, so ask for texture, layering, or stacking in every version you consider. The second mistake is heavy product. Creams, oils, and butters flatten thin hair within hours. Stick to mousses, root sprays, and light texture products applied away from the roots.
Skipping trims is the third. A pixie loses its engineered shape in about six weeks, and a shapeless pixie on thin hair looks thinner than when you started. Book the next trim before you leave the salon. Finally, do not fight your natural texture with a cut designed for the opposite one. A sleek pixie on very curly hair means daily heat styling and damage, while a wash-and-go crop on straight hair is effortless.
Curly-haired readers should also check curly pixie haircuts for volume pixies designed around natural curl instead of fighting it.
Frequently Asked Questions
Are pixie cuts good for thin hair over 50?
Yes. Pixies remove the length that pulls thin hair flat, which lets the roots lift. Stacked layers, tapered sides, and texture build volume into the cut itself. Most women over 50 find a well-cut pixie makes thin hair look noticeably fuller than shoulder-length styles did.
Which pixie cut makes thin hair look thickest?
The crown-stacked pixie creates the most built-in volume because graduated layers push the crown upward. The wedge pixie and tapered pixie with crown volume work the same way. Adding lowlights or a dark root fade increases the illusion further by making the scalp less visible.
How often should I trim a pixie for thin hair?
Every 4 to 6 weeks. Thin hair shows shape loss faster than thick hair, and an overgrown pixie collapses at the crown and looks thinner. Bangs and fringes may need a tidy every 4 weeks. Book the next appointment before leaving the salon so the shape never fully grows out.
What products add volume to a thin pixie without weighing it down?
Volumizing mousse, root-lift spray, and dry texture spray are the three products you need. Apply mousse to damp roots, use root spray along the part line, and finish with texture spray for separation. Avoid heavy creams, oils, and butters, which flatten thin hair within hours.
Should I color my thin hair if I get a pixie?
Color helps more than most people expect. Babylights and subtle highlights add dimension that reads as thickness, and lowlights or a darker root make the scalp less visible. The lightening process also swells each strand slightly. Even a gloss or toner adds shine that makes fine hair look healthier and fuller.
Want a longer version with more coverage through the front? See long pixie haircuts with bangs for pixie-bob hybrids with fringe options.
Final Thoughts
Thin hair over 50 is not a limitation. It is a brief for a good stylist. Pick the volume strategy that fits your thinning pattern, your styling time, and your taste, then commit to the trim schedule that keeps the shape alive. Show up with photos, ask for texture in every version, and skip the heavy products. Do that, and your pixie will do the rest.
