


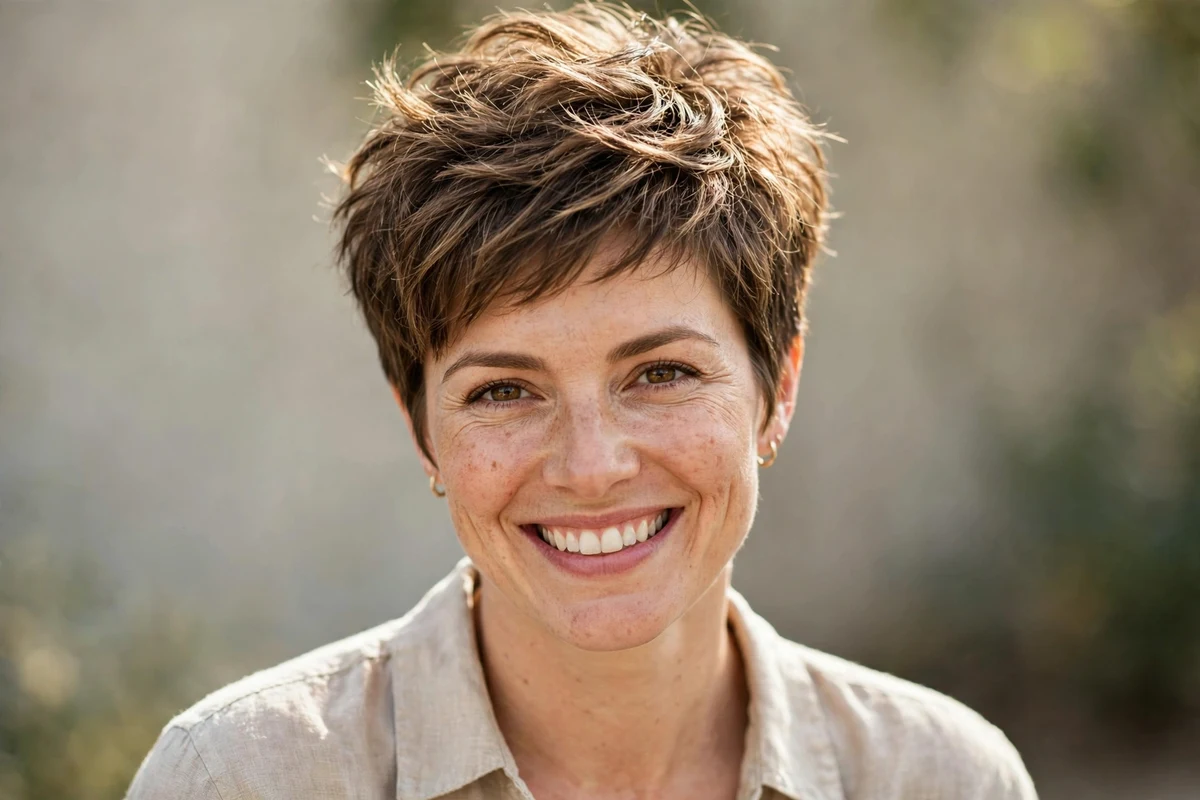
Fine hair does not need more length to look fuller. It needs the right short cut. Long fine hair hangs flat at the roots and thins out at the ends, while a well-built pixie removes that weight and stacks texture where the eye looks first. These short pixie haircuts for fine hair are chosen for the cutting techniques behind them: point cutting, crown lift, tapered napes, smart fringes, and color that fakes density.
Every idea below names what to ask your stylist for, what it costs, and how much daily work it takes. Fine hair looks thickest when it is short, textured, and styled with light products, and this list follows that rule from start to finish.
If you would like a little more length than a classic pixie, pixie bob haircuts for fine hair keeps the same volume-building tricks with longer front pieces and a softer grow-out.
If you are over 50 and your hair is thinning, not just fine, see pixie cuts for thin hair over 50 for volume pixies built around thinning hair after 50.
Quick Takeaways
- Shorter lengths remove weight, which is the main reason fine hair falls flat.
- Ask for point cutting and texture at the crown, not heavy thinning shears, which can make fine hair look sparse.
- Lightweight products win: mousse, dry texture spray, and matte clay over thick oils and heavy waxes.
- Tapered, faded, or undercut sides make the top look fuller by contrast.
- Plan trims every 4 to 6 weeks. A pixie loses its shape fast, and shape is what fakes volume.
1. Side-Swept Pixie
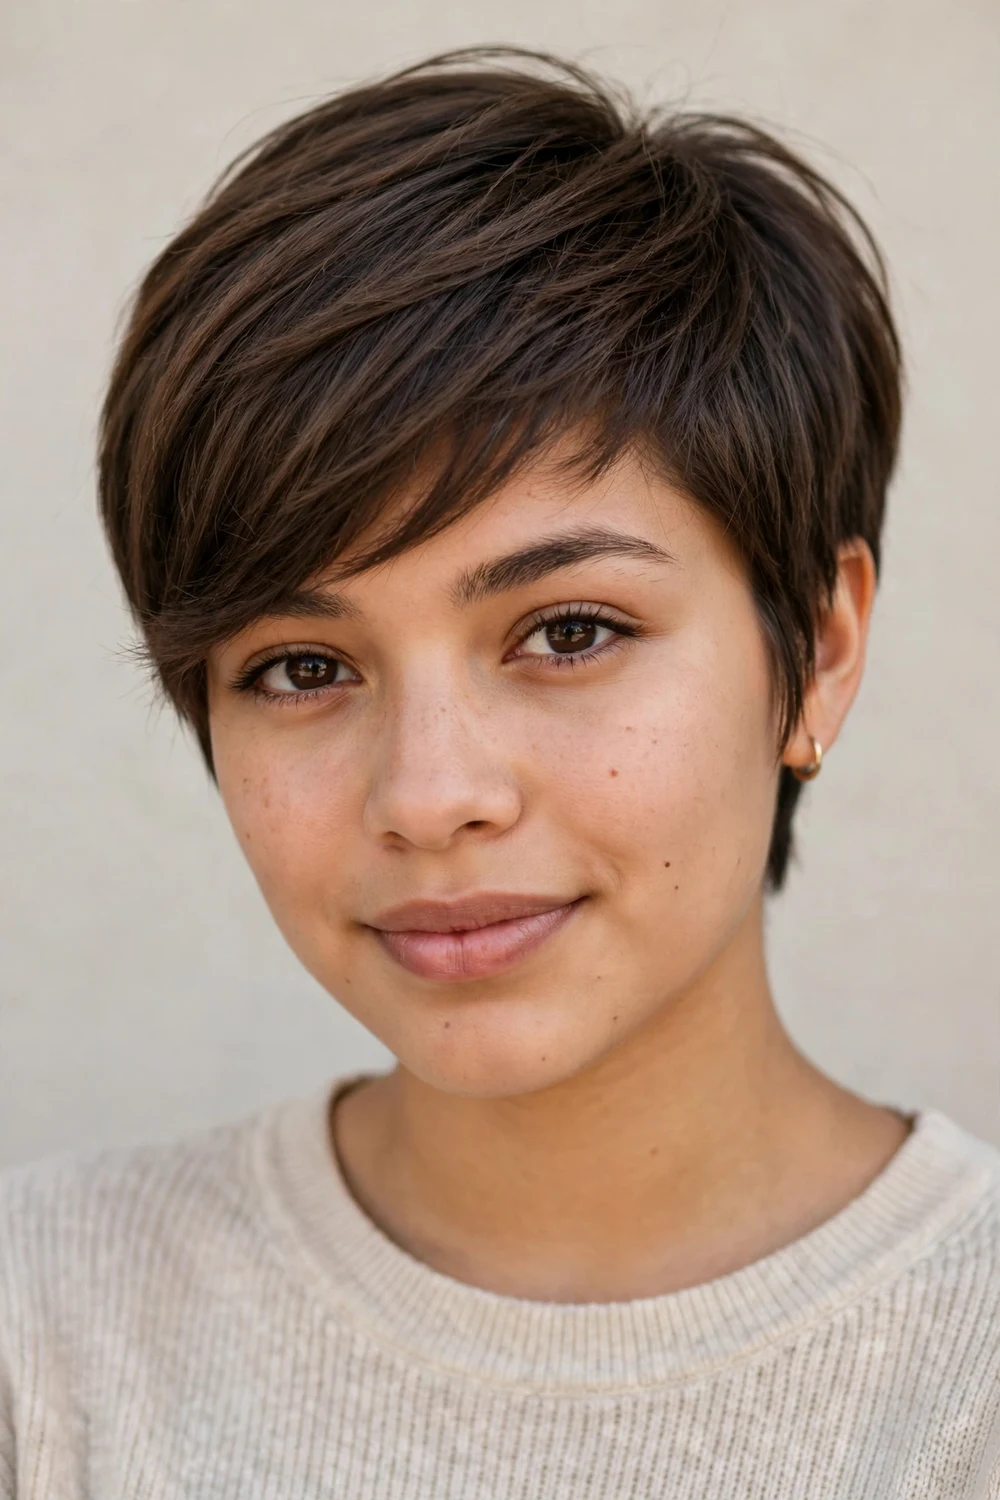
A long diagonal fringe changes everything for fine hair. The sweep across the forehead adds a full extra layer where the face needs softness, and the slanted line pulls the eye sideways instead of letting it notice flatness. Keep the bangs around 3 inches so they can tuck behind one ear.
Blow-dry the fringe to one side with a flat brush, using a heat protectant first. The sides stay tapered and the crown keeps light texture. This is the most requested fine-hair pixie shape in salons for a reason: it works on almost every face shape.
Try this: dry the bangs in the opposite direction first, then sweep them into place. That trick builds root lift that survives the whole day.
Difficulty: Easy · Cost: $45–$70 (cut only)
2. Deep Side-Part Pixie
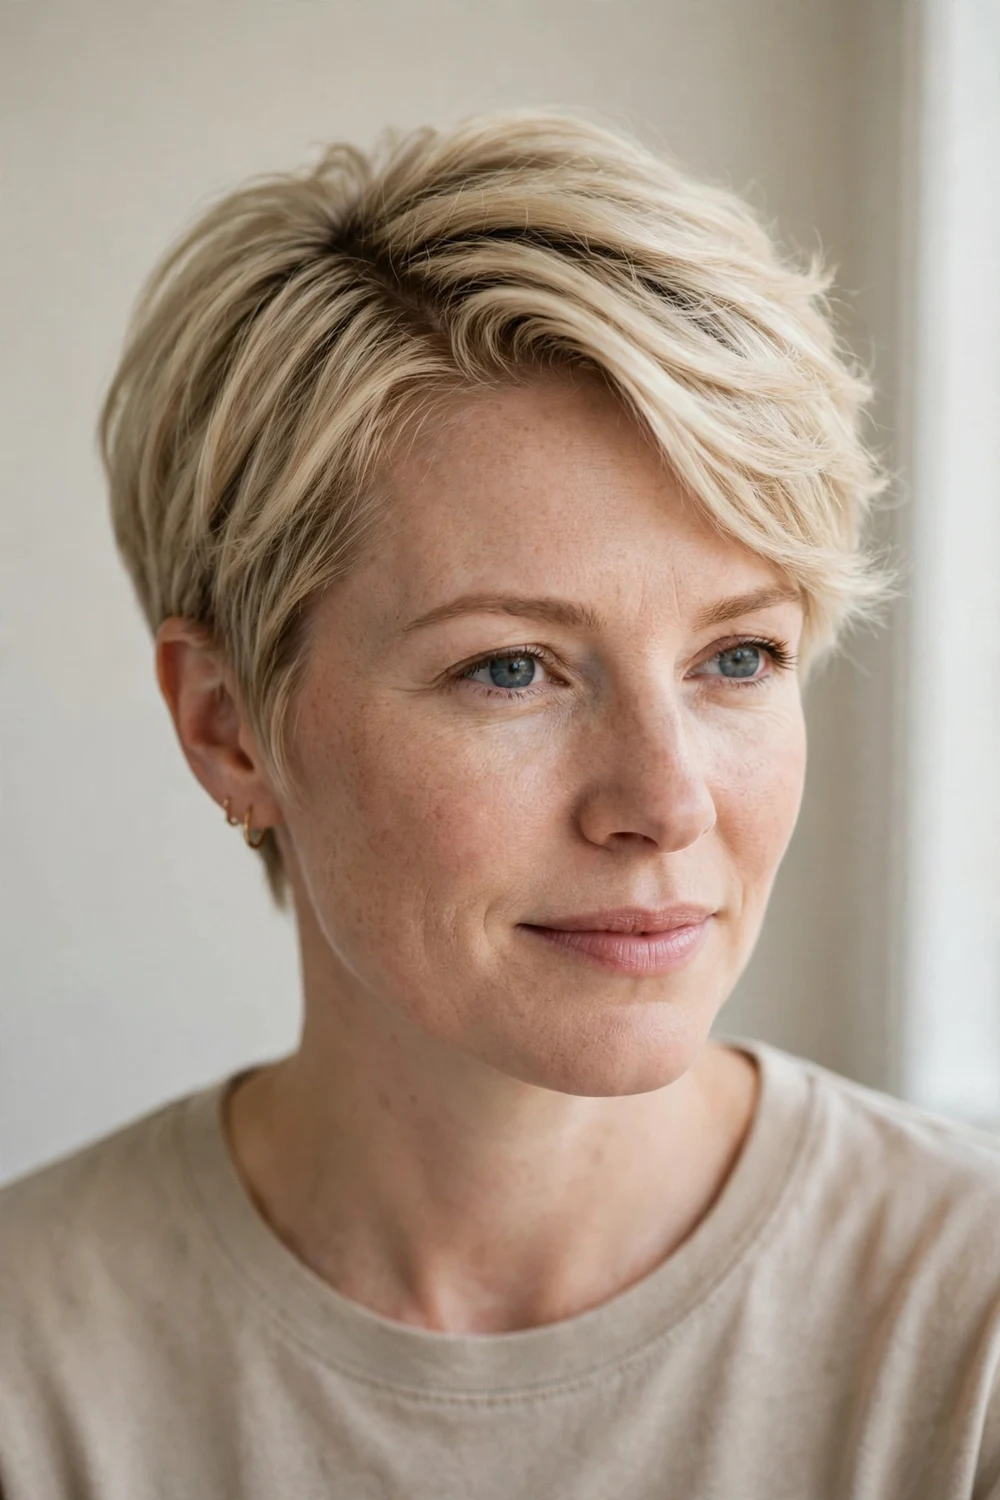
A deep side part is the oldest volume trick in the book and it costs nothing. Shifting the part moves bulk to one side, which forces the roots to stand up instead of lying flat. The layers are cut to support each other so the fuller side holds its shape.
This works as a styling technique on almost any pixie, but ask your stylist to cut the part in deliberately. A cut built around a deep part keeps its lift far better than a part you create after the fact.
Try this: switch your part to the opposite side every few washes. Roots trained one way go flat; alternating keeps them guessing.
Difficulty: Easy · Cost: $45–$65 (cut only)
3. Sleek Side-Part Pixie
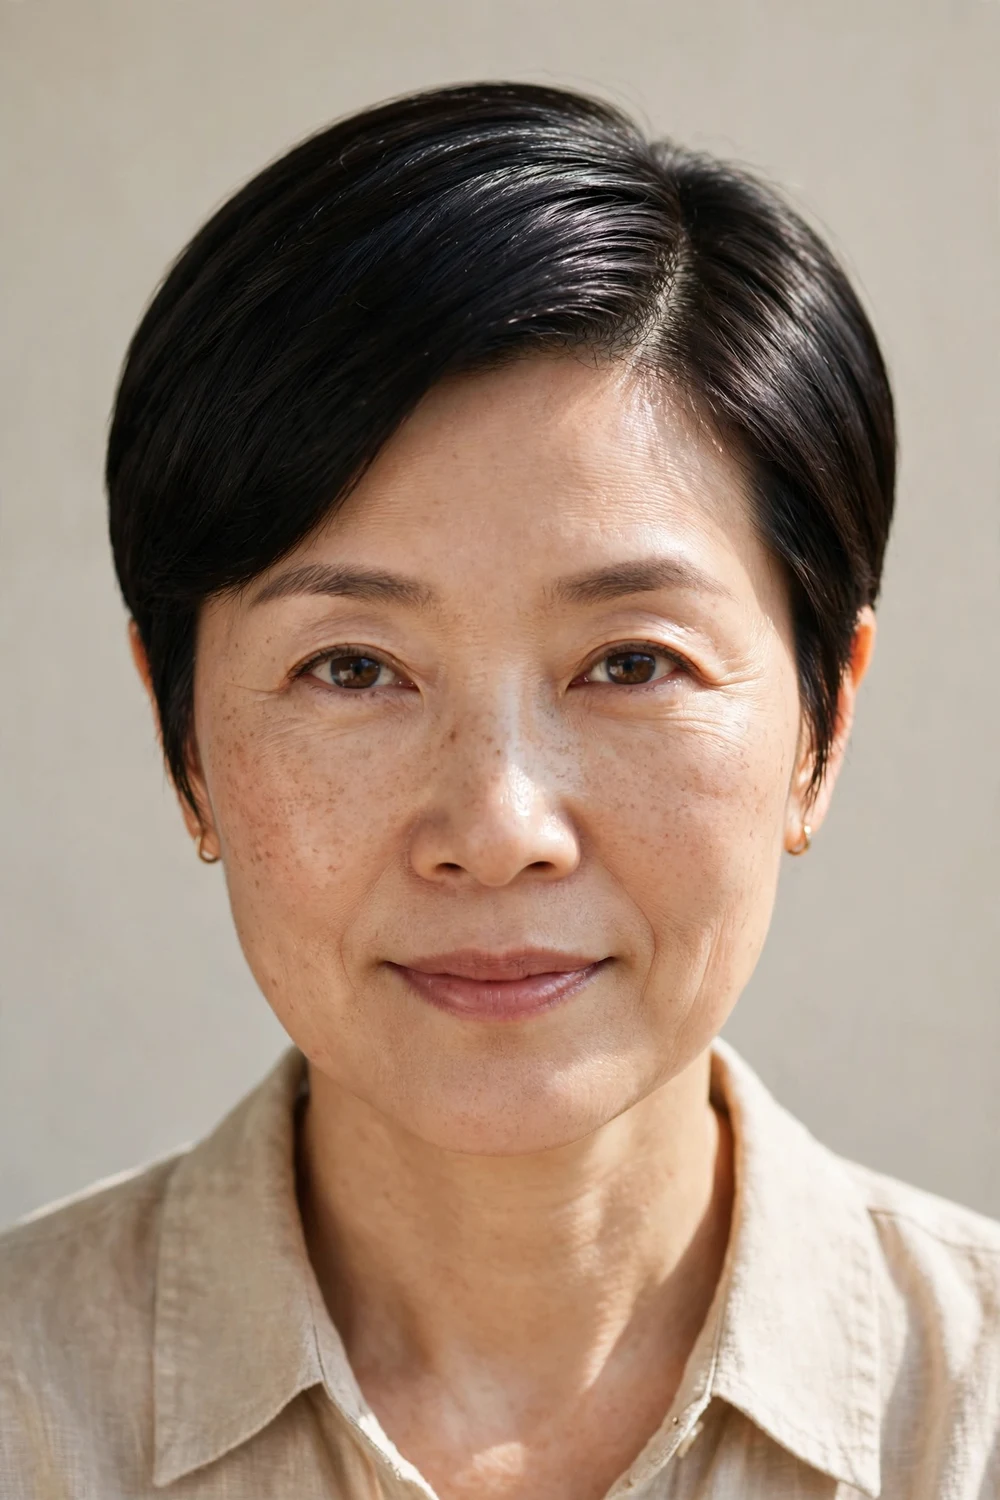
Not every fine-hair pixie needs to be tousled. This polished version uses clean lines and a defined side part for a professional finish. The top stays slightly longer so it can lie smooth, while subtle texturizing underneath keeps it from looking pasted down.
Style with a pea-sized amount of smoothing cream and a comb, or blow-dry smooth with a heat protectant. It grows out gracefully, which means you can stretch trims to 6 weeks without the shape collapsing.
Try this: finish with one light mist of flexible-hold spray, not a heavy lacquer. Fine hair needs hold without the helmet.
Difficulty: Easy · Cost: $45–$70 (cut only)
4. Classic Crown-Lift Pixie
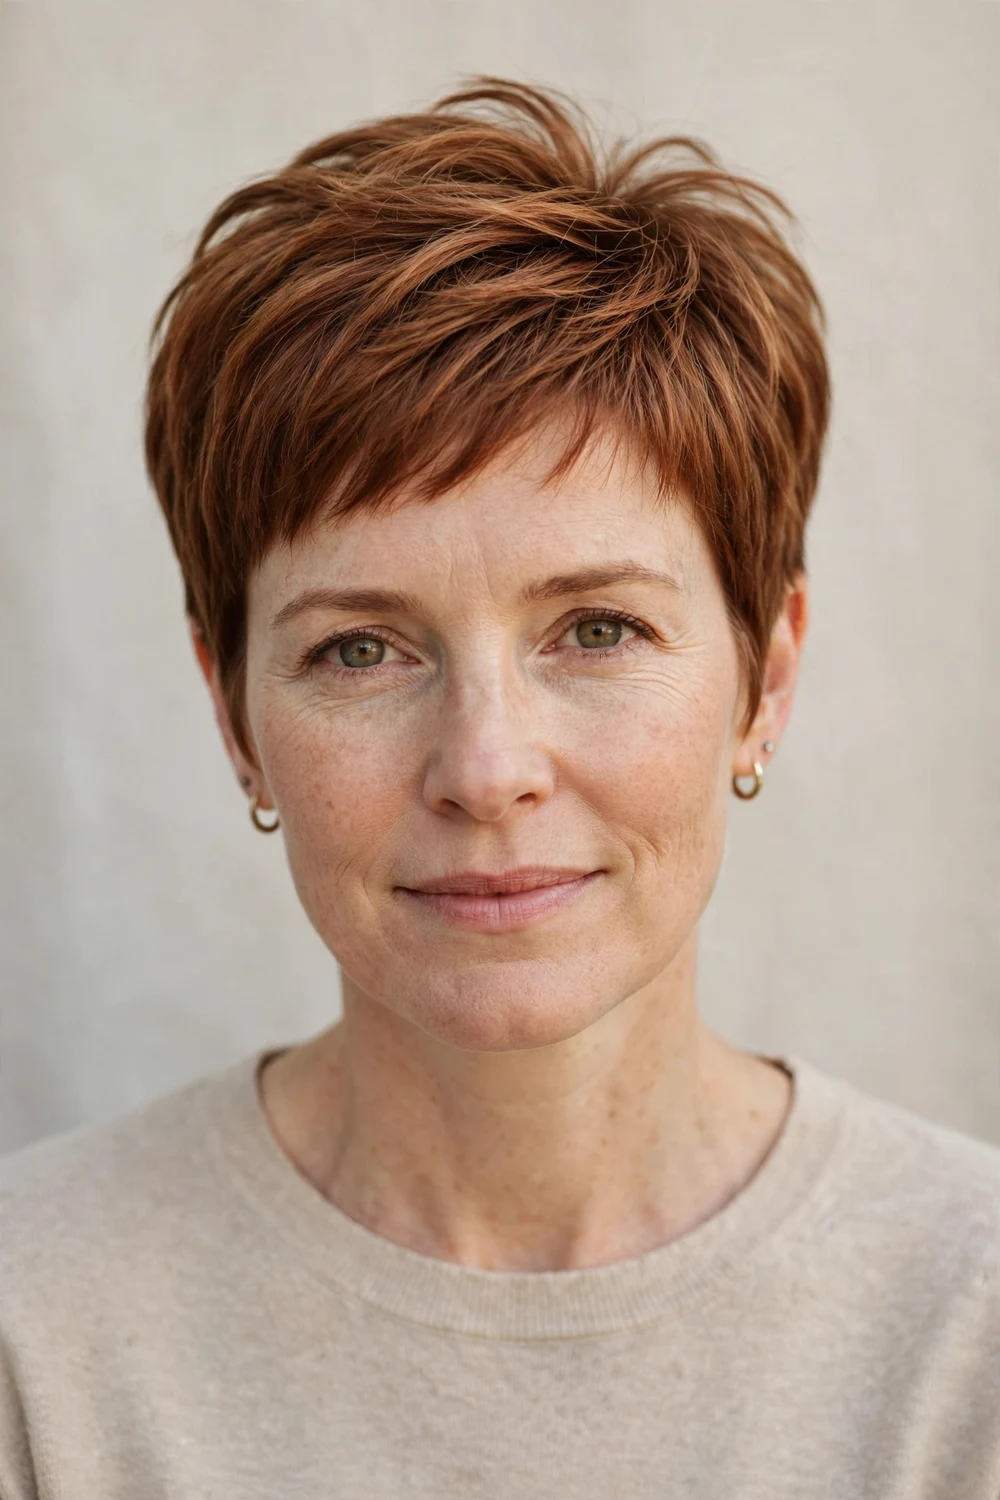
This is the timeless pixie shape: shorter sides and back, longer length concentrated at the crown. Short overlapping layers on top prop each other up, which builds height exactly where fine hair needs it most. Every eye goes to the lifted crown, not the thin spots.
Apply root-lifting spray to damp hair at the crown, then blow-dry upward with a small round brush and a heat protectant. Five minutes of styling buys a full day of lift. A small amount of pomade through the lengths finishes it.
Try this: flip your head upside down and blow-dry the roots for one minute before styling. The pre-set volume lasts for hours.
Difficulty: Easy · Cost: $45–$65 (cut only)
5. Classic Polished Pixie
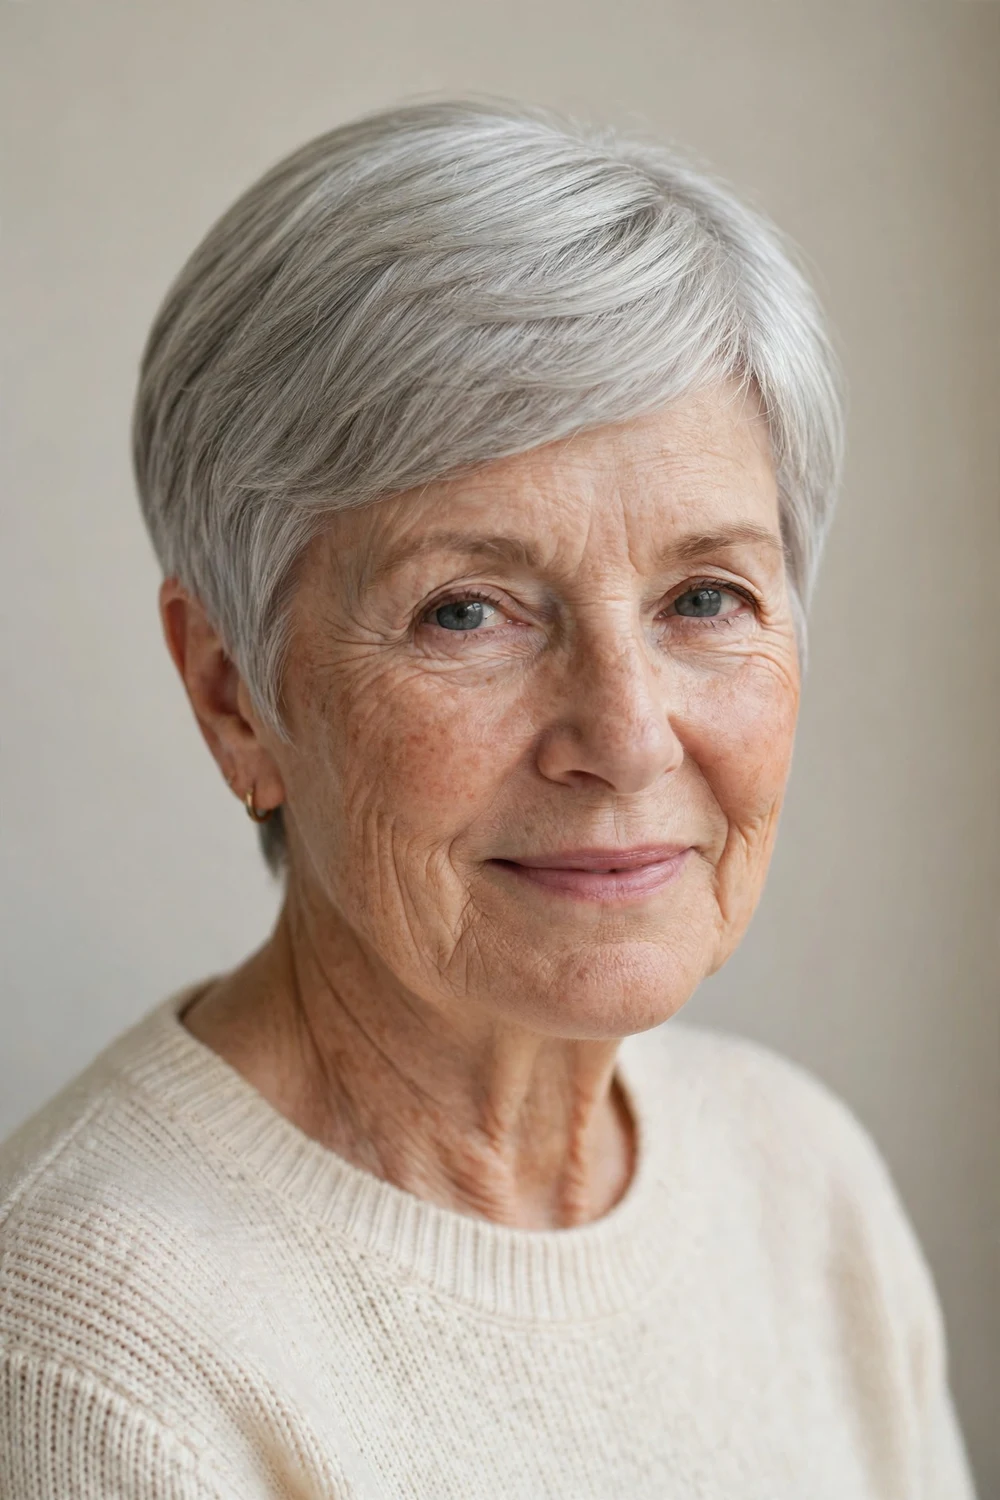
Crisp edges and a gentle side sweep make fine hair look dense, but only if the surface stays smooth. This cut keeps the outline sharp and the top just long enough to lie flat without separating. Frizz is the enemy here, so the finish matters as much as the cut.
Work a bead of lightweight oil or serum through the ends for shine without heaviness. Our short pixie cuts guide shows more classic shapes to compare if you like this polished direction.
Try this: wrap the top in a silk scarf for 10 minutes after styling. It sets the smooth finish and tames flyaways.
Difficulty: Easy · Cost: $45–$65 (cut only)
6. Soft Natural-Texture Pixie
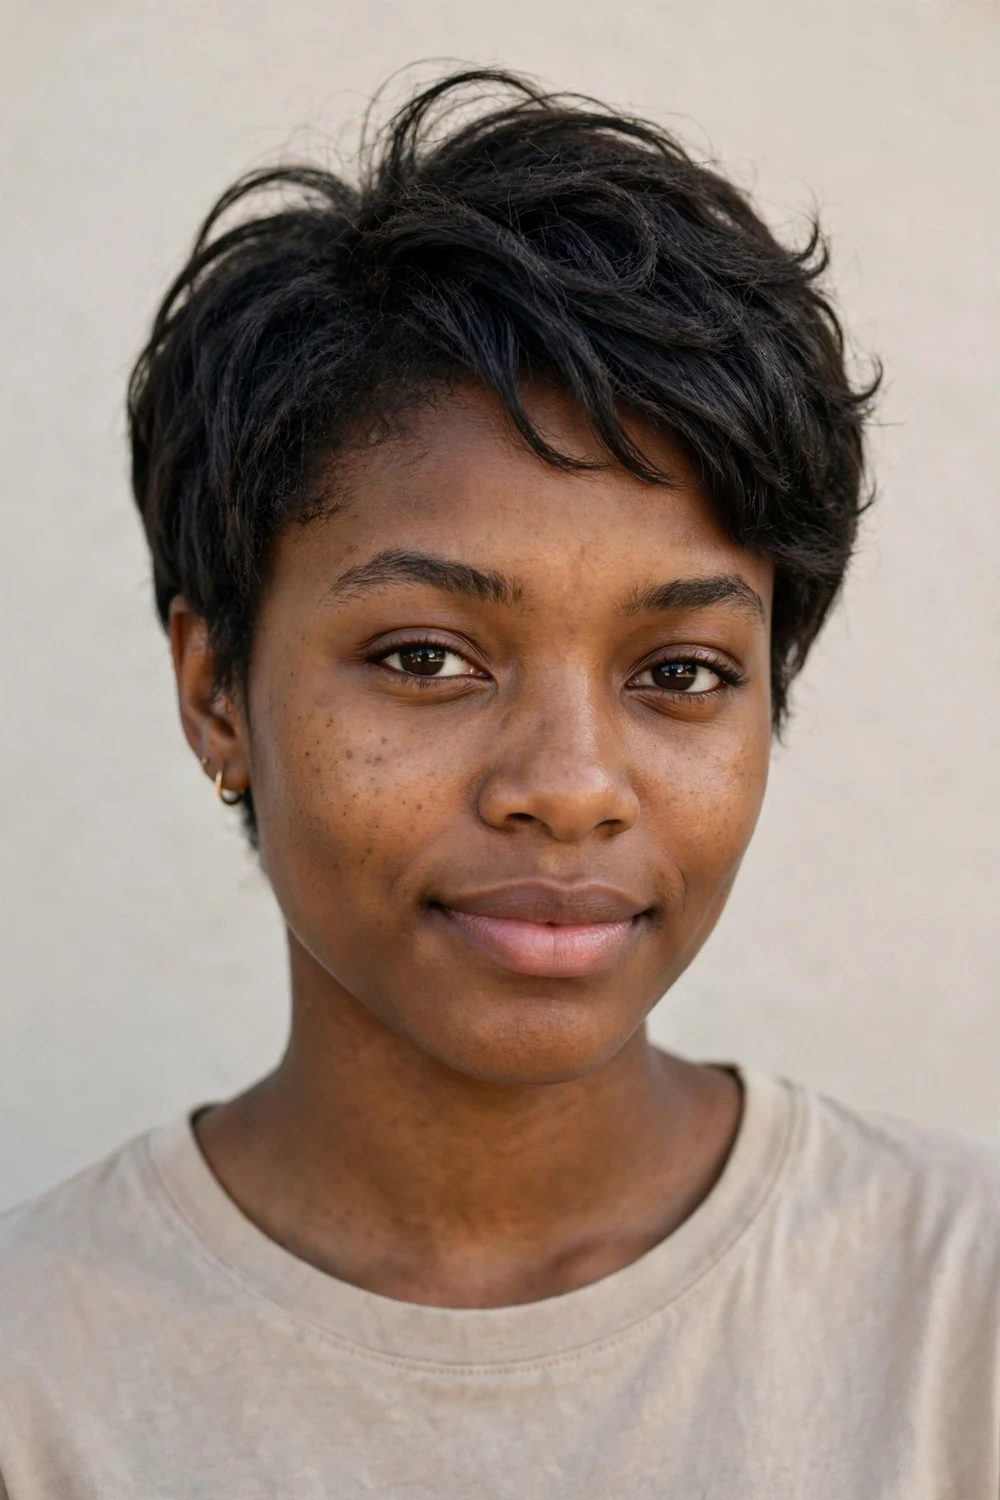
Simple does not mean flat. This short pixie uses soft, weightless layering instead of aggressive texture, with gentle lift at the crown and tidy sides. It suits women whose fine hair already has a bit of natural movement and just needs shaping.
A tiny dab of styling cream rubbed between your palms brings out the movement without weighing it down. Air-drying works well here, which makes this one of the lowest-effort cuts on the list.
Try this: scrunch the top upward while it air-dries. The soft layers separate naturally and hold a little volume.
Difficulty: Easy · Cost: $40–$60 (cut only)
7. Choppy-Layered Pixie
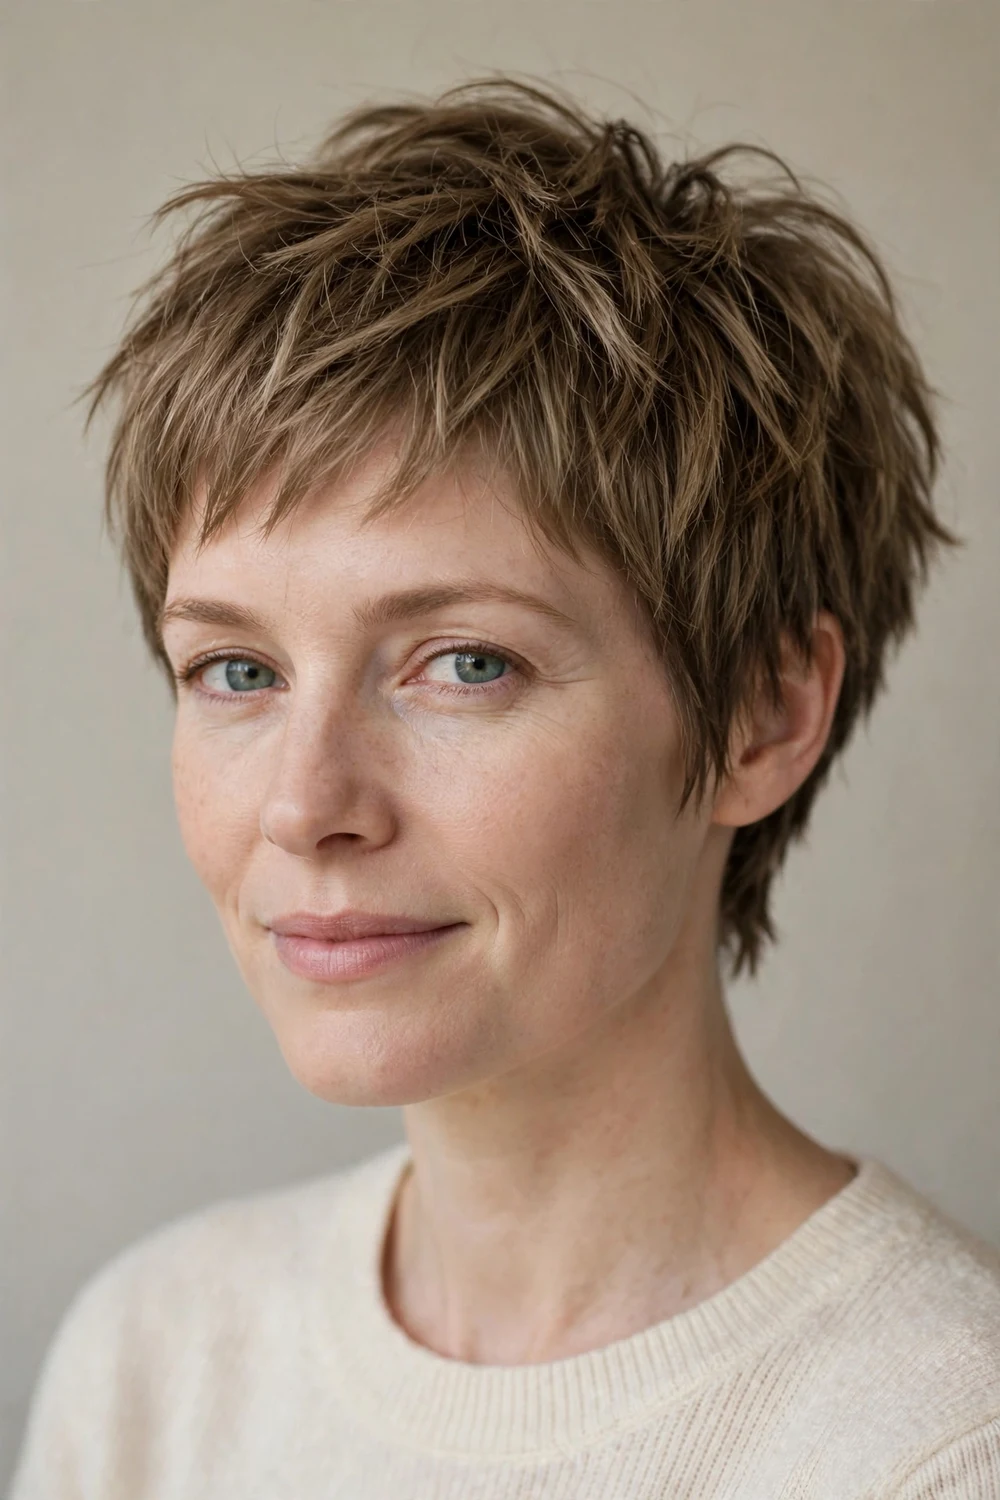
Choppy layers are cut at uneven lengths on purpose. On fine hair, that irregularity is a gift: sparse spots hide between the layers, and the top looks thicker because the eye cannot find one thin line. Ask for point cutting through the crown and a tapered nape.
This cut loves second-day hair. Work a fingertip of texturizing cream through dry hair and twist small sections. The whole routine takes under three minutes. Skip heavy serums, which glue the chop together.
Try this: pinch the ends of 5 or 6 random pieces with a tiny bit of paste. Defined pieces on top make everything underneath look denser.
Difficulty: Easy · Cost: $45–$70 (cut only)
8. Textured Pixie
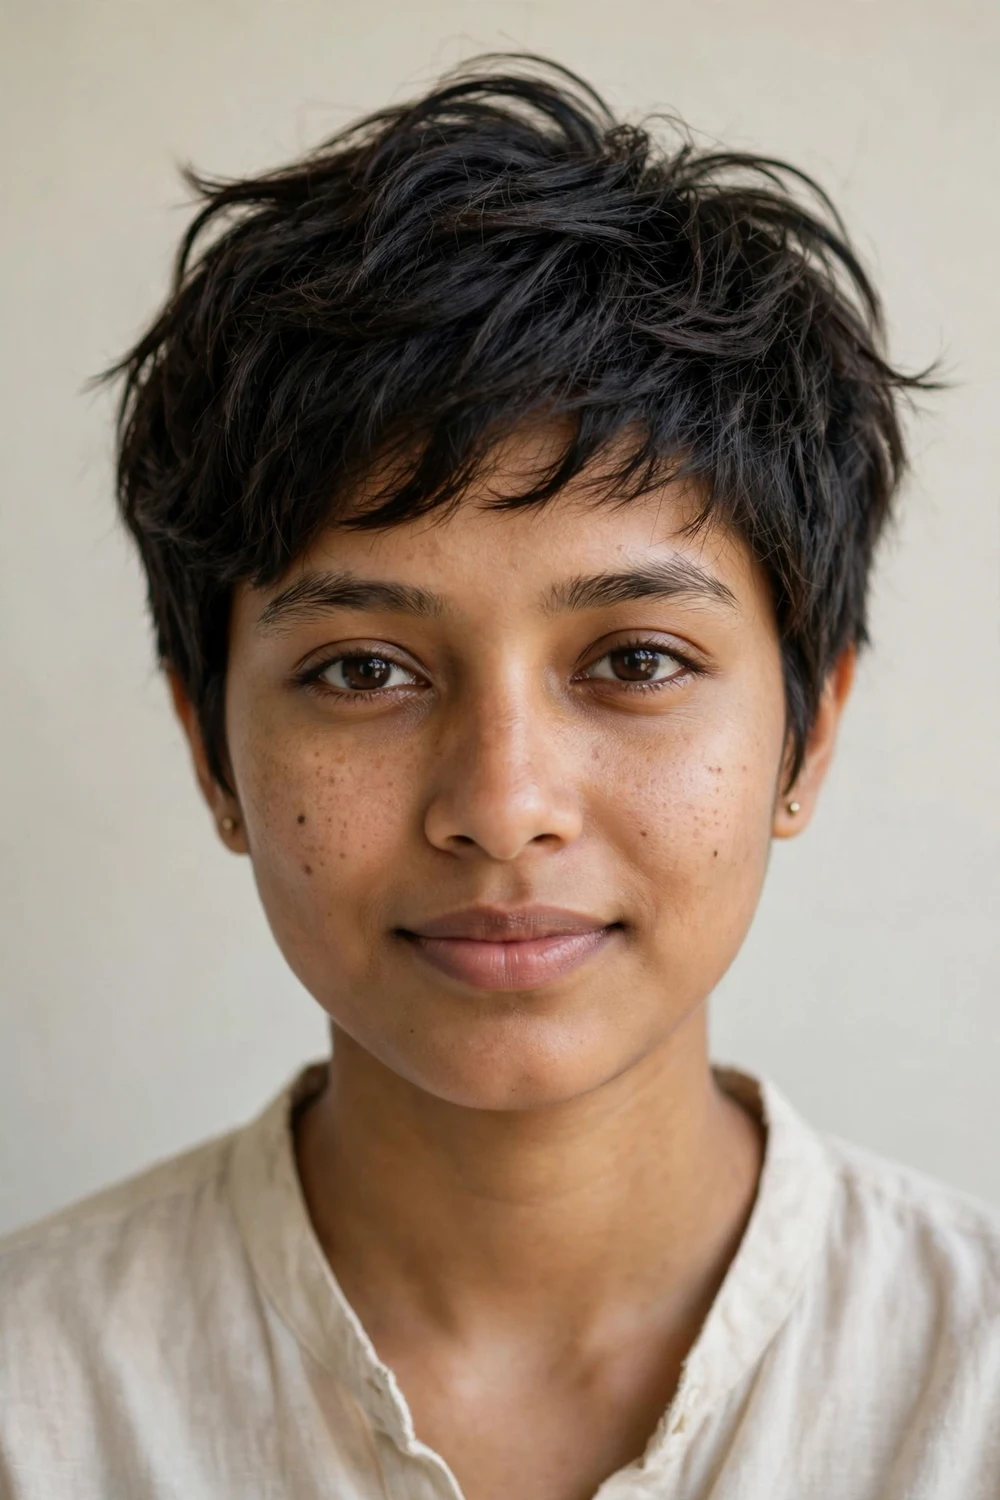
The textured pixie uses razored, piecey layers through the top to create modern movement. The texture builds visual fullness without products doing heavy work, which is exactly what fine hair needs. It suits almost every face shape.
Apply a matte clay to dry hair, working it through with your fingertips while pinching pieces. Ask for slide cutting and point cutting rather than blunt ends. Regular trims every 4 to 6 weeks keep the texture crisp.
Try this: apply clay to dry hair, not damp hair. On short pixies, dry application gives grit and separation instead of a flat finish.
Difficulty: Easy · Cost: $50–$75 (cut only)
9. Razor-Cut Pixie
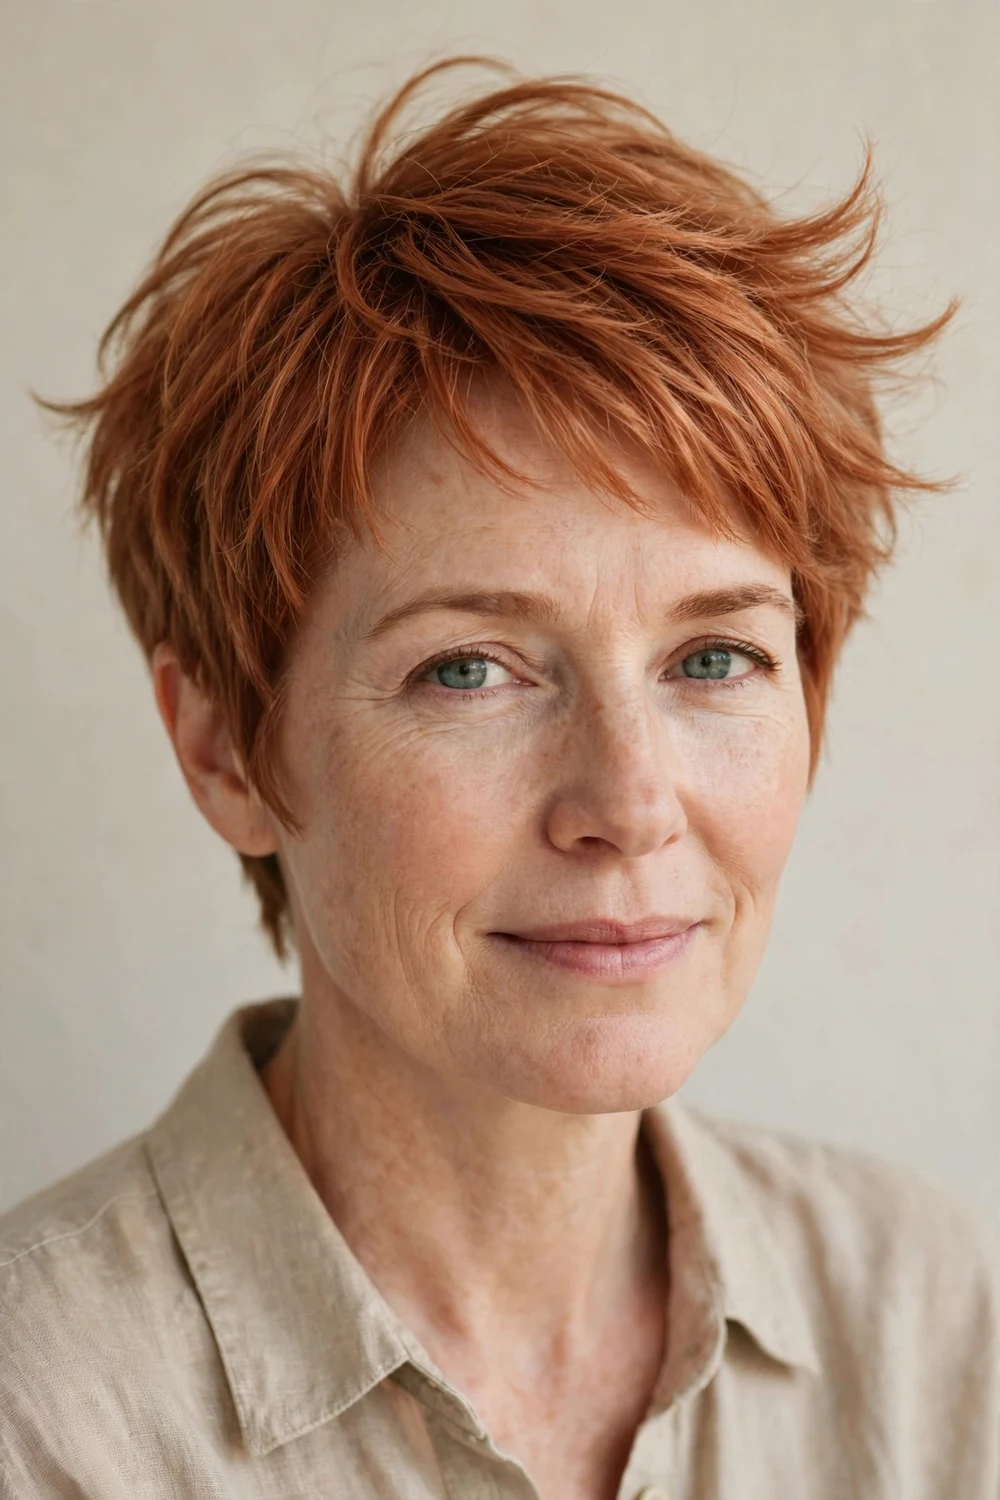
A razor in a skilled stylist’s hand creates texture scissors cannot replicate. Razored ends taper to soft points instead of blunt edges, so the top moves instead of collapsing. Fine hair gets lightness and separation without losing the little density it has.
Ask for razor cutting through the ends, not thinning shears: razors create softness while heavy thinning can hollow out fine hair. Finger-fluff with a bit of mousse for airy texture. For an edgier version, ask for sharper, more dramatic razoring.
Try this: mist sea salt spray on damp hair, scrunch, and air-dry. Razored texture plus salt spray gives volume with almost no product.
Difficulty: Moderate · Cost: $55–$80 (cut only)
10. Texturized Straight-Hair Pixie
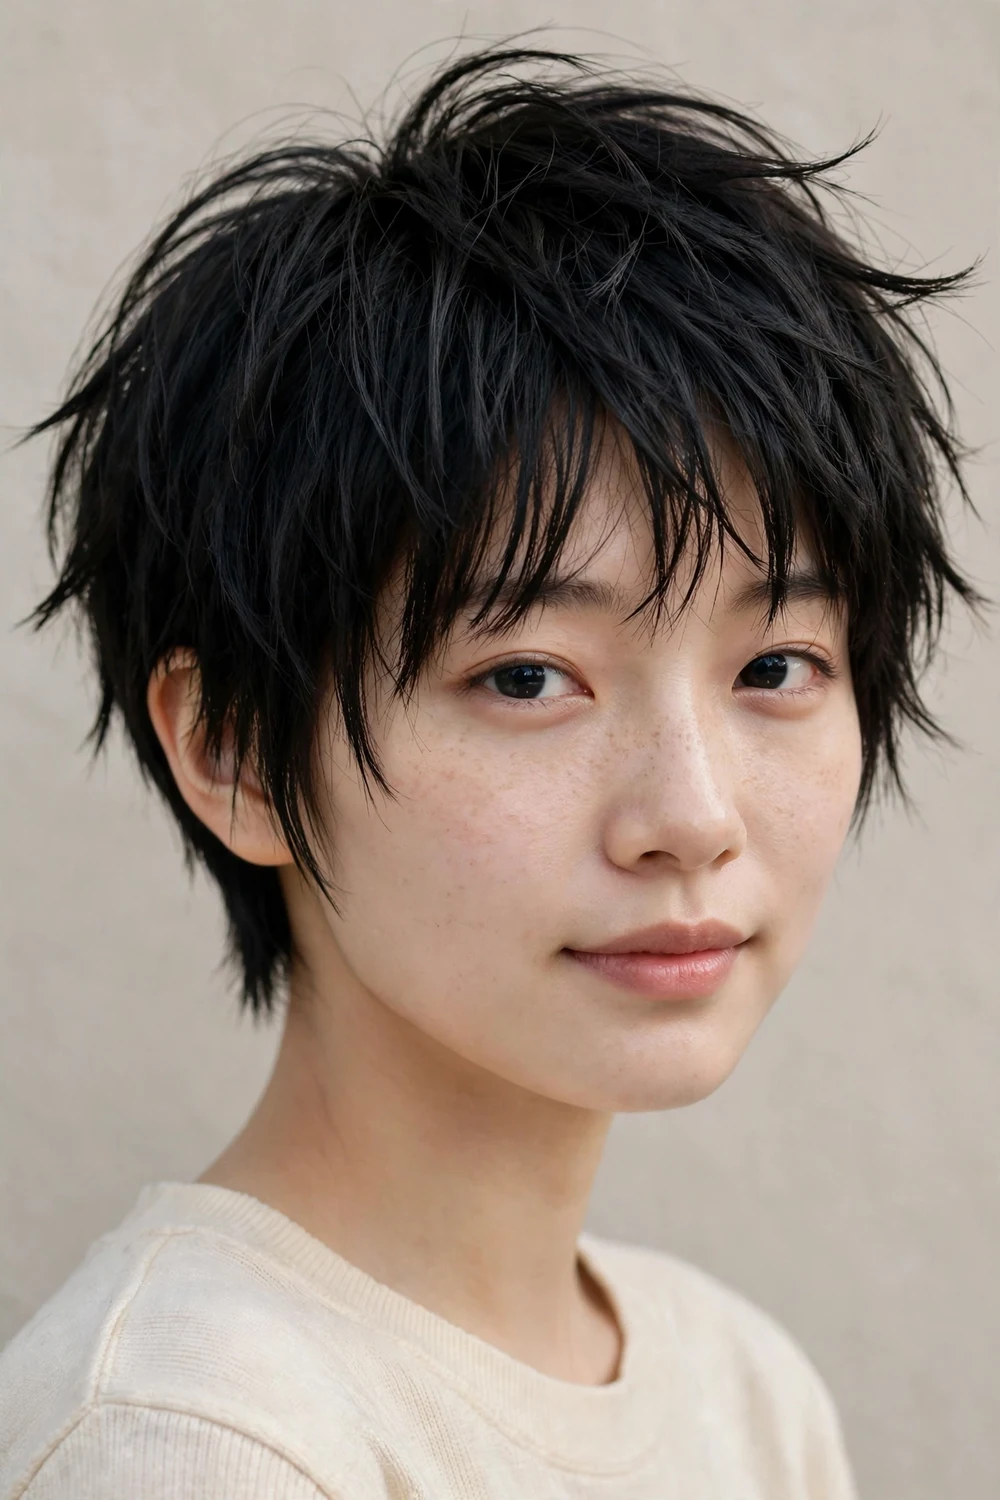
Pin-straight fine hair is the hardest texture to fake volume in, because there is no natural bend to build on. This cut answers with aggressive texturizing: slide cutting and point cutting create irregular edges that catch light and manufacture movement where none exists naturally.
Multiple light product layers help hold the texture: mousse at the roots, then a touch of paste on dry ends. Tell your stylist your hair is “paper straight” so they texturize boldly enough. Timid texturizing on straight hair disappears by noon.
Try this: rough-dry with your fingers lifting at the crown instead of using a brush. Brushes smooth straight hair flat; fingers keep the texture.
Difficulty: Moderate · Cost: $50–$75 (cut only)
11. Tapered Pixie
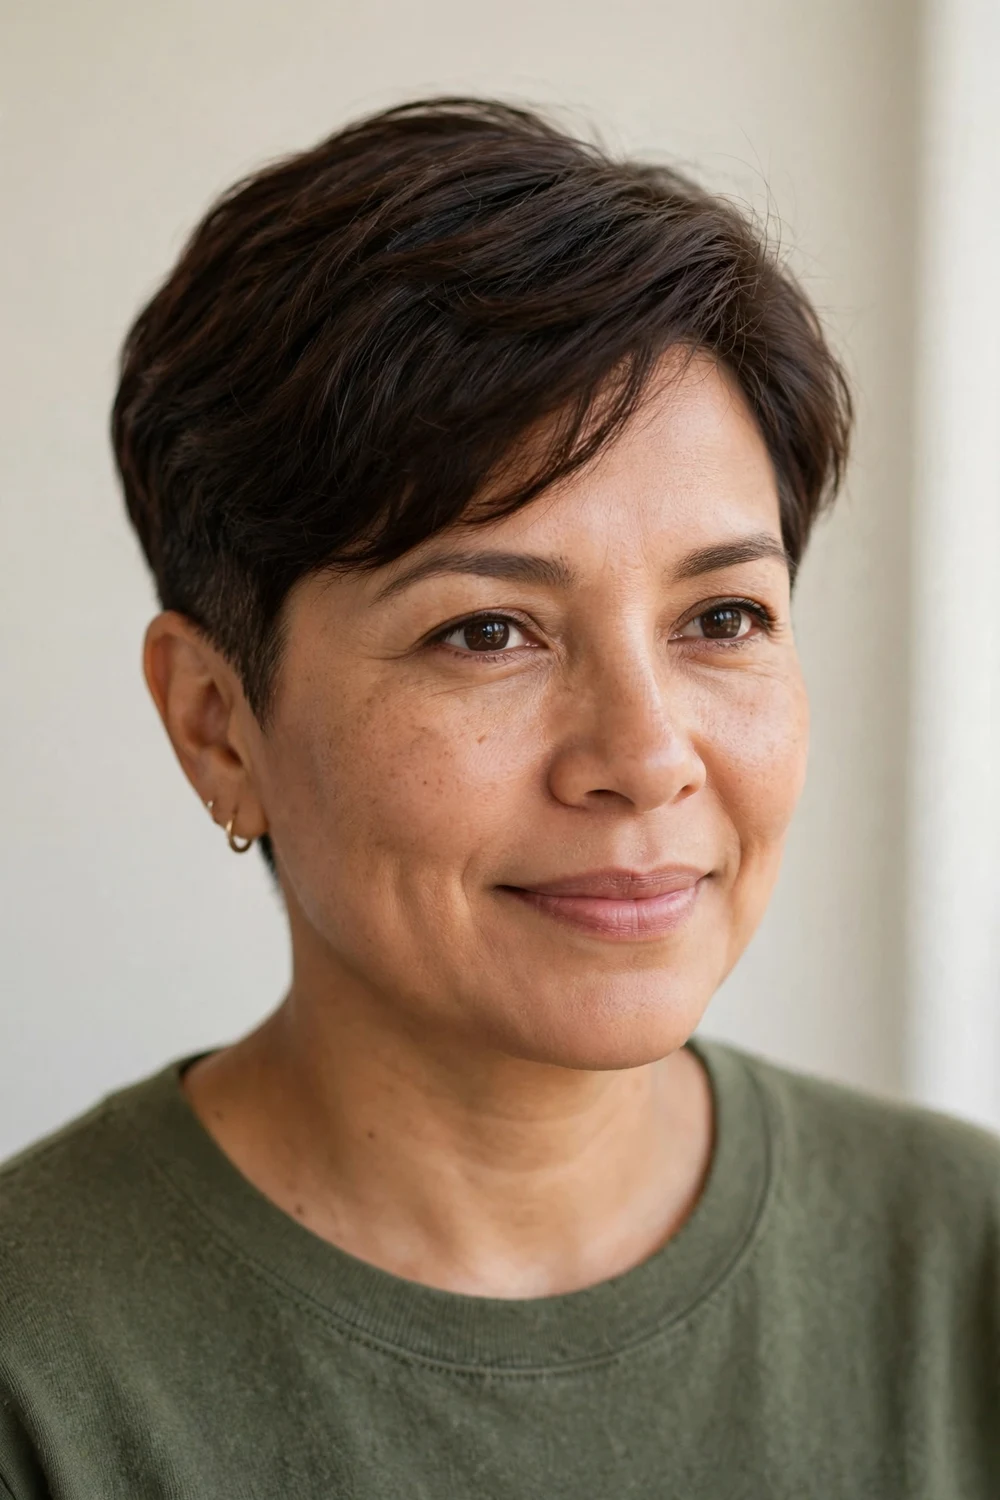
A tapered pixie graduates the hair shorter toward the neckline and ears while keeping gentle volume at the crown. That clean graduation removes the weight dragging fine hair down, and the contrast makes the longer top look fuller than it is. Blondes especially benefit, since the taper keeps light hair from looking washed out.
Ask for stacked layering in the back and a soft, side-swept top. A dollop of mousse before blow-drying gives body at the roots while keeping everything light and polished.
Try this: ask for the taper done with clippers over a comb rather than a hard line. The soft edge grows out more gracefully.
Difficulty: Easy · Cost: $50–$75 (cut only)
12. Side-Parted Fade Pixie
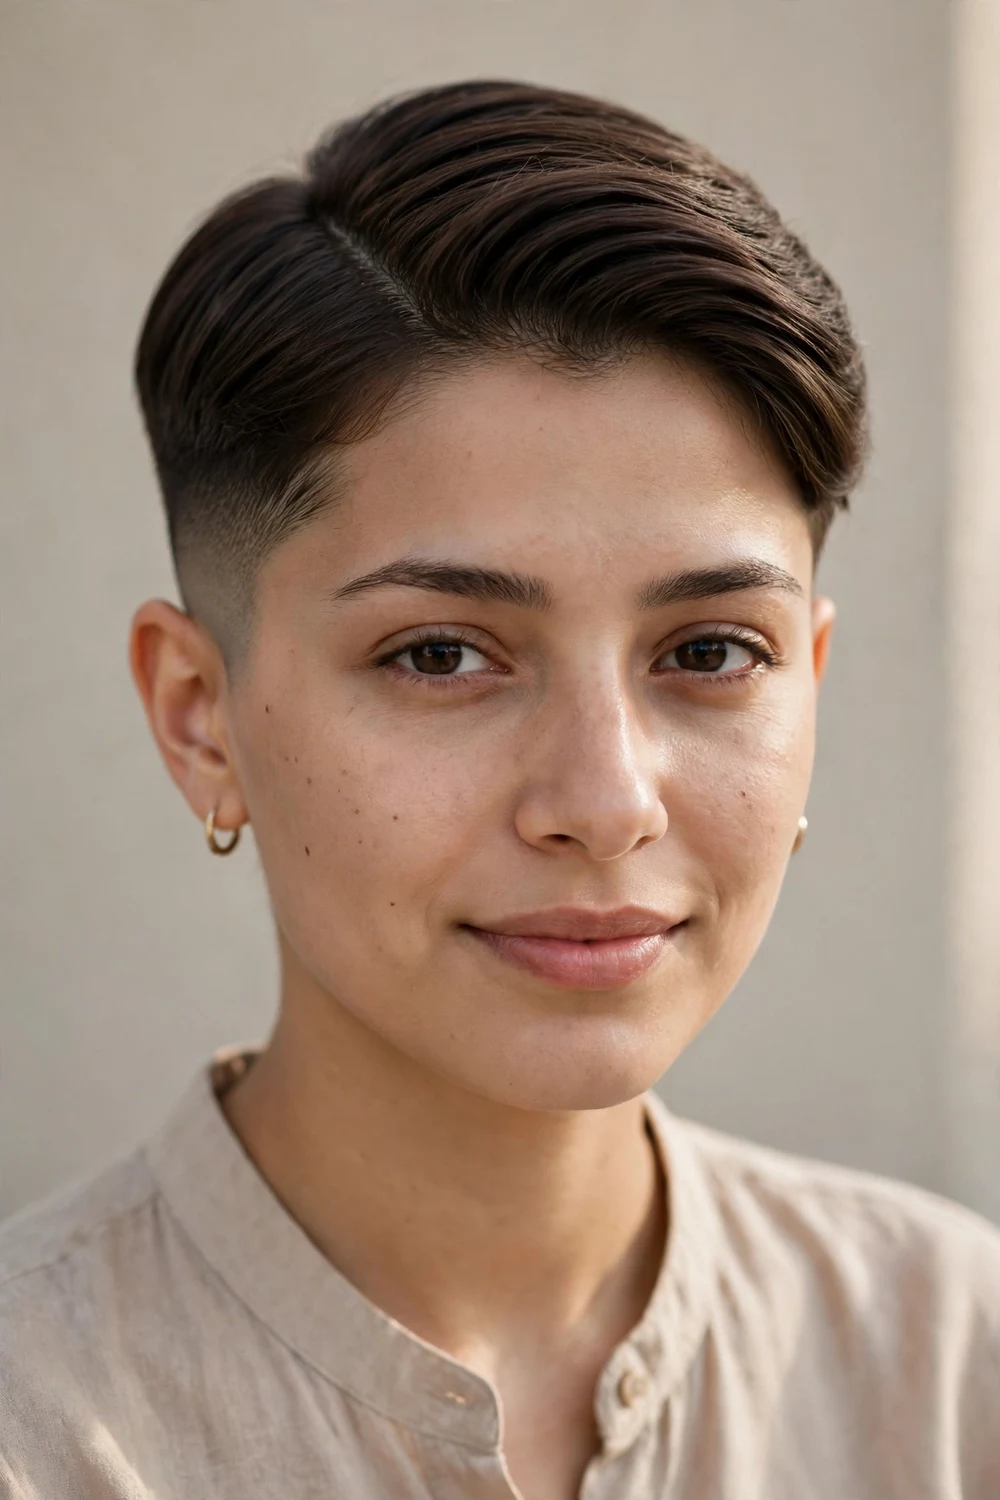
This precision fade paired with a clean side part is all about structure. The fade removes every trace of bulk at the sides, which makes the sleek top look deliberate and dense. It is a minimalist cut that still reads styled.
It suits straighter fine hair best and needs almost no daily work: smooth the top across the part and go. Book a shape-up every 3 to 4 weeks, since fades lose their crispness fast.
Try this: keep a small amount of pomade in your bag. One touch-up at midday restores the sleek line.
Difficulty: Easy · Cost: $40–$65 (cut only)
13. Cropped Pixie
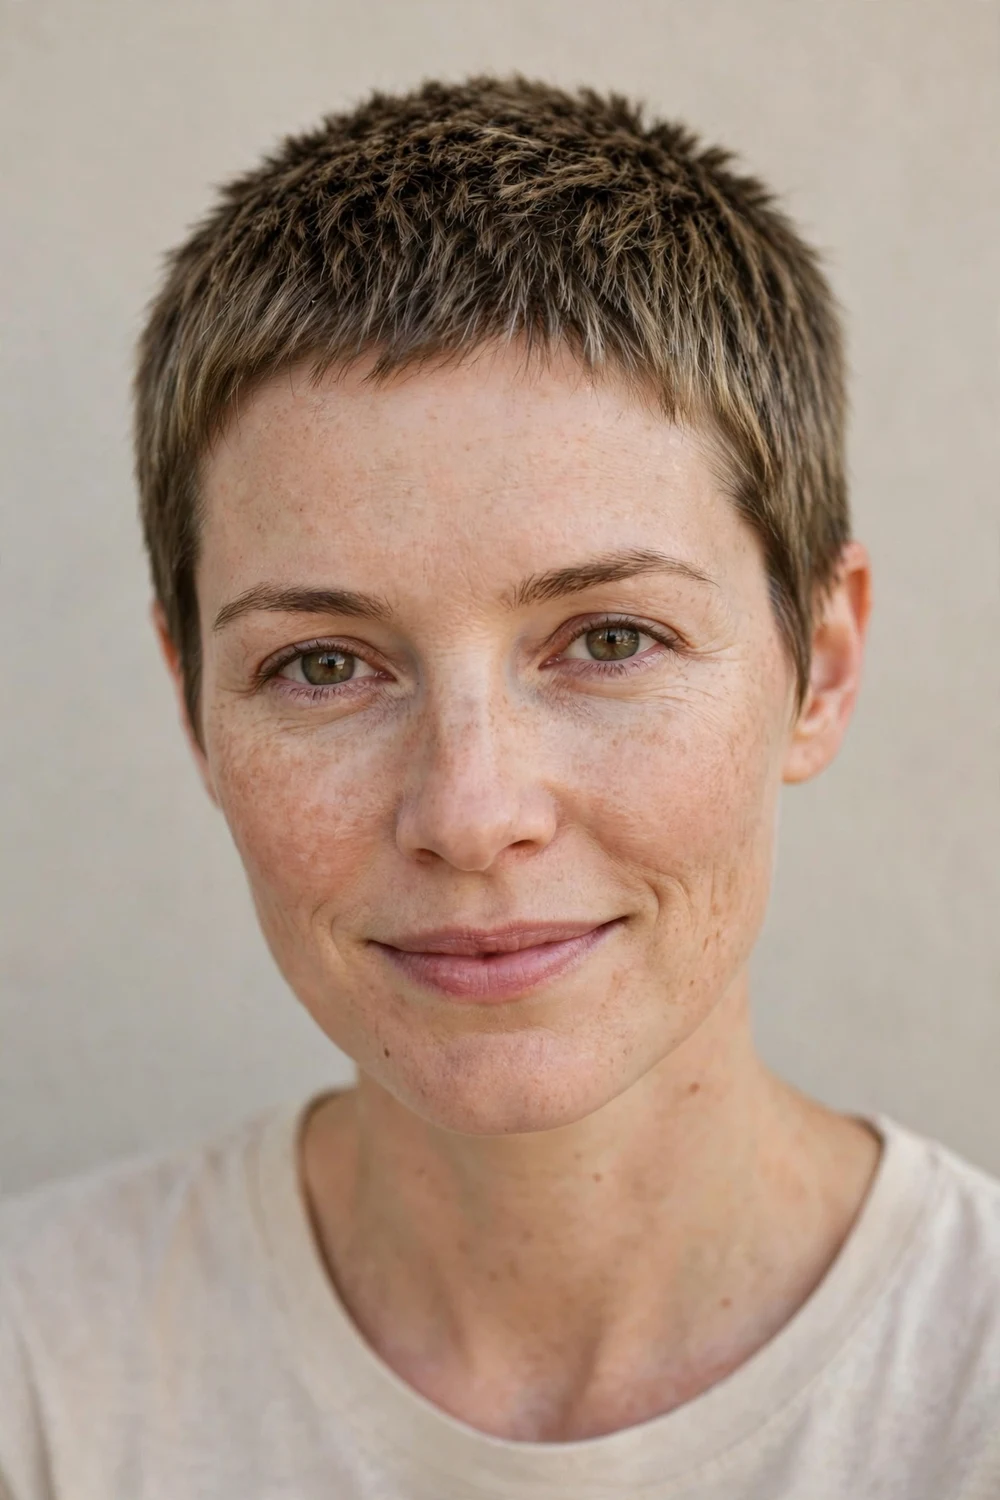
The cropped pixie sits shorter than a classic pixie, with length under 3 inches all over. That minimal length removes any weight that would drag fine strands down. Micro layers through the crown add just enough separation to keep it from looking severe.
Apply a matte clay to dry hair and finger-comb into place. No tools required, no blow-dryer, no round brush. This is the boldest low-maintenance option on the list.
Try this: change the direction you finger-comb every few days. A new direction at the crown reads as fresh volume.
Difficulty: Easy · Cost: $40–$60 (cut only)
14. Buzzed Fade Pixie
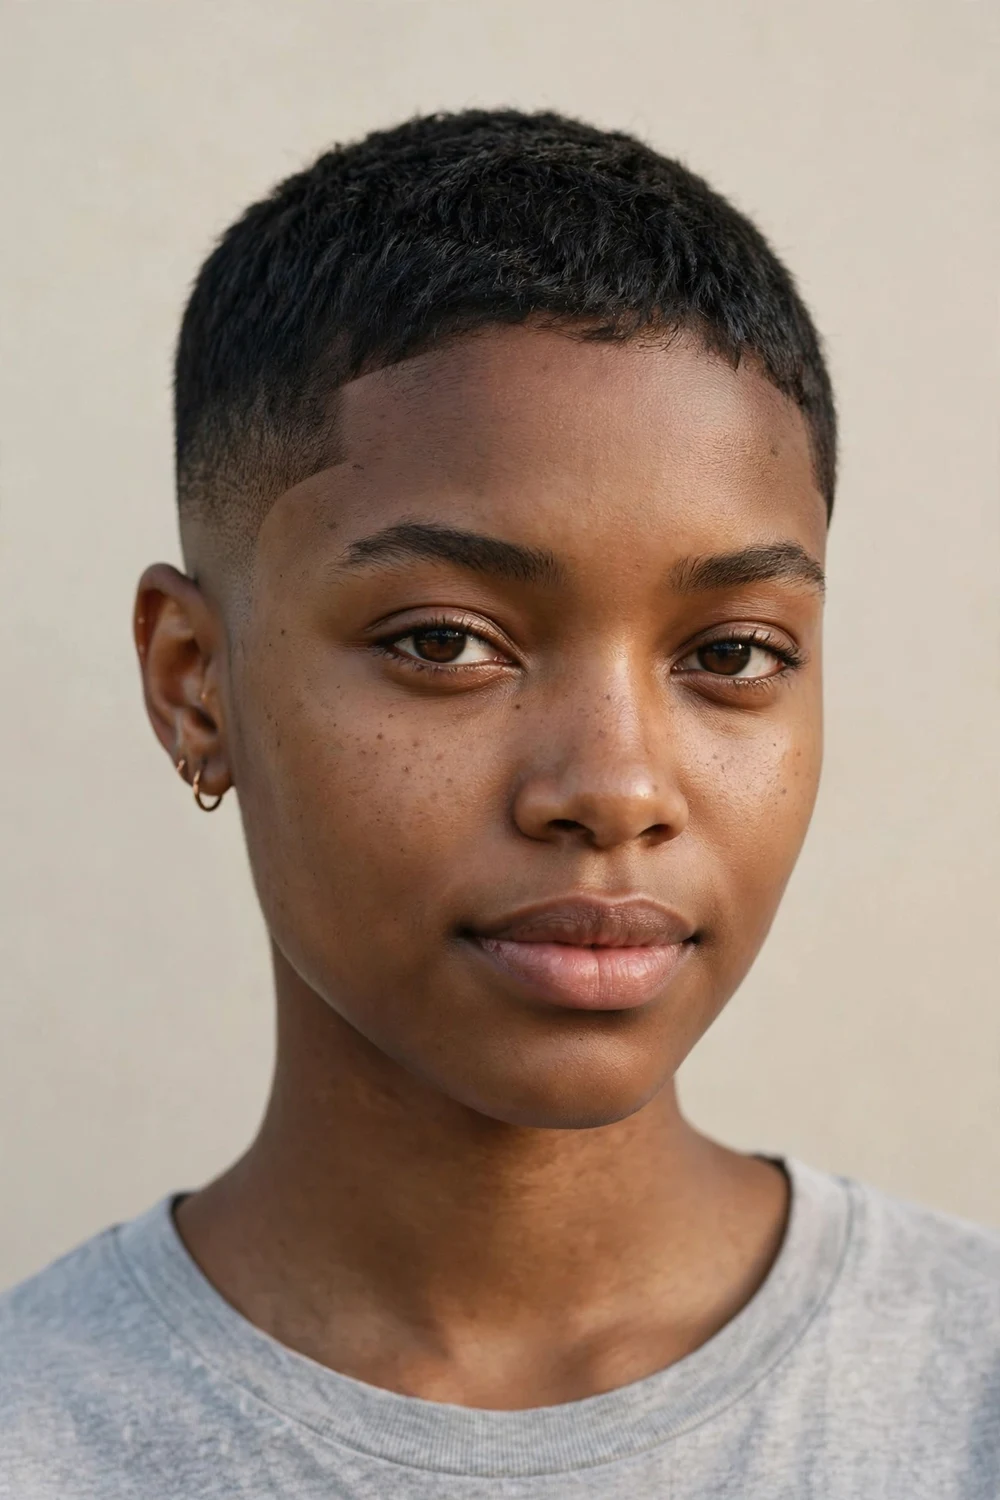
A buzzed pixie with a clean fade makes thin hair look intentional and strong instead of wispy. The fade highlights your features and removes every fragile end. With the right fade, even the thinnest strands look deliberate.
Zero daily styling is needed: maybe a little scalp hydration and shape-ups every 3 to 4 weeks. A flexible paste keeps the top crisp between trims. This cut is pure freedom if you are done with volume sprays and round brushes.
Try this: moisturize the faded areas lightly after washing. Healthy-looking skin makes the fade look sharper.
Difficulty: Easy · Cost: $35–$55 (cut only)
15. Platinum Buzz Pixie
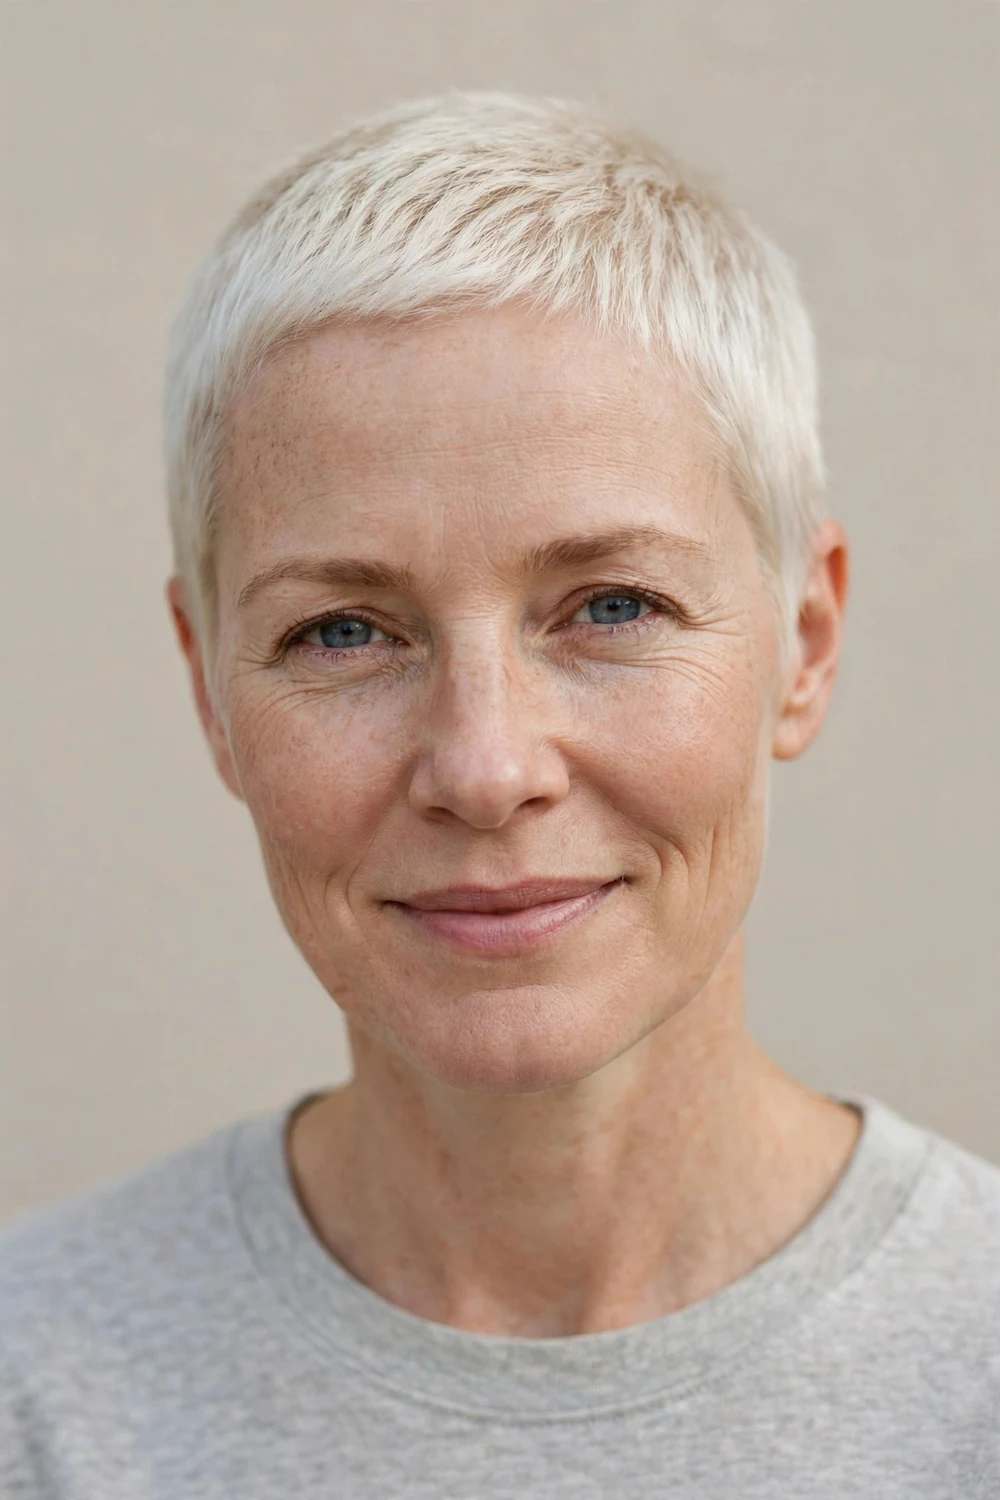
Going platinum with a buzz crop puts all the focus on even, healthy-looking color with no fragile ends in sight. The bright tone reflects light, which gives fine hair the illusion of density. A soft fade at the sides keeps the look modern rather than severe.
Color maintenance matters here: purple shampoo once a week keeps brassiness away, and trims every 3 to 4 weeks keep the edges clean. This is a confident, high-impact choice for women ready for a big change.
Try this: ask your colorist about a bond-building treatment with the bleach. Buzzed platinum only works when the hair looks healthy.
Difficulty: Easy · Cost: $120–$200 (cut + bleach)
16. Asymmetrical Pixie
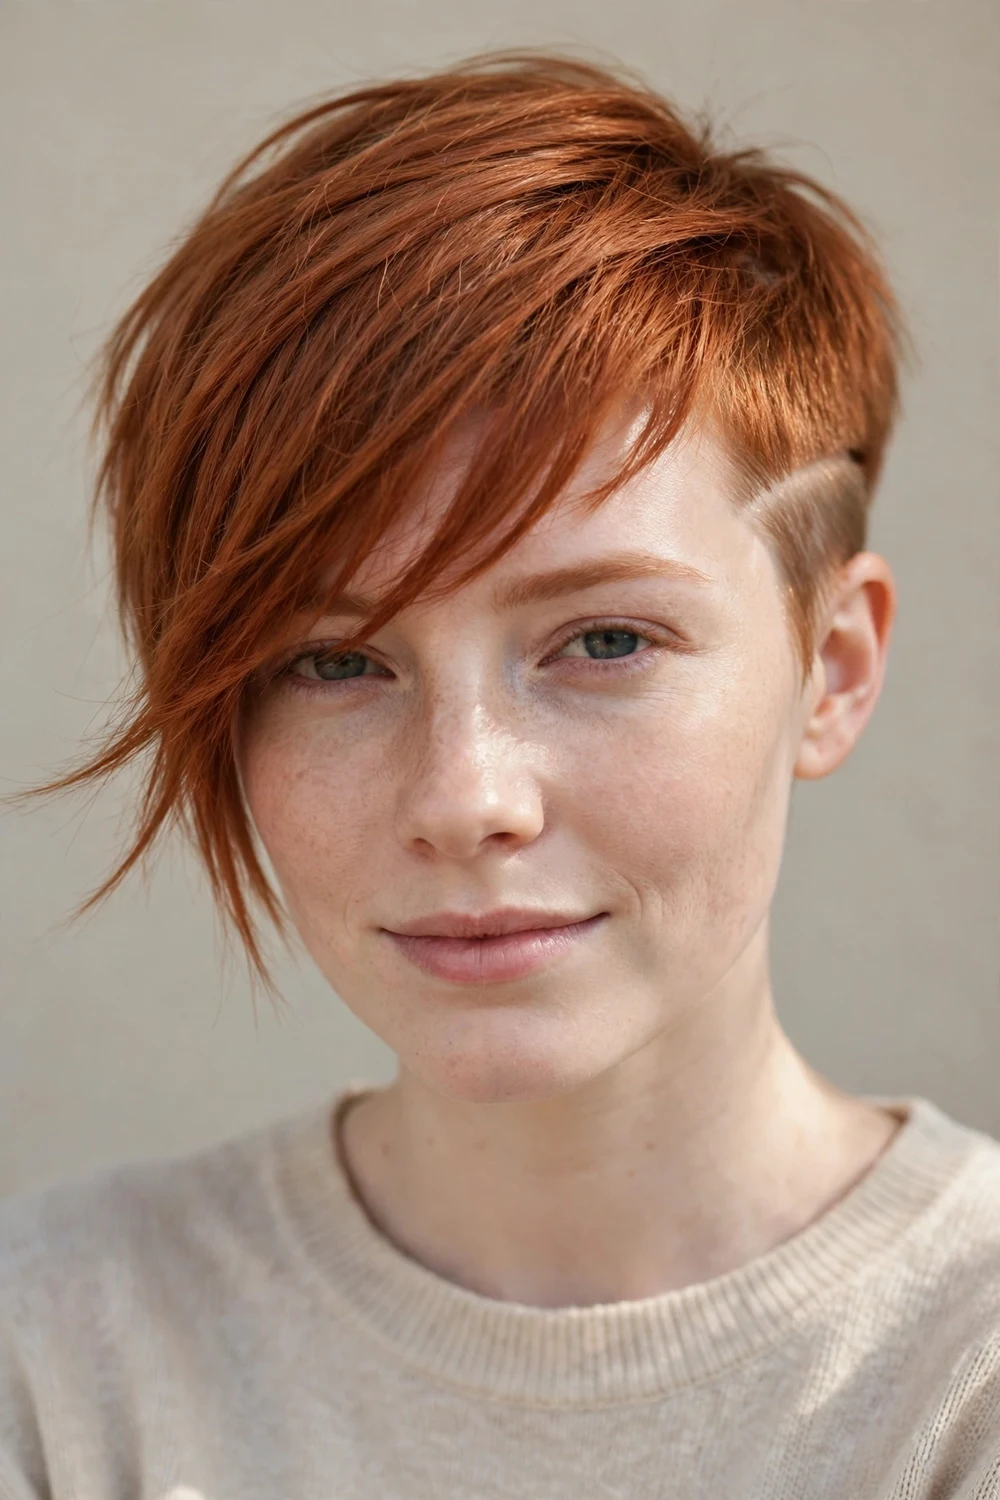
One side sweeps long while the other stays cropped close. That diagonal line pulls the eye across the face instead of letting it settle on flatness, and the longer side gives you styling options a classic pixie lacks. The asymmetry also distributes weight unevenly, which reads as volume.
Wear the long side tucked behind one ear for the day, swept forward for the evening. Trims every 4 weeks keep the two lengths balanced. A light hold spray keeps the sweep in place without stiffness.
Try this: blow-dry the long side forward and across while damp, then flip it into place. Pre-setting the direction saves restyling later.
Difficulty: Moderate · Cost: $50–$80 (cut only)
17. Long-Top, Short-Sides Pixie
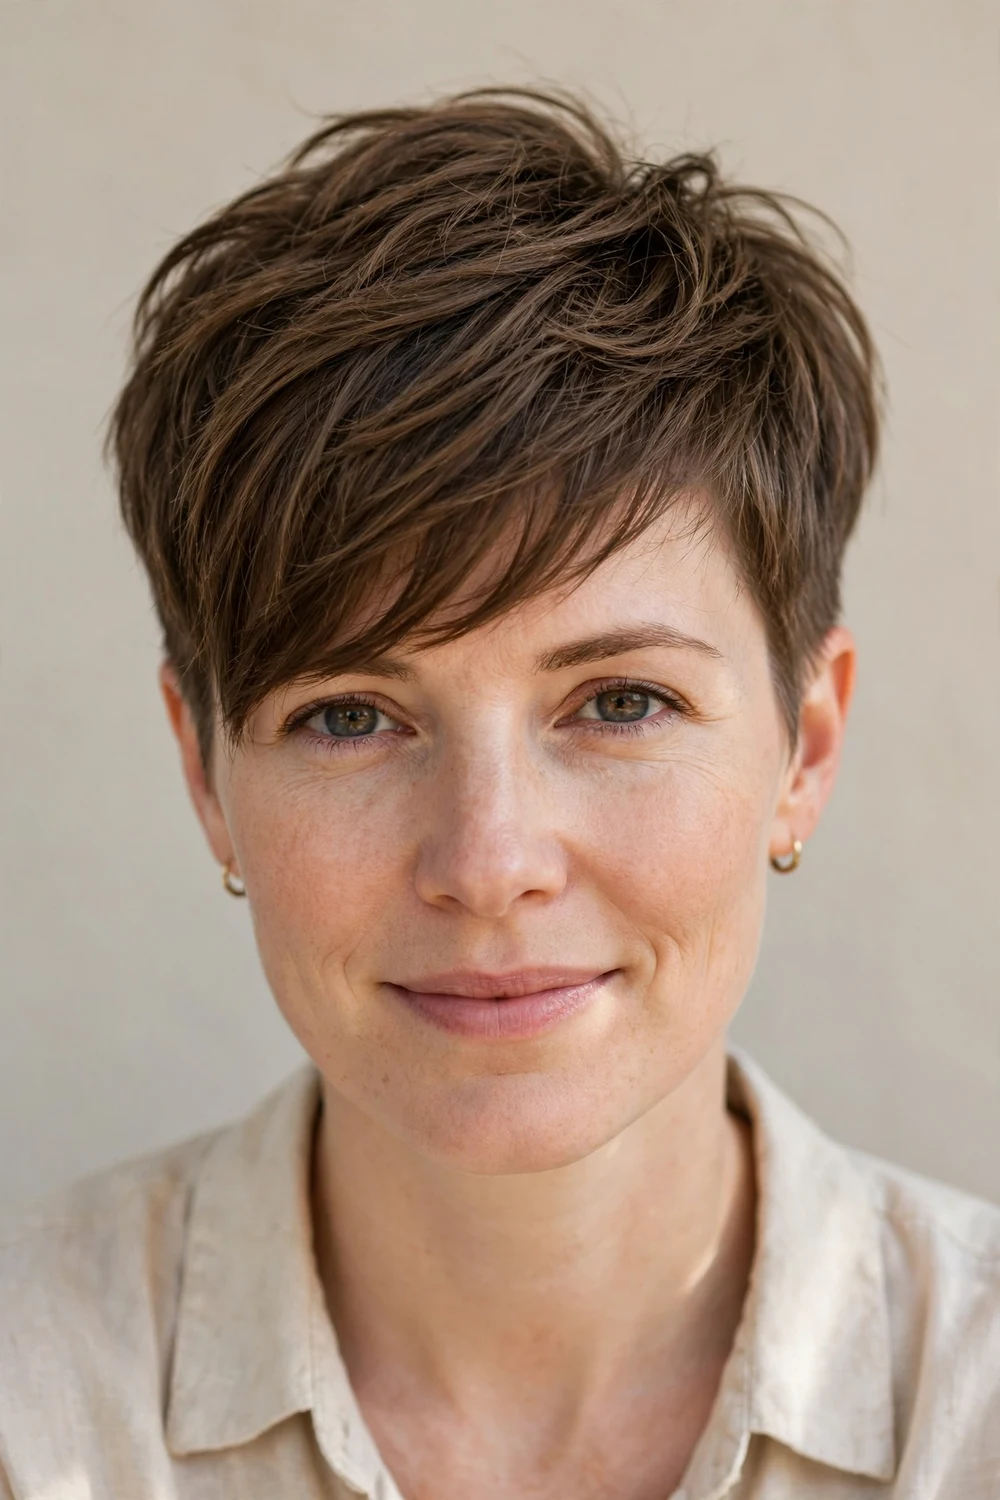
A long top section paired with short tapered sides creates the proportion that makes fine hair look fuller. The top reaches the brows or beyond, giving you styling versatility, while the short sides keep the silhouette modern and remove side bulk that would flatten the look.
Style by lifting the top at the roots and sweeping it across the forehead, slicking it back, or pushing it up. One cut, several moods. Use a heat protectant whenever the blow-dryer shapes the top.
Try this: change the top’s direction day to day. Fine hair shows volume best when the top is not trained flat in one direction.
Difficulty: Moderate · Cost: $50–$75 (cut only)
18. Undercut Pixie
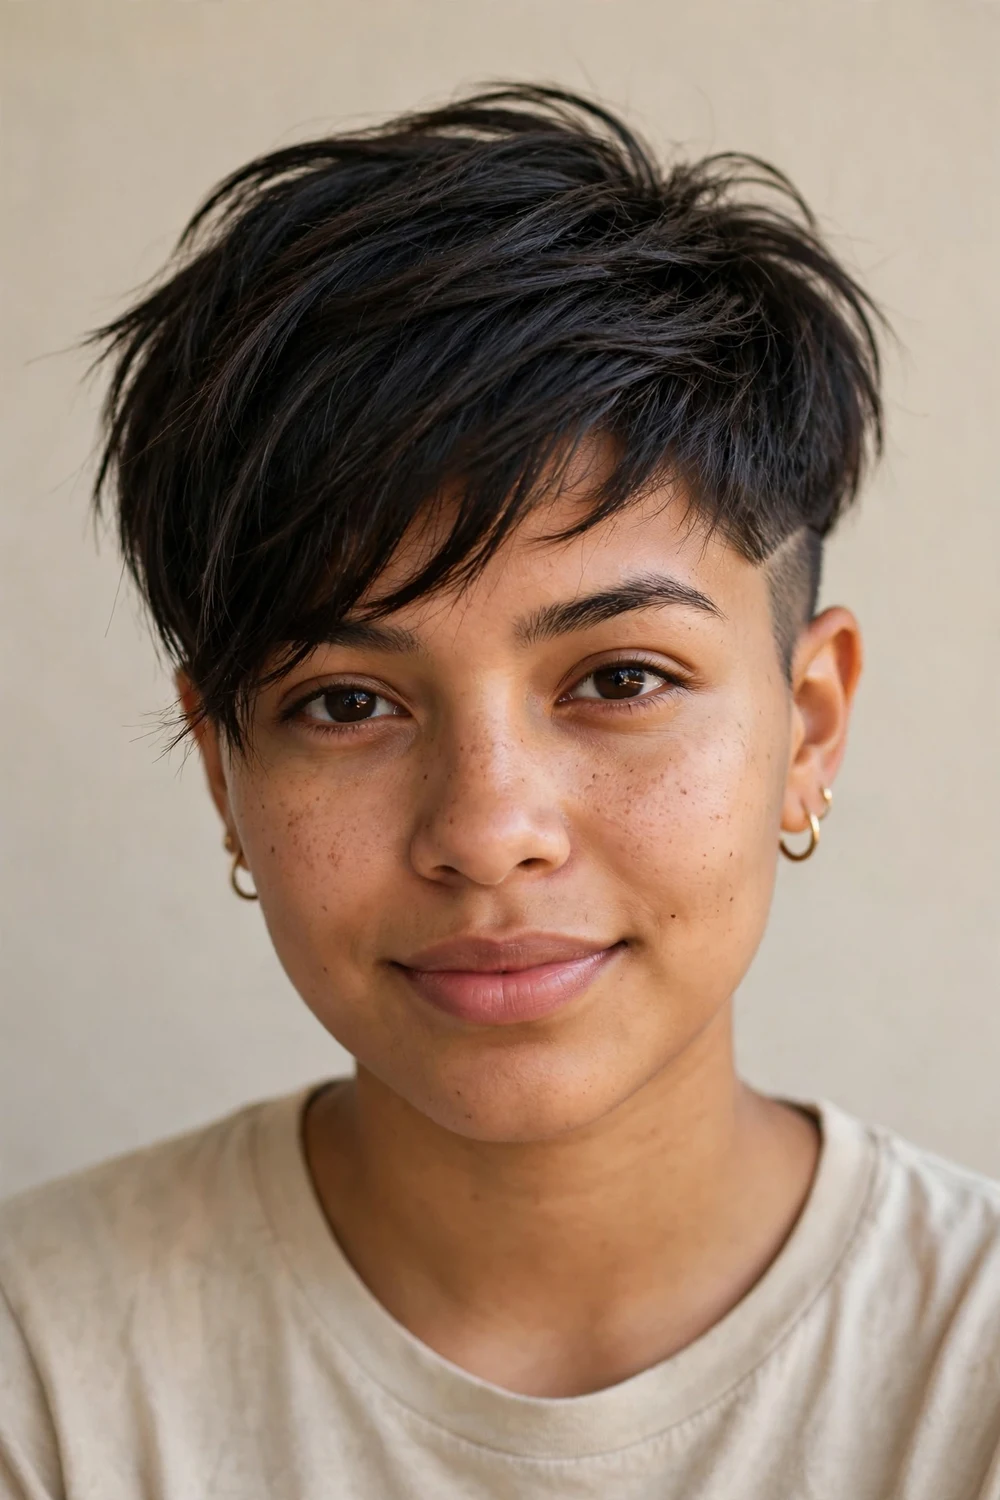
An undercut removes the hair underneath so the longer top section gets all the attention. For fine hair, that contrast is flattering: the clipped sides eliminate density problems, while the top looks dramatically fuller. It is bold but surprisingly low maintenance once established.
Style the top by sweeping it across, lifting it upward, or slicking it back. A dab of dry wax gives piecey definition. The undercut needs re-clipping every 3 to 4 weeks to stay sharp.
Try this: ask for a soft undercut first, a gentle fade rather than a hard disconnect. You can always go bolder at the next appointment.
Difficulty: Moderate · Cost: $50–$80 (cut only)
19. Two-Tone Micro Pixie with Dark Undercut
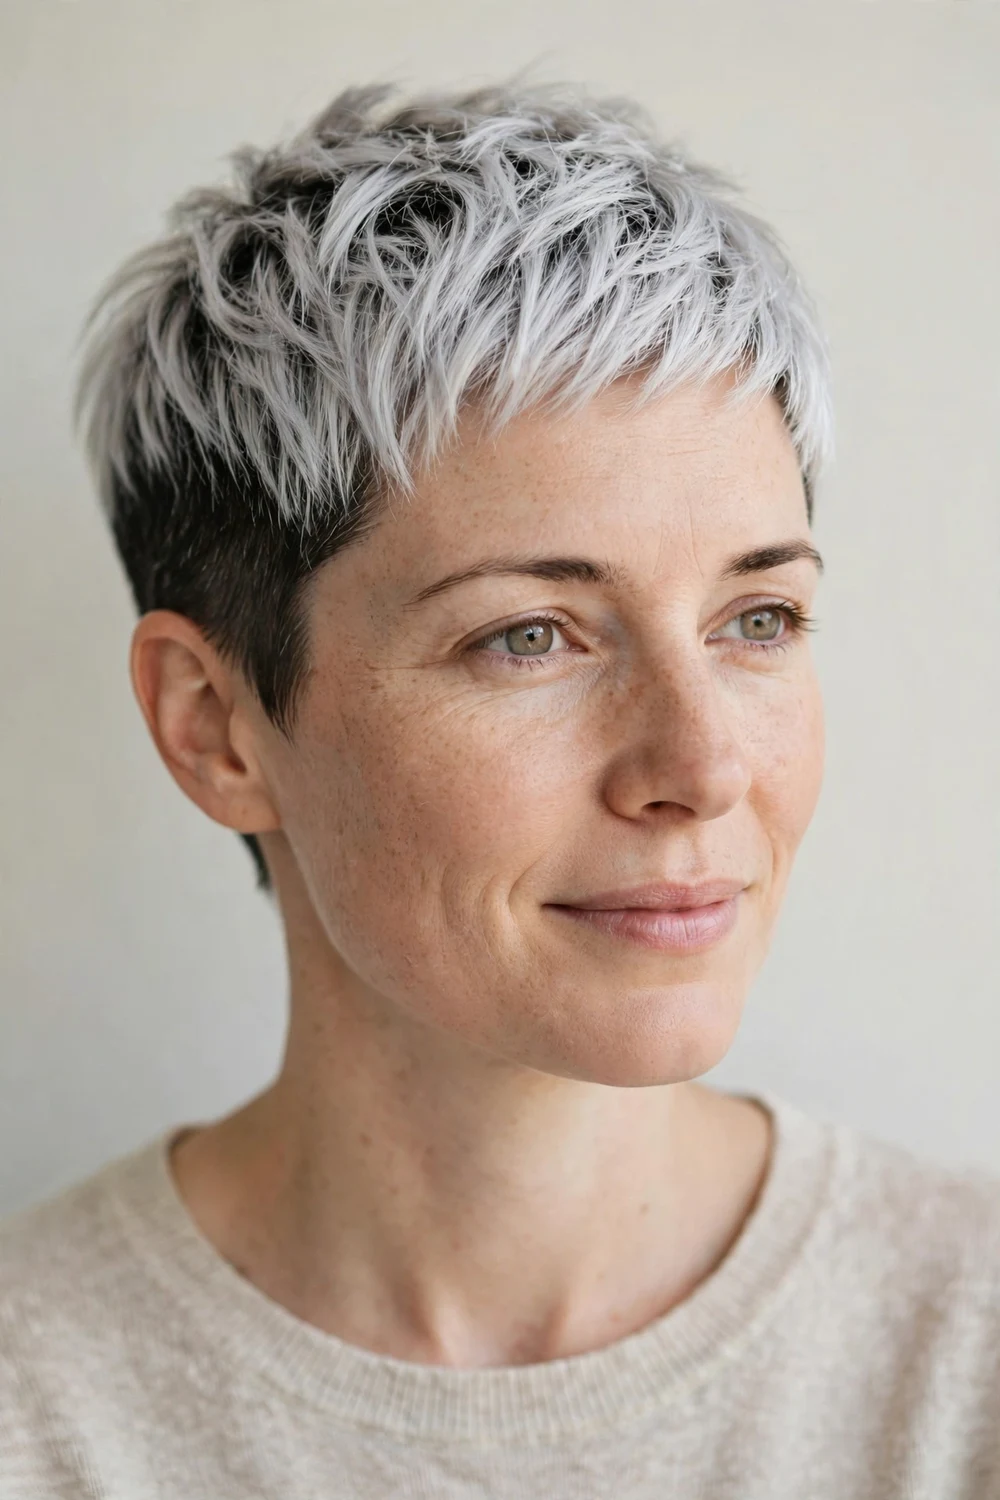
This edgy cut pairs a silver top with a dark undercut, and the contrast does real work for fine hair. The dark underneath makes the light top pop, and that color contrast creates an illusion of thickness that a single tone cannot match. The micro length keeps it crisp.
It is a smart way to experiment with color without changing your natural base dramatically. The two-tone effect also highlights cheekbones and jawline. Refresh the silver with purple shampoo between salon visits.
Try this: keep the undercut slightly longer than skin-close. A little length underneath makes the color contrast softer and easier to grow out.
Difficulty: Moderate · Cost: $130–$220 (cut + color)
20. Swept-Back Pixie
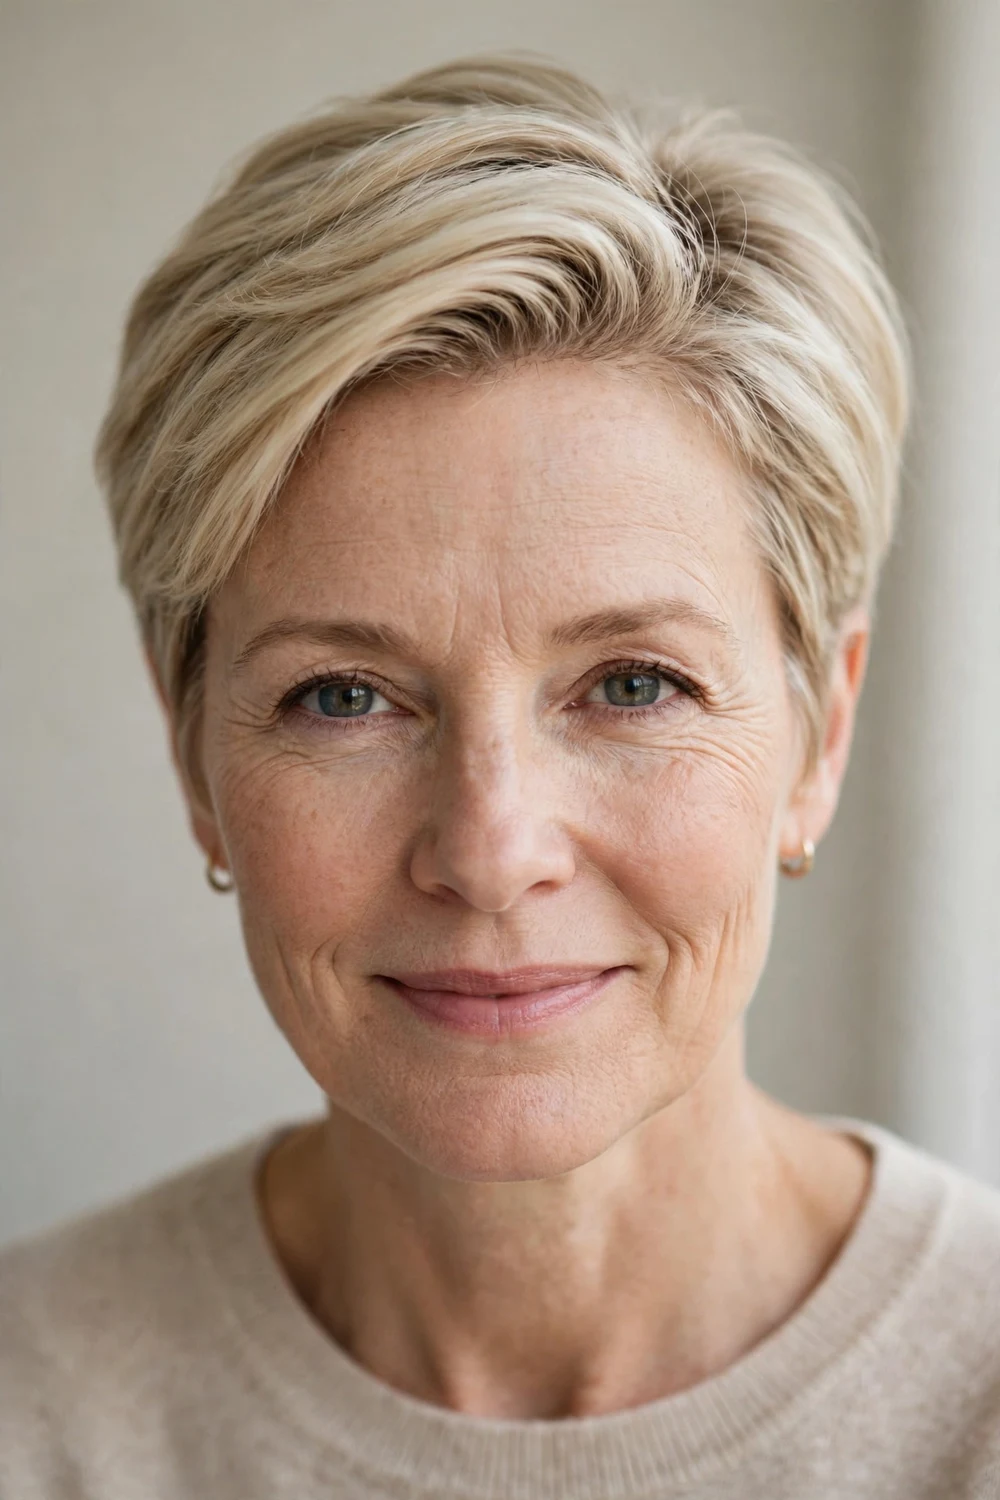
A swept-back pixie keeps longer layers that push straight back off the face. The backward direction builds natural lift at the front hairline, and the longer length gives styling flexibility while strategic layering creates volume. It suits women transitioning from longer hair to shorter styles.
Blow-dry back with a heat protectant and a round brush, or tousle it with paste for a casual version. This conservative pixie works well in professional settings.
Try this: direct the blow-dryer forward first, then sweep everything back. The double direction builds height at the front.
Difficulty: Moderate · Cost: $45–$70 (cut only)
21. Grown-Out Pixie
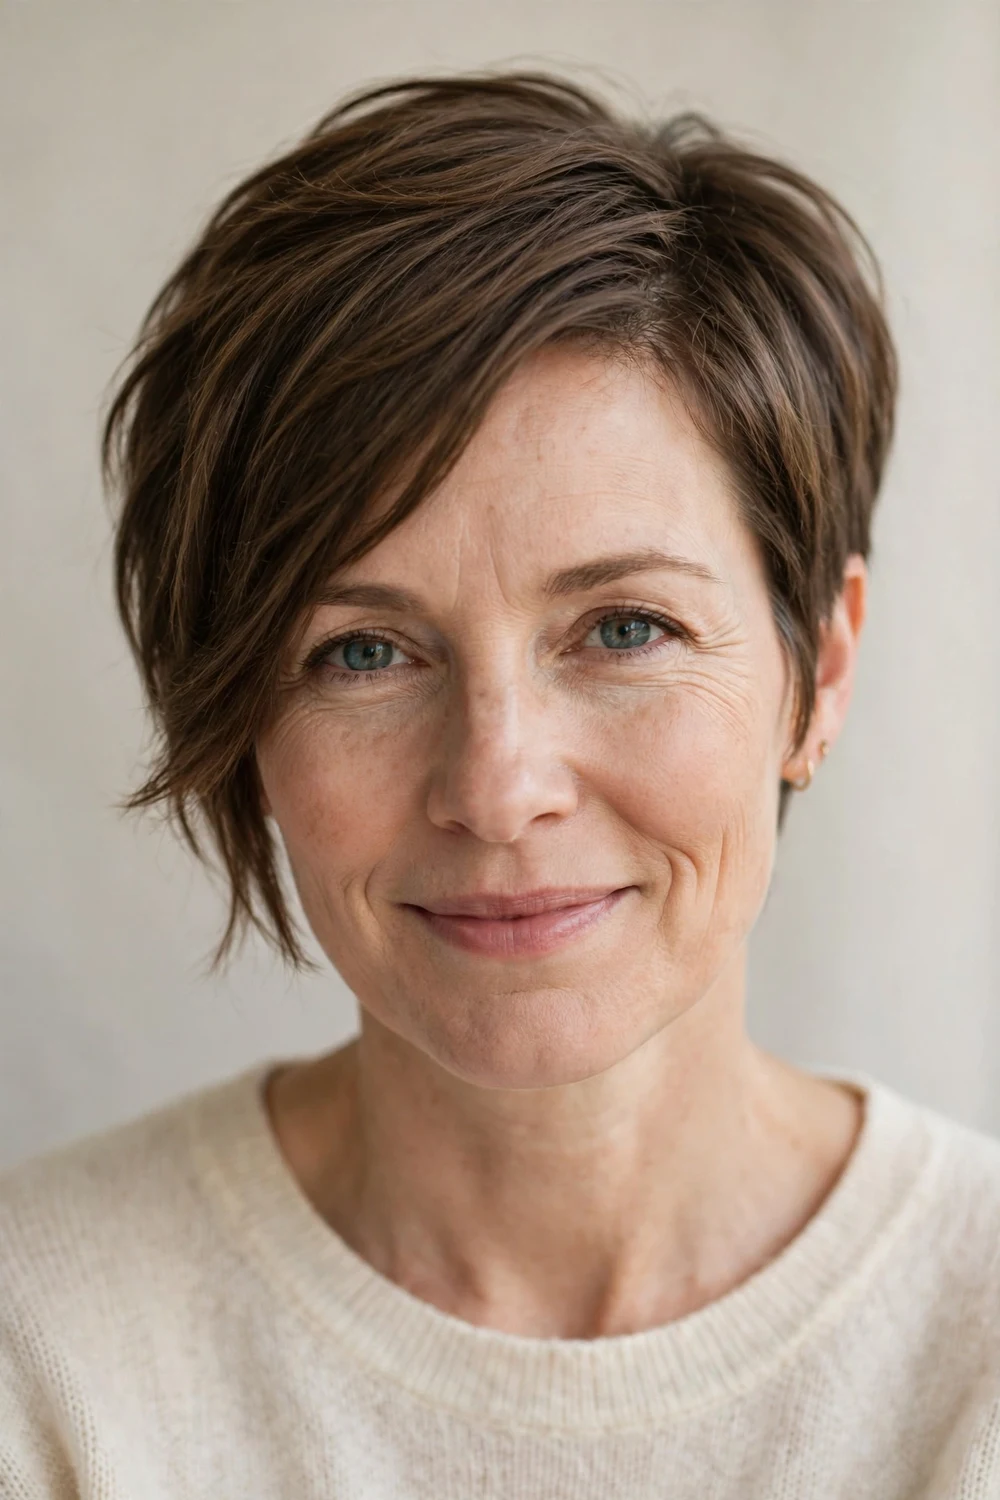
Not every pixie needs to be cropped close to look intentional. A grown-out pixie keeps longer layers on top and around the ears with tapered sides, giving fine hair more surface area while staying well within pixie territory. The longer layers graze the cheekbones and add fullness.
Keep the sides tapered rather than letting them bulk out, which makes fine hair look flat. If you are weighing lengths, this guide to short hairstyles for thin fine hair compares pixies with short bobs so you can see the difference side by side.
Try this: switch your part side to side as it grows. A flexible part keeps a growing pixie looking deliberate, not accidental.
Difficulty: Easy · Cost: $45–$65 (cut only)
22. French Crop Pixie
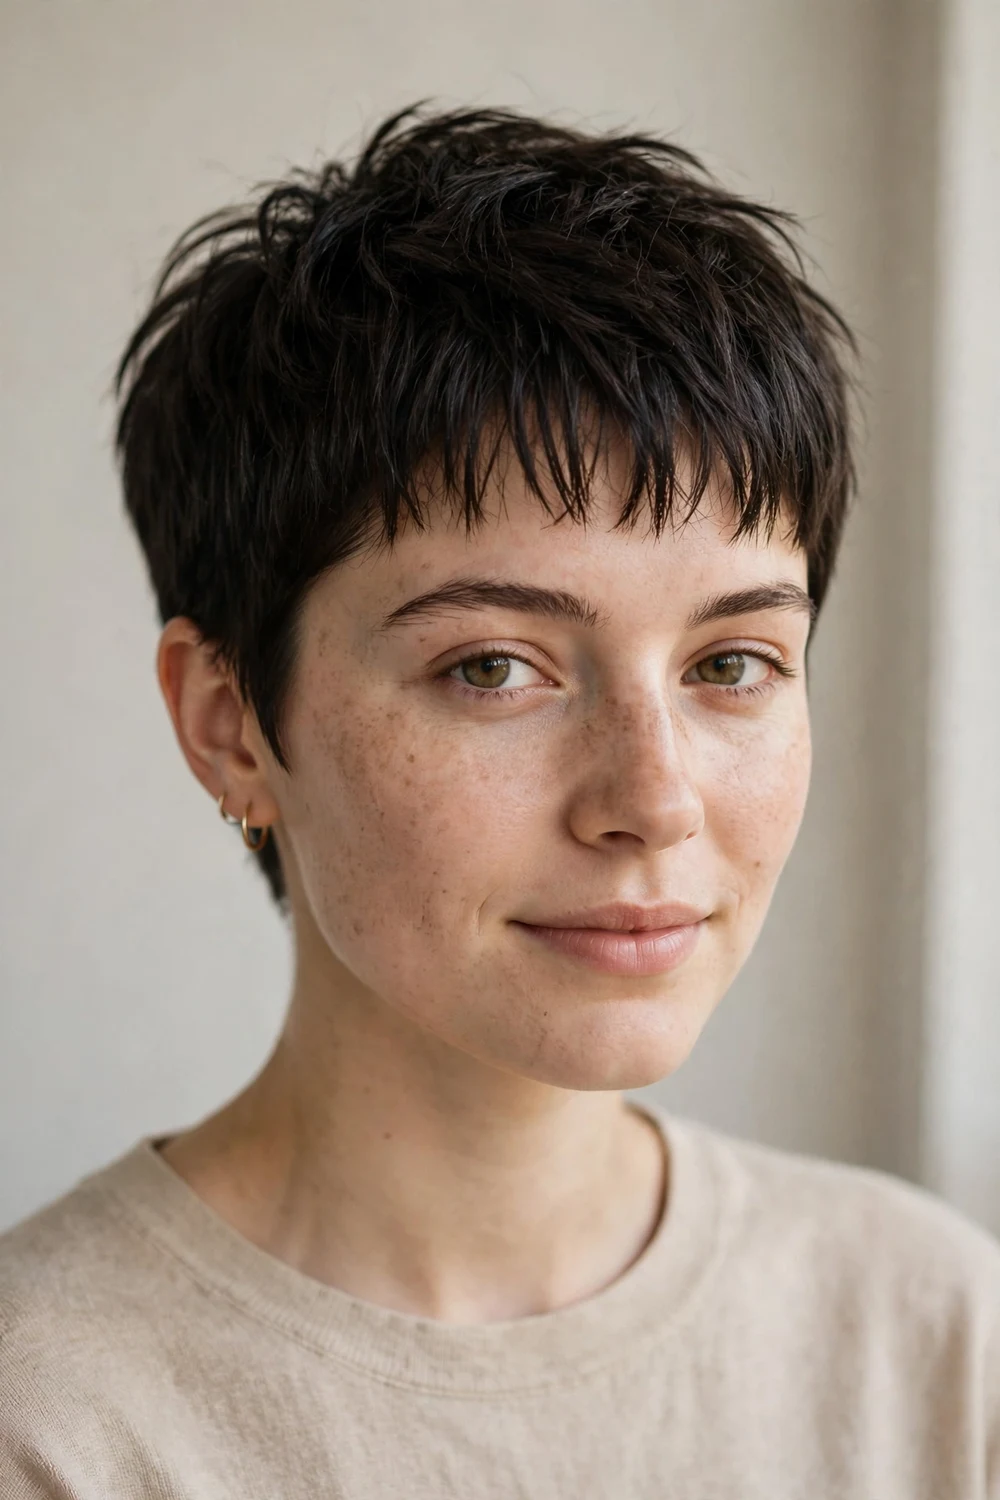
The French crop pixie is shorter than a traditional pixie with a soft, piecey fringe across the forehead. The slightly imperfect, lived-in quality is the entire point: ask for a blunt-ish fringe with tiny notches and a low taper. The short fringe gives structure while the textured top helps fine hair look denser.
Air-dry whenever possible, or use a flat iron for a subtle bend in the ends with a heat protectant. A small amount of cream worked through tames frizz without weighing the cut down.
Try this: push the fringe slightly to one side while it dries. The off-center finish looks more modern than a straight-across line.
Difficulty: Easy · Cost: $45–$70 (cut only)
23. Bixie
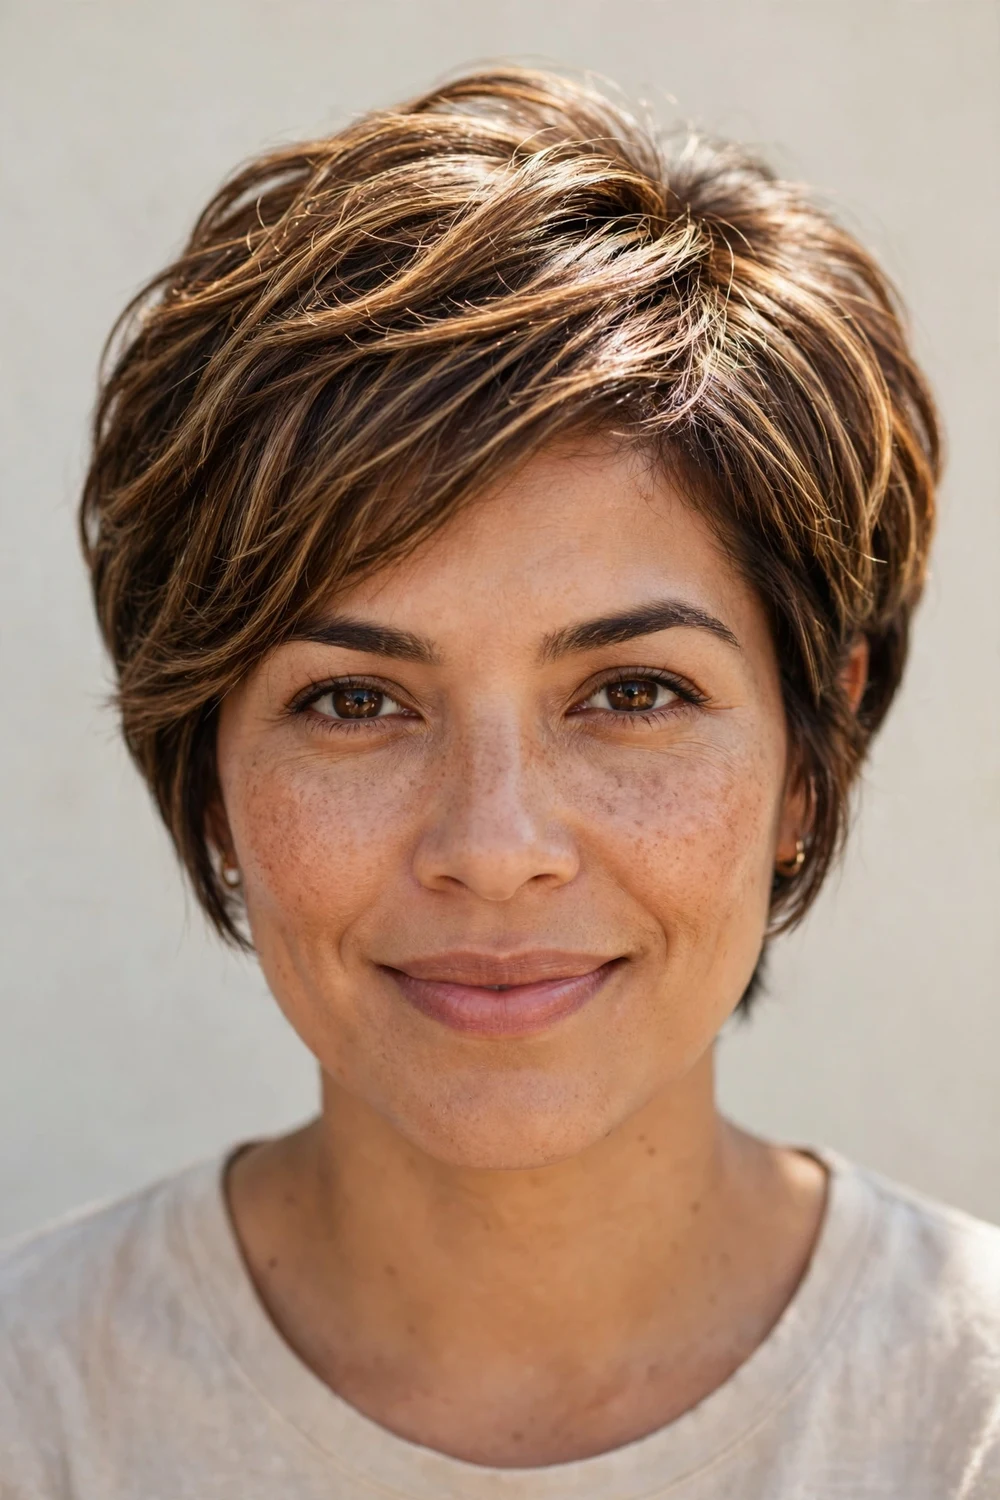
The bixie sits right between a bob and a pixie, with length around the ears and tapered sides. You get more body without extra effort: the rounded shape helps fine hair look fuller at the sides and back, and the extra length gives styling options a pure pixie cannot.
Wash, scrunch with a microfiber towel, and air-dry, then add texture spray for definition. Blow-dry with a round brush when you want it smoother. This is one of the most requested short cuts for fine hair right now.
Try this: tuck one side behind your ear and leave the other loose. The asymmetry shows off the cut’s shape and adds instant style.
Difficulty: Easy · Cost: $50–$75 (cut only)
24. Stacked Lob-Bob Hybrid
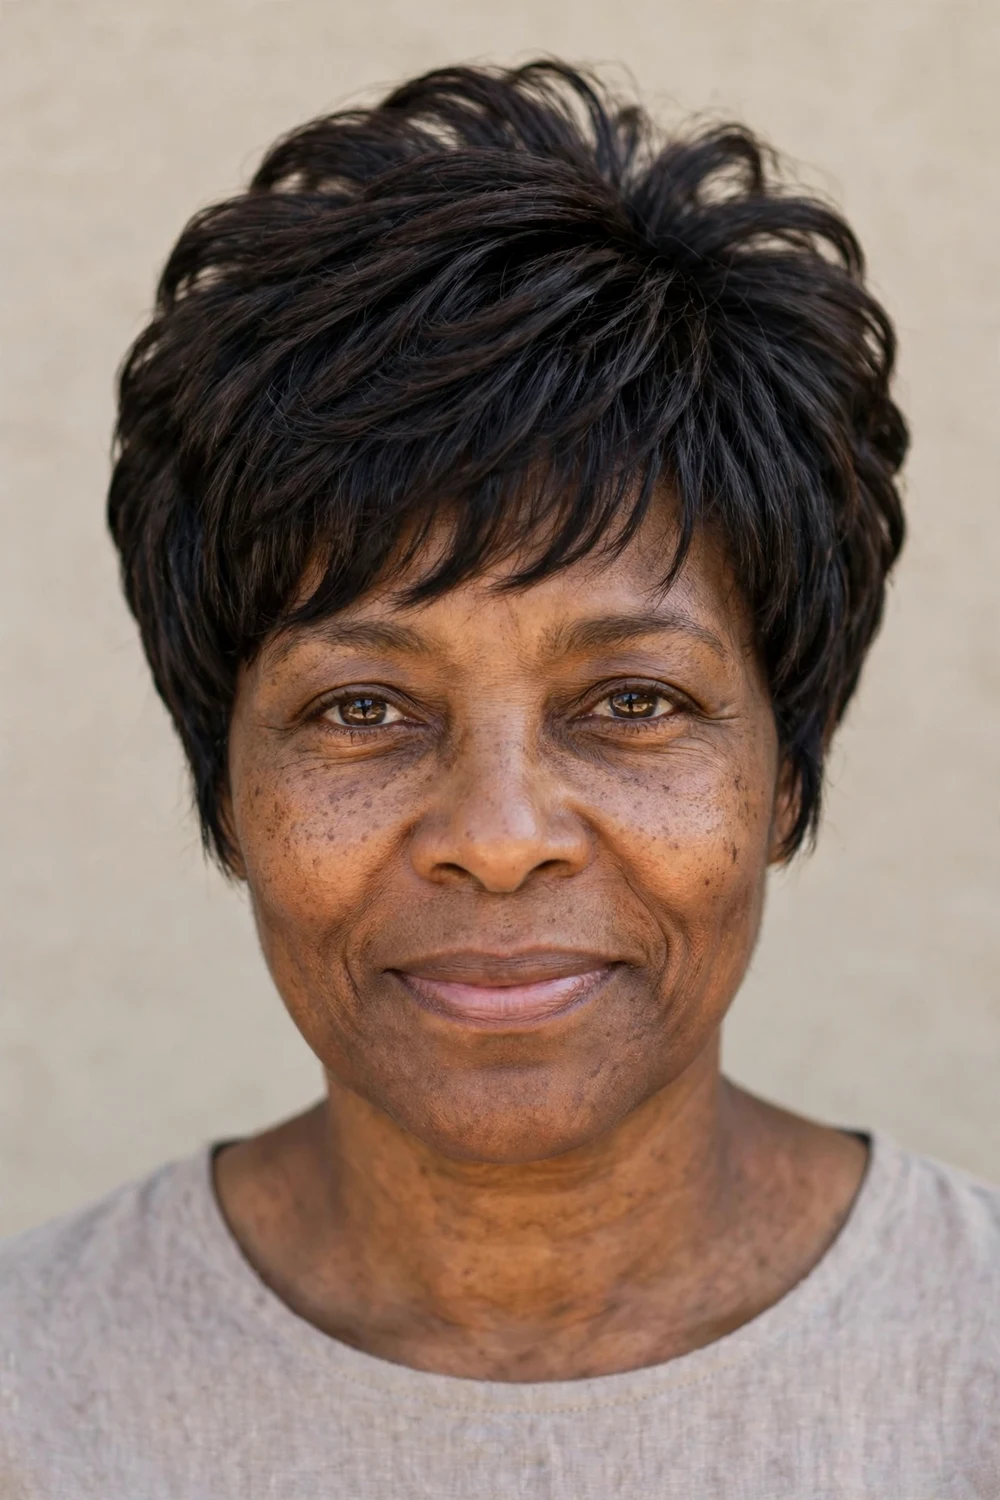
This hybrid keeps pixie shortness at the front with a stacked, graduated back. The stack builds volume exactly where fine hair tends to flop, while the front keeps the face-framing benefits of a pixie. It is a favorite for women who want more body in the back but still crave short length.
Blow-dry smooth with a heat protectant for a polished finish, or air-dry with texture spray for a casual version. If the longer back appeals to you, these bob hairstyles for fine hair use the same volume tricks at longer lengths.
Try this: round-brush the stacked back under while blow-drying. The inward curve is what makes the stack look full.
Difficulty: Moderate · Cost: $50–$80 (cut only)
25. Pixie Shag
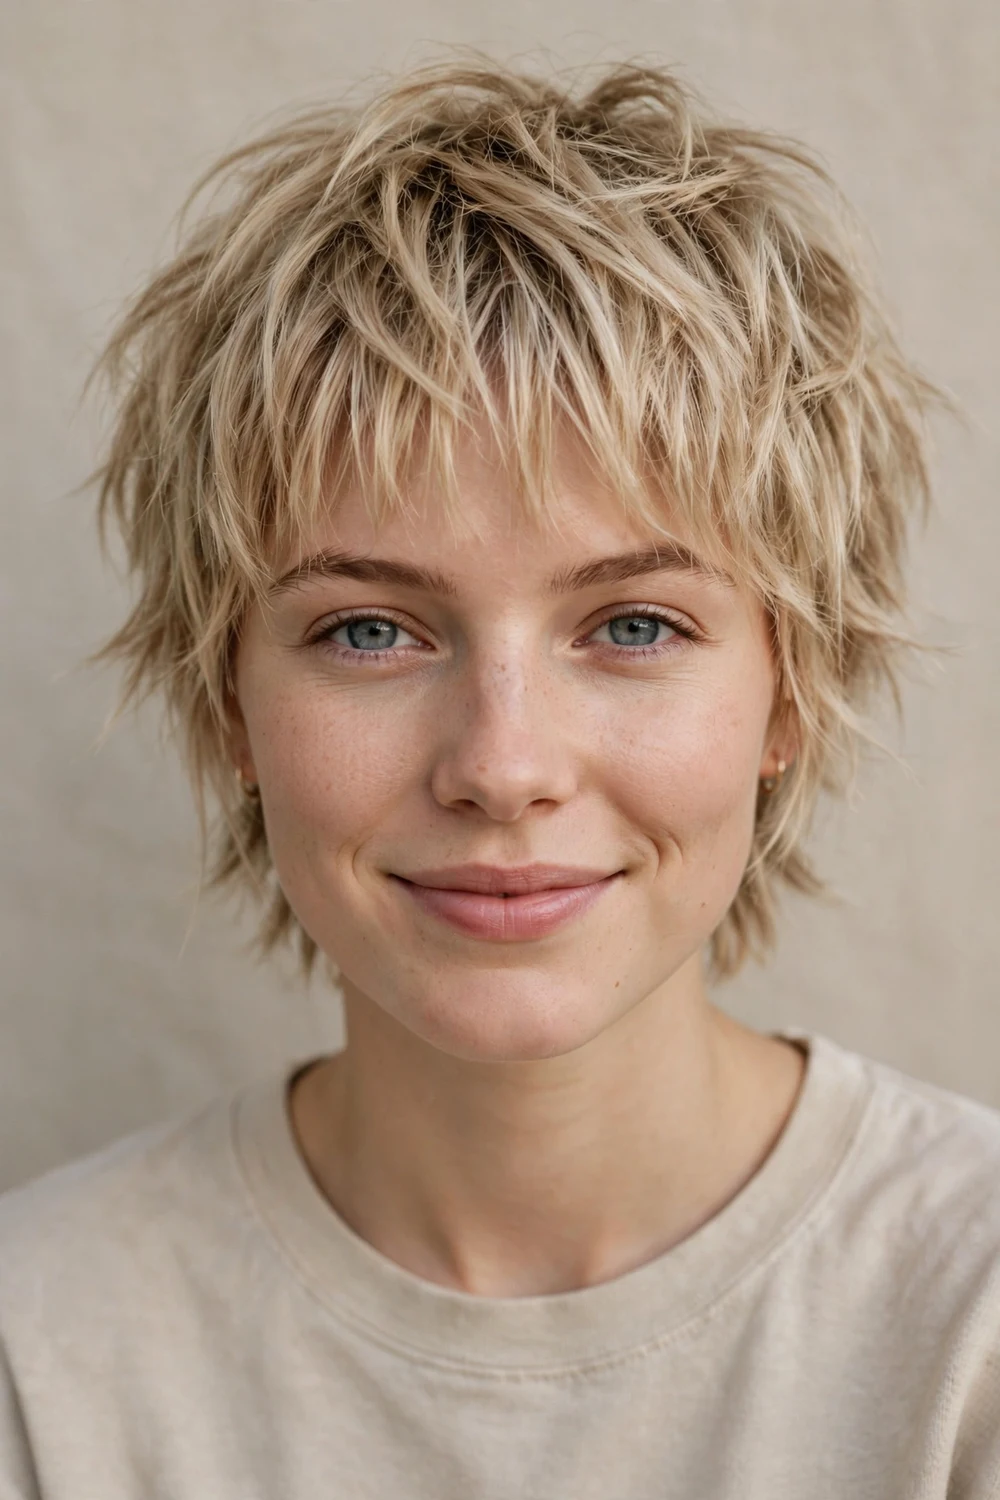
Short shag energy at pixie length means lots of internal texture and layers that move independently. For fine hair, the shaggy approach beats a sleek one: it spreads the hair across more surface area, which makes it look fuller overall. Piecey layers bulk up fine hair without trying.
Spray dry shampoo at the roots for grip, then use a texturizing spray on dry hair rather than heavy products. Weight is the enemy of fine-hair volume, so keep products light and layered.
Try this: flip the layers in different directions with your fingers. Controlled mess is the whole aesthetic here.
Difficulty: Easy · Cost: $50–$75 (cut only)
26. Vintage Sculpted Pixie
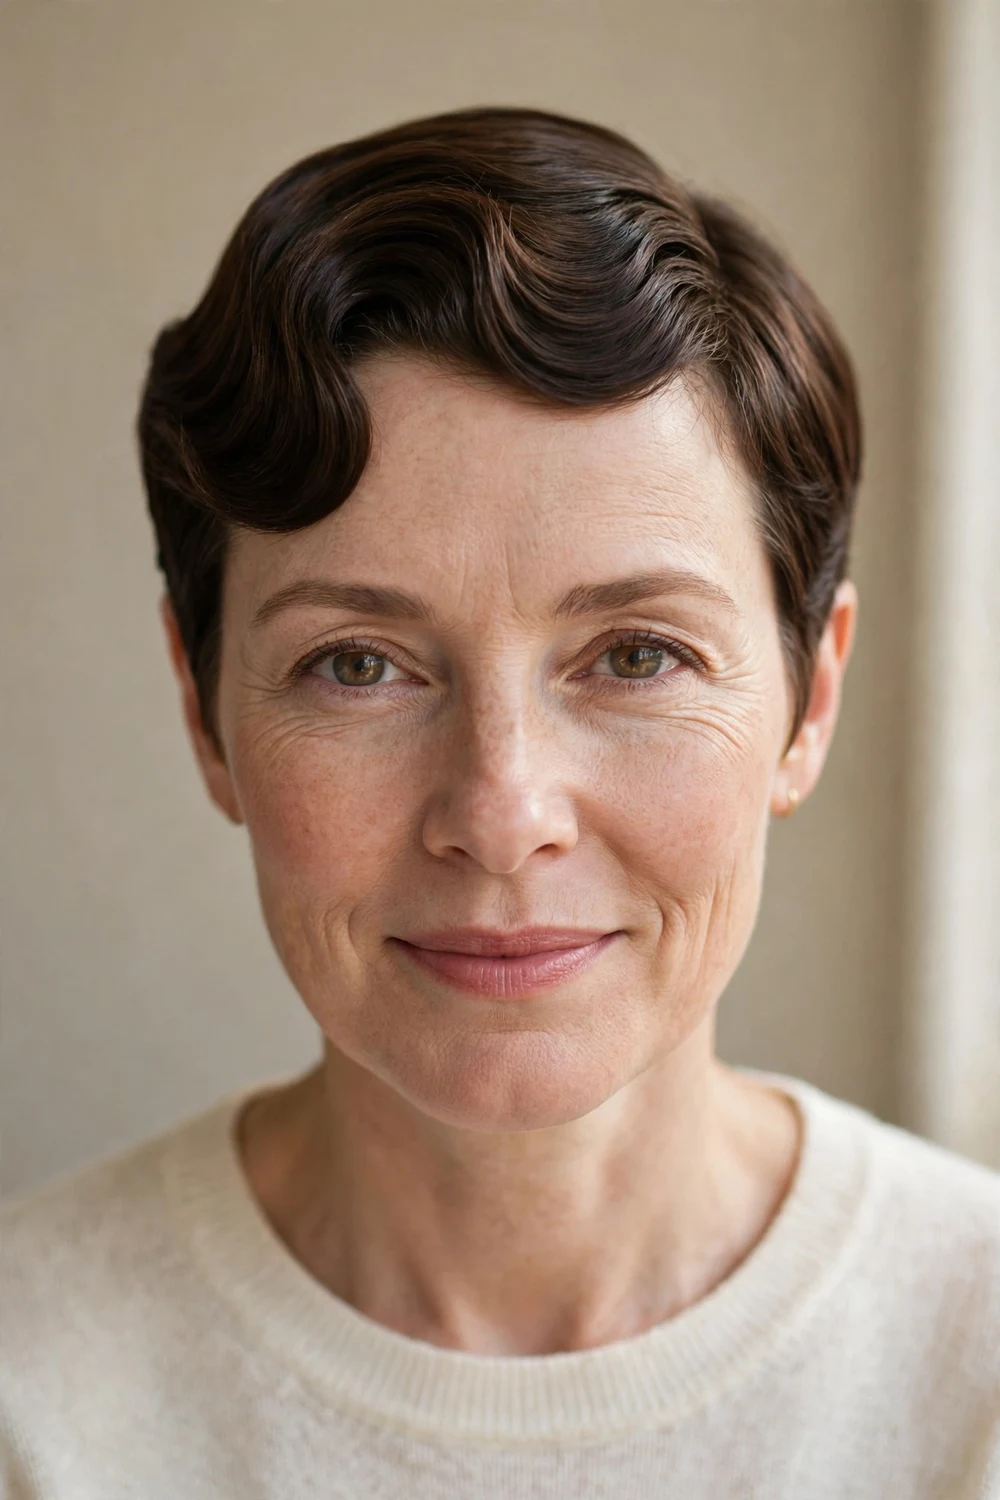
Old-school pixies get their smooth, sculpted front from styling cream and patience. The sculpted wave across the forehead adds a structured fullness that fine hair cannot get from texture alone. It is polished, deliberate, and surprisingly flattering.
Work a lightweight brilliantine or shaping cream through damp hair, then sculpt the wave with a comb and let it set. A touch smoothed through the ends keeps the look polished but not stiff. Allow 10 minutes of styling time.
Try this: set the sculpted front with a duckbill clip while you do your makeup. Remove the clip last for a wave that holds.
Difficulty: Moderate · Cost: $45–$70 (cut only)
27. Retro Finger-Waves Pixie
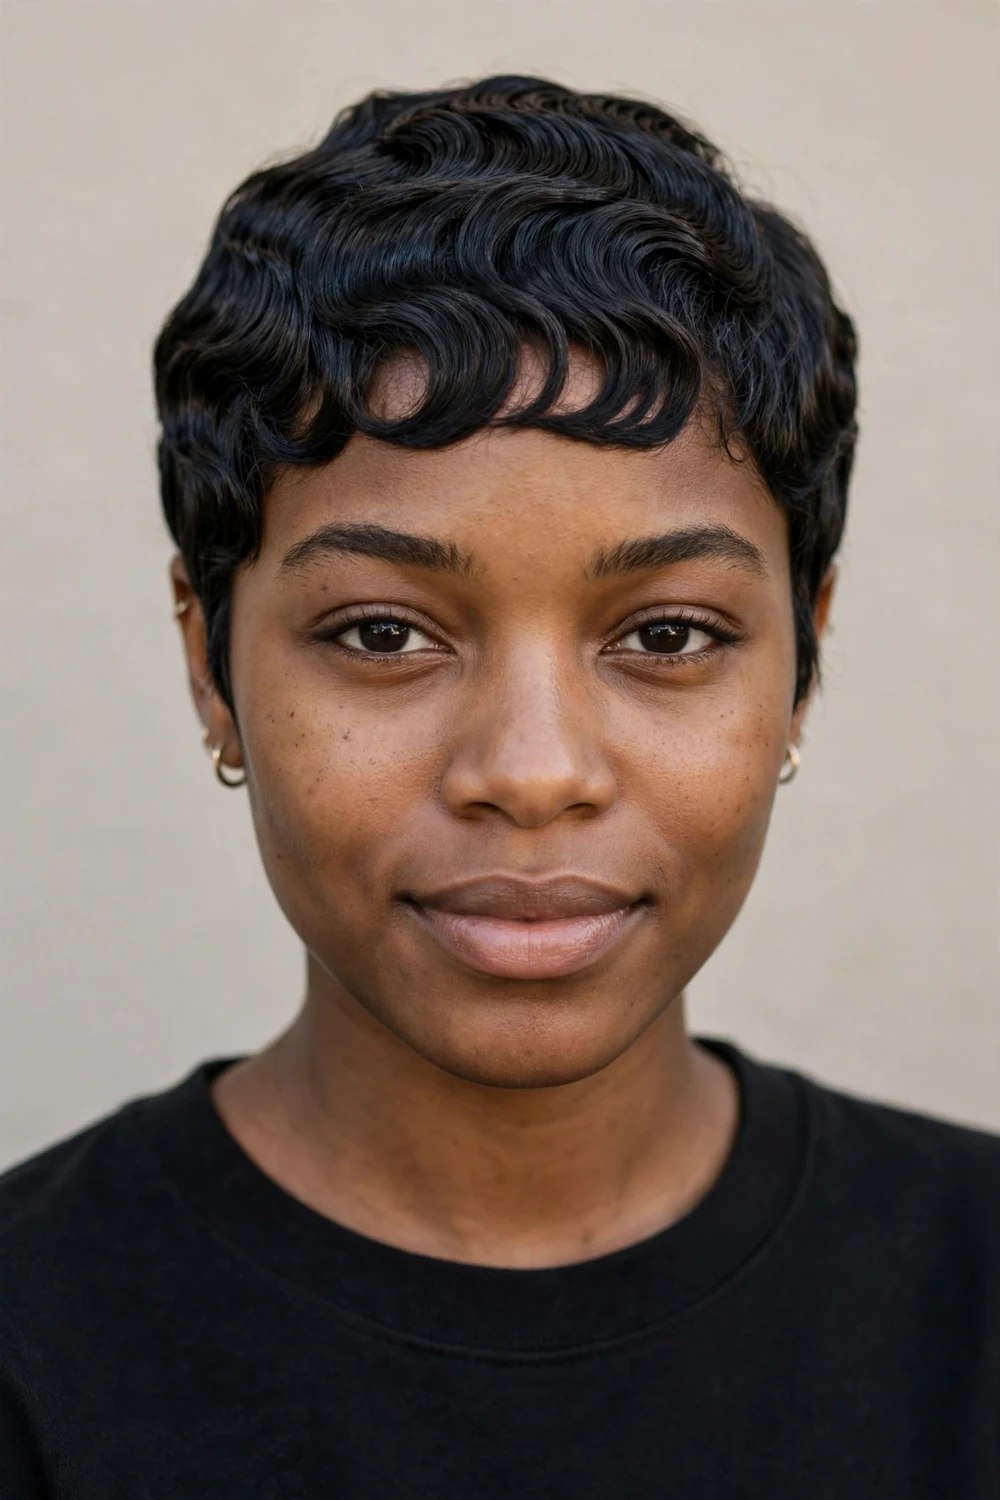
Finger waves give this pixie a vintage twist while the close crop keeps it modern. For fine hair, sculpted waves add texture and form without relying on bulk: the wave pattern itself creates the appearance of density. A two-tone color, like platinum over dark, sharpens the effect.
Sculpt waves into damp hair with strong-hold gel and clips, then let them set fully before removing the clips. This is a special-occasion style more than a daily driver, but the payoff is striking.
Try this: practice the wave pattern on the weekend first. Finger waves take two or three tries to learn, then they are quick.
Difficulty: High · Cost: $45–$70 (cut only)
28. Spiky Pixie
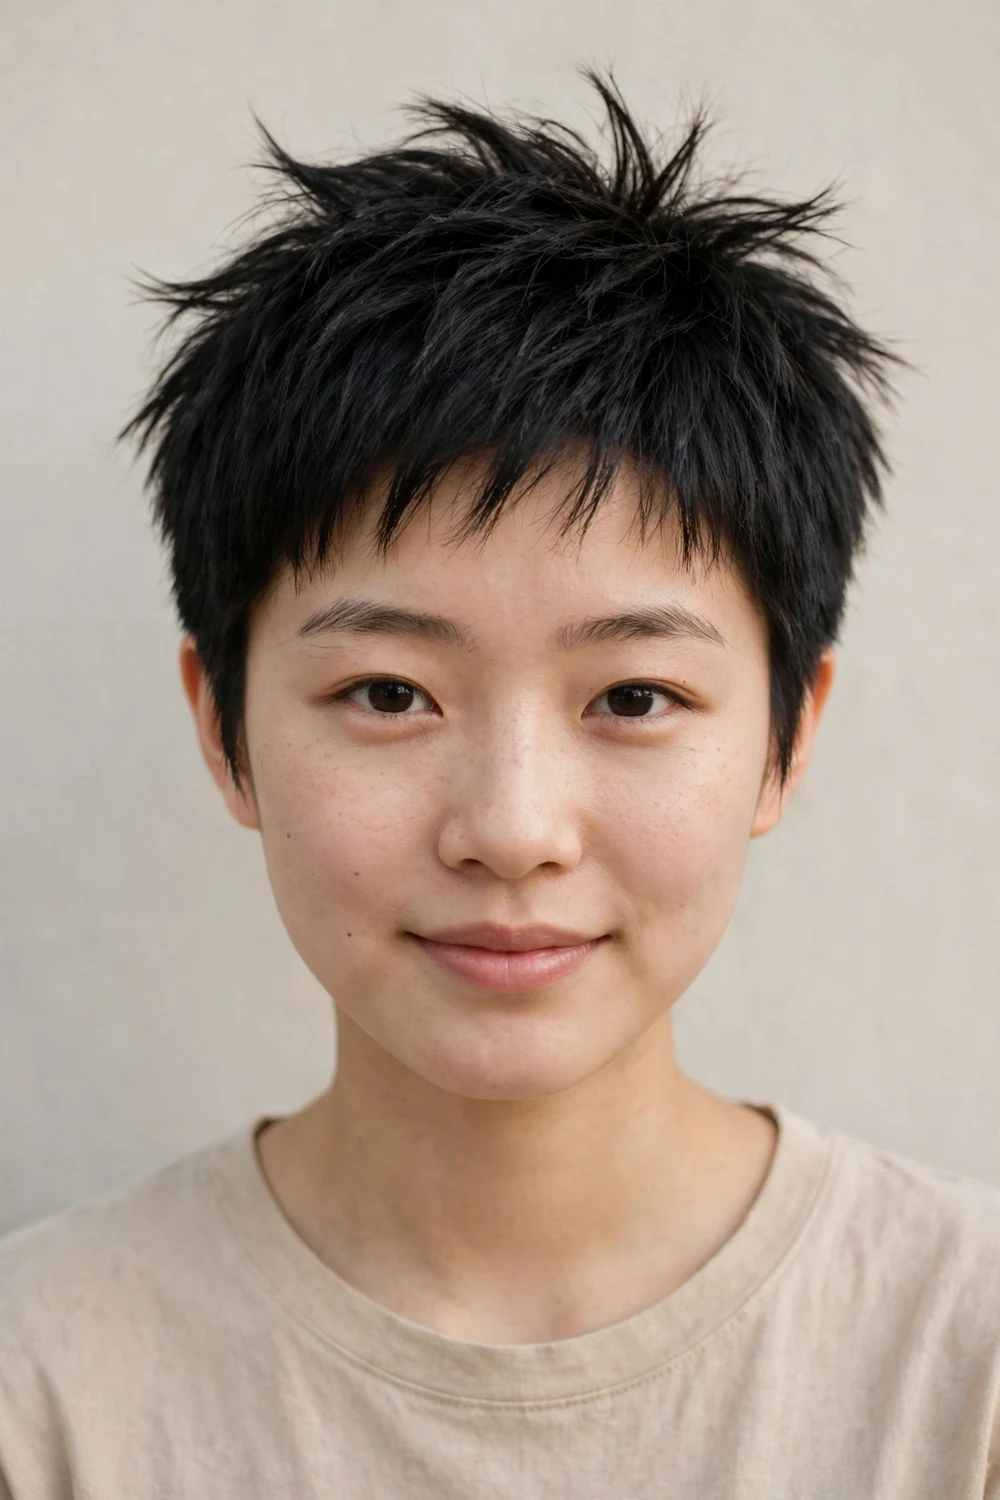
Spikes lift fine hair straight up off the scalp, which is the fastest route to visible volume. Focus the texture on top with crisp edges at the sides: shorter layers styled into soft spikes create incredible visual interest and height. The cut is designed to look tousled while keeping structure.
After washing, work in a small amount of plumping mousse, then define spikes with matte clay or paste on dry hair. The spiky finish hides thin spots completely because the eye reads the spikes, not the scalp.
Try this: spike the crown first and the front last. The crown does the volume work; the front just needs to look neat.
Difficulty: Easy · Cost: $45–$70 (cut only)
29. Curly Pixie with Tapered Sides
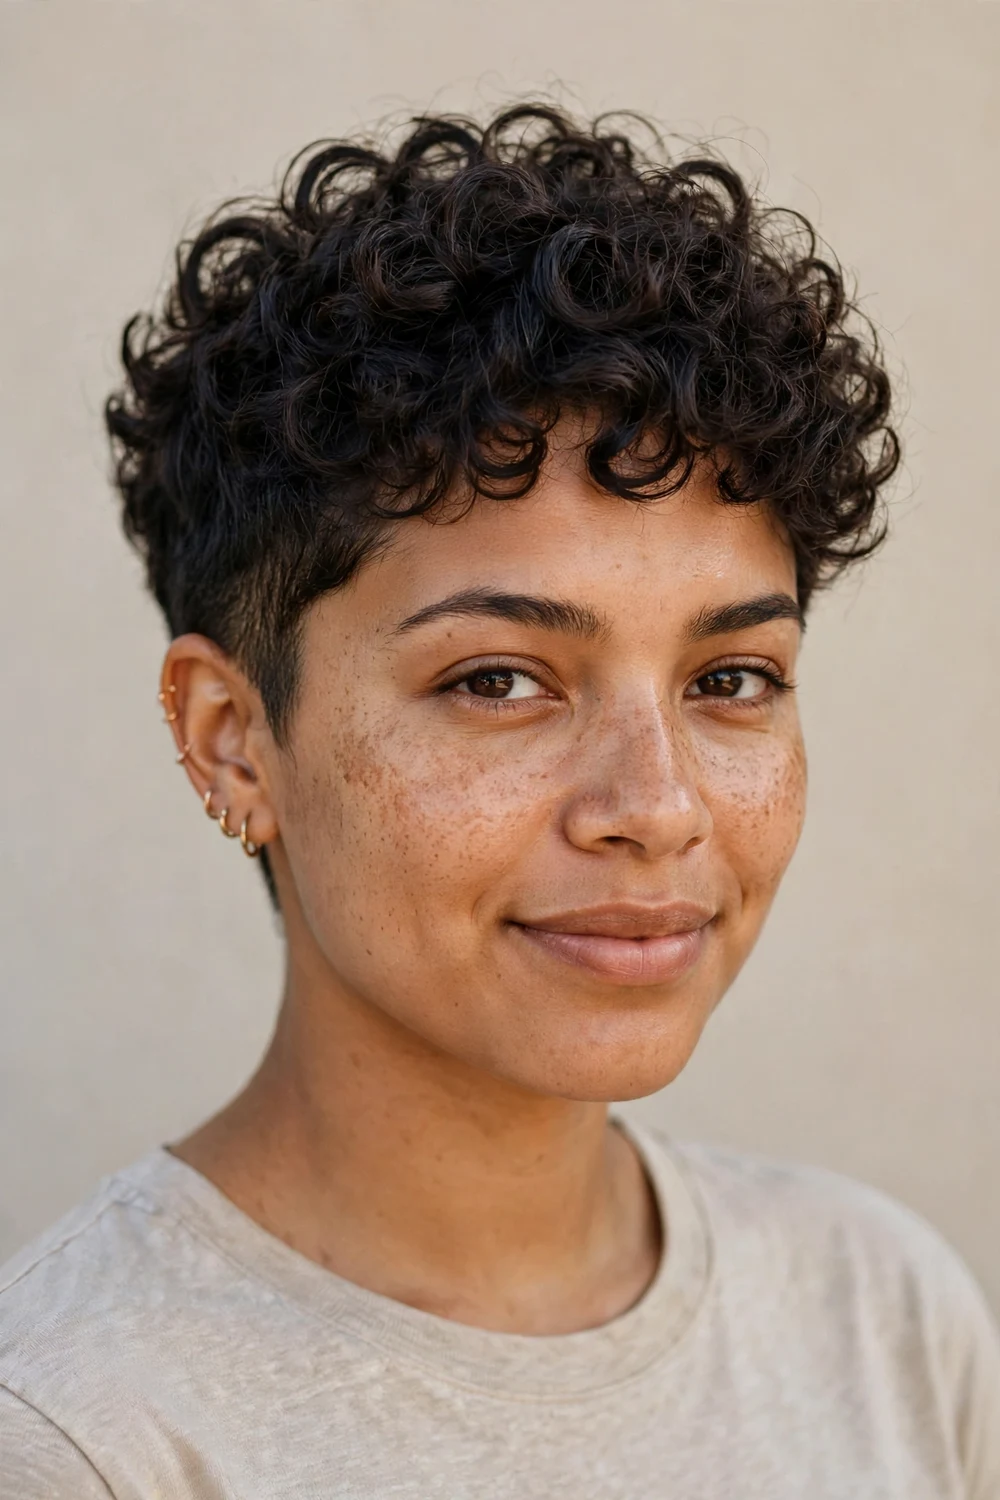
A curly pixie is all about shape, not length. Keeping the sides close lets the curls on top look fuller, even when the hair is fine. Ask for a rounded crown and a clean taper at the nape so the curls sit up instead of spreading wide.
Smooth curl-defining cream through damp curls, then diffuse on low heat with a heat protectant or air-dry. For more curl-focused cuts, our curly pixie haircuts roundup covers shapes built specifically for curl patterns.
Try this: pineapple the top curls overnight with a loose scrunchie. Morning curls keep their shape with zero restyling.
Difficulty: Easy · Cost: $50–$75 (cut only)
30. Brown Shaggy Pixie with Blonde Underlights
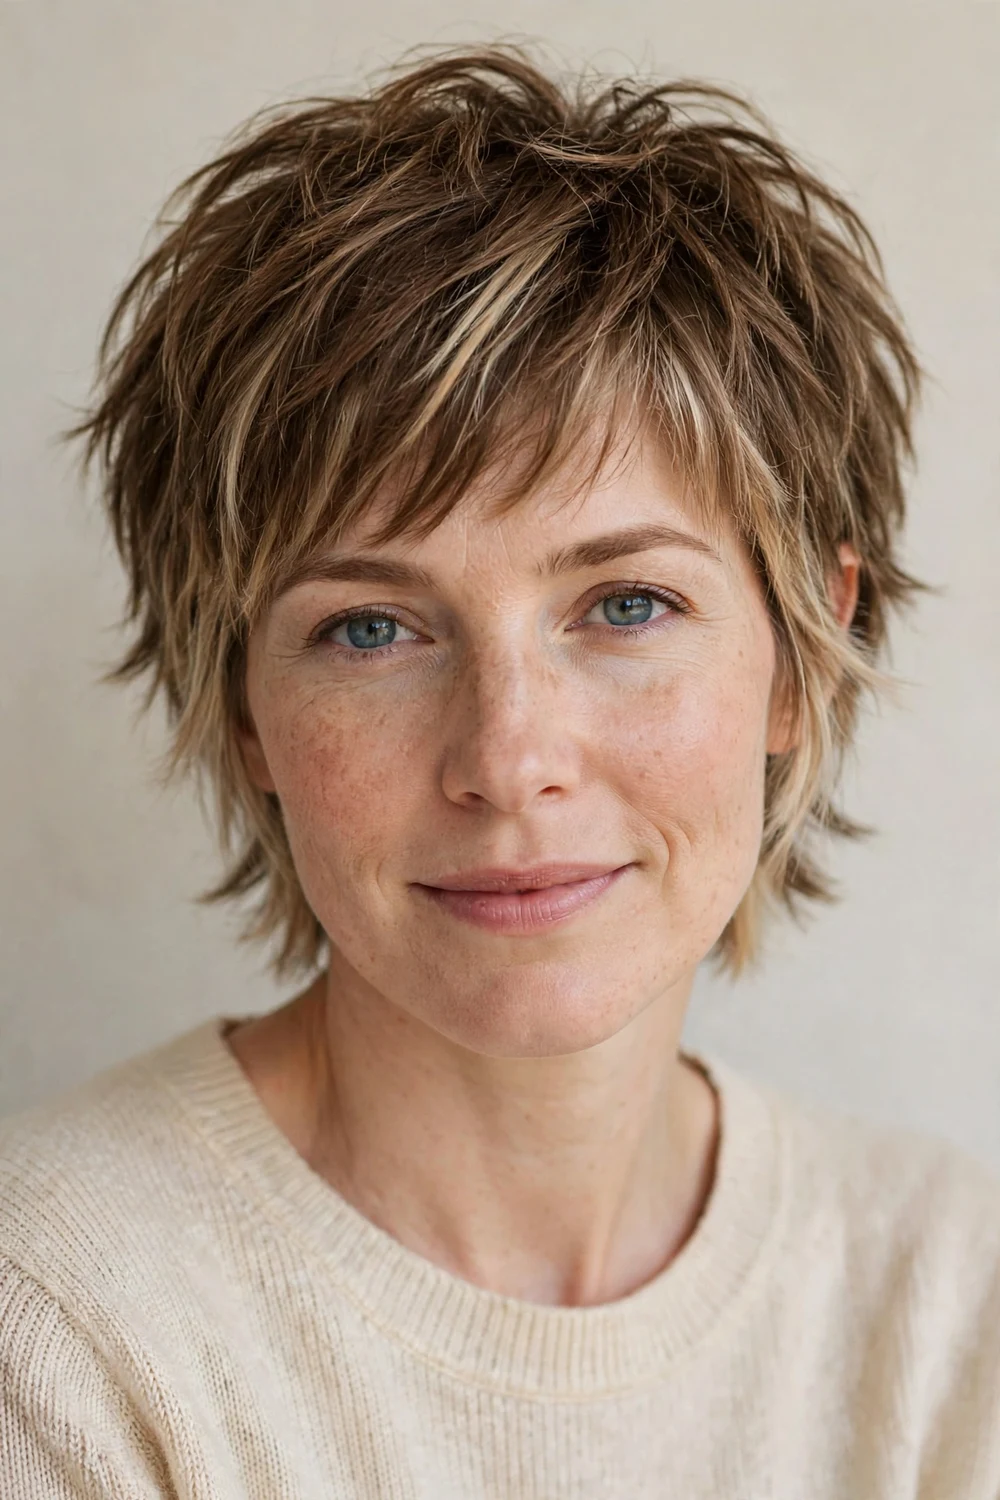
This cut pairs shag-inspired layering with blonde placed underneath darker brown hair. The blonde underlights peek through the brown layers as you move, creating a rich, multidimensional look. The color contrast does the depth work while the shaggy layers add texture.
Style with texture spray on dry hair and finger-tousle. The underlights need a gloss refresh every 8 to 10 weeks to stay bright. This is a great pick if your brown hair looks flat in a single tone.
Try this: ask for the underlights two shades lighter than your base, not platinum. Subtle contrast looks more natural as it grows out.
Difficulty: Moderate · Cost: $140–$230 (cut + color)
31. Micro Fringe Pixie
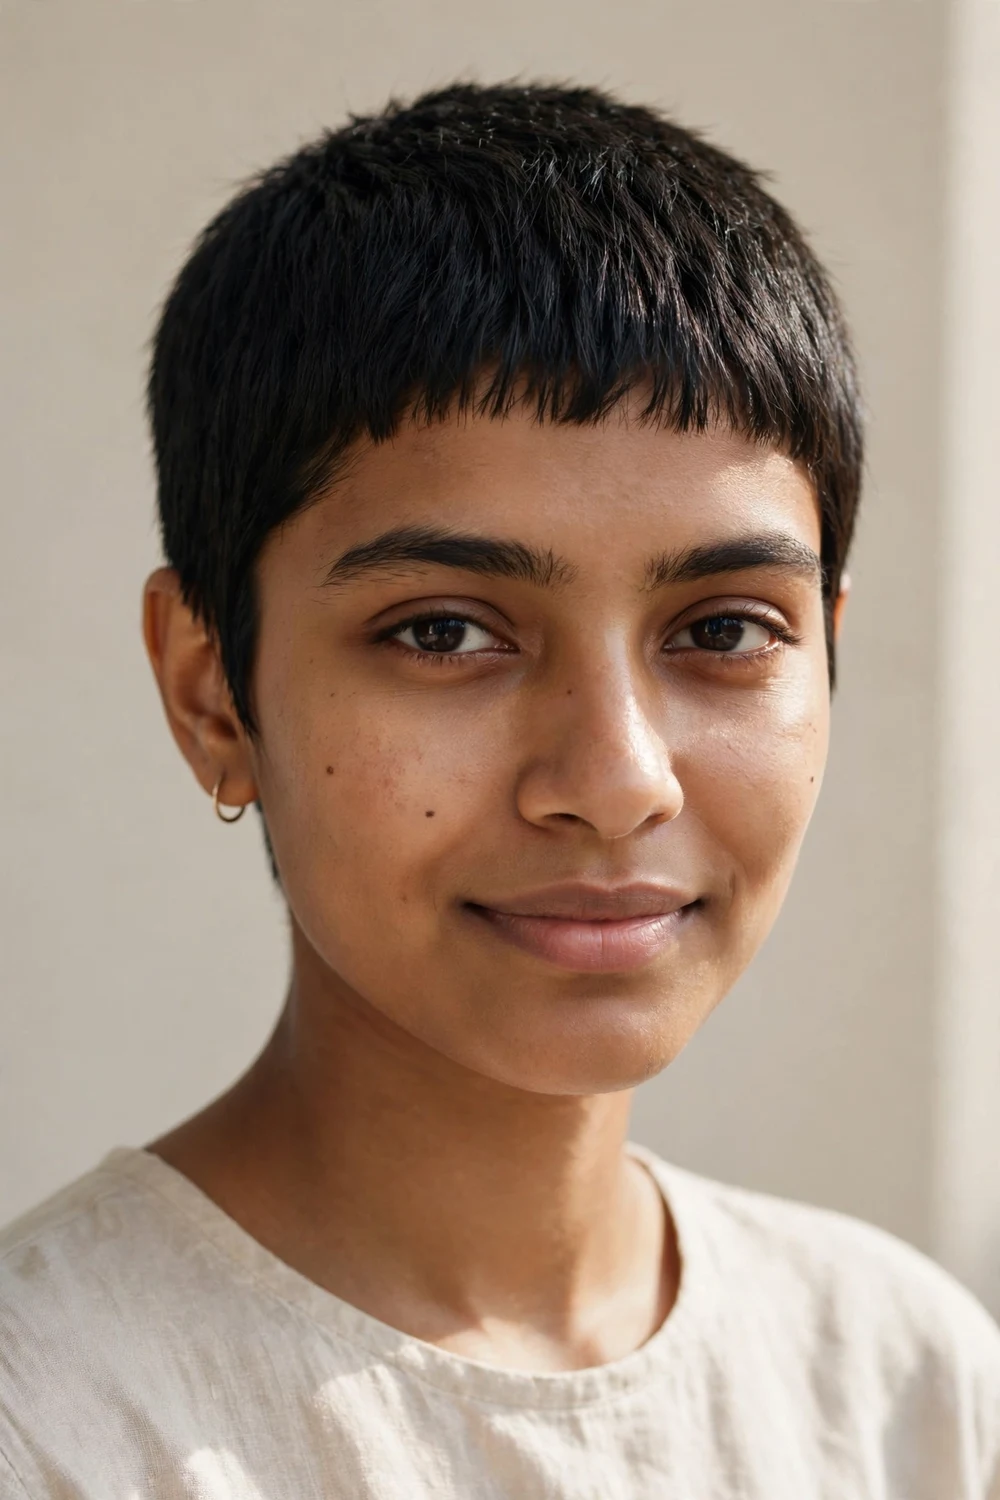
A micro fringe sits high on the forehead, well above the brows, and frames the eyes in a way that feels chic rather than severe. On a close-cropped pixie it becomes the focal point, drawing attention to the eyes and away from any thinness at the crown.
Keep the fringe sharp with trims every 3 weeks; micro fringes grow out awkwardly fast. A light smoothing cream keeps every hair in place without weighing down fine strands.
Try this: blow-dry the micro fringe straight down with a small brush and heat protectant. Any bend in a micro fringe shows immediately.
Difficulty: Moderate · Cost: $45–$70 (cut only)
32. Wispy-Fringe Pixie
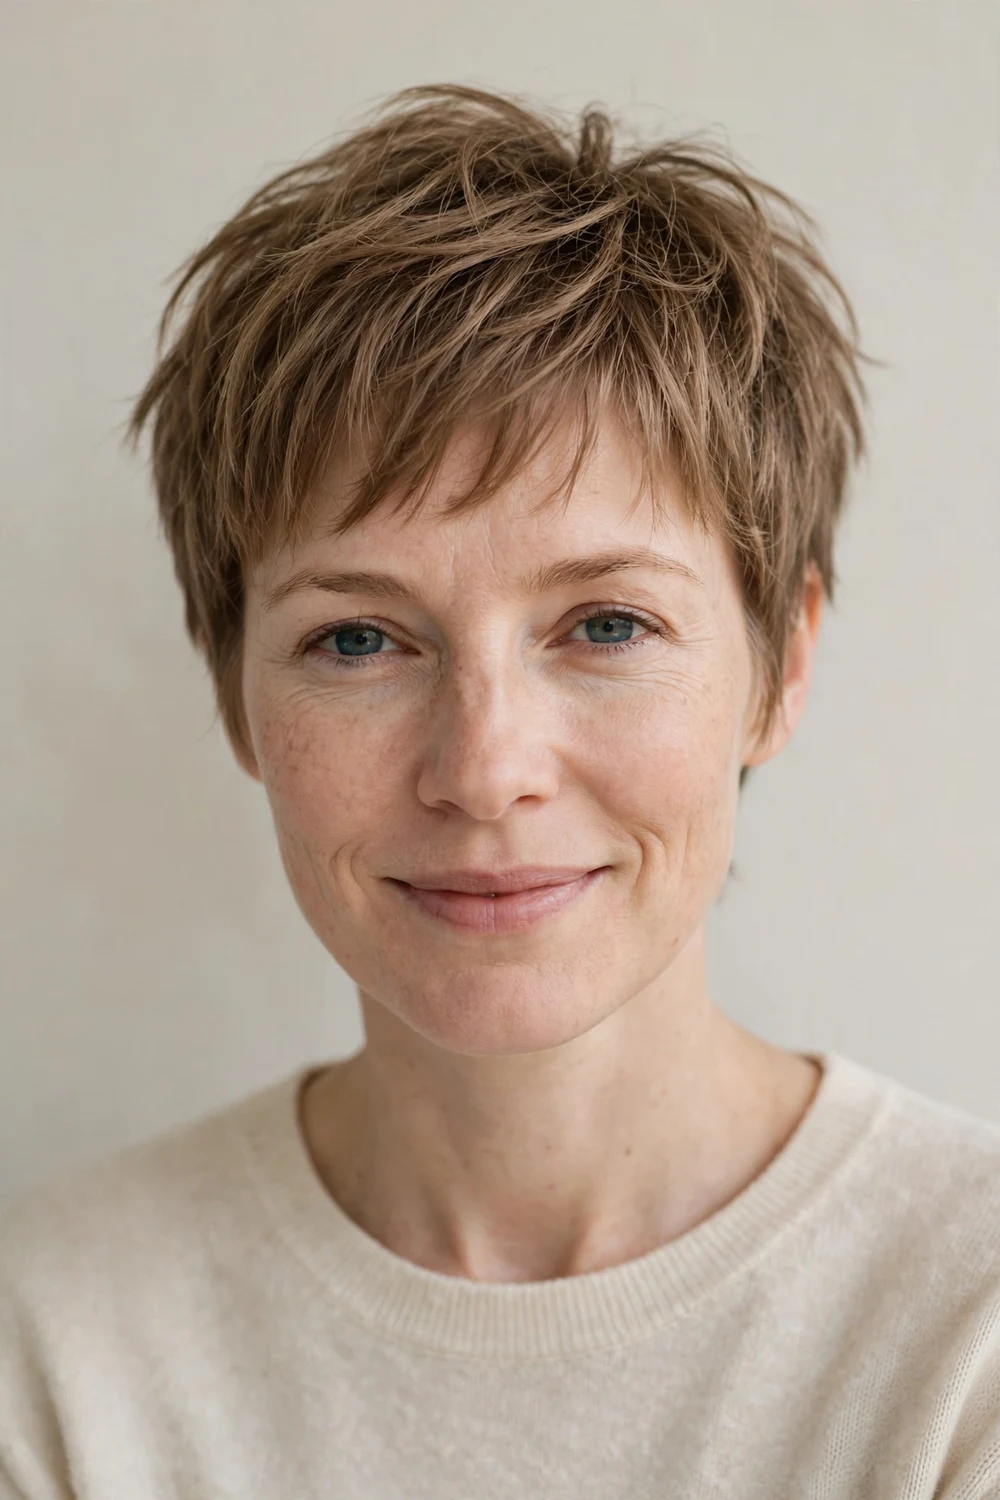
Ultra-fine, wispy bangs create a soft frame around the face without the heaviness of a full fringe. The bangs are cut with a feathering technique that builds natural movement, so they never sit in one blunt, heavy line that would overwhelm fine hair.
Blow-dry the bangs forward with a heat protectant, then finger-separate the pieces. The airy fringe plus a textured top creates dimensional fullness without heavy products. This is one of the softest, most forgiving pixie shapes.
Try this: trim wispy bangs yourself between appointments with small snips straight up into the ends. It is the easiest fringe to maintain at home.
Difficulty: Easy · Cost: $45–$65 (cut only)
33. Feathered Pixie
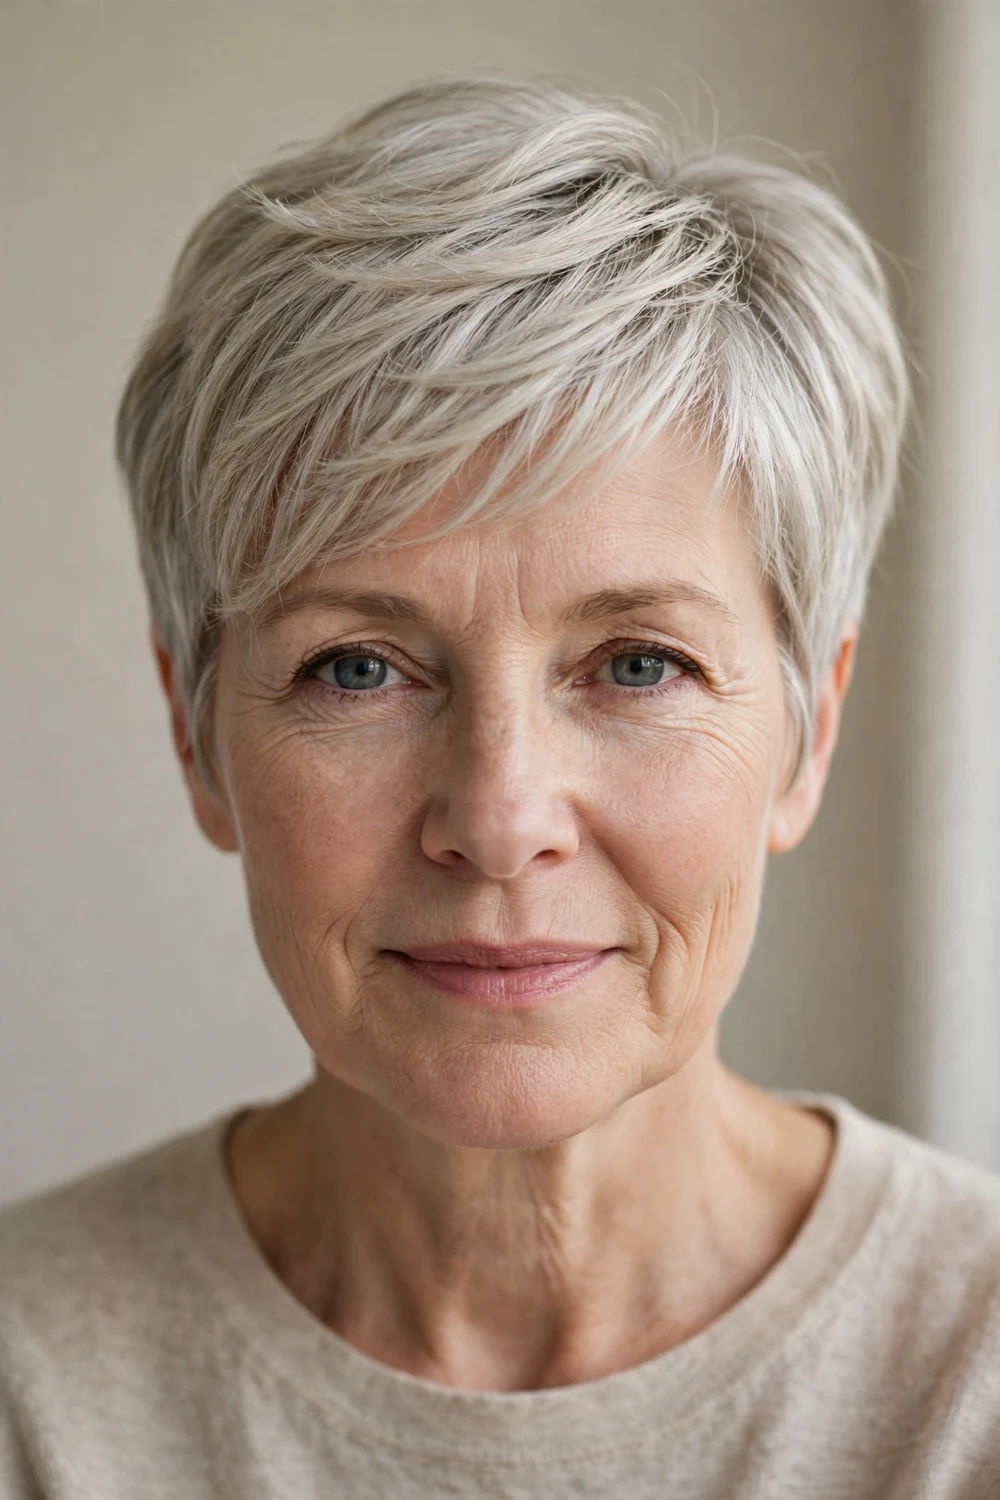
Feathering cuts each strand end to a soft point, so layers melt into each other instead of sitting in hard shelves. Fine hair benefits because there are no blunt lines to reveal thinness. Pair it with tapered sides for a clean, modern outline.
Ask for razor-light ends, not thinning shears: razors create softness, while overuse of thinning shears can hollow out fine hair. A lightweight cream worked through with fingers is all the styling this cut needs.
Try this: scrunch the feathered ends upward while they air-dry. The soft points separate naturally and hold a bit of volume.
Difficulty: Easy · Cost: $50–$75 (cut only)
34. Curtain-Bangs Pixie
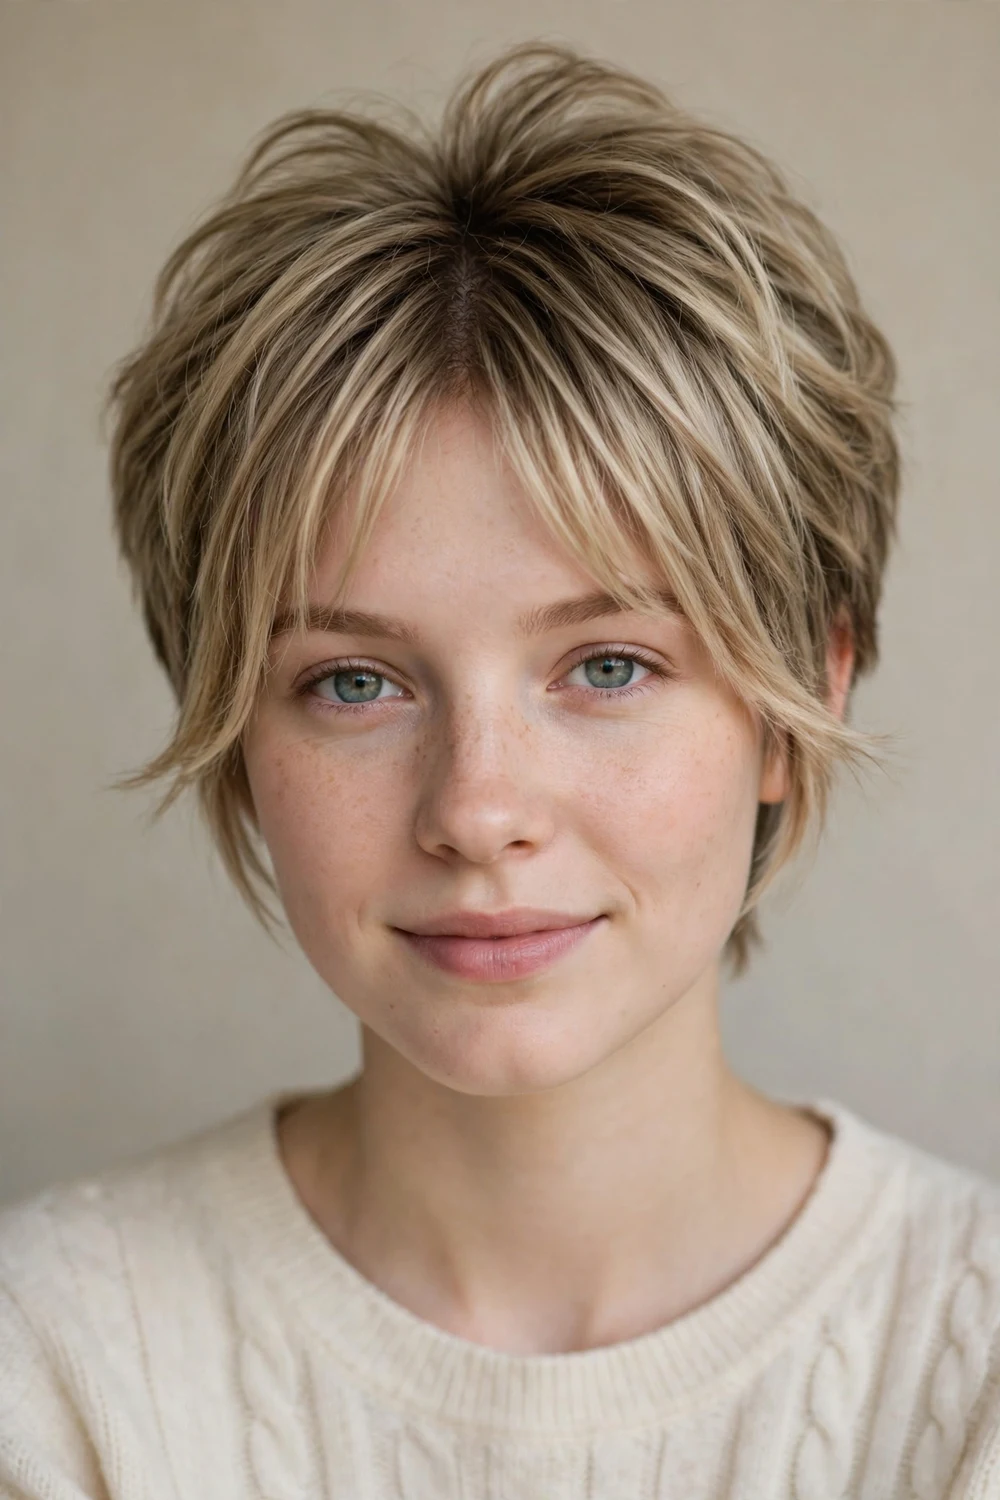
Soft curtain bangs paired with a pixie create the most face-framing combination available at short length. The bangs fall just past the cheekbones and split down the middle, framing the face while the lifted crown keeps the silhouette full.
Dry the bangs forward with a small round brush and a heat protectant, then split them with your fingers. The brightness around the face plus crown volume creates the appearance of fuller hair. Universally flattering across face shapes.
Try this: twist each curtain section away from your face while blow-drying. The outward bend keeps the bangs from falling flat against your cheeks.
Difficulty: Moderate · Cost: $50–$75 (cut only)
35. Bottleneck-Bangs Pixie
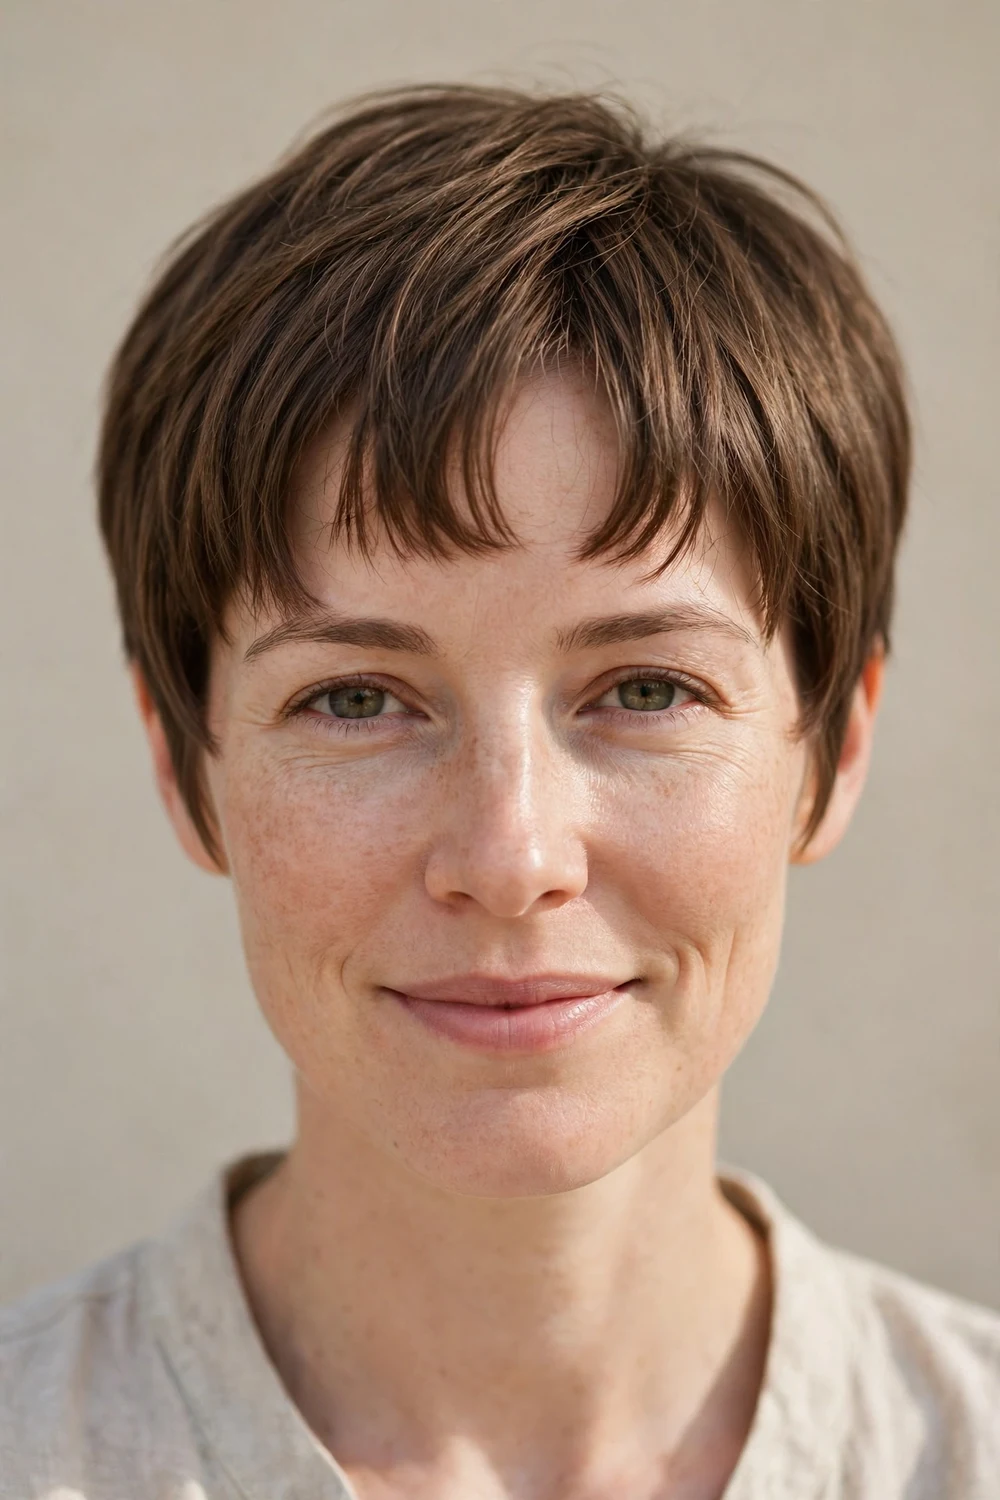
Bottleneck bangs are wider at the temples and shorter through the middle, framing the face like an open curtain. Paired with a pixie, the structured bang shape adds face-framing impact while the short length keeps everything modern. It suits round and oval faces especially well.
Blow-dry the bangs forward with a heat protectant, then split them with your fingers. The structured shape needs a trim every 3 to 4 weeks to keep the bottleneck curve crisp.
Try this: ask your stylist to show you the bottleneck shape on your own face before cutting. The temple width should match your cheekbones.
Difficulty: Moderate · Cost: $50–$75 (cut only)
36. Face-Framing Layers Pixie
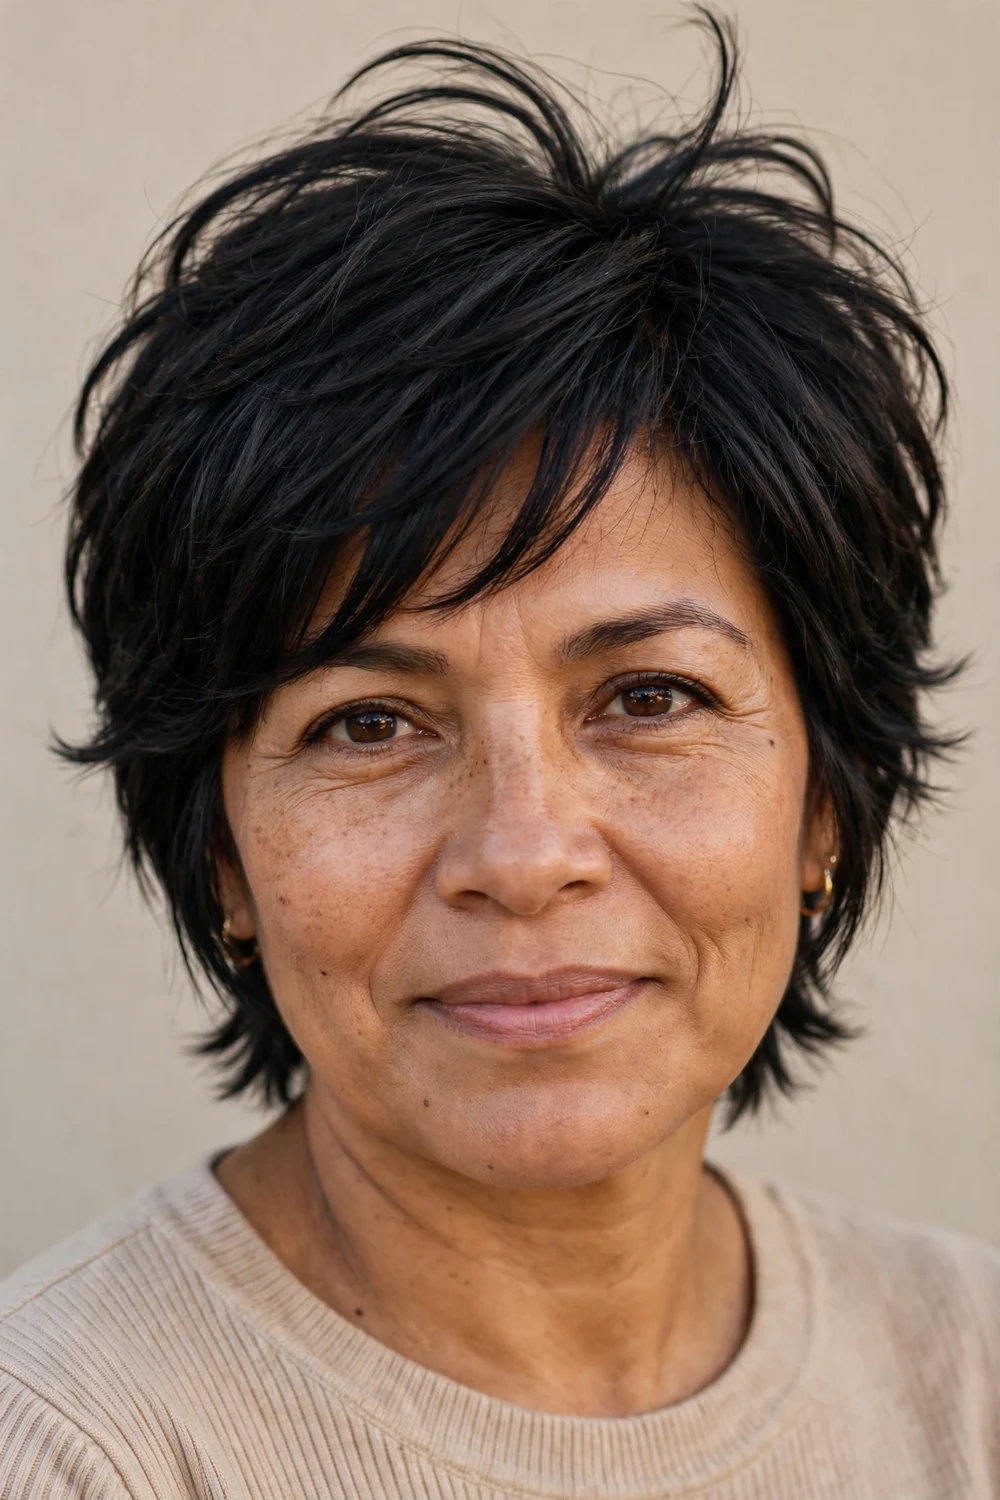
Face-framing layers cut at varying lengths around the face create vertical movement that flatters fine hair. Ask for the shortest pieces at your cheekbones, gradually lengthening toward the back. The vertical lines draw the eye and add dimension where fine hair often looks thinnest.
Dry the face-framing pieces forward with a round brush and a heat protectant, then sweep them back. This works on straight, wavy, and curly fine hair alike.
Try this: keep the shortest face pieces at cheekbone level, not higher. Too-short pieces flip outward and look thin.
Difficulty: Easy · Cost: $45–$70 (cut only)
37. Textured Bangs Pixie
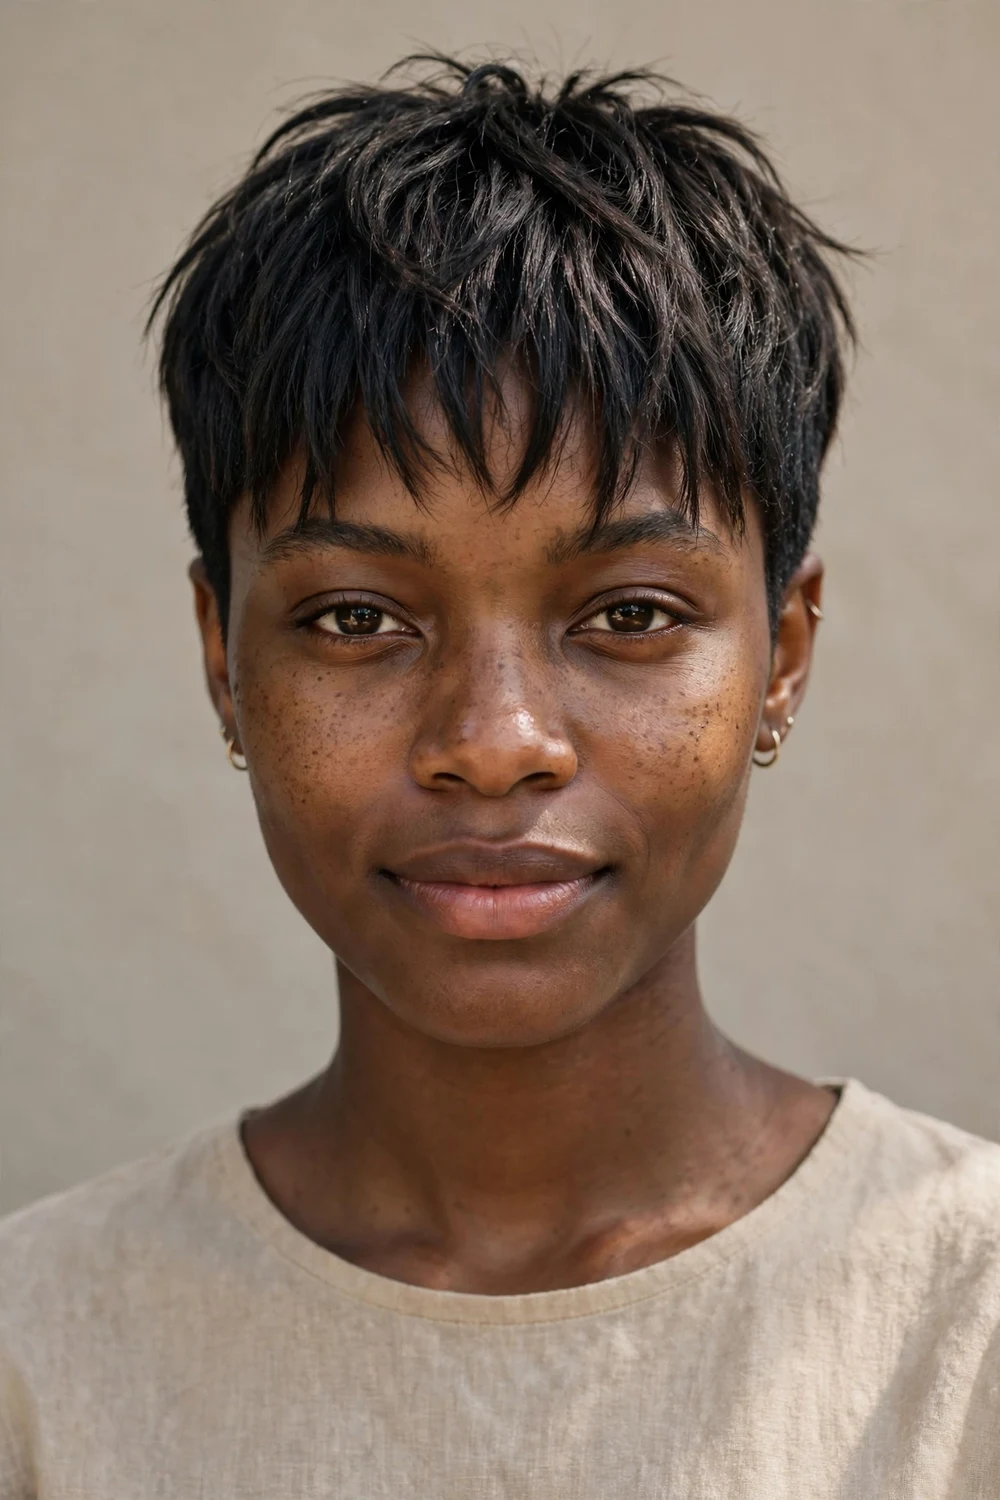
A full, textured fringe adds visual weight to the upper face while the shorter sides create a clean, polished contrast. The bangs are the star here: piecey, separated, and cut to catch light. That contrast between short sides and longer top creates an illusion of density.
Style the bangs with a small amount of pomade for piecey definition. Trim the fringe every 3 to 4 weeks so it stays above the lashes. This classic choice suits women who want their pixie to feel feminine and complete.
Try this: point-cut the fringe ends at home between trims. Tiny upward snips keep the texture fresh without changing the length.
Difficulty: Easy · Cost: $45–$65 (cut only)
38. Dark Point-Cut Fringe Pixie
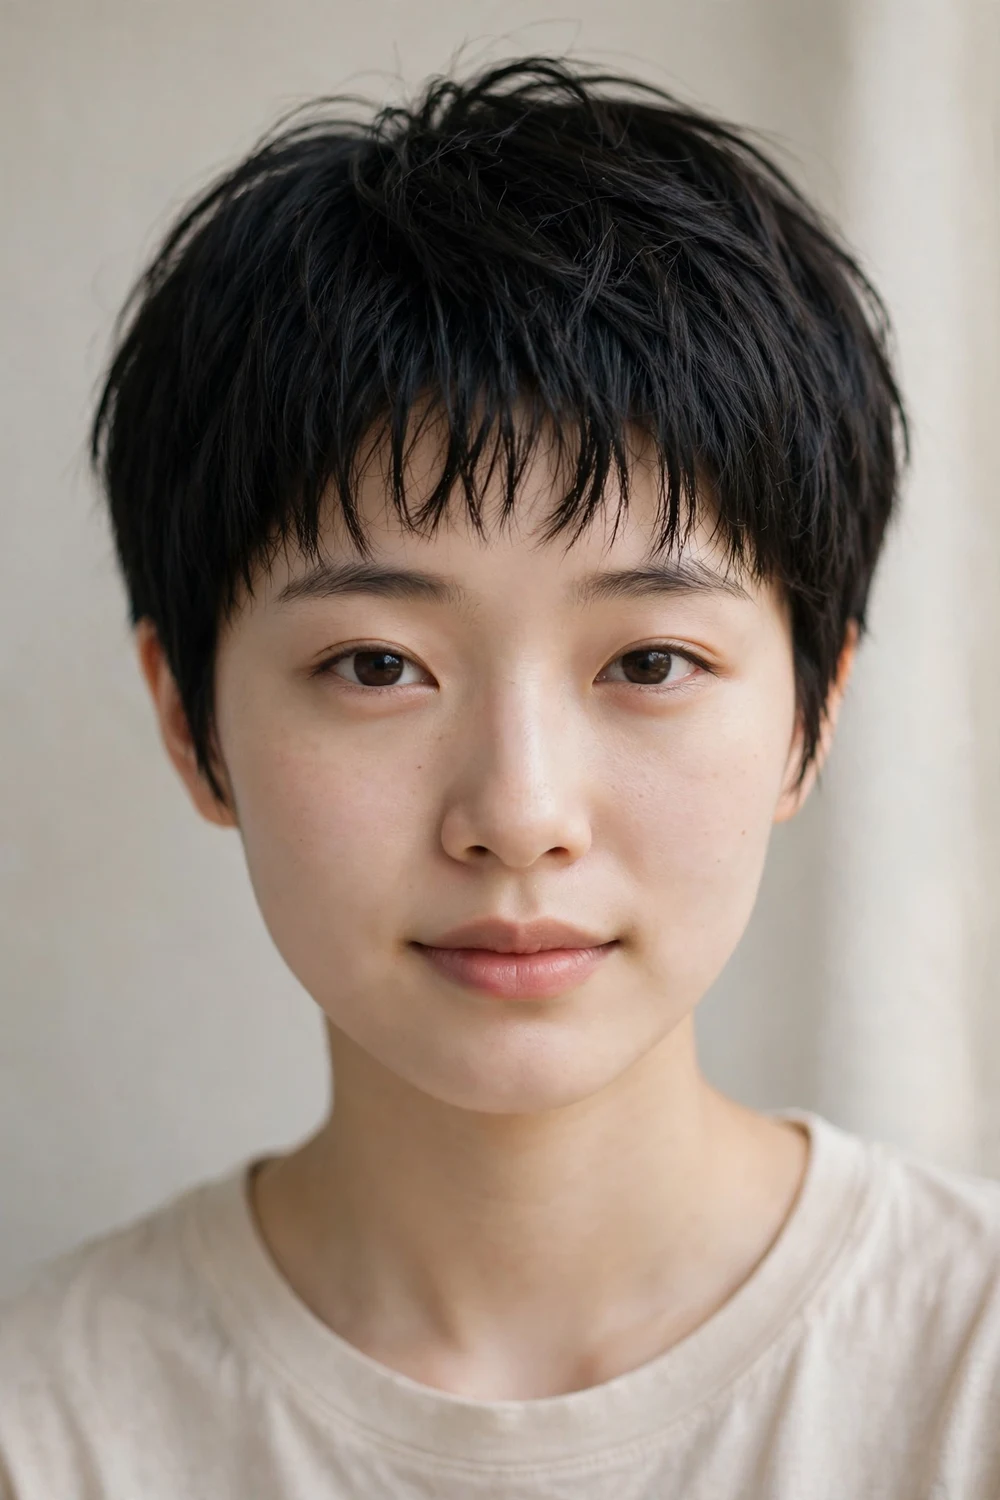
Dark hair shows every blunt edge, so point cutting matters even more here. This pixie keeps the base a rich dark tone with a point-cut fringe that breaks up the hairline into soft pieces. The texture prevents the dark color from looking heavy or helmet-like.
Finger-style with a light paste, pulling the fringe pieces slightly forward. Dark pixies need shine to look healthy, so finish with a drop of lightweight serum on the ends only.
Try this: ask for the fringe point-cut deeper than the rest. Extra texture at the hairline stops dark hair from looking solid.
Difficulty: Easy · Cost: $45–$70 (cut only)
39. Champagne Pixie with Choppy Fringe
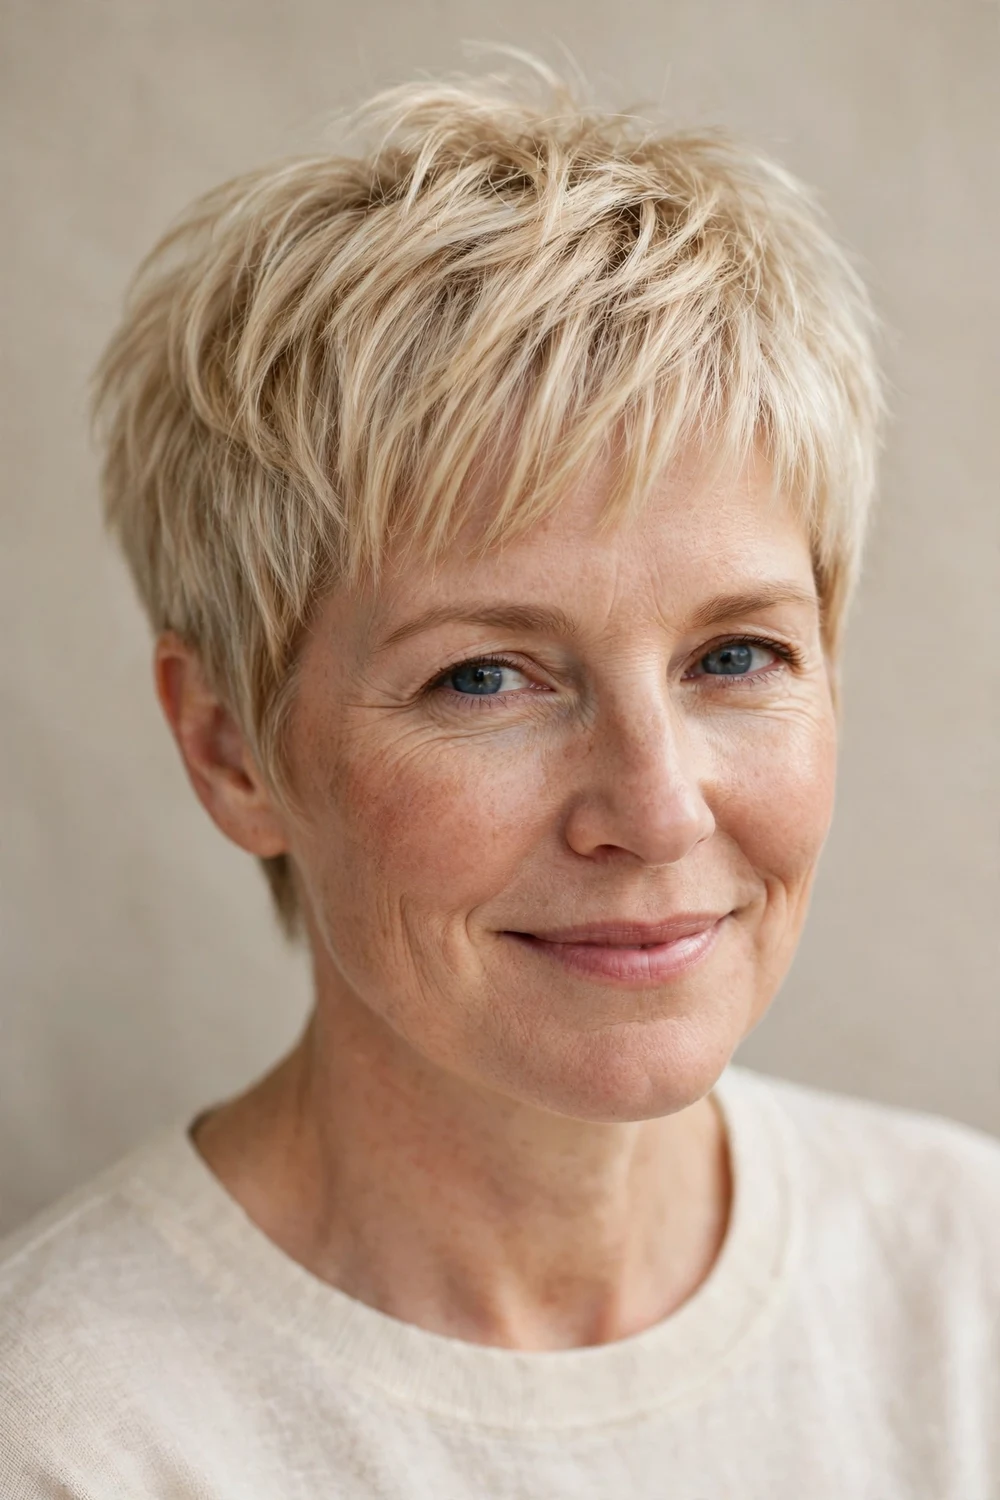
A choppy fringe has saved many pixies from falling flat, and the champagne tone does its own work: the soft, glowing blonde brightens fine strands that need lift. The combination is playful without being messy, with just a touch of texture and lift.
Finger-style with a little paste or dry wax. It flatters square and oval faces, and the color grows out softly. Refresh the champagne tone with a gloss every 8 weeks.
Try this: keep the choppy fringe slightly longer at the corners. The extra length at the edges frames the eyes better.
Difficulty: Easy · Cost: $130–$210 (cut + color)
40. Highlights Pixie
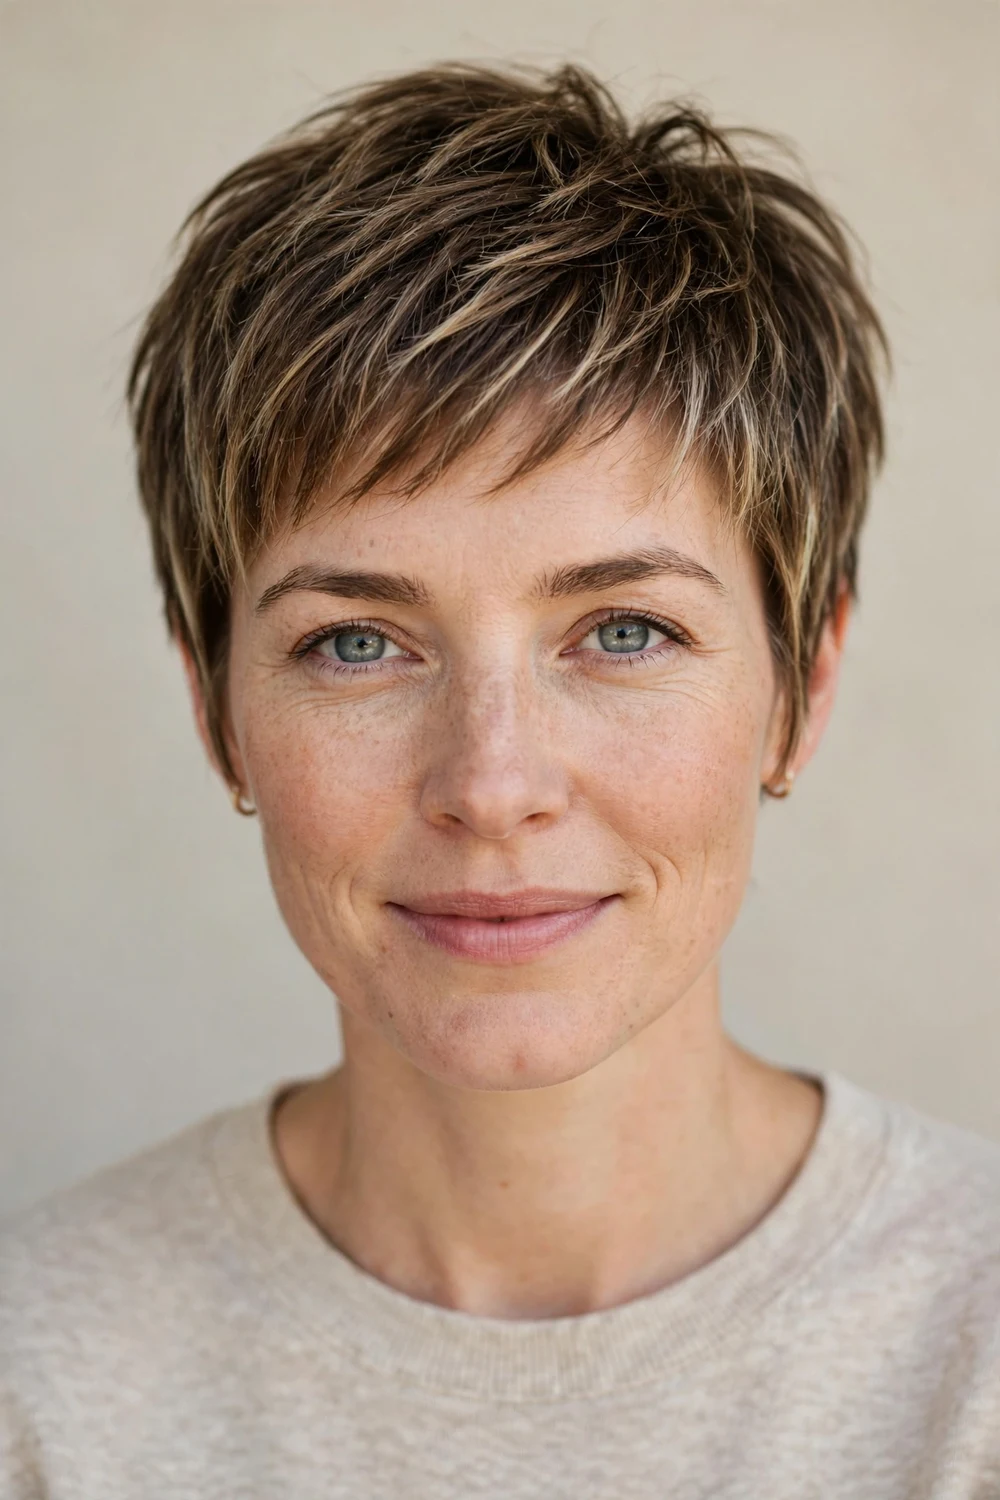
Strategic highlights through a pixie create dimension that mimics density. Ask your colorist for fine highlights placed throughout, with brighter pieces around your face. The dimensional color makes the cut look intentional and noticeably fuller than a single flat tone.
Style with a small amount of pomade for piecey definition. Highlights on a pixie need a touch-up every 6 to 8 weeks. Use a heat protectant before any hot-tool styling to keep the lightened pieces healthy.
Try this: ask for the brightest pieces at the crown. Light at the highest point of the head reads as volume.
Difficulty: Moderate · Cost: $140–$230 (cut + highlights)
41. Babylights Pixie
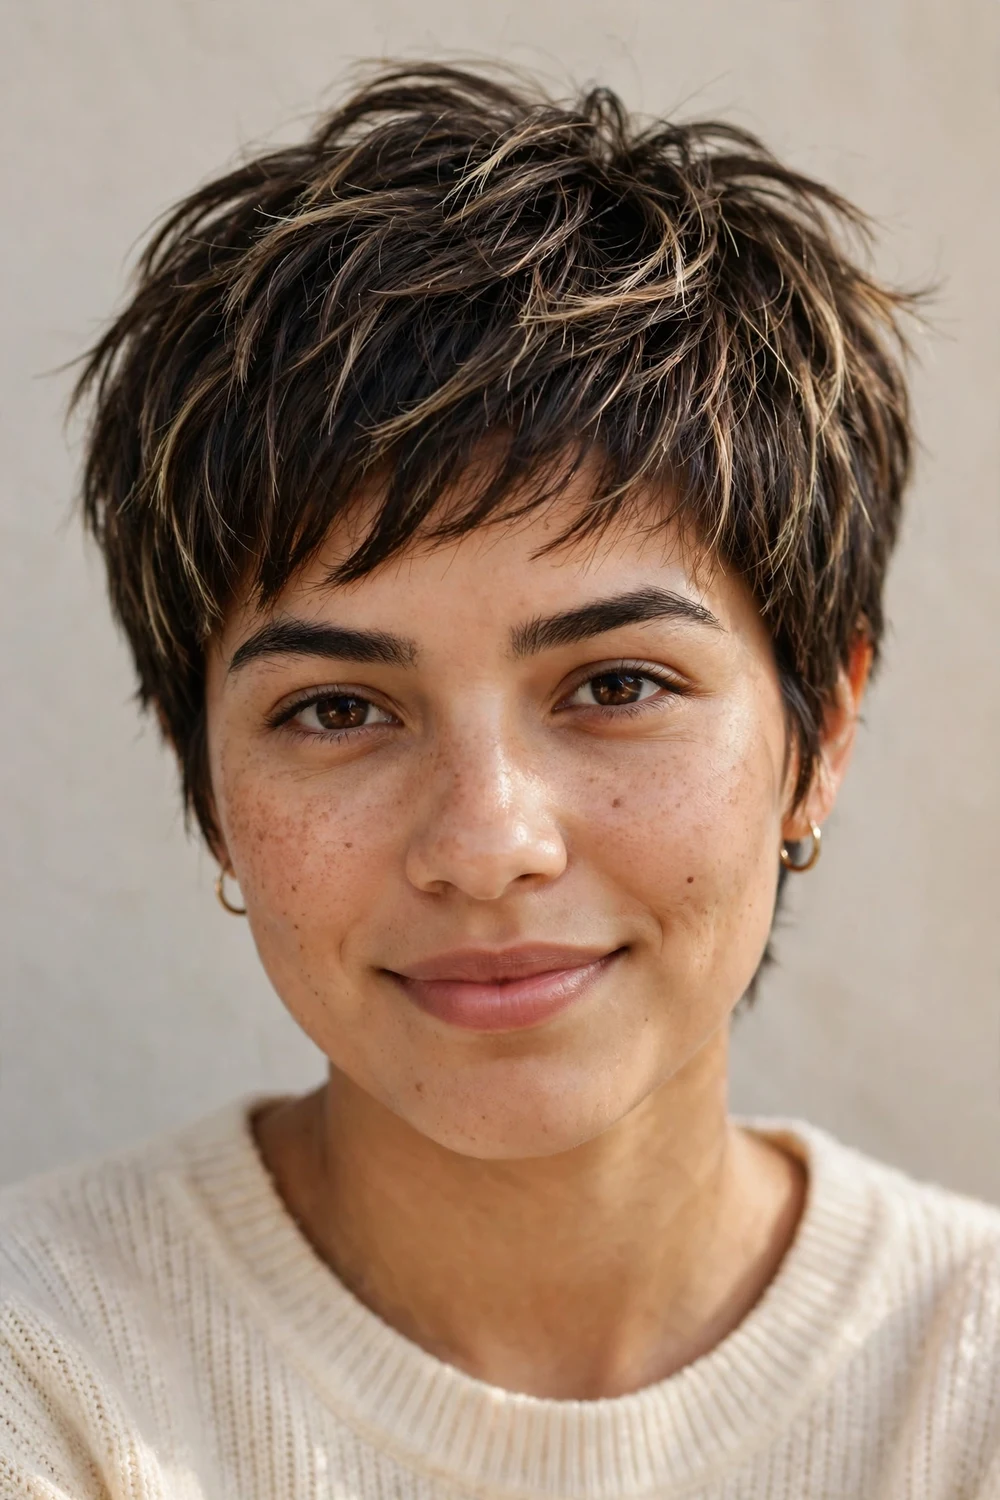
Babylights are finer than highlights, creating dimension that looks natural rather than streaky. Paired with any pixie shape, they give the most subtle fullness-enhancing color. Ask your colorist for placement that catches light at the layered ends.
The dimensional color emphasizes the cut while staying low maintenance, since babylights grow out softly. Style with a small amount of cream worked through with your fingers.
Try this: request babylights concentrated through the top layer only. Dimension on top is what fakes thickness; underneath it is wasted.
Difficulty: Moderate · Cost: $150–$240 (cut + babylights)
42. Bleach Blonde Cropped Pixie
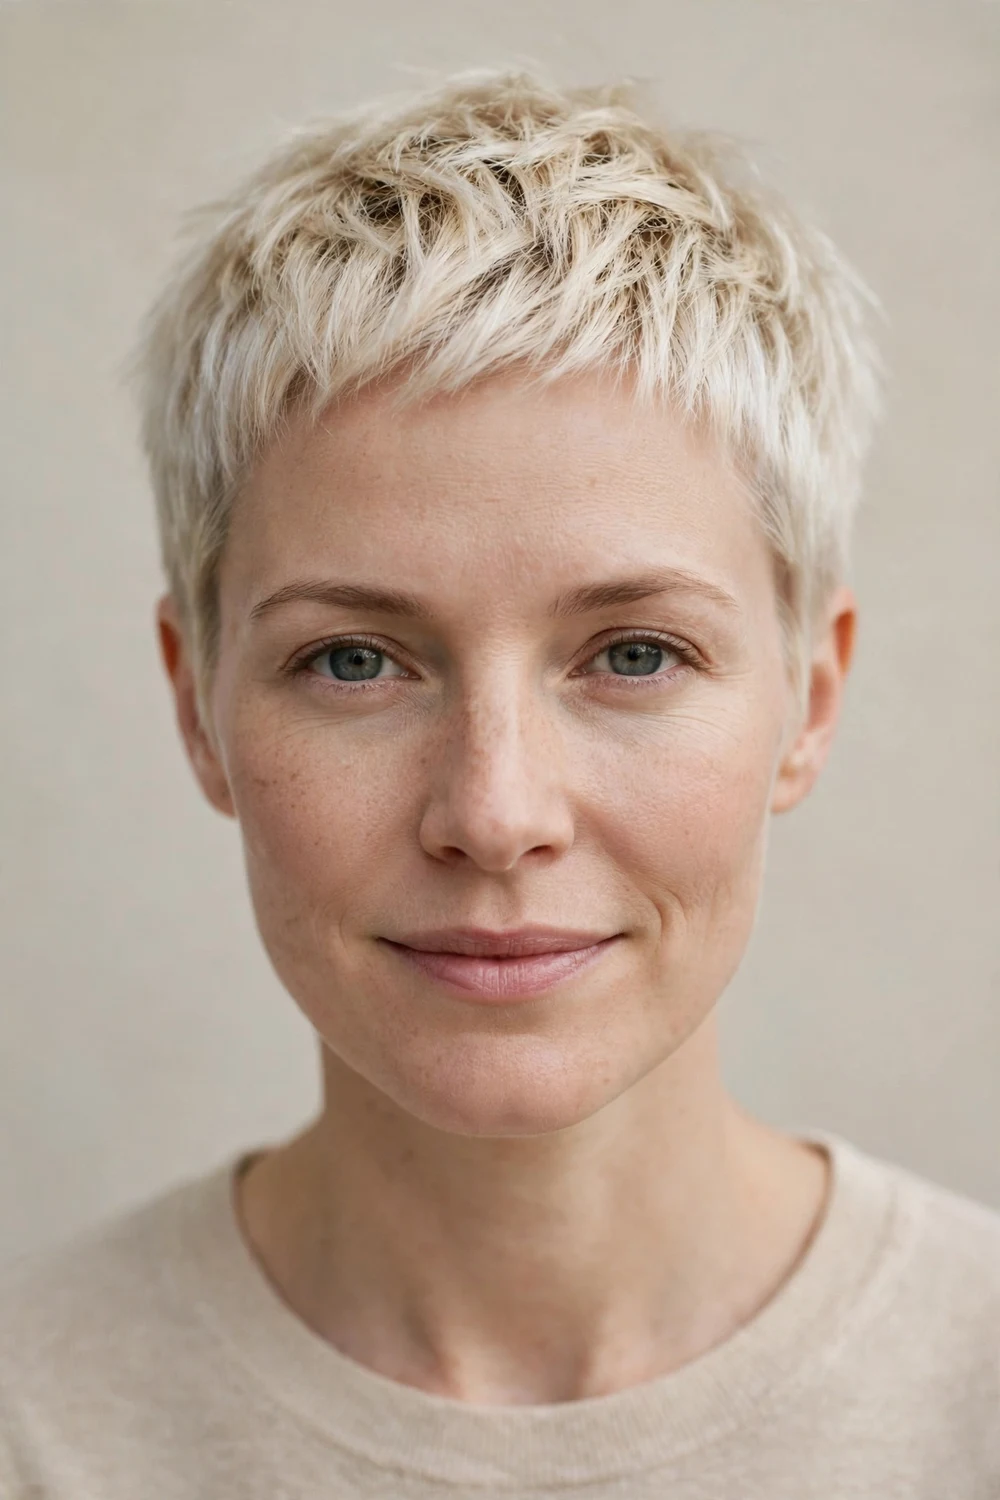
This short, choppy bleach-blonde crop makes fine hair feel full and gritty. Micro layers through the crown create real dimension, and a soft fade at the sides keeps things fresh. The bright blonde reflects maximum light, which is a simple, honest fullness trick.
Mist dry texture spray through for a cool, piecey finish that holds without weighing hair down. Purple shampoo weekly keeps the blonde bright. Bleach plus fine hair needs bond-care, so do not skip conditioning masks.
Try this: keep the bleach one shade warmer than icy. Slightly warm blonde looks thicker than stark white on fine hair.
Difficulty: Moderate · Cost: $140–$230 (cut + bleach)
43. Icy Blonde Crop
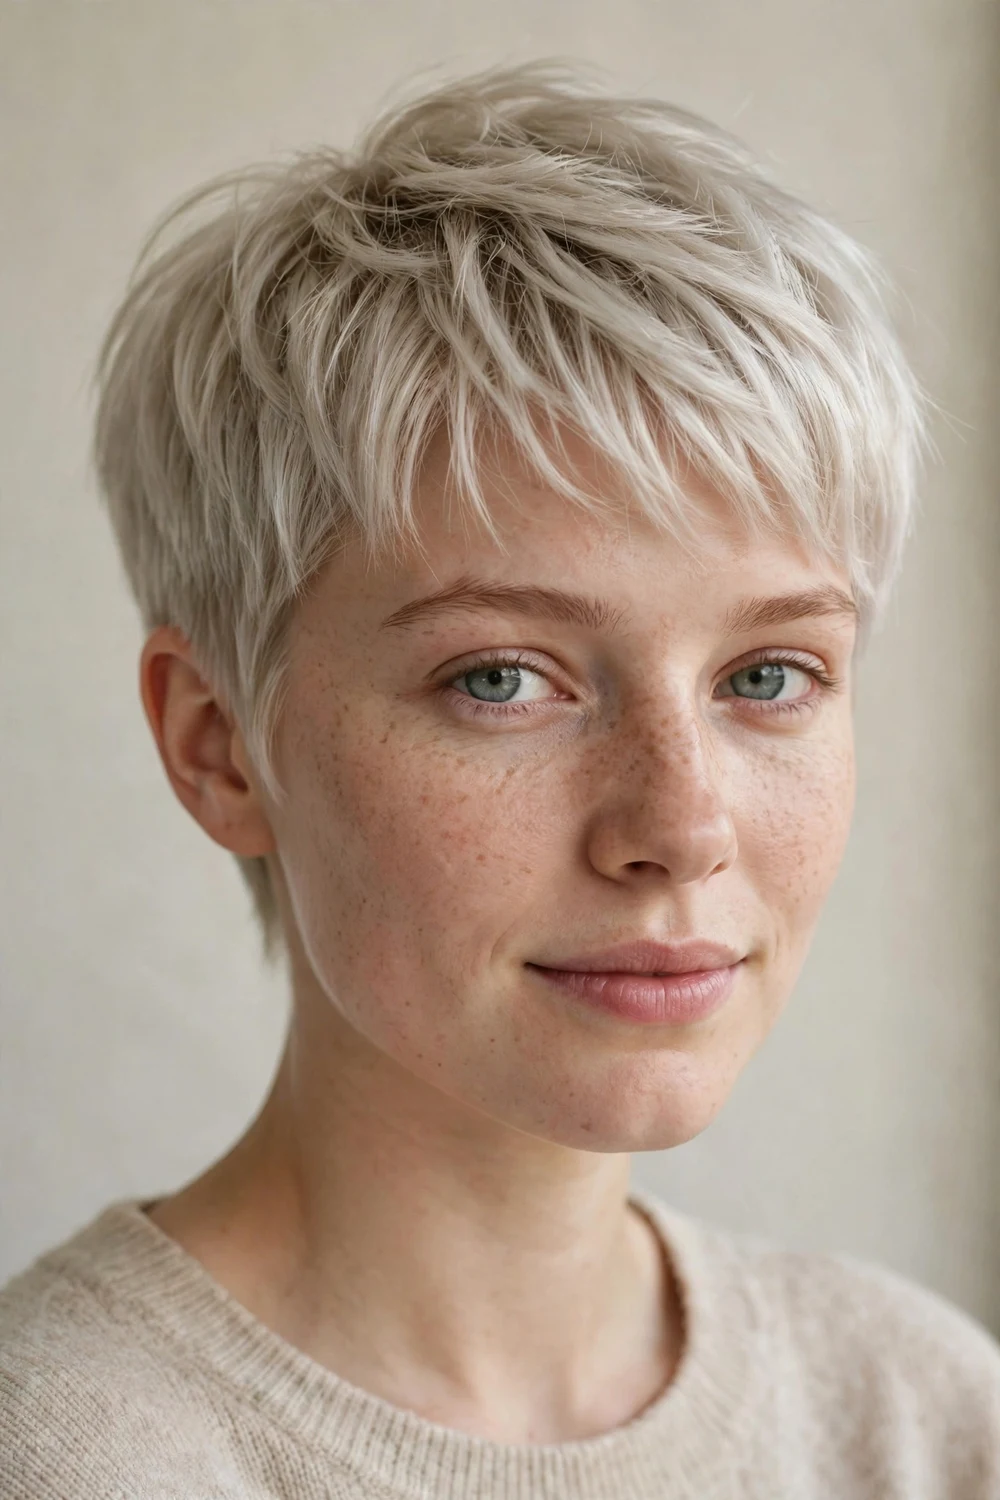
The icy tone reflects light in all the right ways, giving the illusion of density without bulk. The fringe adds softness up front while the back stays crisp and clean with a tapered nape. On naturally straight fine hair, this style practically styles itself.
A little product goes a long way: texture spray on dry hair for separation. Keep purple shampoo in the rotation to hold the icy tone. This is playful, modern, and light to wear.
Try this: ask for a shadow root a shade darker than the icy lengths. The contrast at the roots adds depth that flat icy blonde lacks.
Difficulty: Moderate · Cost: $150–$240 (cut + color)
44. Frosted Tapered Pixie
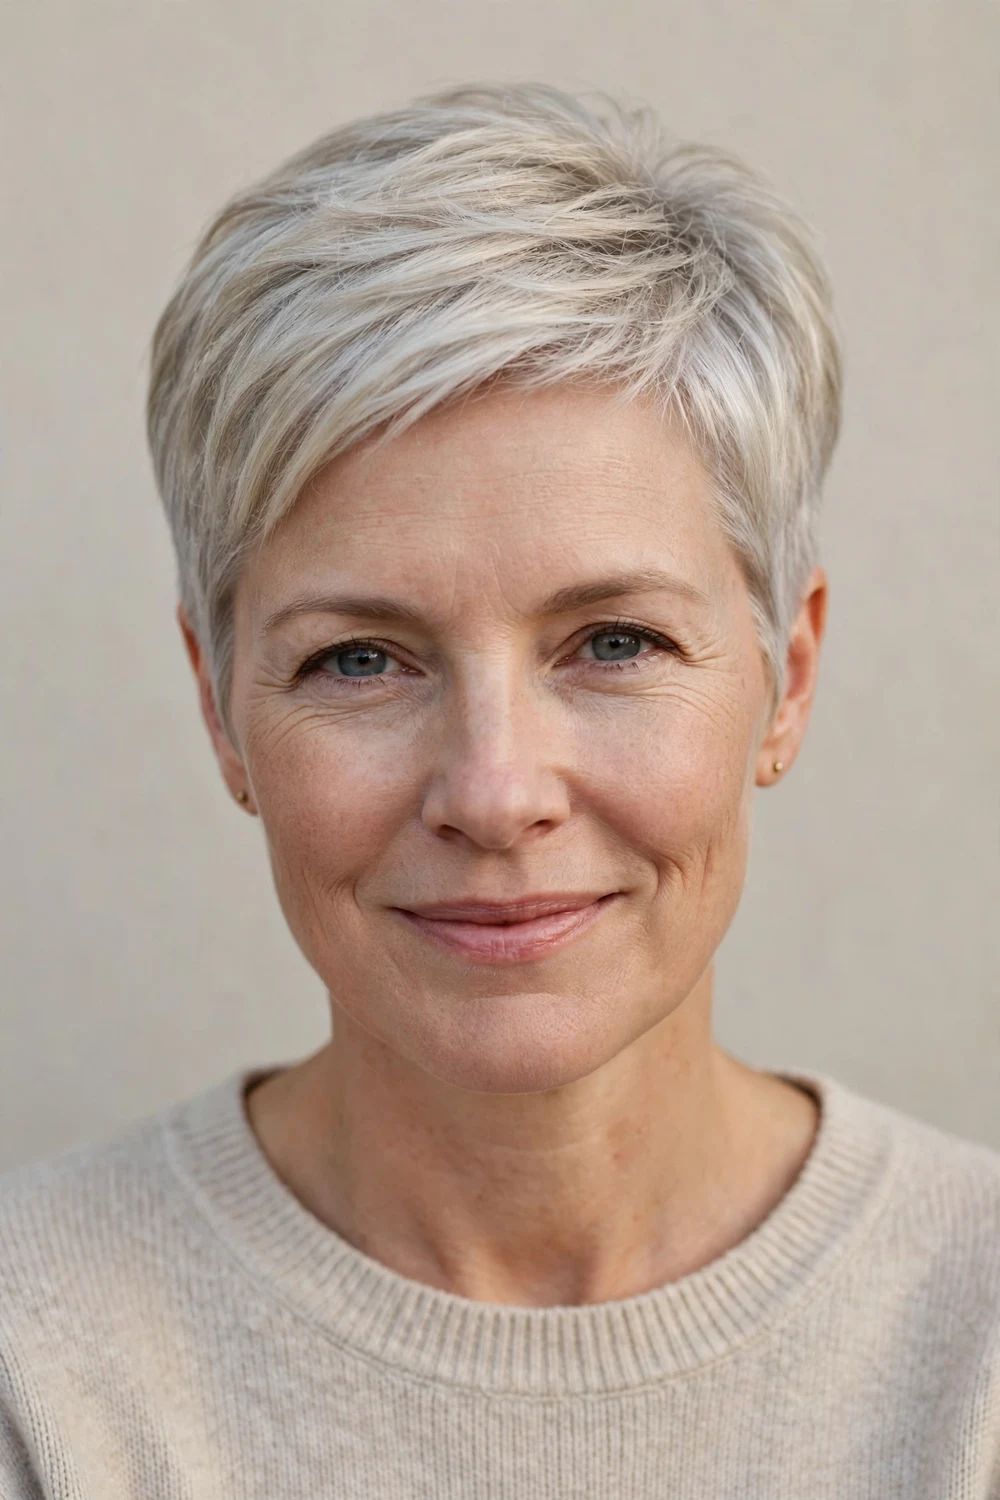
This cut balances soft texture with a sharp shape. The frosted, icy tone gives a high-contrast pop that makes fine strands look brighter and more defined, while tapered sides keep everything sleek and the crown carries just enough lift for dimension.
Style with a bit of mousse or volumizing spray at the roots. It flatters almost any face shape and reads modern without going punk. Bold but very wearable.
Try this: blow-dry the crown with a round brush and heat protectant, then let the tapered sides air-dry. Two-zone drying suits this cut’s two-zone shape.
Difficulty: Moderate · Cost: $140–$230 (cut + color)
45. Ash Pixie
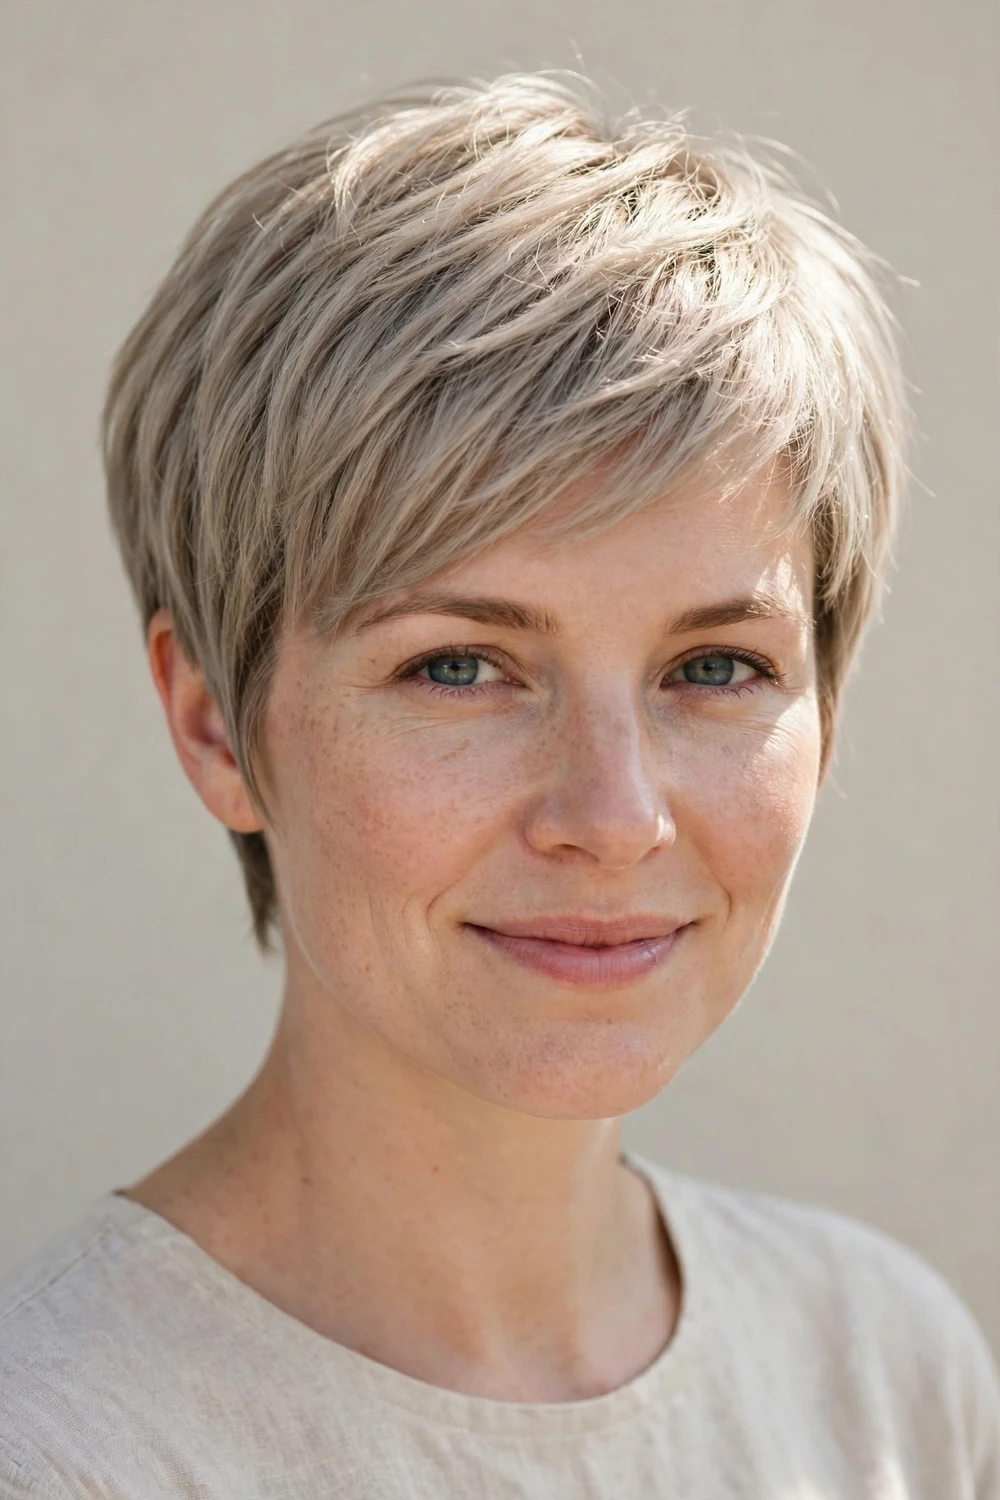
The ash tone adds dimension, which is exactly what fine hair needs to look fuller. Cool, muted blonde has natural depth variation that reads as thickness. Paired with a subtle taper that hugs the neck, this cut stays soft and approachable.
It grows out cleanly, so you are not in the salon every few weeks for the shape. Refresh the ash tone with a gloss when it starts to warm up. Layers placed to catch light keep the movement visible.
Try this: avoid over-washing. Ash tones fade fast, and fine hair looks fuller on day two anyway.
Difficulty: Moderate · Cost: $140–$220 (cut + color)
46. Smoky Textured Crop
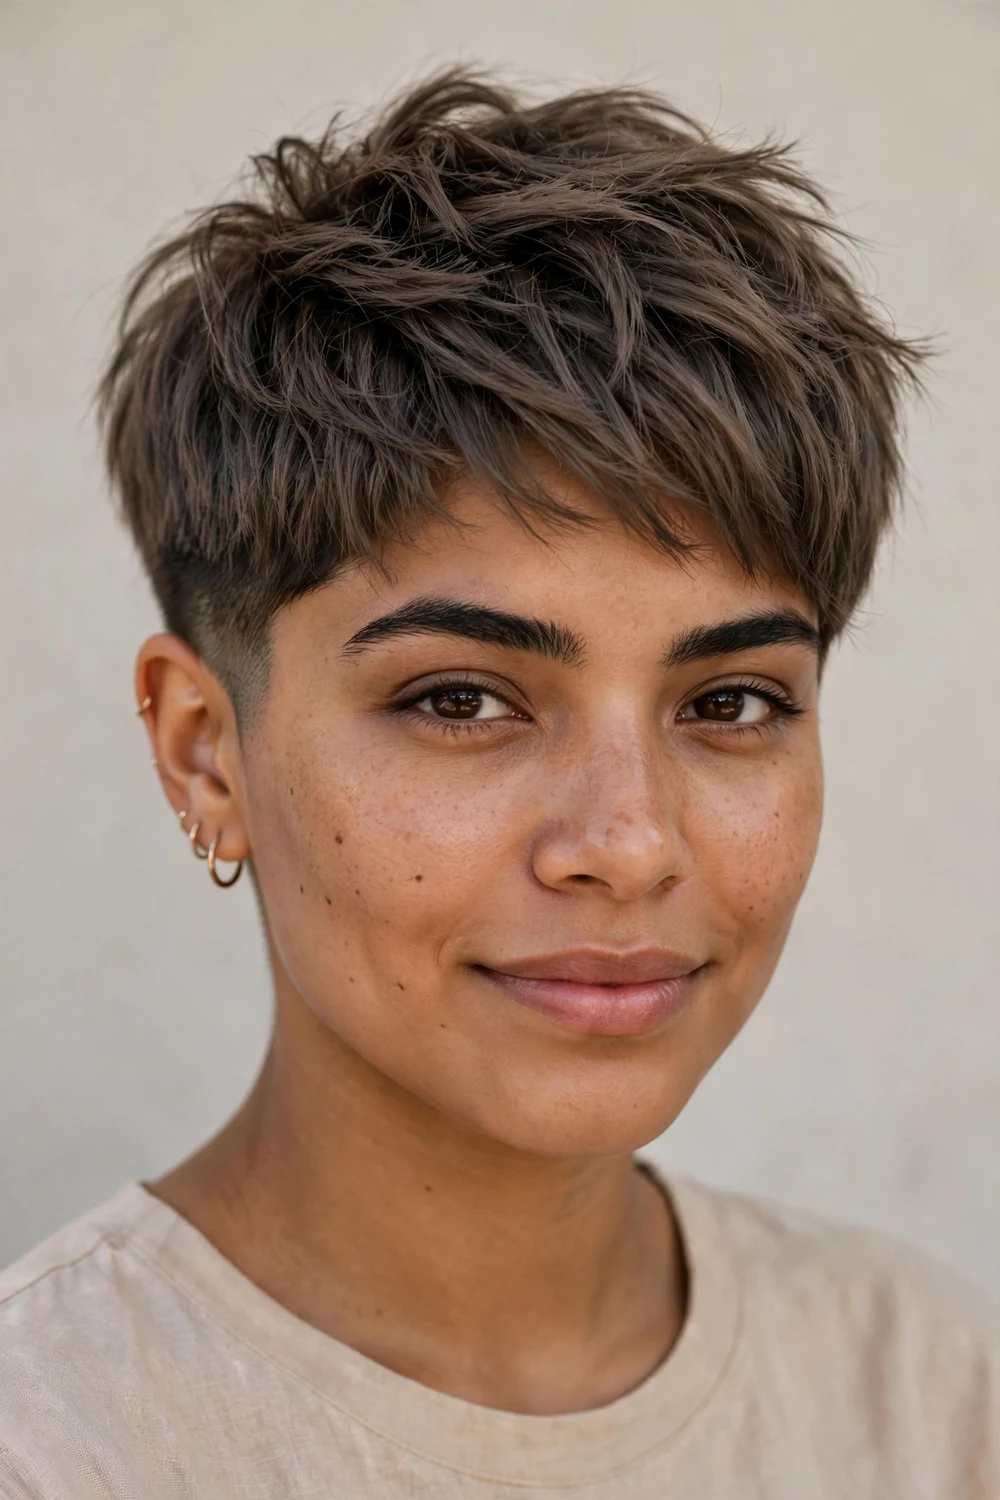
Smoky ash brown brings contrast and control: texture on top, neat faded undercut underneath. The muted tone gives a cool, modern finish while the textured top adds movement where fine hair wants it. The undercut keeps everything lightweight.
Styling is quick: a tiny dab of matte clay and a tousle with your fingers. It works well on round and oval faces. The smoky color is forgiving as it grows out.
Try this: ask for the smoky tone with a demi-permanent color. It fades gradually instead of leaving a harsh grow-out line.
Difficulty: Moderate · Cost: $130–$210 (cut + color)
47. Silver Pixie
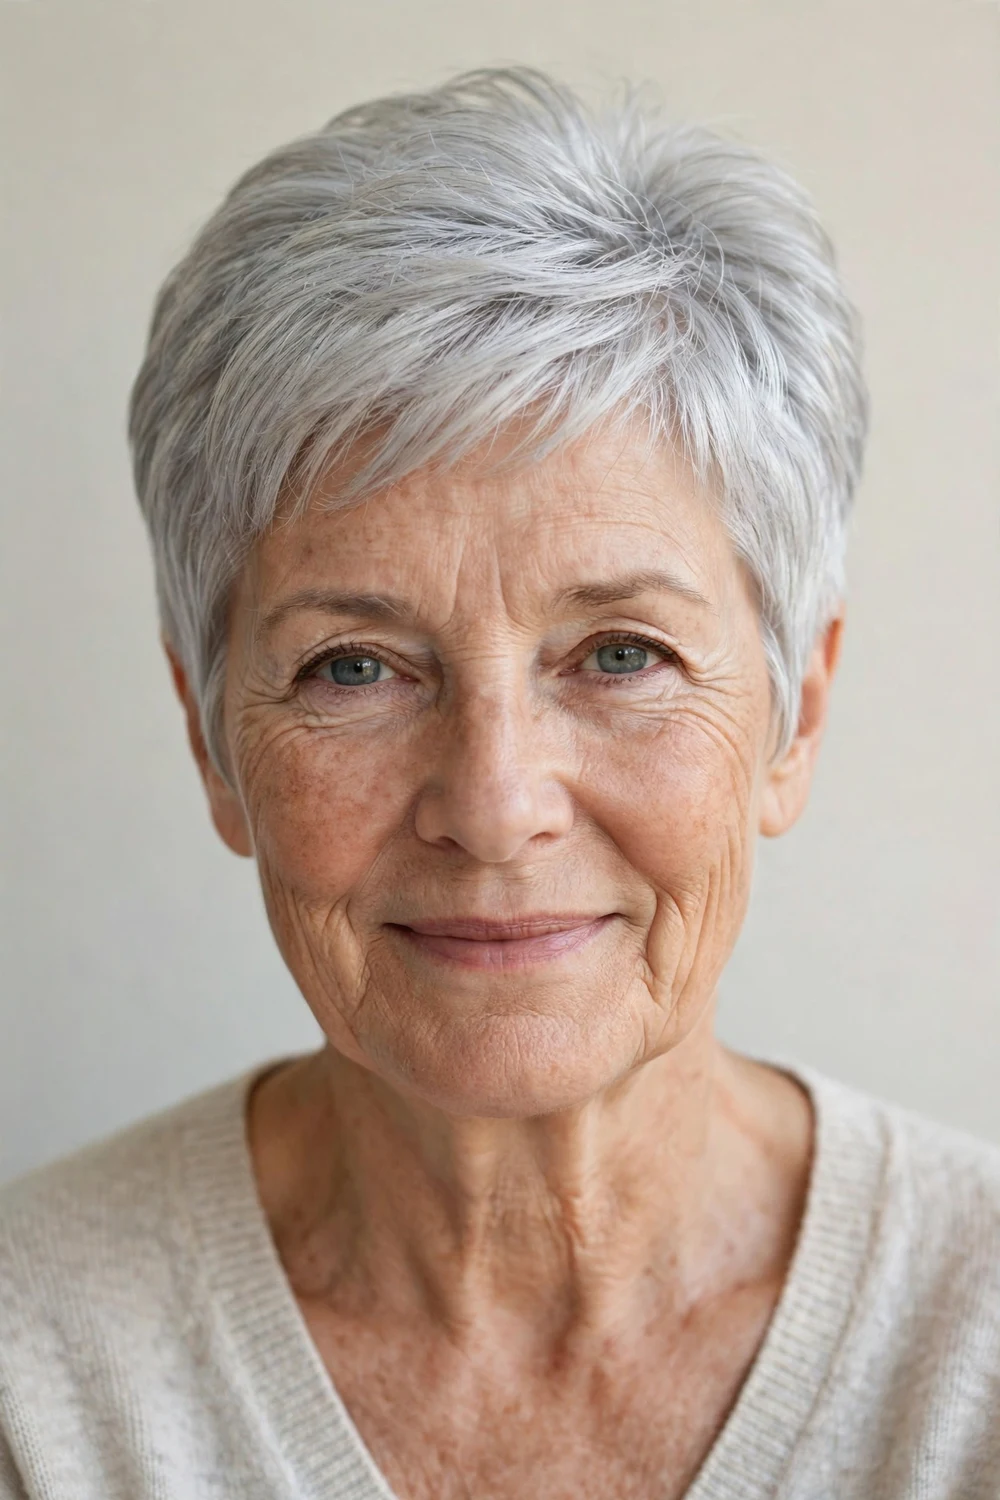
A silver pixie looks best with soft volume, not stiff styling. This shape keeps the crown full and the edges clean, which is ideal for fine hair: the metallic tone reflects light across every layer, and that shine reads as density. Natural silver or salon silver both work.
Sprinkle volumizing mist right at the crown for featherlight lift that never dulls silver tones. Keep the shape soft with regular trims. Silver plus texture is one of the most flattering combinations for fine hair.
Try this: sleep on a silk pillowcase. Silver fine hair frizzes easily, and silk keeps the cut smooth overnight.
Difficulty: Easy · Cost: $45–$70 (cut only, natural silver)
48. Salt-and-Pepper Pixie
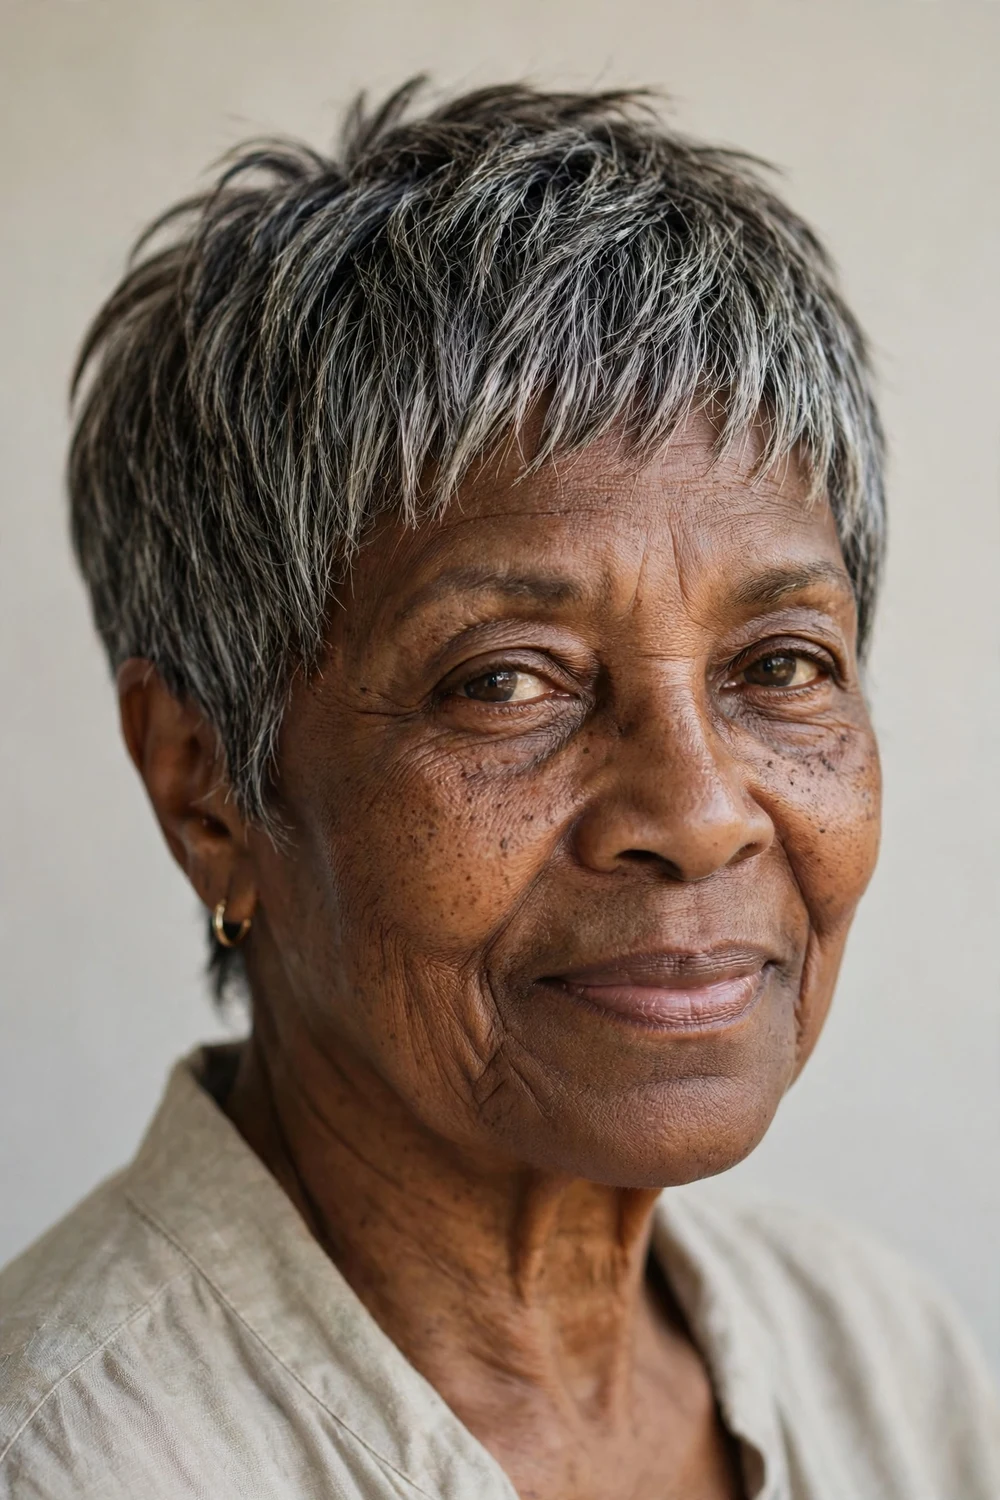
Going gray does not mean going flat. The tonal contrast of gray and darker strands does some of the volume work for you, creating an appearance of depth that solid-color fine hair has to work harder to achieve. Strategic layering shows off that natural color variation.
Ask for point-cut ends and light texturizing throughout so the mix of shades catches light. A purple shampoo every couple of weeks keeps the gray bright instead of yellow.
Try this: add a clear gloss treatment quarterly. It deepens the dark strands and brightens the silver without changing your natural pattern.
Difficulty: Easy · Cost: $45–$70 (cut only)
49. Gray Rounded Pixie
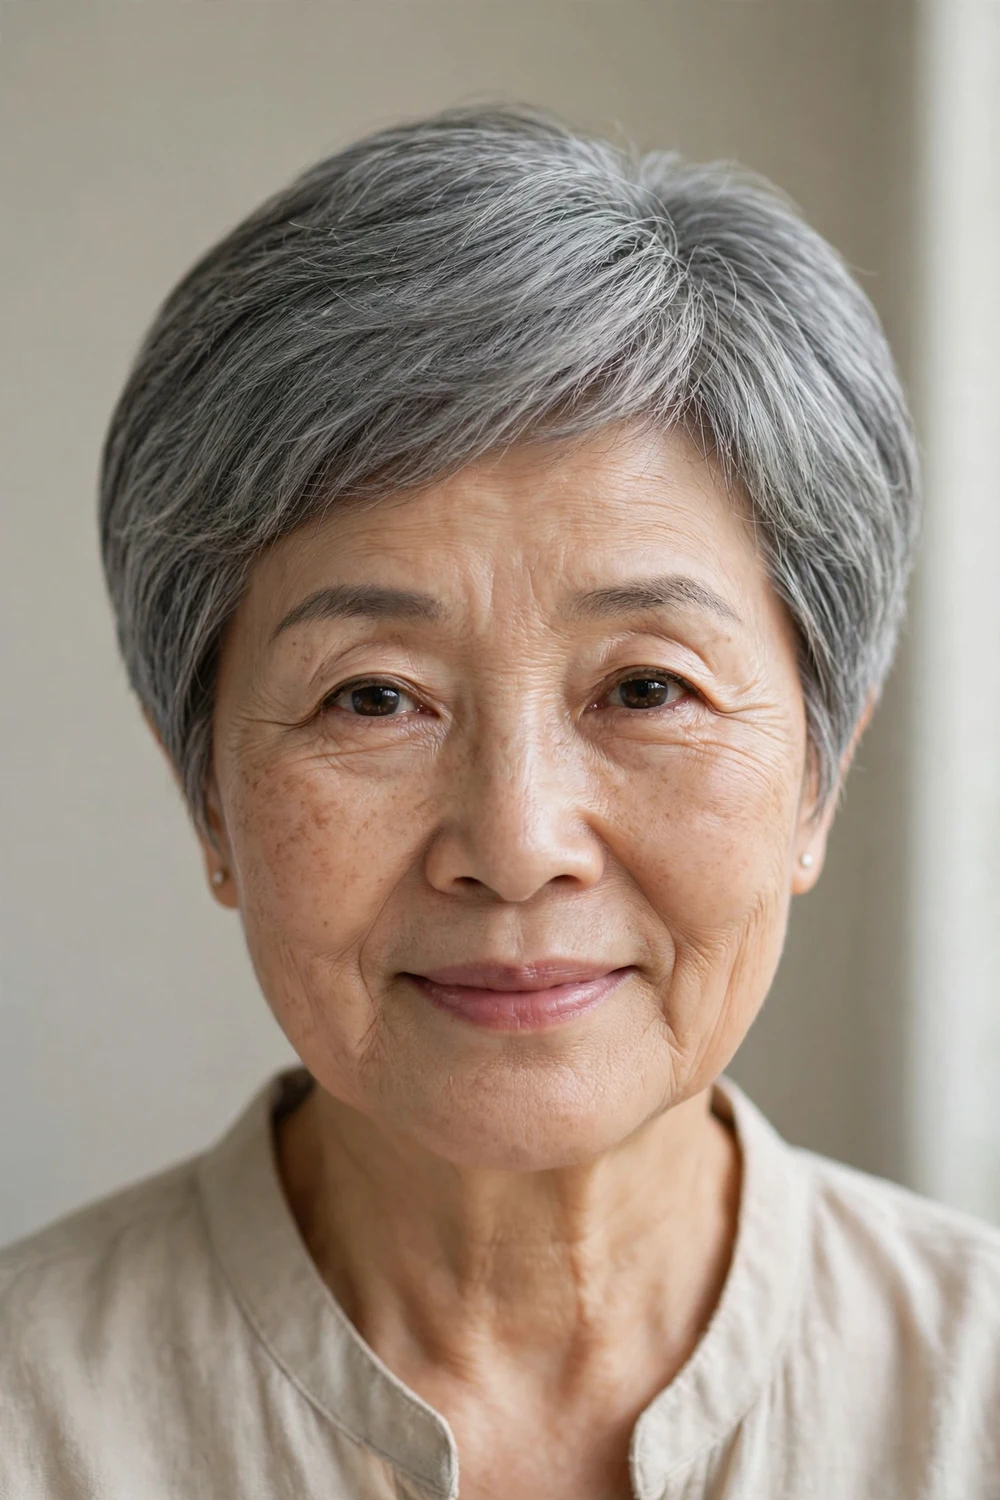
This polished, rounded cut hugs the head with a subtle curve through the back and sides. The smooth texture brings out the natural sheen in gray or silver tones, and the rounded silhouette adds shape without sharp angles or heavy layers. Graceful and practical.
Blow-dry smooth with a heat protectant and a round brush for the curved shape. It proves short hair does not need edge to look intentional. Trims every 5 to 6 weeks keep the round outline.
Try this: direct the dryer nozzle downward along the curve. Downward airflow is what makes the rounded shape lie smooth.
Difficulty: Easy · Cost: $45–$65 (cut only)
50. Warm Auburn Pixie
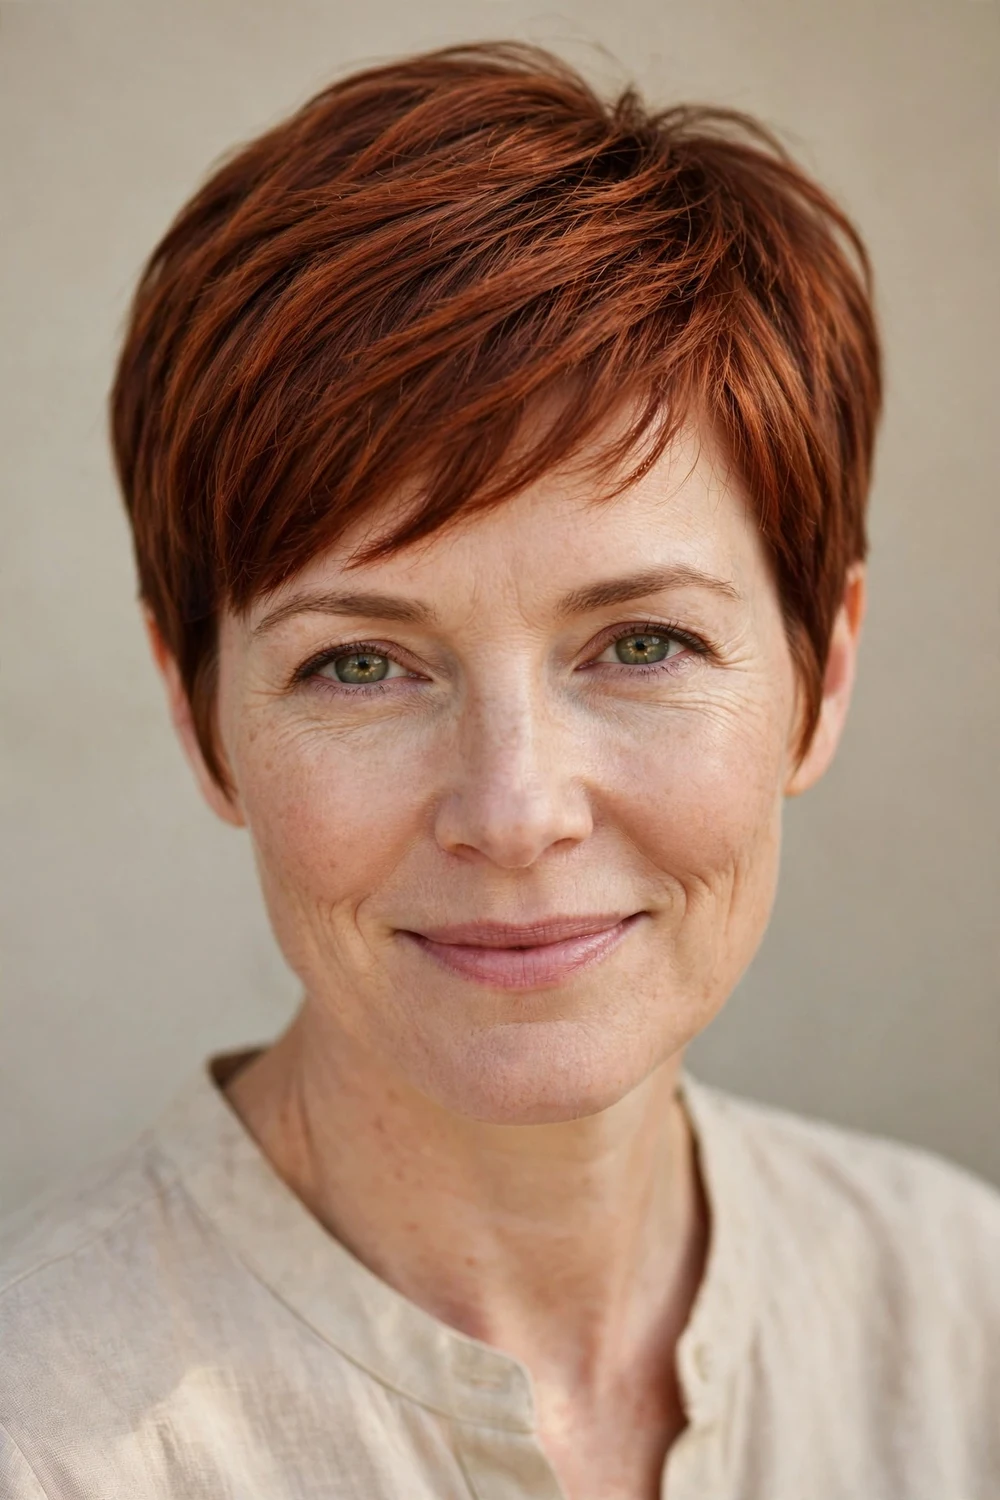
Warm auburn adds instant depth, which helps fine hair more than most colors. The rich red-brown tone has natural variation that reads as thickness, and it suits warm skin tones well. The cut keeps sides neat while the top stays longer for a soft sweep.
Ask for subtle face-framing and light internal layers. Auburn fades faster than brown, so use color-safe shampoo and refresh with a gloss between salon visits.
Try this: rinse with cool water. Hot water strips red tones fast, and auburn needs all the help it can get.
Difficulty: Moderate · Cost: $130–$210 (cut + color)
51. Dark-Root Contrast Pixie
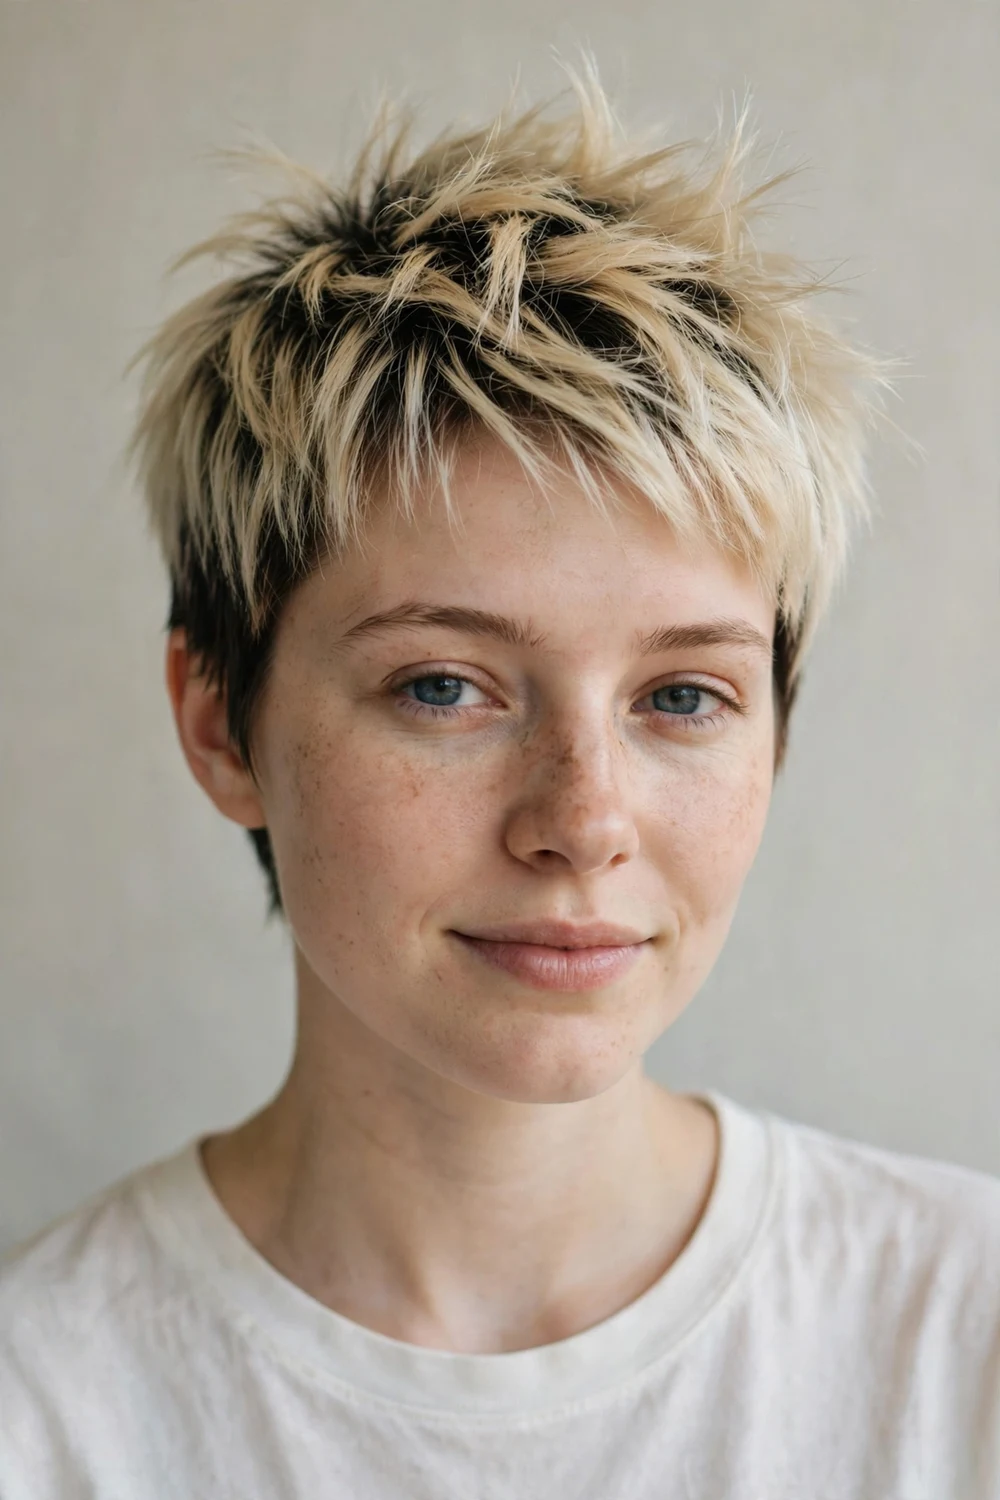
Dark roots under light blonde tips create contrast that makes thinner strands look far more dimensional. The shadow at the roots suggests depth the hair does not actually have, while the light ends catch the eye. It is a clever color trick stacked on a textured cut.
Style spiky or tousled with a lightweight pomade or texture spray, finger-styling only. The dark root also means softer grow-out than an all-over blonde. Refresh the blonde ends with toner every 6 to 8 weeks.
Try this: keep the root shadow 1 to 2 inches deep. Too shallow and the effect disappears; too deep and it reads as grown-out roots.
Difficulty: Moderate · Cost: $140–$230 (cut + color)
52. Lavender-Tint Pixie
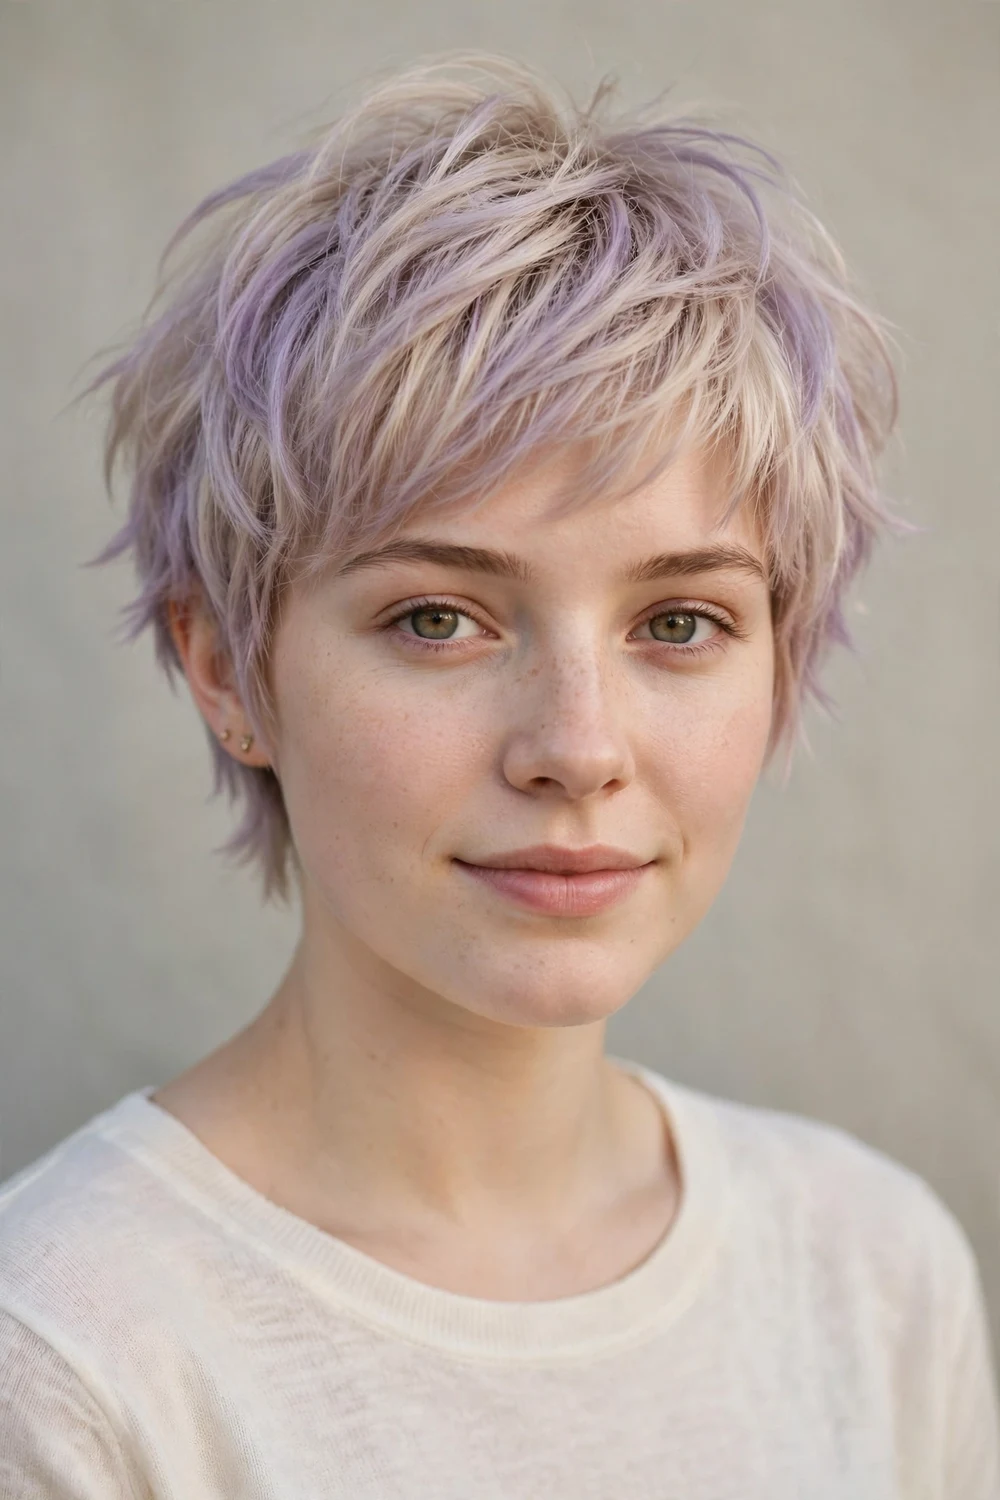
A wash of lavender over blonde gives softness and edge in the same cut. The light layering adds volume without overwhelming delicate strands, and the pastel tint adds visual interest that draws the eye across the texture. It is color play without a loud commitment.
The shape is low maintenance; the color needs refreshing with a color-depositing conditioner every couple of weeks. Choppy layers underneath keep the pastel from looking flat.
Try this: start with a pastel toner, not a permanent fashion color. If you love it, you can go bolder at the next appointment.
Difficulty: Moderate · Cost: $140–$220 (cut + color)
53. Black Pixie with Platinum Bangs
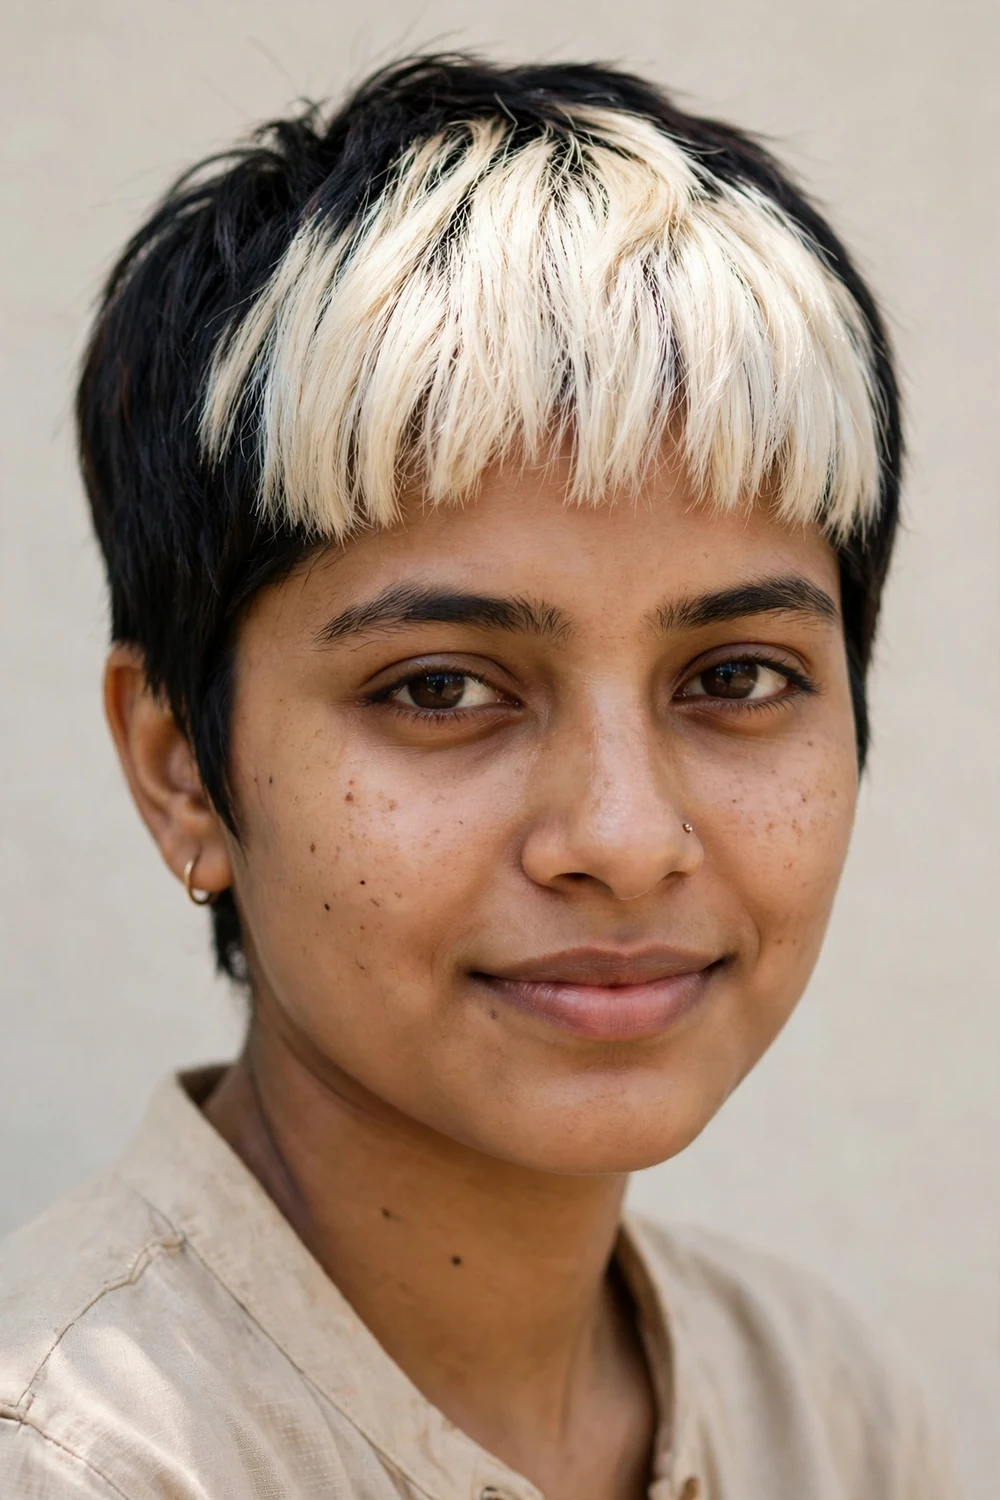
This edgy two-tone cut keeps the base deep black with platinum bangs, and the contrast is the whole point. The light fringe against the dark base creates a striking frame for the face, and the color blocking makes fine hair look deliberately styled rather than thin.
The platinum bangs need toner refreshes every 4 to 6 weeks to stay bright. Keep the black base glossy with a lightweight serum on the ends. This is a statement cut for women who want maximum personality.
Try this: ask for the platinum section to start slightly behind the hairline. A thin dark root at the very front makes regrowth less obvious.
Difficulty: Moderate · Cost: $150–$240 (cut + color)
54. Mixie: Pixie-Mullet Hybrid
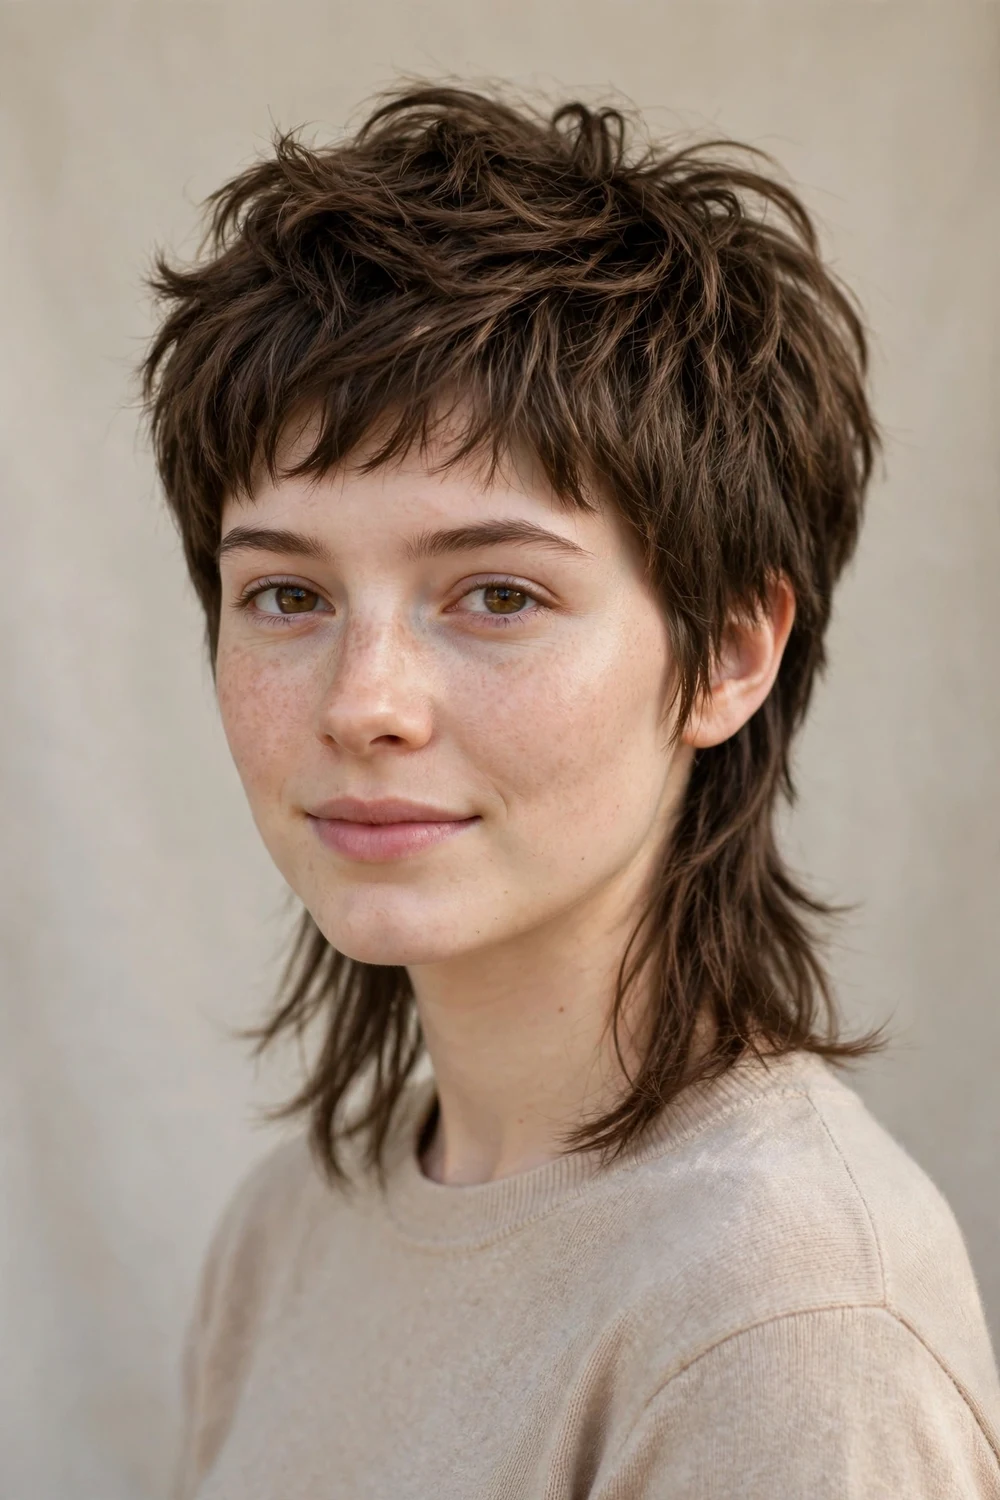
The mixie blends a pixie crown with a longer, textured nape, and it solves a real fine-hair problem: it keeps the volume-building shortness on top while the longer back adds styling interest without adding weight where it hurts. None of the standard pixie lists cover this hybrid, but it deserves a spot.
Texture the nape so it flips and moves instead of hanging. Style the crown with paste for lift and let the back air-dry. It is edgier than a classic pixie but easier to wear than a full mullet.
Try this: keep the nape length to the collar, not the shoulders. Past the collar, fine hair at the back starts to look stringy.
Difficulty: Moderate · Cost: $50–$80 (cut only)
55. Shaved Line-Detail Pixie
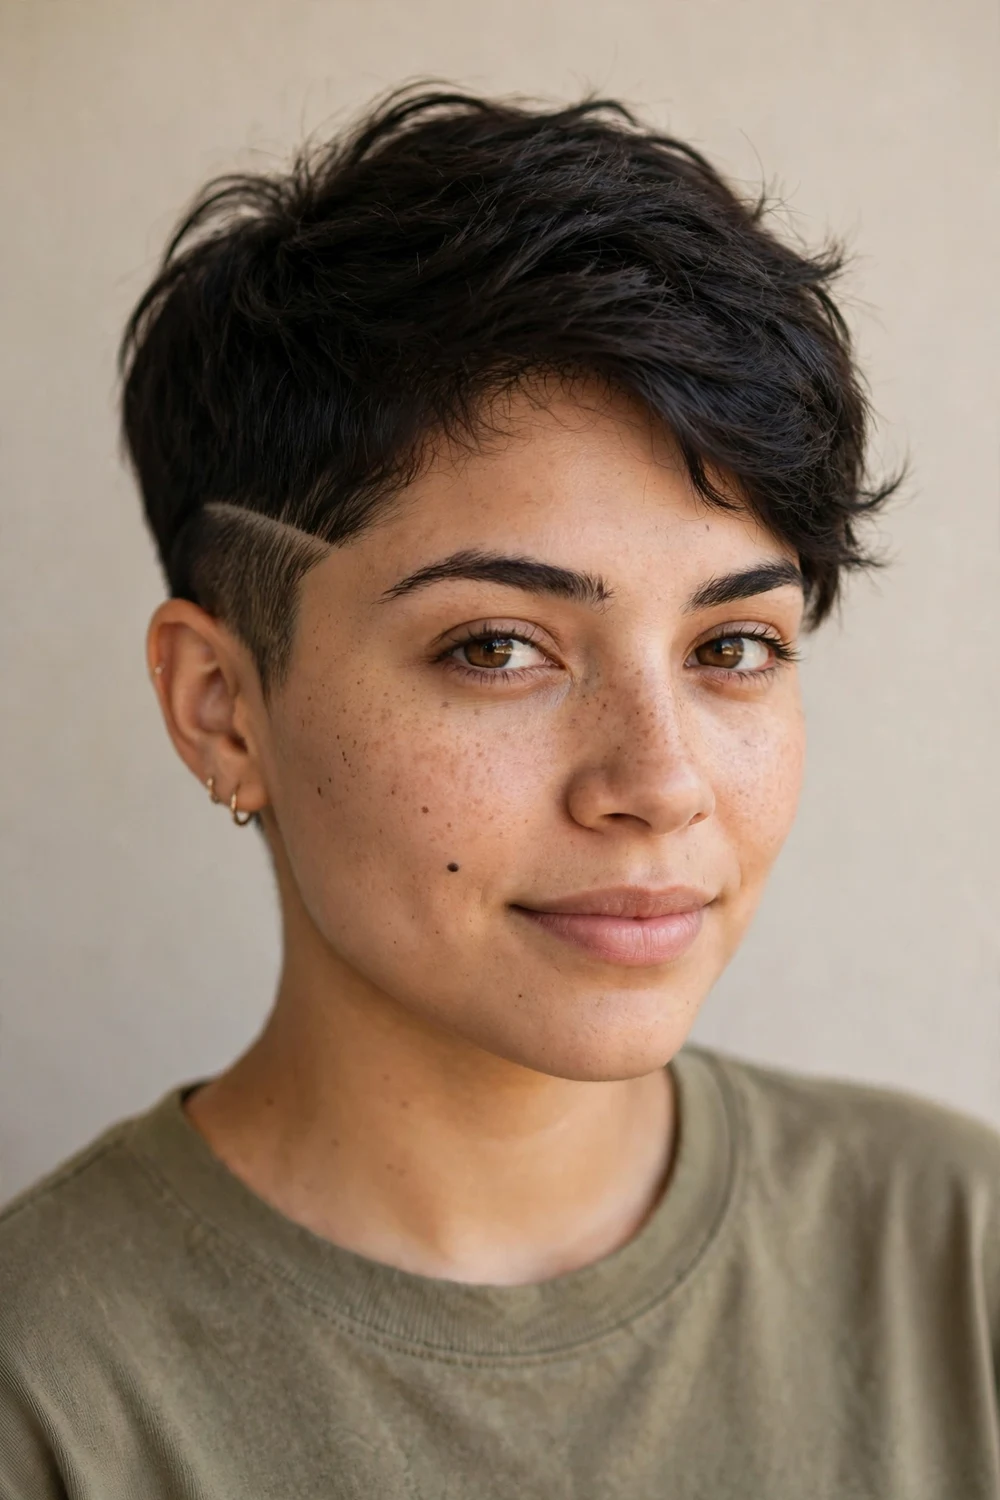
A single shaved line at the temple or nape adds a custom detail that makes a simple pixie look designed. It works especially well on fine hair because the shaved section removes bulk exactly where hair tends to look wispy, while the detail draws the eye to the cut’s precision.
Keep the top textured and longer so the line peeks out rather than dominating. The line needs re-shaving every 2 to 3 weeks to stay crisp, which is the main upkeep cost of this style.
Try this: start with one thin line, not a pattern. A single line is easy to grow out if you change your mind.
Difficulty: Moderate · Cost: $45–$70 (cut + detail)
56. Wet-Look Pixie
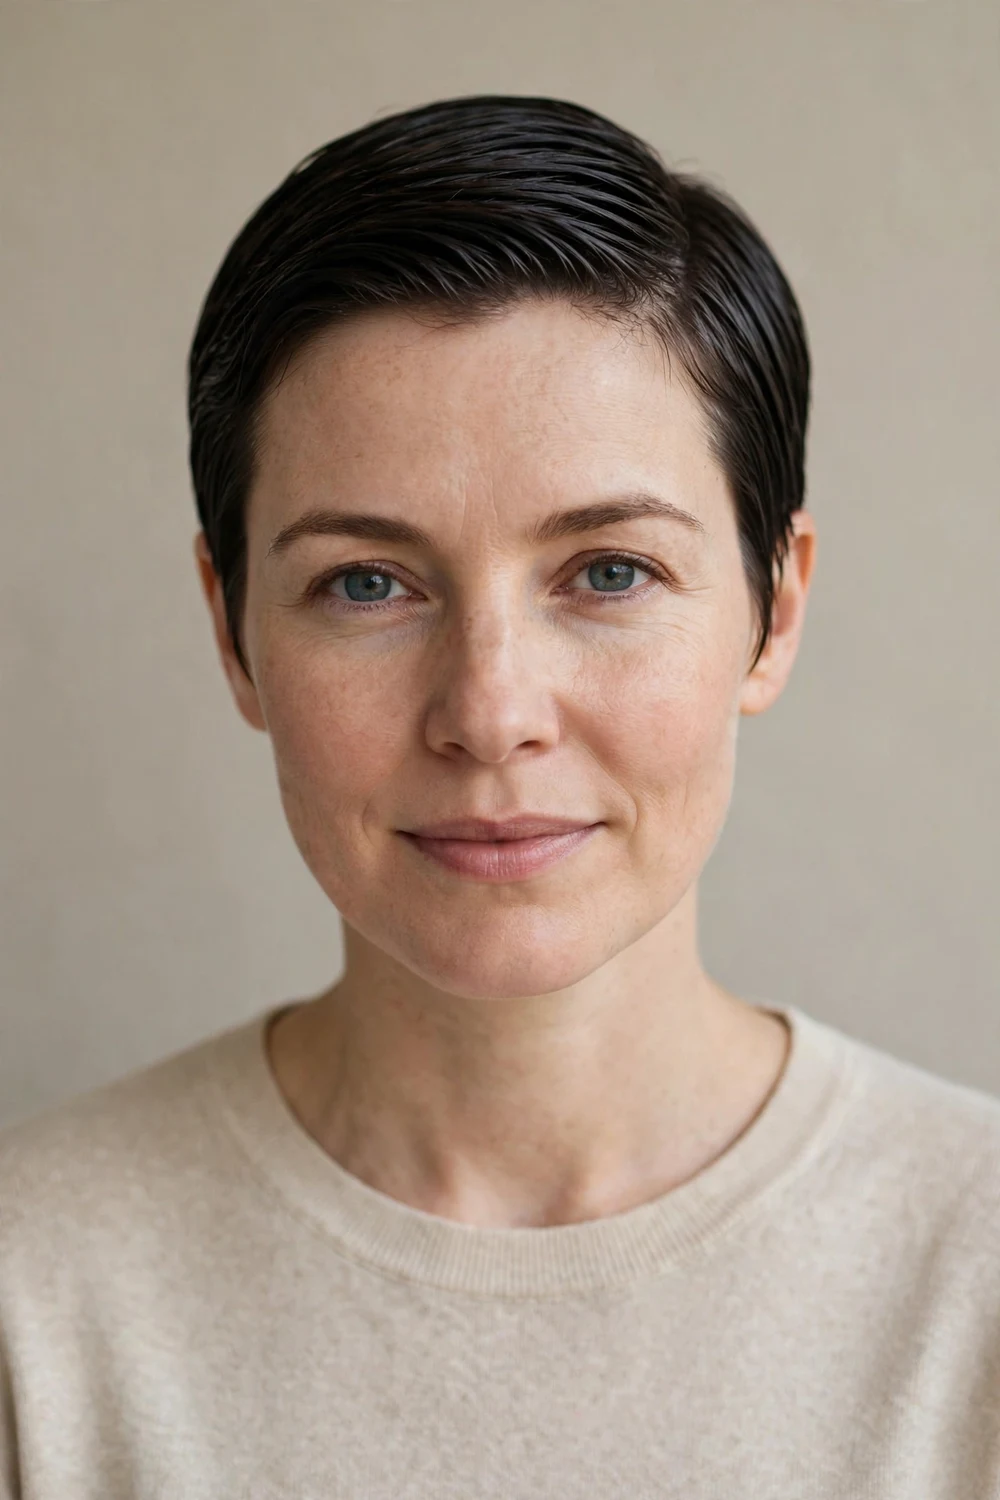
The wet look turns fine hair’s sleekness into an asset. A glossy, damp finish makes strands cling together in deliberate pieces, and the shine reads as health and density. It is a styling-led idea rather than a cut: it works over most of the pixies above.
Apply a wet-look gel or gloss pomade to damp hair and comb it into place, then leave it alone. Do not touch it while it sets. Use a lightweight formula; heavy gel on fine hair collapses by evening.
Try this: mix a drop of serum into the gel before applying. The blend gives shine without the crunch of gel alone.
Difficulty: Easy · Cost: $0–$15 (styling product)
Pixie Cuts for Fine Hair Compared
| Cut family | How it fakes volume | Daily effort | Trim cycle | Typical cost |
|---|---|---|---|---|
| Textured and choppy pixies | Uneven ends scatter light and hide thin spots | 3 minutes, paste on dry hair | 4 to 6 weeks | $45–$75 |
| Crown-lift and tapered pixies | Height on top, clean sides push eyes upward | 5 minutes, mousse plus blow-dry | 4 to 6 weeks | $45–$75 |
| Fringe-led pixies | Extra hair layer at the forehead adds front fullness | 3 to 5 minutes, brush and dryer | 3 to 4 weeks for fringe | $45–$75 |
| Undercut, fade, and buzz pixies | Contrast between short sides and longer top | 1 to 3 minutes, minimal product | 3 to 4 weeks | $35–$80 |
| Color-dimension pixies | Tonal contrast mimics density and depth | 3 minutes, texture spray | 6 to 10 weeks for color | $130–$240 |
| Sleek and polished pixies | Clean lines and shine read as healthy density | 5 minutes, cream and comb | 5 to 6 weeks | $45–$70 |
How to Choose the Right Pixie for Your Fine Hair
Start with your styling patience. If you will not blow-dry, pick a textured, cropped, or buzzed pixie that works with fingers and paste. If you enjoy five minutes with a dryer, crown-lift and tapered shapes reward the effort.
Next, consider your hairline and crown. Cowlicks and thinning spots at the crown do best with choppy texture or a side-swept fringe that covers them. A deep side part also hides a sparse part line without any product.
At the salon, say these words: point cutting, texture at the crown, tapered nape, no heavy thinning. Bring two photos: one of the overall shape and one close-up of the fringe. Stylists cut better with specifics than with adjectives.
What to avoid: one-length blunt pixies with no texture, which show every thin spot. Heavy oils and thick waxes, which glue fine hair flat. Overuse of thinning shears, which hollows out ends. And growing a pixie past the point where the shape holds: book the trim before it looks shaggy, not after.
For more on this topic, see pixie hairstyles for black women.
FAQs
Will a pixie make my fine hair look thinner?
No, if the cut is built for fine hair. Short lengths remove the weight that drags fine hair flat, and techniques like point cutting, crown layering, and tapering create the appearance of density. A blunt one-length pixie with no texture can look thin, which is why the cutting technique matters more than the length itself.
How do I ask my stylist for a pixie that adds volume to fine hair?
Use specific technique words: ask for point cutting instead of heavy thinning shears, texture and lift at the crown, and a tapered nape or faded sides. Bring two reference photos, one showing the overall shape and one close-up of the fringe or top texture. Mention that your hair is fine so the stylist texturizes appropriately.
How often should I trim a pixie on fine hair?
Every 4 to 6 weeks for most pixies. The shape is what creates the volume illusion, and fine hair shows a grown-out shape faster than thick hair. Fringe-led pixies need fringe trims every 3 to 4 weeks, and fades or undercuts need re-shaping every 3 to 4 weeks.
What products work best for fine-hair pixies?
Lightweight products: volumizing mousse at the roots, dry texture spray for grip, and matte clay or light paste for definition. Skip heavy oils, thick waxes, and silicone-heavy serums, which flatten fine hair. Use a heat protectant every time a blow-dryer, flat iron, or curling tool touches your hair.
Can I get a pixie if my hair is thinning at the crown?
Often yes. Textured and choppy pixies are among the best cuts for camouflaging sparse spots, because the uneven layers hide the scalp better than smooth styles. A side-swept fringe or deep side part also covers a thinning part line. For significant or sudden thinning, check with a dermatologist first, then choose a textured cut with your stylist.
If your top priority is a routine under five minutes, these pixie haircuts thin fine hair easy to style were picked for effortless mornings.
Final Thoughts
The right pixie does not fight fine hair. It removes the weight, builds texture where it counts, and lets light do the rest. Pick the shape that fits your mornings, tell your stylist the technique words, and keep the trims on schedule. Fine hair rewards a good pixie more than almost any other texture.

