


Thin hair can hold an updo. The styles that fail on fine hair share one problem: they rely on the hair itself for bulk, and fine hair pulled tight goes flat against the head. The styles in this list work the other way. Each one builds its shape from a technique first, with teasing at the crown, hidden padding, texture spray for grip, or sections pinned wide so the finished style covers more space than the hair inside it.
Start every style here on dry, second-day hair when you can. Freshly washed fine hair is smooth, and pins slide straight out of it. A mist of dry shampoo or texture spray at the roots gives the strands grip before a single pin goes in. Length helps but is no barrier: most of these builds work from shoulder length up, and the medium hair updo ideas roundup covers the same ground by length if you want to compare.
Key Takeaways
- Prep decides the result. Texture spray or dry shampoo on dry hair gives fine strands the grip that pins need.
- Tease the crown only. A small teased section under a smooth top layer adds height where thin hair looks sparsest.
- Padding does the heavy lifting in buns and rolls. A foam donut or roll insert sets the size of the finished shape.
- Pin wide, then pancake. Pulling the edges of a finished bun, braid or chignon outward adds width after the style is secure.
- Cross your pins. Two bobby pins placed wavy side down in an X hold fine hair far longer than a single pin.
1. Textured Messy Updo
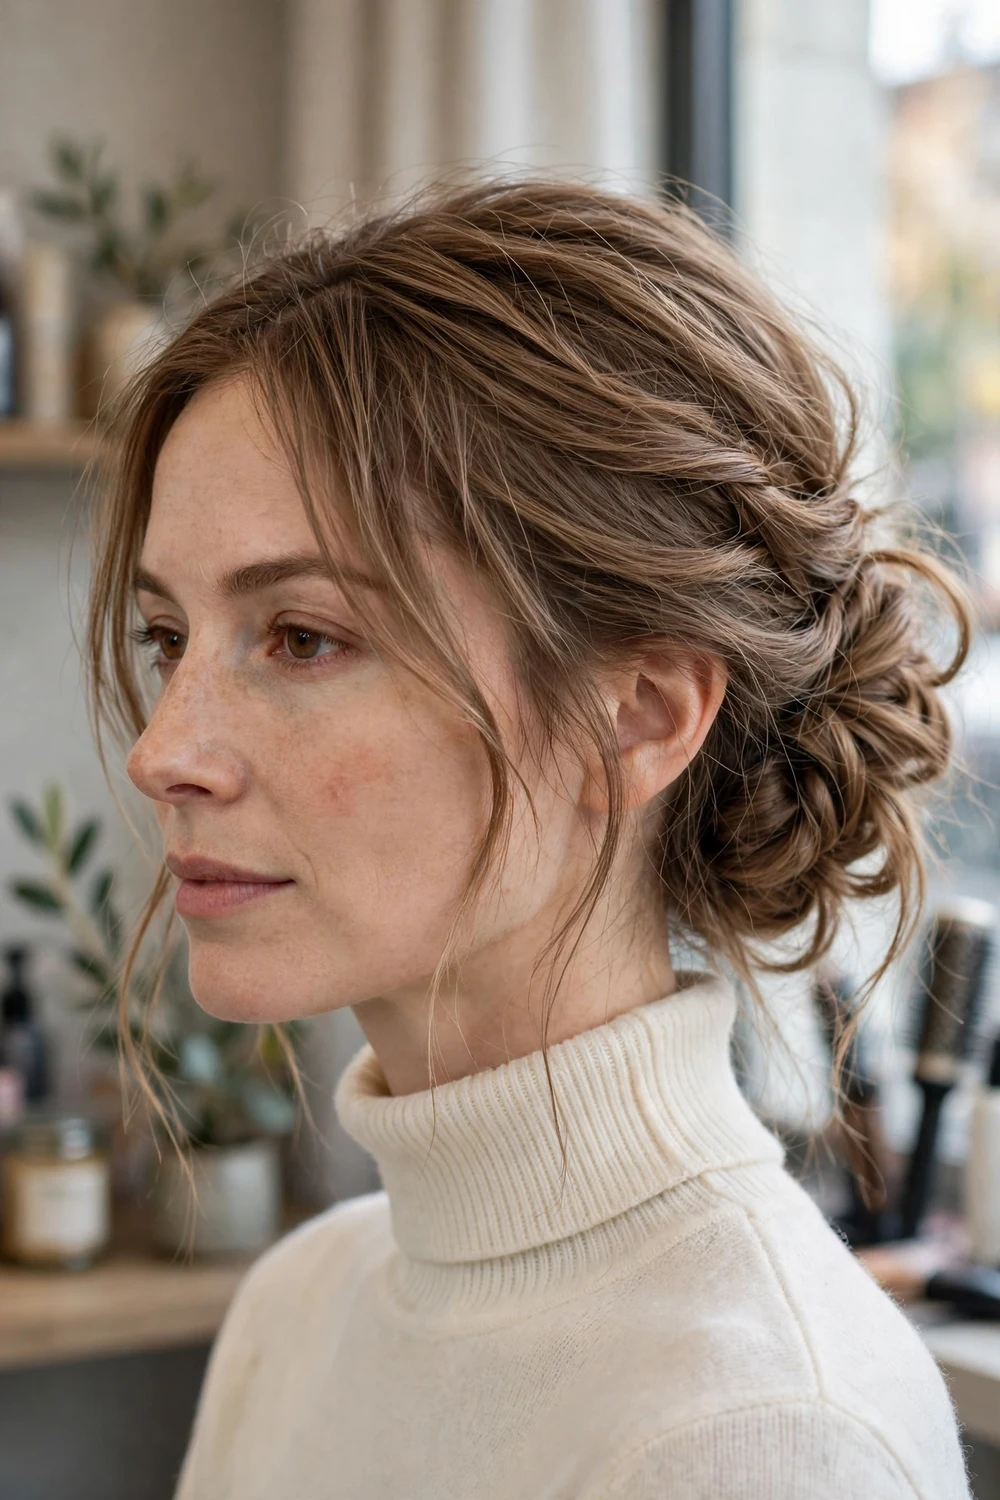
Loose twists are the base of this style. Spray texture spray through dry hair, twist small sections at the sides and back, and pin each twist at the center back of the head. Leave the twists loose as you pin. A tight twist shows every gap between strands, while a loose one covers a wider area.
Once all the twists are pinned, pull gently at the outer edge of each one. This widens the whole shape and covers the scalp at the back. Leave two short strands free at the front. They soften the hairline and cover the temples, where fine hair tends to look thinnest. The cut underneath matters too, and face-framing layers for fine, thin hair give those front strands the right length to work with.
Try this: pin each twist with two pins crossed in an X, wavy side down, and the style holds through a full evening.
Difficulty: Low to Medium · Cost: $ (salon)
2. Donut Padded Bun

A foam donut sets the size of this bun before your hair goes anywhere near it. Pick a small donut in a shade close to your root color. Pull your hair into a ponytail at mid crown, thread the tail through the center of the donut, and spread the hair evenly over the mesh so no foam shows through.
Secure the spread hair with a thin elastic over the donut, then wrap the remaining ends around the base and pin them under. Fine hair often makes a bun the size of a golf ball on its own. Over a donut, the same hair covers a shape two or three times wider, and the mesh gives the pins something solid to anchor into.
Try this: mist the ponytail with texture spray before you spread it over the donut, so the strands stay separated and cover the mesh fully.
Difficulty: Low · Cost: $ (salon)
3. Loop Bun
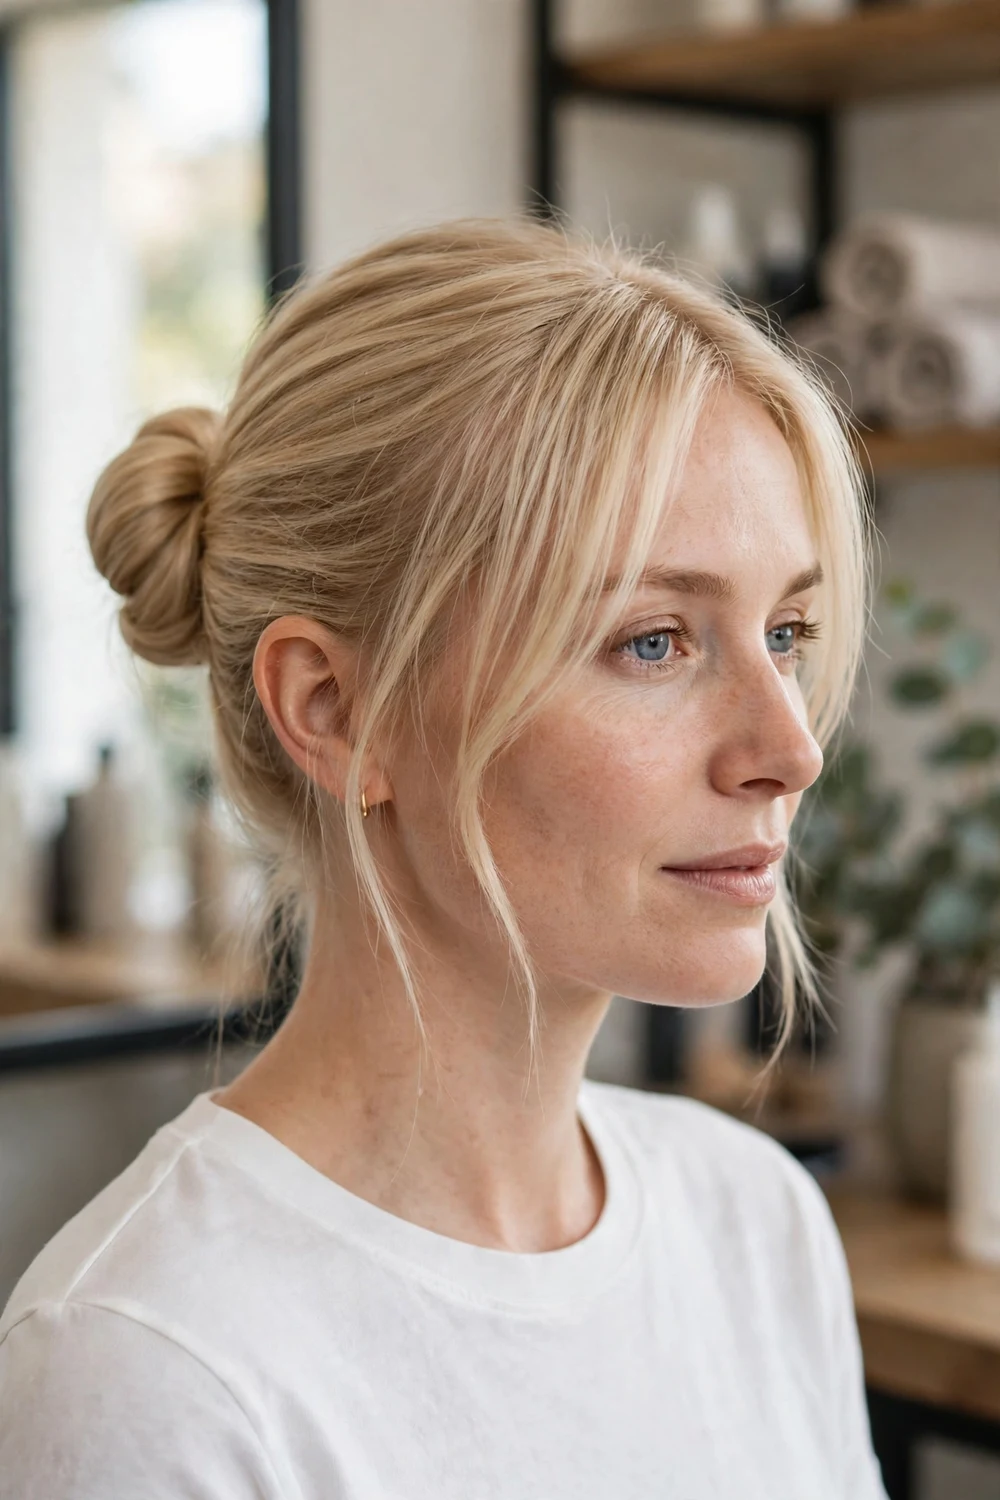
The loop bun is built in one move. On the last pull through a ponytail elastic, stop halfway. The hair forms a loop with the ends hanging free, and that loop reads as a bun with twice the hair inside it. Fan the loop out flat with your fingers so it sits wide against the head.
Wrap the free ends around the elastic to hide it, and pin them underneath. Keep the sides looser than you think you should. Hair pulled drum tight at the sides exposes the scalp on fine hair, while a softer pull keeps coverage. Two short curtain strands left out at the front finish the shape.
Try this: use a small clear elastic for the base and a second one over the wrapped ends, so nothing metal or bulky shows through thin hair.
Difficulty: Low · Cost: $ (salon)
4. High Twisted Bun

Height at the crown does the work in this bun. Gather the hair high, close to the crown rather than at the back of the head. A high base means the sides of the hair sweep up at an angle instead of lying flat, and that angle adds width at the mid-lengths where fine hair usually collapses.
Twist the ponytail into a rope, coil it around its base, and pin the coil flat. Keep a few loose pieces at the sides and nape. Those pieces are planned, and they stop the style from reading severe. Texture spray in the ponytail before twisting keeps the rope from slipping apart as you coil it.
Try this: tease the ponytail lightly before you twist it. The rope coils into a wider bun and the pins grip the teased texture.
Difficulty: Low to Medium · Cost: $$ (salon)
5. Backcombed Top Knot

A top knot on thin hair stays small, and this version works with that instead of fighting it. Curl the hair first with a large barrel iron, or work with second-day waves. Curl and wave make each strand take up more room, so the knot wraps into a fuller coil.
Sweep the hair into a loose ponytail at the very top of the crown. Backcomb the ponytail in short strokes, mist it with texture spray, then wrap it around the base and pin. Leave pieces out around the face before you start. They add width at the front, where a bare, tight pull would show the hairline.
Try this: keep the knot compact and let the loose face pieces carry the softness. A small, neat knot looks intentional on fine hair.
Difficulty: Low to Medium · Cost: $ (salon)
6. Rolled Mid-Crown Knot

This knot sits at mid crown and rolls the hair into itself rather than wrapping it around an elastic. Section the hair, roll each section under, and pin as you go. Rolling builds the shape layer over layer, so the finished knot has more presence than the same hair twisted into a plain bun.
The size stays honest. The roll suits fine hair because it adds structure without padding, and the pinned layers hold each other in place. A curled strand at the front and a few soft flyaways at the crown keep the finish relaxed. Smooth every strand down and the style reads thin again, so leave the surface texture alone.
Try this: roll the sections in the same direction, under and toward the center, and the knot keeps a clean spiral line at the back.
Difficulty: Medium · Cost: $$ (salon)
7. Looped Crown Knot

Medium length fine hair often falls short of a full bun. This knot solves that by looping. Twist small sections and loop each one into the next, pinning as you build a ring of loops at the crown. Each loop borrows hold from the loop beside it, and the ring reads as one full knot.
Pull the face and ear pieces out before you start pinning, so the loose tendrils look planned rather than escaped. The looped build also hides pin heads well, since every loop has a fold a pin can sit inside. That matters on thin hair, where pins show through a smooth surface.
Try this: work in four to six loops of even size. Even loops give the knot a round outline, while uneven loops make it lopsided.
Difficulty: Medium · Cost: $$ (salon)
8. Pancaked Low Chignon

The chignon itself is simple: a loose ponytail at the nape, backcombed, wrapped into a circle and pinned above the hairline. The step that changes it for thin hair comes after pinning. Pinch the outer edges of the finished chignon and pull them outward a little at a time. The shape spreads wider and flatter, and a wide shape covers the back of the head far better than a small tight coil.
Wave the hair before you start, with a large barrel iron or braids worn overnight. Smooth, straight fine hair wraps into the smallest chignon of all. A few pieces escaping at the sides suit this style, so leave them if they fall.
Try this: backcomb the ponytail before wrapping, then pancake after pinning. The two steps together roughly double the width of the finished chignon.
Difficulty: Low to Medium · Cost: $$ (salon)
9. French Twist with a Teased Crown
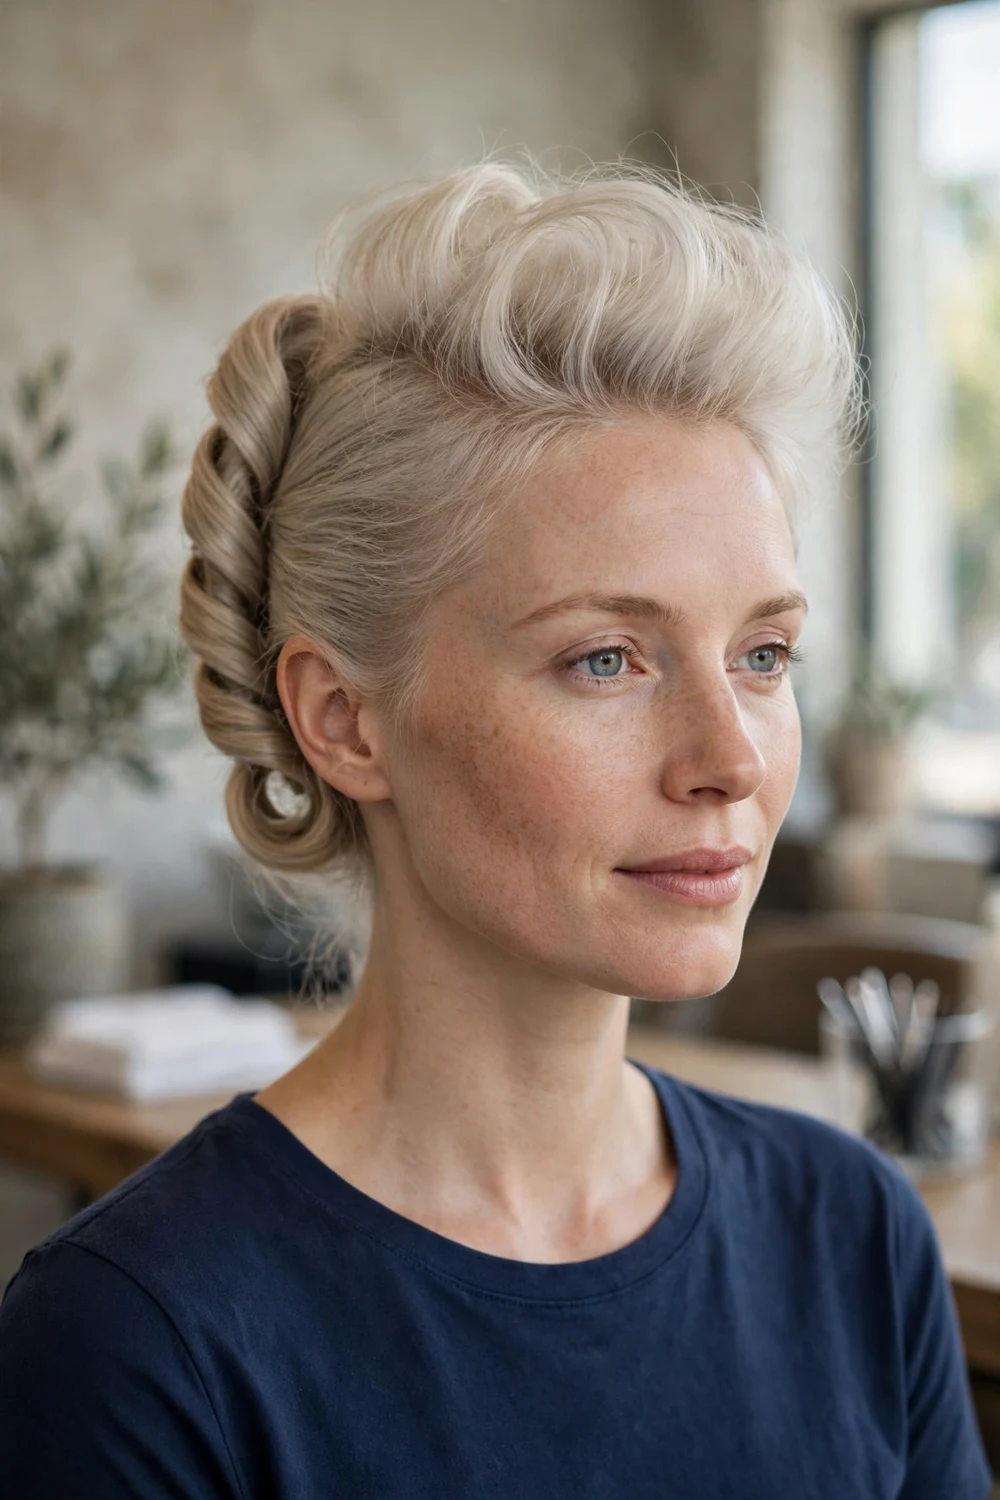
The vertical roll of a French twist suits thin hair because the shape runs long instead of wide. Curl the hair first for lift, then backcomb the roots at the crown with a cushion brush and smooth a clean top layer over the teasing. That hidden teased section is the height the finished twist shows at the top.
Gather the hair at the center back, twist the ends upward into a roll that runs from nape to crown, and pin along the seam with U-shaped pins. Then tug gently on both sides of the roll. The tug widens the roll and softens the line, and it takes about a minute.
Try this: use U-shaped pins along the seam rather than standard bobby pins. They catch more hair per pin and slide out of a twist far less often.
Difficulty: Medium · Cost: $$ (salon)
10. Gibson Roll with Hidden Padding

The Gibson roll forms a soft horizontal roll at the nape. On thin hair, a hidden filler gives the roll its body: a small foam insert or a rolled hairnet in a shade close to your hair color, pinned along the back of the head first. Sweep the hair over the insert, roll it under, and tuck the ends inside the roll.
The insert stays hidden and the roll keeps its shape all day, since the foam holds the form even as the hair relaxes. Loosen the finished roll slightly with your fingers instead of leaving it tight. A softer roll reads fuller and sits more comfortably at the nape.
Try this: pin a vertical line of bobby pins up the back of the head before you roll, so the hair and insert have an anchor row to roll against.
Difficulty: Medium · Cost: $$ (salon)
11. Spiraled Chignon
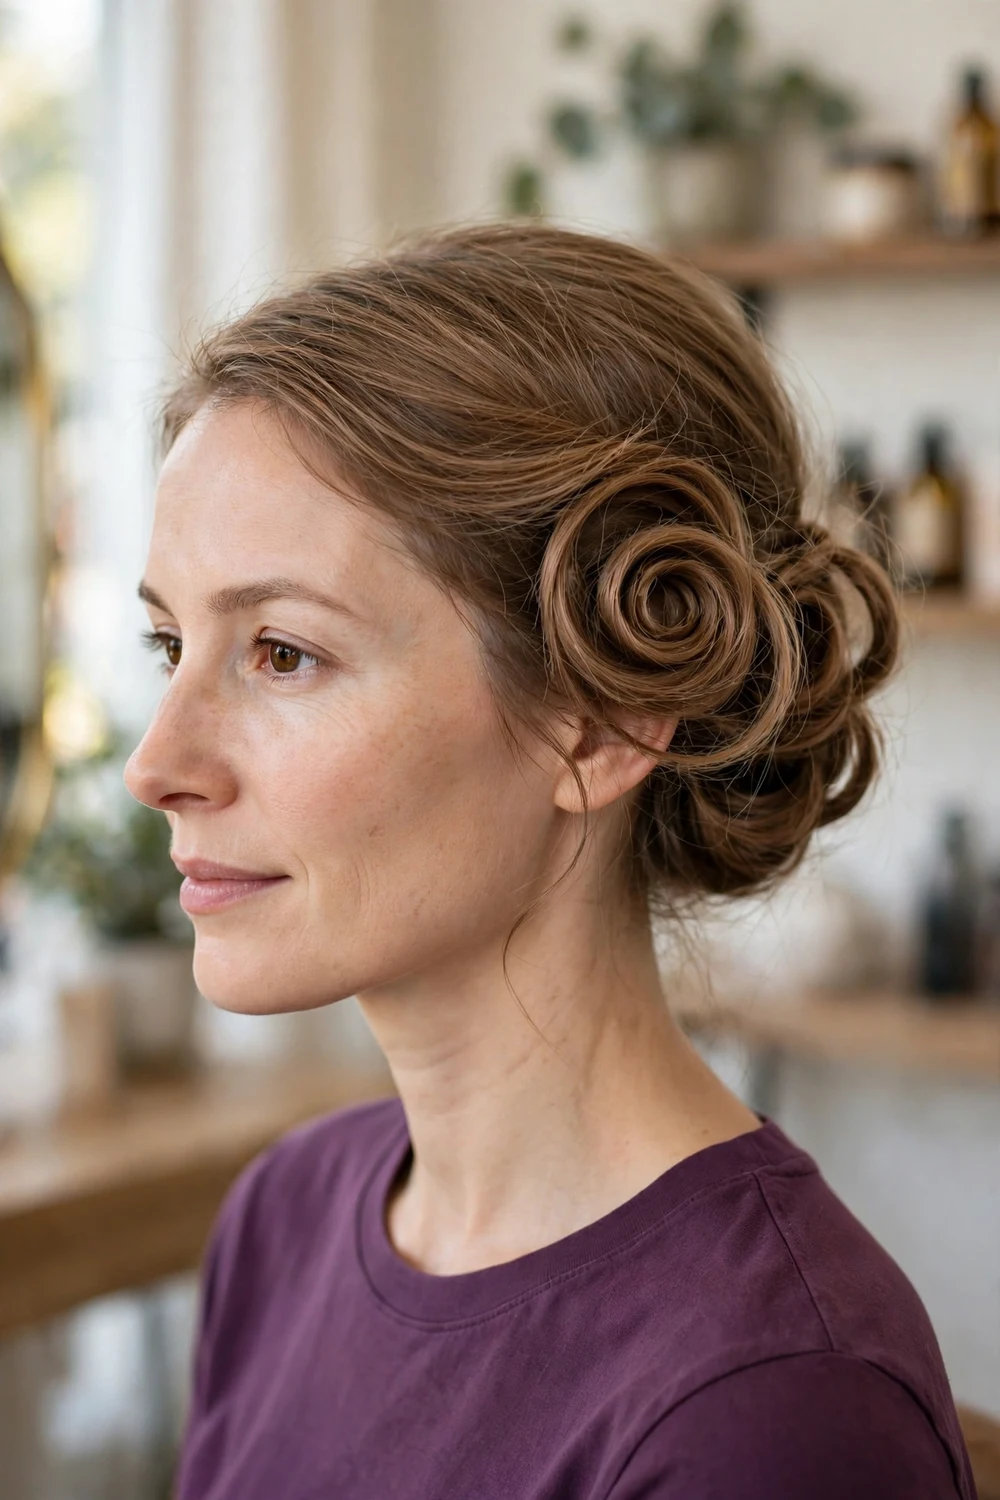
This chignon wraps the hair in even sections around a center point, so the back of the head shows a spiral. The trick for thin hair is the wrapping itself. Several wrapped pieces create the look of fullness through pattern, and the eye reads the spiral as depth even when the hair inside each section is fine.
Divide the hair into even sections before you start, and keep the tension the same in each one. Pin every section as you place it, since the spiral holds by pin count rather than by tightness. Straight, fine hair that lies flat takes this shape well, because the sections stay where they are pinned.
Try this: start the spiral at the outer edge and work inward. The center pin lands last and hides under the final wrapped section.
Difficulty: Medium to High · Cost: $$$ (salon)
12. Pin-Curl Chignon
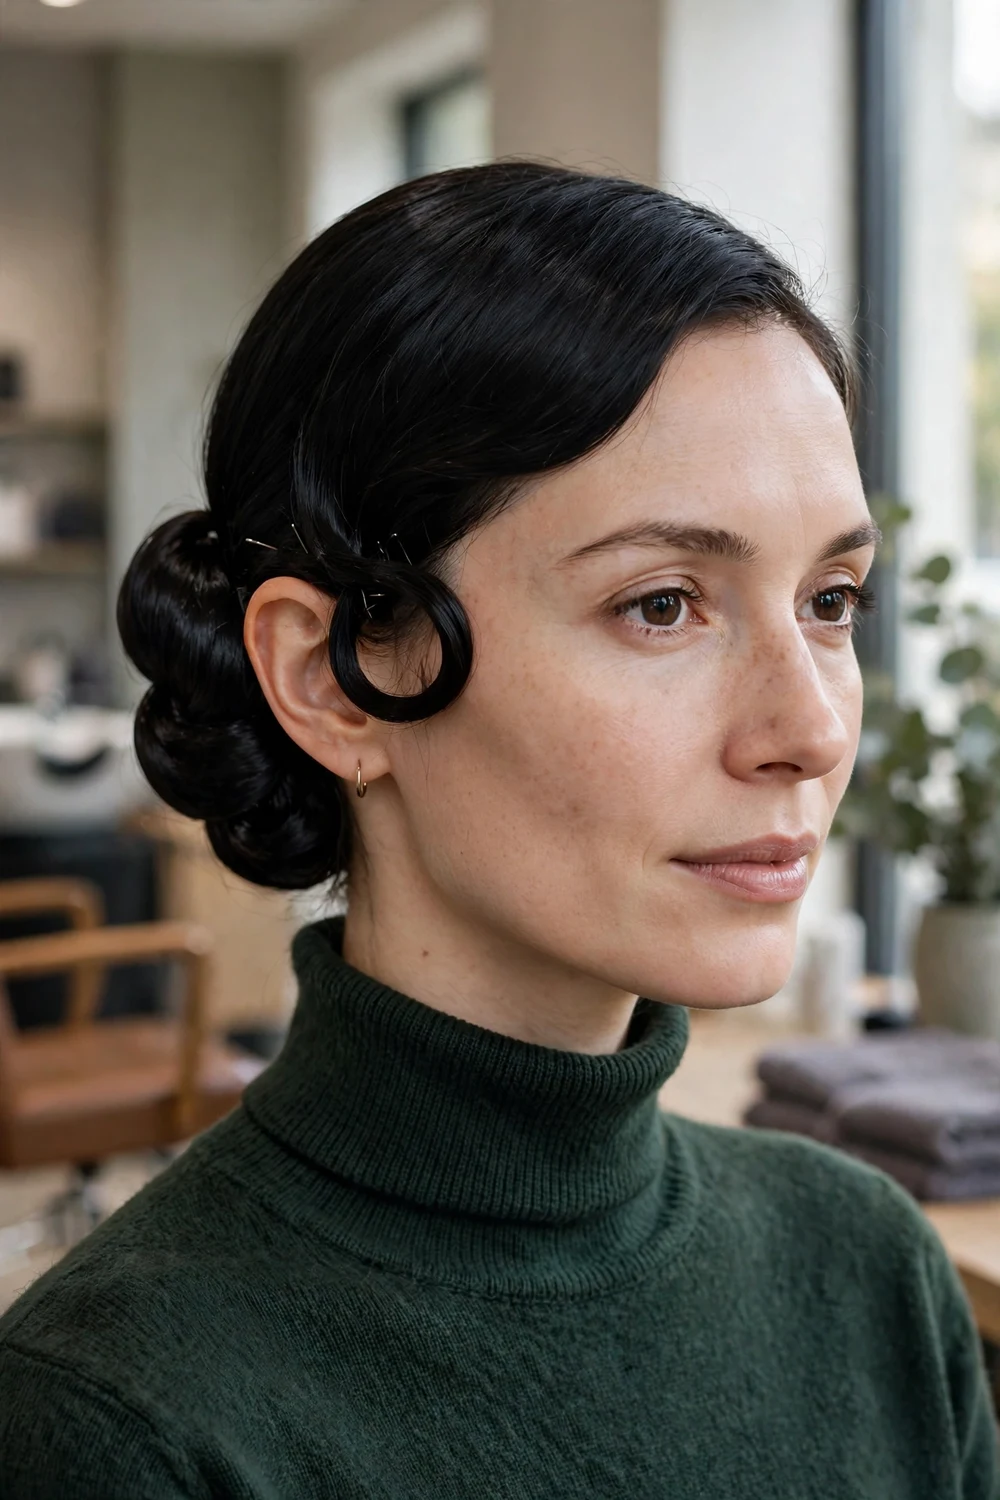
Small pin curls set into a low chignon give this style its sculpted surface. Each curl is rolled flat against the head and pinned, and the rows of curls build a textured shape that sits close and neat. On fine hair the curls hold their rolled form well, since there is less weight pulling each one open.
This is the most skill-based style on the list, and most readers will book it rather than build it. Ask for the curls kept small and the chignon set low. The close fit suits formal dress codes, and the pinned surface stays tidy for hours without loose pieces.
Try this: at a trial appointment, photograph the finished curl pattern from the back. Your stylist can rebuild the same pattern on the day from the photo.
Difficulty: High · Cost: $$$ (salon)
13. Swirl Updo
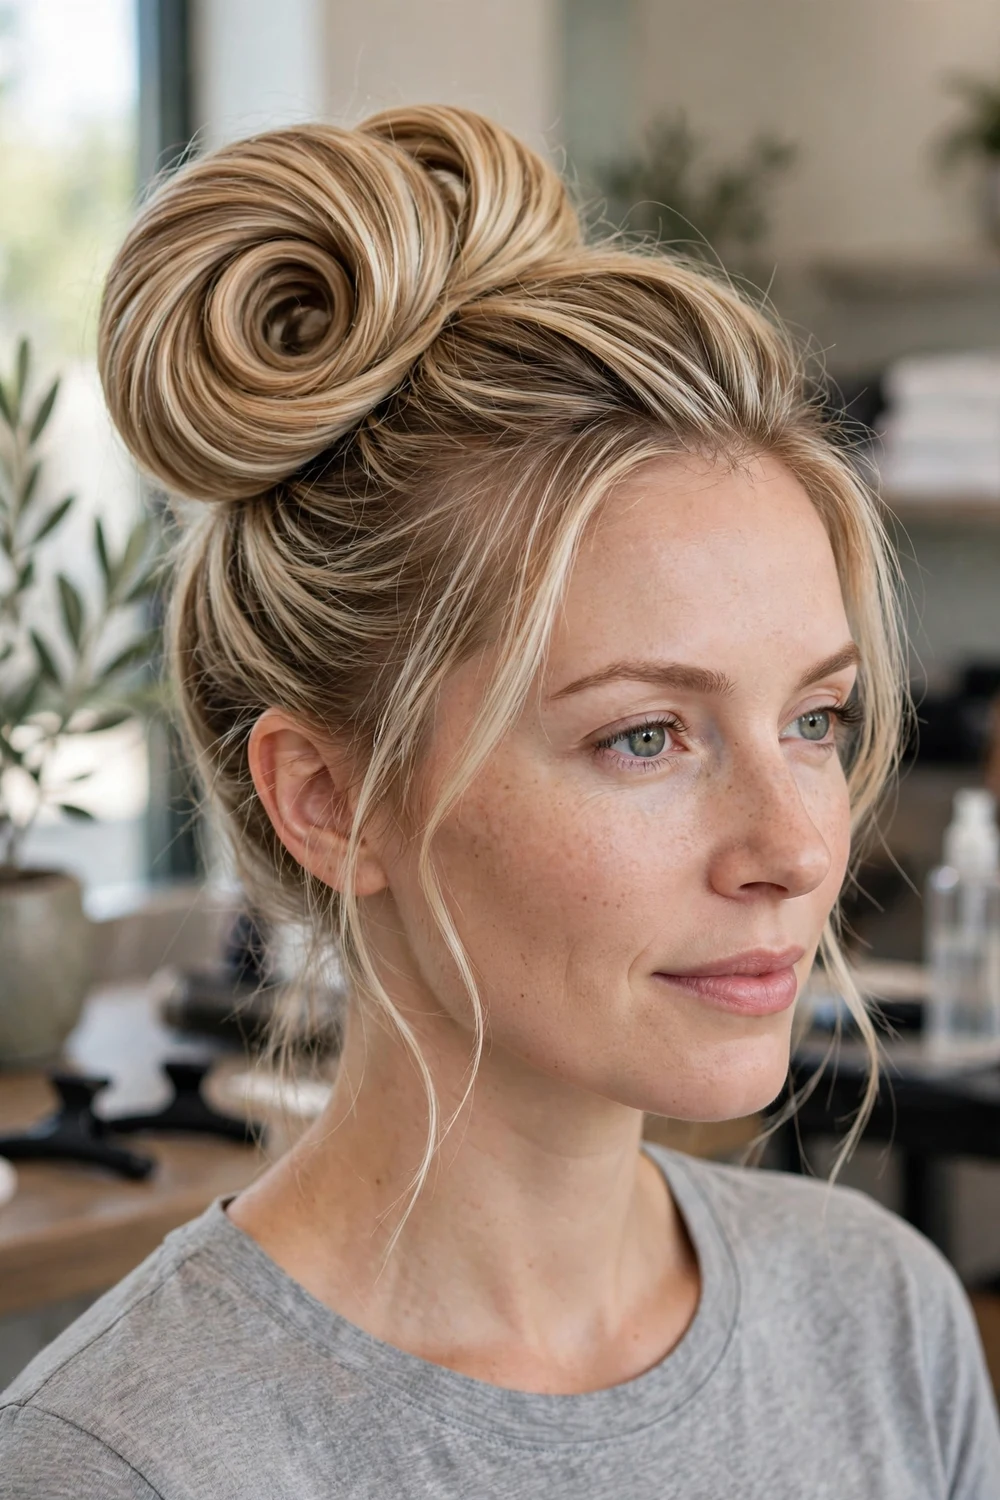
Every section in this updo rolls in the same direction. That single-direction roll creates a cascading swirl, and the bun reads wider than a standard coil because the hair travels across the back of the head instead of stacking in one spot. Loose pieces pinned into the swirl add to the width.
Two-tone or highlighted hair shows the swirl pattern most clearly, since the lighter pieces trace the roll. On one solid color, add the contrast with texture instead: curl the sections first and leave the surface unbrushed, so light and shadow mark the swirl lines.
Try this: roll the largest section first and pin it as the frame, then fit the smaller sections inside it in the same direction.
Difficulty: Medium · Cost: $$ (salon)
14. Twisted Low Bun
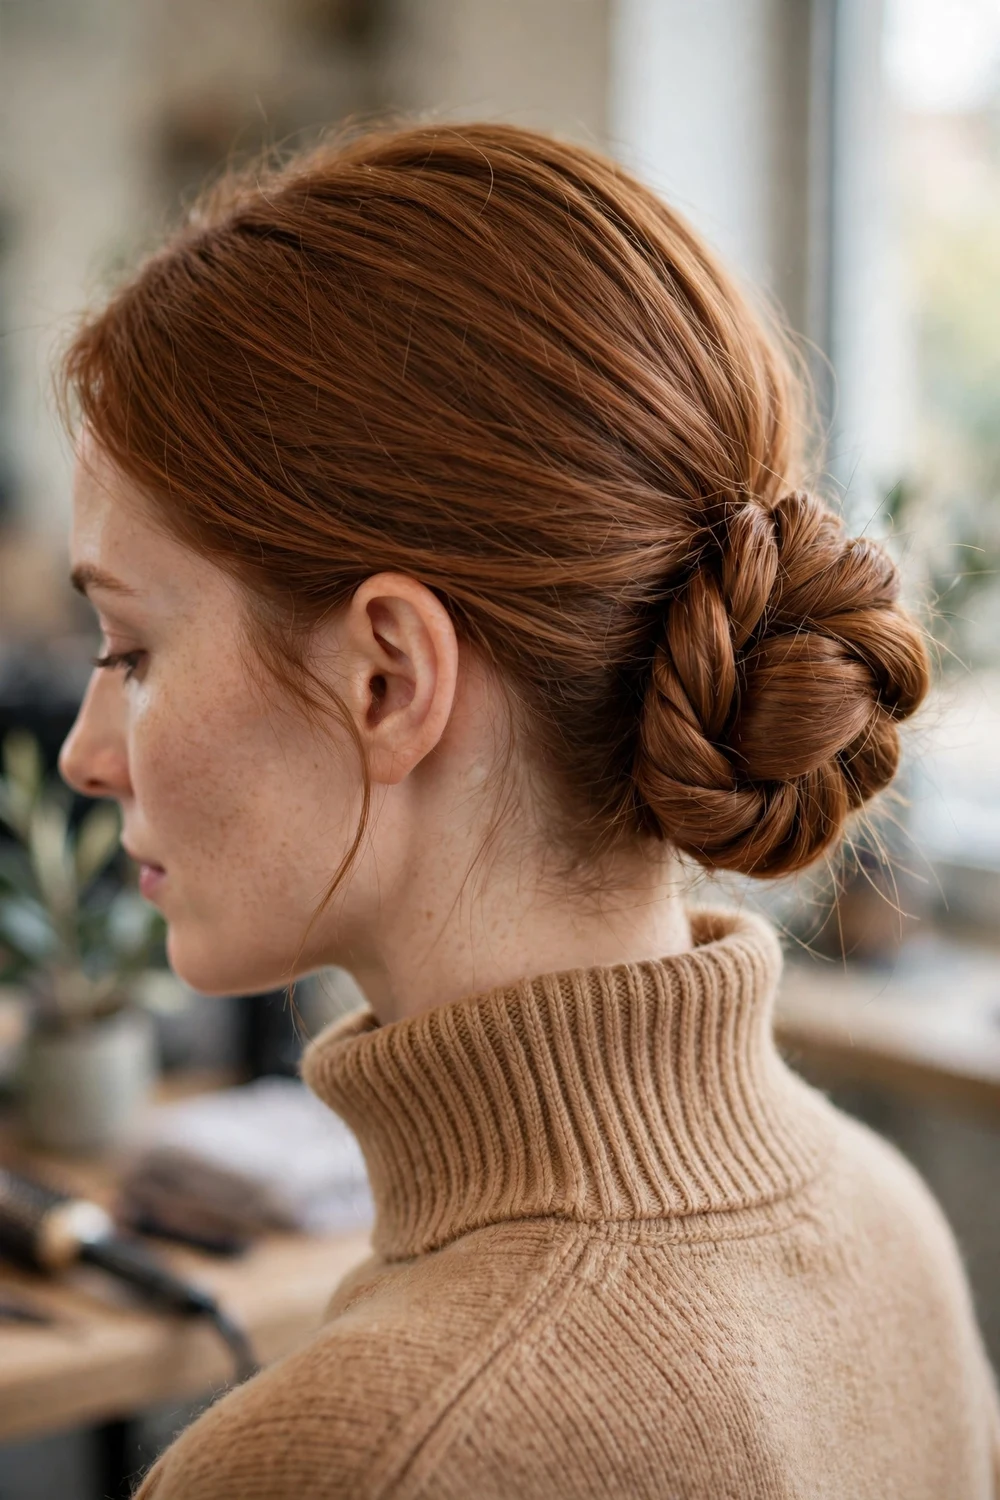
Two sections twisted around each other form this bun. Split a low ponytail in half, twist the halves together into a rope, then coil the rope into a circle at the nape and pin it. The twist pattern gives the finished bun a ridged surface, and ridges catch light in a way a smooth bun cannot.
Set the bun slightly to one side for a change in line, or keep it centered for a cleaner finish. Two or three spin pins hold the coil with less bulk than a row of bobby pins, and spin pins grip fine hair well because they screw through the twist rather than clamping it.
Try this: twist the two sections loosely. A loose rope coils into a wider, softer bun, and you can pancake the edges once it is pinned.
Difficulty: Low · Cost: $ (salon)
15. Halo Braid

A halo braid runs around the head, and that placement does quiet work for thin hair: the braid sits over the hairline and the part, the two places where thinning shows first. Build it on second-day hair with dry shampoo at the roots and texture spray through the lengths, so the braid has grip before it starts.
Part the hair on the side and French braid along the hairline, down one side and around. Braid the other side to meet it, cross the two braids at the nape, and pin them flat. Keep the braid loose as you work. Then pull each plait outward with your fingertips or the tip of a tail comb to widen the whole ring.
Try this: pancake the braid in short sections as you finish each one, rather than at the end. Fine plaits can slip if you pull at the whole braid at once.
Difficulty: Medium to High · Cost: $$$ (salon)
16. Pancaked Crown Braid
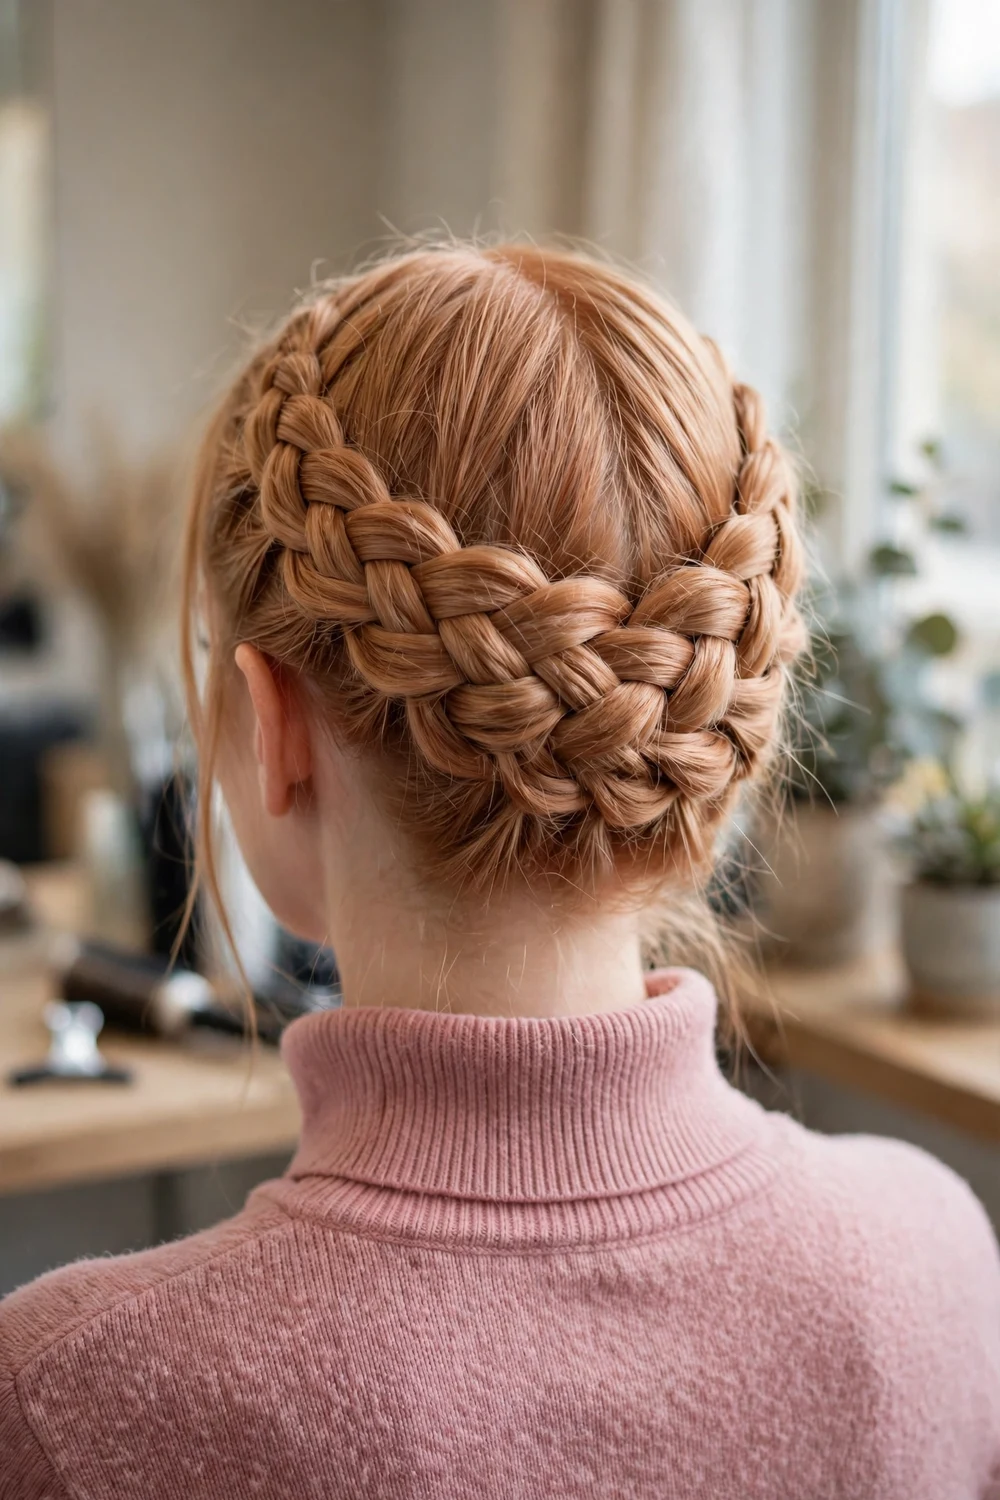
A Dutch braid sits on top of the hair rather than sinking into it, which is why it suits fine hair. Braid from one side of the head in a Dutch pattern, adding hair as you go across the back. As each section is added, pull the outer loops of the braid outward. This pancaking can make the braid look two or three times wider than the hair inside it.
Mist the braid with texture spray before you pull the loops, so the fine pieces hold their widened shape instead of sliding back. Pin the braid across the back of the head and tuck the ends under the opposite side, with crossed pins at the tuck point.
Try this: braid with your fingers under the sections (the Dutch method) rather than over. The raised braid shows its width from across a room.
Difficulty: Medium · Cost: $$ (salon)
17. Braided Nape Chignon

Braiding first is the whole trick here. A plain chignon slips out of fine hair because smooth strands give pins nothing to hold. A braid changes that: braid a simple three strand braid, secure the end with a small clear elastic, and pull the loops of the braid as wide as they will go.
Roll the widened braid up toward the neck and pin it flat against the head. The pins pass through braided texture, which traps them in place. A dusting of volumizing styling powder through the hair before braiding makes fine strands slightly tacky, and the braid holds its widened shape longer.
Try this: pin the roll at four points, top, bottom and both sides, and check it with a hand mirror. The bottom pins carry most of the weight.
Difficulty: Low · Cost: $ (salon)
18. Double Rope Twist Bun

Rope twists lock against each other, and locked twists hold on thin hair with very little pin help. Part the hair horizontally into a top and bottom section. Split the top section in two, twist both pieces in the same direction, then cross them over each other in the opposite direction. Repeat with the bottom section, and you have two rope braids.
Wrap the bottom rope into a flat circle at the nape and pin it. Wrap the top rope around that circle and pin the ends underneath. The two ropes give the bun a detailed, woven surface, and detailed surfaces read as density from a distance.
Try this: keep the direction rule strict, twist right and cross left. If a rope starts to unravel, the cross direction is the step that went wrong.
Difficulty: Medium · Cost: $$ (salon)
19. Triple Knot Nape Bun
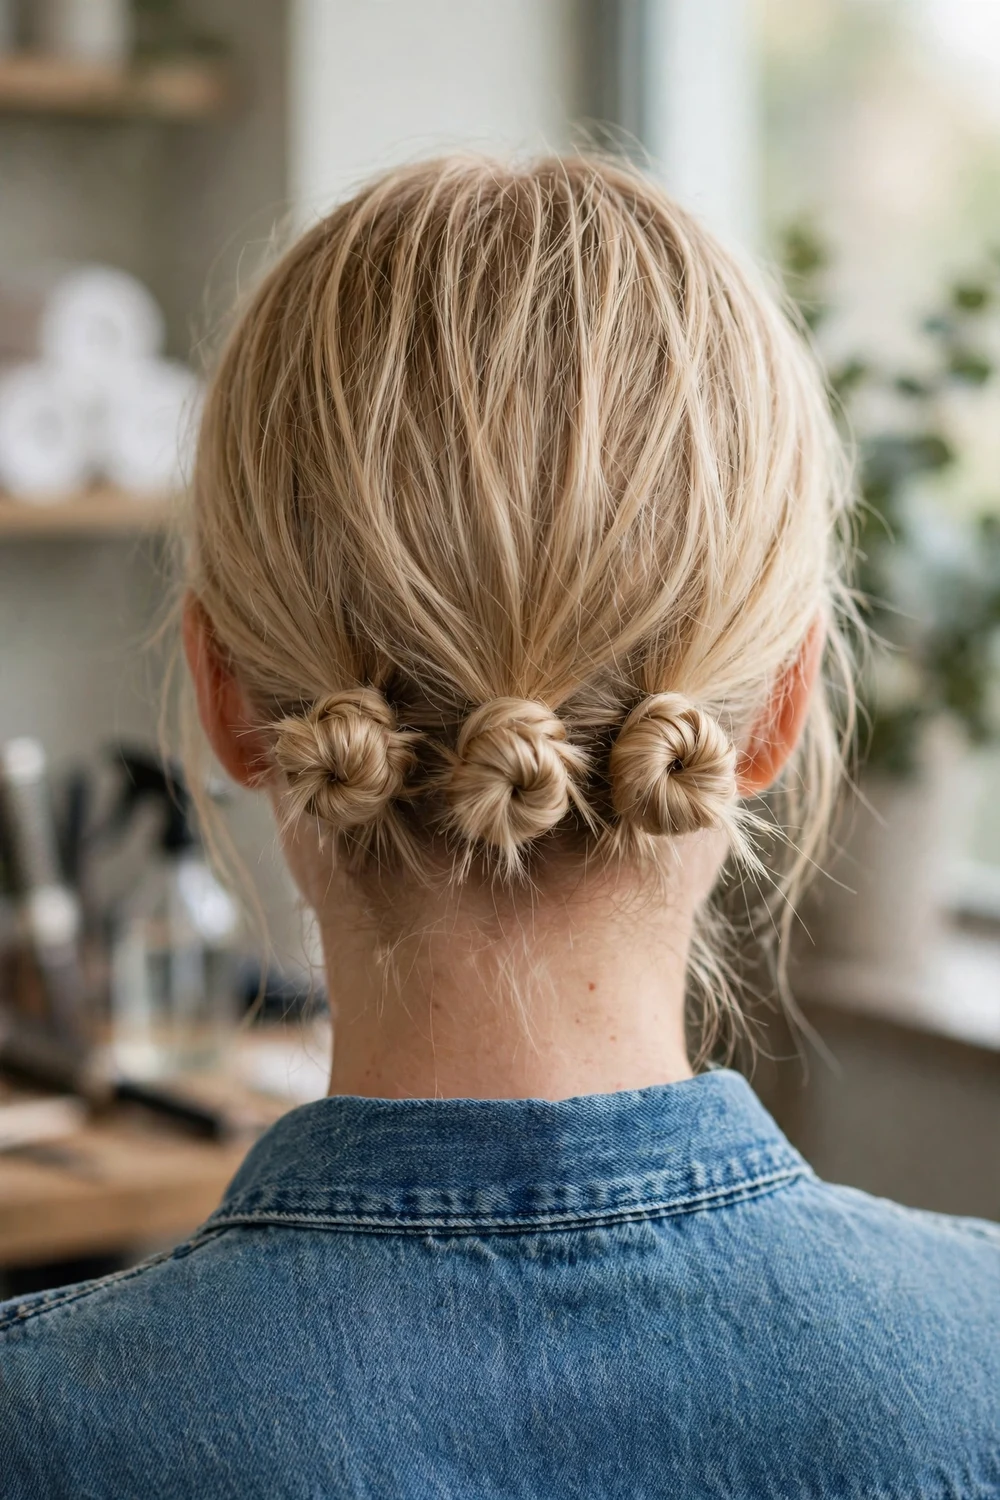
Knots hold themselves, and that makes this style a strong option when pins keep sliding out. Brush all the hair to the nape and divide it into three equal sections. Tie the middle section into a simple knot, the first half of a shoelace knot, and pin it flat. Tie and pin the left section beside it, then the right.
The three knots press against each other, and that pressure keeps the row stable while adding texture at the nape. Because the style uses no elastic, it also works on a day when you have run out of bands. The knots sit low and neat, and the row reads wider than a single small bun would.
Try this: mist each section with texture spray right before you tie it. The slight tack stops the knot from loosening as you pin the next one.
Difficulty: Low to Medium · Cost: $ (salon)
20. Rolled Updo with a Braided Base

This roll hides its support structure. Braid a small braid flat at the nape first and pin it down. That braid becomes an anchor row. The remaining hair is rolled up over it and pinned into the braid itself, so every pin lands in braided hair that grips back.
The build suits collarbone length hair and longer, since the roll needs enough length to wrap over the base. Updos on fine hair usually drop because the pins have no purchase. With a braided base, the finished roll stays in place through a long day without extra spray.
Try this: make the hidden braid tight and the outer roll loose. The contrast gives you hold underneath and softness on the surface at the same time.
Difficulty: Medium · Cost: $$ (salon)
21. Bubble Braid Pin-Up
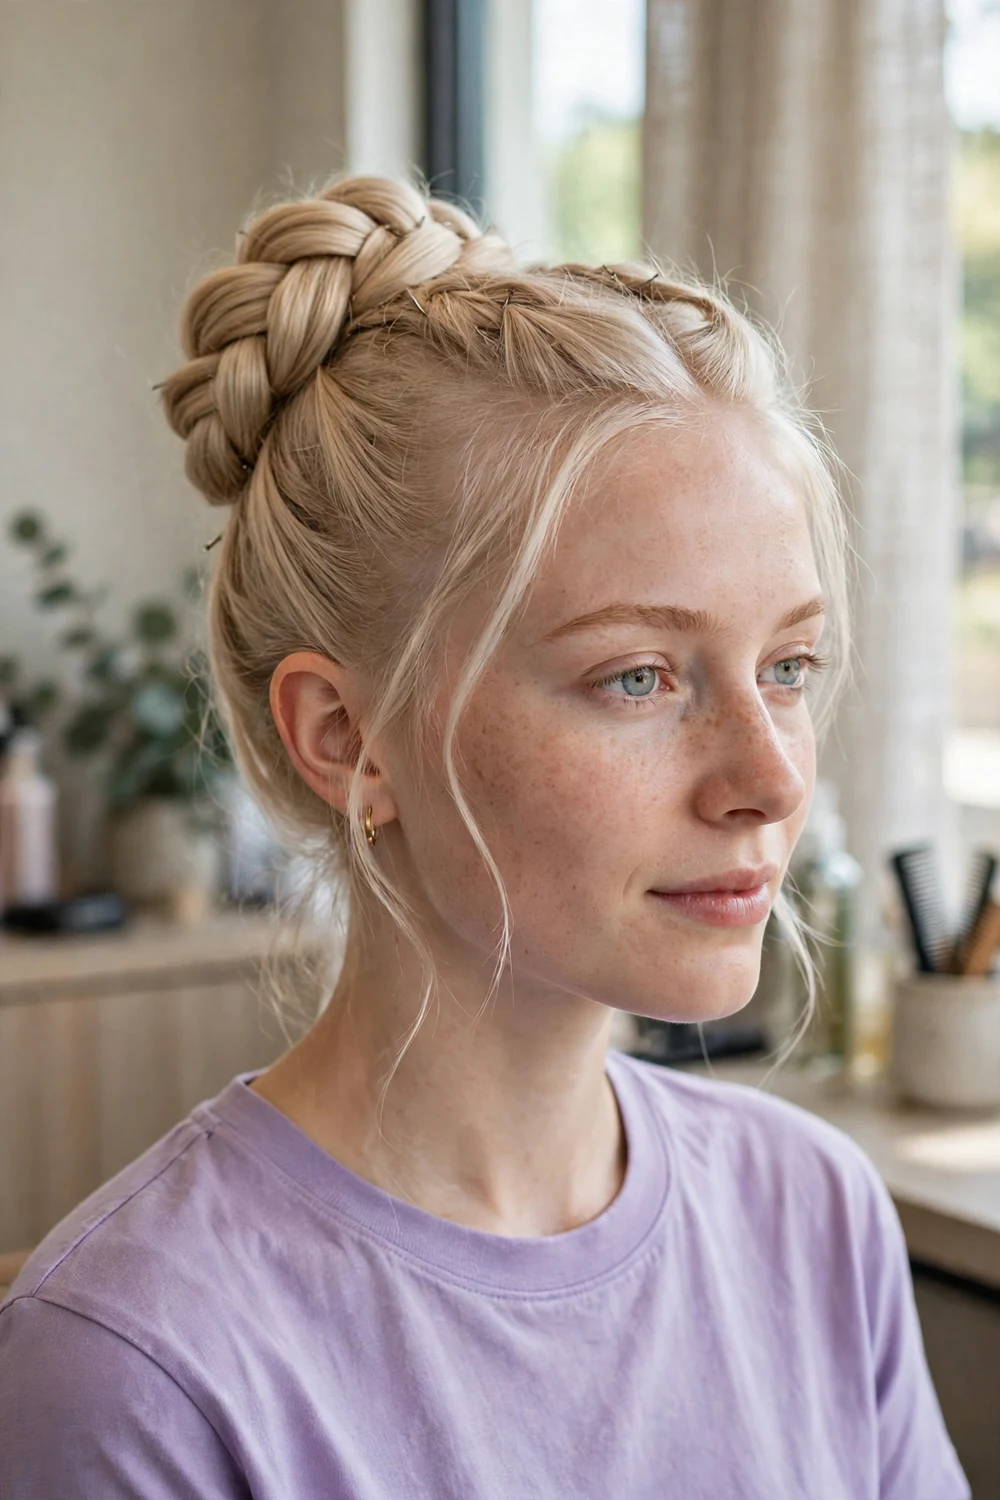
A bubble braid builds volume with elastics instead of braiding skill. Gather the hair into a ponytail, add small elastics every few inches down the tail, and pull each section outward between the elastics until it puffs into a rounded bubble. Each bubble holds its shape because the elastics above and below it lock the width in.
To turn it into an updo, fold the bubbled tail up against the back of the head and pin through the elastics. Pinning through an elastic gives the pin a firm anchor, which fine hair rarely offers on its own. The finished shape shows a row of rounded sections, and rounded sections read as fullness.
Try this: pull each bubble wide at the sides rather than the top. Side width is what shows in photos and in the mirror.
Difficulty: Low to Medium · Cost: $$ (salon)
22. Claw Clip Twist

The claw clip twist is the fastest full updo on this list. Gather the hair at the back, twist it upward against the head, fold the top ends down over the twist, and clip the fold with a large claw clip. The fold matters for thin hair: folded hair doubles back over itself, so the twist covers twice the area of a straight pull.
Choose a clip with a wide grip and matte finish, since glossy clips slide on fine strands. Work on second-day hair or add texture spray first. Let the folded ends fan out a little above the clip rather than tucking them flat, and the top of the style gains height.
Try this: twist in the direction that feels natural, then clip slightly off center. An off-center clip hides the part line at the back, where thin hair can show scalp.
Difficulty: Low · Cost: $ (salon)
23. Curl-and-Pin Updo
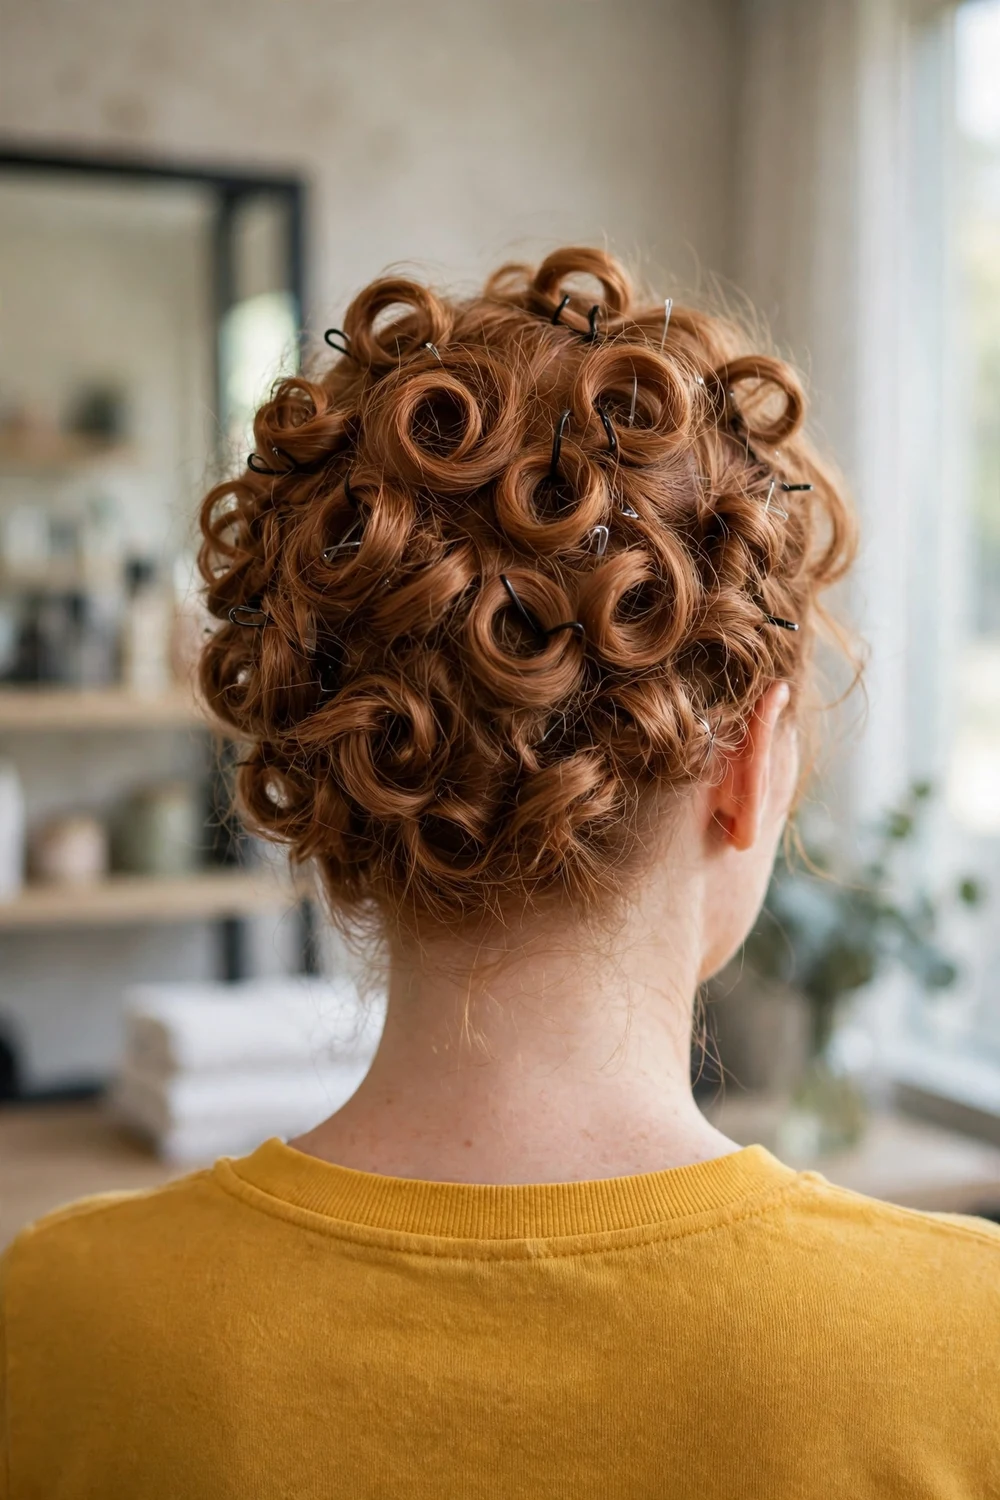
Some thin hair is too short or too fine to reach a bun at all. This style skips the bun. Curl the whole head with a small curling iron or hot rollers, then pin sections of curls up and inward, one curl at a time, tucking each end under. The pinned curls overlap and build the shape of a full updo without any single gathered base.
Curls are the volume source: a curl occupies far more space than the same strand worn straight, and a head of pinned curls covers the scalp in every direction. Pin into the curl beside the one you placed, so the curls support each other in a web. Readers who want to skip heat on other days can pair the prep here with heatless hairstyles for long hair for the days in between.
Try this: let the curls cool fully before you pin them. A warm curl relaxes as it cools and the pinned shape drops within the hour.
Difficulty: Medium · Cost: $$ (salon)
| Style group | Best length | Main volume trick | Difficulty |
|---|---|---|---|
| Padded buns and rolls (donut bun, Gibson roll) | Shoulder length and longer | Hidden foam padding sets the finished size | Low to Medium |
| Looped and knotted buns (loop bun, crown knot, top knot) | Medium length | Looping and backcombing add width without padding | Low to Medium |
| Chignons and twists (pancaked chignon, French twist, swirl) | Medium to long | Teased crown plus edges pulled wider after pinning | Medium |
| Braids and ropes (halo braid, crown braid, rope twist) | Medium to long | Pancaking the plaits and pinning through braided texture | Medium to High |
| Pin-built styles (claw clip twist, curl-and-pin, bubble pin-up) | Short to medium | Curls, folds and elastics create shape section by section | Low to Medium |
Frequently Asked Questions
How do I make an updo look fuller on thin hair?
Build width after the style is pinned. Start with texture spray on dry hair and tease only the crown, then choose a shape with built-in help: padding inside a bun or roll, loops or knots that borrow hold from each other, or curls pinned section by section. Once the style is secure, pull the outer edges of the bun, braid or chignon outward a little at a time. That final widening step, called pancaking, is what makes the finished updo cover more of the head.
What should I put in fine hair before pinning an updo?
Use dry shampoo or a dry texture spray at the roots, worked in with your fingertips and left to sit for a minute before you style. Both add grip and a slightly tacky feel, which is what bobby pins need to hold in smooth, fine strands. Style on second-day hair when you can, since freshly washed hair is at its smoothest. Keep heavy oils and thick creams out of the prep, because they weigh fine hair down and help pins slide.
Is teasing bad for thin hair?
Gentle backcombing at the crown is a standard technique for fine hair when it is done with short, light strokes and a soft brush or teasing comb. Keep the teasing in one small area, the crown section that sits under a smooth top layer, and avoid dragging a comb through the lengths. At the end of the day, work conditioner through the teased section first and ease it apart with your fingers before you brush, so the hair is never pulled against the teasing.
Which updo works best for a wedding on thin hair?
The pancaked low chignon, the French twist with a teased crown and the halo braid hold up best across a long day, since all three are pinned at several points and can be widened after pinning. Book a trial and wear the style for a few hours to check the hold before the day itself. If you are weighing a shorter cut for the event instead, the french bob hairstyles for a wedding roundup shows that route.
How do I stop bobby pins slipping out of fine hair?
Place each pin closed, wavy side down against the scalp, and cross a second pin over it in an X. The crossed pair locks against itself instead of relying on the hair alone. Pin into texture whenever the style offers it: through a braid, a twist, an elastic or a teased section. A light mist of hairspray on the pin before it goes in adds grip as well. Matte pins hold better than glossy ones, since their rougher surface catches fine strands.
Final Thoughts
Thin hair asks for structure, and every style on this list provides it in a different way: foam inside the bun, a braid under the roll, a teased section under the crown, or curls pinned into a web. Pick one technique and practice it twice before you need it for an event, and the third build will take minutes. For shorter lengths, the quick updos for short hair collection covers the fast options built for hair above the shoulders.

