

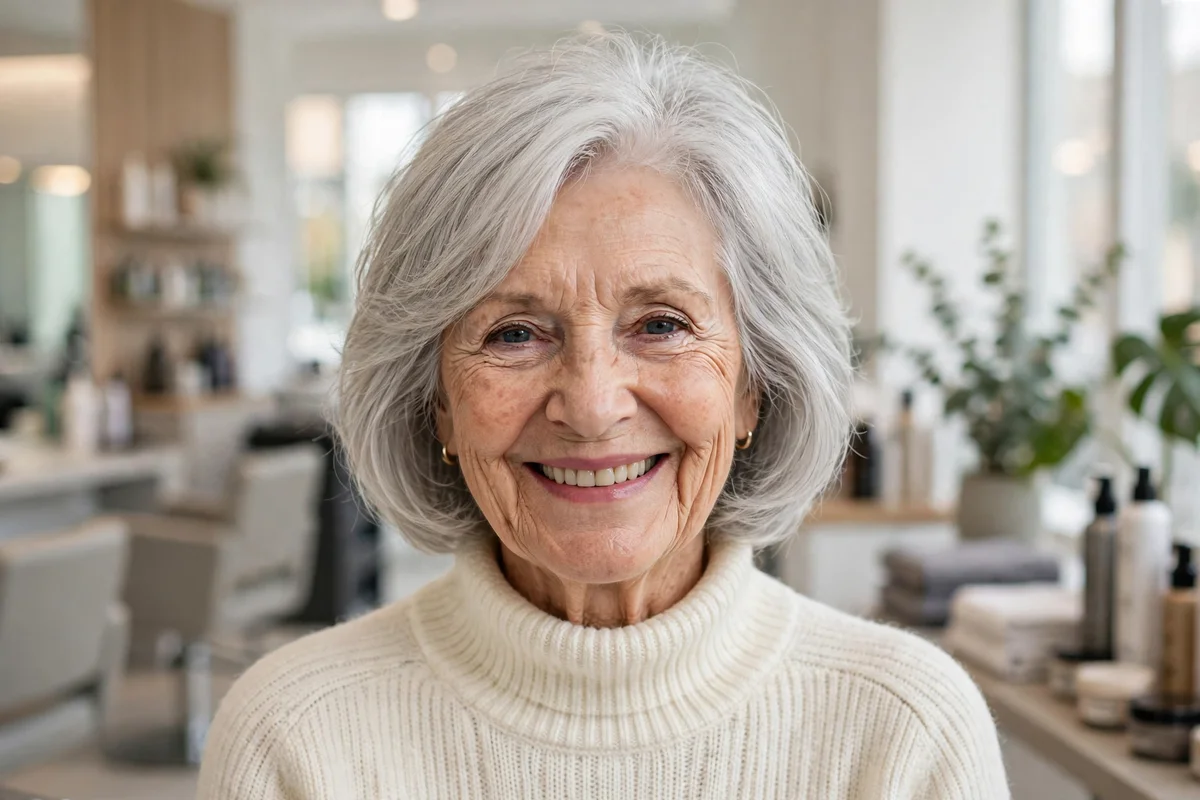
Fine hair in your 70s asks for a different kind of cut. Strands are finer, density is lower, and hair breaks more easily than it did at 50, so shapes that worked then can sit flat and sparse now. Shorter, well-shaped cuts with solid ends and lift at the crown are the ones that hold up.
This guide gathers 22 hairstyles for women over 70 with fine hair, from gentle pixies and tidy bobs to soft shags, one longer option, and two easy up styles. Every idea notes the cut to ask for, how it behaves on fragile fine strands, and one simple tip to try at home.
Key Takeaways
- Short to medium lengths suit fine hair after 70 best, since length adds weight that pulls fine strands flat.
- Solid, blunt ends make fine hair look denser, while heavy layering through the ends makes it look thinner.
- Keep layers short and at the crown only, where they build lift without thinning the outline.
- Gentle handling matters: low heat, soft bands, wide-tooth combs, and no tight pulling at the hairline.
- If your hair is fine and gray as well, the cuts in the guide to hairstyles for thin fine gray hair pair well with the routine notes below.
How to Care for Fine Hair After 70
Wash two or three times a week with a gentle shampoo and use conditioner on the ends only, since conditioner at the roots weighs fine hair down. Pat hair dry with a soft towel instead of rubbing, and detangle from the ends upward with a wide-tooth comb while the hair is damp and conditioned.
Keep heat low and brief. Fine strands after 70 break under high heat, so dry on a medium setting, hold the dryer a hand’s width away, and skip daily flat iron use. For more shapes built around fullness, see the guide to hairstyles to make fine hair look fuller, and for the broader fine-hair basics, the guide to hairstyles for older women with fine hair is a helpful companion read.
| Style group | Best for | Upkeep | Daily styling time |
|---|---|---|---|
| Pixies and crops (ideas 1 to 4, 13, 19) | Fragile strands, fastest mornings, glasses wearers | Trim every 4 to 6 weeks | Under 5 minutes |
| Bobs (ideas 5 to 9, 12, 18) | A solid edge and a fuller outline | Trim every 5 to 8 weeks | 5 to 10 minutes |
| Shags and curls (ideas 10, 11, 14) | Texture and crown lift on straight or curly hair | Trim every 5 to 6 weeks | 5 minutes |
| Medium and longer (ideas 15 to 17, 21, 22) | Keeping length with a blunt perimeter | Trim every 6 to 8 weeks | 5 to 10 minutes |
| Up styles (ideas 20, 21) | Dressier days and photos | Styled as needed | 5 to 10 minutes |
1. Gentle Tapered Pixie Cut Close at the Nape
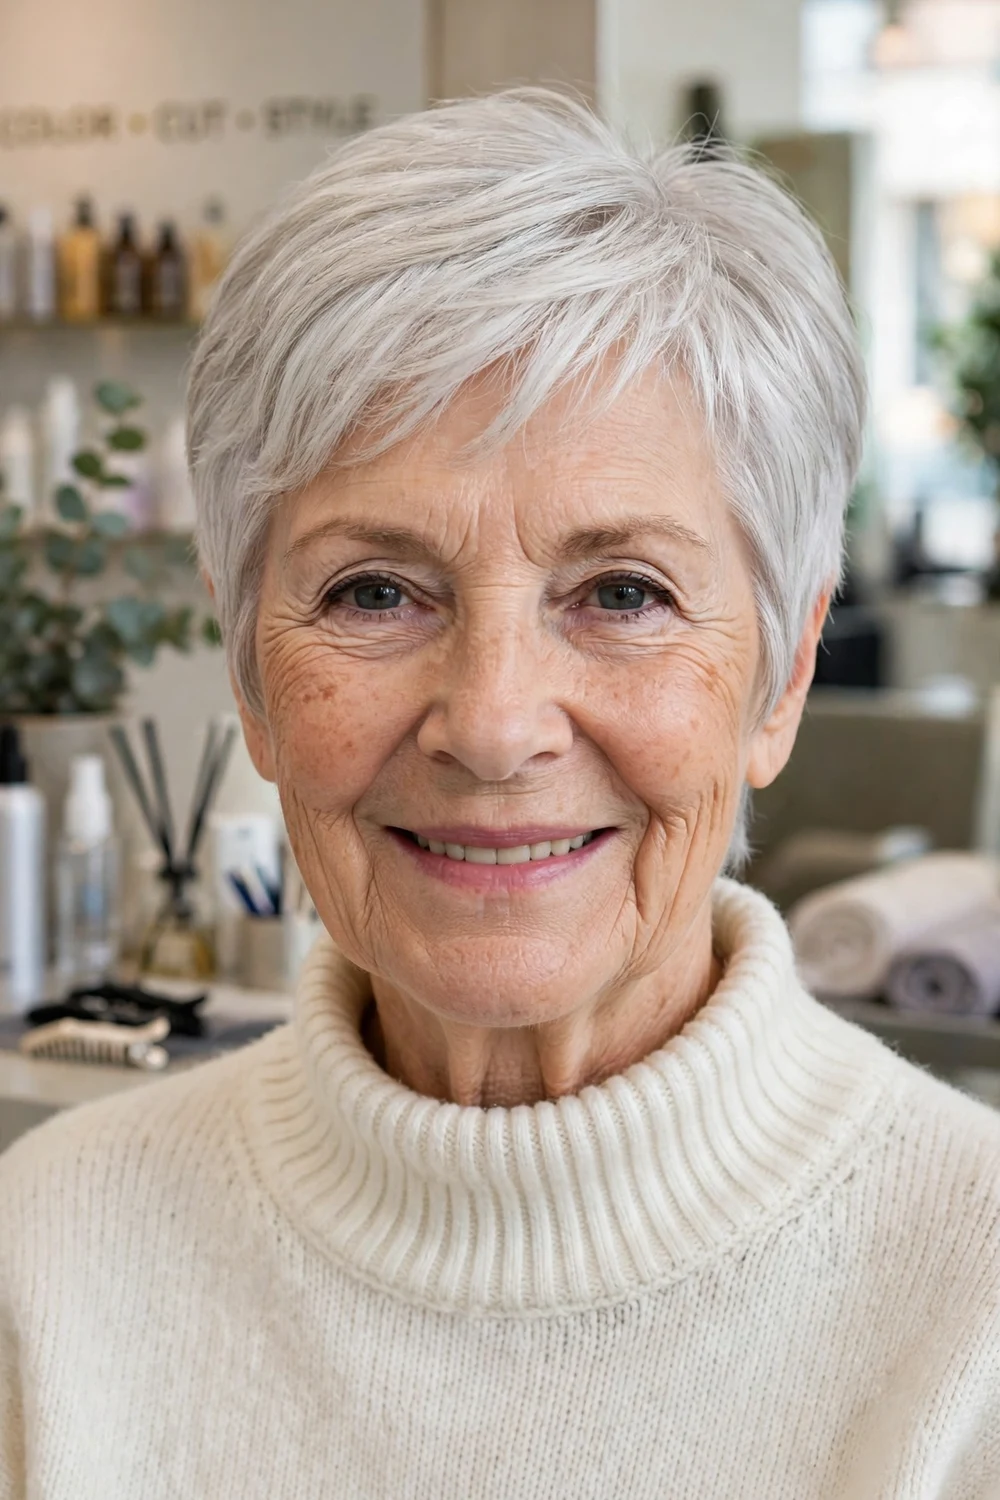
This pixie sits close at the back and sides and keeps two to three inches of soft length on top. The tapered nape removes bulk where fine hair tends to look straggly, and the longer top layers stack over each other so the crown reads fuller than it is.
Ask for scissor cutting rather than clippers on the top section. Scissors leave softer ends on fragile strands, and soft ends bend and lift instead of lying flat against the scalp.
Try this: work a pea-size amount of lightweight mousse into damp roots, then dry the top forward and back with your fingers to build lift without a brush.
Difficulty: Easy | Cost: $ | Time: 5 minutes
2. Ear-Length Pixie Bob with a Lifted Top
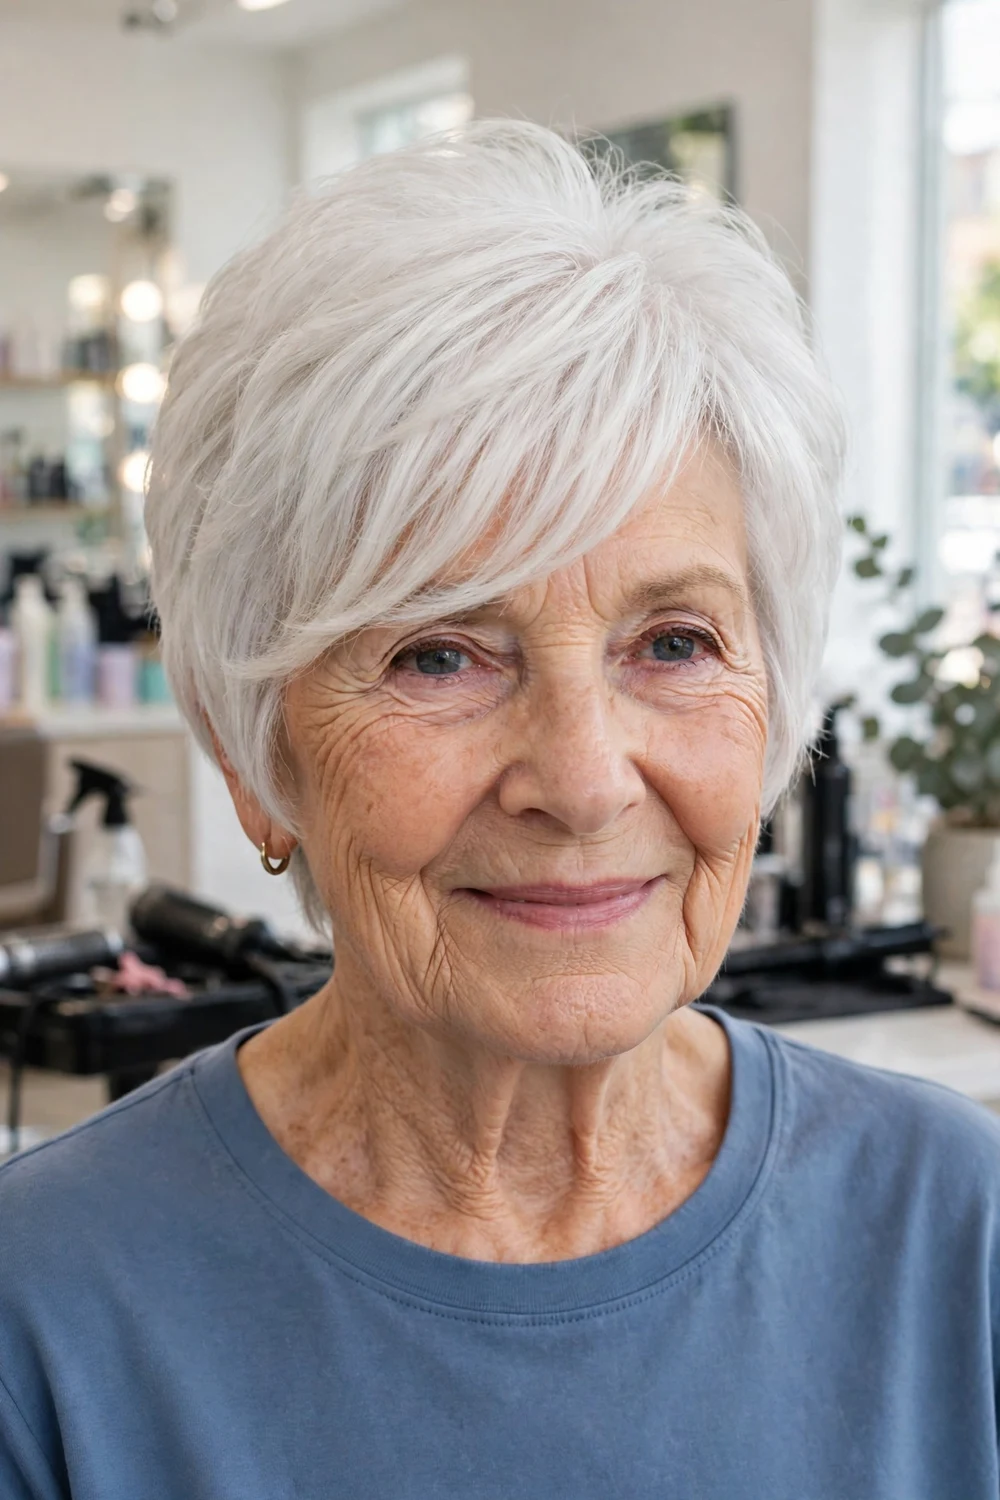
Halfway between a pixie and a bob, this shape ends around the ears and keeps a rounded, lifted top. The ear-length sides give fine hair a visible outline, which reads as density, and the shape still tucks behind the ears on busy mornings.
Keep the fringe long and side-swept rather than blunt. A diagonal front opens the face and covers a thinning hairline softly, and it grows out without a hard line.
Try this: dry the fringe in the opposite direction to where it will sit, then sweep it back across. That small change adds root lift that lasts most of the day.
Difficulty: Easy | Cost: $ | Time: 5 minutes
3. Rounded Crop with a Soft Piecey Fringe
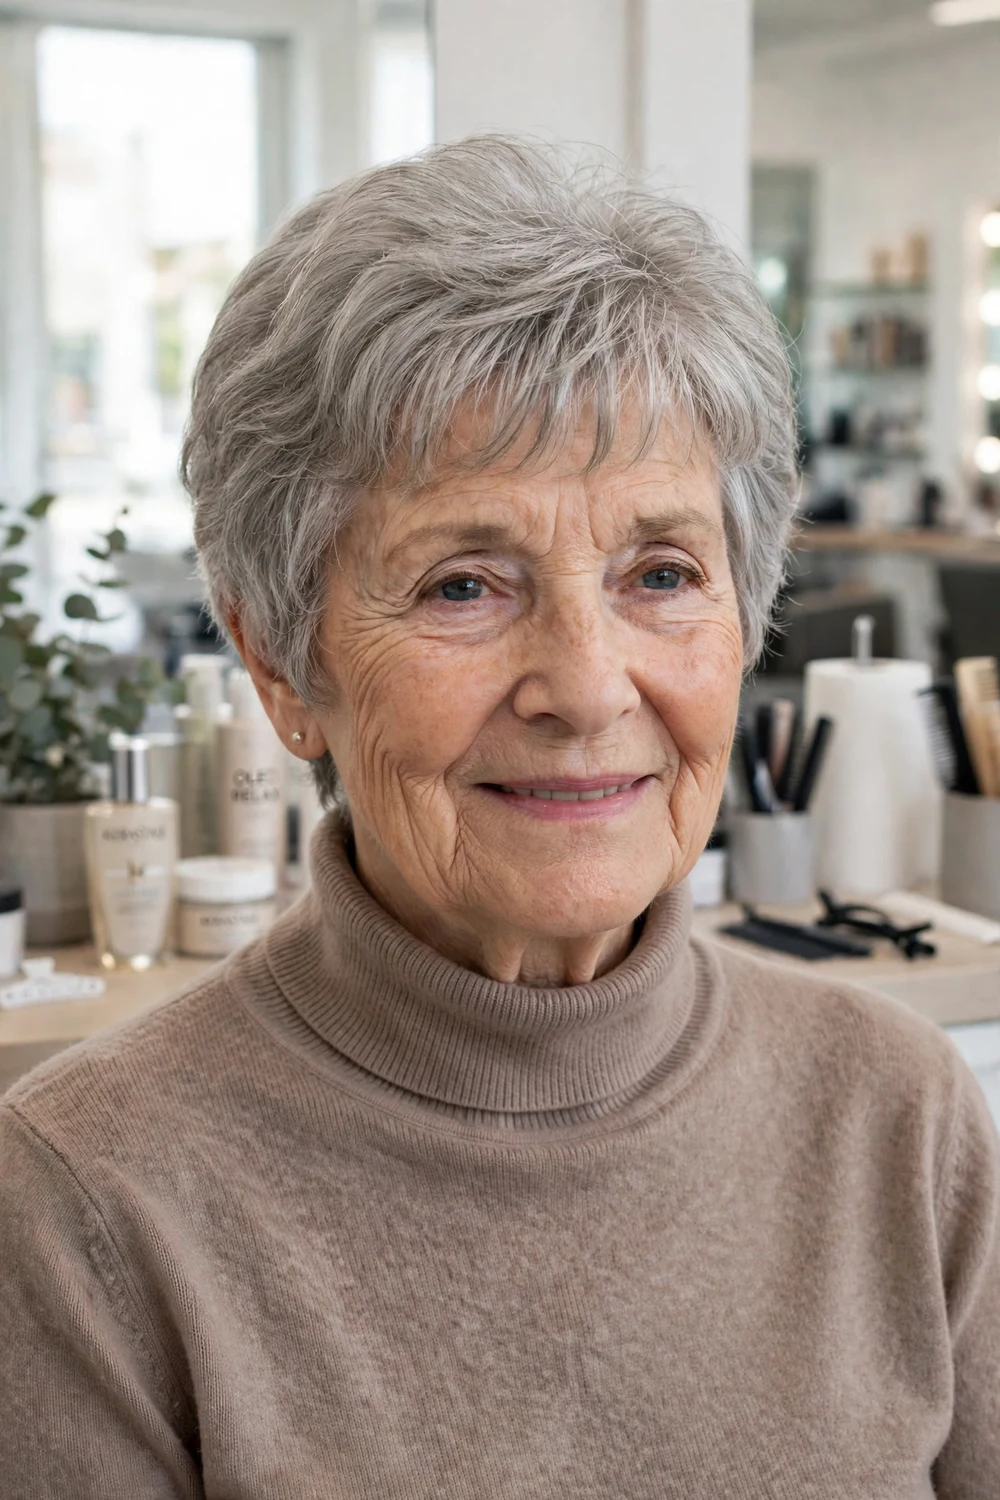
A rounded crop follows the shape of the head and finishes with a light, piecey fringe that sits in soft points on the forehead. On fine hair the rounded outline keeps every strand close to its neighbour, so gaps at the part show far less.
The fringe is cut in small sections and point-cut at the ends, which keeps it airy. A heavy blunt fringe uses too much of fine hair’s limited supply and leaves the sides looking thin.
Try this: pinch the fringe pieces with a tiny amount of matte styling cream once the hair is fully dry. Separating two or three pieces gives the front a deliberate, styled finish.
Difficulty: Easy | Cost: $ | Time: Under 5 minutes
4. Feathered Pixie with Longer Layers on Top
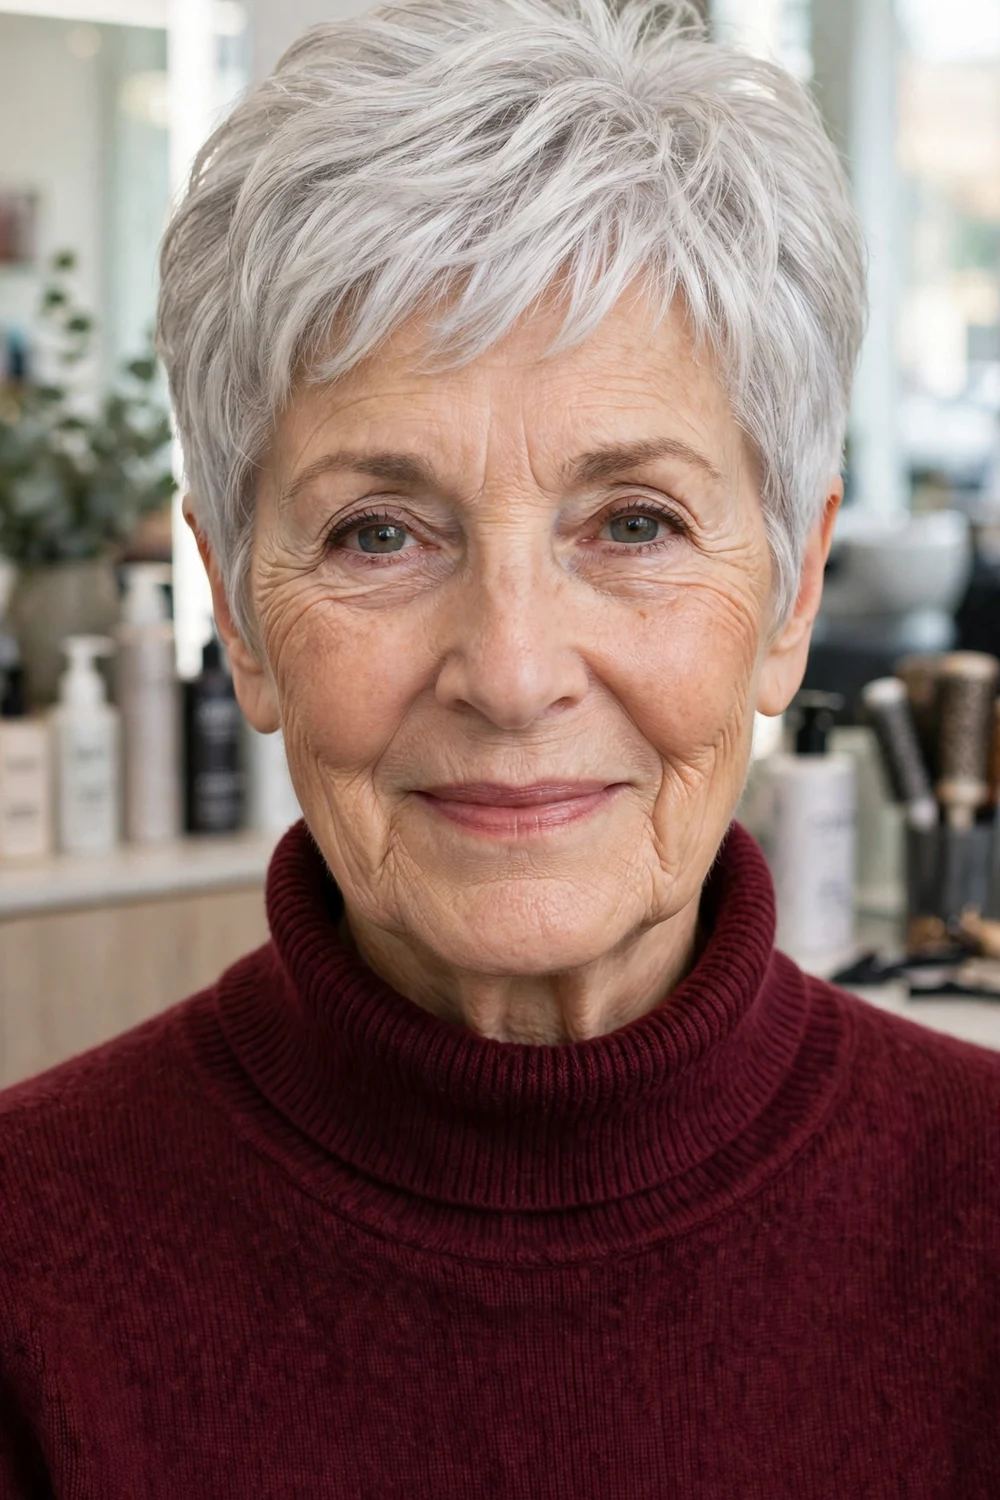
Feathering through the top of a pixie lifts fine strands away from each other so light passes between them and the crown looks airy. The sides stay neat and short, which keeps the shape tidy between trims.
Longer top layers, around three inches, are the working part of this cut. They are long enough to sweep to the side for a dressier finish and short enough to stand up with a little mousse on ordinary days.
Try this: blow-dry the top with a small vent brush, lifting straight up at the roots for the first minute. Fine hair sets as it cools, so let it cool before you smooth it down.
Difficulty: Easy | Cost: $ | Time: 5 minutes
5. Short Pageboy Bob with a Smooth Rounded Back
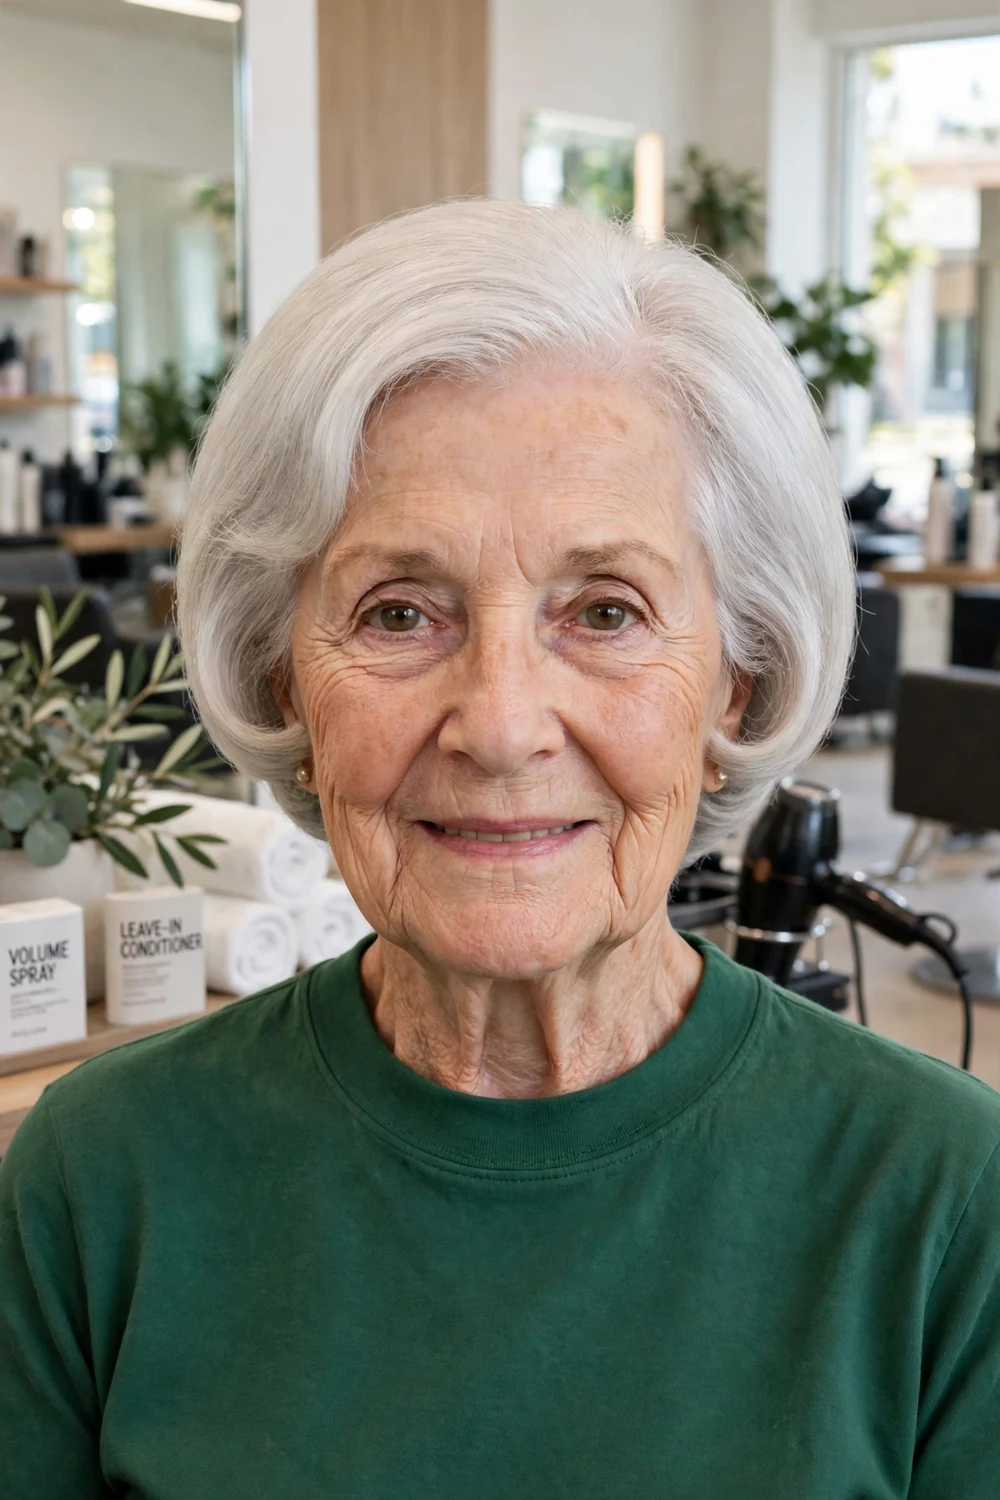
The pageboy outline curves under at the ends and keeps one even length all the way around, which gives fine hair its strongest possible edge. The rounded back fills in the area below the crown where hair often looks thinnest after 70.
A smooth finish suits this shape best. Dry it with a medium round brush turning the ends under, or let it air-dry and pass a warm brush through once at the end.
Try this: if your hair flips out at one side, sleep with that side tucked behind your ear. Fine hair takes the hint overnight and usually sits flatter by morning.
Difficulty: Easy | Cost: $$ | Time: 5 to 10 minutes
6. Jaw-Length Blunt Bob with Solid Ends
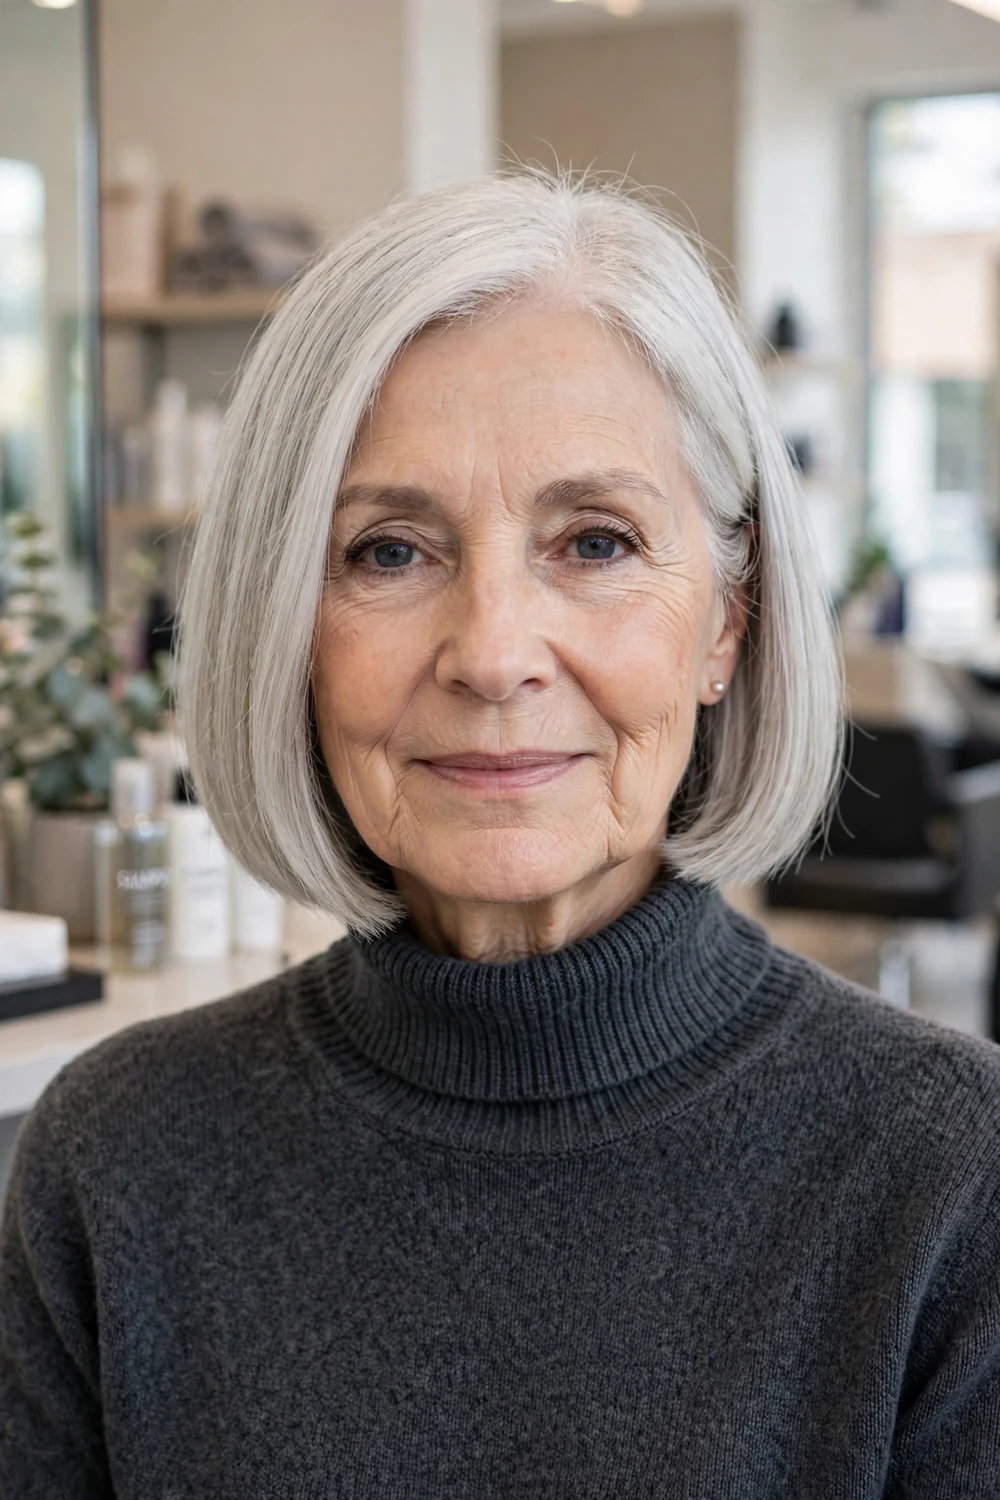
Cutting every strand to one line at the jaw is the simplest fullness trick for fine hair. There are no thin, see-through ends, and the solid edge makes the whole bob look denser from across the room.
Jaw length keeps the weight low enough that roots can still lift. Ask your stylist to keep layers out of the last two inches so the perimeter stays thick, with any layering kept short and high at the crown.
Try this: use a heat protectant spray and a single slow pass of a flat iron only if the ends need it. Daily heat thins fragile ends over time, so save the iron for the days it matters.
Difficulty: Easy | Cost: $$ | Time: 5 to 10 minutes
7. Neck-Length Bob with a Gentle Side Sweep
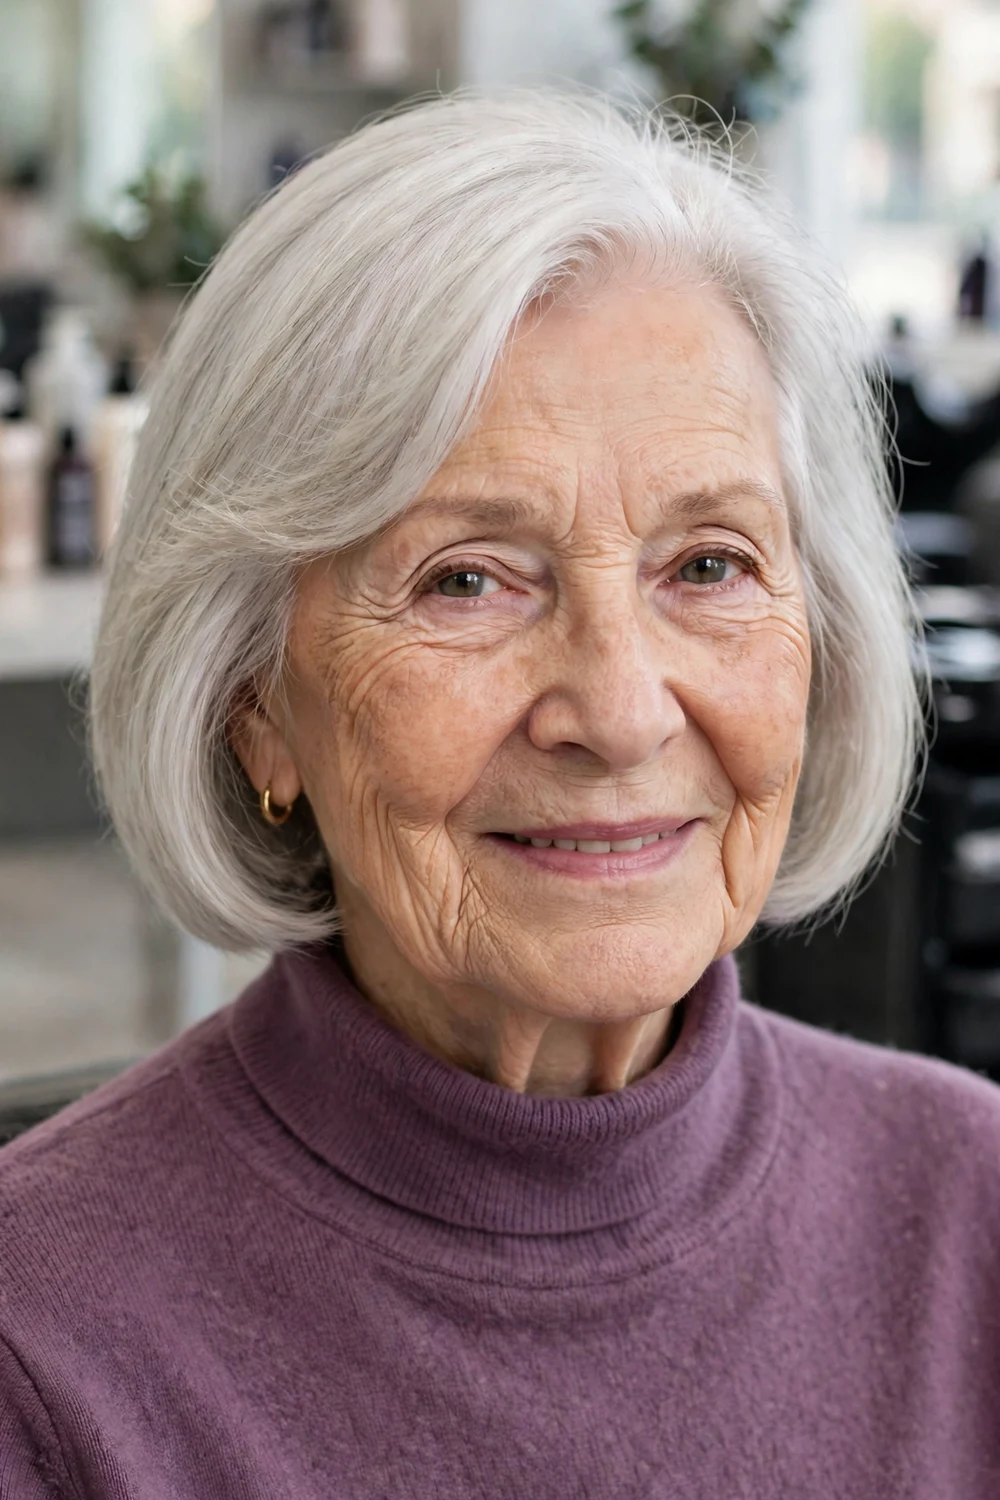
This bob ends at the neck and parts to one side so the longer front sweeps across the forehead. The side part moves the parting away from the spot where fine hair is often sparsest, and the sweep adds width across the front.
Neck length is a kind length for fragile strands. It is long enough to feel like a bob and short enough that the ends stay healthy between trims every six to eight weeks.
Try this: clip the heavier side up with a small sectioning clip while it dries. Removing the clip once dry leaves a soft root bend that holds the sweep in place.
Difficulty: Easy | Cost: $$ | Time: 5 minutes
8. Curved Bob with Ends That Turn Under Softly
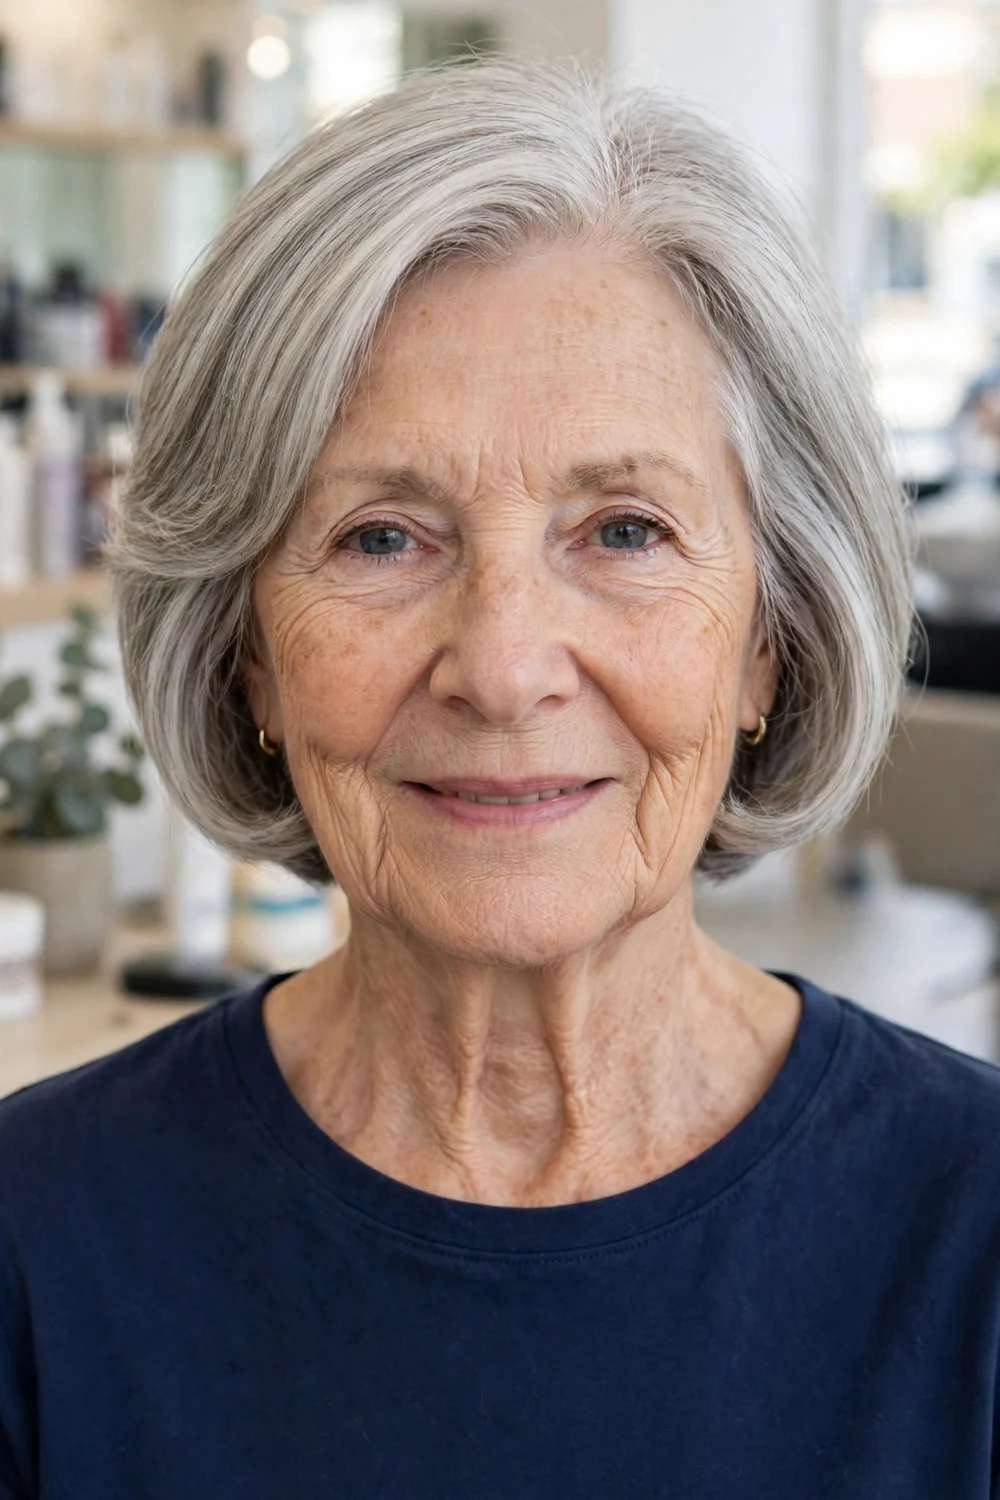
A curved bob is cut slightly shorter at the back so the sides fall forward and turn under at the front. The forward fall frames the cheeks and jaw, and the turned-under ends keep fine hair looking neat instead of wispy.
The curve works best with a smooth blow-dry using a round brush. Air-drying is fine on straighter hair, though the front pieces may need one quick brush pass to sit in the curve.
Try this: dry the back first and the front last. Fine front pieces overheat and flatten quickly, and doing them last keeps their bend fresh.
Difficulty: Medium | Cost: $$ | Time: 10 minutes
9. Lightly Layered Bob with Lift at the Roots
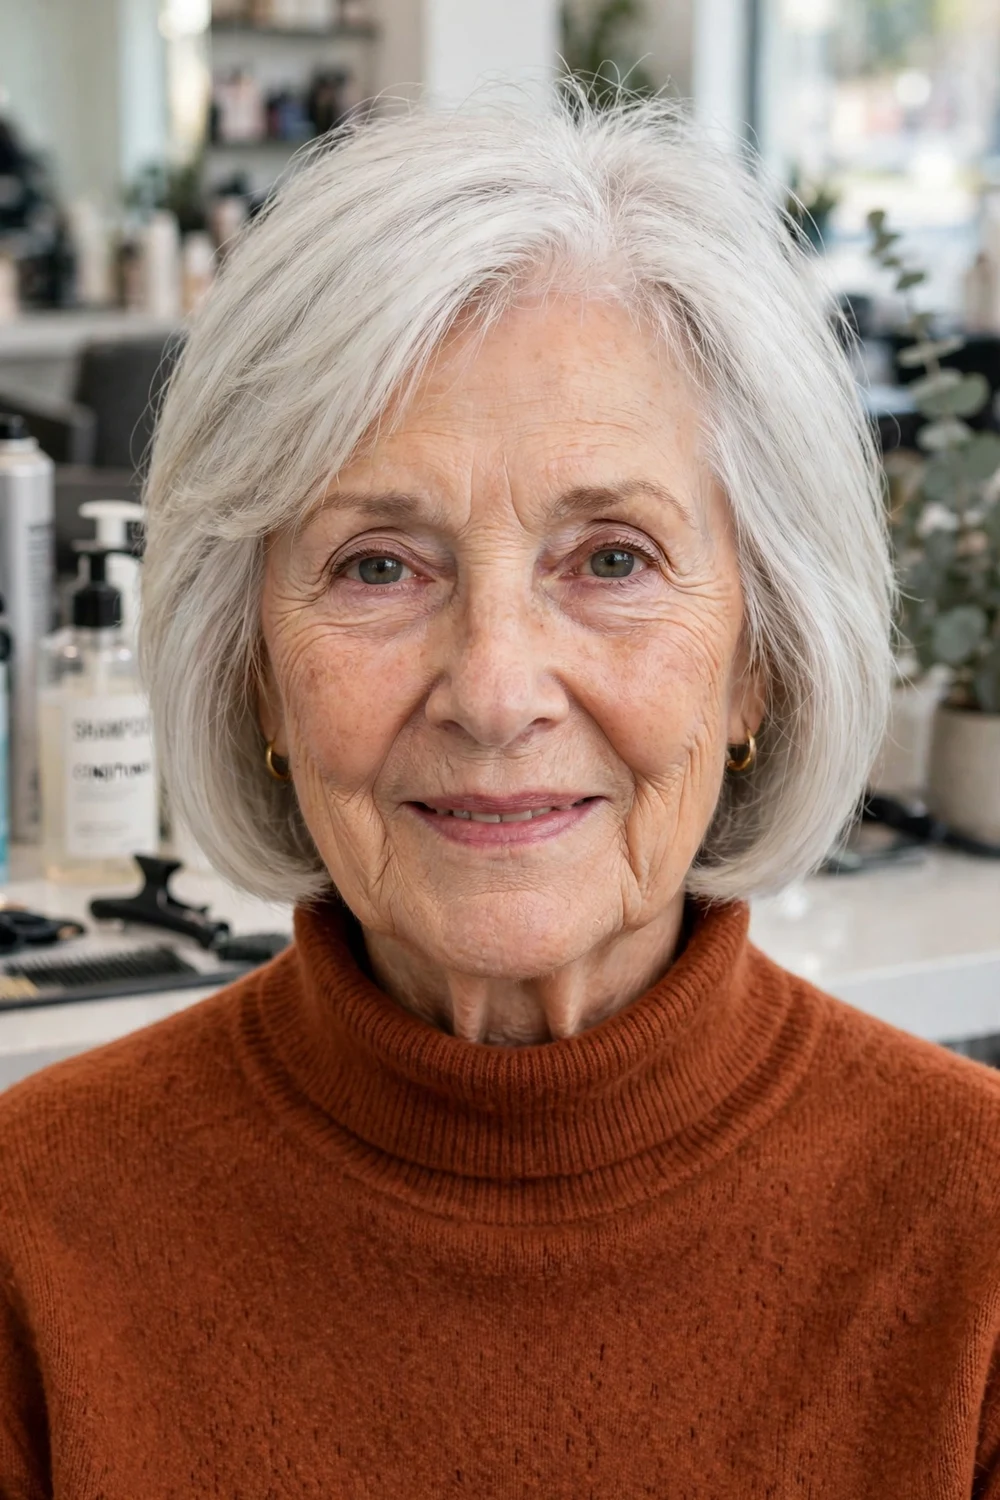
Short layers only through the crown, with a solid bob underneath, give root lift where fine hair needs it and keep the ends full. This is a good step if a one-length bob sits too flat on top but you want to keep the tidy outline.
Keep the layers long and few. Over-layering is the most common reason fine hair looks thinner after a cut, so ask for crown layers that start below the top of the head and blend down.
Try this: apply mousse at the crown only, not through the ends. Product at the ends weighs fine hair down and undoes the lift the layers create.
Difficulty: Easy | Cost: $$ | Time: 5 to 10 minutes
10. Short Shag with Wispy Crown Layers
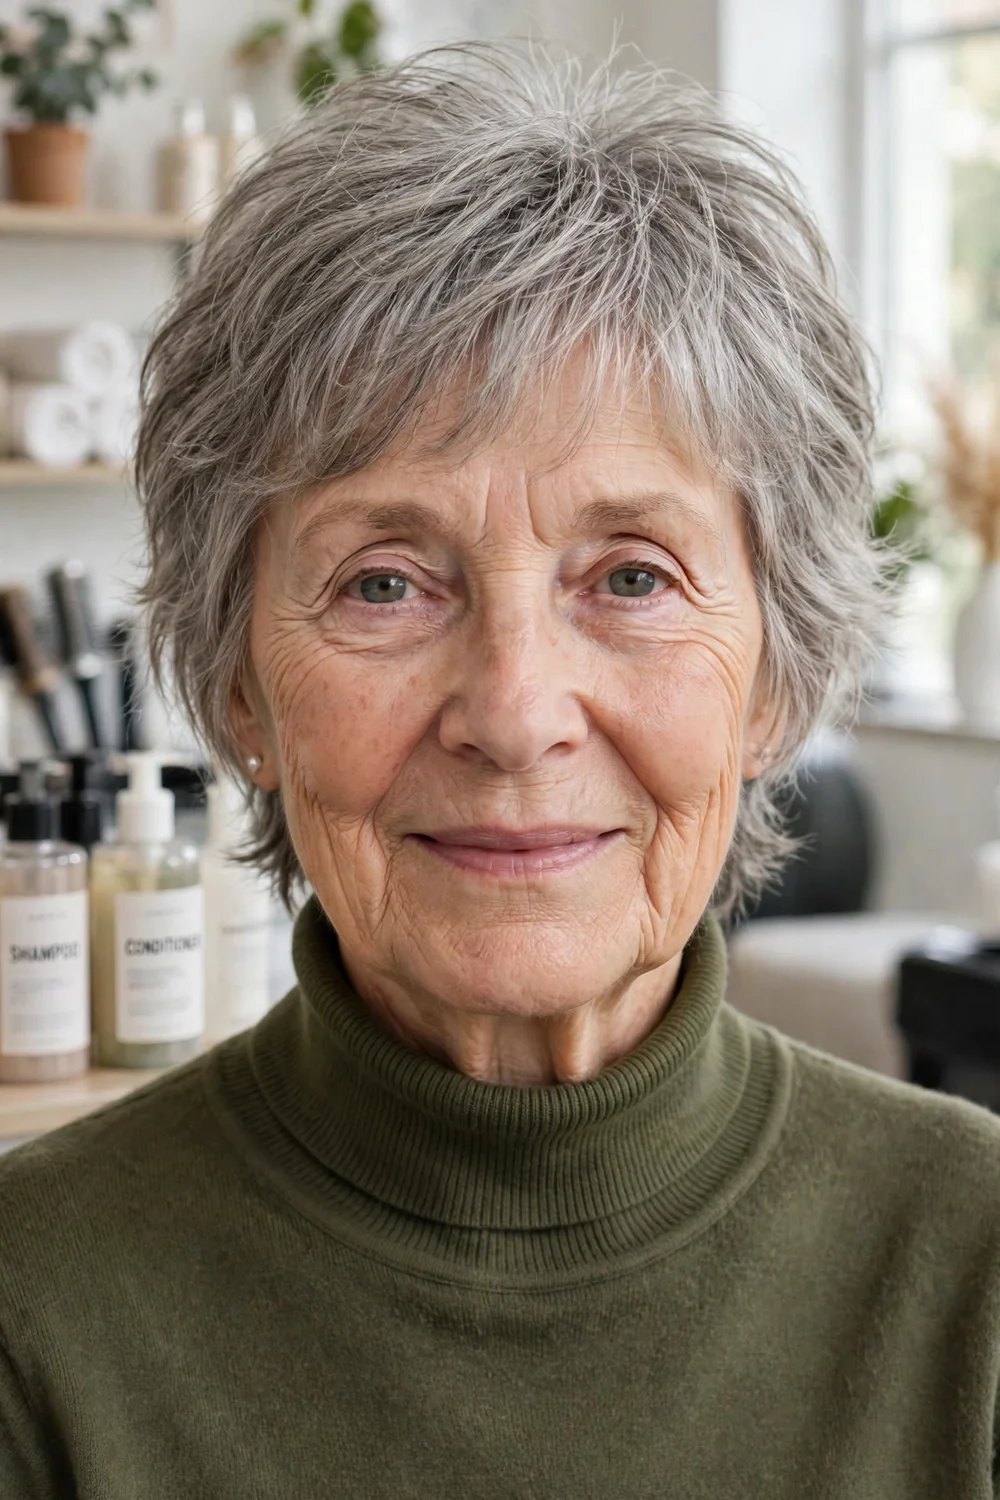
A short shag uses choppy crown layers and soft, wispy ends to create texture that fine straight hair rarely has on its own. The broken outline disguises a sparse part line because no single parting stays on show.
This cut suits a relaxed routine. Scrunch damp hair with a light salt-free texture spray, let it dry, and separate the crown pieces with your fingers.
Try this: refresh second-day hair with a dry shampoo at the crown the night before, brushed out in the morning. It absorbs oil while you sleep and leaves the layers separated.
Difficulty: Easy | Cost: $$ | Time: 5 minutes
11. Soft Feathered Shag with a Short Fringe
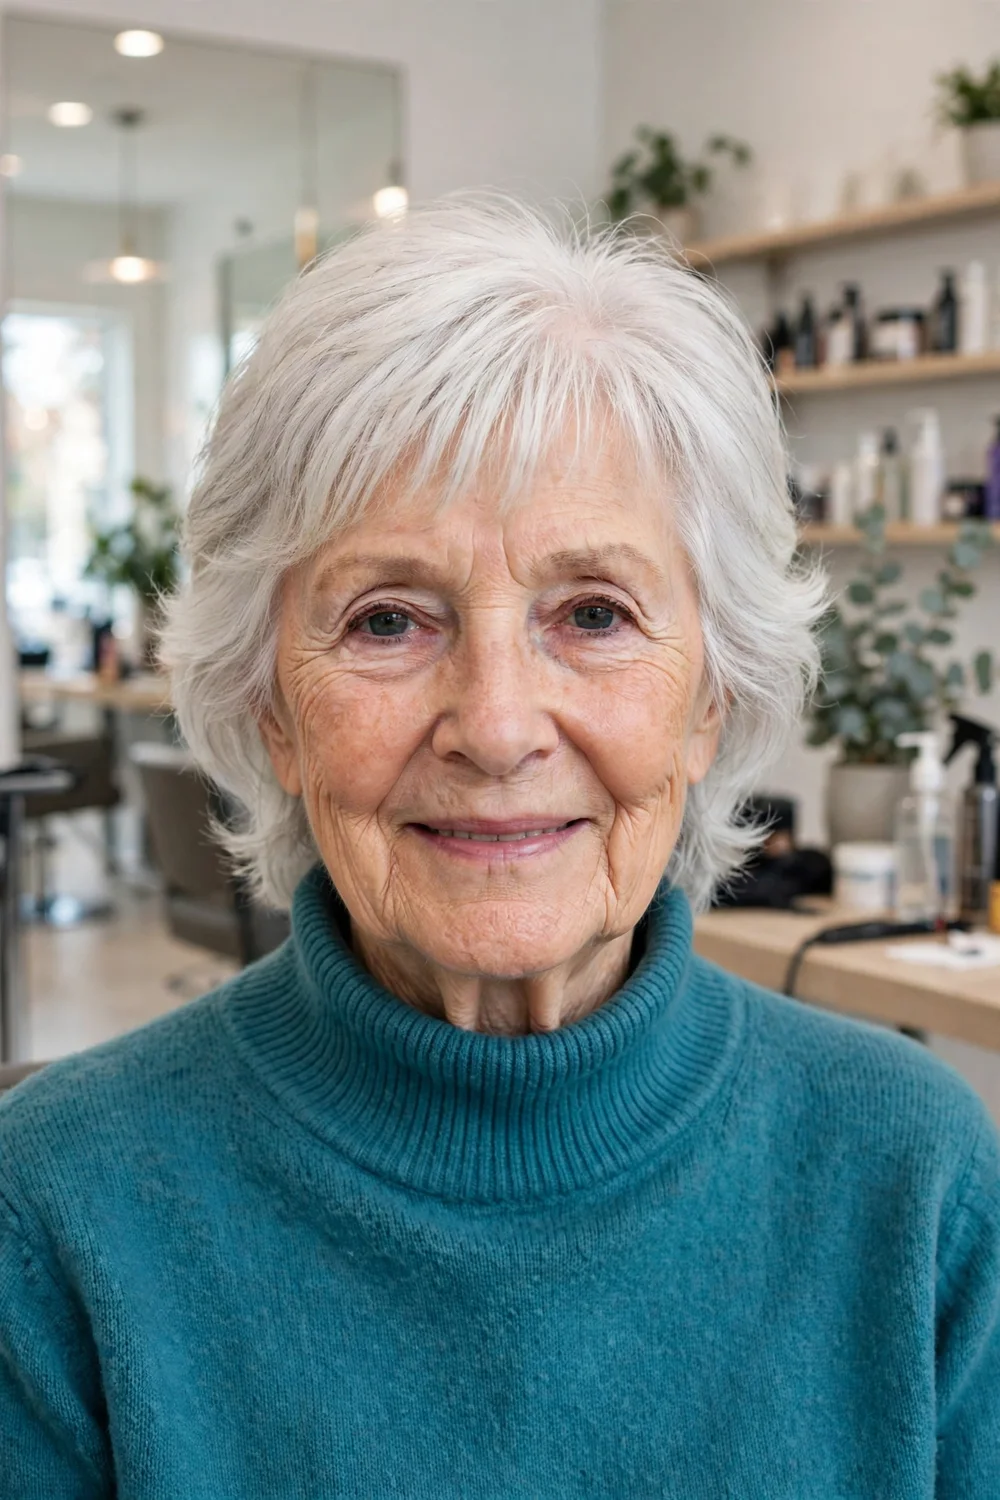
Feathered sides sweep back from the face in this softer shag, paired with a short, light fringe. The backward sweep draws the eye up and keeps hair off the cheeks, which many women in their 70s prefer with glasses and hearing aids.
The fringe is kept short and wispy so it never hangs in the eyes. Trims every five to six weeks keep the feathering in place and stop the ends from separating.
Try this: dry the sides back with your fingers while the hair is damp, then leave them alone. Touching feathered hair while it dries breaks the sweep into strings.
Difficulty: Easy | Cost: $$ | Time: 5 minutes
12. Wavy Chin Bob Styled with Gentle Bends

Loose bends through a chin-length bob widen the shape and make fine hair occupy more space, which reads as fullness. Two or three broad bends per side are enough; tight curls shrink the length and expose the scalp.
Use a wide-barrel iron on the lowest setting that holds, and bend the hair away from the face. Leave the last inch of the ends straight so the bob keeps its modern outline.
Try this: bend only the top layer and the front. The under layer stays smooth and supports the bends above it, and you halve the heat your hair takes.
Difficulty: Medium | Cost: $$ | Time: 10 minutes
13. Curly Pixie Shape for Fine Natural Curls
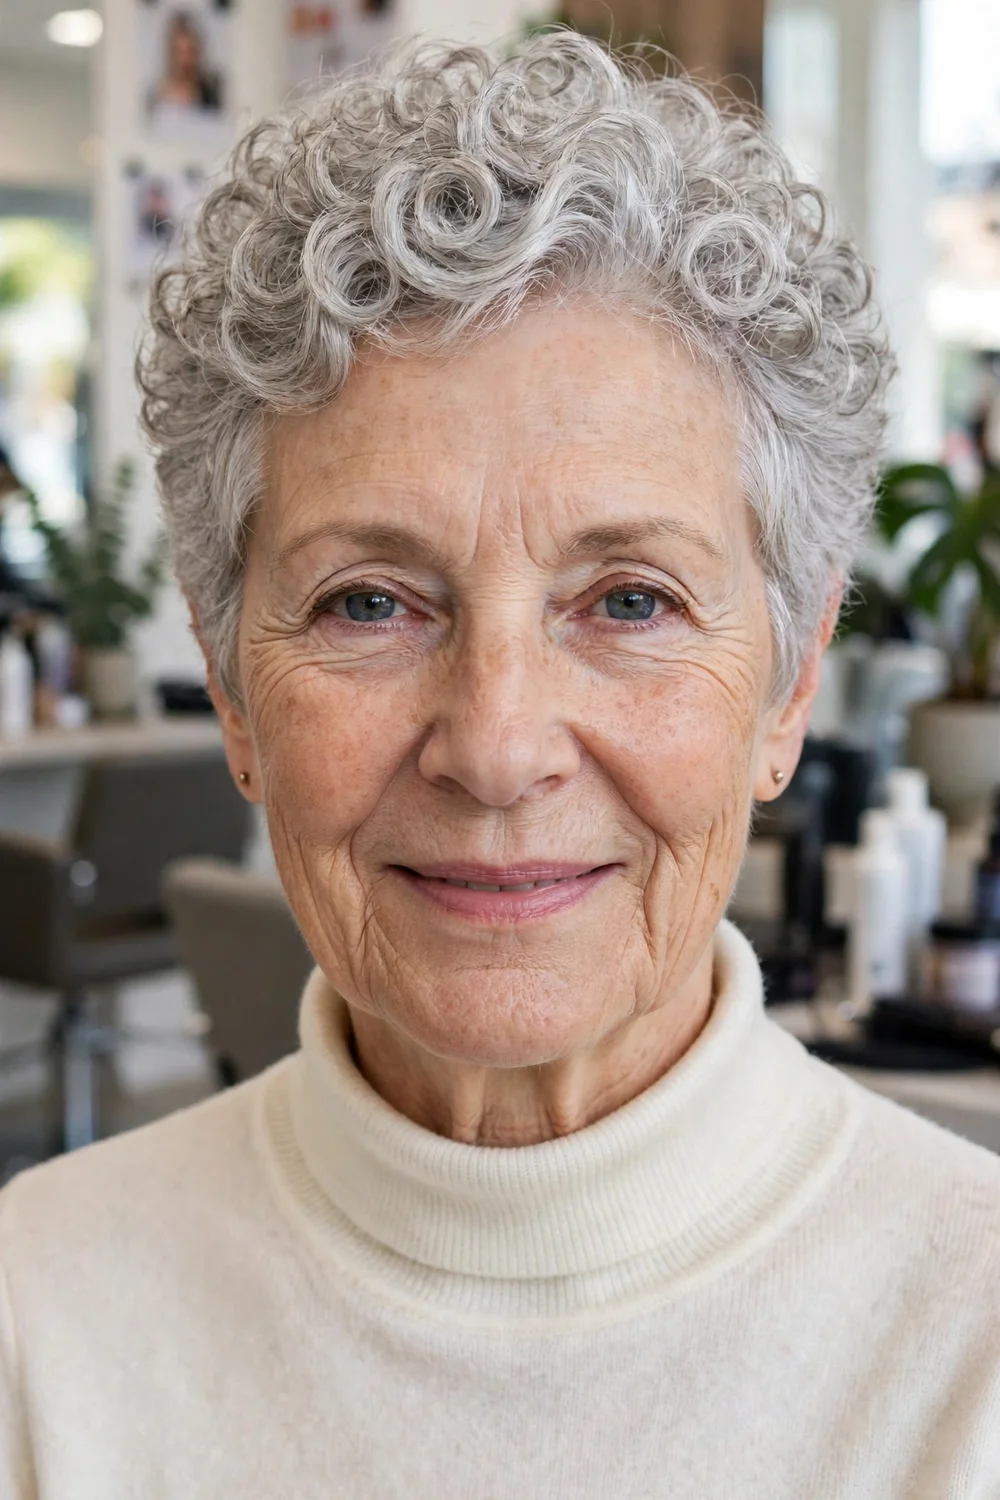
Fine curly hair gains volume from a short pixie shape because the curls spring up once the weight comes off. Cut dry and curl by curl, the top keeps enough length for the curl pattern to show while the sides stay close.
Moisture matters more than hold for fine curls. A light leave-in conditioner scrunched into wet hair, then left to air-dry, keeps the curls defined without the crunch of gel.
Try this: refresh curls on day two with a water mist and a pea-size amount of leave-in, scrunching only the flattest sections instead of redoing the whole head.
Difficulty: Easy | Cost: $ | Time: 5 minutes
14. Airy Short Curls with a Rounded Outline
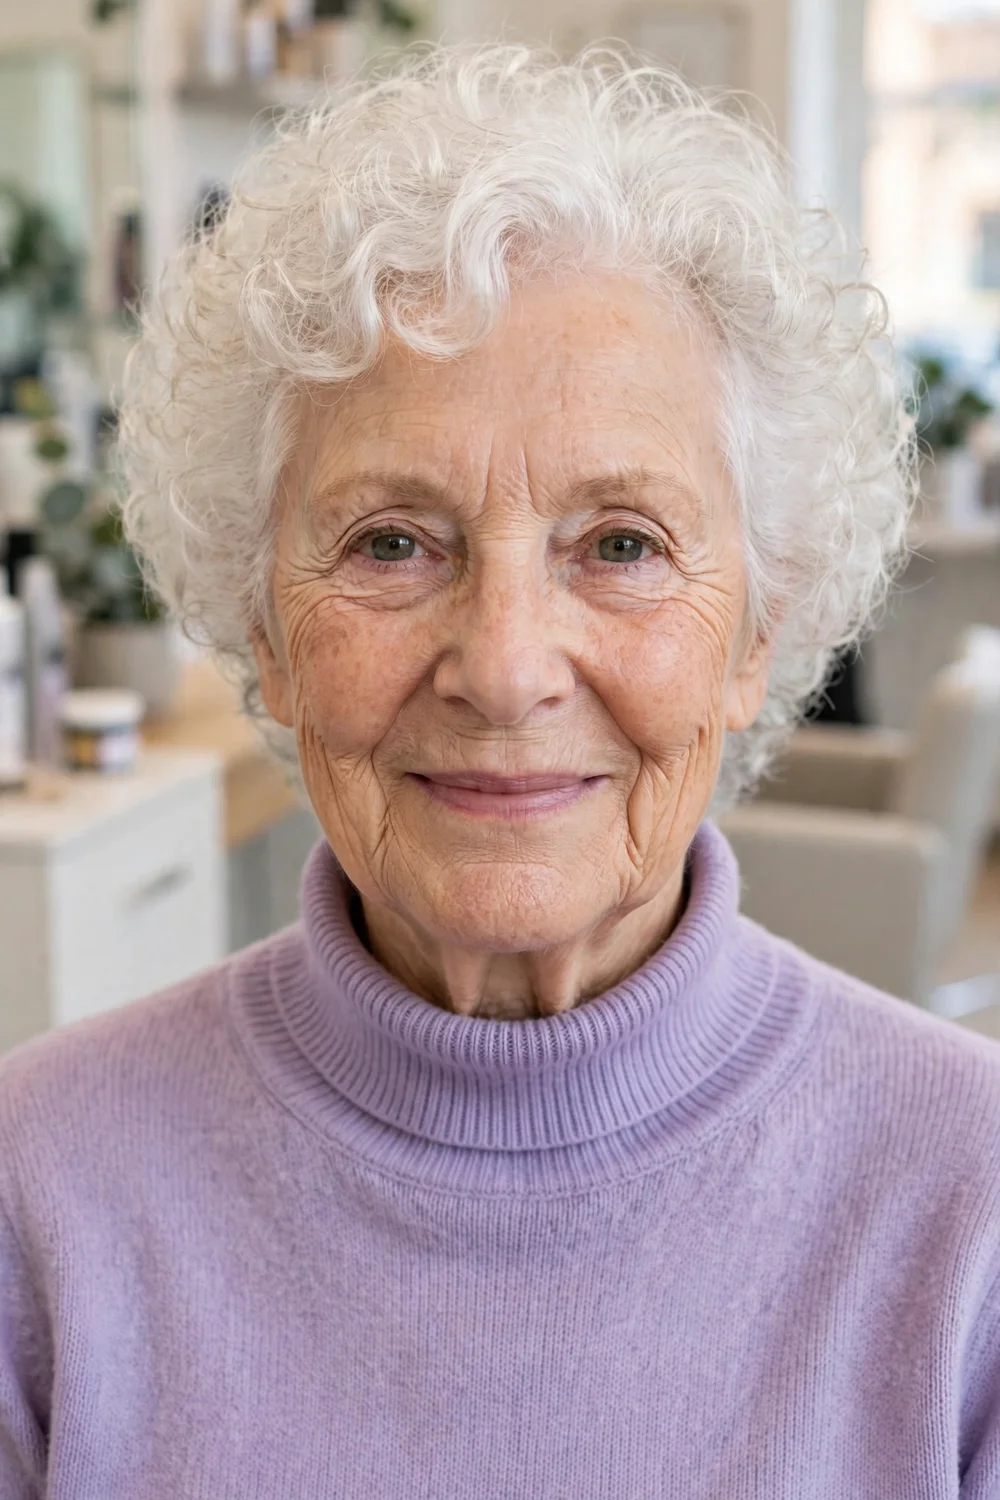
Short curls shaped into a rounded outline give fine wavy and curly hair a full halo effect at a length that is easy to wash and dry. The round shape keeps the volume around the head rather than piled on top.
Ask for the outline to be shaped while dry so the stylist sees the true curl length. Wet cutting often takes fine curls shorter than planned once they spring up.
Try this: dry with a diffuser on low heat and low speed, holding it still under each section. Moving it around creates frizz on fine curls.
Difficulty: Easy | Cost: $ | Time: 5 to 10 minutes
15. Collarbone Lob with a Blunt Perimeter
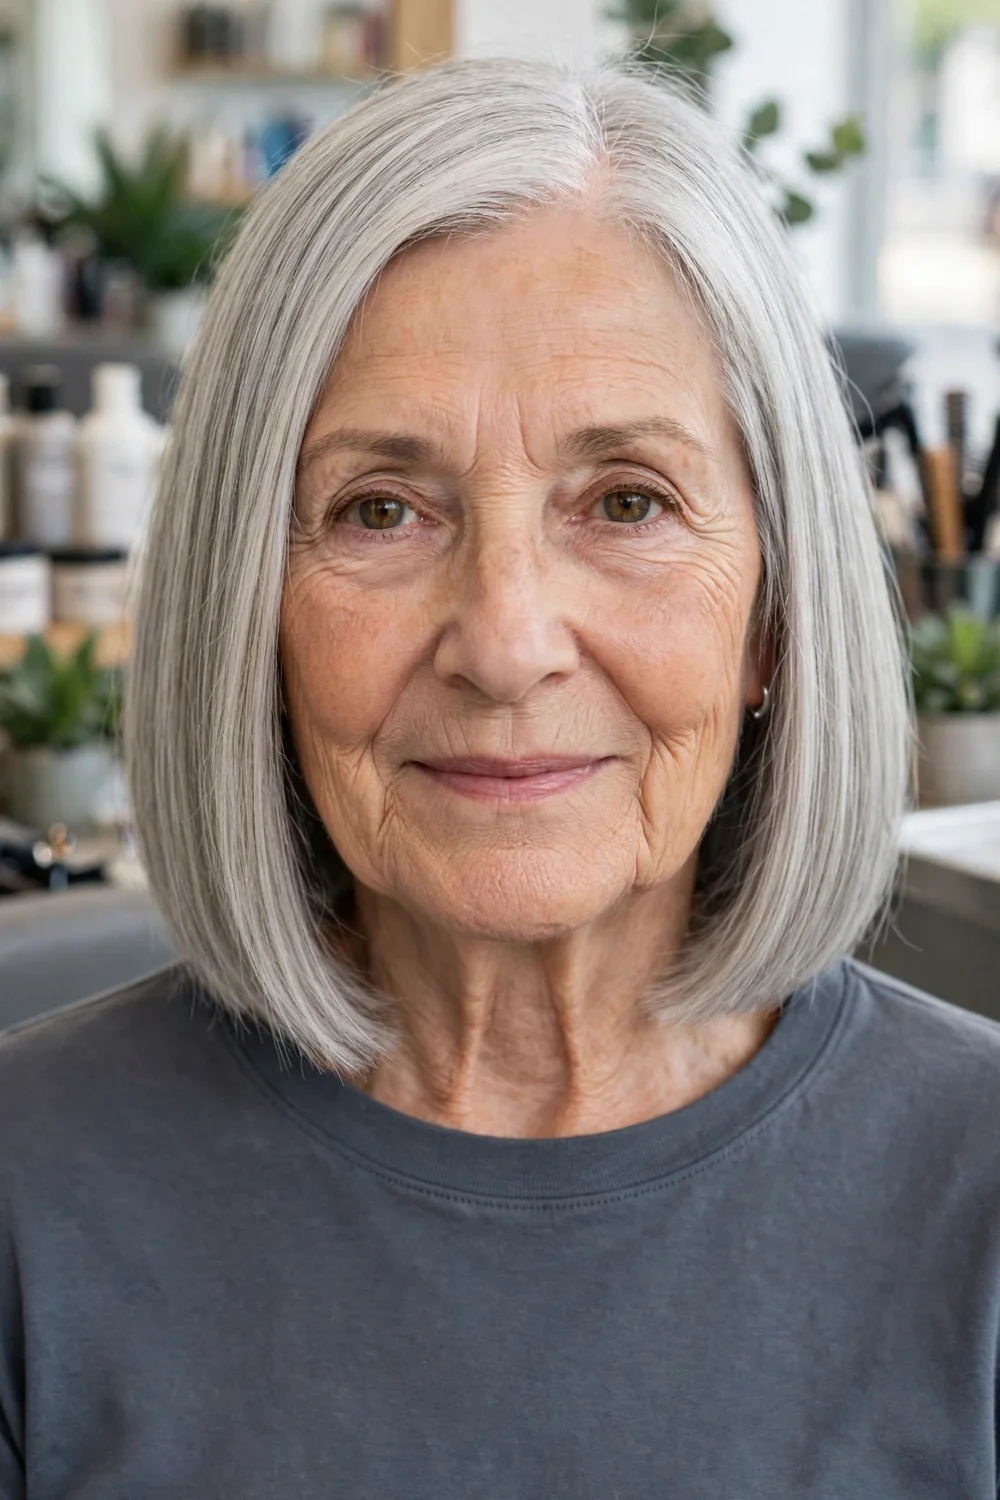
If you want to keep some length, a collarbone lob with a blunt perimeter is the longest cut that still suits fine hair after 70. The blunt ends protect the edge, and collarbone length can still go up into a low ponytail.
Keep layers minimal and long. A few face-framing angles at the front add movement without thinning the back, where fine hair needs every strand.
Try this: wear the part slightly off centre and switch sides weekly. Changing the part stops fine hair from training flat in one direction.
Difficulty: Easy | Cost: $$ | Time: 5 to 10 minutes
16. Shoulder-Skimming Cut with Face-Framing Angles
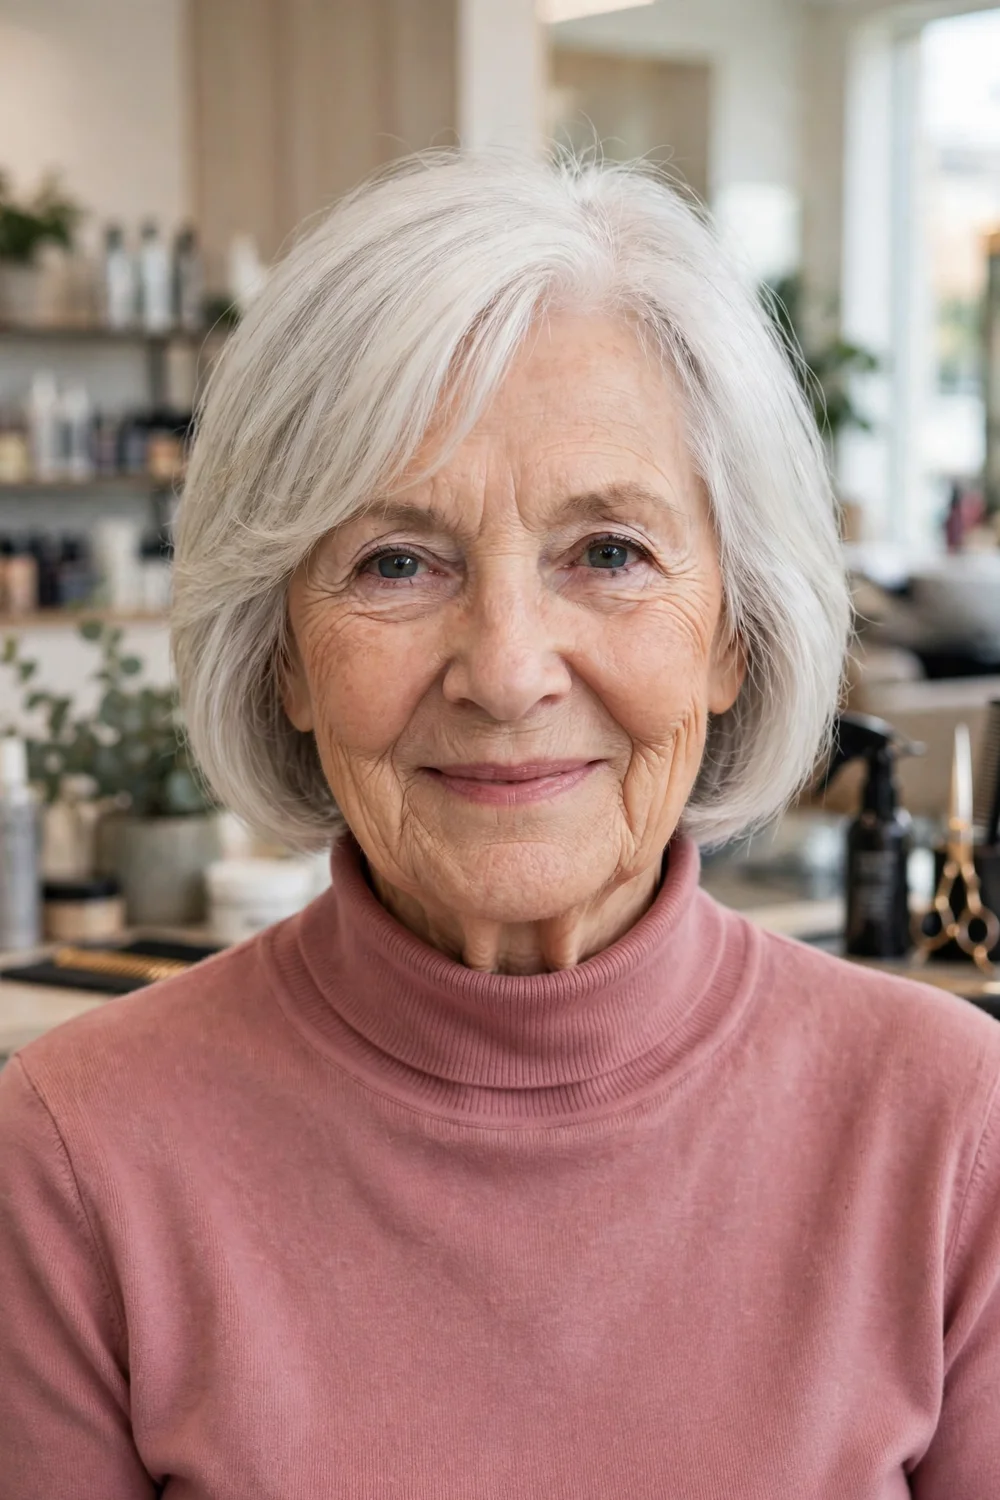
This medium cut skims the shoulders and angles down from shorter pieces at the front. The front angles soften the jaw and cheek area, and the back stays one length so fine hair keeps its weight.
It dries well with a simple paddle brush blow-dry, pulling the front pieces forward as they dry. On straighter hair it also air-dries into a tidy shape for low-effort days, much like the shapes in the guide to low maintenance haircuts for women over 60.
Try this: tuck one side behind the ear and leave the other down. The small asymmetry adds interest and shows off earrings without any styling product.
Difficulty: Easy | Cost: $$ | Time: 5 to 10 minutes
17. Side-Parted Medium Cut with a Sweeping Front Layer
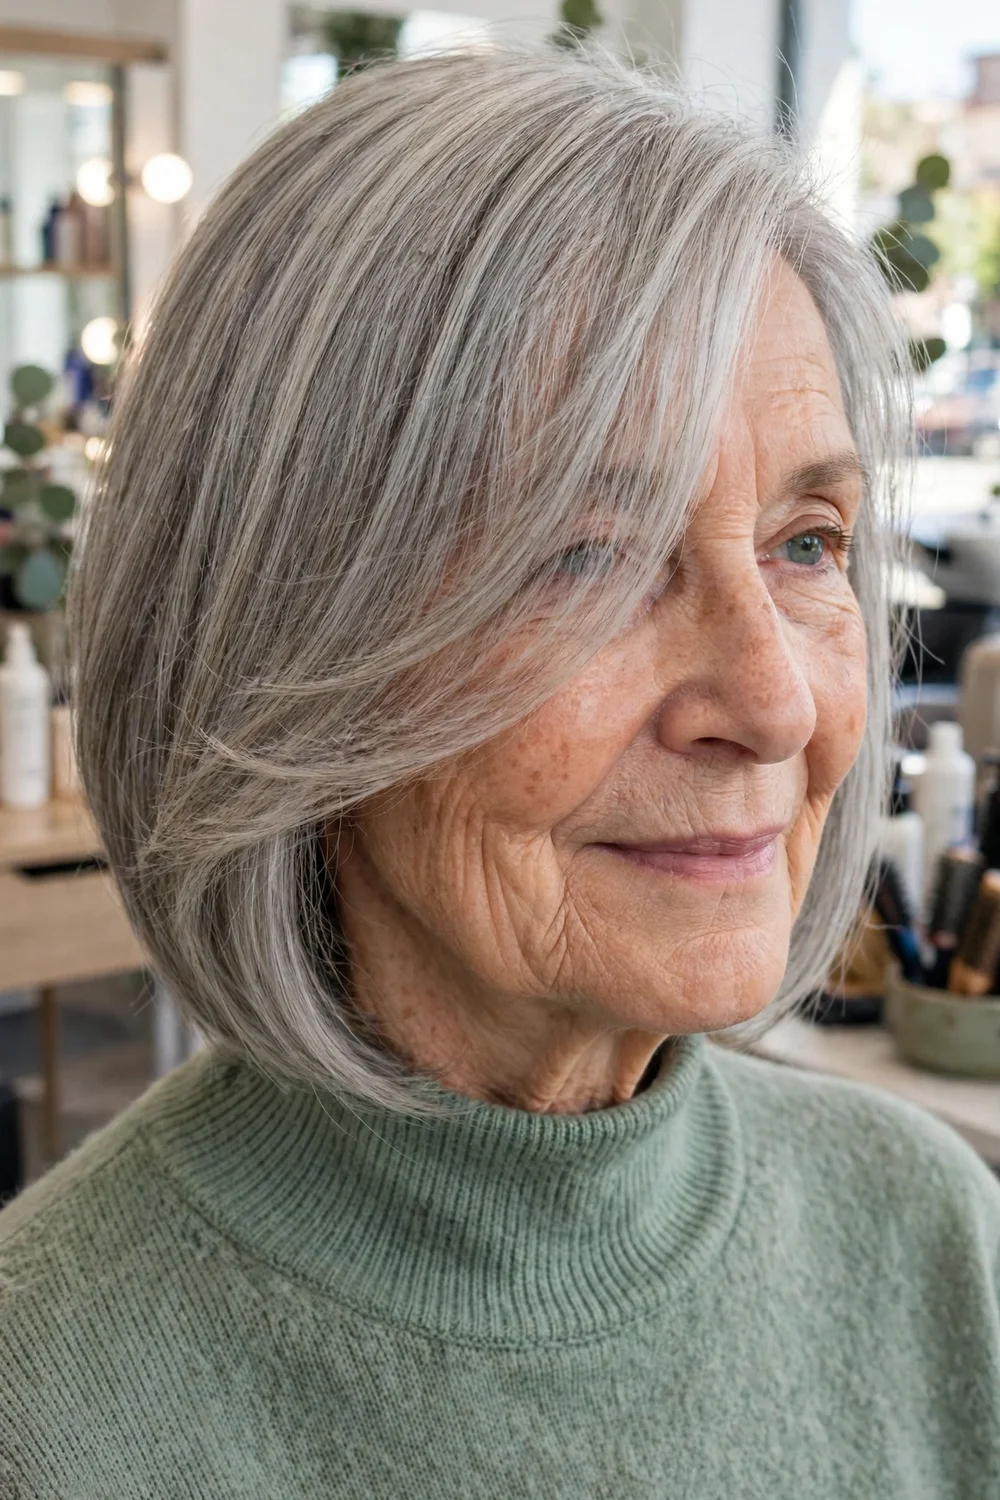
A deep side part and one long front layer create a sweeping line across the face on medium-length fine hair. Moving the part to the side covers a thinning centre part and gives instant root height on the heavier side.
Keep the rest of the cut simple, with blunt ends and no short layers. The single sweeping layer is the feature, and it needs a solid base of hair behind it to read well.
Try this: dry the front layer across the forehead in the direction of the sweep while it is still wet. Once dry it will stay put with no spray at all.
Difficulty: Easy | Cost: $$ | Time: 5 minutes
18. Asymmetric Bob Longer on One Side
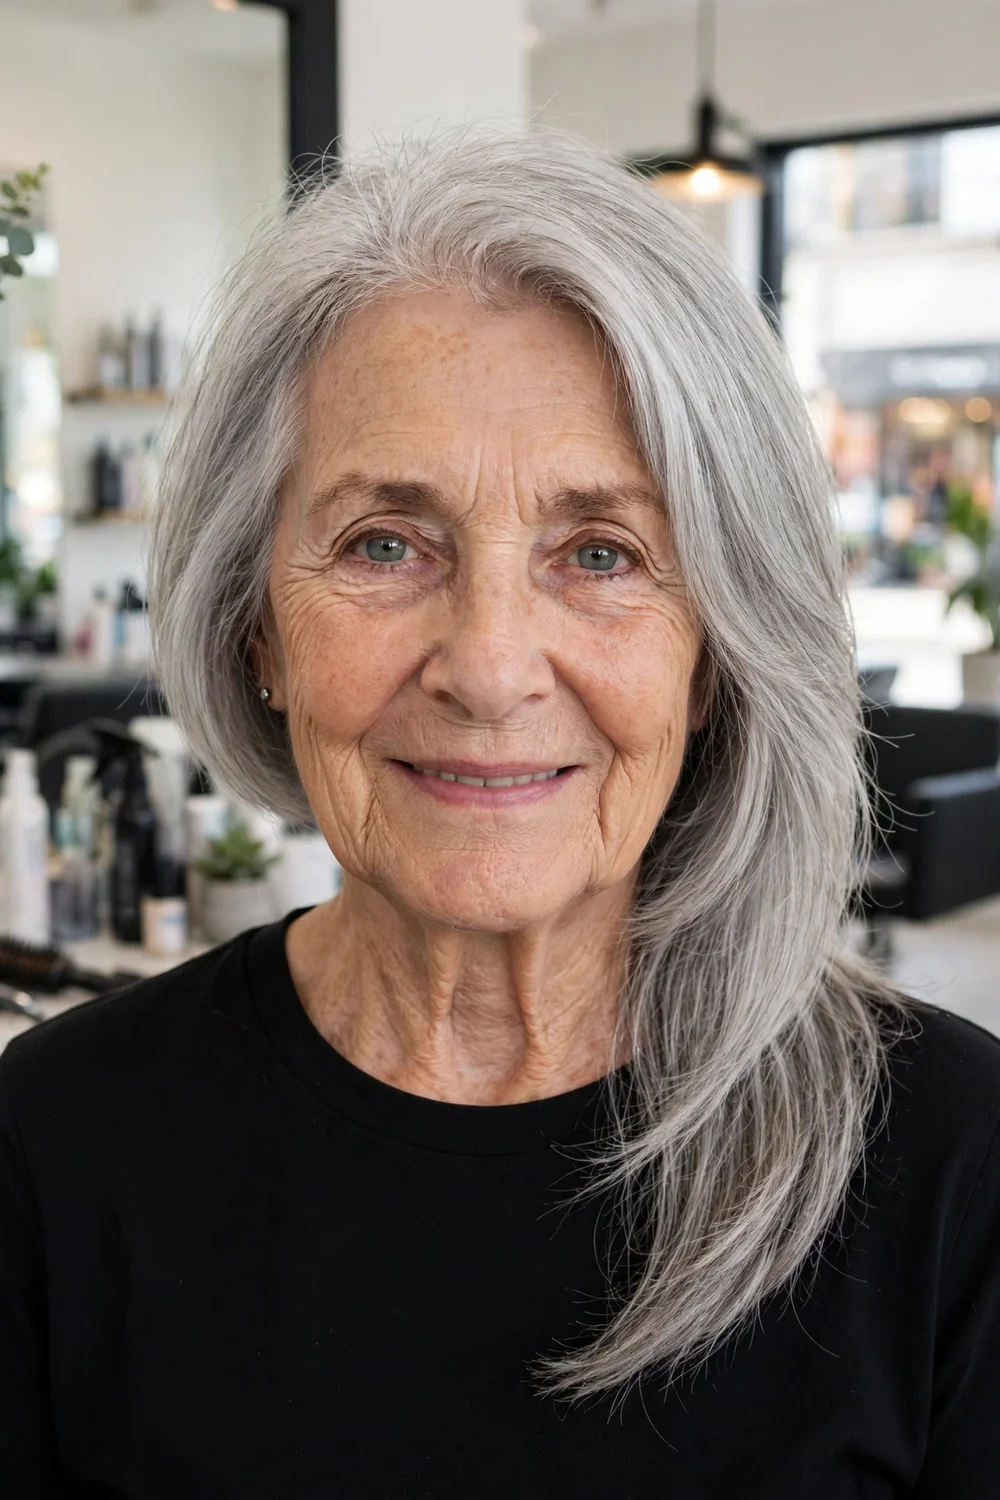
One side cut longer than the other gives fine hair a clear design line that draws attention away from density. The diagonal across the front also balances uneven thinning, since the longer side can be placed where hair is fuller.
This shape needs its outline kept sharp, so plan trims every five to six weeks. It suits straight and slightly wavy hair best, dried smooth with a brush.
Try this: part it on the shorter side. The contrast between the short side and the sweeping long side is what makes the cut look deliberate.
Difficulty: Medium | Cost: $$ | Time: 5 to 10 minutes
19. Glasses-Friendly Crop with Tidy Sides Around the Ears
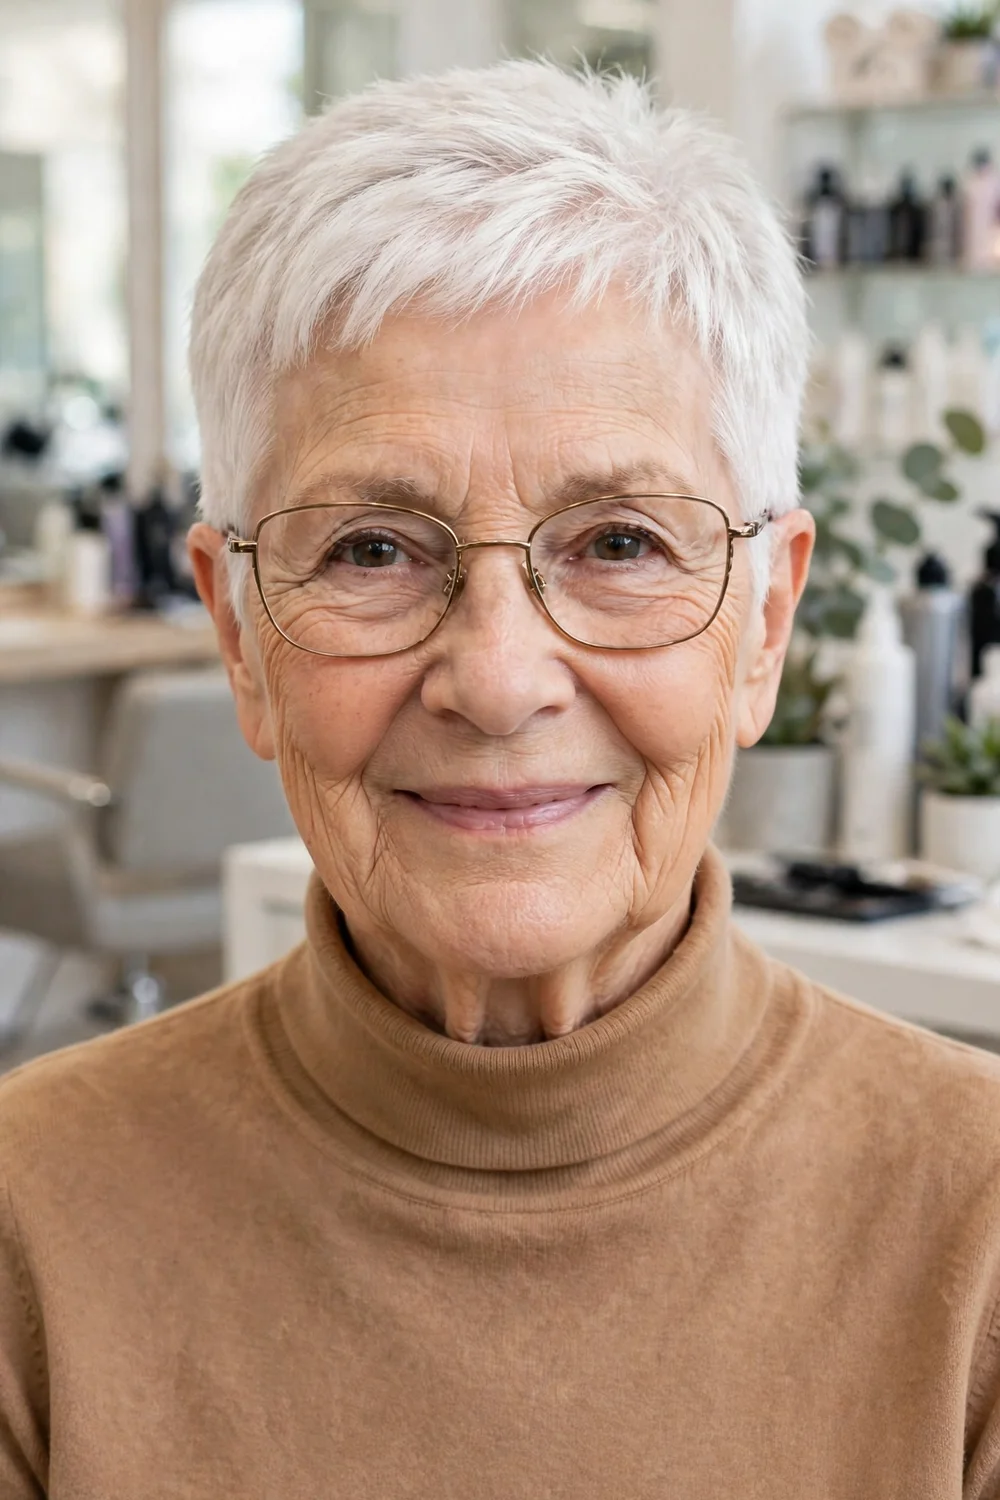
Cut close and tidy around the ears, this crop leaves clear space for glasses arms and hearing aids, with a soft textured top for height. For women who put glasses on and off all day, the neat sides stop hair catching on the hinges.
The top is point-cut for texture that finger-styling can lift in seconds. Nothing about this cut needs heat, which suits fragile strands and arthritic hands alike.
Try this: keep a small tube of light styling cream by the bathroom mirror and smooth the top forward each morning. Ten seconds gives the crop its shape for the day.
Difficulty: Easy | Cost: $ | Time: Under 5 minutes
20. Low Twisted Updo for Fine Medium Hair
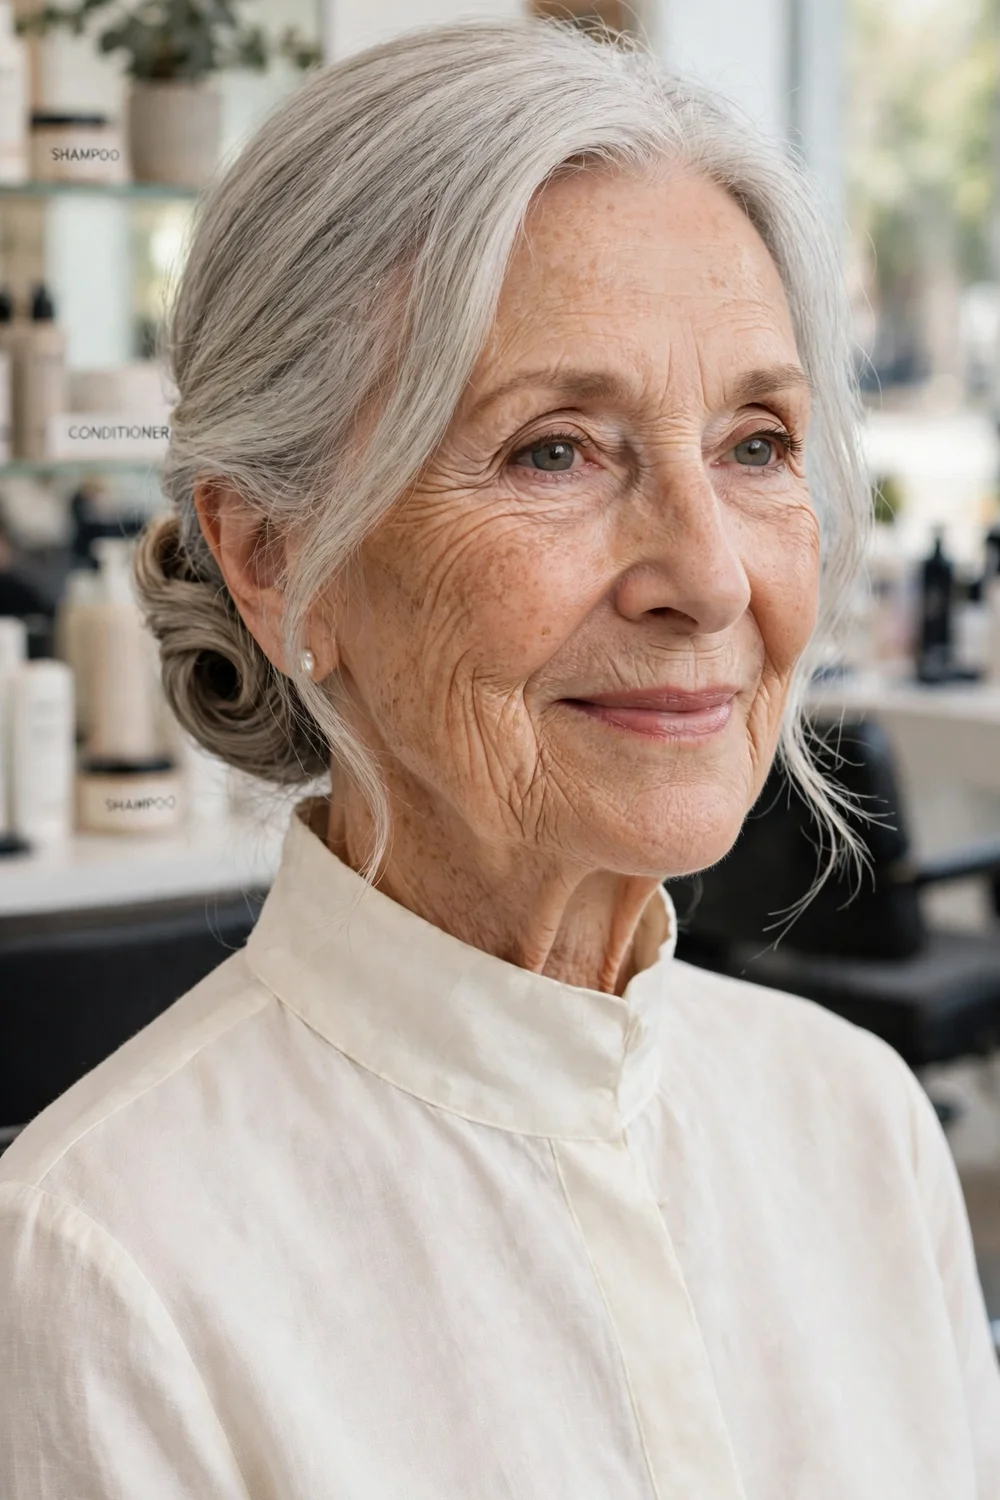
For church, family photos and dressier days, medium fine hair can twist into a low roll at the nape and pin in place. Twisting gathers fine strands together so the updo looks fuller than a bun made from the same hair.
Use pins with a matte, grippy finish rather than smooth pins, which slide out of fine hair. Cross two pins in an X at each side of the twist for hold that lasts the event.
Try this: backcomb nothing and tease nothing. Instead, twist loosely and let a few soft pieces fall at the front, which looks gentler and avoids breakage from teasing fragile hair.
Difficulty: Medium | Cost: $$ | Time: 10 minutes
21. Soft Half-Up Style with a Loose Crown Twist
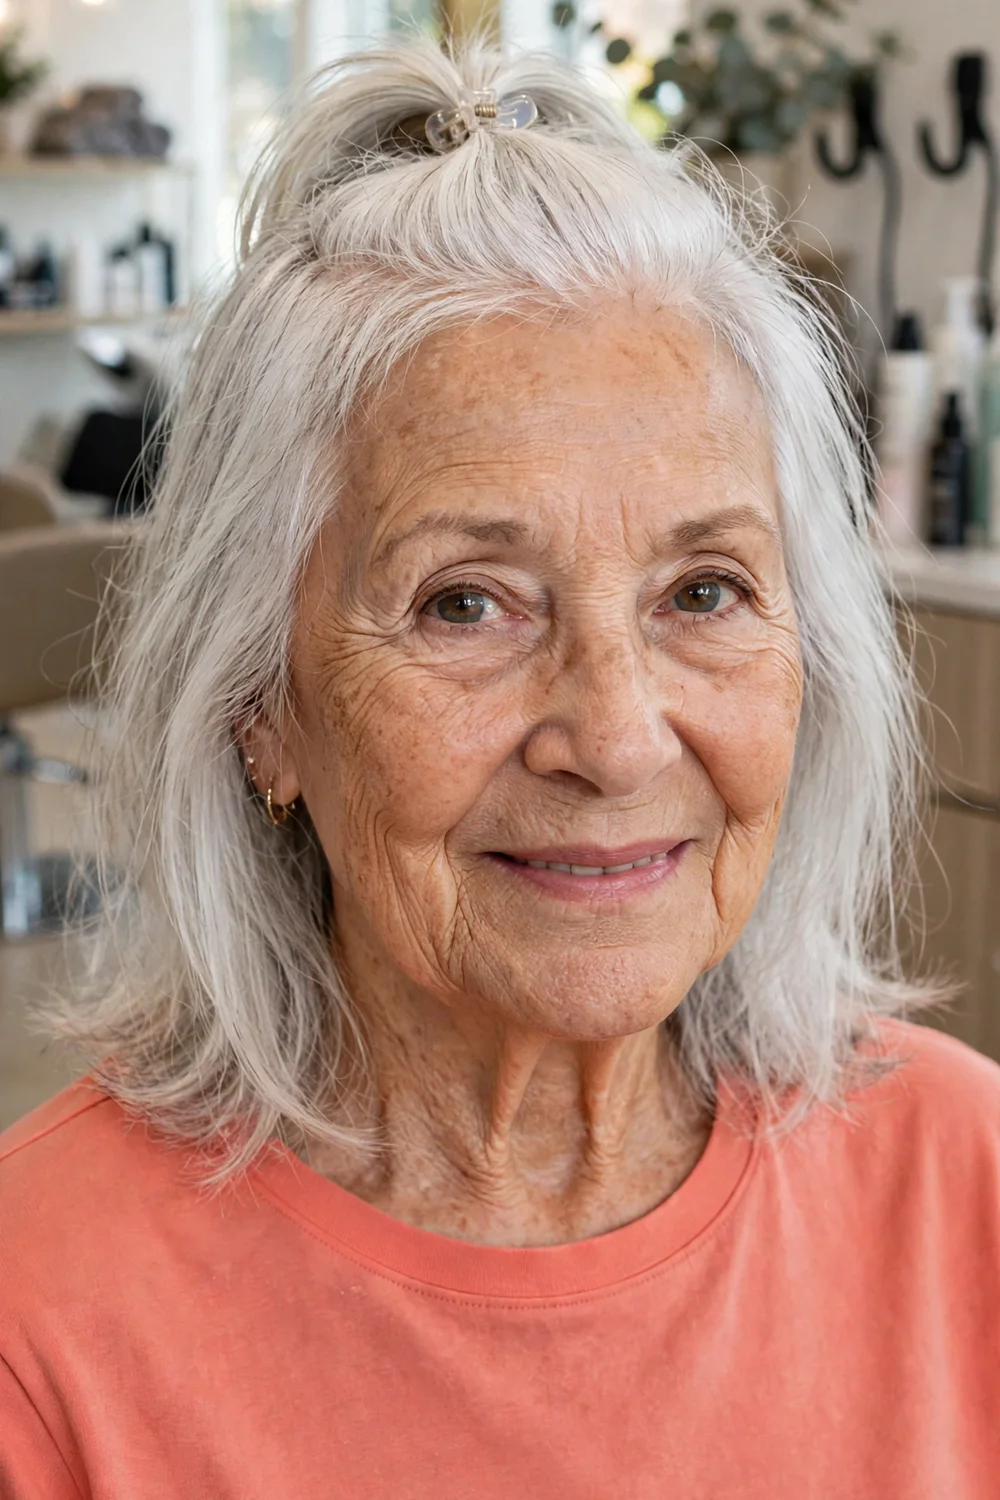
Taking the top section back into a loose twist lifts the crown and keeps hair off the face while the rest hangs at shoulder length. On fine hair the twist adds visible height at the spot where flatness shows most.
Secure it with a small claw clip rather than pins if your grip is limited. The clip holds the twist in one motion and releases it just as easily at night.
Try this: twist the section loosely and push it slightly forward before clipping. That forward push is what creates the soft crown bump.
Difficulty: Easy | Cost: $ | Time: 5 minutes
22. Smooth Low Ponytail with a Lifted Crown for Longer Fine Hair
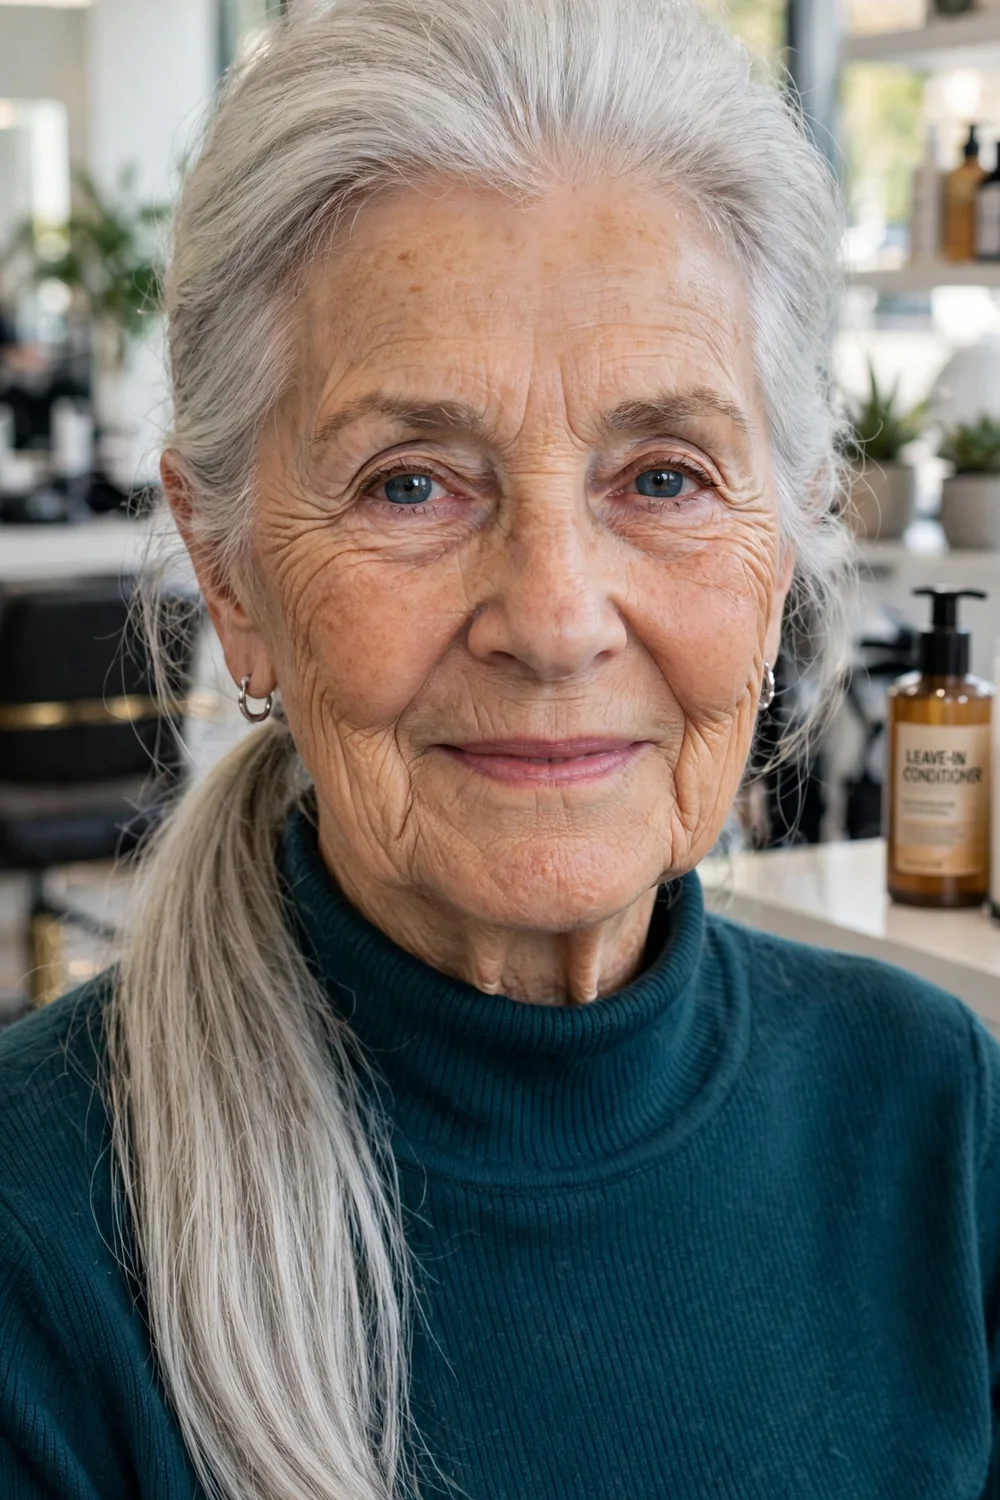
Women keeping longer fine hair can smooth it into a low ponytail and lift the crown section first for a tidy everyday style. Gathering at the nape avoids the tight pulling at the front hairline that high ponytails cause.
Use a soft fabric-covered band and never a bare elastic, which saws through fragile strands. Wrap a small section of hair around the band and pin it under the ponytail for a finished look.
Try this: lift the crown by drying the top section forward over your forehead, then brushing it back into the ponytail. The forward dry sets in lasting root height.
Difficulty: Easy | Cost: $ | Time: 5 minutes
Frequently Asked Questions
What length suits fine hair best after 70?
Short to medium lengths suit fine hair best after 70. Chin, jaw and collarbone lengths keep the ends looking solid, while hair past the shoulders tends to separate and show the scalp. A blunt perimeter at any of these lengths makes the hair read denser.
How often should fine hair be trimmed in your 70s?
Every five to eight weeks for most cuts in this guide. Pixies and crops need the shorter end of that range to keep their shape, while bobs and lobs can go six to eight weeks. Regular small trims also remove fragile ends before they split.
Do layers help or hurt fine hair after 70?
Short layers at the crown help, because they stack and lift. Long or heavy layers through the ends hurt, because they remove the weight fine hair needs at its edge and leave the outline see-through. Ask for crown layers only.
How can I add volume without heat styling?
Dry the crown forward over your forehead, then brush it back, use mousse at the roots only, and switch your part to the other side. A loose crown twist or a dry shampoo applied the night before also adds lift with no heat at all.
What should I avoid with fragile fine hair?
Avoid bare elastic bands, tight high ponytails, daily high-heat ironing, and heavy oils or conditioners at the roots. Each of these either breaks fragile strands or weighs them flat. Soft fabric bands, low heat and light products protect the hair you have.
Final Thoughts
Fine hair after 70 rewards simple, well-cut shapes. A solid edge, a little lift at the crown, and gentle handling will do more for how your hair looks than any shelf of products. Pick the two or three photos here that feel most like you, take them to a stylist who cuts a lot of fine mature hair, and start with the shorter trim rhythm for the first few months while the new shape settles in.

