


Fine hair can look flat even when you have plenty of it. The strands are slim, the crown lies close to the head, and the ends can look see through by midday. Shape changes that picture. Blunt edges make the bottom line read as dense, crown layers lift the top, and waves or a deep side part add width where fine hair needs it most.
Below are 26 hairstyles to make fine hair look fuller, covering blunt bobs, pixies, lobs, shags, waves, braids, and updos for women of varied ages. Each idea explains why it adds body on fine strands, how to ask for it or style it, and how much upkeep it takes, so you can choose by your routine as well as by the photo.
Key Takeaways
- Blunt ends read as density. One even hemline looks thick, while tapered ends can look see through.
- Layers belong at the crown. Crown layers lift fine hair, while heavy layers through the ends thin the bottom line.
- Shorter lengths lift on their own. Pixies, crops, and bobs remove the weight that pulls fine hair flat.
- A deep side part is a fast volume trick. It shifts hair over the crown and covers a wide part line.
- What to avoid: long one length hair with no crown lift, heavy layers through the ends, tight braids that show the scalp, and heavy oils at the roots.
1. Blunt Chin Bob with a Dense Perimeter

A blunt chin bob ends every strand at the same point, so the bottom edge reads as one solid line. That line is what the eye reads as density. Fine ends that taper or feather tend to look see through, while a clean blunt edge keeps all the thickness you have in one place.
Ask for a one length cut with no layers through the ends. If you want a little lift, ask for two or three long layers at the crown only. Blow dry with a round brush and turn the ends slightly under so the shape looks rounded and full.
Try this: Blow dry the crown in the opposite direction to your part, then flip it over. The roots stand higher and the lift lasts longer.
Difficulty: Low to Medium · Cost: $$
2. Stacked Bob with a Rounded Full Back
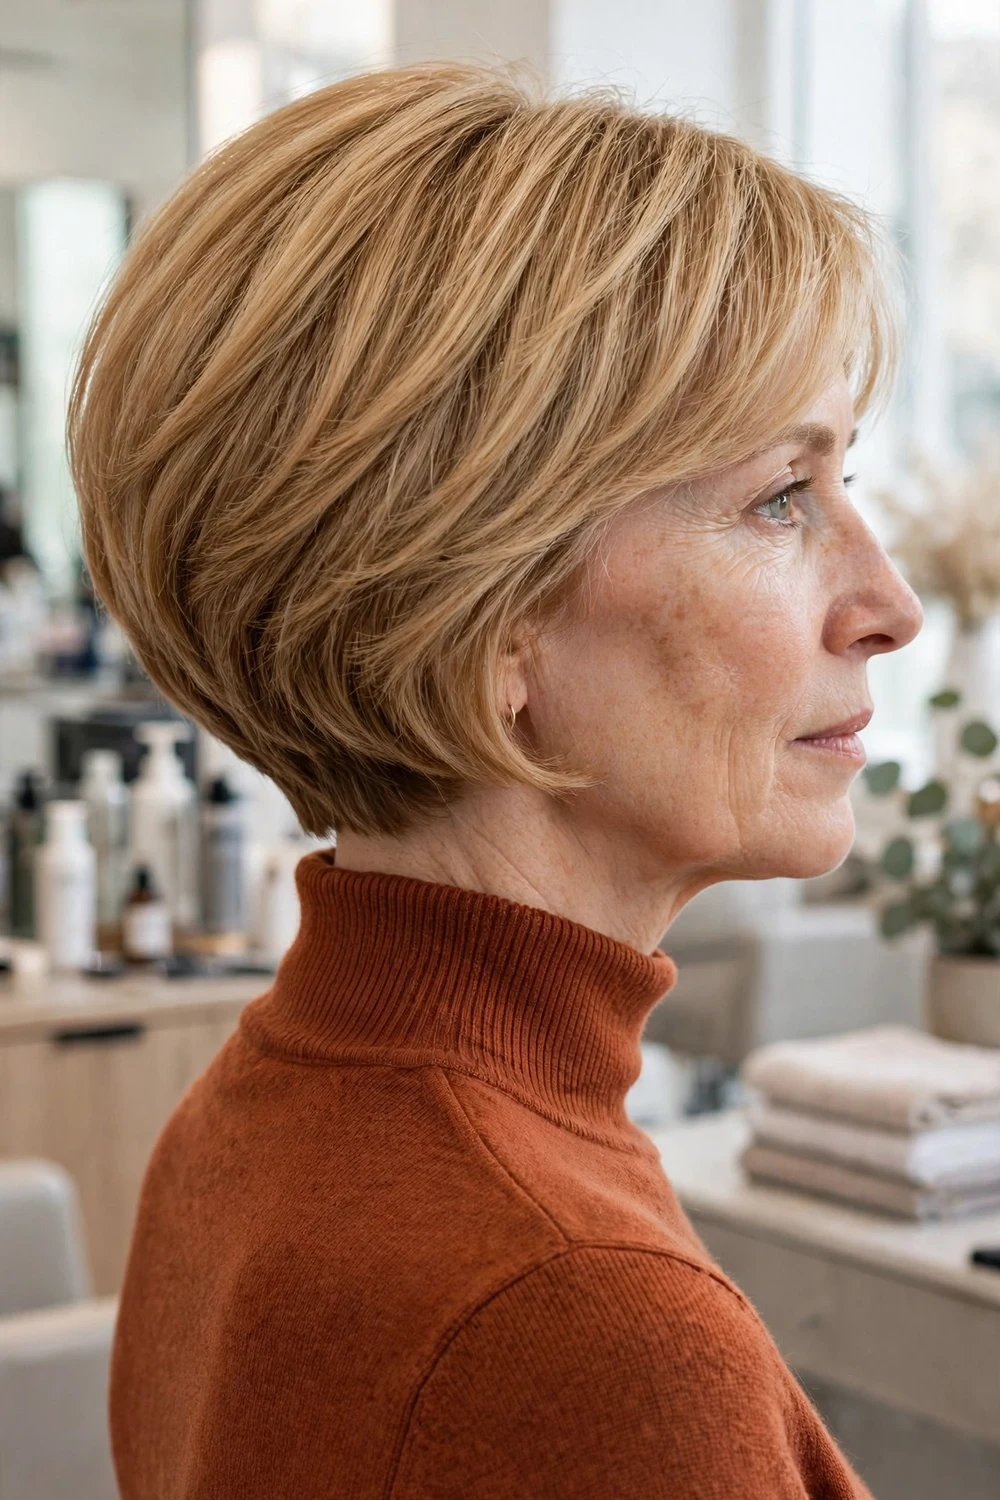
Stacking builds short graduated layers at the nape that support the longer hair above them. The back of the head looks rounded and full instead of flat. From the side, the shape swells gently at the back and angles down toward the chin, which gives fine hair a silhouette it rarely holds on its own.
Ask for soft graduation rather than a sharp stack, so the back looks full and smooth. Blow dry the back first with a small round brush, lifting at the roots, then smooth the top layer over. This shape suits straight to slightly wavy hair and works well with glasses.
Try this: Dry the nape area first. If the back dries flat, the whole cut looks flat, no matter how well you style the front.
Difficulty: Medium · Cost: $$
3. Textured Pixie with a Lifted Crown for Fullness
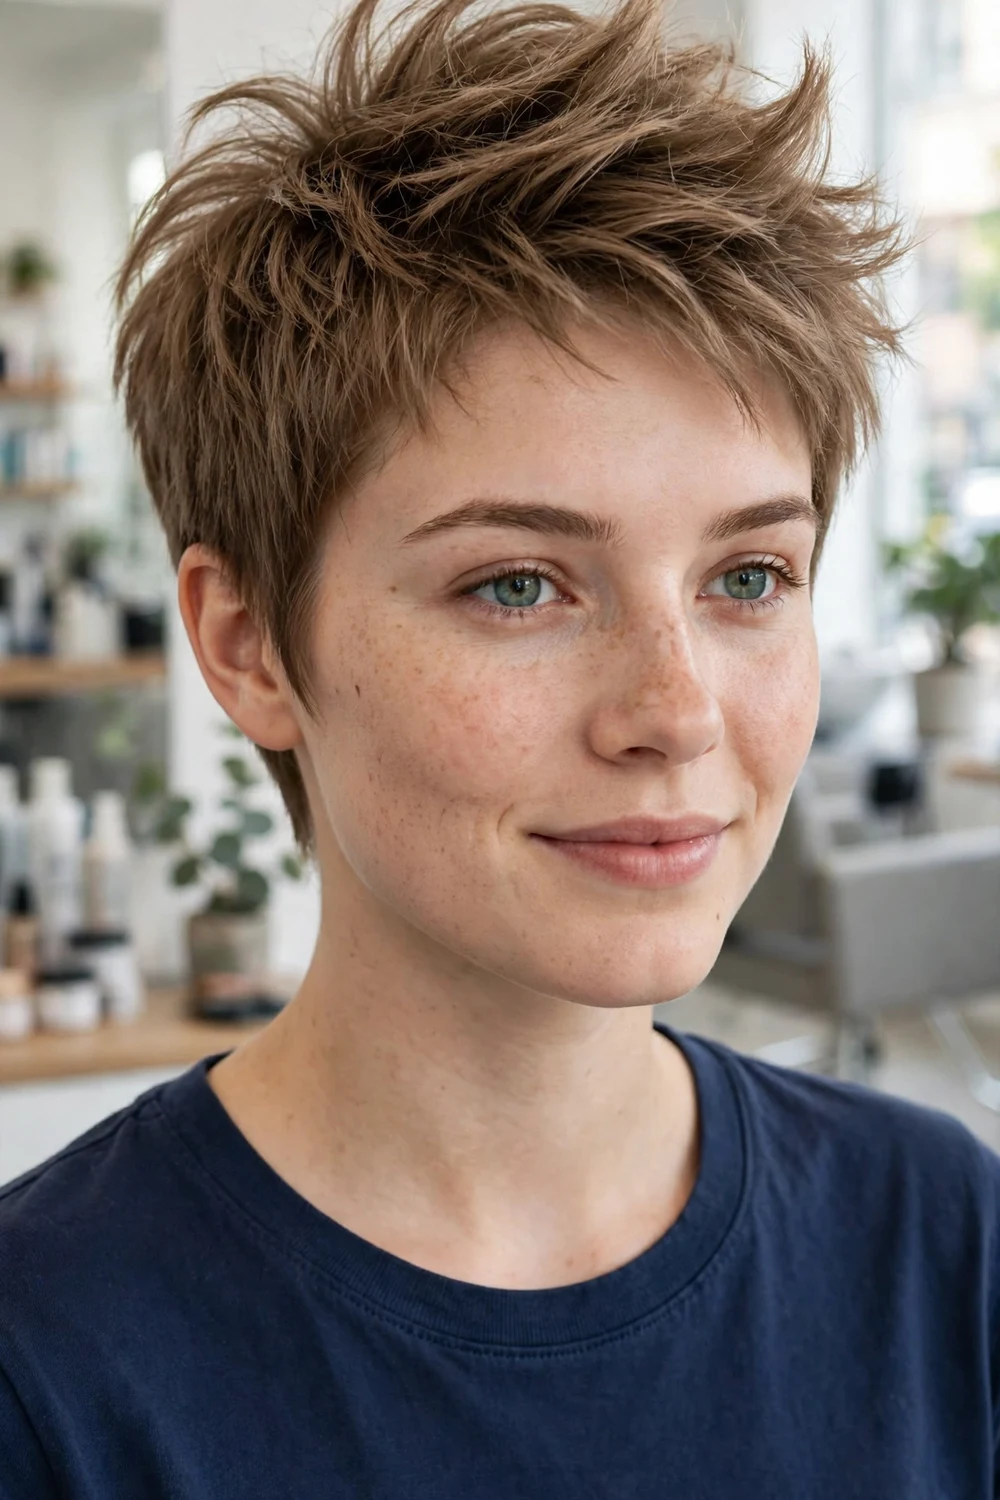
Short hair has very little weight pulling it down, so a pixie gives fine hair natural root lift. Point cut texture on top creates separation and shadow, and both read as density. Keeping the sides neat pushes all the visual volume up to the crown, where fine hair tends to fall flat first. If you want more short options, browse these pixie haircuts for fine hair before your appointment.
Style with a pea size amount of texturizing paste warmed between your fingers. Pinch small sections on top in different directions. Trims every four to five weeks keep the crown texture fresh and stop the shape from growing out flat.
Try this: Apply paste only to the top. Product on the sides weighs them down and makes the cut look uneven.
Difficulty: Low · Cost: $
4. Deep Side Part Bob with Crown Lift
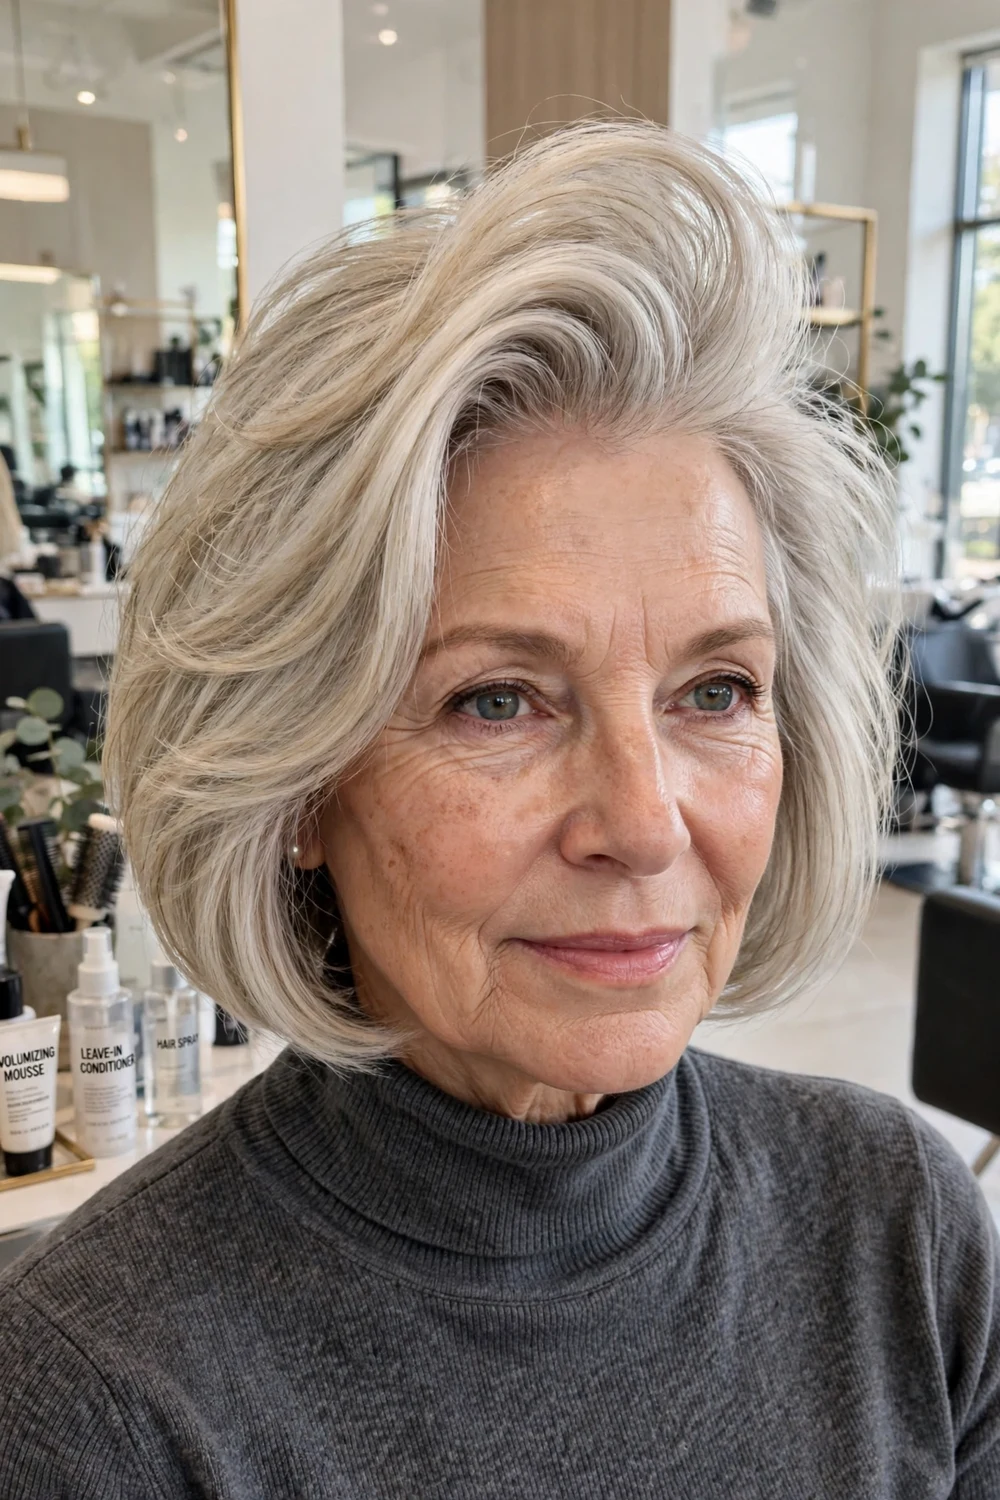
Moving your part two inches to the side gathers more hair over the crown. The sweep covers a wide part line and creates a tall arc of volume across the top. On a bob, the deep part also adds width at the sides, so the whole head looks fuller from the front.
Ask for a bob that sits between the chin and the shoulders, with the ends kept blunt. Dry your hair with the part on the opposite side to the one you wear, then flip it to your real part. The roots keep the lift from the change in direction.
Try this: Change your part side every few weeks. Hair trained in one direction for months lies flatter and resists lift.
Difficulty: Low · Cost: $$
5. Choppy Bob with Piecey Ends for Texture

A choppy bob cuts the ends into soft, uneven pieces that catch light from different angles. The broken edge builds the look of texture and thickness without removing much length. Bob length keeps enough hair for shape, while the piecey finish stops the cut from looking flat or severe.
Work a root lifting spray through damp hair, then dry with your fingers and lift small sections at the roots. Define a few pieces at the front with a tiny amount of paste. This cut forgives second day hair well. A quick spritz of dry shampoo and a scrunch brings it back.
Try this: Keep the pieces large and soft. Very small, thin pieces can look stringy on fine hair, so ask for chunky texture instead.
Difficulty: Low to Medium · Cost: $$
6. Side-Parted Lob with Soft Layers and Root Lift

A lob rests at the collarbone and is about the longest length fine hair can wear while still looking full at the ends. A deep side part adds root lift and a sweep of volume across the top. Soft layers through the last few inches add movement while the ends stay substantial.
Ask for long layers only near the ends, with the perimeter left full. Blow dry with a dryer brush, directing the hair up and over to the opposite side, then flip it back into place. The result moves well and holds its shape through the day.
Try this: Tie the lob up loosely at the crown for an hour before you go out. When you let it down, the roots keep a soft lift.
Difficulty: Medium · Cost: $$
7. Tousled Lob with Wide Waves for Body

A wave bends the hair shaft, and bent hair takes up more space than straight hair. A tousled lob with wide, loose waves can look far fuller than the same hair worn straight. Collarbone length keeps the ends from trailing off into thin, see through points.
Create the bend with a large barrel iron on wide sections, then brush the waves out gently so they merge into soft width. A heat free option is to braid damp hair loosely overnight and undo the braids in the morning. Finish with a light texture spray scrunched through the ends.
Try this: Curl away from the face on both sides. Waves that fall forward close the face in and hide the width you just created.
Difficulty: Medium · Cost: $$
8. Modern Shag with Crown Layers for Height

The modern shag places choppy layers around the crown, where they add height and bounce. The key detail for fine hair is a full perimeter. The bottom edge stays thick while the top gains movement, so you get shape without losing density. For more layered options, see these trendy shag haircuts for fine hair.
Scrunch texture spray through damp hair and air dry, or diffuse on low heat for a few minutes. Keep layers long and sparse through the lengths. Too many short layers remove the density you are trying to show.
Try this: Refresh day two hair with dry shampoo at the roots only. Wetting the ends again makes fine shag layers separate into strings.
Difficulty: Medium · Cost: $$
9. Face-Framing Layers with Curtain Bangs for Front Fullness

Curtain bangs part in the middle and fall to each side, so they add width and fullness right at the front where people look first. They need only a slim section of hair, which suits fine hair well. Paired with face framing layers that start near the cheekbones, the front gains shadow and movement while the back keeps its density. Our face framing layers haircut guide for fine thin hair covers the cutting angles in detail.
Dry the bangs forward first, then split them and sweep each side back with a round brush. That forward then back motion creates the lifted opening. Keep the layers long so the ends stay full.
Try this: Pin the front layers back with a flat clip for ten minutes after drying. The set holds the sweep away from the face for hours.
Difficulty: Medium · Cost: $$
10. Angled Bob with Fine Highlights for Dimension

An angled bob is shorter at the back and longer at the front, which builds a strong, full outline. Fine highlights woven through the top add light and shadow. On flat, one tone fine hair the eye reads thinness quickly. Subtle contrast makes the same hair read as deeper and thicker.
Ask your colorist for fine, blended highlights rather than chunky streaks, and keep the angle gentle for a softer profile. Use heat protectant before any hot brush work, since color treated fine hair breaks more easily. The grow out is soft, so upkeep stays simple.
Try this: Place the lightest pieces around the crown and the front. Light at the top draws the eye up and adds to the look of height.
Difficulty: Medium · Cost: $$$
11. Rounded Bob with a Side-Swept Fringe for Front Volume
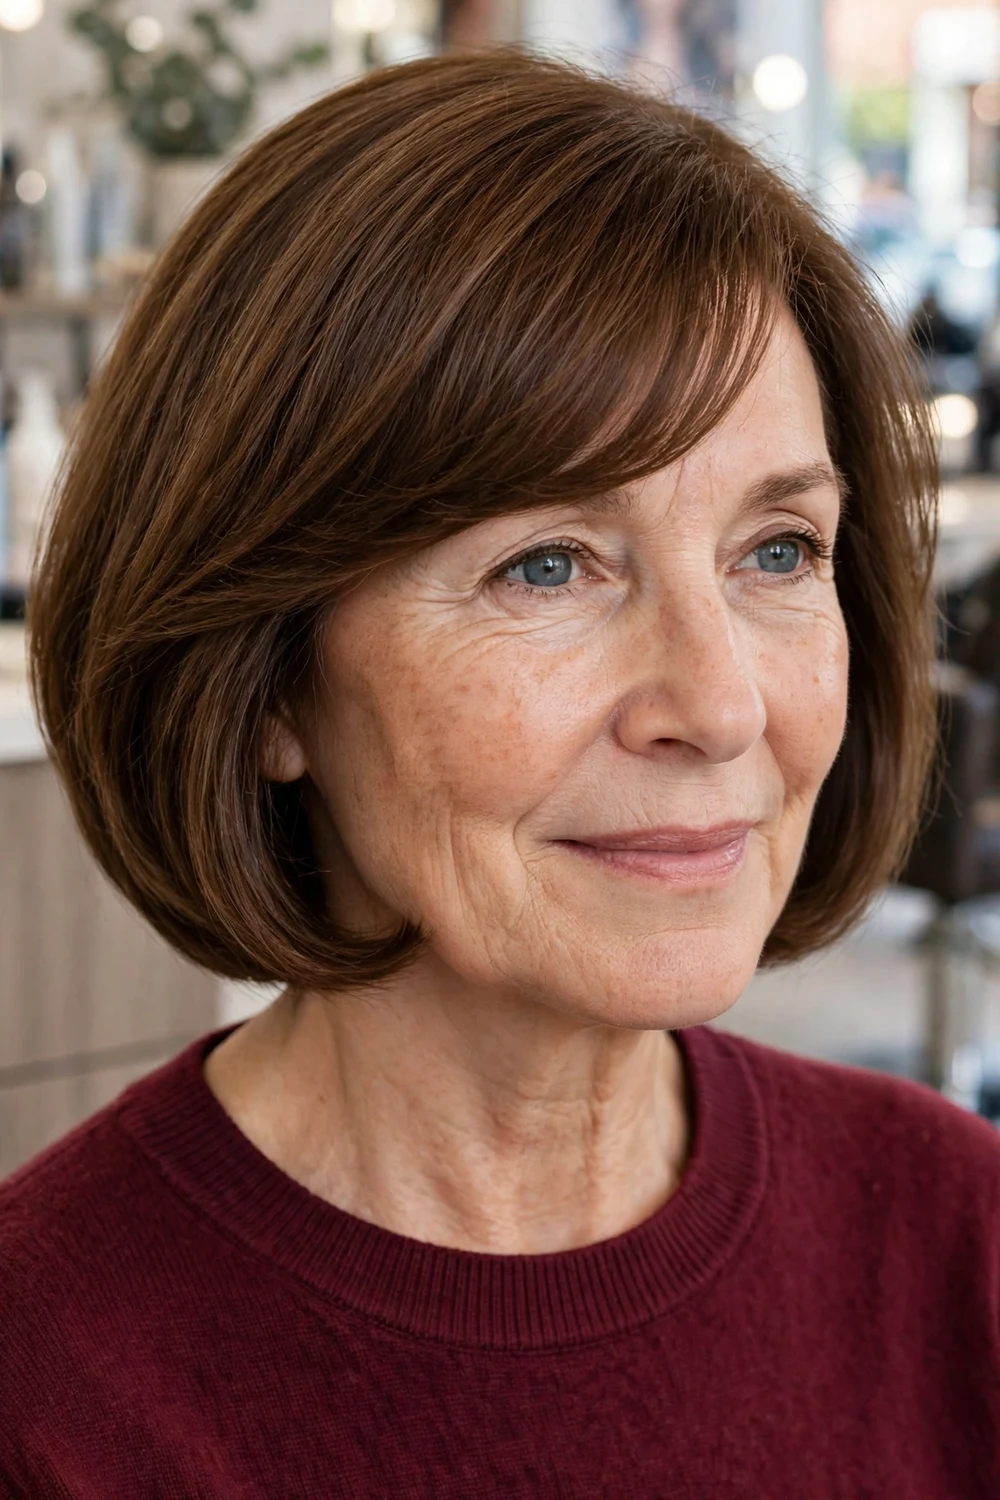
A rounded bob curves under at the ends, and that curve makes the shape look fuller and more substantial. A side swept fringe borrows hair from the side part, so the front looks full rather than thin. A blunt fringe can look sparse on fine hair, while a long sweep has enough hair to read as thick.
Blow dry with a round brush and roll the fringe diagonally across the forehead. Use one drop of light serum on the ends only for shine. More than that will flatten the curve you just built.
Try this: Sweep the fringe from a deep side part. The longer diagonal line covers more of the hairline and looks fuller.
Difficulty: Low to Medium · Cost: $$
12. Feathered Pixie with a Longer Top for Coverage
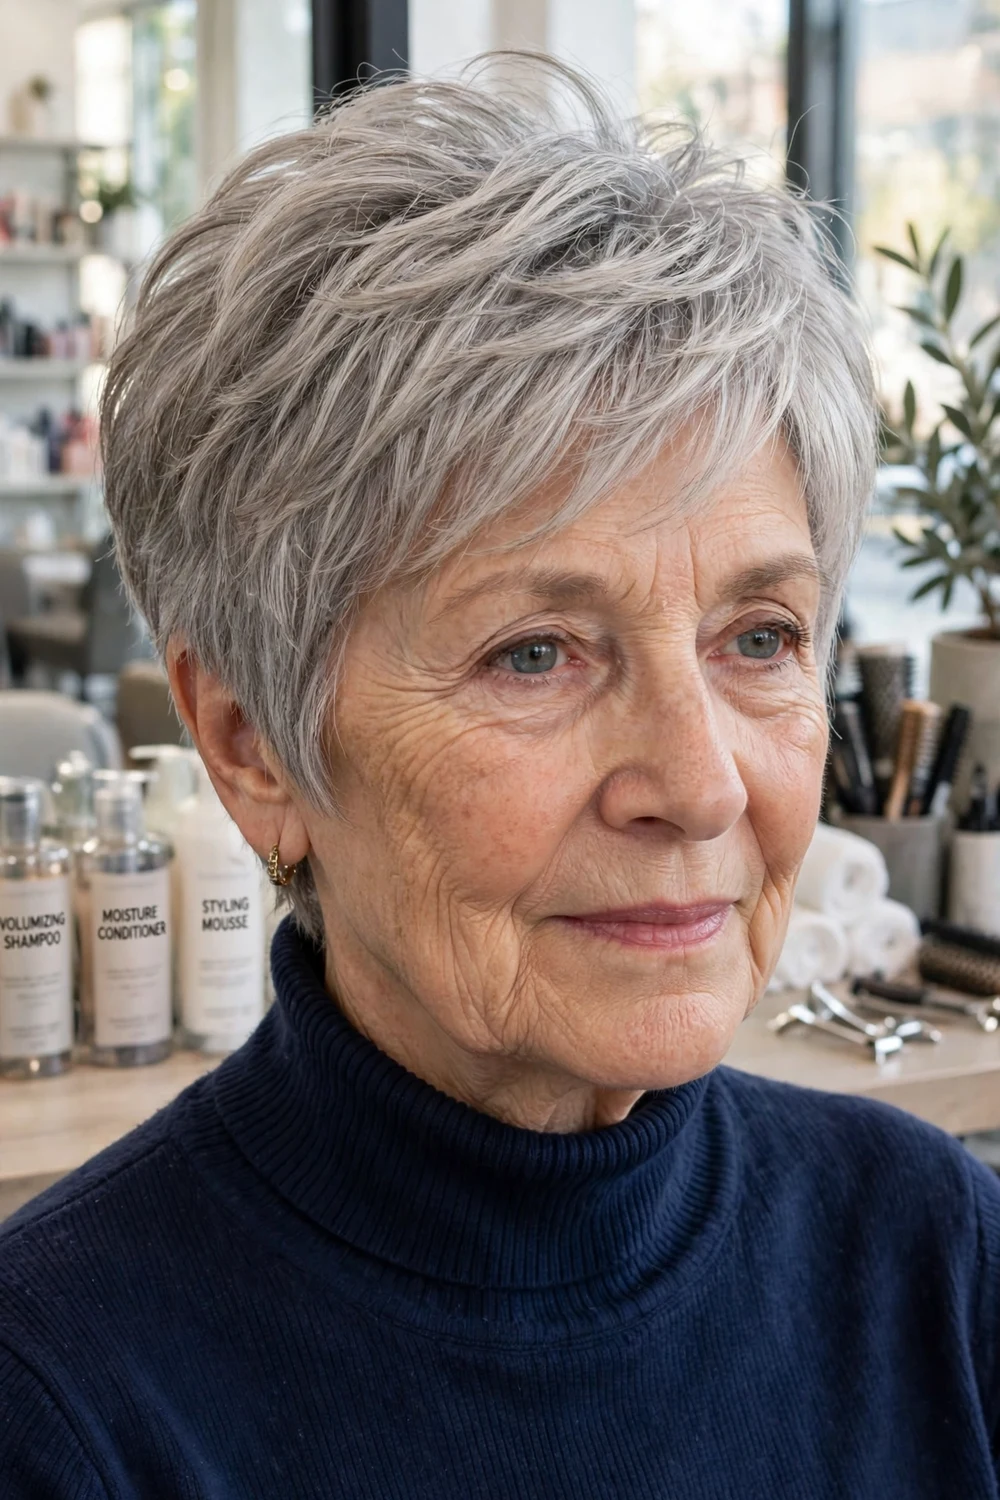
Feathered layers lie over each other in soft steps, which creates movement without cutting away fullness. A longer top lets you sweep the front forward or to the side, which covers a fine hairline with a soft edge. Short sides keep the shape tidy and push attention up to the crown. Longer pixie shapes like these long pixie haircuts for fine hair use the same longer top idea.
Dry the top forward with your fingers, then push it into place. A mini flat iron can flick the front pieces for a polished finish. This cut suits delicate features and crowns that need soft coverage.
Try this: Direct the longer top across the forehead on a diagonal. A straight across line shows gaps sooner on fine hair.
Difficulty: Low · Cost: $
13. Graduated Pixie with a Long Front Sweep

Graduation builds weight and shape into the back of a pixie while the front stays long. That long front section sweeps across the forehead in a diagonal line, which softens the face and covers a fine hairline. The back looks full because the shorter layers stack and support each other.
Wear the front swept smooth for a neat finish, or piece it out with paste for texture. Ask your stylist to keep the graduation soft, so the back looks full and rounded rather than sharp. A mini flat iron helps redirect the front on humid days.
Try this: Blow dry the back with a small brush first. A full looking back makes the long front read as a choice, not as coverage.
Difficulty: Low to Medium · Cost: $
14. Collarbone Blunt Cut with a Soft Bend

One length, blunt ends, collarbone length. This cut keeps maximum density in the perimeter, which helps if layers have left your ends looking thinner in the past. The styling adds a single soft bend through the mid lengths, which suggests body while the ends stay thick.
Create the bend with a flat iron used sparingly. Clamp at mid length, rotate a quarter turn, and glide once. Apply volumizing foam first so the hair has grip and holds the bend past midday.
Try this: Bend only the mid lengths and leave the last inch straight. Bent ends curl under and make the perimeter look shorter and thinner.
Difficulty: Low to Medium · Cost: $$
15. Layered Bob with Balayage Dimension
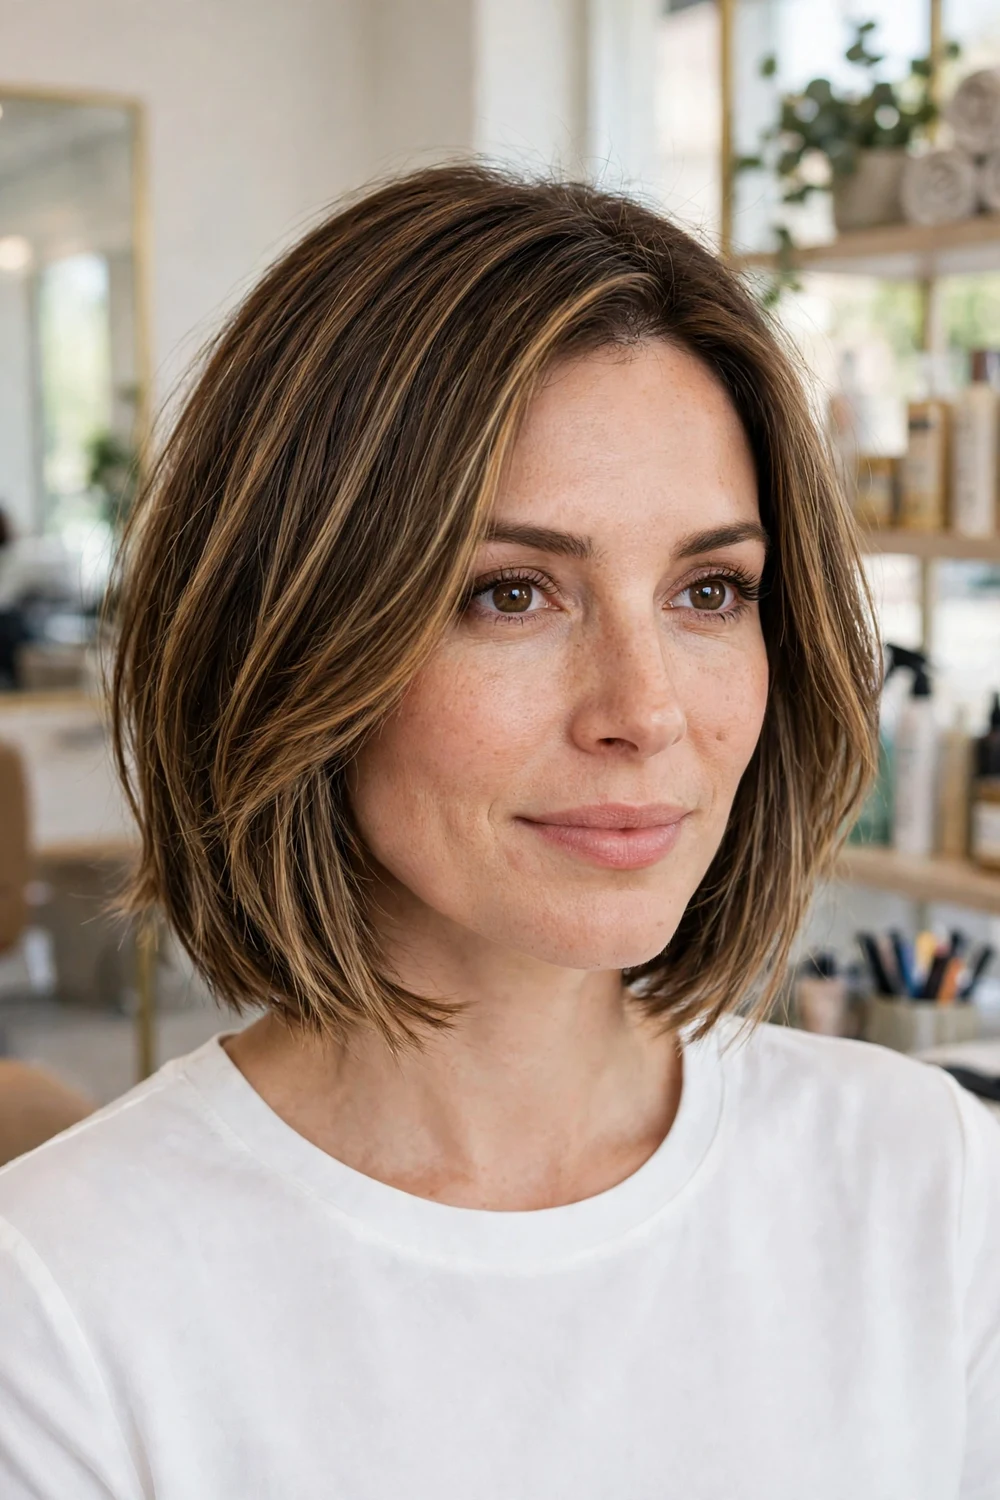
Balayage paints lighter pieces through the lengths, with the lightest parts toward the ends. The gradient of color makes a layered bob look deep and dimensional. Light and shadow in the color do part of the fullness work, so the layers can stay light and the ends stay full.
Ask for hand painted pieces that start a few inches from the roots, so grow out stays soft. Keep layers at the crown and through the front, with the back perimeter left strong. Style with loose waves to show the color movement.
Try this: Ask for two tones only, your base plus one lighter tone. Too many tones can look busy and thin on fine hair.
Difficulty: Medium · Cost: $$$
16. Airy Curly Bob for Fine Natural Curls

Fine natural curls need shape without weight. An airy curly bob cuts the curls to sit at chin to shoulder length, with light layers that let each curl spring up and take space. Curl by curl, the head gains width at the sides and height at the crown. If you like a looser shag edge at this length, these shaggy bob hairstyles for fine hair show the softer version.
Apply a light curl cream to wet hair, scrunch upward, and diffuse on low heat or air dry. Cut curls dry and in their natural pattern, so the shape you see in the salon is the shape you get at home.
Try this: Never brush dry curls to add volume. Lift at the roots with your fingers or a pick instead, so the curl pattern stays intact.
Difficulty: Medium · Cost: $$
17. Tousled Waves on a Medium Cut for Width
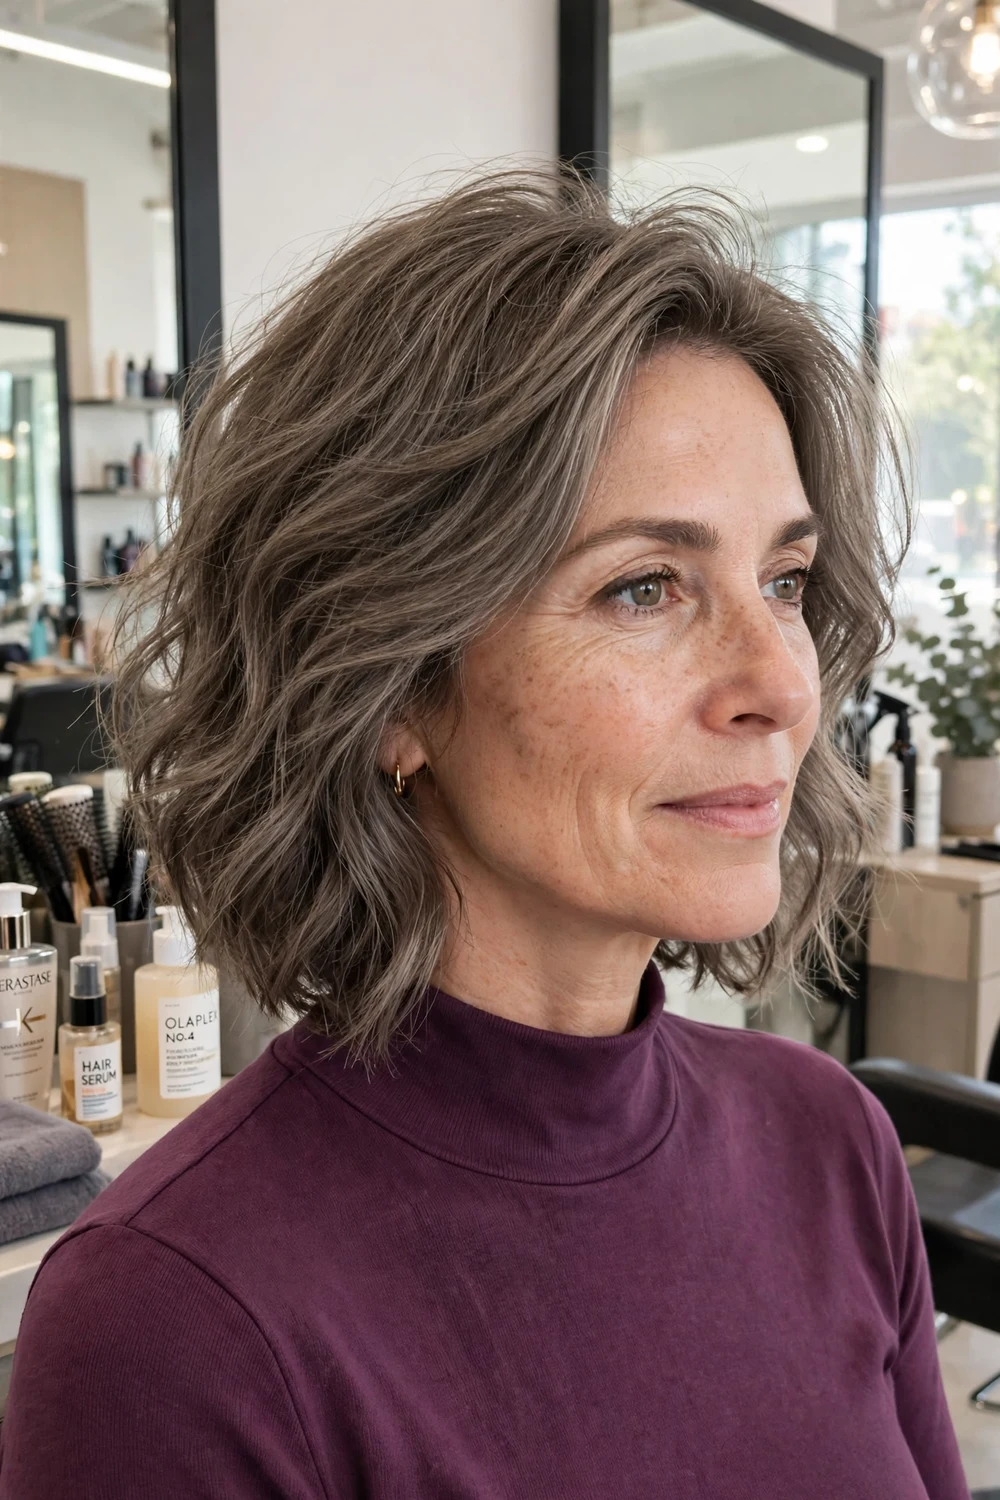
Tousled waves add movement and texture through the whole head, which is why this styling works so well on a plain medium cut. Big, brushed out waves widen the silhouette at the sides. The same hair worn pin straight lies flat against the head and looks far thinner.
Apply volume foam to damp hair before drying. Curl large sections with a wide barrel iron, let each curl cool in your palm, then comb through once with a wide tooth comb. Shake the roots with your fingertips to blend the waves without flattening them.
Try this: Curl in alternating directions. Waves that all curl the same way clump into a few large ropes and show gaps between them.
Difficulty: Medium · Cost: $
18. Hollywood Waves with Deep Movement for Fullness

Hollywood waves use deep, uniform bends that move in one direction. The bold, regular movement makes hair look thick from root to end. On fine hair, the key is prep. Hair that is fully dry and lightly set with heat protectant holds the wave instead of dropping it within the hour.
Brush each section smooth, curl it in the same direction, and pin the curl to cool. Once every section has cooled, unpin and brush through gently so the waves join into wide ridges. Finish with a light hold spray from a distance.
Try this: Let every curl cool fully before brushing. Warm curls stretch out under their own weight and the depth of the wave is lost.
Difficulty: Medium to High · Cost: $$
19. Bouffant Half Updo with Crown Height

A half updo with a lifted crown gives you height where fine hair needs it most, while the loose lengths keep the look soft. Gentle backcombing at the crown builds a cushion of hair that holds the lift. The front and the back both gain volume, so the style reads full from every angle.
Backcomb small sections at the crown with a tail comb, working from the mid lengths toward the roots in soft strokes. Smooth the top layer over the teased section with a brush, then pin or tie the top half at the back of the crown.
Try this: Tease only the under layer of each crown section. Teasing the visible top layer looks rough and is hard to smooth out.
Difficulty: Medium · Cost: $
20. Voluminous Blowout with Lifted Roots
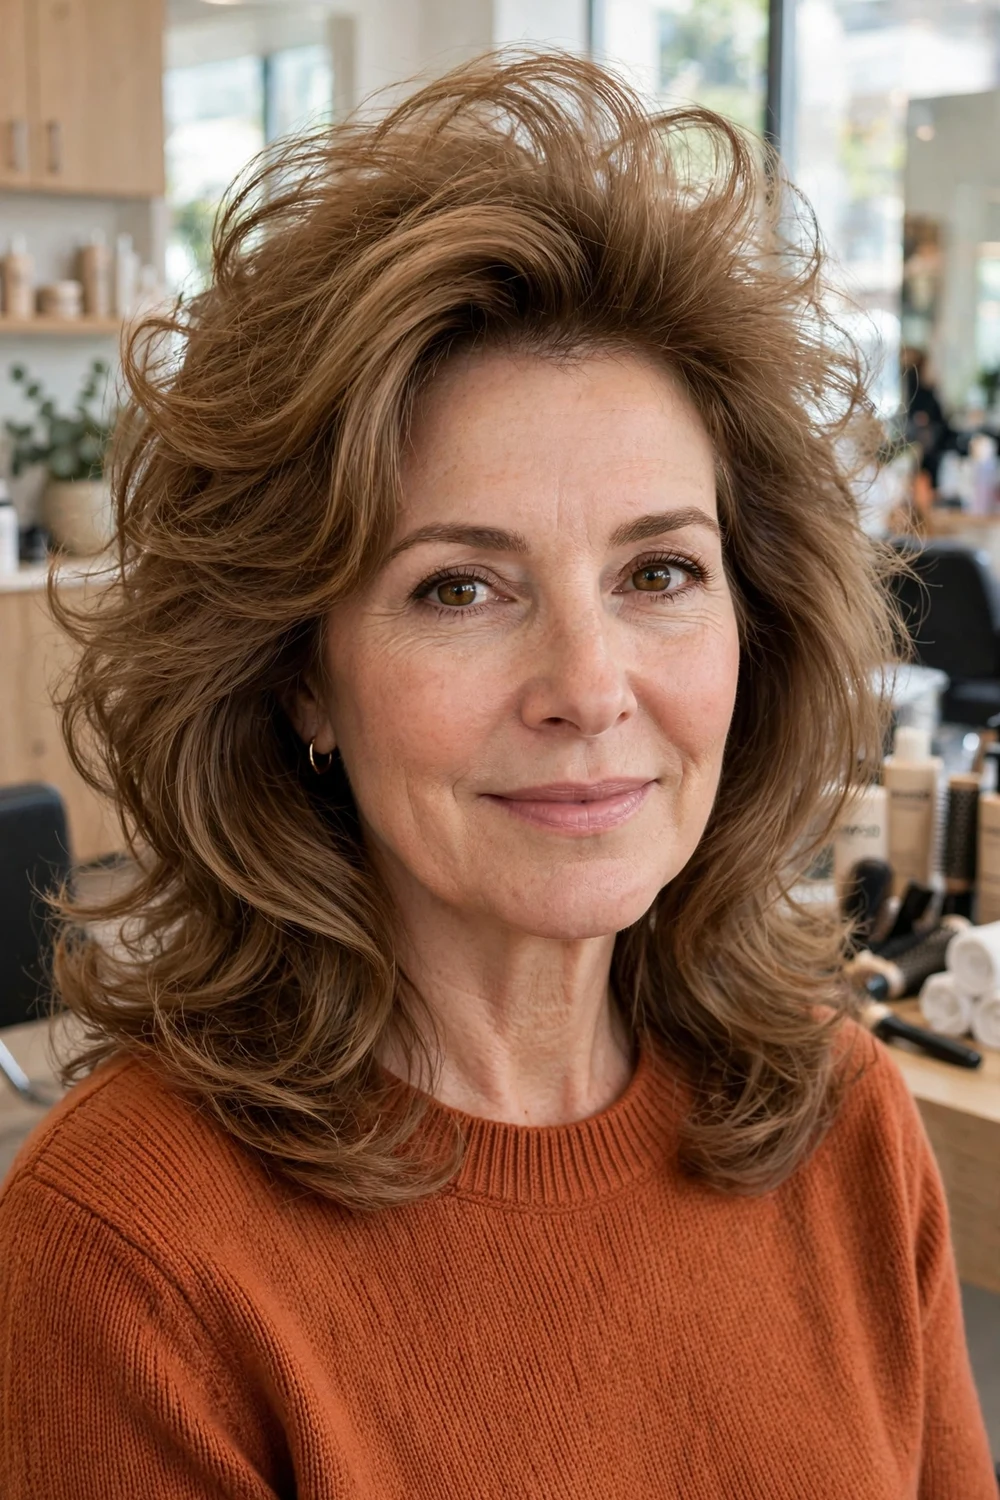
A blowout built for fine hair lifts at the roots first and smooths the lengths second. Drying the roots up and away from the scalp sets the height, while the lengths keep enough bend to look full. A flat, sleek blowout does the opposite and shows how fine the hair is.
Apply heat protectant and root spray to damp hair. Dry in sections with a round brush held close to the roots, pulling up as you follow with the dryer. Let each section cool on the brush for a few seconds before you release it.
Try this: Finish with cool air on the crown. The cool shot sets the root lift you built while the hair was warm.
Difficulty: Medium · Cost: $
21. Loose Pancaked French Braid for a Wider Plait

A French braid worn loose can look far wider than the hair that went into it. The trick is pancaking. After braiding, you gently tug each loop outward, which widens the plait and hides how fine the strands are. Loose tension also keeps the scalp covered, while a tight braid pulls flat and shows the scalp through.
Start with dry shampoo or texture spray at the roots for grip. Braid with light, even tension, secure the end, then pancake loop by loop from the bottom up. Mist with a flexible hold spray so the width holds.
Try this: Braid over waved or day old hair rather than clean, straight hair. Texture in the lengths gives the plait more bulk to widen.
Difficulty: Medium · Cost: $
22. Wavy Ponytail with a Teased Crown

A ponytail on fine hair can look thin in two places, a flat crown and a slim tail. This version fixes both. Soft backcombing at the crown adds height before you tie the hair back, and loose waves through the tail add width so the ponytail swings with visible body.
Tease the crown gently, smooth the top layer, and secure the ponytail at mid height. Wave the tail with a wide barrel iron and brush it out once. Wrap a thin strand of hair around the elastic to hide it. The wrapped base looks denser and more finished.
Try this: Position the ponytail at the back of the crown rather than low at the nape. Height at the tie point lifts the whole profile.
Difficulty: Low to Medium · Cost: $
23. Loose Curly Bun with Face-Framing Pieces

A loose curly bun piles texture on top of the head, which draws the eye up and makes the whole head of hair look larger. Tousled curls in the bun add width in every direction. Loose pieces left out at the front frame the face and stop the style from looking pulled tight and thin.
Curl or wave the hair first if your hair is straight, then gather it loosely on top and pin it with the curls spread wide rather than twisted tight. Pull two slim pieces free at the front and curl them lightly.
Try this: Spread the bun with your fingers after pinning and pin the widest points in place. A bun left as a tight knot reads small on fine hair.
Difficulty: Low to Medium · Cost: $
24. Half-Up Top Knot with Crown Fullness
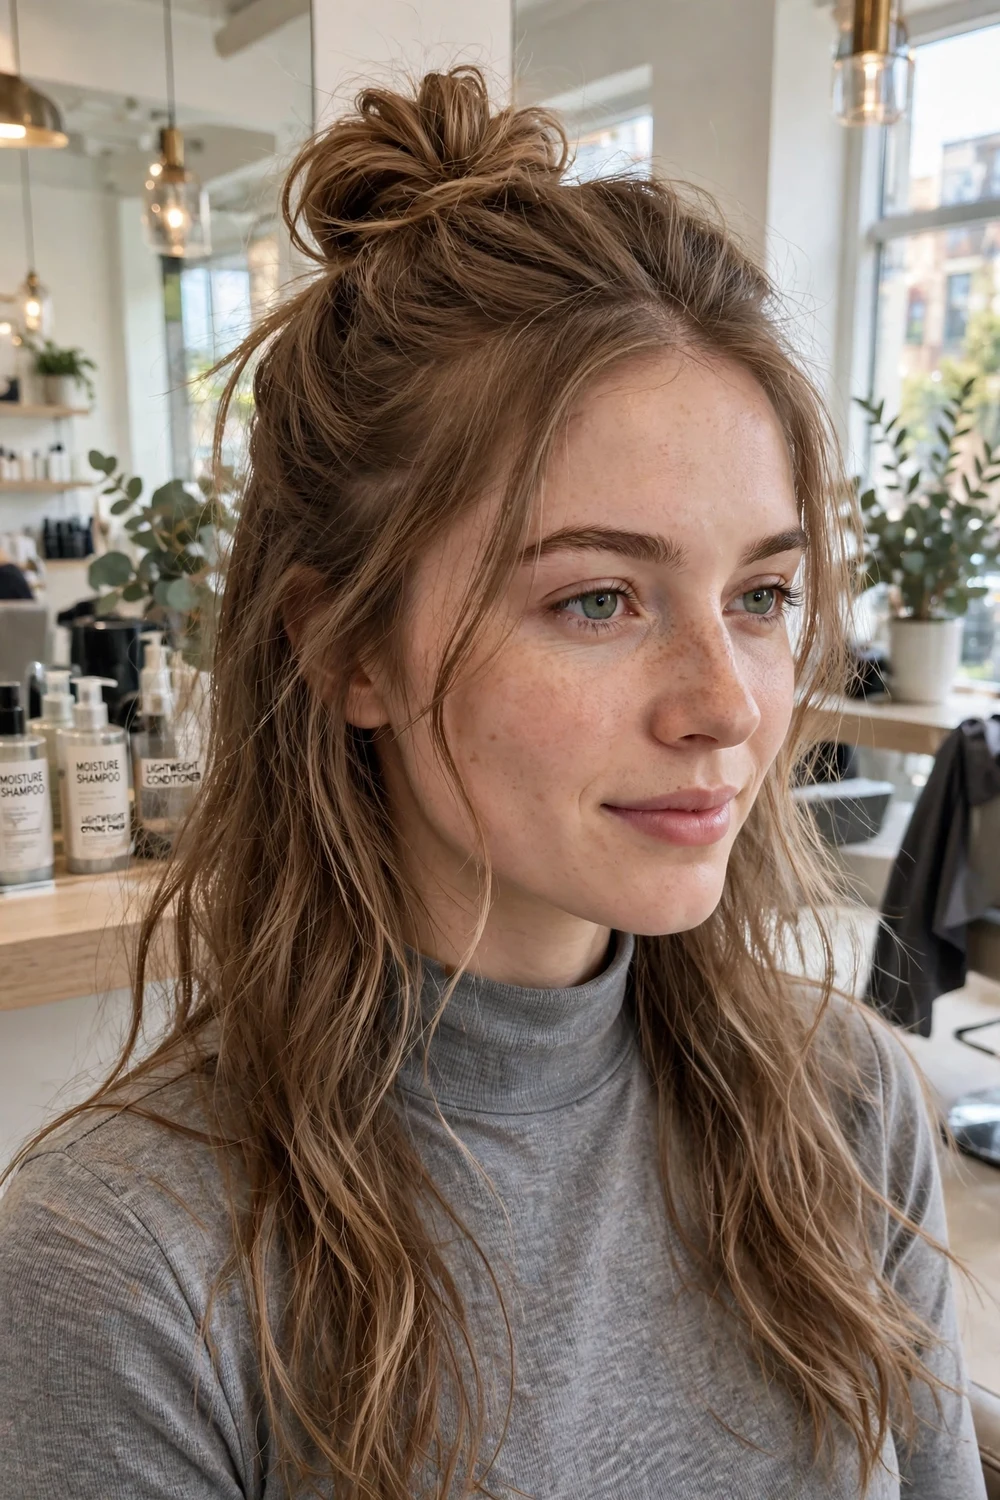
Gathering only the top section into a knot creates height at the crown right away, while the rest of the hair falls loose around the face and shoulders. Loosening the roots before you tie the knot adds a soft lift at the front. Teasing the knot itself makes the bun look wider.
Loosen the hair around the crown with your fingertips first, then gather the top section and twist it into a small knot. Tug the knot gently outward on all sides to widen it, then pin or tie it in place. Leave the lengths wavy for extra width.
Try this: Keep the knot slightly messy and wide rather than small and tight. Width in the knot is what sells the fullness.
Difficulty: Low · Cost: $
25. Short Crop with a Textured Fringe for a Fuller Hairline

A short crop with a textured fringe cuts the front into small, uneven pieces rather than one solid block. Even a fine fringe looks deliberate and full when it is piecey, because the gaps read as texture. Short tapered sides keep the shape clean and push attention up to the eyes and the crown.
Style in two minutes. Work a small amount of paste through the fringe and push it forward and slightly across. Trims every four to five weeks keep the fringe pieces distinct instead of grown out and wispy.
Try this: Ask for the fringe cut on dry hair at the end of the appointment. Fine fringes shrink as they dry, and a dry finish cut avoids a too short result.
Difficulty: Low · Cost: $
26. Long Blunt Cut with Crown-Only Layers for Length
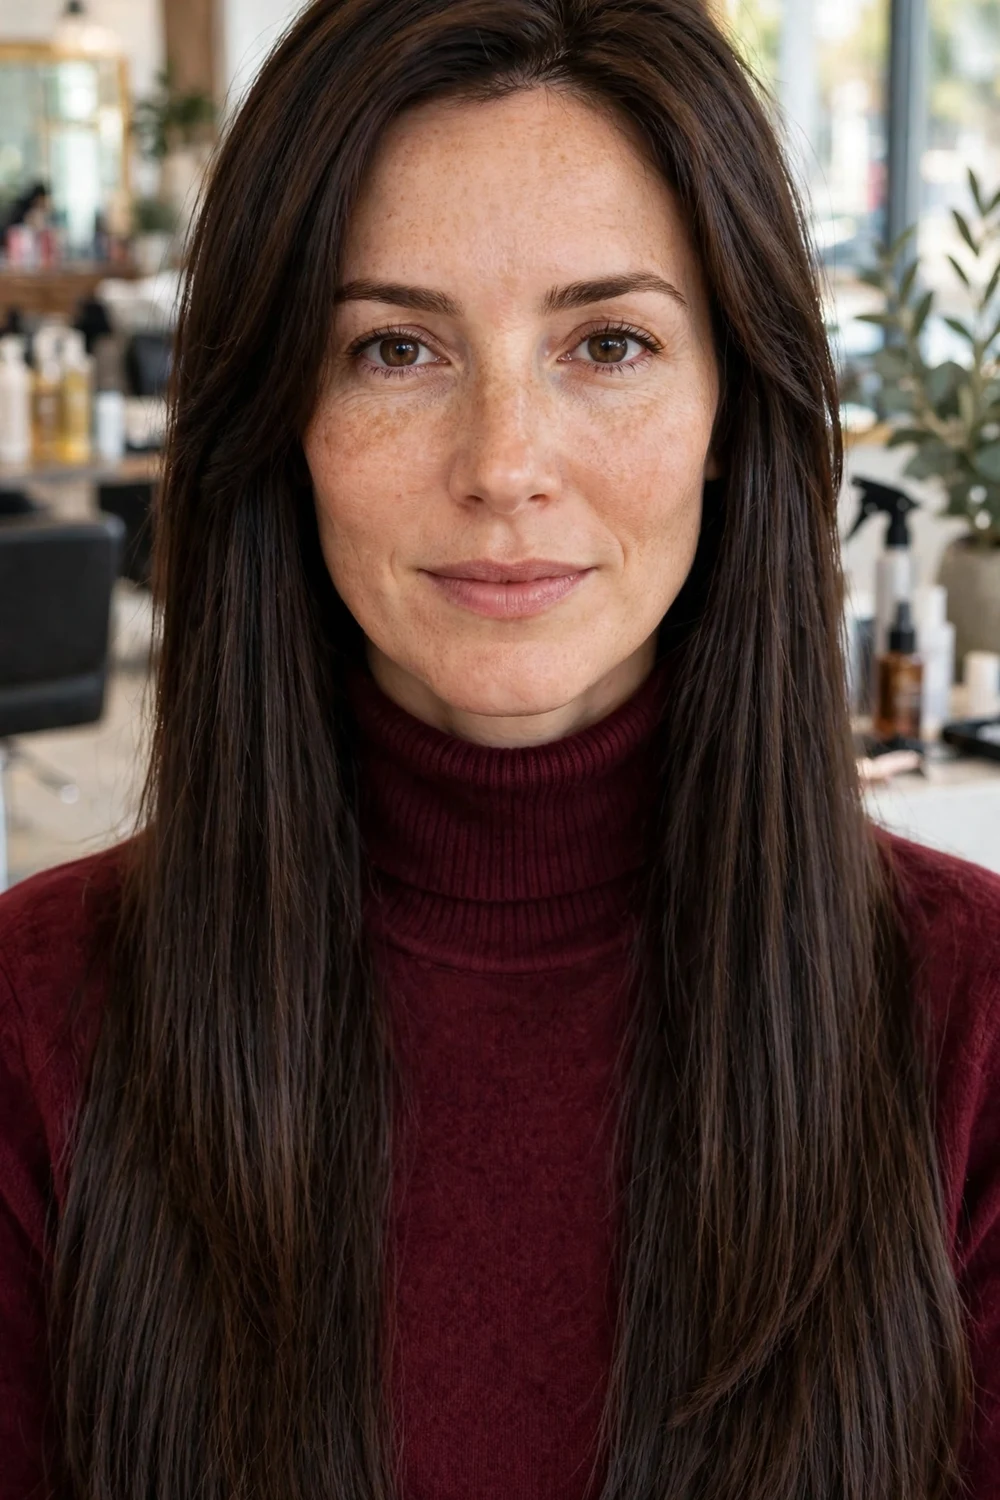
Long fine hair looks fullest when the ends stay blunt and the layers stay at the crown. Crown only layers lift the top without cutting into the lengths, so the bottom line stays dense. Regular trims matter here. Split ends make long fine hair look airy and thin at the bottom.
Ask for a blunt perimeter with short, light layers only in the crown area. Style with volumizing powder or root spray at the roots, which adds lift and absorbs oil at the scalp. Keep conditioner on the lengths only, away from the roots, so the crown does not go flat.
Try this: Book trims on a set schedule even when you are growing your hair. A clean blunt end is the main reason this cut reads full.
Difficulty: Medium · Cost: $$
Quick Comparison: Which Fuller-Looking Style Fits Your Routine?
| Style family | How it adds fullness | Daily styling | Trim cycle |
|---|---|---|---|
| Blunt bobs and collarbone cuts | One dense edge at the perimeter | Round brush blow dry | Every 6 to 8 weeks |
| Pixies and short crops | No weight at the roots, textured crown | Finger styling with paste | Every 4 to 5 weeks |
| Lobs and medium cuts | Side part lift plus soft end layers | Dryer brush or wide waves | Every 6 to 8 weeks |
| Waves, braids and updos | Width, crown height and pancaked texture | Heat or overnight styling | No trim change needed |
Frequently Asked Questions
What haircut makes fine hair look the fullest?
Blunt cuts make fine hair look the fullest. A blunt bob, a blunt collarbone cut, or a stacked bob keeps every strand ending at a similar point, so the edge reads as dense. Crown layers can be added for lift as long as the ends stay full.
Are layers good for fine hair?
Layers help fine hair when they are placed at the crown, where they add lift and movement. Heavy layers through the ends remove bulk from the bottom line and can make fine hair look thinner, so ask for long, sparse layers through the lengths.
Does a side part make fine hair look fuller?
Yes. A deep side part gathers more hair over the crown, covers a wide part line, and lifts the roots on the heavier side. Drying your hair with the part on the opposite side and then flipping it over adds lift that lasts.
How can I add volume to fine hair without a haircut?
Waves, a deep side part, and crown height add volume without cutting. Tousled waves widen the shape, a bouffant half updo lifts the crown, and a pancaked braid widens a plait. Root spray, volume foam, and dry shampoo at the roots help each style hold.
How often should fine hair be trimmed to look full?
Short cuts such as pixies and crops hold their fullest shape with trims every four to five weeks. Bobs and lobs usually need a trim every six to eight weeks to keep the blunt edge clean, since split or tapered ends make fine hair look thinner.
Final Thoughts
Fullness on fine hair comes from shape first and styling second. Pick one blunt edge, one crown lift idea, or one wave or braid style from this list and wear it for a few weeks before you judge it. Small changes in part placement and drying direction often do as much as a new cut.
Take two or three photos to your stylist and name the detail you like most in each one, such as the blunt edge, the crown height, or the side sweep. That gives your stylist a clear target and keeps the ends full, which is the detail that matters most for fine hair.

