

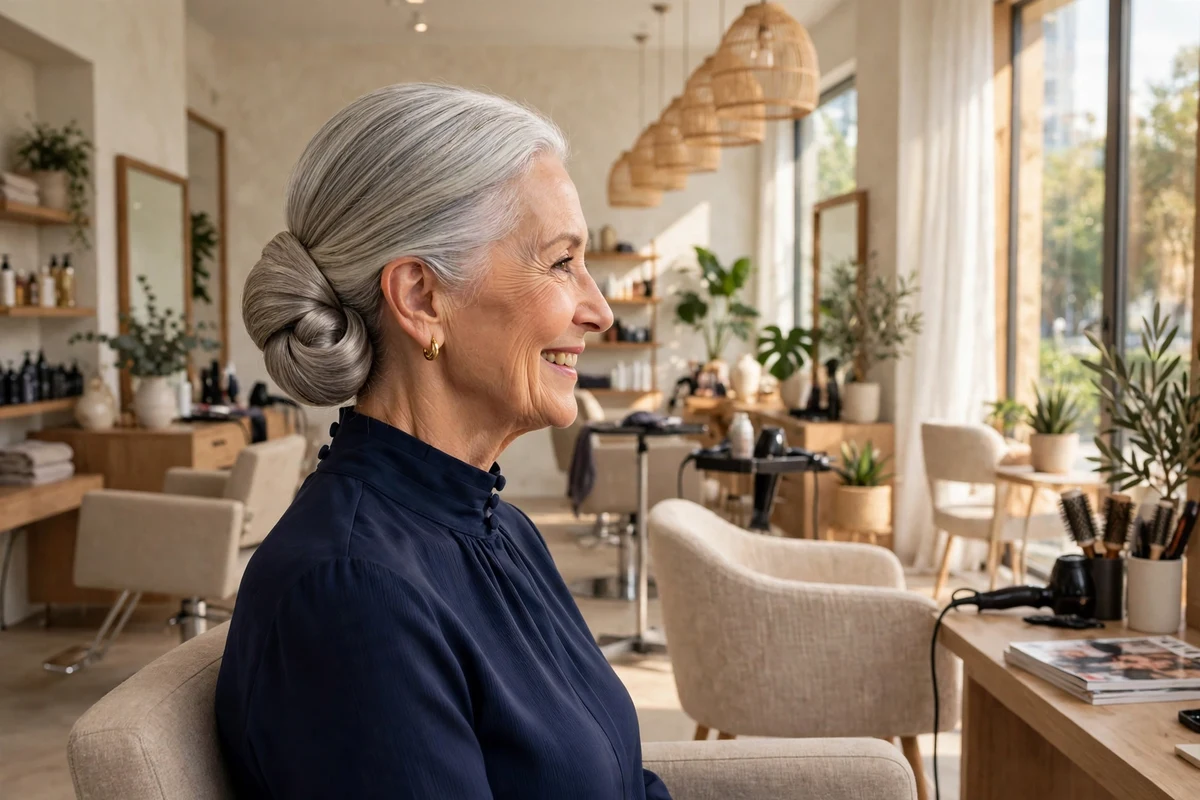
A wedding hairstyle for an older woman has to do three jobs at once. It needs to look polished in photos taken from the front, the side, and the back. It needs to stay comfortable through a ceremony, a meal, and an evening of talking and dancing. And it needs to work with the hair you actually have now, which may be finer, greyer, or shorter than it was at the last big family wedding.
This list collects 23 wedding hairstyles for older women and covers brides, mothers of the bride and groom, and guests. Updos come first, then half-up styles, styles worn down, and short hair options, plus a fascinator friendly style for daytime weddings. If you want general updos for other occasions as well, the wider updo hairstyles for older women roundup covers the same family of styles outside a wedding setting. For a bob length cut dressed up for the day, see the French bob hairstyles for wedding guide as well.
Key Takeaways
- Low styles hold best on a long wedding day: chignons, low buns, and low ponytails stay pinned and stay comfortable for hours.
- Book a trial four to six weeks ahead and wear the style for a full afternoon to test pin comfort and hold.
- Fine or thinning hair holds better with texture, backcombing, or padding inside the bun than with a smooth, tight sweep.
- Bring your fascinator, hat, veil, or clip to the trial, since the headpiece decides which side a style is pinned on.
- Short hair does not need to grow out. A lifted pixie, a polished crop with a clip, or a faux updo all read as occasion hair.
| Style group | Best hair length | Hold on a long day | Works with a fascinator or hat |
|---|---|---|---|
| Updos (chignon, French twist, pinned curls) | Shoulder length and longer | High | Yes, if pinned flat on one side |
| Half-up styles | Shoulder length and longer | Medium to high | Sometimes, check at the trial |
| Styles worn down (curls, waves, blowout) | Chin length and longer | Medium | Yes, with a small or light piece |
| Short styles (pixie, crop, faux updo) | Jaw length and shorter | High | Yes, the back sits flat |
| Ponytails (braided, sleek low) | Long | High | Yes, set the base low |
1. Classic Low Chignon
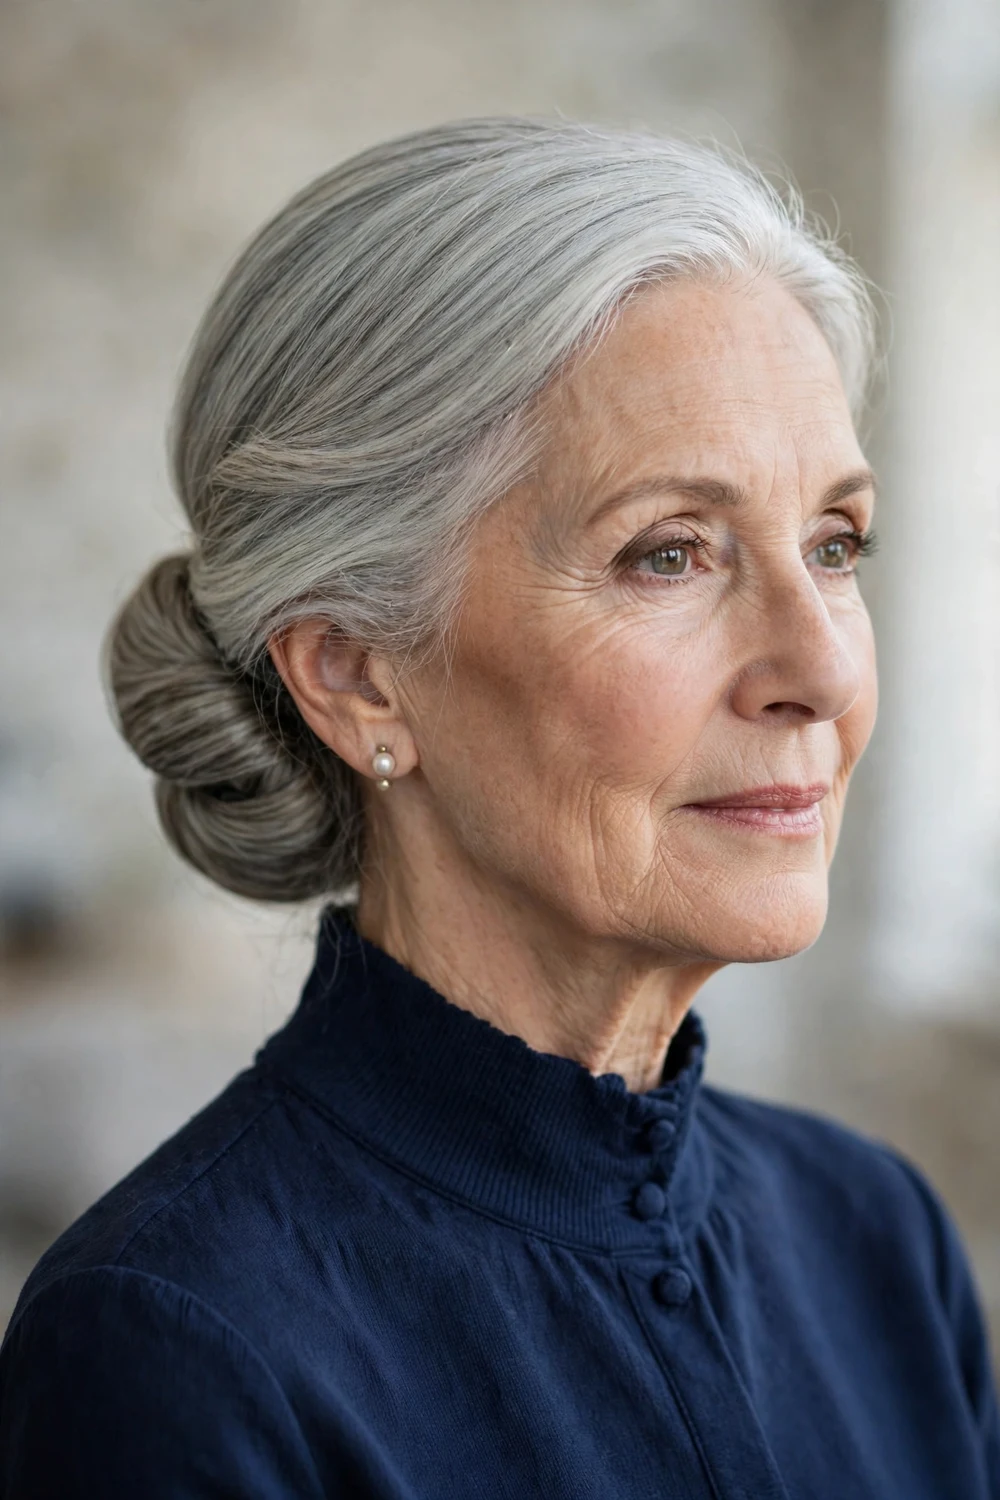
A classic low chignon gathers the hair into a smooth coil at the nape of the neck. The hair is brushed back, twisted around the base of a low ponytail, and pinned with U shaped pins that cross through the coil. A few soft pieces at the temples keep the finish from looking pulled tight.
It suits shoulder length hair and longer, and it works for brides, mothers of the bride or groom, and guests. The low position sits clear of collars, necklace clasps, and jacket backs, so nothing catches on the style during a long day.
Hold is strong once the pins are crossed well. Expect the coil to stay in place through the ceremony, photos, and dinner, with only loose face pieces needing a light spray later in the evening.
Try this: book a trial and wear the chignon for a full afternoon first, so you can check that the pin placement does not press anywhere by hour three.
Difficulty: Medium · Cost: $$ (salon)
2. Twisted Chignon

A twisted chignon starts the same way as a classic chignon, then adds texture before the coil is formed. Sections are twisted loosely as they are pinned, so the finished bun shows soft ridges instead of one smooth surface. Silver and grey hair shows this detail clearly, since the light catches each twist.
It suits medium to thick hair at shoulder length or longer. The added volume at the crown helps if your hair sits flat on top, and the looser finish reads softer in close up photos than a tight coil.
Because the sections are pinned one by one, the style holds well and a single loose twist can be re pinned without taking the whole bun down.
Try this: ask your stylist to twist away from the face on both sides, so the front view stays balanced in photos.
Difficulty: Medium · Cost: $$ (salon)
3. Classic French Twist

A French twist sweeps all of the hair up one side, folds it into a vertical roll at the back of the head, and pins along the seam. The line is upright and clean, and it lengthens the look of the neck. Crown height can be kept low for a daytime wedding or lifted a little for an evening one.
It needs medium to long hair and works best on hair that is not freshly washed, since day old hair grips pins better. Fine hair usually needs light teasing at the base first, or the roll can slip by midday.
A well pinned twist holds for many hours. Carry two spare pins in your bag, since the seam is the one place that can loosen if you lean back against a high chair.
Try this: if you plan to wear a veil, a comb, or a hat later, tell your stylist before the twist is pinned, so the seam is placed where the piece will sit.
Difficulty: Medium to High · Cost: $$ (salon)
4. Elegant Rolled Tuck Updo
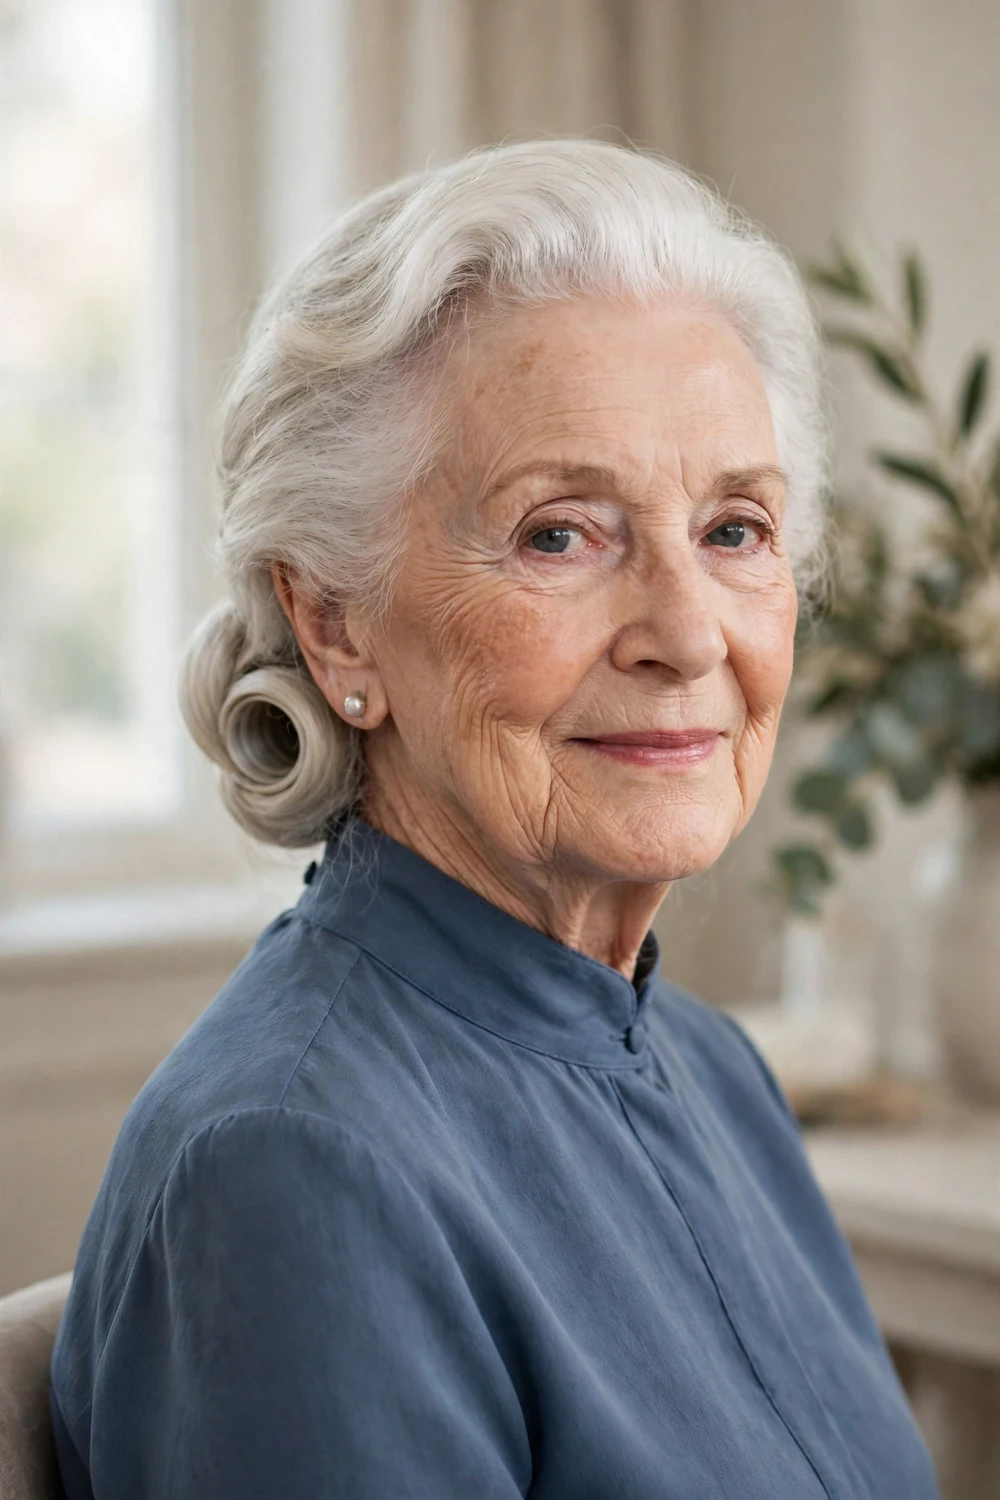
The Gibson tuck rolls the hair up and tucks it into a soft horizontal roll just above the nape. The hair is pulled into a low, loose ponytail, the band is slid down a little, and the length is rolled up and tucked into the pocket that forms above the band.
It suits shoulder length hair, including finer hair that struggles to hold a bun, because the roll spreads the hair out instead of asking it to form a thick coil. The shape sits flat, which makes it comfortable against headrests and car seats on the way to the venue.
Hold is moderate. The roll stays neat for a ceremony and photos, and it is quick to redo in a restroom mirror if an end works loose later on.
Try this: practice the roll twice at home before the wedding week, and use a band that matches your hair color so it stays hidden inside the tuck.
Difficulty: Low to Medium · Cost: $ (salon)
5. Side-Swept Low Bun

A side swept low bun moves the coil off center, so it sits low behind one ear instead of at the middle of the nape. The front is swept across in a deep side part, which gives the style a clear shape from the front as well as the back.
It suits shoulder length and longer hair, and it is a good pick if you want an updo that shows in front facing photos. A bun worn dead center can vanish from the front view, while this one is visible over one shoulder.
Hold is strong, and the off center position keeps the bun clear of a center necklace clasp. Check both sides in a mirror before you leave, since the swept front needs enough spray to stay across the forehead line.
Try this: wear your earrings after the bun is finished and pick the bun side opposite your larger earring, so the two do not compete.
Difficulty: Medium · Cost: $$ (salon)
6. Low Bun with a Pearl Pin

This version keeps the bun itself simple and lets one pearl pin do the detail work. The hair is gathered into a low, smooth bun and the pin is slid in at one side of the coil, angled so the pearl shows from the back and side.
It works on shoulder length hair and longer, and on fine hair too, since the bun can be built over a small bun maker for extra fullness. One pin is easy to place, easy to remove, and easy to match with pearl earrings or a pearl necklace you already own.
The bun holds like any pinned low bun. The pin is decorative, so the coil underneath still needs its own U pins to stay secure through hugging and dancing.
Try this: put the pearl pin in last, after spray, and press it in at a slight downward angle so it does not work upward as you move.
Difficulty: Low to Medium · Cost: $$ (salon)
7. Soft Curled Pinned Updo
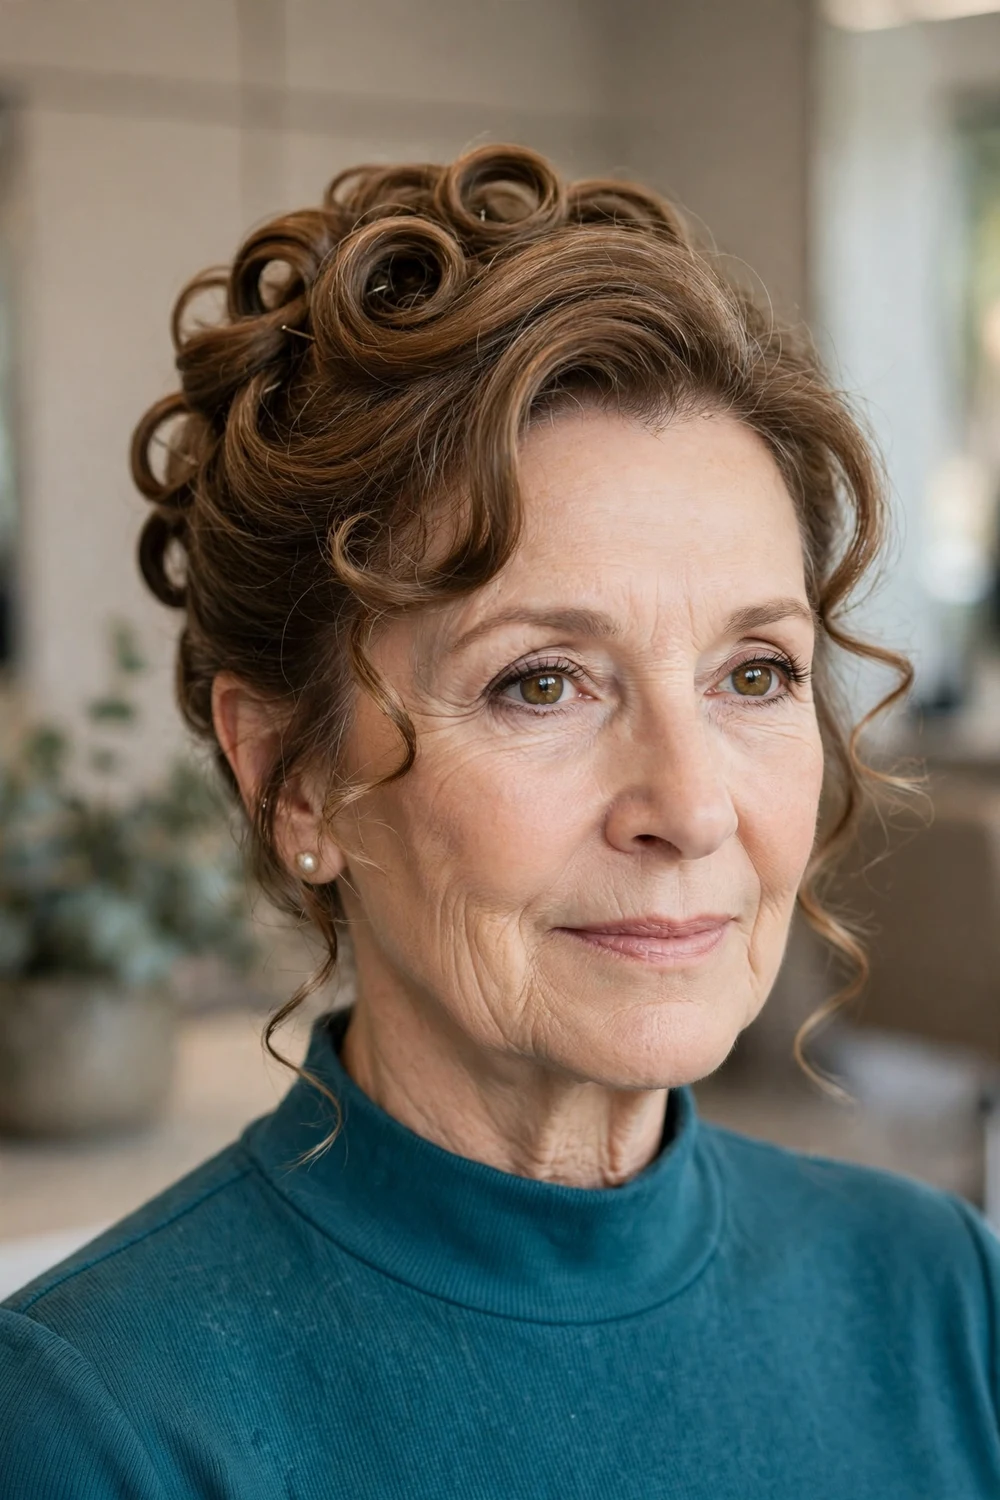
A soft curled pinned updo curls the hair first, then pins the curls up in small sections at the back and crown. Each curl keeps its shape, so the finished style has texture and height without a single hard line. A few tendrils are left loose beside the ears.
It suits medium to thick hair, and it is a strong option for wavy or curly hair that is already used to holding a curl. Straight, fine hair can wear it too, but the curls need to be set and cooled fully before pinning or they will drop.
Hold depends on the set. Curls that were cooled before pinning usually keep their shape all day, and a loose curl can be re pinned in seconds because the style is built from separate pieces.
Try this: ask for the curls to be pinned, not sprayed stiff, and bring a photo of how loose you want the front pieces to sit.
Difficulty: Medium to High · Cost: $$$ (salon)
8. Braided Crown Updo

A braided crown updo braids one or two sections along the hairline and pins the braid around the head, with the rest of the hair gathered into a low bun or left tucked under the braid. The braid gives the front and side views detail, which helps in photos taken from several angles.
It needs at least shoulder length hair, and the braid shows best on hair with some texture or wave. Very silky, freshly washed hair can slide out of a braid, so stylists often add a light texturizing spray first.
Once pinned, a braided crown is one of the steadier wedding styles. The braid holds its sections in place, and the ends are tucked away, so there is little to come loose.
Try this: if braids are new for you, look at the wider braided hairstyles for gray hair over 50 roundup before your trial, so you can show your stylist the braid size you like.
Difficulty: Medium to High · Cost: $$ (salon)
9. Braided Low Bun

A braided low bun braids a side section first, then wraps that braid into or around a low bun. The braid adds thickness on one side, which is useful if one side of your hair grows thinner than the other, and it gives a plain bun a clear focal point.
It suits shoulder length hair and longer, in straight, wavy, or curly textures. The braid can be kept tight for a neat finish or loosened slightly by tugging the edges, which makes the whole bun look fuller.
Hold is strong, since braiding locks the side section together before it is pinned. The bun itself still needs crossed pins, and a light spray over the braid keeps short layers from poking out.
Try this: ask for the braid to start behind the ear rather than at the front hairline if you want the detail to show mainly from the side and back.
Difficulty: Medium · Cost: $$ (salon)
10. High-Crown Formal Updo

A bouffant crown updo lifts the top section with gentle backcombing, smooths a layer of hair over it, and gathers the rest into a low bun or twist. The height sits at the crown, not at the front, so the profile looks lifted without a tall front section.
It suits fine or thinning hair well, because the lift is built with backcombing and light padding rather than with hair length alone. It also pairs well with glasses, since the front hairline stays smooth and clear of the frames.
The crown holds if the backcombing is sprayed before the top layer goes over it. Avoid pressing the crown flat with a hat or headrest on the way to the venue, since the lift is hard to rebuild once it is flattened.
Try this: sit in a low backed chair for the drive to the venue, and keep a small comb in your bag for the crown only, not the bun.
Difficulty: Medium · Cost: $$ (salon)
11. Textured Updo for Fine Hair

A textured updo for fine hair is built in small, loosely pinned sections instead of one tight sweep. The hair is lightly waved or texturized first, then gathered in pieces, with the ends tucked and pinned so the surface looks full rather than flat.
It was made for fine, thin, or soft hair that slips out of smooth styles. Grips and texture spray do most of the work, and a small bun maker or padding can sit hidden inside if the bun needs more body.
Hold is better than most fine hair updos, because no single pin carries much weight. Expect a few wisps by late evening, which suits this style, since it was never meant to look shell smooth.
Try this: wash your hair the day before rather than the morning of the wedding, and skip heavy conditioner on the lengths, so the texture spray can grip.
Difficulty: Medium · Cost: $$ (salon)
12. Pinned-Up Look for Short Hair

A faux updo gives short hair the shape of an updo without needing length. The back and sides are smoothed and pinned flat in overlapping sections, the top is left with soft height, and the short ends are tucked or crossed at the nape so the back view reads as gathered hair.
It suits pixie to bob length hair, roughly jaw length and above at the back. It is a useful route if you like your short cut and do not want to grow it out for one event, and it works well under a small hat because the back sits flat.
Hold is good for the pinned sections, and the top only needs a light spray. Short layers at the front may need one extra grip, so test the style with the exact clips you plan to wear.
Try this: use grips that match your hair color and slide them in with the ridged side down, which holds short sections far better.
Difficulty: Low to Medium · Cost: $ (salon)
13. Fascinator-Friendly Flat Side Chignon

This chignon is pinned flat on one side of the head so a fascinator or small hat can sit on the opposite side without fighting the bun for space. The hair is gathered low and to one side, coiled close to the head, and kept smooth and compact.
It suits shoulder length hair and longer, and it is the style to choose when the headpiece is already decided. Bring the fascinator or hat to the trial. Its base, clip, or band decides which side the chignon goes on and how flat that side needs to be.
Hold is strong, and the flat coil stays clear of the headpiece all day. Check that the piece can be removed at the reception without pulling pins out with it.
Try this: at the trial, put the fascinator on and take it off three times while your stylist watches, so any pin that catches can be moved before the wedding day.
Difficulty: Medium · Cost: $$ (salon)
14. Soft Half-Up with Crown Lift

A soft half-up style takes the top and side sections back and pins them at the crown, while the rest of the hair falls loose over the shoulders. A little lift is built into the crown section before it is pinned, so the top does not sit flat against the head.
It suits shoulder length and longer hair, straight, wavy, or curly. The pinned top keeps hair off the face for photos and greetings, and the loose lengths keep the look softer than a full updo.
The pinned section holds all day if it is secured with two crossed pins or a small clip under the top layer. The loose lengths may need a quick brush and a pass with a curling iron at the reception if the day is humid.
Try this: pin the half-up section a little higher than feels natural, since loose hair pulls the section down slightly as the day goes on.
Difficulty: Low to Medium · Cost: $ (salon)
15. Half-Up Barrel Curls

Half-up barrel curls pair a pinned crown section with large, smooth curls through the lengths. The curls are made with a wide barrel, brushed out lightly, and left in clear waves rather than tight coils, so the back view has shape and shine.
It needs hair past the shoulders to show the curl pattern, and it suits thick or wavy hair that holds a curl well. Fine hair can wear it with a setting spray before curling, though the curls will soften into waves by the evening.
The half-up pinning keeps the front neat even as the curls relax, which is why this style still looks tidy late in the day. A wide tooth comb, not a brush, is the right tool for a quick tidy up.
Try this: ask for the curls to start below the ears, so the crown stays smooth and the volume sits where it shows in back view photos.
Difficulty: Medium · Cost: $$ (salon)
16. Cascading Silver Curls

Cascading silver curls leave long silver or grey hair down, shaped into soft curls that fall over the shoulders and back. The front is usually tucked or pinned lightly behind one ear, so the face stays clear while the lengths do the work.
It suits long hair with natural wave or hair that takes a curl easily. Silver hair can be coarser and drier than pigmented hair, so a smoothing cream before curling helps the curls sit together instead of separating into frizz.
Curls worn down move more than pinned curls, so expect them to loosen over the day. That loosening suits the style. What matters is keeping the front section in place, so carry one small clip as a backup.
Try this: if your silver hair yellows in sun or hard water, use a purple toning shampoo once in the week before the wedding, not the day before, so no tint is left on the surface.
Difficulty: Medium · Cost: $$ (salon)
17. Side-Swept Glossy Waves

Side swept glossy waves use a deep side part and smooth, even waves that fall to one side. The smaller side is tucked behind the ear or pinned flat, and the larger side carries the wave pattern across the front and over one shoulder.
It suits medium to long hair and most face shapes, since the deep part can be placed on whichever side you prefer in the mirror. The smooth finish needs hair that is in decent condition, because shine shows dry ends clearly.
Waves set with pins or clips while they cool hold far longer than waves sprayed straight after curling. Plan on the tucked side needing one check after hugging and photos, since that is where the style gets disturbed first.
Try this: decide your part side at the trial and take front photos both ways, since a deep part changes how the whole face reads on camera.
Difficulty: Medium · Cost: $$ (salon)
18. Layered Shoulder-Length Blowout

A layered shoulder length blowout is the polished version of a haircut many women already wear. The hair is blown out with a round brush so the layers lift at the roots, bend at the ends, and frame the face, then finished with a light shine spray.
It suits layered cuts between chin and shoulder length, in fine, medium, or thick hair. Readers comparing everyday cuts for this length can also look at the classic hairstyles for women over 70 roundup for shapes that blow out well.
A blowout holds its shape for a day if the roots were lifted and the ends cooled on the brush. Humidity is the main risk, so an anti humidity spray matters more here than extra hold spray.
Try this: blow out the hair the morning of the wedding if you can, and sleep on it the night before only if you have tested that it still lifts at the roots.
Difficulty: Low to Medium · Cost: $ (salon)
19. Feathered Bob with Soft Waves

A feathered bob with soft waves keeps a bob length cut and adds light layers and a gentle wave, so the edges flick and move instead of sitting in one solid line. It is styled with a round brush or a wide curling iron, then shaken out so the layers stay separate.
It suits chin to shoulder length bobs, and it is a kind choice for fine hair, since feathered layers make the ends look lighter and fuller. It also suits anyone who wants to look dressed up while still looking like themselves in photos.
This is one of the easiest styles on the list to refresh. A quick pass with a brush and a mist of spray restores the shape, and there are no pins to come loose during the day.
Try this: if your bob is one length, ask your stylist two weeks ahead whether light feathering at the front would help, rather than cutting new layers on the wedding week itself.
Difficulty: Low to Medium · Cost: $ (salon)
20. Textured Pixie with a Lifted Crown
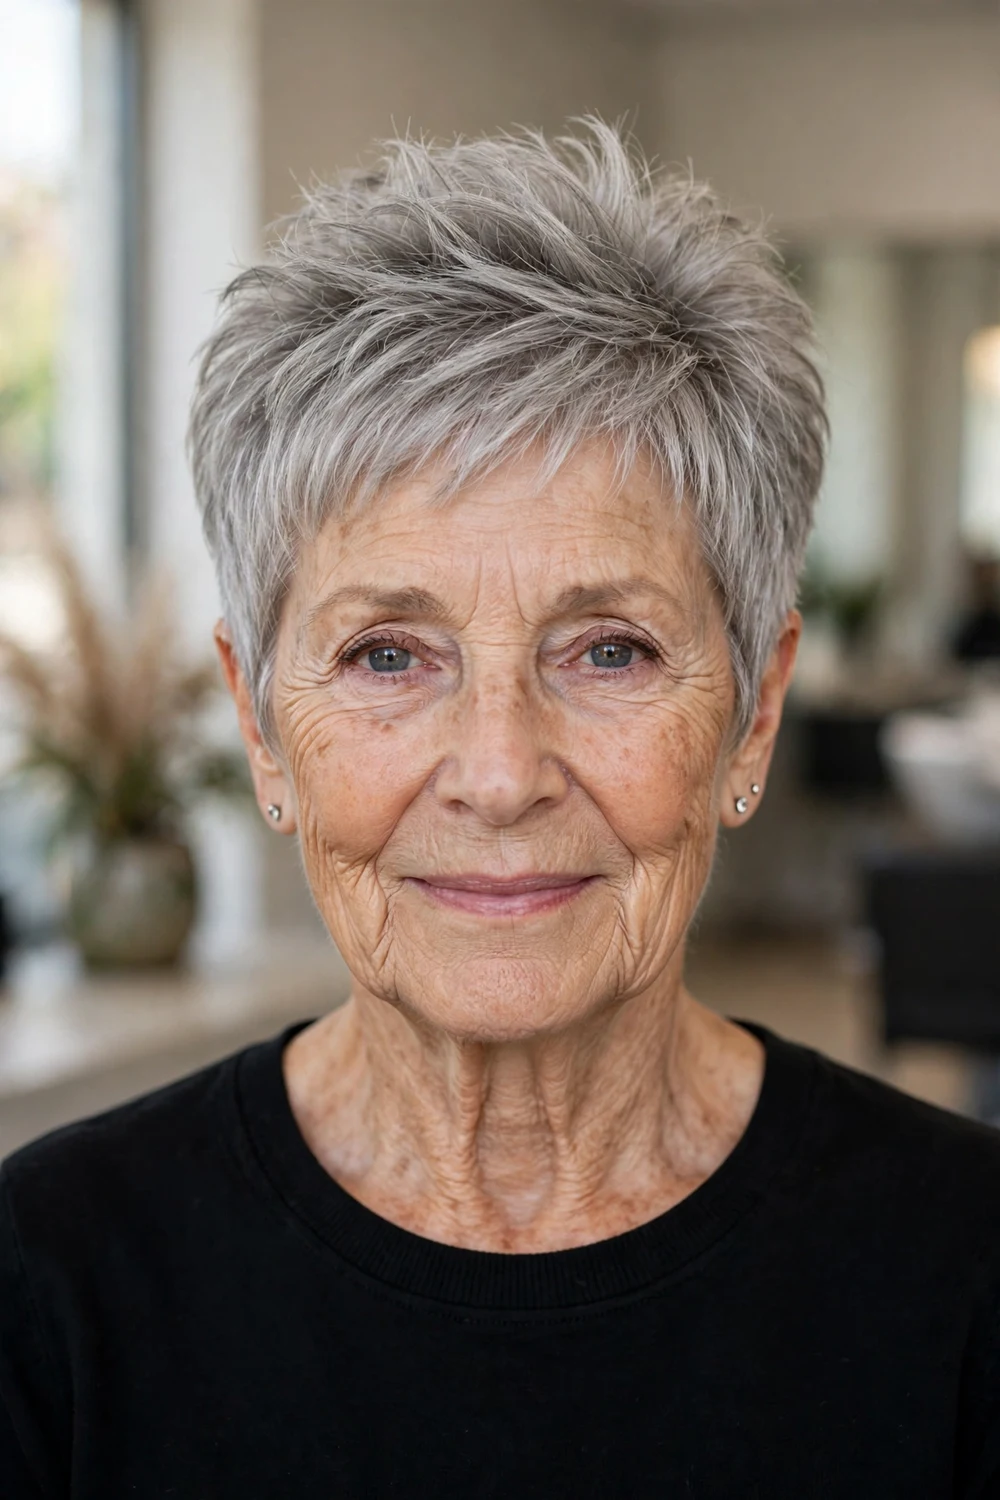
A textured pixie with a lifted crown keeps the sides and back short, then adds height and separation on top with a small amount of styling paste worked through dry hair. The top is lifted with the fingers rather than combed flat, so the shape reads full from the front.
It suits short hair at any texture, and it is a strong pick for fine hair, since short lengths weigh the crown down far less than longer hair does. It also keeps the neck and ears clear, which works well with statement earrings.
There is almost nothing to come undone. The crown may settle after several hours, and a quick lift with dry fingers and a pea sized amount of paste brings it back.
Try this: apply paste to dry hair only, in a pea sized amount, and add more only if the crown still sits flat, since too much paste makes fine pixie hair look separated and thin.
Difficulty: Low · Cost: $ (salon)
21. Polished Short Crop with a Sparkle Clip

A polished short crop smooths a short cut into a neat, glossy finish and adds one sparkle clip at the side. The hair is combed into its natural direction with a light pomade or shine cream, one side is swept across, and the clip holds that sweep in place.
It suits very short to jaw length hair, including hair that is too short to pin into any kind of updo. The clip does the occasion work, so pick one that matches your jewelry metal and keep it small enough to sit flat against the head.
Hold is as good as it gets on this list. The clip and the smooth finish stay put through wind, hugging, and a full evening, and the style needs no mirror checks.
Try this: test the clip on your hair for an hour at home first. Clip weight and grip vary a lot, and a clip that slides on fine hair needs a small grip crossed under it.
Difficulty: Low · Cost: $ (salon)
22. Braided Ponytail with Soft Waves

A braided ponytail with soft waves braids a section at the crown or side, gathers everything into a low or mid ponytail, and waves the lengths that hang free. The braid keeps the top tidy and the waved tail keeps the back from looking plain.
It suits long hair, and it is a practical pick for outdoor or summer weddings, since the hair is off the neck and the tail moves in one piece instead of blowing across the face. Thick hair holds the braid best, though fine hair can wear a looser version.
A ponytail base is one of the most secure foundations in wedding styling. Wrap a small section of hair around the band to hide it, pin that wrap underneath, and the style should need no attention until the evening.
Try this: if you plan to dance, set the ponytail a little lower than you first think, since a high base pulls more as the tail swings.
Difficulty: Medium · Cost: $$ (salon)
23. Sleek Low Ponytail with Curled Ends

A sleek low ponytail with curled ends smooths the top and sides into a low band at the nape, then curls only the hanging lengths. The contrast is the point: a clean, neat top half and a soft, dressed bottom half that shows over one shoulder or down the back.
It suits long, straight or straightened hair, and it is a good bridge style if a full updo feels too formal for a daytime or garden wedding. It also keeps long hair controlled in wind without hiding its length.
The smooth top holds well with a light gel or smoothing cream at the hairline. The curled ends soften over time, and one quick pass with a travel iron or a few pin curls at the reception restores them.
Try this: wrap a strand around the band and pin it underneath, and carry the pin with you, since that wrap is the first thing to loosen on a sleek ponytail.
Difficulty: Low to Medium · Cost: $$ (salon)
Frequently Asked Questions
Should I wear my hair up or down to a wedding as an older woman?
Both work, and the venue and the weather usually decide it. Updos and half-up styles handle heat, wind, and long hours better, and they keep hair off the face for photos. Hair worn down looks softer and feels more like your everyday self, but curls and waves will loosen over the day. If you choose a down style, add some structure at the front, such as a deep side part, a tucked section, or a clip, so it reads as styled rather than unstyled.
How do I keep an updo in place all day without it feeling tight?
Ask your stylist to build the style on crossed U shaped pins rather than pulling the hair tighter. Pins carry the weight, so the scalp does not have to. Day old hair grips better than freshly washed hair, and a light texture spray before pinning helps fine hair hold. Carry two spare pins and a travel size spray, and test the finished style at a trial by wearing it for a full afternoon, including a drive and a meal.
What wedding hairstyle works with a fascinator or a hat?
Pick the headpiece first, then the hairstyle. Low, flat styles work best under a fascinator or small hat: a flat side chignon, a faux updo for short hair, a sleek low ponytail, or a low bun pinned to the opposite side from the piece. Take the fascinator or hat to your trial and put it on and off several times, so your stylist can move any pin that catches on the base or band.
Can short hair look formal enough for a wedding?
Yes. Short hair reads as occasion hair when the finish is deliberate: a lifted, textured crown on a pixie, a smooth polished crop with one sparkle clip, a feathered bob with soft waves, or a faux updo that pins the back sections flat. What matters is a clean finish, enough shine or texture product to show the style was done on purpose, and earrings that suit the shorter length.
How far ahead should I book a trial and my wedding day appointment?
Book a trial four to six weeks before the wedding. That leaves time to change the style, test how it wears over several hours, and try it with your outfit neckline and any headpiece. Book the wedding day appointment at the same time as the trial, and allow more time than a normal salon visit, since updos and pinned curls take longer than a blowout and should not be rushed.
Final Thoughts
Start with the role and the day, not with a photo alone. A bride, a mother of the bride or groom, and a guest all face the same long day, the same photos, and the same weather, so comfort and hold matter as much as the shape of the style. Pick one or two styles from this list that suit your hair length as it is now, take them to a trial four to six weeks ahead, and wear the winner for a full afternoon before you commit. If your hair is short and you are still deciding on the cut underneath the styling, the Thanksgiving hairstyles for women over 60 roundup shows more short and shoulder length shapes styled for a long family day. The right wedding hairstyle is the one you stop thinking about once the ceremony starts.

