


I keep coming back to the lob whenever my hair needs a reset. It takes off the tired ends, it still feels like medium hair, and I can wear it straight on a workday and wavy at the weekend without learning a new routine for each version.
This list gathers 27 lob haircuts, from a plain collarbone cut to angled, curly, and banged versions. Each idea notes the length, the layer placement, and the daily styling it needs, so you can take a short list of real options to your stylist rather than a single photo.
Key Takeaways
- A lob sits between the chin and the collarbone. That length ties back, holds waves, and grows out without a hard in-between stage.
- Blunt and one-length cuts make fine ends look thicker. Longer layers remove weight from thick hair and add movement to straight hair.
- Bangs and parts change a lob more than any other detail. Curtain, wispy, and side-swept fringes all grow out into the cut.
- Angled, inverted, and asymmetrical lobs change the outline. Wavy, curly, and air-dried lobs change how the same cut handles your texture.
- Most lobs need a trim every six to eight weeks, and styling time ranges from air-drying to a full brushed wave set.
1. Classic Collarbone Lob
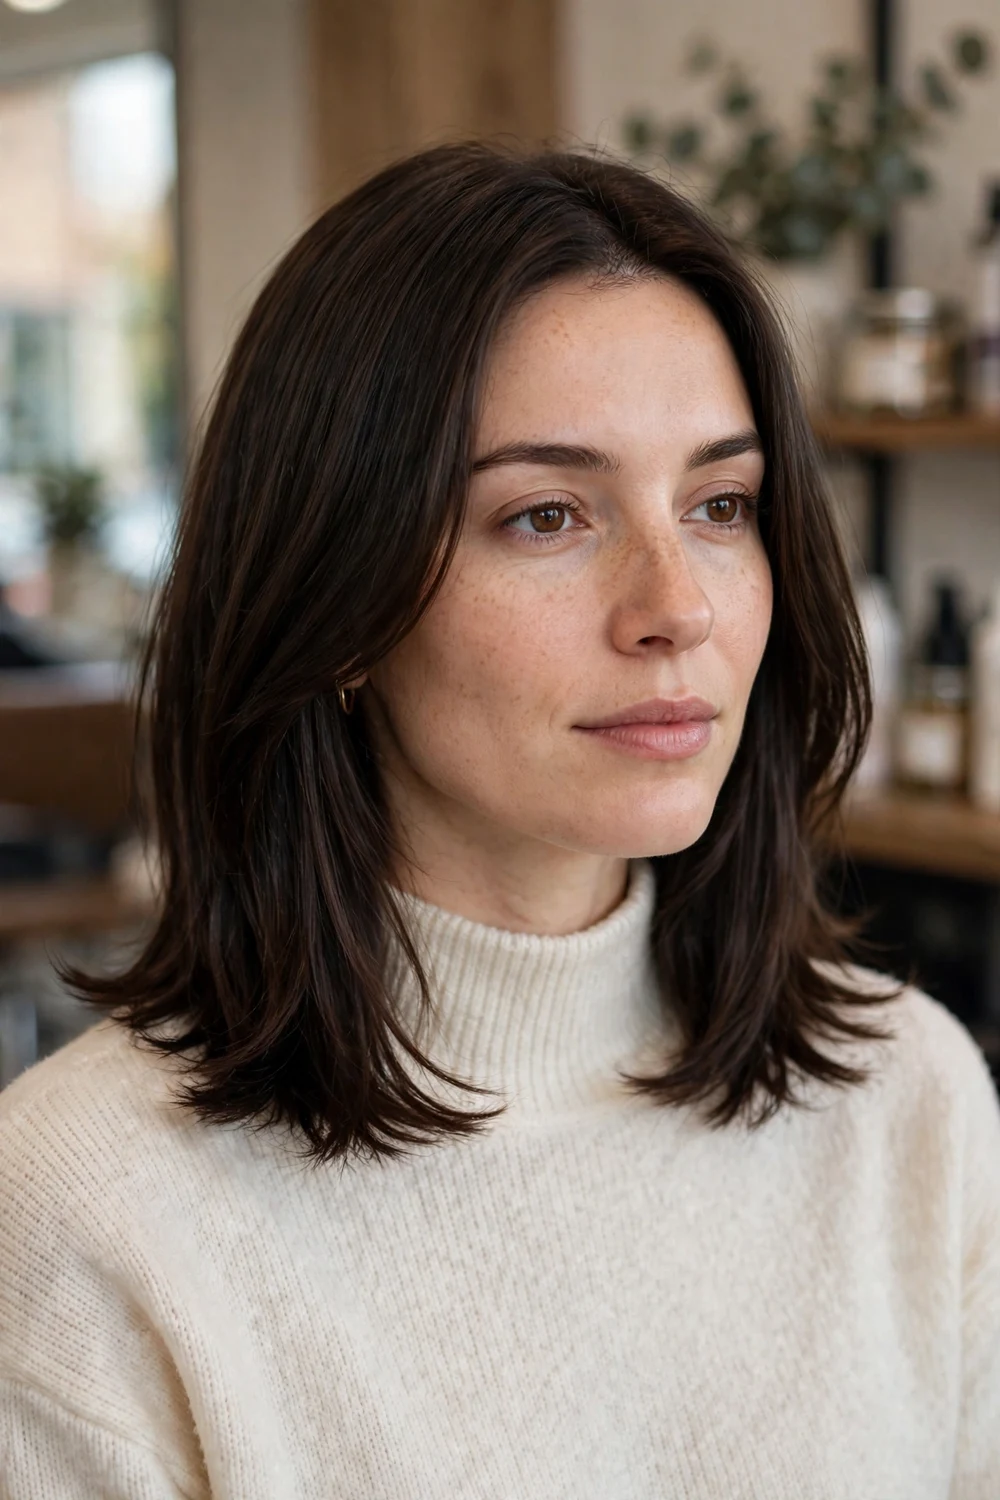
The classic lob sits right at the collarbone, with a clean perimeter and little or no layering. The length grazes the top of the shoulders, so the hair moves as one piece and the ends look full.
Wear it straight with a soft bend at the ends, or add one loose wave through the mid-lengths. It suits most face shapes because the length sits below the chin and keeps the outline simple.
Try this: Take a photo of your hair at collarbone length from the side, so you and your stylist agree on the exact landing point before cutting.
Difficulty: Low · Cost: $
2. Blunt Lob with a Center Part
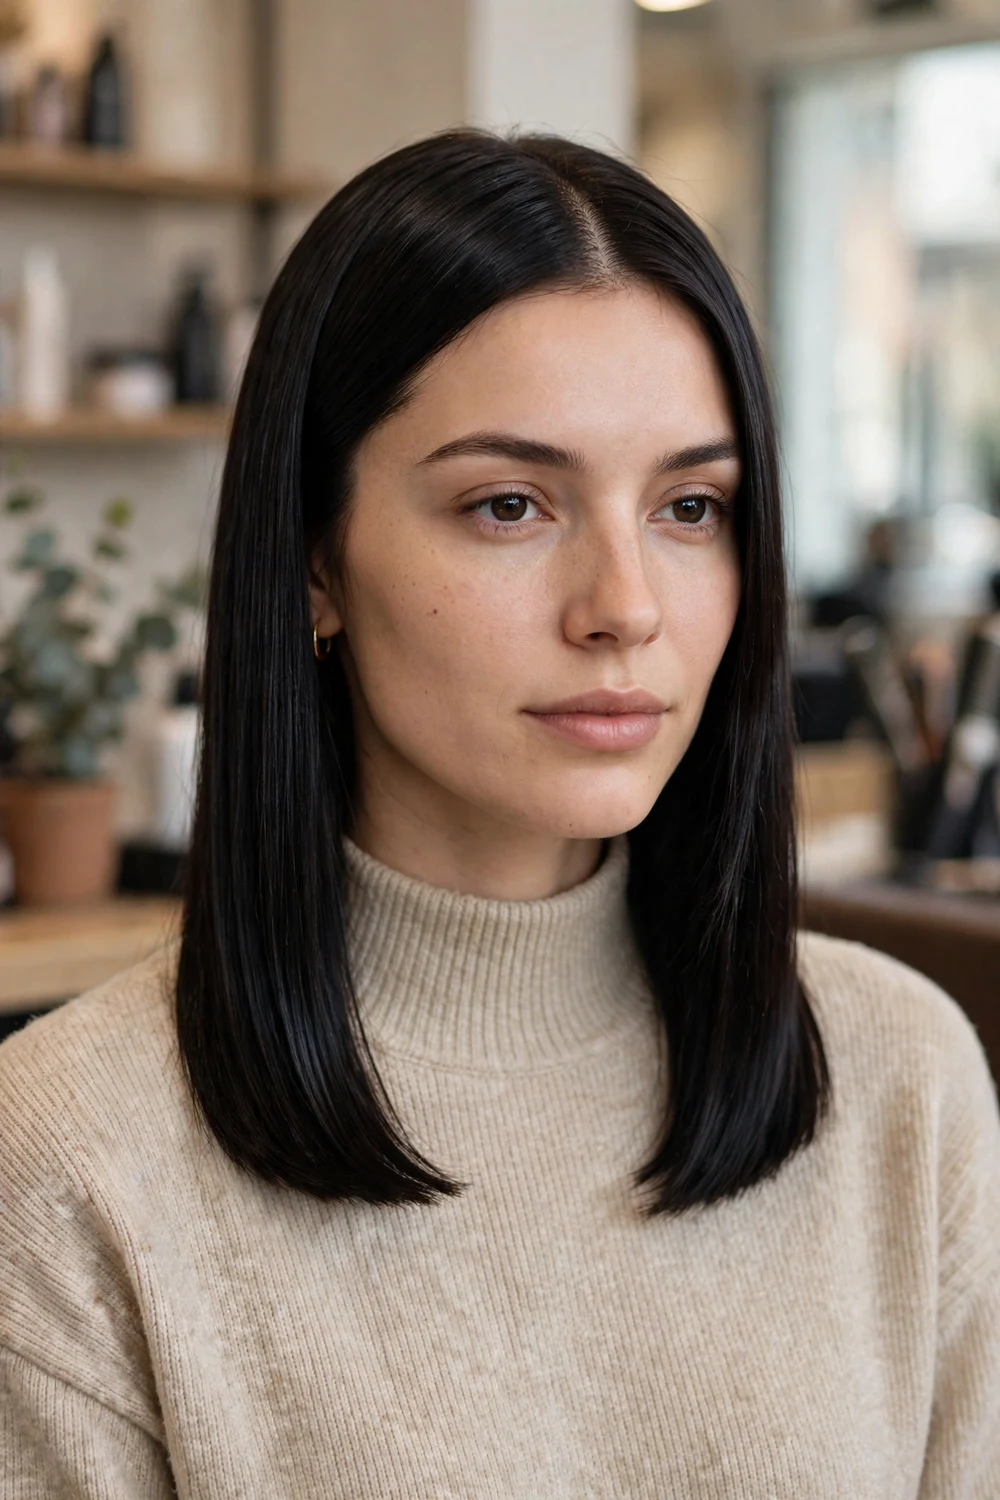
A blunt lob is cut straight across with no layers, so the bottom edge looks thick and even. A center part splits the weight equally on both sides and keeps the shape balanced.
This cut works well on fine to medium hair, where a one-length edge stops the ends looking thin. If your hair is very thick, ask for a little weight removed from inside the cut so the edge does not flare out. For more one-length ideas, see these medium blunt hairstyle ideas.
Try this: Sleep with the hair loose and brush the edge straight in the morning. A blunt edge shows bends from a tight ponytail.
Difficulty: Low · Cost: $
3. Long Layered Lob

Long layers start around the jaw and blend down through the ends. The layers remove bulk from thick hair and add movement to straight hair that would otherwise hang flat.
Ask for the shortest layer to stay below the chin if you tie your hair up often. Blow-dry with a round brush, lifting at the root and rolling the ends under, or air-dry and scrunch the layers for a looser finish.
Try this: Ask for a dry finish check. Layers can look blended wet and sit very differently once the hair is dry.
Difficulty: Medium · Cost: $$
4. Angled Lob

An angled lob is shorter at the nape and longer at the front, where the longest pieces reach the collarbone. The slope draws the eye down and gives the front a sharp, clean line.
Wear it straight to show the angle clearly. A flat iron through the front sections and a light shine spray on the surface keep the slope smooth from back to front.
Try this: Bring a side-profile photo. The angle reads from the side, so a front-only photo can hide how short the back will be.
Difficulty: Medium · Cost: $$
5. Inverted Lob
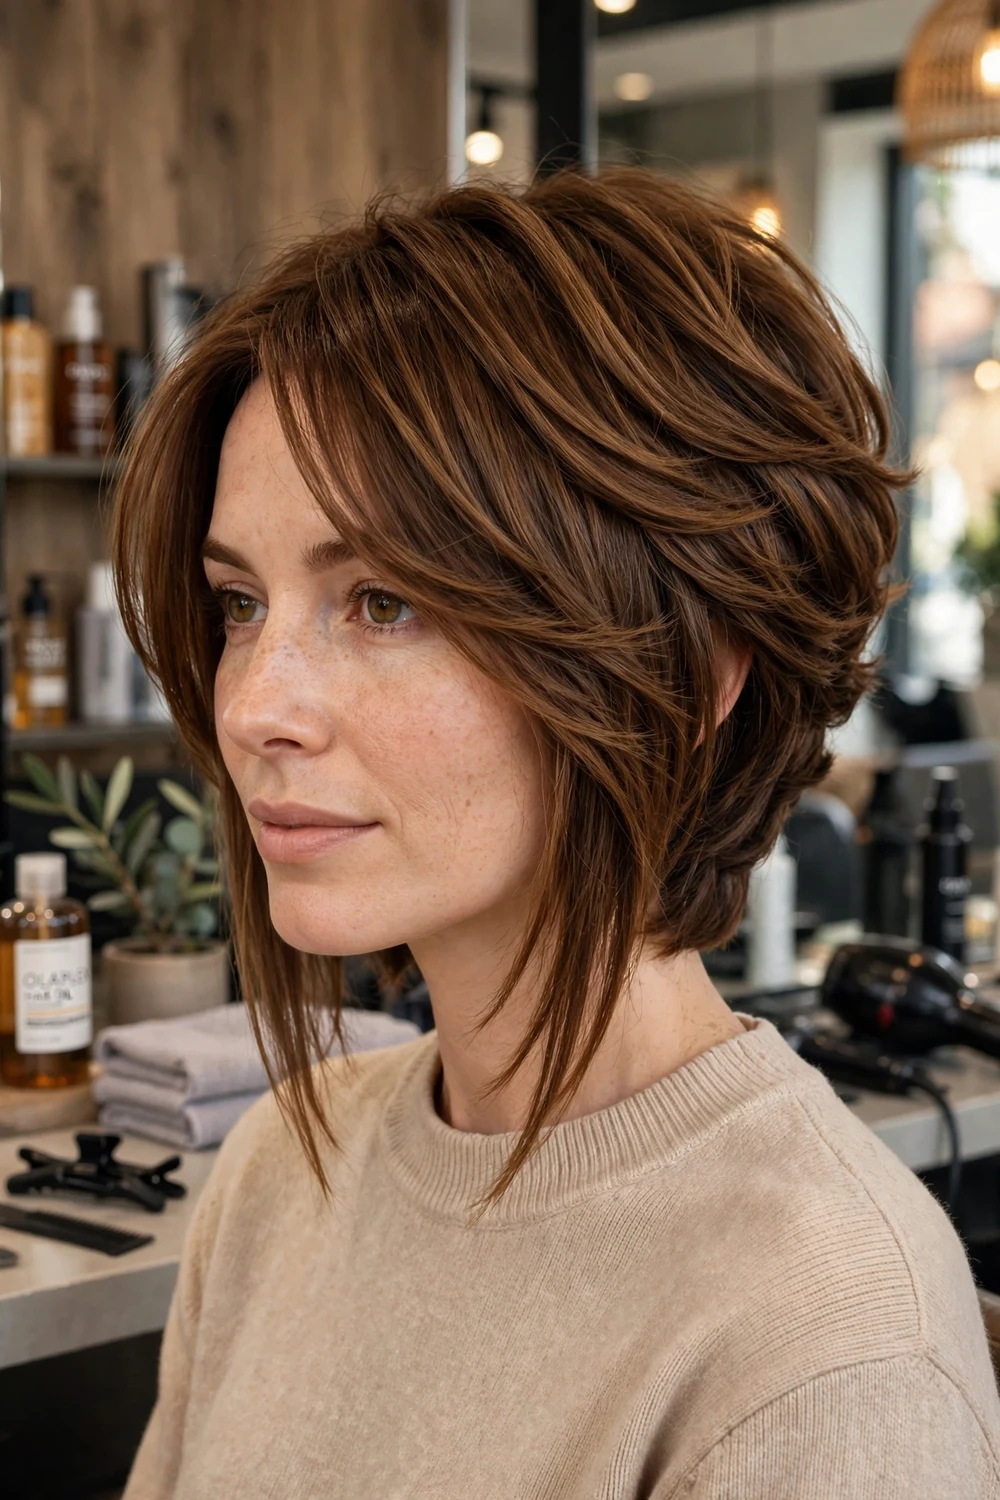
An inverted lob uses short stacked layers at the back to build height at the crown, then lengthens toward the front. The stacking is the detail that sets it apart from a plain angled cut.
This shape helps fine hair look fuller at the back of the head. Keep the front pieces at or below the chin so the cut still reads as a lob and grows out evenly.
Try this: Ask how much stacking the back needs. Start with light stacking, because you can add more at the next visit.
Difficulty: Medium · Cost: $$
6. Asymmetrical Lob
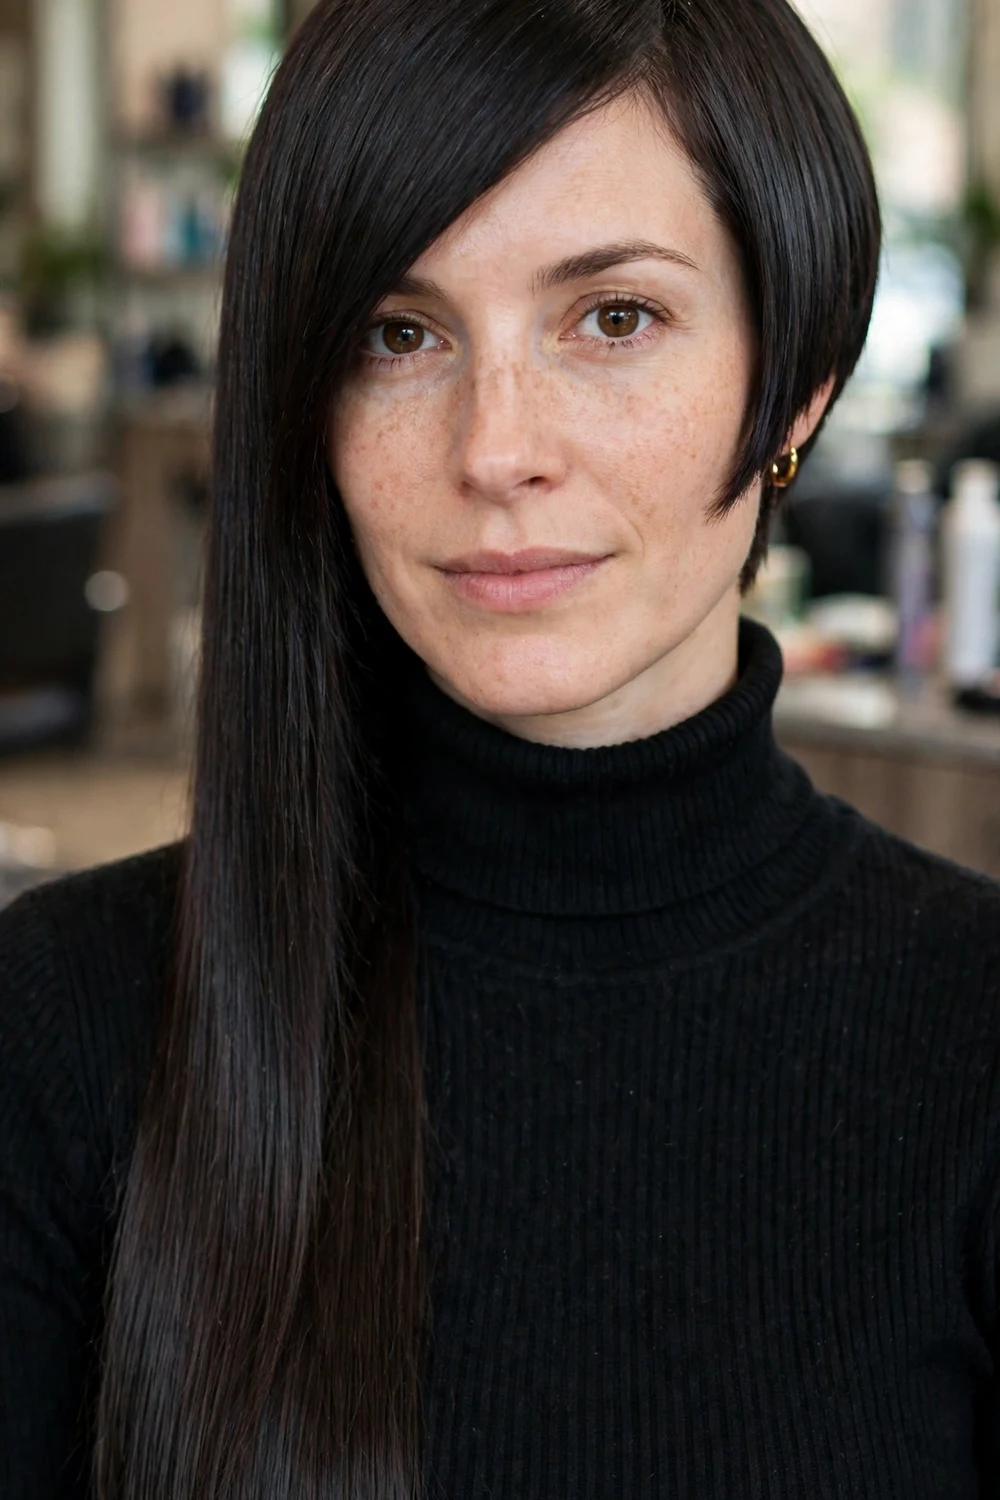
One side is cut longer than the other, usually by an inch or two, and the longer side falls past the chin. The uneven lengths give a plain straight style a clear focal point.
Pick the longer side first, then match your part to it so the length falls forward. Wear it straight or with a bend only on the longer side to keep the contrast clear.
Try this: Decide in the chair which side stays longer and wear your part on that side for the first week.
Difficulty: Medium · Cost: $$
7. Choppy Lob
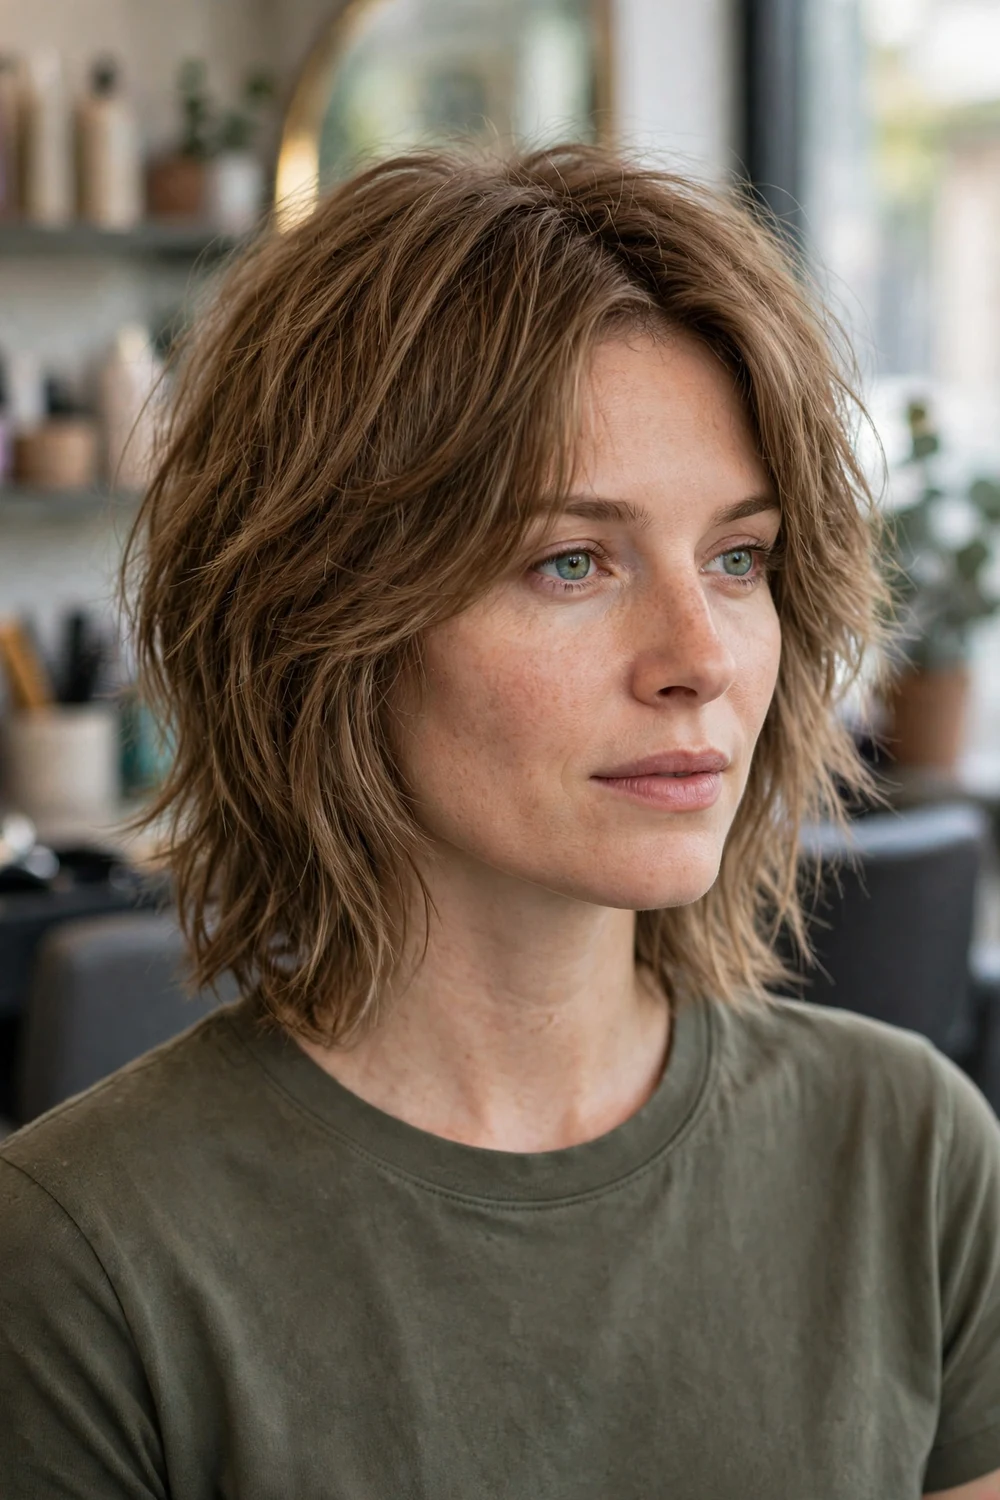
A choppy lob uses uneven, point-cut layers and piecey ends. The broken edge stops the hair sitting in a solid block and gives natural waves more room to form.
This is a good low-heat option. Work a pea-size amount of texture paste through dry ends, twist a few sections, and let the piecey finish do the work.
Try this: Test it air-dried before you add heat. Choppy ends often need only paste, and heat can make them look thinner.
Difficulty: Low · Cost: $
8. Textured Lob
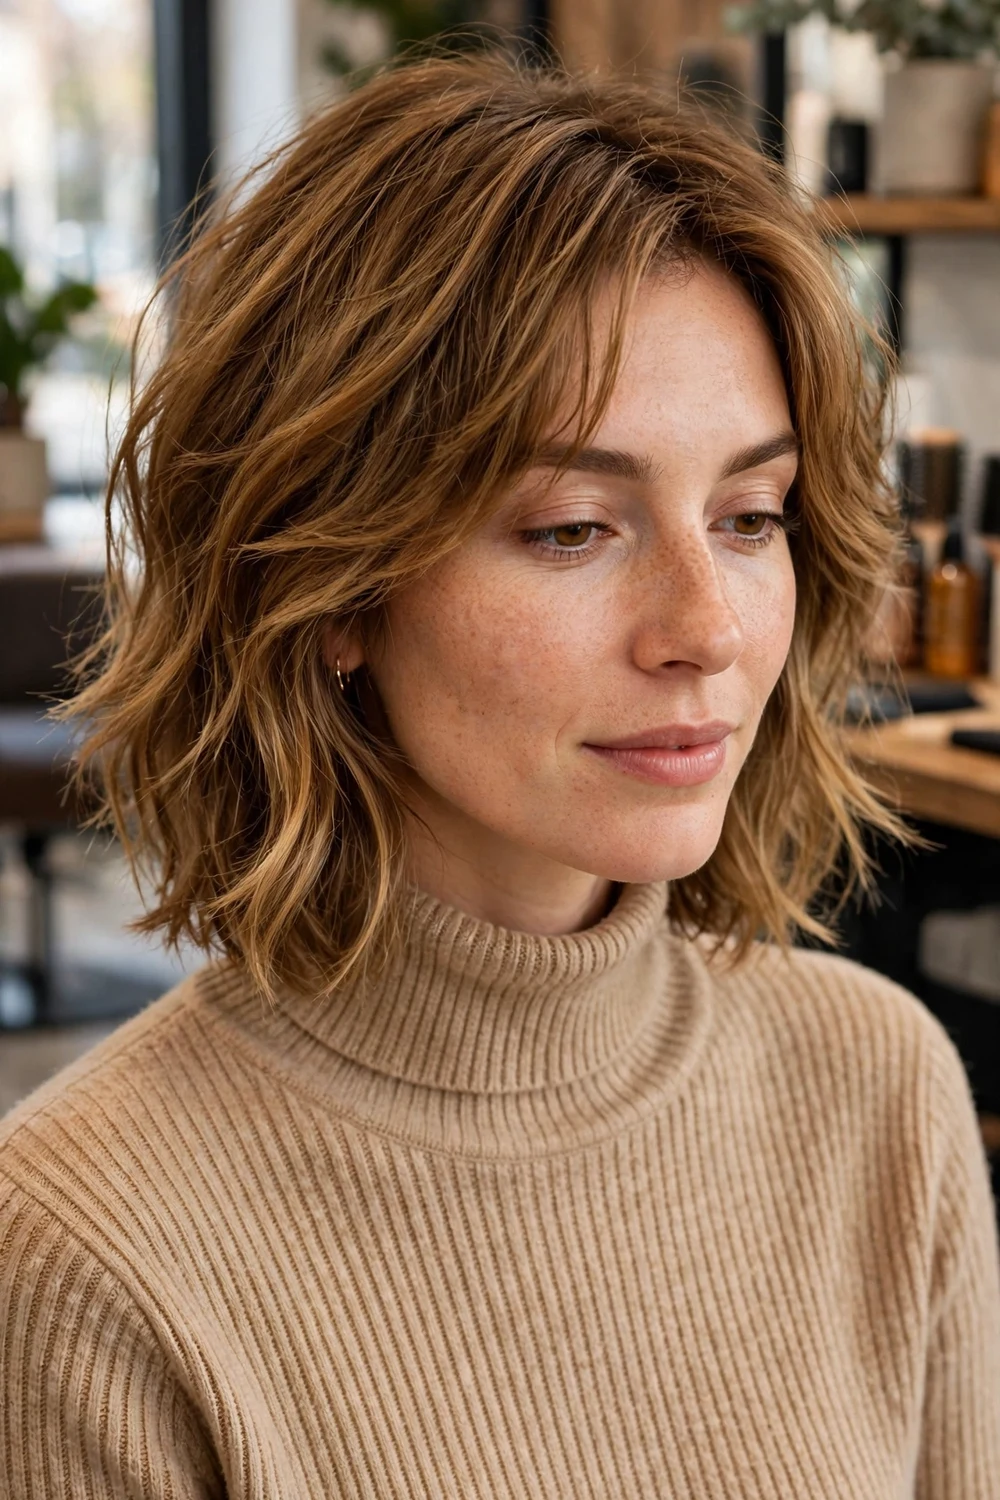
A textured lob keeps the collarbone length and adds point-cutting and light razoring at the ends. The result is softer than a choppy cut, with movement through the last few inches only.
Ask your stylist to texture the ends rather than the mid-lengths if your hair is fine. That keeps the body of the cut full while the edge stays light.
Try this: Scrunch a little mousse into damp ends and let them dry. Textured ends should move without a curling iron.
Difficulty: Low · Cost: $
9. Soft Wavy Lob
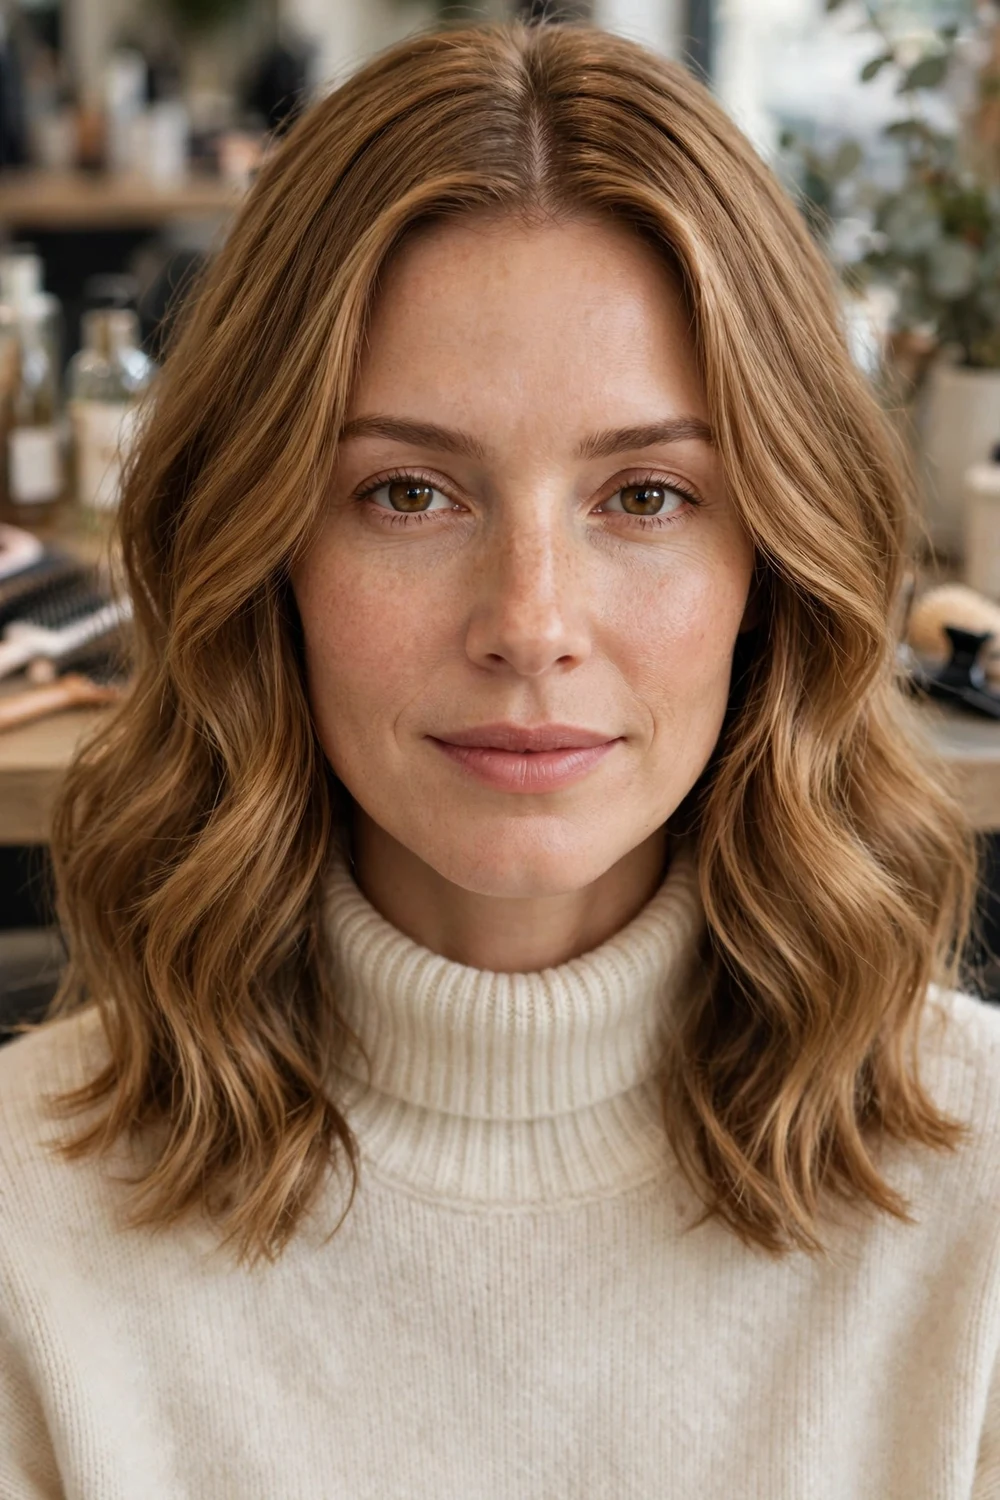
Loose waves through the mid-lengths and ends give a collarbone lob a relaxed finish while the roots stay smooth. The wave should start around cheek level so the top does not widen.
Make the waves with a large barrel iron, leave the last inch straight, then brush through once. For more wave patterns at this length, browse these medium hairstyles with waves.
Try this: Wrap sections in different directions for a natural wave, but keep every section the same size so the pattern stays even.
Difficulty: Low · Cost: $
10. Curly Lob

A curly lob is cut to sit at the shoulders when the curls are dry and sprung up. Shaped layers stop the curls stacking into a wide triangle at the bottom.
Ask for a dry cut if your curl pattern varies across your head, so each section is shaped at its real length. Refresh on day two with water and a little leave-in conditioner scrunched upward.
Try this: Pineapple the top loosely at night with a soft scrunchie to keep curls from flattening against the pillow.
Difficulty: Medium · Cost: $$
11. Shaggy Lob

A shaggy lob pairs collarbone length with lots of short layers, wispy ends, and often a fringe. The layers sit higher than in a classic layered lob, which gives the top more lift.
This cut suits wavy and straight hair that needs texture without thinning the ends too much. If fine hair is your main concern, compare it with these shaggy lob hairstyles for fine hair before you book.
Try this: Diffuse on low heat for five minutes, then let the layers finish air-drying so the shag shape stays piecey.
Difficulty: Medium · Cost: $$
12. French Lob

The French lob sits at the collarbone with natural texture, soft edges, and often a light fringe that is worn undone. The finish is loose, with no hard lines or heavy styling.
Let it air-dry with a small amount of cream worked through the ends. The cut is built to look lived-in, so skip heavy hold products and a very smooth blowout.
Try this: Skip the flat iron for a week after the cut. This style settles once you stop forcing it smooth.
Difficulty: Low · Cost: $
13. Lob with Curtain Bangs

Curtain bangs part in the middle and sweep to each side, blending into face-framing layers at the cheekbones. The rest of the lob stays at collarbone length behind them.
Blow-dry the fringe forward first, then sweep it to both sides with a round brush. Trim the fringe little and often, because it grows into the layers quickly.
Try this: Practice the fringe blow-dry at home with a small round brush. Two minutes on the fringe makes the whole cut look done.
Difficulty: Medium · Cost: $$
14. Lob with Blunt Bangs

A straight-across fringe cut at eyebrow level gives a collarbone lob a strong front line. Keep the rest of the cut simple, with a clean perimeter and minimal layers, so the fringe stays the focus.
This pairing suits oval and longer face shapes, where a horizontal fringe shortens the look of the forehead. Plan on fringe trims between full cuts to hold the line.
Try this: Use a small amount of smoothing cream on the fringe only, so it lies flat without weighing down the rest.
Difficulty: Medium · Cost: $$
15. Lob with Wispy Bangs

Wispy bangs are cut light and see-through, with soft gaps between the strands. They add a fringe to a lob without the weight or upkeep of a blunt fringe.
Ask for the fringe to be point-cut and kept longer at the sides. That shape blends into the lob if you decide to grow the bangs out.
Try this: Blow the fringe dry first while it is fully wet. Wispy bangs that dry on their own tend to split in the middle.
Difficulty: Low · Cost: $
16. Lob with Side-Swept Bangs
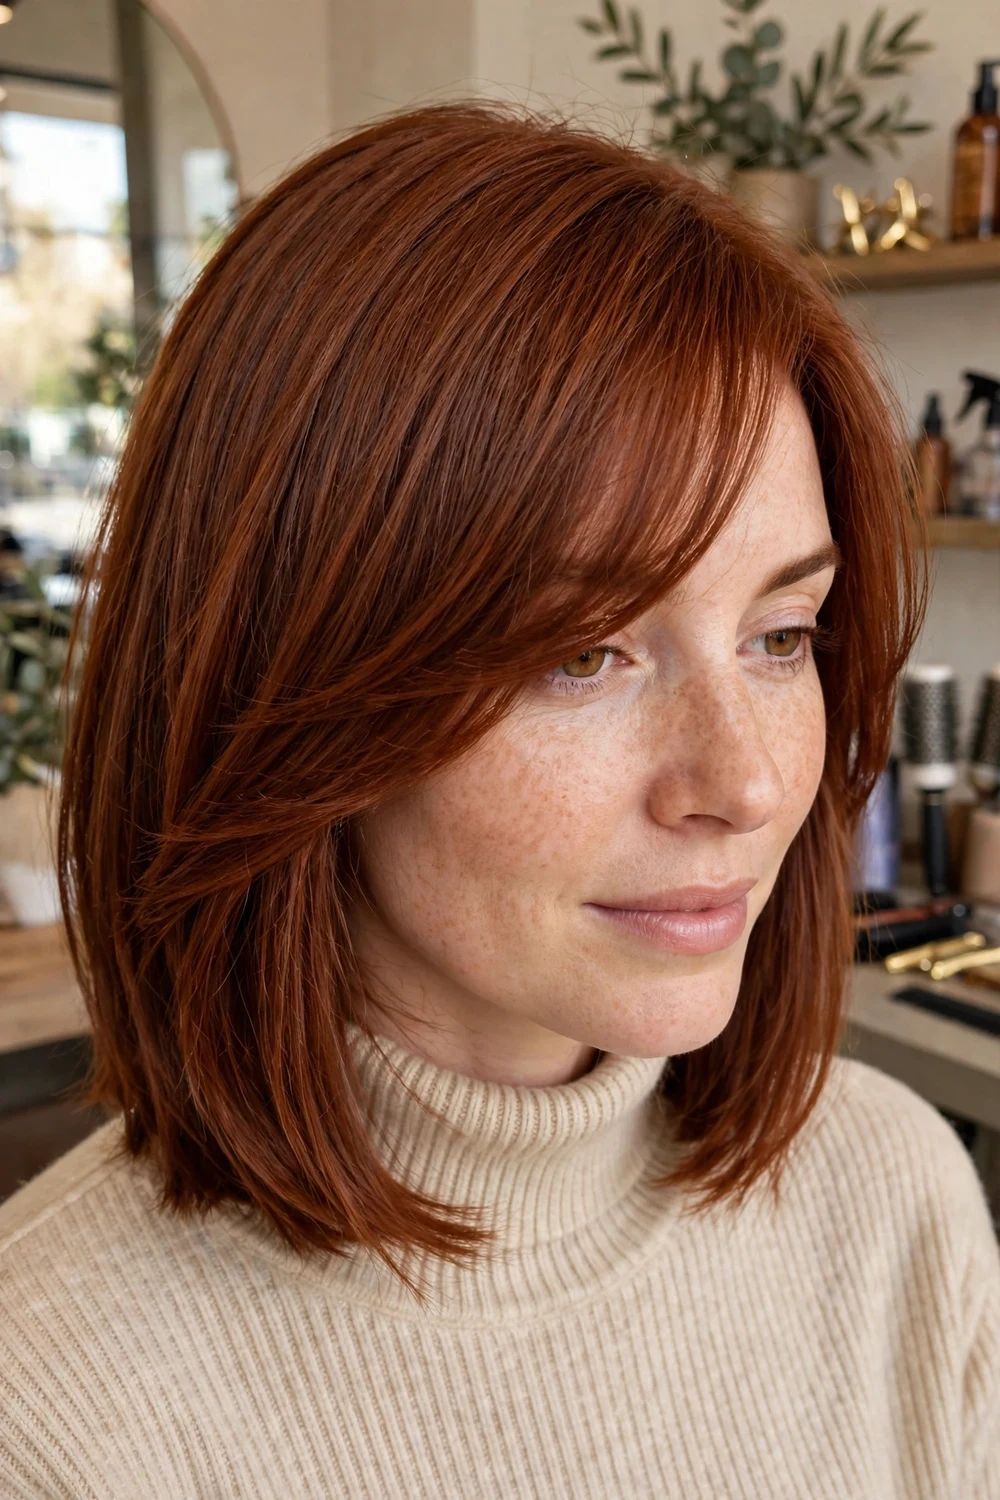
A long side-swept fringe falls diagonally across the forehead and tucks into the longer side of the lob. It softens a strong forehead and works with a deep side part.
Blow-dry the fringe across your forehead in the direction you want it to lie, then finish with a light spray at the root only. Too much product makes a long fringe separate.
Try this: Tuck the long fringe behind your ear on one side when it grows out. It blends into the lob with no trim needed.
Difficulty: Low · Cost: $
17. Deep Side Part Lob
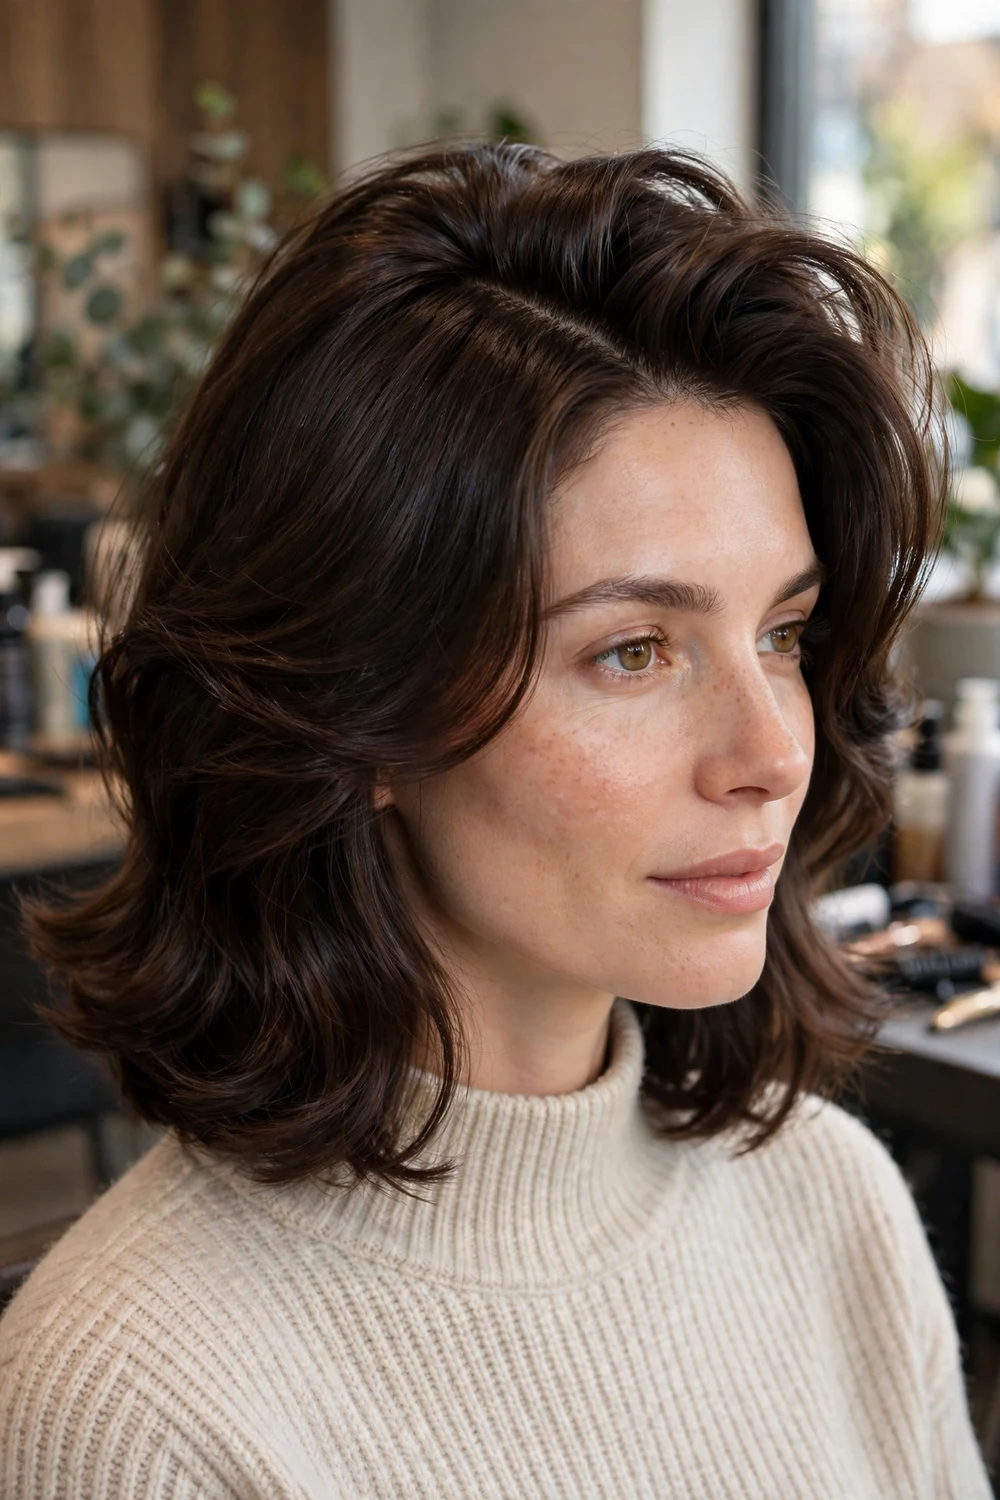
Moving the part well to one side lifts the roots on the heavier side and changes the whole outline of a collarbone lob. The hair below stays the same cut, worn straight or wavy.
Flip your part to the opposite side for extra lift at the root. This is a styling change rather than a new cut, so it is a good first step before you commit to layers or bangs.
Try this: Use a tail comb to set the part while the roots are damp, then dry the roots in the direction of the part.
Difficulty: Low · Cost: $
18. Sleek Straight Lob
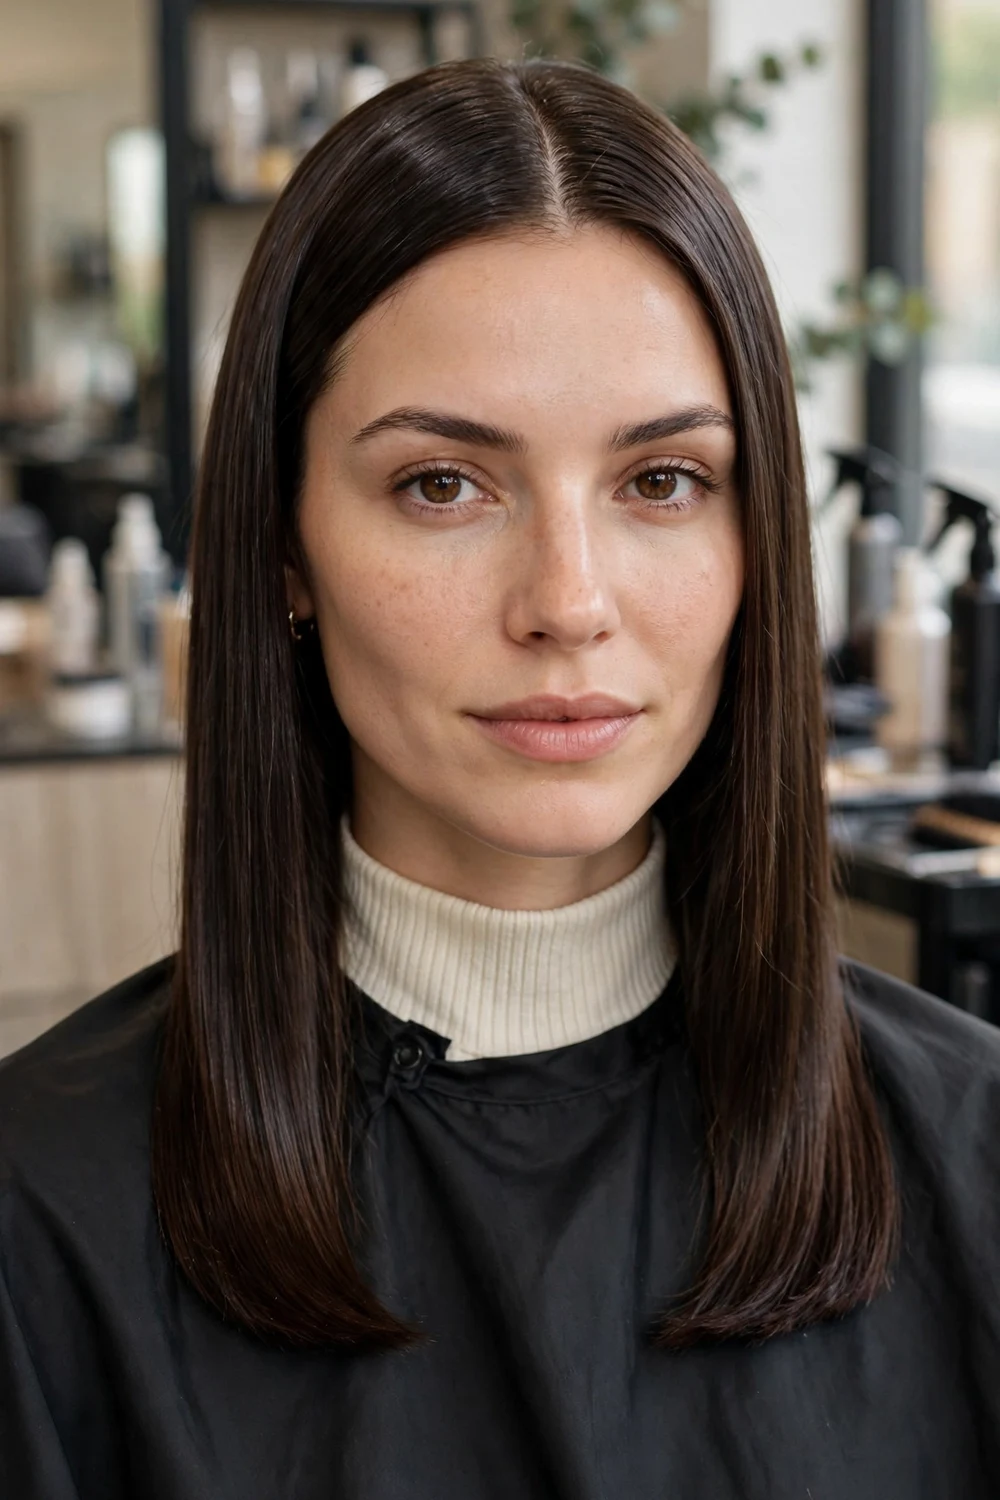
A sleek straight lob is worn smooth and flat, with the shine of the hair as the main detail. It works best on a blunt or lightly layered cut, where the edge stays even.
Use heat protectant before a flat iron and pass the iron once per section at a steady speed. Finish with a drop of oil on the ends only, so the roots stay clean.
Try this: Run a drop of oil between your palms and press it over the surface after ironing, rather than rubbing it through.
Difficulty: Low · Cost: $
19. Feathered Lob

Feathered layers are tapered and flicked away from the face, so the ends look light and layered like the edge of a feather. The layering is strongest around the face and crown.
Blow-dry small sections back and away from the face with a round brush to set the flick. This cut gives fine and medium hair movement without losing collarbone length.
Try this: Set each flicked section with a cool shot from the dryer before you move on, so the feathered shape holds.
Difficulty: Medium · Cost: $$
20. Wet-Look Lob

The wet-look finish uses gel and gloss products on a layered lob so the hair looks damp, defined, and slicked back from the face. The cut underneath is usually textured, which gives the product something to separate.
Apply product to damp hair in sections and comb it back, then leave it to set without touching it. Keep this finish for occasional wear, because daily gel use needs regular clarifying washes.
Try this: Work gel through with a wide comb, not your fingers, for an even slick finish with no clumps.
Difficulty: Medium · Cost: $$
21. Old Hollywood Waves Lob

Uniform S-shaped waves, a deep side part, and a smooth glossy surface define this dressier lob. The waves are brushed into one pattern rather than left as separate curls.
Curl every section in the same direction, let the hair cool fully, then brush through gently so the curls join into waves. Pin one side back behind the ear to hold the shape.
Try this: Set the finished waves with clips at each S bend for ten minutes after brushing, then remove the clips gently.
Difficulty: High · Cost: $$
22. Flipped Ends Lob

Here the last inch or two of the lob is styled to flick outward at shoulder level. The flick adds width at the bottom of the cut and gives a plain one-length lob a clear shape.
Use a round brush or a flat iron to bend only the ends outward. If your hair sits right on your shoulders it may flick on its own, so ask for the length to sit just above or just below the shoulder.
Try this: Decide if you want the flick in or out before you style, and bend every end the same way for a clean finish.
Difficulty: Low · Cost: $
23. Balayage Lob

Balayage places lighter pieces by hand through the mid-lengths and ends of a lob, with the front pieces kept brighter. Waves show the color placement best, because each bend catches a lighter section.
The grow-out is soft, with no hard root line, so salon visits can be spaced further apart than with foil highlights. Budget for a gloss appointment between color visits to keep the lighter pieces clear.
Try this: Use a purple or blue gloss only if your lighter pieces turn warm, and follow the product timing closely.
Difficulty: Medium · Cost: $$$
24. Face-Framing Lob

Shorter layers start at the cheekbone or jaw and frame the face, while the back keeps its full collarbone length. The front pieces can be cut, colored lighter, or both.
Tell your stylist where you want the shortest piece to land, cheekbone or jaw, because that choice changes how much of your face is framed. This is also a practical test run before a full fringe.
Try this: Ask for the front pieces to be cut last, after the back length is set, so the frame is placed with care.
Difficulty: Low · Cost: $$
25. Half-Up Lob

A lob is long enough to pull the top half up and pin it, which shorter bobs often cannot do. The lower half stays loose, straight or wavy, and the pinned section lifts hair off the face.
Gather the top section from temple to temple, twist it once, and pin it at the back of the crown. Leave two thin pieces loose at the front if you want a softer edge.
Try this: Use a claw clip rather than pins for a softer hold that does not dent the lower half.
Difficulty: Low · Cost: $
26. Long Pixie Lob
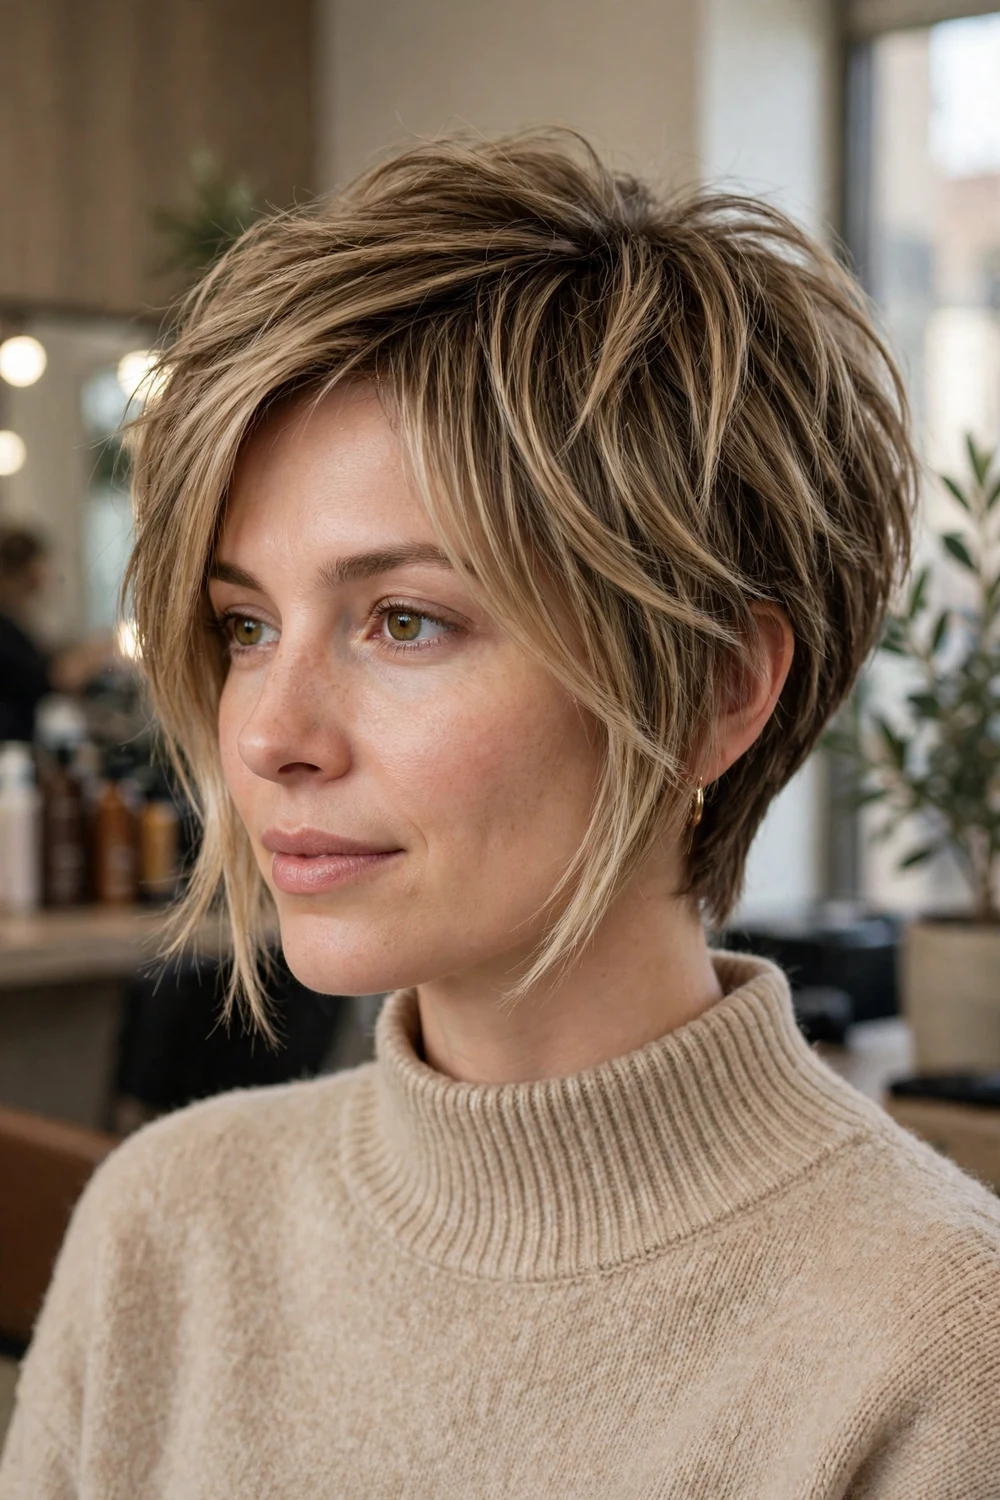
This in-between cut, often called a bixie, has a short layered back and longer lob-length pieces at the front. It suits anyone growing out a pixie or testing shorter hair without losing length at the face.
Keep the front pieces below the chin so you still have styling options. For shorter starting points, look through these pixie bob haircut ideas.
Try this: Grow it in stages. Keep the front long at each trim and let the back catch up over two or three visits.
Difficulty: Medium · Cost: $$
27. Air-Dried Lob

An air-dried lob is cut for your natural texture, with layers placed where your hair already bends or waves. The goal is a shape that settles well with no blow-dryer and no iron.
Ask your stylist to cut with your dry pattern in mind and to keep the ends blunt enough to avoid a thin finish. At home, apply leave-in product to wet hair, scrunch once, and leave it alone while it dries. Readers with fine hair can compare cutting rules in this guide to lob hairstyles for fine hair.
Try this: Wash, condition, scrunch once, and do not touch the hair while it dries. Touching creates frizz in an air-dried cut.
Difficulty: Low · Cost: $
How the Main Lob Types Compare
| Lob Type | Best For | Daily Styling | Cost Band |
|---|---|---|---|
| Classic and blunt lobs | Fine to medium hair, clean outlines | Blow-dry straight or add one bend | $ |
| Layered, choppy and textured lobs | Thick hair, or straight hair that needs movement | Mousse, paste, or a round brush | $ to $$ |
| Wavy and curly lobs | Natural wave and curl patterns | Scrunch, diffuse, or a large barrel iron | $ to $$ |
| Lobs with bangs | Adding a front detail without changing length | Two to five minutes on the fringe | $ to $$ |
| Angled, inverted and asymmetrical lobs | A sharper outline and more crown lift | Flat iron to show the shape | $$ |
| Balayage and face-framing lobs | Color placement with soft grow-out | Waves show the placement best | $$ to $$$ |
Frequently Asked Questions
How long is a lob haircut?
A lob usually falls between the chin and the collarbone, with most salon versions sitting at or just above the collarbone. That range keeps the cut long enough to tie back and short enough to hold its shape.
How often does a lob need a trim?
Most lobs need a trim every six to eight weeks to keep the perimeter clean. Blunt and angled cuts show regrowth sooner, while layered and textured lobs can go a little longer between visits.
Does a lob work on fine hair?
Yes. Fine hair usually looks fuller in a blunt or lightly layered lob, because the one-length edge keeps the ends thick. Keep layers long and few, and ask for texture only at the very ends.
Can you tie up a lob?
Most collarbone-length lobs can go into a low ponytail, a small bun, or a half-up style. If tying your hair up daily matters to you, ask for the length to stay at or below the collarbone and keep face-framing pieces long.
Why do the ends of my lob flick out?
Ends flick when the hair rests right on the shoulders and follows the curve of the shoulder. A small change in length, just above or just below the shoulder, or styling the ends under with a round brush, usually fixes it.
Final Thoughts
A good lob is a practical cut first. It keeps enough length to tie back, it holds a wave, and it gives you several clear ways to change the look with layers, a part, or a fringe, without moving to a much shorter cut.
Pick two or three ideas from this list that match your hair texture and your morning time, then show your stylist the side view as well as the front. That small step settles the length and the layer placement before the scissors come out, and it is how a saved photo turns into a cut you can live with.

