


Medium length is the length where waves show their full pattern. Hair that sits between the shoulders and the collarbones is long enough for a complete S bend to form, and light enough for that bend to hold without being pulled straight by its own weight. The range inside this one length is wide: loose brushed bends at one end, sculpted finger waves at the other, and a long list of cuts, parts, and finishes in between.
This list collects 25 medium hairstyles with waves and orders them by wave pattern and finish first, then by cut, bangs, color placement, and hair type. Every idea notes how the wave is built, who it suits, and how much daily effort it asks for. The focus stays on the wave itself: pattern, size, direction, and finish.
Key Takeaways
- Wave size changes the whole read: wide loose bends look relaxed, while small uniform S waves look formal and set.
- Medium length holds waves well because the hair is long enough to bend twice and light enough to keep the bend.
- Bangs change the front of a wavy style more than any other single cut choice. Curtain and wispy fringes blend in, while a full fringe stays separate and smooth.
- Heatless braid waves and natural air-dried waves give a real wave pattern with no hot tools, as long as the hair dries fully in the shape.
- Fine hair needs blunt ends and light product for waves to look full. Thick hair needs long layers and weight removal so waves do not widen at the bottom.
1. Loose Waves with a Center Part
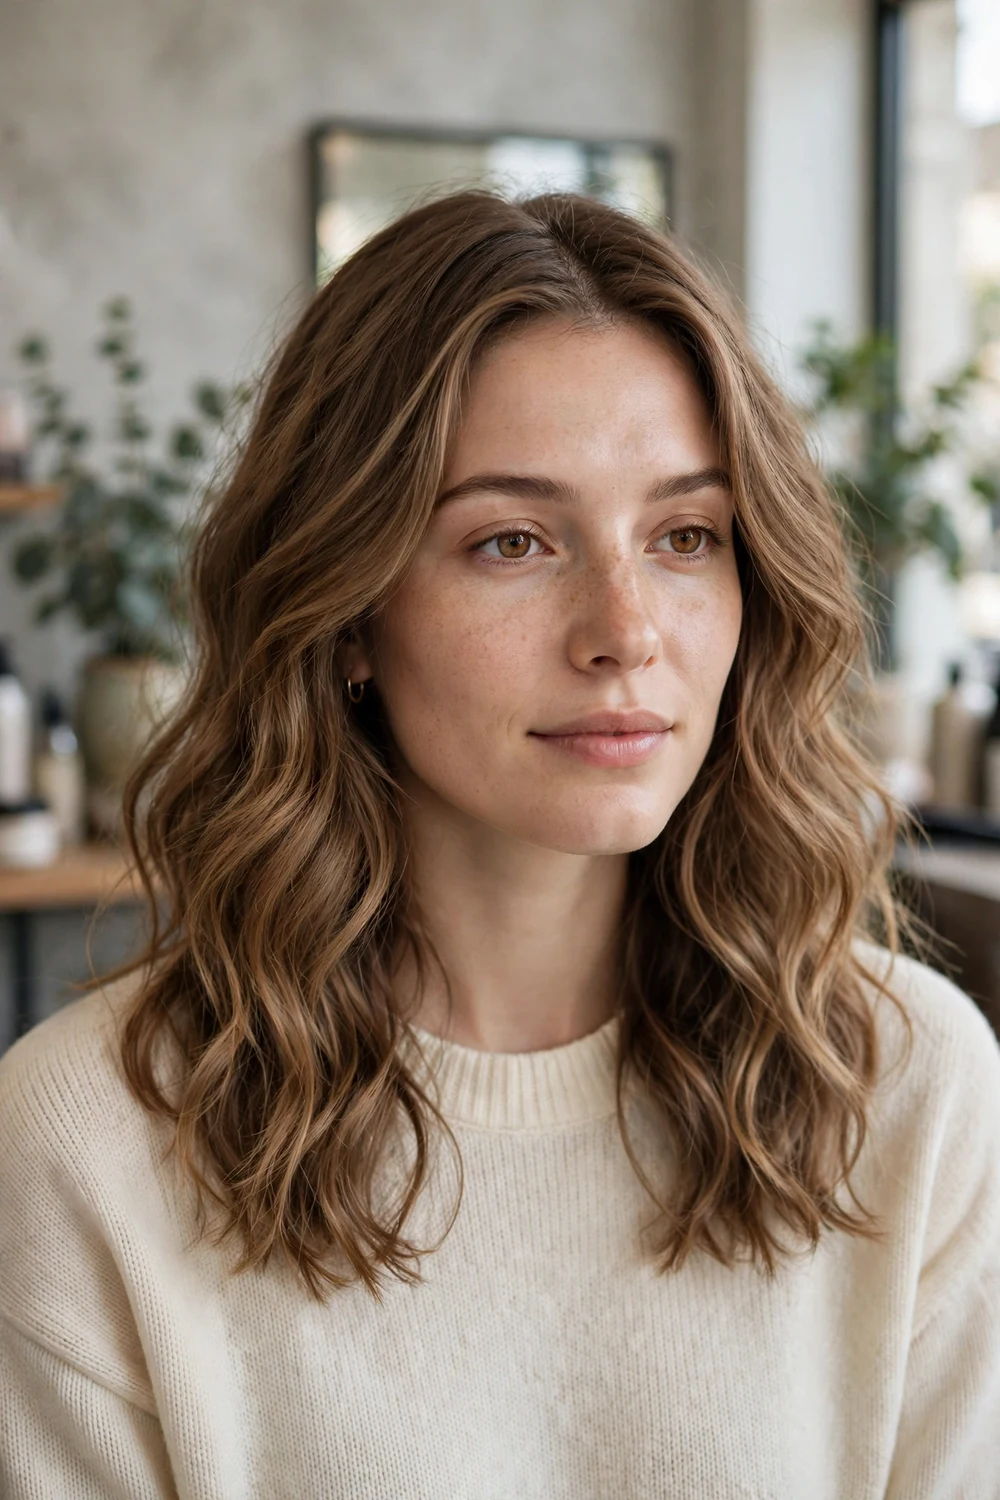
Loose waves are the base style most medium cuts start from: large, relaxed bends that start around cheek level and soften toward the ends. The wave is wide and flat rather than coiled, so the hair still reads smooth at the root. A center part keeps the shape balanced on both sides.
Build them with a large barrel curling iron, wrapping wide sections and leaving the last inch of each end unwrapped. Brush through once with a wide tooth comb after the hair cools and the curls drop into loose waves. Fine and medium hair hold this shape well with a light texture spray at the ends.
Difficulty: Low · Cost: $ (salon)
2. Beach Waves
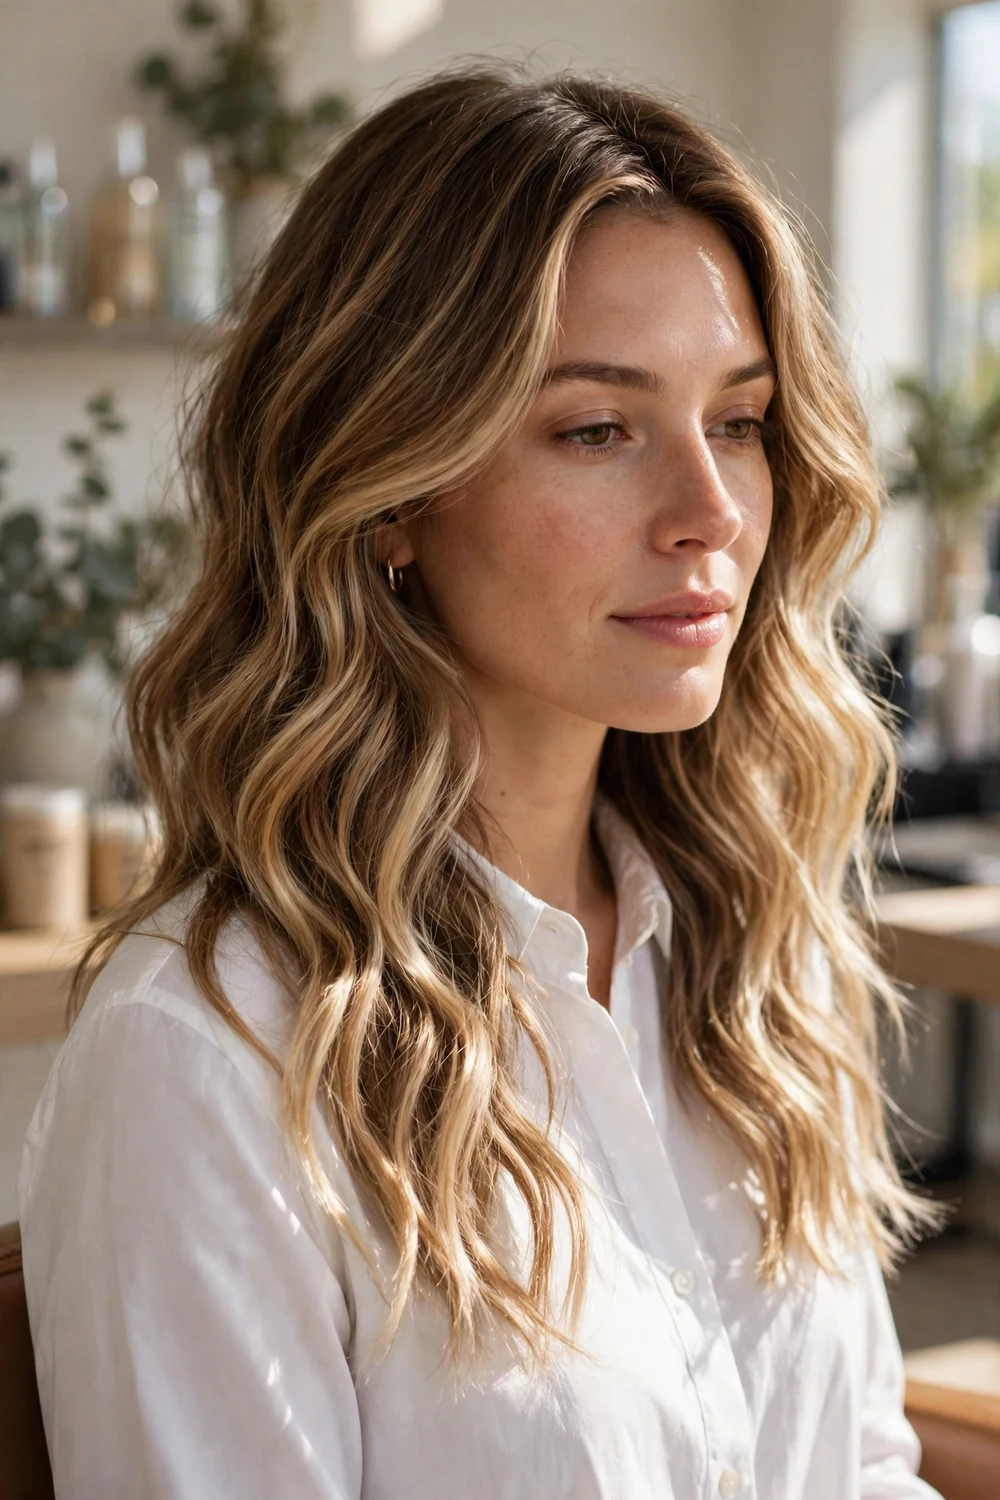
Beach waves are looser at the root, rougher through the mid lengths, and straighter at the very ends. The finish is matte and piecey, and the sections vary in size so nothing looks uniform. Salt spray or a texture foam gives the grit that keeps the bends separated.
Alternate the direction of each wrapped section, toward the face on one piece and away on the next, and leave the ends out of the iron. On naturally wavy hair, scrunch salt spray into damp hair and air dry. The style suits medium hair because the length is long enough to bend twice and short enough to stay light.
Difficulty: Low · Cost: $ (salon)
3. Tousled Waves
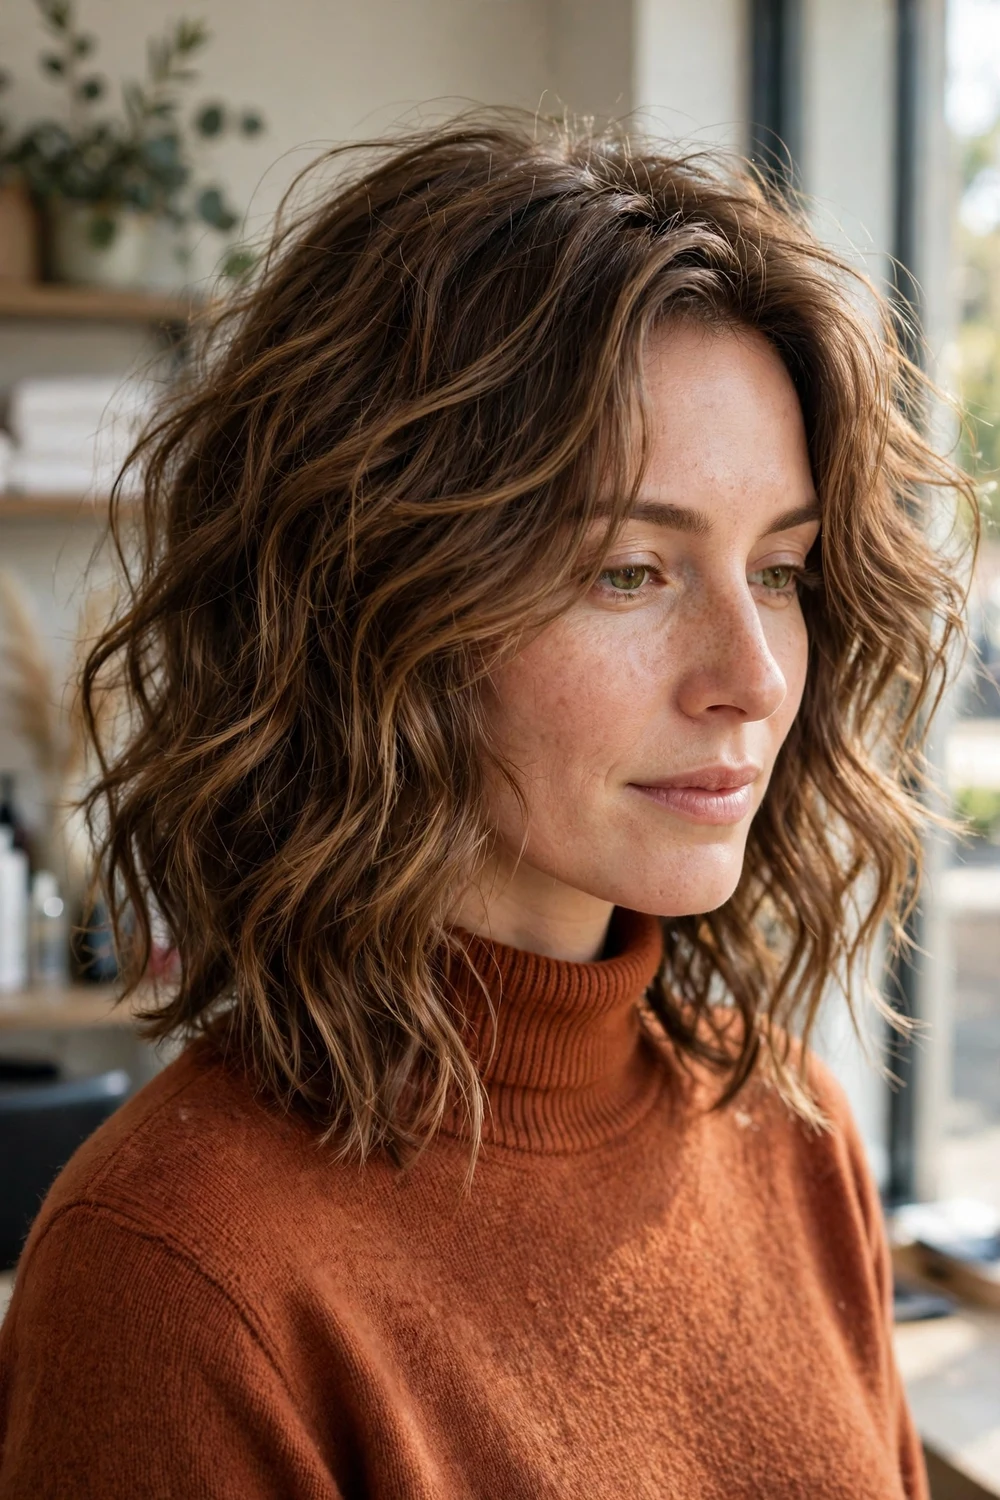
Tousled waves sit one step messier than beach waves. The bends are uneven, the ends point in different directions, and a little frizz at the crown is part of the finish. This is a good match for hair that never dries uniformly, since the style works with mixed texture instead of fighting it.
Apply mousse to damp hair, twist small sections with your fingers, and diffuse on low heat until almost dry. Once dry, pinch the ends with a small amount of texture paste to separate them. Avoid a brush after styling, since brushing pulls the pieces back into one smooth mass.
Difficulty: Low · Cost: $ (salon)
4. Glossy S-Waves
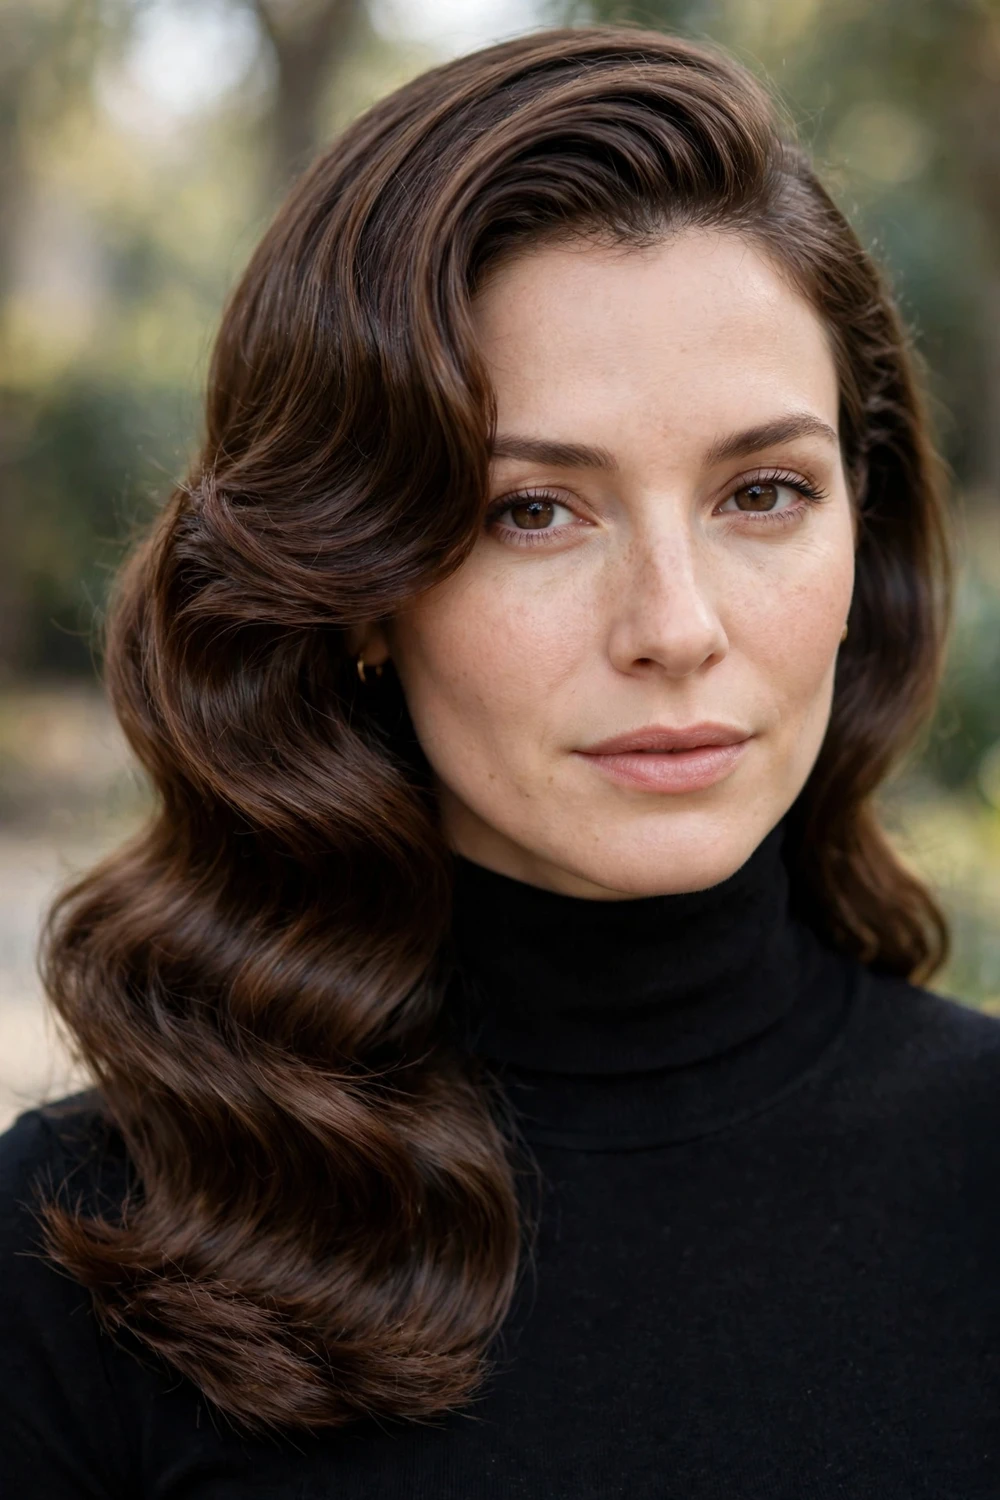
Hollywood waves are uniform, glossy S shaped waves that all bend in the same direction and sit close to the head. Every section is brushed into the next so the surface looks like one continuous wave. Medium length suits the style because the wave pattern stays visible from root to tip without dragging down.
Curl all sections in the same direction with a medium barrel iron, pin each curl to cool, then brush through with a soft bristle brush until the separate curls join into ridges. A shine spray and a light hold hairspray finish the surface. This is an event style, and the salon version includes the set, brush out, and finish.
Difficulty: Medium to High · Cost: $$$ (salon)
5. Retro Finger Waves

Finger waves are sculpted ridges pressed into wet hair with fingers and a comb, forming tight S shapes that lie flat against the head. On medium hair the pattern usually covers the top and sides, while the back can stay in a low smooth finish or continue the ridges to the ends.
The hair is worked while damp with firm gel, section by section, and clipped until fully dry. The result holds its shape for days if it stays dry, but the sculpting itself takes patience and practice. Most people book this as a salon style for formal events and photos.
Difficulty: High · Cost: $$$ (salon)
6. S-Waves
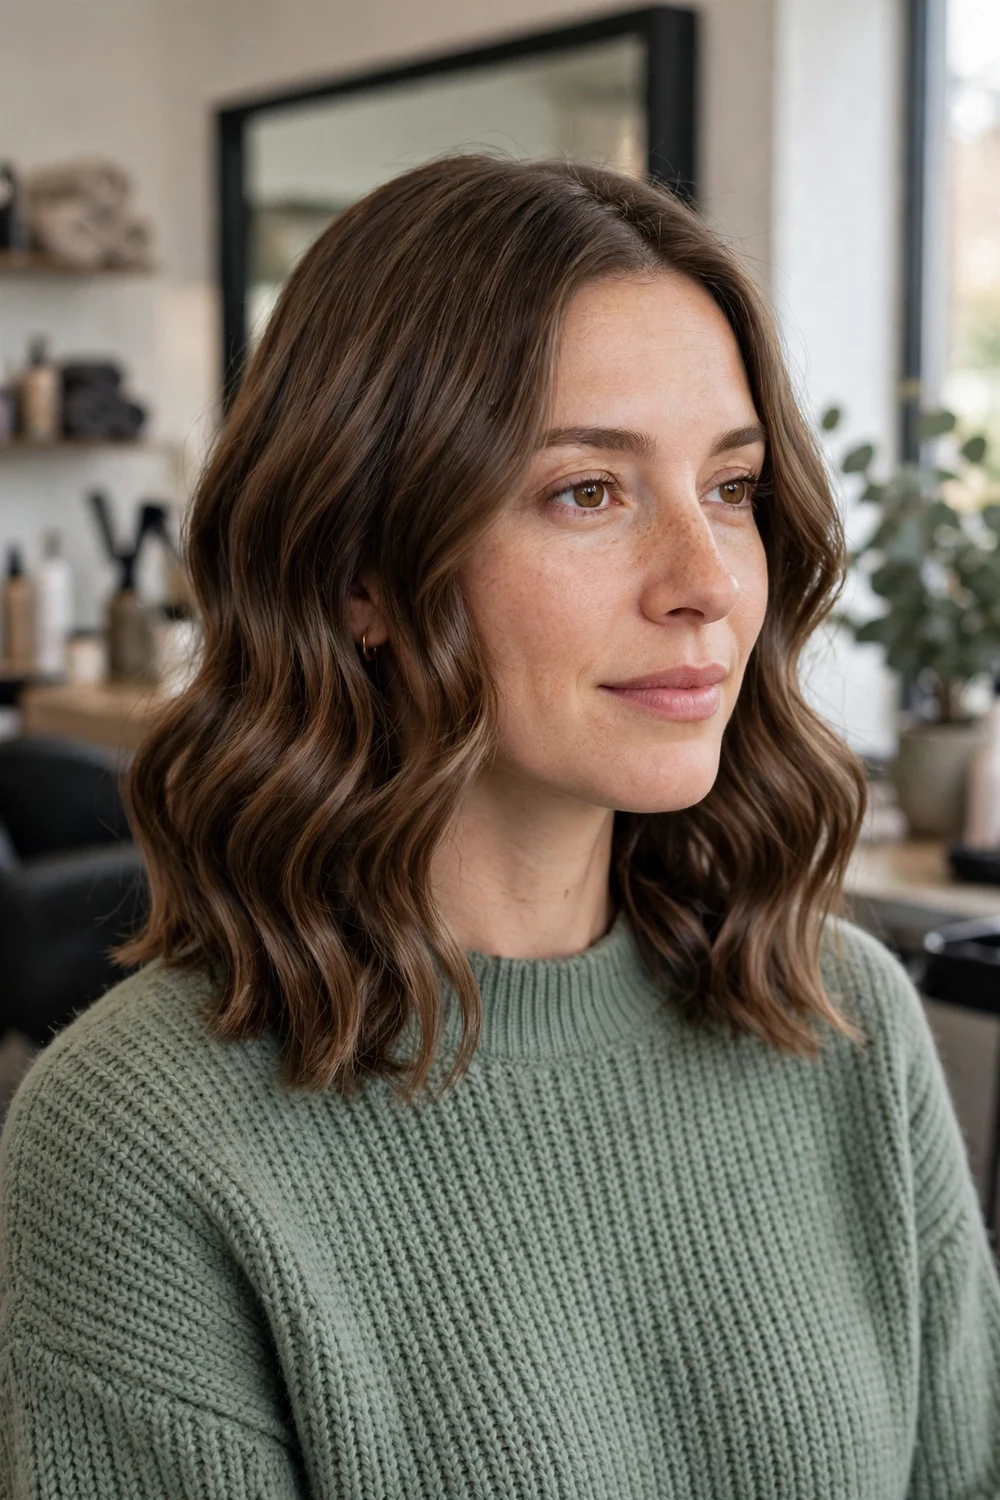
S-waves made with a flat iron have a flatter profile than curled waves. The iron bends the hair back and forth in a continuous S, so the wave sits closer to the head and reflects light in bands. The finish reads modern and works on hair that goes puffy with a curling iron.
Clamp a wide section near the root, push the hair into an S with your free hand, clamp again, then reverse the bend down the length. Keep sections consistent in size so the pattern lines up across the head. A heat protectant is mandatory here because the iron passes over each section several times.
Difficulty: Medium · Cost: $$ (salon)
7. Glossy Polished Waves
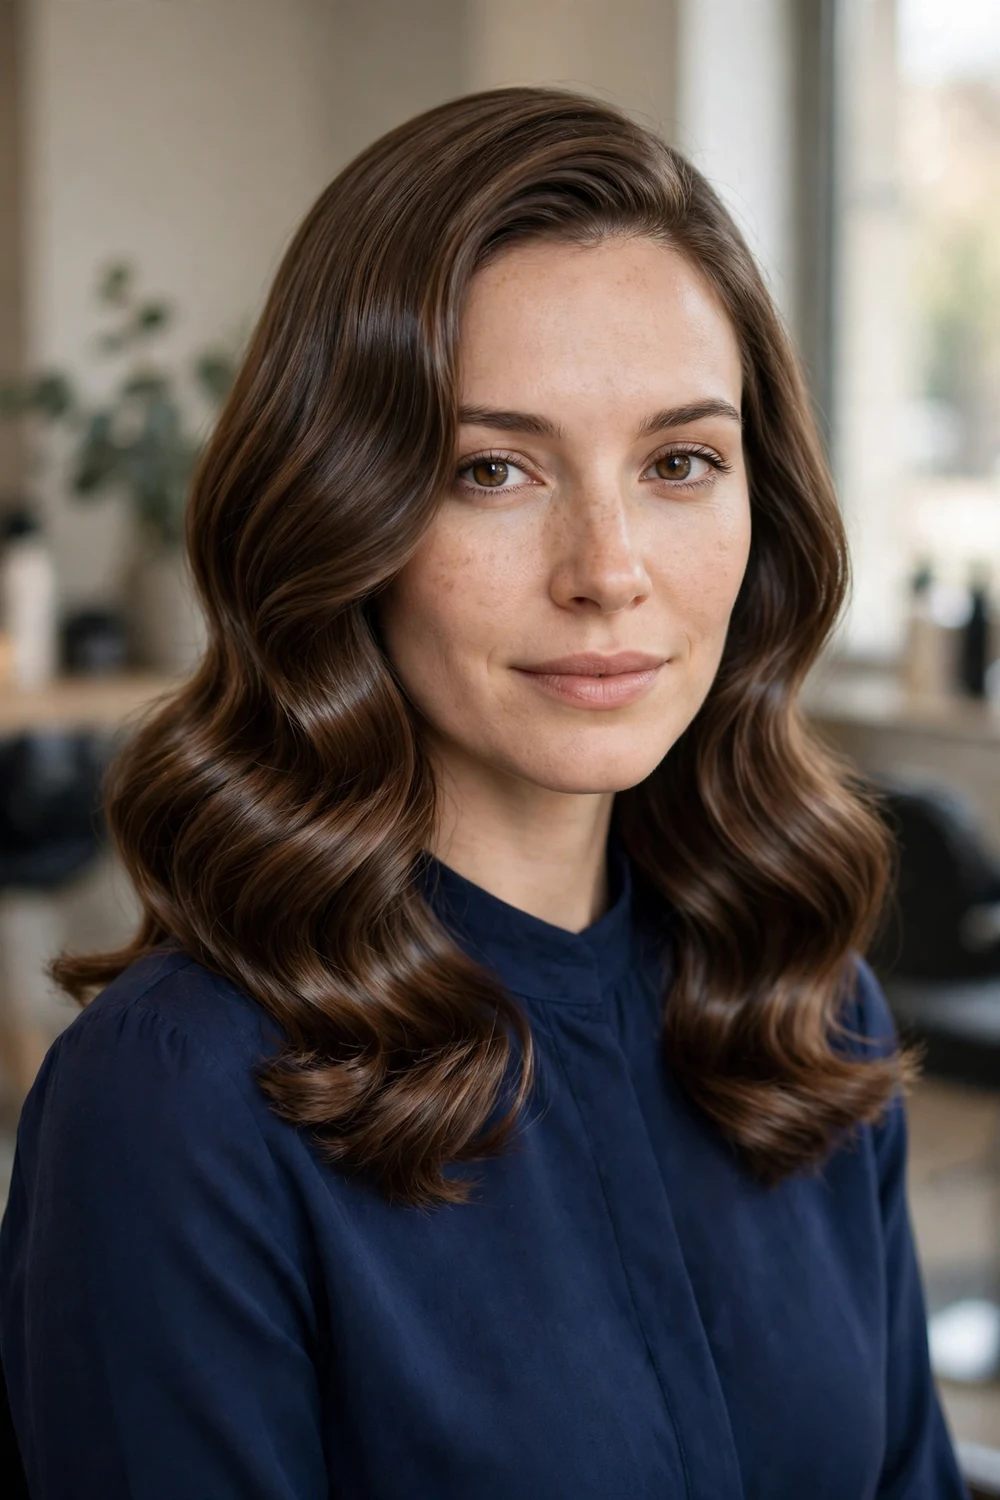
Glossy polished waves keep the wave pattern of loose waves and add a smooth, reflective surface. The roots are sleek, the bends are even, and flyaways are pressed down rather than left as texture. This finish pairs well with solid hair color, since the shine shows in one even sheet.
Blow dry the roots smooth first, then curl wide sections and brush them out gently. Work a small amount of shine serum through the mid lengths only, keeping it away from the roots so the hair does not look oily. A gloss treatment at the salon raises the shine level for several weeks.
Difficulty: Medium · Cost: $$ (salon)
8. Natural Air-Dried Waves
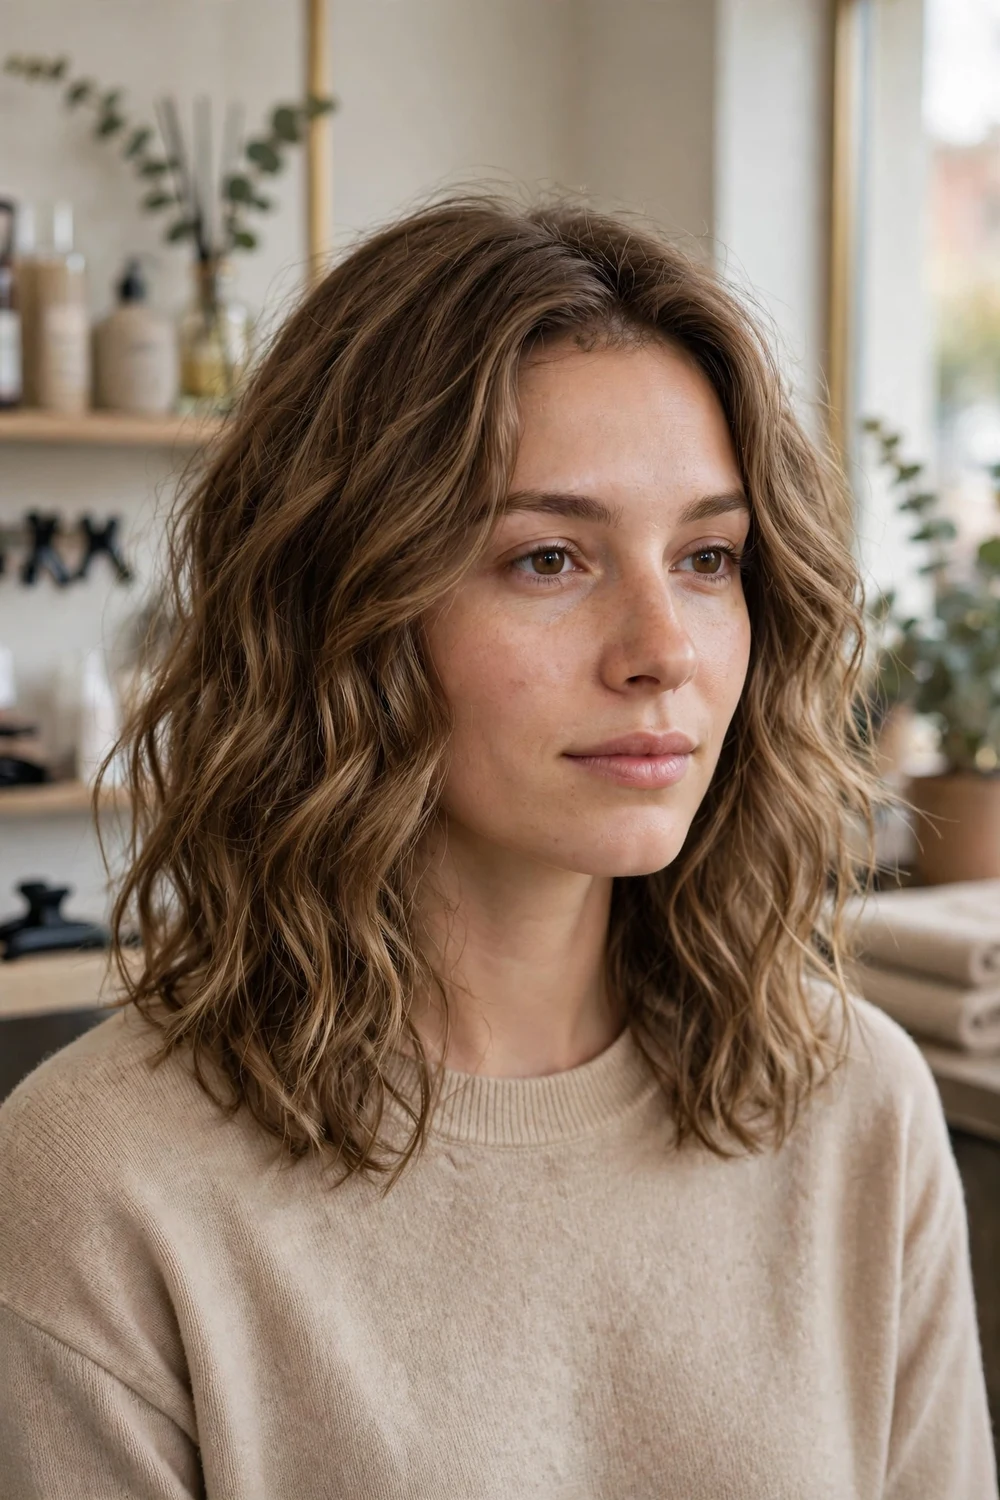
Natural air-dried waves use the wave pattern your hair already has, shaped with product and left to dry without heat. The result varies by head: some get even bends, others get a mix of waves and straighter pieces at the front. The goal is definition and frizz control, not a uniform pattern.
Work leave-in conditioner and a light gel or mousse through soaking wet hair, scrunch upward, and then leave the hair alone until it is fully dry. Touching it while it dries creates frizz. Once dry, scrunch again to soften the gel cast. If you prefer cuts built around this routine, the wash and wear haircuts guide covers shapes that fall into place with almost no styling, while this list stays focused on the wave itself.
Difficulty: Low · Cost: $ (salon)
9. Heatless Braid Waves
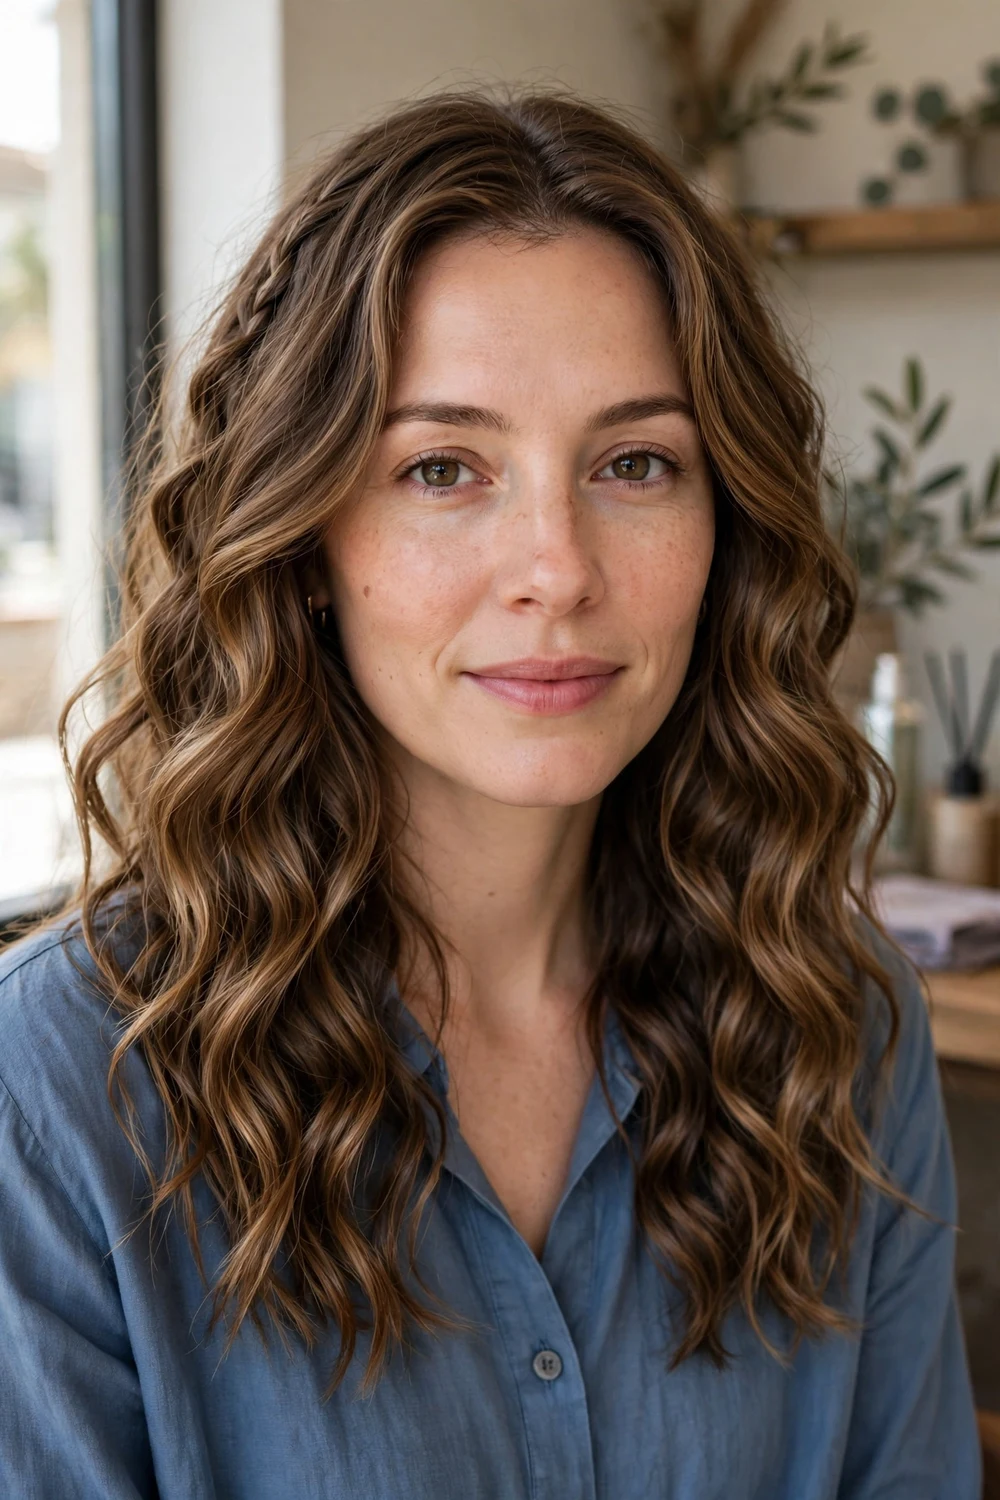
Braid waves come from sleeping in braids on damp hair. One braid gives wide, loose bends, while two or more braids give smaller, more even waves that start higher on the head. The wave is soft and slightly crimped at the top, which separates it from iron made waves.
Braid on hair that is about eighty percent dry, since soaking wet hair can stay damp at the core and lose the pattern. Undo the braids with fingers only and shake the roots loose. For longer methods and overnight options beyond braids, the heatless hairstyles guide covers rollers, twists, and wraps in detail.
Difficulty: Low · Cost: $ (salon)
10. Wavy Lob

The wavy lob is a long bob that ends around the collarbones, worn with soft bends through the mid lengths. The length keeps enough weight for the wave to hang in an S instead of springing into a curl. Ends are usually kept fairly even so the shape reads clean even when the texture is relaxed.
Ask for the back to sit slightly shorter than the front if you want the classic lob line, and keep layers long and few so the ends stay full. Style with a medium barrel iron on the mid lengths only, leaving the roots and tips straighter. The cut grows out evenly and can go longer between trims than a short bob.
Difficulty: Low to Medium · Cost: $$ (salon)
11. Wavy Bob

A wavy bob ends between the chin and the shoulders, so the wave has room for one full bend. The shorter length makes waves spring up more than they do on a lob, which adds volume at the sides. This suits fine to medium hair that falls flat at longer lengths.
Ask for light internal layering if your hair is thick, so the bob does not widen into a triangle, and keep the ends blunt if your hair is fine, so the bottom edge stays full. Scrunch in mousse and diffuse, or wrap a few top sections around an iron for definition on straighter hair.
Difficulty: Low to Medium · Cost: $$ (salon)
12. Layered Waves with Face-Framing Pieces

Layered waves cut shorter pieces around the face that start near the cheekbones and step down into the full length. The layers lift the wave off the face and give the front more movement than the back. The rest of the cut keeps long layers so the overall shape stays soft.
Face-framing pieces also change how waves sit in a ponytail or clip, leaving shaped pieces out at the front. For the cutting logic behind these pieces, the face-framing layers guide explains where layers should start for different hair densities. Style the front pieces with a round brush or iron, bending them away from the face.
Difficulty: Medium · Cost: $$ (salon)
13. Wavy Shag Waves

The wavy shag uses short layers at the crown and longer lengths below, so the waves stack and expand at the top of the head. The ends are point cut and piecey, and the overall outline is wider at the top and narrower at the bottom. Natural wave is a real advantage here because the layers are cut to follow it.
Ask your stylist to keep the layers connected so the shape does not separate into two tiers. Scrunch texture spray through dry hair and lift the crown layers with your fingers. Fine hair versions of this cut family are covered in the shag haircuts for fine hair roundup, which adjusts the layering for thinner density.
Difficulty: Medium · Cost: $$ (salon)
14. Feathered Waves
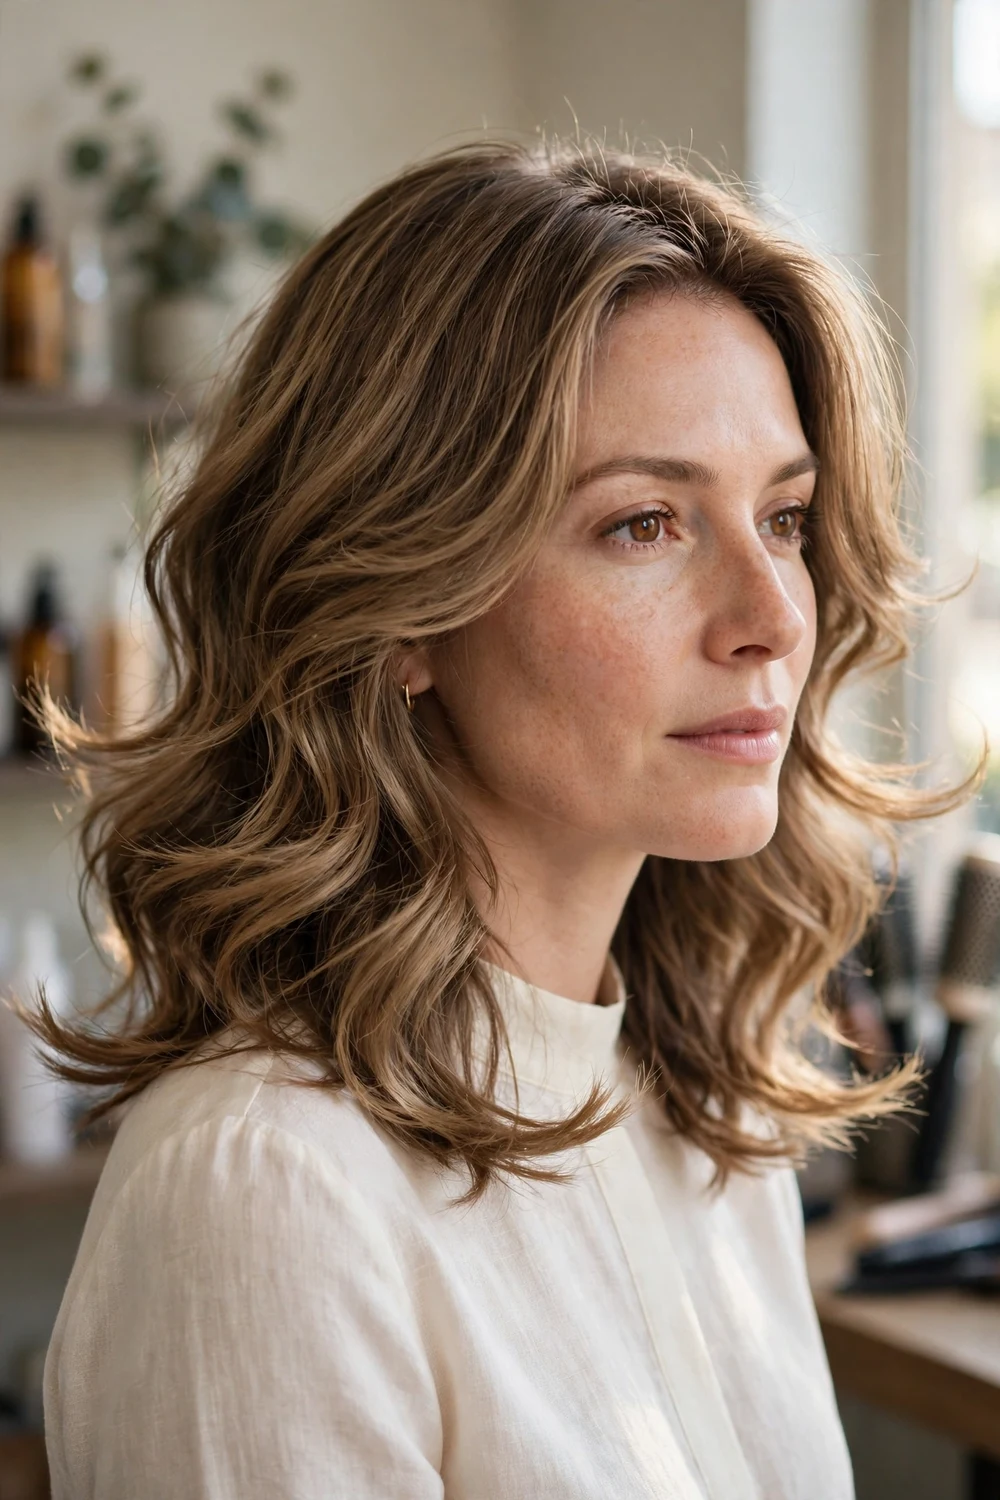
Feathered waves are cut in fine, graduated layers that flick away from the face at the ends. The wave is smooth and swept rather than piecey, and the layers overlap like steps down the length. The style suits medium hair with a natural bend that can be brushed into place.
Blow dry with a round brush, rolling each section away from the face and letting the ends flick out. A light mousse before drying helps the layers hold their sweep. Feathering removes weight gradually, so it works on medium to thick hair that feels heavy in one length cuts.
Difficulty: Medium · Cost: $$ (salon)
15. Waves with Curtain Bangs
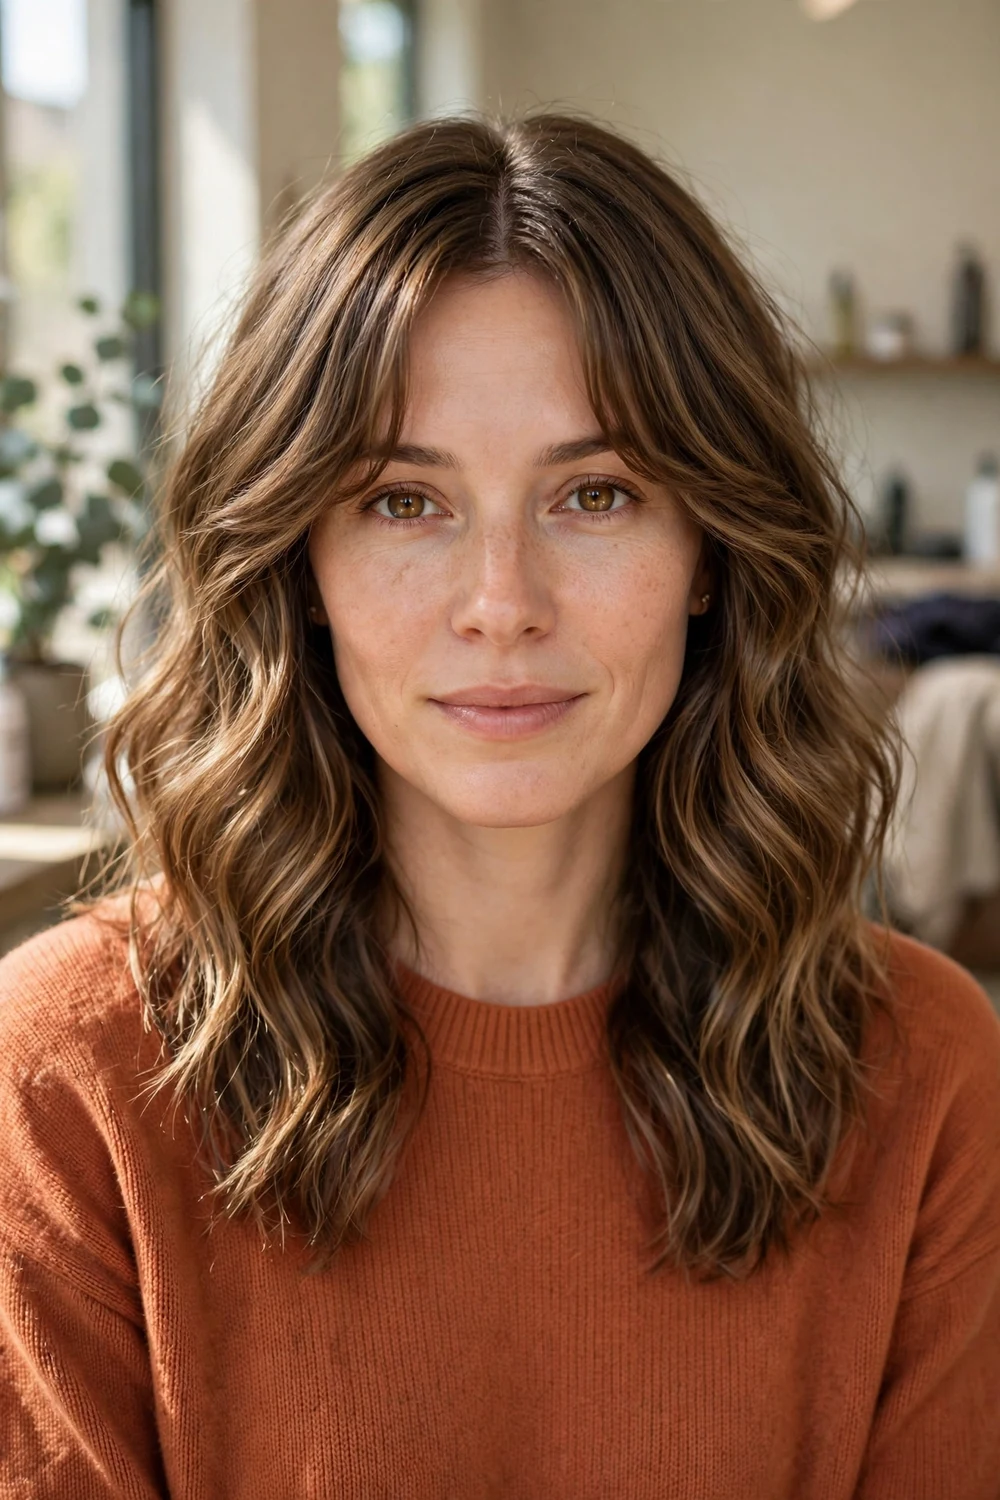
Curtain bangs part in the middle and sweep to each side, with the shortest point near the cheekbones. On wavy medium hair they blend into the front layers instead of sitting as a separate block. The waves and the bangs share the same bend, which keeps the front looking connected.
The bangs need a quick round brush pass or a velcro roller while the rest of the hair air dries, since front pieces dry faster and can go flat or frizzy. Trim them every three to four weeks to hold the cheekbone length. The curtain bangs hairstyles collection shows this fringe at other lengths if you want to compare shapes before cutting.
Difficulty: Medium · Cost: $$ (salon)
16. Waves with Wispy Bangs
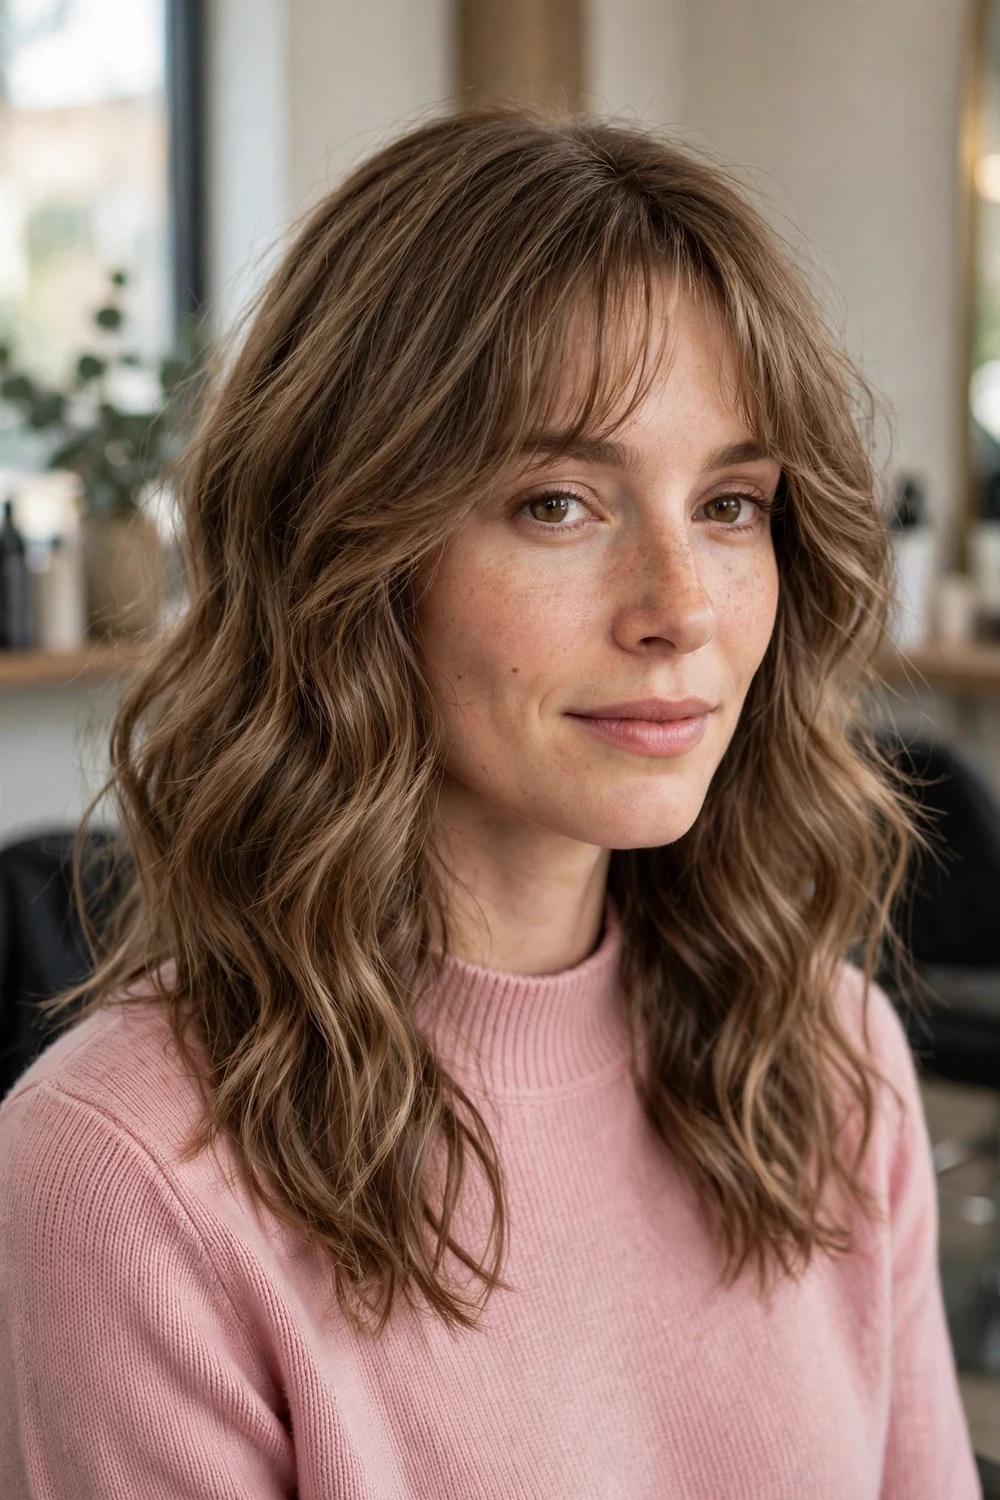
Wispy bangs are cut thin and feathered at the ends, so the forehead shows through the fringe. They add a front detail to wavy hair without the upkeep of a full, heavy fringe. Fine and medium hair suit them best, since thick hair needs a lot of thinning to read as wispy.
Ask for the fringe to be point cut and kept longer at the sides so it merges with the waves. Style by drying the bangs forward with your fingers and a low heat setting, then leave them alone. Product weighs wispy bangs down quickly, so keep oils and serums on the lengths only.
Difficulty: Low to Medium · Cost: $$ (salon)
17. Waves with Side-Swept Bangs
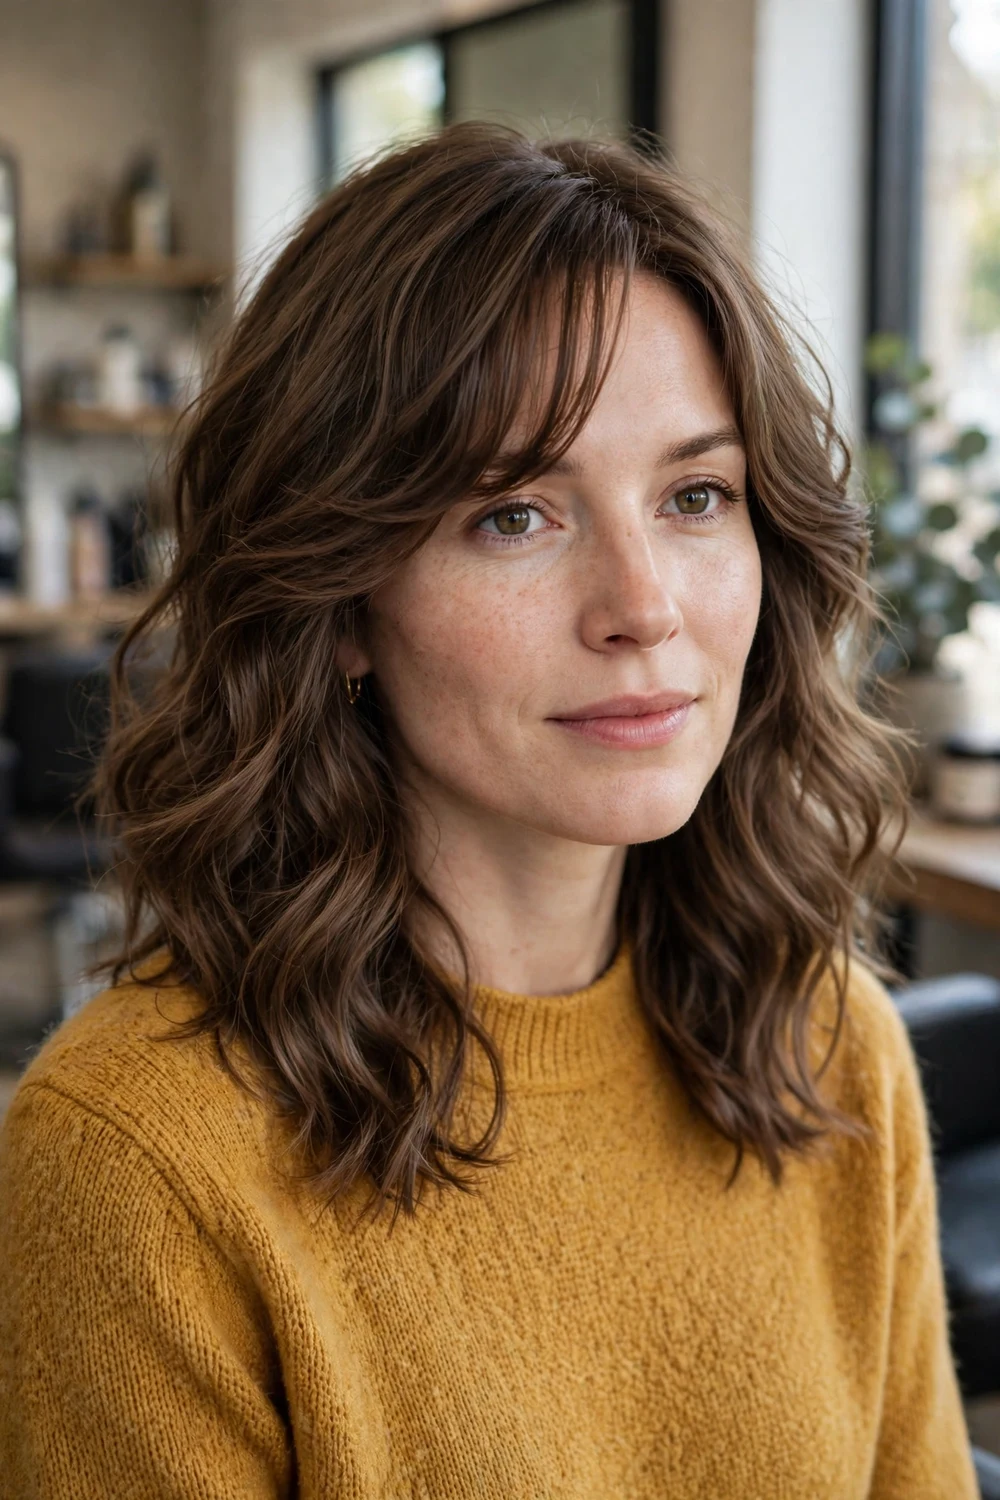
Side-swept bangs are cut long and angled, then brushed diagonally across the forehead into the front layer. They suit wavy hair because the natural bend helps the sweep curve instead of lying straight and stiff. The look softens a strong jawline and balances a high forehead.
Ask for the shortest point to sit near the eyebrow and the longest to reach the cheekbone, blending into a long front layer. Blow dry the fringe in the direction of the sweep with a small round brush. On non wash days, a single bobby pin holds the sweep while the rest of the waves stay loose.
Difficulty: Low to Medium · Cost: $$ (salon)
18. Waves with a Full Fringe
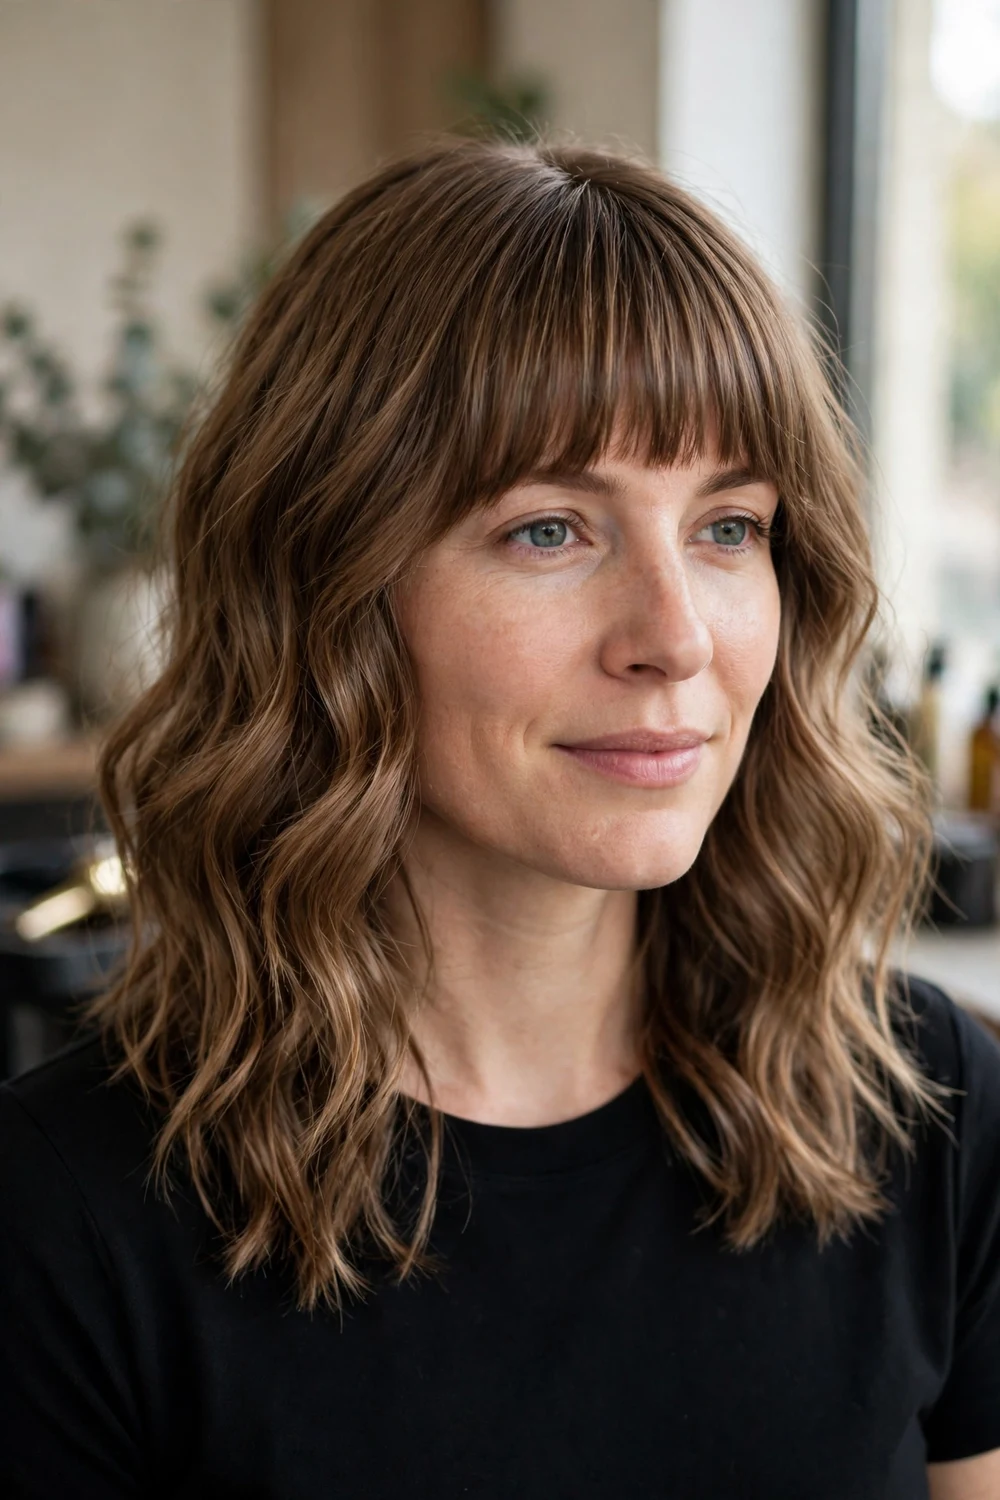
A full fringe is cut straight across at eyebrow level and worn smooth, while the lengths below stay wavy. The contrast between the straight front line and the moving lengths is the point of the style. Medium to thick hair gives the fringe the density it needs to sit as a solid piece.
The fringe is the high upkeep part of this cut: it needs a flat brush blow dry most mornings and a trim every two to three weeks. The lengths can air dry with wave cream, which balances the routine. If your fringe tends to separate, ask for it cut slightly thicker rather than longer.
Difficulty: Medium · Cost: $$ (salon)
19. Deep Side Part Waves

A deep side part moves the parting above the outer corner of one eyebrow, which pushes most of the hair to one side and builds height at the root on the heavy side. The waves fall in a diagonal sweep, and the smaller side can be tucked behind the ear.
Create the part on damp hair so it sets as the hair dries, and add a root lift spray on the heavy side. This is a styling change rather than a cut, so it costs nothing to test on a wavy style you already wear. It suits round and square faces, where the diagonal line adds length to the outline.
Difficulty: Low · Cost: $ (salon)
20. Balayage Waves
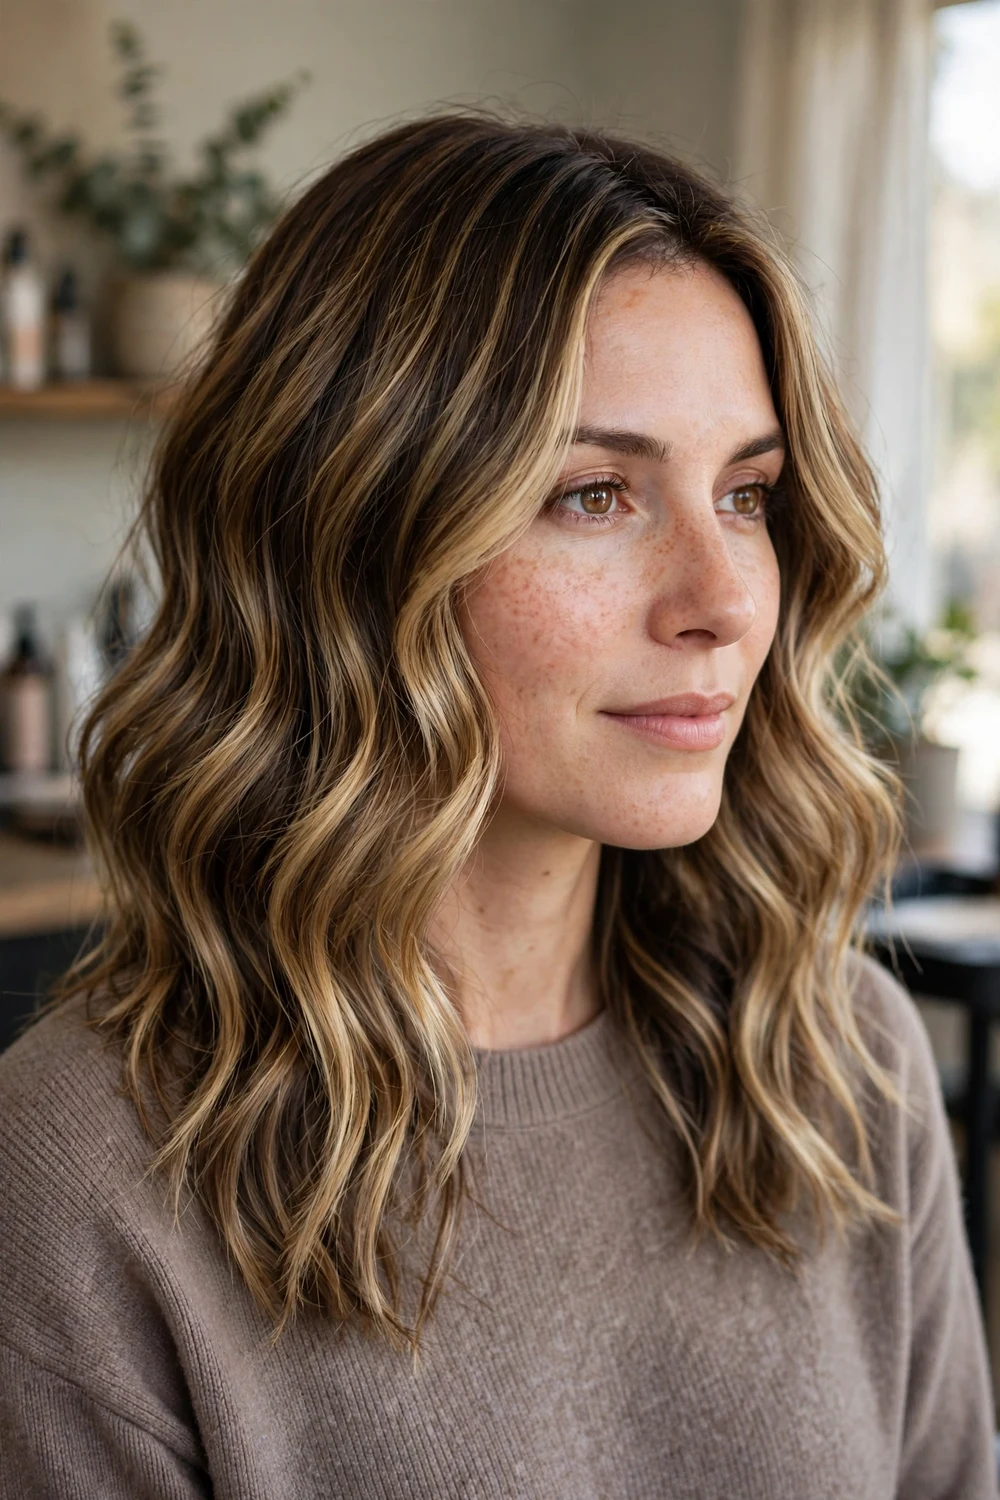
Balayage places hand painted lighter pieces through the mid lengths and ends, and waves are the styling that shows the placement best. Each bend catches light on the painted sections, so the color looks dimensional instead of flat. The roots stay your natural shade, which keeps regrowth soft.
Ask for the lightest pieces around the face and on the top layer, where the waves are most visible. The painting and toning make this a longer salon service, while daily styling stays simple: loose waves with a large barrel iron or your natural pattern enhanced with cream. Refresh the toner every eight to ten weeks.
Difficulty: Medium · Cost: $$$ (salon)
21. Ombre Waves
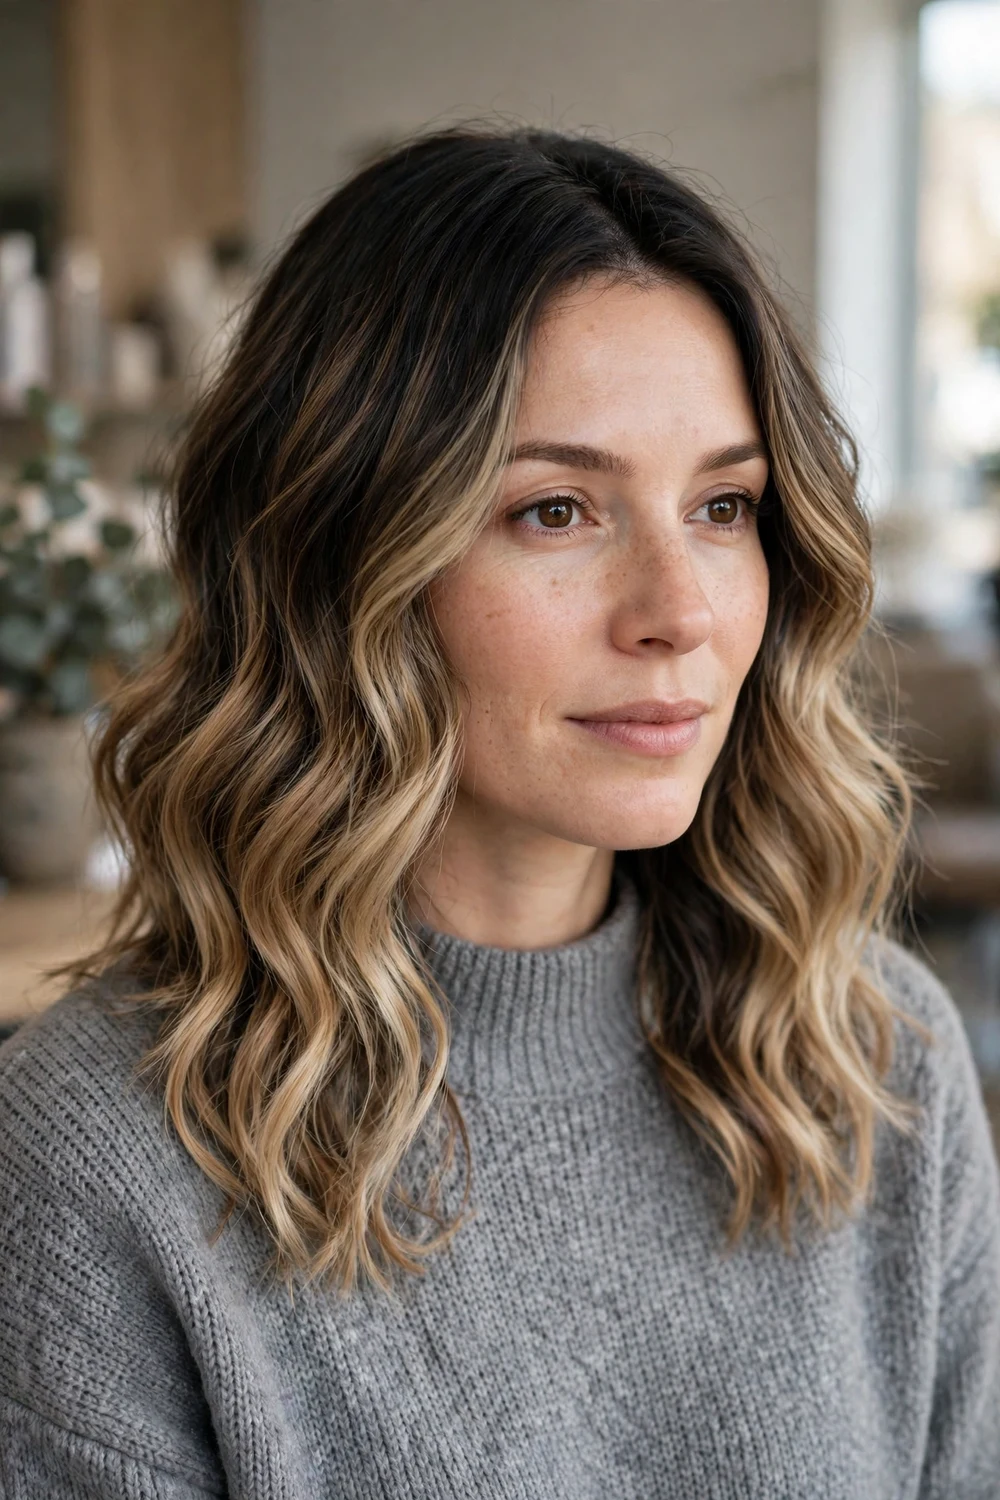
Ombre waves run a gradient from a darker root to lighter ends, with the transition placed around the mid lengths. Waves soften the point where the colors meet, so the gradient reads as a blend rather than a line. Medium length gives the gradient enough room to develop over several inches.
The ends carry the lightest color and the oldest hair, so they need weekly conditioning and gentle handling when wet. The root area needs no color upkeep, and most wearers refresh the ends with a gloss at eight weeks. Style with loose bends concentrated below the transition point to keep the blend smooth.
Difficulty: Medium · Cost: $$$ (salon)
22. Loose Waves for Fine Hair
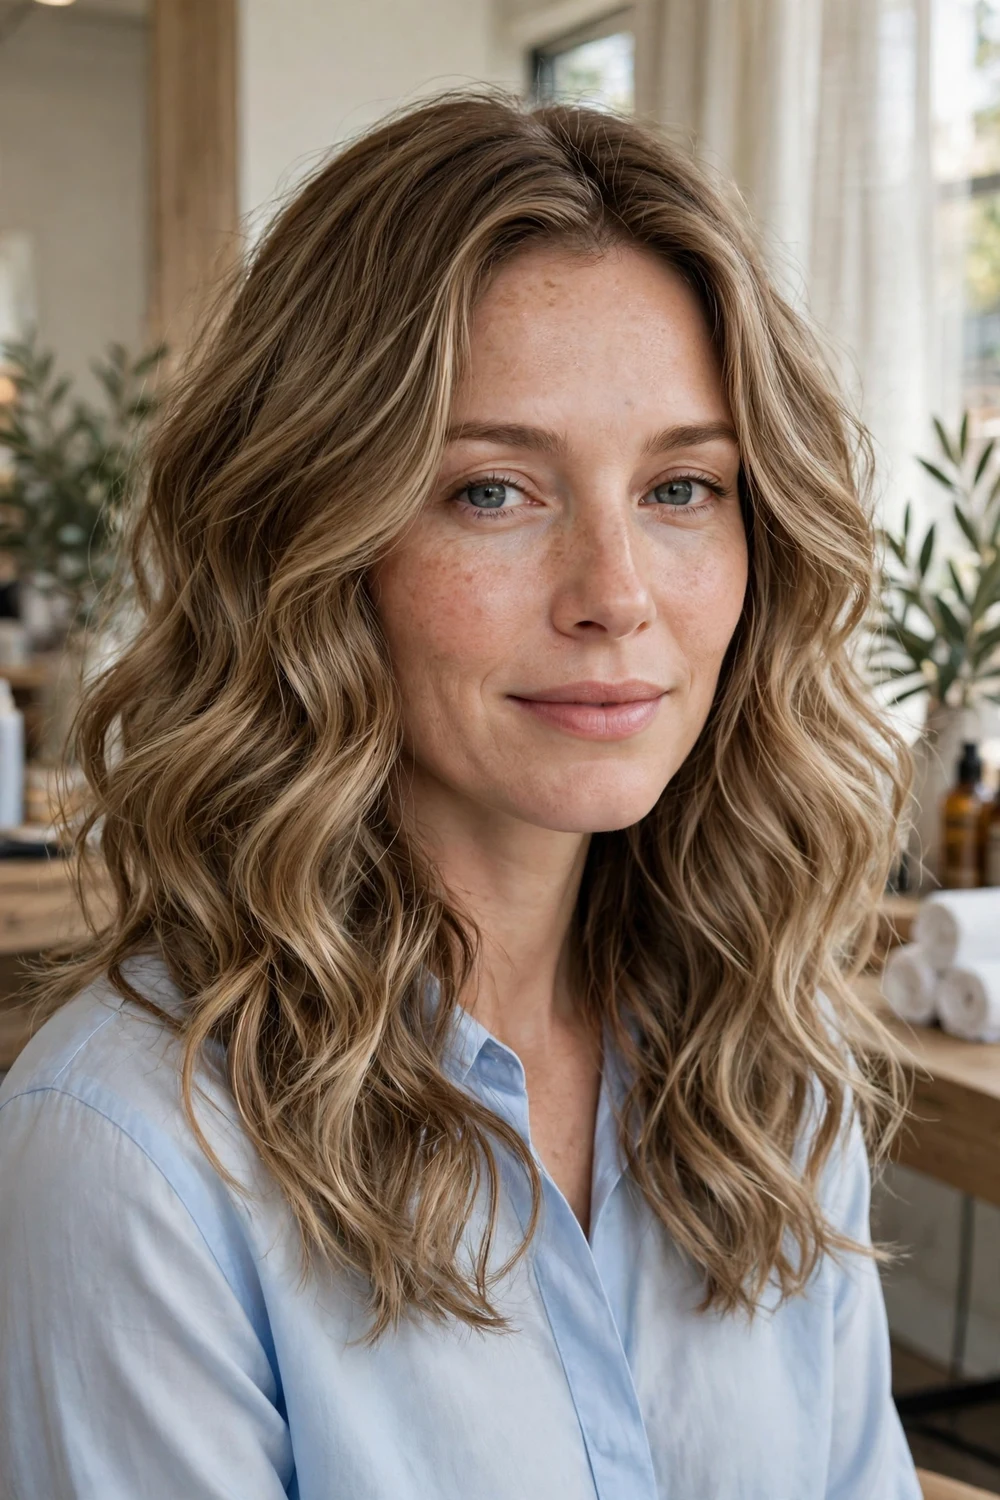
Fine hair needs waves that add width without weight. Loose, wide bends through the mid lengths make each section look thicker, and keeping the ends fairly blunt holds the fullness at the bottom edge where fine hair usually goes thin and see through.
Use mousse rather than oils or heavy creams, and diffuse or air dry with clips at the roots for lift. A light dry texture spray at the ends adds separation. Ask your stylist to limit layers: a few short pieces at the crown help, while heavy layering through the ends makes fine hair look sparser.
Difficulty: Low to Medium · Cost: $$ (salon)
23. Layered Waves for Thick Hair
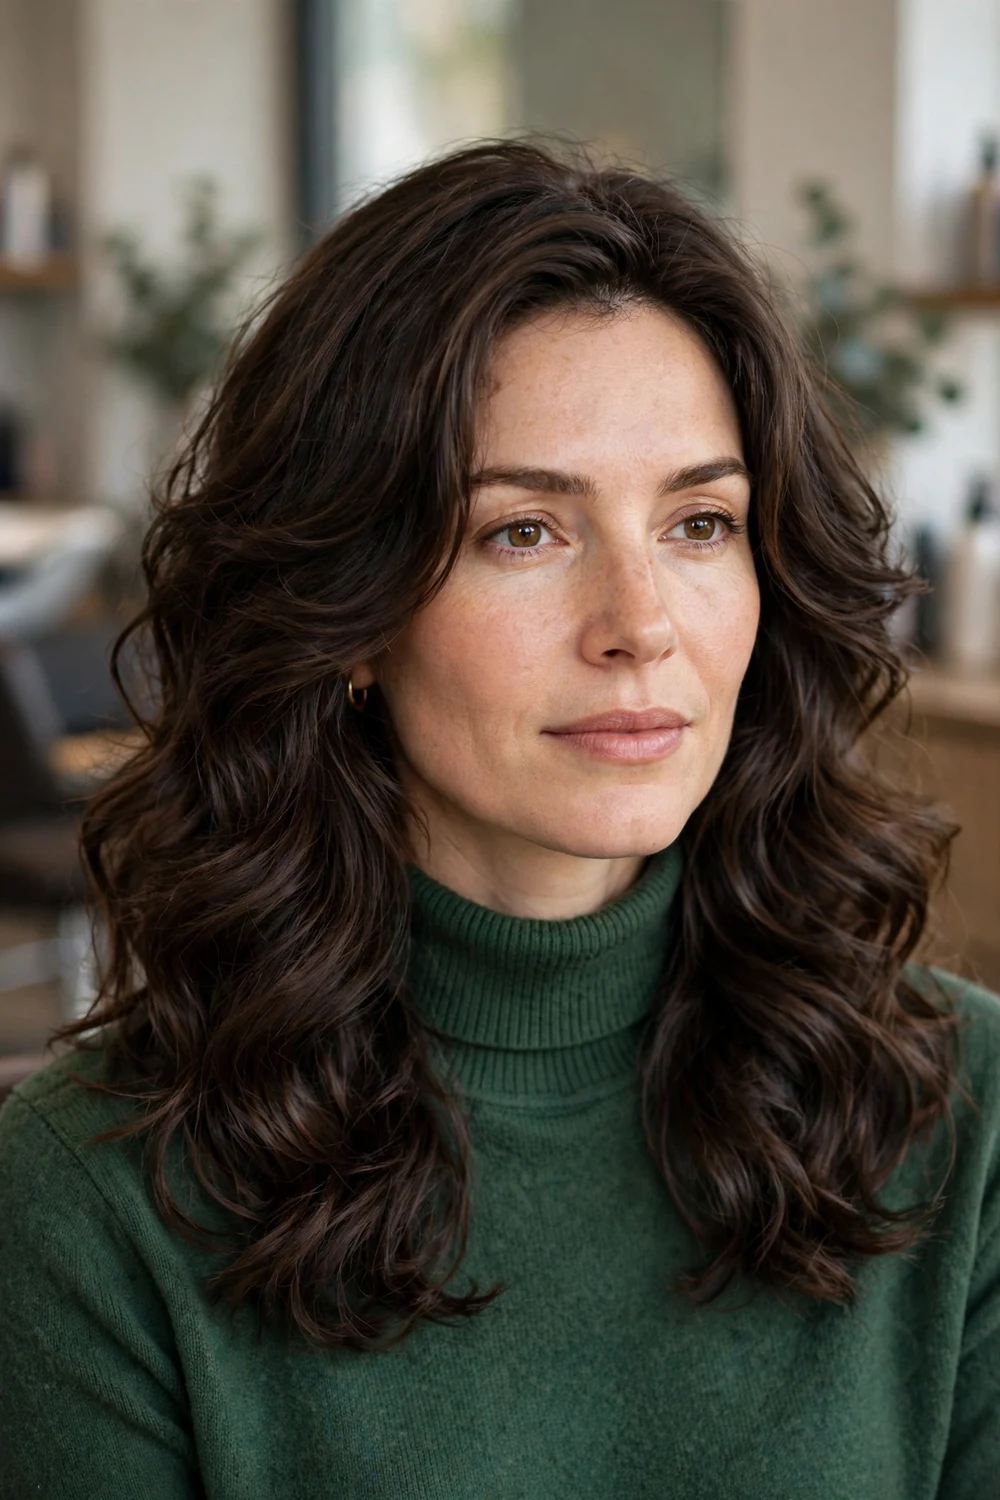
Thick hair carries a lot of weight at medium length, and one length waves can widen into a heavy triangle. Long layers and some internal weight removal let the wave form higher on the head and keep the outline narrower at the bottom.
Ask for layers that start below the chin and for the ends to be point cut, which breaks up the bottom edge. Style with a smoothing cream on damp hair and either diffuse in sections or wrap large pieces around a wide barrel iron. Thinning shears used with care can reduce bulk, but ask for them kept away from the top layer to avoid frizz.
Difficulty: Medium · Cost: $$ (salon)
24. Half-Up Waves
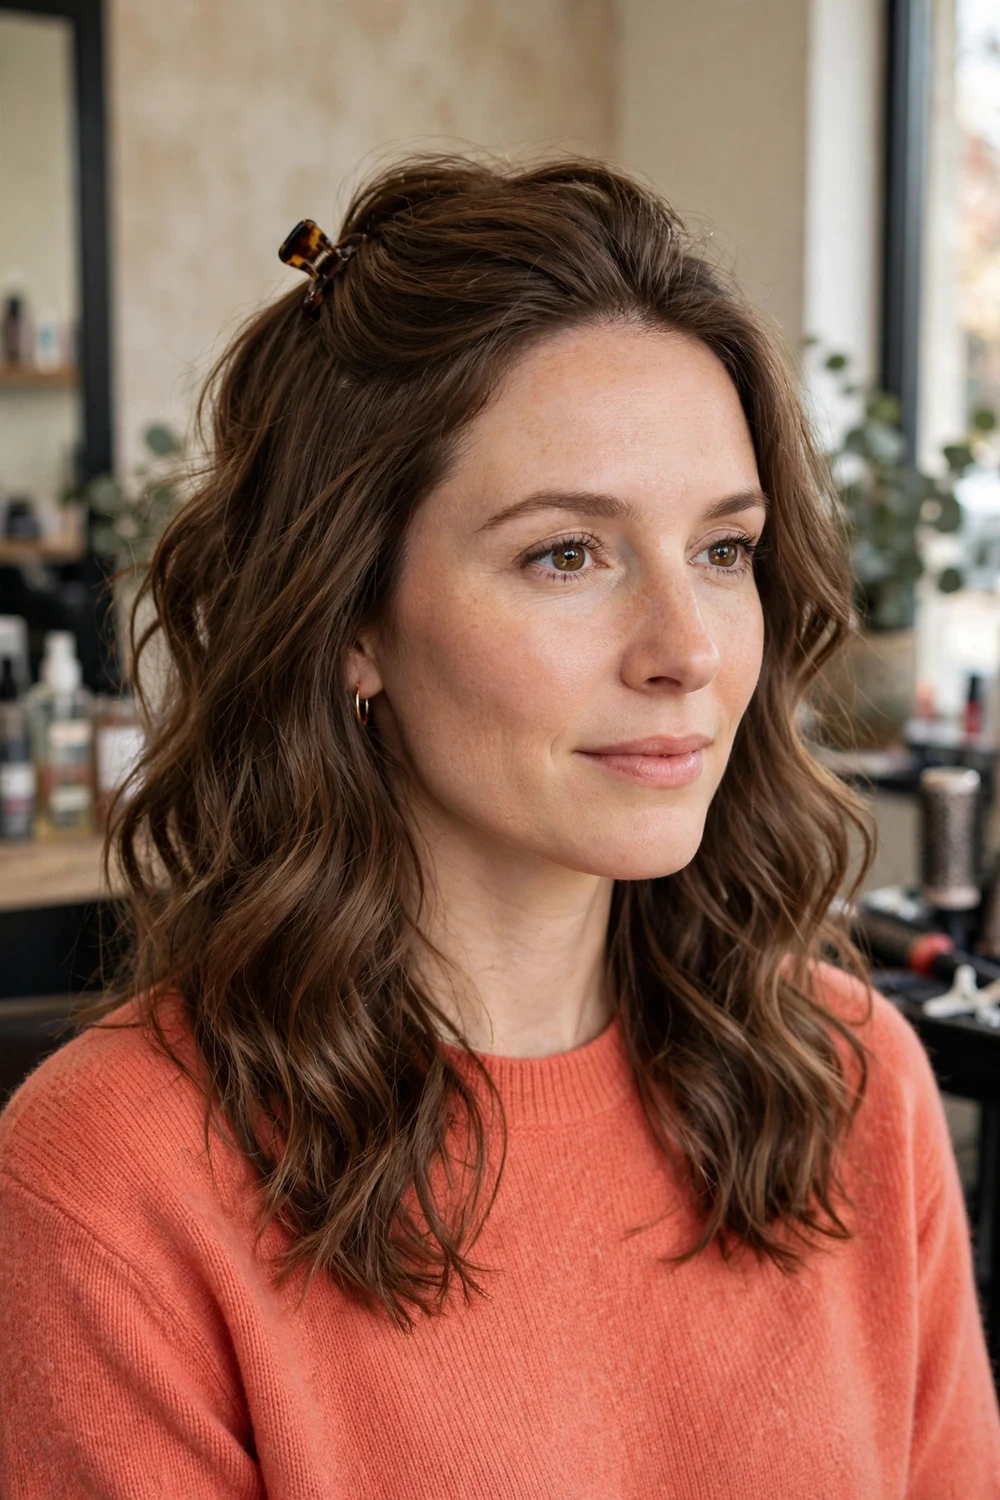
Half-up waves pull the top section back into a small knot, clip, or low twist while the lengths stay down in waves. The style clears hair from the face and still shows the full wave pattern, which is why it works for events as well as daily wear.
Wave the hair first, then gather the top section loosely so the volume at the crown stays in place. Leave two thin pieces out at the front to frame the face. Secure with a clip or pins rather than a tight elastic, which can crease the waves underneath if you take the style down later the same day.
Difficulty: Low · Cost: $ (salon)
25. Wavy Low Ponytail

A wavy low ponytail gathers medium hair at the nape, where the length is just enough for the waves to show in the tail. The top stays smooth or softly parted, and the ponytail itself carries the texture. A wrapped section of hair around the elastic finishes the style without extra accessories.
Create the waves before you gather the hair, since styling the tail after tying gives a thinner result. Keep the elastic firm but not tight, and loosen a few pieces at the hairline with your fingers for softness. This style suits second day waves, when the texture has relaxed and holds together better in a tie.
Difficulty: Low · Cost: $ (salon)
| Wave pattern | Best for | Heat needed | Typical styling time |
|---|---|---|---|
| Loose and beach waves | Fine to medium hair, daily wear | Low, or none with salt spray | 10 to 15 minutes |
| Hollywood and finger waves | Medium to thick hair, formal events | Full heat set or wet sculpting | 30 to 45 minutes |
| S-waves and glossy waves | Hair that goes puffy with curling irons | Flat iron or curling iron plus brush out | 20 to 30 minutes |
| Heatless and air-dried waves | Naturally wavy hair, heat free routines | None | 5 to 10 minutes, plus drying time |
| Layered, shag and feathered waves | Thick hair that needs weight removed | Diffuser or round brush | 15 to 25 minutes |
| Waves with bangs | Adding a front detail to an existing wavy cut | Low, fringe only on most days | 10 to 20 minutes |
Frequently Asked Questions
What is the easiest wave style for medium hair?
Loose waves and beach waves are the easiest starting points. Both use wide sections, forgive uneven bends, and hold up well when the pattern relaxes during the day. Natural air-dried waves are easier still if your hair already has a wave pattern, since the work is product placement and drying time rather than heat styling.
How do I make waves last all day on medium length hair?
Let each section cool fully in its shape before you touch it, since waves set as they cool. Use mousse or texture spray on damp or dry hair before styling rather than heavy products after, and finish with a light hold spray. Sleeping with the hair in a loose braid or a high loose bun preserves much of the pattern overnight.
Can I get waves on medium hair without heat?
Yes. Braiding damp hair, twisting sections and pinning them, or enhancing your natural pattern with mousse and air drying all create waves without hot tools. The hair needs to dry completely in the shape you set, so start with hair that is damp rather than soaking wet and leave the braids or twists in for several hours or overnight.
Which wave style suits fine medium hair best?
Loose waves with fairly blunt ends suit fine hair best. Wide bends add width, blunt ends keep the bottom edge looking full, and light products such as mousse and dry texture spray add grip without weight. Heavy layers, oils, and rich creams tend to flatten fine waves or make the ends look thin.
How often do wavy medium hairstyles need a trim?
Most medium wavy cuts hold their shape for eight to ten weeks. Bangs need shorter cycles: curtain and side-swept fringes need a trim at three to four weeks, and a full fringe at two to three weeks. Layered and shag shapes can stretch a little longer, since the outline is meant to look grown in.
Final Thoughts
Start with the wave pattern, then choose the cut and extras around it. If your mornings are short, loose waves, braid waves, or an air-dried routine will serve you better than a set style that needs forty minutes. If you want one change with a clear effect, add curtain bangs or a deep side part to the wavy cut you already have and live with it for a few weeks before cutting more. Medium length forgives experiments, since most wave styles here can be brushed out, rewet, and restyled the next day.

