

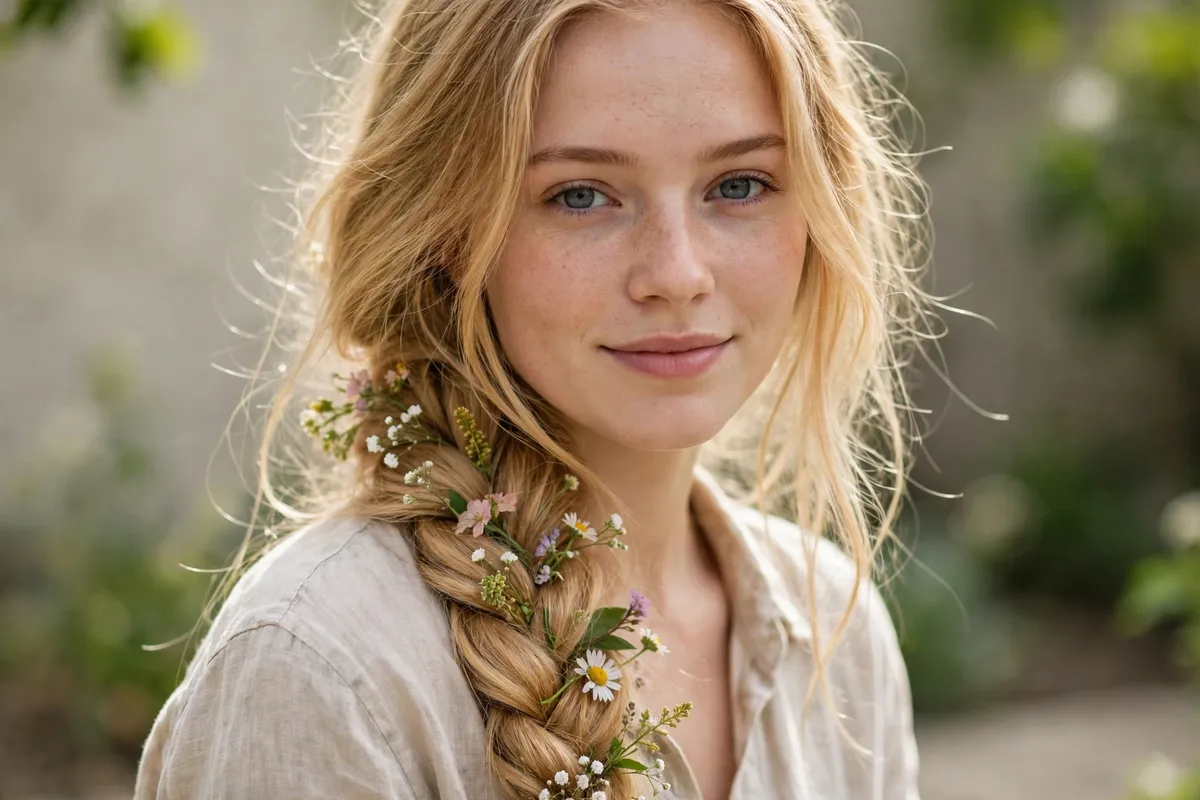
Halloween is under two weeks away, and Rapunzel is one of the smartest costume hair choices you can make this late in the game. Everything happens in one braid or crown, the costume is basically the hair plus a purple dress, and almost every version here works with natural hair, clip-in extensions, or a wig. I have watched years of Halloween costume hair trends come and go, and the Tangled braid stays at the top of the list every October because it is doable in a bathroom mirror.
This list rounds up 23 Rapunzel hairstyles for Halloween, framed the way a costume timeline demands: how long each one takes, what to buy, and what skill it needs. Every idea keeps Rapunzel’s signatures in place, long golden-blonde length, flowers or ribbons woven through, and that full fairytale braid, while staying realistic for party night, trick-or-treating, or a school parade.
Quick Takeaways
- Silk flowers beat real ones for costume hair: they do not wilt, they pin in fast, and you can reuse them next year.
- A pre-braided clip-in extension at the nape gives short or medium hair instant Rapunzel length in about fifteen minutes.
- Pancaking (gently tugging each braid section wider) is the fastest way to make any braid look fuller and more costume-ready.
- Buy supplies now: clear elastics, mini flower clips, a yard of satin ribbon, and bobby pins are all you need for most ideas here.
- If your hair is above shoulder length, the wig route takes five minutes and photographs better than a forced braid.
1. Classic Long Three-Strand Braid

The classic three-strand braid is the fastest route to a readable Rapunzel costume, and it asks for zero special technique. Start by brushing your hair smooth and gathering it into a ponytail at the nape of your neck, securing it with a clear elastic so the anchor stays invisible. Split the tail into three even sections, then cross the right section over the middle, the left over the new middle, and repeat until you run out of length. Tie off the end with a second clear elastic. If your hair reaches at least mid-back, this reads as Rapunzel instantly, and a purple top finishes the costume with no sewing required.
The step that separates a costume braid from an everyday braid is fullness, so take time to pancake once the elastic is in. Starting at the top, gently tug the outer edges of each section outward, working downward so the braid widens evenly into a thick rope instead of a skinny tail. Finish with a light mist of flexible-hold hairspray to stop flyaways without making the braid crunchy. Plan on ten to fifteen minutes total, and if you want extra texture, braid the night before and sleep on it so the plait relaxes into soft waves by morning.
Try this: pancake the braid before the party, then touch it up once you arrive, since hugs and car seats flatten it.
Difficulty: Low · Cost: $ (clear elastics and hairspray)
2. Loose Dutch Braid (the Tangled Look)

This is the screen-accurate version: a Dutch braid, where each strand crosses under the middle instead of over it, so the braid sits raised on the hair like a rope rather than sinking into it. Start at the crown with three small sections, cross each outer strand underneath the center, and feed in hair from both sides as you travel down the head. Keep your tension loose on purpose, because Rapunzel’s braid is soft and chunky, never tight and scalp-pulled, and looser braiding reads more accurate here. Secure the end with a clear elastic and pancake the edges wide for that full fairytale volume.
Pin small silk flowers along the braid once it is done, tucking the stems under the edges of the plait so the clips stay hidden inside the hair. Work in three or four flowers spaced down the length rather than crowding them all at the top, which keeps the balance natural in photos. This one takes twenty to thirty minutes, and watching one quick video tutorial first helps if you have never done an underhand braid before. Braiding on slightly damp hair also gives you better grip, since freshly washed hair slips and loosens faster.
Try this: braid with slightly damp hair for better grip, since freshly washed hair slips and loosens faster.
Difficulty: Medium · Cost: $ (silk flowers, elastics, hairspray)
3. Side-Swept Shoulder Braid

Draping the braid over one shoulder is how Rapunzel wears her hair in the most quoted scenes, and it photographs better than a back braid because the camera actually sees it. Sweep all your hair over one shoulder and smooth the back with a brush so no stray sections peek out behind your neck. Braid a simple three-strand plait down the front of the shoulder, keeping it slightly loose at the top so it falls naturally over the collarbone instead of sticking out stiffly. Tie it off with a satin ribbon rather than a plain elastic, because the ribbon alone sells the costume.
This placement also survives a Halloween night better than a back braid, since the plait rests against your chest instead of dragging across chair backs and car seats where it gets fuzzy. Keep the pancaking moderate so the braid stays sleek enough to sit flat against a dress neckline. Ten minutes is all it needs, and it works on any hair that reaches the chest. Trim the ribbon tails at an angle after tying the bow so the ends look finished instead of frayed.
Try this: tie the ribbon in a bow with long tails, and trim the ends at an angle so they look finished.
Difficulty: Low · Cost: $ (satin ribbon, elastic)
4. Flower Bubble Braid

Bubble braids are the friendliest shortcut on this list because they require no braiding skill at all. Pull your hair into a low ponytail and secure it firmly, then add small elastics every two to three inches down the length of the tail. Gently tug each section outward and slightly upward to round it into a bubble, working from the top down so the bubbles stay even. Repeat until you reach the end of the hair. Anyone who can use a hair tie can do this one, which makes it a strong pick if you are styling someone else’s hair for the party.
The Rapunzel transformation comes from the flowers: pin one or two small silk flowers into each bubble, pushing the clips into the hair underneath so the rounded sections hide them completely. Pastel pinks, lavenders, and peach tones look closest to the movie’s palette against golden hair. Use clear mini elastics instead of black ones so they disappear under the hair and flowers. Expect about twenty minutes of styling, and buy extra flowers since each bubble drinks them up faster than you expect.
Try this: use clear mini elastics instead of black ones so they disappear under the hair and flowers.
Difficulty: Low · Cost: $ (silk flowers, mini clips, elastics)
5. Rose Bubble Braid

This is a close cousin of the flower bubble braid with a more romantic finish: tiny silk roses tucked into every bubble instead of mixed wildflowers. Build the bubbles the same way, low ponytail, elastics spaced a few inches apart, each section tugged round, then press one mini rose into each bubble. If the craft store roses come stemless, hot-glue them onto small alligator clips first so they attach securely and sit at a natural angle. The single-flower repetition reads more deliberate in photos than a mixed bouquet.
Keep the roses small, around half an inch, so the braid keeps its shape instead of getting weighed down and slumping by midnight. Pink and cream roses against golden hair give the most costume-legible result, and spacing the roses slightly off-center rather than dead center creates a more natural, picked-fresh look. Twenty minutes of styling plus a craft store run, and the finished braid doubles as a fairy or garden-princess costume if your Halloween plans change at the last minute.
Try this: space the roses slightly off-center rather than dead center for a more natural, picked-fresh look.
Difficulty: Low · Cost: $ (mini silk roses, clips, elastics)
6. Loose Fishtail Braid
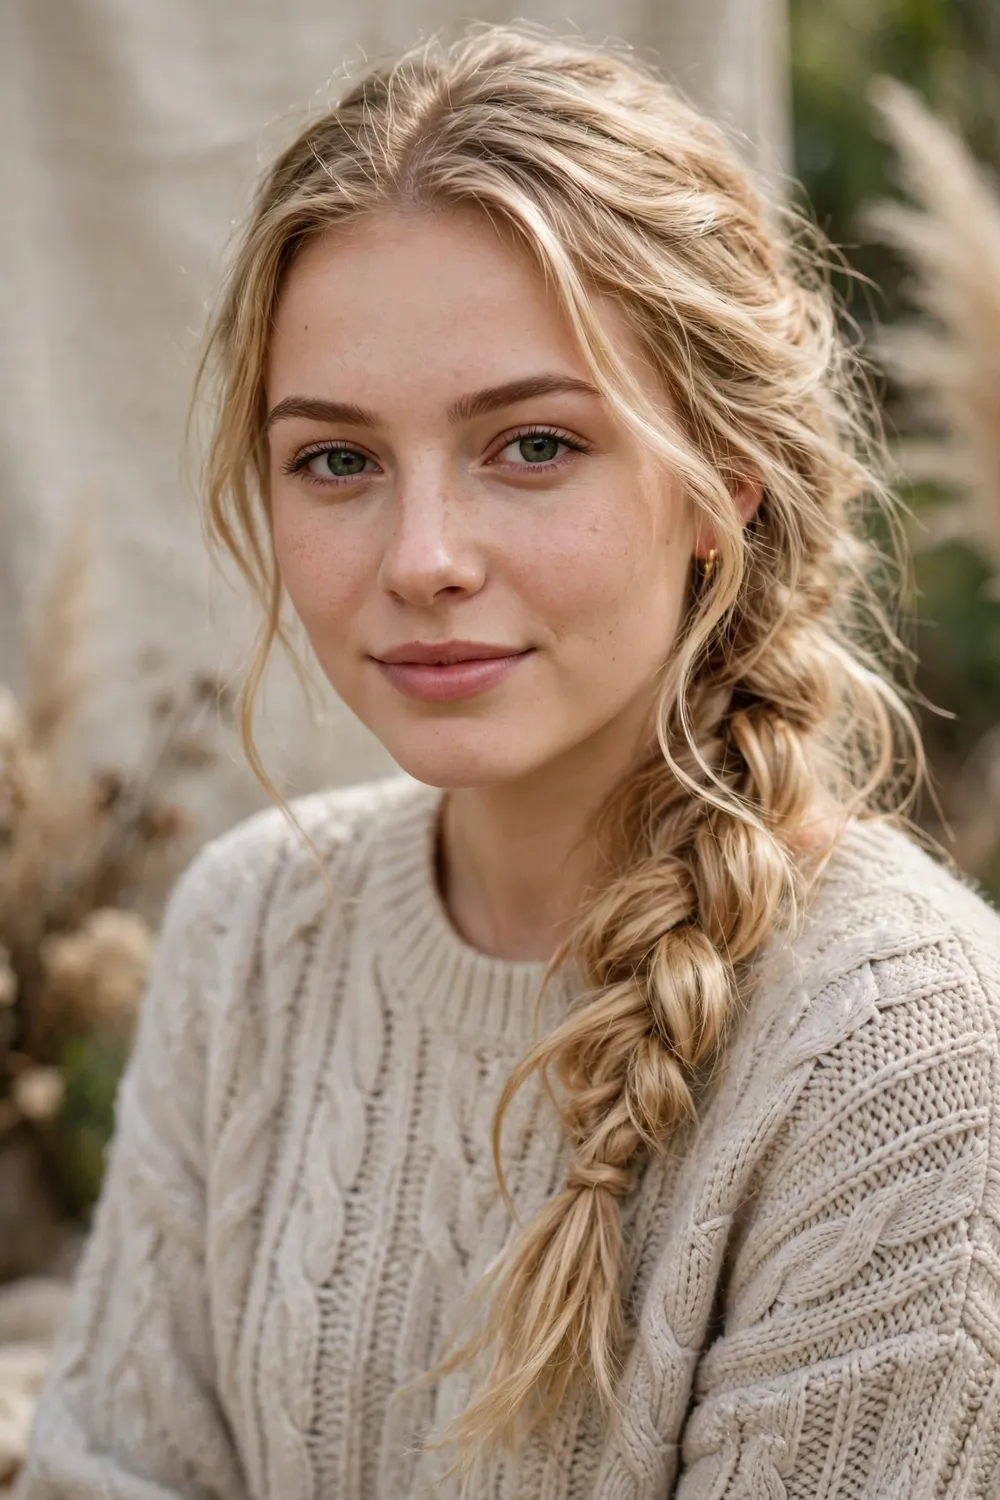
A fishtail braid looks intricate but only uses two sections, which surprises most first-timers. Gather your hair into a low ponytail and split it in half, then take a thin strand from the outer edge of the left section and cross it over to join the right. Take a thin strand from the outer right edge and cross it to the left, and keep repeating with small pieces all the way down. Thinner pieces give a finer, more detailed fishtail, while thicker pieces go faster and look more casual, which suits a costume. Tie off the end with a clear elastic.
For Rapunzel, wear the fishtail loose and slightly undone rather than tight and precise: tug the edges gently once it is tied off, and leave a few face-framing strands out at the front for softness. The zigzag texture photographs well and stands out from the sea of plain three-strand braids at any party. It takes about fifteen minutes once you find the rhythm, so do one practice run the day before. Starting with damp hair or a light styling cream helps, since fishtails made on slippery clean hair unravel quickly.
Try this: start with damp hair or a light styling cream, since fishtails made on slippery clean hair unravel.
Difficulty: Medium · Cost: $ (elastics, light styling cream)
7. Double Side Braids Merged Into One Plait

This build starts with a French braid down each side of the head, beginning at the ear line and braiding back toward the nape, then joins both braids with the remaining loose hair into one big three-strand plait down the back. The two side braids frame the face the way the animated braid does around Rapunzel’s temples, while the single plait keeps the silhouette long and clean. To keep things manageable, clip each finished side braid with a jaw clip while you work so the loose hair stays out of your way until you are ready to merge.
Because the hair is anchored at both sides, this style survives dancing, wind, and long trick-or-treat routes better than a simple back braid, which makes it the most secure hanging option here. It takes about twenty-five minutes and needs decent French-braiding skill, so it is a good one to do with a friend helping, with each person braiding one side. Pin flowers where the three braids meet to hide the elastics and mark the transition point with a decorative flourish.
Try this: do the side braids first and clip each with a jaw clip while you work, so the loose hair stays out of your way.
Difficulty: Medium · Cost: $ (elastics, silk flowers, hairspray)
8. Dutch Lace Sides Feeding One Plait

A lace braid feeds hair in from only one side as it travels, which creates a delicate raised line along the temple instead of a full anchored braid. Run a Dutch lace braid from each temple back toward the crown, crossing strands under the middle and adding hair only from the top side, then gather everything, including the loose hair underneath, into one long three-strand plait down the back. The lace lines look like the detailed side work in the movie’s braid and give the style a professional finish that photographs well up close.
This is a step up in difficulty because the one-sided feeding feels unfamiliar at first, so pin each lace braid flat with bobby pins as you go to stop it loosening while you work on the other side. Give yourself thirty minutes and a hand mirror for the back sections, and pancake the main plait at the end so its fullness balances the finer lace detail up top. The result looks salon-done in party photos, which rewards the extra effort for anyone confident with braiding.
Try this: pin the lace braids flat with bobby pins as you go, since the one-sided feed can loosen while you work.
Difficulty: High · Cost: $ (elastics, bobby pins, hairspray)
9. Accent Micro Braids Around the Main Braid

Before you braid the main plait, section off two pencil-thin strands at the front hairline and braid each into a tiny micro braid, securing them with the smallest clear elastics you can find. Clip these aside with a jaw clip while you build your main braid, then unwrap them and twist or wrap the micro braids around the finished plait in a spiral, tucking their ends in with a bobby pin. This is the detail work that makes a braid look movie-inspired instead of ordinary, and it takes only basic three-strand skill.
The micro braids also solve a practical problem: they cover the elastics where sections join and give flowers something thin to grip onto. Treat this as an upgrade to any base braid on this list rather than a standalone style, since it adds about ten minutes to the total. Use a light hand with hairspray on the micro braids so they stay visible instead of getting glued flat against the main plait, and keep them slightly loose so they sit on top of the braid.
Try this: braid the micro strands before the main hair, and clip them to your shirt with a jaw clip so they stay out of the way.
Difficulty: Medium · Cost: $ (mini clear elastics, bobby pins)
10. Half-Up Braided Crown

If a full-length braid feels like too much work or your hair does not reach very far down your back, a half-up braided crown gives the Rapunzel signal with half the effort. Section off the top half of your hair from temple to temple, tease the crown slightly for a little height, and braid it loosely across the back of your head like a headband. Pin the braid’s ends flat under the opposite side with bobby pins crossed in an X. Let the rest of your hair fall loose, adding soft waves with a curling iron if you have time before the party.
This style earns its place because the visible braid sits right at eye level in photos, and it keeps hair off your face while you eat, dance, or hand out candy. Tuck small flowers or a length of ribbon along the crown braid to push it from everyday half-updo into costume territory. Fifteen minutes, low skill, and it works on hair as short as shoulder length. If you like braided crowns that keep hair off the face, these heatless hairstyles for long hair have more crown and twist ideas that work with the same supplies.
Try this: tease the crown slightly before braiding so the braid sits with a little height instead of lying flat.
Difficulty: Low · Cost: $ (bobby pins, silk flowers)
11. Messy Loose Plait
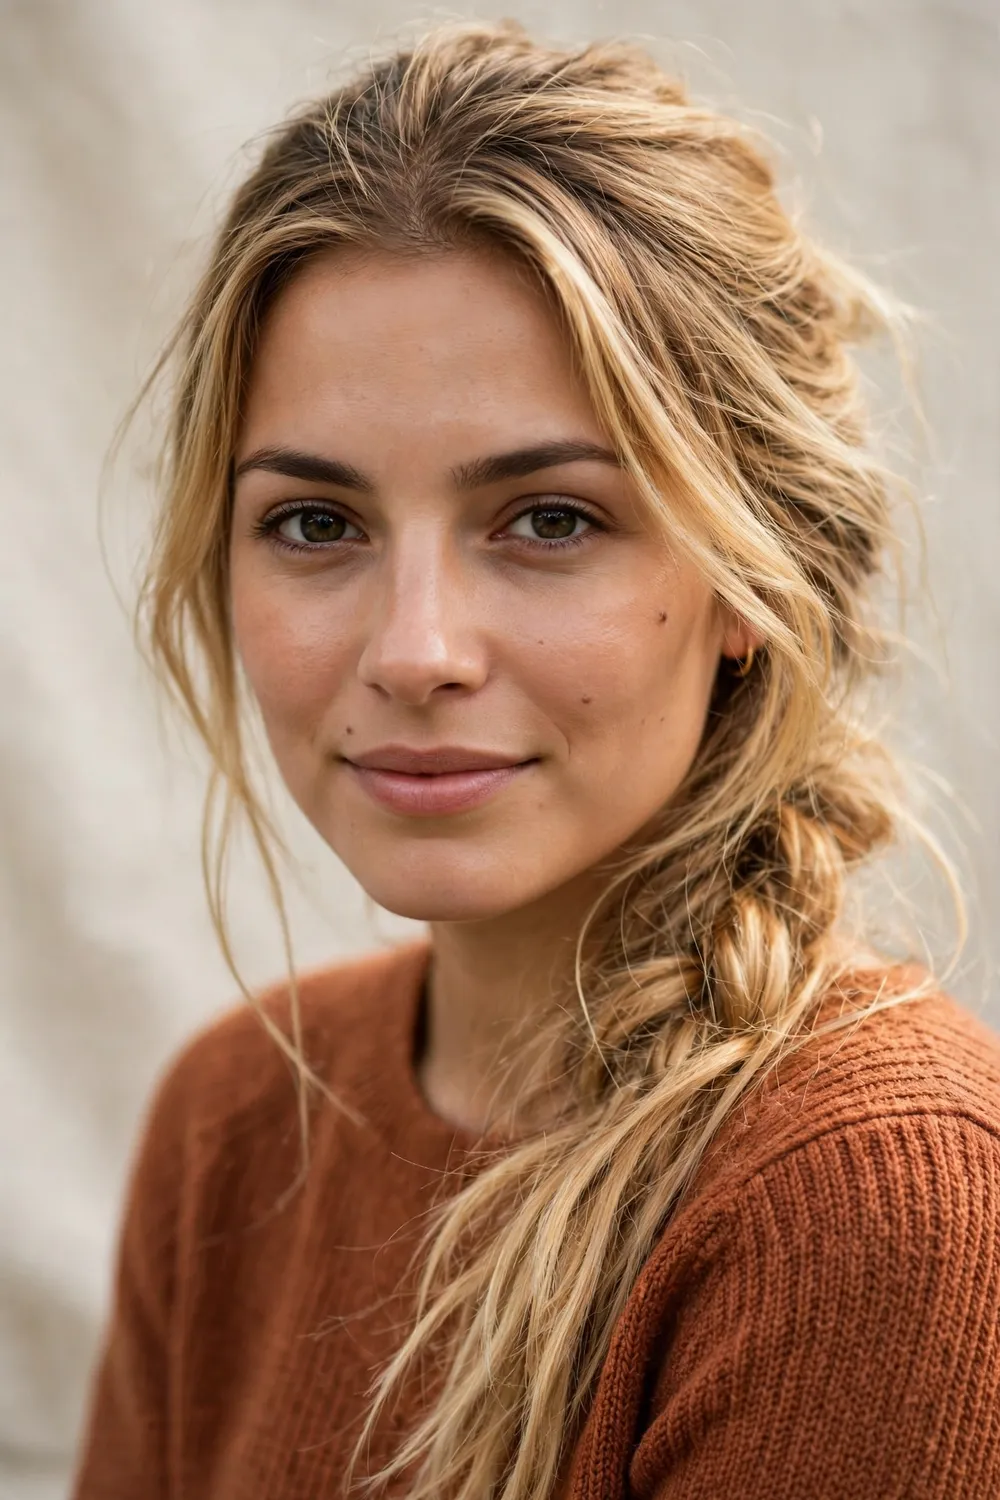
The messy loose plait is the last-minute answer when Halloween snuck up on you: it is fast, forgiving, and honestly close to how Rapunzel’s braid looks after a day of tower escapes. Spritz texturizing spray through dry hair for grip, gather it into a low side ponytail, and braid with zero tension, tugging sections outward as you go. Pull a few strands free around your face for softness, and tie the end off with a ribbon instead of an elastic. Imperfection is the entire aesthetic, so there is no wrong way to finish it.
Because the style is meant to look undone, it survives the whole night gracefully, since further loosening just makes it look more intentional. This is also the best option for wavy or curly hair, because the natural texture does half the work and you can skip the texturizing spray entirely. Braid it looser than feels natural, since braids always tighten up as they settle through the evening. Eight minutes from start to finish, and nobody will believe you did not plan it.
Try this: braid it looser than feels natural, since braids always tighten up as they settle through the night.
Difficulty: Low · Cost: $ (texturizing spray, ribbon)
12. High Braided Ponytail

A high ponytail braided down its length gives you Rapunzel’s drama with playground-proof security, which makes it the top pick for kids’ costumes and school parades. Flip your head forward and gather the hair into a high, tight ponytail, smoothing the crown with a little gel or edge control so the style looks polished in photos. Braid the tail in a three-strand plait, pancake it for fullness, and wrap a ribbon around the base to cover the elastic and add the costume signal. The height keeps the braid swinging clear of backpacks and car seats.
For extra length, clip two wefts of matching extensions into the ponytail before braiding, since the high placement hides the clips completely under the wrapped ribbon. Wrap the ribbon around the base twice and tie it at the front so the bow shows in photos. Twelve minutes, beginner-friendly, and it stays put through an entire evening of trick-or-treating without needing a single repair, which is exactly what parents need on Halloween.
Try this: wrap the ribbon around the base twice and tie it at the front, so the bow shows in photos.
Difficulty: Low · Cost: $ (ribbon, gel, optional clip-in wefts)
13. Fairy Bun With Wrapped Braids

Pair a high messy bun with two small front braids wrapped around its base for a style that reads Rapunzel-meets-fairy, which covers two costume directions at once. Braid two thin sections from the front hairline first and clip them aside, then gather everything else into a high loose bun, twisting the hair rather than looping it so the wrapped braids have texture to grip. Wrap the two braids around the bun’s base and pin them in place. The wrapped braids give the bun the detail it needs to look costumed instead of casual.
Tuck three or four small flowers into the bun and finish with a firm mist of hairspray. Because everything is pinned up, this style handles wind and rain better than any hanging braid, so it is a smart pick if your Halloween involves walking between houses. Fifteen minutes total, and the bun itself does not need to be neat since the braids carry the look. It also works well on second-day hair, which grips pins better than freshly washed hair.
Try this: twist the bun rather than looping it, since a twisted bun gives the wrapped braids more texture to grip.
Difficulty: Low · Cost: $ (bobby pins, small silk flowers)
14. Ribbon-Weave Braid
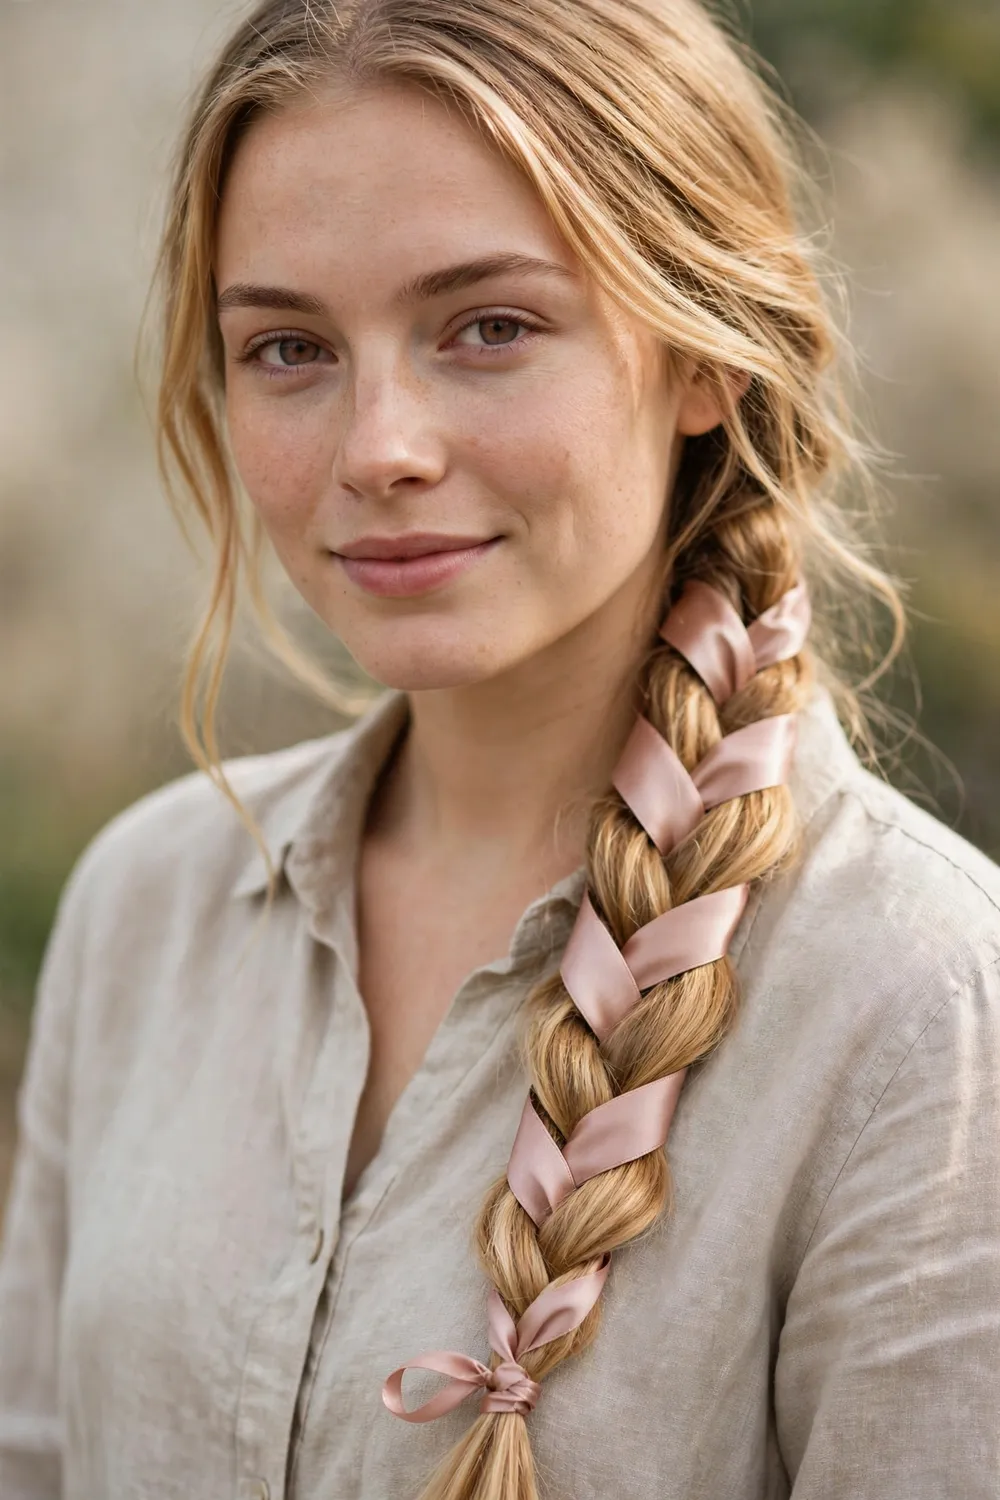
Weaving ribbon directly into the braid is the detail most tutorials skip and the one that gets the most compliments in person. Tie a yard of satin ribbon to a small strand at the top of your ponytail with a tight double knot, then braid the ribbon in as part of one of the three sections, keeping it visible on the outer edge as you cross. Pink ribbon matches the movie’s palette, while gold ribbon glows against darker hair. Keep the ribbon flat as you braid so it shows as a stripe rather than bunching into a cord.
Tie a knot at the end with the elastic to lock the ribbon in, and trim the tail at an angle so it looks finished. This technique works inside any braid type on this list, from a classic three-strand to a fishtail, which makes it the most versatile upgrade here. Use ribbon about half an inch wide, since wider ribbon dominates the braid and narrower ribbon disappears into the hair. Fifteen minutes once you get the rhythm of handling four strands instead of three, and the result looks far more elaborate than the effort involved.
Try this: use ribbon about half an inch wide; wider ribbon dominates the braid, and narrower ribbon disappears.
Difficulty: Medium · Cost: $ (satin ribbon by the yard)
15. Braid With a Big Ribbon Bow Tie-Off

When time is truly short, tie a big satin bow over the elastic at the end of any braid and call it done. The bow covers the plain elastic, adds the Rapunzel ribbon signature, and gives the costume a finished silhouette that reads clearly in photos from across the room. Buy a pre-tied bow on an alligator clip from the craft store and it takes thirty seconds to attach, which makes this the fastest upgrade on the entire list. No braiding skill beyond a basic plait is needed.
Size matters here: the bow should be proportional to the braid, so a long thick braid can carry a four-inch bow while a shorter braid looks better with a two-inch one. Match the bow to your dress or flower colors so the whole costume looks coordinated instead of random. This finish also works as an emergency repair if your braid loosened during the evening, since a bold bow distracts the eye from any fuzzy sections above it. Five minutes on top of any braid, zero skill required.
Try this: match the bow to your dress or flower colors so the whole costume looks coordinated instead of random.
Difficulty: Low · Cost: $ (pre-tied satin bow on a clip)
16. Flower Crown Over Loose Waves

No braiding skill, no problem: a ready-made flower crown over long loose waves is instantly recognizable as Rapunzel and takes ten minutes from start to finish. Add soft waves with a curling iron, or braid damp hair overnight and undo it in the morning for heatless texture. Set the crown just behind the hairline rather than on top of the head, and anchor it with bobby pins crossed in an X behind each ear where they hide under the hair, so it survives hugs and wind without sliding.
This is the best option for hair that will not hold a braid, from very fine strands to layered cuts that keep poking out of plaits. It also works on hair that is not blonde, since the flower crown signals the costume more strongly than hair color does. Keep two spare bobby pins in your bag for mid-party repairs. For long blonde hair that needs a little shape before the crown goes on, these hairstyles for long blonde hair show waves and layers that sit well under accessories.
Try this: anchor the crown with bobby pins crossed in an X behind each ear, where they hide under the hair.
Difficulty: Low · Cost: $ (ready-made flower crown, bobby pins)
17. Flower-Clip Long Hair

Tiny flower clips scattered through loose hair are the lowest-effort entry on this list and a lifesaver when the braid just is not happening. Brush your hair smooth or add quick waves with a curling iron, then clip five to eight mini flowers randomly through the lengths, placing them heavier near the face and sparser toward the ends. The scattered placement looks like flowers caught in Rapunzel’s hair during a walk through the meadow, which is exactly the vibe a costume needs. Choose clips with alligator backs rather than bobby-pin backs, since they grip better and survive the dance floor.
This works on any hair length past the chin and any texture, including curls that refuse to be braided, which makes it the most inclusive option here. It also layers well: add flower clips to the end of any braid on this list for extra detail, or use them on kids who will not sit still for a full braid. Five minutes of styling, and the clips come back out in seconds when the night is over, with no residue or tangling to deal with.
Try this: use clips with alligator backs rather than bobby-pin backs, since they grip better and survive the dance floor.
Difficulty: Low · Cost: $ (pack of mini flower clips)
18. Twin Braids With Flowers

Part the hair down the middle and braid two pigtail plaits for a playful double-braid version that kids love and adults can absolutely pull off. Start each braid slightly behind the ears rather than directly at the sides so the plaits fall forward over the shoulders, pancake both braids wide for fullness, and tie each end with ribbon. Pin small flowers along both plaits, matching the ribbon colors to the flowers so the two sides look intentional rather than random. The symmetry photographs well and the doubled braids distribute weight better than one long plait.
Twin braids are also the most forgiving option for thick hair, since each braid handles half the volume and neither gets too heavy to wear all night. They stay comfortable through a long evening of trick-or-treating and survive backpacks, car seats, and hugs without constant fixing. Fifteen minutes, beginner-friendly, and easy to redo if one side gets messy, since you can rebraid a single side without starting over. This is a strong pick for matching sibling or parent-child costumes too.
Try this: braid slightly behind the ears rather than directly at the sides, so the braids fall forward over the shoulders.
Difficulty: Low · Cost: $ (ribbon, silk flowers, elastics)
19. Halo Crown Braid

A halo braid wraps a Dutch braid all the way around the head like a crown, which gives Rapunzel’s long-hair energy in an updo that will not budge all night. Start behind one ear and Dutch-braid around the hairline, crossing strands under the middle and feeding in hair as you travel. When you complete the circle, tuck the tail under the braid’s start and pin it flat with bobby pins. Once pinned, the ring of braid looks like a golden crown, and flowers tucked into it at intervals complete the costume with almost no extra work.
This one demands patience and about twenty-five minutes, plus enough hair to circle the head, so clip-in extensions help if your hair is on the shorter side. The payoff is total security: nothing hangs down to catch on anything, and the style looks the same at midnight as it did at seven. Practice once before party day, because the wrap-around direction confuses first-timers. Braid with your head tilted slightly toward the side you are working on so you can actually see the braid forming.
Try this: braid with your head tilted slightly toward the side you are working on, so you can see the braid forming.
Difficulty: High · Cost: $ (elastics, bobby pins, silk flowers)
20. Dragon (Snake) Braid

The dragon braid, sometimes called a snake braid, builds a plait inside a plait for a coiled, textured rope that looks far more complex than it is. Pull the hair into a ponytail and split it into two sections, then fishtail-braid each section separately, crossing thin outer strands to the opposite side. Braid those two fishtails together into one final plait and tie it off. The result has a layered, almost scaly texture that stands out from every standard braid at the party and catches light well in photos.
Because the braid is built in stages, it holds its shape exceptionally well through a long night, and the texture reads as deliberate even as it loosens. It takes about twenty minutes and needs basic fishtail skill, so run through one practice braid first on a quiet evening. Keep each stage slightly loose, since a tight dragon braid turns stiff instead of textured. Pin a few flowers along the ridges to pull the style back into Rapunzel territory and soften the edgier texture.
Try this: keep each stage slightly loose, since a tight dragon braid turns stiff instead of textured.
Difficulty: Medium · Cost: $ (elastics, optional flowers)
21. Folded Loop Braid
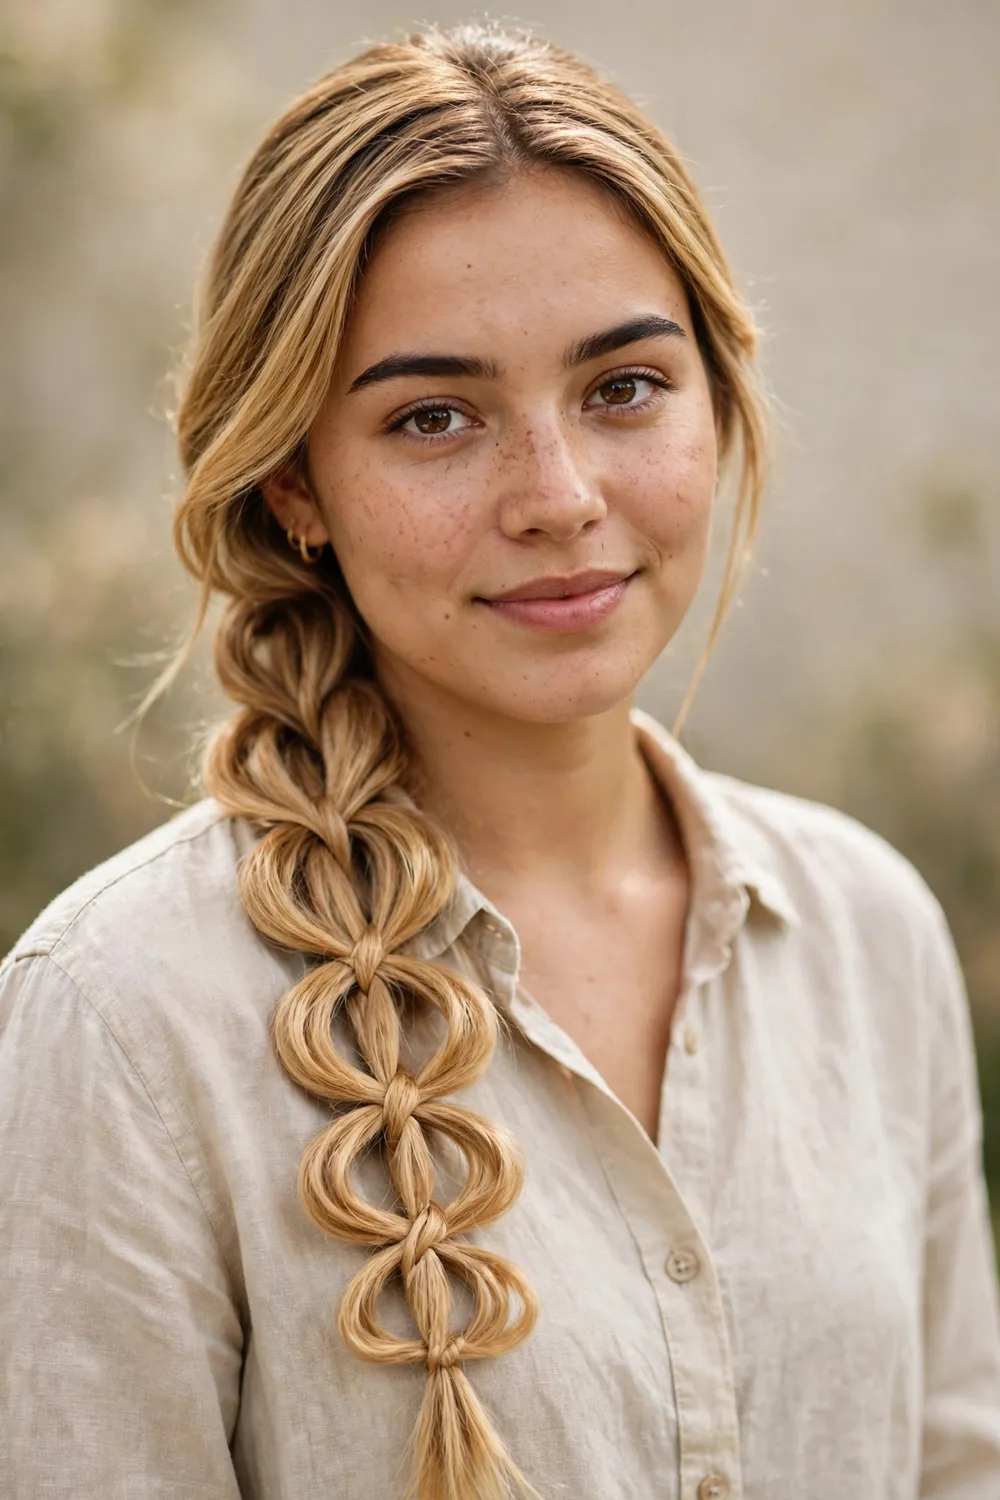
The folded loop braid fakes double thickness by folding the finished braid back over itself and pinning it in place, which recreates the heavy layered look of the animated braid without needing waist-length hair. Braid a loose three-strand plait and pancake it wide, then fold the bottom third up behind the top section and pin the fold flat with bobby pins hidden underneath. Push the pins in from opposite directions so they lock against each other, and pancake the visible sections wide so the fold line disappears into the fullness.
This technique is a gift for medium-length hair that cannot produce a convincing single long braid, since the fold doubles the visible volume in one move. The pinned fold also shortens the braid, which keeps it from tangling in costume capes, scarves, or chair backs through the evening. Fifteen minutes, medium skill, and nobody can tell where the fold is once the flowers go in. Tuck two or three silk flowers right at the fold line to camouflage it completely.
Try this: pin the fold with bobby pins pointing in opposite directions so they lock against each other.
Difficulty: Medium · Cost: $ (bobby pins, elastics)
22. Clip-In Extension Braid for Instant Length

If your hair ends at the shoulders, a pre-braided clip-in extension is the shortcut that makes Rapunzel possible anyway. Start by braiding your natural hair into a small tight braid at the nape to create a flat base, then clip a long pre-braided golden extension right underneath it. Blend the two by wrapping a strand of your own hair around the joint and pinning it flat. The whole join hides under the braid’s bulk, and the result hangs past the waist with a convincing, continuous plait.
Buy the extension a few days early so you can match the tone in daylight, and choose a heat-resistant synthetic or human-hair piece if you want to curl it for texture. Tease the roots at the nape before clipping, since the added grip stops the extension from sliding, then secure it with the built-in combs plus two bobby pins crossed in an X for party-proof hold. Fifteen minutes on costume day, and the extension comes back out in seconds. Short hair does not have to sit Halloween out, and these quick updos for short hair for women show what your natural length can do when the costume is something else.
Try this: tease the roots at the nape before clipping, since the added grip stops the extension from sliding.
Difficulty: Low · Cost: $ (pre-braided clip-in extension, bobby pins)
23. Pre-Braided Golden Wig

A pre-braided golden wig is the five-minute answer and the honest best pick for pixie cuts, bobs, and anyone who does not want to fight their hair on party day. Brush the wig gently from the ends upward to smooth the plait, pin your own hair flat underneath with bobby pins or a wig cap, and set the wig so its hairline sits about a finger’s width above your natural hairline. Secure it with the built-in combs plus pins at both temples, then give it a firm tug test before you leave.
Upgrade the wig the same way you would a real braid: weave a ribbon through the plait, pin in silk flowers, or tie a bow at the end to cover the elastic. Trim the wig’s front pieces slightly so they frame your face instead of hanging like a curtain, which is the difference between a costume wig and a convincing one. Store-brand costume wigs tangle fast, so a little detangling spray before the party keeps the braid smooth through the night. Five minutes to put on, and it comes off the second you get home.
Try this: trim the wig’s front pieces slightly so they frame your face instead of hanging like a curtain.
Difficulty: Low · Cost: $ (pre-braided costume wig, wig cap)
At a Glance: 23 Rapunzel Styles Compared
| Style | Best for | Halloween perk | Upkeep |
|---|---|---|---|
| Classic Long Three-Strand Braid | Mid-back or longer hair | Fastest recognizable costume | Hairspray, touch up pancaking |
| Loose Dutch Braid (the Tangled Look) | Movie-accuracy fans | Screen-accurate raised braid | Bobby pins, hairspray |
| Side-Swept Shoulder Braid | Chest-length hair | Visible in every photo | Ribbon retie if loose |
| Flower Bubble Braid | Beginners, thick hair | No braiding skill needed | Re-tug bubbles, reset flowers |
| Rose Bubble Braid | Romantic costume vibe | Deliberate, polished finish | Keep roses small and pinned |
| Loose Fishtail Braid | Medium to long hair | Stands out from plain braids | Styling cream, hairspray |
| Double Side Braids Merged Into One Plait | Dancers, active nights | Most secure hanging braid | Flowers hide join elastics |
| Dutch Lace Sides Feeding One Plait | Confident braiders | Delicate movie-style detail | Pin lace braids as you go |
| Accent Micro Braids Around the Main Braid | Detail lovers | Covers elastics, adds texture | Light hairspray only |
| Half-Up Braided Crown | Shoulder-length hair | Half the work, full signal | Pin ends, hairspray |
| Messy Loose Plait | Last-minute costumes | Eight minutes, zero pressure | Nothing, loosening helps |
| High Braided Ponytail | Kids, school parades | Stays put, swings clear | Gel the crown, check ribbon |
| Fairy Bun With Wrapped Braids | Windy trick-or-treat nights | Doubles as a fairy costume | Extra bobby pins |
| Ribbon-Weave Braid | Any braid type | Most complimented detail | Keep ribbon flat, knot the end |
| Braid With a Big Ribbon Bow Tie-Off | True emergencies | Thirty-second upgrade | Clip bow back on if loose |
| Flower Crown Over Loose Waves | Non-braiders, layered cuts | Crown does the costume work | X-pinned bobby pins |
| Flower-Clip Long Hair | Any length past the chin | Five minutes, any texture | Spare clips in your bag |
| Twin Braids With Flowers | Thick hair, kids | Symmetrical, photogenic | Redo one side if needed |
| Halo Crown Braid | Updo lovers | Nothing hangs or catches | Practice run recommended |
| Dragon (Snake) Braid | Texture fans | Holds shape all night | Hairspray on the ridges |
| Folded Loop Braid | Medium-length hair | Fakes double thickness | Opposing bobby pins |
| Clip-In Extension Braid for Instant Length | Shoulder-length hair | Waist-length in fifteen minutes | X-pinned bobby pins at join |
| Pre-Braided Golden Wig | Pixies, bobs, no-fuss nights | Five minutes to Rapunzel | Wig cap, detangling spray |
How to Choose Your Rapunzel Style
Start with your hair length, since it decides your route before anything else. Hair past mid-back can do any braid on this list straight from the head. Shoulder-length hair does best with styles that fake length: the folded loop braid, the half-up crown, or the clip-in extension braid. Hair above the shoulders should go straight to the pre-braided wig, which takes five minutes and looks better in photos than a braid stretched past its limit.
Next, be honest about your braiding skill and your clock. If you braid your own hair comfortably, the Dutch braid, lace sides, and halo crown reward the effort. If your braiding stops at a basic plait, the bubble braid, the ribbon bow tie-off, and the flower crown give full costume credit with beginner skills. With Halloween days away, pick the style you can already almost do rather than one that needs three practice sessions.
Finally, match the style to your Halloween night. Sitting at a party means any hanging braid works. Walking door to door in October wind calls for pinned styles like the fairy bun or the halo crown that will not blow apart. For face-framing softness around the braid, these long hairstyles with curtain bangs show how bangs sit with long styles, which helps if you want loose pieces at the front.
Keeping Your Costume Braid Intact All Night
Secure the base first. Most costume braid failures start at the anchor, not the braid itself. A ponytail base wrapped with two elastics holds better than one, and crisscrossed bobby pins at the nape stop side braids from sliding. If you are using a clip-in extension or wig, pin it in an X pattern and give it a firm tug test before you leave the house.
Protect the decorations. Silk flowers should be pinned with their clips pushed under the braid’s edges, not just resting on top, and ribbon ends need a knot or a dot of fabric glue at the tie-off so they do not unravel mid-party. Carry three spare bobby pins, two spare flower clips, and a travel hairspray in your bag. Those five items fix nearly every costume hair emergency.
Plan the takedown. Extensions and wigs come out first, then flowers, then elastics, working from the bottom up so you do not yank knots tighter. Brush gently from the ends upward, and if hairspray made the braid crunchy, a little conditioner on dry hair before you wash loosens the hold. Store silk flowers and ribbons in a bag for next year; good ones survive many Halloweens.
Frequently Asked Questions
How can I do a Rapunzel hairstyle if my hair is short?
You have two strong routes. A pre-braided clip-in extension clipped under a small nape braid gives shoulder-length hair waist-length Rapunzel length in about fifteen minutes. For pixie cuts and bobs, a pre-braided golden wig takes five minutes and photographs better than forcing a short braid. Both options accept the same flowers and ribbons as a natural braid, so the costume reads identically in photos.
What do I need to buy for a Rapunzel Halloween hairstyle?
Most ideas here need only a craft store run: clear mini elastics, small silk flowers or mini flower clips, a yard of satin ribbon, bobby pins, and a travel hairspray. If your hair is short or you want instant length, add a pre-braided clip-in extension or a golden costume wig. Buy flowers a few days early so you can match tones in daylight, and grab extra elastics since they disappear fast.
How do I keep my Rapunzel braid from falling apart all night?
Anchor the base with two elastics and crisscrossed bobby pins, since failures start at the anchor rather than in the braid. Braid on slightly damp hair or with a light styling cream for grip, because freshly washed slippery hair loosens fastest. Mist the finished braid with hairspray, pin flowers under the braid edges instead of on top, and carry spare pins and a travel hairspray for repairs. Side-anchored styles like the double side braids survive active nights best.
Should I use real flowers or fake flowers in the braid?
Use silk or fabric flowers for any Halloween event. Real flowers wilt within hours, stain light hair, and fall apart when you pin them, while silk flowers stay fresh all night, grip clips better, and can be reused next year. If you want real flowers for photos, add them right before pictures and swap to silk for the party itself.
Can kids wear these Rapunzel hairstyles for trick-or-treating?
Yes, and several ideas here are built for it. The high braided ponytail and twin braids stay secure through an evening of walking, keep hair out of the face, and survive backpacks and car seats. Use flower clips instead of pinned flowers for kids, keep ribbons tied rather than hot-glued, and skip heavy extensions that pull on small heads. A quick braid plus a purple dress is a complete costume.
Final Thoughts
With Halloween days away, pick the Rapunzel style that matches your hair length and your patience, buy the flowers and ribbon now, and do one practice run before costume day. A braid plus flowers plus a ribbon is the whole formula, and any of these 23 versions gets you there.

