


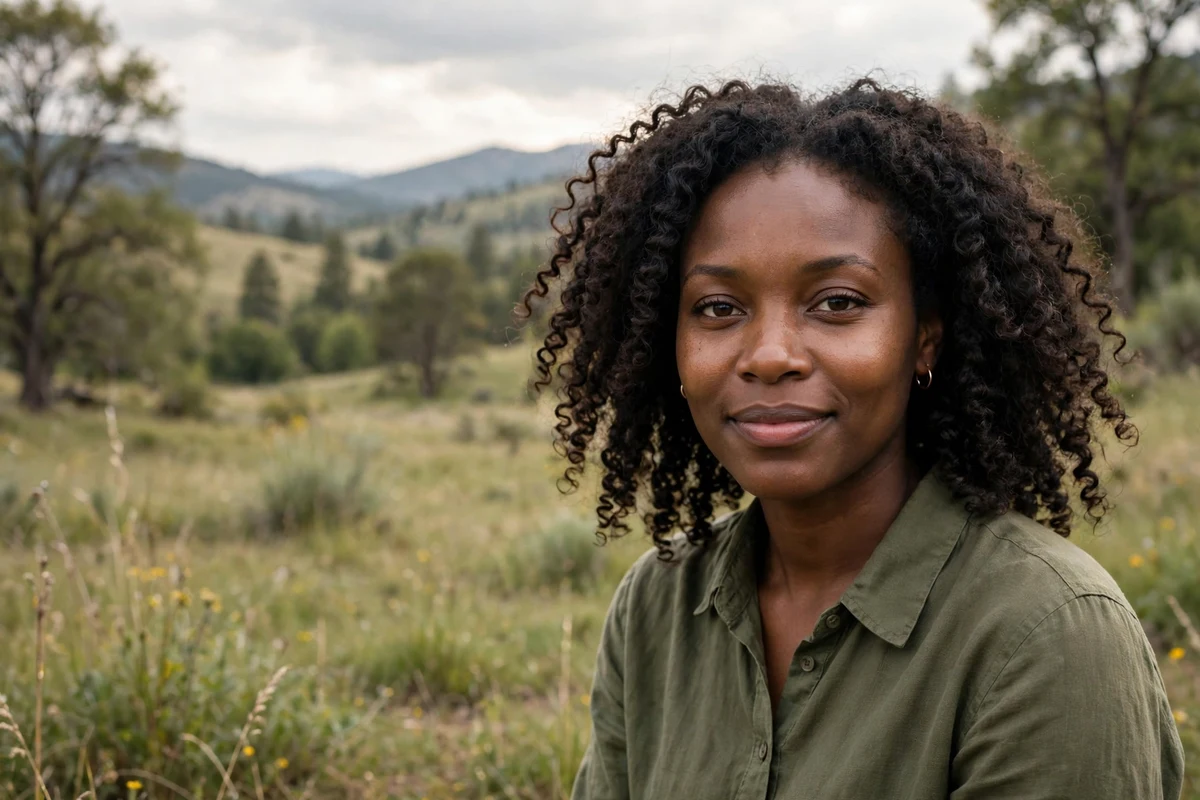
The best natural hairstyles for Black women are the ones that fit your curl pattern, your length, and your daily routine. This guide covers 24 of them, from five-minute wash and go curls to protective styles that stay neat for six weeks. Every style on this list works with natural texture, and each idea comes with a styling tip plus honest notes on difficulty and cost.
Use the quick takeaways below to narrow your options fast, then browse the full list. If you are torn between two styles, the comparison table and the how-to-choose guide near the end will help you decide.
Quick Takeaways
- Wash and go curls, twist-outs, and puffs show off your texture with minimal effort. Twists and braids protect it for weeks.
- Loose natural styles last one to five days with nighttime care. Protective styles last two to six weeks.
- Braided styles should feel snug, never painful. Constant tension around the hairline leads to breakage and thinning edges.
- Apply heat protectant before every pass of a flat iron or blow dryer, including silk presses.
- Moisture keeps every style looking its best: use a leave-in after washing, seal with a light oil, and sleep in satin.
1. Classic Wash and Go Curls

Work in four to six sections on soaking wet hair. Smooth a leave-in conditioner through each section, then layer a curl cream or gel from root to tip, coating small clumps so every curl gets covered. Let it air-dry or diffuse on low heat for extra lift. Once fully dry, fluff the roots with an afro pick to shape the outline.
This style shows your true curl pattern with no special tools beyond products you likely already own. Sleep in a loose pineapple with a satin bonnet, then refresh with water and a little leave-in in the morning.
Try this: apply products section by section in front of a mirror so no patch gets skipped.
Difficulty: Easy · Cost: $0–$20 (styling products)
2. Defined Twist Out

Two-strand twist damp, conditioned hair into medium sections, usually 10 to 16 twists for full volume. Use a cream with hold so each twist keeps its shape while drying. Wait until the hair is fully dry before unraveling. Separate each twist with oiled fingertips instead of a comb to keep frizz down.
The result is springy, uniform curls that last three to five days with nighttime pineappling. Tighter sections give more definition, while larger sections give more fullness. Twist in the same direction throughout so the pattern releases evenly.
Try this: unravel each twist over a sink lined with a towel so shed hair stays contained.
Difficulty: Easy · Cost: $0–$15 (styling products)
3. High Puff

Gather hair toward the crown and secure it with a wide elastic band or satin-lined tie. Keep the tension gentle around your edges rather than pulling tight. Smooth the hairline with a light gel and a soft brush for a neat finish. Leave the puff itself fluffy and only pat the surface instead of brushing through it.
This is a five-minute morning style that keeps curls off your face and works from the gym to the office. Stretch hair with a blow dryer on cool before gathering if you want more height in the puff.
Try this: tie a silk scarf around the hairline for ten minutes after styling to set the edges.
Difficulty: Easy · Cost: $0–$10 (hair tie and gel)
4. Rounded Natural Afro

A shaped afro needs trims every eight to ten weeks to keep the outline round. Wash and deep condition first, then pick the roots out in layers from the bottom up. A light leave-in keeps the shape soft without weighing it down. Sleep with a high pineapple and a satin bonnet so the round shape survives the night.
This style celebrates full natural volume and suits medium to long hair best. Ask your barber or stylist to shape it dry, since shrinkage changes the outline once water hits it.
Try this: pick the roots in small sections instead of one big pass for a more even shape.
Difficulty: Easy · Cost: $25–$60 (shaping trim)
Want more ways to wear a short, full shape? Our short afro hairstyles for Black women roundup covers crops, TWAs, and tapered fros.
5. Flat Twist Updo

Part damp hair into sections and flat-twist each one close to the scalp, feeding in hair as you go. Direct all twists toward the crown or nape, then pin the ends into a tucked bun. This keeps every end protected, and the style can last up to two weeks with a satin scarf at night. Keep the twists snug but never tight around the hairline.
Moisturize the scalp with a light oil every few days while wearing it. Mist with water and leave-in before oiling so the moisture actually gets in. This updo suits work, weddings, and church without daily restyling.
Try this: pin the bun slightly off-center for a softer, less severe look.
Difficulty: Moderate · Cost: $0–$20 (DIY) or $60–$120 (salon)
6. Two Strand Twists

Split small sections of conditioned hair into two pieces and wrap them around each other from root to tip. Work with damp hair and a butter or cream so the twists stay smooth. Wear them loose for two to three weeks as a protective style, or unravel them later for a twist-out. Uneven parts barely show, which makes this one of the most forgiving styles to learn.
Mist with a leave-in spray every few days to fight dryness, and wrap with a satin scarf at night. Twist the ends a little tighter than the roots so they do not unravel in the first few days.
Try this: do the twists on stretched hair to cut down on tangling at takedown.
Difficulty: Easy · Cost: $0–$15 (styling products)
7. Mini Twists

Mini twists use pencil-width sections, which means a longer install of three to five hours but a style that lasts four to six weeks. They are light enough to pull into ponytails and buns without strain. Shampoo gently by focusing on the scalp and letting the suds rinse through the twists. Wear a satin bonnet at night to slow frizz.
Because the sections are small, mini twists show off length beautifully as hair grows. Apply a light leave-in spray every few days to keep them soft, and give your scalp a break between installs.
Try this: keep a spray bottle of diluted leave-in by your bed for quick nighttime touch-ups.
Difficulty: Moderate · Cost: $0–$20 (DIY) or $80–$180 (salon)
8. Bantu Knots

Section hair into squares and twist each section into a coil, wrapping it around itself into a small knot close to the scalp. Tuck the ends under so each knot holds. Wear the knots as a bold sculptural style, or unravel them after a day for springy bantu knot-out curls. Keep the sections even so the finished look stays balanced.
A cream with hold gives the knots grip and reduces flyaways. This style works on short, medium, and long hair, and the knot-out version gives you a second hairstyle from the same install.
Try this: make the sections at the back slightly larger, since hair is usually denser there.
Difficulty: Easy · Cost: $0–$10 (styling products)
9. Half-Up Half-Down Natural Curls

Pull the top third of your curls into a small ponytail or bun and leave the rest down. Use a satin scrunchie instead of a plain elastic to avoid breakage at the tie line. Position the top section at the crown for lift or slightly back for a softer shape. Smooth only the gathered section with gel and leave the loose curls untouched.
This takes about ten minutes and suits second or third day hair well. Add two face-framing curls in front for a softer finish, and refresh the loose curls with water and leave-in if they flatten.
Try this: twist the top section before pinning it for extra texture at the crown.
Difficulty: Easy · Cost: $0–$5 (scrunchie)
10. Pineapple Updo

Flip your head forward and gather all your curls into a loose ponytail at the very top of your head. Keep the band loose so the curls spill over instead of getting crushed. This lifts hair off your neck and keeps curl definition intact through the day. It also doubles as an overnight style with a satin scarf around the hairline.
Many people use the pineapple to preserve a wash and go or twist-out between wash days. Refresh with water and leave-in each morning for extra bounce, and switch to a spiral cord tie if regular elastics leave dents.
Try this: gather the ponytail slightly forward of the crown for maximum lift at the front.
Difficulty: Easy · Cost: $0–$5 (hair tie)
11. Curly Bob

A chin to shoulder-length bob gives curls a clean outline and makes them look fuller. Ask your stylist to cut it dry in its natural state so the shape accounts for shrinkage. Style with a curl cream on damp hair and let it air-dry for soft volume. This cut suits busy routines since it needs little daily styling.
Regular trims every eight to twelve weeks keep the line sharp and stop the ends from thinning out. Diffuse upside down for five minutes on flat days to add root lift.
Try this: tuck one side behind your ear to show off how the layers shift.
Difficulty: Easy · Cost: $40–$90 (cut)
Prefer your curls cropped even shorter? Our short curly hairstyles for Black women guide covers pixies, tapered cuts, and short twist-outs.
12. Finger Coils

Work in half-inch sections of damp hair with a gel or coil cream. Wrap each section around your index finger from root to tip, then slide it off and let it set. The process takes one to two hours on medium hair, but the coils can last a week with a satin bonnet at night. Avoid touching them while they dry.
This method gives the most uniform curl definition of any DIY technique and suits short to medium hair especially well. Coil in the direction your hair naturally grows to cut down on frizz.
Try this: sit under a hooded dryer for 20 minutes to set the coils faster.
Difficulty: Moderate · Cost: $0–$15 (styling products)
13. Chunky Twists

Chunky twists use one to two-inch sections, so a full head takes about an hour instead of an afternoon. They give bold texture and can be worn loose, in a high bun, or swept to one side. The larger size means they unravel faster than mini twists, usually lasting one to two weeks. A heavier cream keeps big twists from puffing up too soon.
This is a good first protective style for beginners because the sections are easy to manage. Seal the ends with a dab of oil after twisting to slow frizz at the tips.
Try this: pin a few twists up at the crown to turn the style into an updo for events.
Difficulty: Easy · Cost: $0–$15 (styling products)
14. Cornrows

Braid sections flat against the scalp from the hairline back, adding hair as you go. Straight-back rows suit everyday wear, while curved or geometric parts add detail for events. Keep the braids firm but never painful around the edges. Tension headaches or small bumps along the hairline are a sign the style needs loosening.
Oil the scalp every few days and wear a satin scarf at night. With care, cornrows stay neat for two to four weeks. Leave baby hairs out of the braid instead of pulling them in tightly to protect your edges.
Try this: ask for a zigzag part if you want the style to look fresh for longer.
Difficulty: Moderate · Cost: $40–$120 (salon)
Love braided protective styles but want added length? Our short box braids hairstyles guide shows how to wear braids with extensions.
15. Feed-In Braids

Feed-in braids add extension hair gradually into each cornrow so there is no bulky knot at the start. The result is a flatter, more natural-looking hairline than traditional braided styles with extensions. Wear them straight back, in a side part, or pulled into a low bun. They usually last three to five weeks with scalp care.
Because the base is a cornrow, the same tension rules apply: the install should never cause pain at the edges. Choose pre-stretched braiding hair to skip the hot-water dipping step at home.
Try this: pull the braids into a low ponytail on gym days to keep them tidy.
Difficulty: Moderate · Cost: $100–$250 (salon)
16. Fulani Braids

Fulani braids mix a center cornrow pattern with loose braids hanging at the sides, often finished with beads, cuffs, or rings. The face-framing pieces make this one of the most recognizable braided styles. Keep accessories light so they do not drag on the braids, and refresh the scalp with braid spray every few days.
Like all cornrow-based styles, skip any install that pulls painfully at the hairline. Add gold cuffs near the front pieces to draw attention to your face for events and vacations.
Try this: thread beads onto the side braids before sealing the ends so they stay put.
Difficulty: Moderate · Cost: $120–$280 (salon)
Want the full breakdown of patterns, accessories, and upkeep? Our Fulani braids hairstyles guide covers every variation.
17. Crown Braid

Braid a single plait around the full perimeter of your head and pin the tail underneath the start. Stretch your hair first so the braid sits smooth, and gently tug the edges of the braid for fullness. This keeps every strand tucked away for weddings, graduations, or long workdays. Bobby pins in a matching shade keep it secure without showing.
Mist with a light hold spray to control flyaways, and sleep in a satin bonnet to wear it a second day. Braid slightly off-center so the seam hides behind one ear.
Try this: pancake the braid a little more on top for a fuller, softer ring.
Difficulty: Moderate · Cost: $0–$20 (DIY) or $50–$100 (salon)
18. Halo Braid

The halo is one continuous braid circling the head, pinned flat so it reads as one smooth ring. It suits medium to long hair and keeps everything off the neck in warm weather. Start the braid behind one ear and work around, adding hair from the hairline as you go. Sleep with a satin bonnet to keep it smooth for several days.
It pairs well with both casual and formal outfits, which makes it a reliable event style. Leave the braid a little loose for a softer, fuller ring rather than pulling it drum-tight.
Try this: wrap a thin scarf around the braid for a pop of color at summer events.
Difficulty: Moderate · Cost: $0–$20 (DIY) or $50–$100 (salon)
19. Tapered Cut

The sides and back are cut short and faded while the top keeps its full curl length. This shape frames the face and cuts styling time to minutes each morning. Maintain the taper with trims every three to four weeks, and keep the top moisturized with a curl cream so the curls stay defined.
It grows out gracefully between appointments and suits anyone who wants short hair with visible curl texture on top. Use a sponge or brush on the top section to even out the curl pattern.
Try this: ask your barber to keep the neckline natural instead of lining it up too high.
Difficulty: Easy · Cost: $25–$60 (cut and upkeep)
20. Side-Part Natural Curls

Create a deep part on one side while hair is damp, then style your curls as usual. The deep part adds instant root lift and makes hair look fuller on the heavier side. It works on loose curls and tight coils alike and needs no cutting or color. Set the part with a clip while hair dries so it holds its place.
Flip the part to the other side every few days to avoid training your hair flat in one direction. A pick at the roots adds extra volume whenever the style starts to fall flat.
Try this: pair the deep part with a wash and go or twist-out for a fresh look on old hair.
Difficulty: Easy · Cost: $0 (no products needed)
21. Natural High Bun

Gather curls at the crown and twist them into a bun, pinning as you go instead of wrapping a tight elastic around repeatedly. Smooth the hairline with gel and a soft brush for a clean finish. This suits work, events, and errands because it keeps hair secure for hours. A satin scrunchie at the base reduces breakage.
On stretched hair the bun sits larger; on shrunken hair it sits neat and compact. Try two buns side by side for a playful variation on weekends.
Try this: leave the ends of the twist slightly loose for a softer, fuller bun.
Difficulty: Easy · Cost: $0–$5 (pins and scrunchie)
22. Low Puff

Gather curls at the nape into a loose puff with a center or side part. This relaxed style suits short to medium hair and stays comfortable all day. Smooth the part line with a little gel and leave the puff itself fluffy. Because it sits low, it works well under hats and headphones.
Refresh with a water mist if the curls start to dry out by afternoon. Use two bands in an X shape for extra hold on thick hair that slips out of a single tie.
Try this: slick the part line with edge control for a sharper finish at work.
Difficulty: Easy · Cost: $0–$5 (hair ties)
23. Faux Hawk

Pin the sides smooth and flat while leaving a strip of curls standing through the center. Work from the nape upward, crossing bobby pins in X shapes for grip. The sides can be slicked with gel or flat-twisted back for extra hold. This gives the drama of a mohawk with no cutting and no shaving.
It suits parties and nights out and comes down in minutes with no commitment. Tease the center strip at the roots before pinning for more height through the middle.
Try this: finish the center strip with a light mist of hold spray so it lasts all night.
Difficulty: Moderate · Cost: $0–$10 (pins and gel)
24. Silk Press on Natural Hair

A silk press straightens natural hair with a blow dryer and flat iron instead of chemicals. Start on clean, deep-conditioned hair and apply a heat protectant to every section before any hot tool touches it. Work in small sections with one smooth pass of the iron at a safe temperature. The result is sleek, swinging hair that reverts to curls with water.
Wrap it in a silk scarf at night and avoid steam to keep it straight for one to two weeks. Get a trim first so the straightened ends look blunt instead of wispy.
Try this: use the chase method with a fine-tooth comb ahead of the iron for a smoother finish.
Difficulty: Moderate · Cost: $60–$150 (salon)
Quick Comparison
| Style | Best for | How long it lasts |
|---|---|---|
| Wash and Go Curls | Showing your natural curl pattern | 1–3 days |
| Twist Out | Defined, voluminous curls | 3–5 days |
| High Puff | Quick everyday styling | 1–2 days |
| Rounded Afro | Maximum natural volume | 2–4 days |
| Two-Strand Twists | Low-manipulation protective wear | 2–3 weeks |
| Mini Twists | Long-lasting protective style | 4–6 weeks |
| Bantu Knots | A bold look plus a curl set in one | 1–2 weeks (knots); 3–5 days (knot-out) |
| Cornrows | Neat, low-effort protective braids | 2–4 weeks |
| Feed-In Braids | Natural-looking braids with length | 3–5 weeks |
| Fulani Braids | A decorative braided style | 3–5 weeks |
| Halo Braid | An elegant tucked-away updo | 3–5 days |
| Silk Press | Straight hair without chemicals | 1–2 weeks |
How to Choose the Right Natural Hairstyle
Start with your curl pattern. Looser 3A to 3C curls hold wash and go definition and twist-outs well. Tighter 4A to 4C coils thrive in puffs, afros, twists, and braided styles that stretch the hair and cut shrinkage. If you are between patterns, try a style from each group and keep the one that holds up past day two.
Next, match the style to your length and routine. Short hair suits tapered cuts, finger coils, high puffs, and bantu knots. Medium hair opens up curly bobs, flat twist updos, and faux hawks. Long hair carries halo braids, crown braids, and feed-in braids best. For busy mornings, pick five-minute styles like puffs, buns, and pineapple updos. For weeks of low effort, choose mini twists, cornrows, or feed-in braids.
Think about the occasion too. Flat twist updos, low puffs, and high buns read polished at work. Halo braids, crown braids, and Fulani braids suit weddings and events. High puffs, cornrows, and bantu knots keep hair off your neck in summer, while feed-in braids and Fulani braids travel well on vacation.
Whatever you choose, protect your edges and your moisture. Braided styles should feel snug, never painful. Keep a leave-in and light oil in your routine, wash every one to two weeks, and give your scalp a break between long protective installs.
Frequently Asked Questions
What is the easiest natural hairstyle for Black women?
A high puff, low puff, or classic wash and go takes only a few minutes. These styles show off your natural curl pattern with almost no tools and very little product.
Which hairstyle protects natural hair the most?
Two-strand twists, mini twists, cornrows, and halo braids protect best. They tuck your ends away and cut down on daily manipulation, which reduces breakage.
How long can protective hairstyles last?
Most protective styles last two to six weeks. Mini twists and feed-in braids sit at the longer end, while two-strand twists and cornrows usually last two to four weeks with proper care.
Can protective hairstyles help hair grow?
Protective styles do not make hair grow faster. They reduce breakage, so you keep more of your length over time. That retained length is what reads as growth.
How often should I wash natural hair?
Most people wash every one to two weeks. Wash more often if you work out daily or use heavy products, and less often if your hair stays clean in a protective style.
Final Thoughts
Natural hairstyles for Black women give you endless ways to wear your texture, from wash and go curls to braids that last a month. Pick by curl pattern first, then by how much time you want to spend each morning. Keep your hair moisturized, protect your edges from tight styles, and switch things up whenever you feel like it.
If your hair falls in the 4A range, these 4a natural hair ideas narrow the list down to styles built specifically for tight S-shaped coils.
For more ideas across every hair type and length, browse the full collection at PrimeHairPicks.

