


Going short after 50 is mostly about fit: fit for your texture, your edges and your mornings. These pixie hairstyles for older Black women cover natural coils, locs, relaxed hair and color, with shapes made for women in their 50s, 60s and 70s. If you want a longer front, our guide to pixie bob haircuts for Black women shows the hybrid version of the same family.
Each idea below gives the cut, who it tends to suit and one styling move to try at home. For a wider set across all ages, see pixie hairstyles for Black women, and for curl-led short cuts see easy 4C short hairstyles for women. Bring front and side photos to your appointment, and agree on side and nape length before cutting starts.
Key Takeaways
- Tapered sides with texture on top is the most flexible base. It works on coils, curls, locs and relaxed hair.
- Most pixies here need a shape trim every 4 to 6 weeks. Close crops and nape lines need cleanups sooner.
- Color ideas sit beside no-color cuts, so you can pick the cut first and decide on color later.
- Gray blending options include a full salt-and-pepper pixie and silver front panels with dark roots.
- Night care is simple: a satin scarf or bonnet keeps edges smooth and cuts morning work.
1. Tapered Natural Pixie for Mature Coils

The sides and nape taper close while the top keeps your natural coil pattern full. That shape suits women in their 50s, 60s and 70s who want a short cut that still shows texture.
Ask your stylist to cut the top with your shrinkage in mind. Coils spring up when dry, so extra length on top keeps the finished shape balanced.
Try this: Work a small amount of leave-in through damp coils, then pick only the roots for lift.
Difficulty: Low | Cost: $ | Time: 10 minutes
2. Curly Crop Pixie with Full Crown

Curls stay full at the crown and shorter at the sides, which gives height without width at the cheeks. It is a good pick when your curls are strong on top and thinner at the edges.
A cut done with curls visible helps the stylist place each curl. Book a dry cut or arrive with your curls styled as you wear them.
Try this: Refresh with a water and leave-in spray, then scrunch the crown one section at a time.
Difficulty: Low | Cost: $ | Time: 10 minutes
3. Salt-and-Pepper Tapered Pixie

Mixed gray and black hair gets a neat taper at the sides and short textured length on top. The blend reads even because the cut keeps every section short.
If you are growing out old color, the short length speeds the change. Most women reach a full salt-and-pepper pixie within a few trims.
Try this: Use a purple-toned conditioner once a week if the gray sections start to look yellow.
Difficulty: Low | Cost: $ | Time: 5 minutes
4. Side-Swept Pixie with Long Fringe

A long fringe sweeps across the forehead and blends into a short back. The diagonal line softens a wide forehead and gives relaxed or silk pressed hair a smooth fall.
Set the part first and cut the fringe to end near the cheekbone. A fringe that ends higher can look blunt and needs more daily work.
Try this: Blow dry the fringe away from the face first, then sweep it back over for lift at the root.
Difficulty: Medium | Cost: $$ | Time: 15 minutes
5. Feathered Layers Pixie for Fine Hair
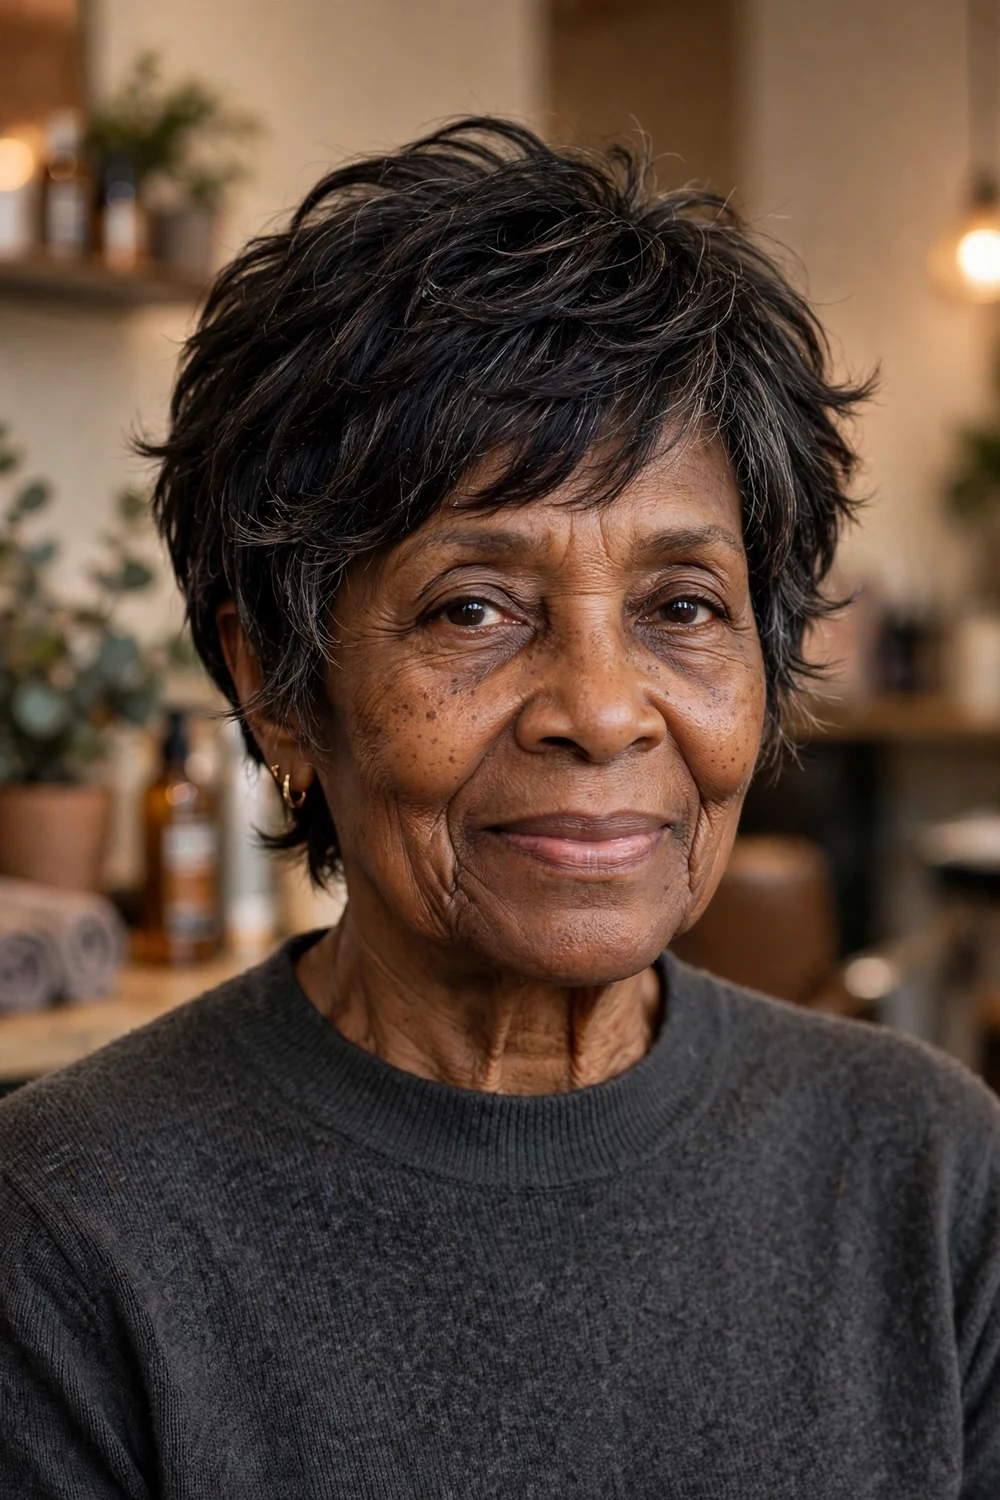
Light feathered ends keep fine hair from sitting flat. The layers are point cut so each end flicks a little, which scatters light and helps the cut look fuller.
Ask for feathering by name. Blunt layers on fine hair can look heavy at the ends and thin at the roots.
Try this: Dry with a small round brush at the crown only, and leave the ends to fall on their own.
Difficulty: Low | Cost: $$ | Time: 10 minutes
6. Finger Wave Pixie for Special Days

Sculpted waves sit close to the head on a short pixie base. The style has deep roots in Black hair culture and still suits weddings, church and photos.
Waves are set on damp hair with gel and a fine tooth comb, then dried fully before you touch them. Plan the set the day before an event when you can.
Try this: Sleep with a satin scarf tied flat so the wave pattern holds for a second day.
Difficulty: High | Cost: $$ | Time: 30 minutes to set
7. TWA Pixie with Rounded Shape

A teeny afro cut to pixie length keeps coils even all over, with the sides shaped to follow the head. The rounded outline keeps the look neat as it grows.
Shape matters more than length here. Choose a stylist or barber who cuts tapered natural hair often, and agree on the outline before cutting.
Try this: Use a curl sponge in small circles for even definition on wash day.
Difficulty: Low | Cost: $ | Time: 5 minutes
8. Long-Top Pixie with Side Sweep

The top keeps real length while the sides and back stay short. You can sweep the top, finger wave it, or wear it loose, so one cut covers formal and casual days.
Because the top grows faster than the shape, book a top trim at six weeks even if the sides still look tidy.
Try this: Tuck the short side behind your ear and leave the long side loose for a clear shape change.
Difficulty: Medium | Cost: $$ | Time: 15 minutes
9. Relaxed Pixie with Smooth Finish
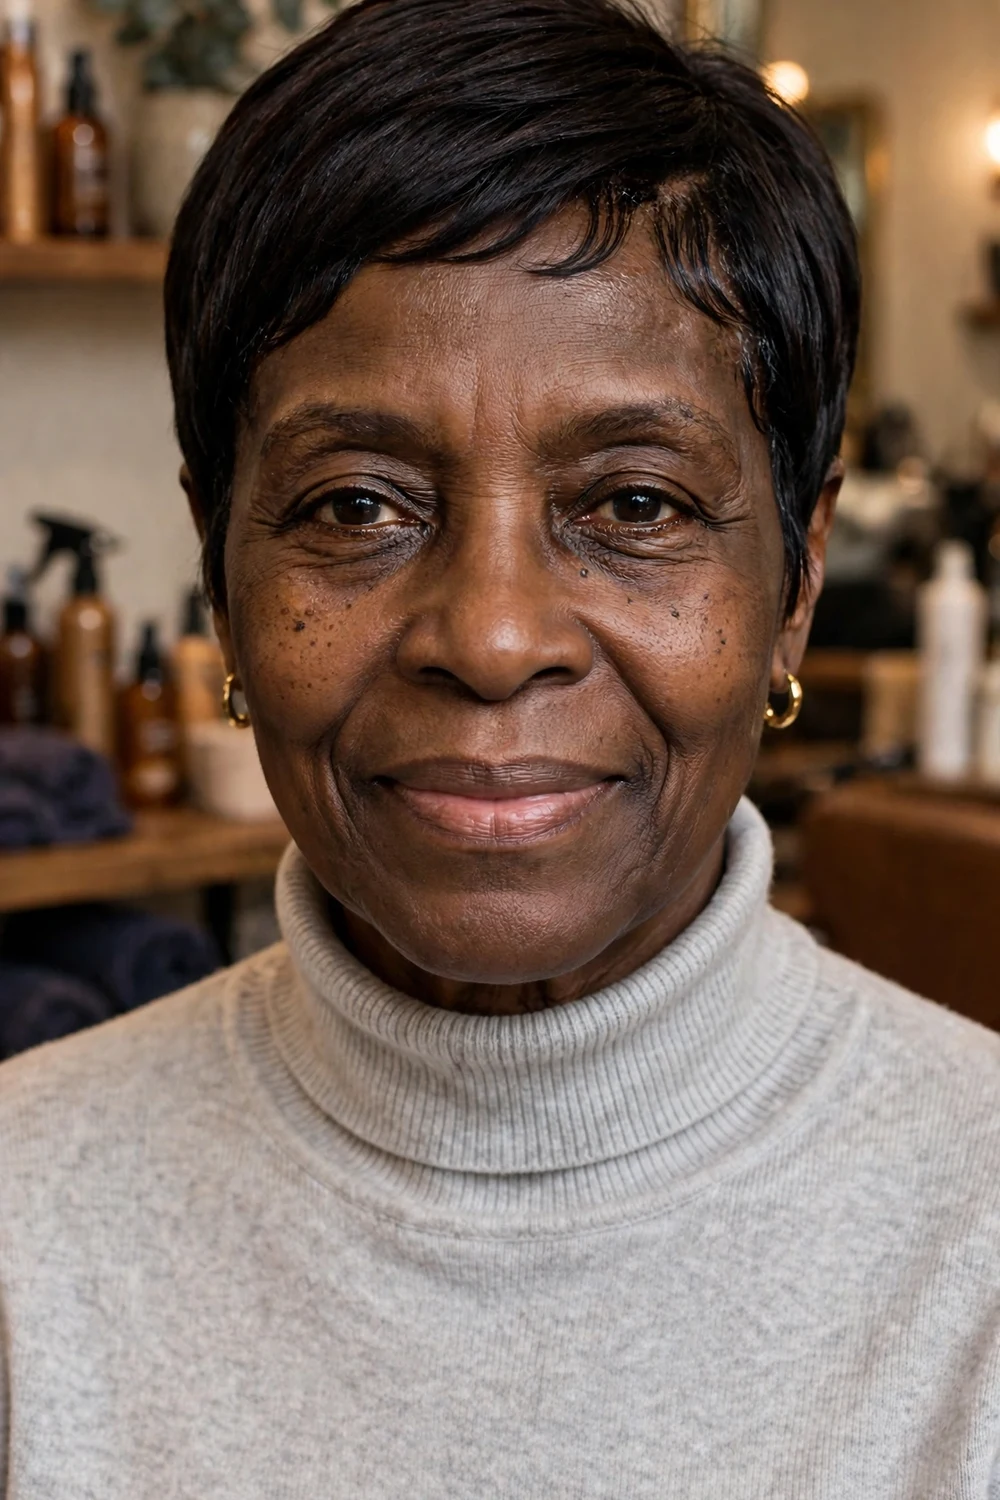
Relaxed hair worn short and smooth gives a clean outline and laid edges. The cut suits women who like a pressed finish without daily flat iron work.
Keep heat low and handle the line where new growth meets relaxed hair with care. Regular trims keep the ends even along that line.
Try this: Smooth a pea size amount of serum over the top only, so the crown keeps its body.
Difficulty: Medium | Cost: $$ | Time: 15 minutes
10. Honey Blonde Pixie with Dark Roots
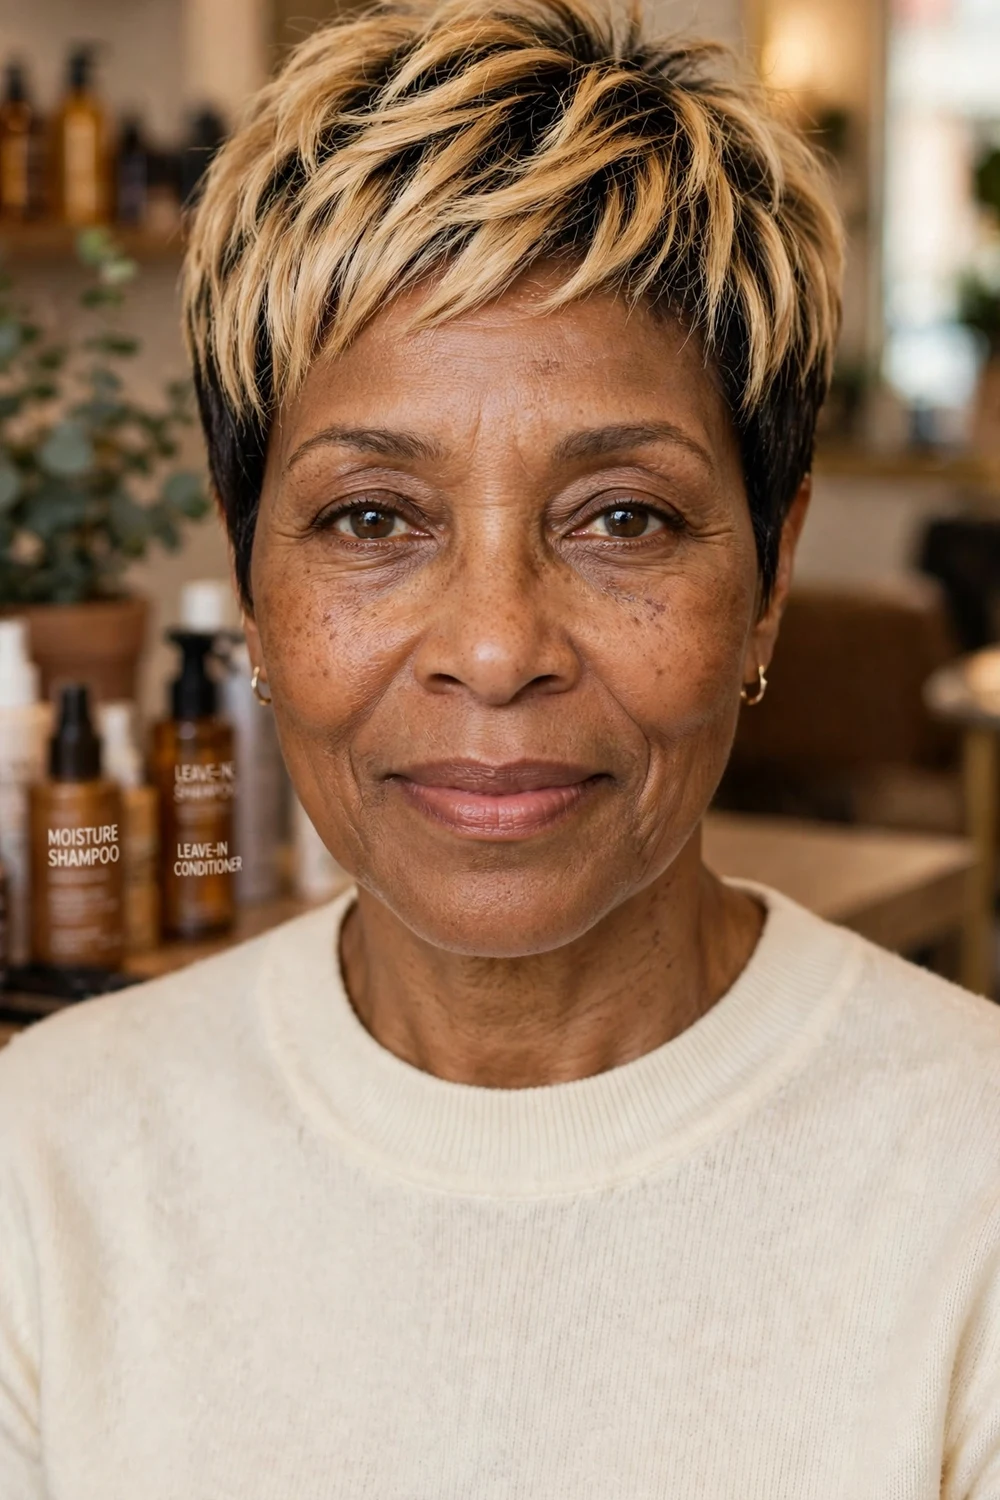
Honey blonde lightens the top while a dark root keeps grow out soft. On a pixie, the short length means less hair to lift, so color sessions stay shorter.
Lightening calls for a strand test and a moisture routine at home. Add a weekly mask and keep hot tools low for the first two weeks.
Try this: Refresh the tone with a gloss made for warm blondes rather than a full recolor.
Difficulty: Medium | Cost: $$$ | Time: 15 minutes
11. Caramel Highlight Pixie for Coils
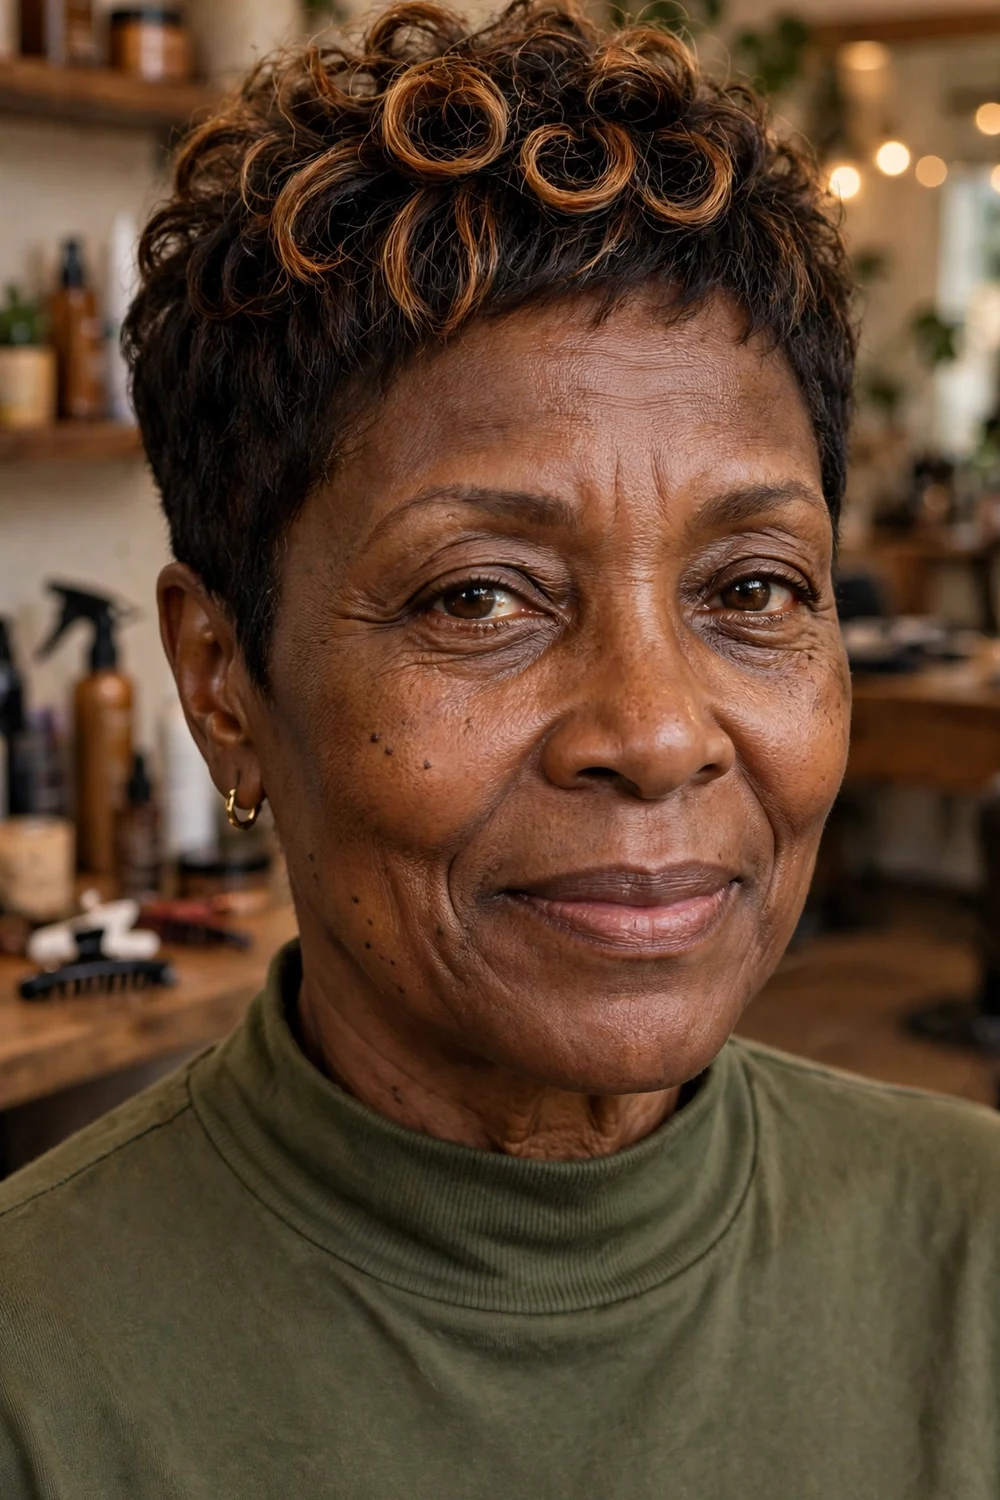
Caramel pieces sit through the curly top and follow the curl pattern, so each coil reads on its own. The sides stay dark, which keeps the contrast clear.
Place color after the cut, not before it. Pieces placed first can be trimmed away when the pixie is shaped.
Try this: Use a color safe conditioner and scrunch color pieces gently so they keep their shape.
Difficulty: Medium | Cost: $$$ | Time: 10 minutes
12. Auburn-Toned Tapered Pixie
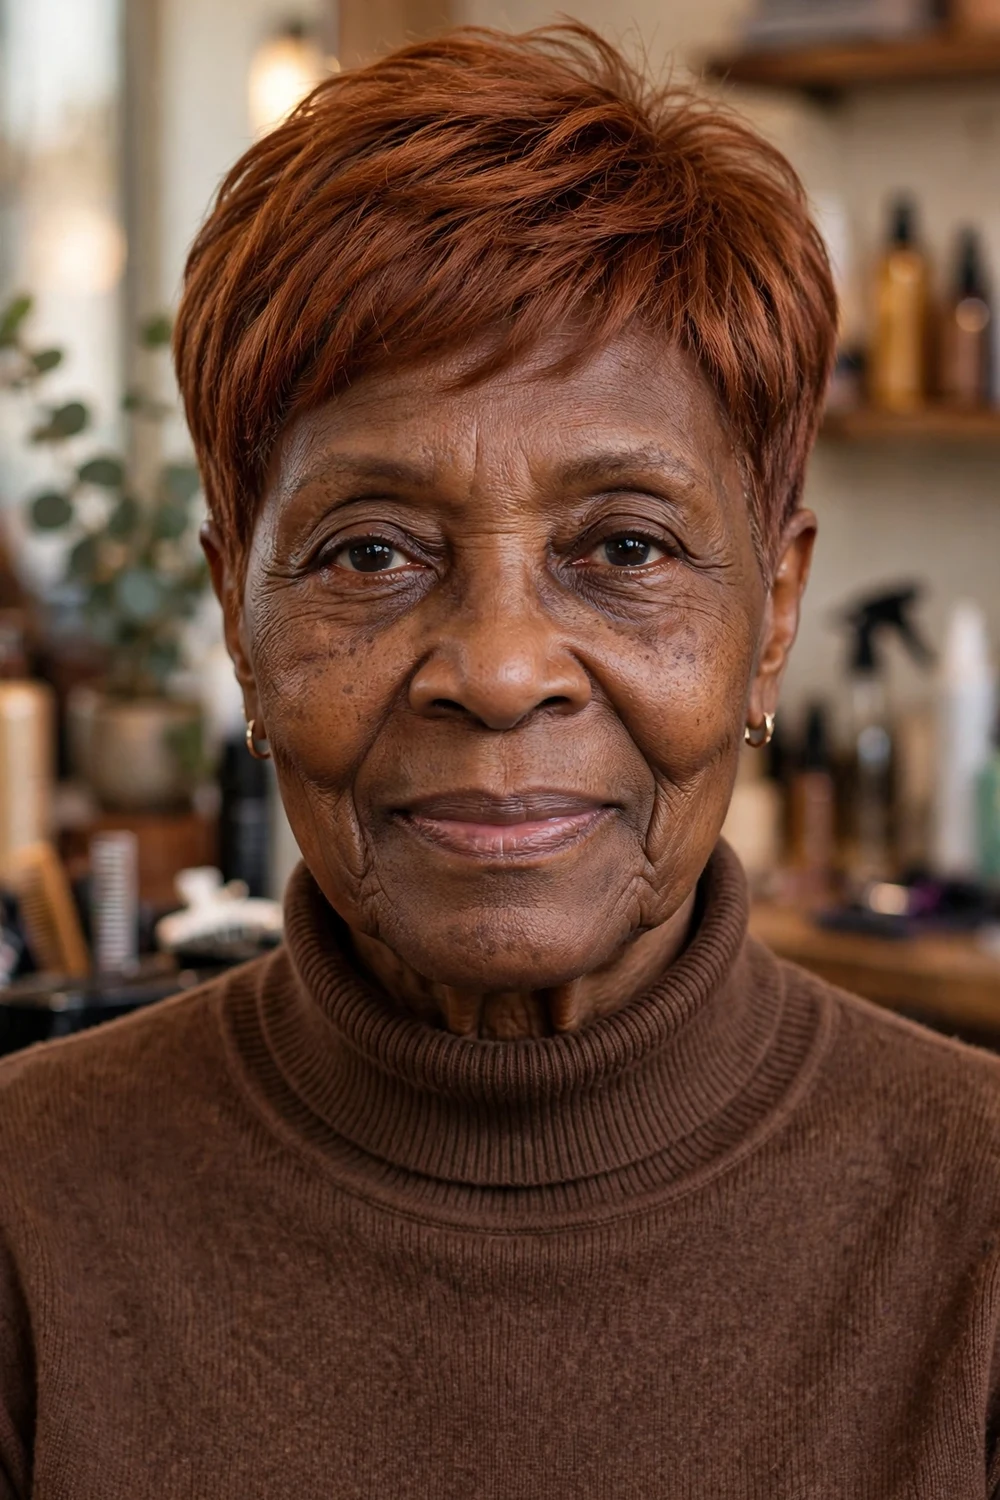
A warm auburn tone over a tapered pixie shows well in natural light and in photos. Dark bases can reach a deep auburn in one session in many cases.
Auburn fades toward brown over time. A gloss visit can refresh the tone without a full color service.
Try this: Wash with cool water and a sulfate free shampoo to slow fade between visits.
Difficulty: Medium | Cost: $$$ | Time: 10 minutes
13. Short Loc Pixie with Tapered Back

Mature locs cut to pixie length sit light on the head, with the back and sides tapered close. The shorter length reduces weight, which many women prefer as locs mature.
Choose a loctician who can finish cut loc ends so they stay neat. Agree on top length first, since locs cannot be uncut.
Try this: Palm roll the top locs after washing to keep the direction of the shape.
Difficulty: Medium | Cost: $$ | Time: 10 minutes
14. Textured Pixie with Soft Bangs
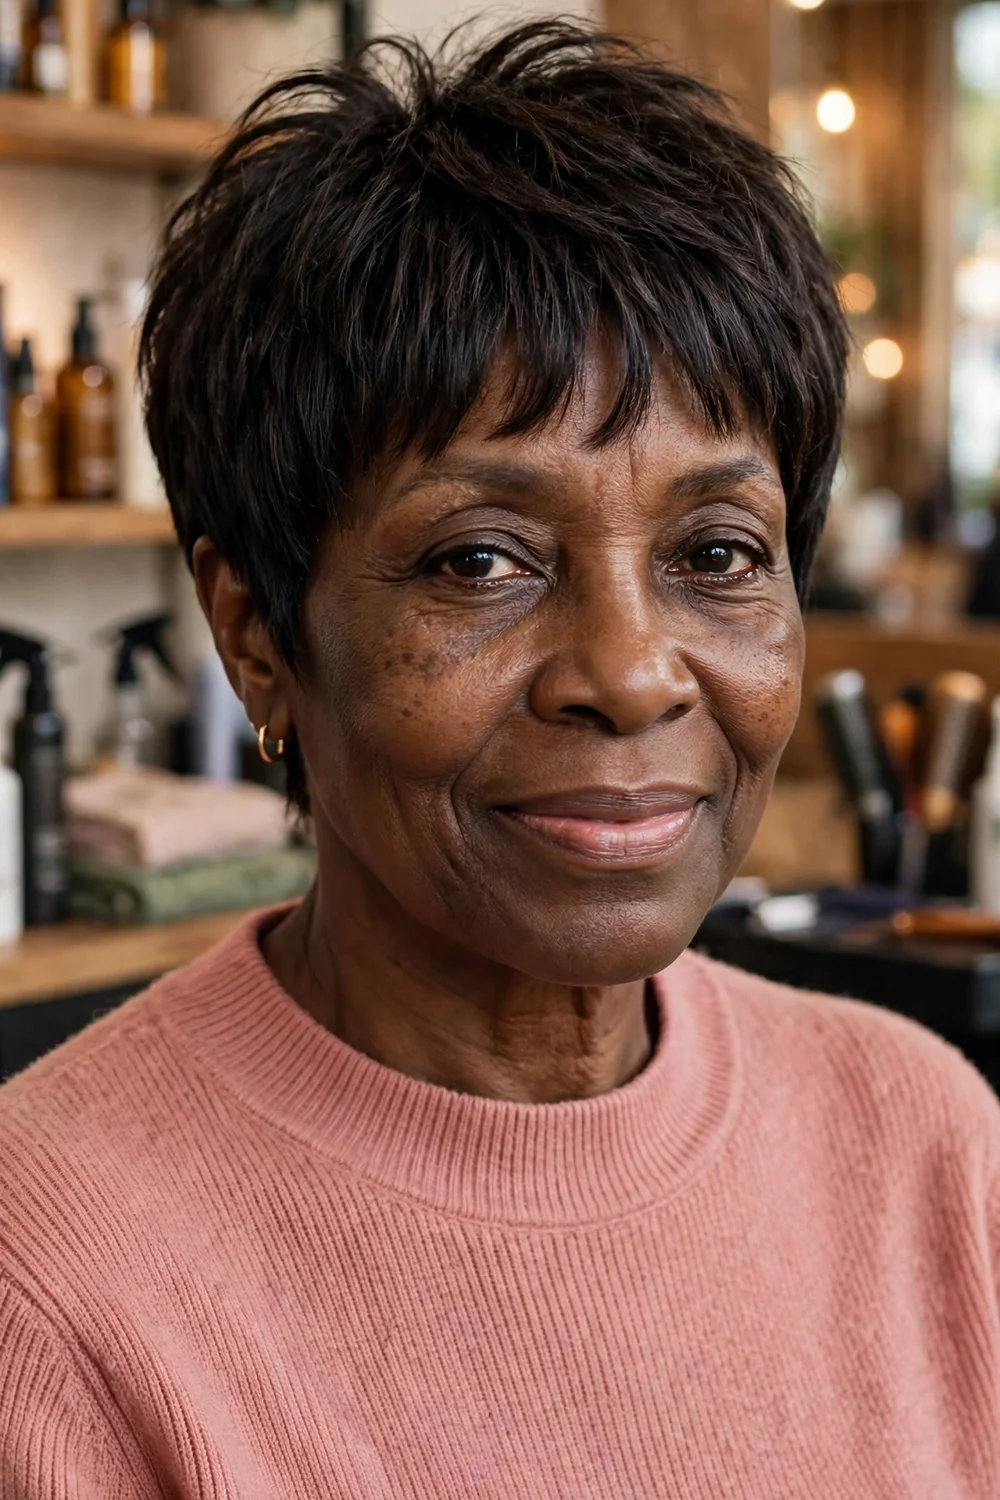
Piecey texture through the top pairs with a soft, light bang. The fringe sits on the forehead without a solid line, so grow out stays forgiving.
Ask for the bang cut light and dry, so you can see the true length before more comes off.
Try this: Pinch the bang ends with matte cream to keep the pieces separate.
Difficulty: Low | Cost: $$ | Time: 10 minutes
15. Glasses-Friendly Short Pixie Crop
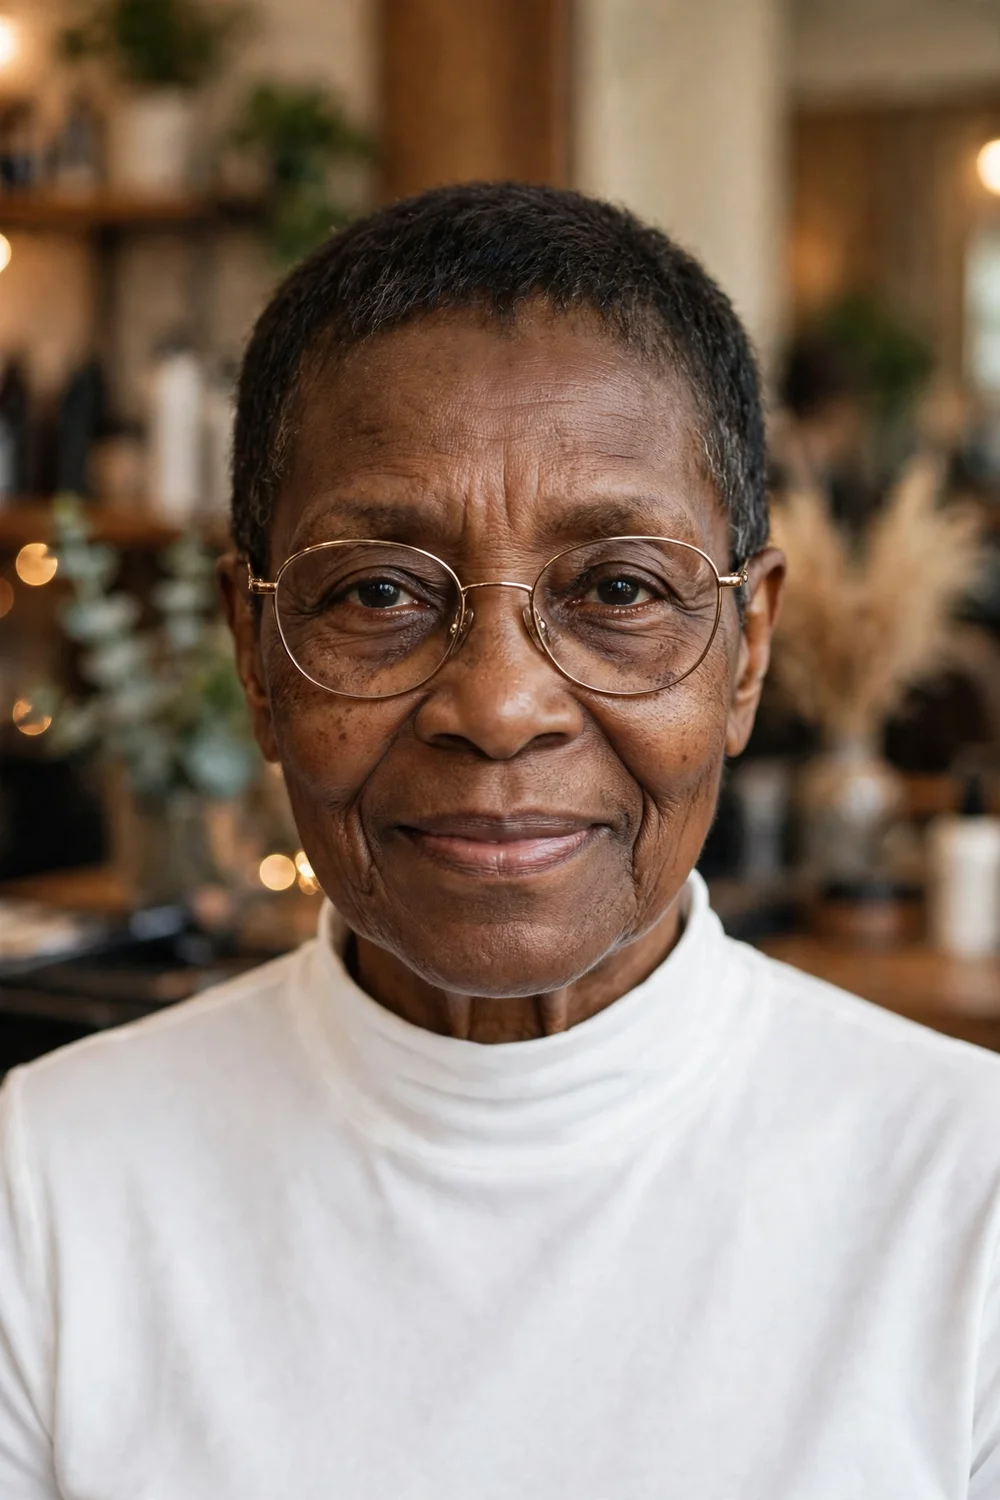
A very short crop keeps hair clear of glasses arms and frames. The sides sit above the ear, so putting glasses on and off stays easy all day.
Tell your stylist you wear glasses daily. The side length should be set with your frames on, not off.
Try this: Keep a small edge brush in your bag for a quick tidy at the hairline.
Difficulty: Low | Cost: $ | Time: 5 minutes
16. Wash-and-Go Coily Pixie
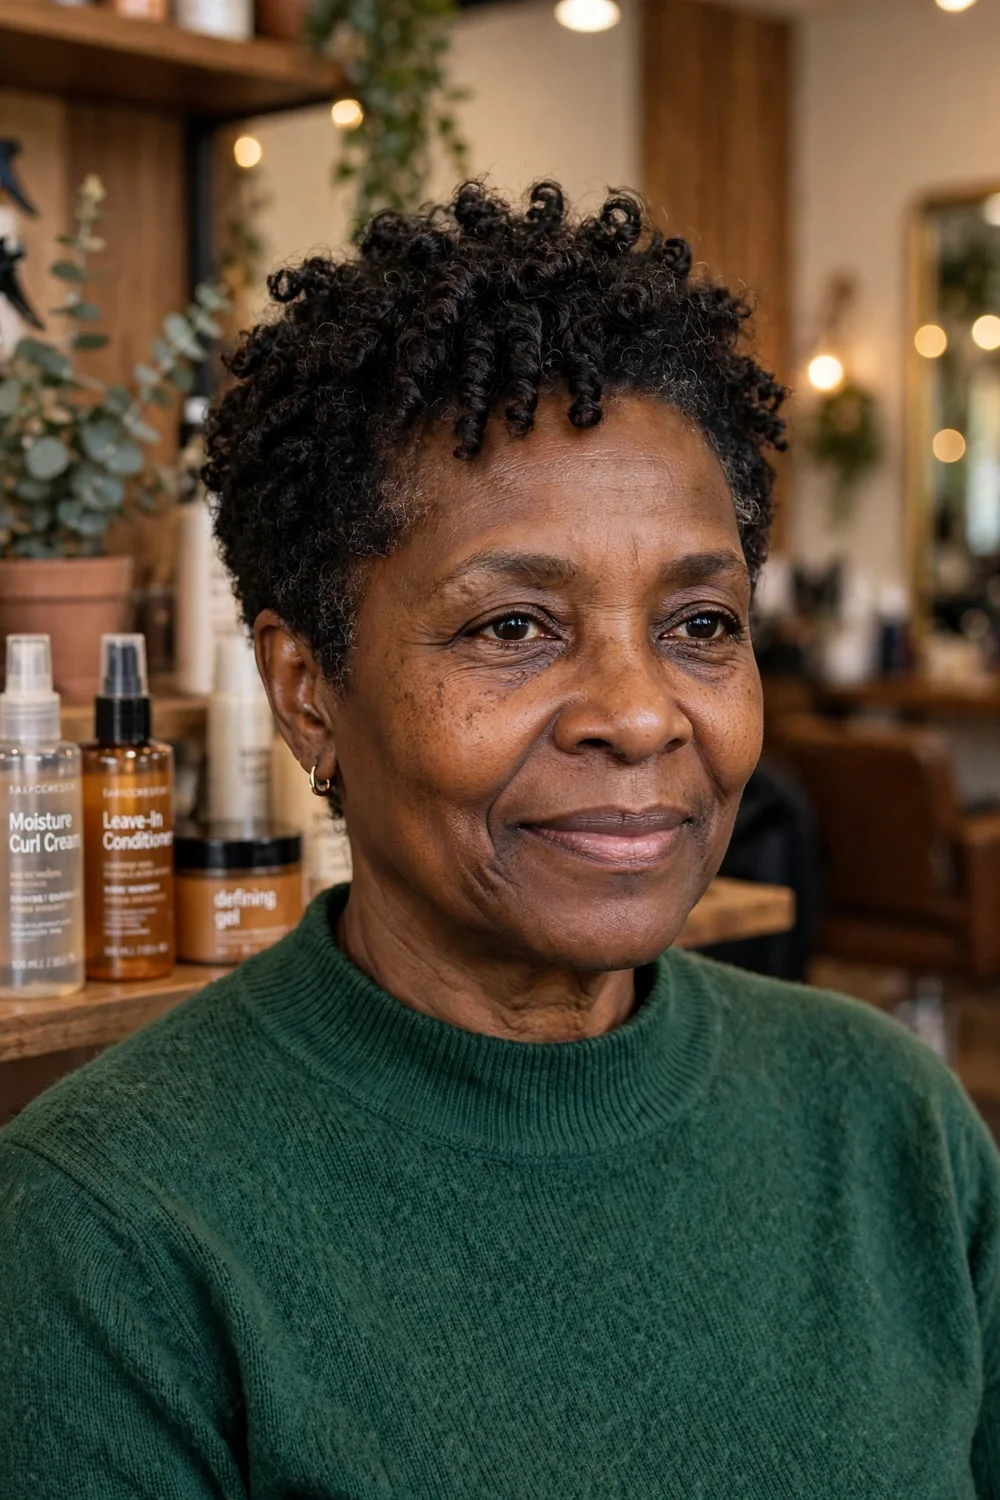
Defined coils on top and short sides make wash day short. The cut is shaped for your coil pattern, so styling is mostly water, leave-in and a light gel.
Cut for shrinkage from the start. A coily pixie cut wet can dry much shorter than planned if shrinkage is ignored.
Try this: Apply gel to soaking wet hair, then leave the coils alone until fully dry.
Difficulty: Low | Cost: $ | Time: 15 minutes on wash day
17. Crown-Height Pixie for Round Faces

Height at the crown and neat sides add length to the look of a round face. The top is cut to stand up a little rather than lie flat.
Keep the sides close. Width at the sides works against the height and shortens the overall shape.
Try this: Lift the crown roots with your fingers while drying, and finish with a light mist of spray.
Difficulty: Medium | Cost: $$ | Time: 10 minutes
18. Low Taper Pixie with Nape Detail
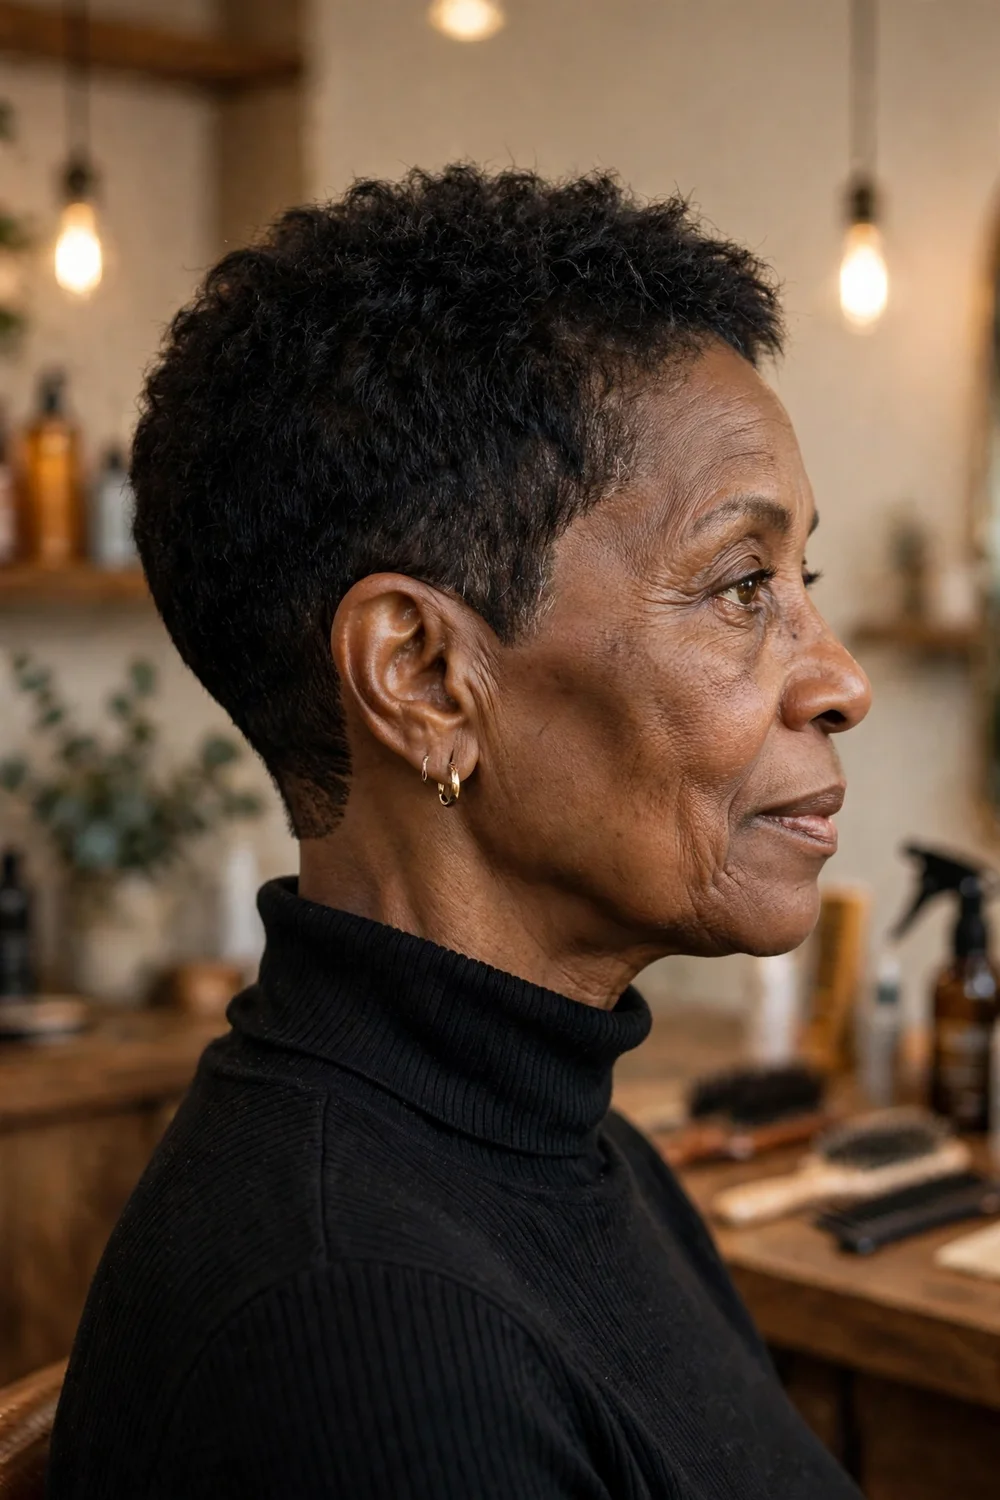
A low taper keeps the sides soft while a clean line at the nape gives the back a finished edge. It suits women who want detail without a high fade.
Nape lines blur in about two to three weeks. A quick cleanup visit keeps the detail sharp between full cuts.
Try this: Brush the taper down in the direction of growth each morning to keep it lying flat.
Difficulty: Medium | Cost: $$ | Time: 10 minutes
19. Copper-Tinted Curly Pixie

Copper tint over curly texture makes each curl easy to see. Keep the cut simple, with short sides, so the color carries the focus.
Choose copper depth by your starting base and ask about lightening first if you want a brighter result.
Try this: Refresh faded ends with a copper color depositing mask every two to three weeks.
Difficulty: Medium | Cost: $$$ | Time: 10 minutes
20. Soft Curl Pixie with Deep Side Part

A deep side part throws soft curls to one side while the other side stays close. The shape suits events and photos, and it resets with each wash.
Set the part while hair is wet so it holds as it dries. Changing the part on dry hair rarely holds.
Try this: Clip the short side flat while drying to sharpen the contrast between sides.
Difficulty: Medium | Cost: $$ | Time: 15 minutes
21. Close-Cropped Pixie for Hot Weather

An even, close crop keeps the head cool and the morning routine very short. The hairline carries the look, so clean edges matter most.
Ask for a guard length you can see on a sample section first. Close crops can always go shorter at the next visit.
Try this: Massage a light scalp oil in after washing to keep the scalp comfortable.
Difficulty: Low | Cost: $ | Time: 5 minutes
22. Layered Pixie with Cheekbone Fringe

Layers step down toward the face and end in a fringe that reaches the cheekbone. The steps help fine hair look fuller along the front.
Tell your stylist if you change your part often. Layers cut for one fixed part fall in a different place when the part moves.
Try this: Sweep the fringe to your usual side while it is damp, then let it air dry in place.
Difficulty: Low | Cost: $$ | Time: 10 minutes
23. Burgundy Pixie with Gloss Finish

A deep burgundy tone on a smooth pixie shows a wine tint in sunlight. The shade usually needs less lightening than brighter reds on a dark base.
Book a gloss with the color service. Burgundy fades toward brown, and a gloss can lift the tone again.
Try this: Use cool water for rinsing and keep flat iron passes to one per section.
Difficulty: Medium | Cost: $$$ | Time: 15 minutes
24. Silver-Streaked Pixie with Natural Roots

Silver panels at the front frame the face while dark roots keep the rest of the pixie deep in tone. It is a step toward gray without a full color change.
Panel placement should follow your part. Silver placed off the part line can disappear under the top layer.
Try this: Use a purple-toned shampoo on the silver panels only, once a week.
Difficulty: Medium | Cost: $$ | Time: 10 minutes
Pixie Hairstyles at a Glance
| Idea | Best For | Upkeep | Cost Band |
|---|---|---|---|
| Tapered Natural Pixie for Mature Coils | Natural coils, daily ease | Trim every 4 to 5 weeks | $ |
| Curly Crop Pixie with Full Crown | Defined curls, crown volume | Trim every 4 to 6 weeks | $ |
| Salt-and-Pepper Tapered Pixie | Gray blending, low upkeep | Trim every 4 weeks | $ |
| Side-Swept Pixie with Long Fringe | Forehead coverage, smooth finish | Fringe trim every 3 to 4 weeks | $$ |
| Feathered Layers Pixie for Fine Hair | Fine hair, added body | Trim every 5 weeks | $$ |
| Finger Wave Pixie for Special Days | Events, sculpted finish | Set lasts several days | $$ |
| TWA Pixie with Rounded Shape | Natural texture, wash day ease | Shape trim every 4 to 6 weeks | $ |
| Long-Top Pixie with Side Sweep | Styling options, first short cut | Trim every 5 to 6 weeks | $$ |
| Relaxed Pixie with Smooth Finish | Relaxed hair, polished look | Trim every 4 to 5 weeks | $$ |
| Honey Blonde Pixie with Dark Roots | Warm color, soft grow out | Color refresh every 6 weeks | $$$ |
| Caramel Highlight Pixie for Coils | Curls with dimension | Gloss every 6 to 8 weeks | $$$ |
| Auburn-Toned Tapered Pixie | Warm tone on a dark base | Gloss every 6 weeks | $$$ |
| Short Loc Pixie with Tapered Back | Mature locs, lighter weight | Retwist every 4 to 6 weeks | $$ |
| Textured Pixie with Soft Bangs | Soft fringe, textured top | Trim every 5 weeks | $$ |
| Glasses-Friendly Short Pixie Crop | Glasses wearers, neat outline | Trim every 3 to 4 weeks | $ |
| Wash-and-Go Coily Pixie | Coily hair, no heat | Trim every 5 to 6 weeks | $ |
| Crown-Height Pixie for Round Faces | Round faces, crown lift | Trim every 4 to 5 weeks | $$ |
| Low Taper Pixie with Nape Detail | Neat nape, soft sides | Cleanup every 2 to 3 weeks | $$ |
| Copper-Tinted Curly Pixie | Curls with warm color | Color care every 6 weeks | $$$ |
| Soft Curl Pixie with Deep Side Part | Soft curls, event ready | Trim every 5 weeks | $$ |
| Close-Cropped Pixie for Hot Weather | Hot weather, fastest routine | Edge cleanup every 2 to 3 weeks | $ |
| Layered Pixie with Cheekbone Fringe | Fine hair, face framing layers | Trim every 5 weeks | $$ |
| Burgundy Pixie with Gloss Finish | Deep red tone, smooth finish | Gloss every 6 weeks | $$$ |
| Silver-Streaked Pixie with Natural Roots | First step toward gray | Panel refresh every 6 to 8 weeks | $$ |
More Ideas to Explore
Frequently Asked Questions
Do pixie cuts suit Black women in their 60s and 70s?
Yes. The same taper, curl and fringe shapes suit women in their 60s and 70s. The main change is cut planning around finer edges and lower density, so ask for softer transitions at the hairline and extra length where hair is thin.
How often does a pixie need a trim?
Most versions need a shape trim every 4 to 6 weeks. Close crops, fades and nape lines blur faster and often need a cleanup every 2 to 3 weeks, while textured and curly pixies can stretch a little longer.
Can a pixie work with thinning edges?
Yes, with the right shape. A longer fringe, a side sweep or extra top length can cover thin edges better than a very close crop. Ask your stylist to keep the front soft and avoid tight tension at the hairline.
What should I tell my stylist before the cut?
Bring front and side photos, name your daily styling time, and agree on side length, nape length and top length before cutting starts. If you wear glasses, keep them on while side length is set.
How do I care for a pixie at night?
Wrap the hair with a satin scarf or wear a satin bonnet. It keeps edges smooth, holds styles like finger waves for a second day, and reduces friction on short hair.
Final Thoughts
Pick the pixie that fits your texture and the time you will give it each morning. A tapered or coily shape asks for very little each day, while waves, gloss color and close lines ask for more salon visits. Show your stylist the front and side photos of your pick, set the lengths together, and keep the trim schedule. A short cut that is kept on schedule holds its shape and stays easy to wear.

