


An elf costume lives or dies on the hair. The ears, the cloak, the makeup all help, but the right hairstyle is what sells the fantasy from across the room. Long flowing lengths, deliberate braids, and the odd silver accessory do more for an elven look than almost anything else in the costume bag.
This list gathers 25 elf hairstyles for Halloween that pair real styling detail with pointed-ear practicality. Every idea notes how the hair sits with prosthetic ears, what the braid or twist actually involves, and what to add so the look reads “elf” instead of “just long hair.” Pick the character you want to be, then build the hair around it.
Quick Takeaways
- Style hair AROUND the ears first: prosthetic tips sit best when the hair near them is tucked, pinned, or braided back rather than left to tangle.
- Half-up styles are the most forgiving elf base, since they frame the ears while keeping the rest of the hair free.
- Thin accent braids, circlets, and hair vines read “elven” faster than any costume accessory.
- Second-day hair holds braids and twists better, so plan your wash for the day before the party.
- Carry extra bobby pins and a travel-size hairspray: costume hair gets touched, hugged, and photographed all night.
1. Half-Up Braided Crown with Loose Waves

This is the classic high-fantasy base for a reason. Take a section from each temple, Dutch-braid them toward the back of the head, and pin them together so the two braids form a single crown across the upper back of your head. Leave everything below the crown loose and curl it in large sections with a 1.25-inch iron, then brush the curls out for soft waves that catch the light when you move.
The braided crown sits just above where prosthetic ears attach, so it frames them instead of covering them. It suits medium to thick hair best, since the braids need enough density to look deliberate. A light mist of flexible-hold hairspray keeps the crown neat, and a few drops of shine spray on the lengths give that otherworldly glow in photos.
Try this: hide the elastic where the braids meet with a small silver cuff or a wrapped ribbon for a finished look.
Difficulty: Medium · Cost: $ (pins, spray, optional cuff)
2. Long Flowing Silver Hair with Side Braids

Nothing reads “high elf” faster than very long, very straight silver hair. The trick is keeping it sleek: flat-iron in thin sections with a heat protectant, then add two tight three-strand braids, each about half an inch wide, starting at the temples and running back along the sides of the head. The contrast between the smooth curtain of hair and the tight accent braids gives the style its structure.
This works on natural silver, platinum blonde, or a silver wig. The side braids pull hair away from the ears, so prosthetic tips stay visible all night. Keep the braids tight and close to the head so they frame the face without frizzing, and finish with a serum on the lengths only.
Try this: tuck the braids just behind the ear tips so the pointed shape peeks out between hair and braid.
Difficulty: Low · Cost: $ (serum, elastics, wig if needed)
3. Loose Mermaid Curls with Floral Accents

For a woodland elf, go softer. Crimp or curl the full length in loose sections, then finger-comb everything so the curls blur into one flowing mass. Tuck small fresh flowers or faux wildflowers behind each ear and a few along one side part. The flowers sit right where the ear tips meet the hair, which draws the eye exactly where you want it.
This is a forgiving choice for naturally wavy or textured hair, since the style wants volume and movement rather than precision. If you skip heat, braid damp hair into six to eight loose braids the night before and unravel them in the morning for heatless waves. Pin each flower with a small bobby pin crossed underneath so it survives hugs and dancing.
Try this: choose flowers with flexible stems and wrap the stem around a bobby pin before sliding it in.
Difficulty: Low · Cost: $ (flowers, pins, texturizing spray)
4. Soft Twists with a Silver Elven Circlet

A circlet does the costuming for you, but the hair underneath still needs intention. Part the hair in the middle, take a two-inch section from each side of the front, twist each one back loosely, and pin them together at the back of the head. Leave the rest down in soft waves. The circlet sits across the forehead over the twists, which holds it steady better than bare hair does.
This suits fine to medium hair and layered cuts, since the twists grip better with some texture. Choose a lightweight circlet so it does not slide during a long evening, and position it just above the eyebrows. The twists keep hair off the ears, so prosthetic tips stay fully visible.
Try this: spray the twisted sections with dry shampoo before twisting so the circlet has something to grip.
Difficulty: Low · Cost: $ (circlet, pins)
5. Short Curly Bob with Berry Accessories
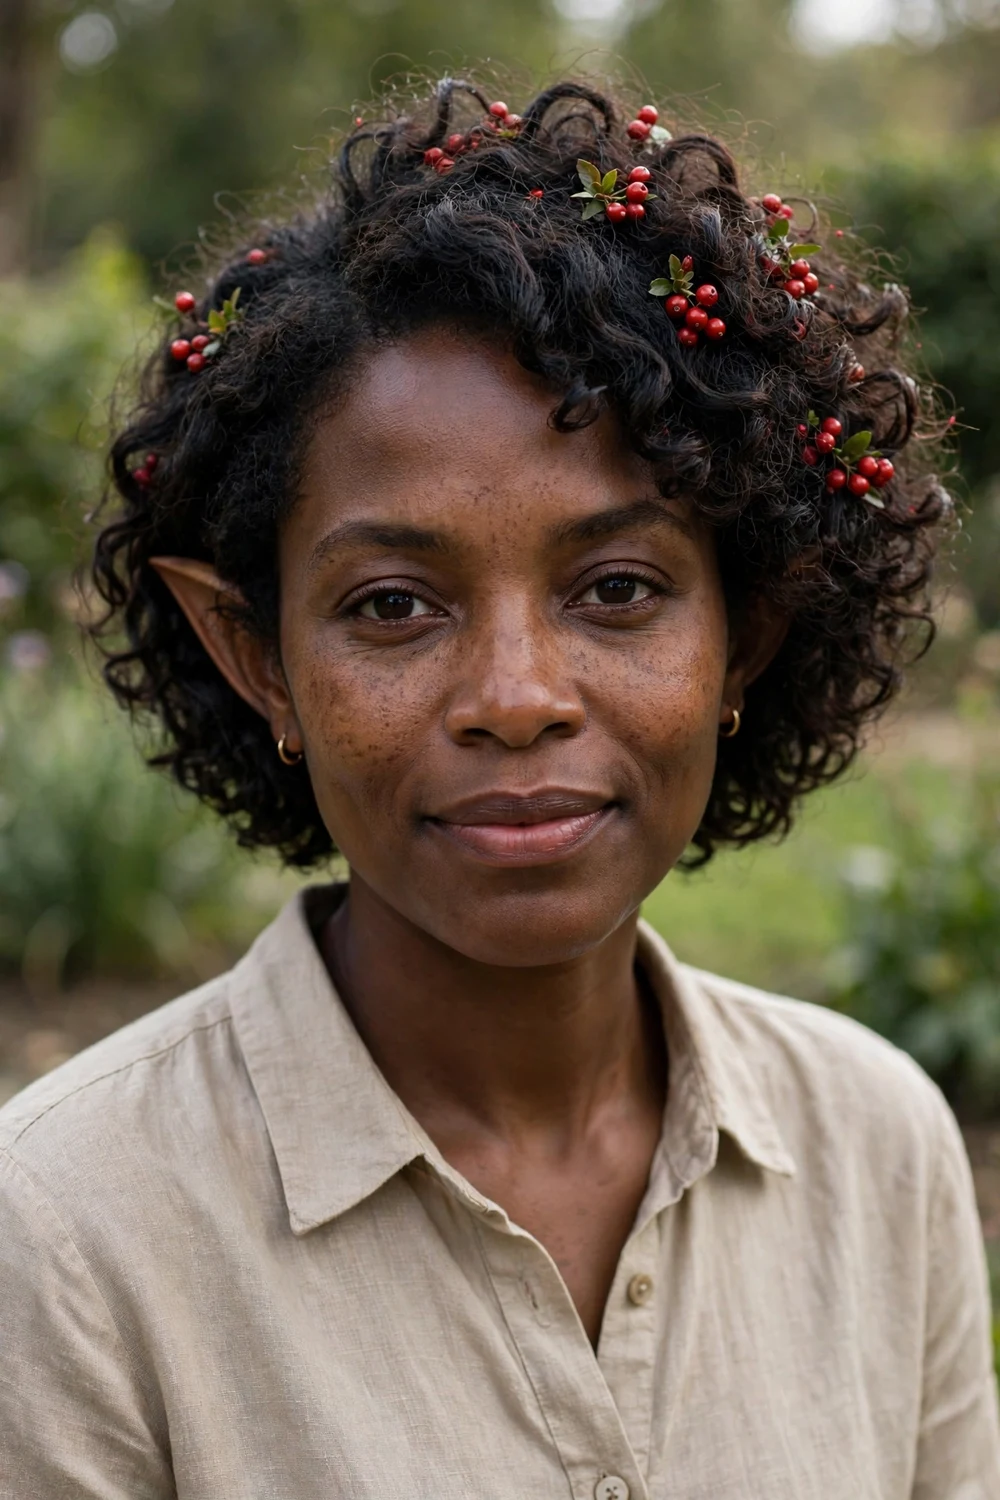
Short hair can absolutely do the elf thing. Diffuse a curly bob for maximum volume at the crown, then pin small faux berries, red beads, or tiny mushroom clips into the curls on one side. The accessories sit above and around the ears, and curls hold pins better than straight hair does, so everything stays put.
This is a strong pick for anyone with naturally curly or coily hair, since the texture is the whole look. Work a curl-defining cream through damp hair, diffuse upside down, and place each accessory by sliding a pin into the curl clump rather than scraping it across. The ears show clearly because the bob ends above them.
Try this: cluster three berries at different heights on one side for a woodland asymmetry.
Difficulty: Low · Cost: $ (curl cream, faux berries, pins)
6. Rustic Half-Up with Loose Red Waves

The ranger version of the half-up: gather the top third of the hair loosely, twist it once, and pin it low at the back of the head so it looks gathered rather than styled. Leave the rest down in natural waves, and pull a few strands free around the face. This one thrives on imperfection, so skip the flat iron and let your natural texture lead.
It works on any length past the shoulders and any hair color, though red and copper tones lean into the forest-ranger mood. A sea salt spray adds the right undone texture. Because the top section is pinned back loosely, the ears stay uncovered, and the style survives a whole night of movement without needing touch-ups.
Try this: use wooden or matte-finish pins instead of shiny ones so the hardware matches the rustic mood.
Difficulty: Low · Cost: $ (salt spray, pins)
7. Twisted Half-Up with Floral Pins
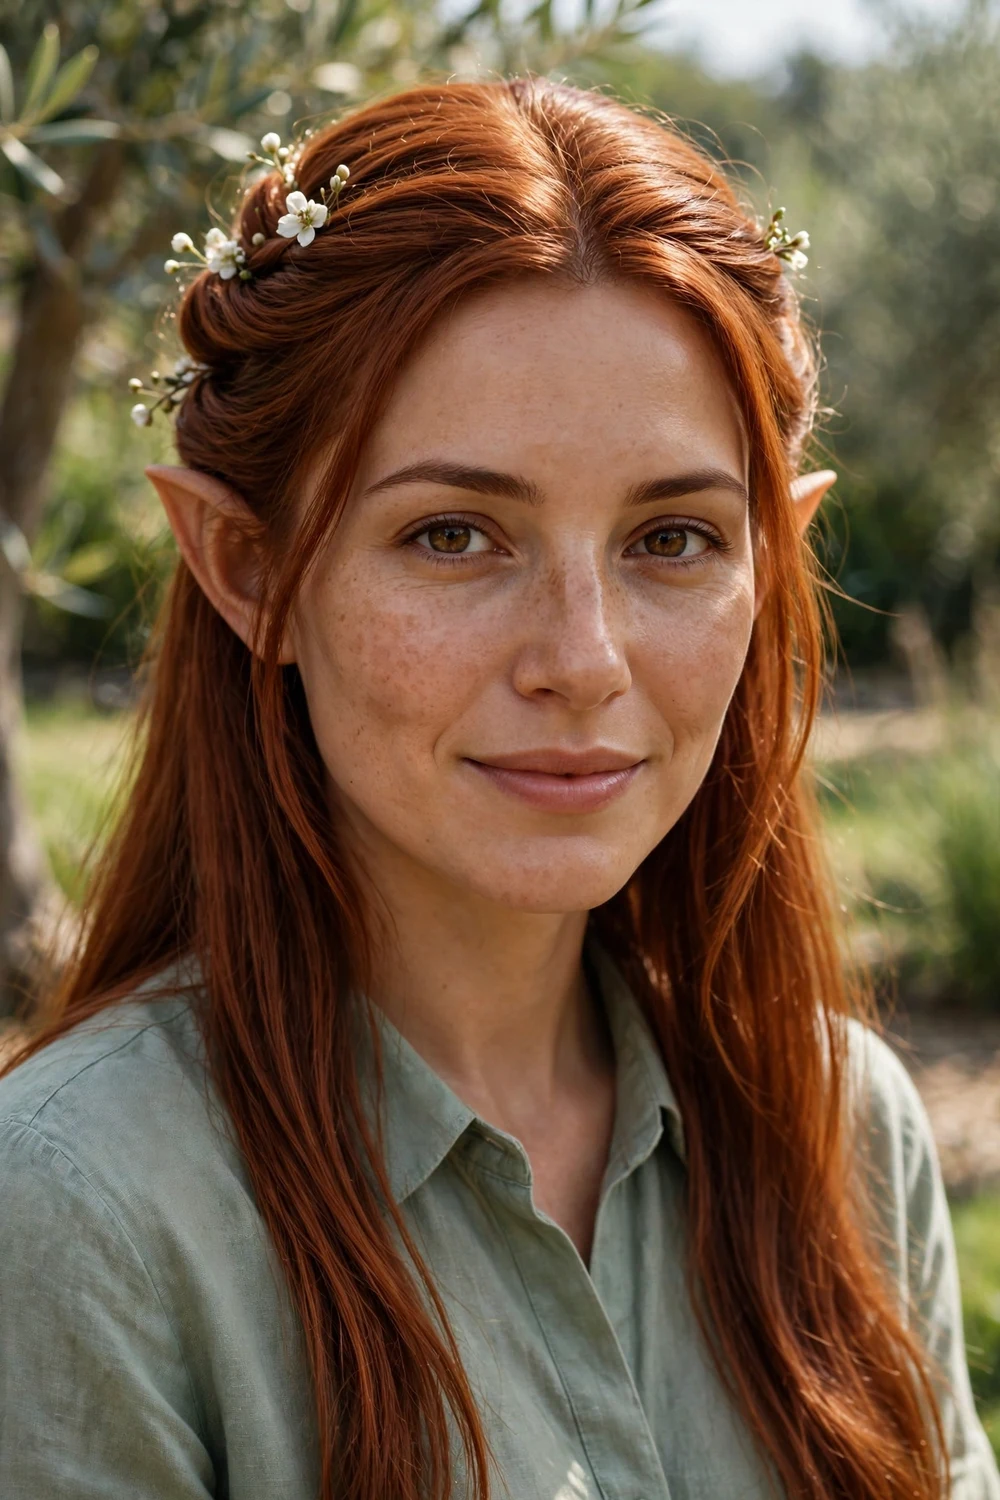
Gentler than a braided crown and faster too. Take the top half of the hair, split it into two sections, twist each one toward the back, and pin them where they meet. Dot the twist line with tiny white floral pins or baby’s breath sprigs, spacing them about two inches apart. The twist creates a soft ridge that reads as deliberate styling from a distance.
This takes under ten minutes and suits medium to long straight or slightly wavy hair. The twists pull everything back from the ears, so prosthetic tips get full visibility. It reads as a healer or gentle forest-dweller character, and the floral pins double as the costume’s main accessory.
Try this: twist the sections away from your face on both sides so the ridge looks symmetrical from behind.
Difficulty: Low · Cost: $ (floral pins, bobby pins)
8. Sleek Half-Up Bun with Draped Chain Headpiece

For royal elf or noble sorceress territory, go sleek. Smooth the top section back with a serum, gather it into a neat bun at the crown, and flat-iron the remaining length so it falls straight and glossy. Drape a gold chain headpiece across the forehead or along the part line and pin its ends under the bun. The polish of the hair sells the “nobility” better than the chain alone.
This flatters long straight hair most, though wavy hair works with enough smoothing. The ears stay completely clear because everything above them is pulled into the bun. A smoothing serum is non-negotiable here, since flyaways break the sleek illusion under party lighting.
Try this: wrap a thin strand of hair around the bun’s elastic to hide it before adding the chain.
Difficulty: Medium · Cost: $ (chain headpiece, serum, flat iron time)
9. Twin Braids with Antler Headband
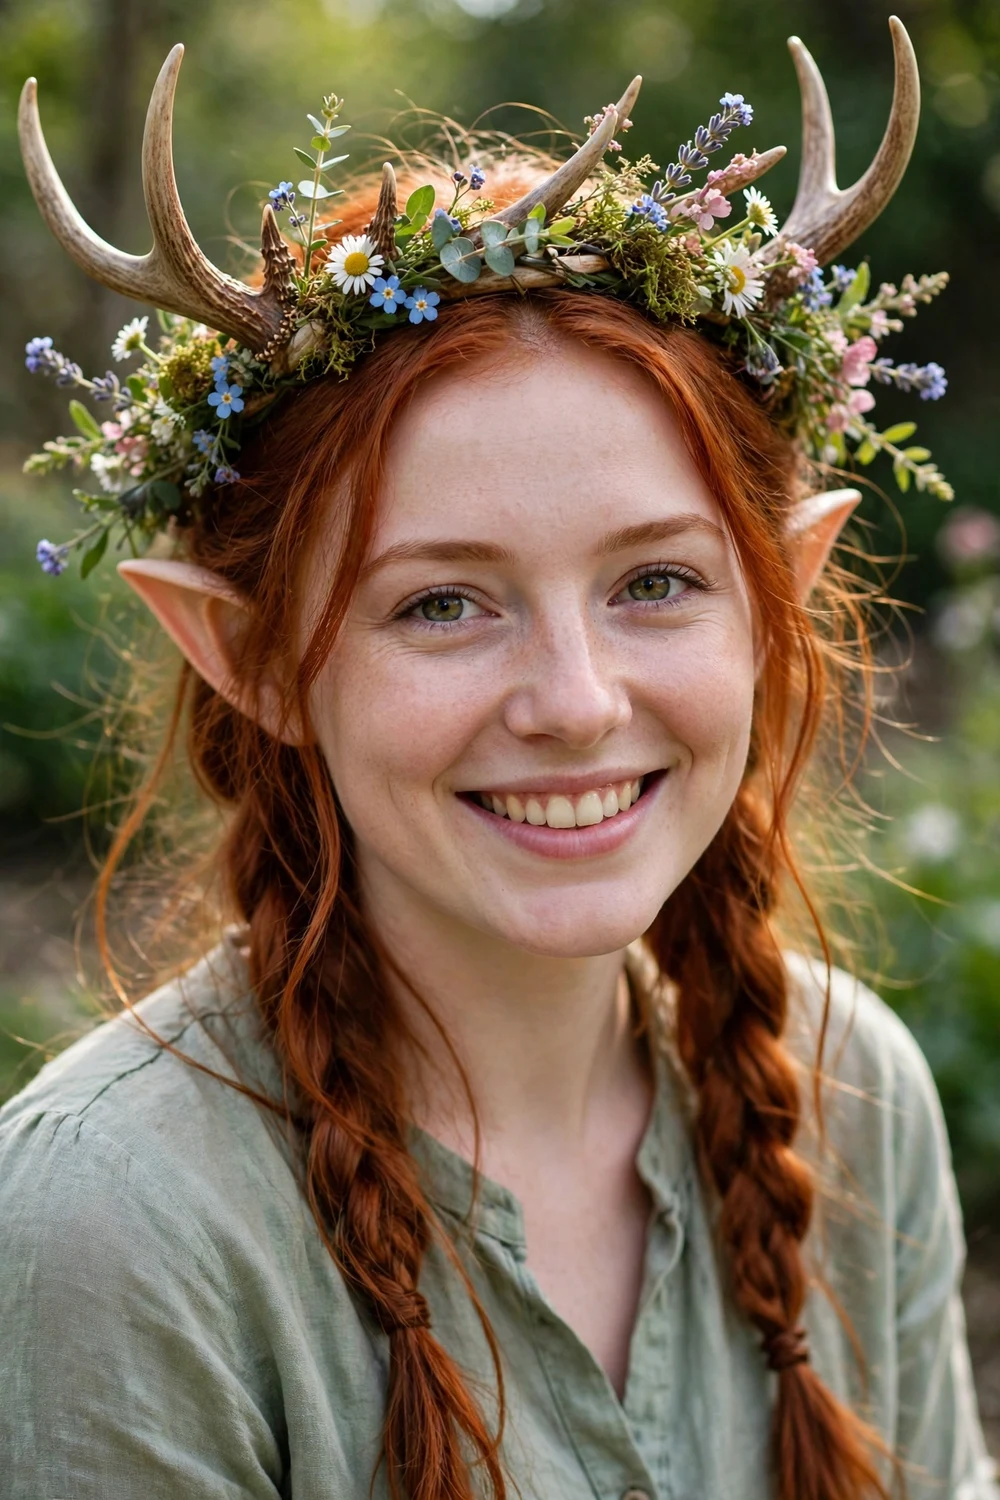
Part the hair down the middle and make two loose three-strand braids, starting each one just behind the ear so the prosthetic tips peek out in front of the braid. Pancake each braid by gently tugging the edges wider, then settle a floral antler headband on top. The messier the braids, the better this looks, so do not aim for clean sections.
This is the druid or forest-spirit pick, and it works on medium to long hair of any texture. Second-day hair grips best here. The headband sits above the ears, so it never interferes with the prosthetics, and the whole style takes about fifteen minutes.
Try this: weave a few faux leaves into the braids themselves so the woodland theme runs through the hair, not just the headband.
Difficulty: Low · Cost: $ (antler headband, elastics)
10. Dark Elf Beach Waves with Smoky Details
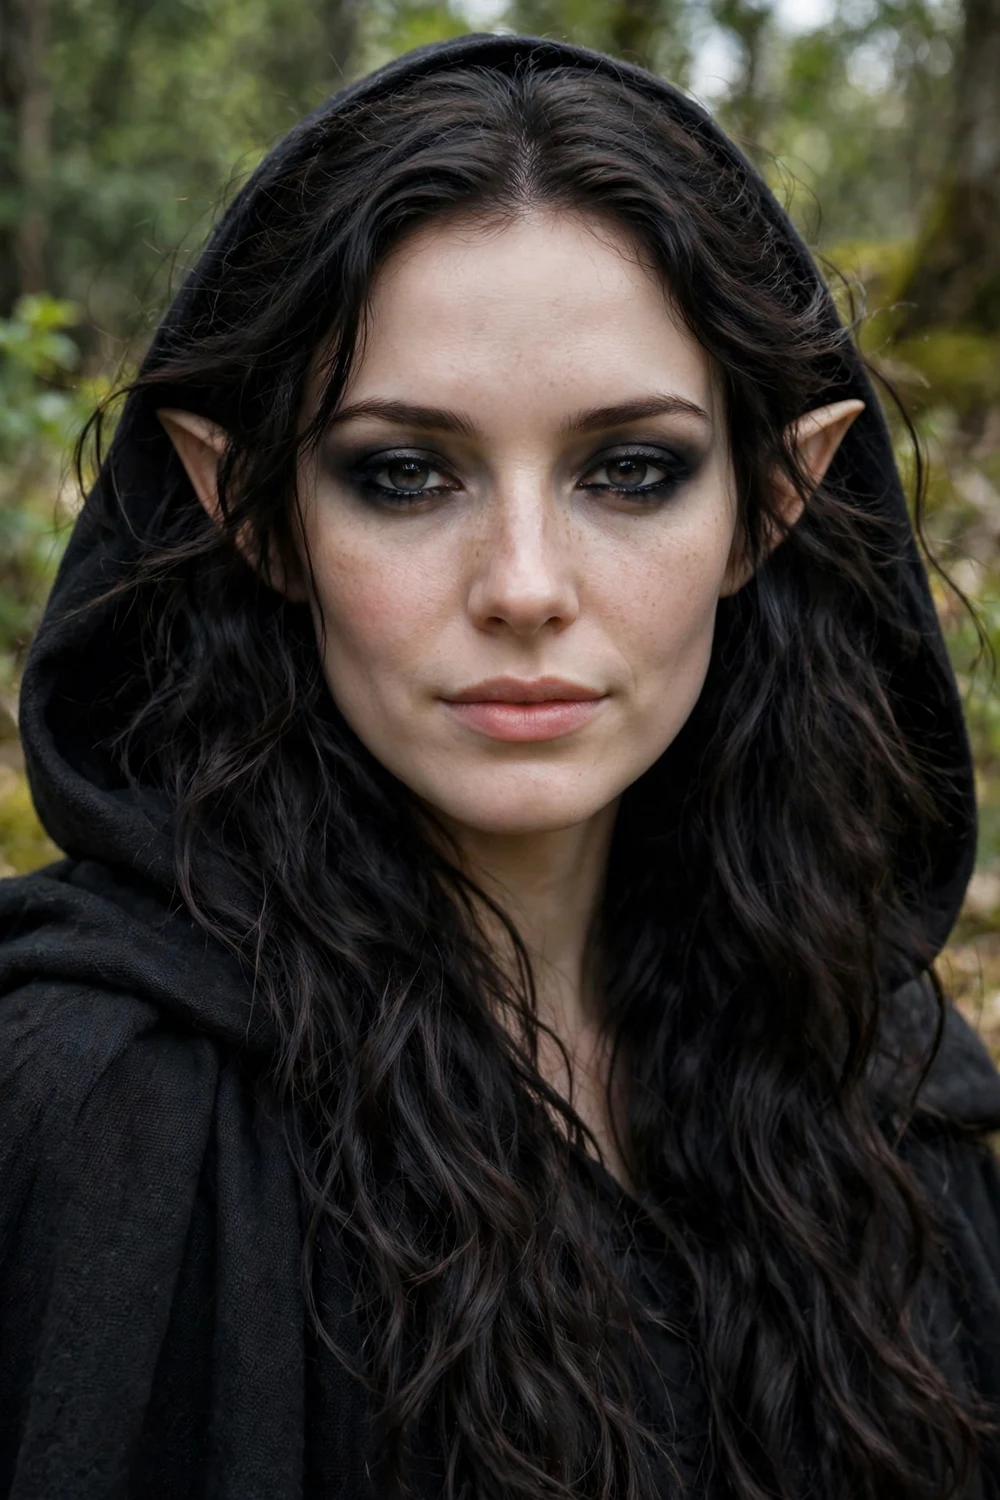
For a dark elf, necromancer, or cursed forest character, keep the hair soft and let the mood come from contrast. Curl the full length with a large-barrel iron in alternating directions, then break the curls up with your fingers and a texture spray for undone waves. The hair itself stays simple; smoky eye makeup and darker lip color shift the whole look toward menacing.
This suits long hair in dark shades, natural or dyed. Because the waves are loose and the part can sit anywhere, the ears stay visible with minimal pinning. A texture spray matters more than hairspray here, since the waves should move when you do.
Try this: tuck one side behind the ear on the side you photograph most, so the ear tip shows in every picture.
Difficulty: Low · Cost: $ (texture spray, dark makeup)
11. Warrior Crown Braids with Loose Length

This is the battle-elf build: two or three tight Dutch braids running from the hairline back across the crown, like rows of armor, with the rest of the hair left long and loose behind. Make the braids as tight and clean as you can, since the tension is what gives the warrior feel. Pin the braid ends flat under the loose hair at the back.
Long, thick hair shows this off best, and lighter shades make the braid rows more visible. Work on second-day hair or add dry shampoo for grip, and section with a tail comb so the rows run straight. The braids pull everything up and back, so the ears sit fully clear of the hair.
If you wear your hair in long-term protective styles, these braided hairstyles for black women show braid bases that take crown rows and warrior styling well.
Try this: add a thin braid on each side of the part line too, so the crown has three rows instead of two.
Difficulty: High · Cost: $ (dry shampoo, elastics, tail comb)
12. Side-Swept Braid with a Floral Crown

Sweep all the hair over one shoulder and make one thick, loose braid, pulling out a few face-framing strands first so the front stays soft. Pancake the braid wide, then set a flower crown on the head slightly tilted. The asymmetry keeps it from looking bridal, and the single braid photographs well from the front.
This works on long hair with some texture, since the braid needs bulk. Warm hair tones suit the harvest-fairy mood, but any color works with the right flowers. Keep the braid on the opposite side from your dominant photo side so the ear on the camera side stays uncovered.
Try this: tie a ribbon at the end of the braid in a color pulled from your costume for a coordinated finish.
Difficulty: Low · Cost: $ (flower crown, elastics)
13. Silver Twin Buns with Loose Ends
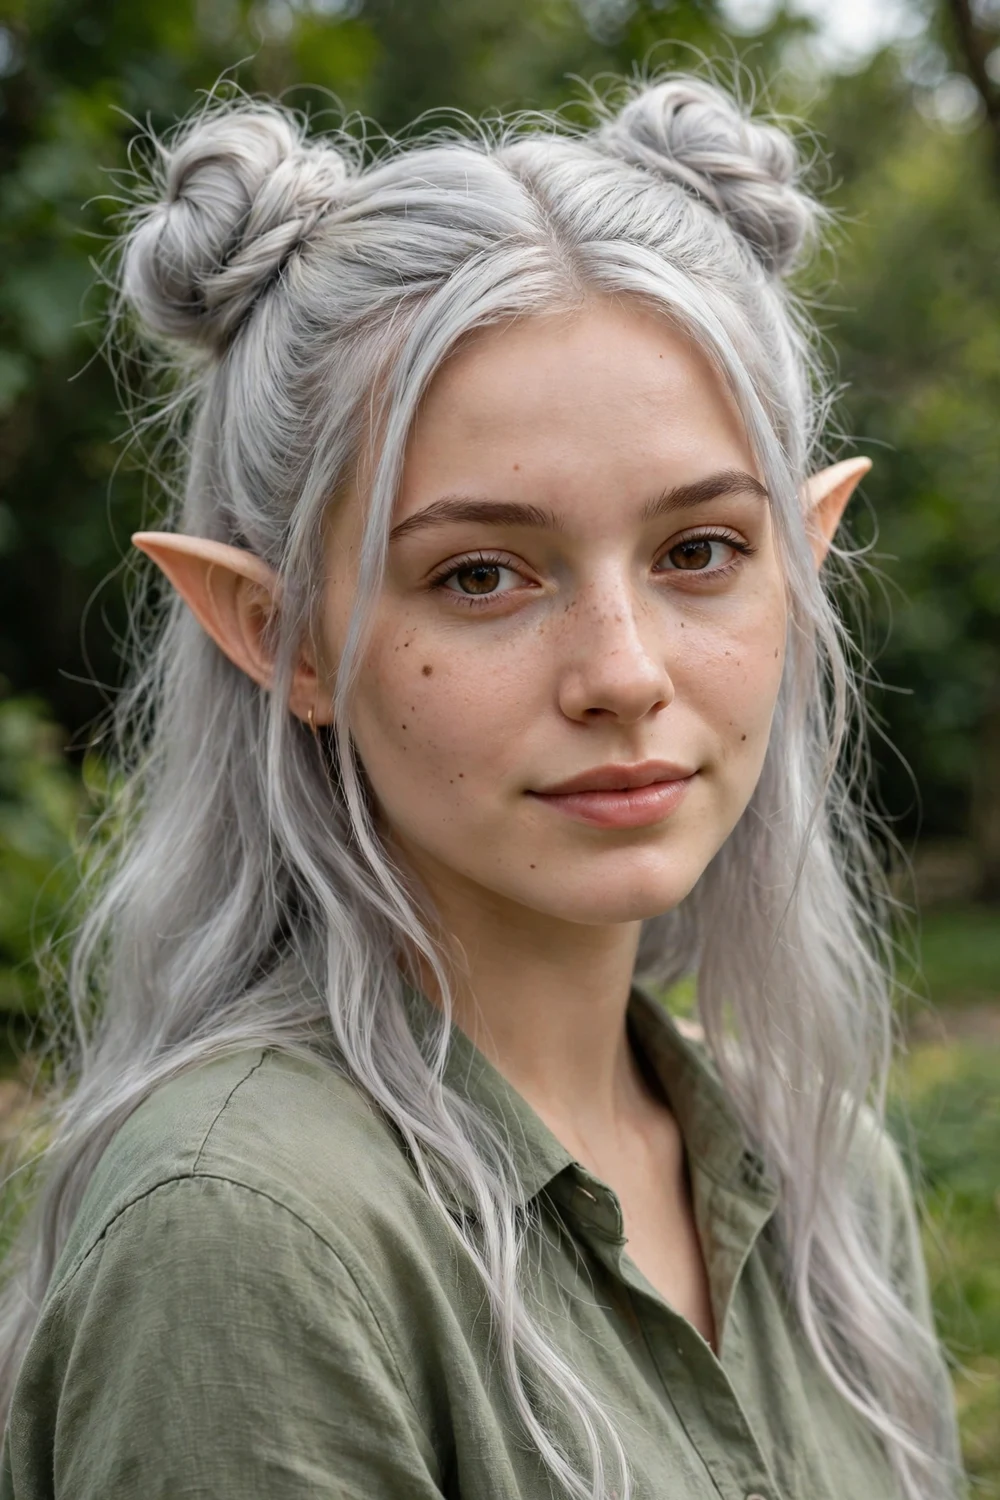
Part the hair down the middle, make two high buns, and leave the bottom half of the length hanging loose behind them. The buns sit on top like a playful crown while the loose ends keep it elven rather than cartoonish. This reads as a young adventurer or anime-influenced elf, and it works especially well with silver, white, or pastel wigs.
Medium to long hair holds the buns best; use clear elastics and pre-section so the buns sit evenly. Leave face-framing pieces out in front of the ears to soften the look. The high placement means the ears are completely unobstructed.
Try this: wrap a thin strand of hair around each bun base to hide the elastic and make them look neater.
Difficulty: Medium · Cost: $ (elastics, pins, wig if needed)
14. Mushroom Crown with Twin Rope Braids

Split the hair into two low pigtails and twist each one into a rope braid: divide each pigtail in two, twist both halves the same direction, then wrap them around each other the opposite way and secure. Top with a moss-and-mushroom crown or any whimsical woodland headpiece. Rope braids have a storybook texture that reads as fairy-tale even before the crown goes on.
This suits medium to long hair and leans fully into playful forest-dweller energy. Use small elastics at the ends and a little mousse to control flyaways without losing texture. The low braids hang in front of the shoulders, so the ears stay visible above them.
Try this: dip the ends of the rope braids in a tiny bit of hair wax so they hold their twist all night.
Difficulty: Medium · Cost: $ (mushroom crown, mousse, elastics)
15. Regal Updo with Cascading Face Curls

Curl the front sections first, then gather the back hair into a twisted updo, pinning it in sections so the shape builds gradually. Let the curled front pieces fall free around the face, and set a silver circlet across the forehead. The updo gives queen energy while the loose curls keep it from looking severe.
This is the high elf royalty pick and suits medium to long hair with enough length to twist up. Pinning in sections makes it far more manageable than trying to build the whole shape at once. The ears sit clear because the sides are swept up and back.
Twisted updos like this overlap with formal event styling, so browse these prom hairstyle ideas for more polished updo variations you can adapt for the evening.
Try this: curl the face-framing pieces last, after the updo is pinned, so they fall exactly where you want them.
Difficulty: High · Cost: $ (circlet, pins, curling iron time)
16. Twin Fishtail Braids with Tousled Crown
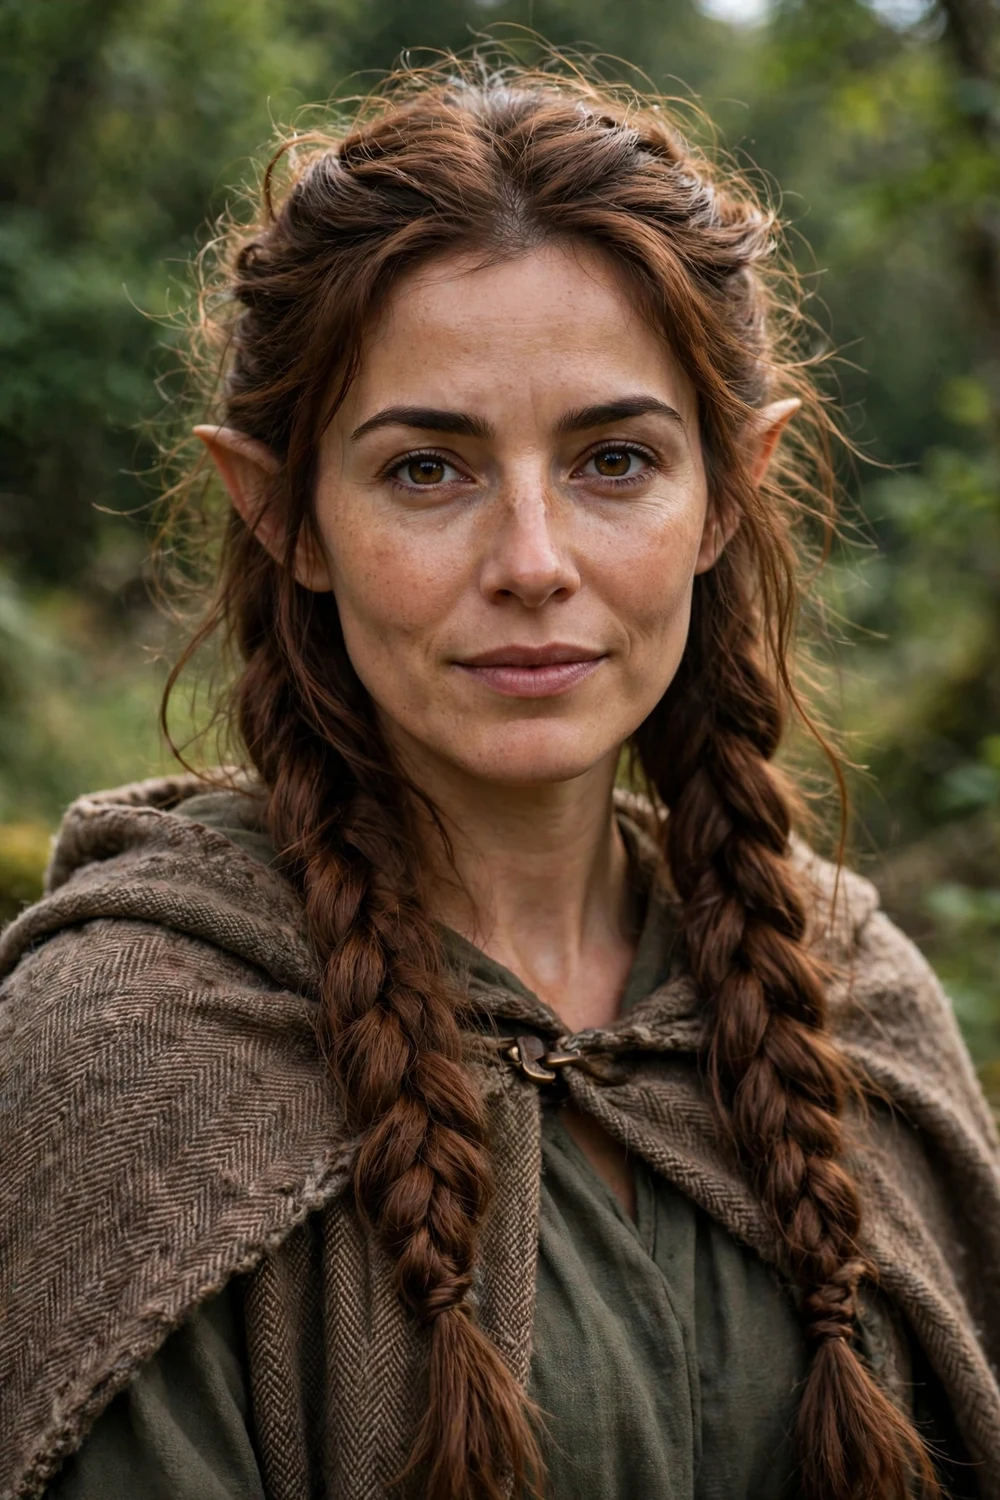
Tease the crown lightly for volume, smooth the top layer over it, then split the hair into two sections and fishtail-braid each one down past the shoulders. Pull the fishtails slightly loose as you go so they look soft rather than severe. The tousled crown plus intricate braids gives scout-or-wanderer energy, like someone who lives in the trees.
This suits naturally wavy or textured hair, since the style wants volume and a little roughness. A texture spray helps the fishtails hold their loosened shape. Start each braid just behind the ear so the ear tips stay visible from the front.
Try this: pancake only the outer edges of each fishtail to keep the centers tight and the silhouette wide.
Difficulty: Medium · Cost: $ (texture spray, elastics)
17. Baroque Half-Up with an Antler Crown

Tease the crown for height, gather the top section into a loose half-up, and let the rest fall in soft waves. Then go maximal on accessories: an antler crown layered with flowers, draped chains, and charms. The hair itself stays simple so the headpiece gets all the attention, which is exactly right for an elven queen or forest goddess character.
This suits long hair that can hold teased volume, and it is the most accessory-heavy look on this list. Anchor the antler crown with bobby pins crossed in an X at four points so it does not shift. The half-up keeps everything off the ears, so the prosthetics read clearly under the crown.
Try this: match one flower color in the crown to your eye makeup for a pulled-together finish.
Difficulty: Medium · Cost: $ (antler crown, chains, pins)
18. Night Elf Side Braid with Face Markings
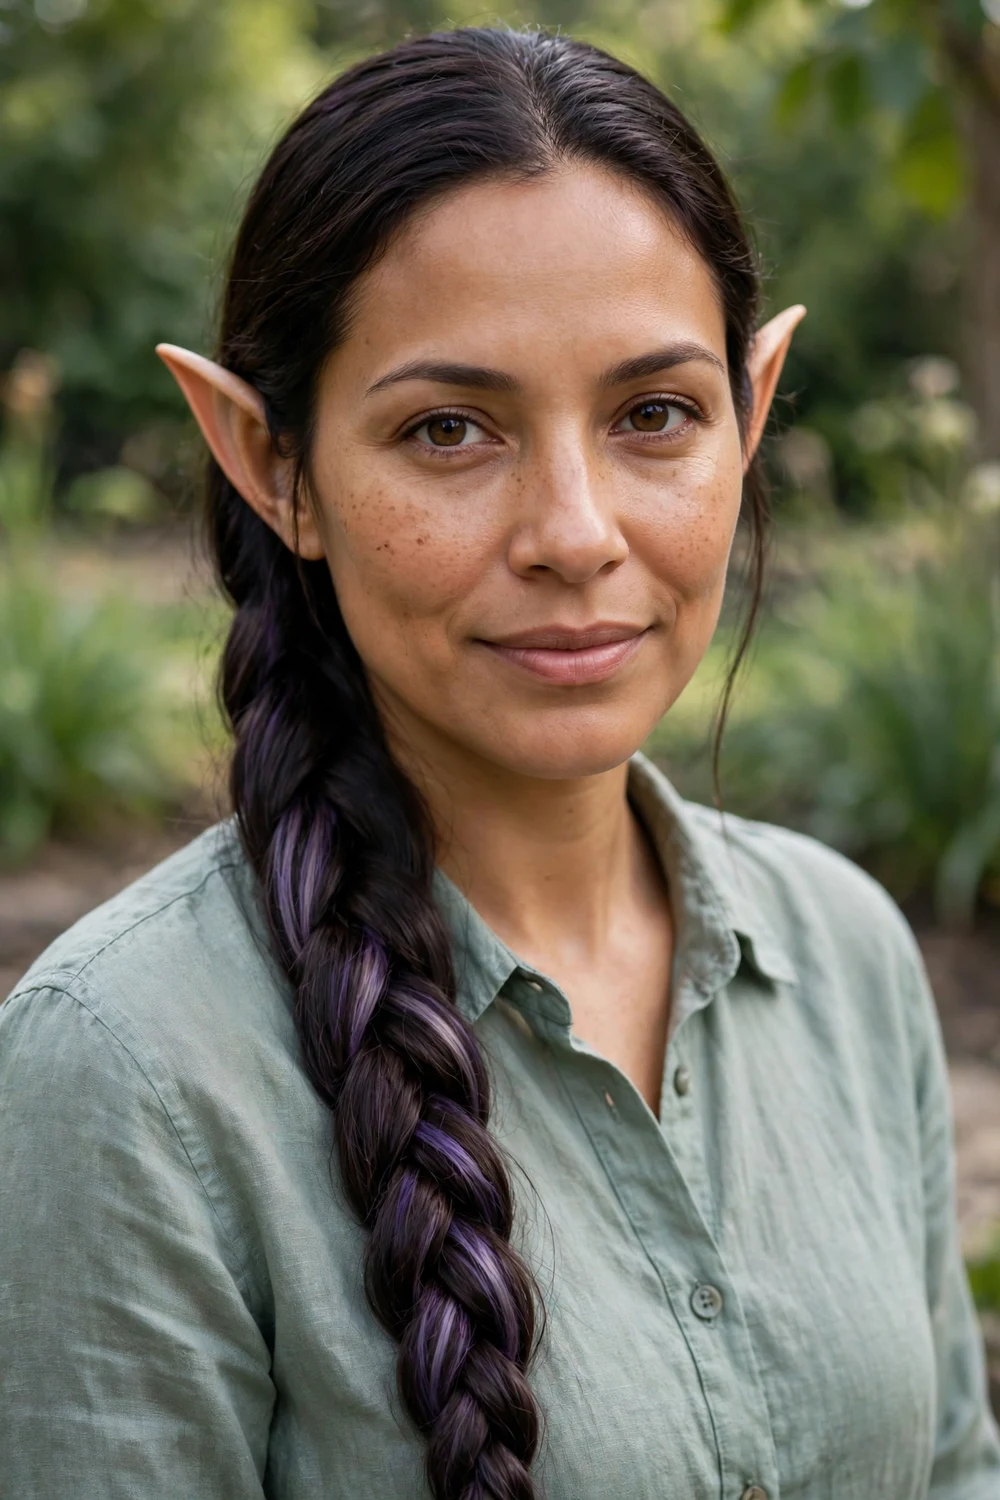
Smooth all the hair to one side with a lightweight gel, then make one clean, tight braid that sits over the shoulder. Add temporary color streaks in purple, blue, or teal through the braid, and paint simple curved markings on the cheeks or forehead with face paint. The sleek braid and graphic markings give serious game-character energy.
This works on long straight or slightly wavy hair, and it is the strongest pick for a night elf or warrior look. The gel keeps everything smooth and controlled, which matters because this style has no loose pieces to hide behind. Tie a ribbon or small charm at the braid’s end for a finished detail.
Try this: set the face markings with translucent powder so they do not smudge onto the braid.
Difficulty: Medium · Cost: $ (temporary color, face paint, gel)
19. Sleek Elven Volume with Gentle Waves

Tease the crown just slightly, smooth the top layer over with a brush, and pin the lifted section in place so the volume holds. Let the rest of the hair fall into soft, defined waves, and add a delicate gold circlet across the forehead. The symmetry and control here read as classic elven nobility, straight out of Rivendell.
This suits long, thick hair best, since the lifted crown needs density to hold its shape. Tease in small sections and smooth over gently so the volume looks intentional rather than frizzy. The pinned-back sides keep the ears fully visible.
Try this: backcomb only the underlayers at the crown and keep the top layer smooth for clean-looking volume.
Difficulty: Medium · Cost: $ (gold circlet, teasing comb, pins)
20. Silken Sleek Half-Up (Minimalist High Elf)
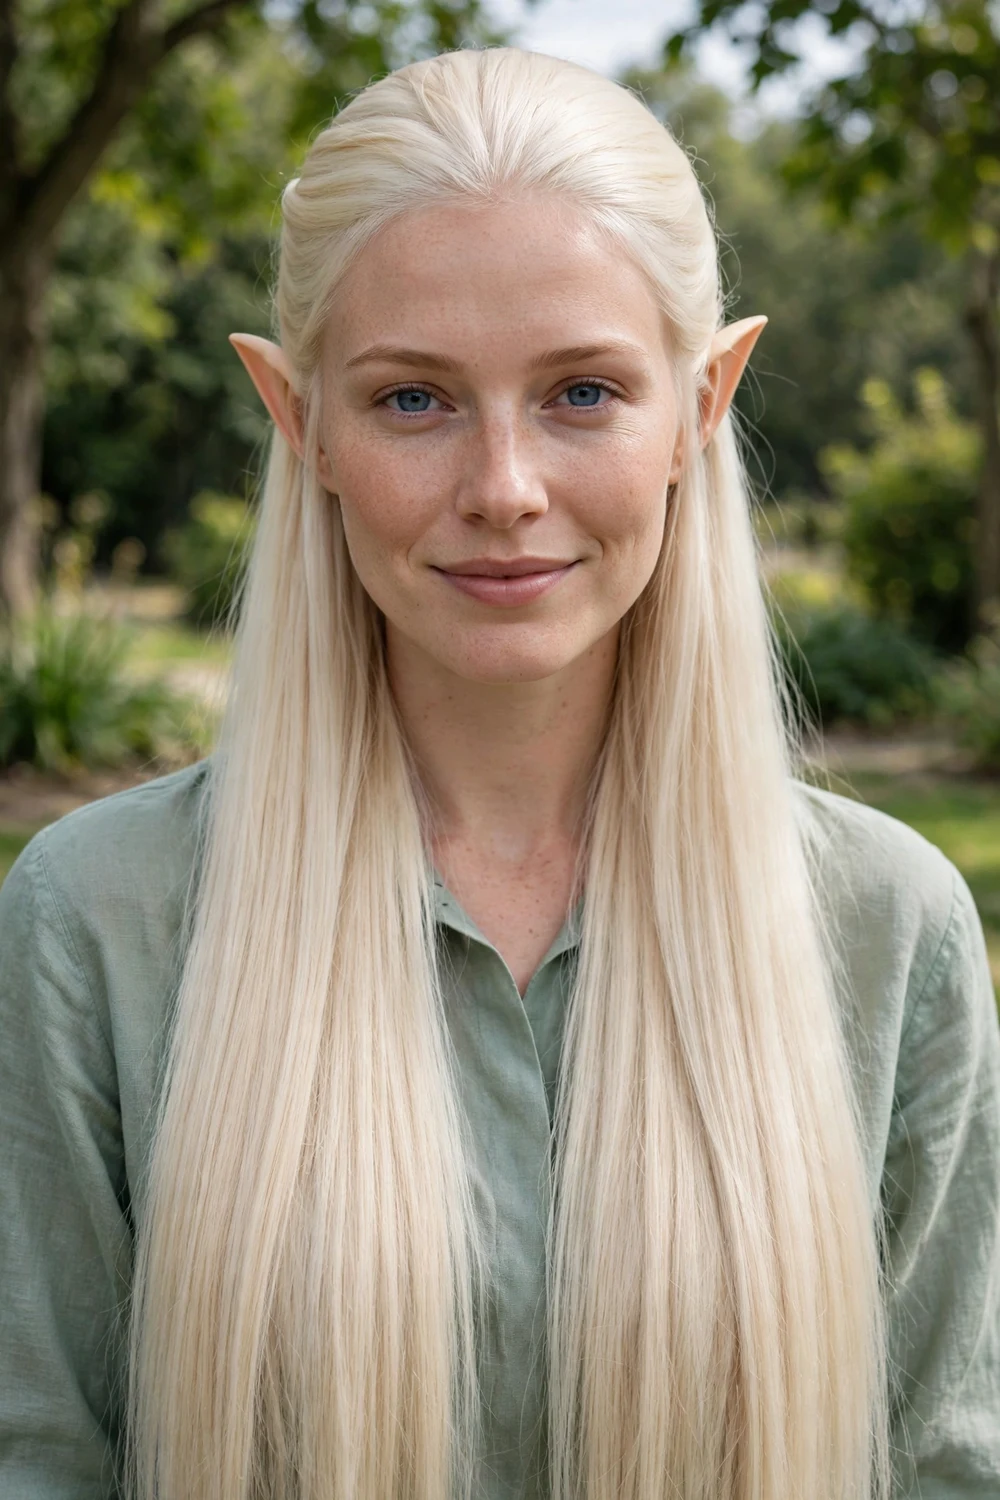
Some elves are all restraint. Flat-iron the full length bone-straight with a shine serum, gather the top section into a simple half-up, and secure it flat against the head. No braids, no accessories, just a glassy finish and perfect symmetry. This reads as an ancient, aloof high elf, and it pairs well with high-neckline or structured costumes.
Straight or straightened hair is required, and the finish has to be genuinely smooth for the minimalism to work. Use a flat iron with a shine spray, smooth the top section with a soft brush, and check the back with a hand mirror since every flaw shows on straight hair. The simplicity keeps the ears as the focal point.
Try this: run a clean mascara spoolie over the part line to tame any baby hairs along it.
Difficulty: Low · Cost: $ (shine serum, heat protectant)
21. Loose Top Knot with Side Layers and Chain Wrap

Gather the hair into a high top knot using your fingers, not a brush, so it stays loose and a little undone. Leave the side layers and face-framing pieces out, then drape a dainty chain across the forehead and pin its ends under the knot. The contrast between the casual bun and the delicate chain gives roguish-elf energy.
This suits medium to long hair with natural texture, since the looseness needs some grip to hold. It takes about ten minutes and survives the night well because the style is meant to look relaxed. The chain sits above the ears, so it never tangles with the prosthetics.
Try this: twist the knot loosely instead of wrapping it tight so it looks fuller and more relaxed.
Difficulty: Low · Cost: $ (chain headpiece, pins)
22. Half-Up Warrior Waves with a Tiara Clip

Twist the top section back and pin it firmly, letting the rest fall in soft waves. Add a small decorative clip or mini tiara right where the twist is pinned. The twist gives structure, the waves give movement, and the single clip adds just enough fantasy without going full royal. This is the elven ranger who leads the patrol.
Thick or long hair carries this best, since the waves need weight to move naturally. Pin the twist with two crossed bobby pins so it holds through a whole evening of activity. The ears stay clear because the twist pulls the sides back.
Try this: choose a clip with a leaf or vine motif so it reads as elven rather than generic sparkle.
Difficulty: Low · Cost: $ (decorative clip, pins, curl cream)
23. Short Bob with Curled-In Ends
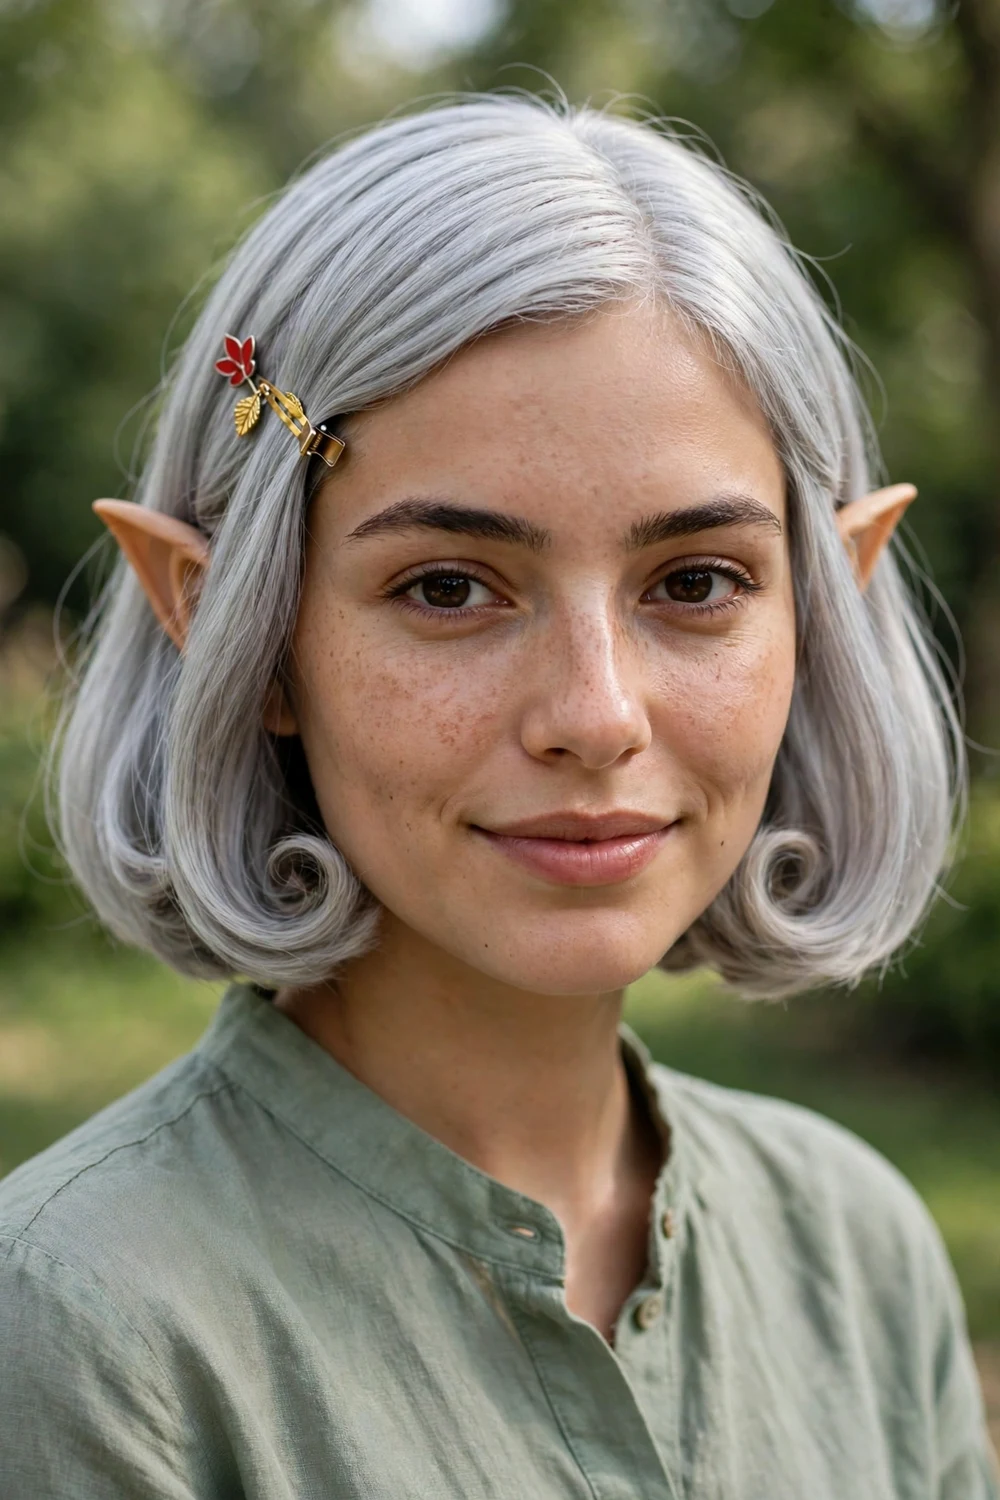
Blow-dry a bob with a round brush, curling the ends under for a neat, bouncy shape, then add small red and gold accessories: clips, beads, or tiny charms pinned along one side. The curled-under ends give a polished, almost vintage feel that stands out in a sea of long-haired elf looks.
This suits straight to slightly wavy hair at chin to shoulder length. A light mist of flexible hairspray holds the curled ends without stiffness. Because the bob ends above the ears, the prosthetic tips show completely, which makes this one of the most ear-friendly options here.
Try this: place the accessories asymmetrically, heavier on one side, so the style looks styled rather than decorated.
Difficulty: Low · Cost: $ (round brush time, clips, beads)
24. Arwen-Inspired Herringbone Temple Braids
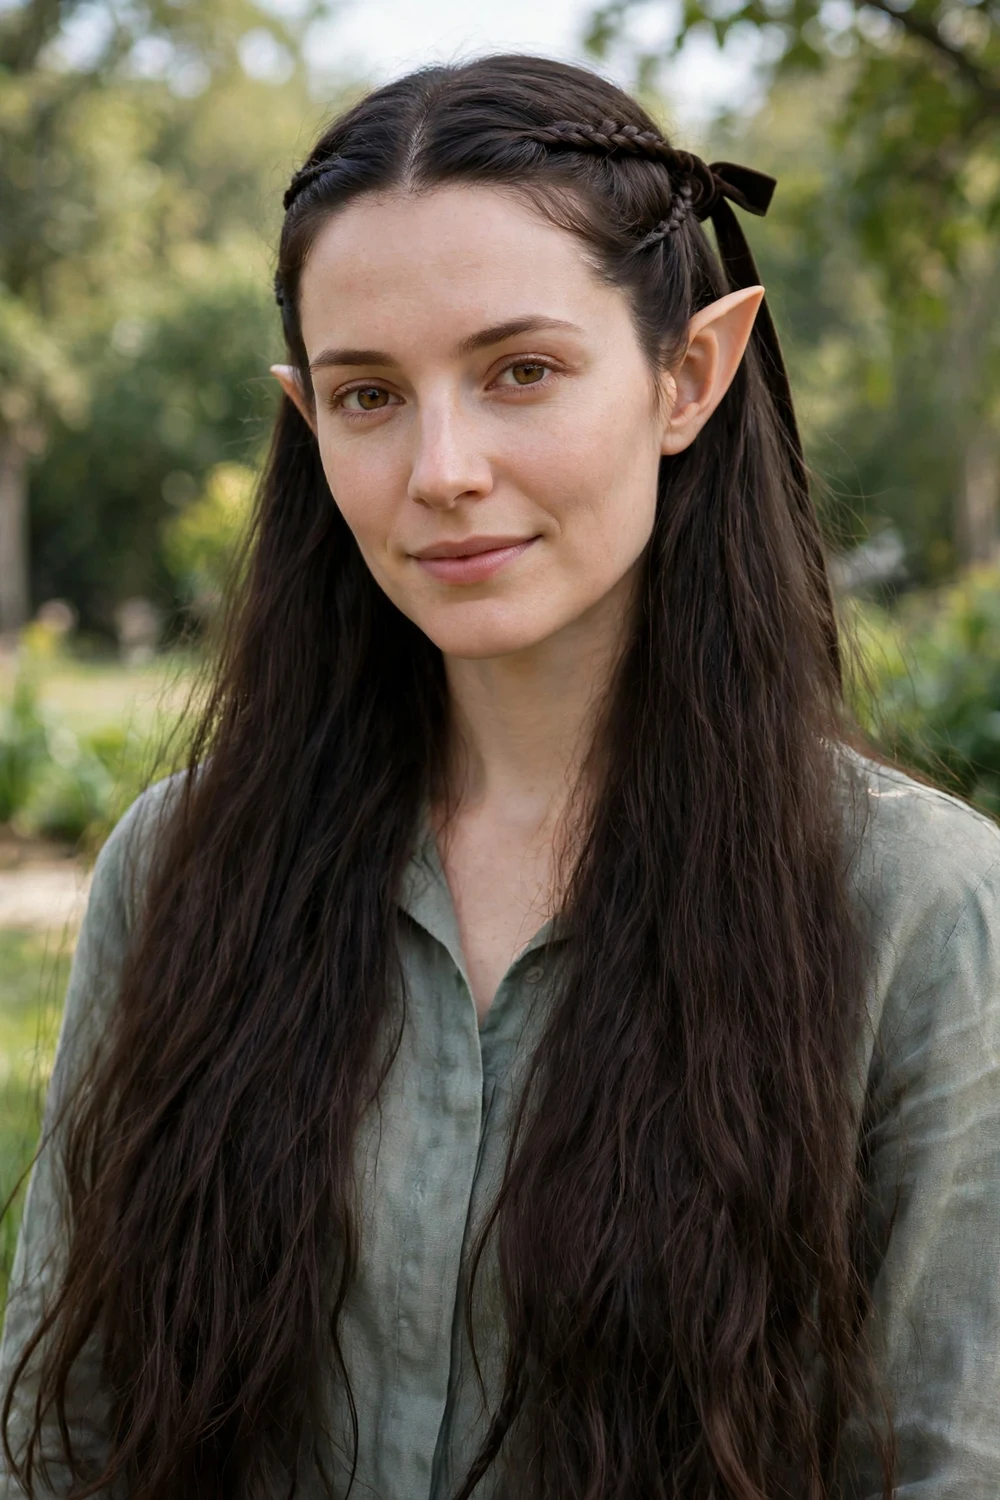
The most recognizable LOTR hairstyle there is. Take a thin section from each temple, fishtail-braid each one (the herringbone pattern is just a two-strand braid where you cross small pieces from the outside in), and join the two braids at the back of the head with a clear elastic or a ribbon. Let the rest of the hair flow long and straight or softly waved behind.
This needs long hair to look right, since the braids are an accent against a lot of length. Keep the braids thin, about half an inch wide, so they read as delicate rather than chunky. The temple placement pulls hair back from the ears, and a dark ribbon at the join nods to the films without needing a full costume replica.
Try this: make the two braids slightly uneven in length before joining so the join sits off-center and looks natural.
Difficulty: Medium · Cost: $ (elastics, ribbon)
25. Ribbon-and-Chain Laced Braids

Make one thick three-strand or fishtail braid, and before you start, tie thin ribbons and a delicate chain to the top of one section so they braid in with the hair itself. As you braid down, the metal and fabric weave through the strands, and the finished braid glints when it moves. Finish with small rings or cuffs slid over the braid at intervals.
This works on long hair with enough length for the lacing to show, and it suits any elf character from woodland to royal depending on your ribbon color. Tie the ribbons and chain securely at the top so they do not slide out as the braid loosens. For a long-wearing braided base that you can dress up this way, these knotless braids hairstyles give you a sturdy foundation to lace through.
Try this: use ribbons in two tones, one matching your hair and one metallic, for depth in the lacing.
Difficulty: Medium · Cost: $ (ribbons, chain, braid cuffs)
At a Glance: 25 Elf Hairstyles Compared
| Style | Best for | Elf-ear tip | Upkeep |
|---|---|---|---|
| Half-Up Braided Crown with Loose Waves | Medium to thick hair | Crown frames the ears from above | Hairspray to hold the crown |
| Long Flowing Silver Hair with Side Braids | Long straight hair or wigs | Side braids pull hair off the ears | Serum on the lengths |
| Loose Mermaid Curls with Floral Accents | Wavy or textured hair | Flowers pinned behind the ears | Pin flowers with crossed pins |
| Soft Twists with a Silver Elven Circlet | Fine to medium hair | Twists keep hair off the ears | Dry shampoo for circlet grip |
| Short Curly Bob with Berry Accessories | Curly or coily hair | Bob ends above the ears | Curl cream, pin into clumps |
| Rustic Half-Up with Loose Red Waves | Any texture, past shoulders | Loose pinning leaves ears clear | Salt spray, no touch-ups needed |
| Twisted Half-Up with Floral Pins | Straight to wavy hair | Twists pull everything back | Ten-minute style, holds well |
| Sleek Half-Up Bun with Draped Chain Headpiece | Long straight hair | Bun clears the whole ear area | Serum to kill flyaways |
| Twin Braids with Antler Headband | Medium to long hair | Headband sits above the ears | Second-day hair grips best |
| Dark Elf Beach Waves with Smoky Details | Long dark hair | Tuck one side behind the ear | Texture spray for movement |
| Warrior Crown Braids with Loose Length | Long thick hair | Rows pull hair up and back | Dry shampoo for braid grip |
| Side-Swept Braid with a Floral Crown | Long hair with texture | Keep braid off the camera side | Pancake the braid wide |
| Silver Twin Buns with Loose Ends | Medium to long hair | High buns leave ears clear | Clear elastics, even sections |
| Mushroom Crown with Twin Rope Braids | Medium to long hair | Low braids hang below the ears | Wax on the rope ends |
| Regal Updo with Cascading Face Curls | Medium to long hair | Sides swept up and back | Pin in sections, curl last |
| Twin Fishtail Braids with Tousled Crown | Wavy or textured hair | Braids start behind the ears | Texture spray to hold looseness |
| Baroque Half-Up with an Antler Crown | Long hair with volume | Half-up keeps ears visible | X-crossed pins anchor the crown |
| Night Elf Side Braid with Face Markings | Long straight hair | Sleek sides show the ears | Gel for a smooth finish |
| Sleek Elven Volume with Gentle Waves | Long thick hair | Pinned-back sides clear the ears | Tease underlayers only |
| Silken Sleek Half-Up (Minimalist High Elf) | Straight or straightened hair | Simplicity makes ears the focus | Shine spray, check the back |
| Loose Top Knot with Side Layers and Chain Wrap | Textured medium to long hair | Chain sits above the ears | Finger-style, ten minutes |
| Half-Up Warrior Waves with a Tiara Clip | Thick or long hair | Twist pulls the sides back | Crossed pins hold the twist |
| Short Bob with Curled-In Ends | Chin to shoulder length | Ends sit above the ears | Flexible hairspray on the ends |
| Arwen-Inspired Herringbone Temple Braids | Very long hair | Temple braids pull hair back | Keep the braids thin |
| Ribbon-and-Chain Laced Braids | Long hair | Single braid leaves ears open | Tie lacing in securely |
How to Choose Your Elf Hairstyle
Start with the character, not the hair. A woodland elf wants loose texture, flowers, and asymmetry. A high elf or royal wants symmetry, sleekness, and one strong accessory like a circlet. A dark elf or warrior wants tighter braids, darker tones, and sharper lines. Once you know the character, half the list eliminates itself.
Next, be honest about your hair and your skill level. Long hair opens up every option here, but short hair has real choices too: the curly bob, the curled-in bob, and the top knot all work without extensions. If you have never fishtailed before, practice once the week before the party rather than learning on Halloween night. And if your October costume doubles as a winter-party look, these christmas hairstyles for women show how similar braids and waves adapt for the holiday season.
Finally, fit the style to the evening. A style with lots of pins and a heavy headpiece is fine for a house party but miserable on a bar crawl. Loose braids and half-up styles survive movement, hugs, and wind far better than precise updos. Pick the version you can forget about once the night starts.
Keeping Your Elf Hair Intact All Night
Ears first. Apply prosthetic ears before you finish styling, not after, so you can work the hair around them. Spirit gum and most adhesives weaken with sweat and heat, so keep hair off the adhesive edges and avoid tucking strands behind the ears once they are on. If an edge lifts mid-party, press it back down with a clean fingertip rather than pulling hair over it.
Pins and hold. Braids loosen and updos sag as the night goes on, so over-pin slightly at the start: every anchor point gets two crossed bobby pins instead of one. A travel-size flexible-hold hairspray in your bag handles flyaways without making the hair crunchy. Skip heavy oils near the ears, since they can loosen adhesive.
Wigs and color. If you are using a wig for silver or extra length, secure it with a wig cap and a few pins at the temples so it does not shift when you move. Temporary color sprays and chalks look great in photos but transfer onto costumes and ears, so apply them before dressing and let them dry fully. Wash everything out the same night: glitter and color spray get harder to remove the longer they sit.
Frequently Asked Questions
How do you style hair around prosthetic elf ears?
Style around the ears, not over them. Pull the hair near your ears back with twists, braids, or pins before applying the prosthetics, so the adhesive edges sit on clean skin. Keep loose strands away from the adhesive during the night, since hair tugging on the edges is what makes ears lift. Half-up styles work best because they frame the ears while keeping the rest of the hair free.
What is the easiest elf hairstyle for Halloween?
The twisted half-up with floral pins is the fastest option on this list: it takes under ten minutes with just bobby pins and small flowers. The rustic half-up with loose waves is nearly as easy, since it is meant to look undone. Both keep the ears visible, need no heat styling skills, and survive a whole evening without touch-ups.
Can you wear an elf hairstyle with short hair?
Yes. The short curly bob with berry accessories and the short bob with curled-in ends are both designed for chin-to-shoulder hair, and the loose top knot works on medium lengths. Short hair actually shows off prosthetic ears better than long hair does, since nothing covers them. Add one woodland or metallic accessory and the costume reads clearly.
What hair color works best for an elf costume?
Any color works, but certain shades lean into the fantasy faster: silver and platinum for high elves, copper and red for woodland elves, and dark brown or black for dark elves and warriors. Temporary color sprays and clip-in streaks let you test a shade for one night without dyeing. Match the shade to your character rather than chasing a single “correct” elf color.
How do I make my elf hairstyle last all night?
Start with second-day hair, which holds braids and pins better than freshly washed hair. Over-pin every anchor point with two crossed bobby pins, set braids with a light hairspray, and carry a travel-size spray plus spare pins in your bag. Keep hair away from the prosthetic ear adhesive, and avoid restyling once the night starts: every adjustment loosens the structure a little more.
Final Thoughts
An elf costume is one of the few Halloween looks where the hair matters as much as the outfit. Pick the character first, build the hair around the ears, and give yourself more pins than you think you need. Whether you go for flowing silver lengths or a pair of rough twin braids, the right hairstyle is what makes people see the elf before they see the costume.

