

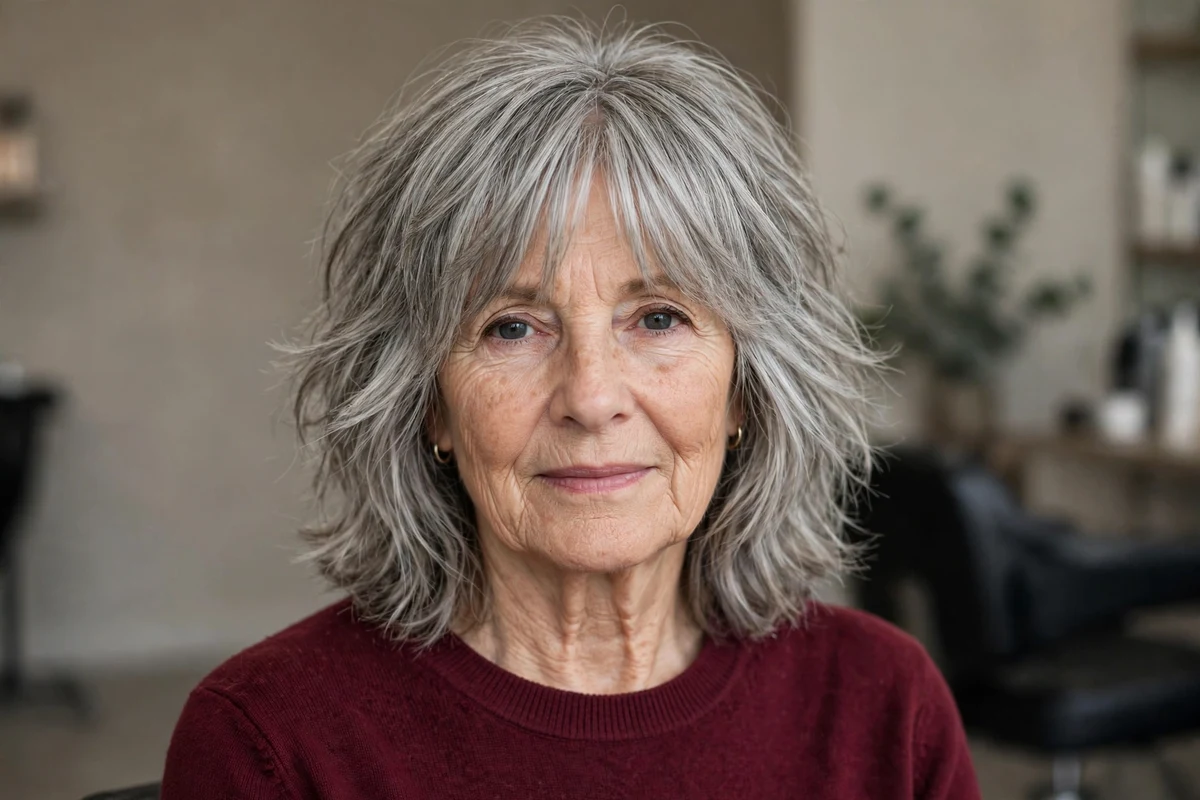
After 60, the shag that works best is rarely the heavy, choppy version in old photos. The modern version is lighter. Layers are placed where hair needs lift, ends are softened so grey and fine hair keep their fullness, and fringes are cut to work with glasses, partings, and real morning routines. I have pulled together the modern shapes that keep coming up in salons now, from short shixies and bixies to longer ghost layers and butterfly layers.
Use this list by length first, then by hair type. Short cuts ask for more frequent trims and less daily styling. Medium and long shags ask for less frequent cuts and a little more care at the ends. Every idea below notes who it suits, how to style it at home, and what to ask for, so you can take two or three clear options to your stylist.
Key Takeaways
- Modern shags for women over 60 use softer, placed layers rather than heavy all-over chopping, so fine and grey hair keep fullness at the ends.
- Short shixie, bixie, and pixie shags are fastest each morning and need trims every five to six weeks. Shoulder and long shags stretch to eight to ten weeks.
- Curtain bangs, side-swept fringes, and full fringes each solve a different need. Cut any fringe around your glasses if you wear them daily.
- Grey-friendly colour placement, including root melts, balayage, and money pieces, grows out softly through shag layers without a hard line.
- Tell your stylist how you actually dry your hair. A shag cut for air drying is layered differently from a shag cut for a daily blowout.
How to Choose a Modern Shag After 60
Start with thickness. Fine hair does best with longer, softer layers, blunt or lightly point cut ends, and crown layers that start lower. Thick hair can carry shorter crown layers, tapering, and internal weight removal. Curly hair should be shaped with the curl pattern visible, so the dry length is not a surprise. If fullness is your main concern, the short layered hairstyles for women over 60 guide shows how layer placement changes volume at short lengths.
Then choose by routine. If you air dry, pick the wash-and-go, wavy crown lift, or ghost layer versions and say so clearly at the salon. If you blow dry most days, the French bob, stacked bob, and butterfly layers will hold their finished shape longer. Bangs add a daily minute or two and a fringe trim between cuts, so factor that in before choosing a full fringe.
| Length family | Ideas in this list | Best for | Trim cycle |
|---|---|---|---|
| Short pixie and bixie shags | 1, 2, 5, 19 | Fast mornings, glasses wearers, fine hair needing crown lift | 5 to 6 weeks |
| Bob shags | 3, 9, 14, 20, 21 | A clear outline with movement, fine to thick hair | 5 to 8 weeks |
| Medium and shoulder shags | 4, 6, 7, 8, 10, 15, 16, 17, 18, 22, 23, 24, 25, 26 | Most face shapes, tie-back length, grey blending colour | 6 to 8 weeks |
| Long shags | 11, 12, 13 | Keeping length, natural waves, low-commitment layering | 8 to 10 weeks |
1. Modern Shixie with Choppy Crown Layers

The shixie sits between a pixie and a shag. The sides stay short and tidy, the crown carries short choppy layers, and the top keeps enough length to sweep forward or to the side. For women over 60, that crown texture is the point. It lifts hair that has started to lie flat without needing a full blowout.
Ask for the nape to stay soft rather than clipped tight. A soft nape grows out more gently and keeps the shape wearable for five to six weeks. Silver and salt-and-pepper hair show the choppy layers clearly, since each short layer catches light at a different angle.
Try this: Ask your stylist to point cut the crown layers instead of razor cutting them if your hair is fine. Point cutting keeps the ends fuller.
Difficulty: Low · Cost: $$
2. Textured Bixie Shag with Soft Fringe

The bixie blends a bob outline with pixie layering. Length lands around the ears, the sides carry shaggy internal layers, and a soft fringe grazes the brows. It suits women who want a short cut with a little more length to tuck, pin, or part differently on different days.
Internal texturising keeps the shape light. Without it, a bixie can puff at the sides on thick hair or sit heavy on fine hair. Keep the fringe wispy rather than full if you wear glasses, so the fringe and frames do not compete for the same space.
Try this: Bring your glasses to the appointment and have the fringe cut while you are wearing them.
Difficulty: Low · Cost: $$
3. Razor-Cut Silver Shag Bob with Wispy Fringe
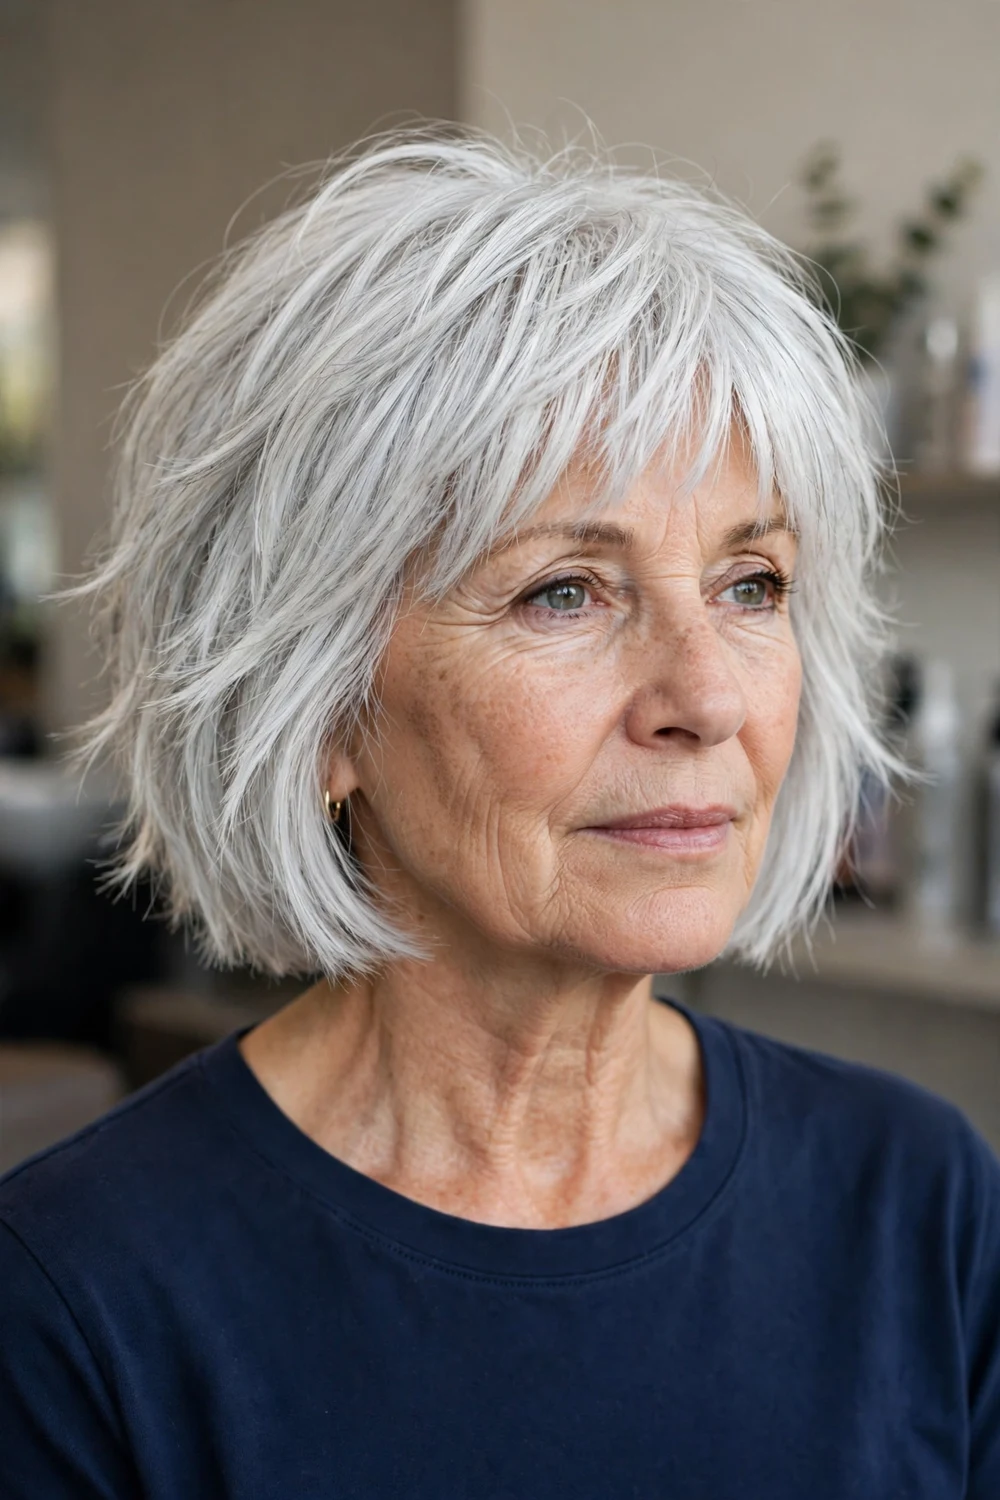
This bob keeps a clear chin-length outline and adds razor-cut layers through the crown and sides. The razor softens the ends, so silver hair moves in separate pieces instead of sitting as one solid block. A wispy fringe connects the top layers to the sides.
Razor work suits medium and thick hair best. On very fine hair, ask for point cutting instead, since a razor can thin fine ends too much. A purple toning shampoo once a week keeps silver tones clear between cuts, and trims every six to eight weeks hold the bob line.
Try this: Ask where the shortest layer will sit before cutting starts. For this bob it should start near the cheekbone, not higher.
Difficulty: Medium · Cost: $$
4. Shoulder-Length Modern Shag with Curtain Bangs

Curtain bangs part in the middle and sweep to each side, blending into shoulder-length shag layers. The length is long enough to tie back and short enough that the layers still lift at the crown. It is the most flexible length in this list for women who change their part or wear their hair up at home.
The bangs need a quick tidy every four to six weeks, while the main cut holds for eight weeks. Dry the bangs first, sweeping them side to side with a brush, then let the lengths air dry or rough dry. That order keeps the front looking finished even on low-effort days.
Try this: If you are new to bangs, start with longer curtain bangs that reach the cheekbones. They can be shortened at the next visit.
Difficulty: Low · Cost: $$
5. Curly Pixie Shag for Salt-and-Pepper Hair
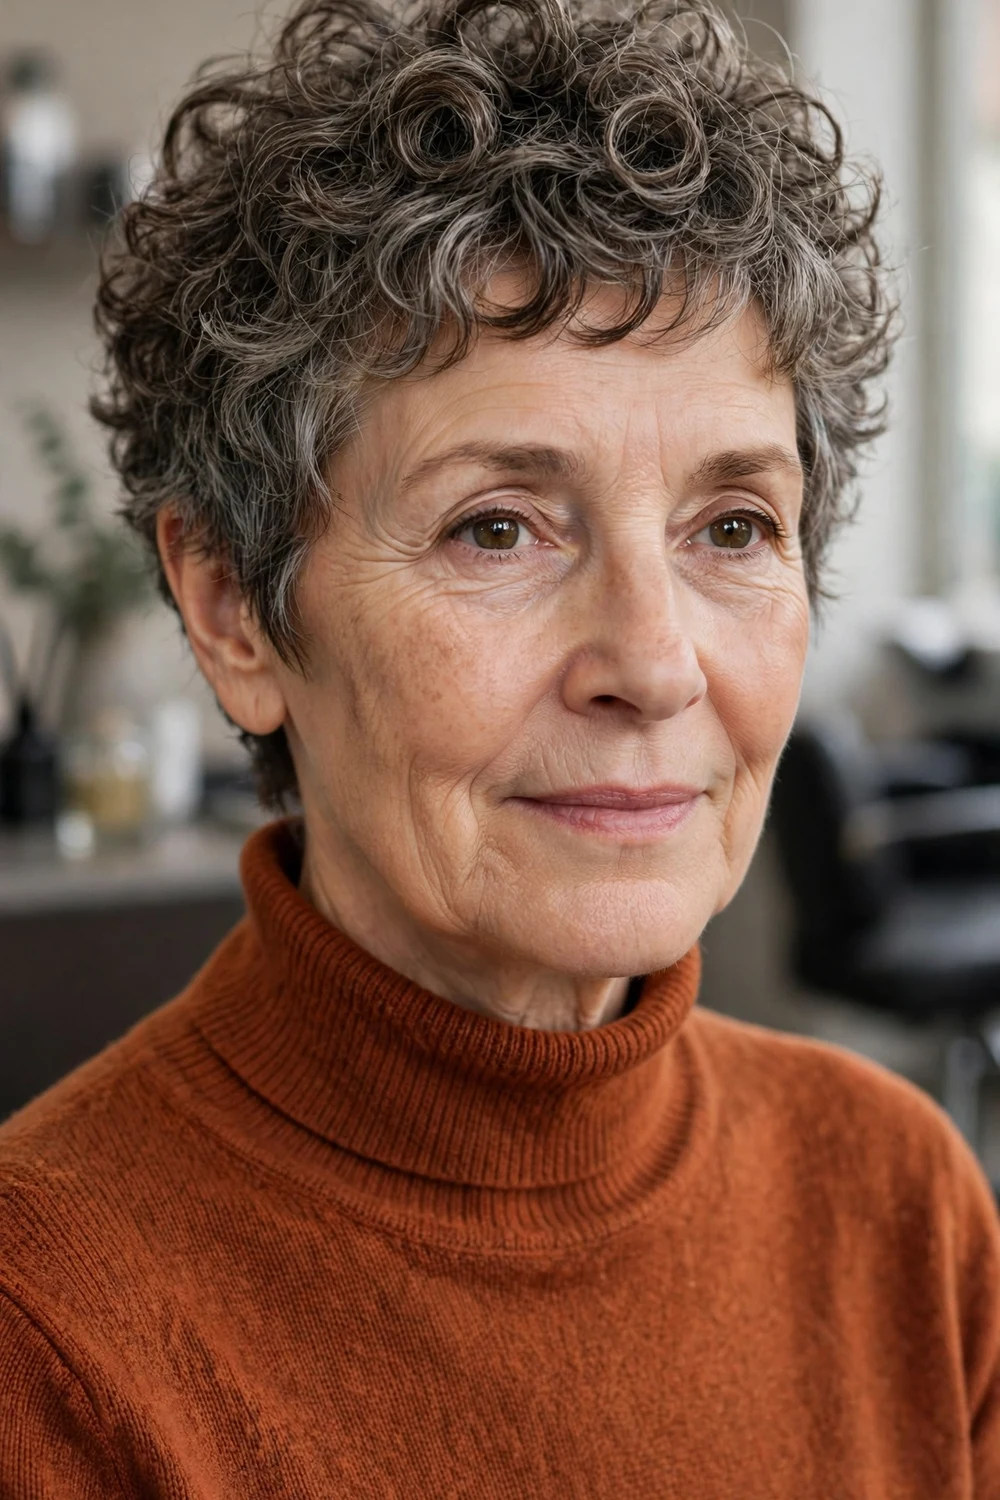
Short curls and shag layering work well together. The sides and nape are tapered, the top keeps longer curly layers, and the fringe follows the natural curl pattern instead of being forced straight. Salt-and-pepper colour adds natural contrast, so the curls read as separate coils.
Have this cut shaped dry or with curls visible, so the stylist can see where each curl will sit after shrinkage. At home, work a small amount of curl cream through damp hair, scrunch upward, and let it air dry or diffuse on low heat. Avoid brushing dry curls, which breaks the pattern.
Try this: Ask for the top to stay a finger length longer than you think you want. Curls spring up shorter once dry.
Difficulty: Low · Cost: $
6. Soft Modern Shag with Feathered Face Frame

This version keeps the shag layers soft and blended, with face-framing pieces that sweep back from the cheeks. The feathered finish is light and brushed, so the cut reads polished for daytime wear while still carrying shag movement through the crown and ends.
It suits straight and lightly wavy hair, and it is a calm first shag for women moving away from a one-length bob. Styling is a quick blow dry with a round brush at the front pieces only. The rest can rough dry. Compare it with the broader shaggy hairstyles for older women guide if you want the classic versions side by side.
Try this: Use a light mousse at the roots only. Product through the ends can weigh soft layers down by midday.
Difficulty: Low · Cost: $$
7. Disconnected Shag for Fine Hair Volume

A disconnected shag uses layers cut at clearly different lengths. Shorter crown layers sit over longer pieces underneath, and that contrast makes fine hair look fuller than even layering does. Cheekbone pieces frame the face and break up a straight outline.
The key is restraint at the ends. Ask for the longer underlayers to stay blunt or lightly point cut, so fine hair keeps its outline. This cut pairs well with the ideas in hairstyles for older women with fine hair if fullness is your main goal. Trims every six weeks keep the contrast clear.
Try this: Skip heavy waxes. A root spray and a light texture spray give lift without collapsing fine layers.
Difficulty: Medium · Cost: $$
8. Neck-Length Shag with Piecey Ends

Length at the nape of the neck gives more coverage than a pixie and less weight than a shoulder cut. Internal layers build shape through the middle, and piecey ends separate at the bottom so the outline looks light. A short curtained fringe finishes the front.
This length air dries well on straight and wavy hair. Work texture cream through the ends while damp, twist a few sections with your fingers, and leave it alone while it dries. Touching it too often flattens the piecey finish. The cut holds for six to eight weeks.
Try this: Ask for the back to sit just above the collar. That length avoids constant friction from coat and scarf collars in winter.
Difficulty: Low · Cost: $$
9. Short Shag with Balayage Dimension
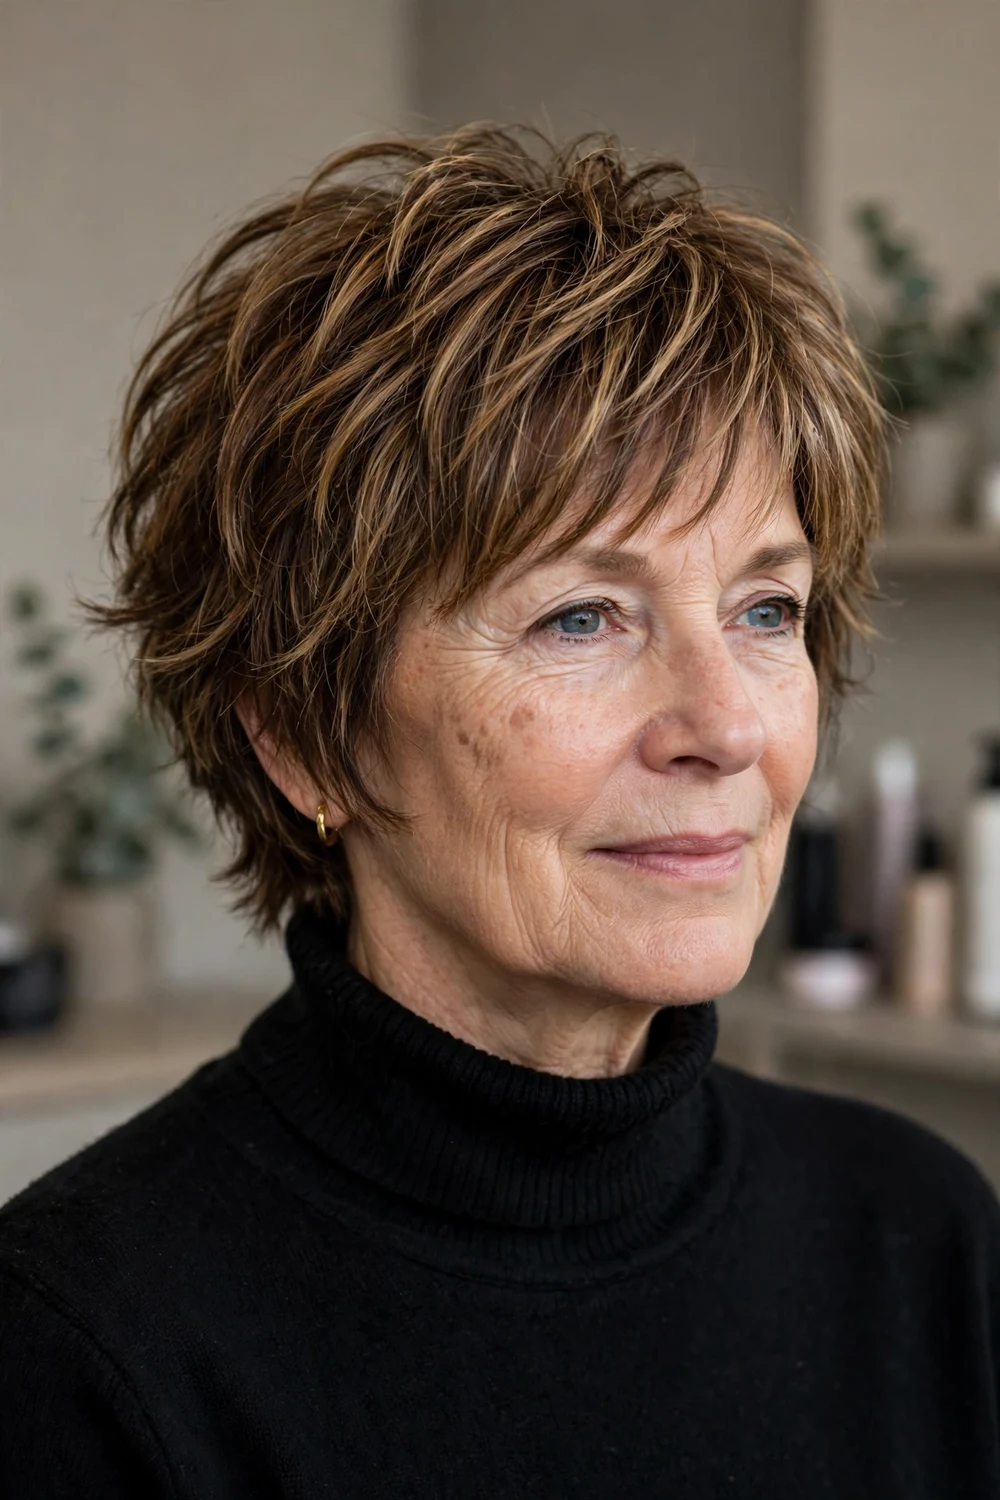
Balayage places lighter pieces by hand through the ends and face frame, so each shag layer reads separately. On a short shag, that placement adds depth without an all-over colour change and without a hard regrowth line. The base colour stays close to your natural shade.
Keep the lightest pieces at the front and through the crown layers, where they show the cut best. Colour appointments can stretch longer than cut appointments, since balayage grows out softly. Plan the cut every six weeks and the colour refresh less often, based on how fast your grey shows at the part.
Try this: Ask for a gloss with the balayage if your hair feels dry. The gloss adds shine and helps the lighter pieces blend.
Difficulty: Medium · Cost: $$$
10. Wavy Modern Shag with Crown Lift
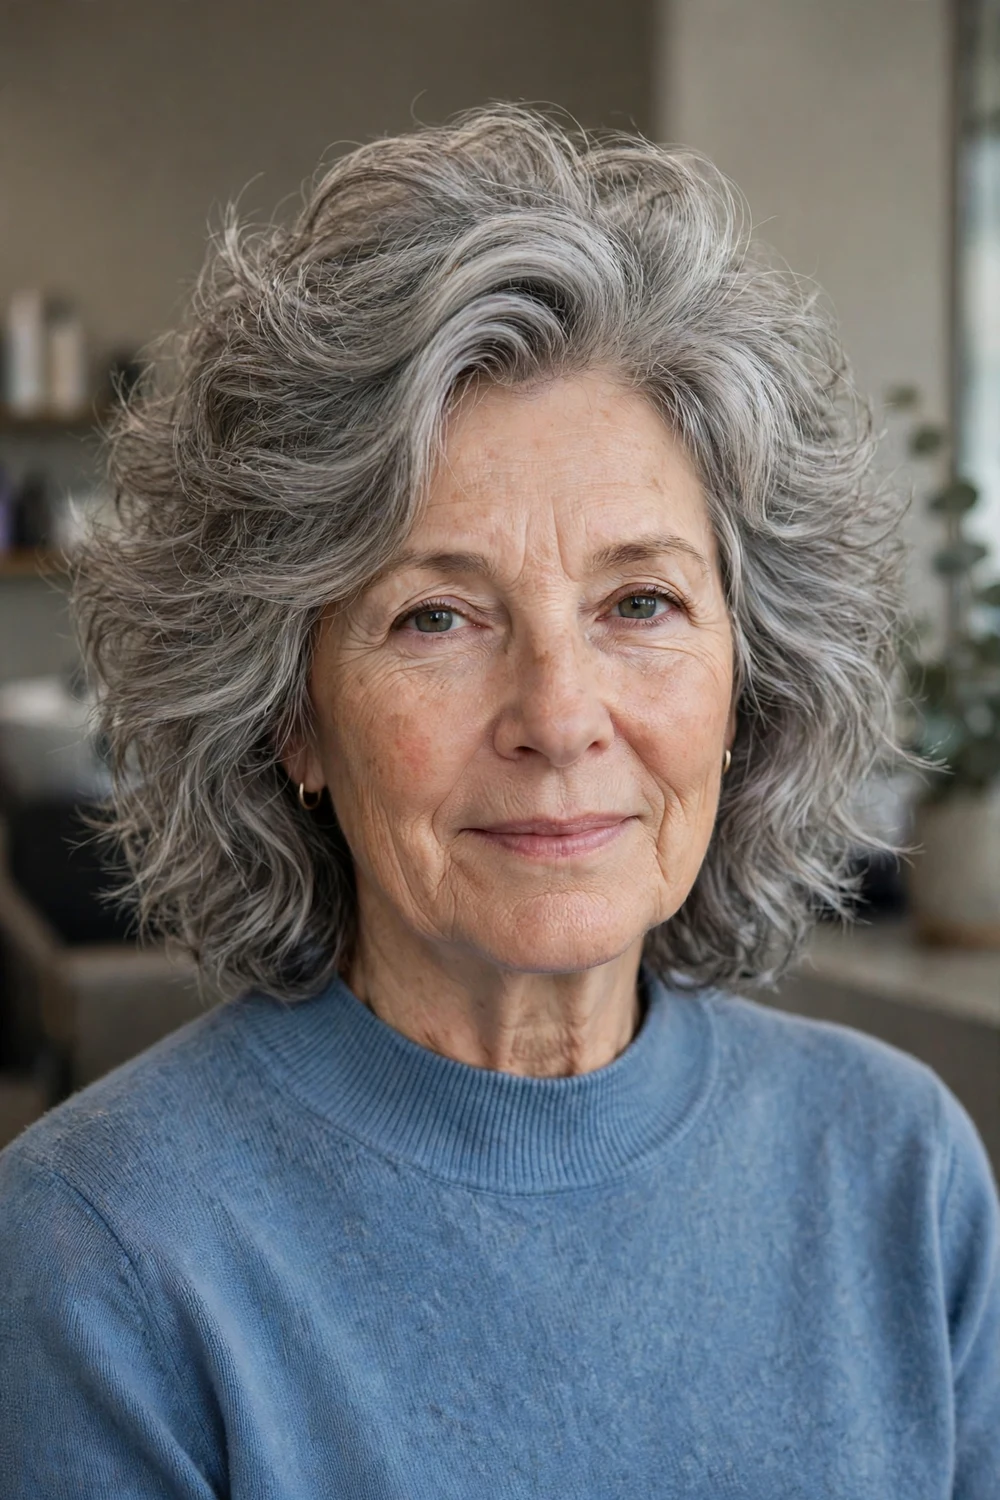
Extra layering at the crown is the focus here. Shorter crown layers stack to build height where hair over 60 often flattens first, while the sides and lengths stay longer and softer for balance. Natural waves fill the shape out, so the lift looks like texture rather than teasing.
Dry the crown first, lifting sections upward with your fingers or a small brush. A root lifting spray used only at the crown is enough product for most heads. If your hair is fine, see the length and layering options in shaggy bob hairstyles for fine hair before you decide how short to take the crown layers.
Try this: Sleep with the crown loosely clipped up if your waves flatten overnight. Release it in the morning and mist with water to reset the lift.
Difficulty: Low · Cost: $$
11. Long Modern Shag with Ghost Layers

Ghost layers are cut inside the hair, under the top surface. The outside keeps a smooth, longer outline, while the hidden layers remove weight and add movement when the hair turns or is tucked back. It is the lowest-commitment long shag in this list.
This version suits women who want to keep length past the shoulders and still lose the heavy, triangular shape that long hair can develop. Conditioning matters more at this length. Use conditioner on the lengths only and a weekly moisture mask if the ends feel dry. Trims can stretch to ten weeks.
Try this: Ask your stylist to show you the internal layers before the final check. You should feel less weight without seeing a choppy surface.
Difficulty: Medium · Cost: $$
12. Botticelli Wave Shag with Curtain Fringe
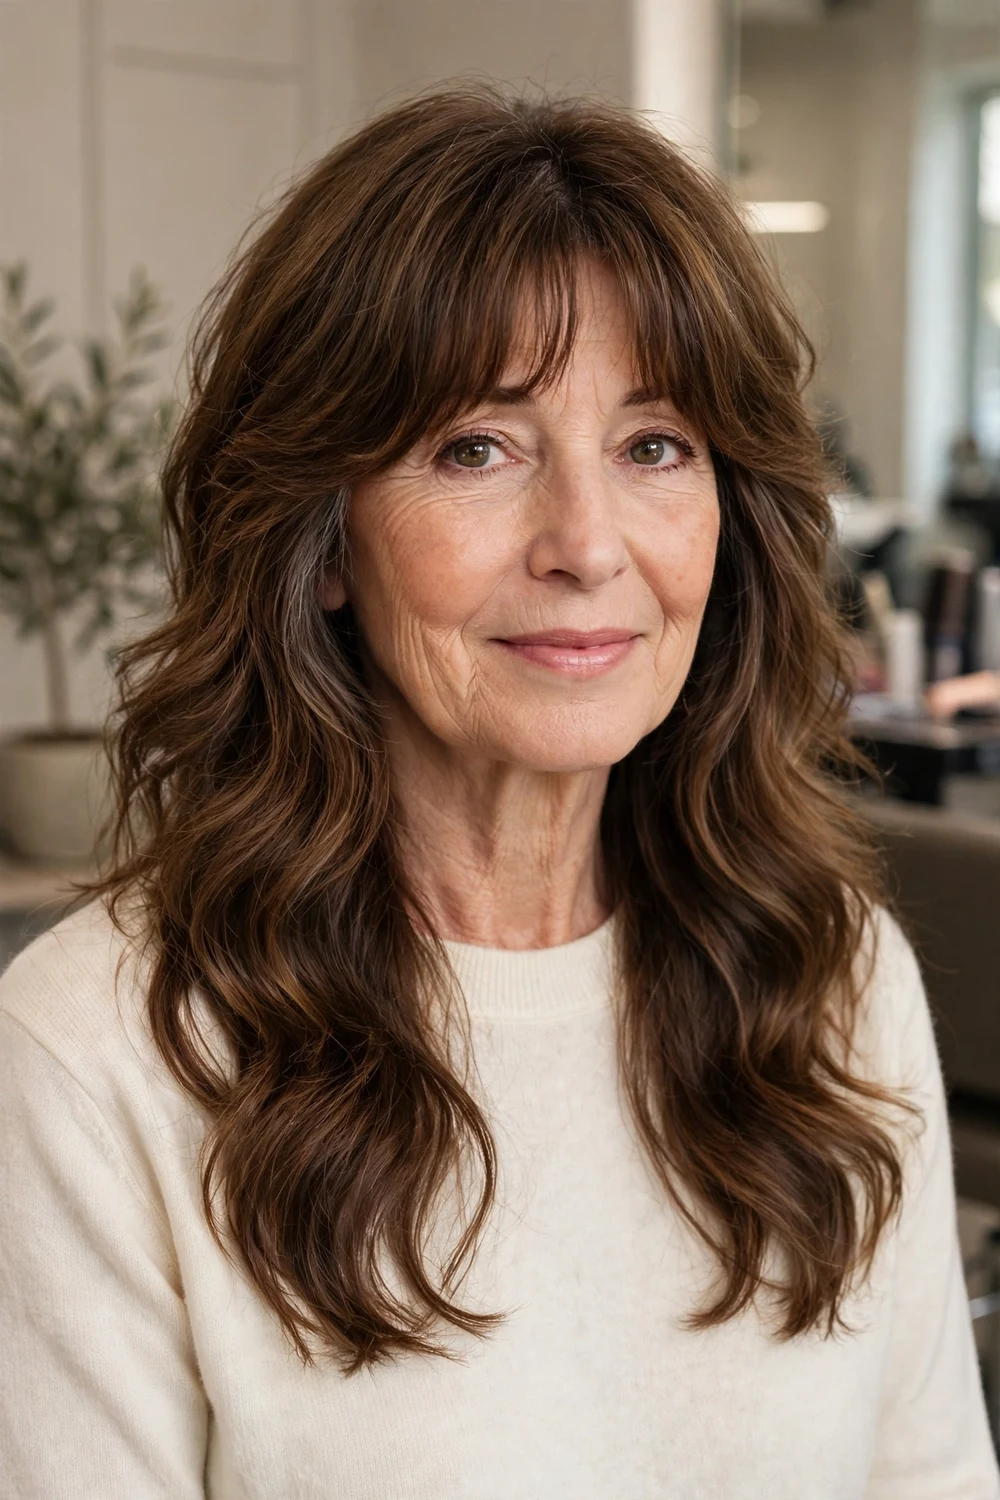
Long, loose waves carry this shag, with a fuller curtain fringe that skims the lashes and blends into face-framing waves. Layers start lower than in a classic shag, around the cheekbones and jaw, so the wave pattern stays in large sections instead of breaking into frizz.
It works best on hair with a natural wave already present. Trying to create this wave daily on straight hair takes time and heat. Enhance a natural wave with mousse on damp hair, twist in sections, and diffuse or air dry. A fringe trim every four weeks keeps the curtain shape clear of the eyes.
Try this: If your fringe grows fast, ask the salon about quick fringe trims between full cuts. Many salons offer them as a short visit.
Difficulty: Medium · Cost: $$
13. Butterfly Layer Shag for Longer Hair
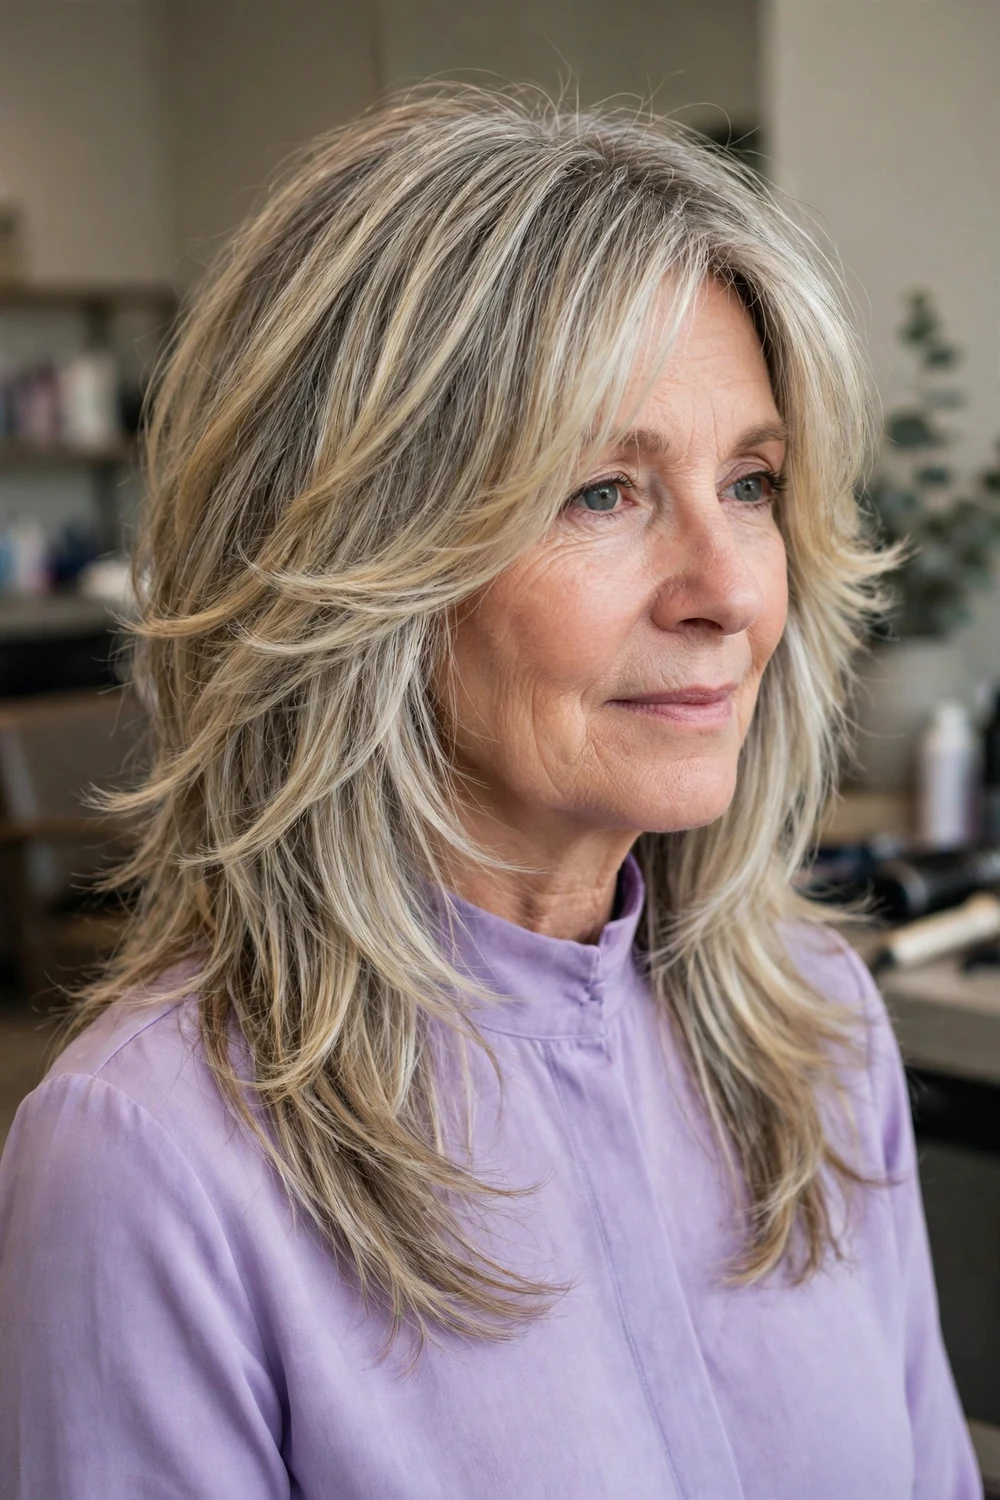
Butterfly layers are long, winged layers that flick away from the face at the front and stay long at the back. Combined with light shag texture at the crown, the result has movement at the front without losing length behind. The front pieces can be pulled up while the back stays down.
Styling leans on a blow dry at the front. Roll the face-framing pieces away from the face with a round brush, then let the back dry with less attention. The cut suits medium and thick hair, since very fine hair may not hold the winged flick through the day.
Try this: Take a side photo at your appointment. The butterfly shape reads most clearly from the side, so check that view before you leave.
Difficulty: Medium · Cost: $$
14. French Shag Bob with Shattered Ends
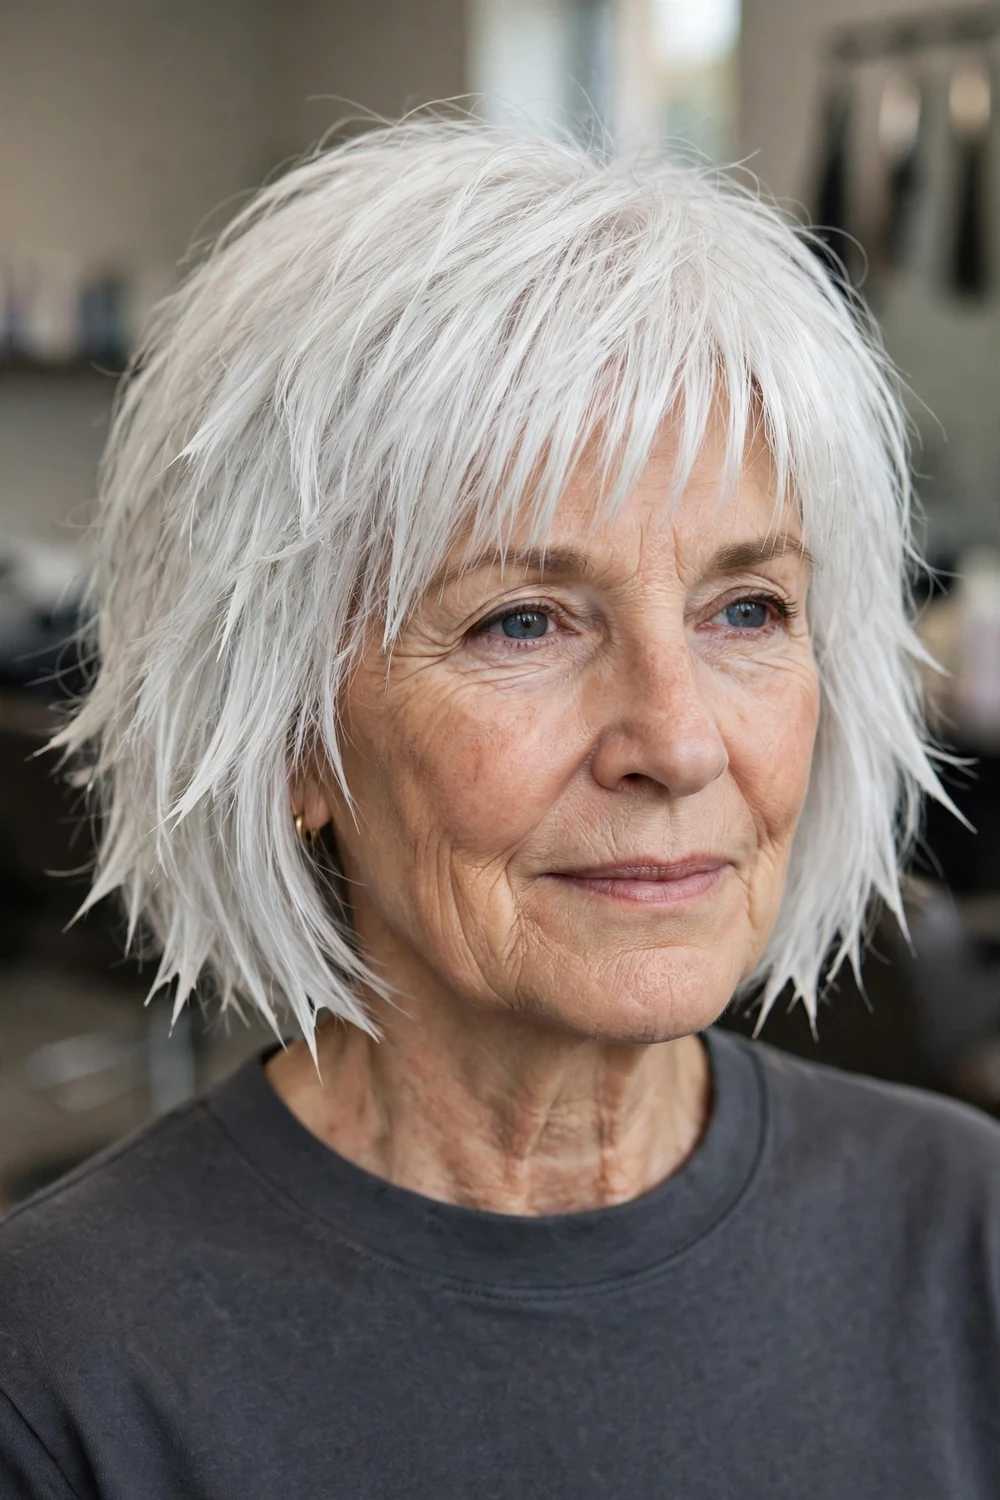
The French shag bob sits at chin length with shattered, uneven ends and a light piecey fringe. Keeping the length at the chin avoids a boxy bob outline, while the shattered ends keep the perimeter moving. White and silver hair suit this cut well, since the clean length shows the colour clearly.
Ask for the sides to stay slightly longer at the front if your face is round. That front length narrows the outline. At home, a quick rough dry and a fingertip of paste through the ends is the full routine. The fringe can be worn forward or swept to the side as it grows.
Try this: Avoid a heavy straight fringe with this bob if you want the modern version. The piecey fringe is what keeps it in shag territory.
Difficulty: Medium · Cost: $$
15. Bright White Bardot Shag with Full Fringe

A fuller fringe and soft volume through the sides define this shag. The fringe sits at brow level and blends into longer side layers, while the lengths carry loose shag texture to the shoulders. On bright white hair, the shape does the work and no colour placement is needed.
A full fringe needs commitment. It will need a trim every four to five weeks and a quick daily sweep with a brush or dryer to sit correctly. In return, it covers forehead lines and draws focus to the eyes, which is why many women over 60 choose it. Keep the sides soft so the fringe does not look separate from the cut.
Try this: Dry the fringe straight down first, then sweep it slightly to each side. Drying it only to one side can set a stubborn part.
Difficulty: Medium · Cost: $$
16. Modern Wolf Shag with Soft Edges
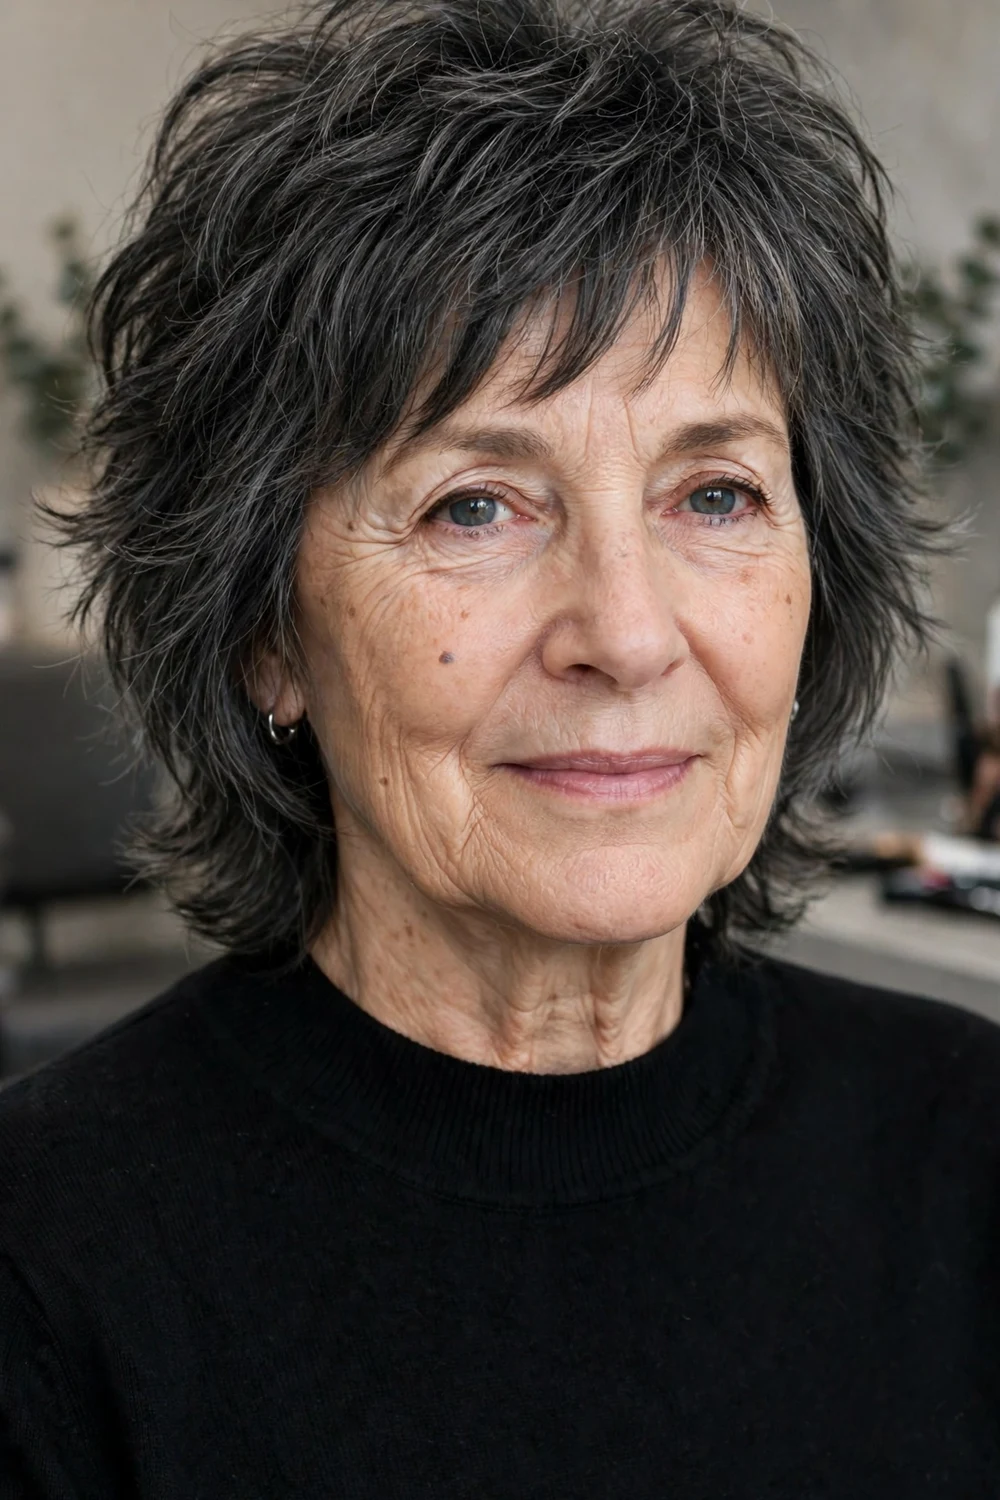
The wolf shag borrows the wolf cut shape, with a fuller crown, tapered sides, and longer pieces at the back, then softens every edge for wear after 60. Layers are choppy at the top and blended at the ends, so the silhouette has character without a harsh outline.
It suits medium and thick wavy hair best, since the shape needs some natural body to fill the crown. Fine straight hair can wear a shorter, softer version. For a bolder take on related shapes, compare the cuts in trendy shag haircuts for fine hair and note which layer strength matches your hair type.
Try this: Ask for soft edges in writing on your salon notes if you return to a different stylist. That phrase keeps the next cut from drifting too sharp.
Difficulty: Medium · Cost: $$
17. Mid-Length Wolf-Inspired Shag with Honey Tones

This mid-length version keeps the wolf-inspired crown volume and longer back, with honey toned pieces placed through the top layers. The warm tones highlight the choppy texture and keep grey blending soft at the part, since the lighter pieces sit close to natural grey in value.
Colour placement should follow the layers. Lighter pieces belong on the crown and face frame, with the back kept deeper for contrast. Use a colour-safe shampoo and expect a gloss refresh between full colour visits if the honey tones fade brassy. The cut itself needs shaping every six to eight weeks.
Try this: Ask for fine, woven highlights rather than thick slices. Fine pieces blend better with growing grey.
Difficulty: Medium · Cost: $$$
18. Choppy Shag with Side-Swept Fringe

A side-swept fringe changes the balance of a shag. The fringe sweeps across the forehead and merges into longer side layers, while choppy layers through the back keep thick hair from sitting heavy. The asymmetry softens a strong jaw and gives straight hair a clear direction.
Razor or point cut ends both work here, chosen by hair type. Thick and coarse hair handles razor softening well, while fine hair keeps more fullness with point cutting. Style the fringe with a light paste, sweeping it across while damp so it dries in place. The rest of the cut can air dry.
Try this: If you part your hair on the opposite side naturally, tell your stylist. The fringe should be cut for the side you actually wear.
Difficulty: Low · Cost: $$
19. Tapered Shag for Thick Hair
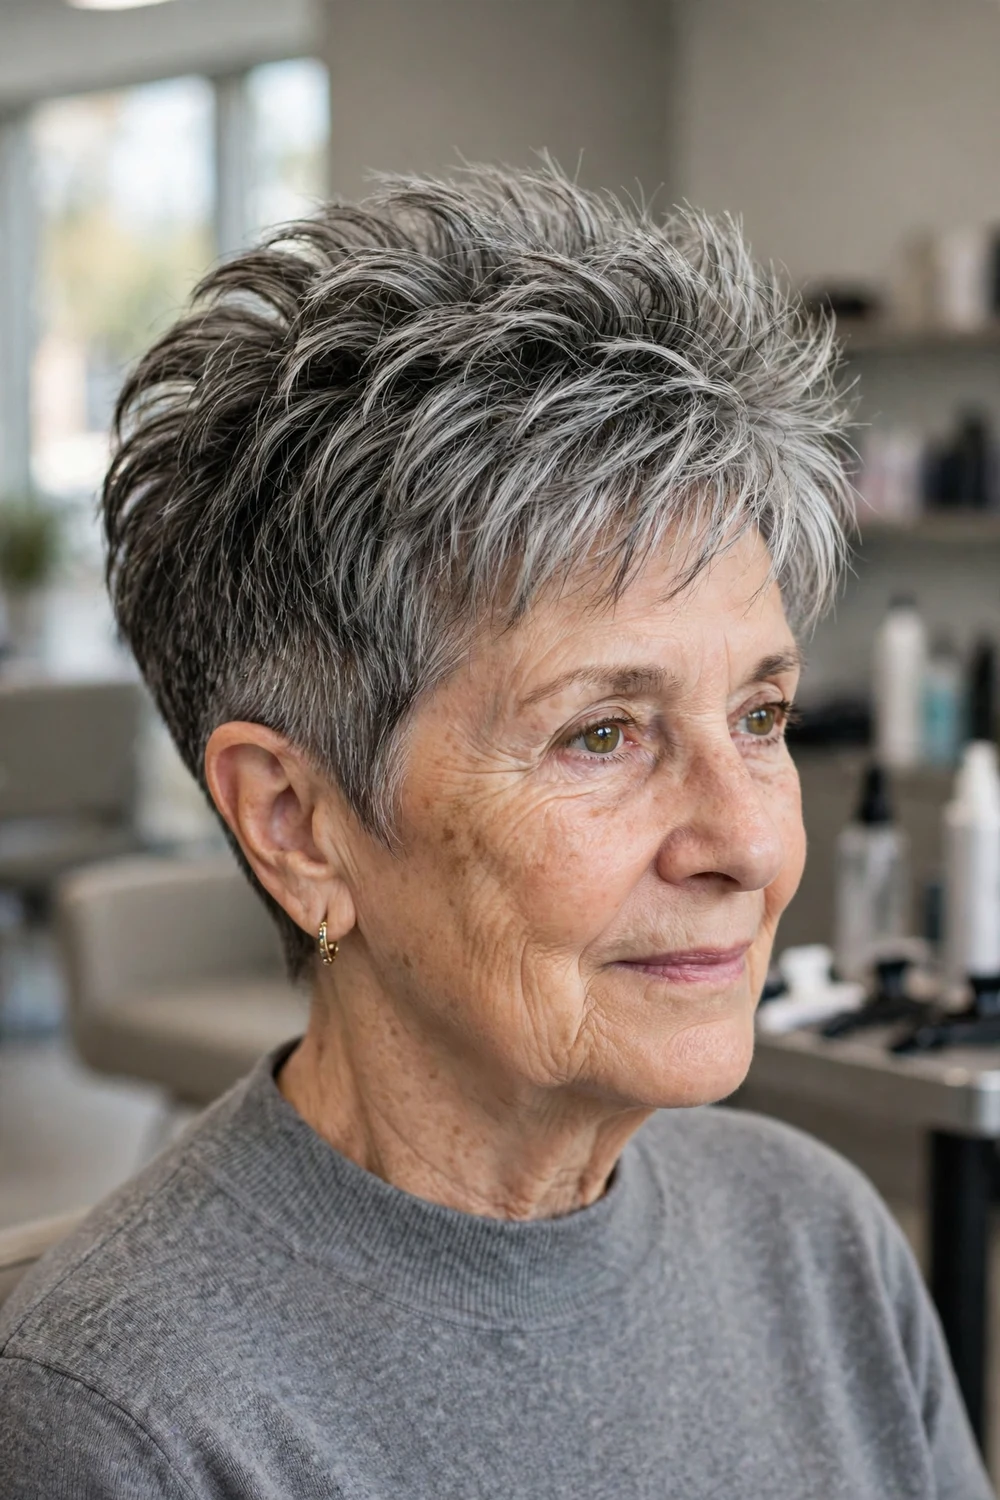
Tapering removes bulk at the back and sides and leaves length and texture on top. For thick hair over 60, that weight removal is often the difference between a shag that sits light and one that puffs out by midday. The top layers stay choppy and movable.
Ask how close the taper will go at the nape. A soft taper with scissors looks more blended than a clipped taper and grows out more evenly. At home, a fingertip of matte paste through the top is enough. No product is needed on the tapered sections. Rebook at five to six weeks to keep the back tidy.
Try this: This is a good option if you wear collared shirts often. The tidy nape avoids hair sitting over the collar.
Difficulty: Low · Cost: $$
20. Stacked Shag Bob with Lifted Back

Stacked layers at the back build a lifted, rounded shape, while the front stays longer toward the chin. Adding shag texture through the stack stops the back from looking too solid or dated. The front length frames the jaw and keeps the bob feeling current.
The stack needs regular shaping. Plan trims every five to six weeks, since stacked layers lose their lift first as they grow. Blow dry the back with a small brush lifting upward, then smooth the front pieces forward. Fine hair holds the stack well, and medium hair holds it with light mousse.
Try this: Ask to see the back with a hand mirror at the end of the cut. The stack is the main feature, so check its height before you leave.
Difficulty: Medium · Cost: $$
21. Curly Shag Bob with Middle Part
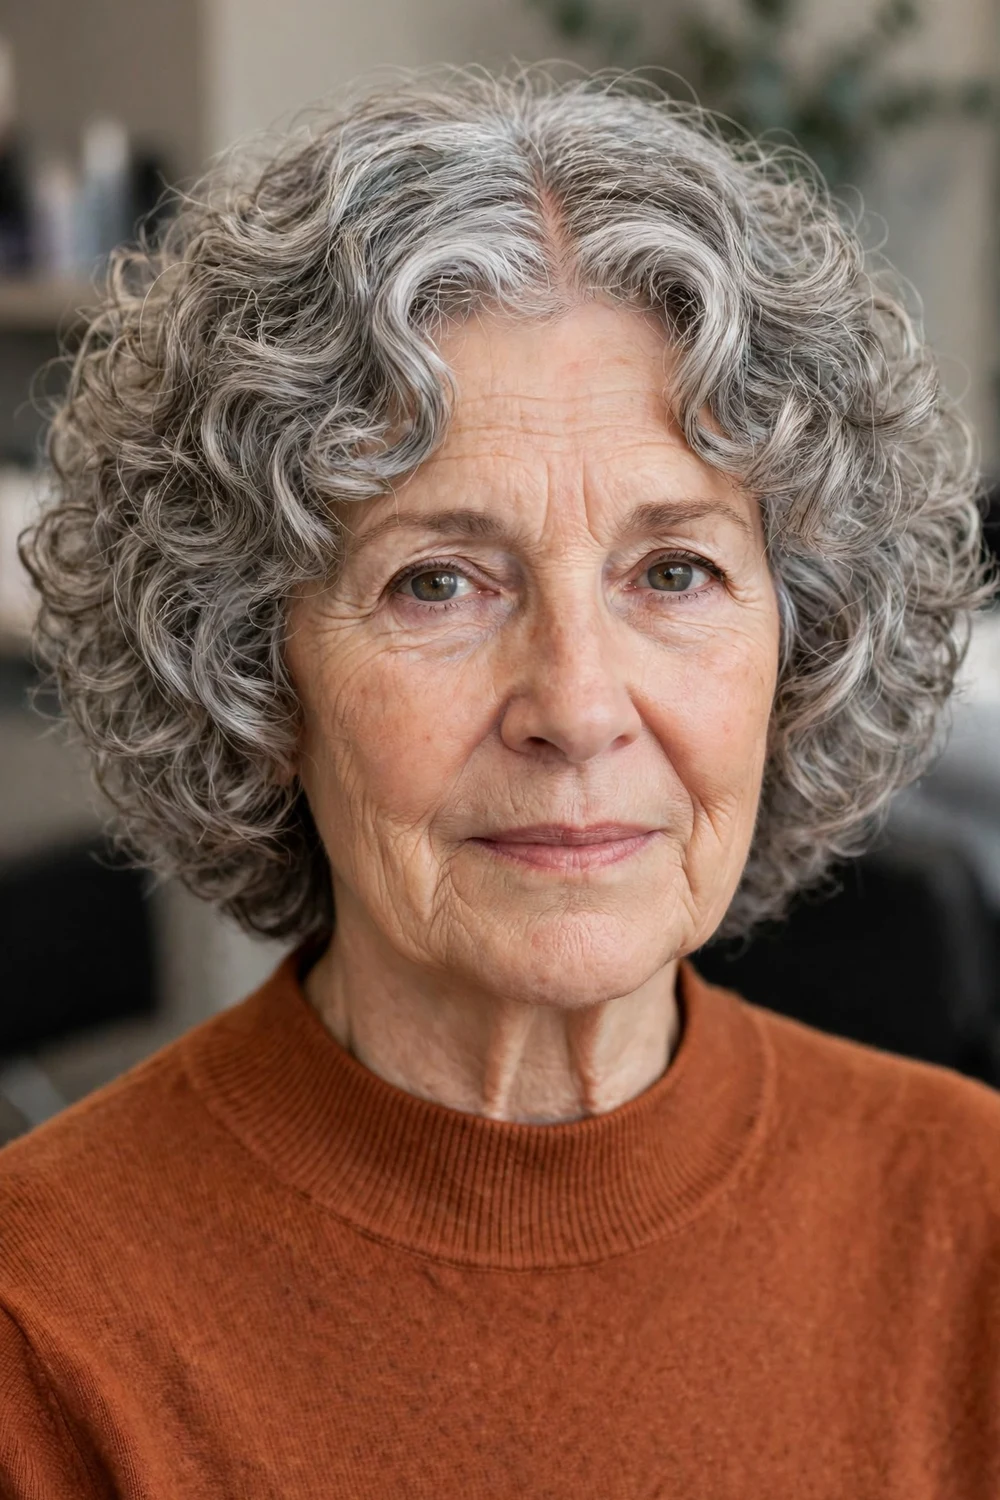
A middle part and rounded curl layers give this bob a balanced shape on both sides. Curls are layered to sit in a rounded outline at jaw to neck length, with no heavy fringe. Each curl is shaped to fall without stacking into a triangle at the bottom.
Have curls cut with the pattern visible, ideally dry, so length and shrinkage are clear. At home, apply curl cream to wet hair, part it in the middle while wet, and diffuse or air dry without moving the part once it sets. A middle part can feel like a change if you have worn a side part for years, so give it a full week before judging it.
Try this: If one side curls tighter than the other, point it out. Your stylist can leave that side slightly longer to balance the dry shape.
Difficulty: Medium · Cost: $$
22. Shag with Root Melt for Grey Grow-Out
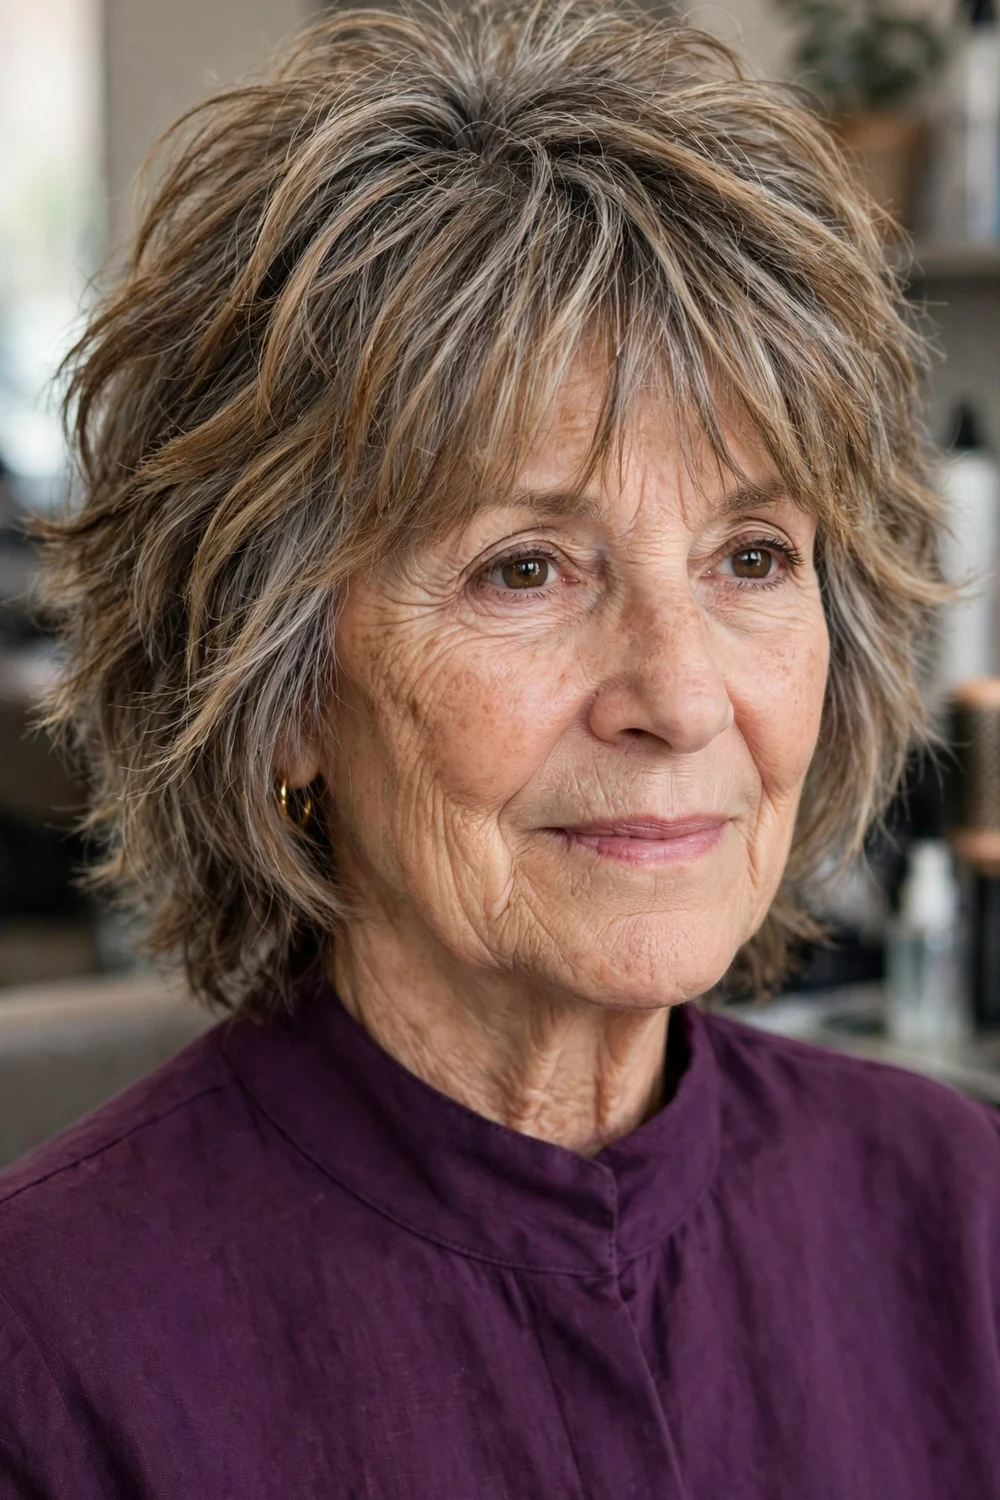
A root melt blends the root area into the lengths with a soft gradient, so grey regrowth does not appear as a hard line through shag layers. The colour at the roots stays close to your natural base, then melts into a slightly lighter tone through the mid-lengths and ends.
This is a colour technique paired with any shag length in this list, shown here on a medium shag. It suits women who are growing in grey unevenly and want fewer emergency colour visits. Toning appointments every few months keep the melt looking planned, while the cut follows its normal six to eight week cycle.
Try this: Ask your colourist to keep the melt low at the back and slightly higher at the front. That placement looks most natural as it grows.
Difficulty: Low · Cost: $$$
23. Shag with Money Piece Highlights
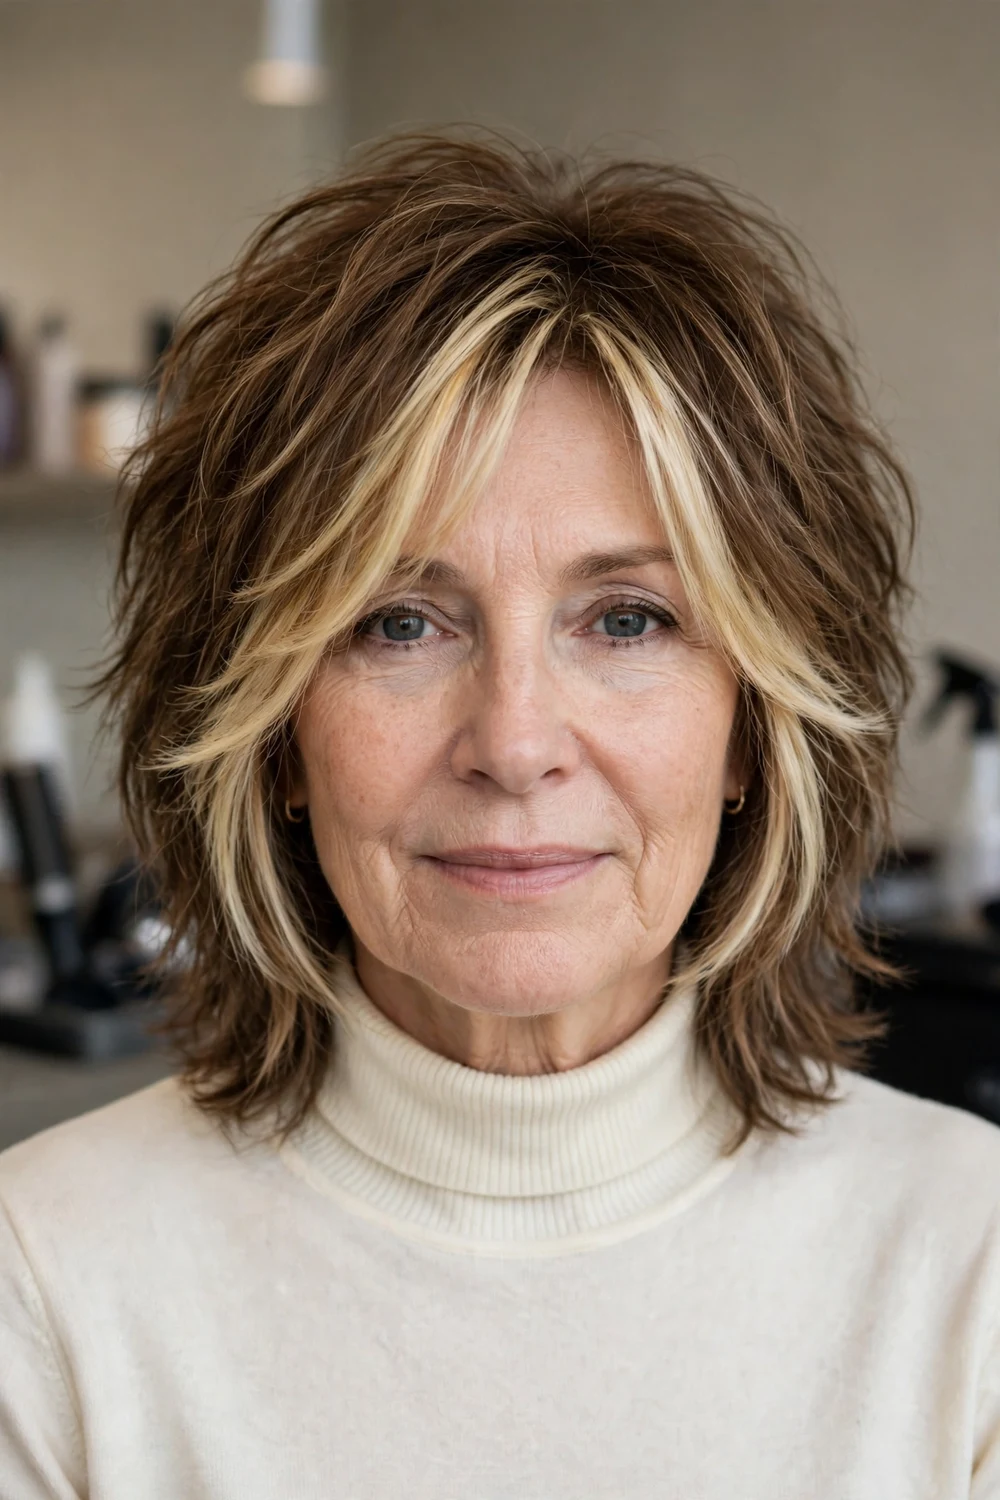
Two brightened pieces at the front frame the face while the rest of the shag keeps its natural or base colour. On layered hair, those front pieces sit on the face-framing layers, so the brightness and the cut reinforce each other. It is a lower-commitment colour change than all-over lightening.
Keep the money pieces fine and blended at the root so grow-out stays soft. Very thick, high-contrast pieces can look separate from a soft shag. This placement works on straight, wavy, and curly shags, and it can be refreshed on a partial appointment rather than a full colour visit.
Try this: Decide the brightness with your everyday makeup in mind. If you wear little makeup, a softer contrast usually feels more comfortable.
Difficulty: Medium · Cost: $$$
24. Blunt Perimeter Shag for Fuller Ends
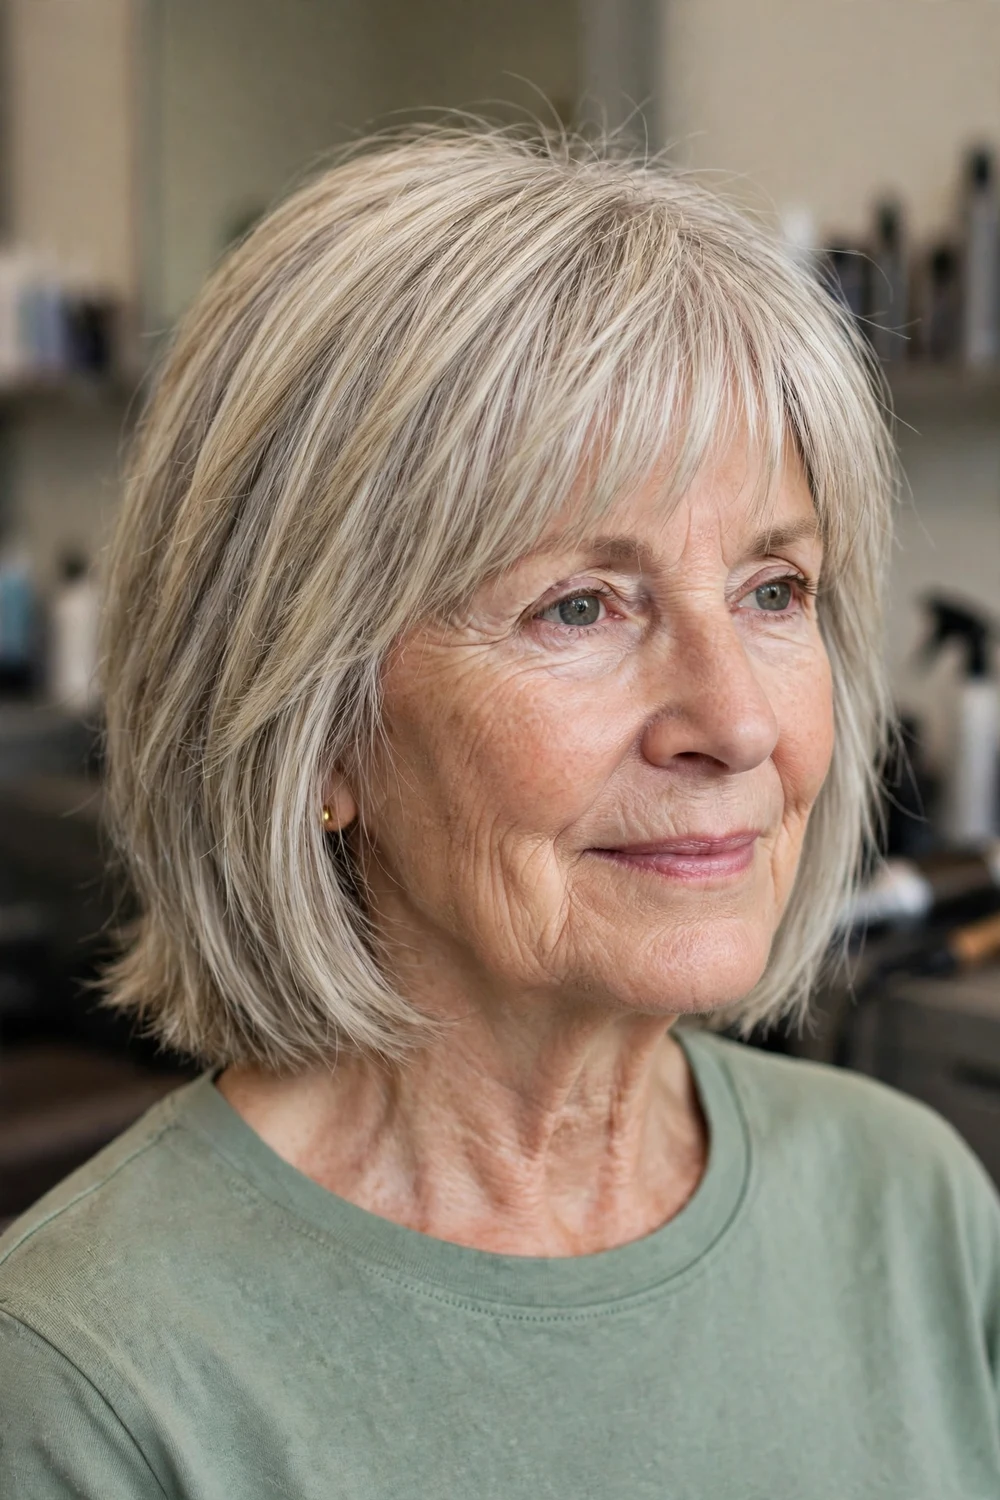
Here the outer edge stays blunt and even, while the interior carries the shag layers. That blunt perimeter makes fine hair look fuller at the bottom, which heavy chopping can undo. The interior layers still give crown lift and movement, so the cut does not sit flat.
This balance suits fine and thin hair especially well, and it is covered from another angle in shaggy lob styles for fine hair for longer versions. Ask your stylist to texturise only the interior and to leave the last inch of the perimeter alone. Trims every six to eight weeks keep the blunt line crisp.
Try this: Avoid thinning shears on the ends at any visit. One heavy thinning pass can undo the fullness this cut is built to keep.
Difficulty: Low · Cost: $$
25. Air-Dry Wash-and-Go Modern Shag

This shag is cut to fall into place without heat. Layers follow the natural fall and wave of the hair, ends are softened just enough to separate, and the fringe, if present, is kept long enough to sweep aside without daily styling. It is the lowest daily effort cut in this list.
The salon cut matters more than products here. Tell your stylist you plan to air dry most days, so the layers are cut for your natural texture rather than for a blowout finish. At home, scrunch a light cream into damp hair and leave it alone while it dries. Once dry, break up any stiff sections with your fingers.
Try this: Wash-and-go does not mean trim-free. Book every seven to eight weeks so the air-dry shape stays intentional.
Difficulty: Low · Cost: $
26. Tousled Shoulder Shag with Diffused Waves

Shoulder length, loose waves, and piecey layers make this the relaxed end of the modern shag range. Diffusing lifts the waves and helps the layers hold volume through the day, while the shoulder length keeps enough weight for the waves to stay in large, soft sections.
Apply curl or wave cream before diffusing, cup sections upward, and use low heat. Stop while the hair is almost dry and let the last part air dry to limit frizz. On straight hair days, the same cut can be worn smooth with the layers showing as flicked ends, so it works in two finishes from one cut.
Try this: If humidity flattens your waves, refresh with a water mist and a short diffuse in the morning rather than rewashing.
Difficulty: Low · Cost: $$
Frequently Asked Questions
What makes a shag modern for women over 60?
A modern shag uses softer, placed layers, lighter ends, and a fringe cut for your face, glasses, and routine. Older shag versions often used heavy chopping all over. The modern version keeps crown lift and movement while protecting fullness at the ends, which matters more on fine and grey hair.
Will a shag work on fine or thinning hair after 60?
Yes, with adjusted layering. Fine hair does best with longer soft layers, a blunt or lightly point cut perimeter, and crown layers that start at cheekbone level or lower. Heavy razor work and thinning shears on the ends can make fine hair look sparse, so ask your stylist to texturise the interior only.
How often does a modern shag need trimming?
Short shixie, bixie, and pixie shags need a trim every five to six weeks. Bob and shoulder shags hold for six to eight weeks, and long ghost layer and butterfly versions can stretch to eight to ten weeks. Fringes need a shorter tidy every four to six weeks.
Can a shag work with natural grey hair?
Yes. Layers give grey hair shape and help its natural texture sit in a clear outline instead of spreading outward. Silver and salt-and-pepper hair also show layering well, since each layer catches light differently. A toning shampoo once a week and conditioner on the lengths keep grey layers looking clear and smooth.
Should I choose curtain bangs, a side fringe, or a full fringe?
Choose curtain bangs if you want a soft frame that can be swept aside and grows out gently. Choose a side-swept fringe if you wear a side part or want asymmetry to soften the jaw. Choose a full fringe if you want focus at the eyes and are willing to trim it every four to five weeks and style it briefly each morning.
Is a shag hard to style at home?
Most modern shags in this list need five minutes or less. Short versions need a fingertip of cream or paste worked through with your fingers. Wavy and curly versions need product on damp hair and air drying or diffusing on low heat. The main requirement is honesty at the salon about how you dry your hair, so the cut is layered for your real routine.
Final Thoughts
A modern shag after 60 is a practical cut with a clear point of view. Pick the length that matches the time you want to spend each morning, pick the layer strength that matches your thickness, and let grey, waves, or curls be part of the shape rather than something the cut has to hide. Take photos of two or three ideas from this list, agree on where the shortest layer will sit and how the fringe will work with your glasses, and you will leave with a cut that holds its shape between visits and still feels like you.

