

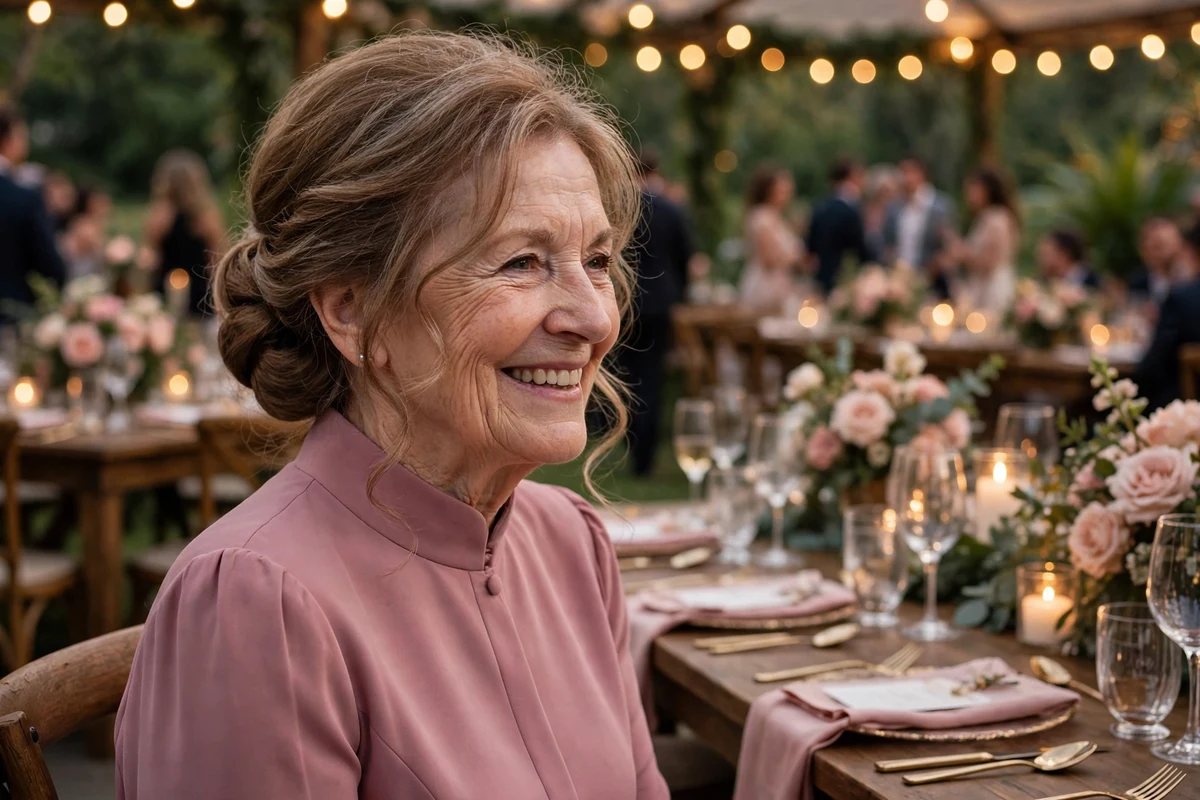
Thin fine hair can hold a formal wedding style all day when the style is built on texture, padding, and crossed pins rather than on length or thickness. That is the approach behind every idea in this list of mother of the bride hairstyles for thin fine hair. Low buns gain size from a small donut or a padded coil, crowns gain height from gentle teasing under a smoothed top layer, and curls are set and cooled before pinning so they keep their shape through photos, dinner, and dancing.
The 27 ideas run from low chignons and French twists to half-up styles with volume, short pixie and bob finishes, and pinned styles that suit an outdoor ceremony. Each one explains how the volume is built, how the style is pinned or set, how long it holds, and who it suits. If you want a wider set of updo shapes first, the general updo hairstyles for older women collection shows the same families on a range of hair types.
Key Takeaways
- Texture comes before pinning. Mousse, dry texture spray, and a light curl pass give slippery fine strands the grip that pins need.
- Padding does the size work. A small hair donut, a bun maker, or a padded coil lets a low bun or chignon look full without heavy backcombing.
- Crossed pins hold longer than side by side pins. An X pattern over each section locks fine hair that would otherwise slide loose.
- Several small pinned sections look fuller than one tight twist, and they hide a thin crown better than a sleek pulled back finish.
- Set curls and let them cool fully before you pin or brush them. Cool curls hold for hours longer than curls styled while warm.
How Volume Is Built in Thin Fine Hair
Start on hair washed the day before, since day old hair grips pins and twists better than clean, silky hair. Work a light mousse through damp hair or mist dry hair with texture spray at the roots, then blow dry with the head tipped forward so the crown dries lifted. Where the part has sat in the same place for years, move it slightly to one side. A shifted part covers more scalp and stops the top from lying flat in photos, a point covered in more depth in the guide to hairstyles for women over 60 with thin hair.
Keep product light and layered at the roots only. Heavy oils, thick creams, and shine serums on the roots weigh fine strands down and undo the lift you just built. Save smoothing products for the mid lengths and ends. At the trial, wear the finished style for at least a few hours and check it in daylight and in flash photos, since a thin crown shows more under a camera flash than it does in a salon mirror.
| Style family | How volume is built | Best hair length | Hold through the day |
|---|---|---|---|
| Padded buns and chignons | Hair donut, bun maker, or padded coil under the hair | Shoulder length and longer | High, fully pinned |
| Textured and pinned updos | Curl pass first, then small sections pinned with crossed pins | Chin length and longer | High, sections hold independently |
| Half-up styles | Teased crown under a smoothed top layer, small top section | Shoulder length and longer | Medium to high, lengths may soften |
| Waves and blowouts worn down | Root lift, roller set, curls cooled before brushing | Chin to shoulder length | Medium, refresh with a brush and spray |
| Short pixie and bob finishes | Root lift and texture paste on the top section only | Pixie to chin length | Medium to high, quick to reset |
1. Padded Low Chignon
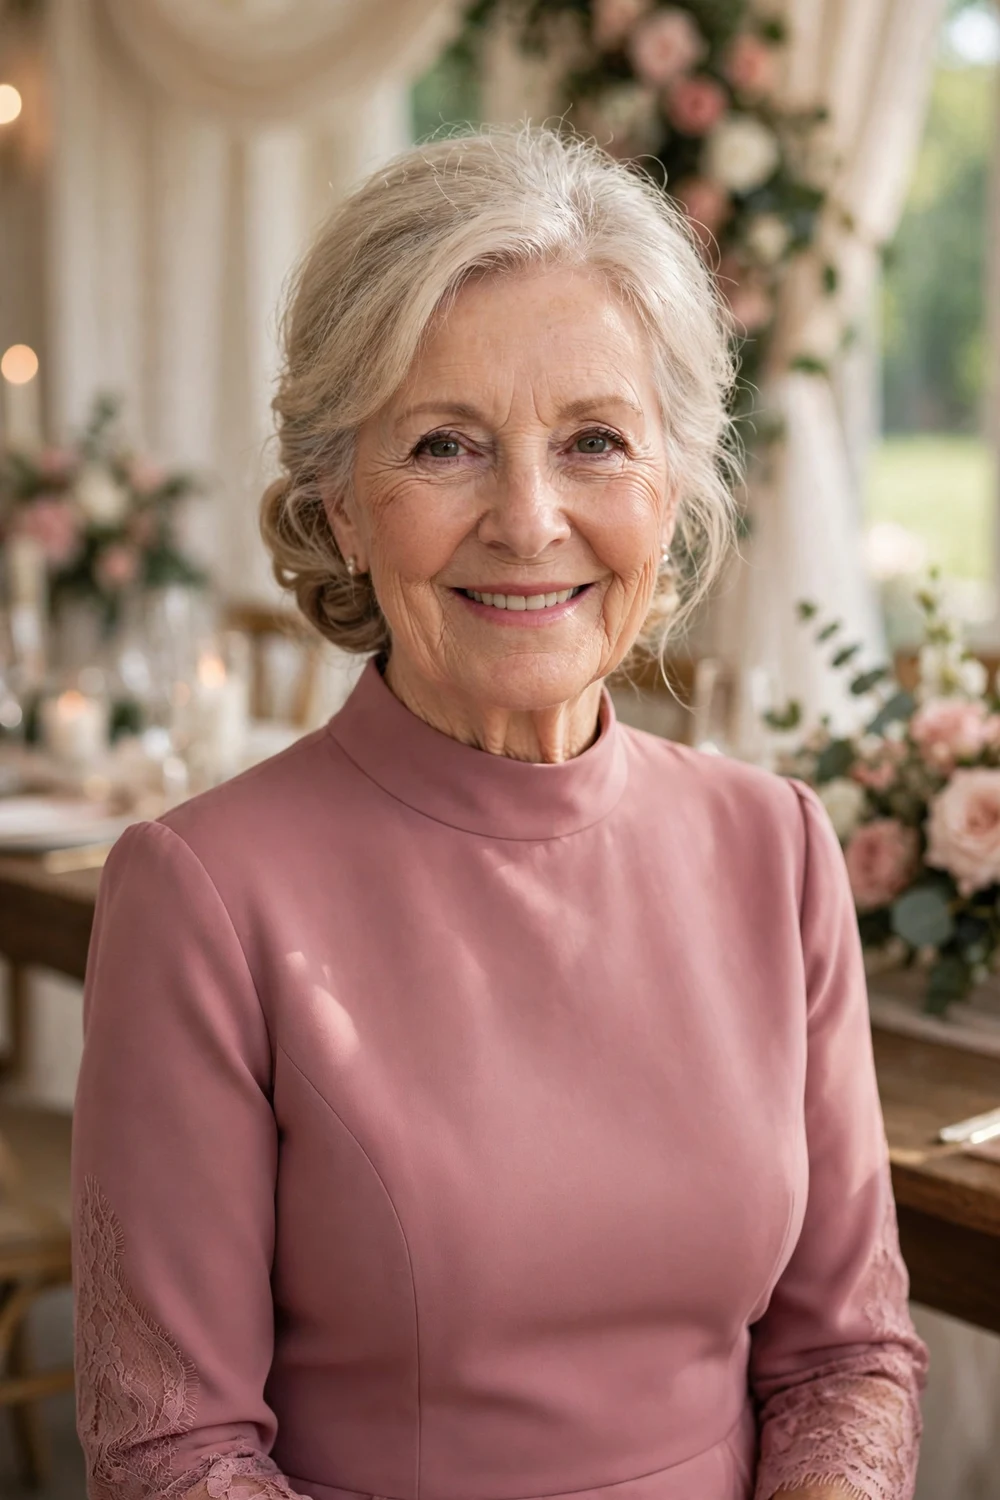
The hair is gathered into a low ponytail at the nape, twisted into a coil, and pinned over a small padded form so the chignon has a rounded shape that thin hair on its own rarely gives. The padding carries the size, which means the hair itself needs only light teasing at the crown. A few soft pieces left at the temples keep the front gentle in photos.
U shaped pins hold a coil better than standard bobby pins, and two pins crossed at the base stop the chignon from tipping as the day goes on. The style sits clear of collars and dress straps, and it holds from the ceremony to the last dance with no repair beyond a loose pin pushed back in. It suits shoulder length hair and longer, and it works with almost any neckline.
Try this: match the padding color to your hair color, and spread the hair evenly over it before pinning so no edge of the form shows through fine strands.
Difficulty: Medium · Cost: $$ (salon)
2. Soft Textured Updo
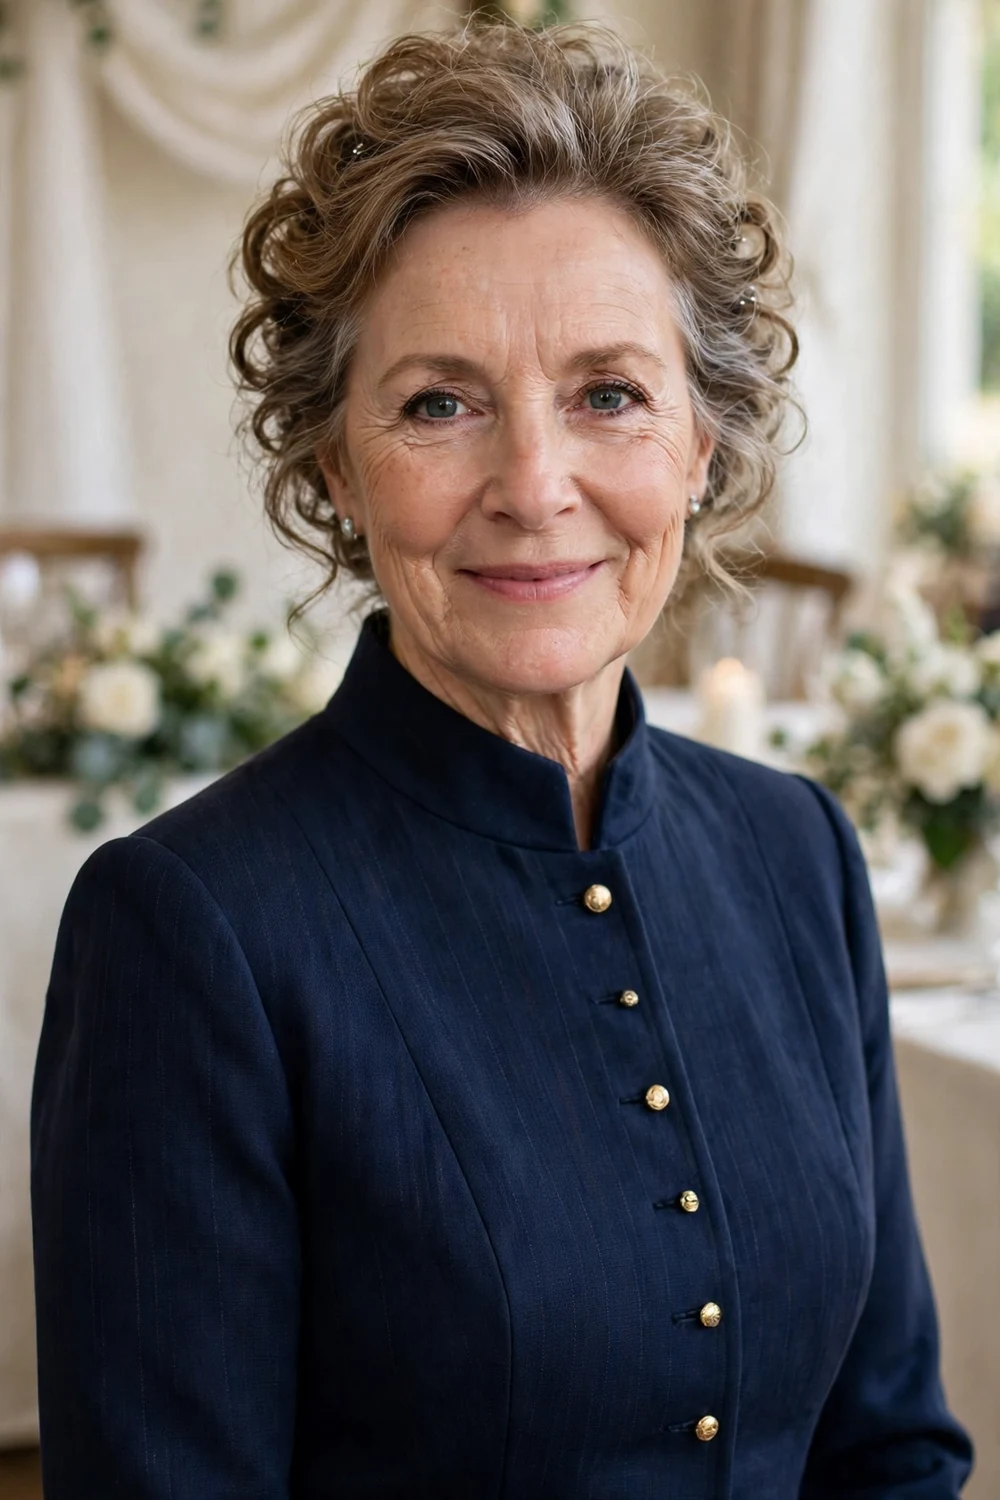
A loose, textured updo hides a thin crown better than any sleek style, because the broken surface leaves no flat area where scalp can show through. The hair is curled in large sections first, since curled hair takes up more space than straight hair, then pinned up in loose clusters at the back and crown.
Root lift spray on damp hair and a blow dry with the head tipped forward set the base. Once the sections are pinned, small pieces at the crown are lifted gently with the fingertips to open the texture. If the part still shows scalp in bright light, a tinted root powder in your shade blurs it for the day and washes out with shampoo. Hold is strong, since each cluster is pinned on its own.
Try this: ask your stylist to pin the clusters slightly loose rather than flat. Tight pinning removes the texture that makes this style read full.
Difficulty: Medium · Cost: $$ (salon)
3. Low Donut Bun

The donut bun is the most direct answer to a bun that looks too small. Hair goes into a low ponytail, a hair donut slides to the base, and the lengths are spread evenly over the ring, tucked under, and pinned. The ring gives a round, even shape in minutes, and the wearer supplies only the outer layer of hair.
Fine hair needs the donut in a shade close to the hair color, plus a slow, even spread of the lengths so the ring stays covered at the back where you cannot see it. Take a phone photo of the back at the trial and check the coverage. Pinned this way, the bun holds all day and suits medium to long hair, high necklines, and detailed dress backs that need the hair kept low and tidy.
Try this: curl the ponytail lightly before spreading it over the donut. The slight wave makes the lengths cover the ring with fewer gaps.
Difficulty: Low to Medium · Cost: $$ (salon)
4. French Twist with a Teased Base

A French twist sweeps the hair upward into a vertical seam at the back of the head, which lifts the whole silhouette and lengthens the neck in profile photos. On fine hair the twist can slide, so the base matters more than the finish. Light mousse worked through before styling and gentle teasing along the center back give the seam something to grip.
Long pins crossed along the seam hold the twist through a full day, and a small padded insert under the roll can add width if the twist looks narrow. The front stays smooth with a little height at the crown. This is one of the most formal options on the list, and it suits medium to long hair and evening weddings.
Try this: practice the twist twice before the wedding if you plan to do it yourself, and photograph the back each time so your hands learn the pin placement.
Difficulty: Medium to High · Cost: $$ (salon)
5. Twisted Low Bun
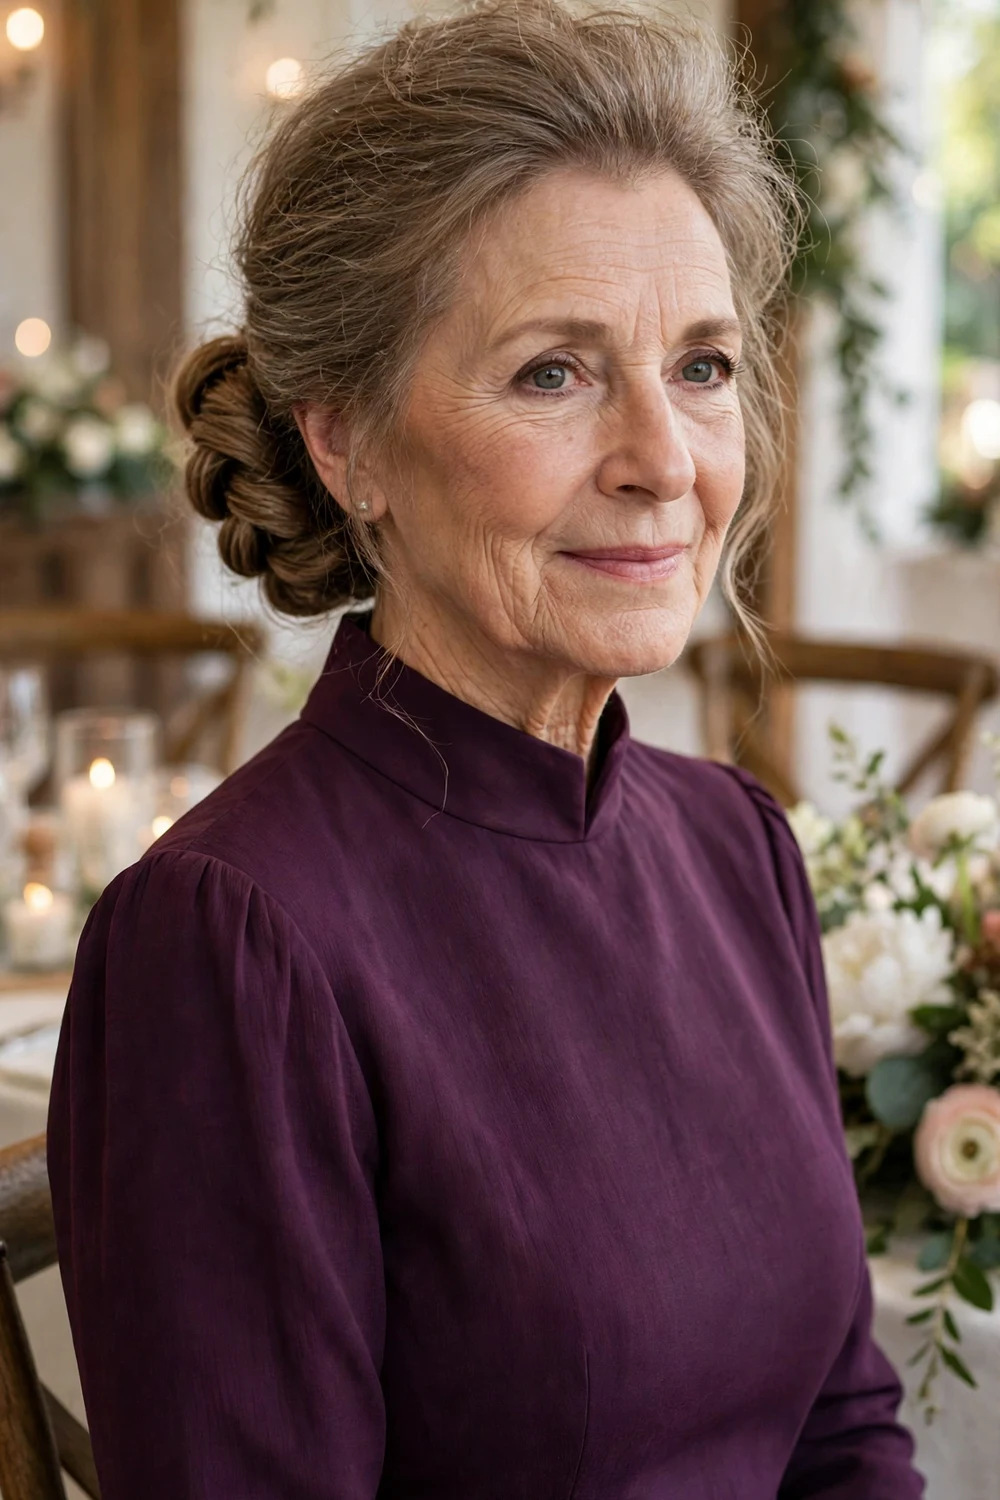
Instead of one smooth coil, this bun is built from two or three rope twisted sections wrapped together at the nape. The interlaced surface catches light along each twist, so medium and fine hair reads thicker than it does in a flat bun. The twists also hide pins well, which matters when hair is too fine to cover pin ends on its own.
Each twist is pinned as it is placed, so the bun holds in sections and stays comfortable through a long reception. A slightly loose twist looks intentional, which makes this a forgiving style to recreate at home with practice. It needs no accessory, so it pairs well with a beaded or detailed dress, and it suits shoulder length hair and longer.
Try this: mist each section with texture spray before twisting. The added grip stops fine ends from slipping out of the rope as you wrap it.
Difficulty: Medium · Cost: $$ (salon)
6. Side-Swept Chignon
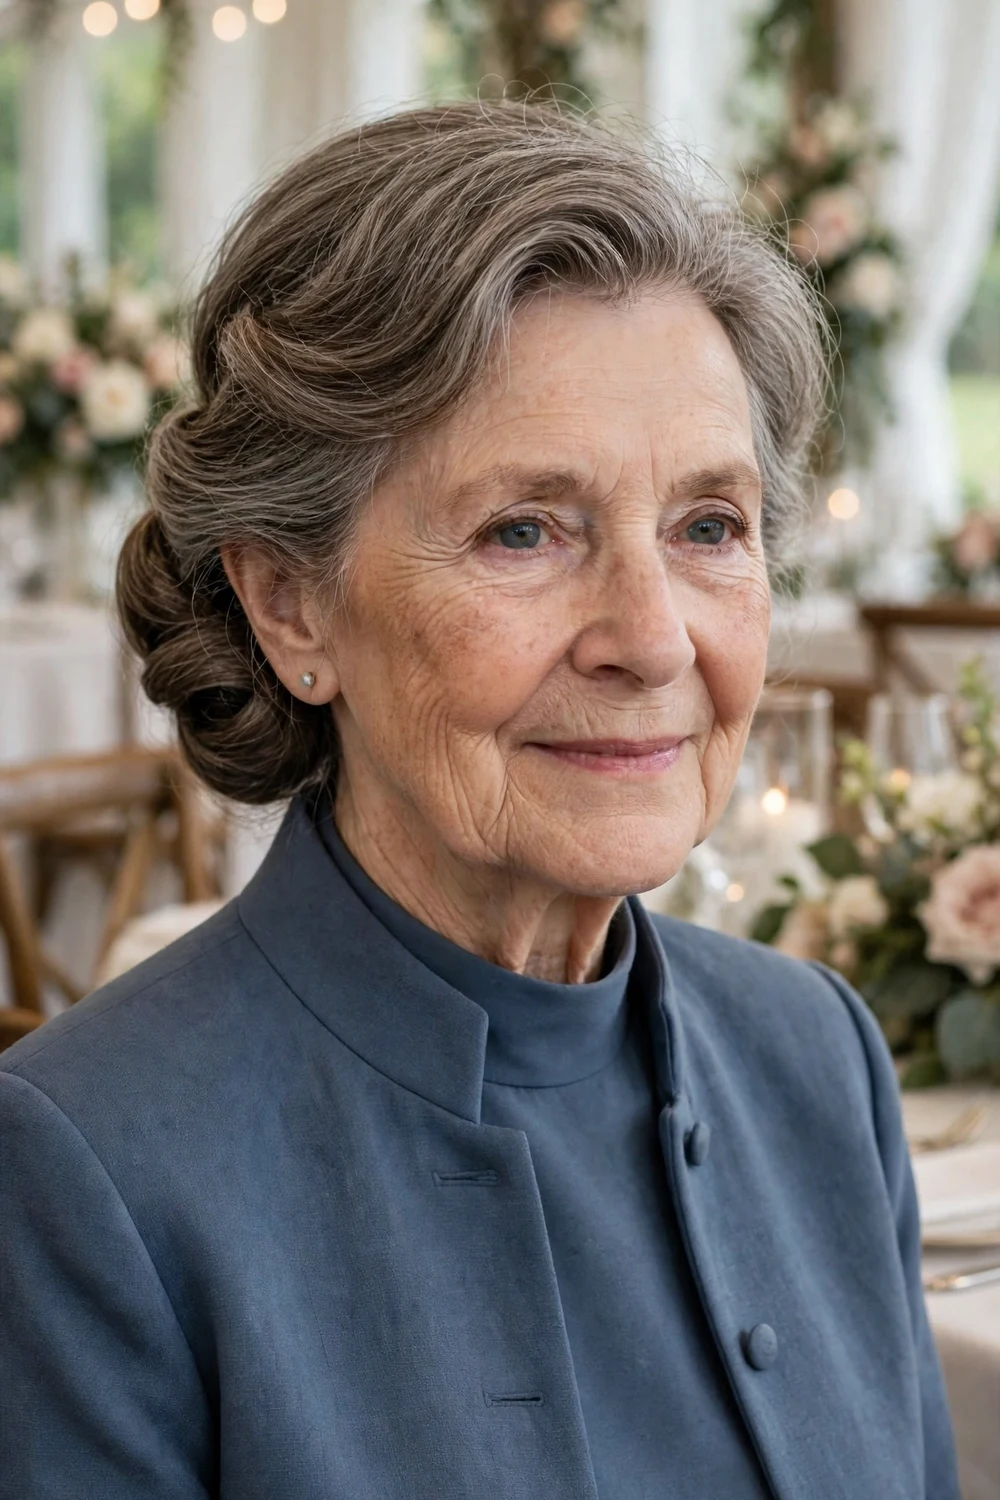
Moving the chignon to one side, just behind the ear, softens the whole look and adds an asymmetry that photographs well from the front, side, and back. It pairs with a deep side part, and the part itself does volume work, since hair swept over from the side covers the crown more fully than a center part on fine hair.
Build the chignon on the side where your hair is fuller or holds a pin better, and keep a longer earring on the open side. A light smoothing pass over the lengths before sweeping keeps flyaways from fuzzing the outline. The coil is padded lightly if it needs size, pinned with crossed pins, and holds through the full event. It suits medium to long hair.
Try this: decide the side with the photographer in mind. The open side of the face is the side that reads best in seated ceremony photos.
Difficulty: Medium · Cost: $$ (salon)
7. Gibson Tuck Roll
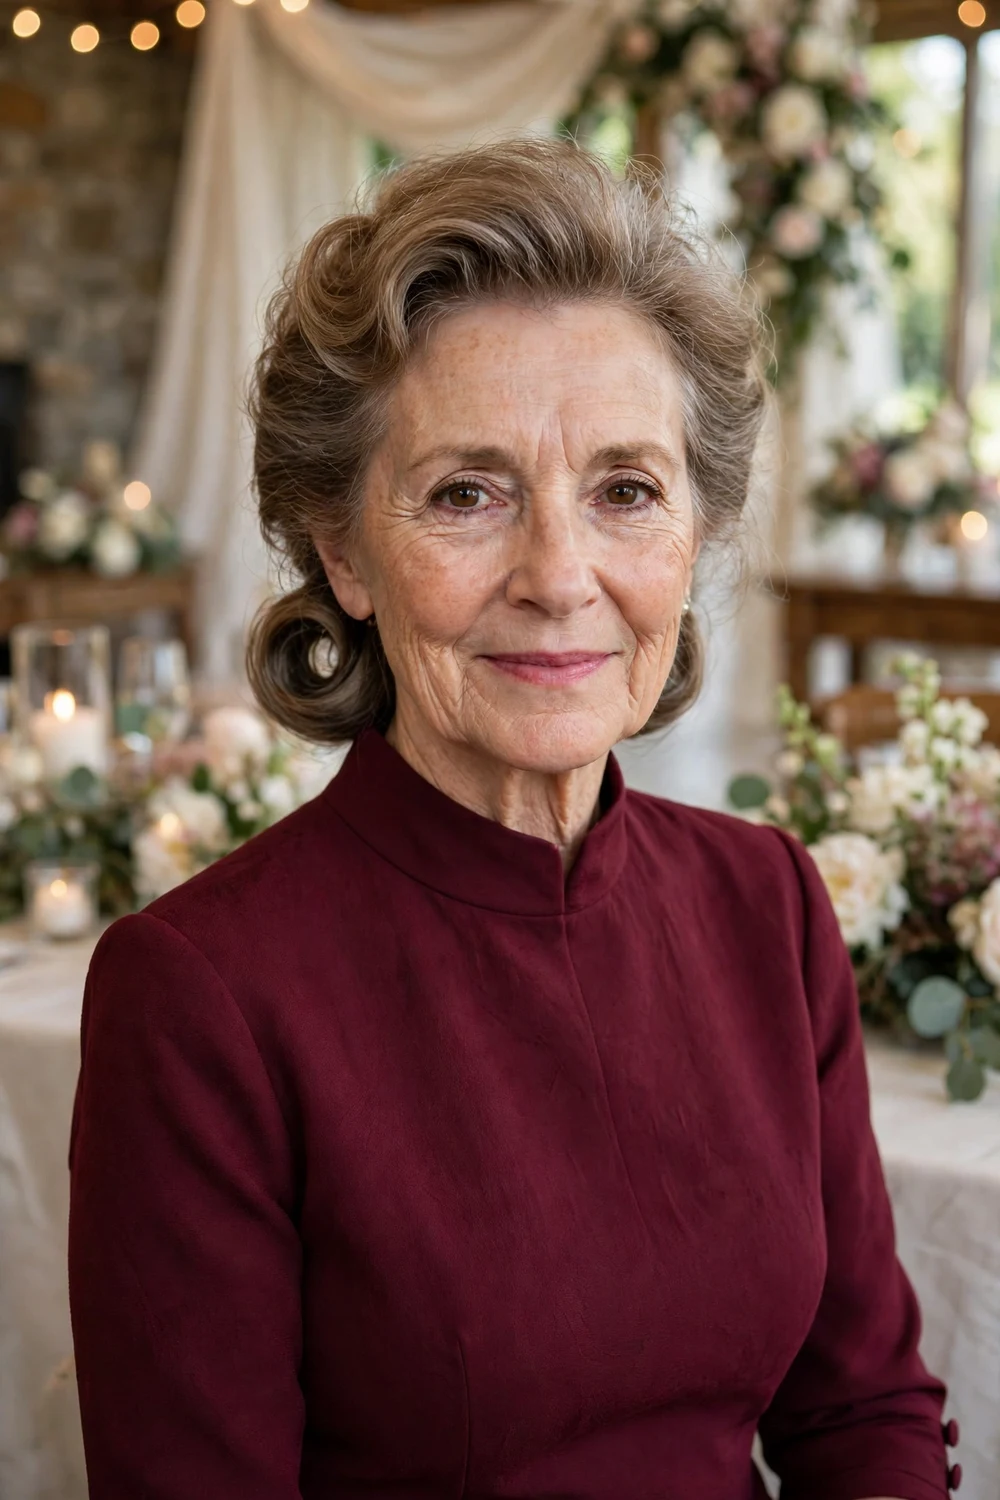
The Gibson tuck rolls the hair upward into a soft horizontal roll at the nape. A low ponytail is pulled partway through a small gap above the elastic, the tail is rolled up and into itself, and the roll is pinned along its length. The rolled shape has width built into it, so fine hair looks fuller across the back of the head.
There is no tight pulling and no hard edge, which makes this one of the more comfortable formal styles for a long day. It holds best on hair washed the day before, since the roll grips lived in hair better than silky clean hair. Medium lengths suit it best, and a small padded roll insert can widen the shape if your lengths are very fine.
Try this: place two crossed pins at each end of the roll. The ends are where fine hair works loose first, and the X pattern locks them.
Difficulty: Low to Medium · Cost: $$ (salon)
8. Bouffant Crown Updo
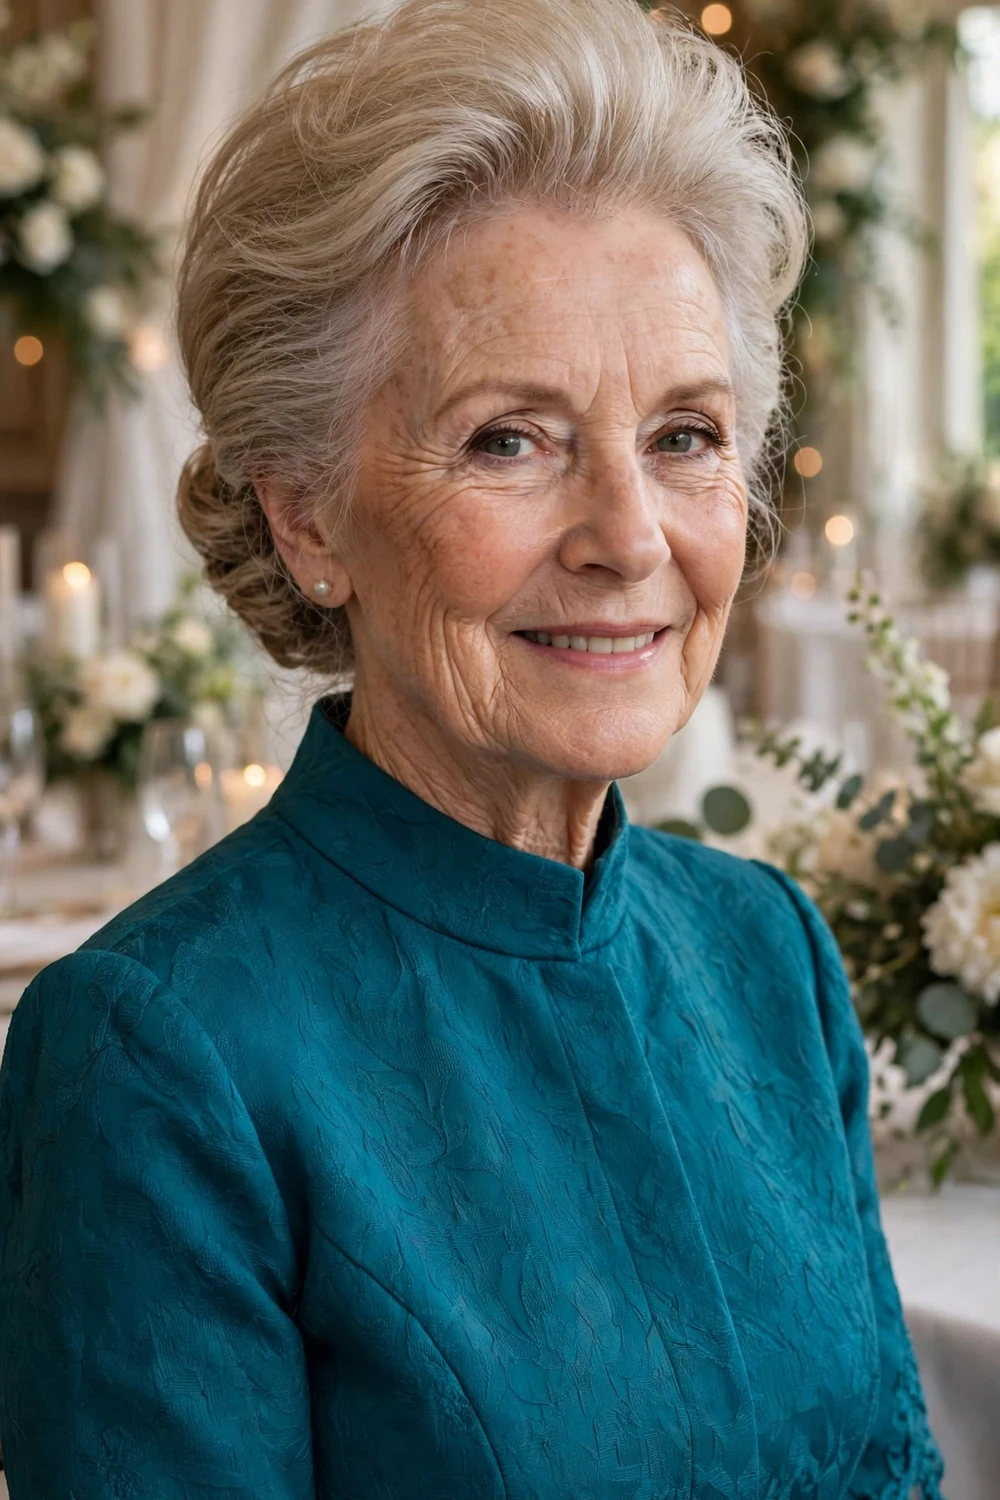
A gentle bouffant at the crown adds height that balances a bun or chignon at the back and lengthens the face in photos. The lift is built by teasing the underside of the top section, then smoothing the surface layer over it so no teased hair shows through. That hidden lift is what covers a sparse front hairline better than hair pulled flat.
The volume should move a little rather than sit as a hard shell, so the spray goes on in light layers after the shape is set. The back can be a plain low bun, a coil, or a small twist, since the crown does the main work. This suits medium to long fine hair and formal weddings where a flat top would read too plain.
Try this: tease in thin horizontal layers and smooth only the top one. Teasing the whole crown at once creates a lump that shows through fine hair.
Difficulty: Medium · Cost: $$ (salon)
9. Loose Pinned Updo in Small Sections
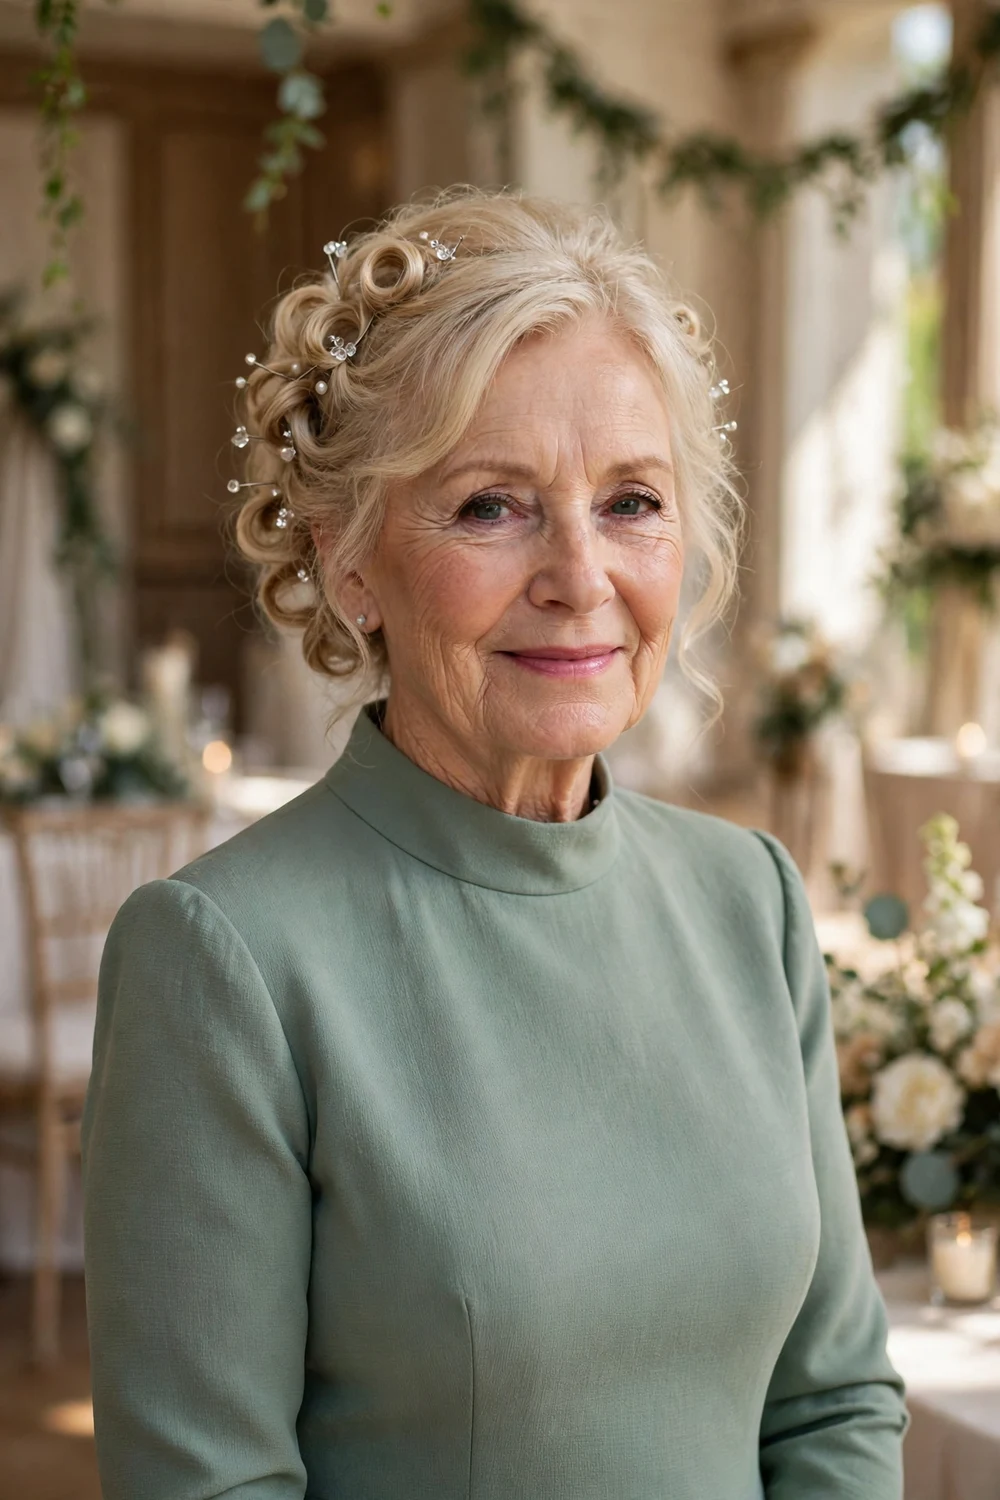
Very fine hair holds an updo better in pieces than in one twist. The hair is curled first, then pinned up in loose sections across the back and crown. Several small pinned pieces overlap and cover each other, so the finished updo looks fuller than a single bun made from the same hair.
Dry shampoo or texture spray worked into clean, dry hair gives the pins something to catch on, since grip matters more than spray strength on slippery strands. Use pins in your hair color and hide them under the curls, because a bright pin shows clearly through fine hair. Each section holds on its own, so if one piece softens by evening the rest of the style stays in place.
Try this: curl every section before you start pinning, and let the curls cool in place. Warm curls pinned up lose their bend and the updo loses its bulk.
Difficulty: Medium · Cost: $$ (salon)
10. Pinned Curl Updo
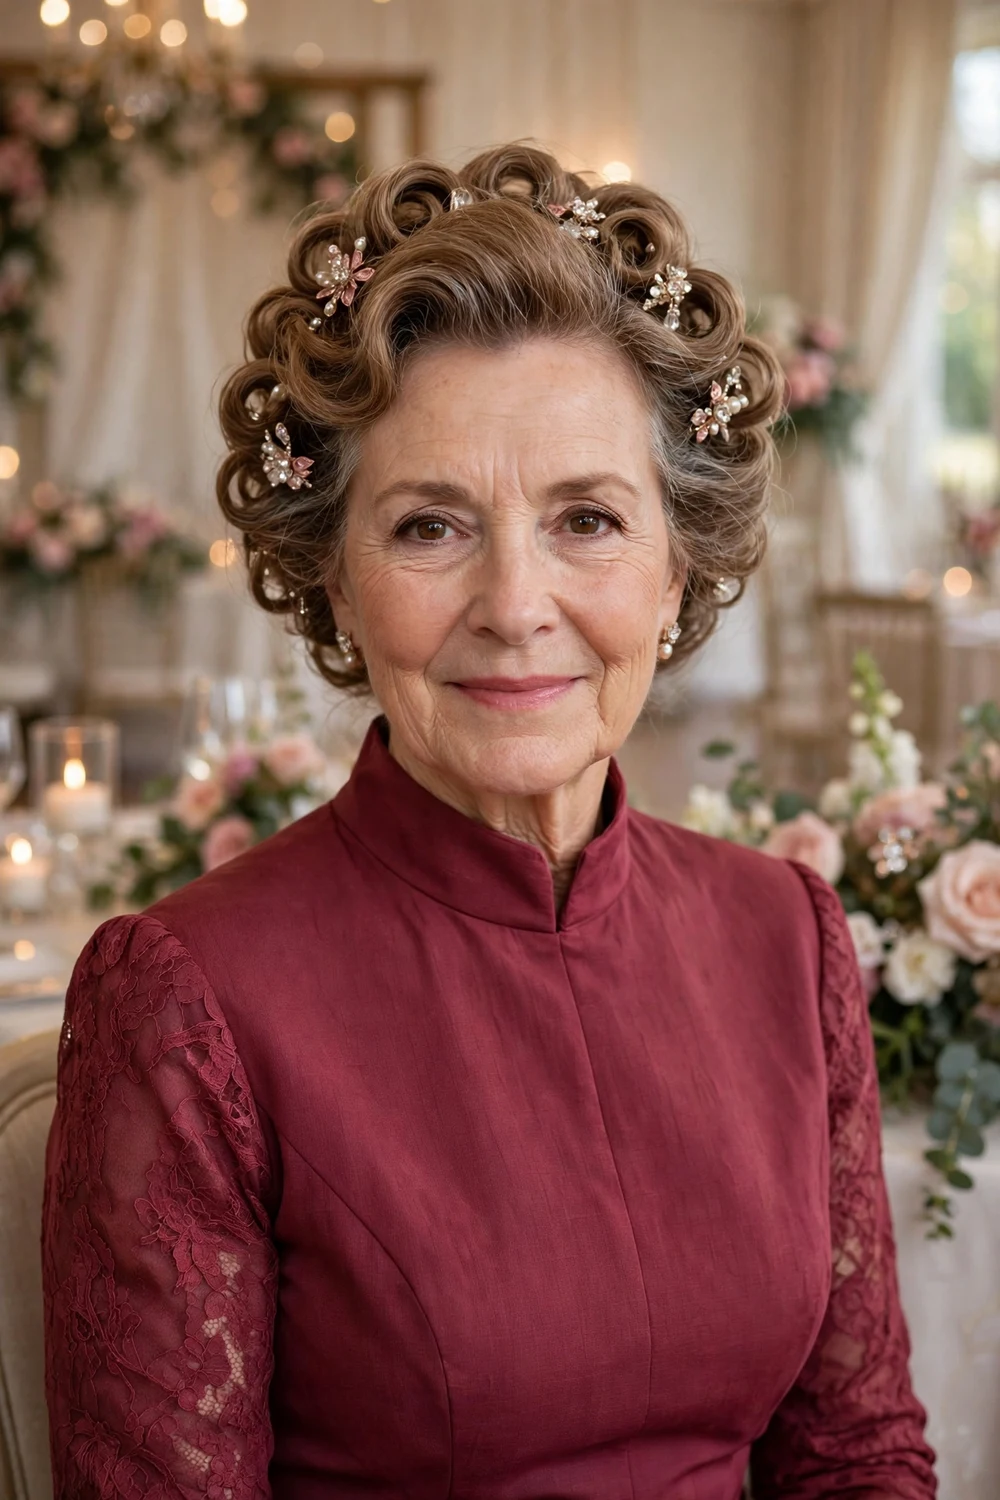
This updo is built for a long wedding day. Curls are set with mousse, cooled fully, and pinned close to the head one by one, so the curl itself becomes the building block of the style. Pinned curls keep their shape far longer than loose curls, and the cluster of bends gives fine hair visible body from every angle.
Cross the pins in an X over each curl rather than pushing two pins in side by side, since the crossed pattern locks the curl against movement, hugs, and dancing. A few jeweled pins placed at the edges dress the style up without adding weight. It suits medium to long hair, and layered hair works well because shorter pieces join the texture instead of escaping.
Try this: pack four spare pins, a travel size spray, and a fine comb in your bag. That small kit covers almost any repair between dinner and the last dance.
Difficulty: Medium to High · Cost: $$$ (salon)
11. Side Braid into a Low Bun

A slim braid run from one temple back into a low bun adds detail and does practical work at the same time, since it captures the short front layers that escape from a plain bun. The braid is kept thin and loose, then gathered with the rest of the hair into a bun at the nape.
On fine hair a braid can look narrow, so the edges are tugged gently outward loop by loop once it is pinned, a technique called pancaking, which widens the braid without adding hair. The bun underneath can sit over a small donut if it needs size. The style holds well through the day and suits medium to long hair, along with garden and daytime weddings.
Try this: add a light mist of texture spray before braiding. Fine strands braided clean tend to slip, and the spray keeps the loops in place while you pancake them.
Difficulty: Medium · Cost: $$ (salon)
12. Soft Curled Updo

The hair is curled all over, then loosely pinned into soft clusters at the back and crown, with two fine curled pieces left free at the front. The curls supply the volume, so this style flatters fine hair that looks thin when it is straight and smooth. It also suits layered hair, since shorter pieces become part of the curl pattern.
Each curl needs to cool fully before pinning, because a cooled curl keeps its shape for hours longer than one pinned while warm. Pin the clusters with crossed pins and leave a little movement in each one. Pulled too tight, the style loses the softness that makes it work. Hold is good through a full day, and the front pieces soften the jawline in close photos.
Try this: keep the face framing pieces slim and curl them away from the face. Thick front chunks can look heavy against fine hair at the back.
Difficulty: Medium · Cost: $$ (salon)
13. Half-Up Bouffant with Soft Waves

A half-up bouffant builds height at the crown and leaves soft waves over the shoulders, so you get lift where fine hair needs it and length where you want softness. The top section is teased at the roots underneath, smoothed back, and pinned loosely, while the lower hair is waved with a large iron.
Fine and medium hair gain the most from this shape, since the teased base does the lifting and the waves add width at the sides. Brush only the surface of the teased section, because teased hair showing through the top layer reads messy rather than polished. The pinned top holds all day even as the waves soften, and the style sits well under a small comb or clip.
Try this: set the waves a little tighter than the finished look you want. Fine hair relaxes over the first hour, and the extra bend settles into the right shape.
Difficulty: Medium · Cost: $$ (salon)
14. Twisted Crown Half-Up
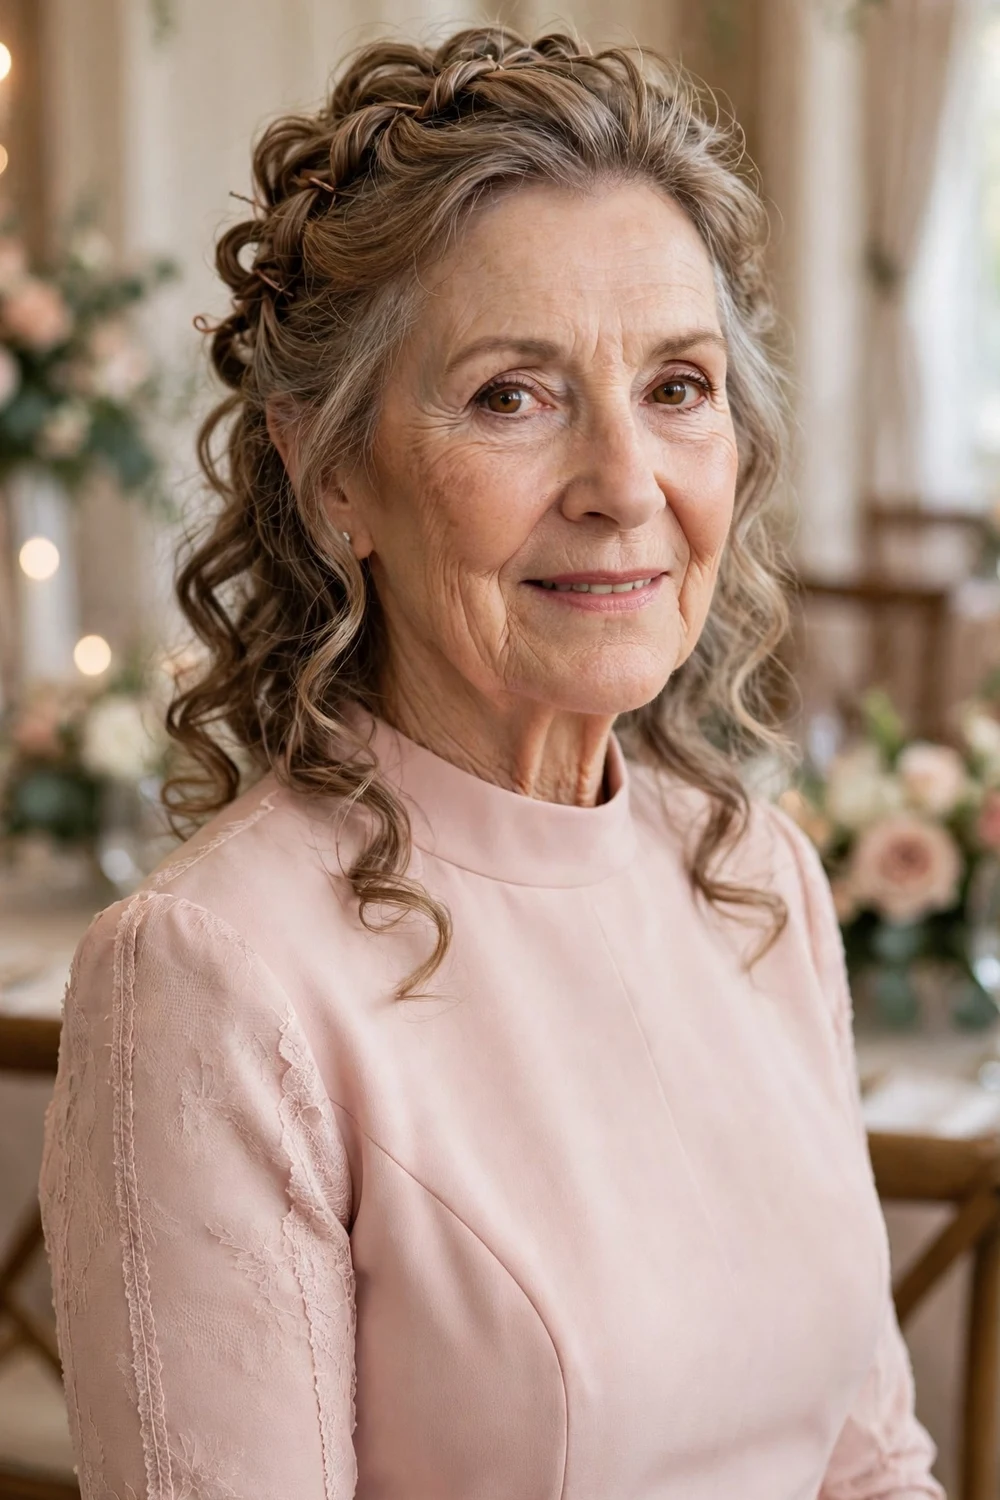
Small sections from each side are twisted gently and pinned across the back of the head into a soft band, with the rest of the hair left in waves or curls. The twists can be angled slightly forward before pinning, which helps cover a thinning temple area that a plain swept back style would expose.
Twists are kinder to fine hair than braids, since they need less tension at the root and fewer strands to look complete. Pin each twist where it lands and cross a second pin under it, then let the lower curls fall over the pin line. The style holds well through a long day, hides flyaways at the sides, and suits medium to long hair at both formal and garden weddings. More half-up and shoulder length shapes are collected in the medium hair updo ideas roundup.
Try this: loosen each twist slightly with your fingertips after pinning. A tight twist looks thin, and a loosened one covers more of the back of the head.
Difficulty: Low to Medium · Cost: $$ (salon)
15. Half-Up Chignon with Cascading Waves

The top section is twisted into a small chignon at the back of the head, and the rest of the hair falls in soft waves. The small chignon keeps the front and crown tidy, while the waves below supply the body that fine hair needs at the sides and back.
Build the chignon on a small clear elastic hidden under the twist, since a mini chignon held by pins alone tends to loosen when you lean back against a chair at dinner. Keep the chignon small on thin hair, because a large one pulls hair away from the crown and can show scalp at the part. A few pearl pins tucked at the edge finish the join. The style suits medium to long hair and stays comfortable all day.
Try this: wave the lower hair before you build the chignon, and pin the twist over the top of the waves so the join stays covered.
Difficulty: Medium · Cost: $$ (salon)
16. Half-Up with Pinned Twists and Crown Volume
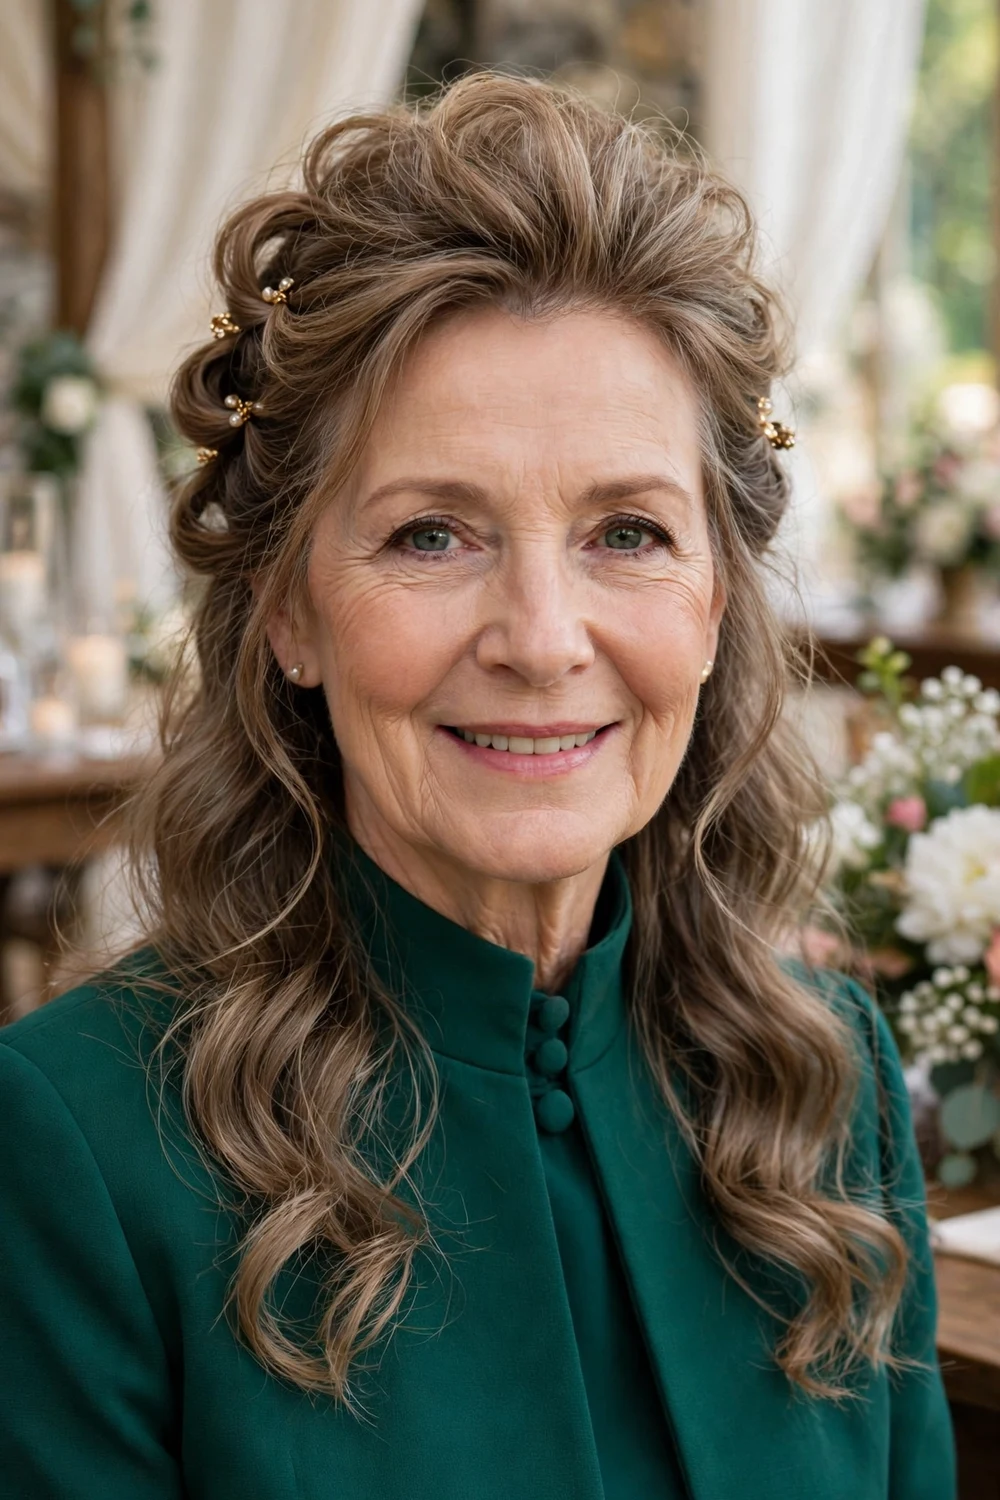
Gentle teasing at the crown gives height first, then small sections from each side are twisted and pinned across the back, with waves left below. For fine hair this combination works on two levels at once: the lift covers the crown, and the twists add texture across the back where hair often looks thinnest in photos taken from behind.
Keep the top section small. A half-up that takes too much hair from the crown leaves the part wide and the sides thin. Pin the twists so they overlap slightly, and place a small sparkle pin where they meet if you want a focal point. The pinned structure holds through the ceremony and reception, and the style suits formal weddings and medium to long hair.
Try this: tease only the underside of the crown section and smooth the top layer down with a soft brush before you twist the sides back.
Difficulty: Medium · Cost: $$ (salon)
17. Half-Up with a Shifted Part and Small Crown Section

This half-up starts with the part moved slightly off its usual line. A part worn in the same place for years lies flat and shows more scalp, while a shifted part lets hair fall across the crown from a new angle and covers more skin. The top section taken back is kept deliberately small, teased at the root underneath, and pinned at the back.
Because most of the hair stays down, the lengths keep their visible density instead of being pulled into the pinned section. Soft waves through the lower hair add width, and a small clip or comb over the pins finishes the back. It suits medium to long fine hair, and it is a sound choice when the crown is the main area you want to cover.
Try this: shift the part only a little, around half an inch. A dramatic new part can fall back to its old line within an hour on fine hair.
Difficulty: Low to Medium · Cost: $$ (salon)
18. Side-Swept Waves with a Pearl Comb

Pinning the hair behind one ear and letting the rest fall over the opposite shoulder is softer than a full updo, and the deep side part pulls extra hair across the crown, which helps cover a thinner side. Waves are set with a large iron, cooled, and brushed through once so they sit as one smooth wave pattern.
The comb needs an anchor or it will work loose on fine hair. Slide a bobby pin in under the comb line first, then set the comb over it so the teeth have something to grip. Think about which side the photographer will catch when you stand beside the bride, and sweep the hair to the other side so your face stays open to the camera. Hold is medium, with the waves softening by evening.
Try this: set the waves slightly tighter on the swept side. That side carries more hair and drops faster under its own weight.
Difficulty: Medium · Cost: $$ (salon)
19. Soft Hollywood Waves with a Swept-Back Top
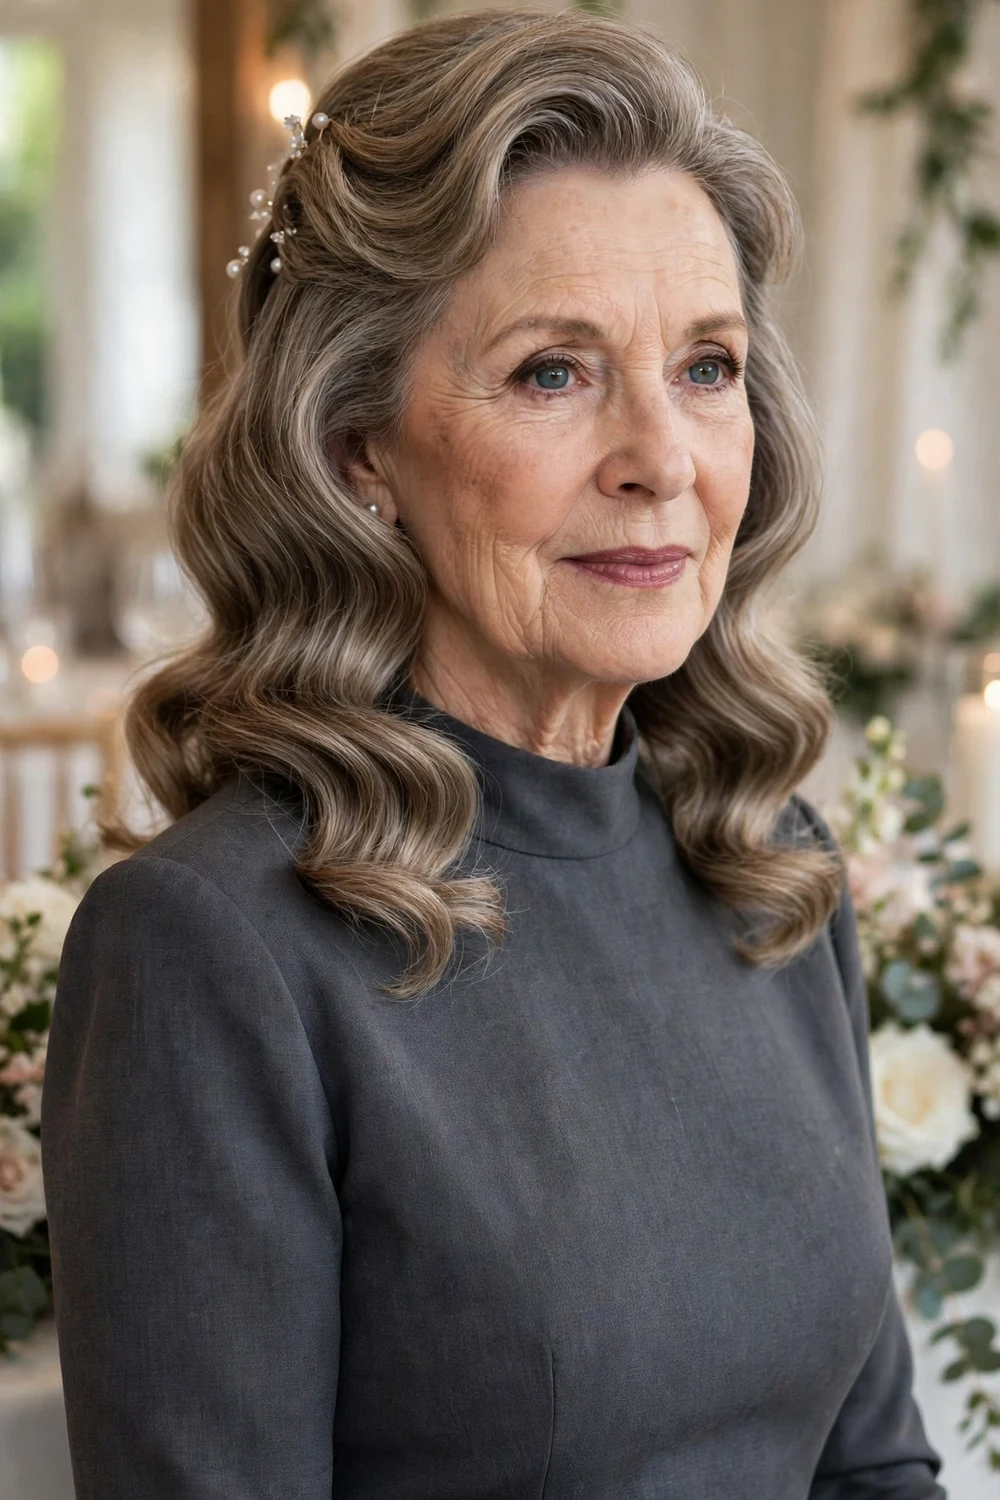
Uniform S shaped waves give fine hair a smooth, wide surface that reads fuller than separated curls, since the wave pattern reflects light in one sheet. Every section is curled in the same direction, cooled fully, and brushed through once so the separate curls link into a single wave. The top section is swept back and pinned softly to keep the face clear.
This is a polished choice for a formal or ballroom wedding, and it needs medium to long hair for the wave to repeat down the length. The weak point is time, since brushed waves on fine hair relax over several hours. A light mist of flexible hold spray after brushing, plus a small clip at the side, keeps the shape presentable through the reception.
Try this: pin each curl up while it cools. Cooling in the curled shape is what lets fine hair hold a wave pattern instead of dropping straight.
Difficulty: Medium to High · Cost: $$$ (salon)
20. Low Wrapped Ponytail with a Lifted Crown
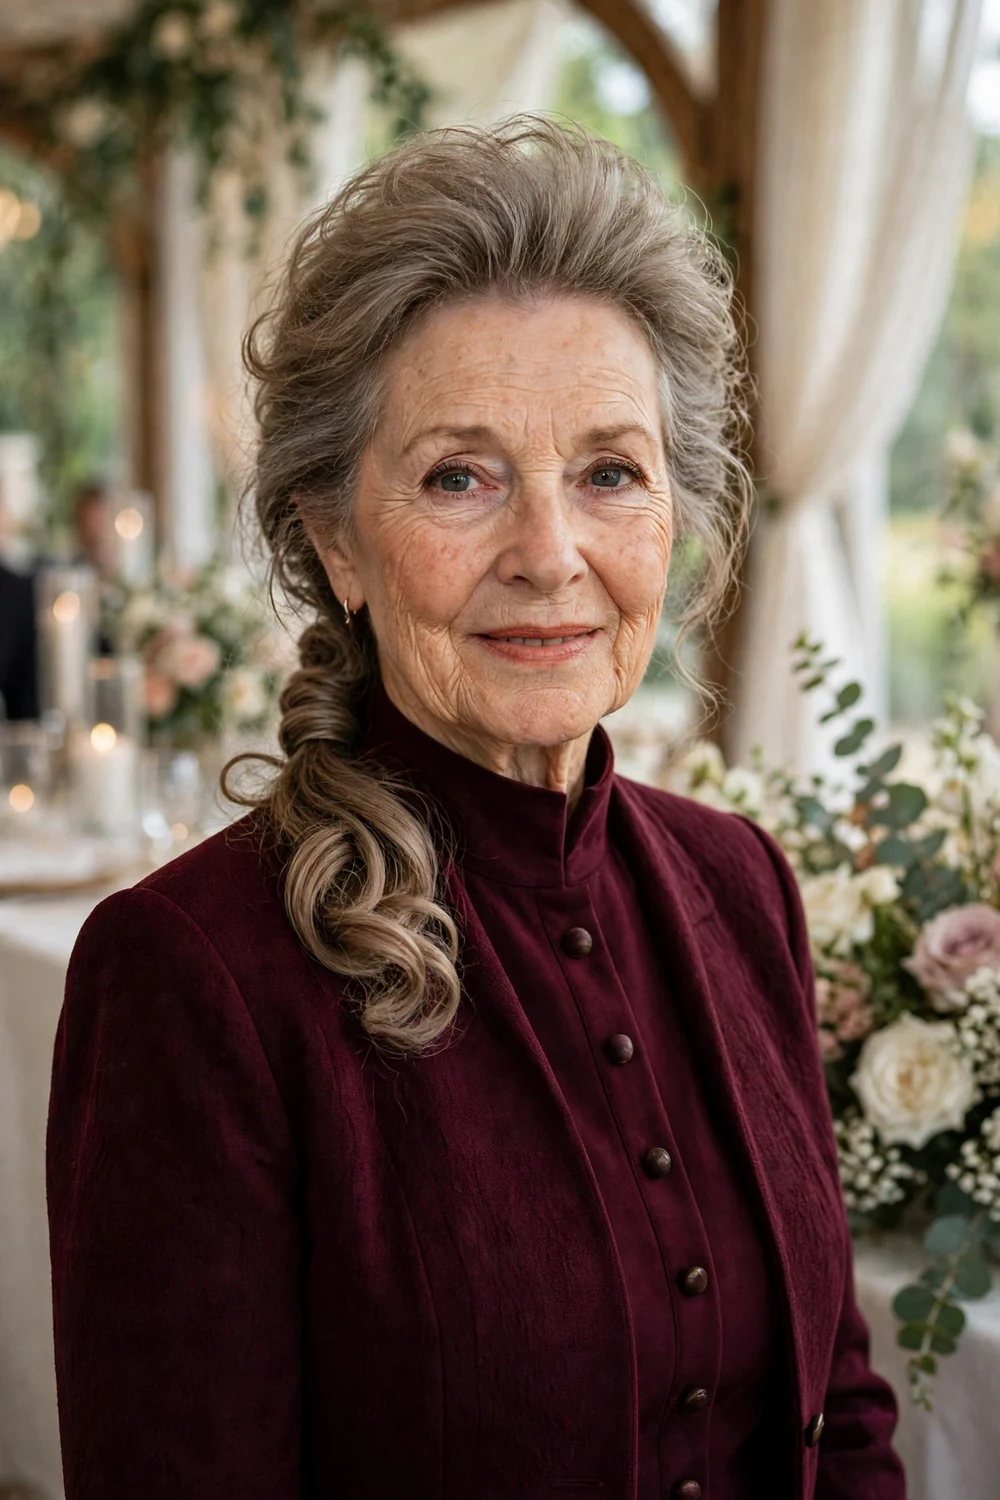
A low ponytail tied at the nape, with a thin strand wrapped around the elastic and pinned underneath, reads formal rather than casual when the crown has lift. Tease the crown lightly and smooth the top layer before gathering, so the front has height instead of lying flat against the head.
Keep the tie low and slightly loose. A tight ponytail pulls at the temples by evening and can show scalp at the front hairline on fine hair. Curl the length loosely for width, or leave it smooth if your hair holds a curl poorly. The style is quick, stays tidy all day, and suits hair past the shoulders along with modern, simple wedding settings.
Try this: use a small clear elastic under the wrapped strand instead of a thick band. Fine hair shows a bulky elastic through the wrap.
Difficulty: Low to Medium · Cost: $ (salon)
21. Fascinator-Friendly Flat-Side Low Bun
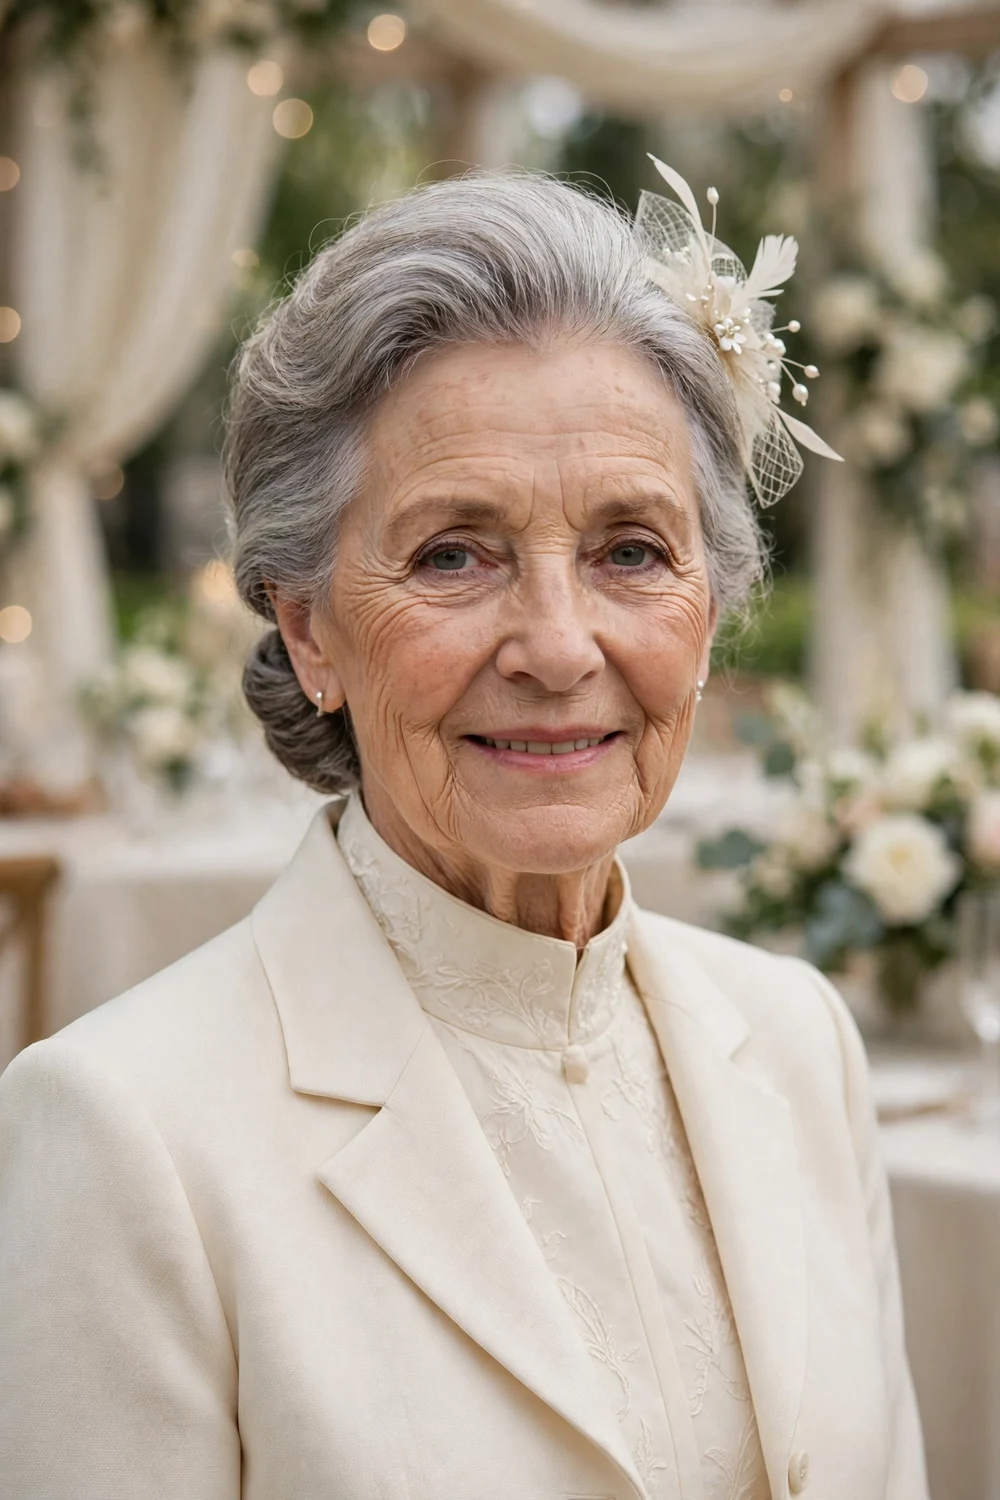
If you plan to wear a fascinator, one side of the head needs to be smoothed flat so the piece sits flush and level. The hair on that side is pinned down first, and the rest is gathered into a low bun at the nape or on the opposite side. The flat side also solves a fine hair problem, since the fascinator base covers the area where hair is thinnest at the temple.
Take the actual fascinator to your hair trial, because its comb or band position decides which side gets flattened and where the bun should sit. Pin the hair under the base of the piece before placing it, and cross two pins under the comb so the piece has an anchor in slippery hair. The bun can sit over a small donut for size, and the whole arrangement holds through a full day of hugs and photos.
Try this: check the fascinator angle in a mirror from the front and the side at the trial. A piece that sits level in the salon can tilt once the bun softens.
Difficulty: Medium · Cost: $$ (salon)
22. Curly Pinned Updo

Naturally curly fine hair should be pinned up as curls rather than brushed out first. Defined curl clusters are gathered upward and pinned while they still hold their coil, which gives height and softness at the same time. The natural bend of each curl adds the volume that straight fine hair has to borrow from padding.
Define the curls with a light cream or gel while the hair is damp, let it dry fully, then pin gently without pulling the coils straight. Work in clusters and cross the pins under each cluster so they stay hidden. A few curls left free at the hairline keep the front soft. The style holds well because it works with the texture, and it often looks better as the evening softens it slightly.
Try this: avoid brushing the curls at any stage on the day. Brushing separates fine curls into frizz and removes the definition the style depends on.
Difficulty: Medium · Cost: $$ (salon)
23. Knotted Low Updo
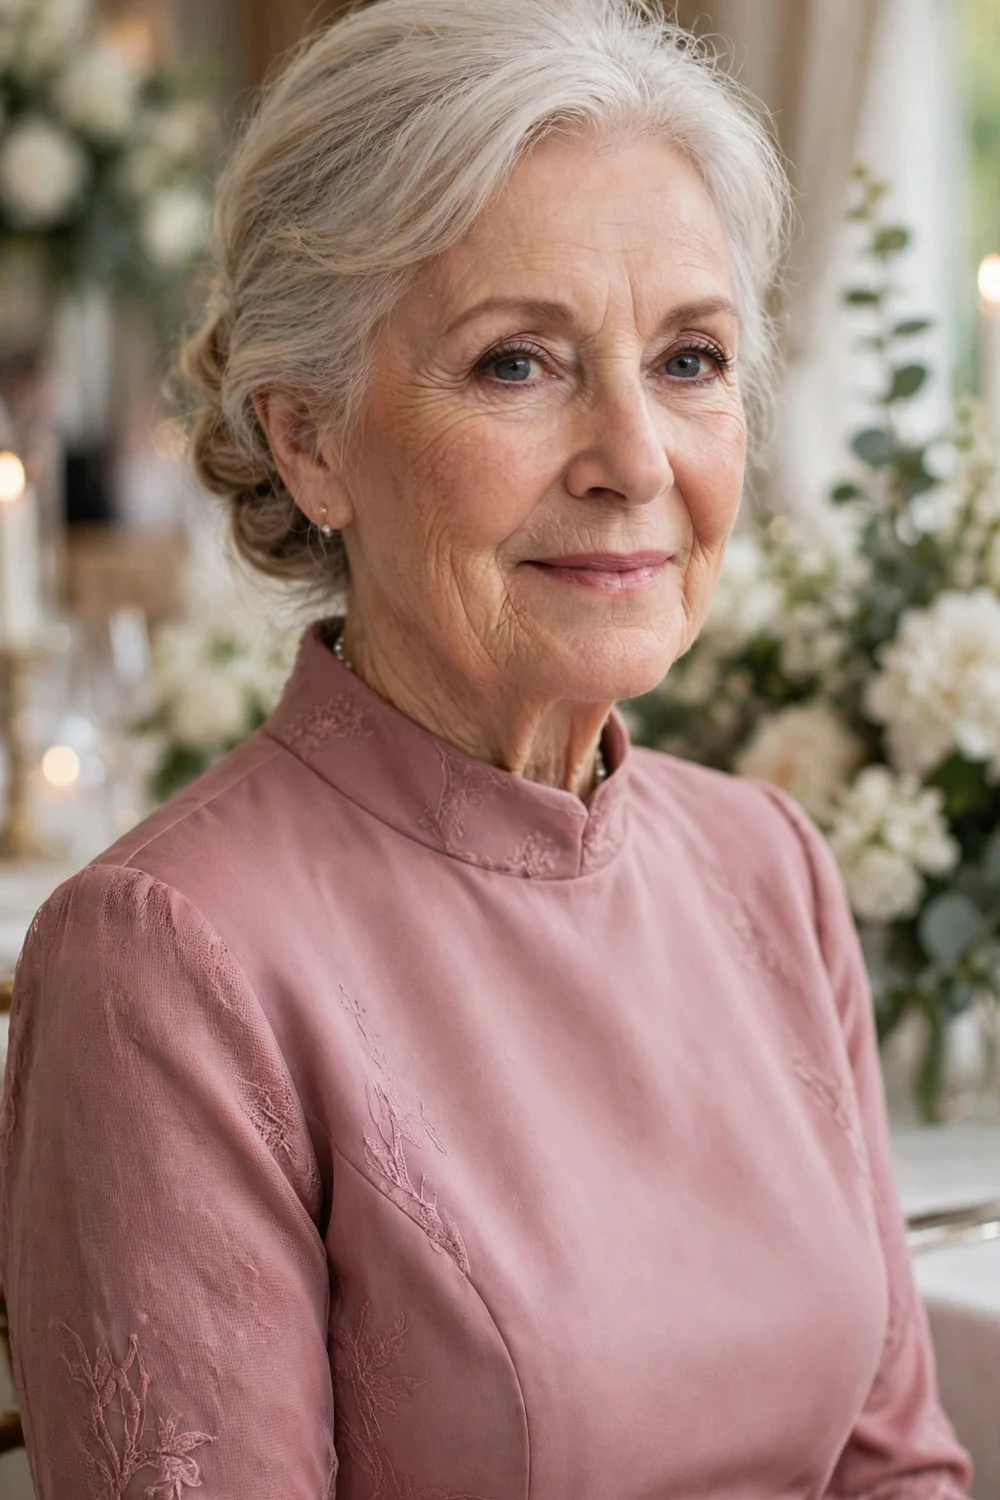
The hair is looped into an actual knot at the nape, which creates a sculpted shape from the back, where the photographer catches you during the ceremony. The knot uses the length of the hair itself to build size, so medium to long fine hair can form a clear shape without padding.
The knot holds best on hair that is smooth but not freshly washed, since very silky hair slips out of the loop. Cross two long pins through the center of the knot in an X to lock it, and add a light tease inside the loop if the knot looks small. The front stays smooth with soft height at the crown. It suits formal weddings and dresses with a plain back that can carry a detailed hairstyle.
Try this: form the knot slightly above the nape if your dress has a high collar, so the knot sits clear of the fabric instead of rubbing against it.
Difficulty: Medium to High · Cost: $$ (salon)
24. Faux Updo for Short Hair
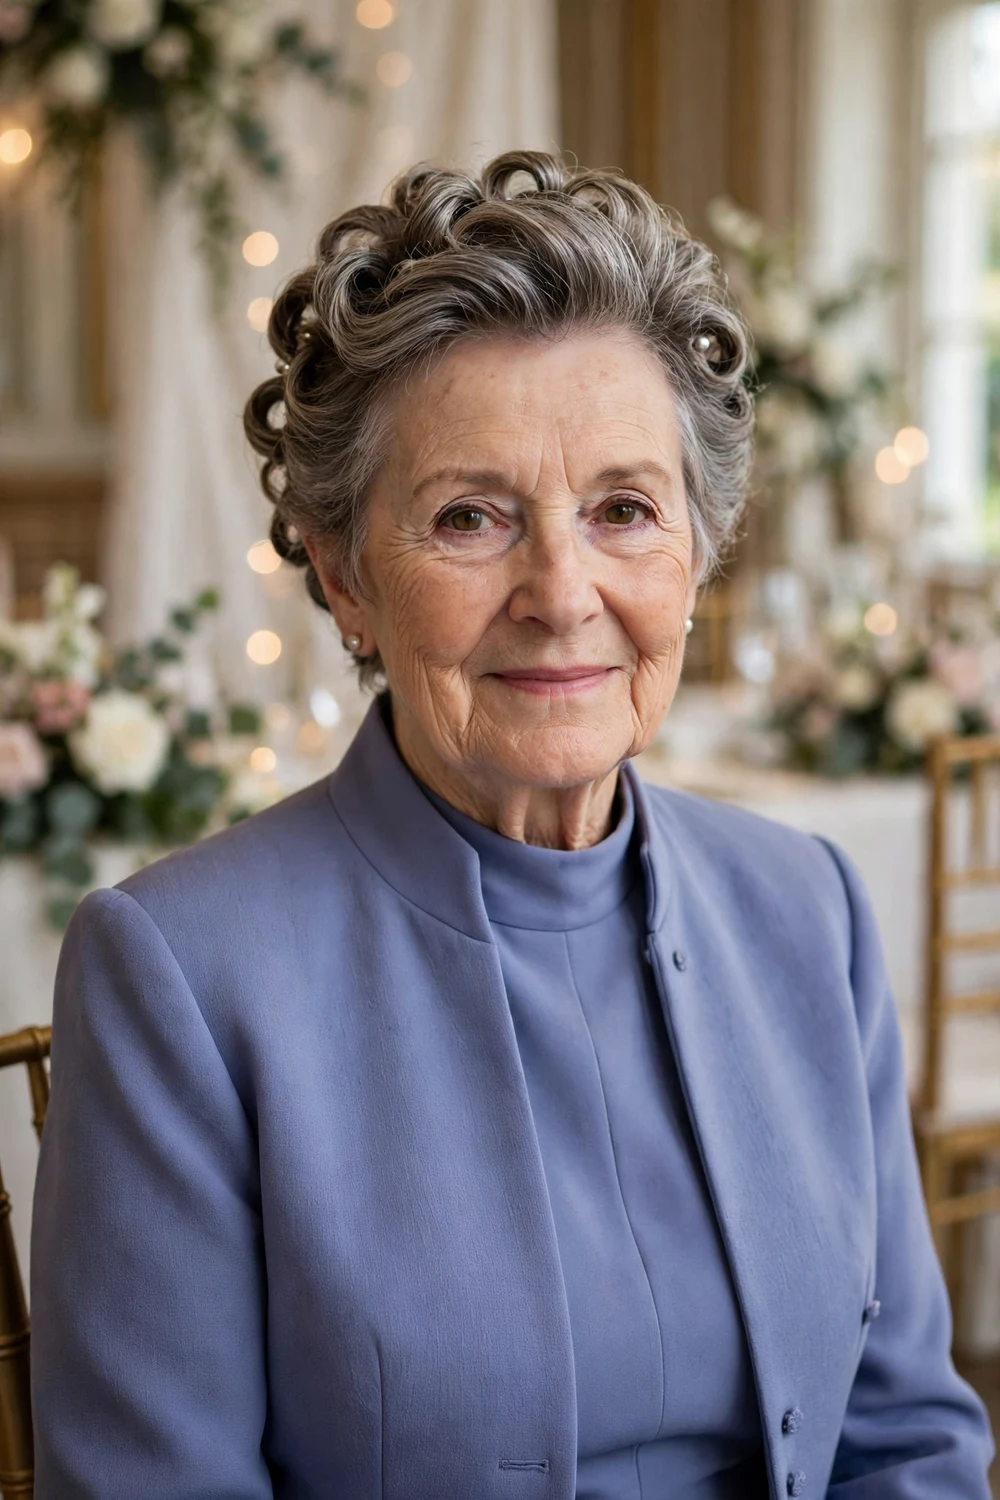
Short hair can still read as an updo. Small twists, rolls, and pinned sections at the back and crown create the shape and detail of a full updo on a bob or a long pixie, and the eye reads the height and texture rather than the missing length. For fine hair this is a useful route, since short sections weigh less and stay lifted.
Work in small sections and pin each twist as you go, crossing two mini pins over each other to lock it. A dab of texturizing paste on the fingertips gives short ends the grip to stay tucked instead of springing loose. The back gains the most from this style, so check it with a hand mirror or a phone photo at the trial. Short length updo options are also covered in the quick updos for short hair collection.
Try this: use mini pins rather than full size pins. Standard pins are too long for short sections and their ends poke out through fine hair.
Difficulty: Medium · Cost: $$ (salon)
25. Textured Bob with Root Lift and Curled Ends

A bob worn down can look fully dressed for a wedding when the roots are lifted and the ends are curled under or flicked with a round brush. Shorter length helps fine hair here, since there is less weight pulling the roots flat, and a chin to shoulder length bob holds a blow dry shape longer than long hair does.
Apply root lift spray before the blow dry and use a round brush to lift at the root rather than smoothing down the shaft. Set the top in two or three large rollers while you do your makeup, then remove them and shake the hair out with your fingers. A single small clip above one ear dresses the bob up and keeps one side off the face for photos. Book a trim two to three weeks before the wedding so the cut has settled.
Try this: skip heavy shine serum at the roots. On a fine bob it flattens the lift within an hour, so keep serum on the ends only.
Difficulty: Low · Cost: $ (salon)
26. Tousled Pixie with a Lifted Top

On a pixie, the cut carries the look and the top section does the volume work. Keep some length on top at your pre wedding trim, then blow dry that section forward and up with root lift so it dries with height. Short sides keep the shape neat and let the lifted top read clearly in photos.
Work a pea sized amount of light paste through dry hair and push the top to one side or slightly forward, piece by piece, so the texture shows. Use fewer products rather than more, since each added layer weighs fine short hair down and removes the lift you built. A small jeweled pin tucked above one ear is enough decoration. The style takes minutes to reset if it flattens during the day.
Try this: carry a travel size texture powder in your bag. A tiny amount worked into the roots at the reception brings the top back up without wetting the hair.
Difficulty: Low · Cost: $ (salon)
27. Roller-Set Blowout for Shoulder-Length Fine Hair

A roller set gives shoulder length fine hair smooth volume that a brush alone rarely holds. Hair is blow dried with a round brush for root lift, then wound onto large Velcro or heated rollers and left to cool fully. The cooling step sets the bend and the lift at the same time, so the finished blowout has body through the crown and a clean turn under at the ends.
Remove the rollers gently and arrange the hair with your fingers or one pass of a wide brush, since repeated brushing pulls the set out of fine hair. This is a good choice for a daytime or less formal wedding, and for mothers who do not want their hair pinned up. Hold is medium, and a light flexible spray plus a small brush in your bag covers a quick refresh before the reception photos.
Try this: put the rollers in before you get dressed and take them out last. The longer the hair cools in the rollers, the longer the lift lasts.
Difficulty: Low to Medium · Cost: $ (salon)
Frequently Asked Questions
What is the best mother of the bride hairstyle for thin fine hair?
A padded low chignon, a low donut bun, and a soft textured updo are the most reliable choices. Padding or a hair donut supplies the size, texture at the crown covers the part, and crossed pins hold the shape through a full wedding day. Sleek, flat styles are harder to wear with thin fine hair because they pull the hair tight against the scalp and show gaps at the part and temples.
How do I stop pins from slipping out of fine hair?
Start with grip rather than extra spray. Work dry texture spray or a little dry shampoo into the hair before pinning, use pins in your hair color, and cross two pins in an X over each section instead of placing them side by side. Hair washed the day before holds pins better than freshly washed hair, and a small clear elastic under a twist or mini chignon adds an anchor that pins alone cannot give.
Can I wear my hair down as the mother of the bride if my hair is fine?
Yes. A roller set blowout, soft waves with a deep side part, and Hollywood style waves all read as formal when the roots are lifted and the ends are finished. The trade off is hold, since loose fine hair softens over several hours while a pinned style keeps its shape. Tuck one side behind an ear with a hidden pin or a small comb so your face stays clear in photos and the hair stays out of the way during hugs.
Should I get a hair trial before the wedding?
Yes, and the trial matters more with fine hair because hold and coverage are hard to judge from a photo. Book the trial several weeks before the wedding, bring your dress neckline photo and any fascinator or clip you plan to wear, and keep the finished style in for a few hours. Check the crown and the back in daylight and in flash photos, since a thin area at the part shows more under a camera flash than it does in salon light.
How can I make a bun look bigger with thin hair?
Use a form under the hair. A hair donut, a bun maker ring, or a padded insert gives the bun its shape while your own hair forms the outer layer, spread evenly and pinned under the form. Curling the hair lightly before you build the bun helps it cover the form with fewer gaps, and choosing a form in a shade close to your hair color keeps it hidden if a strand shifts during the day.
Final Thoughts
For thin fine hair, the winning wedding styles share the same base: texture before pinning, padding where size is needed, and pins crossed so slippery strands stay put. Pick by your hair length first, then by the neckline of your dress, and test the full style at a trial before the day. Short hair is not a barrier either, since a lifted bob, a tousled pixie, or the wedding ready shapes in the french bob hairstyles for wedding collection show how much a well finished short style can carry. With the prep done once and done properly, the style you leave the salon with is the style that stays in the photos.

