


Highlights are the most flexible way to change hair color without giving up your base. You keep the shade you already like, and you add light in the places that change how the whole head looks: around the face, through the ends, or woven fine through the top. I like starting a color change here, because a highlight service can be as small as a few front pieces or as full as a whole head of foils, and you can build on it at the next visit.
This roundup collects 27 hair highlight ideas and orders them so you can narrow down fast: techniques first, then placements, then shades, and finally the specialist options for grey blending, curls, short cuts, and pastel color. Every idea notes who it suits, how it grows out, and its cost band. If your base is brown and you want depth for the season, the fall highlights for brown hair list is a good companion read.
Key Takeaways
- Start with technique, then shade. Foils, balayage, babylights, and teasylights decide grow-out and upkeep before color choice does.
- Soft-root techniques (balayage, sombre, teasylights, color melt) stretch refreshes to 10 to 12 weeks, while classic foils sit at 6 to 8 weeks.
- Fine techniques (babylights, microlight-style foils, teasylights) suit fine hair and first-time color. Wider pieces (ribbons, chunky) need texture or a deliberate retro plan.
- Dark bases do not need to go blonde. Caramel, copper, auburn, and honey lift brown and black hair with less lightening than platinum or pastel.
- Hidden and partial placements (peekaboo, partial, money piece) test a new shade at the lowest cost and commitment.
How to Choose Your Highlight Technique
Match the technique to your calendar first. If you can visit a salon every six to eight weeks, classic foils and chunky placements stay looking sharp. If you need three months between visits, pick a soft-root technique: balayage, foilayage with a root smudge, teasylights, sombre, or a color melt.
Then match the shade to your base and undertone. Warm bases carry caramel, honey, copper, and auburn with the least lightening. Cool and neutral bases carry ash blonde and platinum more cleanly, but those shades need toning upkeep. Fine hair shows lines easily, so fine weaves such as babylights are safer than wide pieces, while thick and curly hair needs wider placement so the color does not disappear.
| Technique | Grow-Out | Typical Refresh | Cost Band |
|---|---|---|---|
| Classic full foils | Visible root line | 6 to 8 weeks | $$ |
| Partial highlights | Visible on top only | 8 to 10 weeks | $ |
| Balayage / foilayage | Soft, no hard line | 10 to 12 weeks | $$ |
| Babylights / teasylights | Diffused | 8 to 12 weeks | $$ |
| Money piece / face framing | Visible at hairline only | 6 to 8 weeks, short visit | $ |
| Platinum / pastel | Visible, plus fast fading | 4 to 6 weeks for tone | $$$ |
1. Classic Full Foil Highlights
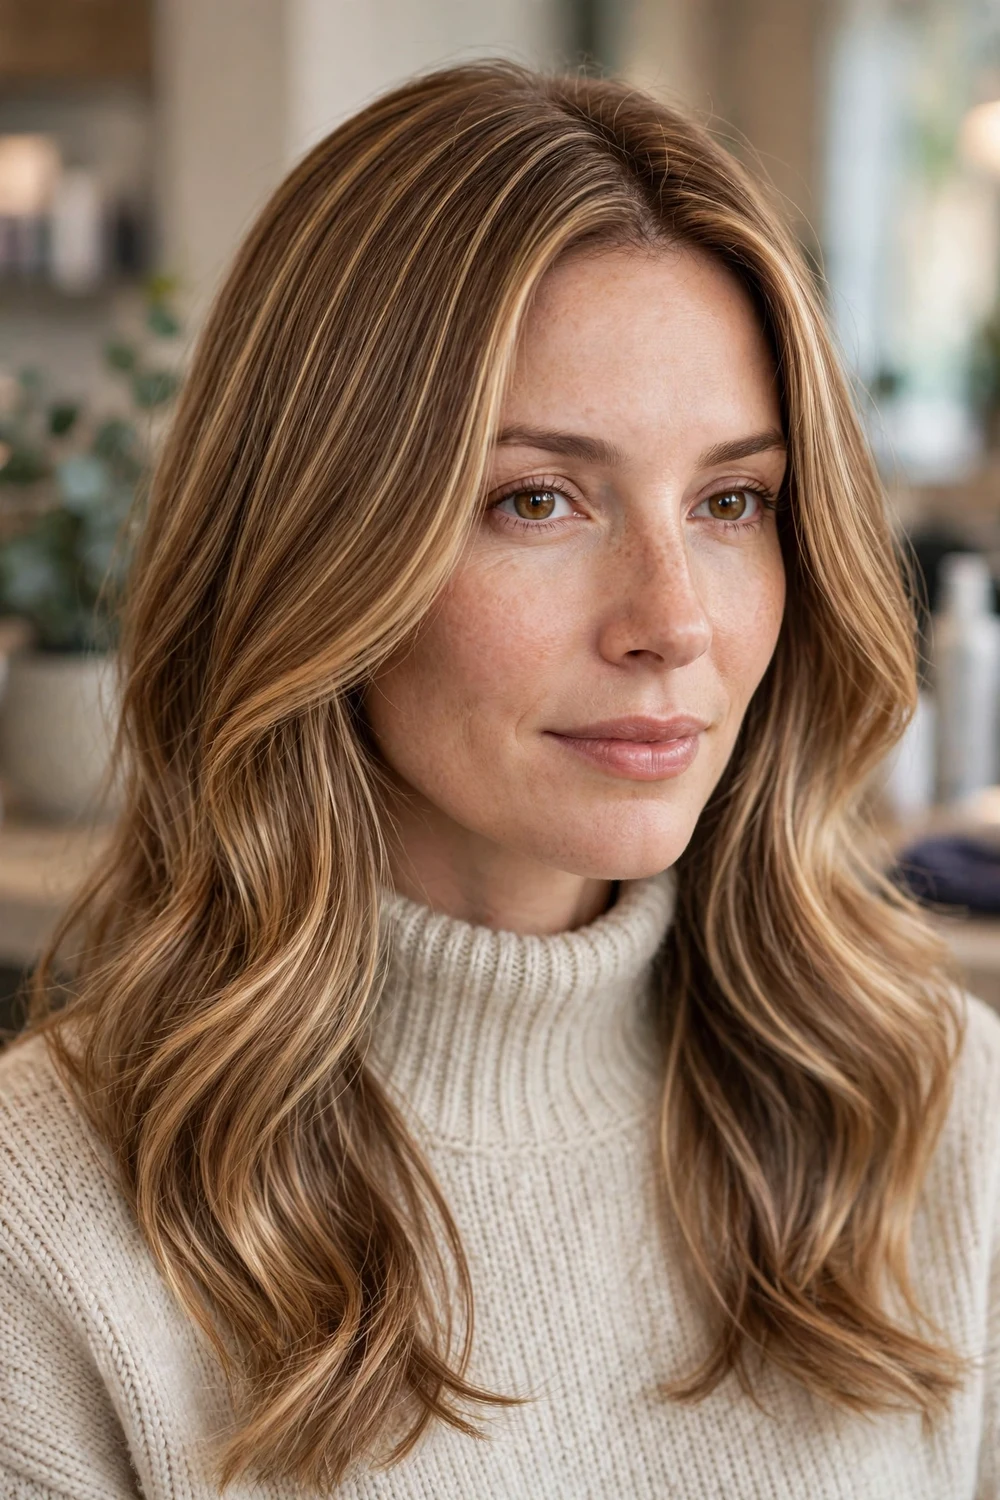
This is the longest-running salon highlight service and still the clearest route to even, all-over brightness. Every section gets attention, including the underneath and the nape, so the color looks the same worn down, half up, or in a ponytail.
Pick it when your base feels flat all over and a partial service keeps leaving the back looking darker than the front. On medium and long hair the finished effect is uniform light with fine variation between foils, which keeps it natural at normal viewing distance.
Ask your colorist how many levels of lift you need before you book. Two levels gives a soft lift on brown bases, three levels reads clearly blonde, and pushing further in one visit can stress fine hair.
Try this: Show your colorist a photo of the finished brightness, not only the placement, so you agree on the end level before foils go in.
Difficulty: Easy · Cost: $$
2. Partial Highlights

A partial service is the smaller, faster version of foiling. It covers the hair people actually see when you wear it down, and it leaves depth underneath that makes the top pieces look brighter by contrast.
It suits first-time highlight clients, anyone testing a lighter shade before a full commitment, and anyone whose underneath rarely shows. The trade-off is simple: in a high ponytail or bun, the underneath will still look like your base color.
If coverage is your main question, read the dedicated partial hair highlights guide, which breaks down T-section, crown, and half-head options in detail.
Try this: Book a partial first if you are unsure about going lighter. You can extend the same placement to a full head at the next visit without changing the shade.
Difficulty: Easy · Cost: $
3. Balayage Highlights

Balayage is painted freehand onto the surface of the hair, so the lightest pieces sit on the mid-lengths and ends and the root stays close to your natural color. That soft root is why balayage grows out without a hard line.
Brunettes get the most visible payoff, because painted caramel, honey, or toffee pieces show clear movement against a brown base. Blondes use balayage for a lived-in finish that stretches the time between appointments.
Tell your colorist where you want the brightness to start. Starting at cheek level gives a brighter face area, while starting at jaw level or lower keeps the look quieter and lower upkeep.
Try this: Bring two photos: one for the root softness you want and one for the end brightness. Balayage results vary more between colorists than foil results do.
Difficulty: Easy · Cost: $$
4. Foilayage Highlights

Foilayage solves one common problem: painted highlights alone do not always lift dark hair enough. Wrapping painted sections in foil adds heat and lift, so dark brunettes and black hair can reach honey, caramel, or pale blonde in fewer sessions.
The finish still looks painted rather than striped, because the color is applied in sweeps before it is wrapped. Expect a shadow root or root smudge at the end of the service to soften the top of each piece.
This is a strong pick if your hair is dark, thick, or previously colored and a standard balayage quote came back with a warning about limited lift.
Try this: Ask whether your service includes a gloss. Foilayage pieces often need a toner to settle the raw lifted color into the shade you picked.
Difficulty: Moderate · Cost: $$
5. Babylights
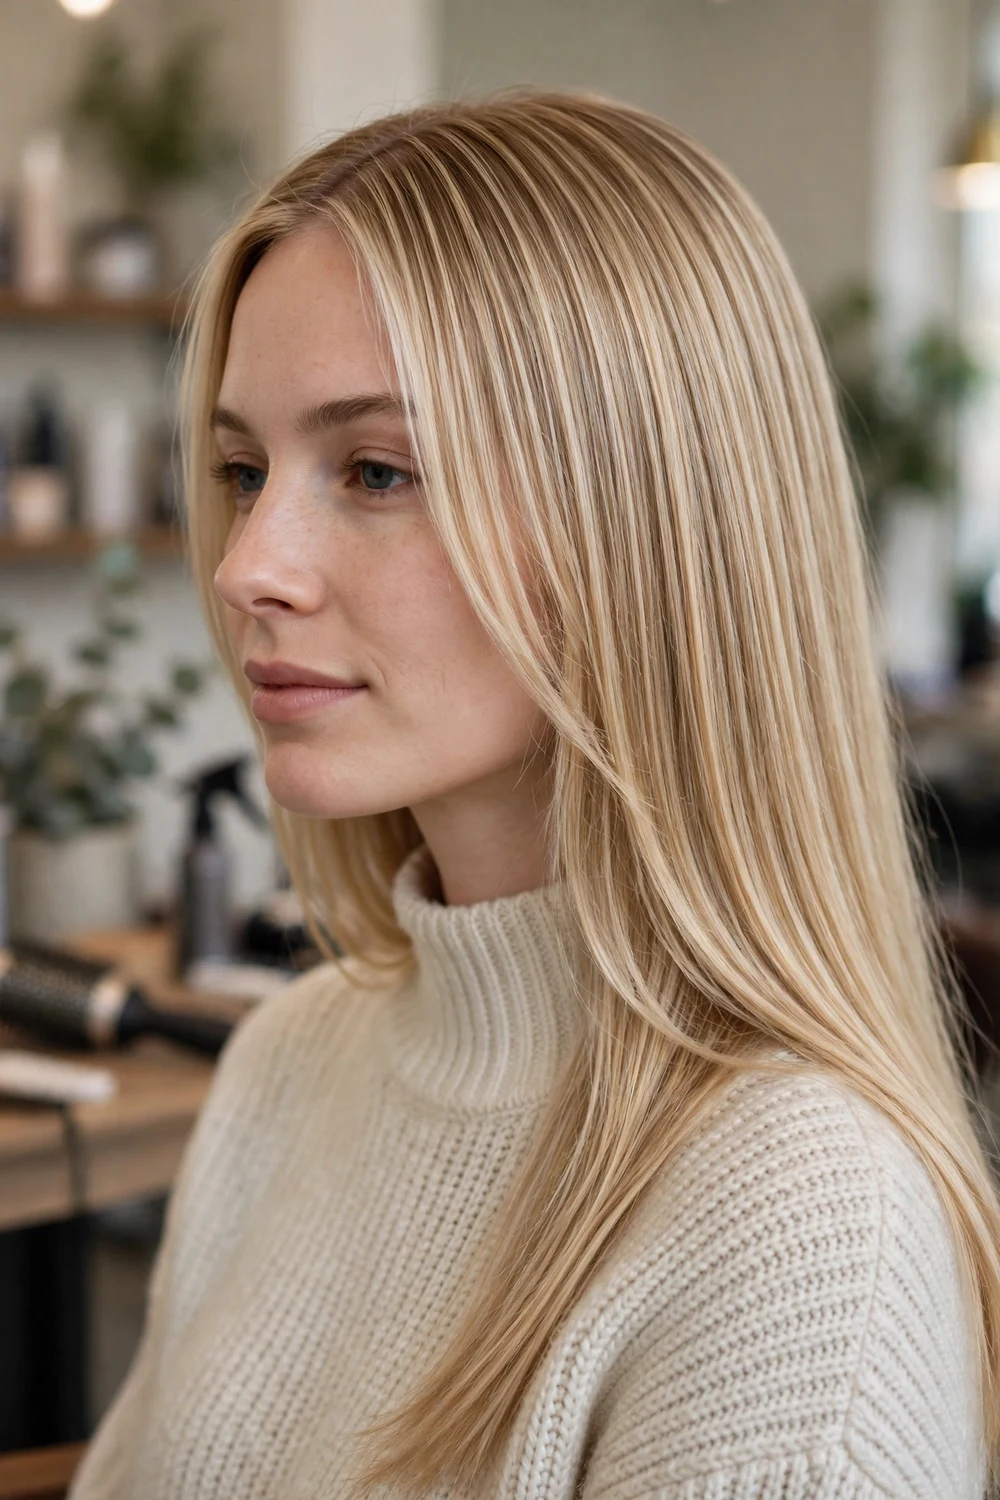
Babylights use much smaller sections than classic foils. The result reads as overall brightness rather than separate stripes, which is why the technique suits fine hair that shows every line of color.
On blondes and light brunettes, babylights lift the whole look by one or two levels while keeping the base visible. On darker hair they work best as a face and part-line accent, since a full head on a dark base takes a long appointment.
The appointment is longer than a classic foil service because there are more, smaller foils. Plan for that time, and expect a refresh focused on the part and hairline between full services.
Try this: If your hair is fine, ask for babylights at the hairline even if you choose another technique elsewhere. That one change removes the stripe effect where it shows most.
Difficulty: Moderate · Cost: $$
6. Teasylights
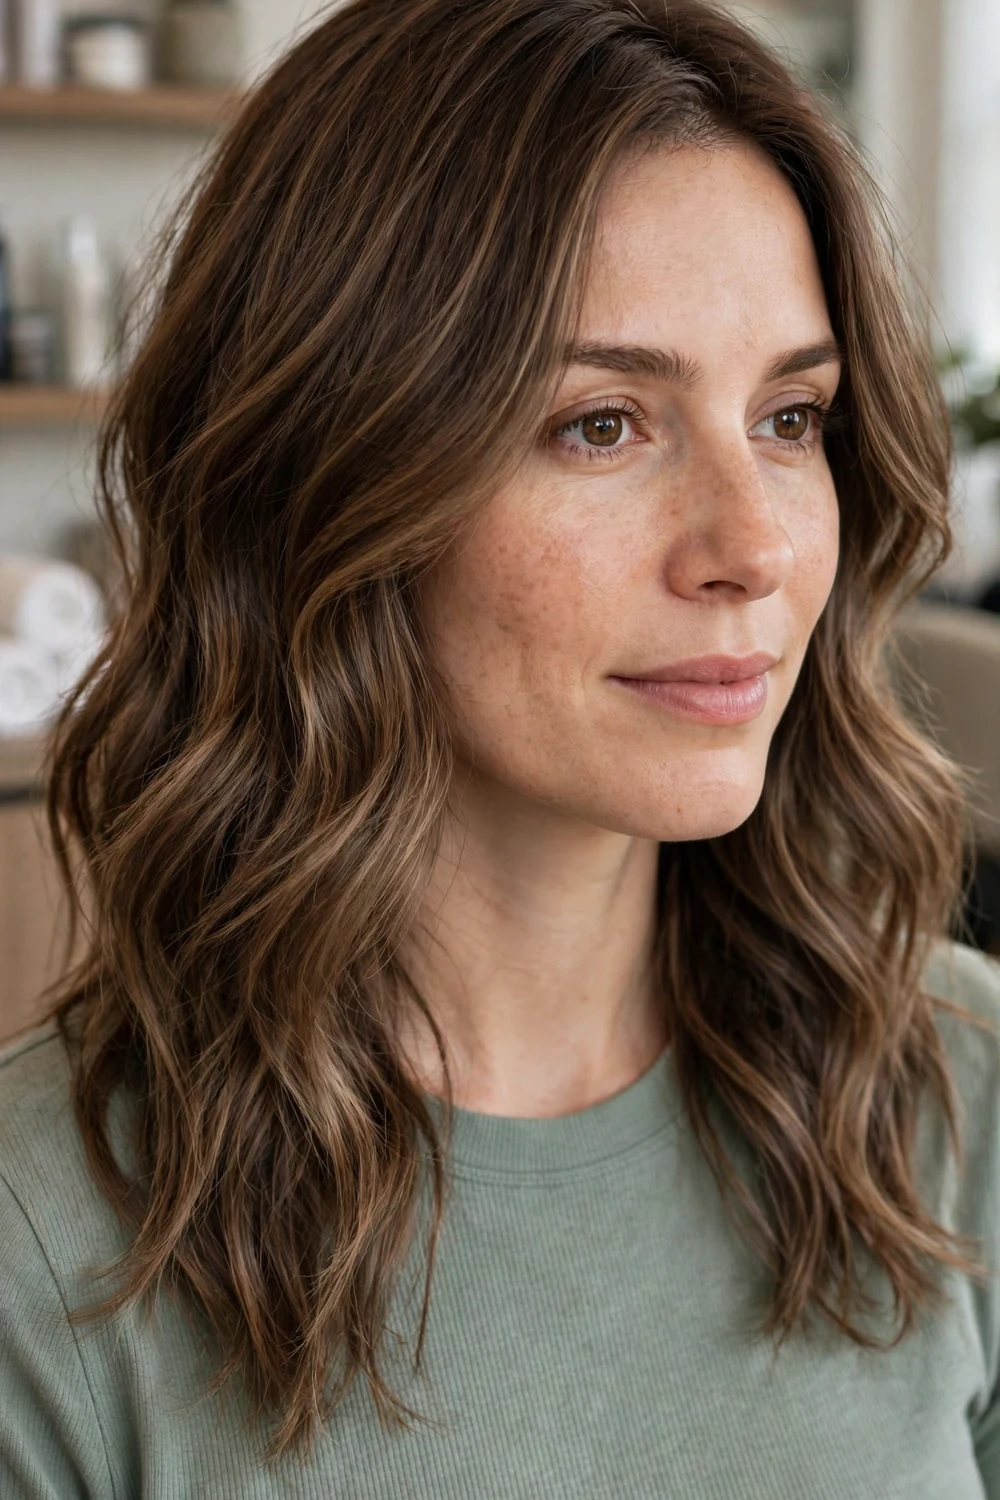
Teasylights start with teasing or backcombing each section before lightener goes on. The teased hair stays at the root, so the lightened strands begin at different depths and the grow-out line stays blurred.
The technique suits anyone who dislikes a visible root line but still wants brightness close to the top of the head. It also works well on layered cuts, where a hard foil line would show through the layers.
Teasylights take patience at the wash basin, since the teased sections need careful detangling after processing. A good colorist will warn you about that step and work through it slowly.
Try this: Ask for teasylights with a root smudge if your natural base is much darker than your highlight shade. The two together give the softest grow-out.
Difficulty: Moderate · Cost: $$
7. Face-Framing Highlights
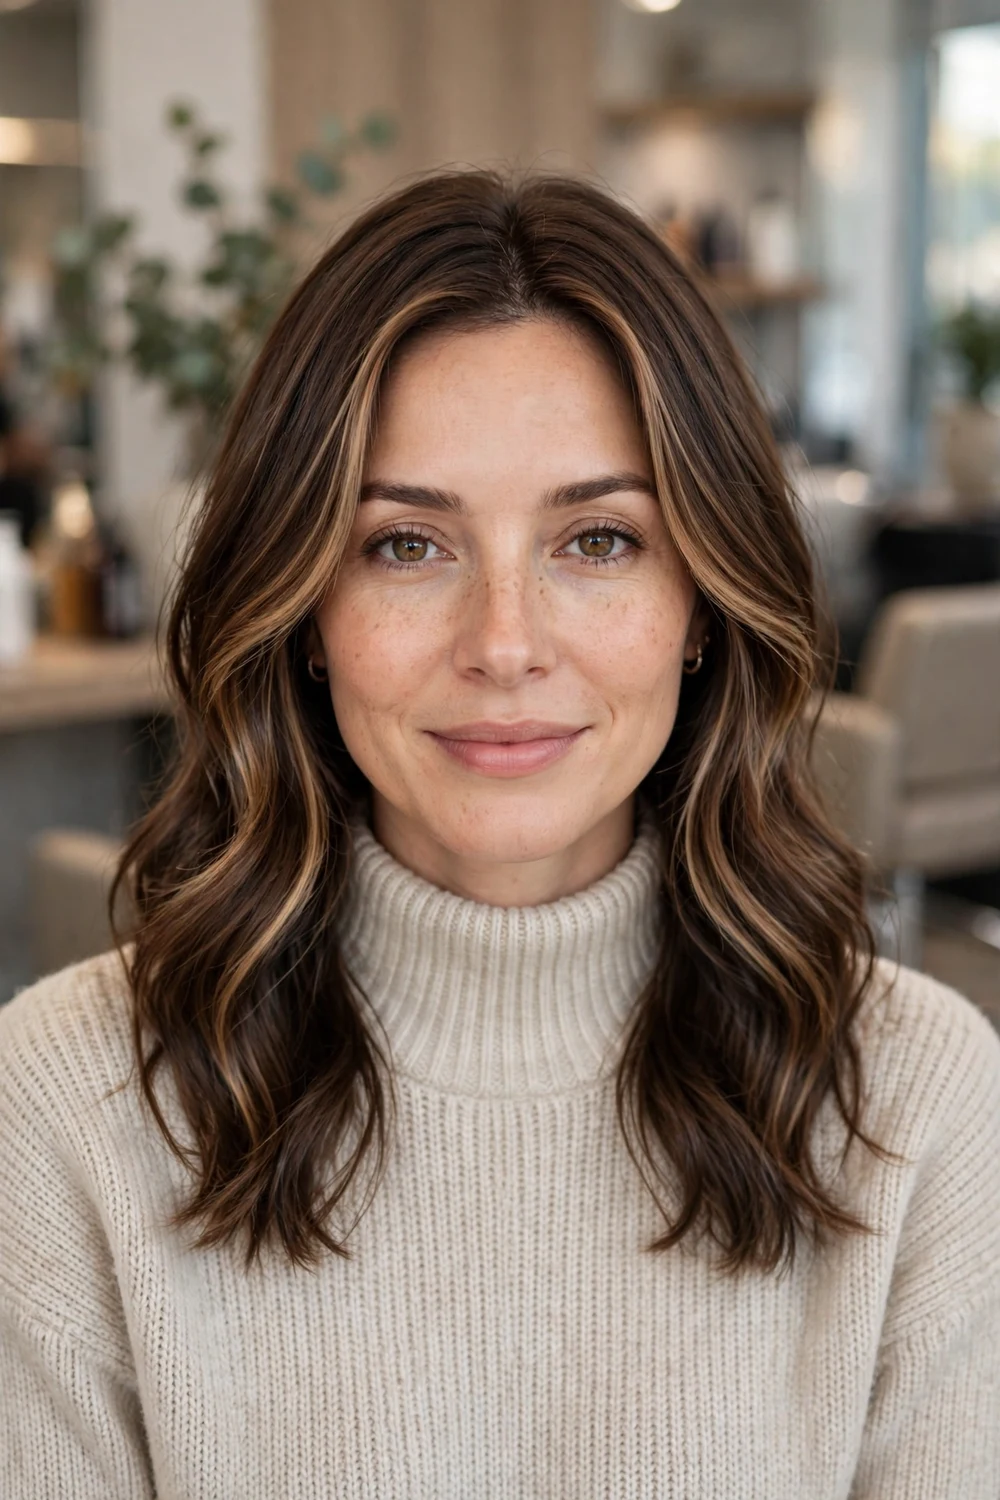
Face-framing highlights concentrate light where it changes how your face looks, rather than spreading the same color through the whole head. Two to six front pieces, one or two levels lighter than the rest, are enough for a clear effect.
This is a good first highlight service and a good refresh between larger services. It also pairs well with curtain bangs, face-framing layers, and any cut where the front pieces are cut shorter than the back.
Keep the front pieces only slightly lighter if you want a quiet result. A bigger jump in level at the front reads as a deliberate style choice and needs more frequent toning.
Try this: Take a selfie in daylight after your appointment. Face-framing color looks different in salon light, and daylight shows whether the front pieces sit at the level you wanted.
Difficulty: Easy · Cost: $
8. Money Piece Highlights
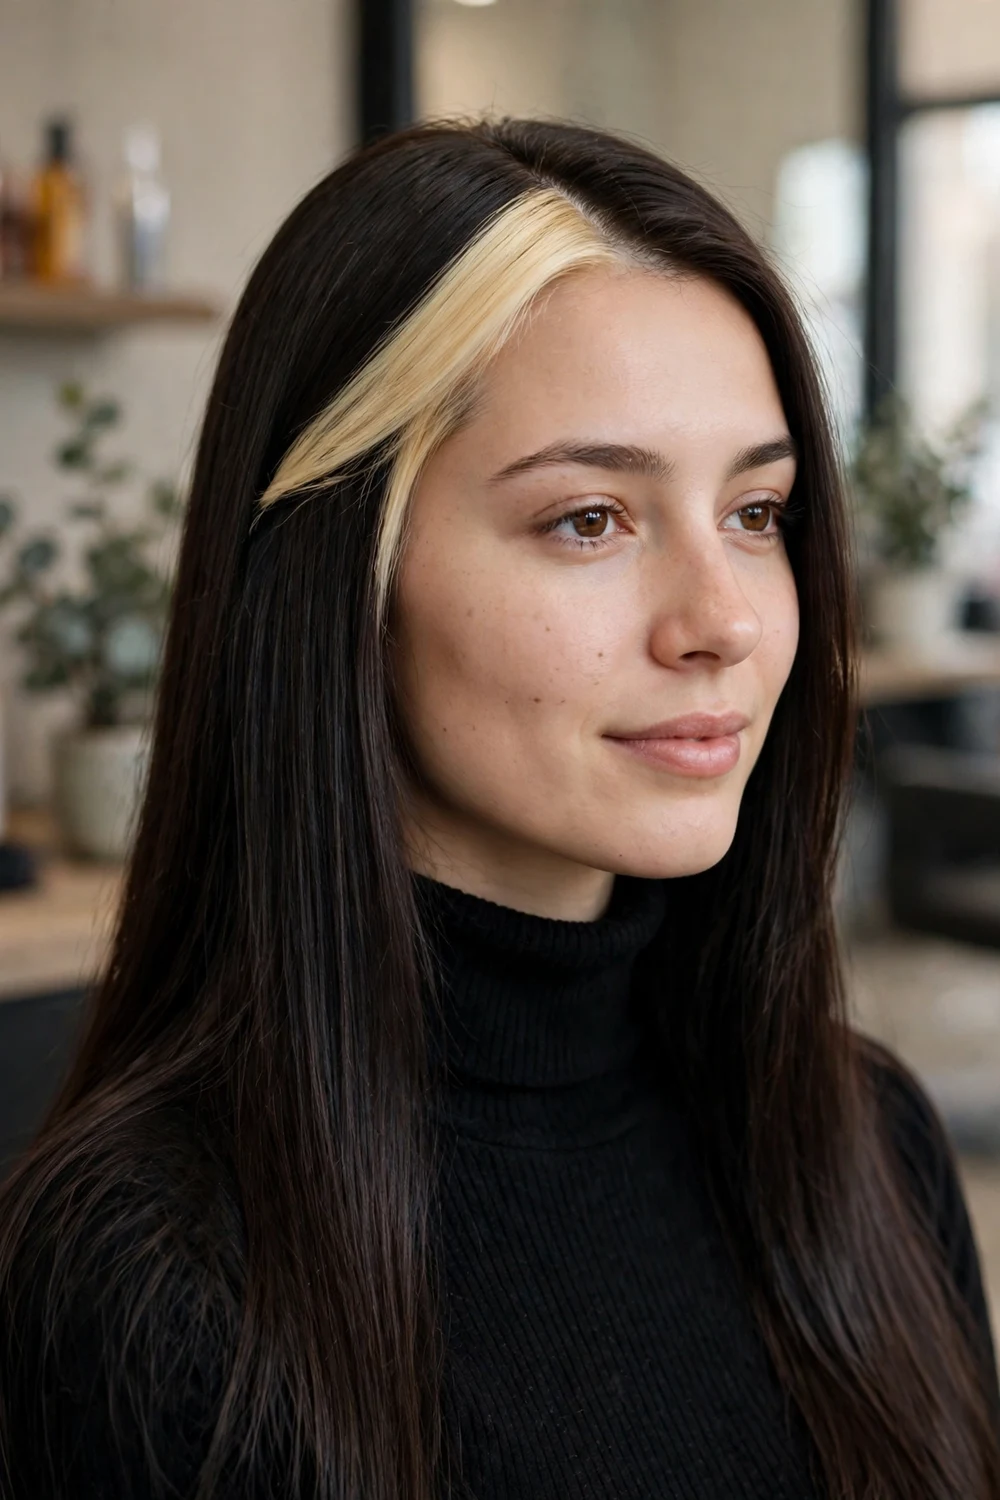
The money piece is the stronger cousin of face framing: a single bright section at the front, light enough to stand out against the rest of the hair. It photographs clearly and shows in every style that leaves the front loose.
It works on straight, wavy, and curly hair, and on dark bases the contrast is the point. upkeep is focused on a small area, so a money piece refresh is a short appointment compared with a full service.
Choose the width with care. A narrow section reads as an accent, while a wide section changes your whole front look and grows out with a more visible line.
Try this: If you wear a centre part, ask for the money piece split evenly on both sides. An uneven split shows every time you part your hair in the middle.
Difficulty: Easy · Cost: $
9. Ombre Highlights

Ombre puts the lightest color at the ends and keeps the root dark, with a blended middle zone where the two meet. Because the root is your own color or close to it, ombre is one of the lowest upkeep highlight styles on this list.
It needs length to work well. On shoulder-length and longer hair the gradient has room to breathe, while on short hair the dark-to-light shift can look abrupt unless the contrast is kept small.
Ombre ends are the oldest, most processed part of your hair, so they need the most care. A weekly conditioning mask and a purple or blue shampoo, matched to your tone, keep the ends from looking dry or brassy.
Try this: Ask your colorist to show you where the blend zone will sit on your actual length before color goes on. Moving it up or down by an inch changes the whole balance.
Difficulty: Easy · Cost: $$
10. Sombre Highlights
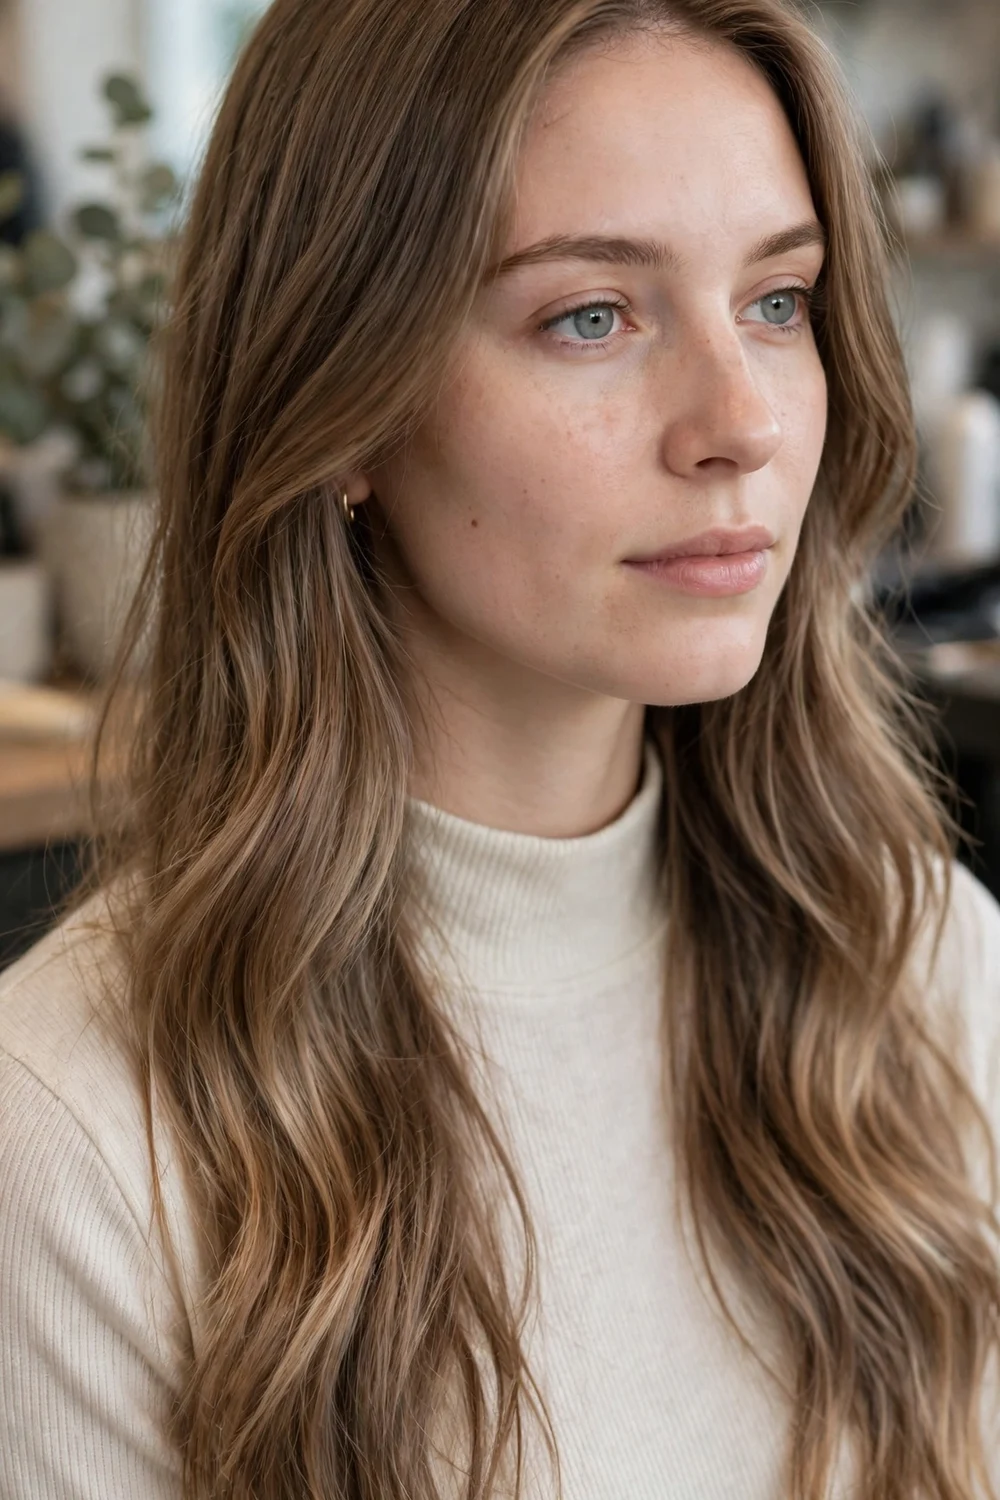
Sombre keeps the ombre structure and turns the contrast down. Root and ends sit only one or two levels apart, so the finished look is a gentle lightening that suits workplaces and anyone who wants change without a clear before-and-after.
It is a practical pick for light brown bases, where a strong ombre can look harsh, and for first-time color clients who want to live with a gradient before going lighter.
For shade ideas that stay in this soft range, the highlight ideas for light brown hair list shows honey, caramel, and sandy options on similar bases.
Try this: Keep sombre to a two-level gap at most. Beyond that it becomes standard ombre, and the softer effect you booked for is lost.
Difficulty: Easy · Cost: $$
11. Color Melt Highlights

A color melt is about the joins, not a single shade. Your colorist places a root shade, a mid shade, and a lighter end shade, then blends each boundary until the hair reads as one flowing color.
Melts work with highlights, balayage, and ombre underneath them, and they are a useful fix when a previous color has grown out with a visible band. The result is polished and even, at the cost of a longer, more technical appointment.
Because three shades are involved, bring a photo that shows the full length of the hair, not a close crop. Your colorist needs to see how much of each shade you expect.
Try this: Ask how the melt will fade. Each shade fades at its own rate, and a gloss refresh usually restores the blend without redoing all three colors.
Difficulty: Moderate · Cost: $$
12. Ribbon Highlights

Ribbon highlights are wider than babylights and narrower than chunky highlights. Placed along the curves of wavy or curly hair, they catch light on the outside of each wave and leave shadow in the troughs, which makes texture look deeper.
Straight hair can wear ribbons too, but the effect is calmer and reads more like classic dimension. The technique earns its keep on hair with movement, where each ribbon has a curve to follow.
Ask your colorist to place ribbons on dry, styled hair if possible. Seeing the wave pattern first means the ribbons land on the peaks of the waves, where light naturally hits.
Try this: Style with loose waves on the day you want the color to show most. Ribbons placed for waves flatten out and look wider when the hair is straightened.
Difficulty: Easy · Cost: $$
13. Caramel Highlights for Brunettes
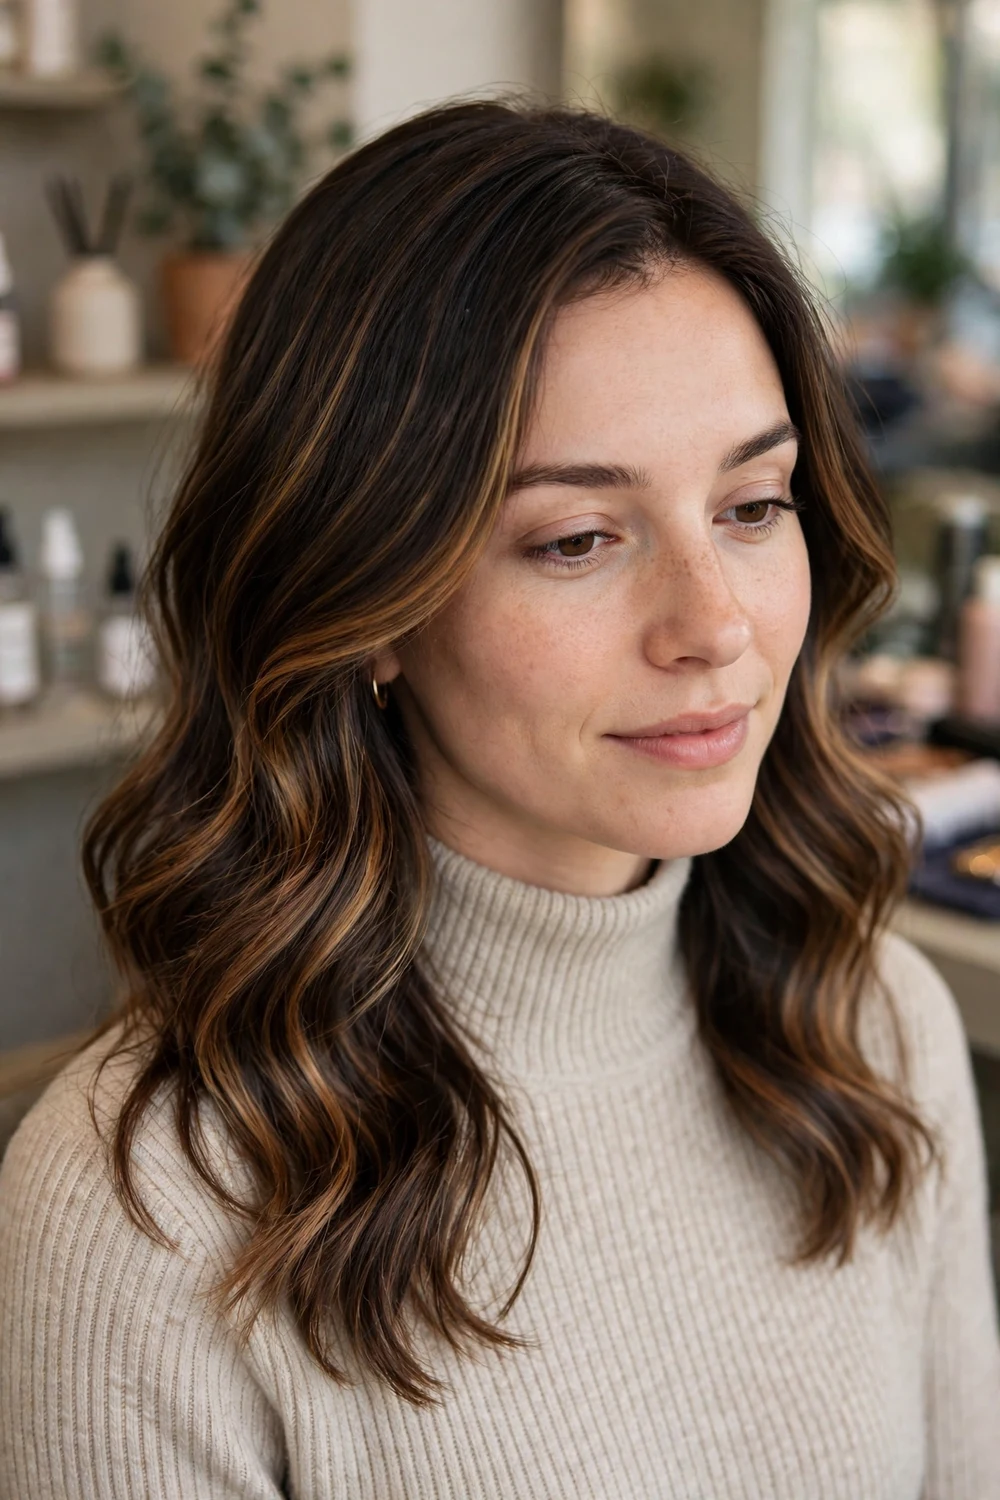
Caramel is the most requested highlight shade for brunettes for a practical reason: it lifts a brown base without needing the hair to go blonde first. The warmth in caramel also sits comfortably against most brown bases, warm or neutral.
Placement decides the effect. Caramel through the mid-lengths and ends gives a sunlit finish, caramel near the face brightens skin, and caramel only at the ends gives a soft gradient that grows out easily.
Caramel can turn brassy as it fades, especially on hair that was lifted a lot to get there. A gloss in a neutral or slightly cool caramel tone resets it without more lightener.
Try this: Show your colorist whether you want golden caramel or a cooler, toffee-leaning caramel. The two fade differently and suit different skin undertones.
Difficulty: Easy · Cost: $$
14. Honey Blonde Highlights
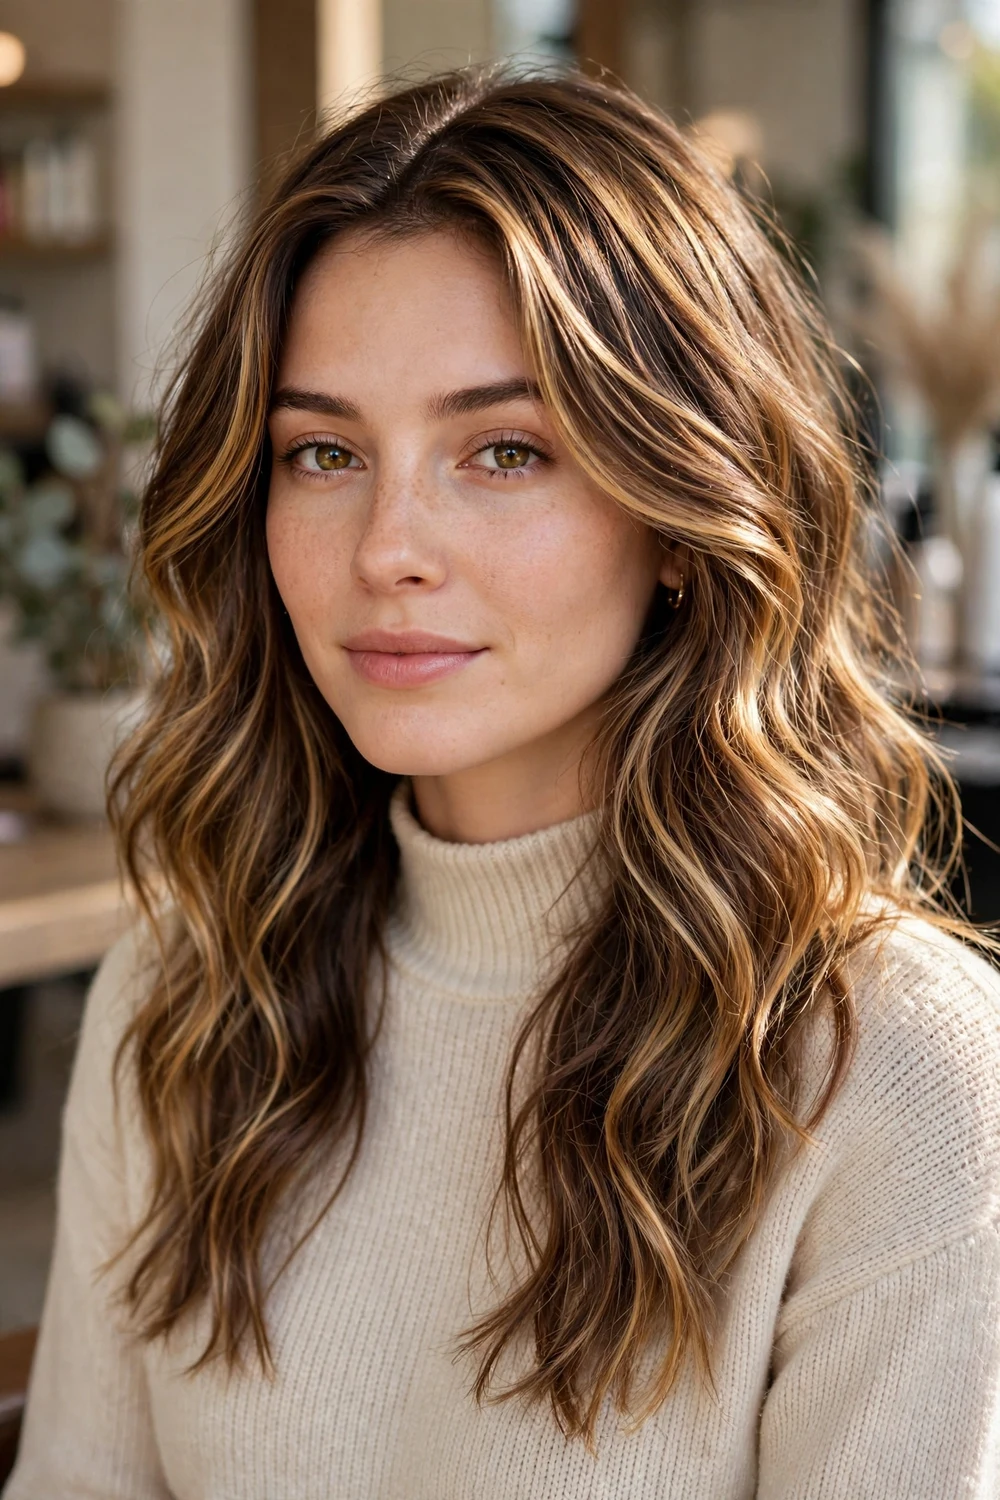
Honey blonde highlights bring warmth and brightness in equal measure. On a brown or dark blonde base they read sunny and soft, and on skin with warm or neutral undertones they tend to flatter without extra makeup changes.
Honey works in foils, balayage, and babylights, so you can match the technique to your upkeep budget and keep the shade. It also blends well with a slightly deeper root, which stretches the time between appointments.
Warm shades fade toward brass over time, so plan on a toning gloss and a sulfate-free wash routine. Heat styling speeds up fading, so use a heat protectant on highlighted lengths.
Try this: If your base is very dark, ask for honey in stages. Jumping straight to a pale honey in one visit often means stronger lightener and more breakage risk on fine ends.
Difficulty: Easy · Cost: $$
15. Copper Highlights

Copper highlights add warmth that blonde highlights cannot. Over brunette hair, copper pieces glow in sunlight and indoor warm light, and they give red-leaning skin tones a highlight option that does not fight the base color.
Copper fades faster than blonde or caramel, so the shade you leave the salon with should be slightly deeper than your target. It will settle into the target within a few washes and hold longer from there.
Keep copper pieces away from a full-head bleach plan unless you want an overall copper result. As highlights, a quarter to a third of the hair in copper gives a clear effect with the base still reading brunette.
Try this: Use a color-depositing conditioner in copper between visits if your colorist approves it for your hair. It tops up the tone that washes out fastest.
Difficulty: Moderate · Cost: $$
16. Ash Blonde Highlights
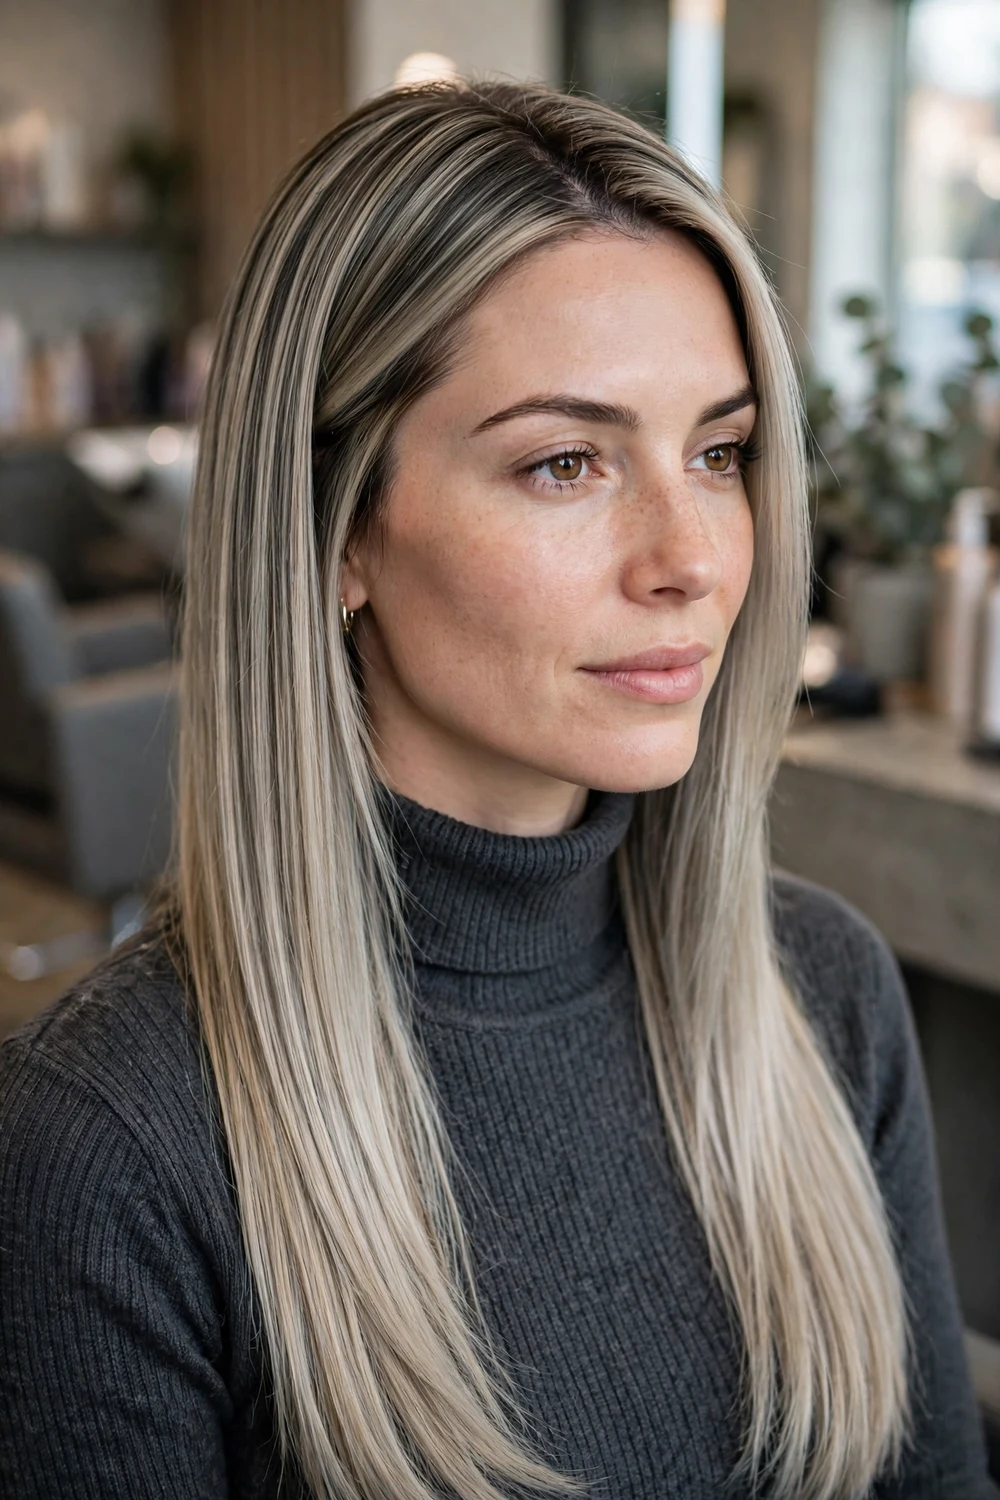
Ash blonde highlights suit cool and neutral skin and anyone whose hair pulls orange or yellow whenever it is lightened. The cool tone is maintained with toner, so upkeep is part of the style rather than an extra.
On a dark base, ash pieces create strong contrast and a smoky finish. On a light base, they give a cooler overall blonde without going fully platinum. Either way, purple shampoo once a week is the standard home care, used sparingly so the ash does not turn lilac.
Ash tones can look dull if the hair is dry, because cool colors reflect less light than warm ones. A clear gloss adds shine back without changing the tone.
Try this: Ask your colorist to tone slightly warmer than you think you want if this is your first ash result. Cool tones look cooler on your own head than they do in a photo.
Difficulty: Moderate · Cost: $$
17. Platinum Highlights
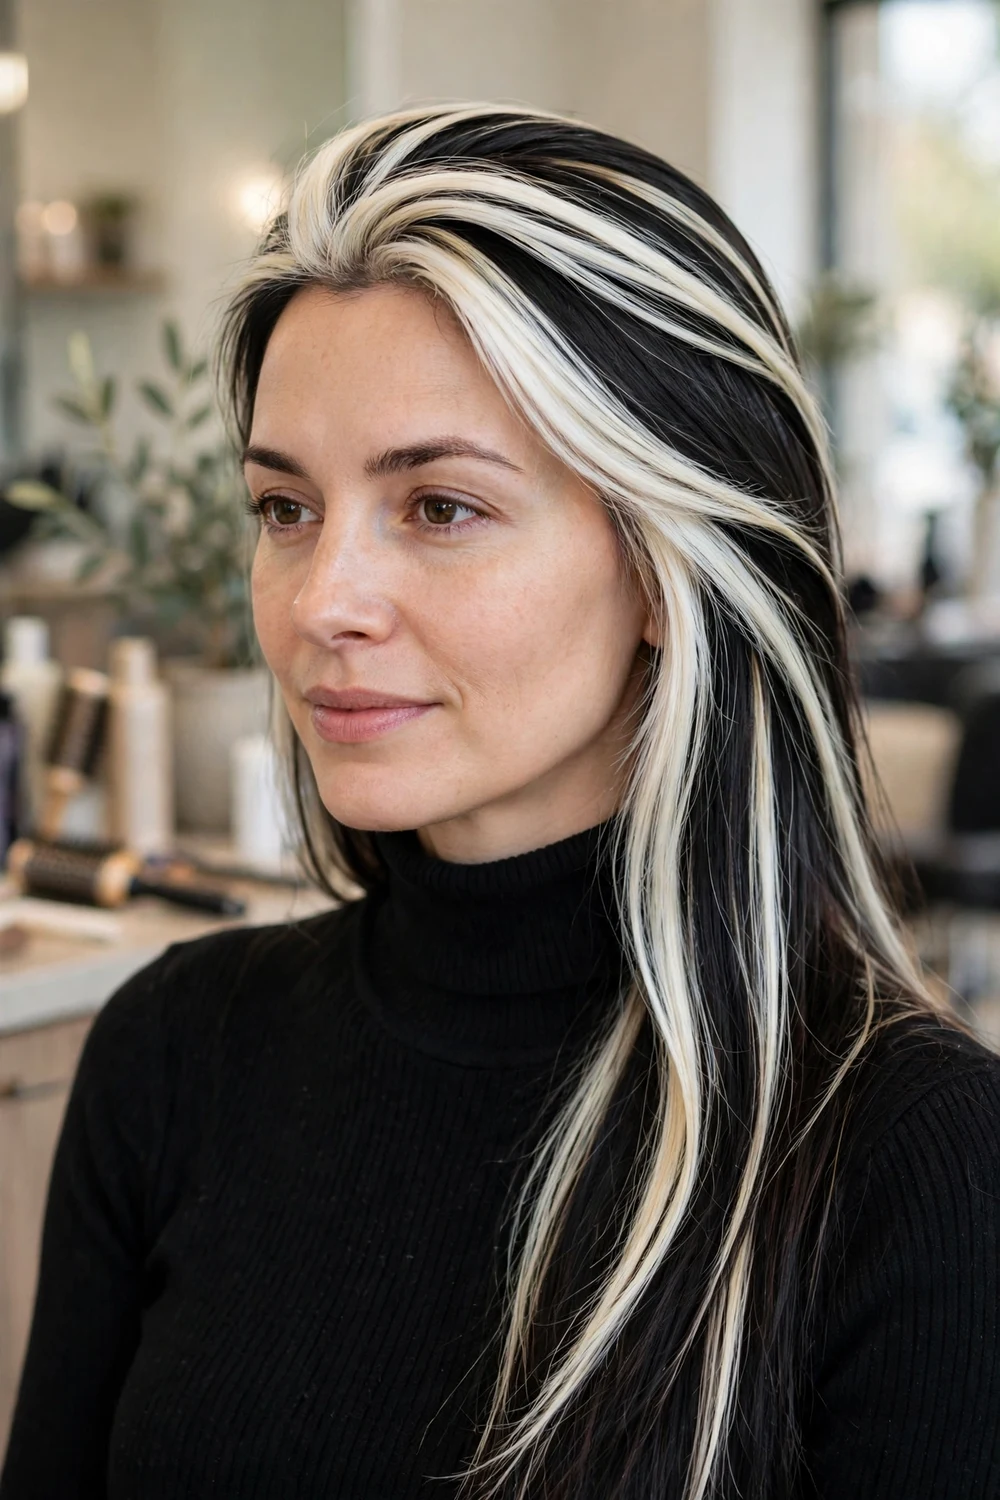
Platinum highlights are the highest-lift option on this list. On a blonde base they give an icy, bright finish, and on a dark base they create the strongest contrast available from highlights alone.
The cost is time and hair condition. Reaching platinum usually takes more than one session on dark or previously colored hair, and the lightened pieces need protein and moisture care plus regular toning to stay clean and pale.
This is a salon-only plan for most people. Be direct with your colorist about your color history, including box dye, since old color is the main reason platinum lifts unevenly.
Try this: Book a strand test first. It shows the lift your hair can reach in one session and the tone you will actually get, before you commit to a full head.
Difficulty: Hard · Cost: $$$
18. Bronde Highlights
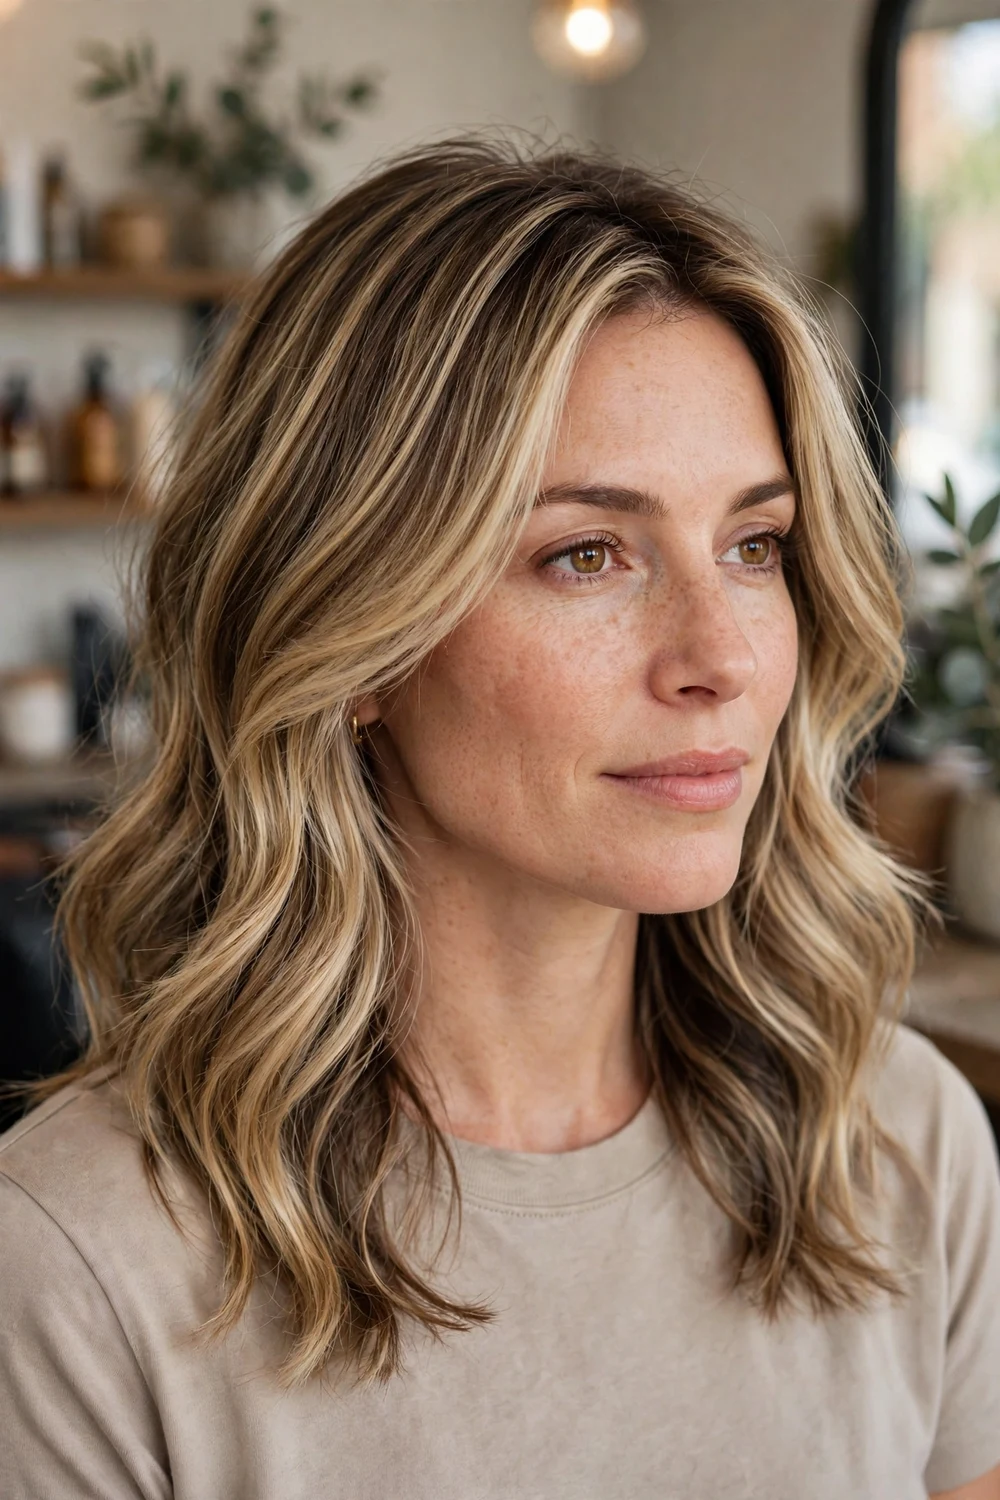
Bronde sits in the middle: brown depth with blonde brightness, woven so neither color dominates. It suits anyone who has gone back and forth between brunette and blonde and wants a shade that stops that cycle.
Because both dark and light pieces are present, bronde hides regrowth well and works across seasons without a full recolor. Colorists build it with highlights plus lowlights, or with balayage in two blonde tones over a brown base.
Tell your colorist which side you lean toward, bronde that reads mostly brown or bronde that reads mostly blonde. The ratio of light to dark pieces is the whole decision in this style.
Try this: Bronde is a good reset after a too-dark or too-light result. It can be built from either direction in one appointment in most cases.
Difficulty: Easy · Cost: $$
19. Chunky Highlights
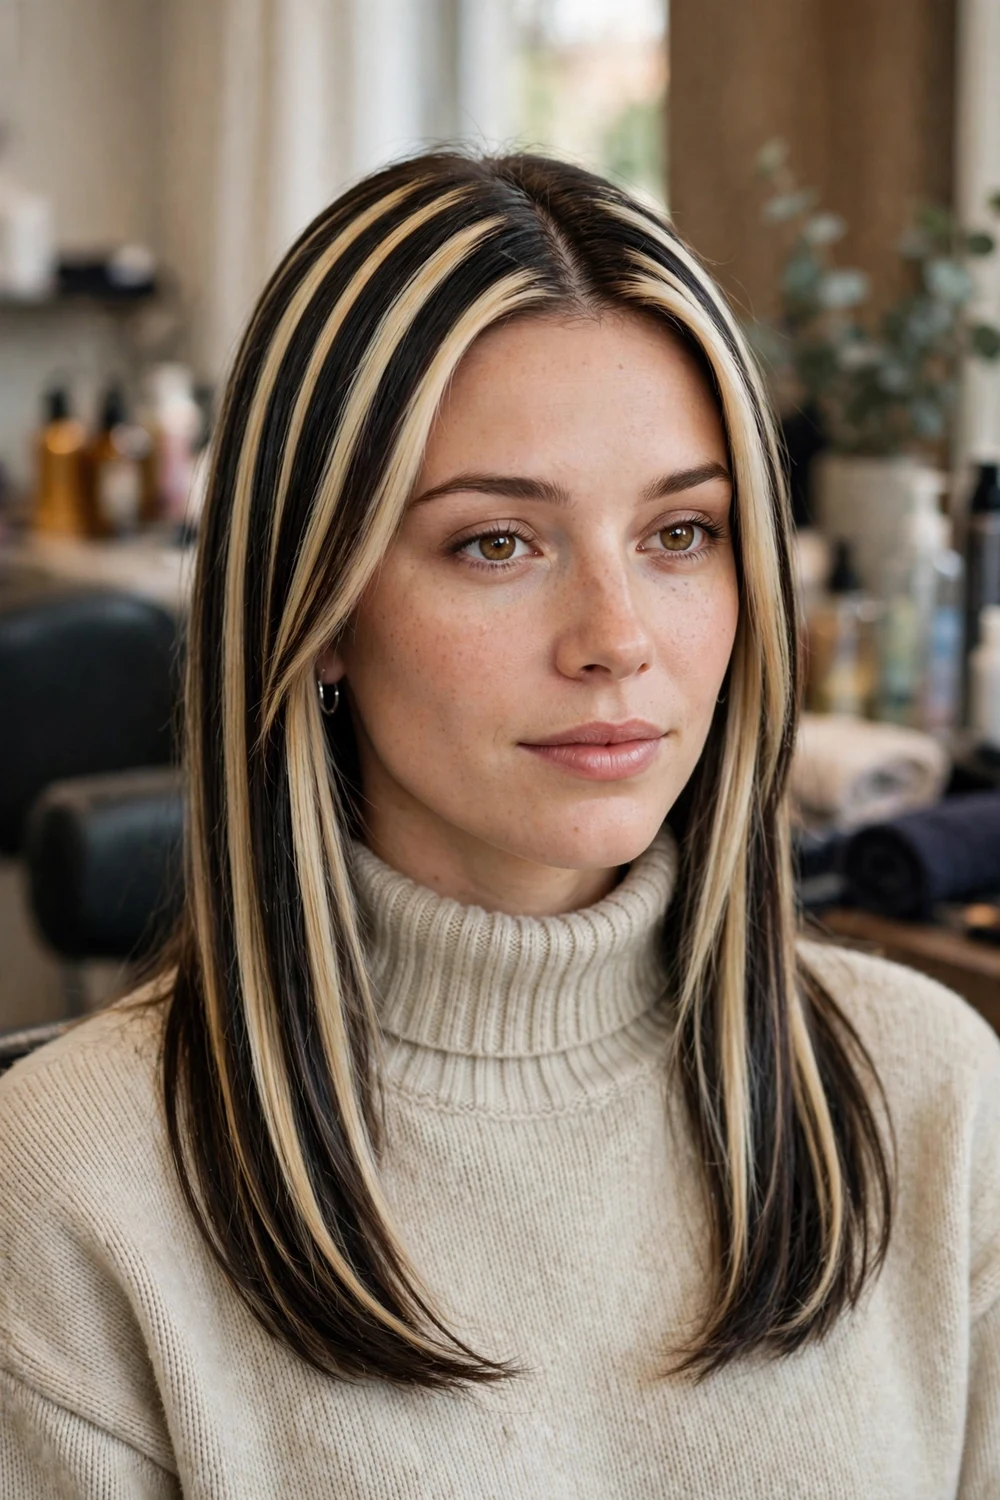
Chunky highlights are back as a deliberate retro choice. Wide pieces, often blonde over a dark base or copper over brown, are placed at the front and through the top where the contrast shows most.
This style needs confidence in the placement, because there is no blending to hide behind. It also grows out with a visible line, so plan on more frequent refreshes than with balayage or teasylights.
Chunky pieces work best on straight and lightly wavy hair, where the stripes stay clean. On tight curls, wide pieces break up in the curl pattern and read more like ribbons.
Try this: Start with chunky pieces only at the front if you are testing the look. Adding more later is easy, while softening a full head of chunky color takes a full corrective service.
Difficulty: Moderate · Cost: $$
20. Peekaboo Highlights
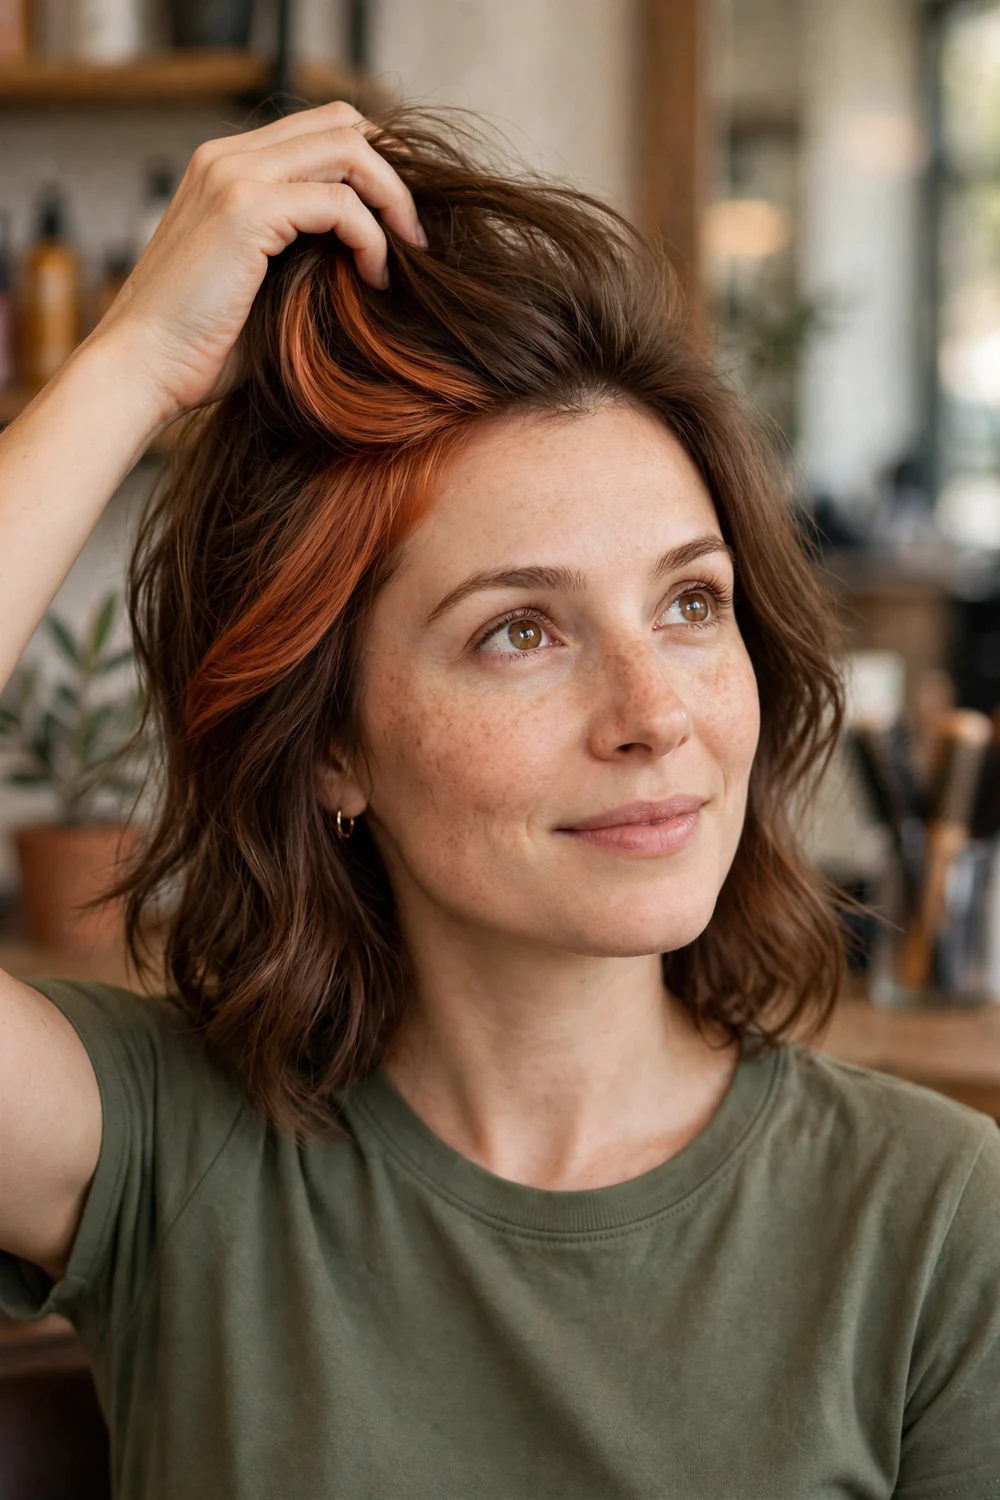
Peekaboo highlights hide the fun part. A panel of blonde, copper, pink, or another shade sits underneath, so a conservative daytime look turns into a colored one with a ponytail, a tuck behind the ear, or a gust of wind.
This is the lowest-risk way to test a fashion shade, because the visible hair stays your normal color and the hidden panel can grow out or be colored over without affecting your everyday look.
Choose a panel position based on how you wear your hair. A nape panel shows in updos, a side panel shows when you tuck your hair back, and a full underlayer shows in movement.
Try this: If you test pink this way and want more of it, the pink hair highlight ideas list shows the same shade family worn visibly, from face framing to full panels.
Difficulty: Easy · Cost: $
21. Lowlights Paired With Highlights
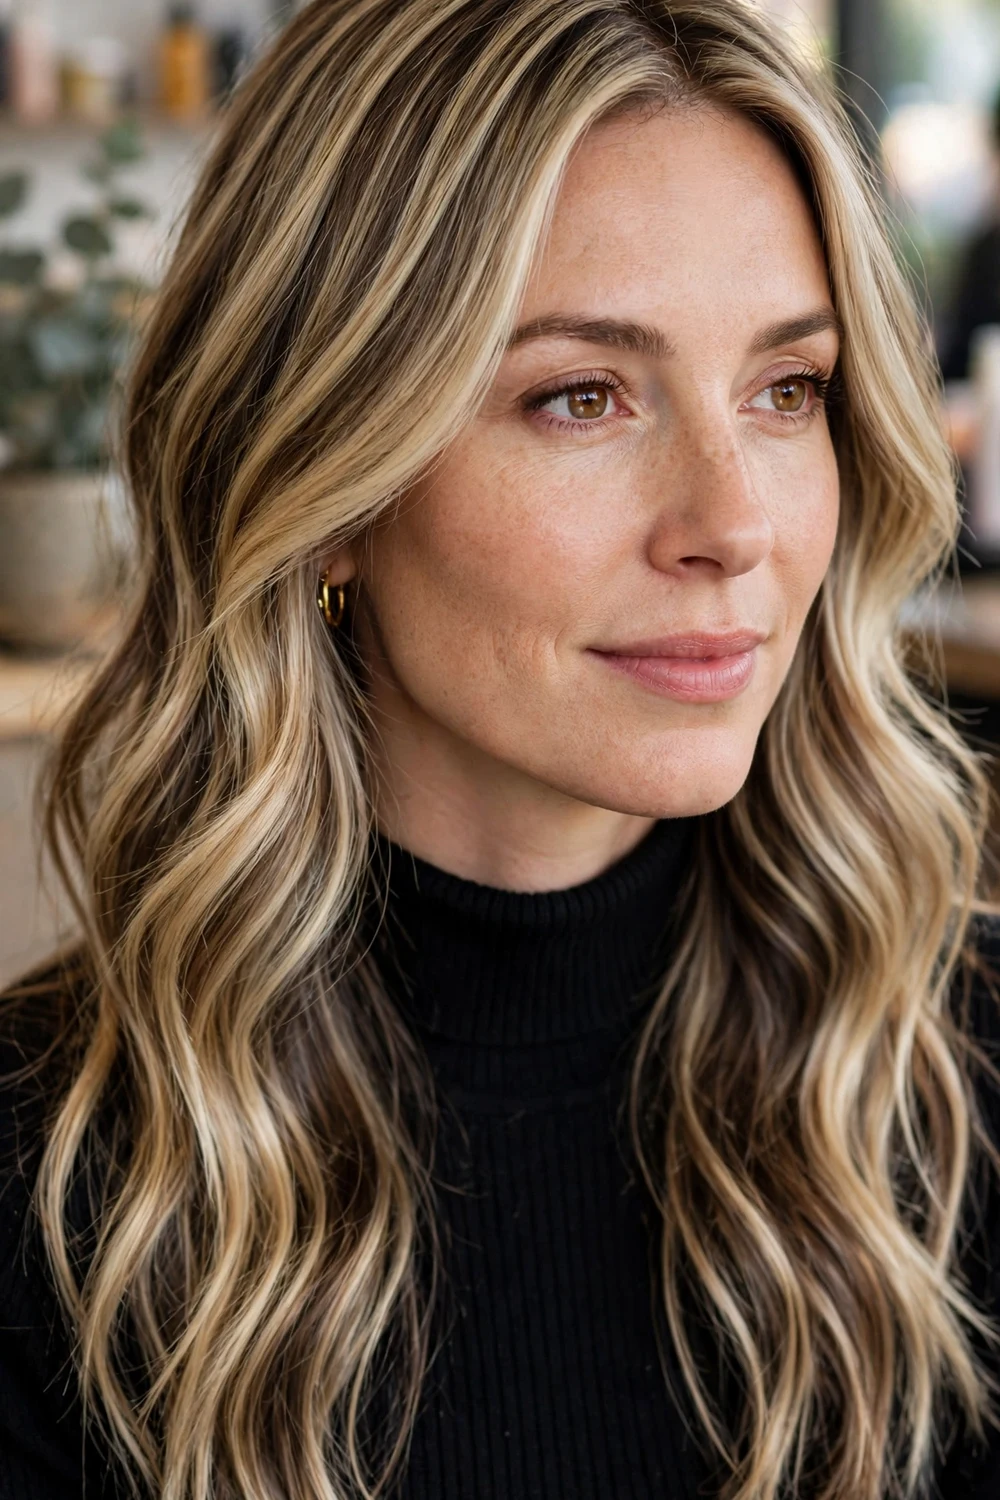
Highlights alone can leave hair looking flat and washed out, especially after several refresh appointments where more and more hair has been lightened. Lowlights fix that by putting depth back between the light pieces.
The pairing suits blondes who feel too solidly blonde, brunettes whose highlights have merged into one light mass, and anyone whose hair lacks shadow. The dark pieces make the light pieces look brighter without more bleach.
Ask for lowlights in a shade close to your natural base, not darker. Going too dark creates stripes and takes several washes to soften.
Try this: Count your services: if you have had three highlight refreshes in a row with no lowlights, ask your colorist whether depth is what your hair is missing.
Difficulty: Easy · Cost: $$
22. Grey Blending Highlights
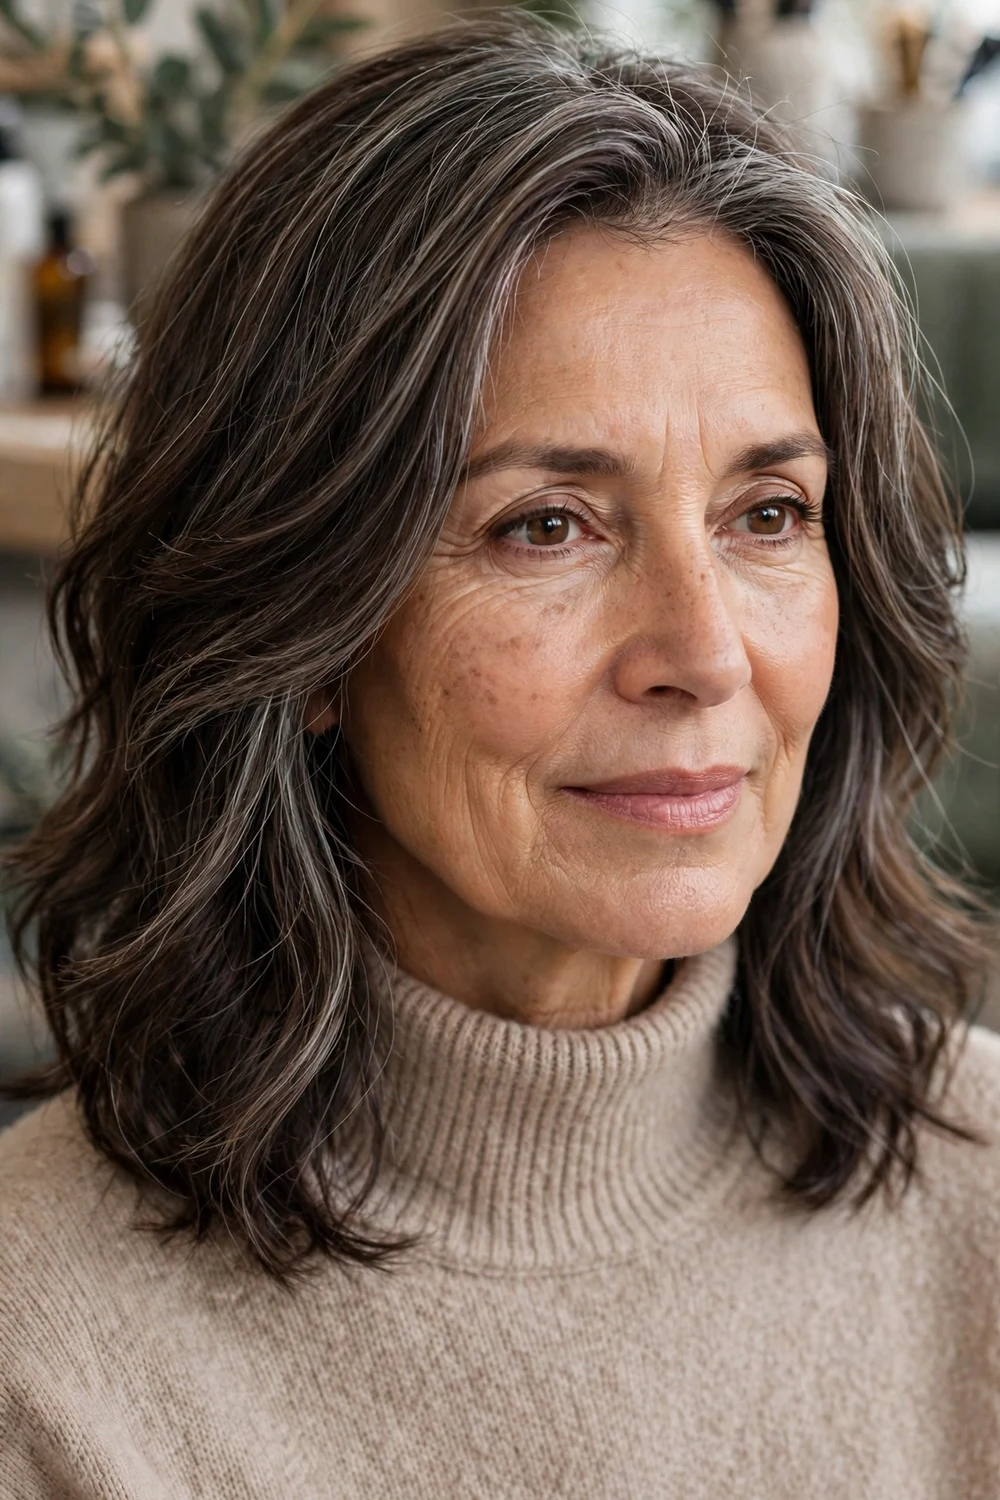
Grey blending uses highlights to soften the contrast between your colored hair and the grey growing in, rather than covering the grey completely. Fine ash and silver pieces break up the root line, so regrowth looks like part of the color.
It suits anyone moving away from full root coverage who is not ready to go fully grey. Appointments get less frequent over time, because the blend tolerates more regrowth than a solid root color does.
For brunette-specific placement and shade mixes, see the grey blending highlights for brunette women guide.
Try this: Be patient with the first two appointments. Blending is a transition, and the line softens gradually as more of the old solid color grows out and is cut away.
Difficulty: Easy · Cost: $$
23. Pink Highlights
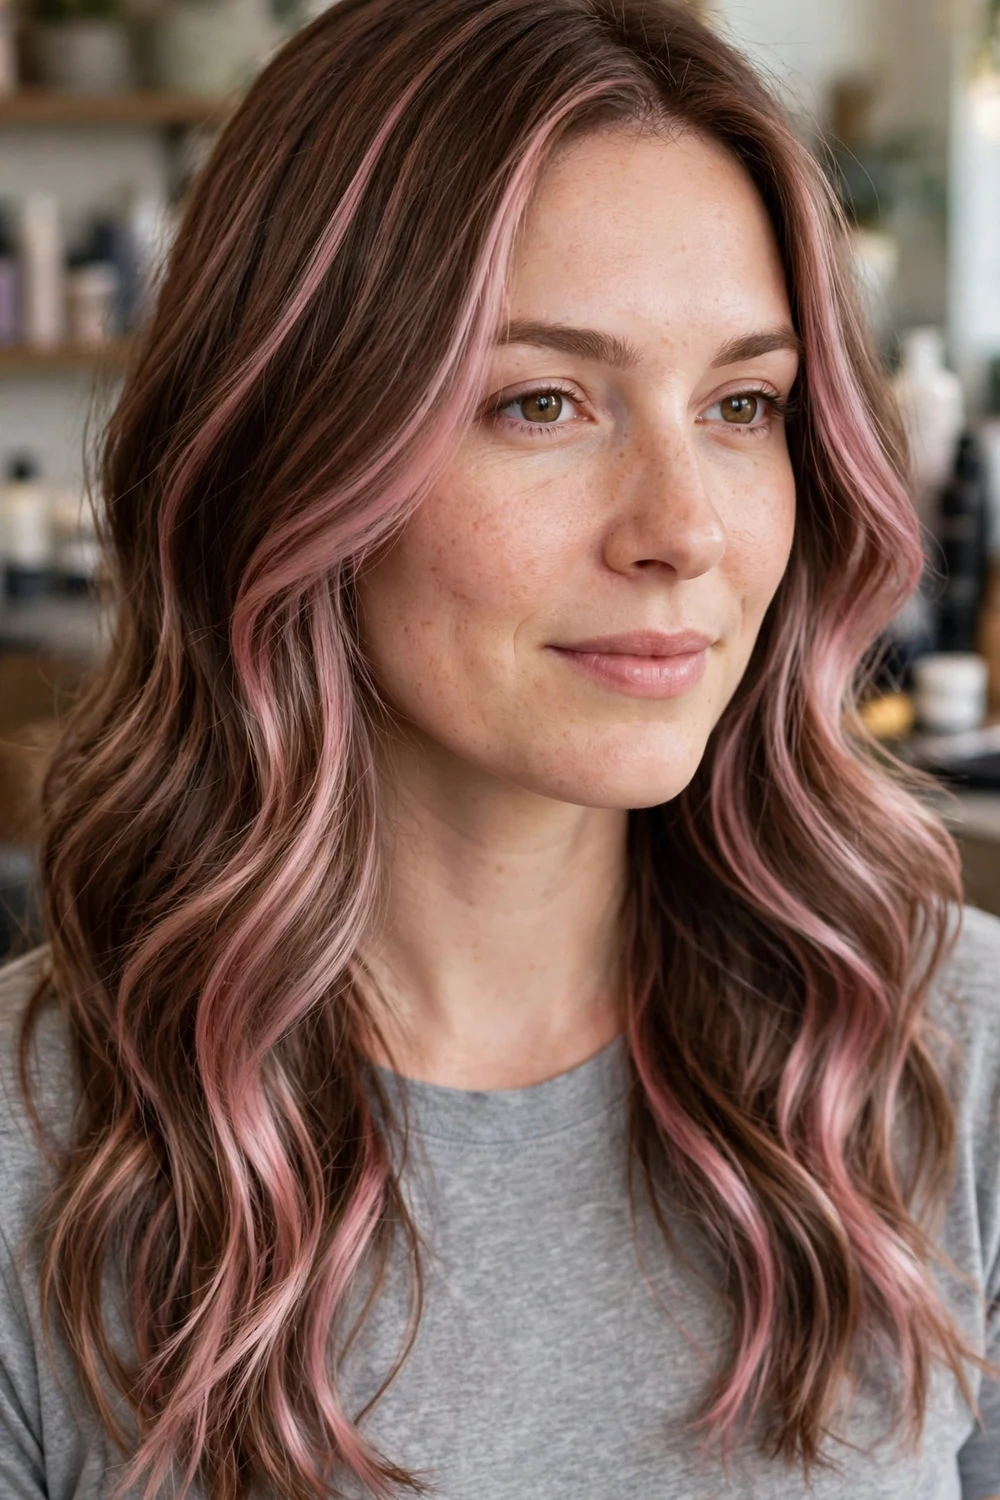
Pink highlights range from a pale rose tint over pre-lightened blonde to a deeper magenta that can sit over brown with less lifting. The lighter the pink, the more lightening it needs first and the faster it fades.
Placement controls how bold the result is. Pink face framing and pink ends are easy to trim away or recolor, while a full head of pink foils is a bigger commitment in upkeep and in fading care.
Pink fades with every wash, so cool water, fewer washes, and a pink color-depositing conditioner are the standard routine. Expect a refresh every few weeks for pastel shades.
Try this: Decide your pink by its faded state, not its fresh state. A deeper pink fades through rose to a soft blush, which many people like more than the day-one color.
Difficulty: Moderate · Cost: $$
24. Red and Auburn Highlights
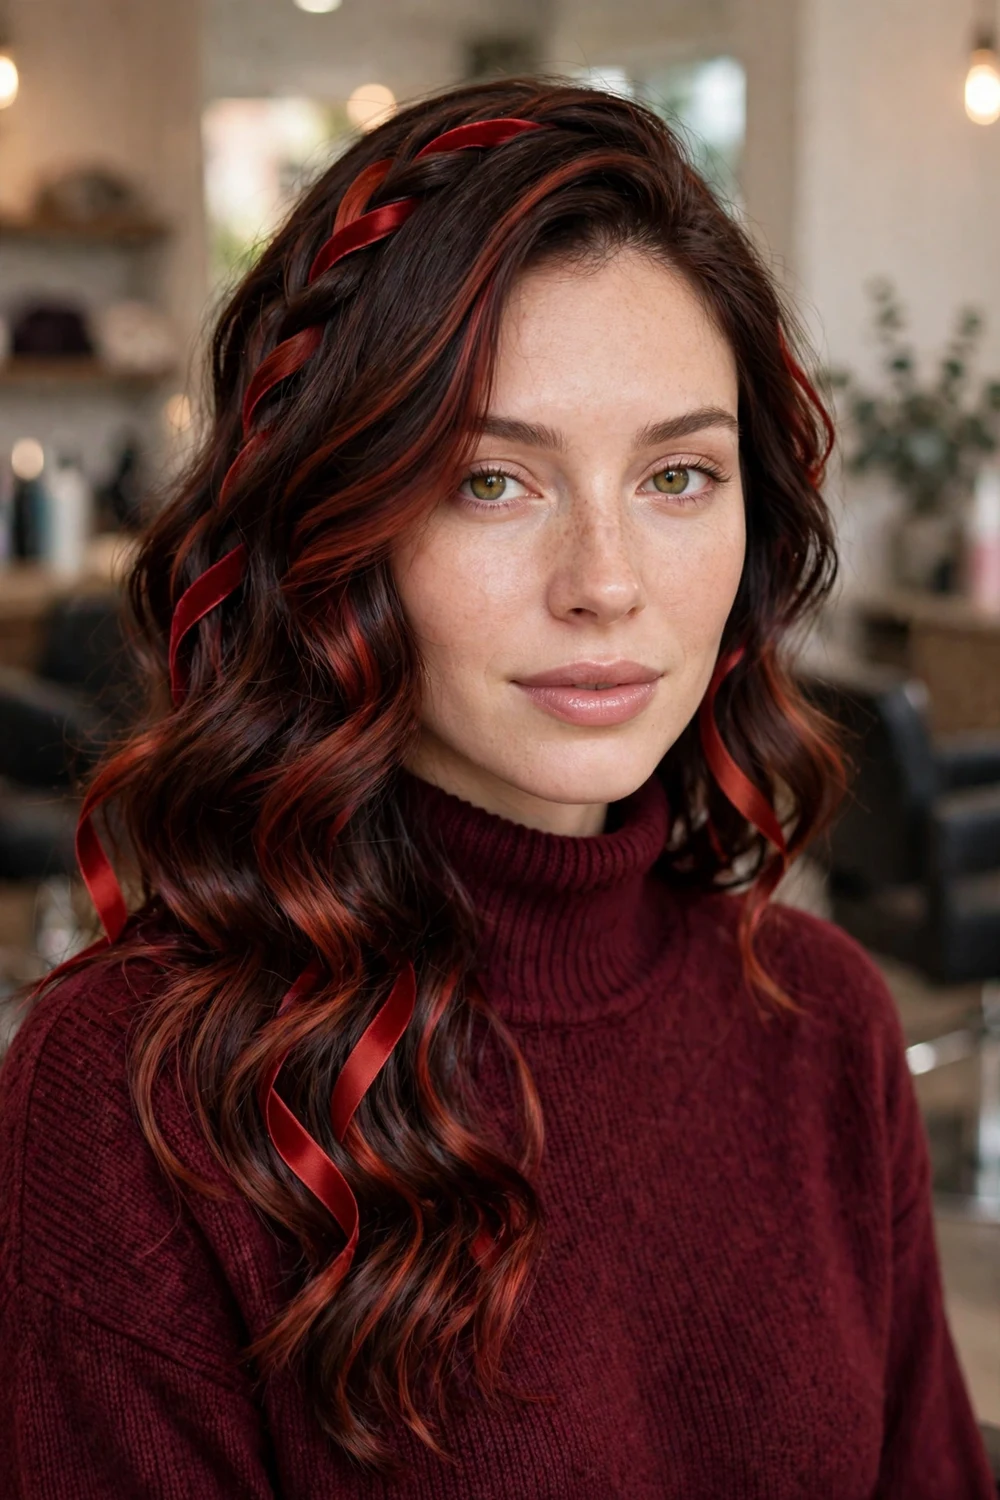
Red and auburn highlights give dark hair warmth and visible movement without the upkeep of an all-over red. Auburn pieces over espresso or black-brown bases show best in sunlight and in photos with warm light.
Red shades fade faster than brown or blonde, so the same rules as copper apply: start slightly deeper than your target, wash less often, and use color-safe products. A red gloss refresh restores the tone without new lightener.
Auburn suits warm and neutral skin most readily, while cooler burgundy-leaning reds are the better match for cool skin. Ask your colorist which side of red your skin needs before choosing.
Try this: If your base is black, ask for auburn rather than bright red for a first service. It lifts more predictably and fades into the base more softly.
Difficulty: Easy · Cost: $$
25. Highlights for Curly Hair
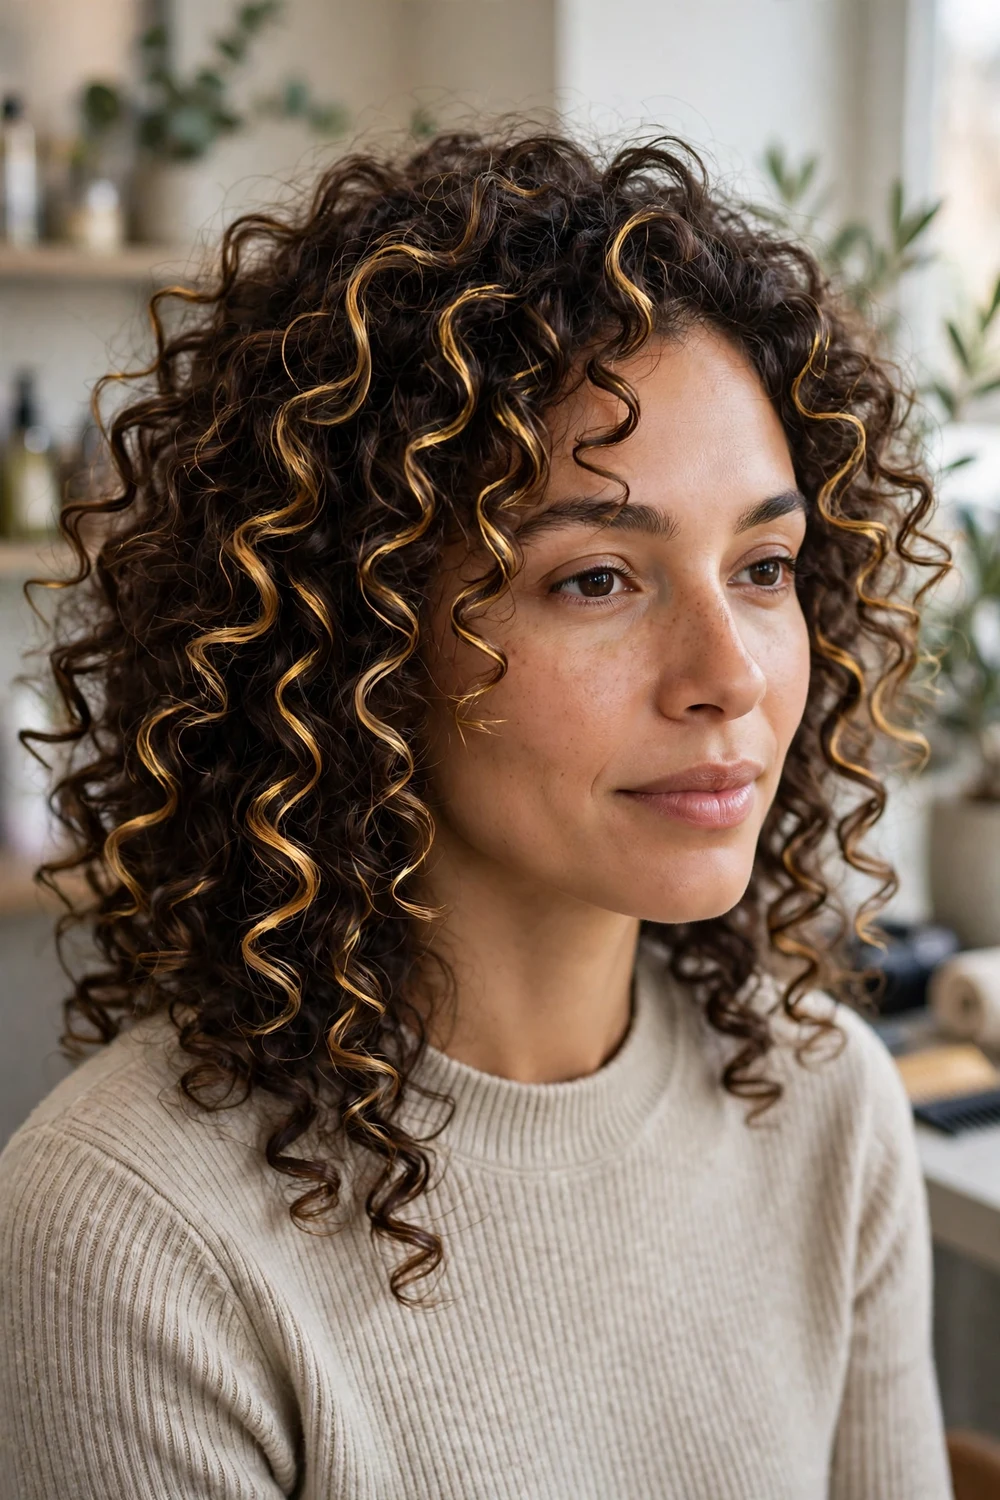
Curly hair needs its own highlight placement. Foils and standard sections ignore the curl pattern, while pintura painting follows each curl, placing light on the parts of the curl that face outward.
The result moves with the hair and still looks placed when curls shift, which is the main failure point of foil highlights on tight textures. Curly highlights also tend to be placed slightly wider, because fine pieces get lost inside a curl.
Find a colorist who cuts and colors curly hair regularly. The placement depends on seeing your curls dry and in their natural pattern, not stretched out wet.
Try this: Arrive with your hair styled as you normally wear it. Pintura placement is mapped on your real curl pattern, so a straightened appointment leads to misplaced color.
Difficulty: Moderate · Cost: $$
26. Highlights for Short Hair and Bobs

Short hair shows highlights differently: there is less length for gradients, so placement at the top, front, and fringe does most of the work. Fine pieces through the crown add texture to pixie cuts, while wider pieces on a bob create clear movement.
Balayage and ombre need adapting on short hair. The blend zone is compressed, so colorists usually keep the contrast smaller and start the lightening closer to the root than they would on long hair.
Short cuts are trimmed often, which is an advantage: highlighted ends are cut away regularly, so short hair tolerates lightening well and rarely carries old, tired color at the tips.
Try this: Bring a photo of your exact cut with highlights, not a long-hair photo. The same shade looks completely different when the gradient has four inches to work with instead of fourteen.
Difficulty: Easy · Cost: $
27. Pastel Highlights
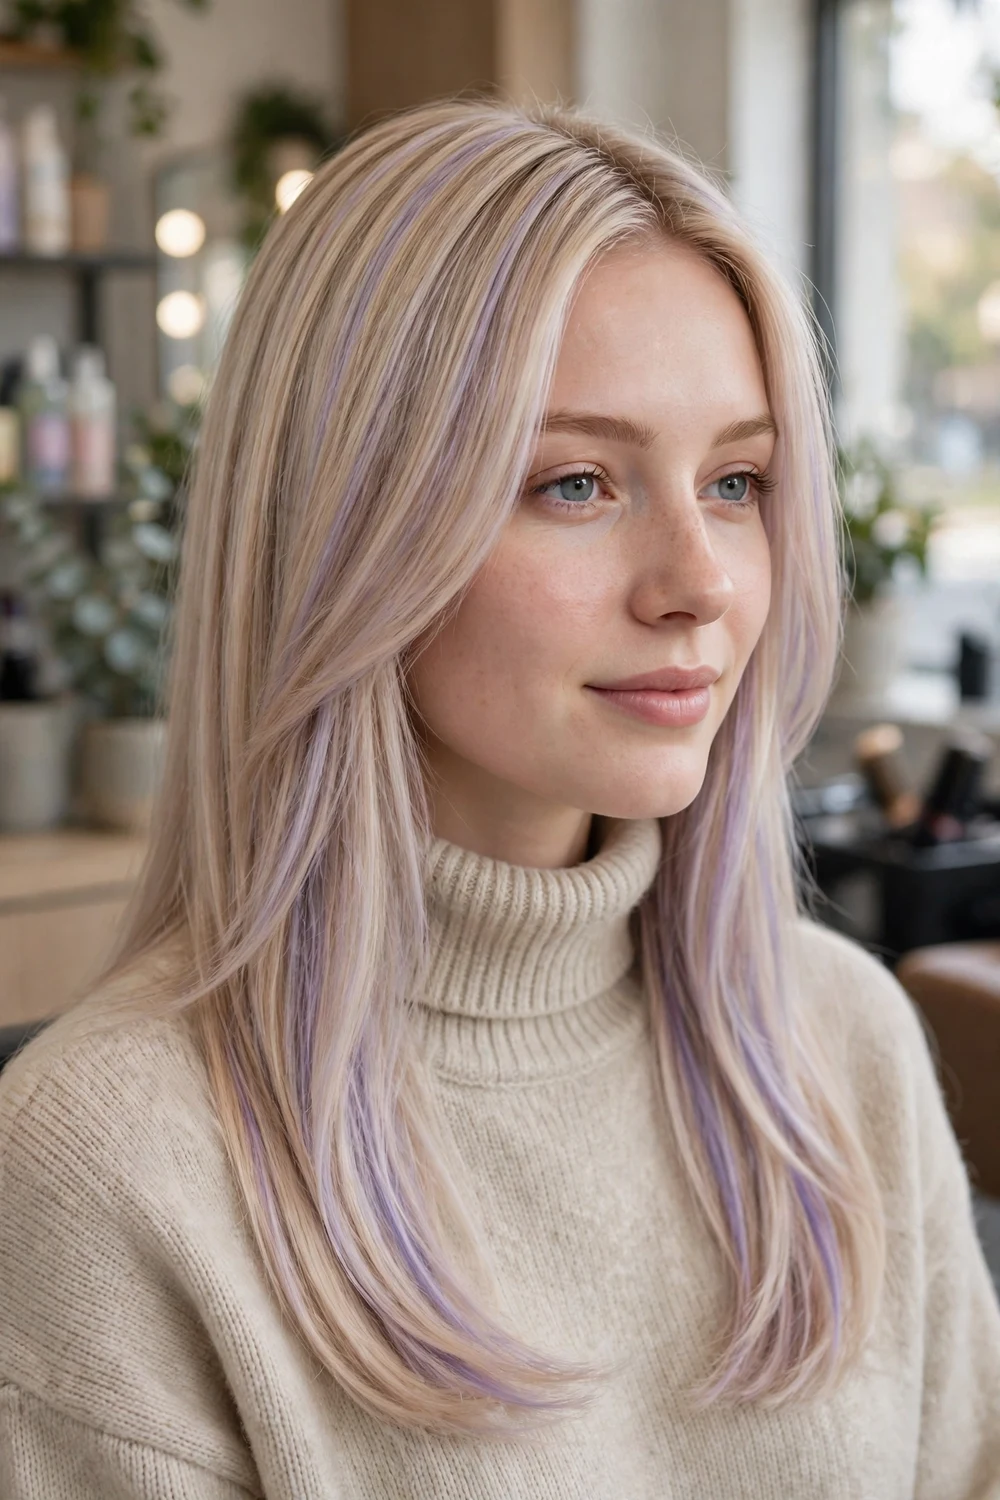
Pastel highlights are the softest version of fashion color. The hair must be lightened to a pale blonde first, then tinted, which makes pastel the most process-heavy idea on this list and the one that fades the fastest.
In return, pastel pieces are easy to change. As they fade to a silvery blonde, you can tint again in the same shade or switch to another pastel without more lightener, as long as the base stays light and healthy.
Pastel suits a planned, short-term look: a season, an event stretch, or a trial before a stronger fashion shade. Cool water, minimal washing, and minimal heat keep it alive longest.
Try this: Test pastel as a few pieces first if your hair has never been lightened to pale blonde. The lightening step, not the pastel tint, is where damage happens.
Difficulty: Hard · Cost: $$$
Frequently Asked Questions
What is the difference between highlights and balayage?
Highlights usually mean foiled pieces lightened from near the root, in a set pattern. Balayage is a hand-painted technique where lightener is swept onto the surface and concentrated on the mid-lengths and ends, so the root stays softer and grow-out is less visible. Many salon services now combine the two, for example foilayage.
How long do highlights last before they need a refresh?
It depends on the technique and the contrast. Classic foils with a clear root line usually need a refresh at 6 to 8 weeks. Softer techniques such as balayage, sombre, teasylights, and grey blending can go 10 to 12 weeks or longer, because the grow-out line is blurred from the start.
Do highlights damage hair?
Highlights lighten only selected strands, so less hair is processed than with an all-over color. Lightening still dries and weakens the pieces it touches, and higher lift shades such as platinum and pastel need the most care. Conditioning treatments, lower heat, and spacing out services keep highlighted hair in good condition.
Can you put highlights on dark or black hair?
Yes. Dark hair can take caramel, honey, copper, auburn, and ash highlights, and foilayage helps dark bases lift further in one service. Very pale shades such as platinum usually take more than one session on dark hair. A strand test shows what lift is realistic for your hair before you book a full service.
Should I choose partial or full highlights?
Choose partial highlights if you wear your hair down most of the time and want brightness on the top, crown, and front for a shorter, lower-cost appointment. Choose full highlights if you wear your hair up often or want even brightness underneath and at the nape as well. The partial highlights guide compares the coverage options in detail.
How do I stop highlights from turning brassy?
Warmth shows through as toner fades, which is what brassiness is. A toning gloss refreshes the shade without more lightener, purple shampoo helps cool blonde and ash pieces, and blue shampoo helps brunette highlights. Washing less often, using cool water, and protecting highlighted hair from high heat all slow fading.
Final Thoughts
The right highlight is the one that fits your base color, your hair texture, and the gap you can actually keep between salon visits. Start smaller than you think you need if this is your first color service: a partial, a money piece, or a set of face-framing pieces will tell you how your hair lifts, how the shade fades on you, and whether you want more of it. From there, every technique on this list can be expanded at the next appointment, which is exactly why highlights remain my first suggestion for anyone who wants a change they can control.

