

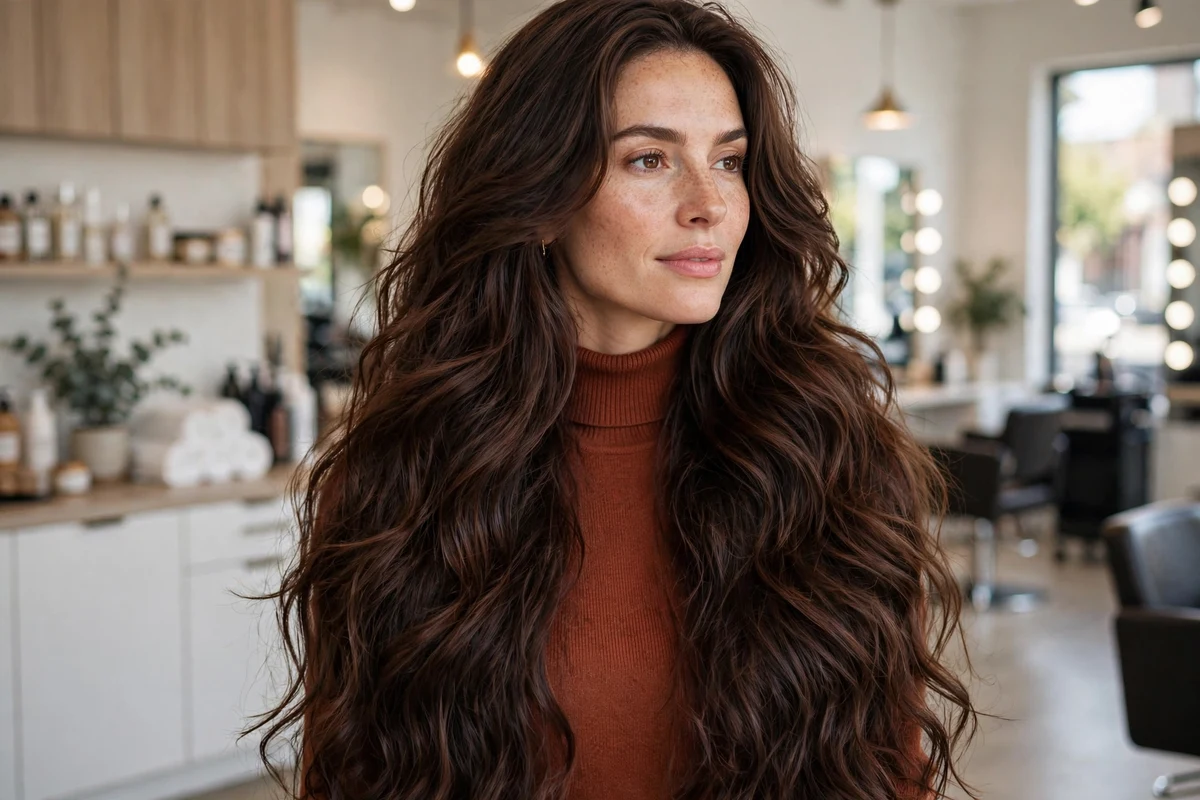
Long thick hair gives you a lot to work with, and a lot to carry. The styles that work best are the ones that spread the weight around, take bulk out in the right places, and still let you show the length you have grown.
This list mixes cuts and everyday styles, from layered cuts that lighten the ends to braids and buns that hold heavy hair securely. Each idea notes how hard it is and a simple cost band, so you can pick what fits a normal week as well as a special day.
Key Takeaways
- Layers, U-cuts, and V-cuts remove weight from thick hair without losing length.
- Braids, low buns, and bubble ponytails hold heavy hair more comfortably than one tight high style.
- Hidden underlayers lighten the nape area while the top still looks full.
- Use cost bands as a guide: $ is mostly at home styling, $$ is a standard salon cut, $$$ adds color work.
1. Long Layers with Face-Framing Pieces
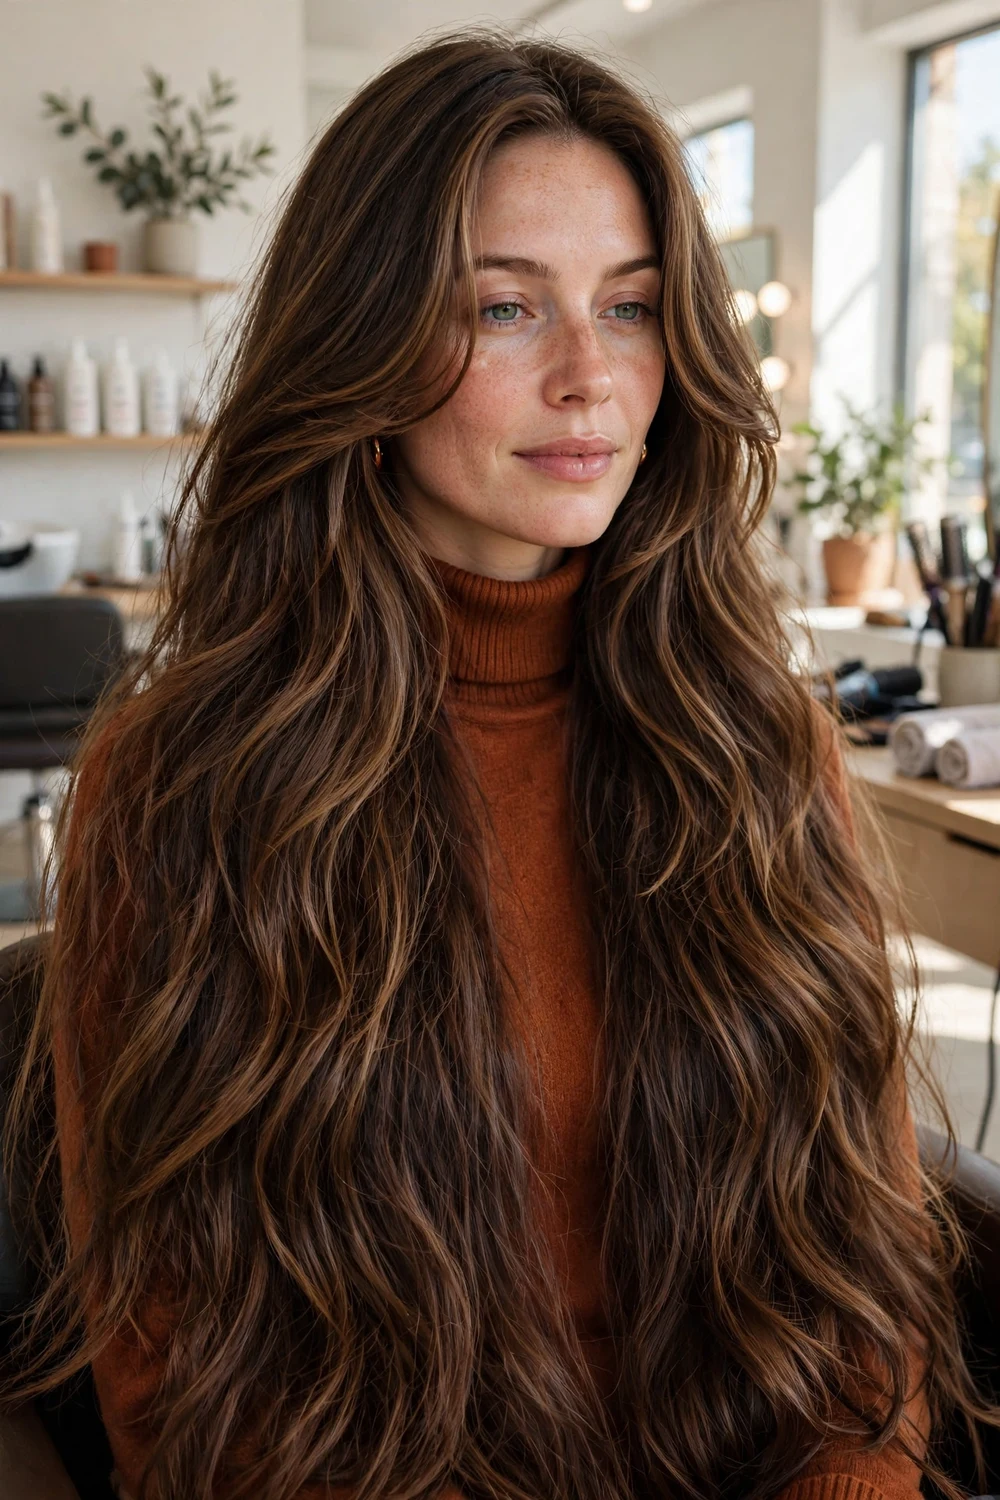
Ask your stylist to keep the shortest layer at chin length or below, so the front opens up without losing density at the back. The layers remove weight in a controlled way and stop thick hair from hanging in one solid block.
Wear it with a center or soft side part and let the front pieces curve outward. A round brush on the front sections alone gives polish in a few minutes while the rest can air dry.
Try this: Part it slightly off center on day two to restore lift at the roots without restyling.
Difficulty: Easy · Cost: $
2. Classic U-Cut
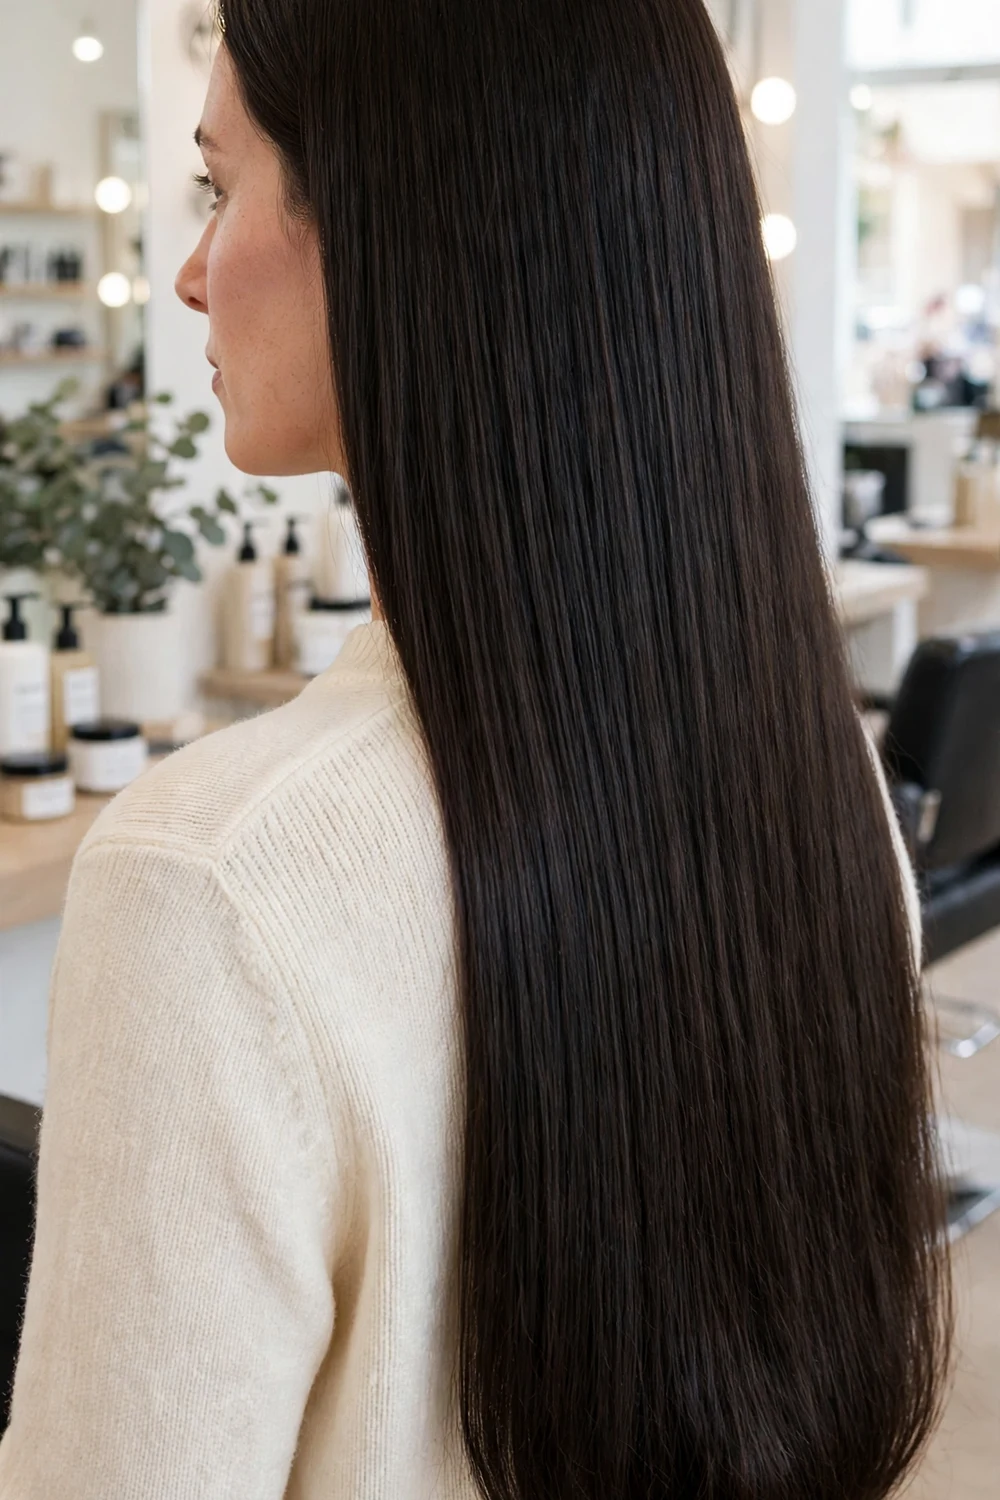
The back edge curves in a gentle U shape instead of a straight line, so the sides keep some length and the middle sits longest. That curve stops the corners from looking bulky and helps long thick hair swing rather than sit stiff.
It suits straight and lightly wavy hair and grows out evenly. Ask for clean ends with very light layering on top if you wear braids and buns often, since even ends tuck in more neatly.
Try this: Book end trims on a regular schedule so the rounded back edge keeps its clean curve.
Difficulty: Easy · Cost: $
3. Layered V-Cut

The back comes to a soft point while layers cascade down each side, which takes weight off the sides and keeps length at the center. On thick hair the V shape reads clearly because there is enough density to hold the line.
Ask for the point to stay soft rather than sharp if your ends are dry, and book trims that only dust the tip. Straightened or smoothed hair shows the shape best, though loose waves soften it for everyday wear.
Try this: Ask for a back view photo at the salon so you can check the point sits in the center.
Difficulty: Medium · Cost: $$
4. Feathered Layers
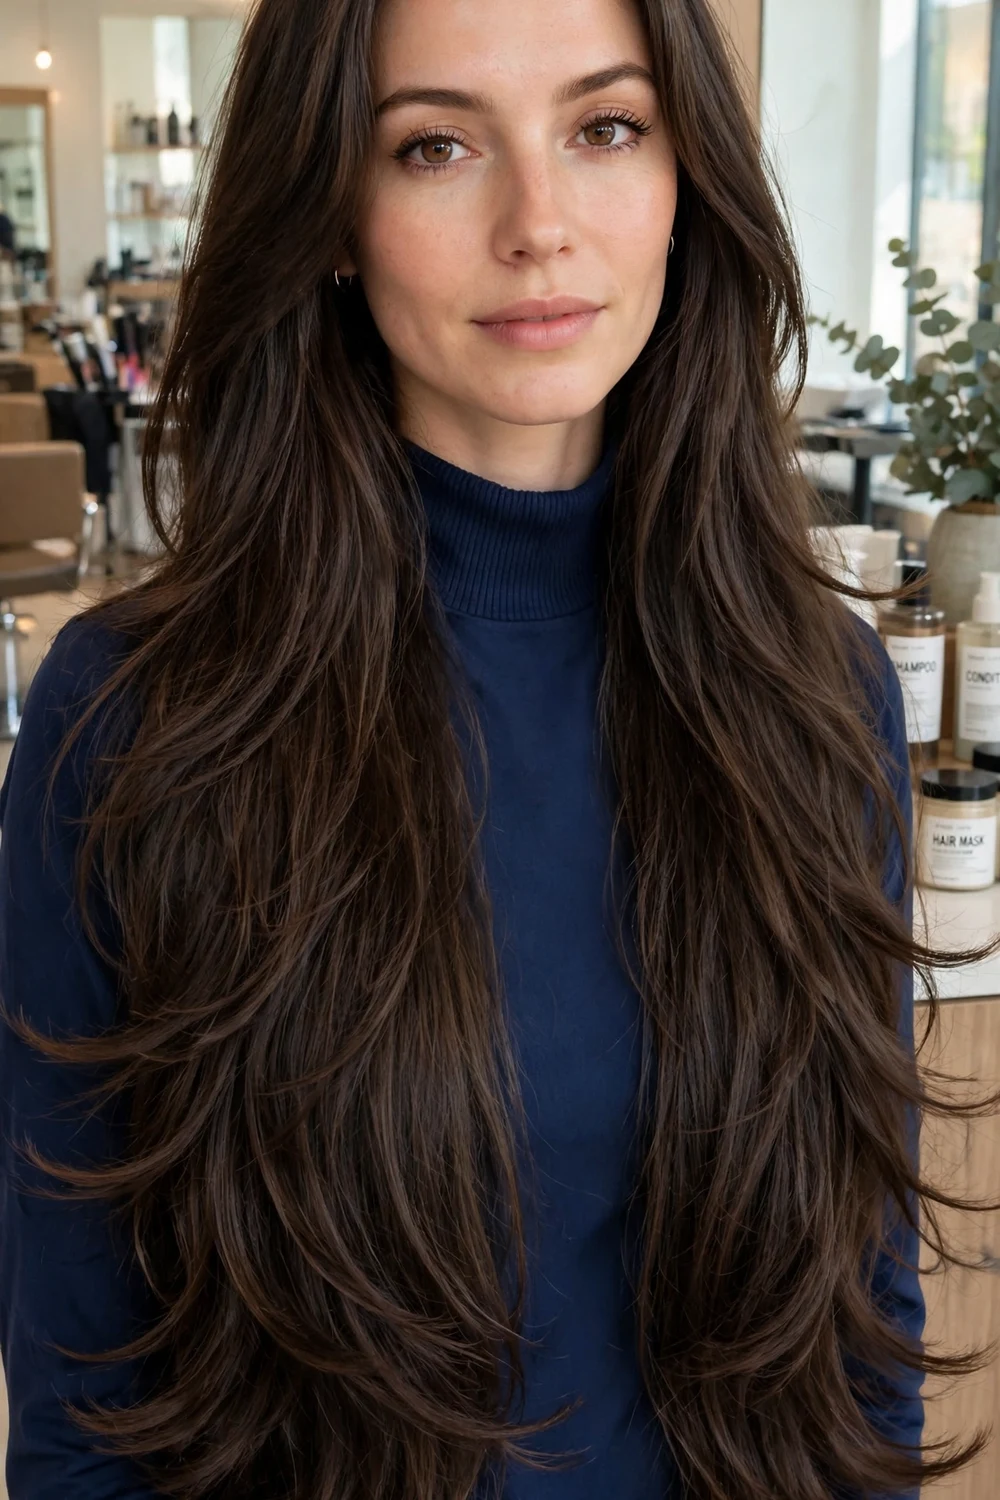
Feathering thins and texturizes the last few inches of each layer so the ends flick outward instead of stacking up. Thick hair holds that flick well and the whole cut feels lighter without shorter overall length.
Blow dry the ends away from the face with a round brush, or use a large barrel iron on the bottom third only. Keep the feathering from mid-lengths down if your top layers tend to puff out.
Try this: Flick the ends outward only on the top layer for a lighter finish in half the time.
Difficulty: Medium · Cost: $$
5. Shaggy Cut with Curtain Bangs
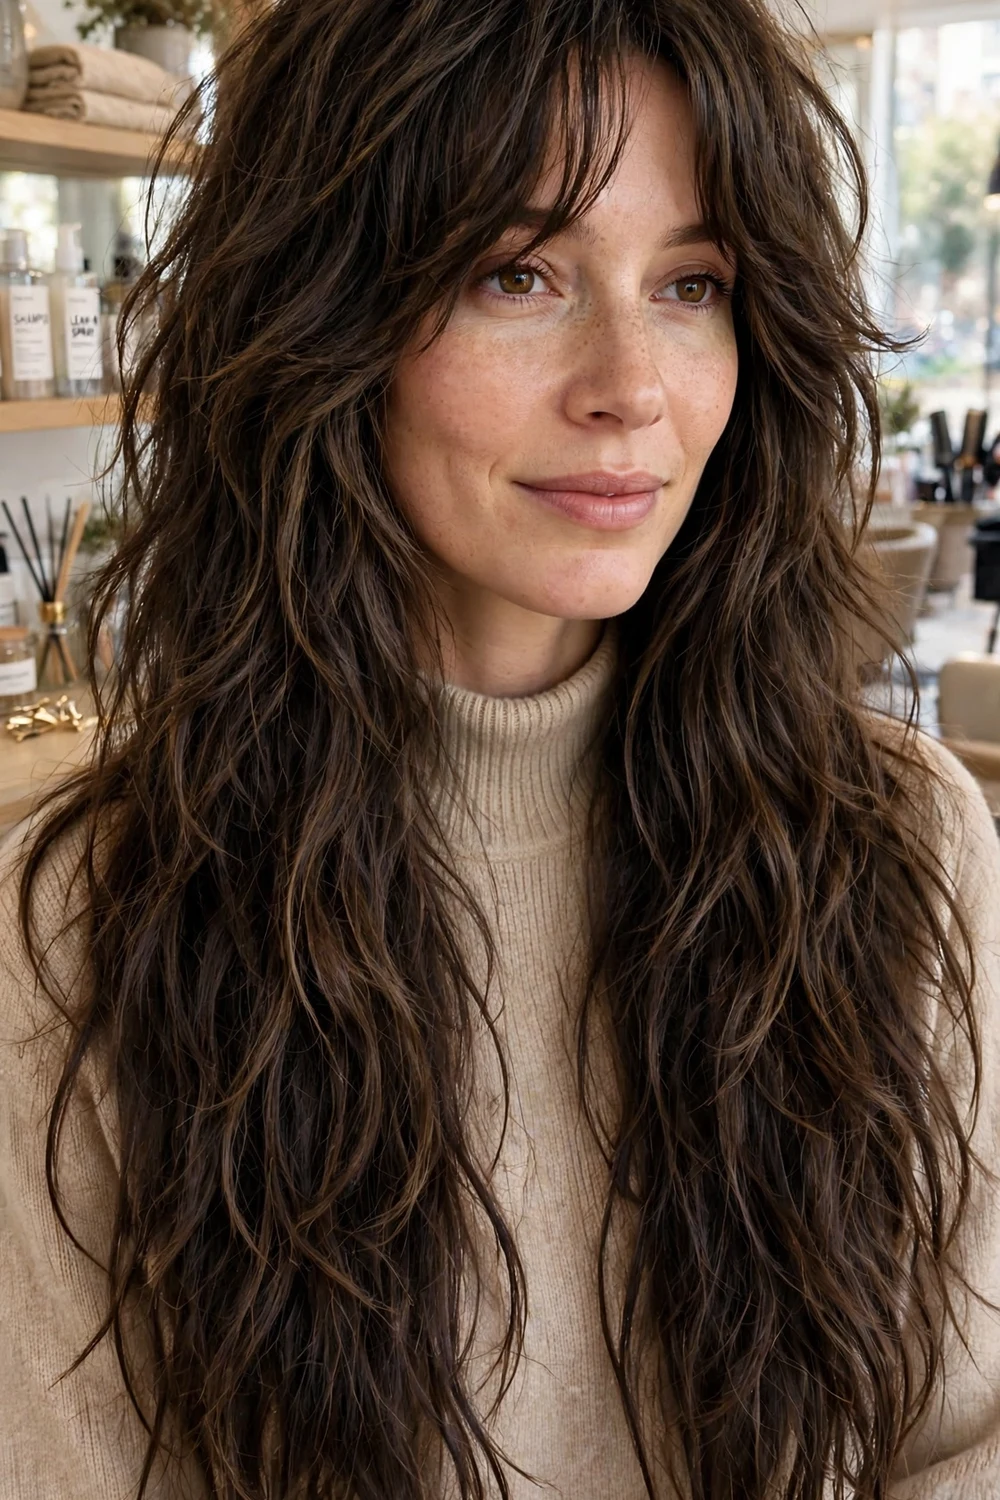
Shorter choppy layers through the crown and curtain bangs that split in the middle give thick hair movement and break up heaviness around the face. The texture is built into the cut, so styling can stay loose and quick.
Work a pea sized amount of styling cream through damp ends and let it air dry for a lived in finish. Ask your stylist to keep the shag layers longer at the back if you want the look without a mullet feel.
For a shorter take on the shag shape, see these long hairstyles with curtain bangs for more front framing options.
Try this: Sleep with the bangs clipped loosely to one side so they keep their split in the morning.
Difficulty: Medium · Cost: $$
6. Blunt Cut with Full Fringe
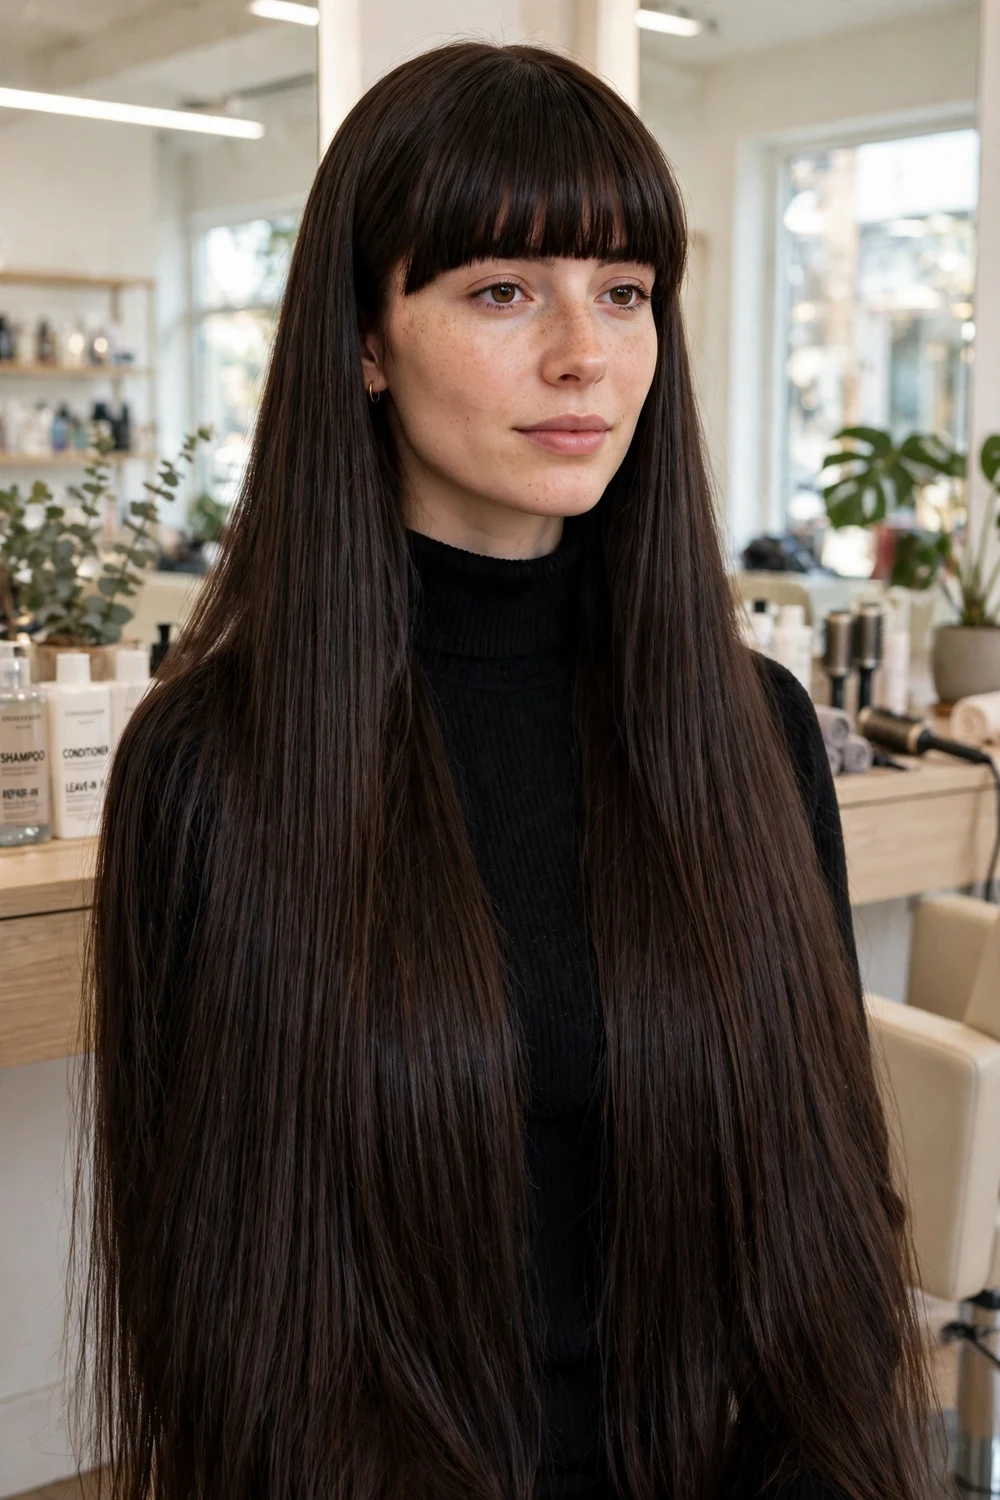
One length ends and a full fringe make a strong, tidy shape that uses the natural weight of thick hair to sit flat and neat. The fringe should be cut slightly thinner than the rest so it lies down instead of springing up.
This works best on straight or smoothed hair and oval or longer face shapes. Plan on fringe trims between main cuts and a quick pass with a flat iron on the front only on busy mornings.
Try this: Trim the fringe little and often rather than waiting for a full cut appointment.
Difficulty: Medium · Cost: $
7. Side-Swept Bangs with Long Layers
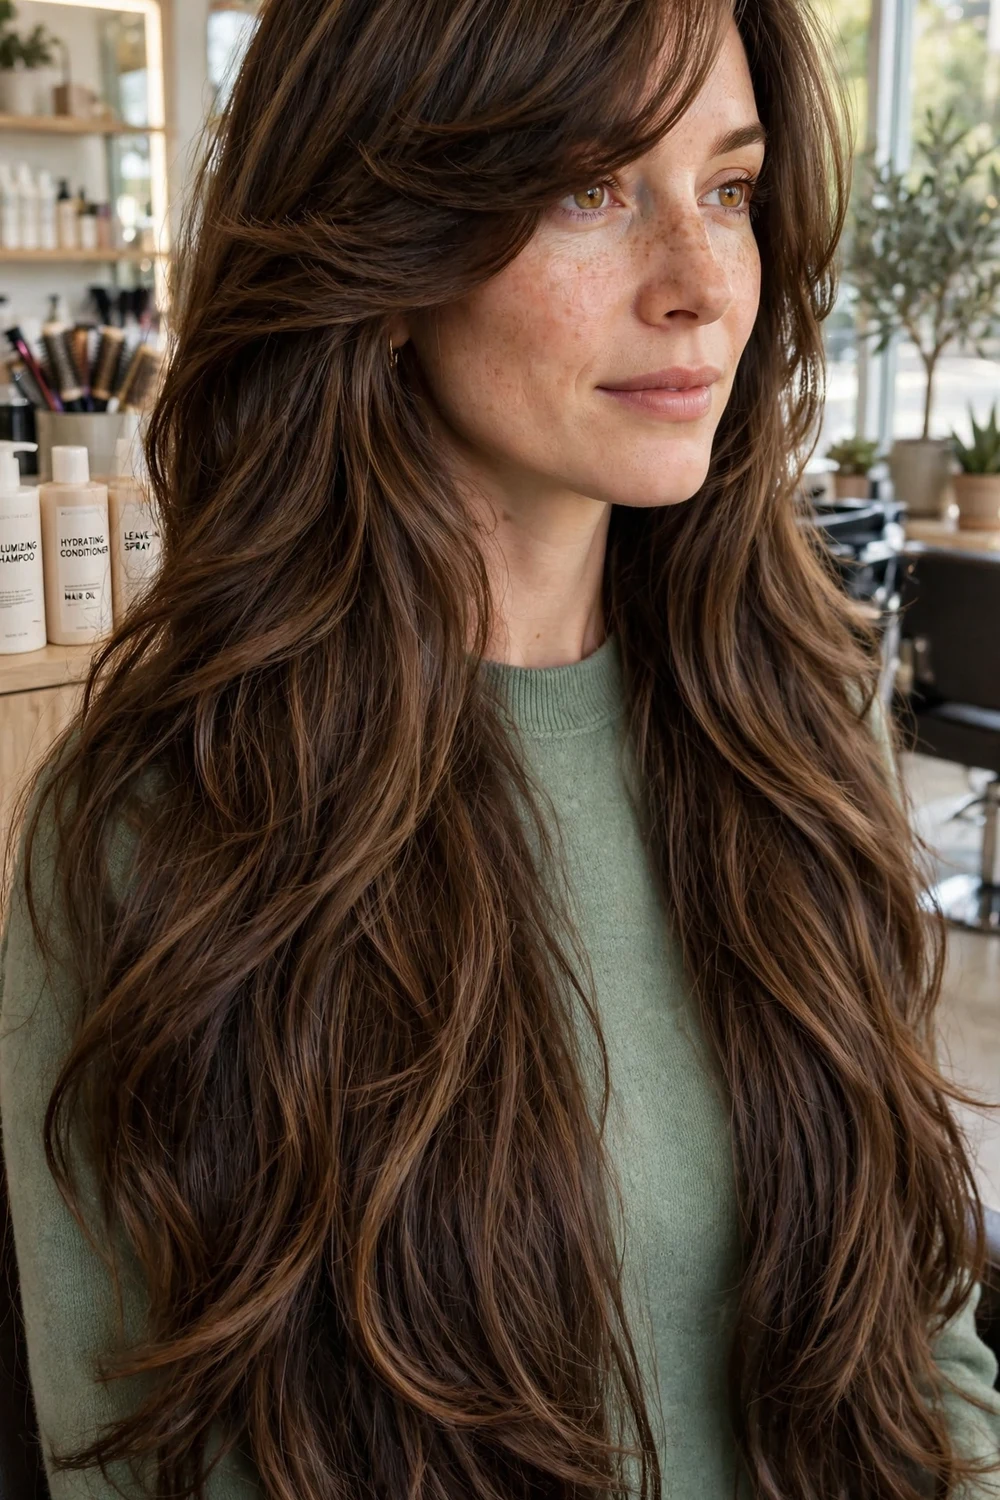
A long side-swept bang blends straight into the layers, which softens a strong hairline and adds movement at the front without a full fringe commitment. It also makes ponytails and buns look finished with very little effort.
Blow dry the bang diagonally across the forehead, then let it fall to the side. If you are growing out a fringe, ask for this shape as an in-between step that still looks planned.
Try this: Tuck the longer side behind your ear to show the sweep of the bang.
Difficulty: Easy · Cost: $
8. Sleek Straight with Curved Ends
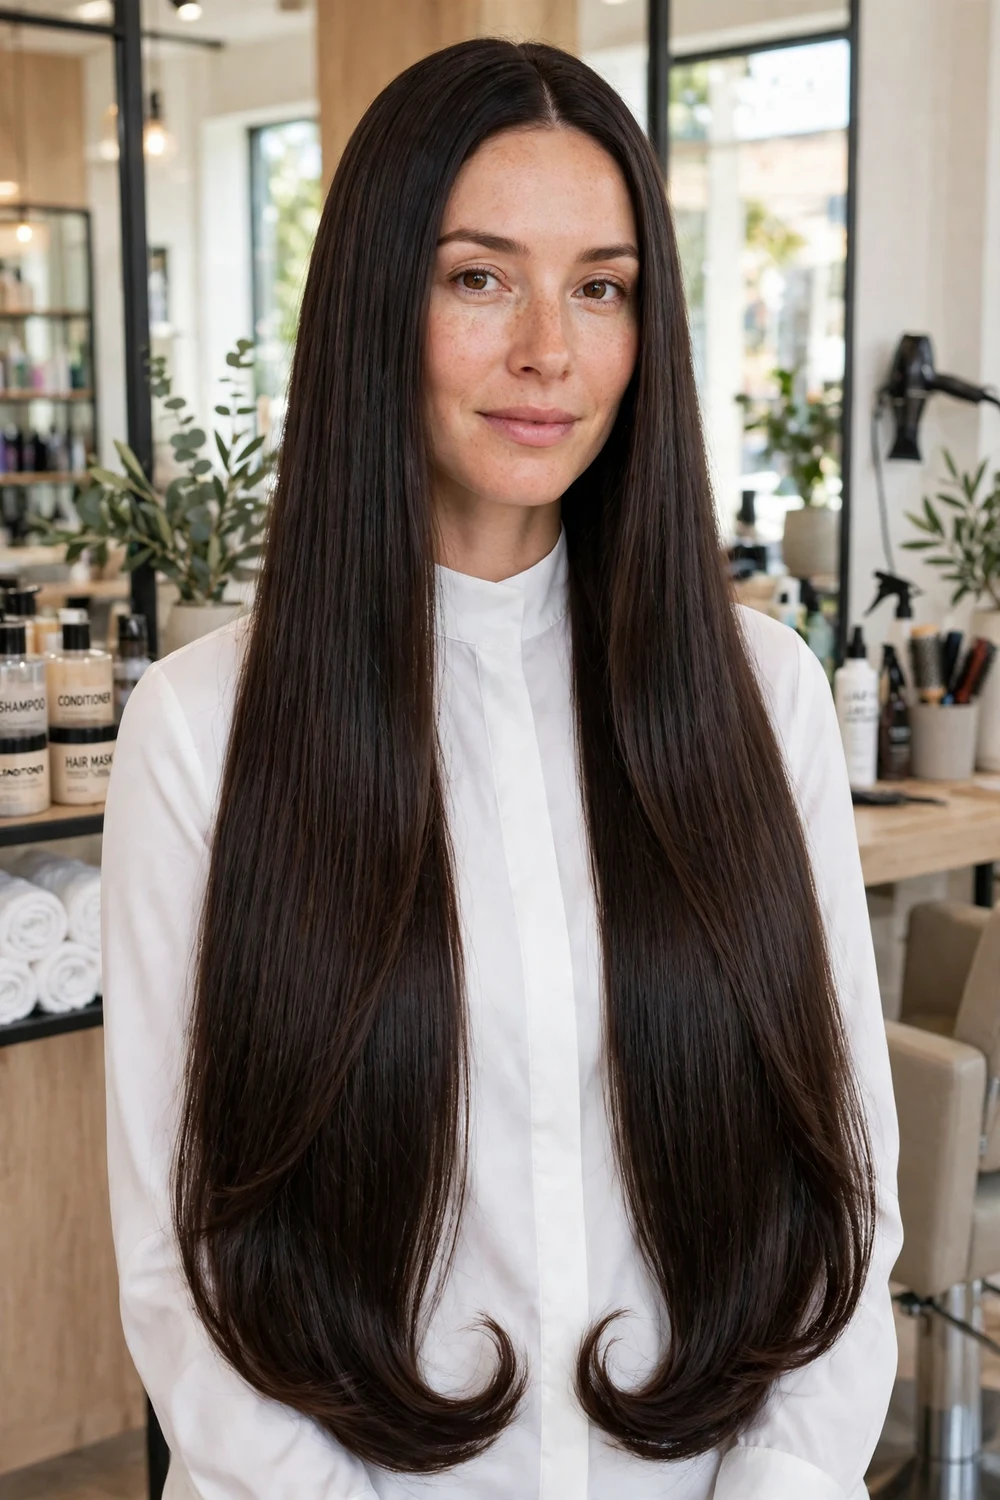
Worn pin straight through the lengths with the last inch curved inward, this finish keeps thick hair looking orderly and shows off healthy ends. A center part keeps the weight balanced on both sides.
Use heat protectant, dry in sections, and flat iron only the top layer and ends if your hair is already fairly straight. A light serum on the ends only keeps the surface smooth without greasing the roots.
Try this: Finish with a cool shot from the dryer to set the inward curve at the ends.
Difficulty: Medium · Cost: $
9. Loose Beach Waves
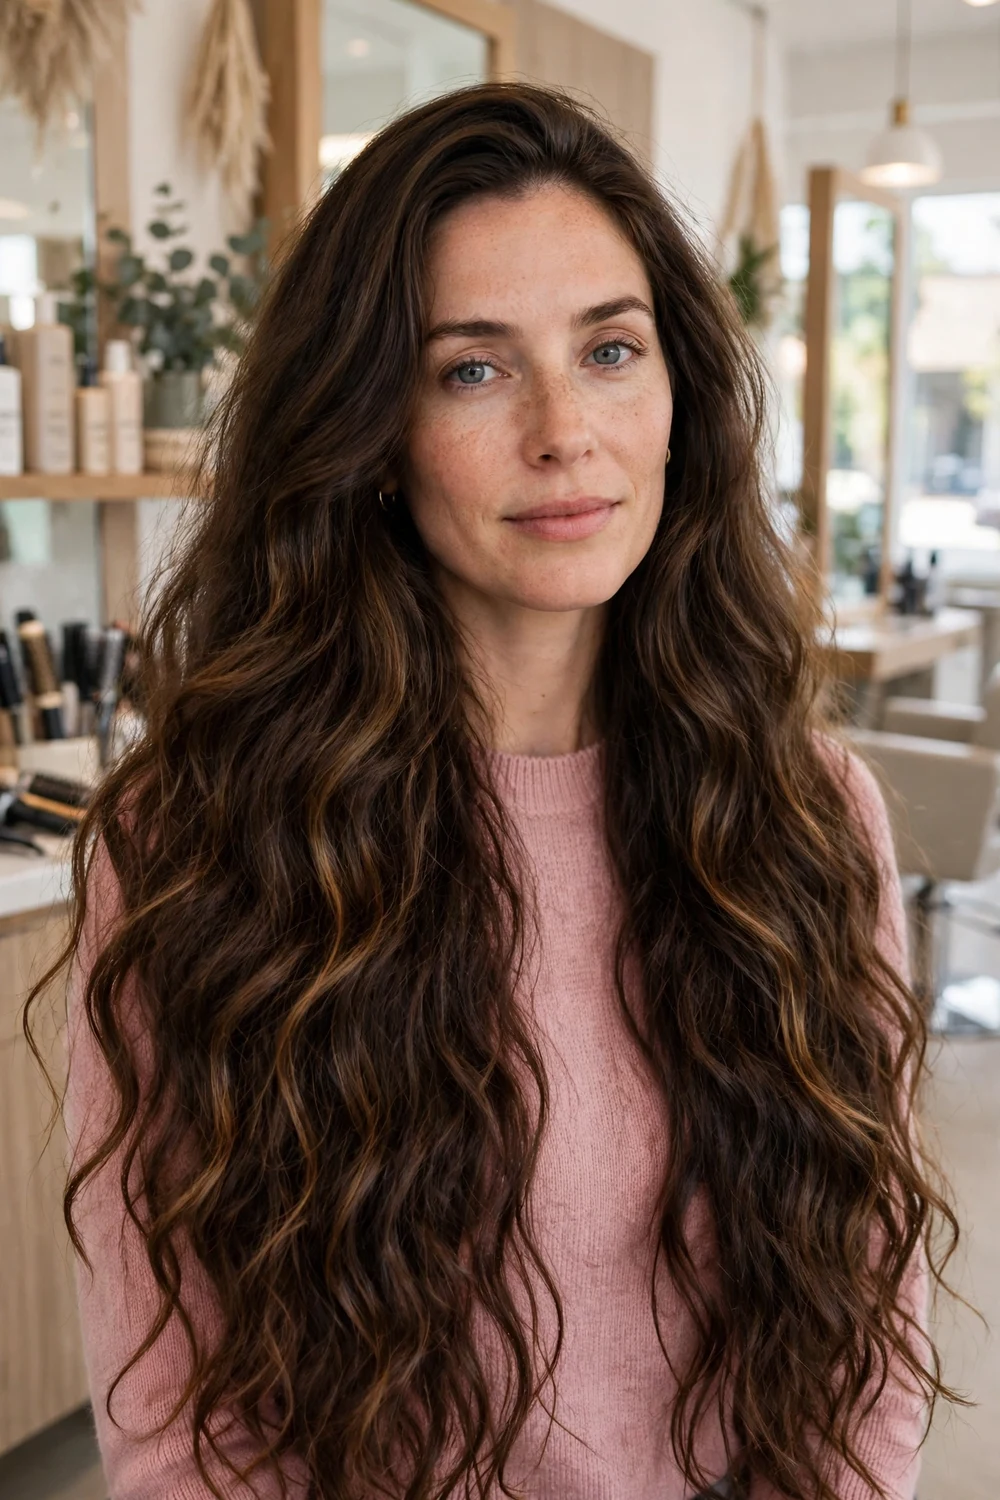
Large loose waves from mid-lengths down break up the bulk of thick hair and give long lengths a relaxed shape. Keeping the top flatter and the waves lower stops the style from widening at the cheeks.
Braid damp hair in two loose braids overnight, or use a large barrel iron and brush the curls out well. Thick hair holds this wave for two to three days with a dry shampoo refresh at the roots.
For a heat free way to get a similar wave, check these heatless hairstyles for long hair that work overnight.
Try this: Set the waves in two loose braids while you get ready, then undo them last.
Difficulty: Easy · Cost: $
10. Long Waves with Dimensional Color
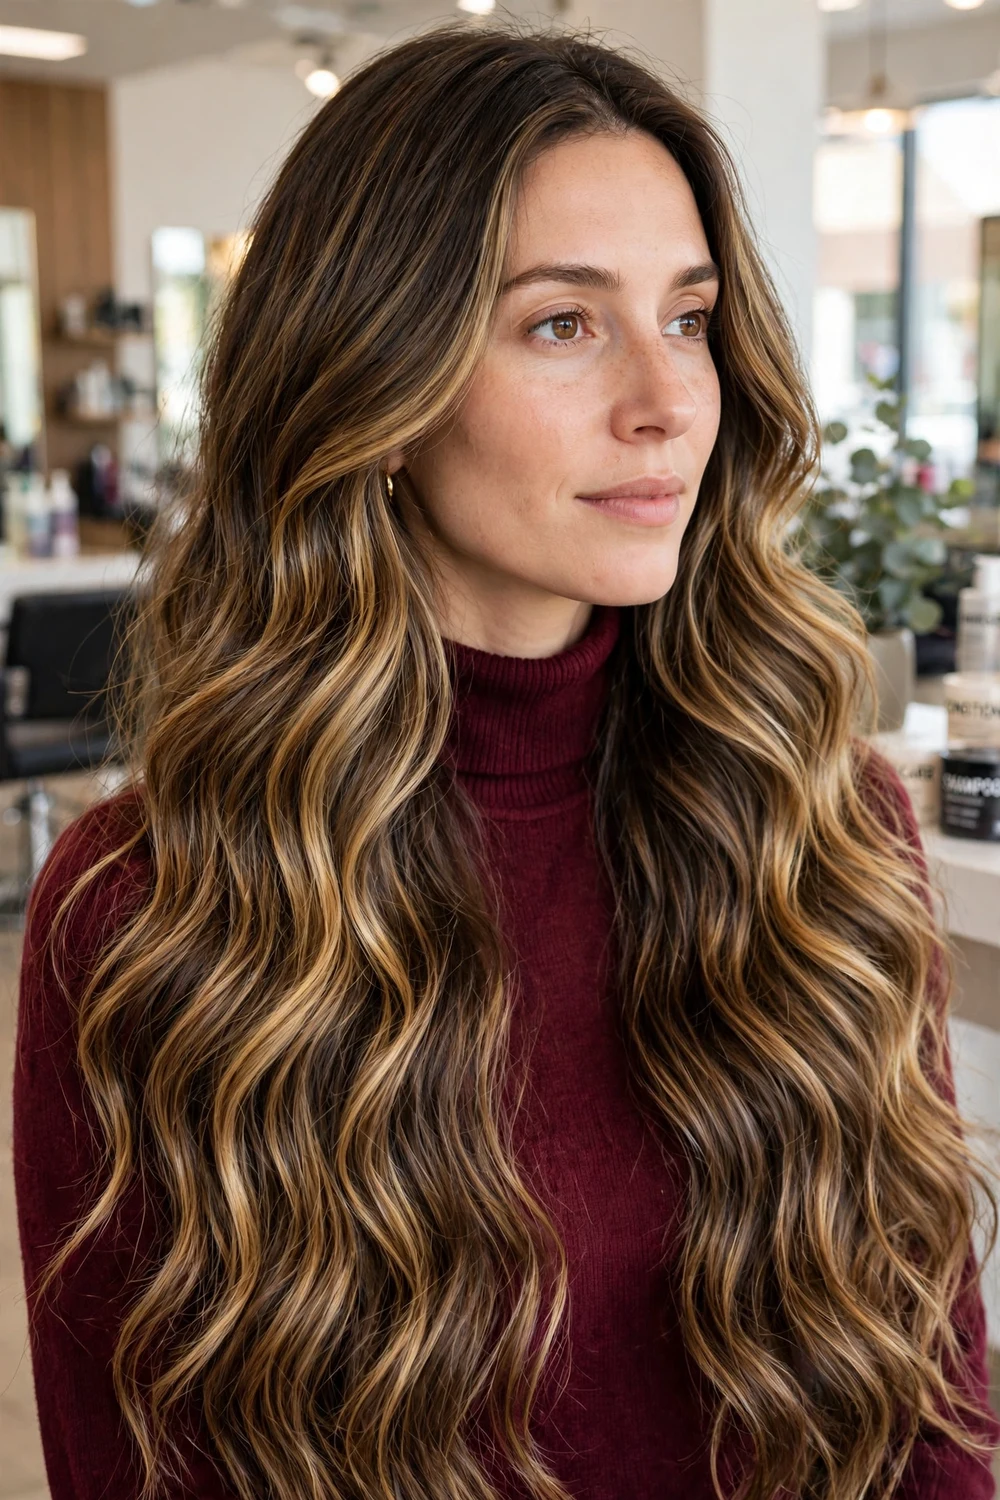
Waves paired with balayage panels placed through the mid-lengths show movement that a single flat color can hide on very thick hair. Lighter pieces around the face and through the ends make layers easier to see.
Ask for placement that follows your layers rather than a uniform pattern, and keep the root area close to your natural shade for softer grow out. Use color safe shampoo to keep the tones clean between salon visits.
If you wear your hair curly most days, these long curly haircuts with layers show how layer placement changes with curl pattern.
Try this: Schedule a gloss between color appointments to keep the lighter pieces clear and bright.
Difficulty: Medium · Cost: $$$
11. Tousled Waves with Minimal Layers
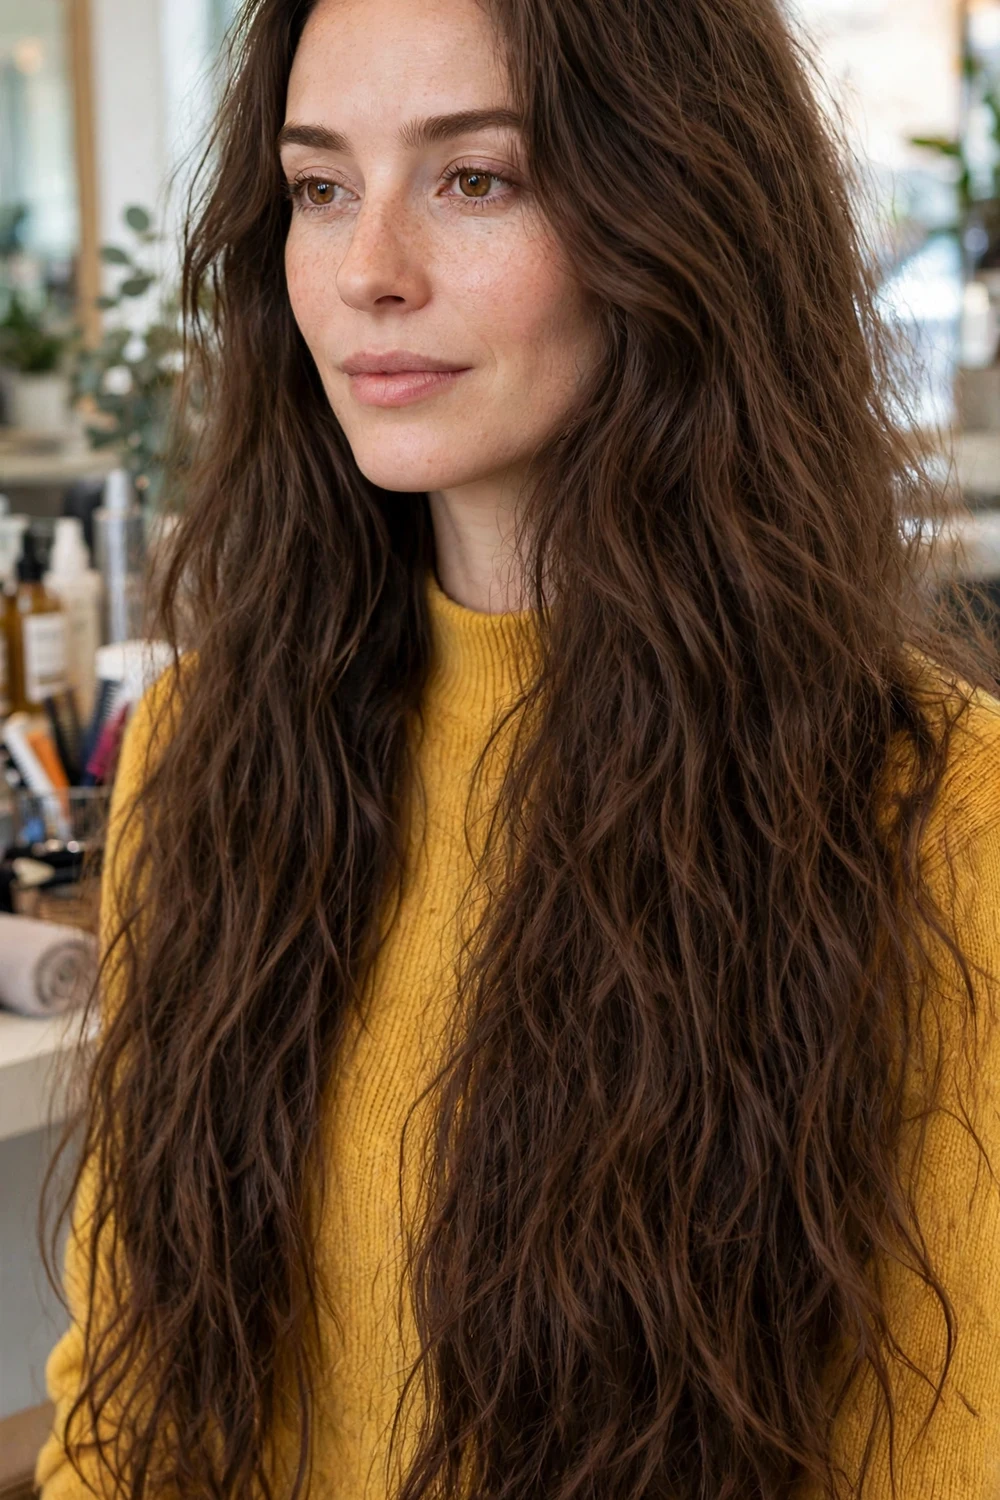
With only light shaping at the ends, this look lets natural density stay the main feature. The tousled finish keeps it from looking too neat, and the weight of thick hair helps the waves fall instead of puffing out.
Scrunch styling cream into damp hair and twist in four sections while it dries. Shake it out with your fingers rather than a brush so the waves stay separated and soft.
This finish pairs well with the ideas in soft waves for long thick hair if you want a softer wave pattern.
Try this: Shake the roots with your fingertips instead of brushing to keep the tousle in place.
Difficulty: Easy · Cost: $
12. Twisted Crown with Loose Length
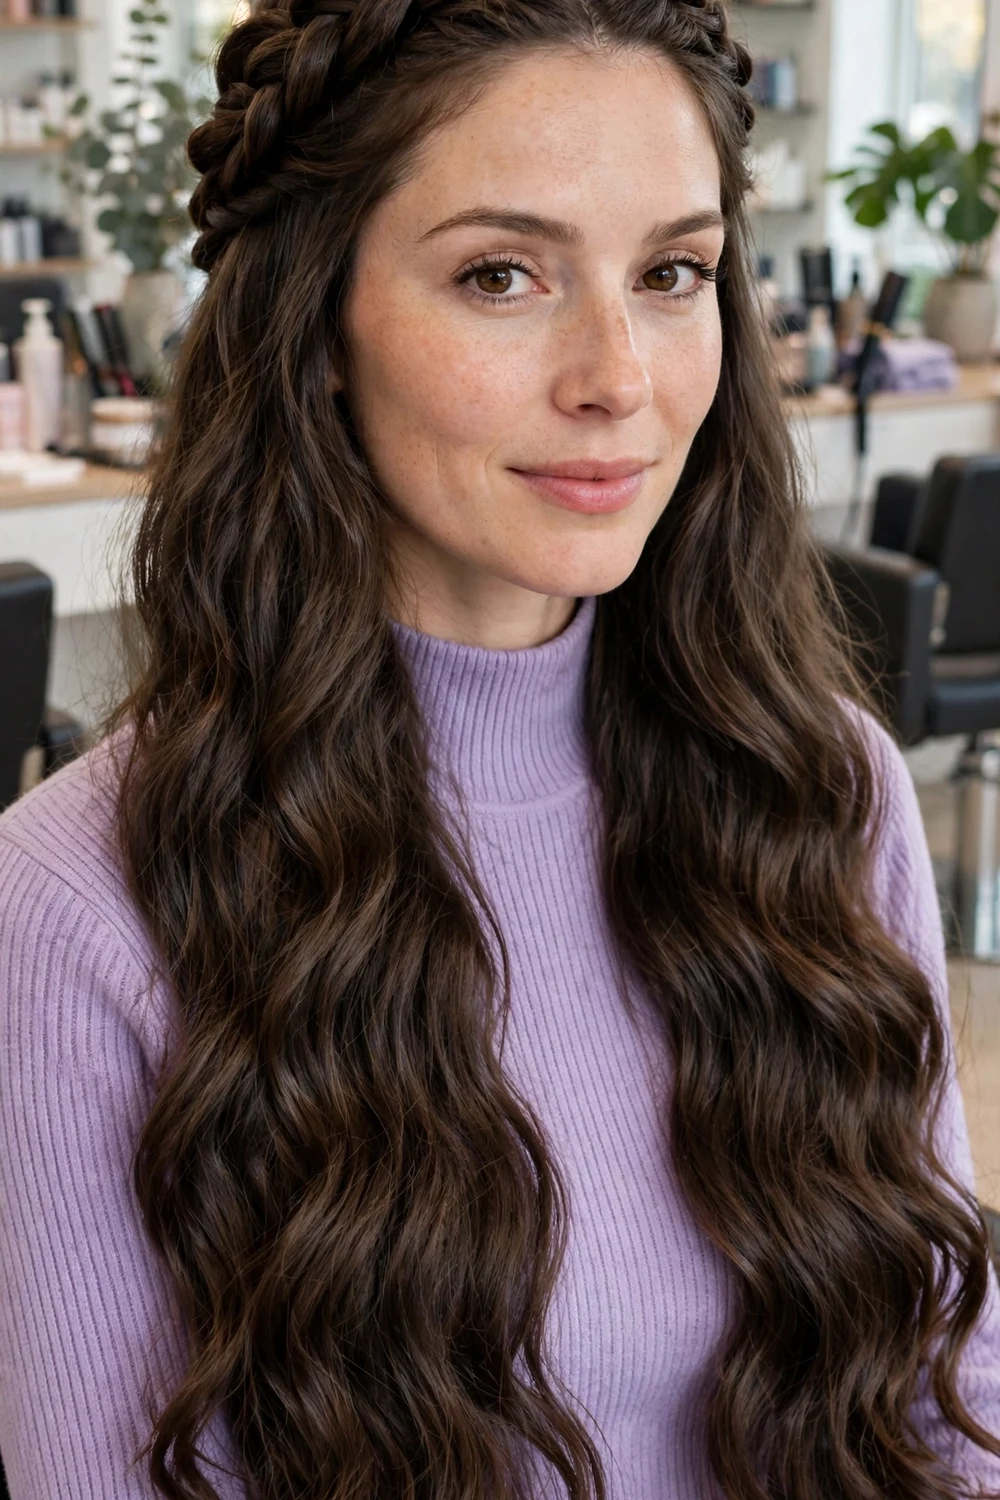
Two twists meet at the back of the head while the rest of the length stays down, which keeps hair off the face and still shows off long thick lengths. The twist holds well because thick sections grip each other.
Take wide sections above each ear, twist them back, and pin where they meet under a layer of loose hair so the pins stay hidden. It works for weddings, photos, and hot days when you want hair down but controlled.
Try this: Cross two pins under the twist join and cover them with a strand of loose hair.
Difficulty: Medium · Cost: $
13. Milkmaid Braid Crown
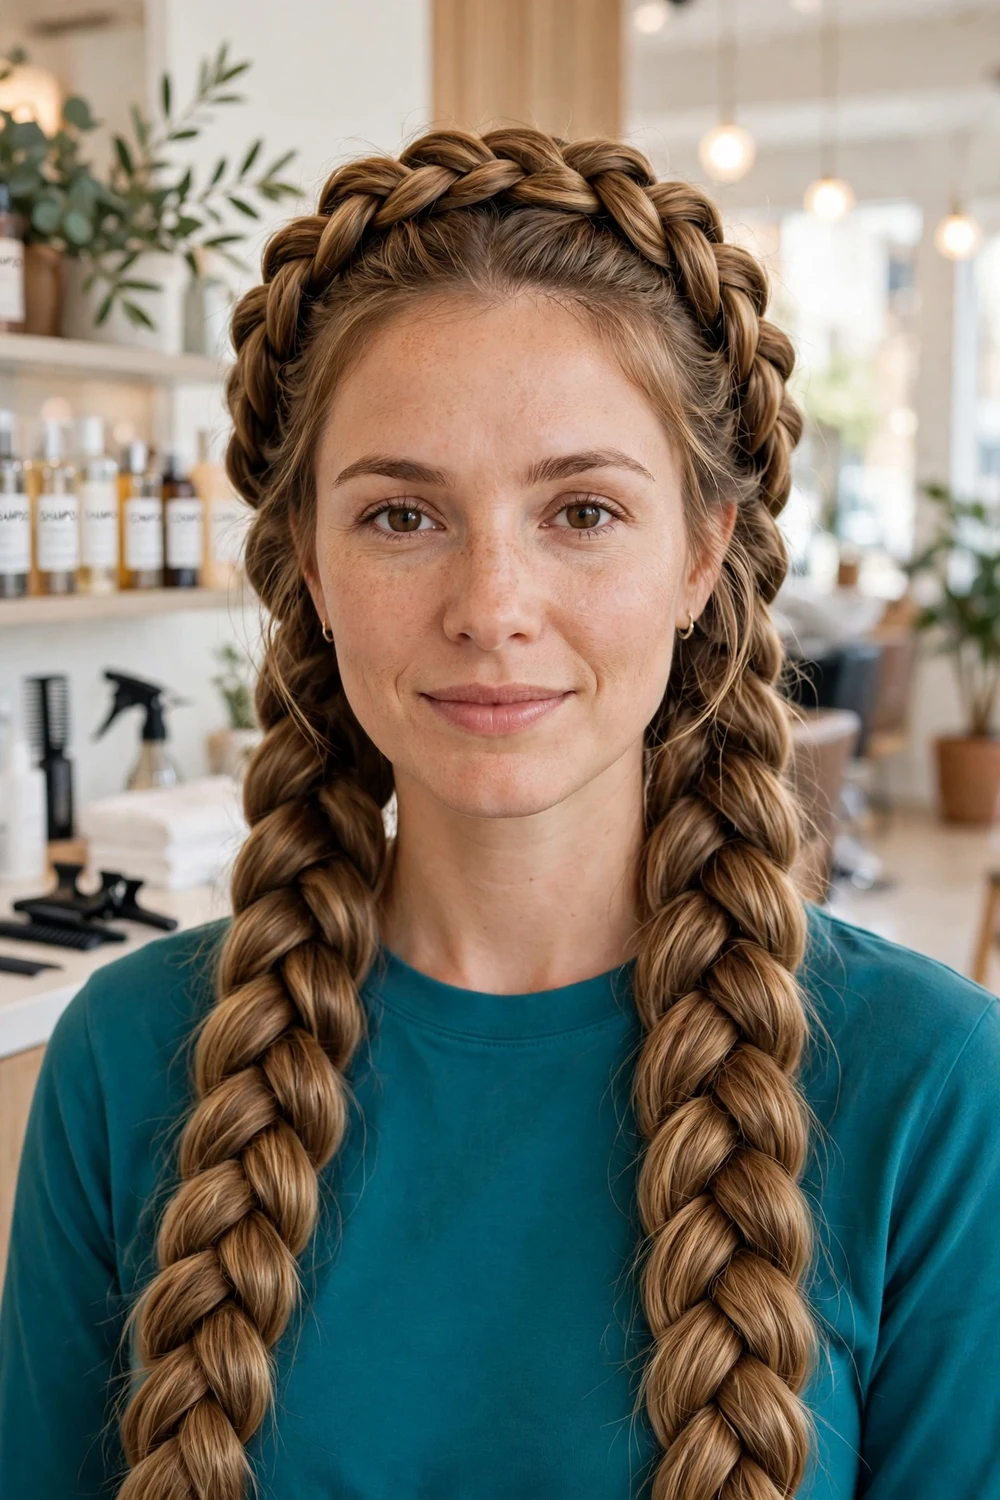
Two braids are pinned over the top of the head like a headband, spreading the weight of very thick hair around the head instead of pulling it all to one point. It stays secure for a full day when pinned at several points.
Braid in two low braids first, then cross them over the top and pin every two inches. Leave the braids a little loose before pinning so the crown looks soft and does not pull at the hairline.
Try this: Start the braids behind the ears so the crown sits flat when crossed over.
Difficulty: Hard · Cost: $
14. Loose Fishtail Braid

A fishtail uses small crossed sections, and thick hair gives it clear detail that thin hair cannot hold. Pulled gently apart after braiding, it looks full and soft rather than tight and thin.
Start it low and to one side so you can see your progress in the mirror. Dust a little texture powder on your hands before braiding if your hair is freshly washed and slippery.
Try this: Pancake the braid by tugging the outer edges of each segment, working from top to bottom.
Difficulty: Medium · Cost: $
15. Sleek Low Braid
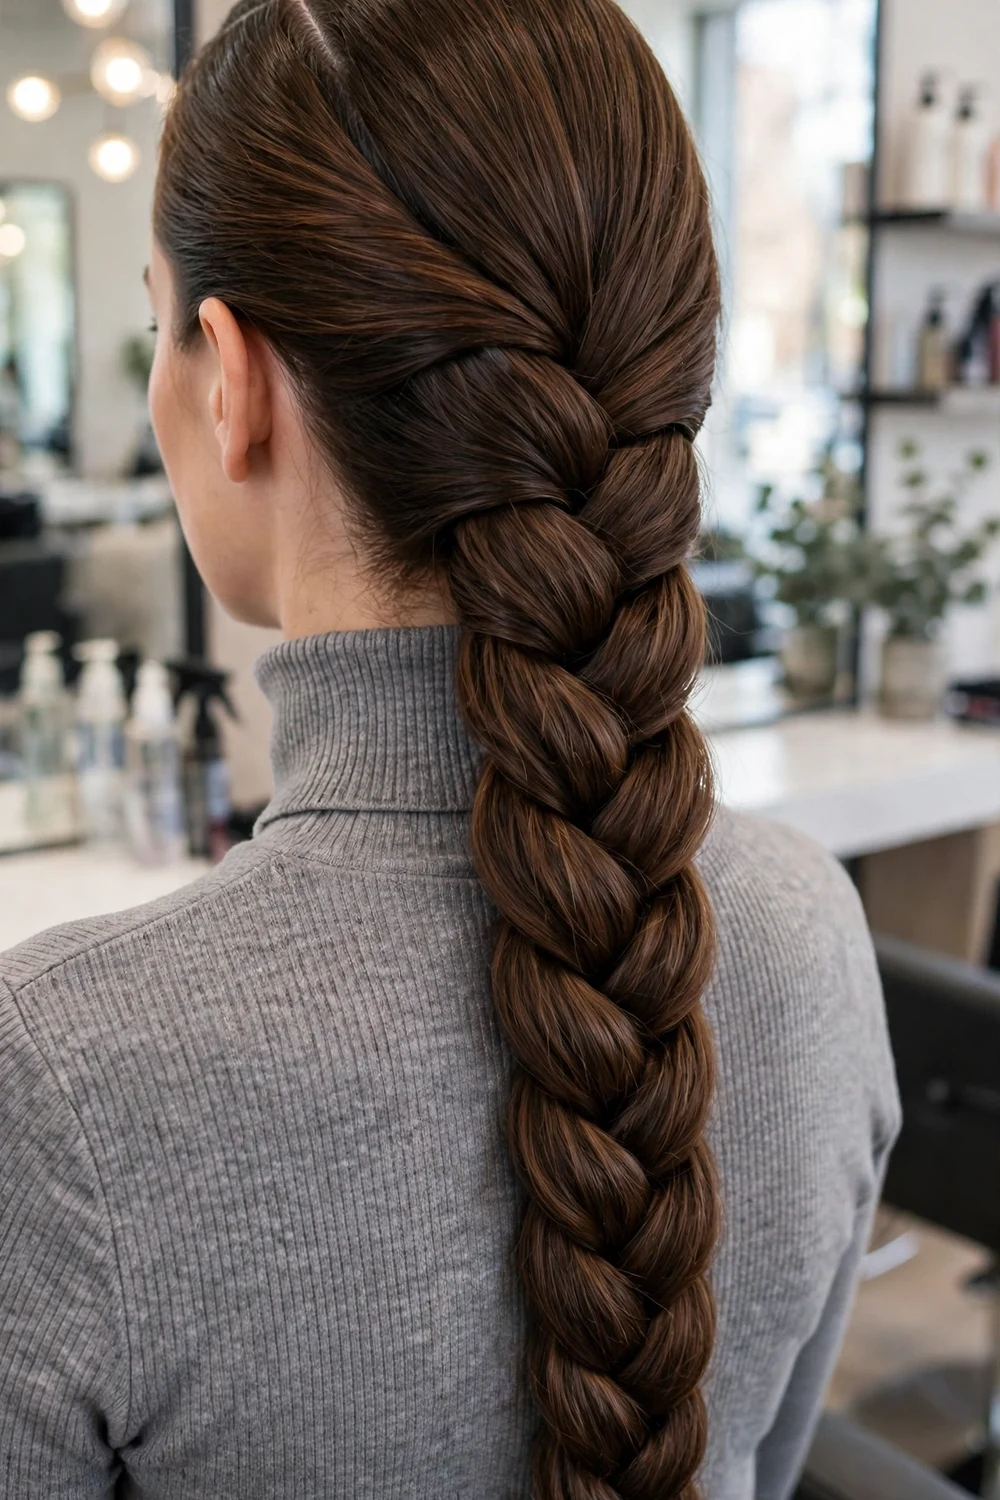
A smooth low braid at the nape keeps long thick hair contained for work, travel, and workouts, and the clean part keeps it looking planned. Thick hair makes the braid itself substantial, so it reads as a style rather than a quick fix.
Smooth the top with a brush and a little gel at the hairline, then braid firmly and secure with a covered elastic. Finish the end with a small amount of oil to keep the tail tidy.
Try this: Add a second small elastic at the end of the braid if your ends are freshly cut and slippery.
Difficulty: Easy · Cost: $
16. Flipped Faux Fishtail Braid
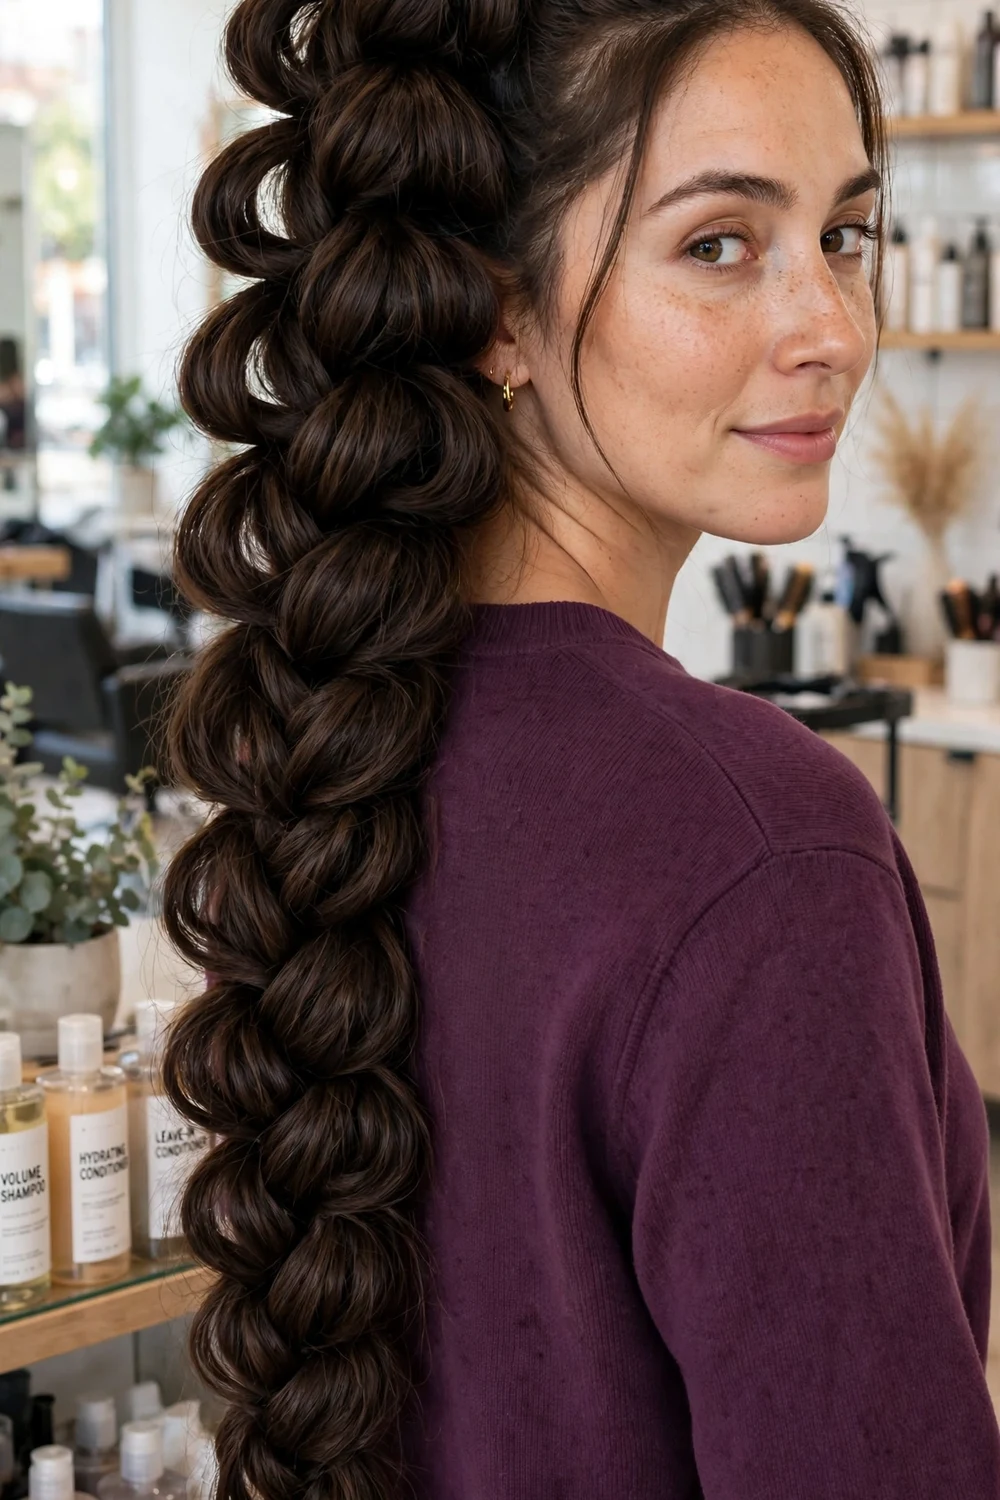
This version copies the look of a fishtail with stacked small ponytails that are flipped through each other, so you skip the fiddly small sections. On thick hair the segments look plump and the pattern holds all day.
Tie a ponytail, add another elastic a few inches down, split and flip the section through, then repeat down the length. Tug each segment outward gently to build the wide fishtail shape.
Try this: Keep the elastics the same color so the flipped sections read as one braid.
Difficulty: Medium · Cost: $
17. High Messy Bun

Piling thick hair on top of the head spreads its weight and gives height that balances fuller cheeks. Loose pieces at the front keep it relaxed and stop it from looking too tight.
Use a strong thick-hair elastic plus a second one if your bun tends to slide, and pin the heaviest section at the back. Day two hair grips better than freshly washed hair for this style.
Try this: Form the bun with the ends tucked under, then pull out front pieces last for balance.
Difficulty: Easy · Cost: $
18. Simple Low Bun
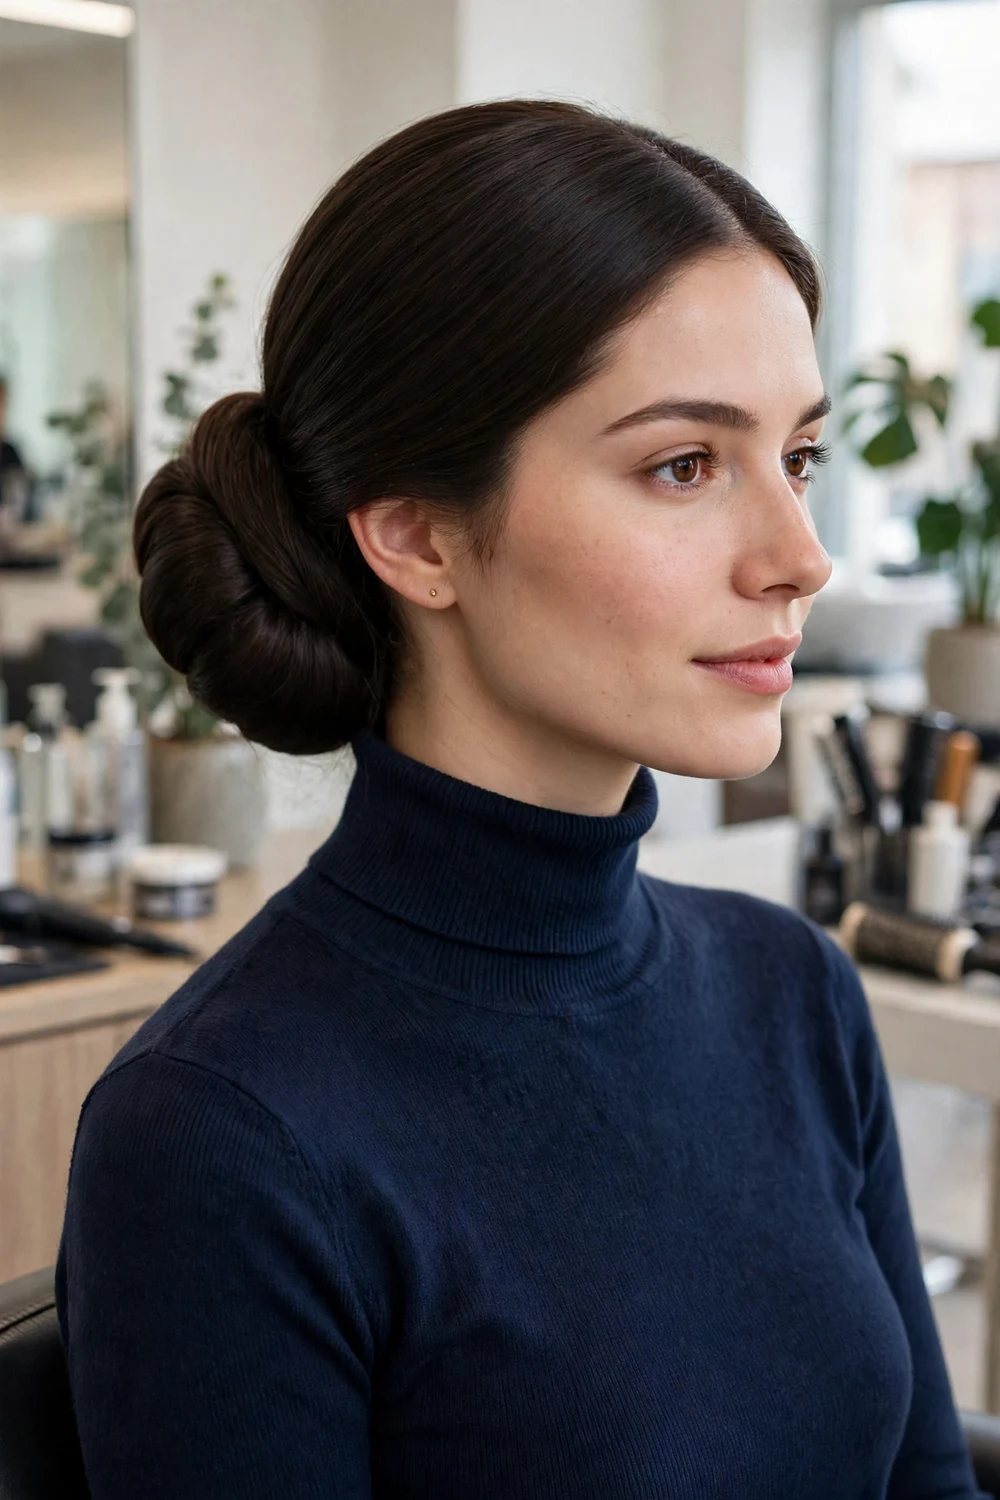
A low bun at the nape handles the full weight of long thick hair without pulling at the crown, which makes it comfortable for long events. The smooth finish keeps bulk looking neat rather than heavy.
Twist the ponytail before wrapping it so the bun stays compact, and cross two pins through the base on each side. It pairs well with a side part for a softer front view.
Try this: Use a hair donut only if you want a rounder shape, since thick hair often has enough bulk alone.
Difficulty: Easy · Cost: $
19. Voluminous Updo with Loose Tendrils
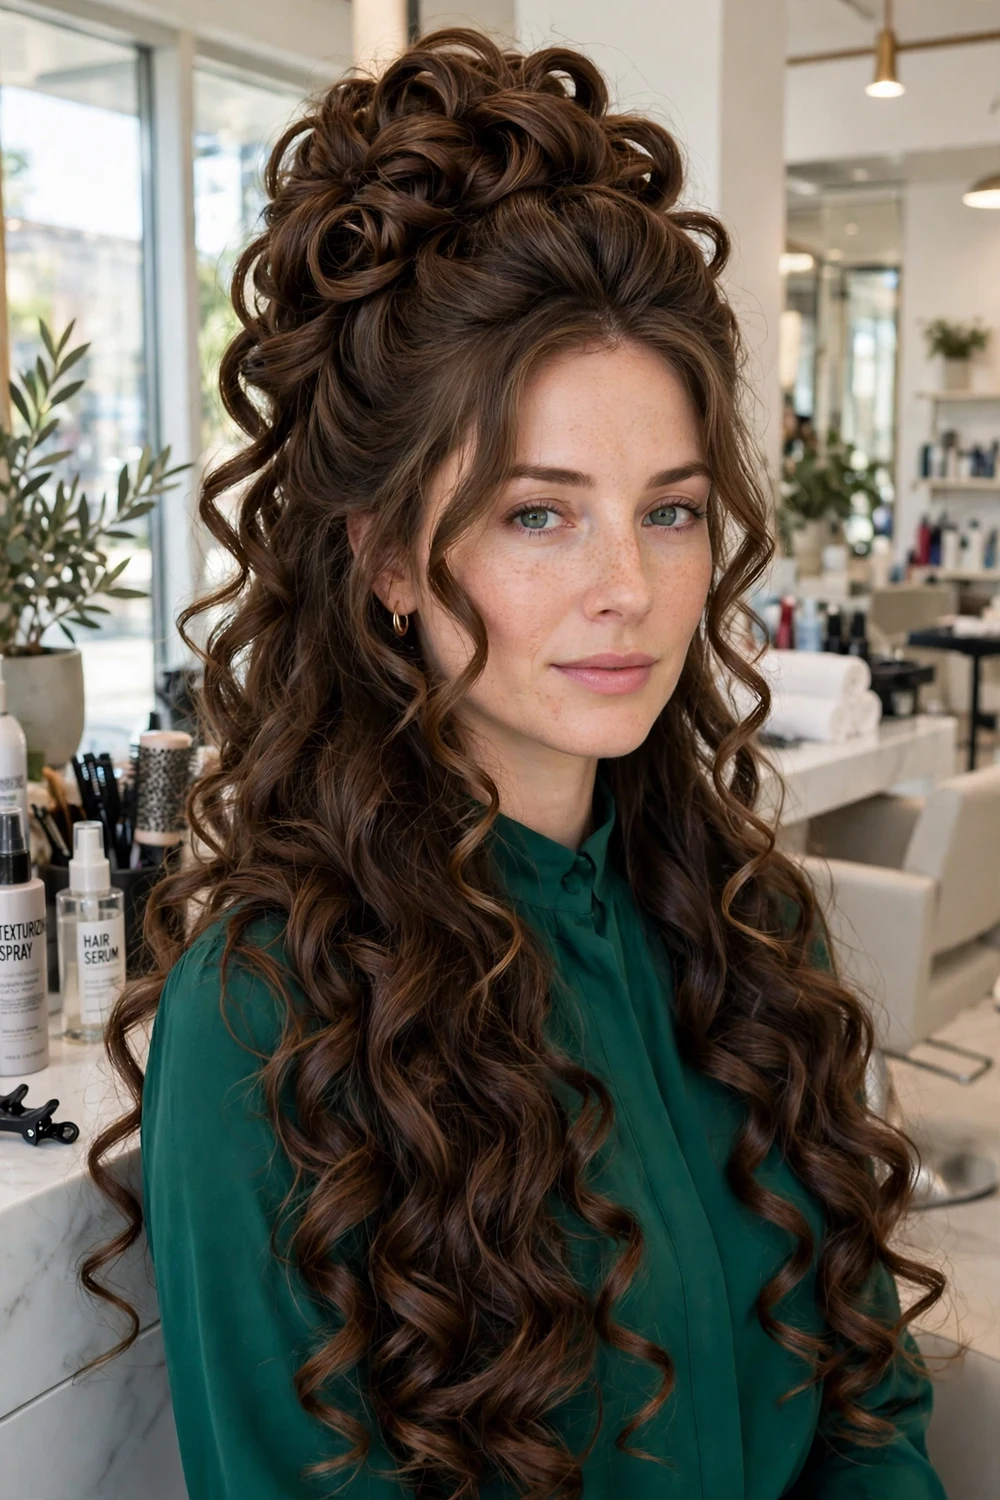
Sectioning thick hair into a back updo plus loose curled tendrils at the front stops one style from carrying all the weight at once. The height at the crown and soft front pieces suit photos and formal events.
Curl the front tendrils last, after the updo is pinned, so they stay fresh. Book this with a stylist for big events, or practice the pinning order once at home before the day.
Try this: Pin the updo in sections, left, right, then center, so no single pin carries too much weight.
Difficulty: Hard · Cost: $$
20. Mod High Ponytail with Crown Lift
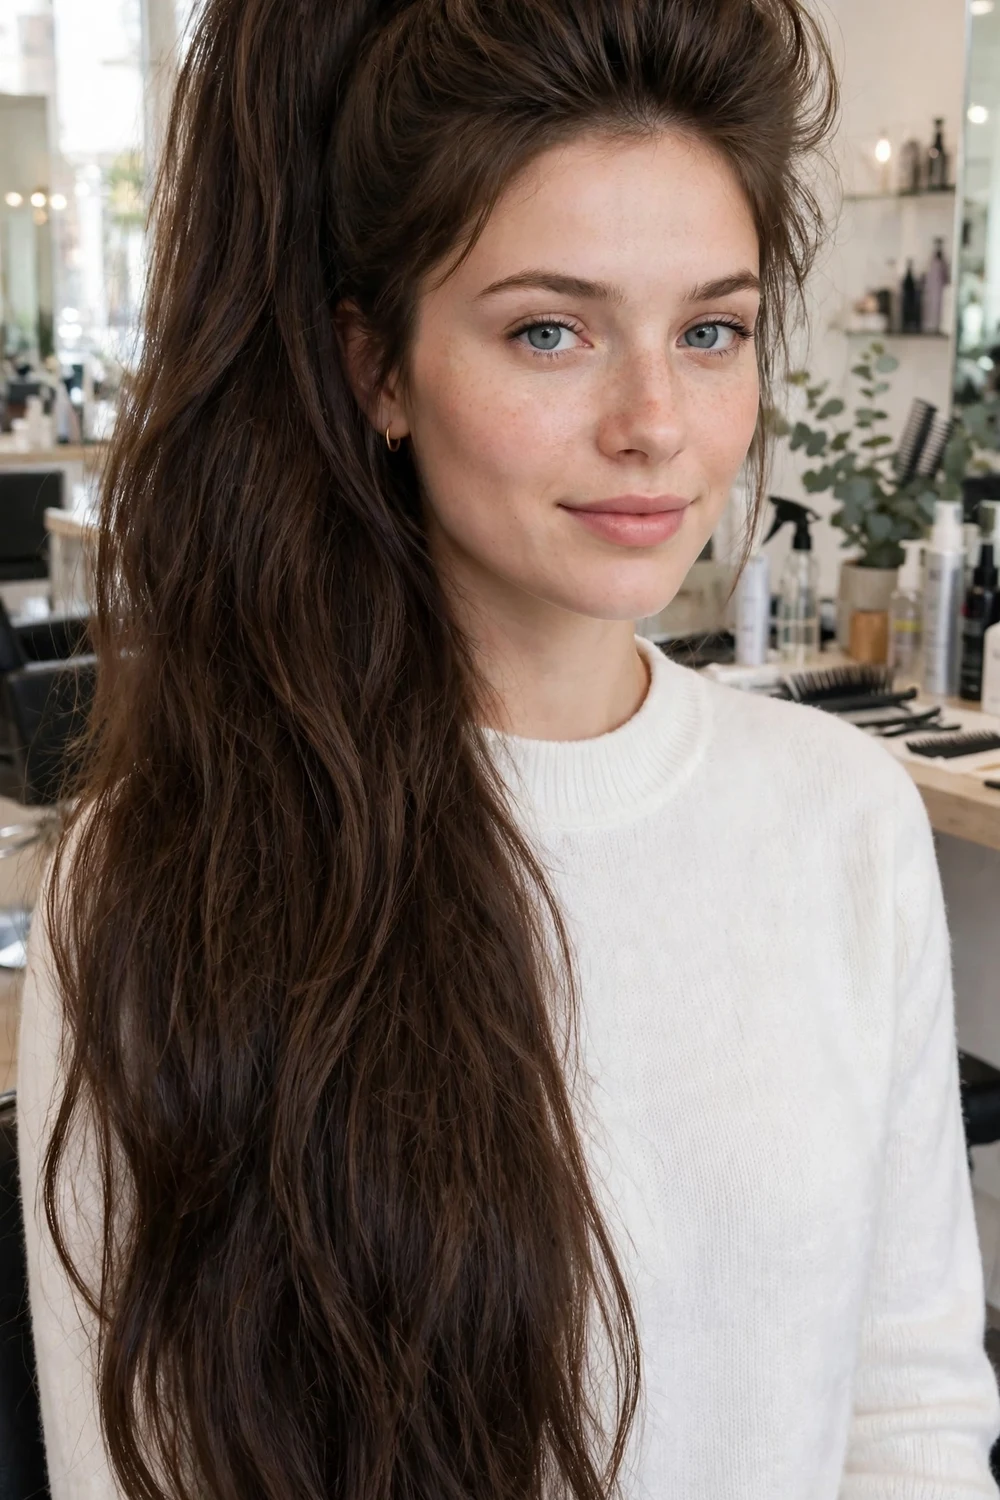
Backcombing a small crown section before tying the ponytail adds lift at the top, so a high ponytail on thick hair looks balanced instead of flat on top and heavy at the back.
Tie the ponytail in two parts, a top section first and then the rest joined into it, to reduce pull and get more height. Wrap a thin strand around the elastic for a clean finish.
More ponytail variations, including wrapped and braided bases, are in this roundup of trendy ponytail hairstyles for long hair.
Try this: Tie the ponytail slightly higher than you want it, since thick hair pulls it down a little.
Difficulty: Easy · Cost: $
21. Bubble Ponytail
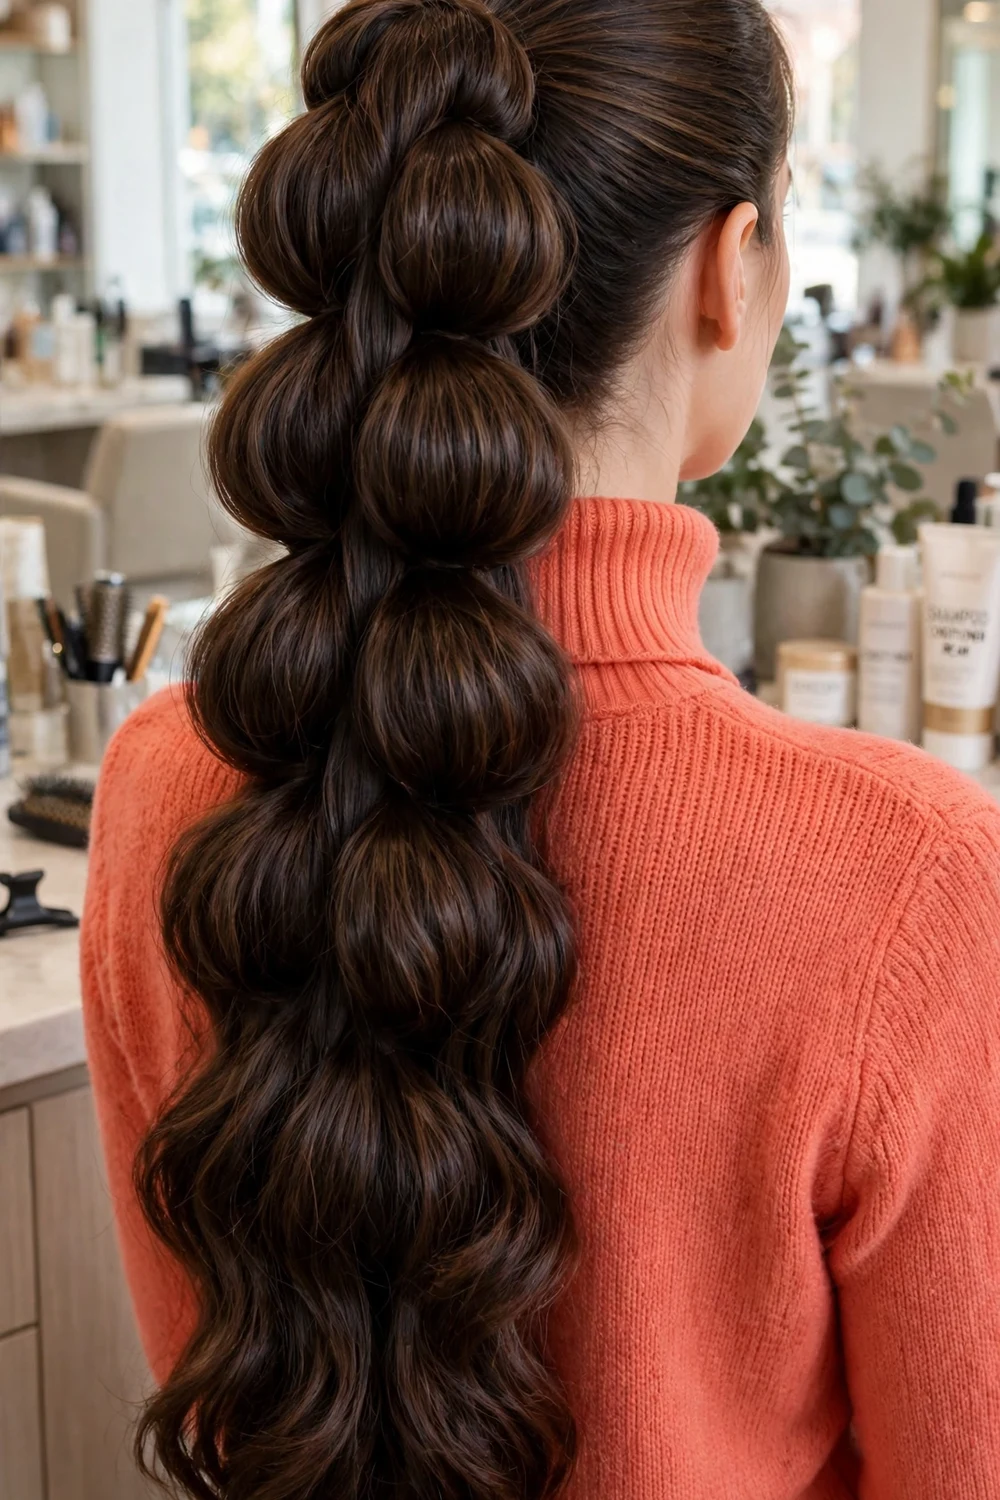
Elastics placed every few inches down a ponytail create rounded bubbles, and thick hair makes each section look full without teasing. It keeps long hair controlled while still showing its length.
Use clear or hair colored elastics and tug each bubble outward evenly on both sides. A slightly high placement keeps the bubbles visible from the front in photos.
Try this: Space the elastics evenly by measuring with two fingers between each one.
Difficulty: Easy · Cost: $
22. Claw Clip High Looped Ponytail
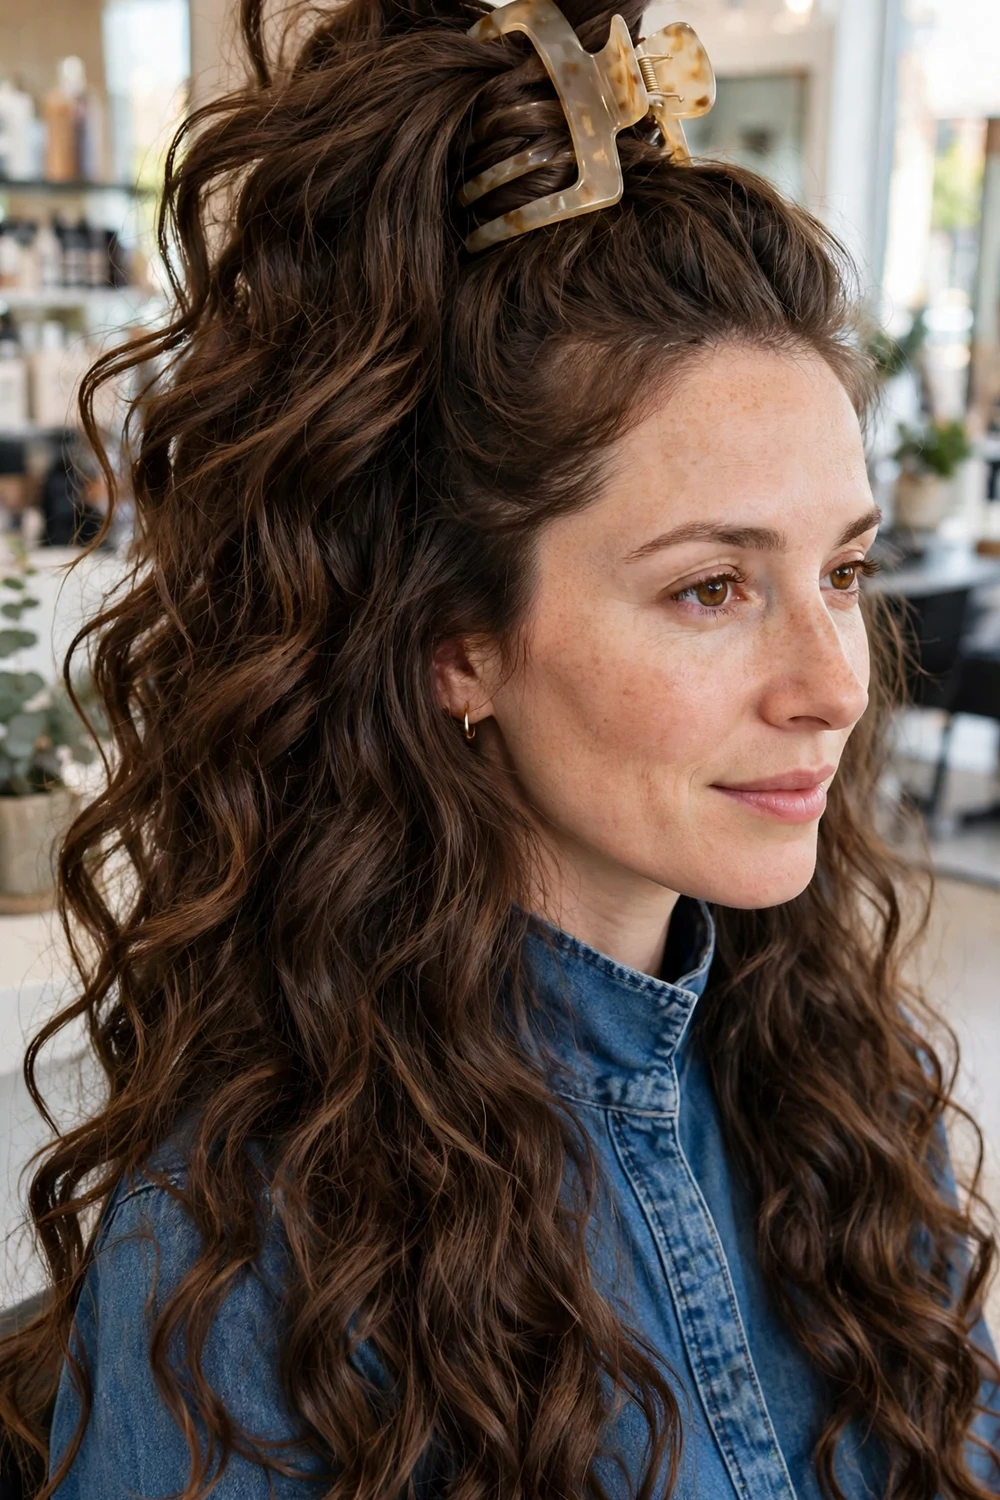
Looping the length up and clipping it high lets waves spill over the clip, which gives the look of a ponytail with less pull on the scalp. A large clip made for thick hair is the key supply here.
Twist the ponytail once, loop it upward, and clip through the twist close to the head. If the clip slips, add a small elastic first and clip over it for extra grip.
Try this: Clip over a small hidden elastic if your hair is freshly washed and very slippery.
Difficulty: Easy · Cost: $
23. Half-Up Ponytail
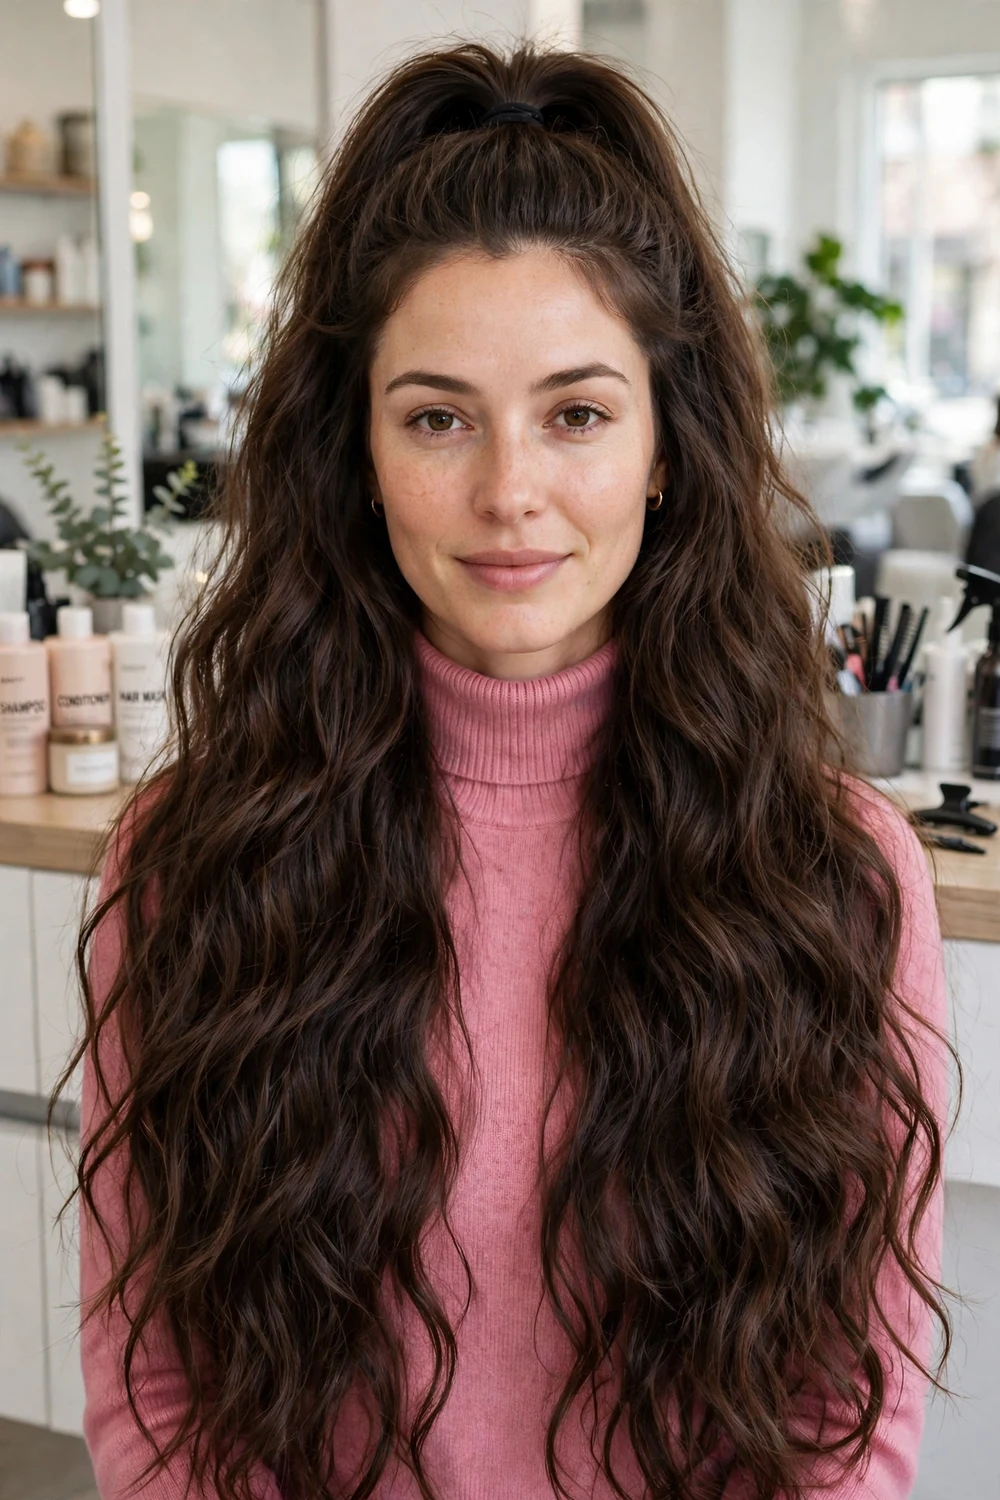
Taking the top section from ear to ear into a high small ponytail lifts the front while the rest of the length stays down. Thick hair gives the top ponytail real height and the loose hair keeps the look full.
Angle the section slightly upward toward the crown for more lift, and curl the top ponytail ends so they blend with the loose hair below. It is a fast fix for day two hair.
Try this: Curl the small top ponytail so it blends into the loose hair instead of sitting apart.
Difficulty: Easy · Cost: $
24. Half-Up Space Buns
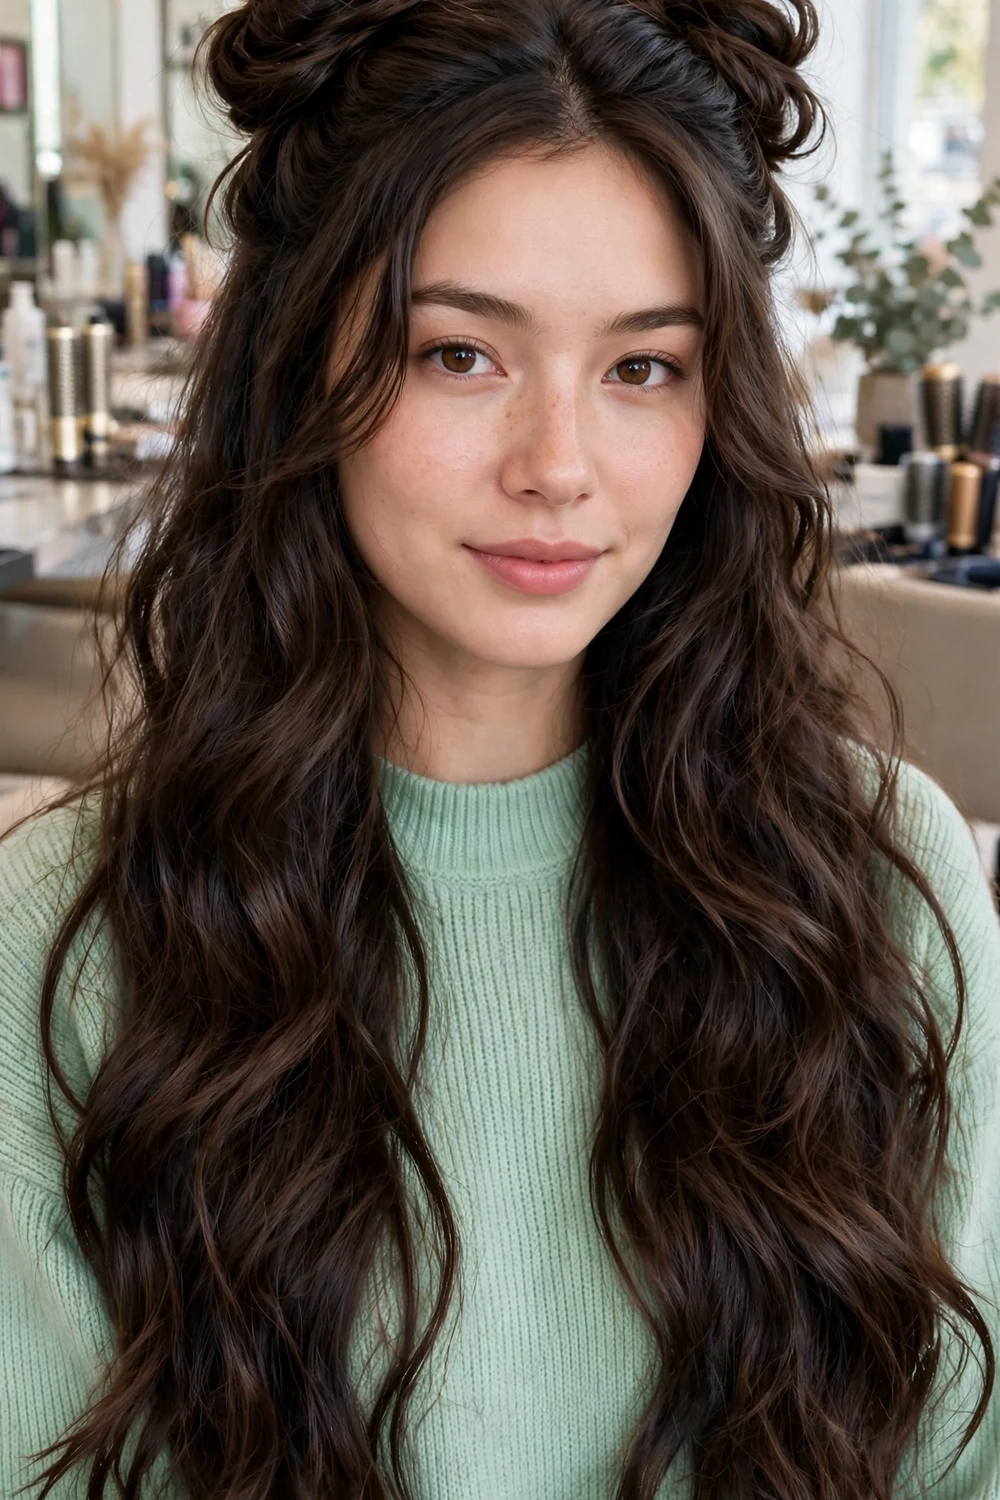
Two small buns on the top section keep the style playful while the loose length below balances the proportions on very thick hair. Splitting the top into two buns also spreads weight so neither bun pulls.
Make the buns smaller than you think, since thick hair expands them fast, and pin the base of each bun as well as using elastics. Leave two thin front pieces out to soften the hairline.
Try this: Make both buns at the same angle by checking them in a second mirror from the side.
Difficulty: Easy · Cost: $
25. Low Ponytail with Curtain Bangs
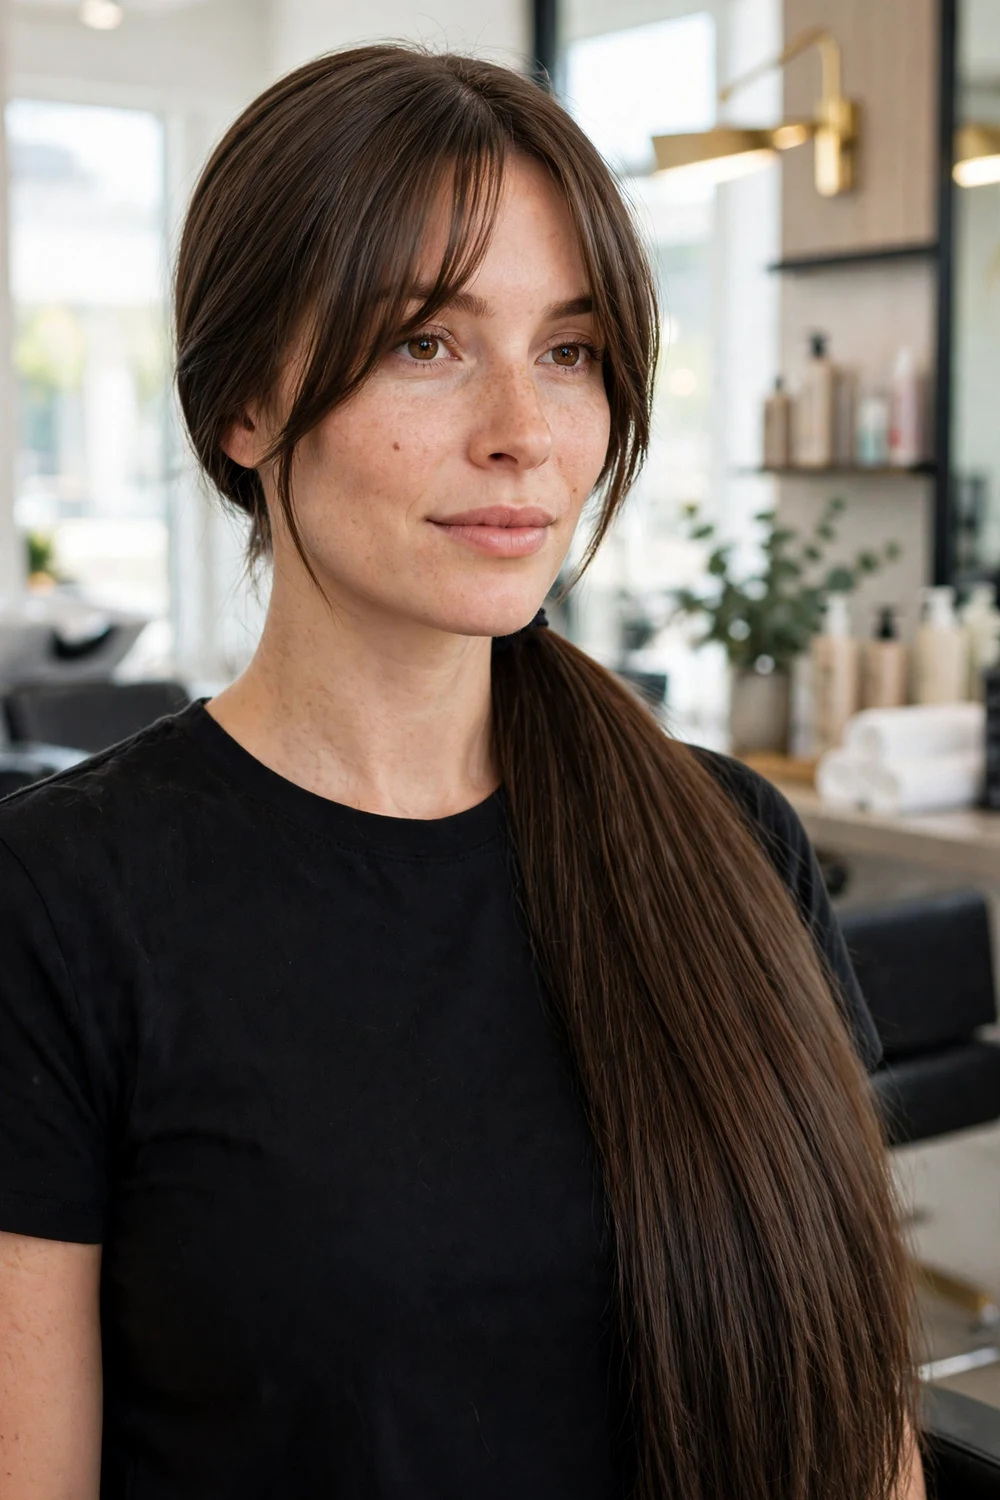
A smooth low ponytail keeps the back simple while curtain bangs do the framing work at the front. This pairing suits work and formal settings where you want thick hair tidy but not scraped back.
Dry the curtain bangs forward first, then tie the ponytail, so the front keeps its shape. Keep the ponytail at the nape and slightly loose at the sides to avoid a harsh line.
Try this: Leave the bangs out when you tie the ponytail, then style them separately at the end.
Difficulty: Easy · Cost: $
26. Full Natural Curls with a Headband
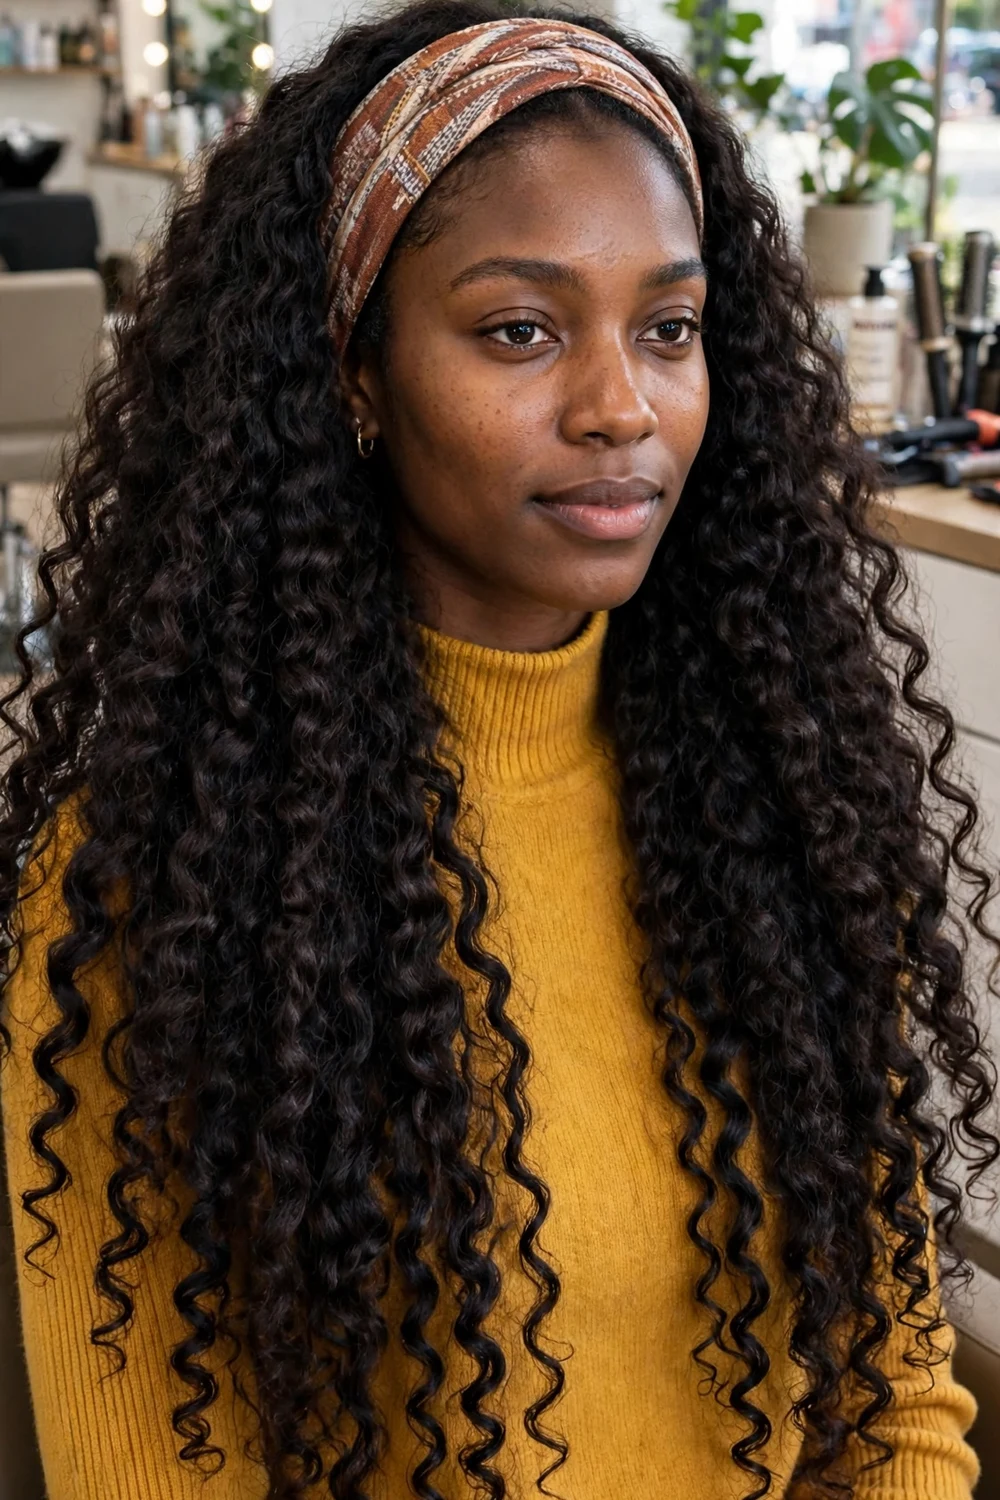
Letting thick curls sit at their full volume, pushed back with a wide soft headband, keeps the shape natural and the hairline comfortable. The headband controls the front without flattening the rest.
Choose a wide fabric band rather than a thin hard one to avoid a line across the curls. Refresh with water and a little leave in conditioner scrunched upward, and let it dry without touching it much.
Try this: Push the headband back an inch from the hairline to avoid flattening the front curls.
Difficulty: Easy · Cost: $
27. High Braided Ponytail
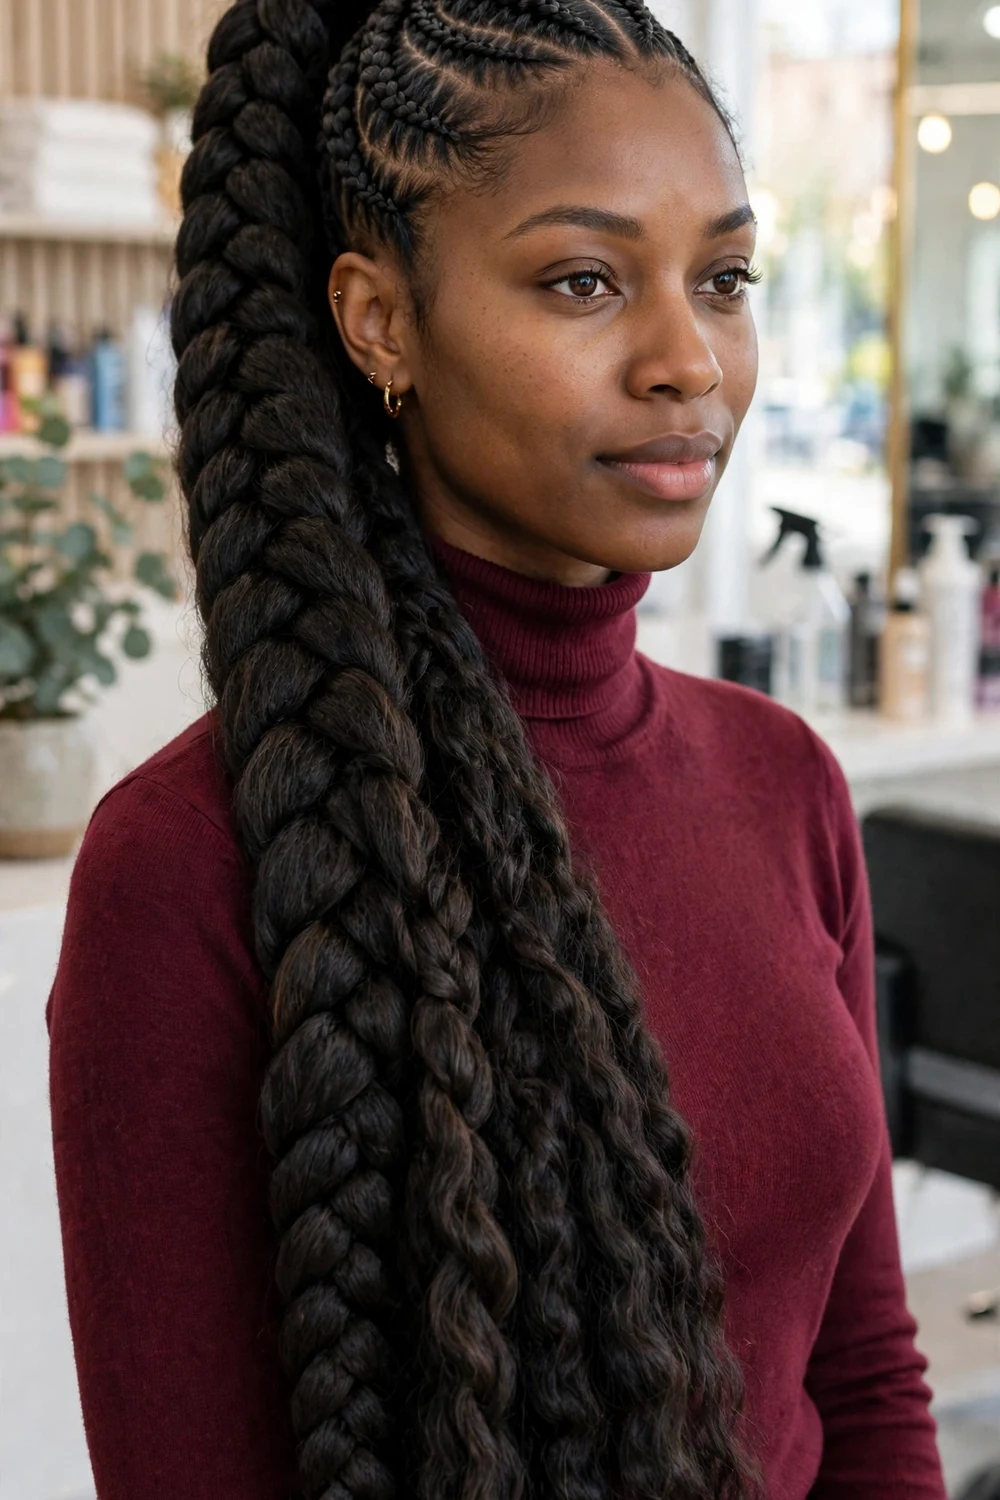
Braiding the base and then the ponytail itself gives long thick hair strong hold for active days and warm weather, and lifts the weight off the neck. It suits naturally textured and coily hair especially well when done without excess tension.
Keep the edges looser than the center sections and take breaks if you braid it yourself. Plan it as an occasional style rather than a daily one if your hairline is sensitive to pull.
Try this: Moisturize the ends the night before so the braid looks smooth and stays together.
Difficulty: Hard · Cost: $$
28. Long Cut with Hidden Underlayers
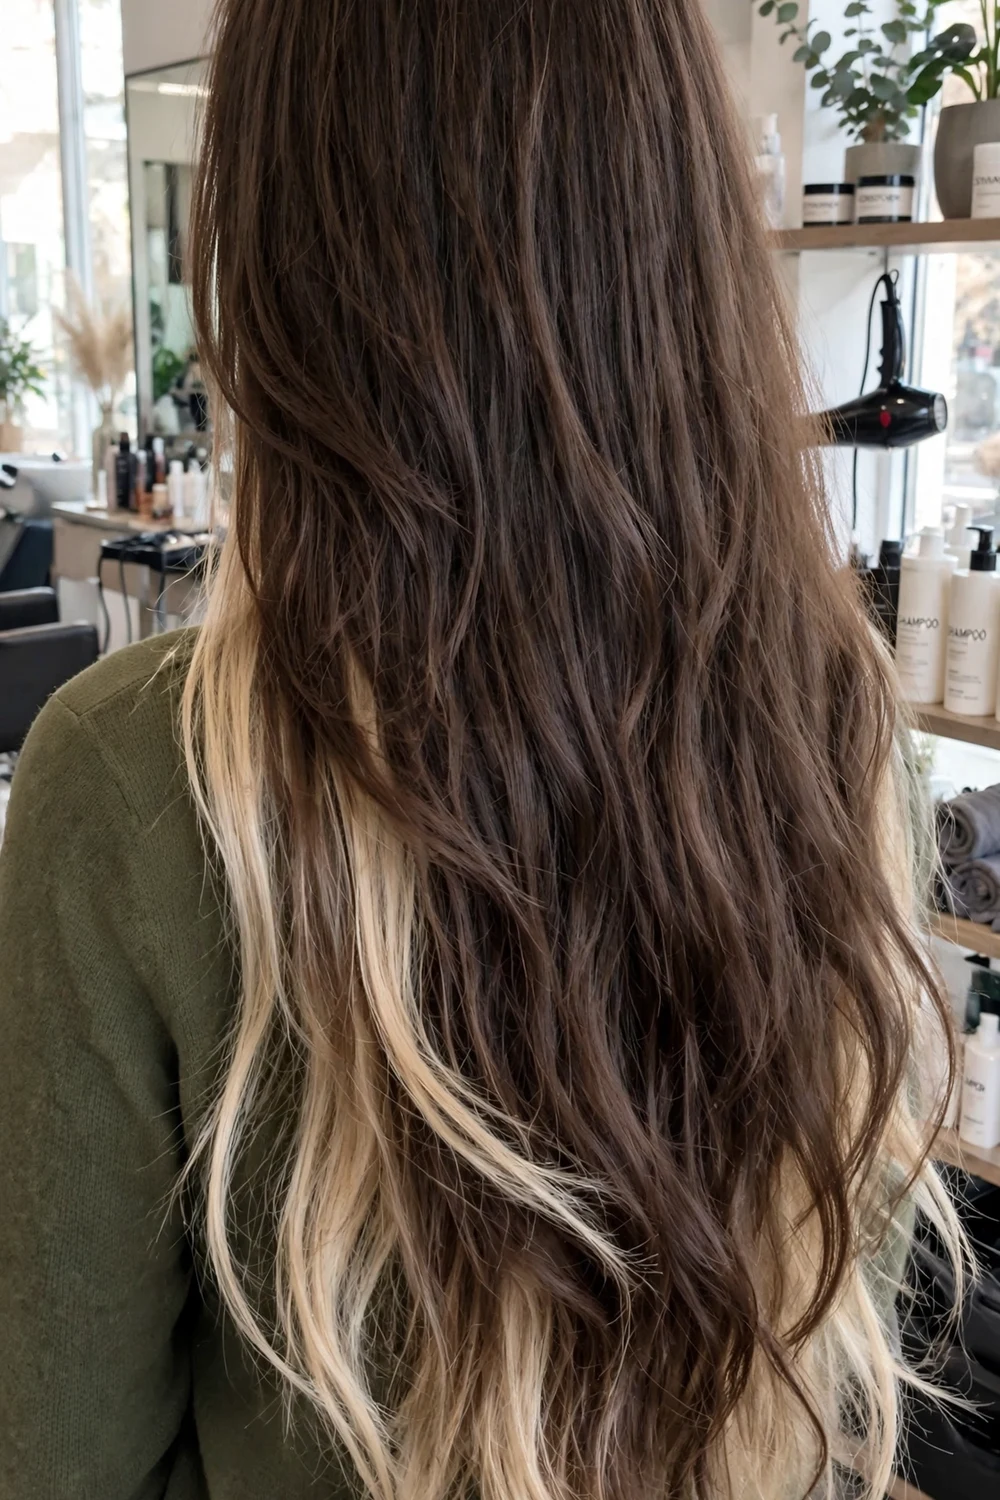
Shorter layers are cut underneath while the top layer stays long, so the hair looks full from the outside but carries less weight underneath. This is a useful option if your hair feels heavy at the nape or dries very slowly.
Ask your stylist to show you exactly where the underlayers will sit before cutting, and keep them away from the front hairline. It grows out discreetly because the visible top layer stays one length.
Try this: Ask for the underlayers to start below the ears so updos still look full at the sides.
Difficulty: Medium · Cost: $$
Quick Comparison: Cuts vs Everyday Styles for Thick Hair
| Style type | Best for | Weight control | Typical cost band |
|---|---|---|---|
| Layered cuts (ideas 1, 3, 4, 5, 28) | Daily wear, reducing bulk | High, built into the cut | $$ |
| One length cuts (ideas 2, 6, 8) | Straight hair, neat finish | Low, keeps full weight | $ |
| Braids (ideas 12 to 16, 27) | Long days, travel, warm weather | High, spreads weight around the head | $ |
| Buns and updos (ideas 17, 18, 19) | Events, work, second day hair | Medium to high, depends on pinning | $ to $$ |
| Ponytails (ideas 20, 21, 22, 25) | Quick styling, showing length | Medium, use two part tying for comfort | $ |
Frequently Asked Questions
What haircut works best for long thick hair?
Layered cuts usually work best for long thick hair because they remove weight from the ends and add movement without losing length. Long layers with face-framing pieces, a layered V-cut, and a classic U-cut are all good starting points to discuss with your stylist.
How do I stop long thick hair from looking triangular?
Ask for layers that start below the chin and lighter, texturized ends, which stop the hair from widening at the bottom while staying flat at the top. Wearing loose waves instead of a pin straight finish also helps balance the shape.
How often should long thick hair be trimmed?
Most people with long thick hair do well with a trim every eight to twelve weeks, depending on heat use and how the ends feel. Fringes and sharp V-cut points usually need a small tidy up between main appointments.
How can I make a ponytail more comfortable with thick hair?
Tie the ponytail in two sections, the top half first and then join the rest into it, to spread the pull across two elastics. A low ponytail at the nape is usually more comfortable than a high one for all day wear.
Can thick hair suit a blunt cut?
Yes, thick hair can suit a blunt cut because its natural weight helps the ends sit in a clean, even line. It works best on straight or smoothed hair, and it needs regular end trims to keep that line sharp.
What is the easiest everyday style for long thick hair?
A low braid, a simple low bun, and a bubble ponytail are among the easiest everyday styles for long thick hair. They take a few minutes, hold heavy hair securely, and can be done without heat.
Final Thoughts
Long thick hair does not need to be cut short to feel manageable. The right layers, a braid or bun that spreads the weight, and a ponytail tied in two parts can make the same length feel very different from day to day. Pick two or three ideas from this list that fit your routine, try them for a week each, and keep the ones that hold up on your busiest days.

