

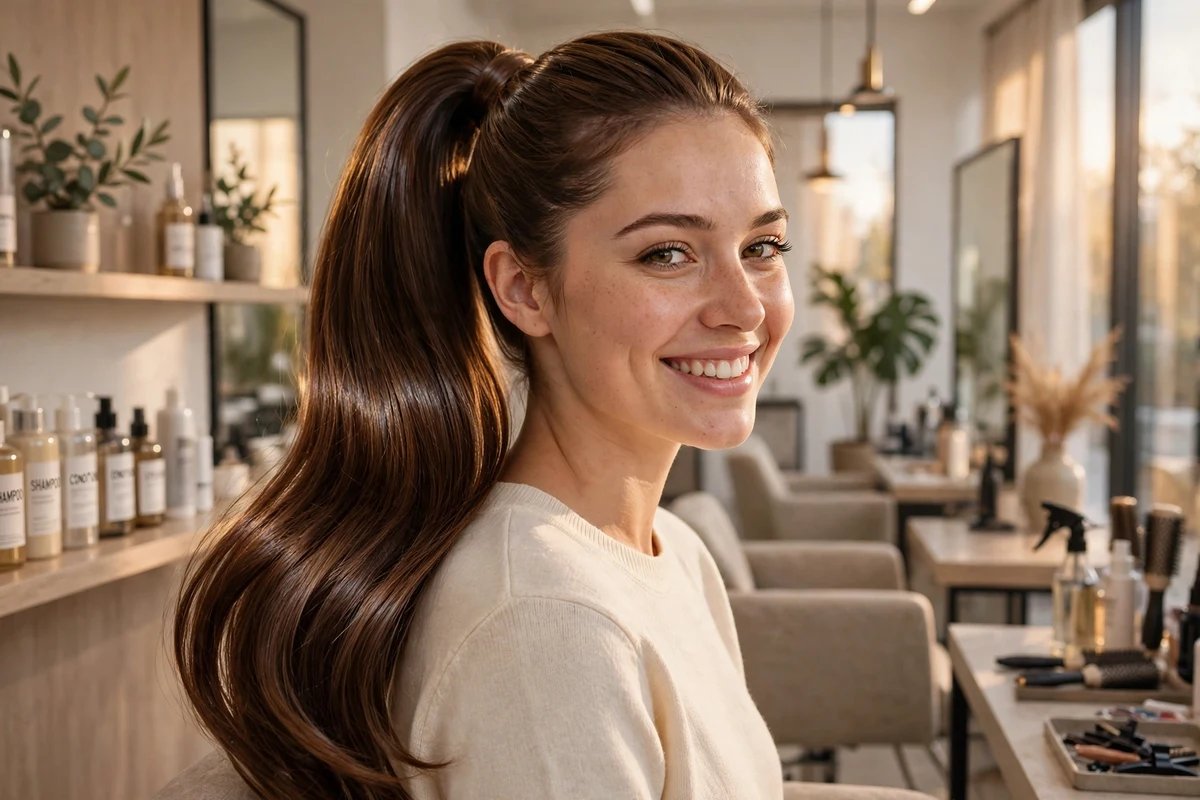
Long hair gives a ponytail room to do more than hang straight down. The same length can be braided, bubbled, twisted, wrapped, or flipped, and each version changes the shape enough to feel like a different style. I rotate through these versions during a normal week, and the ones I return to are the ones that hold on heavy hair without a lot of fuss.
This list collects 26 trendy ponytail hairstyles for long hair, grouped by placement and finish: sleek and polished bases first, then textured and half-up styles, then braids and twists, and finally the accessory finishes. Every idea notes the placement, the tools you need, and a difficulty and cost guide, so you can pick by the time you have as much as by the look you want.
Quick Takeaways
- Placement changes everything: high ponytails lift, mid ponytails balance, and low ponytails read calm and neat.
- Long hair holds the detailed styles best, including bubble, pull-through, fishtail, and stacked double ponytails.
- Two elastics and crossed bobby pins under the base stop heavy hair from sliding down.
- Braided and twisted ponytails stay tidy longest, which suits active days and windy weather.
- Accessories finish a plain ponytail fast: a scarf, a bow, or a metal cuff covers the elastic in one step.
How to Choose Your Ponytail
Start with placement, then pick the finish. High styles need the strongest hold and suit straight, wavy, and curly hair. Low styles are gentler on the scalp and pair well with center parts and accessories. Braided and twisted tails trade a few extra minutes for a style that stays tidy for hours. The seasonal roundup of fall hairstyle ideas for long hair shows several of these bases worn with fall outfits if you want more context.
| Ponytail family | Best for | Hold level | Typical time |
|---|---|---|---|
| High sleek and flipped | Evenings, photos, lifted look | High | 10 to 15 minutes |
| Low polished and wrapped | Work, dinners, center parts | Medium | 5 to 10 minutes |
| Wavy, curly, and messy | Daily wear, second day hair | Medium | 5 to 10 minutes |
| Bubble and pull-through | Full look on fine or layered hair | Medium to high | 10 to 20 minutes |
| Braided and twisted | Active days, wind, travel | High | 10 to 20 minutes |
1. High Sleek Ponytail

Place this ponytail at the crown, in line with the tops of your ears, and brush every section up toward that point before you secure it. A boar bristle brush and a small amount of smoothing gel along the hairline give the clean finish that defines this style.
Keep the lengths straight and glossy. Run a flat iron over the ponytail once it is up, then finish with a light shine spray. A strong elastic plus a second elastic over it stops long, heavy hair from sliding down during the day.
Try this: Use two elastics instead of one, and cross two bobby pins under the base to hold the height on thick hair.
Difficulty: Low to Medium · Cost: $ (salon)
2. Low Polished Ponytail

Gather this one at the nape with a clean center part. Brush the sides down flat, secure with a thin elastic, and keep the lengths smooth and straight so the whole shape reads neat from front and back.
This placement suits workdays and dinners because it stays off the face and sits flat under a coat collar. A drop of serum through the ends stops flyaways without weighing the ponytail down.
Try this: Tuck the elastic under a small section of hair from below the ponytail and pin it flat for a clean base.
Difficulty: Low · Cost: $ (salon)
3. Wavy Ponytail

Set soft waves through the lengths first, then gather the hair at mid height, around the back of the crown. Waves give long hair movement in a ponytail and stop the tail from hanging flat.
Leave the crown smooth but not tight. Finger comb the waves apart after securing the elastic so each wave stays separate, and mist with a flexible hold spray that will not make the waves stiff.
Try this: Curl away from your face in large sections, then brush once with a wide tooth comb for waves that hold their shape longer.
Difficulty: Low to Medium · Cost: $ (salon)
4. Curly High Ponytail

Work with your natural curl pattern here. Gather curls up high with your hands rather than a brush, and secure with a soft scrunchie or a spiral tie that will not crush the curls at the base.
Refresh the curls in the tail with a small amount of curl cream scrunched through damp hands. Let a few curls fall at the front if you like a softer frame, and keep heat off this style to protect the pattern.
Try this: Put this ponytail up on dry, fully set curls. Damp curls stretch under their own weight and the base loosens fast.
Difficulty: Low · Cost: $ (salon)
5. Messy Textured Ponytail

Start with texture spray through dry hair, then gather the hair loosely at mid height with your fingers. The bumps and loose pieces are part of this style, so skip the brush at this stage.
Pull two thin strands out at the front and gently loosen the crown with your fingertips. This is a good second day style, since natural oil gives the hair grip and helps the texture stay in place.
Try this: Tease only the underside of the crown, then smooth the top layer over it with your palm for lift without a rough finish.
Difficulty: Low · Cost: $ (salon)
6. Bubble Ponytail

Secure a high or mid ponytail first, then add small clear elastics every two to three inches down the length. Long hair gives you room for four to six sections, which is where this style gets its shape.
Gently pull the sides of each section outward to round it into a bubble. Keep each bubble a similar size, and work from the top down so the spacing stays even.
Try this: Measure the spacing with two fingers between elastics so the bubbles stay even from base to tip.
Difficulty: Low to Medium · Cost: $ (salon)
7. Half-Up Ponytail
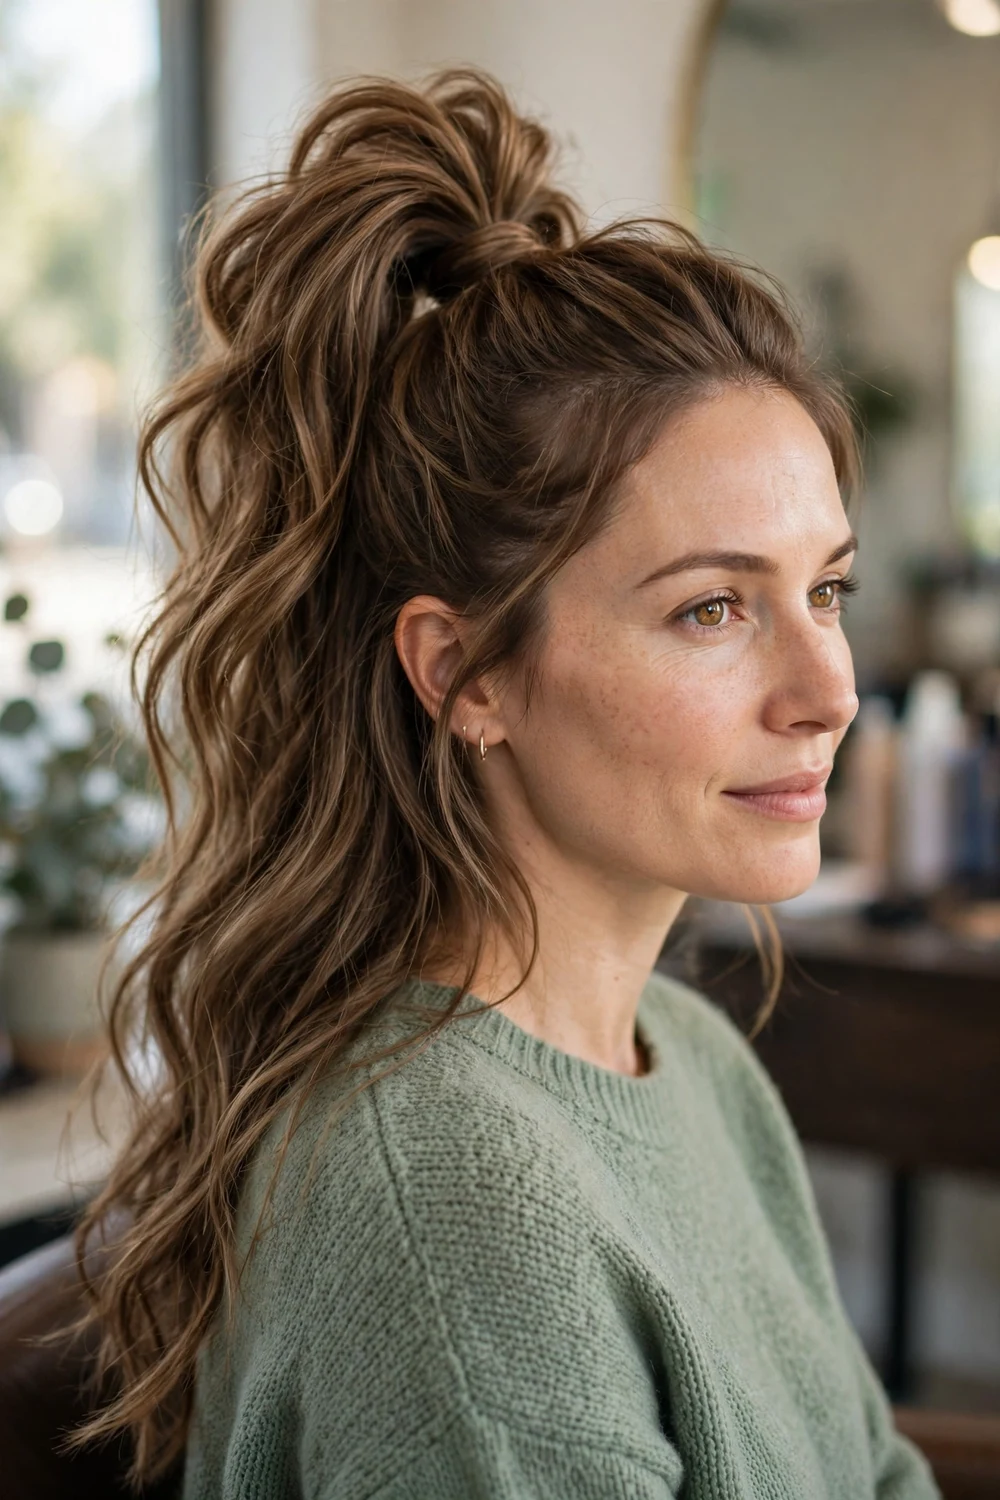
Take the top section of hair from above the ears, gather it high, and secure it while the rest of the hair stays loose down your back. You get hair off your face and you still show the full length underneath.
Add waves to both parts so the tied section blends into the loose hair. This style works well on days when the top layer needs control but the lengths still look good worn down. If you like no-heat routines, pair it with the styles in the heatless hairstyles for long hair guide the night before.
Try this: Angle the half-up section slightly upward as you tie it, so the small ponytail lifts instead of dragging the top flat.
Difficulty: Low · Cost: $ (salon)
8. Half-Up Bubble Ponytail
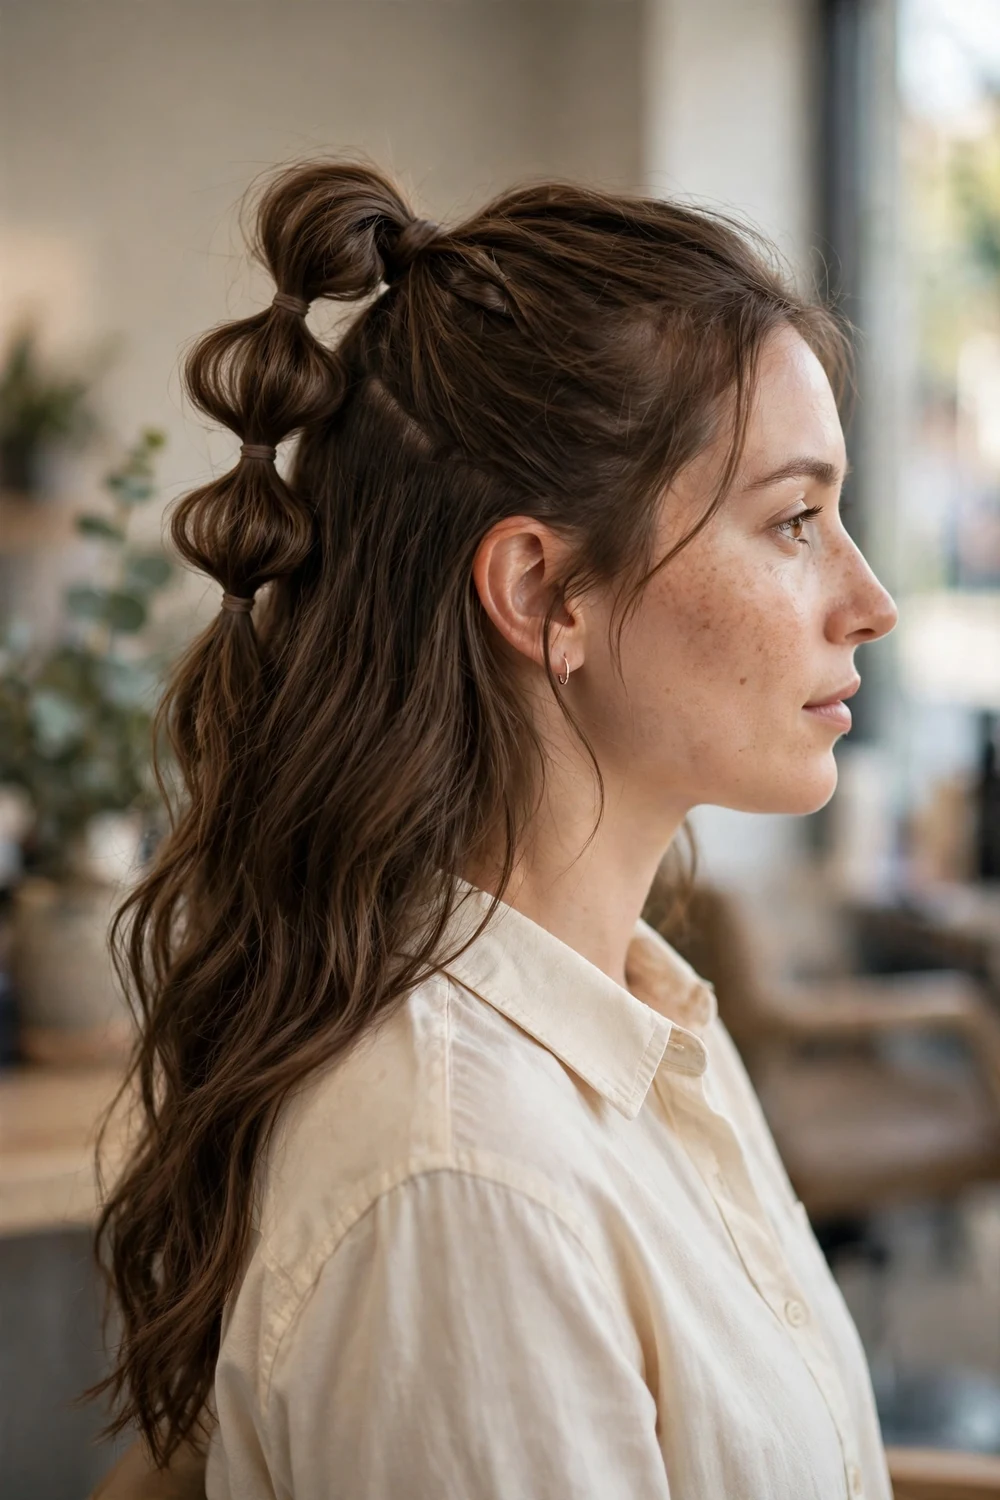
Build this on the half-up base. Tie the top section, then add two or three small elastics down that short ponytail and puff each section out into a small bubble.
The loose hair underneath keeps the look soft, while the bubbles add detail at the crown where people see it first. Clear elastics keep the focus on the shape rather than the ties.
Try this: Keep the bubbles small and tight on this one. Large bubbles on a short top section pull the base loose.
Difficulty: Low to Medium · Cost: $ (salon)
9. Side Ponytail
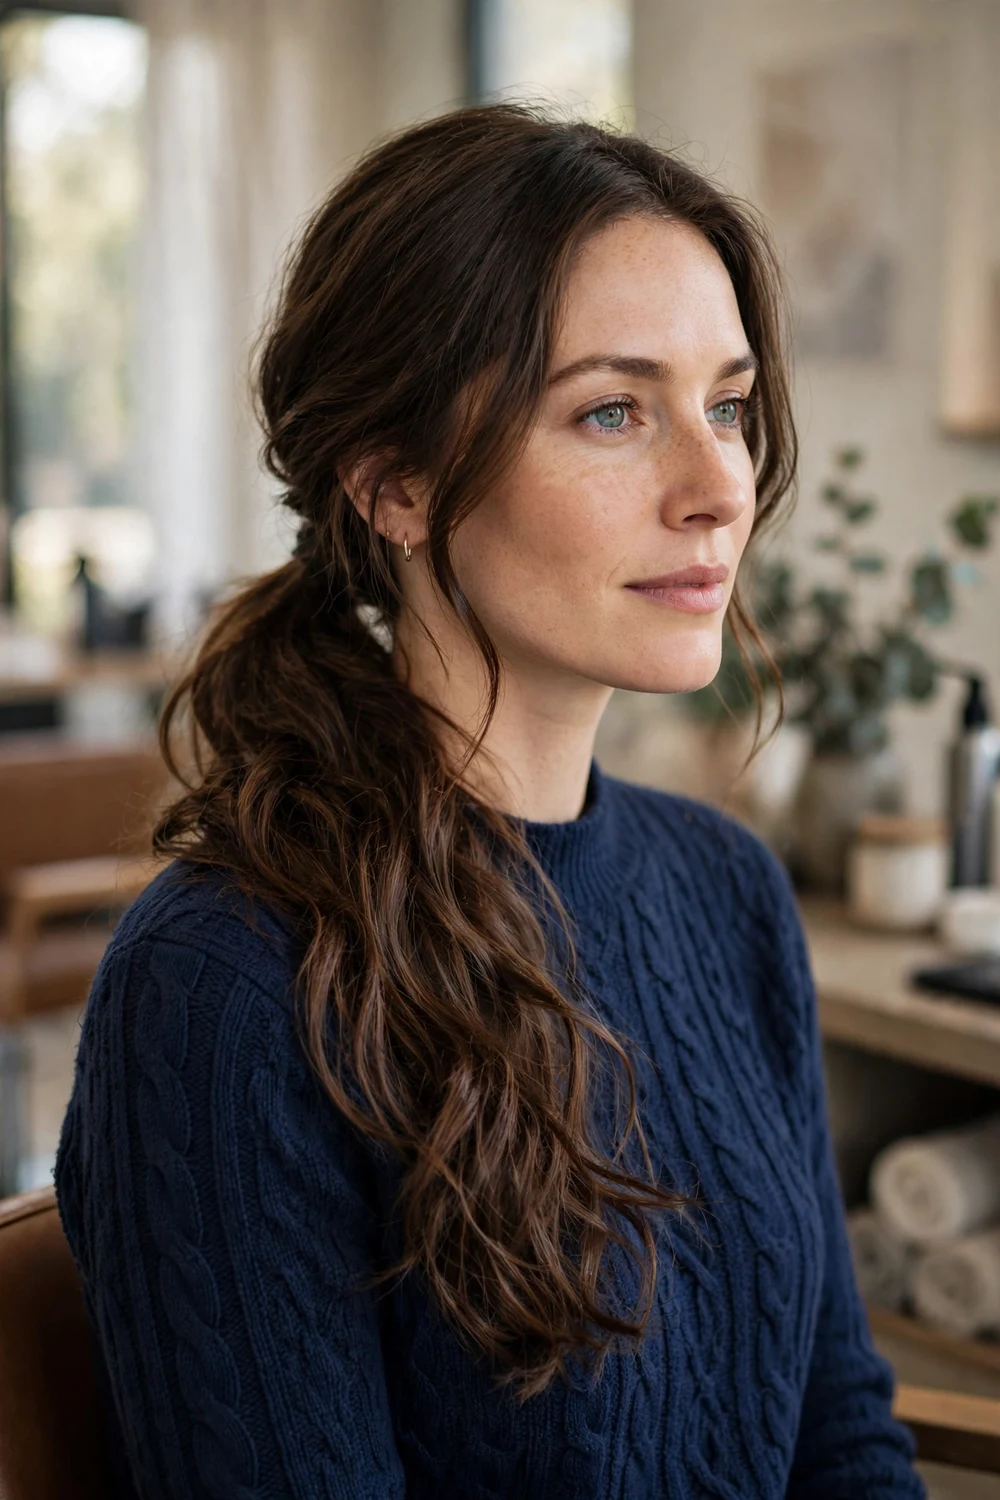
Gather the hair low and to one side, just behind the ear, and let the full length rest over that shoulder. Waves or curls suit this placement because the tail sits at the front where texture shows.
Keep the opposite side smooth and tucked behind the ear for a clean line. A side ponytail also keeps long hair out of the way while you eat, work, or travel, without pulling at the crown.
Try this: Decide which shoulder the tail will sit on before you start, and brush all the hair to that side first so no strays cross the back.
Difficulty: Low · Cost: $ (salon)
10. Hair-Wrapped Ponytail

The wrap is the detail here. Secure a mid or high ponytail, take a thin section from the underside of the tail, wrap it around the base until the elastic is covered, and pin the end underneath.
Use a section about the width of your thumb. Too thin and the elastic shows through, too thick and the wrap looks bulky. A tiny dot of gel on the end section helps it stay smooth as you wrap.
Try this: Spray the wrap section lightly before you wrap it, so it grips the base and the pin holds all day.
Difficulty: Low · Cost: $ (salon)
11. Retro Flipped Ponytail
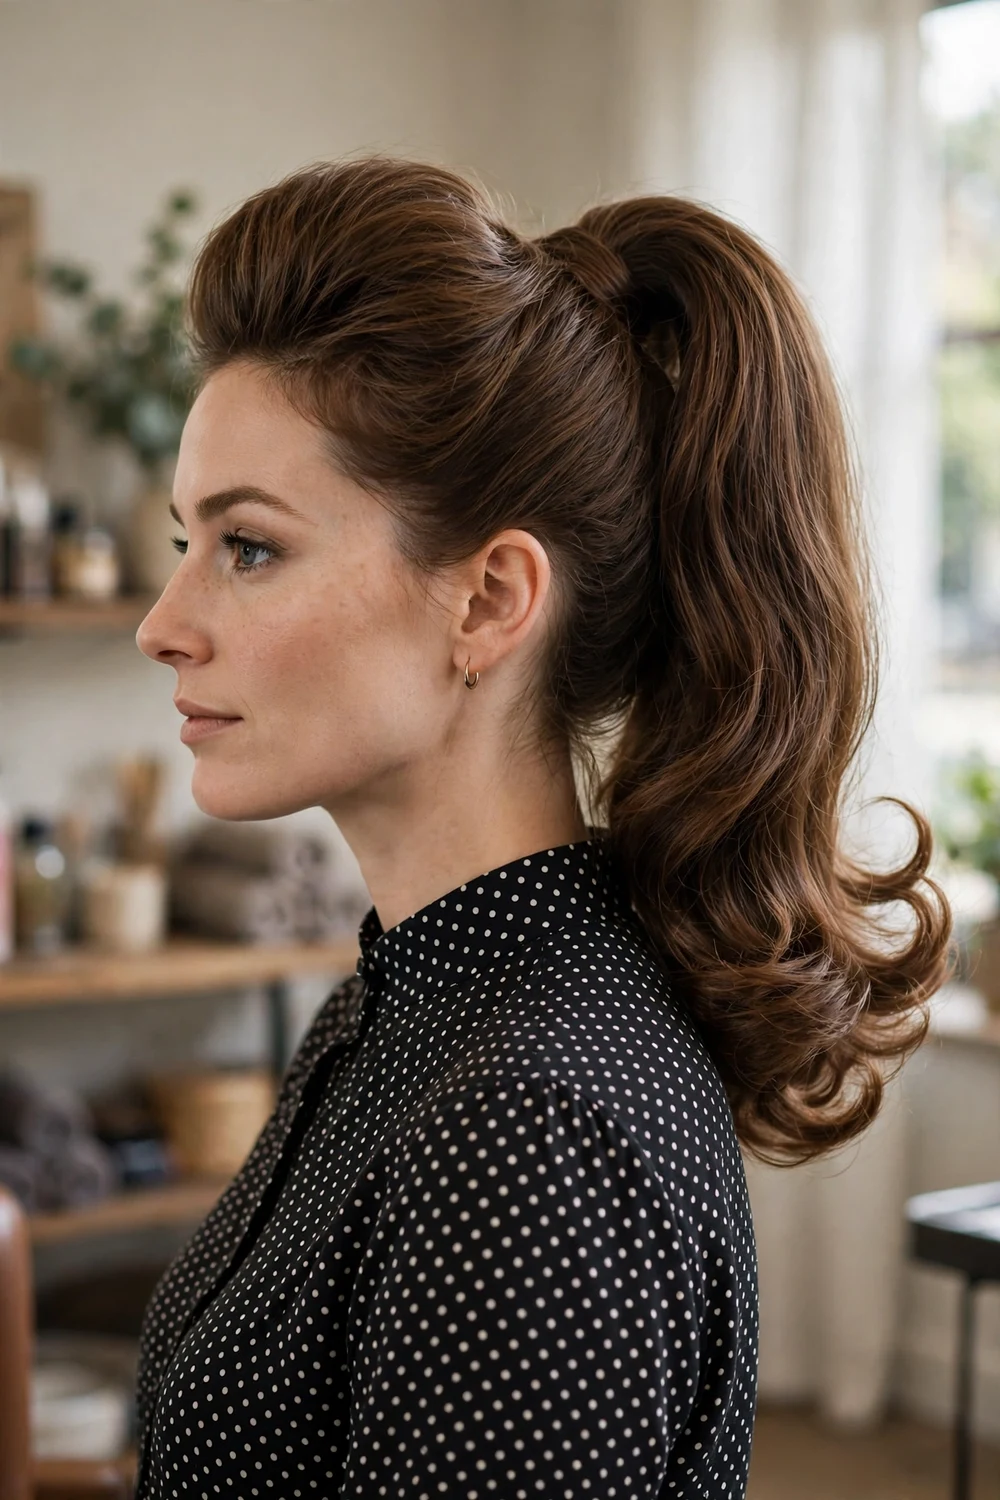
Tease the crown lightly, gather the hair high, and keep a deep side sweep at the front. The retro detail is at the ends: bend the last few inches outward with a flat iron or a round brush and dryer.
Long hair carries the flip well because there is enough length for the bend to read clearly. Finish with a firm hold spray on the ends only, so the crown stays soft.
Try this: Flip the ends in small sections and hold each one for a few seconds as it cools, so the bend sets instead of dropping out.
Difficulty: Low to Medium · Cost: $ (salon)
12. Stacked Double Ponytail

This style uses two ponytails to build one longer looking tail. Tie the top half of your hair high at the crown, then tie the remaining hair into a second ponytail about an inch below the first.
The top tail falls over the base of the lower one and hides it, so the eye reads one long, full ponytail. This is a useful trick for layered hair, where a single ponytail can look thin at the ends.
Try this: Keep the two bases close. A gap between them breaks the line and gives the trick away.
Difficulty: Low to Medium · Cost: $ (salon)
13. Double Side Ponytails
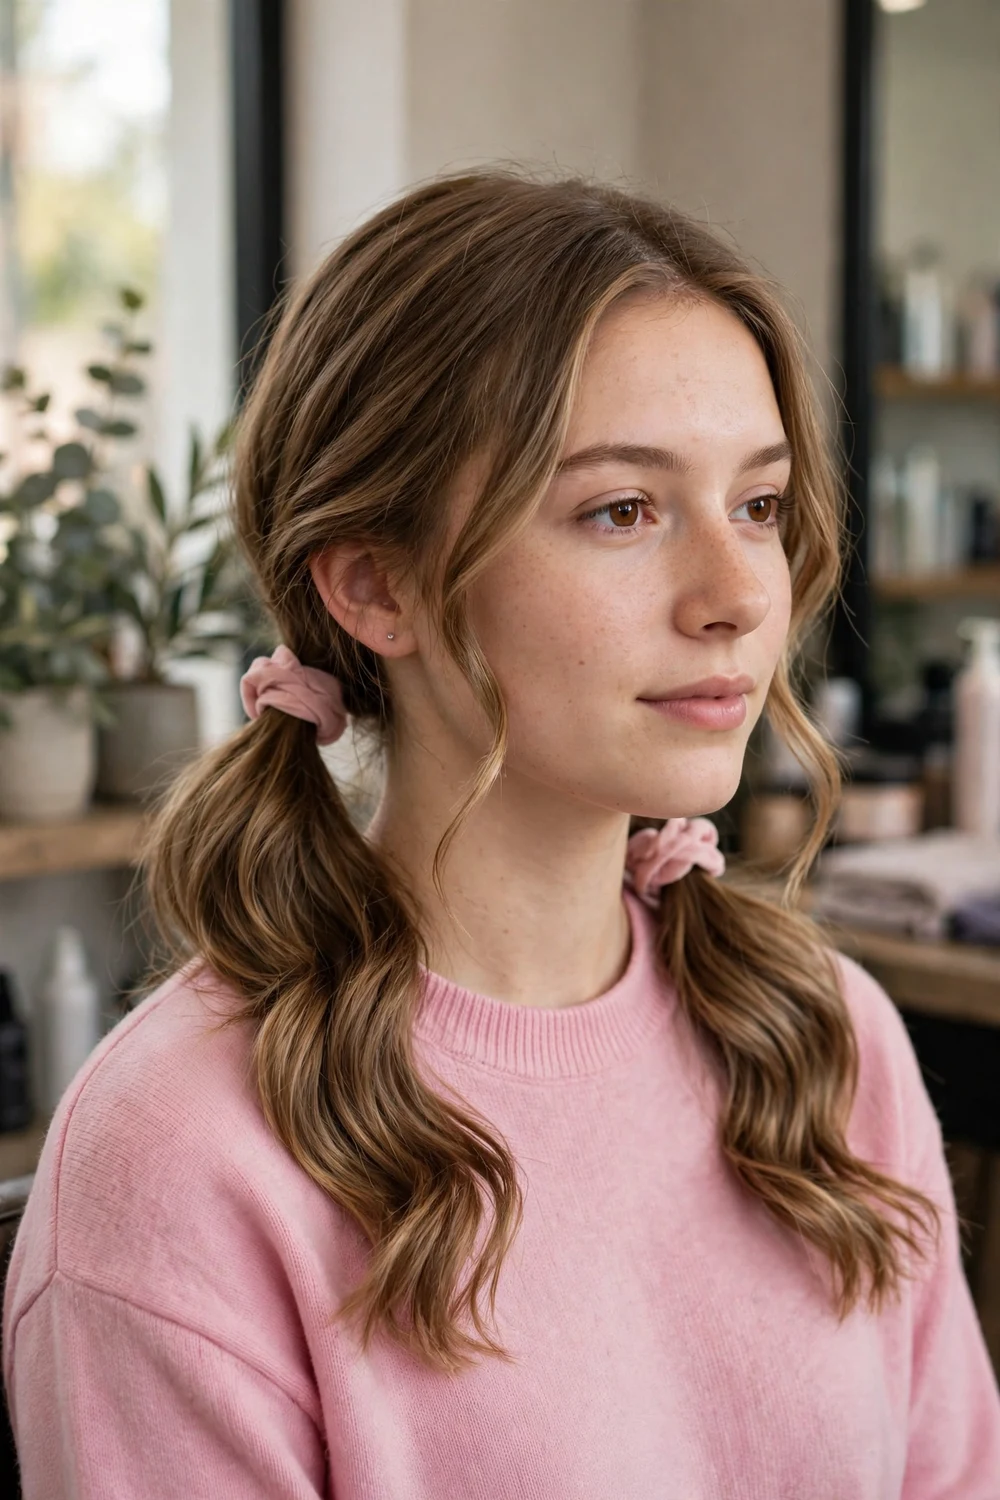
Part the hair down the middle and tie one low ponytail behind each ear. Keep both sides even in height and fullness, and add the same waves to each side so the pair matches.
Low placement keeps this style relaxed and wearable, and long hair gives each side enough weight to hang smoothly. Soft scrunchies are kinder than thin elastics for a style you wear all day.
Try this: Tie the first side, then match the second side to it by feel and by mirror check from the front before you tighten it.
Difficulty: Low · Cost: $ (salon)
14. Braided Ponytail

Tie a secure high or mid ponytail, then braid the full length in a plain three strand braid and secure the end with a small elastic. Long hair is what makes this work: the braid stays thick for most of its length.
A braided tail stays tidy in wind, at the gym, and under a hat, and it does not tangle the way a loose ponytail can. Smooth a little leave-in conditioner through the tail before you braid to keep the strands neat.
Try this: Braid over one shoulder so you can see your hands, then swing the finished braid back when you are done.
Difficulty: Medium · Cost: $$ (salon)
15. French Braid Ponytail

Start a French braid at the front hairline and add hair as you work back over the crown. Stop at the nape, secure everything with an elastic, and leave the rest of the length loose as the ponytail.
The braid holds the top and sides firmly, so this style suits active days when a plain ponytail slips. Keep the braid snug at the sides and looser at the crown if you want some height.
Try this: Keep your thumbs close to the head as you add sections. Small, even additions give the neatest braid line.
Difficulty: Medium to High · Cost: $$ (salon)
16. Fishtail Ponytail
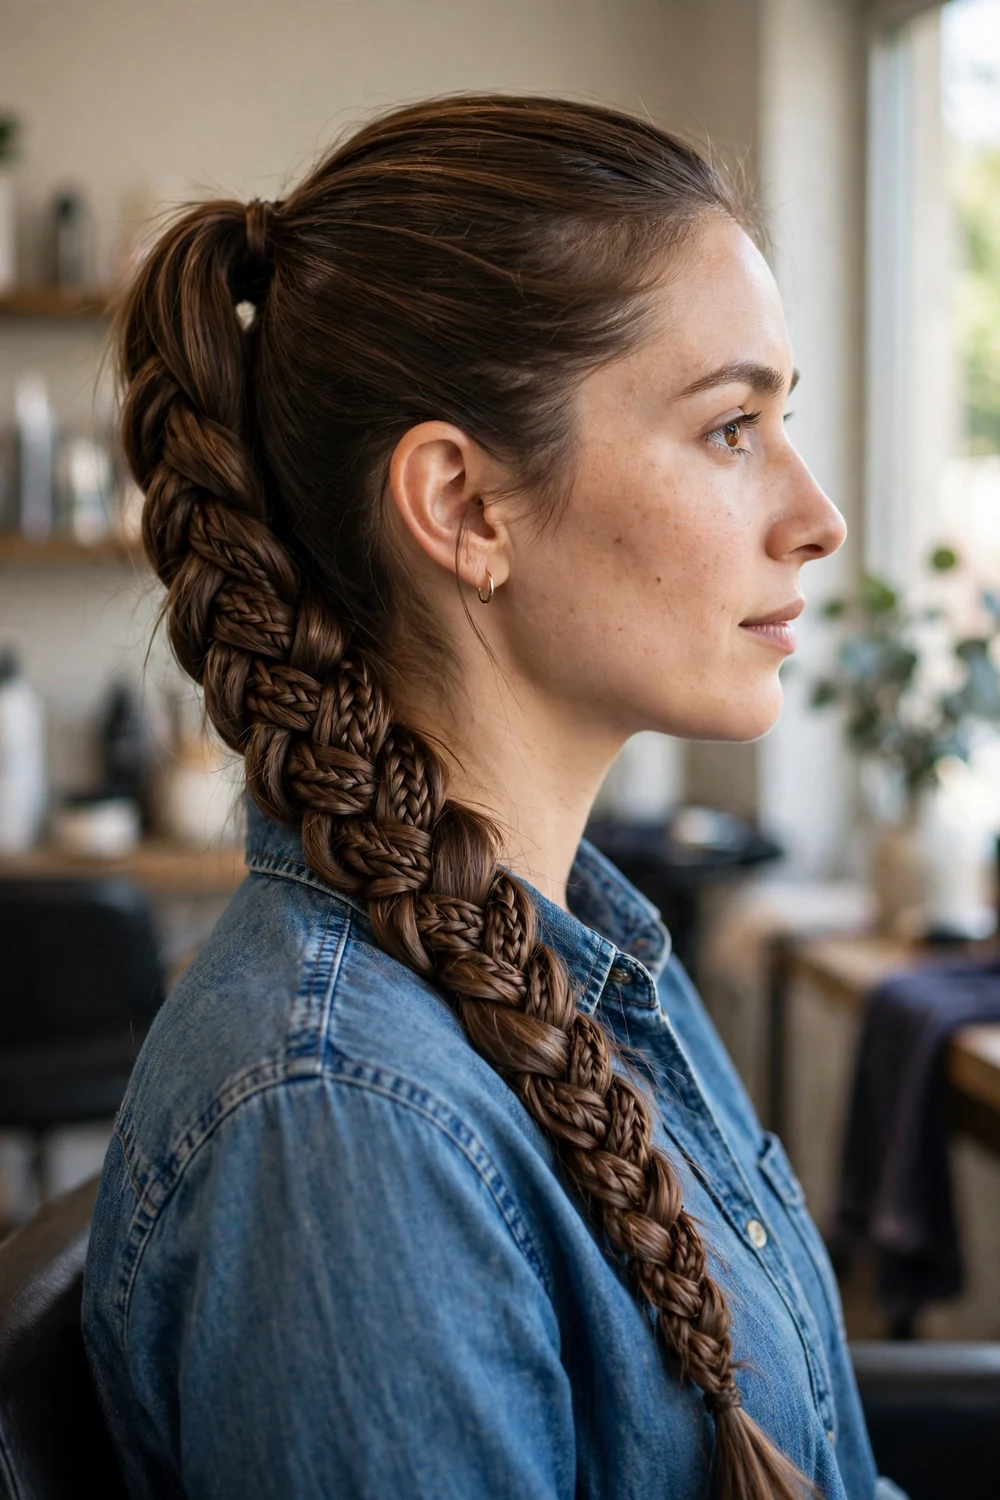
Tie the ponytail first, split the tail into two sections, then cross a thin strand from the outside of one section over to the other side. Repeat, alternating sides, all the way down.
Thin strands give the tight woven pattern this braid is known for, and long hair gives you the length to show it. Gently pull the edges of the finished braid outward to widen it and make the pattern read larger.
Try this: Work in a mirror for the first few inches, then settle into the rhythm. The pattern speeds up once the first section is set.
Difficulty: Medium to High · Cost: $$ (salon)
17. Braided Crown Ponytail

Braid one or two small sections along the front hairline, from ear to ear or from a side part across the crown, then gather those braids in with the rest of the hair into a ponytail at the back.
The braids do the detail work at the front, where a plain ponytail can look plain, and the tail at the back stays simple. Pin the braid ends under the ponytail base so no short ends stick out.
Try this: Braid the crown sections first and clip them aside, then gather everything together in one step so nothing gets left out.
Difficulty: Medium · Cost: $$ (salon)
18. Rope Twist Ponytail

Tie a low or mid ponytail, split the tail into two equal sections, twist each section in the same direction, then wind the two sections around each other in the opposite direction. That counter twist is what locks the rope in place.
The result reads like a braid but takes half the steps, and it holds well on straight and wavy hair. Secure the end firmly, since a rope twist will unwind from the bottom if the elastic is loose.
Try this: Keep both sections the same thickness from top to bottom, or the rope will spiral unevenly and kink.
Difficulty: Medium · Cost: $$ (salon)
19. Twisted Low Ponytail
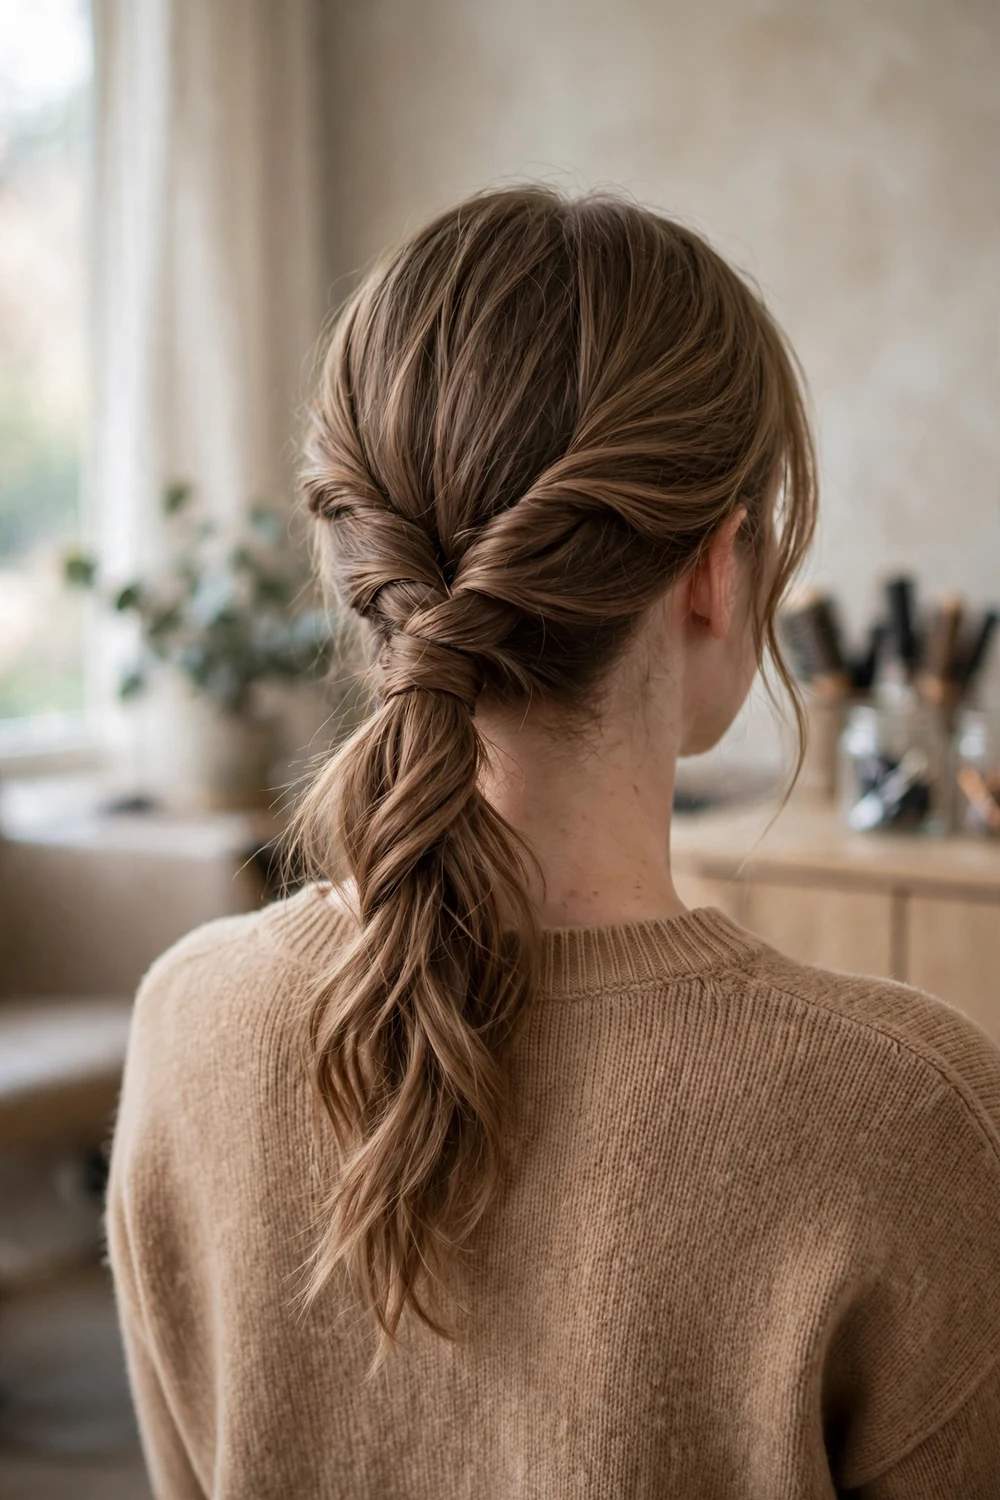
Part the hair, take a section from each side at the temples, twist each one back along the head, and join them with the rest of the hair in a low ponytail at the nape.
The twists add detail at the back and sides while the tail stays loose and simple. This is a calm, neat style for work or dinner, and it takes only a few minutes once you know the steps.
Try this: Twist the side sections away from your face and pin them in place before you tie the ponytail, so they do not unravel while you gather the rest.
Difficulty: Low to Medium · Cost: $ (salon)
20. Pull-Through Ponytail

This style builds a row of linked sections that look like a thick braid. Start with a ponytail, tie a second ponytail just below it from the side hair, split the first tail around the second, and repeat down the length.
Long hair is a real advantage here because each link needs length to puff out. Pull each section wide as you go, since the width is what gives this ponytail its full look. Clear elastics keep the links clean.
Try this: Set the spacing before you start puffing. Even links look tidy, and you cannot easily move an elastic once the section above it is widened.
Difficulty: Medium to High · Cost: $$ (salon)
21. Topsy-Tail Ponytail

Tie a low or mid ponytail, push your fingers up through the hair just above the elastic to open a small gap, then flip the whole ponytail down through that gap and pull it snug.
The flip creates a neat twisted roll above the base and adds detail to a plain low ponytail in under a minute. You can repeat the flip at a second point lower down on very long hair for a doubled effect.
Try this: Loosen the base slightly before you flip. A ponytail tied too tight will not pass through the gap cleanly.
Difficulty: Low · Cost: $ (salon)
22. Scarf Ponytail

Tie your usual high or low ponytail, knot a lightweight scarf around the base, and either let the ends hang with the tail or weave them loosely through a braid or bubble sections.
A scarf adds color and pattern without any heat or product, and it covers the elastic at the same time. Choose a smooth fabric that slides against hair rather than gripping it, and keep the knot snug so it does not travel down the tail.
Try this: Tie the scarf to the elastic first, under the ponytail, then bring the ends forward. The knot stays hidden and holds better.
Difficulty: Low · Cost: $ (salon)
23. Bow Ponytail
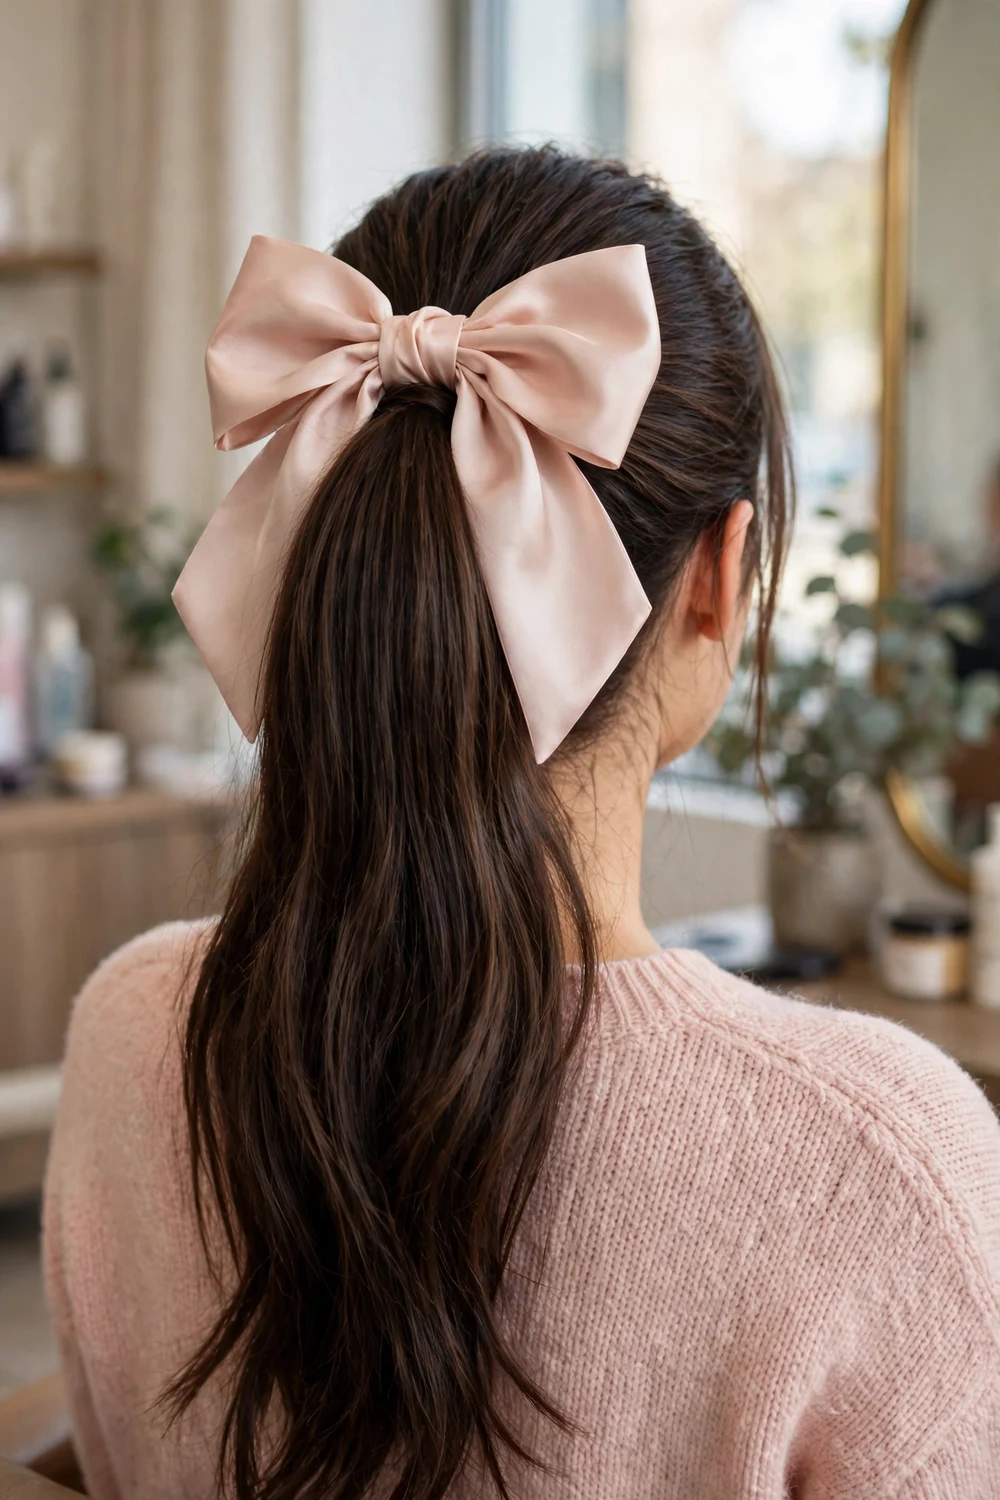
Style the ponytail first and finish it with the bow. A high ponytail with smooth lengths shows a bow best, since the bow sits at the highest point and stays visible from the front and side.
Clip or tie the bow just above the elastic. A wide satin or velvet bow suits evening plans, while a smaller cotton bow suits daytime. Keep the rest of the style simple so the bow stays the single detail.
Try this: Attach the bow after hairspray. Spray dulls satin and can spot velvet, so the accessory always goes on last.
Difficulty: Low · Cost: $ (salon)
24. Cuffed Ponytail

A metal ponytail cuff slides or clips over the base of a sleek ponytail and covers the elastic in one step. Lined up bobby pins along one side give a second version of the same idea, using pins you already own.
Keep the hair itself smooth and simple with this one. The metal detail does the talking, and a textured or messy base fights with it. This finish suits the low polished and high sleek bases earlier in this list.
Try this: Put the cuff on a ponytail tied with a thin elastic. A thick scrunchie base will not fit under most cuffs.
Difficulty: Low · Cost: $ (salon)
25. Ponytail with Side-Swept Bangs

Leave the front section out before you tie the ponytail. Sweep that section across the forehead to one side, pin or tuck the end behind the ear, and gather the rest into a high ponytail.
The sweep softens a high, tight ponytail and suits anyone who finds a fully pulled back hairline too severe. If you wear long hairstyles with curtain bangs, the same front section can be left loose and blended into this sweep.
Try this: Set the sweep with a light spray on your fingertips, not directly on the hair, so the fringe stays soft and movable.
Difficulty: Low to Medium · Cost: $ (salon)
26. Wet-Look Ponytail
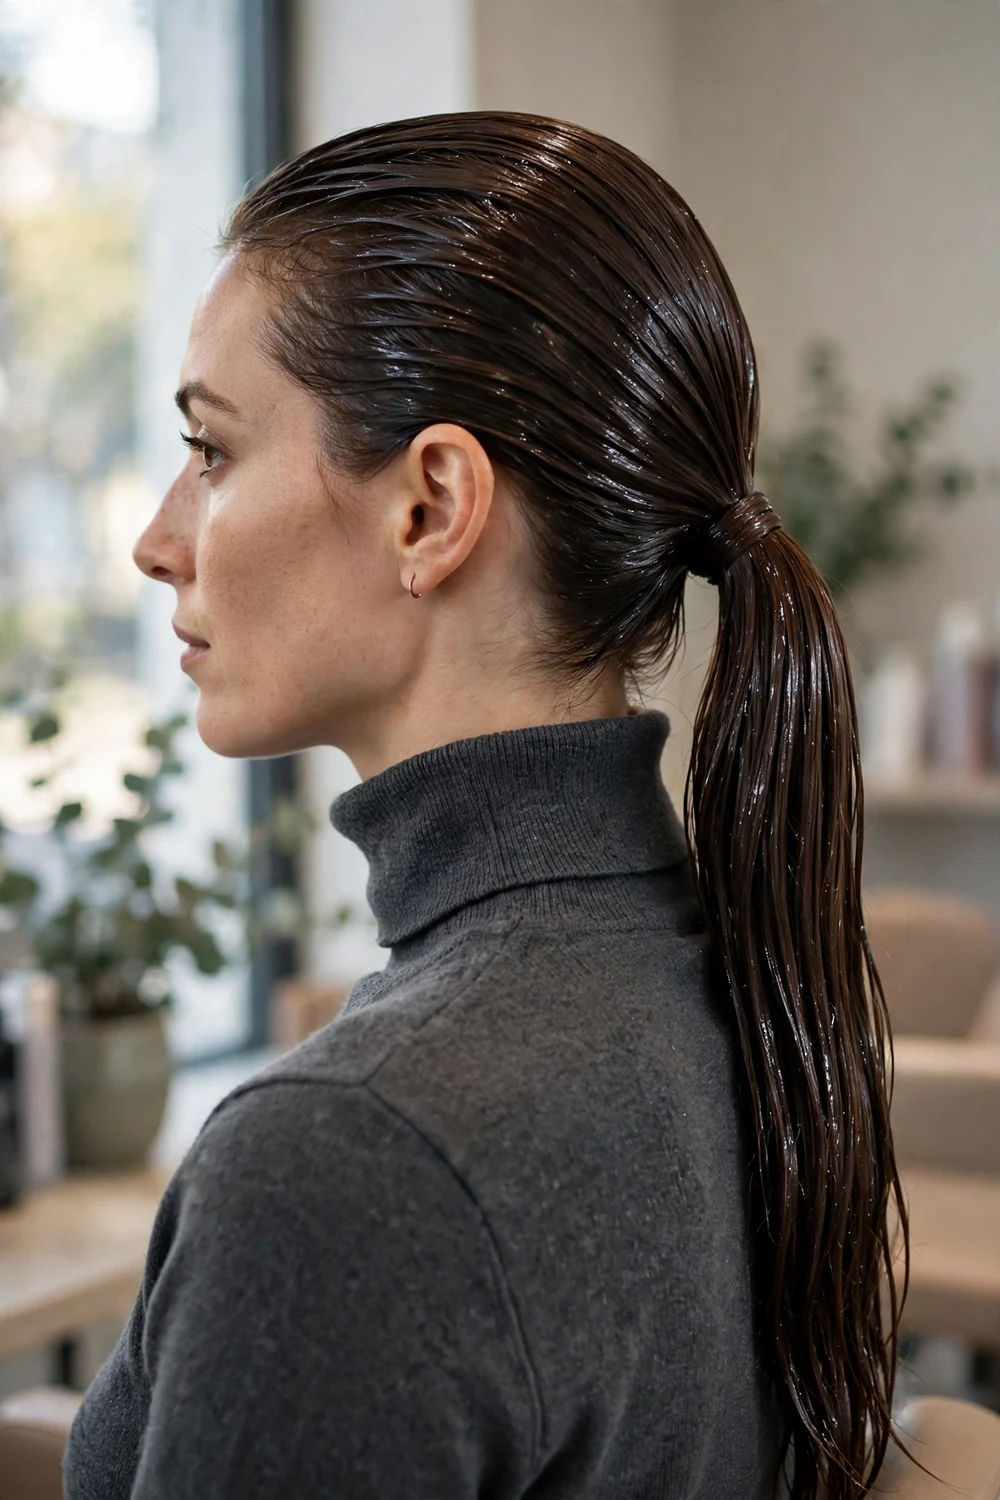
Work a strong hold gel through damp hair from roots to mid lengths, brush everything back flat, and tie a low or high ponytail while the hair is still damp. The lengths keep a glossy, just wet finish as the gel sets.
This is a gap idea in most ponytail roundups, yet it is one of the easiest trend looks to copy at home. Keep the part sharp if you wear one, and smooth the sides with the side of the brush for a clean line. Expect a firm hold and a wash needed before restyling.
Try this: Apply gel in sections. One pass over the whole head leaves dry patches that frizz as the style sets.
Difficulty: Low to Medium · Cost: $ (salon)
More Ideas to Explore
Frequently Asked Questions
How do I stop a ponytail on long hair from sliding down?
Use two elastics instead of one, and tie the ponytail on dry hair with some texture spray for grip. Cross two bobby pins in an X under the base, pointing upward, so they brace the elastic. For very heavy hair, the stacked double ponytail in this list splits the weight across two bases and holds height longer.
Which ponytail height suits long hair best?
High ponytails lift the face and show the most length and swing. Mid ponytails sit at the back of the crown and suit most daily plans. Low ponytails at the nape read the calmest and work well with center parts, scarves, and bows. Try each height in a mirror from the side, since the side view shows the line most clearly.
How can I make a thin ponytail look thicker?
Add texture before you tie it. Waves, curls, and backcombing at the crown all add width. The bubble, pull-through, and stacked double styles in this list also build visible fullness, because each one spreads the hair over a wider shape than a plain tail.
Do ponytails damage long hair?
A ponytail tied in the same tight spot every day can stress the hair at the base and at the hairline. Rotate the height, use soft scrunchies or spiral ties for daily wear, and keep tight sleek styles for shorter stretches. Never tie wet hair up tightly, since wet hair stretches and breaks more easily.
How do I keep a ponytail smooth without frizz?
Start on fully dry hair, brush with a boar bristle brush, and smooth a small amount of serum or gel along the top and sides before you tie it. Finish flyaways after the ponytail is up by pressing them down with the back of the brush or a fingertip with a little product on it.
Final Thoughts
A ponytail rotation is the simplest styling plan long hair allows. Keep two or three bases you can do without thinking, one sleek, one textured, and one braided, then change the finish with placement, a wrap, or an accessory on the days you want something different. My own test is always the side mirror check and the two hour check: if the base still sits where I put it and the ends still look tidy, the style earns its place.
When the weather turns cold, several of these bases carry straight into the winter hairstyles for long hair collection, where low polished, scarf, and braided ponytails sit alongside the season’s other long styles.

