


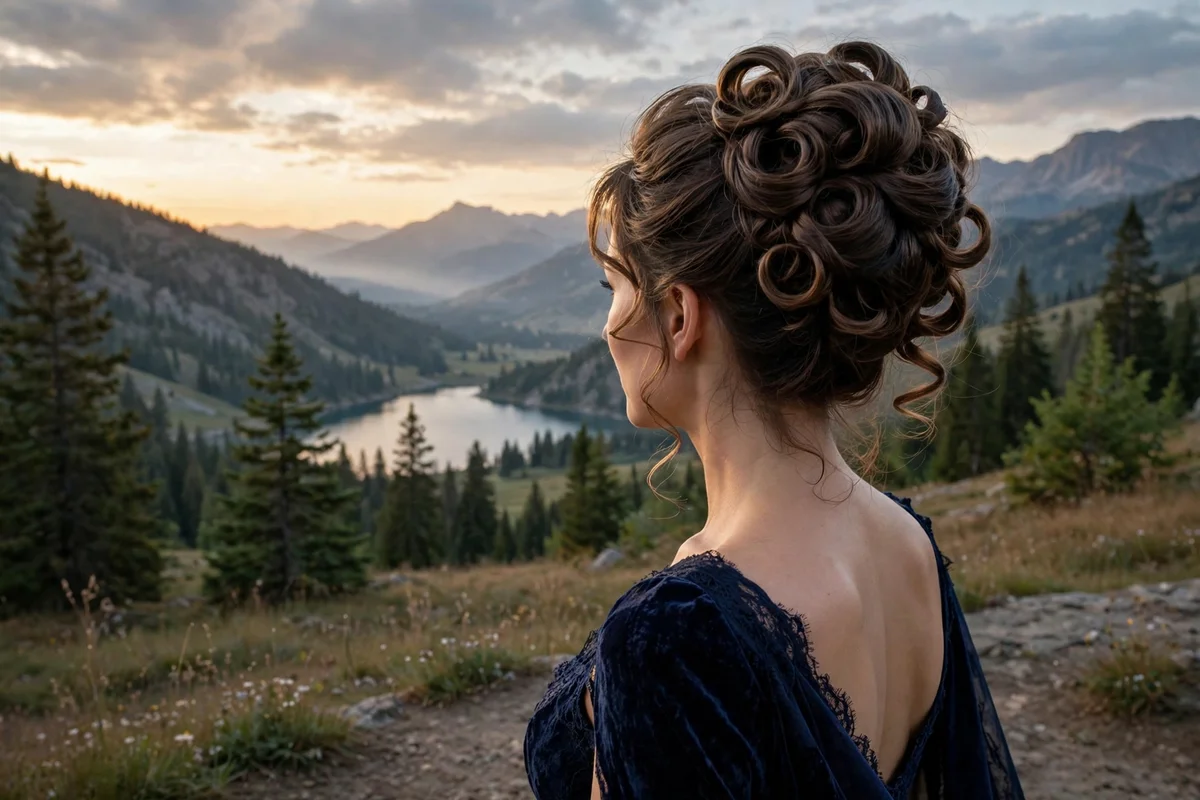
Thin hair can look completely different at a formal event than it does on a regular Tuesday. The right formal hairstyle for thin hair does two jobs at once: it builds visible volume and it holds its shape for hours. These 24 styles are chosen because they work with fine strands instead of against them, using backcombing, pre-curling, and smart pin placement to create fullness that lasts.
The single biggest trick is prepping before you style. Curl or add texture first, use lightweight volumizing products, and never skip a root lift. Every style below lists an honest time estimate so you can plan your getting-ready schedule.
Quick Takeaways
- Pre-curl thin hair before any updo: curls give pins grip and add instant body.
- Backcomb the crown lightly and smooth the top layer over it for hidden volume.
- Use lightweight mousse and flexible-hold spray; heavy products flatten fine hair.
- Style second-day hair when you can: natural oils help pins and braids hold.
- Most formal updos here take 10 to 20 minutes once you have practiced once.
1. Softly Tousled Bun
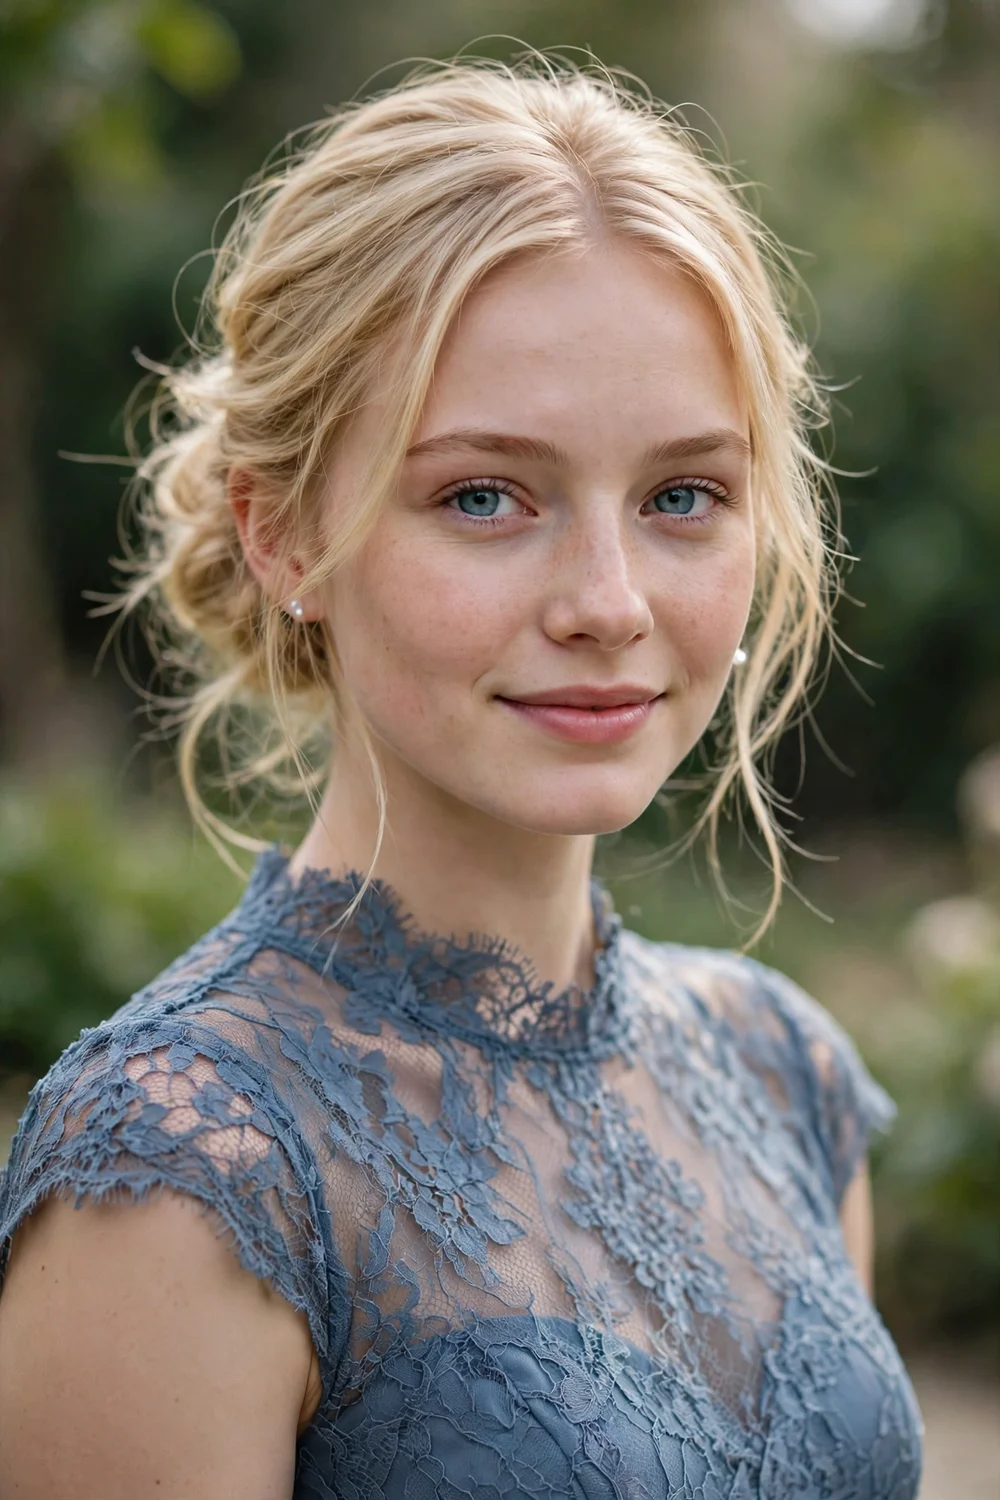
Curl the hair in 1-inch sections with a medium iron, then gather it into a loose low bun at the nape. Don’t pull the sections smooth. The curls create air between strands, and the bun looks twice as full as it would on straight hair. Secure with bobby pins pushed in from four directions so the shape holds.
This is one of the most forgiving formal styles for thin hair because imperfection is the point. A few loose pieces around the face soften the look and hide any thin spots at the temples.
Try this: pancake the bun by gently tugging small loops of hair outward after pinning. It widens the bun without adding weight.
Difficulty: Easy · Cost: $0–$6 (bobby pins, light hairspray)
2. Side Chignon with Subtle Braid
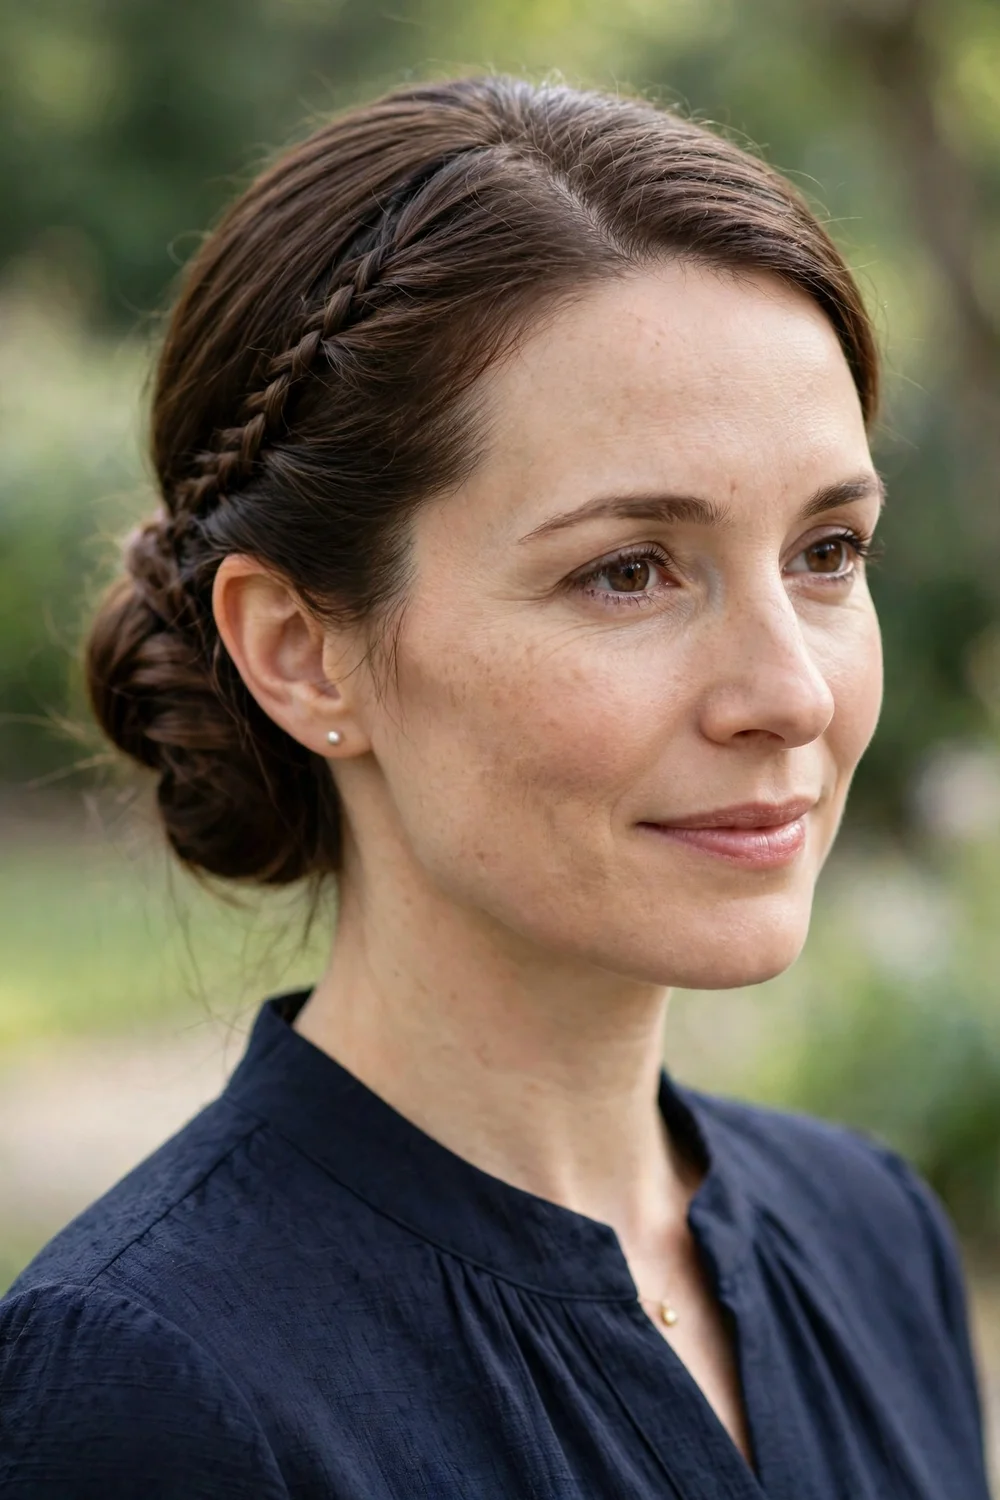
Make a deep side part and braid a slim three-strand section along the hairline from the part to behind the ear. Gather the rest of the hair low near the jawline on the same side, twist it into a chignon, and pin the braid’s tail into the twist. The braid adds texture that flat thin hair usually lacks.
Placing the chignon to the side instead of center back shows off the detail from the front. It photographs well because the braid leads the eye along the style.
Try this: stretch the braid slightly wider after securing it. A pancaked braid looks thicker on fine hair.
Difficulty: Medium · Cost: $0–$5 (bobby pins, small elastic)
3. Loose Romantic Updo
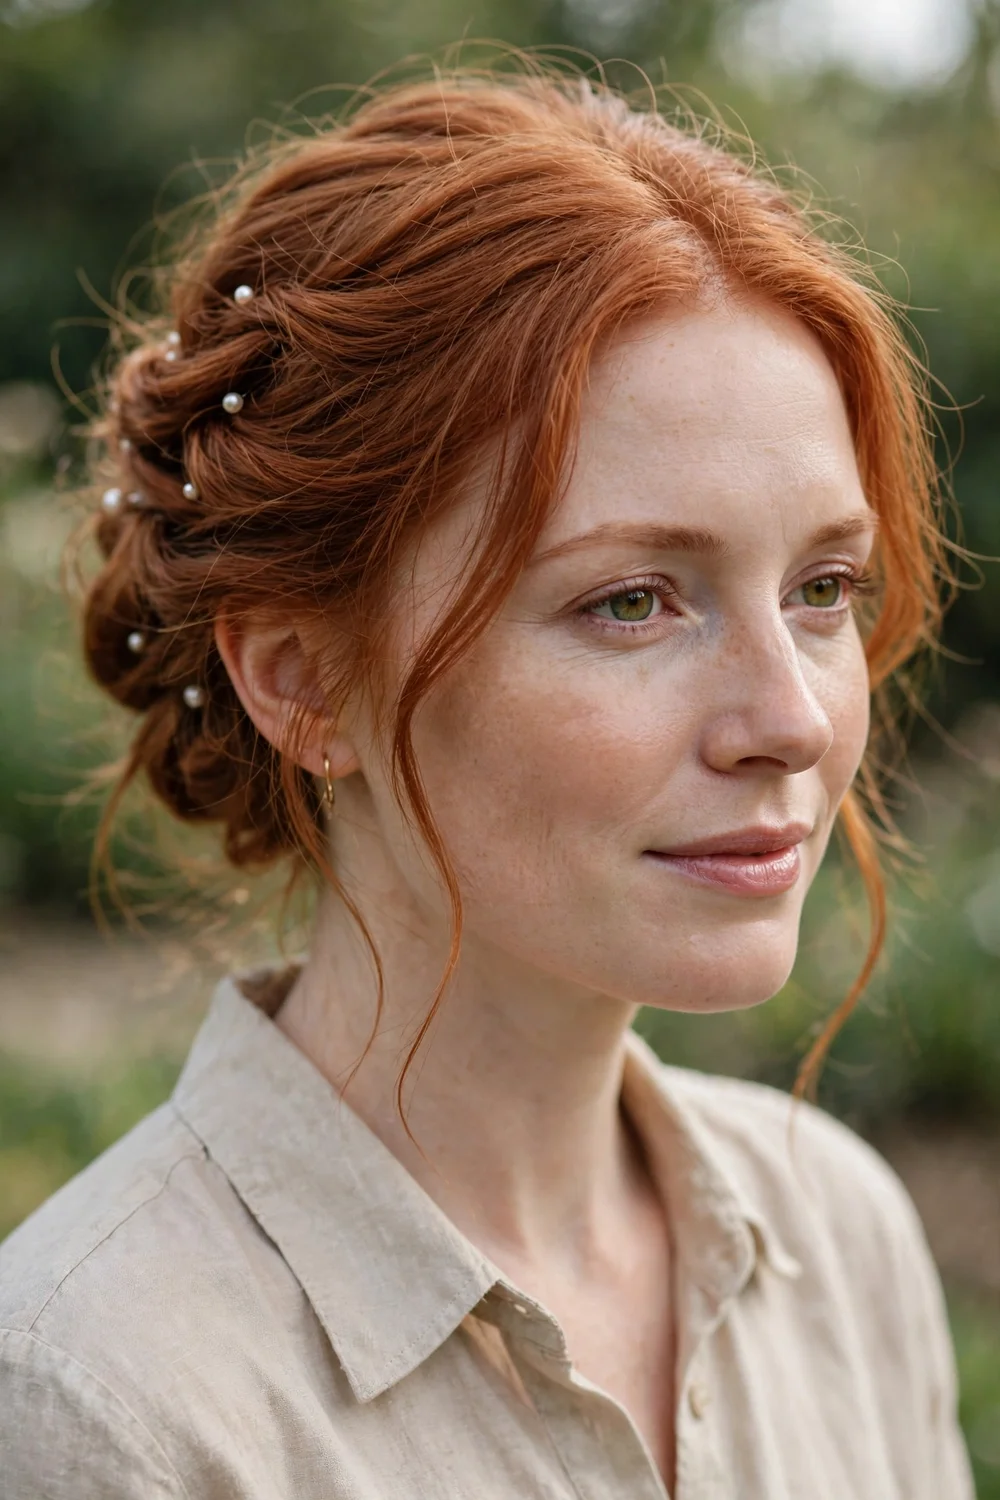
Pre-curl everything, then pin sections up loosely starting from the bottom and working up, leaving the crown soft. Tuck ends under rather than wrapping them tight. Finish with two or three pearl pins or a small floral comb. The curls do the volumizing work, so the pins just hold the shape.
This style suits evening receptions and weddings because it reads soft in photos. On thin hair, the loose pinning matters more than the curl pattern: tight pinning flattens everything you just built.
Try this: pin into the curls, not through them. Pushing pins into the curve of a curl hides them completely.
Difficulty: Medium · Cost: $4–$12 (pearl pins or floral comb)
4. Curled Layered Bob
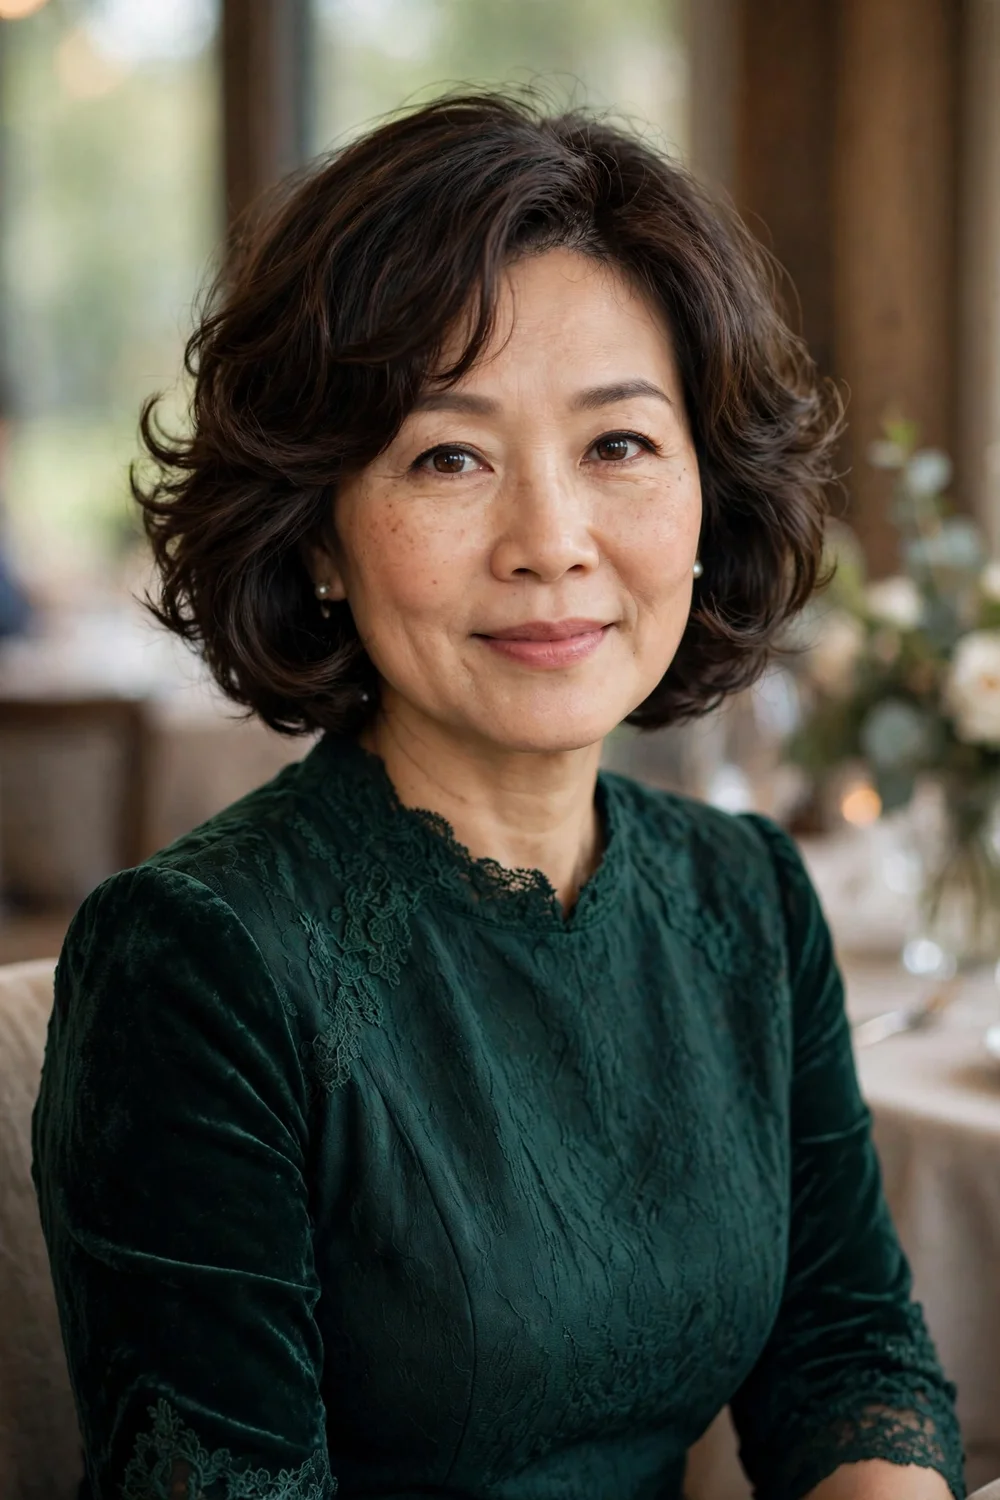
If your hair is bob length, you don’t need an updo to look formal. Curl the layers away from the face with a 1.25-inch iron, then brush the curls out gently with a paddle brush for soft waves. A light shine mist on the ends finishes it. The layers distribute volume evenly instead of letting it collapse at the bottom.
This works best on bobs with some layering already cut in. One-length bobs can still work, but ask your stylist to point-cut the last inch for movement before the event.
Try this: curl the front sections away from your face and the back sections toward it. The opposing directions create fuller-looking movement.
Difficulty: Easy · Cost: $0–$8 (heat protectant, shine mist)
5. Sleek Low Chignon
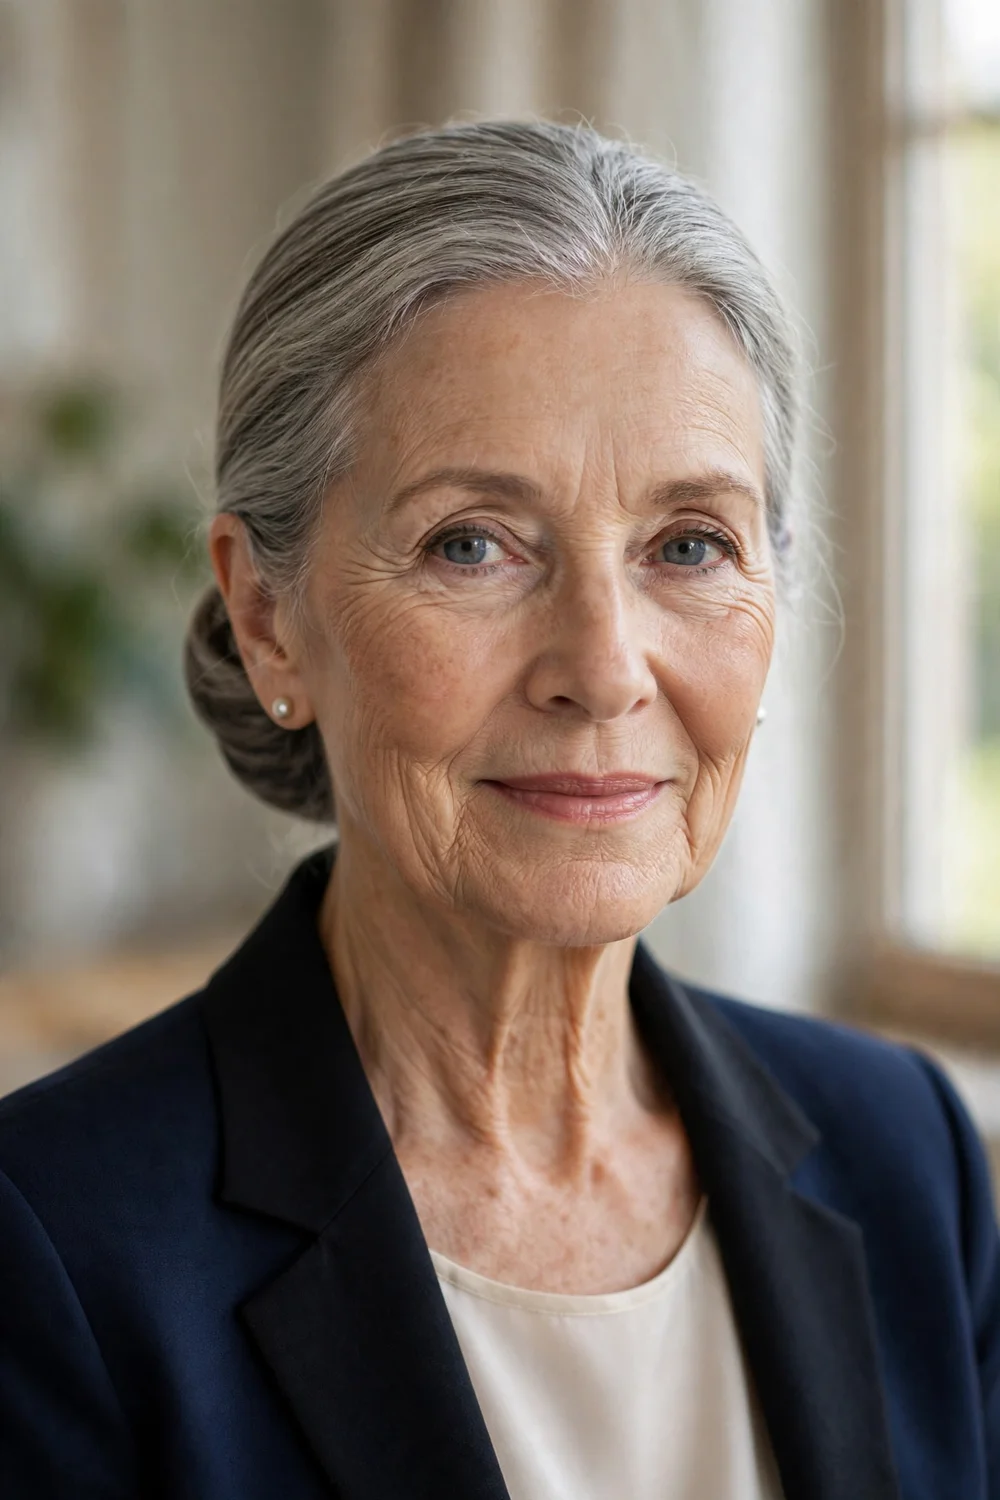
Blow-dry the hair smooth with a round brush, make a clean center or side part, and twist the length into a tight chignon at the nape. The polish is what makes it formal: every strand in place, no flyaways. On thin hair, keep the twist compact rather than spreading it wide, which would expose thinness.
A sleek chignon pairs well with statement earrings since nothing competes around the face. It also lasts well in humidity because there is no curl to fall.
Try this: wrap a small section of hair around the elastic before pinning to hide it. It takes ten seconds and looks salon-done.
Difficulty: Easy · Cost: $0–$5 (bobby pins, smoothing serum)
6. Side-Swept Waves
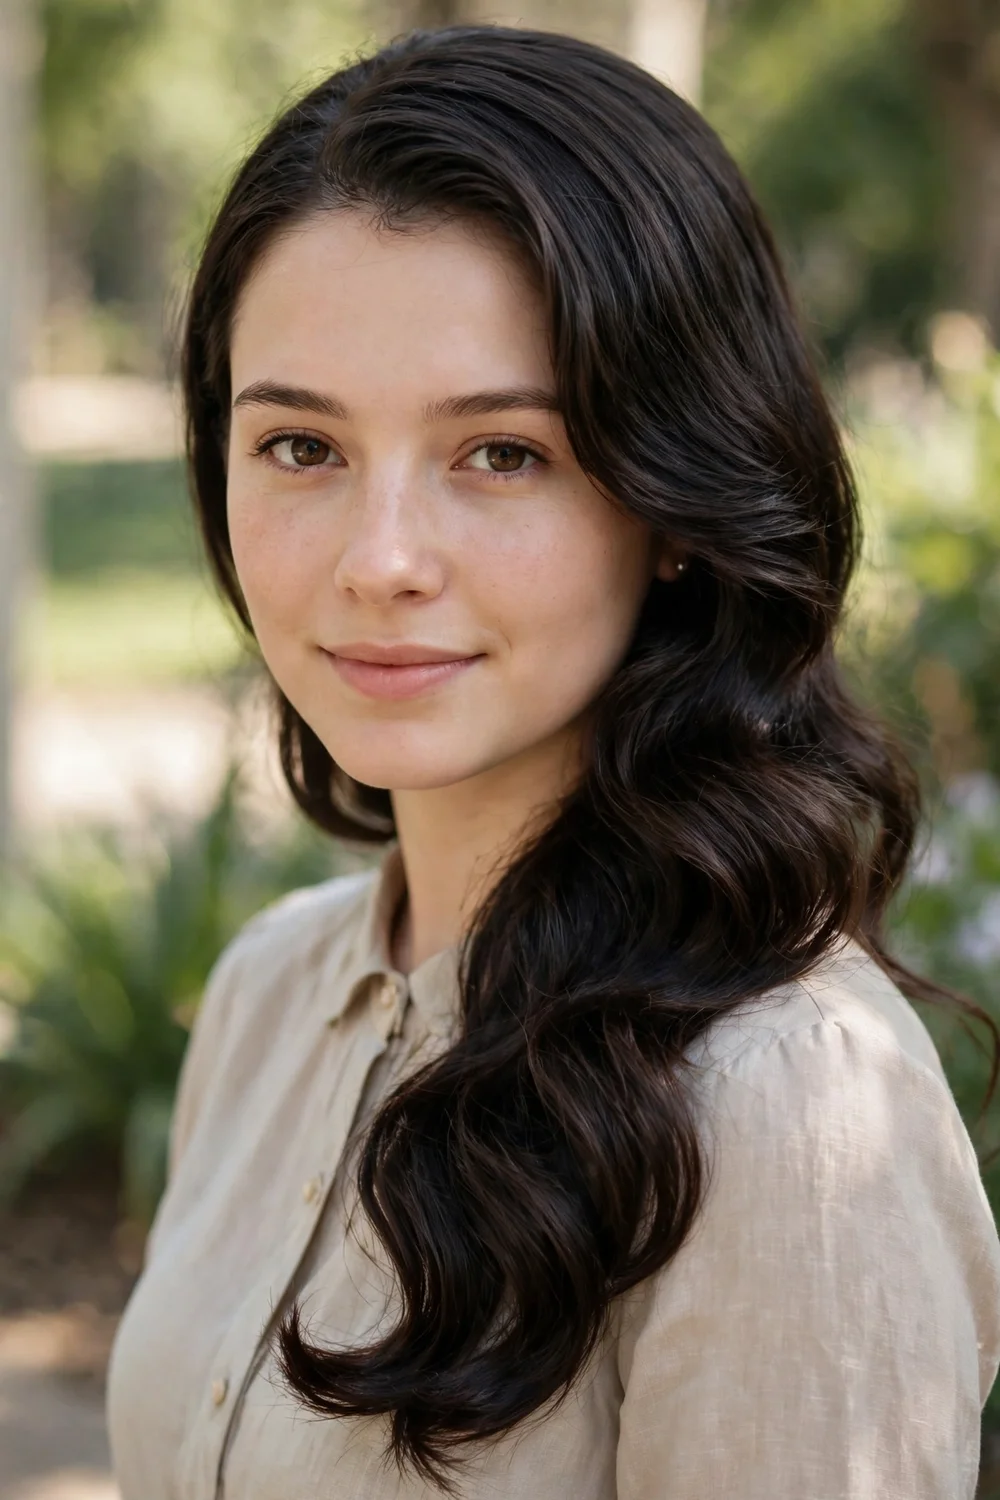
Create a deep side part, curl everything away from the face, then sweep all the hair over one shoulder and pin the underneath section flat at the nape. The mass of hair on one side reads as thickness. Brushing the curls out after they cool gives soft waves instead of ringlets.
This is a strong choice for thin hair because it concentrates all your hair in one visible area. Pinning the back flat keeps the silhouette clean from behind.
Try this: backcomb the roots on the heavy side before sweeping. The lift at the part makes the waves look supported, not draped.
Difficulty: Easy · Cost: $0–$6 (curling iron, bobby pins)
7. Braided Bun
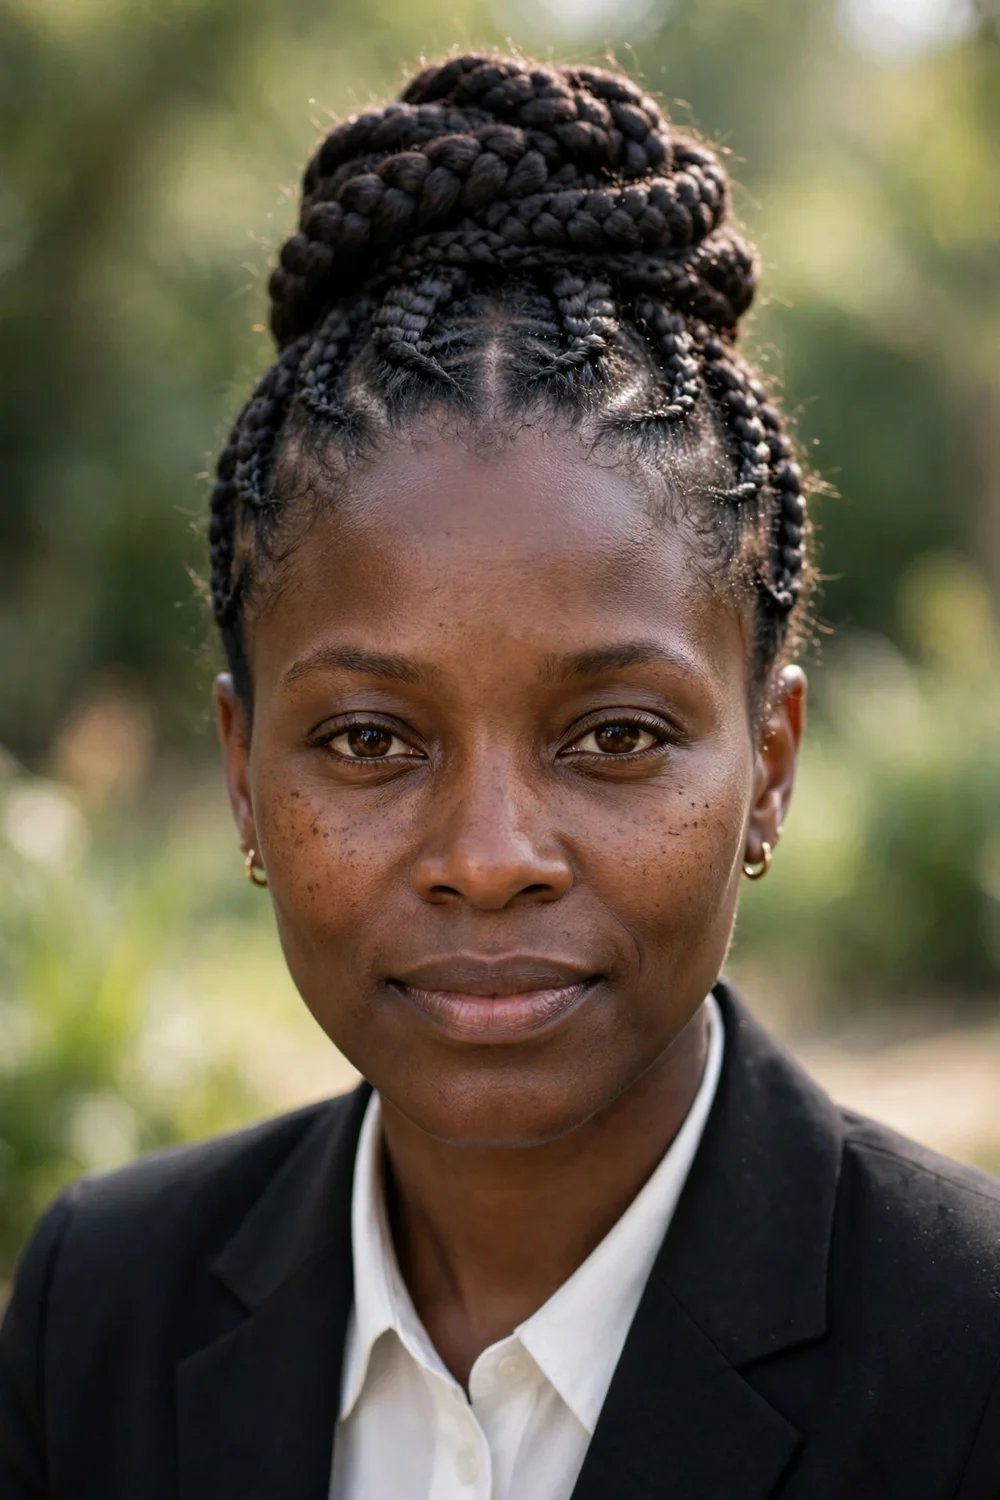
Braid a section from the front hairline back, then wrap it into a bun with the rest of the hair. The braid adds visible texture and width to the bun, which is exactly what thin hair needs. Leave a few tendrils loose around the face for softness.
A three-strand braid is enough; fishtails can look too thin on fine hair unless pancaked aggressively. Secure the bun with pins in an X pattern for hold.
Try this: braid slightly damp hair with a bit of mousse. It grips better and the braid holds its width.
Difficulty: Medium · Cost: $0–$5 (bobby pins, mousse)
8. Dutch Braid Crown
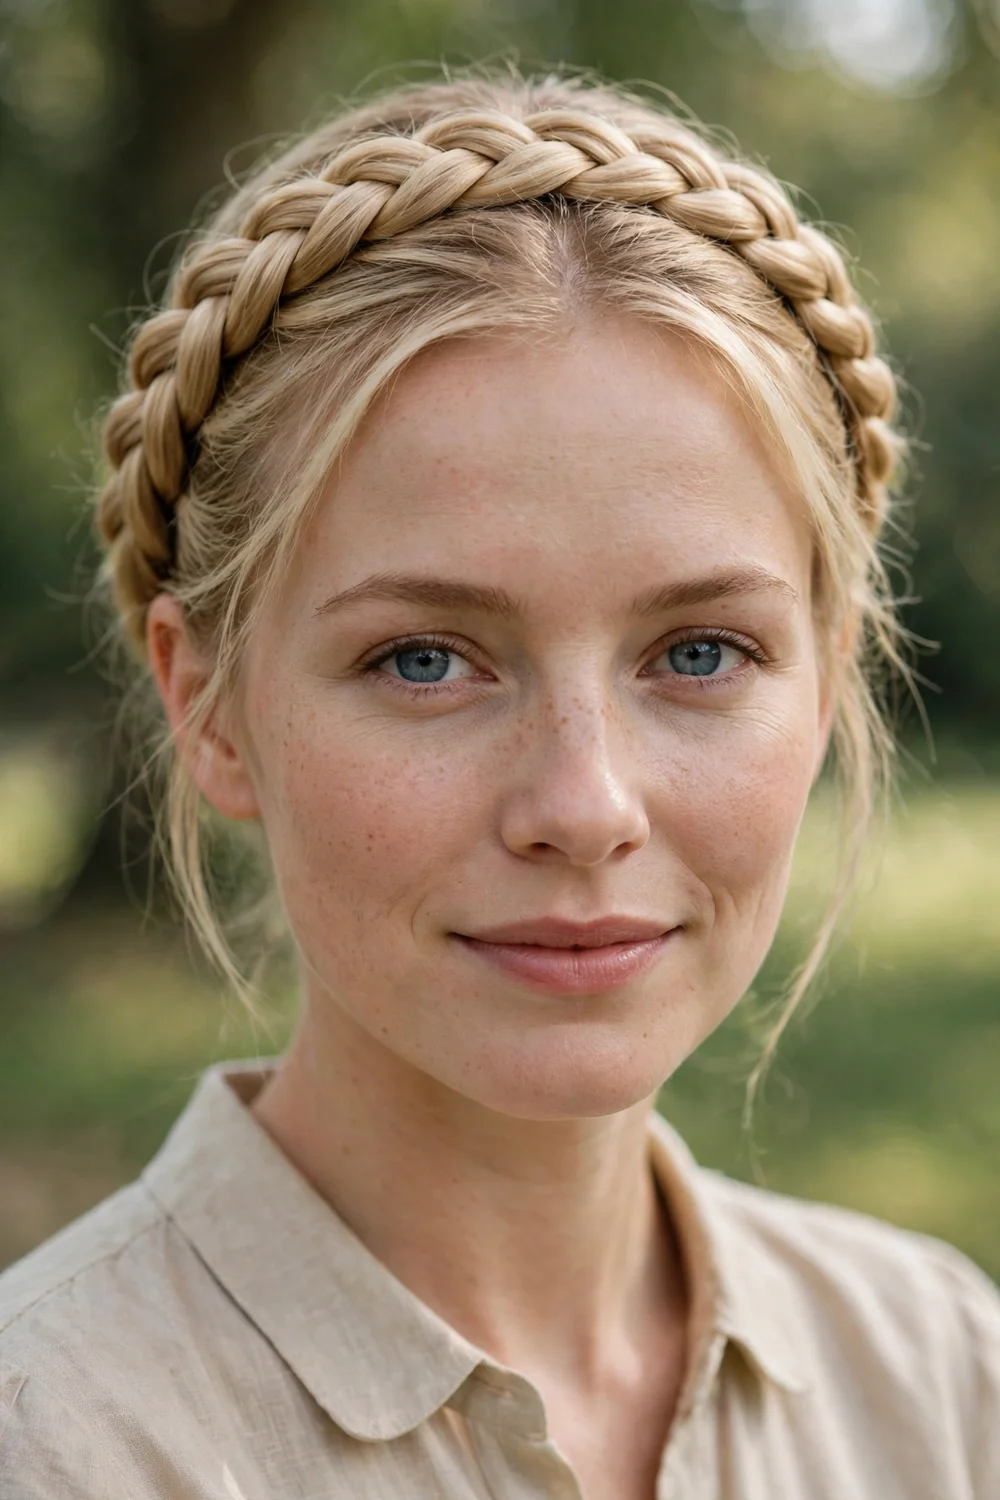
Make two Dutch braids, one on each side of the head, and bring them around to meet at the back, pinning them into a crown. Dutch braids sit on top of the hair instead of inside it, so they look raised and full even on fine strands. Pull each loop gently wider as you go.
This reads regal and formal with almost no accessories needed. It also keeps hair completely off the neck, which is welcome at summer events.
Try this: add a light dusting of dry shampoo to the roots before braiding. The grit gives fine hair something to hold onto.
Difficulty: Medium · Cost: $0–$5 (bobby pins, elastics)
9. Backcombed Voluminous Chignon
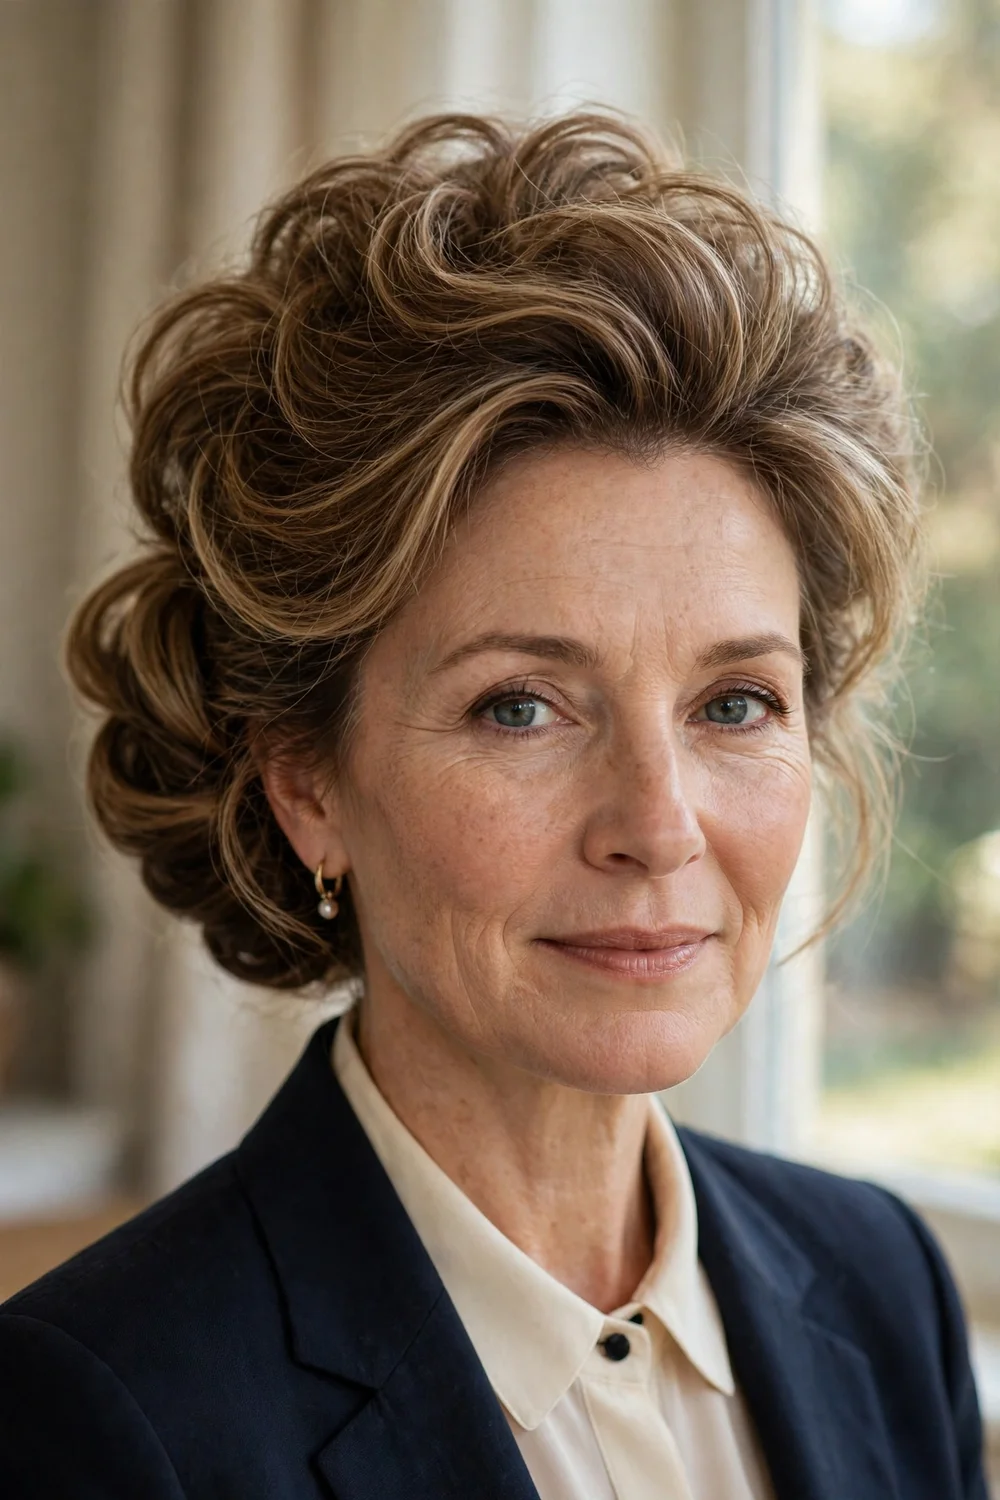
Gather the hair into a low ponytail, backcomb the ponytail itself for volume, then wrap it around its base to form the chignon. Backcombing the ponytail before wrapping is the key step: it doubles the visual size of the finished bun. Smooth only the very top layer with a soft brush.
Finish with a medium-hold spray rather than a strong one. Strong-hold spray can make backcombed hair look stiff instead of full.
Try this: backcomb in three short strokes per section, not long drags. Short strokes build a cushion without tangling.
Difficulty: Medium · Cost: $0–$6 (teasing comb, hairspray)
10. Polished Low Ponytail

Tease the crown, smooth the top, and secure a low ponytail at the nape, wrapping a strand of hair around the elastic. Curl the ponytail’s ends under or outward for a finished shape. On thin hair, a low ponytail looks more formal than a high one because the volume sits where the eye expects fullness.
This style takes five minutes and suits office formals and dinners. The wrapped elastic is what separates it from a daytime ponytail.
Try this: place the elastic slightly off-center at the nape. It looks more styled than dead center.
Difficulty: Easy · Cost: $0–$4 (elastic, bobby pin)
11. Half-Up Twisted Crown
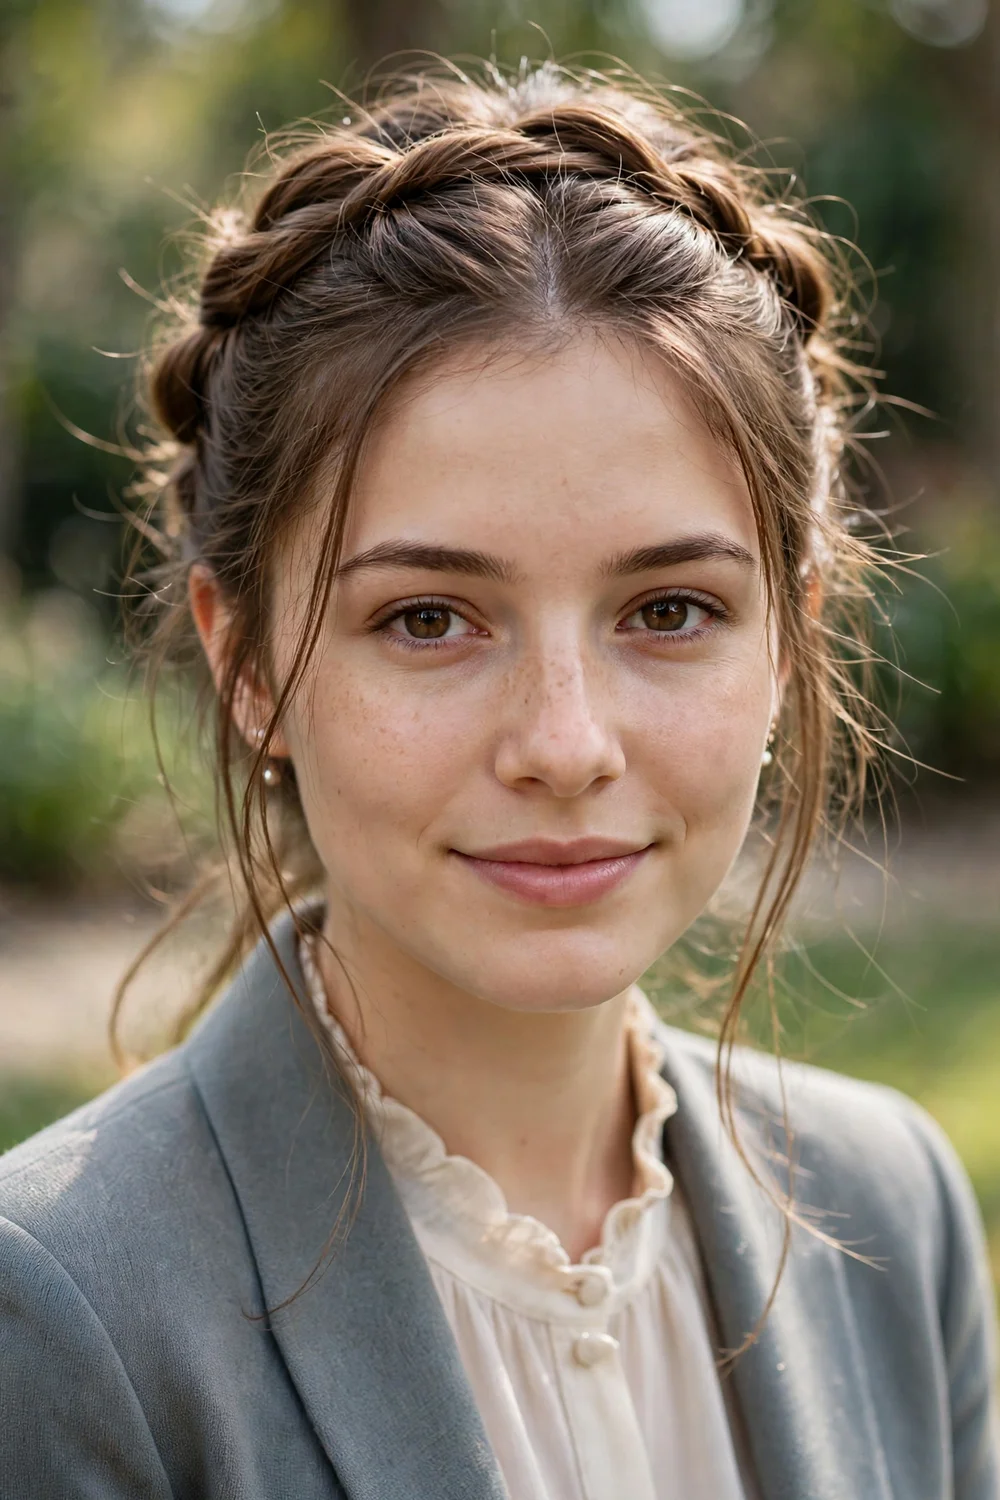
Take two front sections, twist each one back along the hairline, and pin them where they meet at the back of the crown. Leave the rest down with soft curls. The twists create a crown effect that adds width at the top, and the down hair keeps the look from feeling severe.
This works on medium to long thin hair and takes under ten minutes. It is a good middle ground when a full updo feels like too much.
Try this: twist the sections away from your face, not toward it. The twist lays flatter and holds longer.
Difficulty: Easy · Cost: $0–$4 (bobby pins)
12. Half-Up French Twist
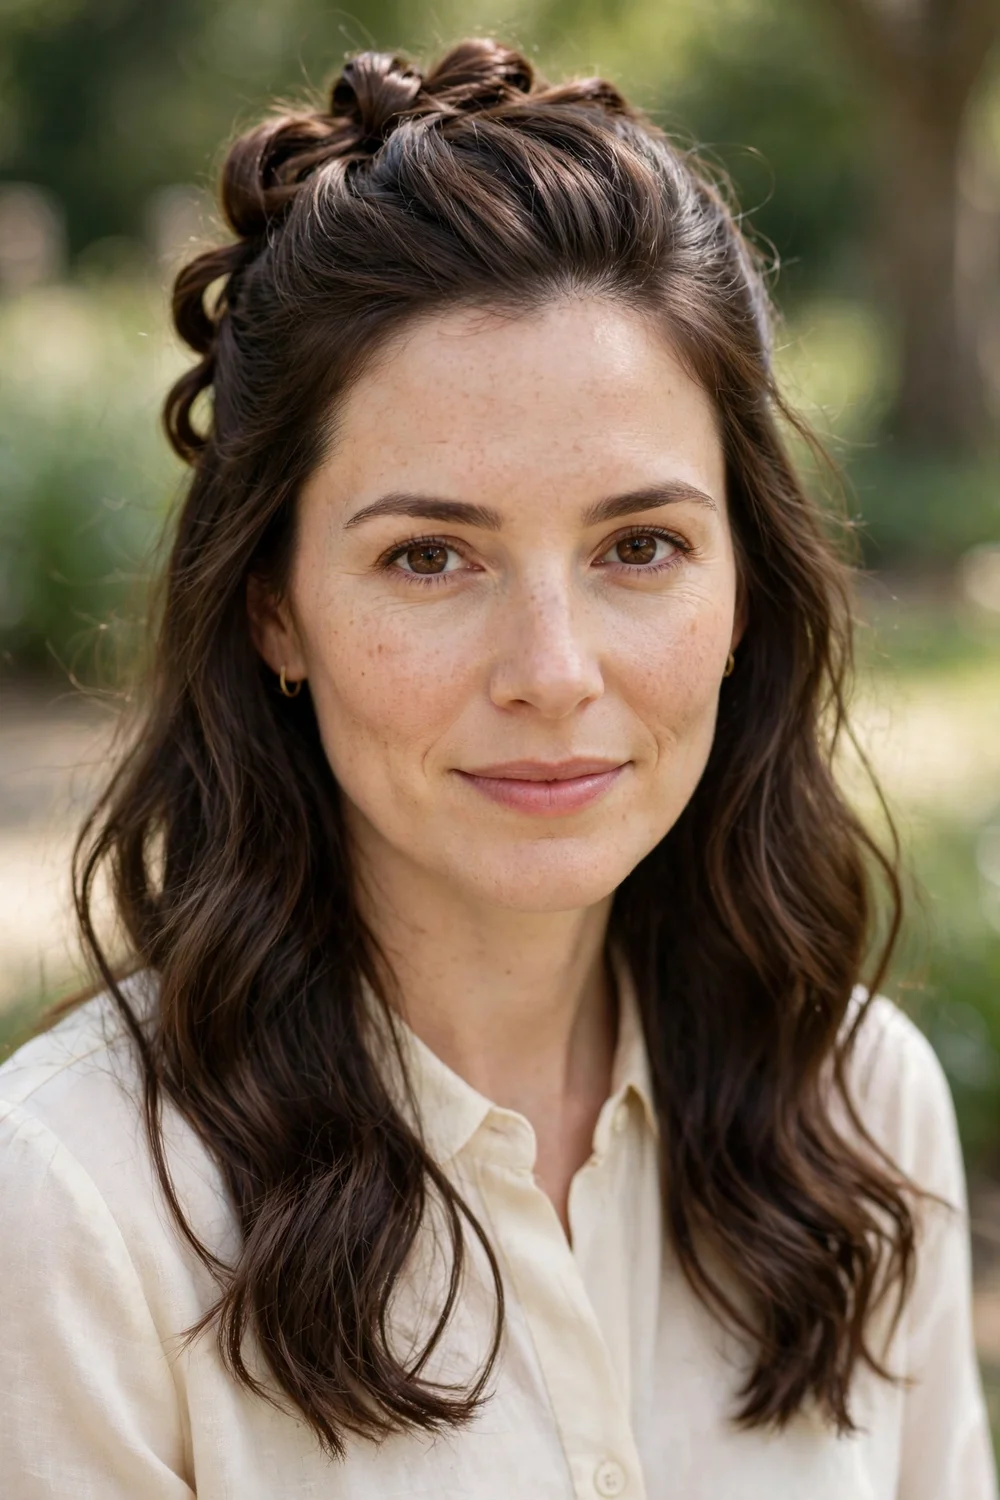
Gather the top half of the hair, twist it upward into a mini French twist, and pin it at the crown, leaving the bottom half down. The vertical twist adds height, which thin hair usually lacks. Curl the loose bottom half for balance.
The contrast between the sleek twist and soft waves below reads formal without a full updo. A small jeweled pin at the twist’s base dresses it up further.
Try this: backcomb the crown section before twisting. The twist then has something to grip and looks fuller.
Difficulty: Medium · Cost: $0–$8 (bobby pins, decorative pin)
13. Curly Half-Up Style
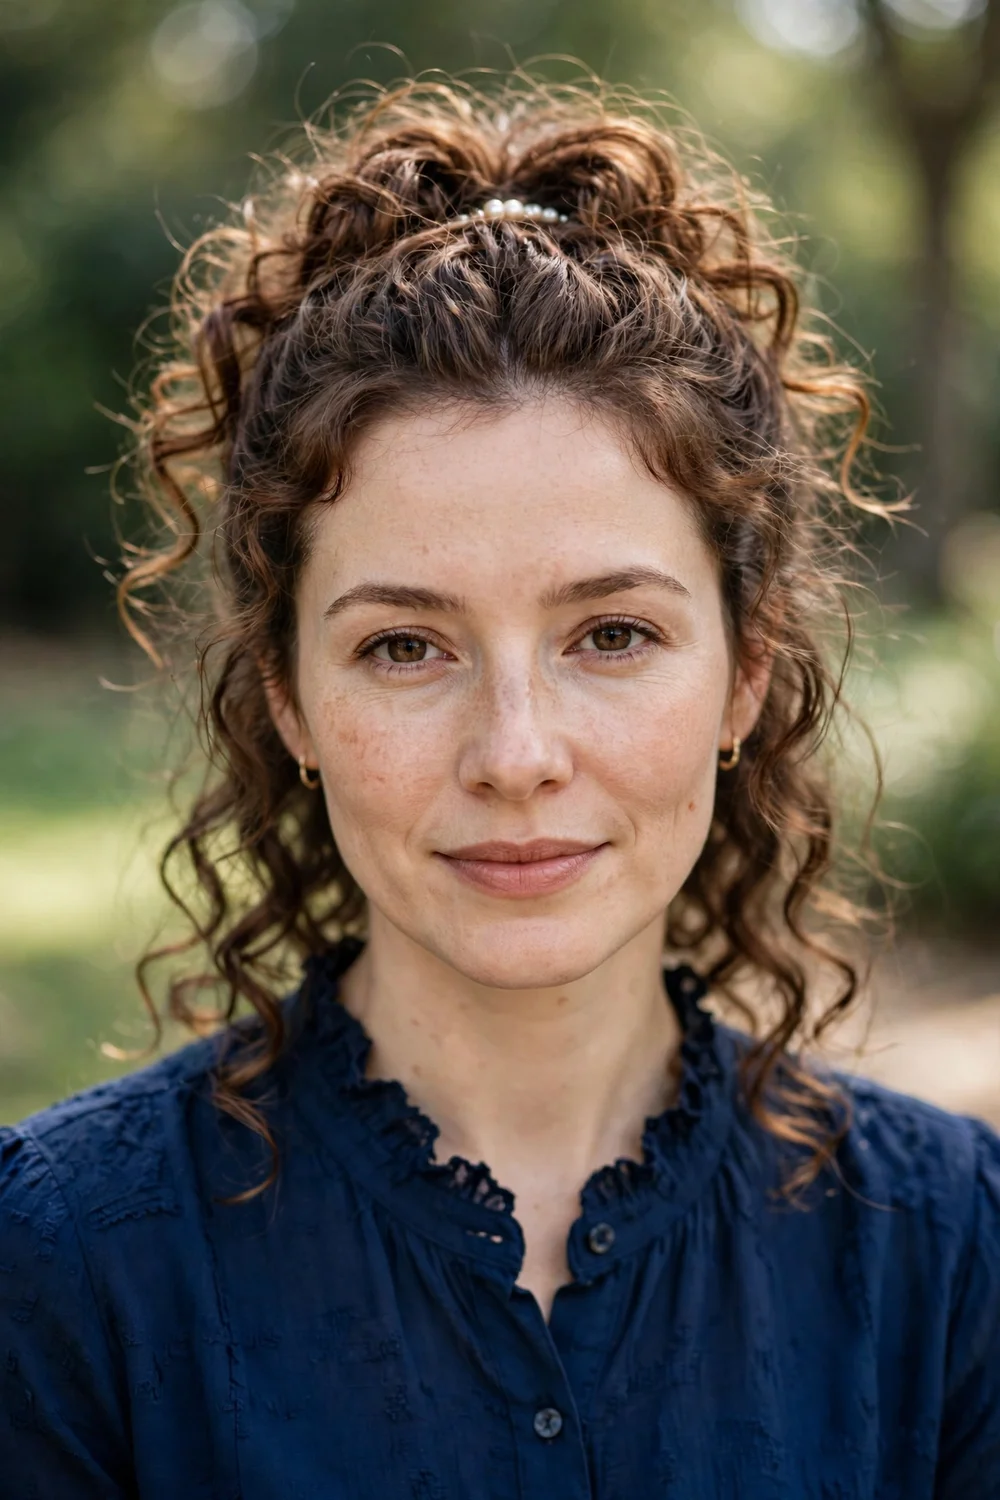
Curl the whole head, then gather just the top section into a small bun or twist at the crown. The curls multiply the visible hair, and the half-up section keeps it off the face. This is one of the highest-volume looks on the list for the effort involved.
Let the half-up section sit slightly forward on the crown rather than flat at the back. The forward placement builds height where thin hair needs it most.
Try this: use a 1-inch iron for the top layers and a 1.25-inch for underneath. Mixed curl sizes look thicker than uniform ones.
Difficulty: Easy · Cost: $0–$5 (elastic, bobby pins)
14. Classic French Twist
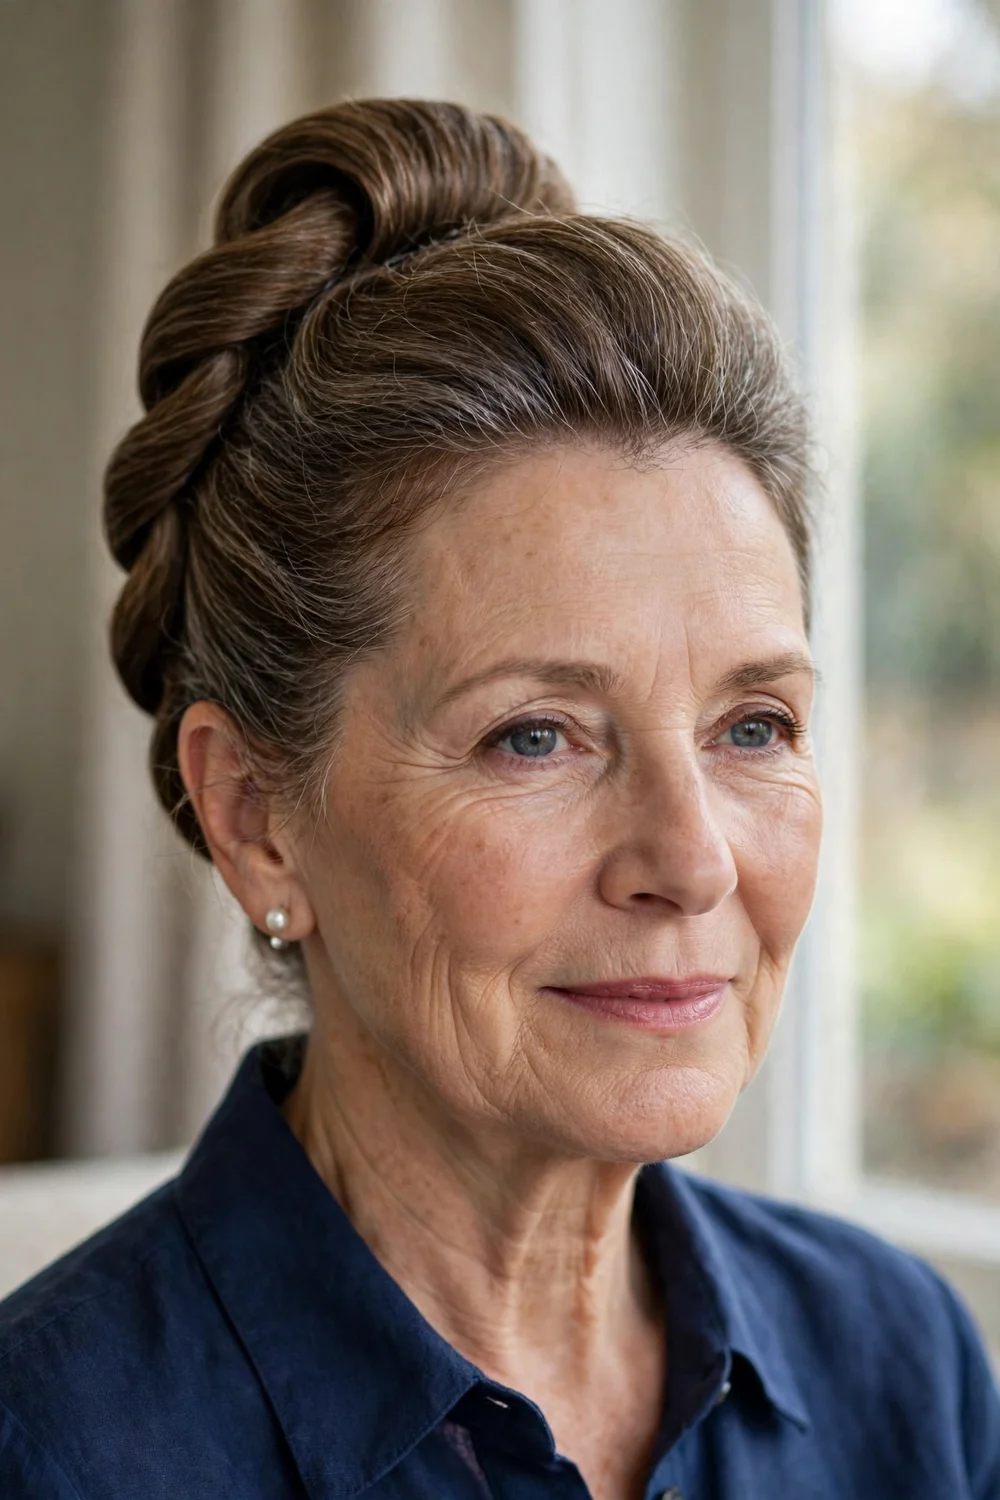
Sweep all the hair to one side, pin it along the center back to anchor it, then roll the length up and inward into the twist and pin. On thin hair, backcomb the length lightly before rolling so the twist has body. Tuck the ends in and smooth the surface.
The French twist is the most formal style on this list and suits galas and black-tie events. It holds well because the pins anchor along the whole roll.
Try this: practice the roll direction once before the event. Rolling the wrong way is the main reason twists collapse.
Difficulty: Hard · Cost: $0–$6 (long bobby pins, hairspray)
15. Low Twisted Knot
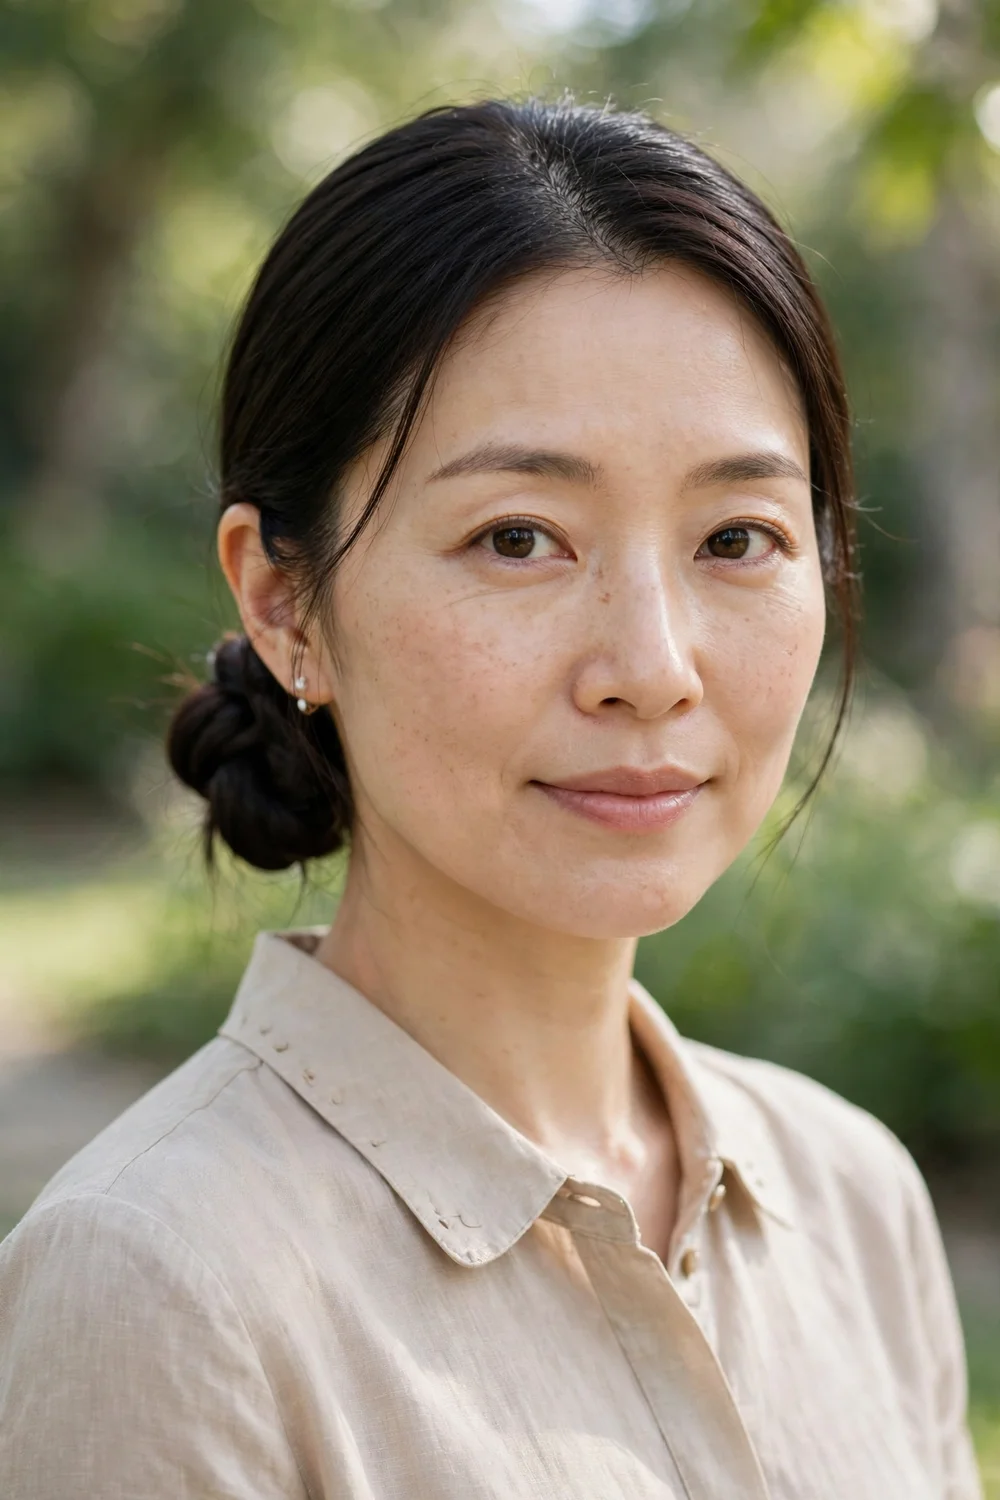
Split the hair into two low ponytails at the nape, twist each one, then wrap the twists around each other into a knot and pin. Two twisted sections look fuller than one smooth bun because the twist ridges catch light and create texture.
This is simpler than it sounds and takes about eight minutes. It suits straight thin hair especially well since the twists add the texture straight hair lacks.
Try this: twist the sections in opposite directions. They lock together better and the knot holds without extra pins.
Difficulty: Easy · Cost: $0–$4 (elastics, bobby pins)
16. Sleek Straight Blowout
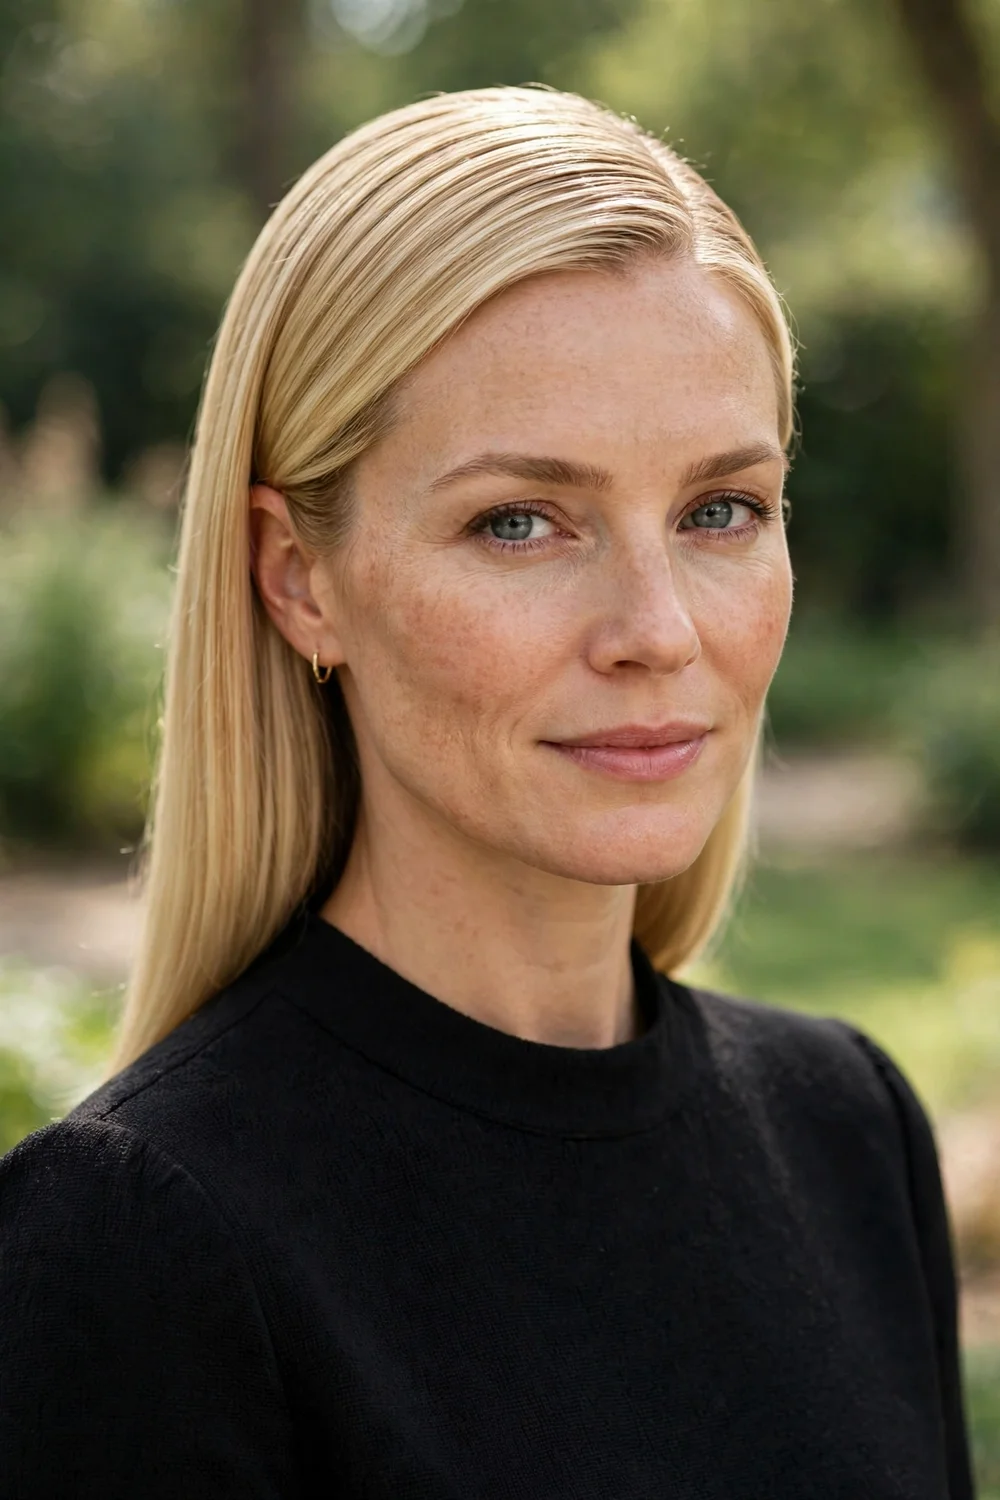
Blow-dry with a round brush for root lift, then smooth the lengths with a flat iron, flipping the ends slightly under. Finish with a shine serum on the mid-lengths only, never the roots. The gloss makes thin hair look healthier and more deliberate.
Apply a heat protectant before every hot tool pass. On fine hair, heat damage shows fast and makes ends look even thinner.
Try this: blow-dry the roots in the opposite direction of your part first, then flip. The roots stand up instead of lying flat.
Difficulty: Easy · Cost: $0–$10 (heat protectant, serum)
17. Side-Swept Formal Updo
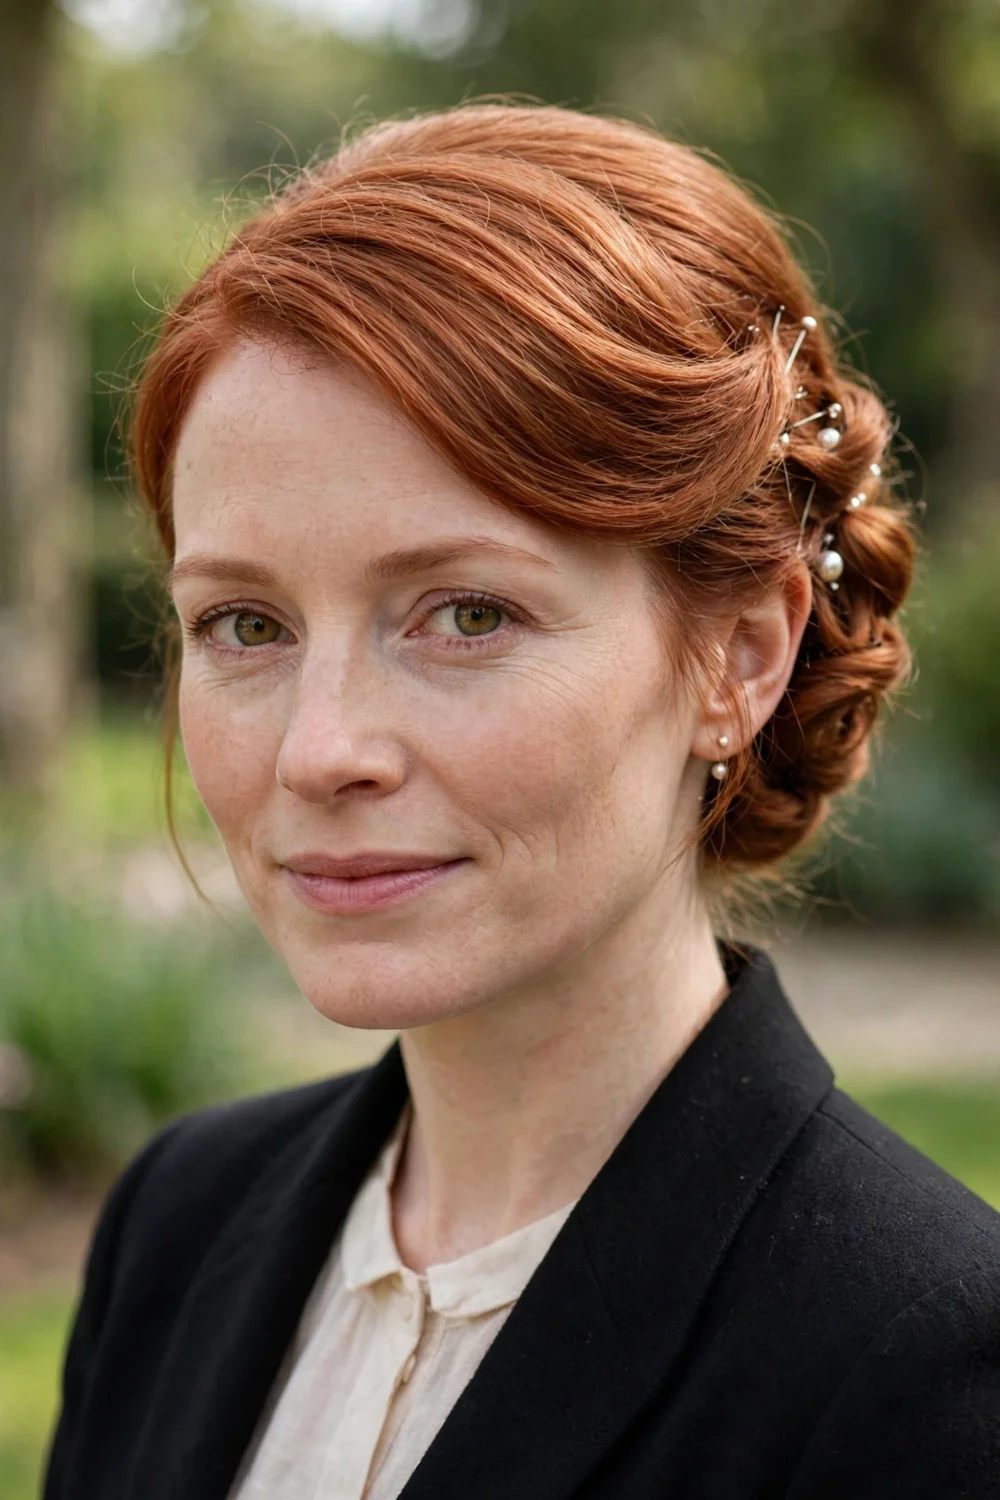
Tease the crown, sweep everything to one side, and pin sections up loosely along the side of the head, tucking ends under. The asymmetry adds visual interest and the side placement shows the detail from the front. Leave one curled tendril loose on the opposite side.
This style photographs from every angle because there is detail on the visible side and a clean shape behind. Good for events with lots of photos.
Try this: pin the first anchor section at the nape on the heavy side. Everything else builds on that anchor.
Difficulty: Medium · Cost: $0–$6 (bobby pins, hairspray)
18. Pearl-Pin Pinned Updo

Create any simple low bun or twist, then place five to seven pearl pins in a scattered pattern through it. The pins do double duty: they hold the style and they add the formal detail, so the base style can stay simple. On thin hair, pins placed into the bun’s curves disappear into the hair.
Keep the pins lightweight. Heavy jeweled combs pull on fine hair and loosen the style within an hour.
Try this: cluster the pins on one side instead of spreading them evenly. An asymmetric cluster looks styled; even spacing looks cautious.
Difficulty: Easy · Cost: $5–$12 (pearl pin set)
19. Wrapped Low Bun
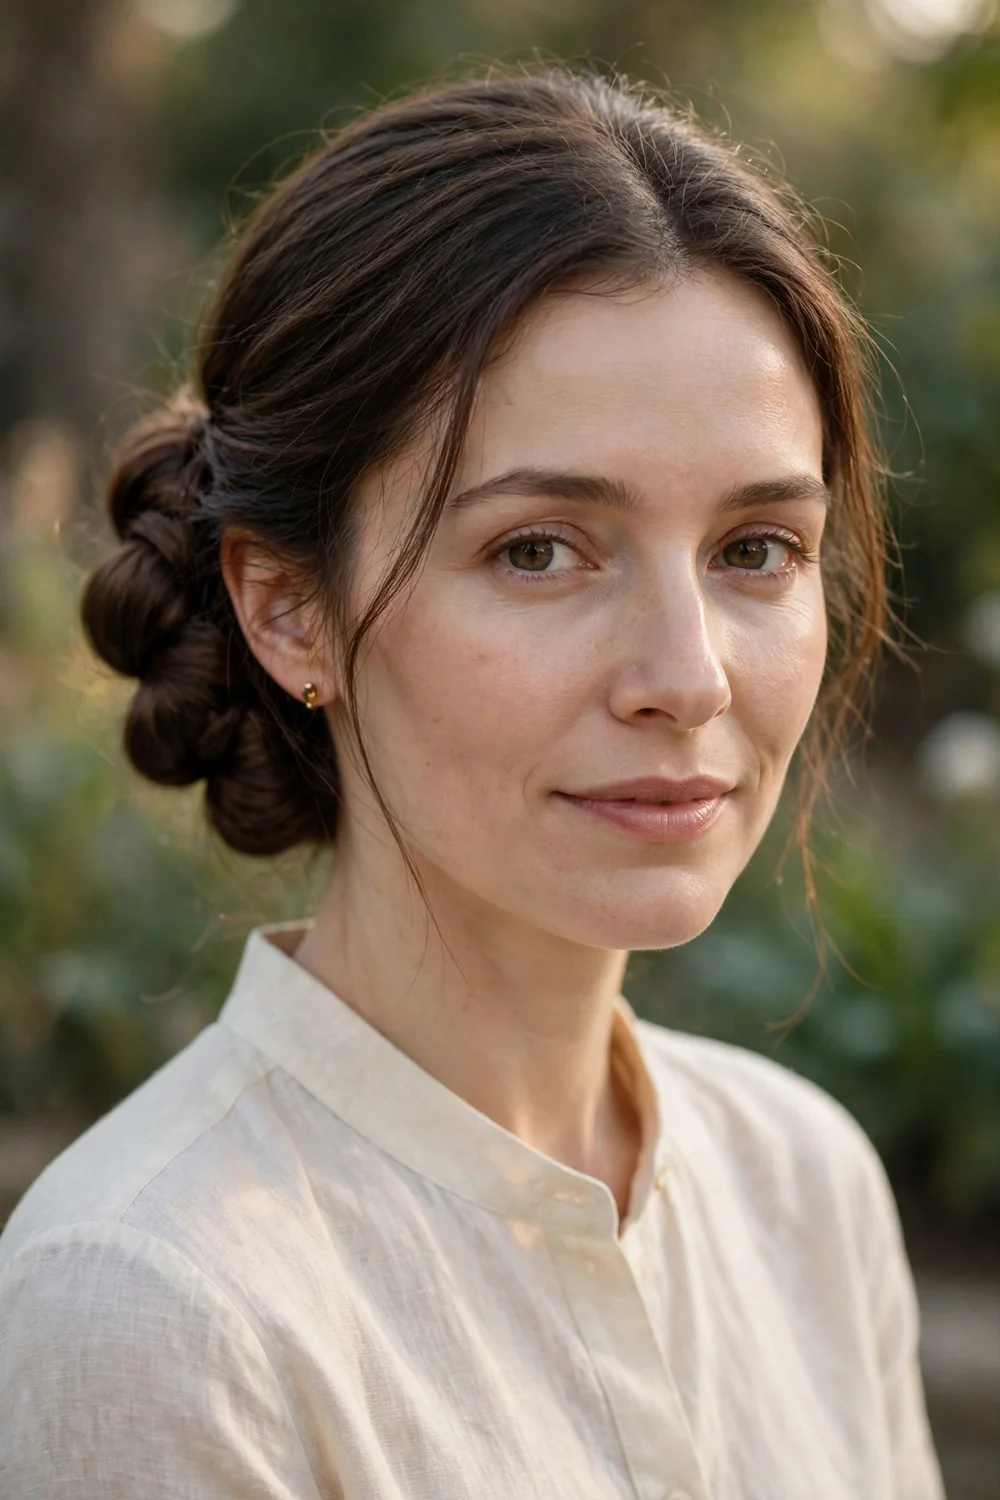
Make a low ponytail, then wrap two-inch sections of the ponytail around its base one at a time, pinning each. Wrapping in sections instead of one twist builds a wider, more textured bun. Each wrap adds a visible ridge that reads as fullness.
This technique works on shoulder-length and longer thin hair. The sectioned wrapping hides how little hair there actually is.
Try this: curl the ponytail before wrapping. Curled sections wrap into a bigger-looking bun.
Difficulty: Easy · Cost: $0–$5 (elastic, bobby pins)
20. Fishtail Braid Half-Up
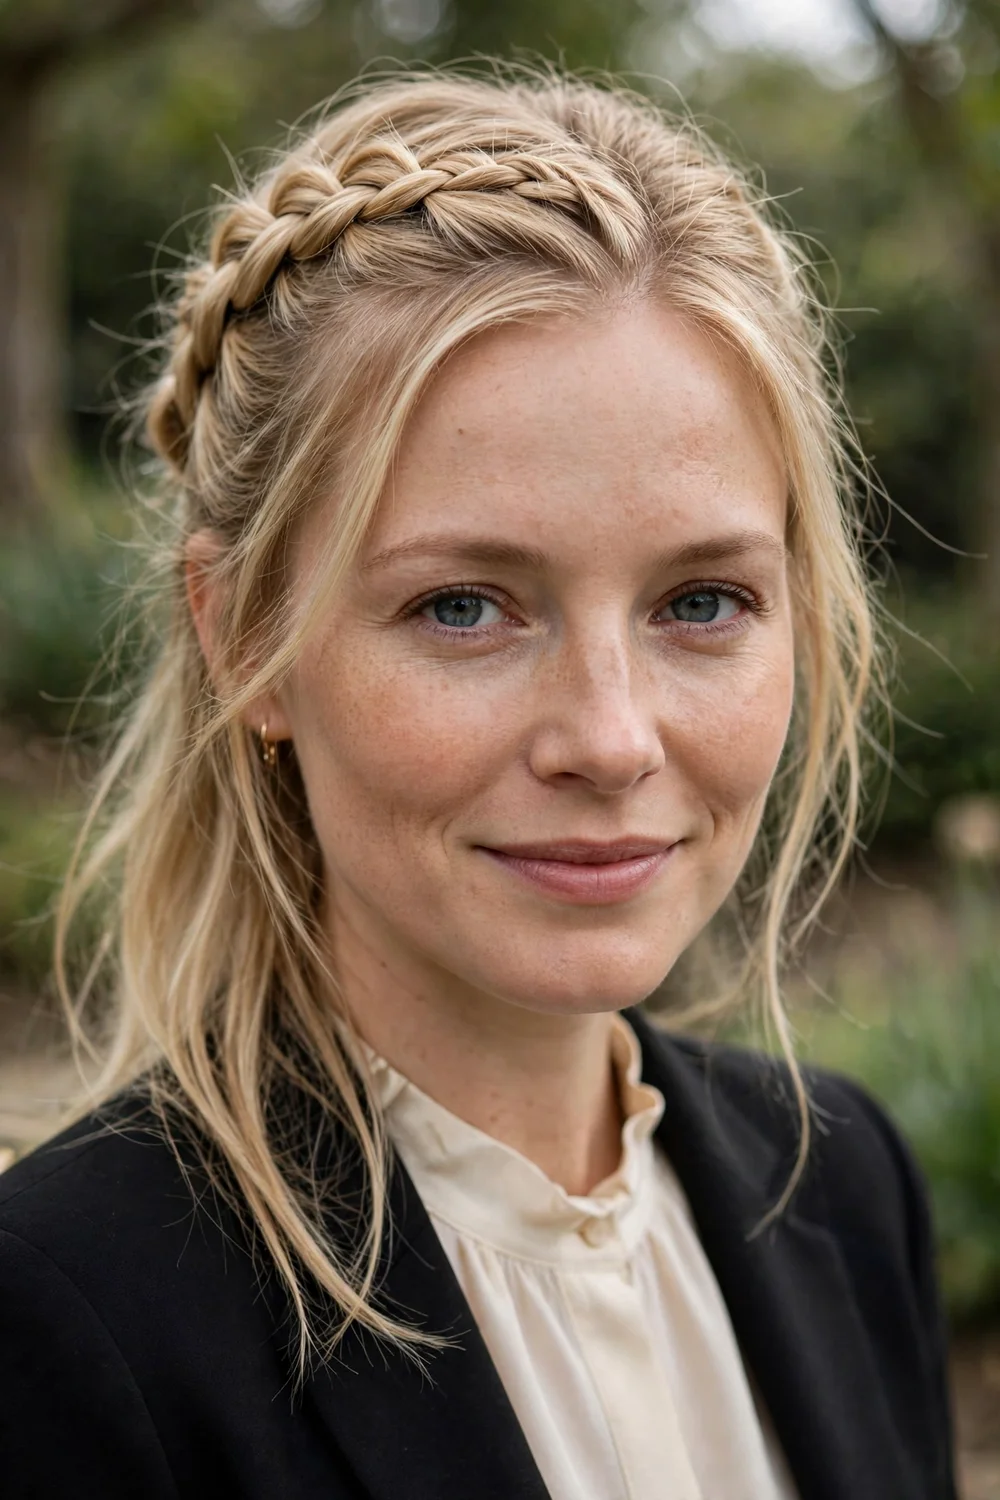
Braid a fishtail with the top half of the hair and secure it at the back of the crown, leaving the rest down. Pancake the fishtail aggressively by pulling each section wide: fishtails look thin on fine hair unless widened. The intricate pattern reads formal on its own.
Keep the bottom half smooth or lightly waved so the braid stays the focus. This takes practice; do a trial run before the event day.
Try this: braid with a little texturizing powder on your fingertips. It stops fine strands slipping out of the pattern.
Difficulty: Hard · Cost: $0–$6 (elastic, texture powder)
21. Textured Formal Top Knot
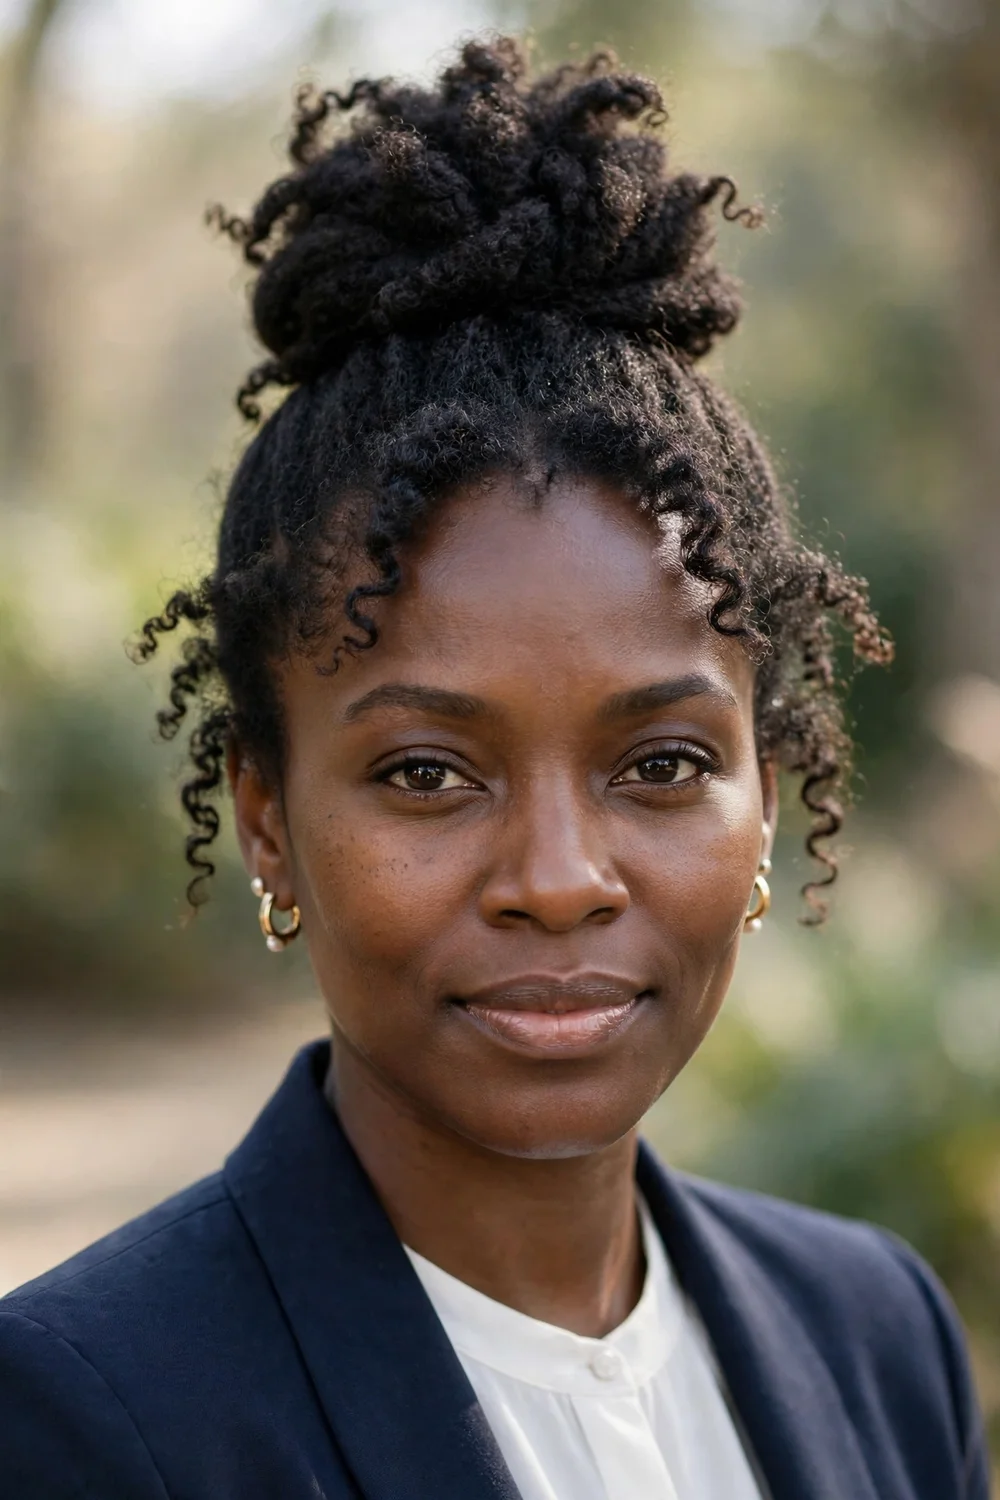
Backcomb the crown, gather the hair high, and wrap it into a knot, pulling small loops outward for texture. A top knot on thin hair needs the backcombing step; without it the knot looks small and tight. Set the knot slightly back from the hairline, not right on top.
Add a slim headband or jeweled clip at the base for evening polish. The height of the knot lengthens the neck visually.
Try this: use a small hair donut inside the knot if your hair is very fine. It gives the knot a base to wrap around.
Difficulty: Easy · Cost: $3–$8 (donut form, pins)
22. Face-Framing Tendril Updo
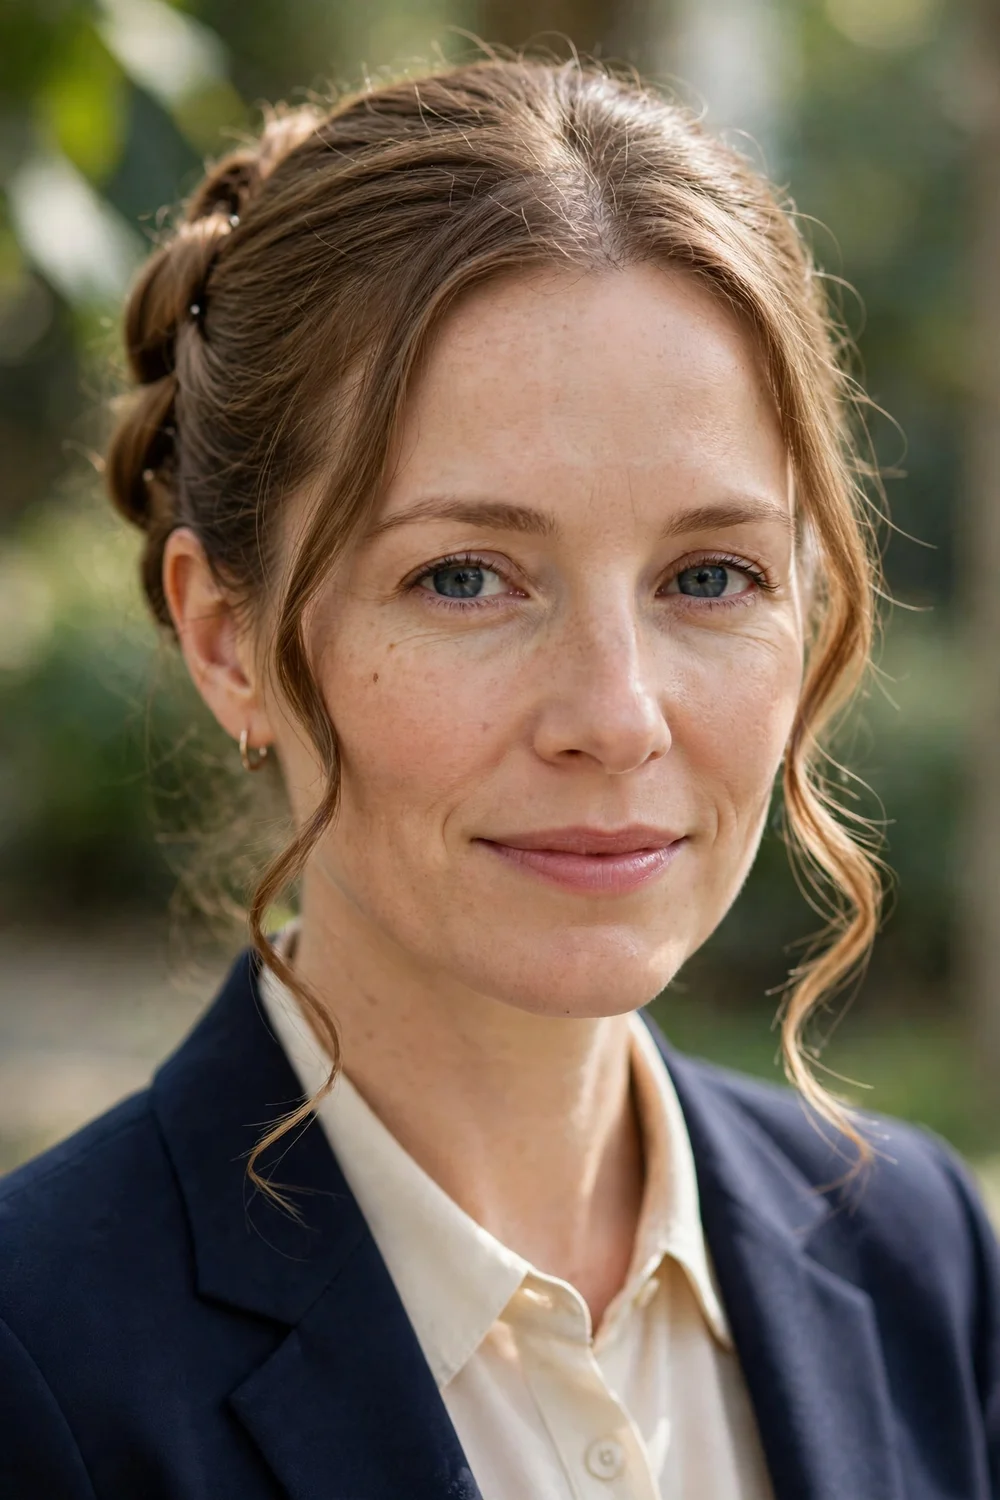
Pin the hair up loosely, then pull out two front sections and curl them into soft tendrils. The tendrils frame the face and distract from any thinness at the temples or hairline. Curl them away from the face so they don’t fall forward all evening.
Keep the tendrils thin: thick pulled-out sections make the pinned-up hair look thinner by comparison. Two slim curls are enough.
Try this: spray the tendrils with flexible-hold spray while they are still warm from the iron. They keep their curl for hours.
Difficulty: Easy · Cost: $0–$5 (bobby pins, curling iron)
23. Padded Donut Bun
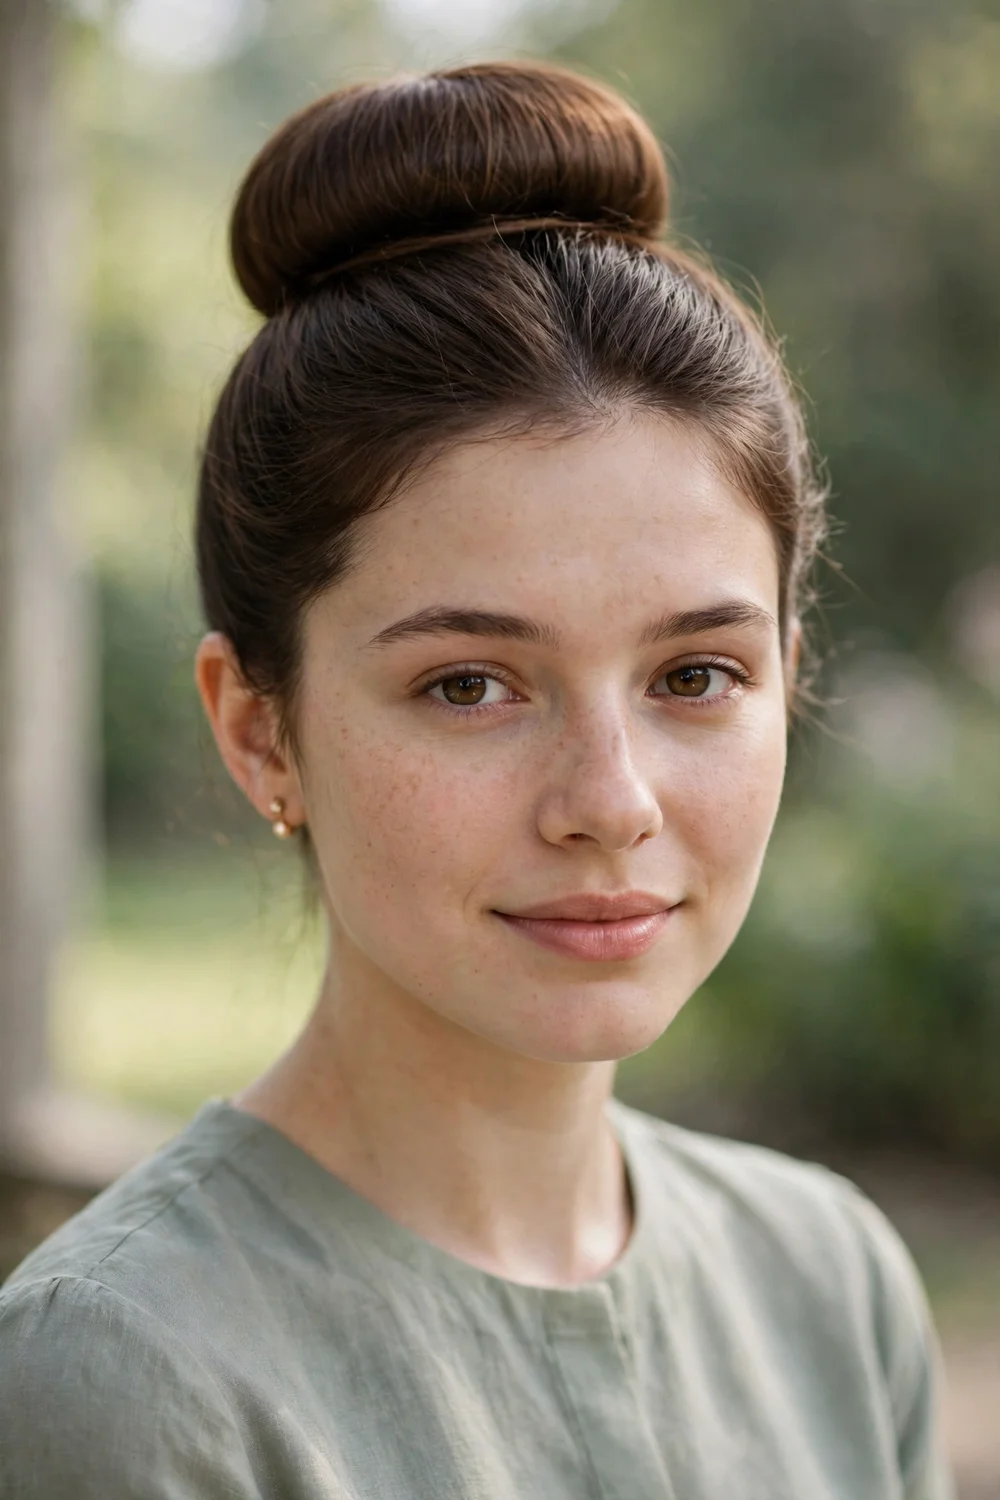
Pull the hair through a foam donut form at the crown or nape, spread the hair over the form, and pin the ends under. The form creates a perfectly round, full bun no matter how fine the hair is. Match the donut color to your hair so nothing shows through thin spots.
This is the most reliable volume trick for very thin hair. The bun looks the same every time, which makes it great for important events.
Try this: backcomb the ponytail lightly before spreading it over the donut. The texture helps the hair cover the form evenly.
Difficulty: Easy · Cost: $4–$8 (donut form, pins)
24. Velvet Bow Low Ponytail
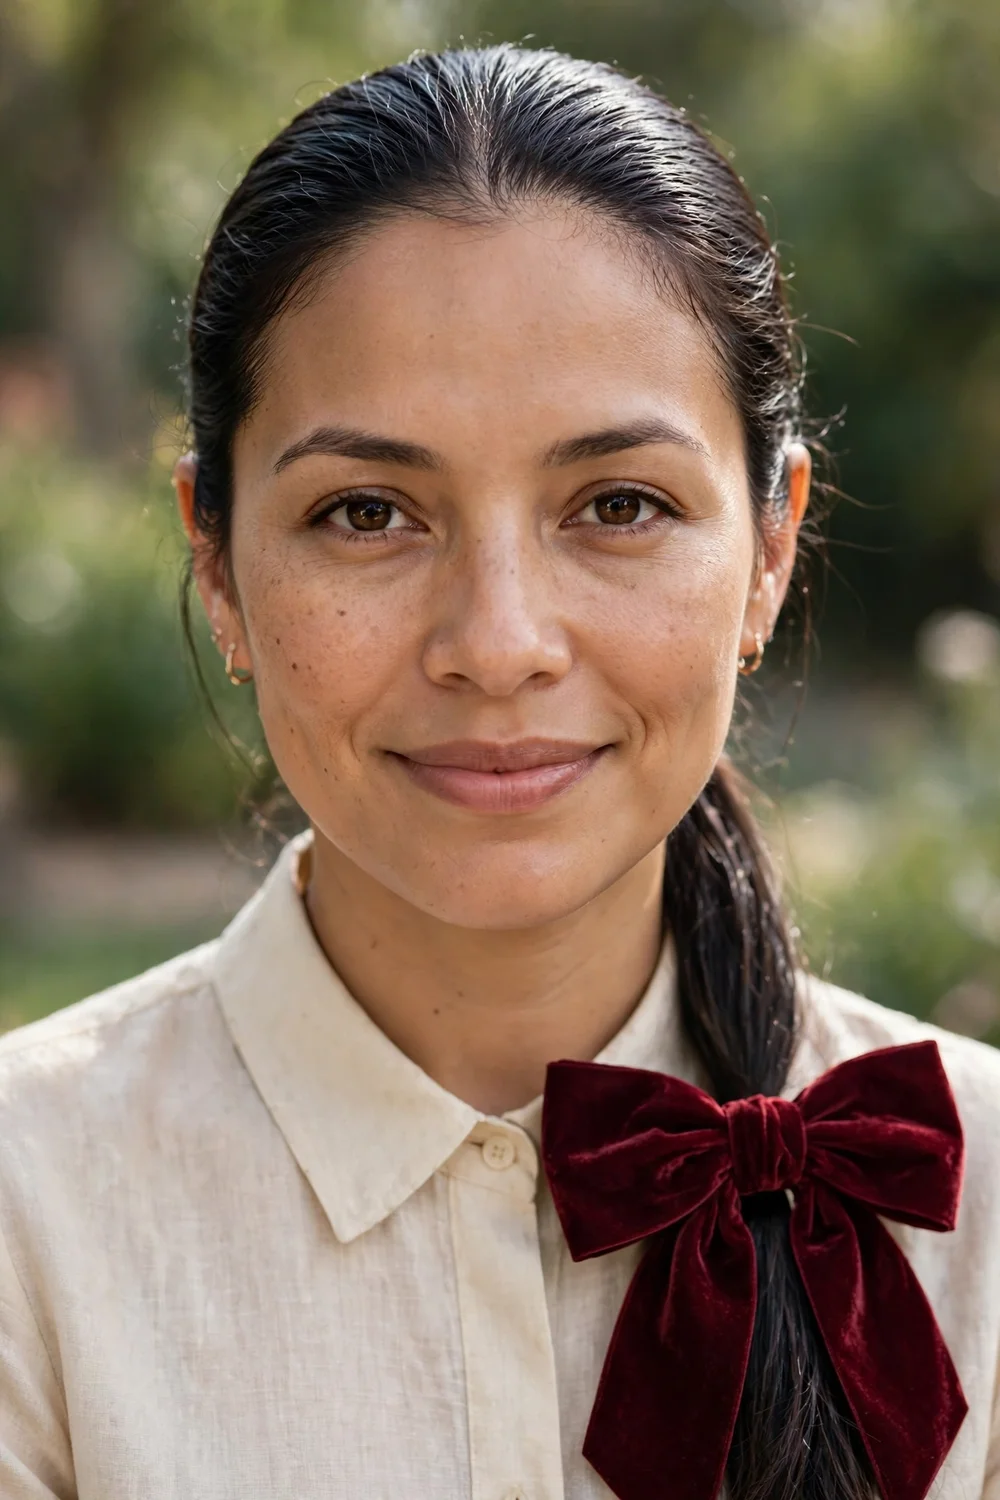
Style a smooth low ponytail with a slight bend at the ends, then tie a wide velvet bow around the base. The bow adds the formal element while its width covers the elastic and the narrowest point of the ponytail. Choose a bow in a deep color like burgundy, forest, or black.
This is the fastest formal option on the list at about five minutes. The bow does the visual work, so the ponytail itself can stay simple.
Try this: tease the ponytail’s top section lightly before tying the bow. The bow sits on volume instead of flat hair.
Difficulty: Easy · Cost: $3–$10 (velvet bow)
For everyday volume ideas beyond formal events, these short hairstyles for thin fine hair show how the right cut builds fullness into daily styling too.
Quick Comparison
| Style | Works best on | Time needed | Key product |
|---|---|---|---|
| Softly Tousled Bun | Medium to long | 15 minutes | Light hairspray |
| Side Chignon with Braid | Medium to long | 15 minutes | Bobby pins |
| Loose Romantic Updo | Medium to long | 20 minutes | Pearl pins |
| Curled Layered Bob | Bob length | 15 minutes | Heat protectant |
| Sleek Low Chignon | Medium to long | 10 minutes | Smoothing serum |
| Side-Swept Waves | Long | 15 minutes | Curling iron |
| Braided Bun | Medium to long | 15 minutes | Mousse |
| Dutch Braid Crown | Medium to long | 20 minutes | Dry shampoo |
| Backcombed Chignon | Medium to long | 15 minutes | Teasing comb |
| Polished Low Ponytail | Medium to long | 5 minutes | Elastic |
| Half-Up Twisted Crown | Medium to long | 10 minutes | Bobby pins |
| Half-Up French Twist | Medium to long | 15 minutes | Bobby pins |
| Curly Half-Up Style | Medium to long | 15 minutes | Curling iron |
| Classic French Twist | Medium to long | 20 minutes | Long bobby pins |
| Low Twisted Knot | Shoulder length+ | 10 minutes | Elastics |
| Sleek Straight Blowout | Medium to long | 20 minutes | Heat protectant |
| Side-Swept Formal Updo | Medium to long | 20 minutes | Hairspray |
| Pearl-Pin Pinned Updo | Medium to long | 15 minutes | Pearl pin set |
| Wrapped Low Bun | Shoulder length+ | 10 minutes | Bobby pins |
| Fishtail Braid Half-Up | Long | 20 minutes | Texture powder |
| Textured Formal Top Knot | Medium to long | 10 minutes | Donut form |
| Face-Framing Tendril Updo | Medium to long | 15 minutes | Curling iron |
| Padded Donut Bun | Medium to long | 10 minutes | Donut form |
| Velvet Bow Low Ponytail | Medium to long | 5 minutes | Velvet bow |
How to Choose the Right Formal Style
Match the style to your hair length first, then to the event. Bob-length hair does best with curled bobs or pinned half-up styles; medium to long hair can carry full updos. For outdoor events, choose pinned styles over curls, since humidity drops curls fast on fine hair.
Avoid heavy oils and thick creams on the day. They weigh thin hair down within an hour. Stick to mousse at the roots, a light spray to finish, and dry shampoo for grip. And do a trial run of any new style at least once before the event: the second attempt always looks better than the first.
If your hair is very fine and you want everyday options too, these curly hairstyles for thin fine hair use texture the same way formal updos do.
Frequently Asked Questions
What formal hairstyles add the most volume to thin hair?
Pre-curled updos add the most: softly tousled buns, loose romantic updos, and backcombed chignons. The curls create air between strands, and backcombing builds a hidden cushion. Padded donut buns give the most guaranteed volume for very fine hair.
Can formal hairstyles for thin hair last all day?
Yes, with the right prep. Use lightweight mousse on damp hair, style second-day hair for grip, cross bobby pins in X shapes, and finish with flexible-hold spray. Avoid heavy products that flatten fine hair as the day goes on.
Should I curl thin hair before putting it up?
Almost always. Curling gives pins something to grip and adds body that straight fine hair lacks. Even loose waves make a visible difference in how full an updo looks and how long it holds.
Do hair accessories work for thin hair?
Yes, as long as they are lightweight. Pearl pins, small floral combs, and velvet bows add formal detail without pulling. Skip heavy jeweled combs, which drag on fine hair and loosen the style.
Are buns or down styles better for thin hair at formal events?
Buns and updos usually win because you control the volume with backcombing and pinning. Down styles can work if you pre-curl and concentrate the hair, like side-swept waves. Pick based on your comfort: the style you can maintain all evening is the right one.
Final Thoughts
Formal styling is where thin hair gets to cheat a little. Curls, backcombing, and smart pinning build volume that isn’t there naturally, and nobody at the event knows the difference. Pick one style from this list, practice it once on a quiet evening, and you will walk in knowing your hair will hold all night.
If your formal occasion is a Sunday service, church hairstyles for thin fine hair rounds up 23 modest styles tuned for fine hair that stay neat from the first hymn to the last.

