

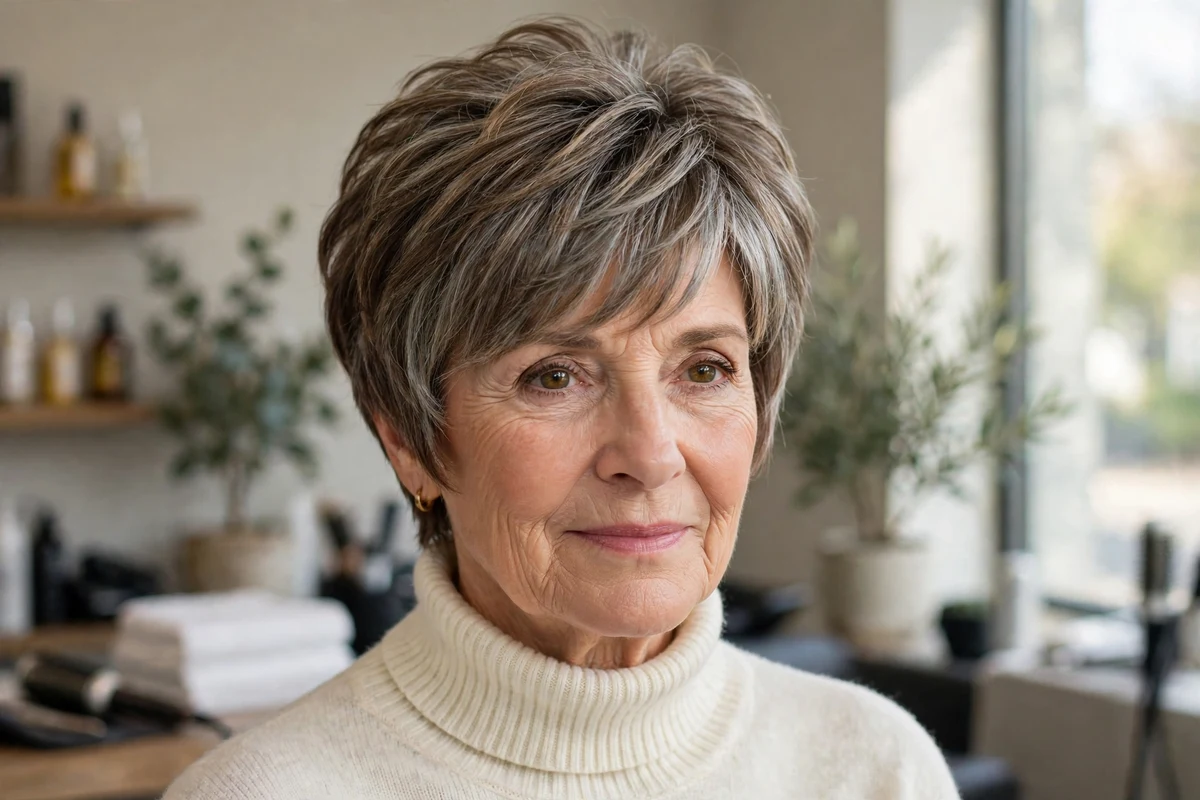
Layers are the reason a pixie keeps its shape on older hair. As hair gets finer, a one-length pixie tends to sit flat at the crown and wide at the sides. Cutting the hair in layers of different lengths removes that flatness: shorter pieces support longer ones, the crown gains height, and the outline can be shaped around the face instead of ending in one hard line.
This list brings together the layered pixie shapes that work for women in their fifties, sixties, and seventies, from soft graduated layers to dry-cut curls and a glasses-friendly version with tucked sides. Each idea explains how the layers are cut, who they suit, and what the daily routine actually involves. If you are still deciding on length, the roundup of short pixie haircuts for older women shows the shorter shapes side by side.
Key Takeaways
- Layers add crown height by stacking shorter pieces under longer ones, which makes fine hair look fuller.
- Point cutting, feathering, and razoring are three different ways to soften layer ends. They suit different densities, so match the method to your hair.
- Glasses wearers and long or round faces each have a layered version shaped for them on this list.
- Most layered pixies need a trim every five to six weeks. Grown-out and curly versions stretch to seven or eight.
- Cost lines on this page use bands only: $ is a basic cut, $$ adds shaping detail or a fringe tidy, $$$ includes color work.
How to Choose Your Layered Pixie
Start with density. Fine hair does best with stacked, point-cut, or graduated layers, where short pieces hold the crown up. Thick hair needs the opposite approach, layers that remove weight from inside the cut so the sides sit closer to the head. Curly and wavy hair should be layered in its natural state, ideally cut dry, so the shape you see in the salon is the shape you get at home.
Then choose by face and routine. Round faces suit height on top and flatter sides, long faces suit side volume and a fringe, and glasses wearers should look at the tucked-side version. The broader guide to pixie haircuts covers shapes beyond layering, and the spiky pixie cuts for older women list is the place to look if you want a lifted, piecey crown instead of soft layers.
1. Soft Graduated Layers with a Tapered Nape
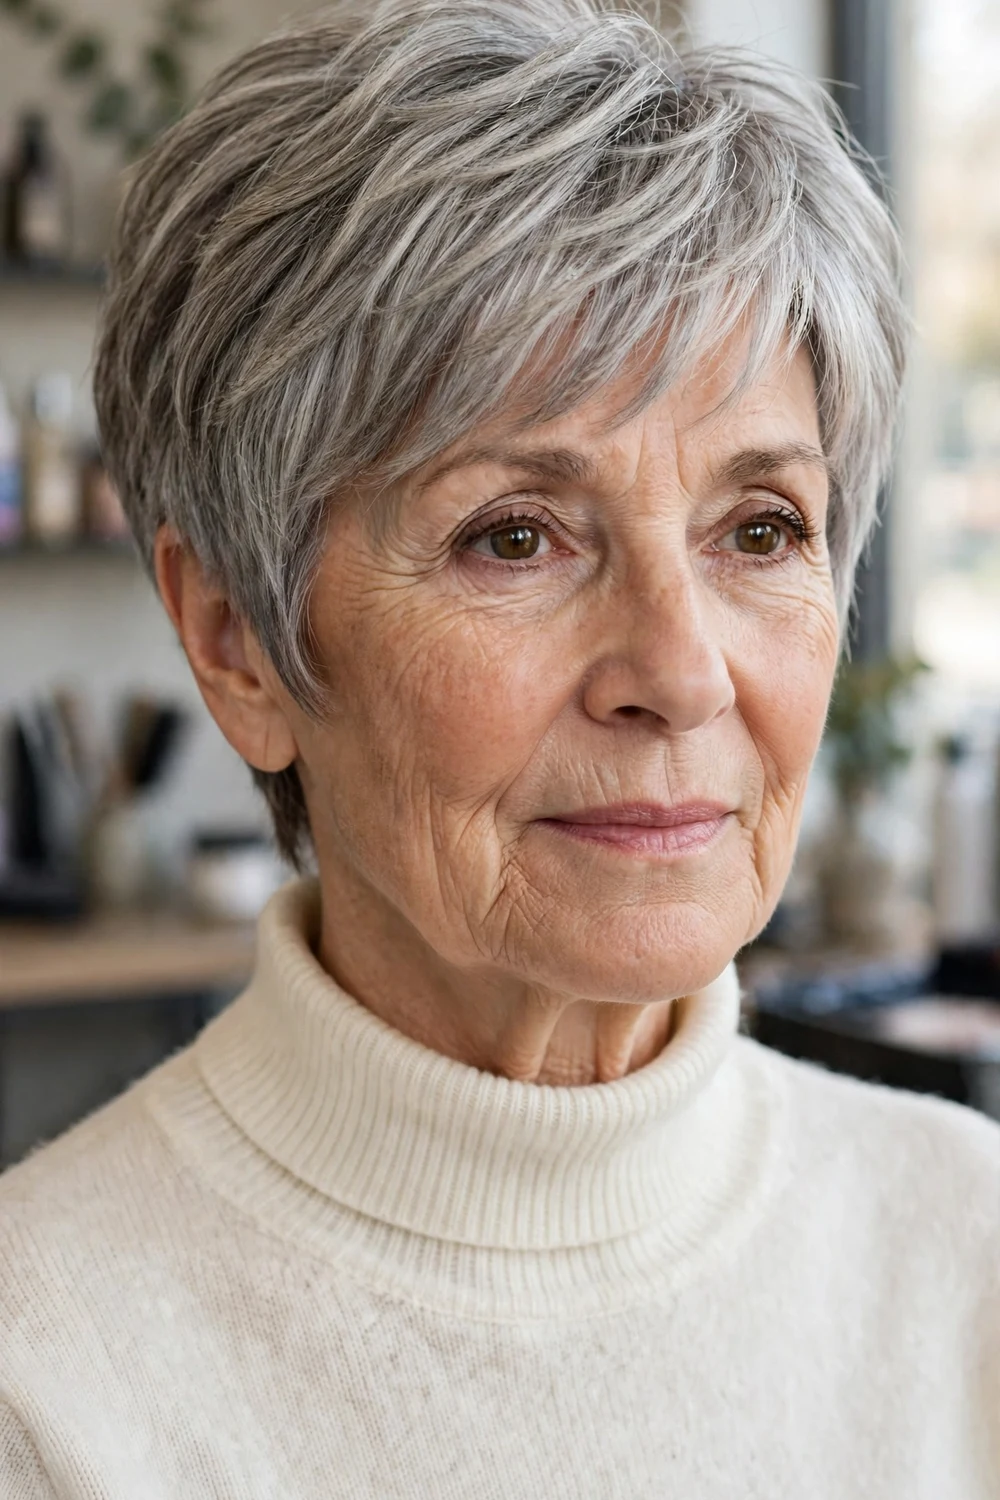
Graduated layers stack one over the next from the nape upward, so the back of the head keeps a rounded, tidy shape. The nape itself is tapered close with scissors, and the layers get longer toward the crown, where they reach about two to three inches.
This shape suits straight and slightly wavy hair, and it grows out in an orderly way because each layer sits on the one below it. Style by blow drying with a small round brush, lifting at the roots for the first minute, then smoothing the ends forward with your fingers.
Try this: Ask for scissor graduation rather than clippers at the nape if your skin is sensitive. The finish is softer and the grow-out line stays faint.
Difficulty: Easy | Cost: $ | Time: 5 minutes
2. Crown-Stacked Layers for Fine Hair

Short layers are stacked through the back and crown, each one cut slightly shorter than the layer beneath it. That stacking is what holds the crown up on fine hair, since the short pieces support the longer ones instead of letting them lie flat by midday.
Keep the sides simple and close to the head so all the visual weight stays at the crown. A pea-size amount of root mousse on damp hair, worked in before drying, is usually the only product this cut needs. It suits oval and longer faces well because the height sits on top.
Try this: Dry the crown first, before the sides. Fine hair sets as it cools, so the first two minutes of heat decide how the crown behaves all day.
Difficulty: Easy | Cost: $ | Time: 5 minutes
3. Face-Framing Layers with a Side-Swept Fringe
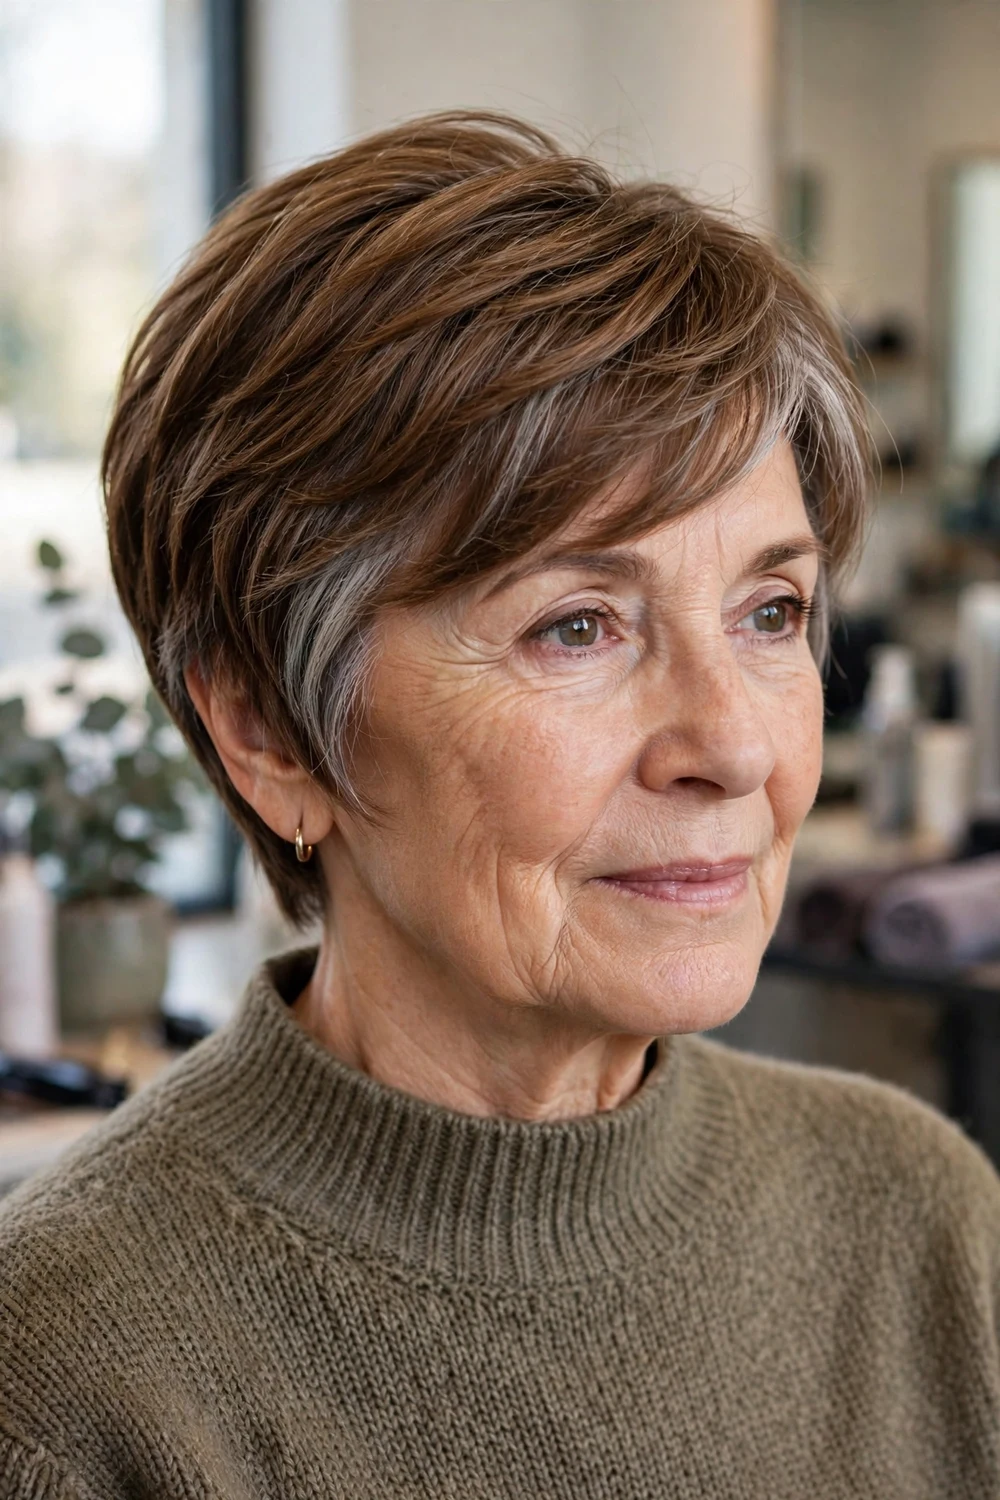
The layers around the face are left longer than the rest of the cut and angled down toward the cheekbones. They blend into a side-swept fringe that crosses the forehead diagonally, which softens the brow line and draws attention toward the eyes.
This is a forgiving option if you are growing out a shorter pixie, because the front length gives you something to work with. Sweep the fringe with a paddle brush while drying, then let the ends fall where they land. Heavy wax flattens the sweep, so keep product light and matte.
Try this: Pin the fringe in its swept direction while it cools after drying. Thirty seconds of cooling holds the sweep far longer than extra product does.
Difficulty: Easy | Cost: $$ | Time: 5 to 8 minutes
4. Long Top Layers over Tapered Sides

The top keeps four to five inches of layered length while the sides and back are tapered short. That contrast gives you styling range: the top can be swept forward, pushed to one side, or brushed back, while the tapered outline keeps the overall shape neat.
Women who like options tend to stay with this cut the longest. It also helps a round face, because the longer top adds height while the close sides keep the width down. Finger-dry the top, then finish with a light texture cream on the ends only.
Try this: Change your part every few days. The long top layers respond well, and rotating the part stops one side from training flat.
Difficulty: Moderate | Cost: $$ | Time: 8 minutes
5. Feathered Silver Layers with a Soft Outline
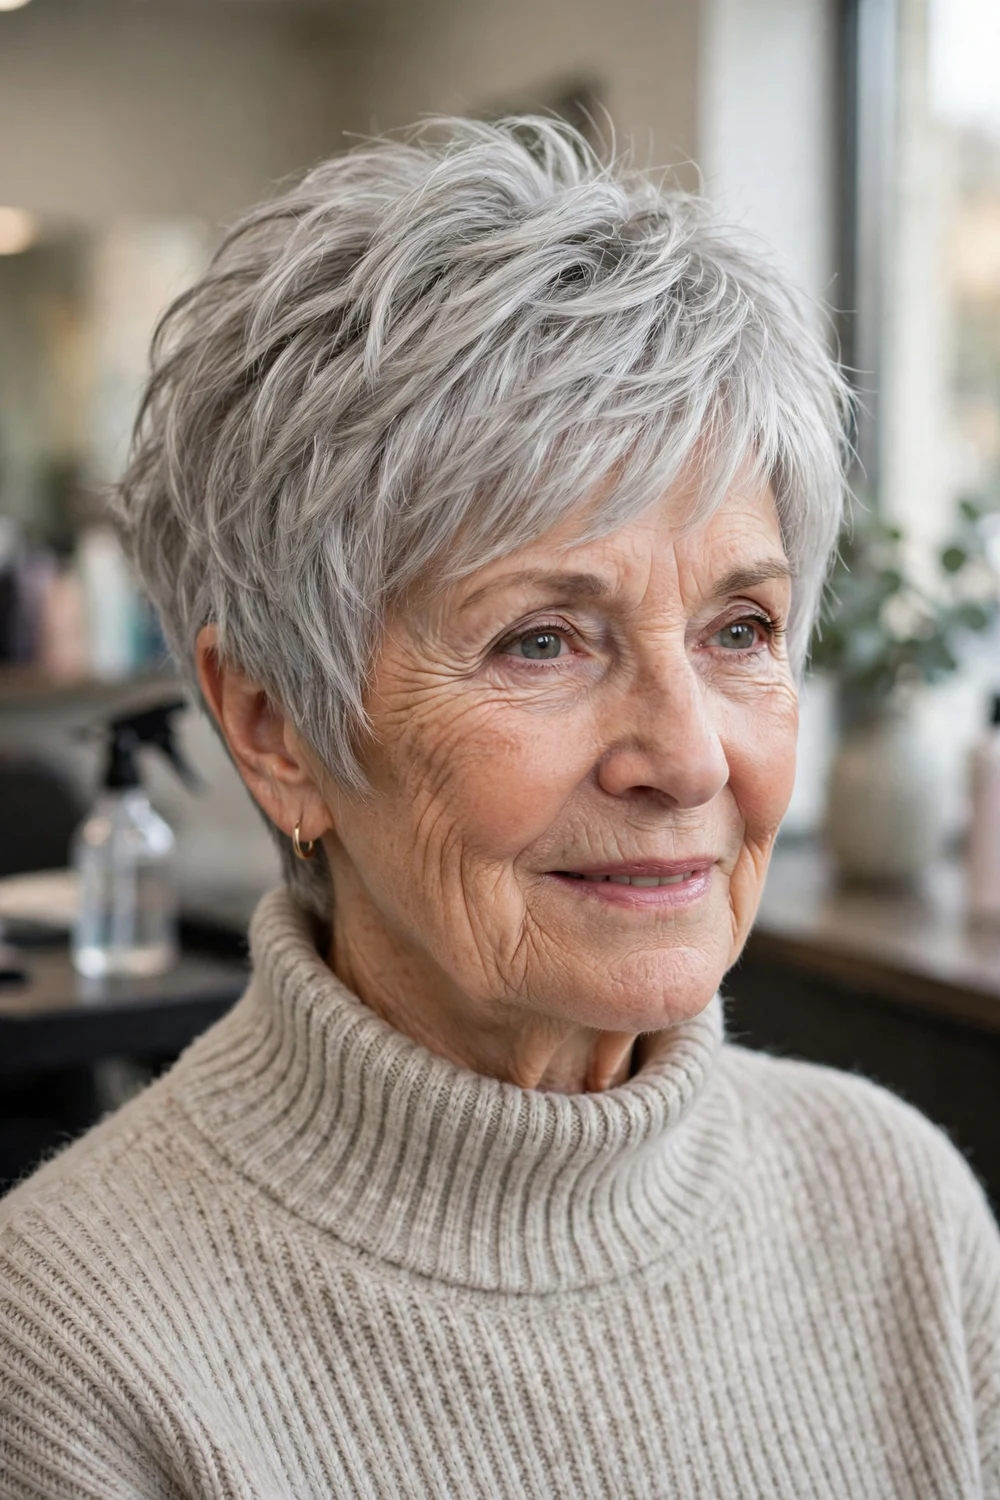
Feathering cuts the ends of each layer at a fine angle, so the outline of the cut looks soft instead of blunt. On silver hair the effect reads light and airy, and the layered interior stops the cut from looking like a solid helmet shape.
Silver hair often has a wiry texture, and feathered ends help it lie down instead of sticking out. Use a smoothing cream the size of a pea on damp hair and dry on a low heat setting. Ask for a trim every six weeks to keep the feathered ends from splitting.
Try this: A purple shampoo once a week keeps silver layers bright and stops yellowing from hard water or heat styling.
Difficulty: Easy | Cost: $ | Time: 5 minutes
6. Point-Cut Crown Layers with Wispy Ends
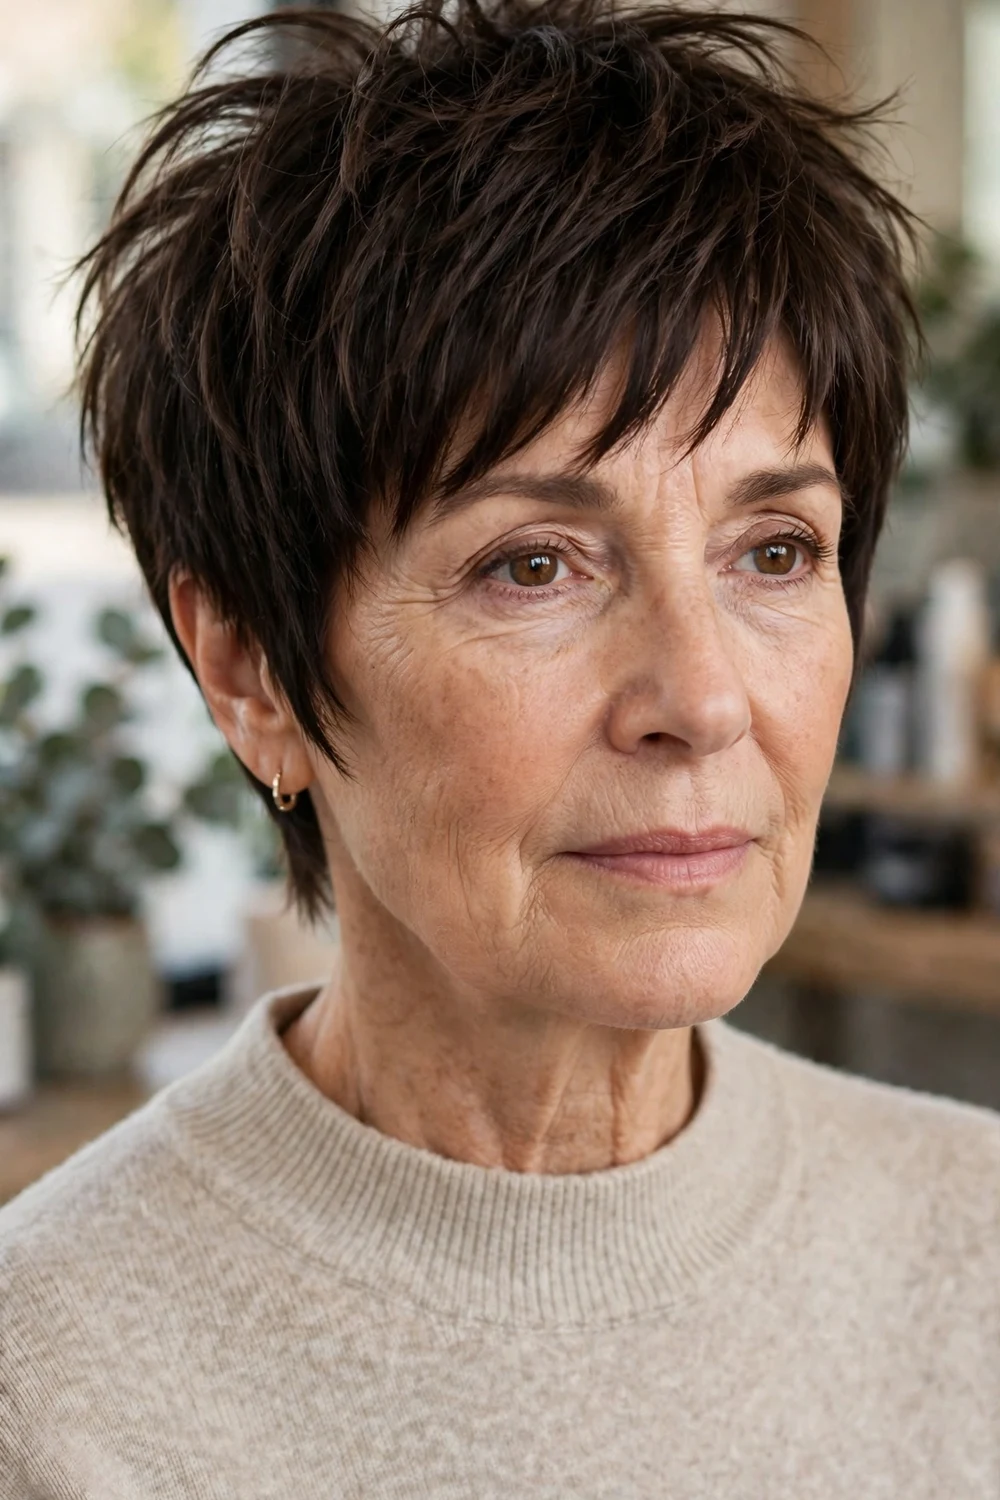
Point cutting snips into the ends of the hair at an angle instead of straight across. Through the crown, that creates layers with broken, wispy tips that separate on their own and add movement without any deliberate styling effort.
The wispy ends are a practical choice for thinning crowns, because separated tips cover more scalp visually than blunt ends do. Style with a small amount of dry texture spray after drying, scrunching the crown upward with your fingertips. Skip oils on this one, since they weigh the wispy ends down.
Try this: Show your stylist where your crown feels thinnest. Point cutting can be concentrated there and kept gentler where your hair is fuller.
Difficulty: Easy | Cost: $ | Time: 3 to 5 minutes
7. Layered Pixie with a Curtain Fringe

A curtain fringe parts in the center and falls to either side of the face, blending into the layered front of the pixie. The fringe pieces usually reach the cheekbones, and the layers behind them are kept light so the front does not look heavy.
This fringe works well with glasses, because the parted shape leaves the center of the forehead open and the sides sit behind the frames. Dry the fringe by brushing it forward first, then parting it and sweeping each side back. That order stops it from splitting in odd places.
Try this: If your fringe grows fast, ask about a free fringe tidy between cuts. Many salons offer one, and it keeps the curtain shape for two extra weeks.
Difficulty: Moderate | Cost: $$ | Time: 8 minutes
8. Asymmetrical Layers with a Deep Side Part

One side of this cut is left noticeably longer, with layers that sweep across from a deep side part, while the other side is cut close above the ear. The imbalance is deliberate, and it gives a standard pixie a more current outline.
The longer side softens one cheek and the deep part adds height at the front, which suits round and square faces. Keep the short side tidy with a trim every four to five weeks, since even a little growth shows there. Style the long side with a flat brush, drying it across the forehead.
Try this: Wear the part on the side opposite your strongest facial feature. The sweep draws the eye across, which balances the face.
Difficulty: Moderate | Cost: $$ | Time: 8 minutes
9. Weight-Removed Layers for Thick Hair
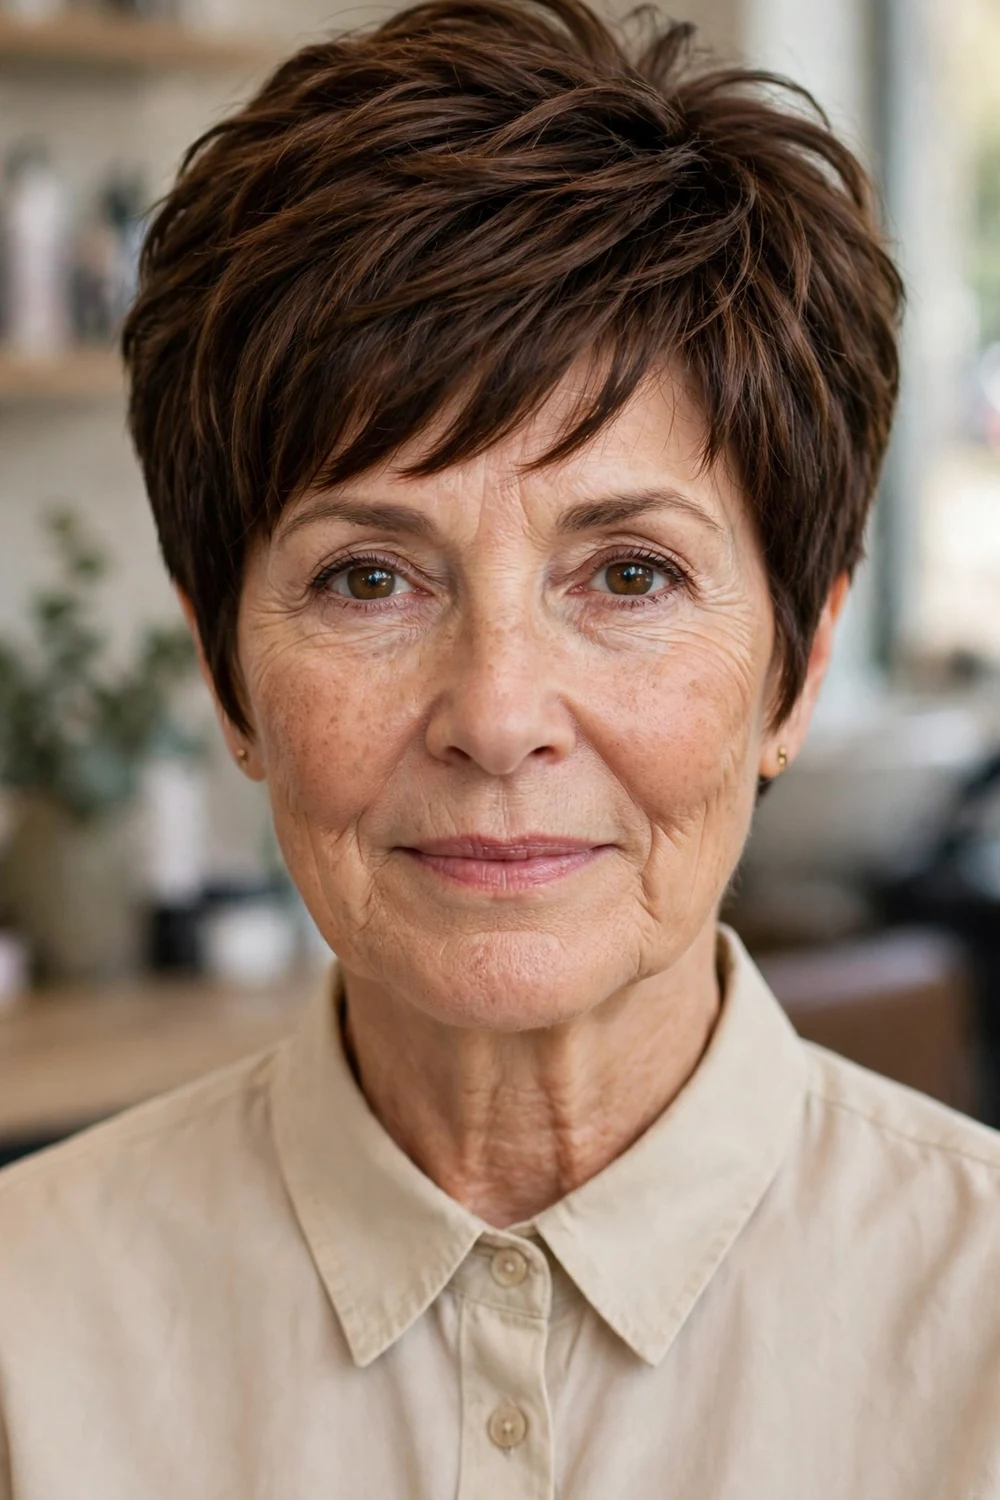
Thick hair in a pixie can puff out at the sides and look wider than you want. This version removes weight from the inside of the cut with internal layers, so the surface stays smooth while the bulk underneath is reduced by a noticeable amount.
Ask your stylist to remove weight with scissors or thinning shears used carefully in the mid-lengths, never at the roots, where they can create short pieces that stick up. The result dries faster and sits closer to the head. A light smoothing balm through the mid-lengths keeps the outline calm.
Try this: Book the first version of this cut with extra time. Good weight removal is slow work, and a rushed version takes out too much in one spot.
Difficulty: Moderate | Cost: $$ | Time: 5 to 8 minutes
10. Dry-Cut Curly Layers with Natural Spring

Curly hair shrinks as it dries, so these layers are cut on dry hair, curl by curl, at the length they will actually sit. The layers are distributed around the head to stop the shape from going wide and flat on top, which is the usual problem with curly pixies.
Work with your natural curl pattern rather than straightening it. Scrunch a curl cream into wet hair, then leave it alone while it air dries, since touching curls mid-dry creates frizz. Sleep on a smooth pillowcase to keep the layers from flattening overnight.
Try this: Bring a photo of your hair on a good curl day to the appointment. It shows your stylist your true shrinkage and curl pattern better than words do.
Difficulty: Easy | Cost: $$ | Time: 5 minutes plus air dry
11. Air-Dried Wavy Layers
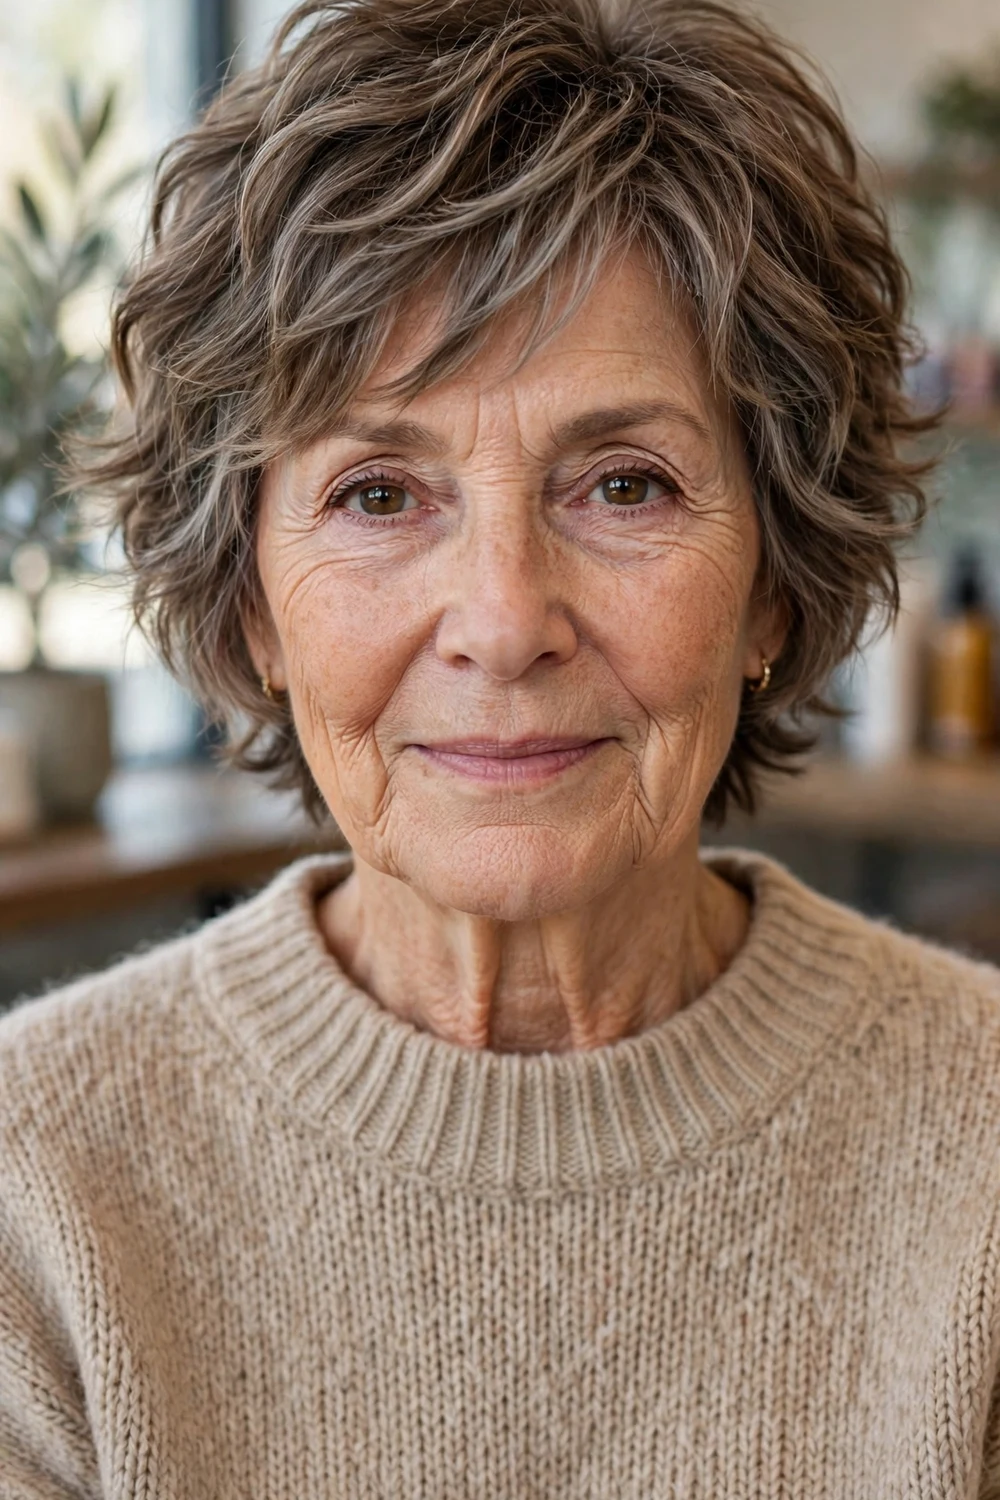
Loose waves suit layering well, because each layer lets the wave bend at a slightly different point, which reads as movement all over the head. The cut is shaped so the waves fall into place as they dry, with no brush or heat needed on most days.
This is the lowest effort cut on this list. Apply a leave-in conditioner to damp hair, shape the waves with your fingers, and let them dry. If one section dries straight, twist it around a finger with a drop of cream and let it set for a few minutes.
Try this: Plopping wavy layers in a soft cotton T-shirt for ten minutes after washing adds definition without any heat or extra product.
Difficulty: Easy | Cost: $ | Time: 3 minutes plus air dry
12. Brushed-Forward Layers with a Short Fringe
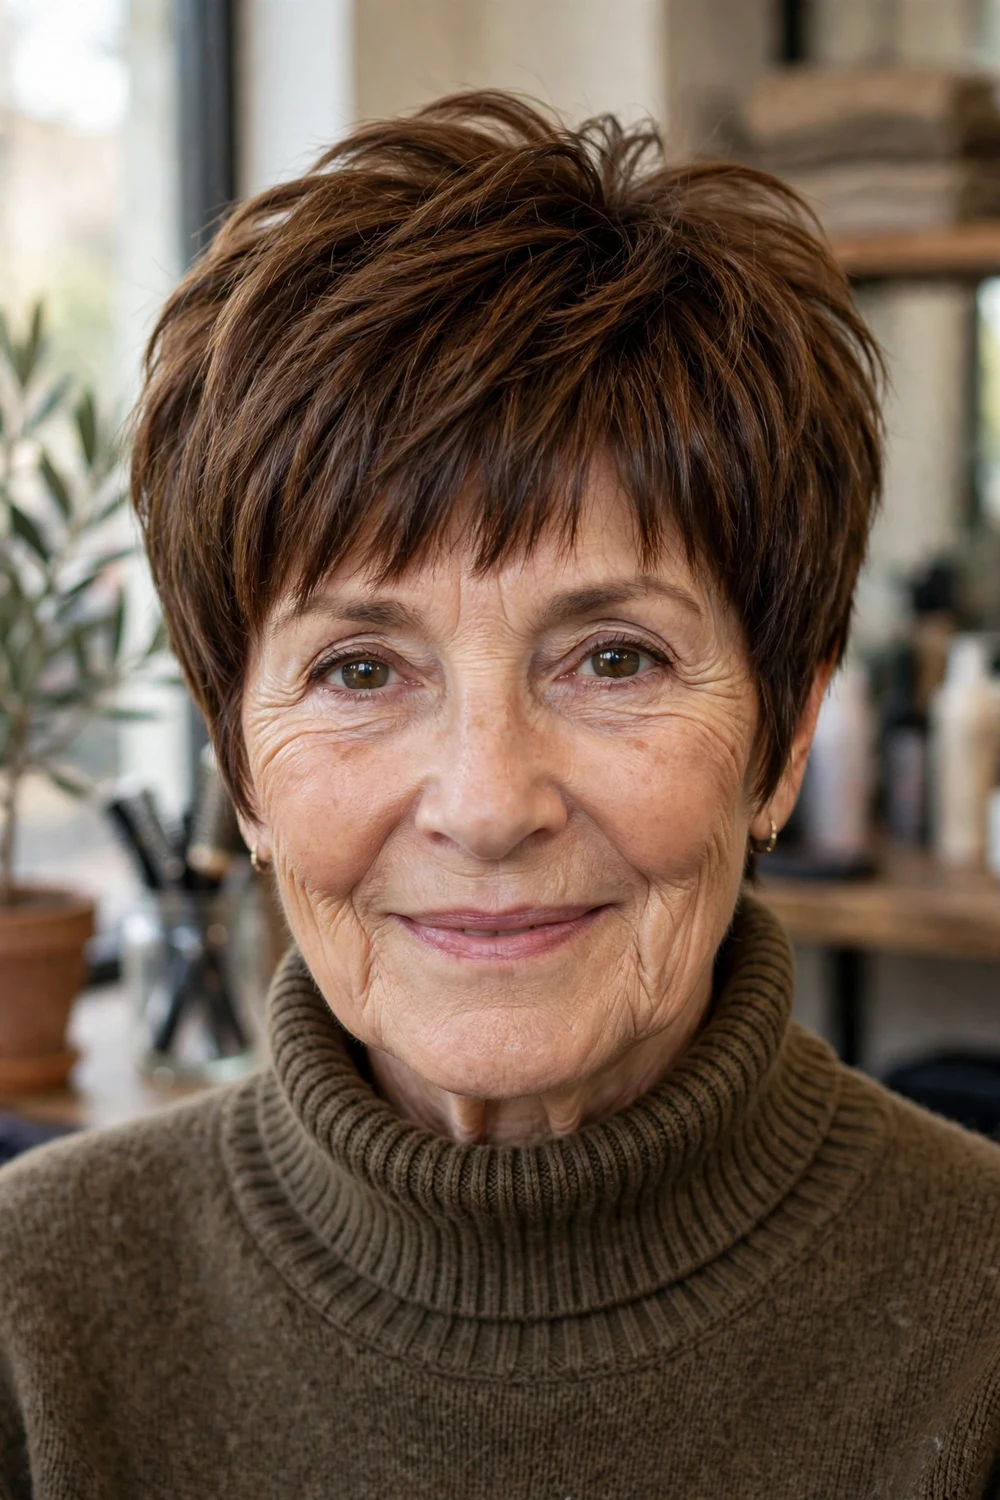
Every layer in this cut is directed forward, from the crown toward the forehead, ending in a short fringe that sits above the eyebrows. The forward direction gives full coverage at the front hairline, which many women prefer as the hairline softens with age.
Dry the hair in the direction it will be worn, brushing forward from the crown in short strokes. Drying it backward first and then forcing it forward leaves bumps at the crown. A matte paste, warmed between the palms and pressed over the surface, keeps the forward sweep in place.
Try this: Keep the fringe just above the brows rather than on them. It grows into the brow line within two weeks, so starting higher buys you time between trims.
Difficulty: Easy | Cost: $ | Time: 5 minutes
13. Tucked Sides for Glasses Wearers

The layers at the sides are cut to sit flat and tuck cleanly around the ears, with a small notch shaped where glasses arms rest. That small detail stops the arms from pushing hair out into a wing at the side of the head, which is a common annoyance with short cuts.
The top keeps enough layered length to style in a few directions. Bring your everyday glasses to the appointment and wear them while the sides are cut, so the stylist shapes around the arms you actually use. If you switch frames often, mention it, since wider arms need a slightly deeper notch.
Try this: Tuck the sides behind your ears while the hair is still damp. As it dries in that position, it learns to sit there on its own.
Difficulty: Easy | Cost: $ | Time: 5 minutes
14. Razored Layers with a Feathered Perimeter
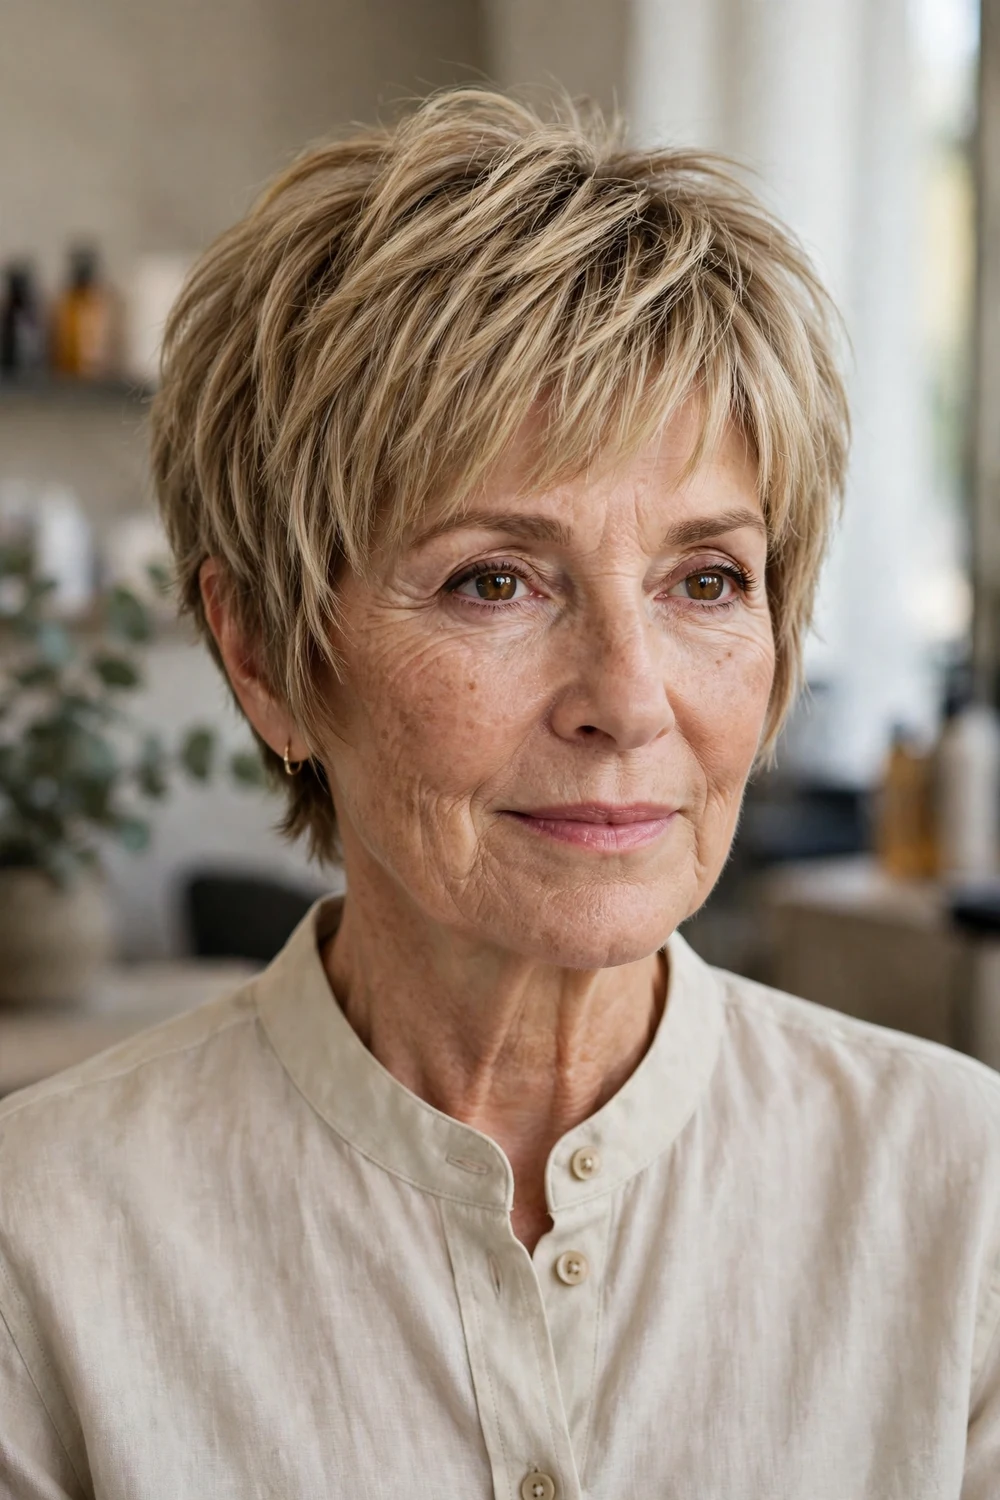
A razor, used on wet hair, slices the ends of each layer into fine tapered points. Around the perimeter of the cut, the ears, forehead, and nape, that razoring creates a feathered edge that lies soft against the skin instead of ending in a hard line.
Razored layers suit straight and wavy hair with medium density. Very fine hair can look stringy if it is razored too much, so ask for razor work on the perimeter only if your hair is fine. Style with a light spray gel on damp hair and finger-dry for a loose, separated finish.
Try this: Ask whether your stylist uses a guarded razor. It gives the same feathered ends with more control, which matters on thinner areas.
Difficulty: Moderate | Cost: $$ | Time: 5 to 8 minutes
15. Layered Pixie in Salt and Pepper Tones
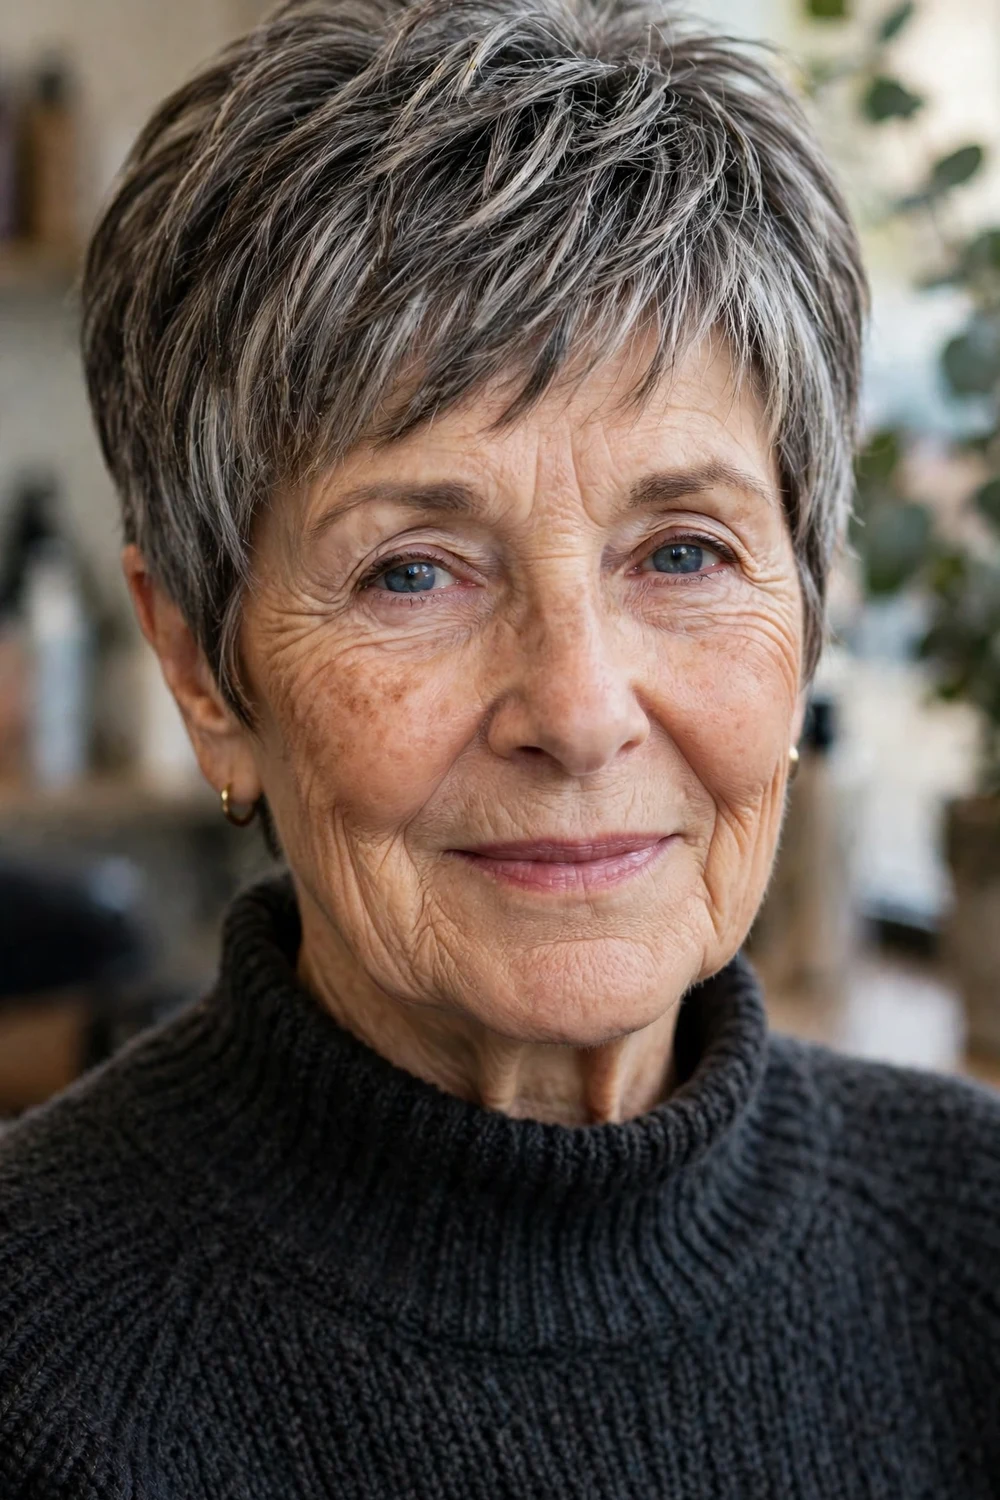
Salt and pepper hair has built-in dimension, since dark and silver strands sit side by side. Short layers show that mix off well, because each layer catches the light at a different angle and the color variation becomes part of the style instead of something to cover.
This cut is a good step for women who are growing out old color and want the transition to look deliberate. Keep the layers fairly even in length so the dark and light strands distribute evenly. A clear gloss treatment at the salon adds shine without changing the color at all.
Try this: Silver strands are drier than pigmented ones. A weekly moisturizing mask on the lengths keeps the layers from looking wiry.
Difficulty: Easy | Cost: $ | Time: 5 minutes
16. Stacked Back Layers with a Smooth Front

The back of this cut is stacked in short layers that build a rounded shape at the occipital bone, while the front is left smoother and longer, sweeping down toward the jaw. You get a tidy profile from behind and a softer, face-length frame from the front.
It suits women who want a neat back view for collars and scarves, since the stacked back sits above the collar line. Dry the back layers downward with a small brush, then smooth the front pieces forward. The two zones take about a minute each once you have the habit.
Try this: Check the back with a hand mirror before you leave the salon. The stacked shape is the whole point of this cut, so it should look rounded, never flat.
Difficulty: Moderate | Cost: $$ | Time: 8 minutes
17. Layered Pixie with a Soft Nape Undercut
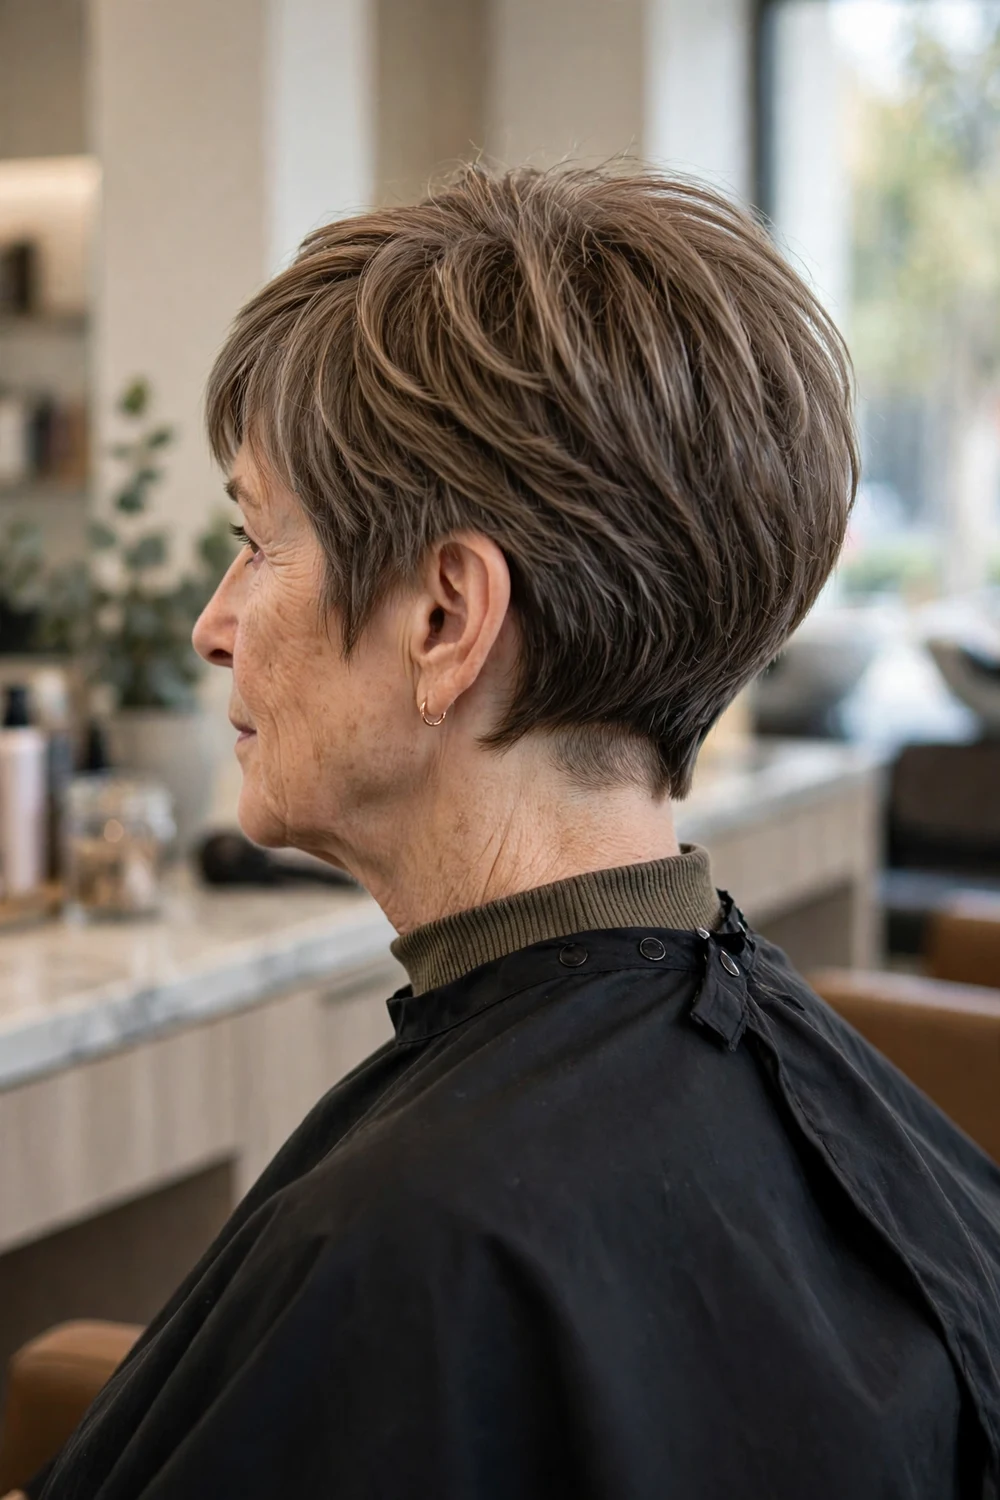
Only the nape area is clipped short in this version, while the layers above it stay long enough to fall over the undercut when the hair is down. The short nape removes the heavy, fast-growing section at the back and keeps the neckline clean for weeks.
This is a practical middle ground if a full undercut feels like too much. The top layers hide the clipped area on most days, and the neckline stays tidy between appointments. Style the top as you would any layered pixie, with a brush lift at the crown and a light cream on the ends.
Try this: Ask for the undercut to start low, below the occipital bone. A low undercut stays hidden under the top layers as it grows.
Difficulty: Moderate | Cost: $$ | Time: 5 minutes
18. Grown-Out Layers for an Easy Grow-Out

Some cuts look sharp for two weeks and then fall apart. This one is planned for the whole cycle: the layers are blended with no hard steps between them, so as the hair grows, the shape simply gets a softer, longer version of itself.
Choose it if you prefer eight weeks between salon visits, or if you are growing a pixie toward a short bob and want the in-between stage to look intentional. The trade is less precision in week one. Finger styling and a light mousse are all it asks for on a daily basis.
Try this: Tell your stylist your real visit interval, honestly. Layers can be spaced for a four week cycle or an eight week one, and the spacing is different.
Difficulty: Easy | Cost: $ | Time: 3 to 5 minutes
19. Layered Pixie with Fine Highlights for Dimension
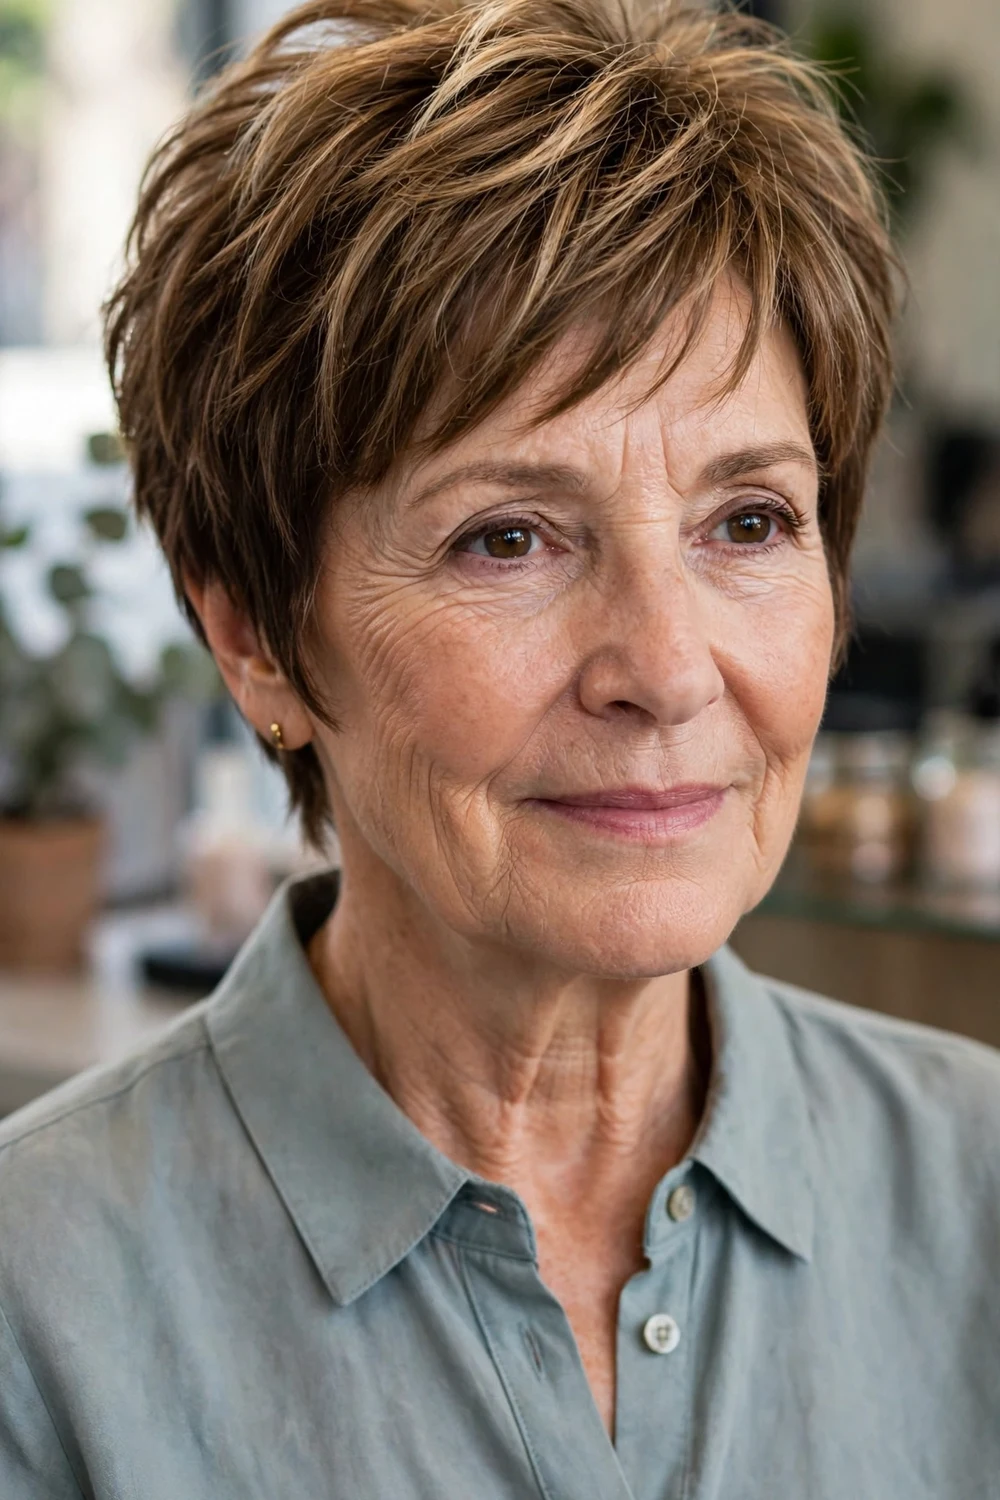
Fine highlights, placed through the top layers only, add a sense of depth to a pixie that can otherwise look like one flat block of color. The lighter pieces follow the direction of the layers, so the eye reads movement even on a day when you have barely styled it.
Keep the highlights fine and close to your natural shade, within two levels, so regrowth stays soft and salon visits do not multiply. This pairing suits flat, one-tone hair of any base color. A color-safe shampoo helps the lighter pieces stay clear instead of turning brassy.
Try this: Ask for the highlights to sit mostly at the crown and front. That is where light naturally falls, so the effect reads as dimension rather than stripes.
Difficulty: Moderate | Cost: $$$ | Time: 5 minutes
20. Round-Shaped Layers for Full Cheeks
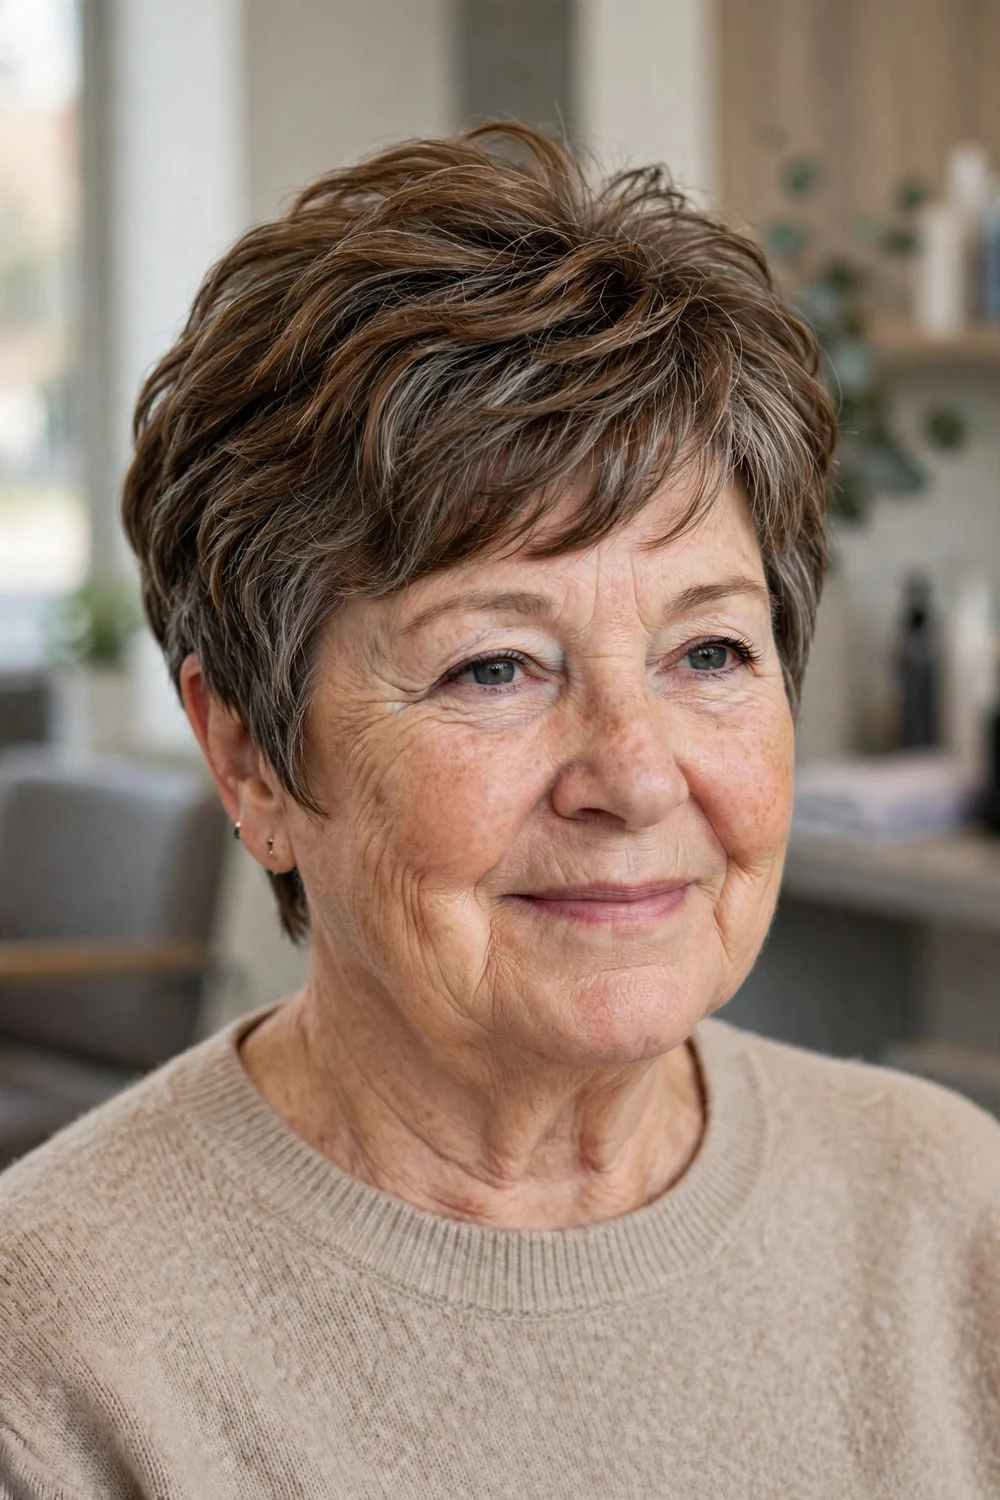
The layers in this cut follow a rounded shape, curving in below the cheekbones instead of ending right at them. Ending a layer at the widest point of the face draws attention there, so the curve is placed lower, which lengthens the look of the face.
Keep some height at the crown and keep the sides flatter, since width at the sides works against the goal here. This cut pairs well with a side part, which breaks up the roundness further. Dry the crown upward, then press the sides down with the flat of the brush as they cool.
Try this: Avoid tucking this cut behind the ears. Tucking removes the lower curve that does the lengthening work, so let the sides fall as cut.
Difficulty: Easy | Cost: $$ | Time: 5 to 8 minutes
21. Side-Volume Layers for a Long Face
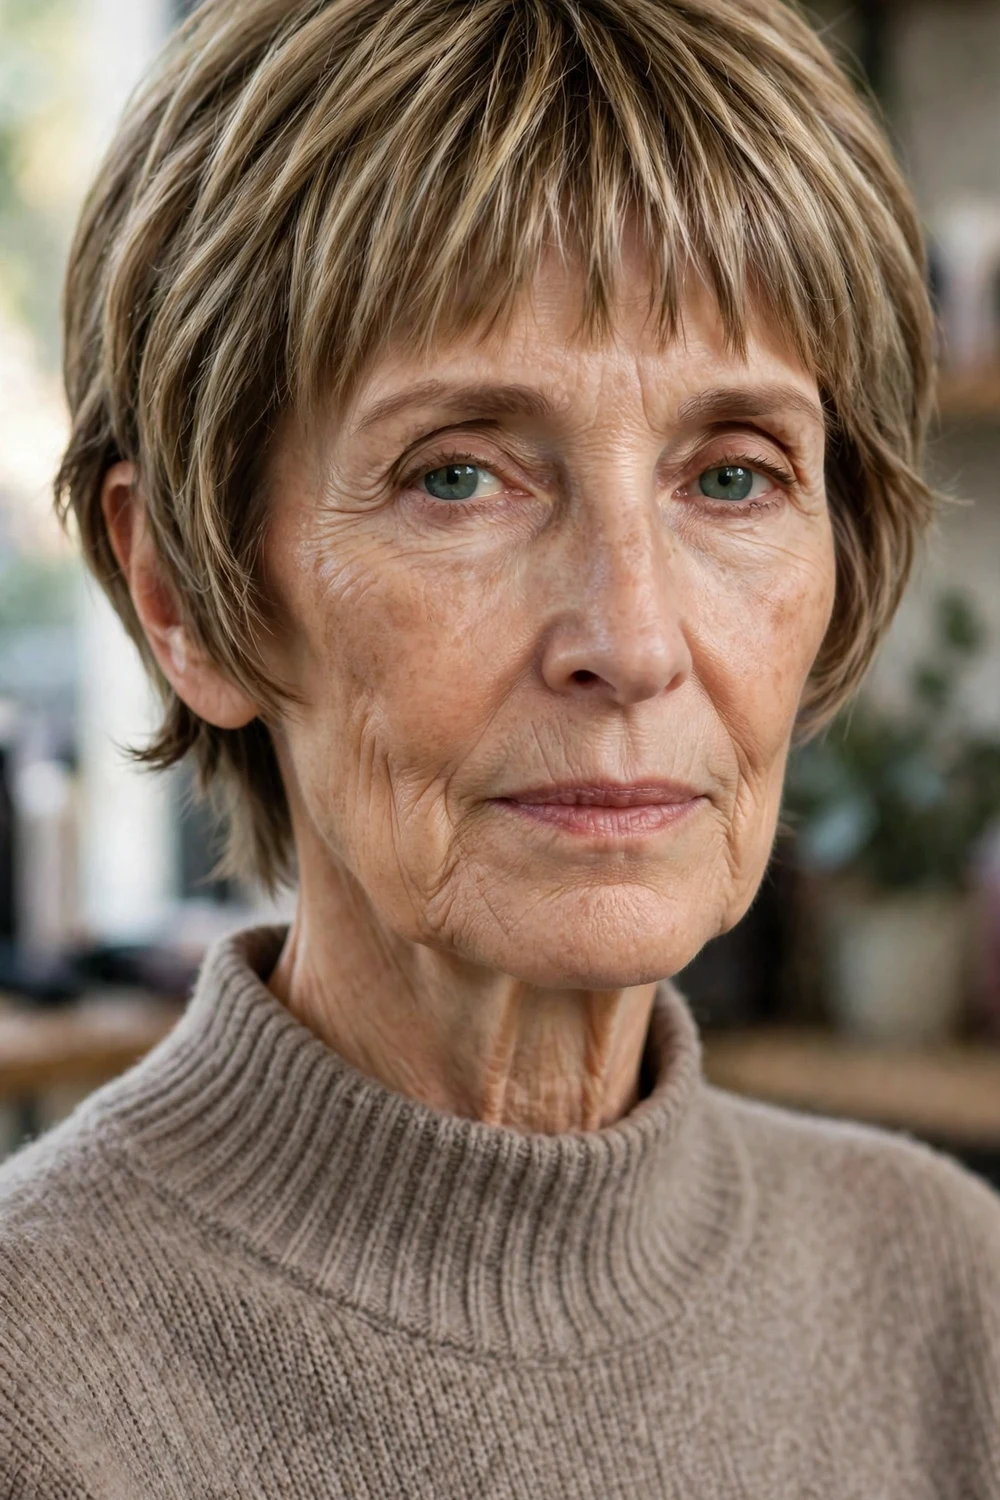
A long face benefits from the opposite strategy to a round one: width at the sides and less height on top. The layers here are left fuller at cheek level, and a fringe shortens the forehead visually, so the proportions balance out.
Keep the crown layers flatter and direct them forward or sideways rather than up. A fringe that sits at or just below the brows works best, since a short fringe adds back the length you are trying to reduce. Dry the sides outward with a brush to hold the width, and keep root products away from the crown.
Try this: If you wear this cut, skip high ponytail style updos on longer days out. Anything that adds top height undoes the balance the cut creates.
Difficulty: Moderate | Cost: $$ | Time: 8 minutes
22. Low-Maintenance Layers with a Natural Part

This cut is built around your own growth pattern. The stylist finds your natural part and cowlicks first, then cuts the layers to fall the way the hair already wants to fall, so you are never fighting your own hair in the morning.
It suits women who have worn the same part for years and have no wish to retrain it. Daily styling is a wash, a comb through in the natural direction, and air drying or a minute with the dryer. Because the cut follows the growth pattern, it also holds its shape well as it grows.
Try this: Wash your hair the night before the appointment and let it fall naturally. Your stylist needs to see your true part and cowlicks, not a styled version.
Difficulty: Easy | Cost: $ | Time: 3 minutes
23. Evening-Swept Layers with Root Lift

For evenings, the same layered pixie can be swept fully back from the face with lift at the roots, which changes the whole mood of the cut. The layers are kept long enough at the front, around three inches, to reach back without pulling free within the hour.
Blow dry the front section upward and back with a root spray at the base, then let it cool before you touch it. Cooling is what locks the lift in. A light shine spray over the surface, held well away from the head, finishes the swept look without making it look wet or stiff.
Try this: Practice the swept version once at home before an event. It takes three tries to learn how much root spray your hair actually needs.
Difficulty: Moderate | Cost: $$ | Time: 10 minutes
Layered Pixie Cuts at a Glance
Use this table to compare daily effort and trim cycles before you settle on a shape. Idea numbers match the sections above.
| Idea | Best for | Daily styling | Trim cycle |
|---|---|---|---|
| 1. Soft Graduated Layers with a Tapered Nape | Straight or fine hair, tidy grow-out | Round brush lift at roots, smooth forward | 6 to 7 weeks |
| 2. Crown-Stacked Layers for Fine Hair | Fine hair that falls flat at the crown | Root mousse, dry crown first | 5 to 6 weeks |
| 3. Face-Framing Layers with a Side-Swept Fringe | Softening the brow and cheek area | Paddle brush sweep, light matte product | 5 to 6 weeks |
| 4. Long Top Layers over Tapered Sides | Styling options with a neat outline | Finger-dry, texture cream on ends | 4 to 5 weeks |
| 5. Feathered Silver Layers with a Soft Outline | Silver hair with a wiry texture | Smoothing cream, low heat dry | 6 weeks |
| 6. Point-Cut Crown Layers with Wispy Ends | Thinning crown, low effort texture | Dry texture spray, fingertip scrunch | 5 to 6 weeks |
| 7. Layered Pixie with a Curtain Fringe | Glasses wearers, center-part fans | Brush forward, part, sweep back | 5 weeks, fringe tidy between cuts |
| 8. Asymmetrical Layers with a Deep Side Part | Round and square faces, modern outline | Flat brush across the forehead | 4 to 5 weeks |
| 9. Weight-Removed Layers for Thick Hair | Thick hair that puffs at the sides | Smoothing balm through mid-lengths | 5 to 6 weeks |
| 10. Dry-Cut Curly Layers with Natural Spring | Natural curls, dry-cut shaping | Curl cream scrunch, air dry untouched | 7 to 8 weeks |
| 11. Air-Dried Wavy Layers | Wavy hair, no-heat routine | Leave-in conditioner, finger shape | 6 to 7 weeks |
| 12. Brushed-Forward Layers with a Short Fringe | Front hairline coverage | Brush forward from crown, matte paste | 4 to 5 weeks |
| 13. Tucked Sides for Glasses Wearers | Glasses wearers, flat tidy sides | Tuck sides while damp | 5 to 6 weeks |
| 14. Razored Layers with a Feathered Perimeter | Medium density, soft edge finish | Spray gel, finger-dry | 5 weeks |
| 15. Layered Pixie in Salt and Pepper Tones | Growing out color, natural gray mix | Finger style, weekly moisture mask | 6 weeks |
| 16. Stacked Back Layers with a Smooth Front | Neat back profile, longer front frame | Brush back down, smooth front forward | 5 weeks |
| 17. Layered Pixie with a Soft Nape Undercut | Clean neckline, hidden undercut | Crown lift, light cream on ends | 4 to 5 weeks for the nape |
| 18. Grown-Out Layers for an Easy Grow-Out | Long gaps between salon visits | Finger style, light mousse | 7 to 8 weeks |
| 19. Layered Pixie with Fine Highlights for Dimension | Flat one-tone color, added depth | Standard styling, color-safe shampoo | 5 to 6 weeks, color every second visit |
| 20. Round-Shaped Layers for Full Cheeks | Full cheeks, longer face effect | Crown up, sides pressed flat | 5 to 6 weeks |
| 21. Side-Volume Layers for a Long Face | Long faces, width at cheek level | Dry sides outward, fringe forward | 5 weeks |
| 22. Low-Maintenance Layers with a Natural Part | Fixed natural part, minimal routine | Comb in natural direction, air dry | 6 to 7 weeks |
| 23. Evening-Swept Layers with Root Lift | Evenings out, swept-back finish | Root spray, dry up and back, cool | 5 to 6 weeks |
More Ideas to Explore
Frequently Asked Questions
Do layers make a pixie harder to maintain?
No, as long as the layers are cut for your hair type. Blended and graduated layers grow out in order and need a trim every six to seven weeks. Short stacked layers and fringes need attention sooner, around four to five weeks, because their shape depends on precise lengths at the crown.
Are layered pixie cuts good for thinning hair?
Yes, for most women. Shorter layers at the crown support the longer pieces above them, so the hair stands up instead of lying flat against the scalp. Point-cut and wispy ends also help, since separated tips cover the scalp more evenly than blunt ends do. Ask your stylist to keep the layers at the thinnest area a little longer for coverage.
What is the difference between feathered, point-cut, and razored layers?
Feathering angles the ends of each layer so the outline looks soft. Point cutting snips into the ends to create broken, wispy tips and separation. Razoring slices the ends into fine tapered points and gives the loosest finish. Feathering suits most densities, point cutting suits fine hair well, and razoring suits medium density hair best.
Can a layered pixie work with glasses?
Yes. Ask for the sides to be cut flat with a small notch shaped where the arms of your glasses rest, and wear your everyday frames to the appointment so the stylist can shape around them. A curtain fringe also works well with glasses, because the center part leaves the brow line open.
How do I style a layered pixie on a busy morning?
Work a pea-size amount of root mousse or smoothing cream into damp hair, dry the crown first with a small brush or your fingers lifting upward, then smooth the sides in the direction they were cut. Most versions on this list take three to five minutes. Air-dried wavy and curly versions take less, since they are cut to fall into place on their own.
Final Thoughts
A layered pixie is a practical cut that still gives you choices. Pick the layer pattern that matches your density first, then the fringe and outline that match your face and your glasses, and you will have a shape that holds up between salon visits instead of collapsing after the first week.
Take two or three photos from this list to your appointment and talk through the trim cycle honestly with your stylist. If you want a longer top to play with, the long pixie haircuts for older women guide covers that direction in more depth.

